Splatoon 2: All The Sunken Scroll Locations
GameSpot may receive revenue from affiliate and advertising partnerships for sharing this content and from purchases through links.
Written In Ink
Splatoon 2, the sequel to the colorful Wii U shooter, is now available on Nintendo Switch. It introduces a new co-op mode called Salmon Run, changes to weapons and gear, and a new-and-improved version of the original's single player with fun collectibles to find.
The hardest collectibles to get are the Sunken Scrolls, short newspaper-like clippings, photographs, and more that provide clues to the world of Splatoon. There's one on each of the single-player campaign's 27 regular levels; click ahead for a full walkthrough on how to find each of them.
For more on Splatoon, see our review and our full Amiibo unlock guide. You can also check out our beginner's guide to weapon classes and tips and tricks for Turf War.
Tentakeel Outpost: Level 1
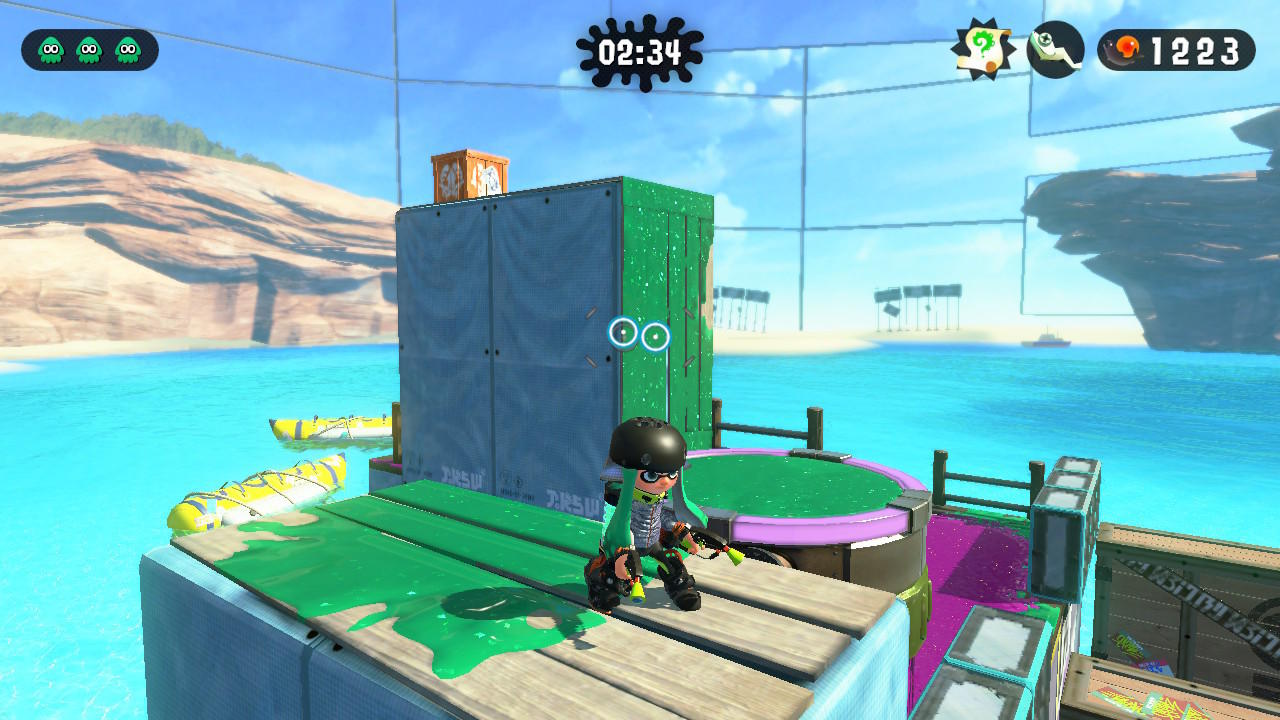
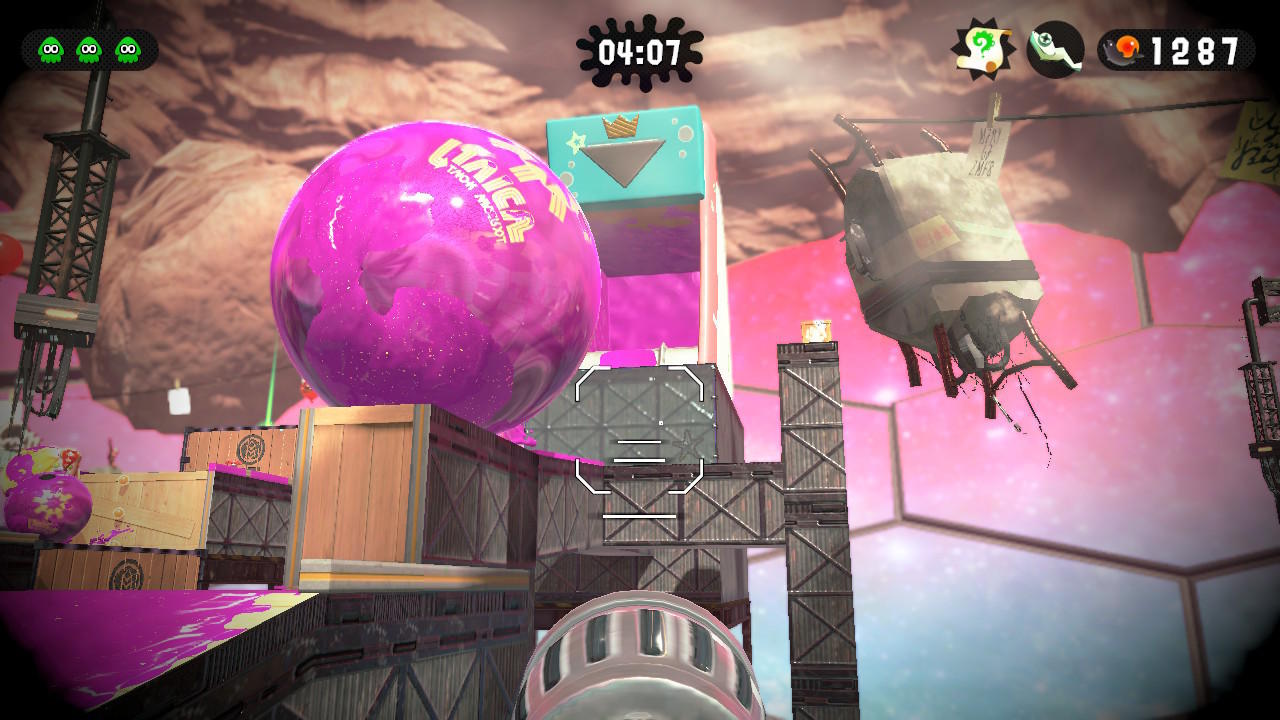
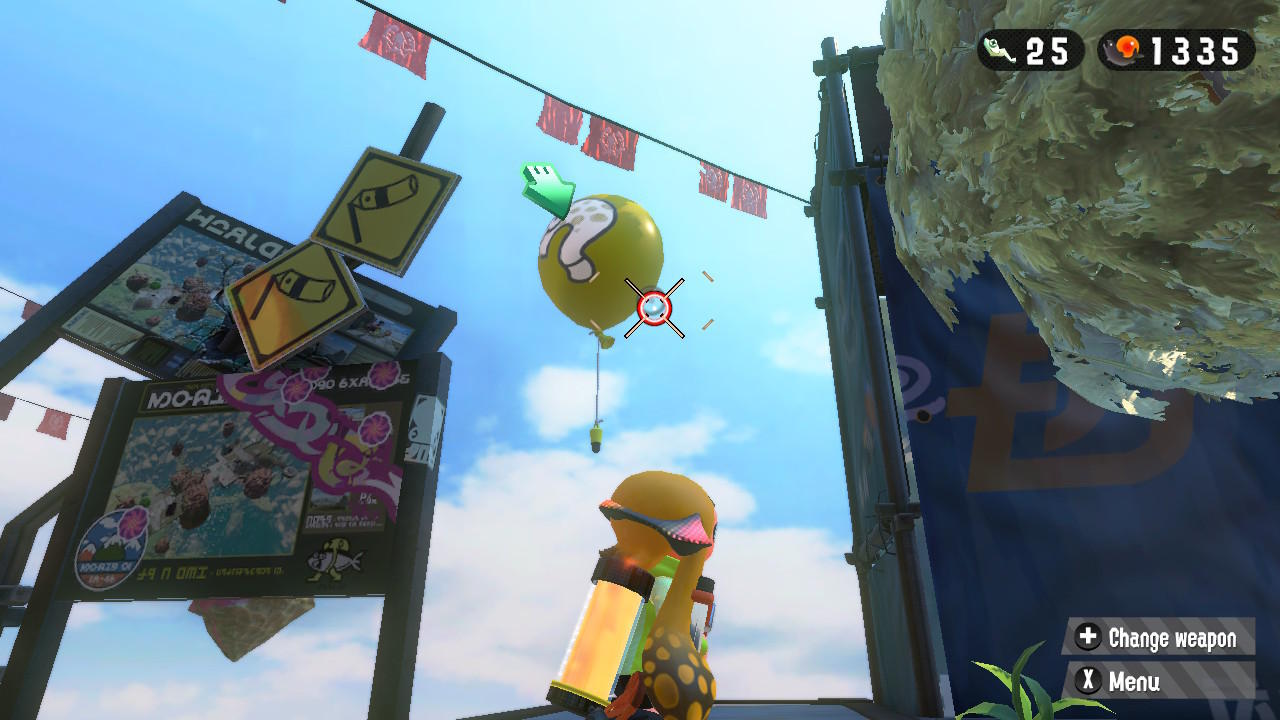
Once you reach the tower, blow up the Balloon Fish at the top to destroy the boxes, then fall through the grate in squid form to get to the bottom. Instead of confronting the enemy right away, turn around to access a balcony-like platform; there will be a small portion of inkable wall and a grate with a box at the end. Shoot the box to reveal the scroll.
Tentakeel Outpost: Level 2
Early on in the level, you'll be at the bottom of two parallel towers with several enemies on a grate above you. Climb the first tower, then drop down into the pink ink at the foot of the second. The scroll is in a box by the wall.
Tentakeel Outpost: Level 3
You'll arrive at a wall guarded by pink paint-covered rollers. When they retract, quickly ink the wall and swim up it. Before going to the launchpad, turn to your right; there will be a ledge supporting an inkable wall. Climb up that wall to get the scroll.
Suction-Cup Lookout: Level 4
About halfway through the level, you'll reach a platform with Octohurlers riding smaller, thinner platforms around it. Kill each of them, then ink one of their platforms and ride it to the area underneath the main platform. Carefully swim or walk down the moving platform to reach the area with the scroll.
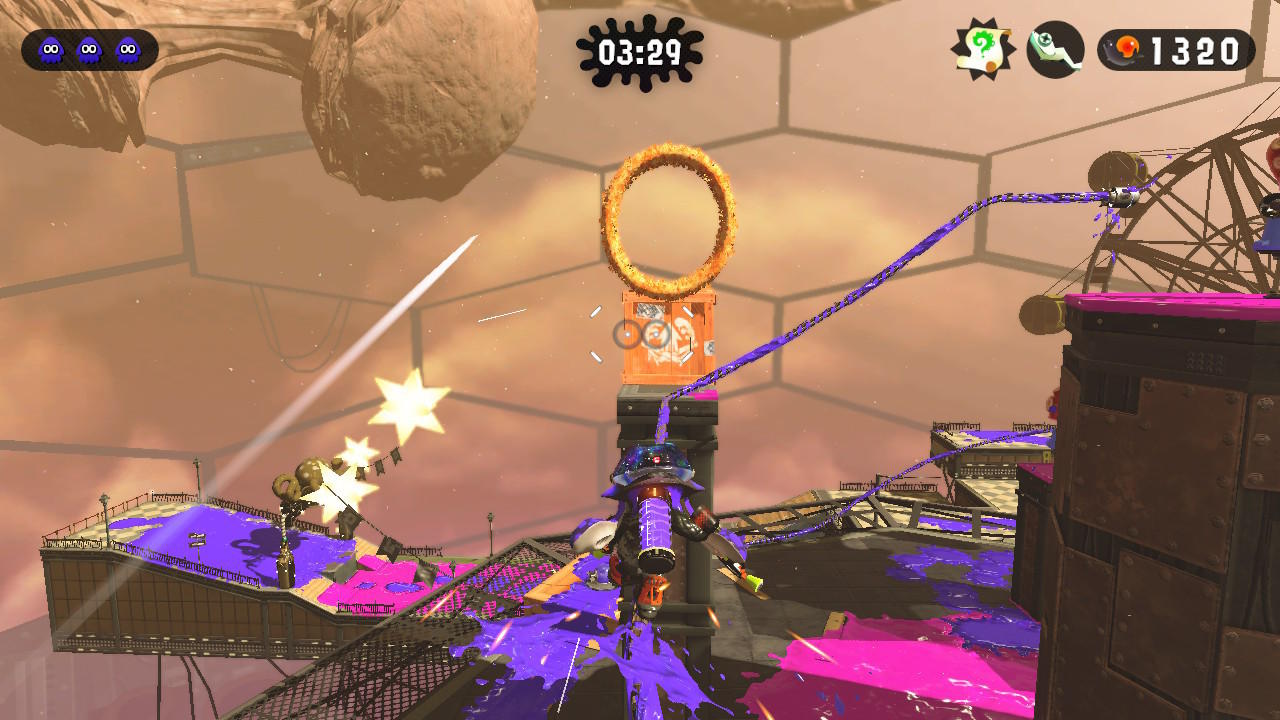
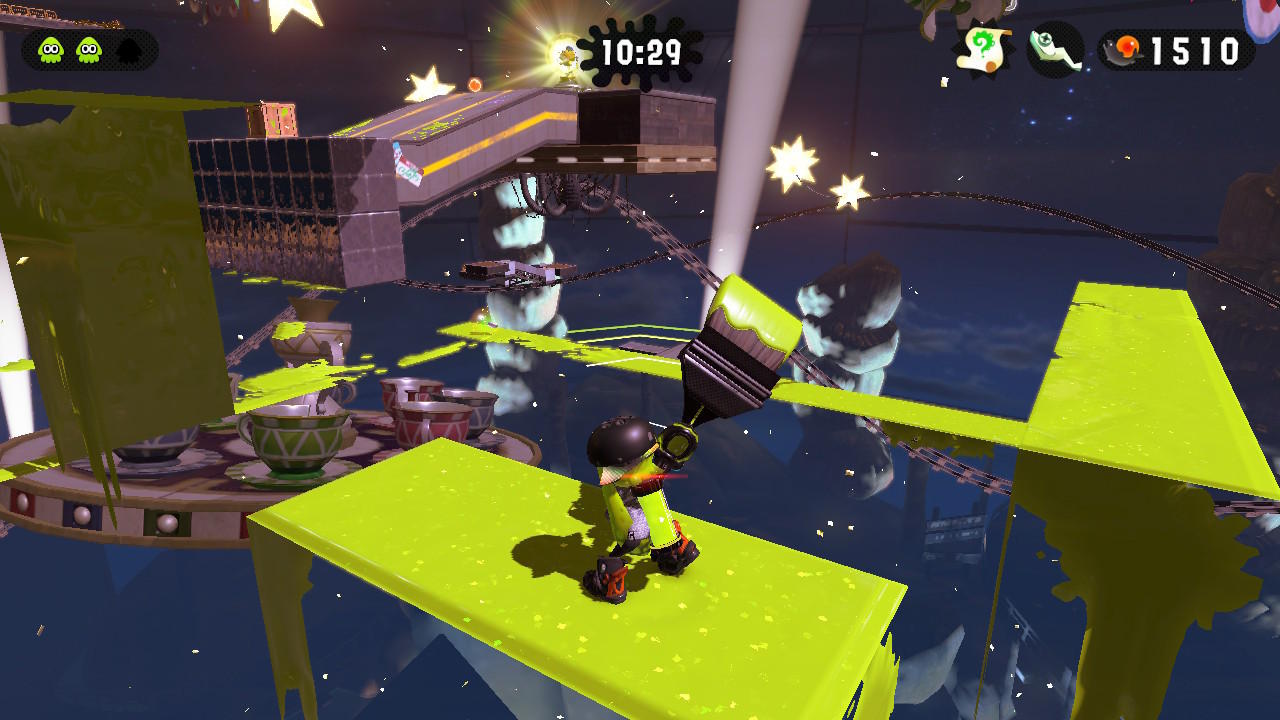
Suction-Cup Lookout: Level 5
Ride the winding rail on the platform with the pillar in the center. There will be a squid ring ahead of you; jump through it and onto the platform behind it. Shoot the box there to reveal the scroll.
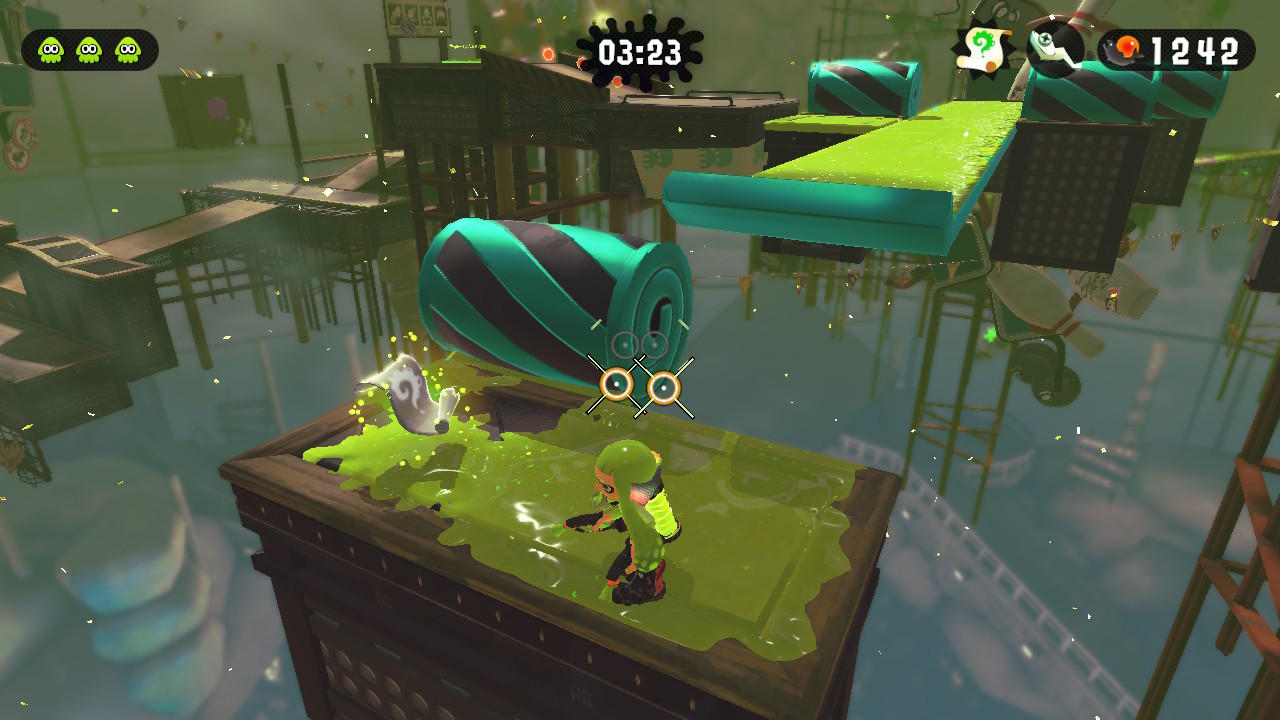
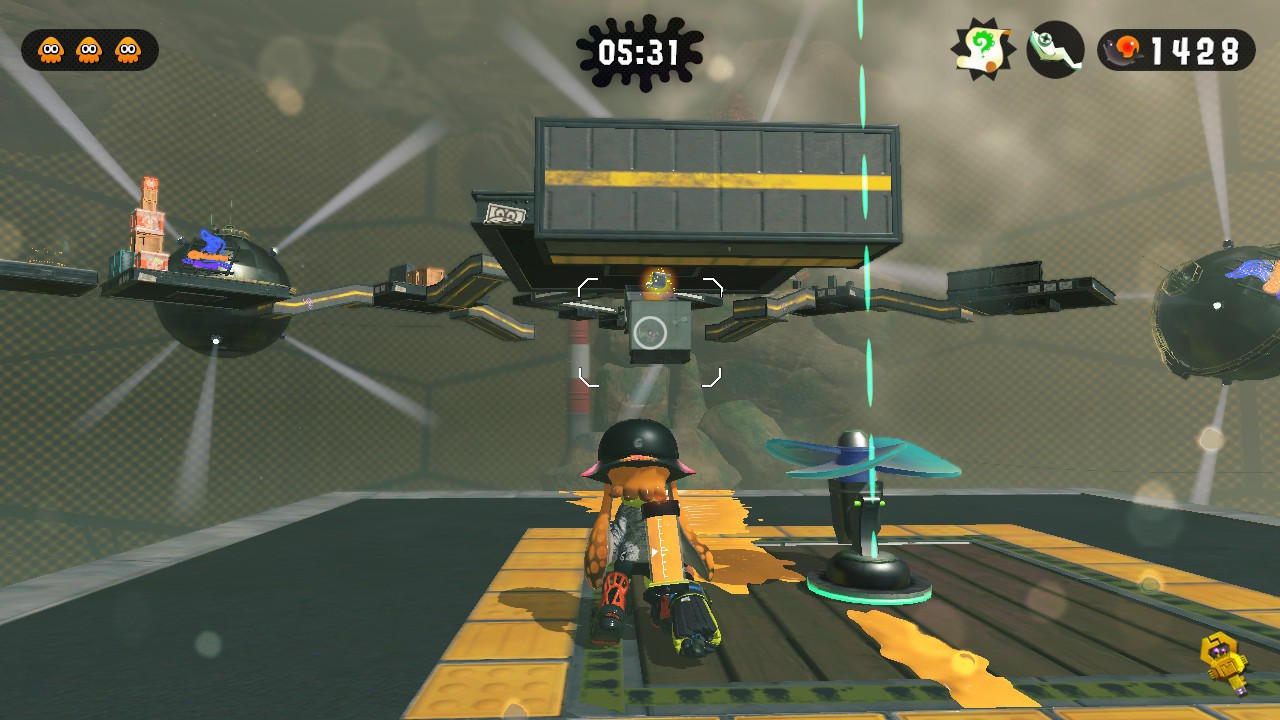
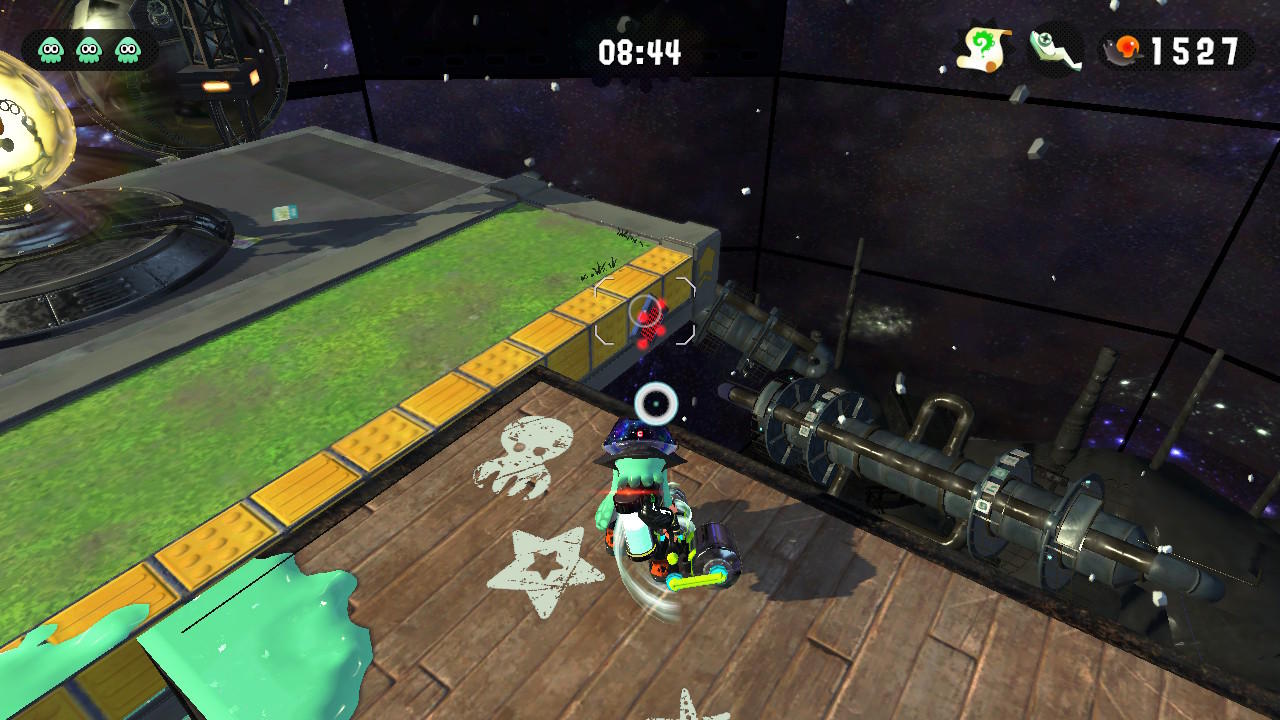
Suction-Cup Lookout: Level 6
In the area with the torpedo-like Octarians, there's a platform under you with a rail entry point on it. You'll be able to see it from your landing point if you move a bit to the right. Carefully drop down to it, then ride the rail up to the platform tucked away at the end. The scroll will be in one of the boxes there.
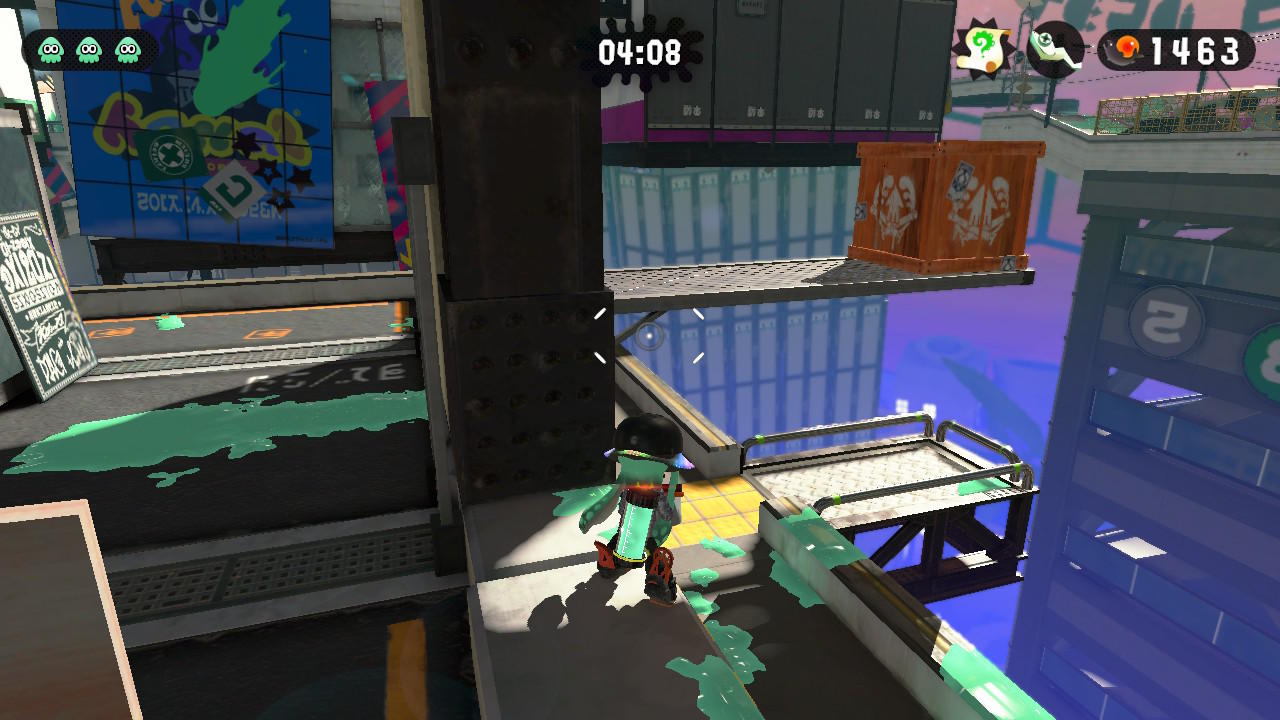
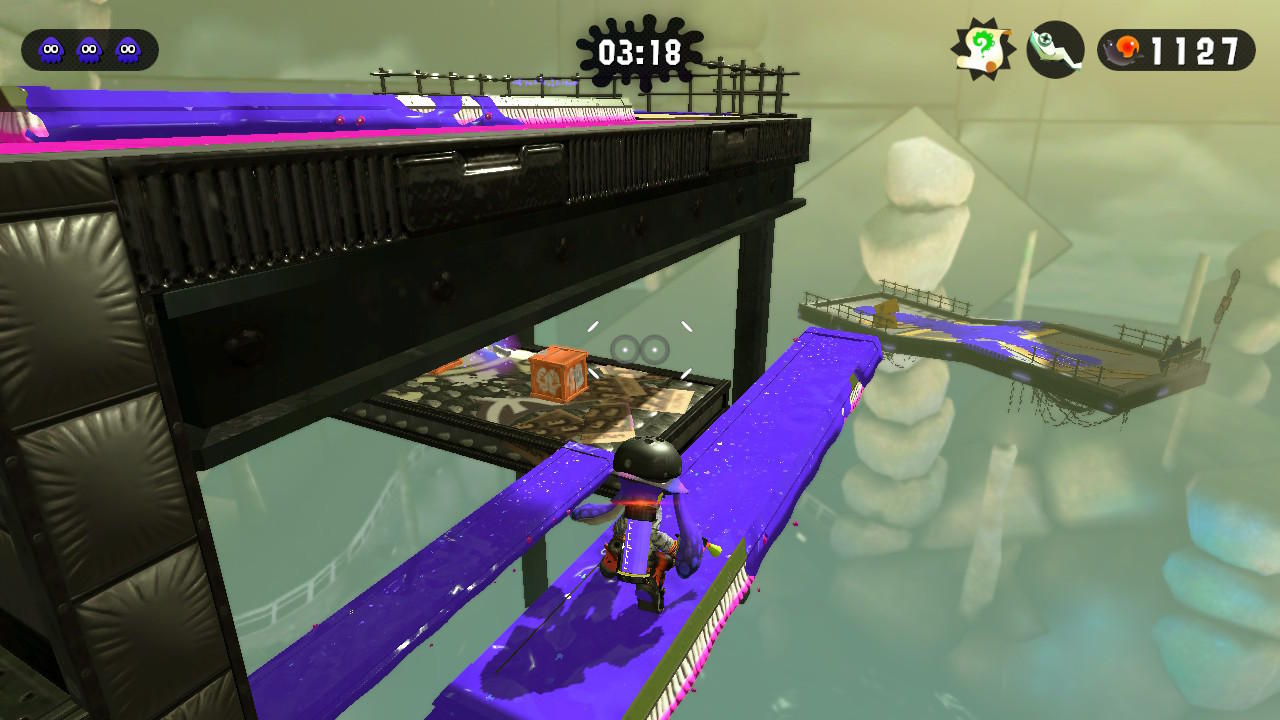
Suction-Cup Lookout: Level 7
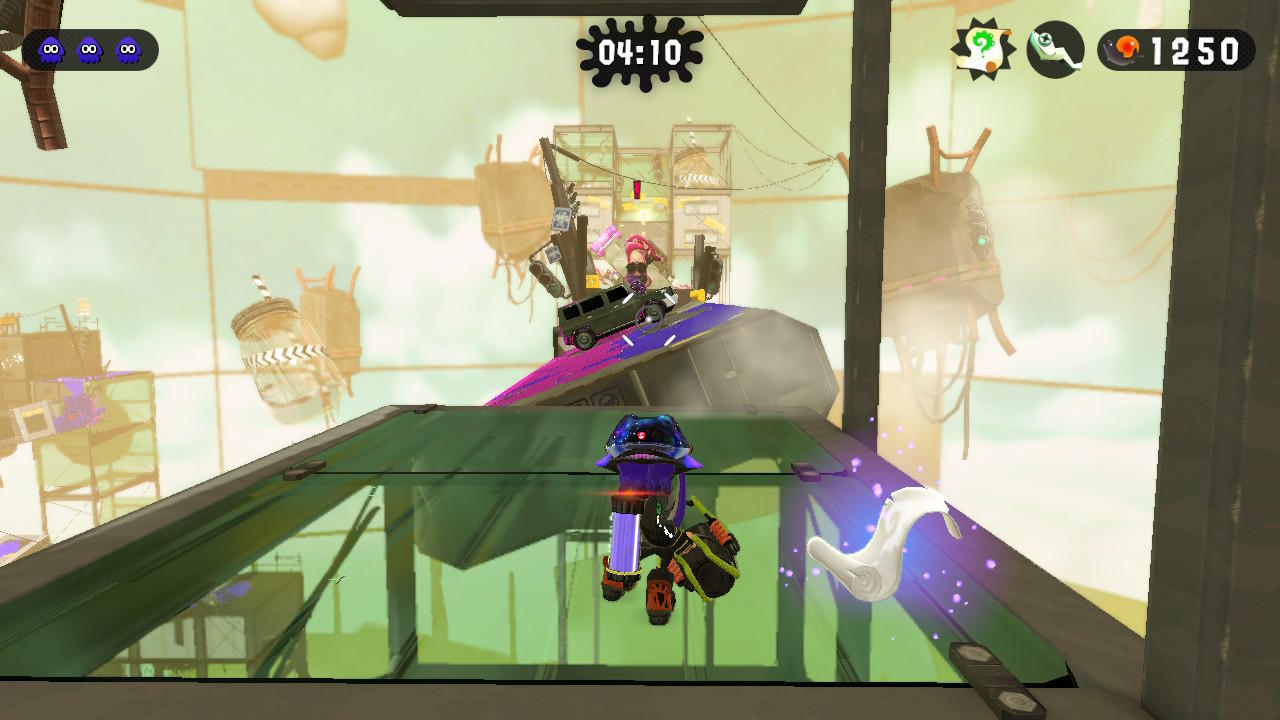
Get past the first two giant Squee-Gs. Once you reach the third, ride it to the opposite end of the platform and jump off of it onto the slightly higher area. Before using the launchpad to move on, jump down on the glass platform to the right--there's a small box in the corner containing the scroll.
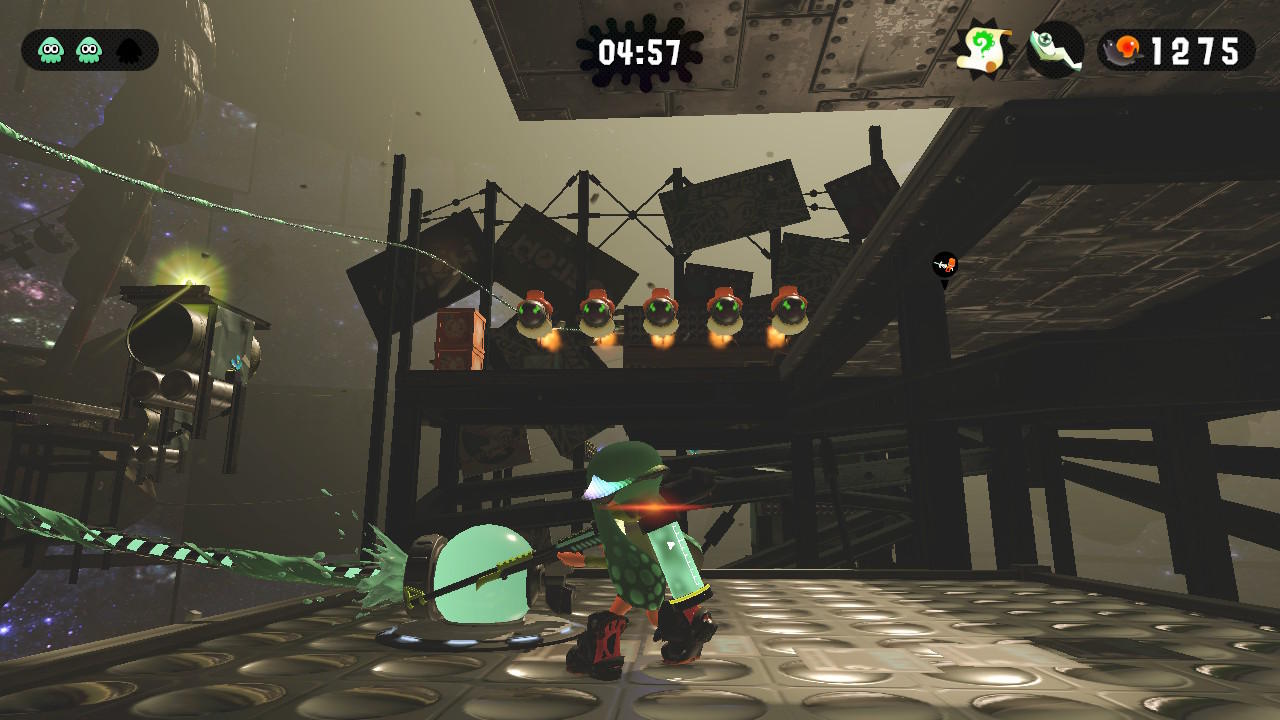
Suction-Cup Lookout: Level 8
In the area with "a lot of Inkfurlers," be sure to shoot the fourth one--it's longer than the rest and will lead you straight to a platform with a box on it. Shoot the box to get the scroll.
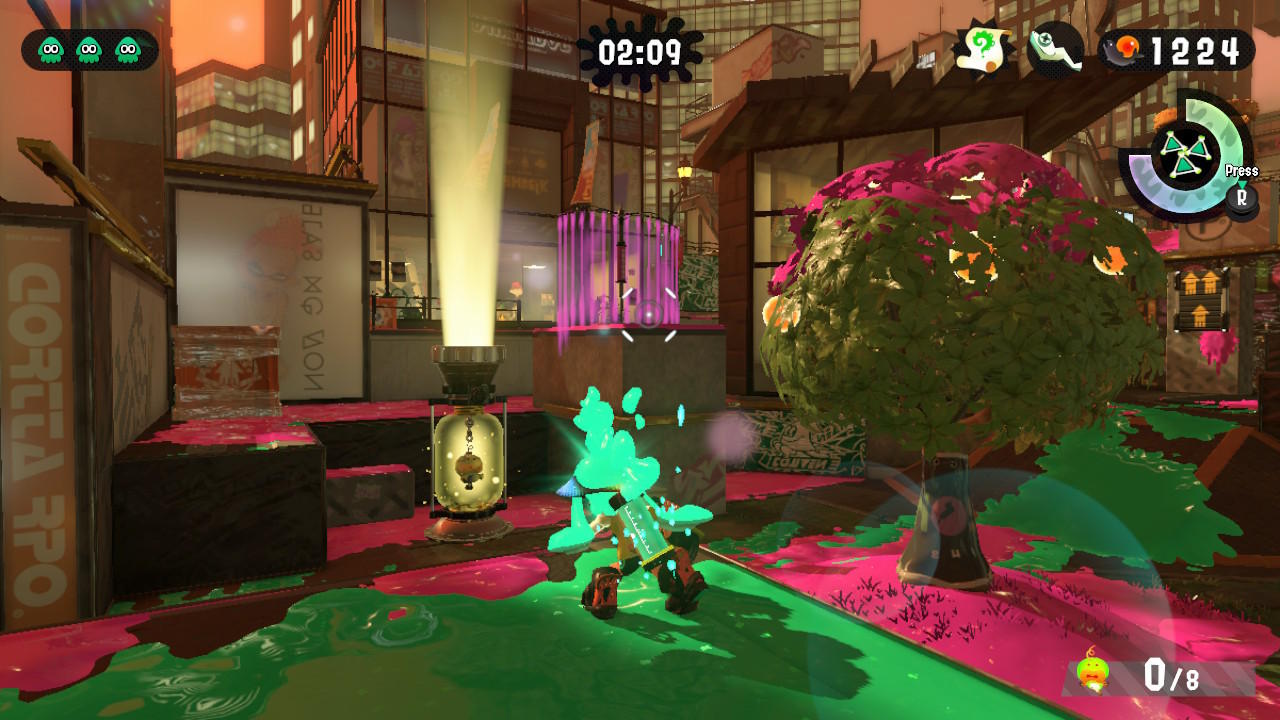
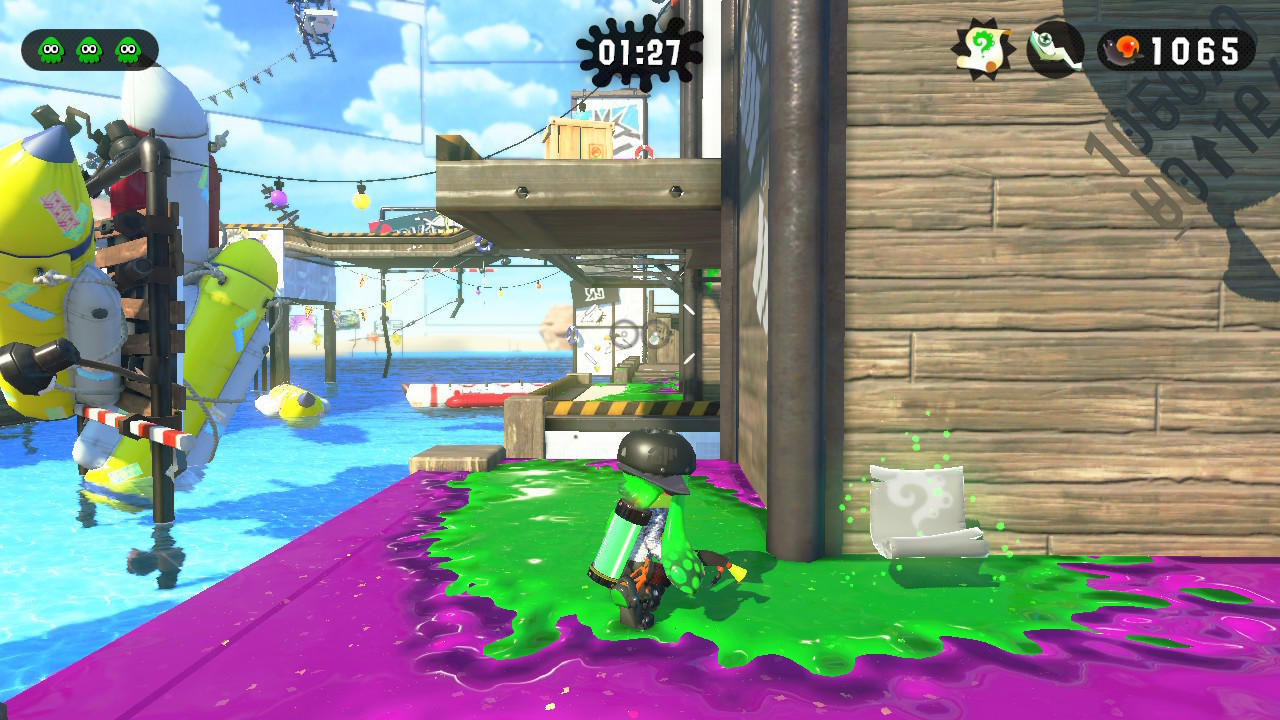
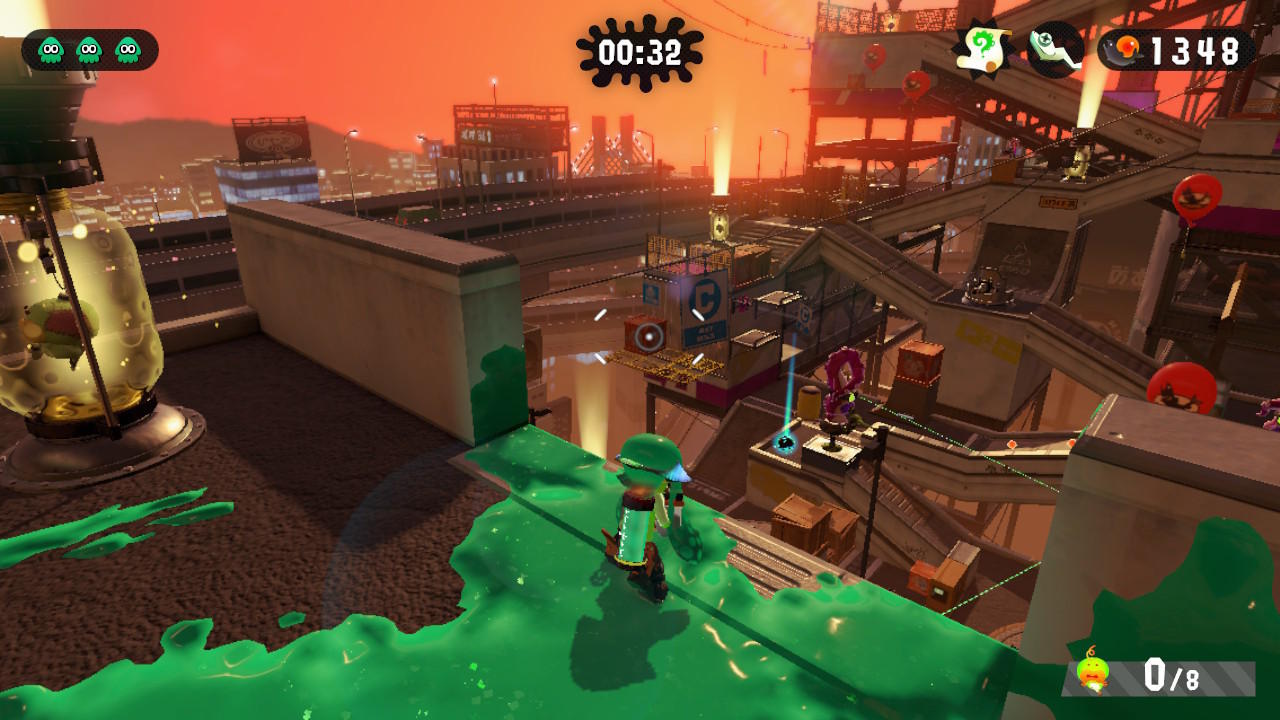
Suction-Cup Lookout: Level 9
From your spawn, take a left. Go past the Splash Wall by the bridge and make your way to a second Splash Wall on a platform above one of the trapped Mini Zapfish. Destroy the Splash Wall and ink the area around it to reveal a box. Destroy the box to get the scroll.
Beaker's Depot: Level 10
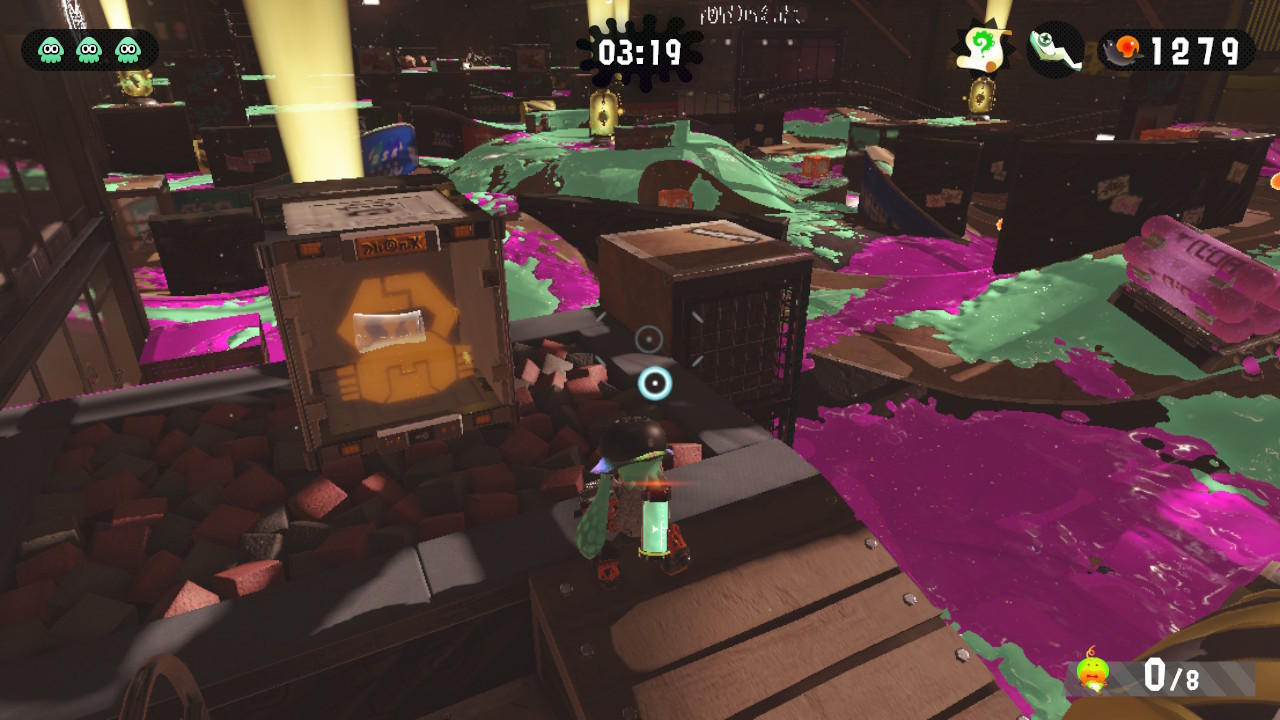
Get past the section with the first Octoseeker and continue to the area with the second. Wait for it to pass by, then make your way to the gap in the platform that's bridged by inkable sponges. There's a second set of sponges below the first; use the Slosher to throw ink down on those, then carefully drop down onto them. The scroll is in the wooden box next to the launchpad.
Beaker's Depot: Level 11
At the narrow pathways (where Marie tells you not to get "sloppy"), there will be a platform below you. Drop down through the squid rings and splat the Tentakook here to get the scroll.
Beaker's Depot: Level 12
Carefully bounce your way past the conveyor of tall, inkable walls. While avoiding the Flooder at the end, ink up the (stationary) walls to your left. Swim up the shorter one, jump on top of the Flooder, and then jump and swim up the taller wall. At the top is a wooden box containing the scroll.
Beaker's Depot: Level 13
Shoot your Splatling at the Grapplink while the Flooder is under it; this will put you on top of the Flooder, which you can then ride over to the pillar with the cardboard box on it. Ink the sides, then jump over and swim to the top to retrieve the scroll inside.
Beaker's Depot: Level 14
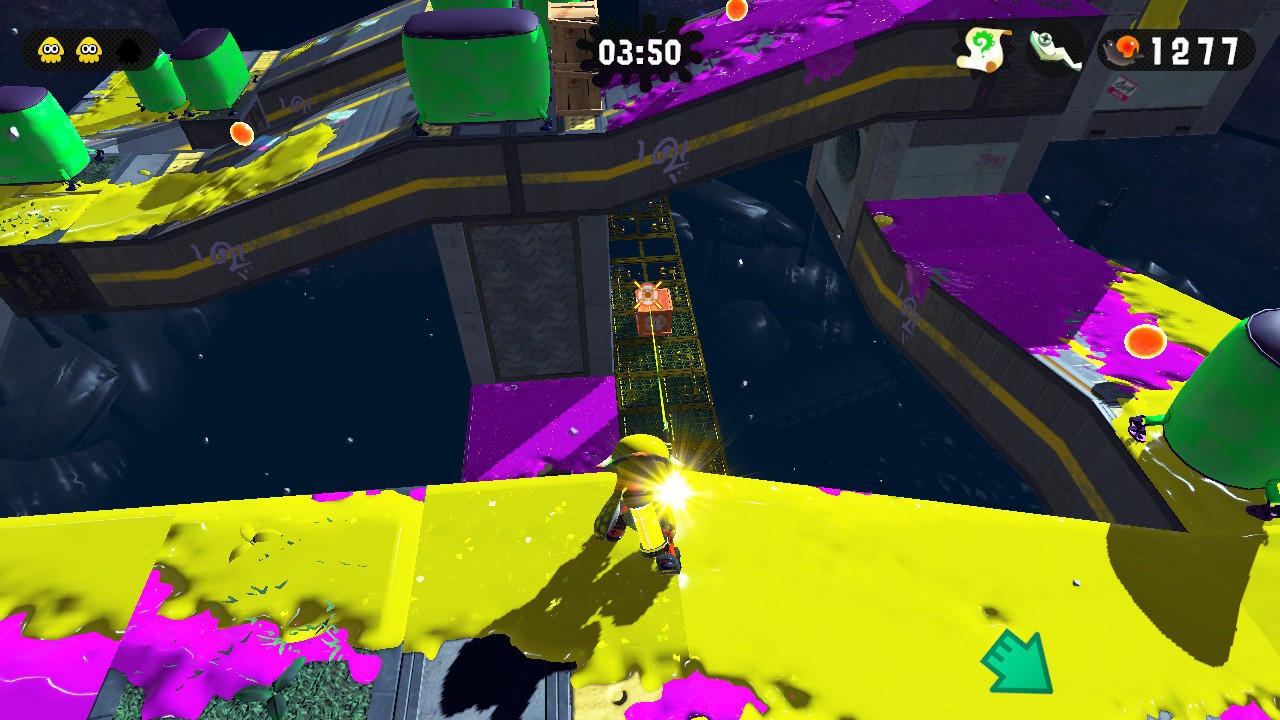
Move carefully to avoid the Octosniper early on in this level. After moving from platform to platform, you'll hit a checkpoint; the scroll is directly underneath the area with the checkpoint on it. Just drop down and ink up the area to swim over to it.
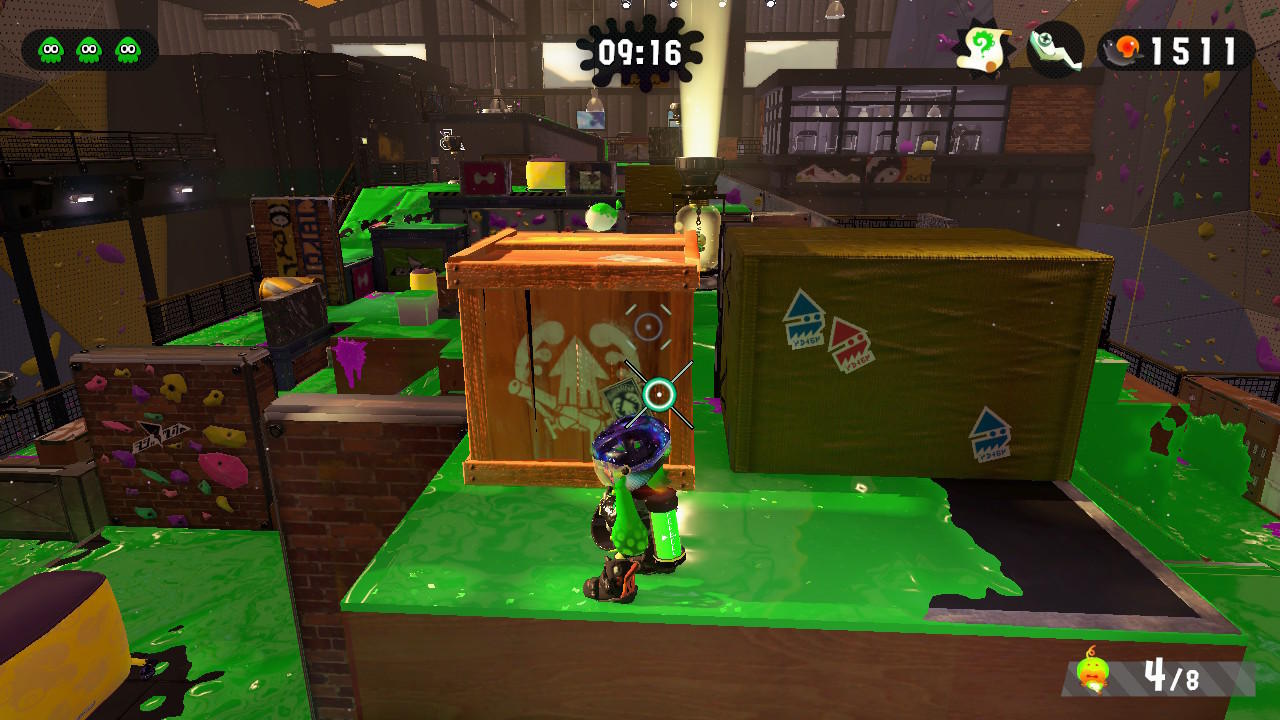
Beaker's Depot: Level 15
The scroll is in a locked box in front and to the left of the Octoling spawn (if your back is to the spawn, that is). You'll be able to find one of two keys by breaking boxes near the center of the map. Keep in mind that the other locked box contains a special, so if you don't want to go looking for both keys, just skip that box.
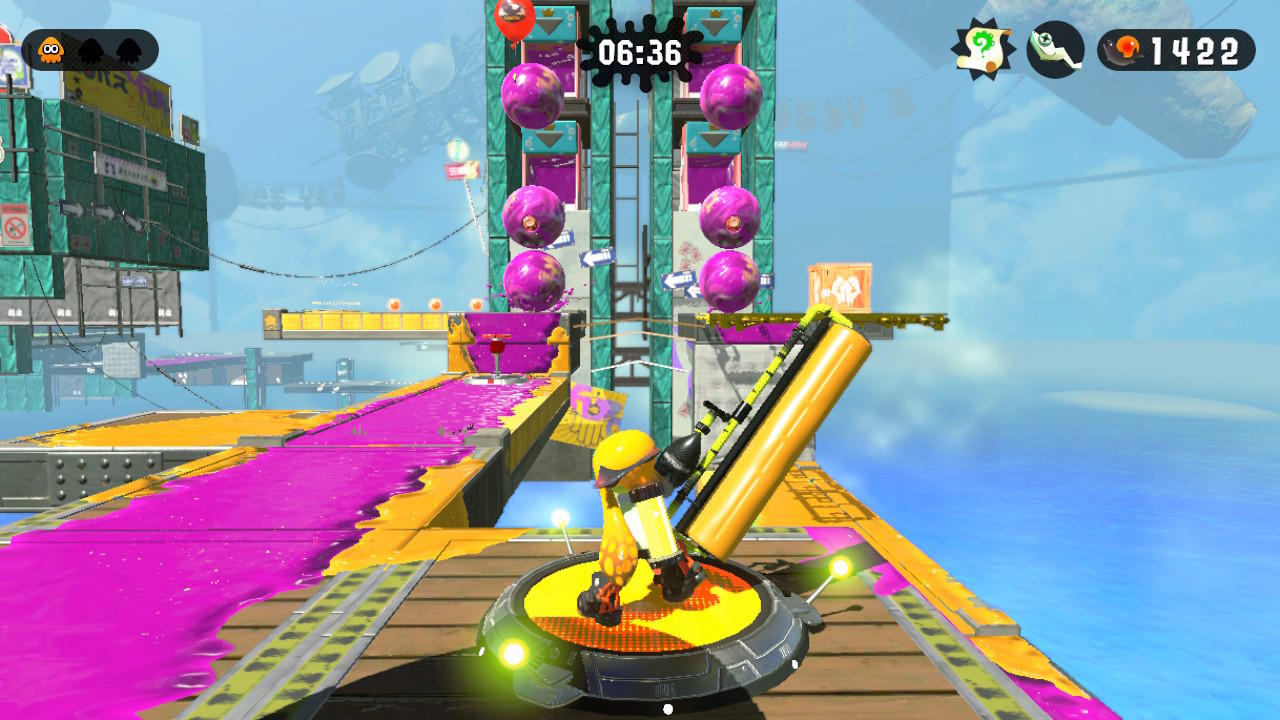
Slimeskin Garrison: Level 16
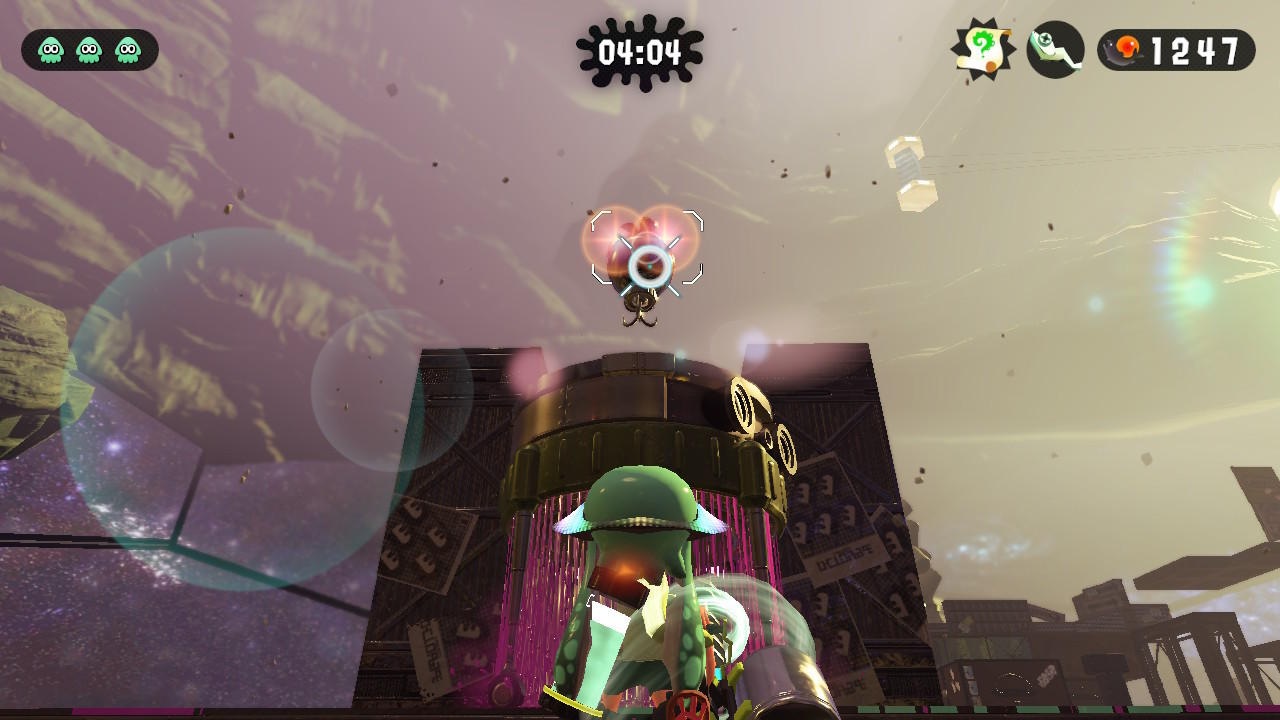
Aim the cannon at the giant Octoballer, then shoot just as the Ocatarian becomes visible to destroy it. Quickly ink and swim your way up toward the pillar with the wooden box on it while avoiding the next Octoballer. The scroll is in the box.
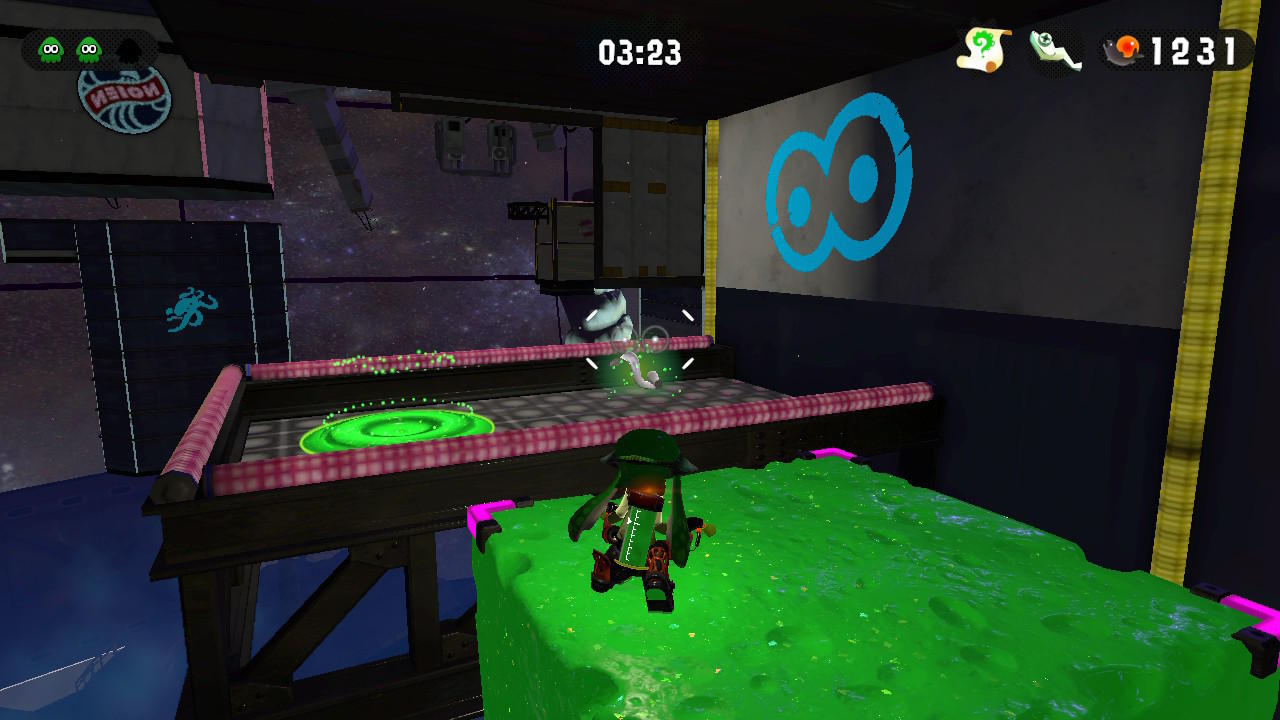
Slimeskin Garrison: Level 17
Drop down through the grate just after the checkpoint, being careful not to fall off the rotating platform. Instead of going straight for the Octocommanders, turn around and make your way to the glass platform. The scroll is in a wooden box.
Slimeskin Garrison: Level 18
Make it past the rail-grinding section around the tower and to the area with three Octosnipers. Take out the snipers, then drop down to the platform below you. Break open the wooden box to get the scroll.
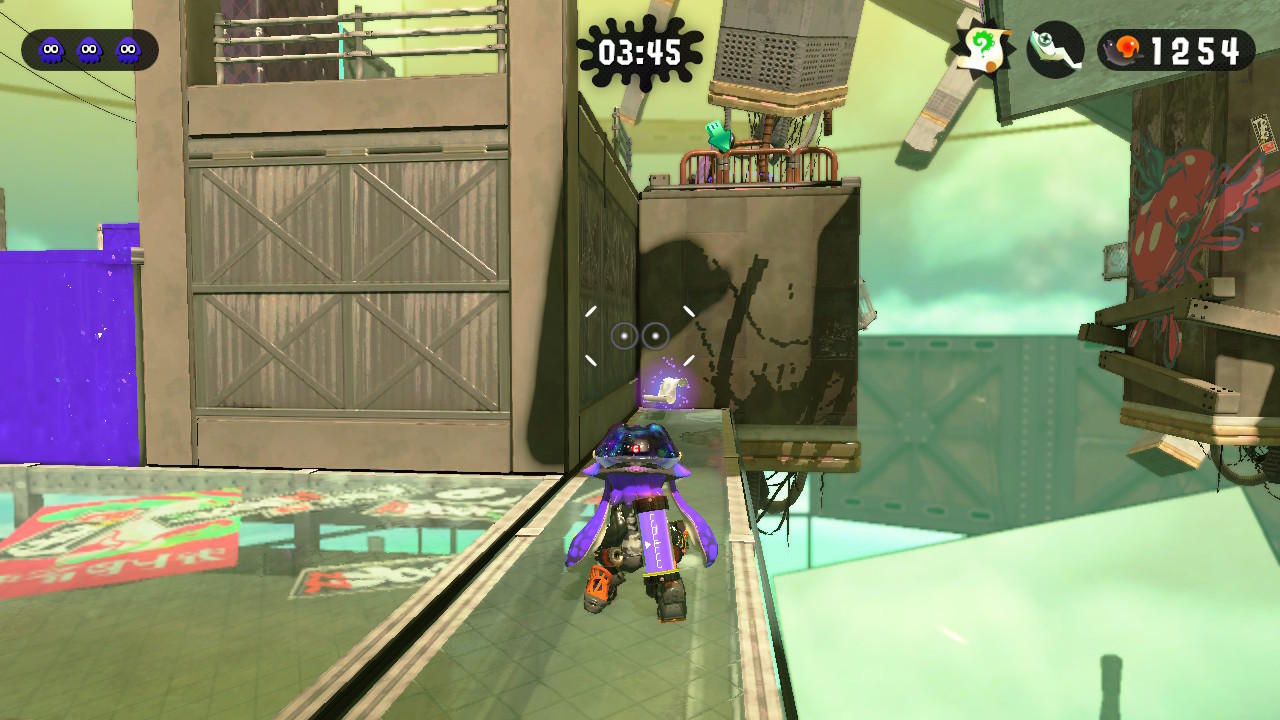
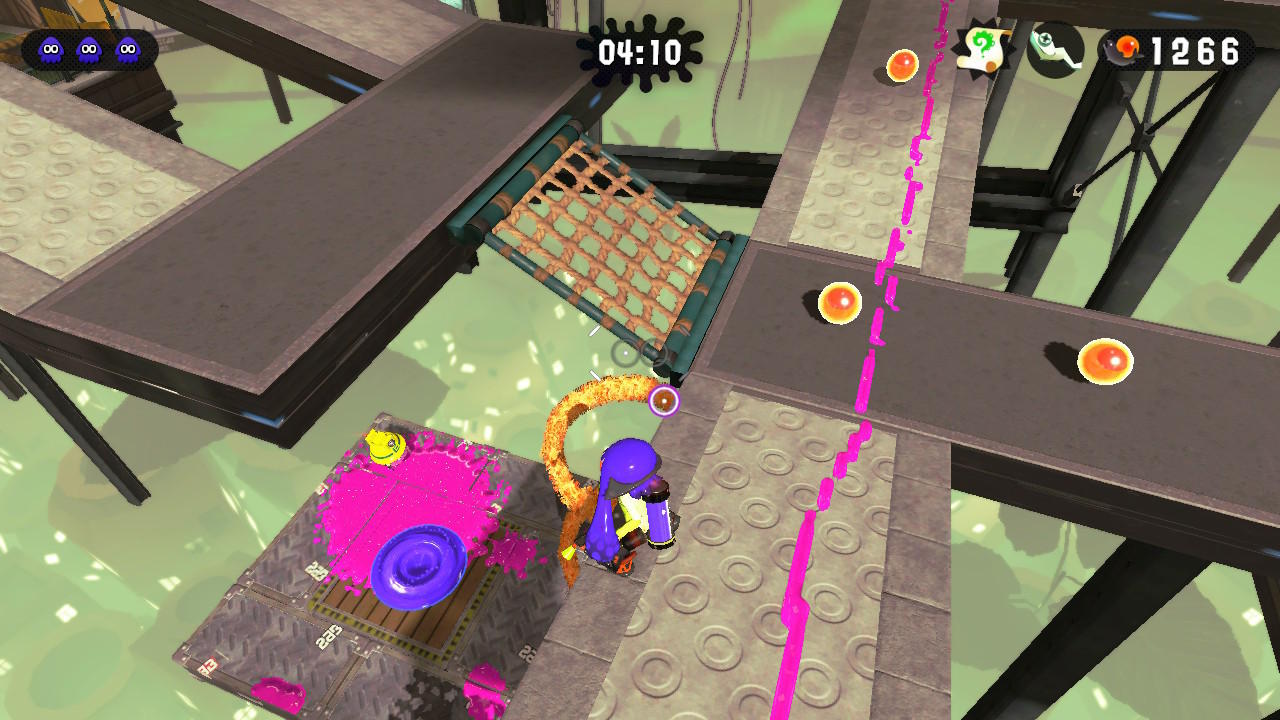
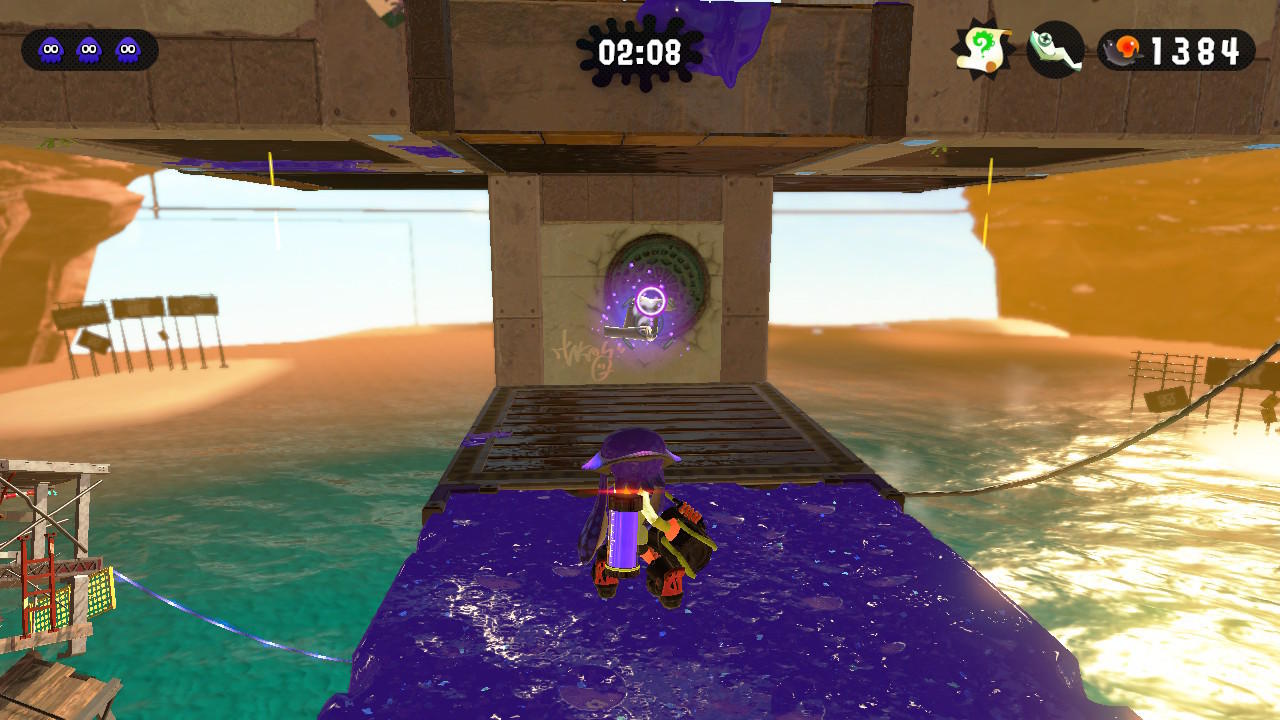
Slimeskin Garrison: Level 19
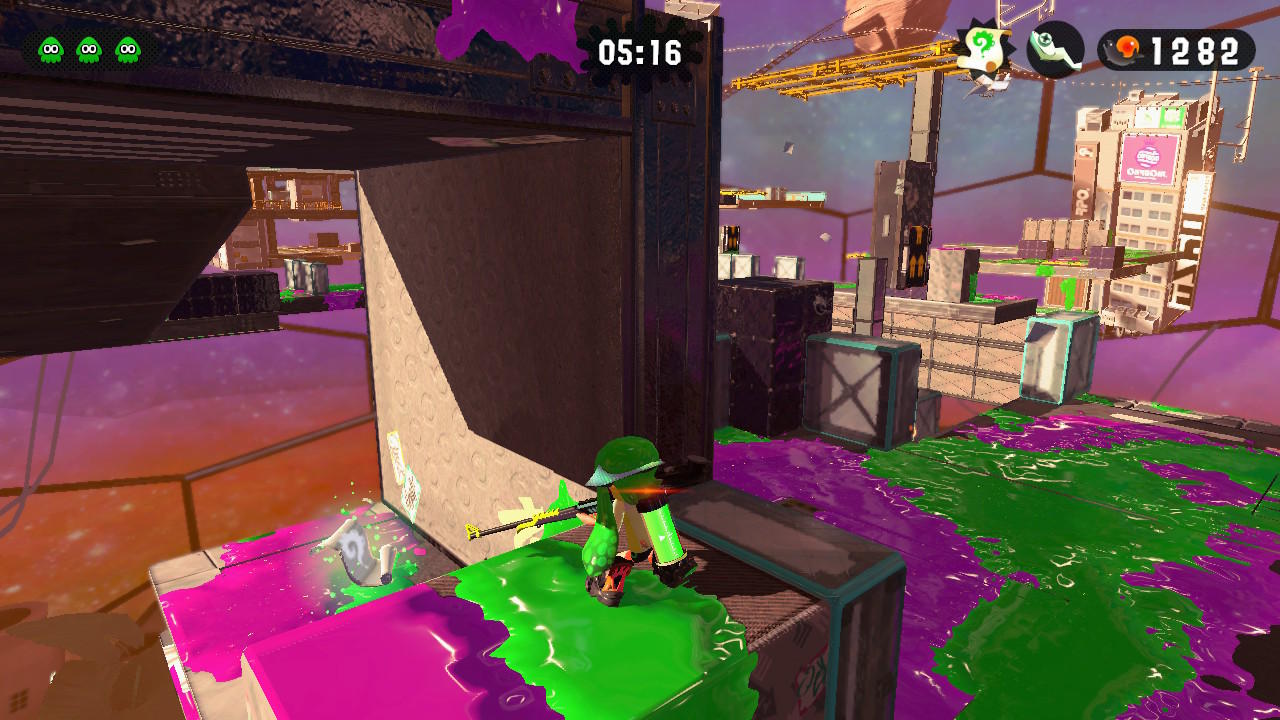
From the center area containing three launchpads and three locked boxes, take the middle launchpad. It will send you to an area you have to traverse using Grapplinks. The scroll is on an apparently out-of-reach grate. There is a red switch next to the fourth Grapplink down; aim a little to the left of the Grapplink with your blaster to ink up the switch (the large blast radius will also hook you to the Grapplink). You'll be able to pick up your hard-earned scroll at the final landing area, just before the launchpad that returns you to the start.
Slimeskin Garrison: Level 20
Collect one of the keys you need to proceed, then unlock the box straight ahead. It'll open up to reveal a fan; shoot at it to send the platform upward, then jump off of it and onto the stationary platform. Turn back around and, while still on the stationary platform, shoot down at the fan to move the elevator platform back up toward you. There will be a small red switch on the side closest to you. Shoot and ink it to reveal a hidden walkway behind you containing the scroll.
Slimeskin Garrison: Level 21
The scroll is on the Octolings' side of the map to the left of your spawn. You'll have to take out the Octosnipers (or, if you're really brave, just avoid them) to get there. Ink the wall and swim up to the lower grate, then jump to the grate on with the wooden box on it. Break open the box to get the scroll.
Cephalon HQ: Level 22
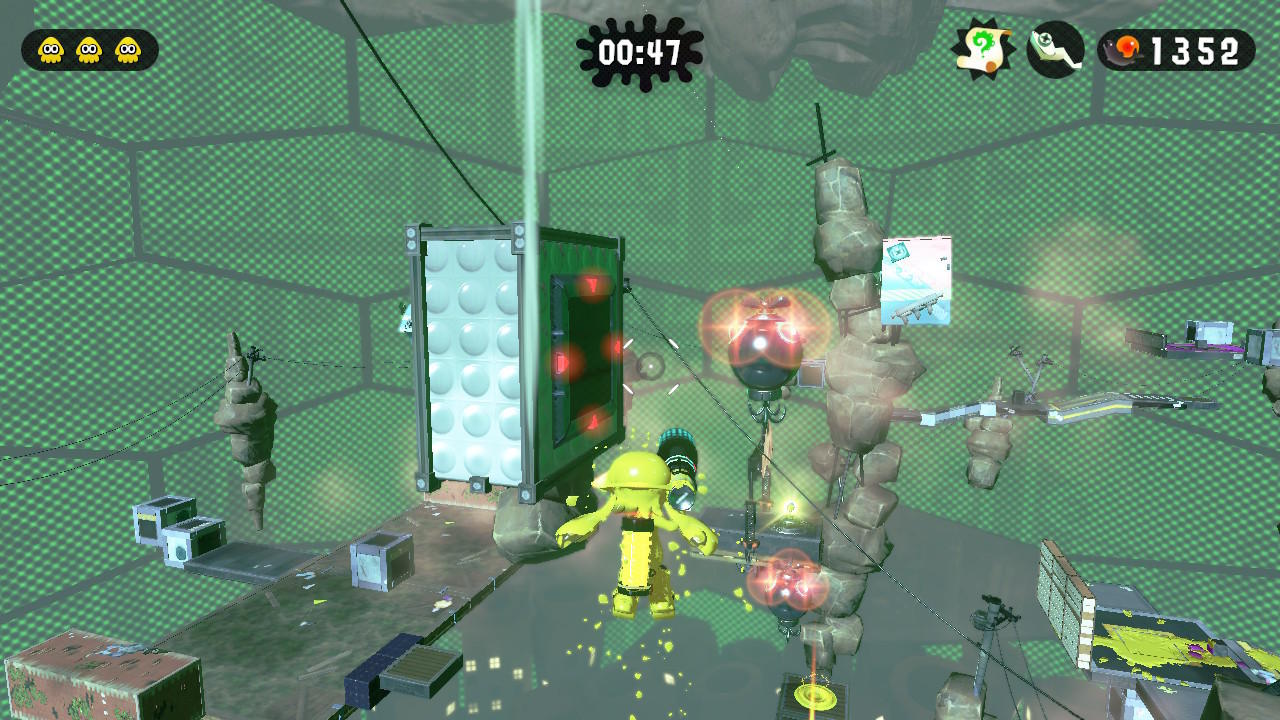
Throw a bomb to distract the Squee-Gs if need be, then ink up the invisible pillar on your right, closest to the Zapfish. There will be a series of invisible platforms you can access from this pillar; they'll lead you directly to the scroll. If you're having trouble finding it, just fling ink in all directions until something sticks.
Cephalon HQ: Level 23
Once you get to the winding ink rail, be prepared to jump twice: once over the pink ink roller, and then immediately over to another rail on your right. This rail will lead you to a platform containing the scroll.
Cephalon HQ: Level 24
Reach the platform with two moving pillars on it--the one with inkable sponges you can use to ascend. Just off the end of this platform, slightly below you, will be an inkable sponge. Use the Slosher to throw ink on it, then drop down. The scroll is tucked under the platform.
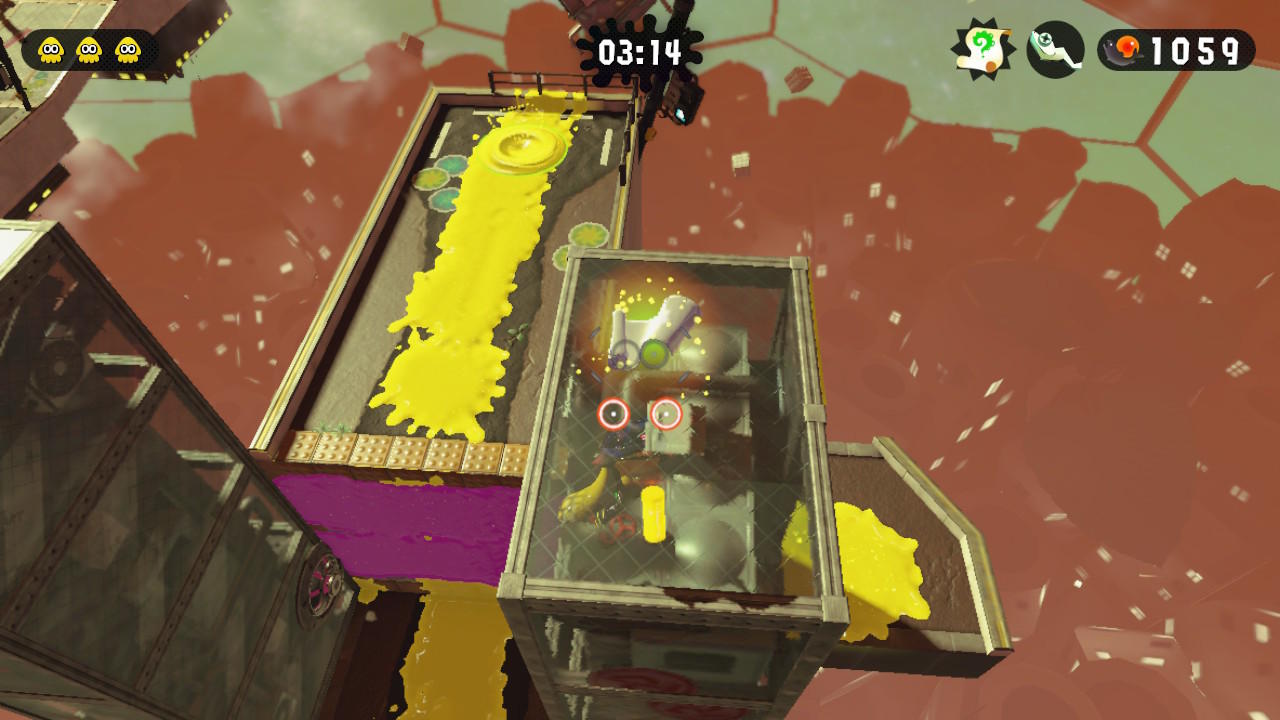
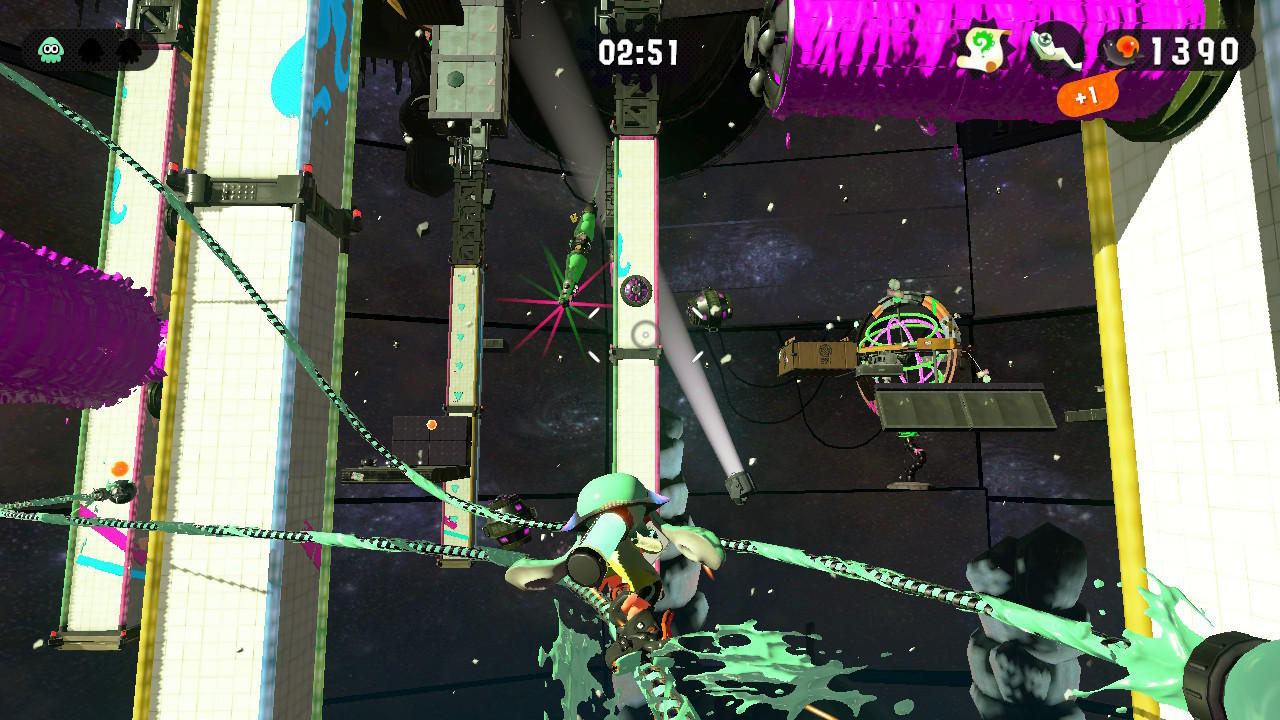
Cephalon HQ: Level 25
This one is a bit complicated, but it's a lot of fun! In the last section of the level, use your Splatling to shoot the target and move the floating platform. Continue to shoot it and ride your way around to where the Zapfish is held captive. Like in level 20, there's a hidden red switch on the side of the Zapfish's platform. Shoot it to reveal a launchpad; ride that launchpad to another platform, then climb up the Octostamp to reach another launchpad on its back. You'll land on a stack of boxes, which you can shoot with your Splatling to get the scroll.
Cephalon HQ: Level 26
You'll reach a set of two parallel platforms with stacks of three Octoballers each barreling toward you. The scroll is in a wooden box at the end of the right lane, but you have to jump to it from the left. Time it carefully and don't get squished!
Cephalon HQ: Level 27
Move out in front of your spawn past the first Mini Zapfish and ink the small platform in the center (it will have pink ink on it already) to reveal a wooden box. The box contains the scroll.
Bonus: Overworld Stamps
Each of the five overworlds contains one scroll, but they aren't like the rest--instead of lore details or cute tidbits, these give you stickers to commemorate your achievement. To get them, you have to shoot down a series of colored balloons before they blow away. It takes a little practice, but when you shoot the first balloon in the series, it will point you to the next balloon. Use ink to lay out a path for yourself as each balloon appears. Don't worry if you miss one; just wait for the starter balloon to reappear and try again.