INTRO:
The X-COM series (it has to be insisted here that there is a hyphen in the original name of the IP) has generally offered a diluted 4X experience, set against a setting with gameplay that gradually but surely increases the challenges which the player would face.
In the second entry of the XCOM reboot series, this is still so, except that there is a clearer sense of urgency this time around. This is delivered through encounters with surprisingly troublesome hostile entities, as well as management-oriented gameplay that is particularly oriented around how, when and even where the player spends his/her in-game time.
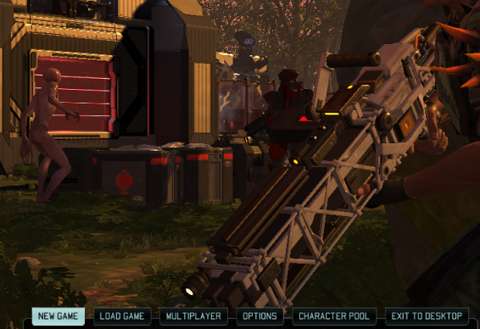
Unfortunately, XCOM 2 has design issues, the most obvious of which can be represented by what the player sees upon reaching the main menu for the first time.
PREMISE:
In the original X-COM series, the story was set in a version of Earth where canonically, the counter-alien organization that is X-COM has won every time there was an invasion, but with increasingly greater cost to the planet.
In the reboot, Firaxis throws the assumption that X-COM has won out of the window. It is uncertain whether anything in the previous game was canon, but from the explanation of some of the returning characters who allude to the events of the expansion to the first game, Enemy Within, strongly suggests that the organization was betrayed from within. If it was, it did not survive the treachery.
Anyway, fast-forward 20 years or so later, the aliens, led by the enigmatic “Elders”, have coopted all of the governments on the planet into its fold, remolding them as the monolithic “ADVENT”. To ease the acceptance of the aliens’ rulership of humanity, they have offered many goods and services which were simply impossible by the standards of human-developed technology and science, the most notable of which is medicine that is far beyond the capability of Man.
Of course, the aliens’ true intentions are not that easy to discern; suspicion remains among those who would not accept alien rulership. Due to this resistance, XCOM has managed to survive all those years, albeit as an underground movement.
This is where the player comes in. Apparently, after having located the missing Commander of the previous incarnation of XCOM, the XCOM of this game launches a rescue operation to retrieve the Commander. It also appropriated the hardware that is necessary to maintain a mobile base of operations, which would presumably be more resistant to the perfidy of treachery, as was not the case with the previous XCOM.
Hours into the game, a discerning player would realize that the story makes for a surprisingly good reason to justify the rather different gameplay in the strategic layer of the game. The story also happens to be worked far better into the mission-based portion of the gameplay as well, as will be elaborated further later.
VISUAL DESIGNS - OVERVIEW:
The most apparent aspect of the game, for better or worse, will have to be explained before the rest. This is because the visual designs of the game are simultaneously one of its most impressive aspect, but also one of its most worrisome (at least for this reviewer).
It has to be mentioned first that this reviewer has played the game on the lowest graphical settings. The following critique is not about how the game looks, but rather whether it was necessary for it to look the way it is in the first place.
MANY VISUAL ASSETS:
The bulk of the 30 GB and so of the game’s assets is for visuals. There are many, many models and model parts for characters, especially for humans. Even the aliens and their ADVENT cronies have many model swaps, even if they do happen to maintain the same model silhouette for each type of enemy; add textures to these, and there would be astoundingly even more visual assets. There are just as many assets for the environments in the mission areas as well.
Of course, these many assets make for considerable visual diversity within the experience of the game. Yet, this also means that the bulk of the assets for the game is just there for flair and snazz. One would wonder how the gameplay could have been if that much effort had been spent on designing gameplay instead.
CONSIDERABLE LOADING TIMES:
Unfortunately, having many visual assets also means that loading times can be considerable. This can be seen right when the game launches; there has to be a wait for the scene in the main menu to appear. That said, the scene in the main menu cannot be disabled.
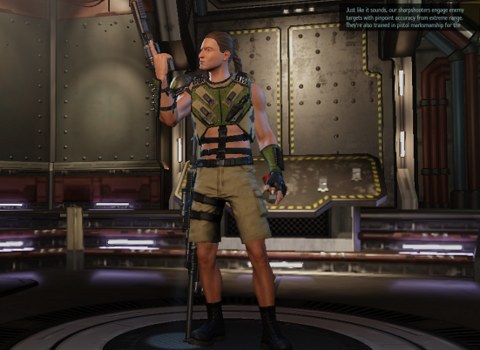
(On the other hand, it can seem amusing to some players that the character in the foreground is one of the player’s veteran troops in his/her current playthrough.)
FINICKY USER INTERFACES:
The user interfaces for many segments of the game – especially the missions – are composed of small buttons, which can be a problem if the player, for whatever reason, does not wish to use the keyboard.
Of course, the keyboard shortcuts are effective work-arounds, but one would wonder why Firaxis even bothered with the on-screen buttons in the first place.
There are more problems than just small buttons: these mainly affect the missions and the Avenger view mode, and will be described later where relevant.
TUTORIAL:
For many players, it would be wise to attempt the tutorials first. The outcomes of the scenarios which are shown in the tutorial are very much made certain by its developers, e.g. there will always be two XCOM fighters who die and Jane Kelly will be the player’s first recruit. The player is also shoehorned into making specific commands, even if the player could have recognized that there are better decisions to be made.
Nevertheless, the tutorial is adequate enough in forwarding the lessons about the basics of gameplay, as well as establishing the premise and general theme of the game.
THE AVENGER – OVERVIEW:
The first XCOM reboot title was criticized for not retaining the original games’ feature of having multiple bases with grid-like layouts. The sequel will not address this criticism by reintroducing that feature. Instead, it has set up a premise which attempts to justify the limitation of just one base with cell-like rooms.
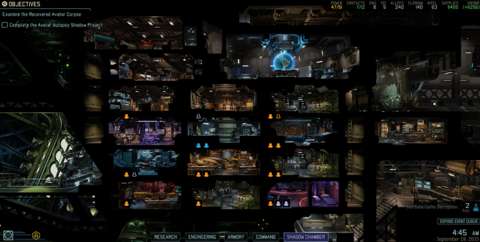
With that said, the Avenger is the only base of operations which the player would have. It is an immense ship however; it can accommodate numerous rooms and it has infrastructure to make it possible to introduce diverse functions to these rooms.
However, since the Avenger is made from the wreck of a pre-existing alien ship, most of the ship’s interior is in a mess. This means that they have to be cleared first; this is not unlike the excavation gameplay element in the first XCOM reboot.
On the other hand, there are quite a number of differences which has been introduced in XCOM 2, which makes the gameplay of developing the base a notably different experience. Yet, there are also a few changes which may not please players who are expecting an overall increase in sophistication. These changes will be described in their own sections.
NO MORE ADJACENCY BONUSES:
In the first XCOM reboot title, there were adjacency bonuses which made the development of the base a tad more complex than it would have been if there were none at all. In XCOM 2, this gameplay element appears to be missing. Perhaps Firaxis has intended to replace this with something else instead; this will be described shortly.
ROOMS WITH DETRITUS & ‘EXCAVATING’ THEM:
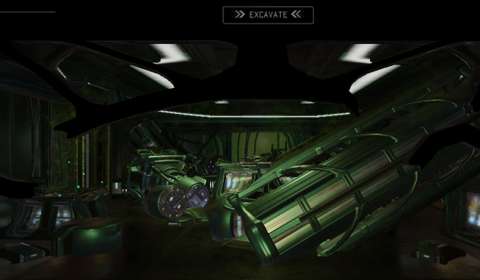
As implied earlier, the Avenger starts out as a work-in-progress vehicle. Although most of its critical systems and facilities have been completed, there are still rooms in it which are unusable by its crew. These are the rooms which the player will need to clear out so that useful facilities can be installed within them. Incidentally, perhaps to have the game seem familiar to veterans of the first XCOM reboot, the act of clearing them is called “excavation” as well.
In the first XCOM reboot title, excavations are endeavours which are time-consuming and costly, hence necessitating decisions on the player’s part concerning the opportunity costs of spending money on further excavations instead of spending them elsewhere.
XCOM 2 removes the monetary cost, but replaces it with the need to task Engineers (or Gremlins from the Workshop facility) on the ‘excavations’. As will be described later, Engineers (and Gremlins) are precious assets which can be used to do essential things other than excavations. Therefore, the player will have to juggle the need to clear rooms versus the need to have the Engineers do other things.
REWARDS FROM EXCAVATION:
What makes ‘excavations’ in XCOM 2 more interesting than its predecessor is that the detritus in the rooms happen to be composed of materials and hardware which are useful to the operation of the Avenger and its crew.
Whenever a room is completely excavated, the player will be rewarded with resources. Incidentally, the player will always be able to see what could be obtained from a room before it is excavated, so the player can utilize this in order to obtain resources which he/she would need later.
ADJACENCY RESTRICTIONS ON EXCAVATIONS:
For better or worse, there is the limitation of being only able to clear rooms which are adjacent to rooms that had already been cleared; this is similar to a limitation on excavation in the previous game. The definition of adjacency, i.e. rooms which are immediately to the left, to the right, above and below of other rooms, has also been retained.
Furthermore, rooms on the lower floors of the Avenger take more time to clear out, not unlike the lower regions of the underground base in the previous game. Yet, while this limitation can be explained easily in the previous game, it is not so in XCOM 2. To elaborate, there are corridors which are running along the underside of the Avenger. It is odd that the corridors would not have made the clearing of the lowest rooms easier.
Of course, one could argue that this gameplay design is implemented with the intention of controlling the pace of the development of the base. Yet, the narrative in XCOM 2 does not support this as much as the narrative in the previous XCOM supported the excavation activities.
EXPOSED POWER COILS:
Players who recall the first XCOM reboot title may remember that there were “tiles” in the underground region of the base that are not just solid earth. There were “tiles” with geothermal vents which can be developed into space-efficient power plants.
XCOM 2 retains this minor gameplay element by turning it into a few rooms with exposed power coils. Like the other debris-filled rooms, these are randomly ‘seeded’ into the interior of the Avenger such that their locations are not always in the same place from one playthrough to another.
These rooms benefit both power-producing facilities and those which do not produce power. In the case of power relays, the exposed power coils increase their power throughput. In the case of any other facilities, these rooms waive the power costs.
This is something worthwhile keeping in mind, because power cost considerations do not just stop at the construction of facilities. Existing facilities can be upgraded, which also happens to increase their power costs.
FACILITY UPGRADES:
One of the gripes about the first XCOM reboot is that the considerations for base development generally end at where and when to construct facilities. After they are built at optimal locations in the base and at appropriate milestones during a playthrough, there is little else that the player needs to consider.
In XCOM 2, many facilities can be upgraded so as to improve their function. The upgrades do not do just these too; they also happen to increase the number of slots for staffing. This will be elaborated shortly.
STAFFING:
In the previous XCOM title, staffing is not much of an issue because there is the assumption that the maintenance of the facilities already covers that factor.
In the case of the Avenger, it is implied that it starts out with a skeleton crew which is composed of only key personnel. It is also implied that there is automation of the facilities too, but just enough to have them running at baseline effectiveness.
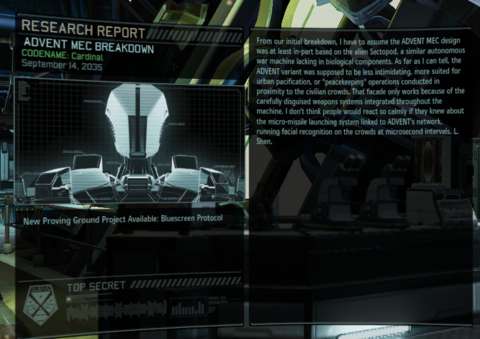
Therefore, the Avenger is in need of additional manpower, specifically skilled ones. Of course, these are engineers and scientists, in keeping with the X-COM tradition of representing these august professions (albeit in broad strokes). Engineers are the more needed of the two. Scientists will only ever engage in research and the only facility which they staff is the laboratory (and the player can only ever have one of this).
Staffing facilities generally either reduces the time needed to complete whatever project the facility is striving towards, or increases their effectiveness. For example, an Engineer can staff the Proving Ground, which is where the fabrication of particularly versatile and powerful hardware is undertaken; getting such hardware as soon as possible is a good thing. On the other hand, the same Engineer could have been used to staff a Power Relay, thus enabling the opportunity to install a facility which the player particularly needs.
In the latter case, if an Engineer has been staffed to enable something that is critical, such as increasing the power capacity of the Avenger or the number of regions which XCOM can keep in touch with (more on this later), the Engineer will be locked in place until spare capacity has been created. Fortunately, this is something that XCOM 2’s in-game documentation will mention.
RESEARCH:
Continuing the tradition of the franchise, there is the gameplay element of “research”, in which technologies and further research projects will be unlocked via the examination (and consumption) of whatever alien hardware or corpses which the soldiers manage to bring in after missions (assuming that the missions do allow retrieval of such things; there will be more elaboration on this limitation later).
Interestingly, the player no longer needs to bring in live subjects – only their corpses (or wrecks, in the case of automatons) would suffice in this sequel. This can seem like a step back in terms of gameplay sophistication, though the game attempts to justify this by implying that live specimens would jeopardize the secrecy of the whereabouts of the Avenger, considering that all of the ADVENT soldiers and their alien cohorts are in psychic contact with their masters.
(There will be missions where XCOM captures and interrogates human sympathizers however; why the game does not apply the same consideration to them can seem like a story-telling gap.)
Anyway, some research projects do not require corpses or wreckage. Instead, they require resources, the amounts of which will be clearly stipulated. These are usually follow-up research which stems from having made some discoveries from the examination of corpses or wreckage.
Interestingly, in the case of research projects which are oriented around the examination of corpses or wreckage, having up to five of any type will allow instant completion of the associated project. (Presumably, with such an abundance of specimens, the scientists can resort to destructive means to accelerate the examination.) Considering that even the shortest examination projects will take three days at the least, this can be helpful if the player wants to gain access to whatever engineering projects which they would yield.
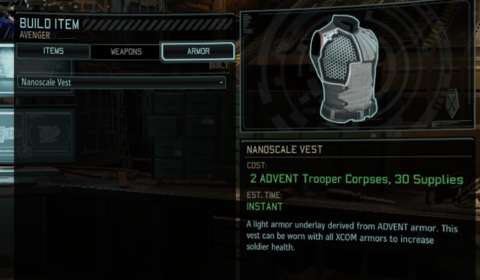
On the other hand, these engineering projects often require the same corpses or wrecks. If the player is saving up for these, he/she might be annoyed that there does not seem to be any option to pursue the slower research option instead of the faster one; the faster will always be the one available by default if it is enabled.
MANDATORY RESEARCH & SHADOW CHAMBER:
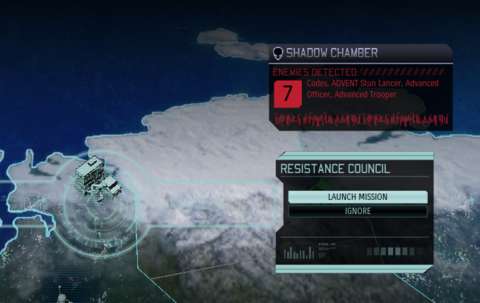
In order to progress in the game, the player will need to invest into a specific line of research. Incidentally, this line of research is performed via the “Shadow Chamber”, a special facility that is specifically oriented around the progress of the storyline.
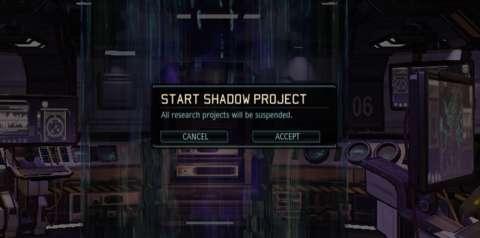
When Shadow Chamber research projects are undertaken, all other research projects will be frozen; presumably, this is because both the lead engineer and head scientist will be needed for work in the Shadow Chamber.
Fortunately, the Shadow Chamber is not completely useless. It is after all, a powerful computing facility which makes use of psionics. After building it, the player is provided with the number of enemies which he/she can expect to encounter in any mission, as well as their diversity. (The exact breakdown of enemies is not provided however.)
ENGINEERING PROJECTS:
The Engineering bay of the Avenger is where the player purchases permanent upgrades for the soldiers, as well as equipment of relatively minor potency. The player will need to complete the research projects which are associated with the upgrades and save up the resources which are needed to make the purchases, but otherwise, their benefits are immediately available as soon as the purchases are made.
PROVING GROUND:
The Proving Ground is where gear of greater versatility and potency is manufactured. Unlike the projects in the Engineering bay, the projects at the Proving Ground actually take time to complete, presumably because whatever is being made there requires testing and/or is volatile. (Oddly though, most of the gear is not guns, but rather items which go into other load-out slots.)
The wait is usually worthwhile: most of the created gear grants their wearers additional abilities or otherwise give the player considerable tactical leeway. For example, the “Spider Suit” gives its wearer a grappling hook ability which can be used without consuming any action points.
Among these projects, four are particularly notable: the so-called “experimental” projects. These can potentially produce up to more than a dozen different items, all of which are powerful, but there is randomization in what the player would get upon completing one of these repeatable projects. Presumably, with ample materials, he player could obtain all of them eventually.
On the other hand, these four “experimental” projects consume the rarest resources: Elerium cores. It so happens that many of the other Proving Ground projects require Elerium cores as well, and the player might not want to risk these precious things by spending them on projects with randomized results.
This randomization sours what could have been a sweetly implemented gameplay feature. It also further reinforces the impression that the game designers resort to the vagaries of luck to somehow ensure gameplay balance.
AVENGER USER INTERFACES:
It has to be mentioned here that some of the user interfaces for the development of the Avenger and the undertaking of research and engineering projects are accessed by clicking on buttons which are tucked away in a row of tabs at the bottom of the screen.
For example, to view the interior grid of the Avenger before installing and removing facilities (the latter in particular), the player will need to open the Engineering tab and select appropriate option.
Some other user interfaces are tucked away in tabs which can only be seen by visiting specific rooms in the Avenger. For example, the archives can only be seen by visiting the Commander’s quarters.
Although such user interface designs are serviceable, they do come across as less convenient than big shortcut buttons. It may even seem like this was the case so that the user interface would not block the view of the Avenger’s interior. If so, then some degree of user friendliness has been sacrificed for the sake of eye-candy.
RESOURCES:
The term “resources” has come up a few times already in this article. In keeping with the tradition of the series, there are resources which the player needs to gather in order to pursue projects, with which to enhance the capabilities of XCOM and bring the playthrough closer to completion.
One notable difference which XCOM 2 has compared to its predecessors is that the “Elerium” resource – canonically an energy-rich but rather volatile mineral, has been split into two types: raw Elerium crystals, and the already finished Elerium cores. The latter is rarer and more coveted than the former, the reason for which has already been mentioned earlier in the section about the Proving Ground.
The main resource is “supplies”. Astute players would quickly recognize this as being analogous to money in the previous game. Supplies fulfill the same purpose as money had: they are needed to maintain the upkeep of the Avenger and are the currency to pay to do just about anything significant in the development of the Avenger and other XCOM assets.
Supplies are gained mainly via the gameplay element of ‘supply drops’. This is actually an iteration of the monthly income in the previous XCOM game, except that instead of the resources being automatically credited into the Avenger’s account, the Avenger has to reach the locations of the supply drops and spend time to gather them, which is a process that takes at least 3 in-game days.
This introduces a layer of complication, because the time which the Avenger spends on collecting supplies could have been spent doing something else somewhere else in the world. Moreover, the player cannot postpone the supply pick-ups indefinitely; like the other events of opportunity around the globe, the supply drops will eventually disappear if the player tarries too long.
Supplies are also gained by completing missions which offer them as rewards. Sometimes, after completing missions, the player may also be rewarded with the locations of other events of opportunity, which may include an opportunity to gain even more supplies. As mentioned earlier, supplies are also gained through clearing the debris-filled rooms in the Avenger.
The last but not least way to obtain supplies is to sell assets at the Black Market, which will be described later. These assets may be needed for other endeavors, however, so this is not to be done lightly unless the player believes that he/she already has a surplus of materials.
Next, there are alien alloys. If the player intends to upgrade weaponry or armor, he/she will need a lot of these. The late-game projects can consume up to three digits of alien alloys, so the player might want to hoard as many as possible. Even a surplus would help, because they can be sold at the Black Market and chances are, the player will have many more alien alloys than he/she does of anything else.
Then, there are Elerium Crystals. These are mainly used for gadgets or particularly complex gear; quite a number of Proving Ground projects require them. Otherwise, they are not that any more remarkable than alien alloys.
INTEL:
Finally, there is Intel. Intel is practically an alternative version of Supplies. If an endeavor does not consume supplies or other resources, it is likely to consume Intel instead. Moreover, the currency which is used to buy things at the Black Market is Intel instead of supplies.
Perhaps the implementation of Intel would have been more sophisticated if they could actually be used for their name-sake purpose. For example, the player could have been given the option of paying Intel to obtain the breakdown of enemies which would be encountered during a mission or spending Intel to obtain an advantage in missions, such as pre-mission sabotage of enemy assets.
(In fact, the penultimate story-related mission does provide options to alter mission parameters with the expenditure of Intel. It is odd, however, that the other missions do not allow these.)
Anyway, like Supplies, Intel can be gained as rewards from missions. The main way to obtain Intel, however, is to have the Avenger sit in the Resistance HQ and listen in on ADVENT communications; of course, this is just the narrative description for an act of simply sitting in place and gaining resources. There does not appear to be any risk to doing this.
In fact, it appears to be the default way to pass in-game time with. If the player does not have any endeavours to pursue on the world map, the player will have to return to the Resistance HQ and gather Intel, because there would be no other way to fast-forward time.
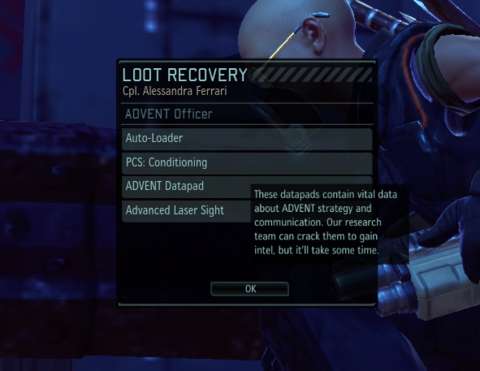
If there is anything which differentiates Intel from the other resources, it is that it is the only resource which can be yielded by the Research Facility. To elaborate, the player can obtain loot such as ADVENT data storage devices, which will open up pseudo-projects in the Research Facility (apparently so because it is the only facility which has the means to crack the security measures in these devices). Completing these pseudo-projects will reward the player with Intel, though at the opportunity cost of not having the facility spend time on research.
Intel can also be gained by capturing uncooperative VIPs alive; this endeavor will be described further later.
SOLDIERS:
Soldiers are perhaps the most important assets which the player has. The player will be having four to six of them engaging in missions, either commanding them to victory or to awful deaths.
The player can obtain soldiers in several ways. The main way is to recruit them through the Armory of the Avenger; presumably, the Avenger picks up someone who is willing to pick up a gun to fight for the cause. However, these recruits always come raw, and will be next-to-useless after the enemy has diversified and intensified its forces.
The other way is to obtain them as rewards from completing missions, or from picking them up from somewhere when the opportunity to do so crops up in a stroke of good fortune. These recruits are often already battle-hardened, and their level of experience generally rises as the playthrough progresses.
Soldiers can also be obtained by recruiting them through the Black Market or the Resistance HQ, but these require the expenditure of Intel or Supplies.
Conveniently, any already-experienced recruits will not have their skills already selected; the player can select these for them. Moreover, they are counted as having just been promoted, so there is a possibility that they may trigger the Advanced Warfare Center’s bonus (which is that recently promoted soldiers may earn a random but additional skill outside of their specialization for free). However, the flip-side is that already-experienced recruits have picked their specializations already.
The classes of soldiers will be described in their own sections later, because they have capabilities which are significantly from each other.
GUERRILLA TACTICS SCHOOL:
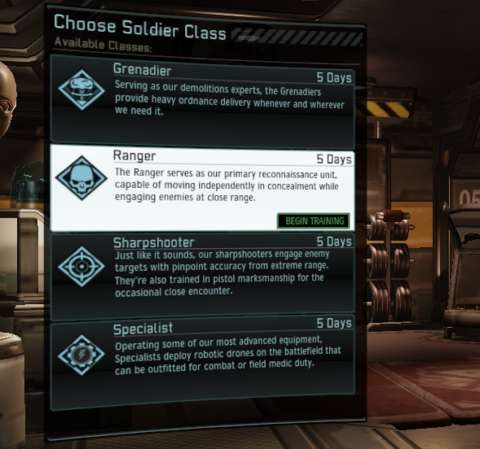
The Guerrilla Tactics School is a facility which any wise player may want to invest in. This is the facility which will provide the options to expand the size of the squad which the player can bring into a mission, among other options.
Fortunately, the facility does do something more than just unlock upgrade options. In the early stages of the playthrough, the player will be making use of it to train raw recruits such that they adopt specific specializations, instead of having specializations randomly selected for them like it was in the previous XCOM reboot title.
In the late stages of a playthrough though, when the player may have amassed a sizable roster with a balanced mix of specializations, the usefulness of this facility plummets. It would have been more useful if there is some kind of upgrade for it that makes it remain relevant throughout a playthrough.
ADVANCED WARFARE CENTER:
The Advanced Warfare Center is a facility which is made available after XCOM has managed to advance its medical technologies significantly. It acts as both an infirmary, as well as a retraining facility of sorts for experienced soldiers. In the case of the former, it accelerates the healing process for wounded soldiers, provided that it is staffed with (of all people) an engineer.
As for the latter function, it is a solution to address a complaint about the previous game, which is that there was no way to re-select skills which the player realizes is not particularly contributing to his/her desired strategy.
(Of course, one can argue that the player should be carefully planning the advancement of soldiers in the first place, but this argument would apply only for experienced players, not for players who are playing XCOM 2 for the first time and who went in blind.)
Anyway, the facility can perform the retraining of a soldier of any level of experience, but does so over the course of several days, during which the soldier is not available for missions. Furthermore, there can only ever be one Advanced Warfare Center, so this is a fair trade-off.
SOLDIER LOAD-OUT (IN GENERAL):
Like the previous XCOM reboot title, the gear load-out of soldiers is composed of slots, one for each specific type of gear. People who prefer the inventory grid system of the old X-COM games would be quite disappointed.
There is one notable difference in the load-out system of XCOM 2 compared to that of the previous game: not every soldier has a side-arm; only the Sharpshooter does. This can pose a problem to players who prefer that the soldiers have something to fall back to when the magazines of their primary weapons run empty.
On the other hand, the soldiers’ secondary weapon slots in the previous game have been replaced with gear pieces which are specific to their specialization in the sequel. These are the gear which particularly differentiate the specializations from each other, as will be described later.
Unfortunately, in the vanilla version of the game, i.e. sans any mods or DLC packs, whatever hardware which goes into the primary and secondary weapon slots would be hardly any functionally different from the next piece of hardware which goes into the same slot. (The Ranger is able to choose either the general-purpose rifle or the shotgun archetypes, but this is not enough versatility in options.)
This is because just about all of the weapons which go into these slots are consecutive upgrades of the previous ones. There is an option to return to the previous ‘marks’, but there is no practical reason to do so other than for some sort of bragging right for having endured a playthrough with obsolete armaments.
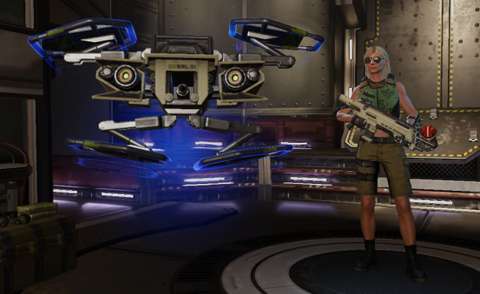
The armor suits have been a bit more sophistication, however, especially the late-stage ones. This is because they determine how many slots of utility items which a soldier can have and there are additional special abilities which come with these suits. For example, compared to its standard-issue contemporary the Predator armor, the Spider Suit does not have two utility slots, but has a grappling hook which allows soldiers to clamber onto rooftops without spending any action points.
Incidentally, the armor suits which provide special abilities must be fabricated at the Proving Ground. It would seem that the game designers do not consider the trade-off between having an additional utility item and having a special ability to be adequate balancing. (Having used both the standard-issue suits and the Proving Ground ones, this reviewer would opine that this is acceptable; the special abilities tend to provide considerable tactical options, and in some cases like the Grappling Hook, reusable ones.)
UTILITY ITEMS:
Speaking of utility items, these are usually consumables or gear which provide ever-present bonuses but otherwise no additional tactical versatility.
The standard-issue utility item is the explosive grenade; if the player cannot decide on what utility items to use, sticking to the grenade is usually a good way to solve the indecision. This is because explosive grenades always blow up cover and parts of structures other than those which are built with thick alien alloys. They also always shred the armor ratings of armored enemies (there will be more on armor ratings later). The convenience which this provides would make the explosive grenade the go-to choice when consumables of a more situational nature are not needed.
Speaking of situational consumables, some may be indispensable in certain missions. For example, if the player suspects that robots and automated turrets form the majority of the opposition (usually due to the Shadow Chamber’s information), he/she may want to bring along EMP grenades, which make such enemies rather trivial to deal with.
If the player deems that his/her soldiers have enough special abilities of their own without having to resort to utility items – which is something that can be quite true late into a playthrough – he/she can have them carry statistic-upgrading items instead. For example, there are vests which can be worn in addition to armor suits in order to further increase the hit-point rating of the soldier of the soldier, or in the case of some of the late-game ones, grant him/her immunity to poison and fire.
WEAPON UPGRADES:
It has been mentioned earlier that items which go into the primary weapon slots tend to be consecutive upgrades of each other, much like they were in the previous game.
Firaxis may be aware of this criticism to some degree, because there is a gameplay element of the modification of primary weapons. This feature has to be unlocked by completing a certain research project first before it becomes available.
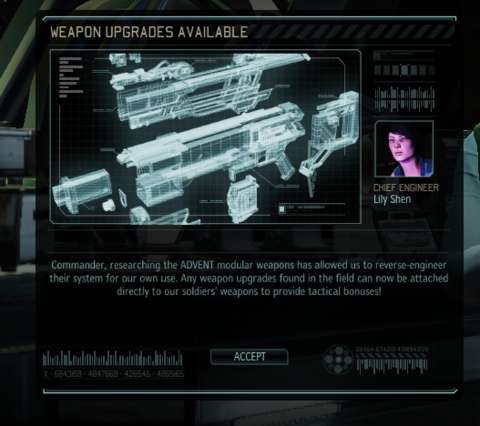
Each primary weapon has at least one slot of its own which can accommodate the installation of a so-called “weapon upgrade” part. The benefit of any particular part is generally associated with its name. For example, scope sights confer bonuses to aiming.
The parts also have quality ranks. The player encounters regular parts first, and eventually comes across parts of “Advanced” and “Superior” quality, in that order. The later ones start out rare at first, but as playthrough time is accumulated, they become more common. Higher-ranked parts impart greater benefits, but otherwise have no other notable gameplay designs.
Eventually, the player will upgrade the standard-issue primary weapons into higher-tier ones. Starting from “MAG” weapons, each primary weapon has have two slots for weapon upgrades. However, the player will not be able to install more than one part of the same type, even if they are of different quality ranks. For example, a MAG rifle will not be able to have two Scopes of any quality. Of course, this is a believable and understandable limitation.
It is worth noting here that any weapon upgrades which have been installed into a primary weapon of a previous tier will be transferred over to the next tier of the weapon; even the visual designs of the weapon upgrades would change to accommodate the primary weapon of the next tier. This is a slightly goofy gameplay design, but it is convenient.
By default, weapon upgrade parts cannot be removed and reused. Slots can be freed up for better parts, but this involves destroying any parts which have been installed in them. However, there is a late-stage minor gameplay element which can allow the reuse of already installed parts, if the player invests time and resources into pursuing this instead of the end-game.
Weapons with upgrade parts can be removed from the hands of soldiers who have them so as to be equipped on other soldiers. Indeed, any weapon with a unique permutation of parts will be listed as its own weapon in the list of things which go into a soldier’s primary weapon slot. This is a much welcome option.
PERSONAL COMBAT SIMS:
“Personal combat sims”, or “PCS” for short, are ‘items’ – for lack of a better word to use – which the player can use to tweak one of the statistics of any soldier.
When a PCS is used on a soldier, he/she is considered to have ‘equipped’ the item and will thus obtain its benefits. This is not unlike utility items which confer ever-present bonuses, but PCS’s go into their own slots. Furthermore, like weapon upgrade parts, PCS’s have ranks of quality.
Like weapon upgrade parts, ‘installed’ PCS’s generally cannot be replaced without destroying them. Fortunately, and conveniently, doing so does not appear to damage the soldiers in any way.
LOOTING:
Looting is the next iteration of a gameplay element which was introduced in XCOM: Enemy Within. Specifically, this is the next step in further introducing a sense of urgency to missions, which was something that began after Firaxis noticed that players who did better in XCOM: Enemy Unknown are generally those who are more conservative (and this apparently was not what they desired from players).
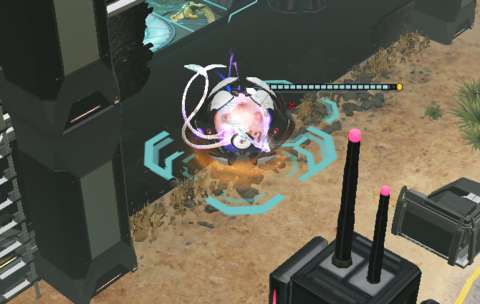
Anyway, when a player kills an enemy, there may be a chance that this enemy drops items which can be recovered before the end of the mission (successful or otherwise). Such an opportunity is indicated by a small yellow-outlined area that appears around the remains of said enemy, together with an indicator which shows how many turns the player has left before this opportunity lapses.
More often than not, getting to the loot is a significant risk. For example, if the player has been resorting to tactics which destroy the cover of enemies, then their dropped loot will be in the open together with their corpses. Of course, the player still has a few turns to figure out a plan to get to them, but if this happens early in a firefight, the player might have to forgo the loot.
It is also worth noting here that it has to be one of the player’s soldiers who has to get to the loot; dominated or hacked enemies do not count. (There will be more on controlled enemies later.)
Conveniently, the mechanism of looting is also how the acquisition of weapon upgrade parts, personal combat sims and some resources (especially Elerium cores) is implemented. Although looting is not the only means to obtain these items, it is the most efficient and economical way, mainly because it is free. There is, of course, the matter of the timer on looting stuff.
Among the loot which the player can obtain are data storage devices which can be analyzed by the Research Facility to yield intel or the location of one of the ADVENT’s research sites (more on these later). Interestingly, there can only be one of each type of data storage device in the player’s possession at any time; the player will not have the opportunity to loot another until the current one has been consumed.
GLOBAL MAP – OVERVIEW:
As mentioned earlier, the Avenger will be moving about the world so that XCOM’s strike-force can be closer to the places where they need to go to.
Yet, despite this statement, the player does not get to go anywhere and everywhere from the get-go. The narrative tries to justify this by stating that XCOM itself does not initially know where to strike the ADVENT and their alien masters to do the most damage. Specifically, they have to wait for information from the Resistance before they can conduct missions.
Gameplay-wise, this means that the player is limited to just a couple of regions in the world from the start. One region will be the Resistance’s HQ. This is where the player will go to if there are no worthwhile or urgent events or missions to go to.
As mentioned earlier, the HQ is the main source of Intel. To make more efficient use of the time spent on farming Intel, the HQ can be ‘upgraded’ to provide a bonus to something that goes on in the Avenger. For example, there is an option to provide accelerated installation of facilities on the Avenger.
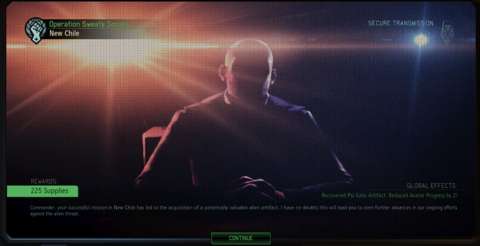
The HQ is also where the player can hire additional manpower with supplies. This is often a costly option though, so it is best taken when it is absolutely urgent to do so (though that would often mean that the player is already doing poorly on a playthrough).
Next, there is the Black Market; this will be revealed early in a playthrough. Since it is a location on the world map, the player must consider the in-game time that is spent on travelling to it. Nevertheless, the player will be visiting it anyway, because it often offers goods which are usually worth their purchase. For example, one of the purchase options is always a batch of supplies, which the wise player should always consider. Moreover, it is the only place where the player can gain something from the sale of resources other than supplies.
Speaking of purchases and sales, at the Black Market, the player spends Intel to make purchases and is paid in Supplies for sales. This is an interesting (though not entirely new) twist on the usual mechanism of stores and vendors in video games. However, as mentioned earlier, Intel and Supplies are practically currency-type resources, so the sophistication of this gameplay design would lead to little more than the balancing of the consumption of both resources at the Black Market and away from it.
The options at the HQ and the Black Market will be changed every month; these occurrences will be indicated by symbols which appear next to their icons in the global map view. Unfortunately, the player will not know what exactly they have until the Avenger gets there. This may have been a deliberate design decision, partially backed up by the narrative justification that the Avenger has to keep its communications with other parties to a minimum to avoid discovery by the ADVENT.
There are other nuances about the gameplay in the global map view which will be described in their own sections.
TRAVELLING:
The Avenger is a high-speed craft, but it will still take (in-game) time to get to where it needs to go to. Part of this time is for take-off and landing; either will gobble up several in-game hours each time they occur. This is a caveat which the game does not inform the player about.
When the Avenger is travelling from one place to another, research, manufacturing and other on-board activities appear to occur at a slower pace or perhaps even stalled. This is not told to the player either, but is implied via the remarks of certain characters that work is a lot harder to perform when the Avenger is flying about.
(These remarks also include slightly humorous jabs at the piloting skill of the Avenger’s only pilot, “Central” Officer Bradford, who, in his attempt to defend himself, mentions that he is the only one who volunteered to fly the immense ship.)
Therefore, the observant player may want to consider keeping travelling to a minimum. Even though the time which is spent flying about is short compared to the time which is spent on completing non-combat events, travel time can stack up over the length of a playthrough and cost the player a lot of productivity.
RESISTANCE CONTACTS:
In the narrative, the Resistance is splintered across the world and is living in isolated communities, often in the middle of nowhere. It is XCOM’s job to connect them together so as to funnel information over to XCOM so that it can strike at ADVENT and their alien masters where they are most vulnerable.
Gameplay-wise, this means that the player has to move about the globe, making ‘contact’ with the Resistance within regions of the world so as to create opportunities for missions in those regions. This is a critical part of the gameplay, because story-critical missions often occur in regions of the world where the player has to reach and make contact with the Resistance in it. Furthermore, ADVENT research facilities often appear in regions which the player has yet to make contact with. (There will be more on ADVENT research facilities later.)
After having made contact with a region, the Resistance there will also provide supplies to XCOM, thus contributing to the monthly supply drop that the Avenger can retrieve.
This is the most that the Resistance can offer to XCOM, unfortunately. Players who expect the Resistance to provide some muscle or forward reconnaissance for use in missions will be disappointed, because they will not provide such things.
Anyway, contacting the Resistance in a region of a world is a straightforward matter; this region has to appear on the global map, after which the player has to spend a fee of Intel to make it available for contact. The Avenger flies over there and spends several days to complete the process of contacting them. However, it is a time-consuming process which the player has to balance against other time-consuming opportunities.
After making contact with the Resistance in a region, the player can ‘improve’ the region by setting up a radio tower for the Resistance to use. This involves the expenditure of supplies and, again, the expenditure of time to set up the tower. On the other hand, the pay-off is long-term because every radio tower increases the amount of supplies in the monthly supply drop and also minimizes the Intel cost of contacting an adjacent region of the world.
If there is any oddity with the gameplay element of making contacts, it is that the player will be shoehorned into a circuit around the globe, instead of being given the freedom to go in any direction from the region which the player started with.
CONTINENTAL BONUSES:
There are cluster of regions which are adjacent to each other and which happen to be located on recognizable continents of the globe (assuming that the player has the requisite geographical knowledge to recognize them). These clusters are referred to in-game as “continents”. If the player can contact the Resistance in a certain number of regions within a cluster (but not all of the regions), he/she obtains the ‘bonus’ which is offered by the cluster.
For example, the South American cluster provides a bonus which grants an additional weapon upgrade slot to primary weapons. This clearly gives the player a considerable edge.
Considering these bonuses, it is worthwhile making contact with the Resistance within certain continents. However, if the player loses contact with regions such that the number of regions in contact falls under the threshold which is needed to unlock the bonus, the bonus will be lost. (There will be more on losing contacts later.)
EVENTS – NON-COMBAT ONES:
As mentioned earlier, the Resistance will inform XCOM of opportunities to either gather more strength or attack the ADVENT and the aliens. These opportunities manifest in the global map as events with their own icons. To take these opportunities, the Avenger must fly over to where they occur.
Some of these events do not involve combat. Rather, the Avenger only needs to land somewhere and spend time there while XCOM’s operatives presumably do things while it is grounded. There is rarely any interruption to this process; the player may be alerted to the appearance of other events, but that is all there is to any form of disruption. The Avenger will not be, for example, ambushed while XCOM is looking for resources through a non-combat event.
Perhaps this is meant to ease gameplay and limit the scope of events which do not directly involve missions. On the other hand, it also means that these events are, well, uneventful. Indeed, they would have been quite boring if not for the consideration that time spent on them could have been spent elsewhere.
Anyway, these non-combat events usually involve the retrieval of resources or individuals to be added to XCOM’s human resources. Generally, the type of resource or individual will be told to the player, but the exact amount of resources or the capabilities of the individual (in the case of he/she being a soldier) is not. This appears to be randomized, but as a playthrough progresses, the amounts of resources or capabilities of the individual generally increase.
AVATAR PROJECT PROGRESS:
Early on in a playthrough, the player will be informed about the aliens’ ongoing “Avatar” project. This project is described as being detrimental to humanity as a species. As the player progresses in the story, it certainly turns out to be so in a rather insidious, and surprisingly refreshing (though not necessarily new) way.
Gameplay-wise, the player must prevent the Avatar project from reaching completion. If it does, the player gets a straight game-over. (Interestingly, letting the Avatar Project complete on its own does not appear to reveal the nature of the project at all; the player would get the stock “bad” ending cutscene.)
Strangely, even though XCOM initially knows next to nothing about the nature of the project, it still somehow knows about its state of progress. Presumably, XCOM’s ally, the “Spokesperson”, is providing insider information about its level of progress. Of course, this is just a minor quibble about the narrative not always convincingly supporting the gameplay.
Anyway, progress on the Avatar Project is depicted by a meter of ‘pips’, or squares which change color as its progress ticks forward. The progress of the project will go up on its own, unceasingly until the player reaches the endgame. The presence of ADVENT research facilities accelerates this.
Progress updates generally occur monthly, with a minimum of one pip; each known facility contributes a further pip.
Interestingly, each facility has its own update cycle, which appears to be counted from the point of its appearance on the global map. Therefore, if the player can estimate these cycles correctly (the game does not appear to do so for the player), he/she can knock out the facilities in the nick of time before their progress updates occur.
However, it has to be mentioned here that stalling the progress of the Avatar project does not appear to contribute to the story in significant ways (other than to introduce a sense of urgency); it is mainly there for the purpose of gameplay.
RETALIATION:
The ADVENT will not sit idly by while XCOM operates against it. It can hit back in two ways: hunting down the Avenger and grounding it, or retaliating against Resistance settlements. Of the two, the latter is more common and will be described first.
Interestingly, the player is somehow informed about the number of weeks left before the next retaliation against the Resistance. However, the player is not informed about which day it would be in the week that it occurs, so it can still happen in rather inopportune times. Furthermore, which region of the world would be the target is not foretold either.
Anyway, once it happens, the player will be immediately alerted to an ongoing retaliation in a region which the player has contacted. It is in the player’s interest to respond to this as soon as possible. The consequences of not doing so is severe; if the player fails to respond within the same day, contact with the resistance in that region is lost, together with any radio tower which have been built. The player will have to repeat the process of contacting that region again, which can take a lot of very crucial time.
The player’s response is, of course, to conduct a mission, specifically of a type that is unique to this event alone. An ADVENT/alien strike-force attacks a Resistance settlement, killing seemingly unarmed civilians until XCOM soldiers can stop them – typically by making a bloody ruin of the aggressors and probably blowing up someone’s home even further in the process.
Astute players might notice an oddity: for so-called members of the “Resistance”, the civilians are unbelievably defenseless. Considering that there is a backstory of people fighting against the ADVENT, that the civilians would do nothing but cower in place until an XCOM soldier tells them to scram, or more likely, get killed by the enemy is very difficult to accept, even though this is a work of fiction.
Perhaps there can be the argument that the ADVENT strike-force has already neutralized the armed defenders of the settlement, and is engaging in bloody mop-ups. Even then, this is just a cover for a gameplay design decision that ensures that XCOM soldiers go in alone with no armed support from the Resistance.
Another oddity is that the XCOM soldiers do not start with concealment (more on this later). The narrative reason for this is that the ADVENT strike-force already knows that XCOM soldiers are coming, but then this reasoning could have been applied for just about any other mission.
Still, that the XCOM squad does not start with concealment makes for a slightly different experience from other missions. In addition to rescuing as many civilians as possible, the XCOM soldiers have to engage any enemy that they meet immediately.
To complicate matters, the enemy has a tendency to shoot civilians first. Furthermore, the civilians are often too terror-struck to be smart about where they are cowering; many of them are simply out in the open. Since ‘rescuing’ them is a matter of getting a soldier adjacent to them, this can be a problem.
Moreover, there is a quota on the number of civilians which have to be saved so that the Resistance in this region can survive. If too many civilians die, i.e. the count of survivors is below the quota, the region is lost even if the player manages to annihilate the enemy strike-force.
Alternatively, the player can choose to rescue civilians up to the quota or above, and then exfiltrate. The mission would be considered a partial success anyway and the Resistance would survive, but the player does not obtain any bonus rewards.
Speaking of bonus rewards, it is in the player’s interest to annihilate the enemy strike-force and make rescues above the quota. Doing so actually strengthens the Resistance in that region, resulting in an increase in the number of Supplies which it contributes to the monthly supply drop.
DELAYED VOICE-OVERS IN RETALIATION MISSIONS:
Unfortunately, there is a significant source of annoyance in retaliation missions. This is the delayed voice-overs for Central Officer Bradford’s remarks about civilians getting killed. There will be one voice-over for the first civilian to be killed, and then another when the third gets killed, and so forth.
These remarks would not have been an issue, except that there appears to be a delay of several seconds between the moments when a civilian is killed and when Bradford makes his remarks. Unless the player disables voice-overs for such in-mission remarks by characters like Bradford, this problem will always recur whenever civilians are killed (which is pretty much inevitable, due to their stupidity as mentioned earlier).
DARK EVENTS:
The ADVENT does not merely conduct punitive operations against XCOM and the Resistance. There are also the so-called “Dark Events”. This is the game’s term for gameplay modifiers which affect XCOM’s performance and also the capabilities of the ADVENT and its inhuman allies.
They are over a dozen types of Dark Events, each with its own descriptions, artwork and gameplay effect. For example, there is a Dark Event which halves the number of supplies in the next supply drop.
The implementation of Dark Events is two-stage. Somehow, XCOM is informed about the Dark Events which the ADVENT is preparing, but the Dark Events are only activated in the next month, if they are not stopped. In the next month, the ADVENT will prepare another three.
Two of the three Dark Events which are being prepared are known, but the third is always initially hidden from the player and has to be revealed by spending Intel. The nature of the third is always fixed; there is no randomization, so the player could exploit game-reloads to save Intel.
An implemented Dark Event usually lasts a month, but some can be virtually permanent until the player obtains the Guerrilla Ops event to eliminate them. For example, there is a Dark Event that upgrades regular ADVENT troopers with additional armor, thus making them more durable.
XCOM HUNTS:
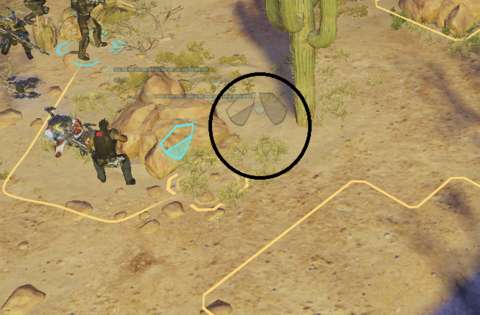
There is a particular Dark Event which the player might want to look out for: this one deploys a UFO out into the global map, and its task is to track down the Avenger and bring it to ground. The ADVENT and the aliens do not seem to want to destroy the Avenger, but are intent on killing anyone in it so as to presumably recover the Avenger.
When this occurs, the player will be thrown into a compulsory mission; he/she must get through it, or the Avenger will be lost.
The XCOM soldiers deploy via what appears to be a loading ramp which has been extended from the Avenger. The player has to prevent any enemy from reaching the ramp and doing something to it over a turn; failing to do so triggers a game-over.
Depending on how prepared the player is, the ramp may also be defended by automated turrets which will fire on any encroaching enemies. However, the player’s main form of defense – and counter-attack – is the roster of soldiers in XCOM’s employ.
The player’s choice of soldiers appears first in the battlefield; the others will appear in subsequent turns, according to the order at which they were recruited into XCOM’s service. Presumably, a skilled player would eventually be able to overwhelm the attacking ADVENT and alien forces, especially if the player has been careful in nurturing his/her soldiers and maintaining a roster of considerable size.
However, the enemy also obtains reinforcements every few turns, which eventually escalate in severity and frequency. Therefore, the player is doomed, unless he/she achieves the main objective, which is the destruction of whatever device that is preventing the Avenger from lifting off. This is easier said than done, because the player will need to go through the attacking enemy force to get to it and it also happens to be defended by a squad of enemies.
There is no reward from completing this mission, other than any loot which the player has managed to snag and the satisfaction of living to fight another day. On the other hand, a cunning player could exploit the fact that every XCOM soldier would eventually be deployed in order to grant them some combat experience. This risks the appearance of further enemy reinforcements, of course.
GUERRILLA OPS:
Dark Events, whether they are being prepared or have already been implemented, can be stopped via the performance of “Guerrilla Ops” missions.
Every month, the player is guaranteed at least one of these missions. In this case, the player is given three options of Guerrilla Ops missions, each one corresponding to one of the three Dark Events which are being prepared. The player can only choose one, however. Each mission also has its own set of rewards other than the neutralization of the Dark Event. Therefore, the player will have to choose carefully, and will likely have to suffer the consequences of not having dealt with the other two in the next in-game month.
In addition to the guaranteed mission, there may also be opportunities for more Guerrilla Ops missions, if the player is lucky enough to have them appear. There are also missions and events which reward these opportunities, so it is in the player’s interest to seek them out if only to prevent the ADVENT from becoming stronger or XCOM from being weakened by causes other than the player’s own incompetence.
Guerrilla Ops missions appear to have narrow windows of opportunity, however. Therefore, there is the matter of having to spend time, however little, to have the Avenger relocate.
If there is any issue with this mission type, it is that what the player’s soldiers have to do may not match the nature of the Dark Event. For example, to block the Event which places a mole in the Resistance, the player may have to blow up something, as if this would somehow reveal the mole.
OTHER MISSION TYPES:
Other types of missions will randomly appear on the global map as timed events. Completing these successfully provides the player with rewards which are specified to the player before the player even makes the decision to undertake them.
There are about nine of other types of missions, which can seem a tad limited in the long run. However, their mission parameters also include terrain types, which can significantly differentiate the experience of one mission from another mission of the same type.
However, there is some measure of predictability in the terrain type: missions which require the extraction of VIPs, friendly or otherwise, almost always occur in one of the sci-fi futuristic cities and almost always require evacuation.
EVACUATION:
Speaking of evacuation, this is an option which the player has for some missions, but for some other missions, its requirement is imposed on the player.
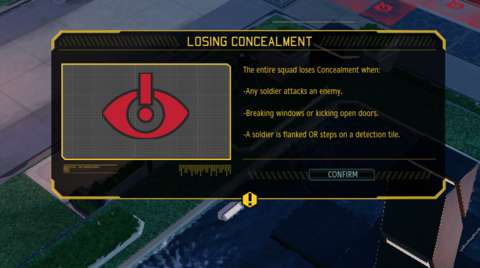
In the former case, evacuation is for when things go terribly wrong and the player wants to cut his/her losses instead of trying to forge on. This may be necessary, but also undesirable: if the player ends a mission which does not require evacuation with an evacuation, the enemy’s remains and their equipment will not be recovered.
As for missions which do impose the requirement of evacuation, there will be no recovery of any enemy assets at all, other than the loot which the XCOM soldiers have personally recovered. These missions are also timed; failure to extract all soldiers means that those left behind are pretty much doomed.
(Speaking of which, there is a lost opportunity here to implement missions which have the player rescuing soldiers who have been left behind.)
Furthermore, enemy reinforcements have a tendency to be deployed close to the evacuation zone, which can complicate matters. On the other hand, the player could exploit this to get more kills, as deployed reinforcements always end their first turn taking cover. However, subsequent reinforcements tend to be more severe and troublesome.
As an example of missions which require evacuation, strikes on ADVENT research facilities always require the player to haul ass after the player has planted explosives in the facilities. However, the player gets to decide where to place the evacuation zones. In another example, which is the extraction of VIPs, the player is directed to an evacuation zone which has already been marked on the battlefield; the player does not get to relocate the zone.
Fortunately, evacuating a soldier which has reached the evacuation zone is a simple matter. The recovery of such a soldier is a free action, i.e. it can always be done regardless of how many action points which the soldier has.
RECOVERING THE FALLEN (& UNCOOPERATIVE VIPS):
Evacuation is also the only means of recovering fallen XCOM soldiers, if the player does not have the luxury of being able to secure the mission area for reliable recovery of their remains and their gear. Otherwise, any slain or unconscious XCOM soldier who is left behind after evacuation will be lost forever, together with their gear.
However, recovering a fallen soldier is not an easy matter. Another soldier will have to spend an action point to pick up the body. While carrying it, the soldier will not be able to do much, e.g. he/she will not be able to fire any weapons; to do anything substantial, the soldier will have to lay down the body, which will expose the fallen character to enemy fire.
Interestingly though, in the case of an unconscious individual, the soldier who is carrying the person will take all incoming damage; the body of the individual will not block any hits, if the player is wondering if it would act like a meat-shield.
Furthermore, despite the heft of the person, the soldier who is carrying him/her is still very much capable of climbing up onto buildings. (There are more of such unbelievable athletics, as will be mentioned later.)
The same mechanism of hauling bodies is also used for the recovery of any uncooperative VIPs, who have to be typically beaten senseless first if the player wishes to capture them instead of killing them.
CONCEALMENT:
One gameplay element that is introduced in XCOM 2 is concealment. XCOM operations have to be more furtive this time around, mainly because the enemy is heavy-handed and can promptly apply its heavy hands.
Gameplay-wise, this means that any enemy forces in the mission area start out completely unaware of the presence of the XCOM soldiers. This is an advantage that the player should always keep in mind; the player’s soldiers can spot enemies without triggering a response, which can be exploited in order to make sure that if the XCOM soldiers fire first, they fire with a volley that can devastate an entire enemy squad.
The player can also make use of this condition to get closer to the objective. However, the objective will always be attended to by at least one squad of enemies, so ultimately, the player may have to deliberately lose concealment in order to complete the mission.
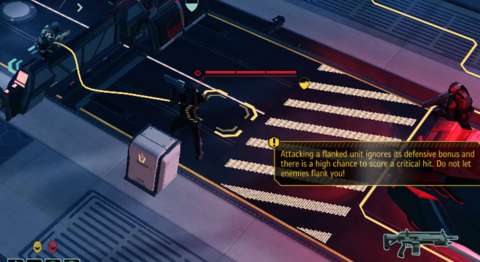
Speaking of losing concealment, enemies can still spot the player’s soldiers if they get into their detection range. Their detection range is depicted by zones which radiate outwards from them, showing where the player’s soldiers should not pass through lest they are discovered.
Interestingly, as long as the XCOM soldiers has cover in between them and the enemy, they will not be spotted as long as they do not break from cover. This means that the player could have the team hiding behind cover for a few turns while an enemy squad patrols by.
This tactic is perhaps more effective if the mission does not have a timer, but it can be done in missions with timers if the player notices that this can get the squad closer to the objective and without having too many enemy squads getting in the way.
ENEMY RESPONSE & SCRAMBLING FOR COVER:
After losing concealment, the enemy’s response to the XCOM soldiers’ presence is very much like that in the previous game; when an enemy squad happens across the player’s soldiers, they get free moves, which they will use to scramble for cover. This was a significant complaint about the previous game from players who do not like that they get free moves.
In XCOM 2, the player has more control over this behavior, thanks to the concealment phase. Early on in a playthrough, the game will coach the player on how to set up ambushes during the concealment phase, such as the use of overwatch before breaking concealment.
Yet, wise veterans of the previous game would realize that it is still best to have the enemy do the scrambling for cover in their own turn, such that their turn is wasted on doing so. Having the enemy scramble for cover in the player’s turn means that they get to act in their upcoming turn anyway.
OVERWATCH:
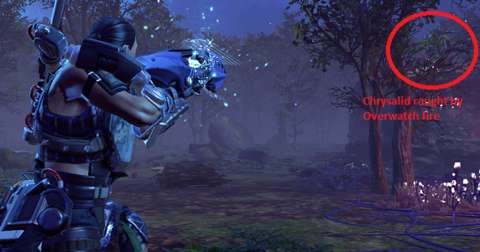
The gameplay element of “Overwatch” returns from the previous game. When ordered to go into “Overwatch”, a character ends his/her/its turn and then proceeds to look out for any enemy that might move into or through his/her/its field of vision and, more importantly, its field of fire. The first enemy which does so will be shot at by the soldier.
It is worth noting here that the aforementioned enemy does not need to be moving within his/her/its own turn. Enemies which are scrambling for cover during the player’s turn will be shot at too.
Ostensibly, the player can set up soldiers on Overwatch such that the first enemy squad which they attack from Concealment will all be shot at while they scramble for cover. Indeed, this is perhaps the most effective way to get rid of the first enemy squad to be targeted, during the early stages of a playthrough.
However, as the player’s soldiers gain more abilities and the enemy gains more protective measures (such as ever-present dodge bonuses), the player might want to consider ceasing this strategy in favor of others which do not make use of Overwatch shots.
TO-HIT ROLLS:
For better or worse (worse, in this reviewer’s opinion), there are RNGs which determine whether a character would hit his/her/its intended target or not.
Like so, so many other games which use it, the “to-hit” system works as follows: there is a numerical threshold which is decided by factors such as cover and the attacker’s base aim rating. Then, an RNG roll is made (or has been made; this will be elaborated later). Next, the result of the roll is checked for whether it is under or below the threshold. If it is under the threshold, the hit lands. If it is not, it does not, and is likely to be wasted.
This means that really bad luck can ruin the outcome of an otherwise well-executed plan. To elaborate, the player could have done everything to gain an edge over enemies, such as taking cover on high ground, destroying the cover which the enemy would use and having a still-concealed soldier attack from a flanking position. Yet, unless the player can attain to-hit probabilities of 100% (i.e. an almost certain hit), getting misses despite high to-hit thresholds can render the player’s plan for naught.
Fortunately, it is not always an all or nothing result on to-hit rolls. There are a few permutations of the latter sort of outcome, which will be described later where relevant. More importantly, 100% to-hit chances are indeed possible; there is no minimum chance-to-miss, which would be one of the worst game designs in the eyes of this reviewer.
On the other hand, there is a gameplay element that can foul even 100% to-hit chances. This will be described later.
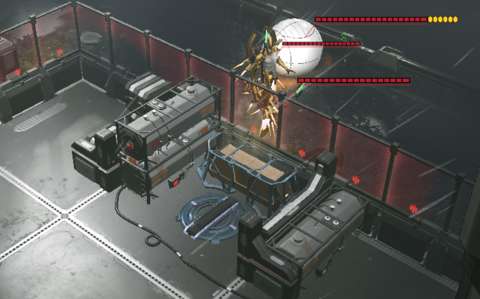
COVER:
Like in the previous XCOM reboot, characters can move next to cover and have the cover interposed between them and any attacker. This inflicts a penalty on the to-hit threshold of the attacker, but does not necessarily reduce any damage that would be inflicted; that would be the purview of the armor rating, which will be described later.
In XCOM 2, there are just two types of cover: low cover and high cover. Low cover are usually provided by crates, rubble and even bushes, whereas high cover is usually provided by the walls of buildings or some sufficiently high obstacle, such as large boulders.
Destroying cover will be the main element of just about every player’s strategy of dealing with enemies, especially if flanking is a risky maneuver that might attract the attention of more enemies.
Usually, the destruction of cover is achieved through the application of explosives, all of which can rip apart any kind of cover. This trait of explosives alone makes them a worthwhile option to take in lieu of other less brutal but perhaps less versatile gear.
Cover can also be damaged or destroyed with shots which miss the target but hit the cover which it is behind instead. The mechanism which allows this to happen is not entirely clear, but it does not appear to be an entirely random occurrence. This can be observed through the tendency for this to occur when the attack missed and the penalty to the attacker’s to-hit threshold is mostly due to cover.
In the case of cover pieces such as trees and street posts, the cover that they provide are reduced from high cover to low cover when they are damaged, an occurrence which is depicted through the snapping of trees or posts.
It should be noted here though that debris which is hurled out from the destruction of cover does not appear to damage nearby characters in any way. Debris is mainly there just for visual gratification.
STRAY SHOTS:
Shots which miss the target and any cover which it is behind will only dissipate if they fly out of the effective range of their originating weapons. Otherwise, it will hit anything which is behind the target, possibly even another character if he/she/it happens to make the mistake of being behind the intended target.
DODGES & GRAZES:
Certain characters, such as Codices and certain late-stage enemies, have Dodge ratings. These act as a second-chance if their attackers land their to-hit rolls; this can be observed if the player has attained a 100% to-hit threshold. This means that there is no automatic guarantee to be had from even 100% to-hit chances. Furthermore, dodge ratings also appear to work against explosives as well, and these bypass the to-hit gameplay mechanism.
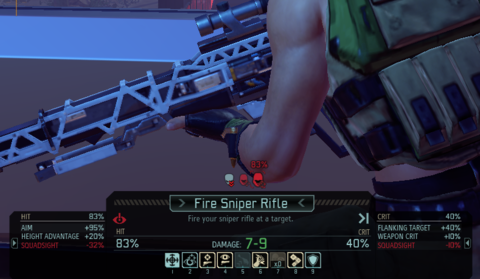
Fortunately, Dodge ratings are not completely imbalanced gameplay-wise. Firstly, Dodge ratings tend to be low, meaning that it is (typically) a matter of considerable luck if a character manages to pull off a dodge. Secondly, dodging shots does not mean that the character gets away scot-free; he/she/it will still be grazed by the shot, and suffers some damage in the process. In the case of attacks which inflict debuffs, such as poison, the de-buffs will be applied via the grazes anyway.
Finally, there is a hard-counter for dodge ratings: attacks from concealment bypass them. Therefore, the player might want to consider investing in Rangers who can retain their concealment after the squad has been exposed, or if the player has the time to do so, scout out the mission area and target enemy squads with characters which have dodge ratings first.
EVER-PRESENT DEFENSE BONUSES:
In a rather cheap attempt to make the late-stage enemies tougher, especially the “Elite” variants of ADVENT troops, Firaxis has given them unspecified “defense” bonuses, which reduce the chance to hit them. There is no plausible explanation for this, other than they are there just to make the late-stage enemies more difficult to kill.
HACKING:
XCOM 2 is not one to miss out on the video game version of hacking. However, instead of being a silly mini-game, hacking in XCOM 2 is simply a matter of picking one of two mutually exclusive options and then crossing one’s fingers that the RNG roll made by the hacker would pass the threshold for success.
It is unfortunate that Firaxis’s idea for hacking just so happens to be yet one more RNG-based mechanism. As for the threshold, it is calculated from the difference between the effective “tech” rating of the hacker and the rating of the hacking target; there does not appear to be any other factors.
There can be some gameplay complexity to be had from the outcomes of hacking though.
There are several types of hacking targets. Foremost of these are mission-essential systems, such as computer terminals which the player must access in order to download critical data. The outcomes of their hacking will always include whatever the mission objective is, but the player can also pick one of two additional outcomes to try for. These have RNG thresholds, however, but failing to pass does not result in anything adverse.
One of the additional outcomes is particularly desirable: this is the one which permanently upgrades the hacker’s tech rating. If the player is lucky enough to score it, he/she may be able to develop a character to become the primary hacker of the squad.
It is worth pointing out here that mission-critical systems are the only things which any soldier can attempt to hack. For the other hacking targets, only the Specialist has the potential to engage them.
Next, there are ADVENT sensor posts. These project detection zones, but are more easily avoided than enemy patrols because they are static structures. Furthermore, they are only a threat during the concealment phase; after that, they actually serve as decent cover.
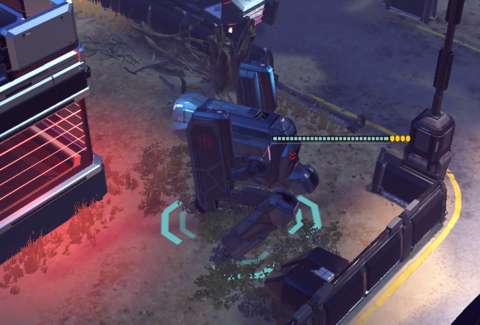
Anyway, these sensor posts can be hacked to shut them down and there are also two options which the player can pick. However, there is a separate threshold for the shut-down which must be passed, failing which the sensor will summon enemy squads over to it. Furthermore, failing such a hack during the concealment phase will immediately remove the squad’s concealment as well.
The options for the hacking of sensor posts provide additional ‘consumable’ skills for the hacker, or the entire squad, if the player would take the riskier option.
Finally, there are enemy machines, which can only be compromised by a Specialist with the Haywire Protocol. These also happen to be the most difficult targets to hack, mainly because it would be incredibly advantageous for the player to do so. After all, they tend to be very well-armored and often have considerable firepower.
Anyway, the two options for hacking enemy machines are as follows: a temporary shut-down and a take-over attempt that is much riskier. Speaking of risk, if the hacking attempt fails, the enemy machine actually becomes more capable at combat. This is of course a typical risk-versus-reward gameplay design.
“SEEDED” RNG ROLLS:
As long as there have been games with RNG rolls, there has been “save-scumming”, which is the exploitation of the game-save and game-load feature so as to “re-roll” the results of RNG rolls.
One of the ways that game-makers have used to combat this is to implement lists of “seeded” RNG rolls, which the game will use instead of making randomized rolls on the spot. In the case of XCOM 2, there are quite a number of such lists, even for a single character. For example, there is a list for dodge rolls, meaning that if the next RNG roll for a dodge attempt by a character is under his/her/its dodge rating, he/she will always dodge the next attack on him/her/it, regardless of who or what is making that attack.
It is not entirely foolproof of course. Players who can recognize the use of the lists can attempt to exploit the seeded RNG rolls via specific actions. For example, returning to the matter of the dodge roll, the player can try to waste weak attacks on enemies with successful dodge rolls, before using more powerful attacks to land hits on them.
FIRE:
Buildings and other structures which appear in mission areas are highly destructible; the exceptions are mission-critical structures such as bridges which the player will need in order to cross over to other sections of the mission area and the super-hard hulls of UFOs.
Much of this destruction is mainly there for the purpose of snazz, as has been mentioned earlier. However, there are a few gameplay elements which are associated with them. One of these is cover, which has been mentioned already, and the other is fire.
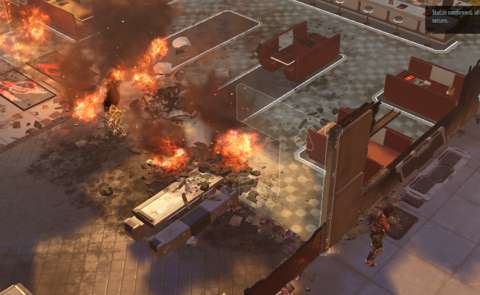
Fire is usually caused by explosions, either from the detonation of explosive weapons or the rupture of fuel containers. Depending on the severity of the explosion in the first place, fire can spread, and even strengthen if more explosions occur where it is. Fire destroys cover and can also bring down the floors and ceilings of buildings.
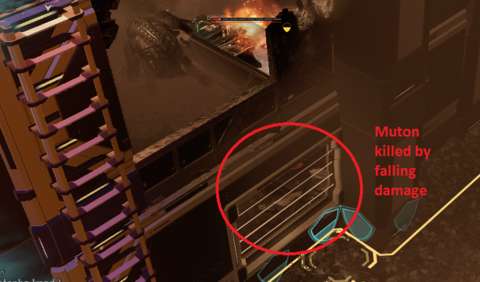
Fire is also one of the lingering hazards which can occur on the battlefield, the other two being acid and poison gas. These will be described shortly.
LINGERING HAZARDS:
Regions of the mission area can be turned hazardous due to the presence of acidic vapors, poisonous gases or roaring fire. Anyone travelling through these affected regions have to risk infliction of the de-buffs which are associated with these hazards.
For example, fire will inflict the burning de-buff, which causes a character to take damage over a few turns. As another example, anything organic which is moving through poison vapors have to make “saving throws” (to borrow a Dungeons & Dragons term) against being poisoned (which also causes damage over time, albeit for longer periods than being caught on fire).
Generally, these hazards will eventually dissipate on their own. The exception is fire, which can spread if there are more explosions in their vicinity. They can also ignite fuel containers, including those in vehicles.
FALLING:
All characters appear to be capable of climbing tall structures with incredible gusto, and even more astonishingly, fall from such structures without seemingly hurting themselves when they are traversing the mission area. This ability is perhaps explainable with regards to the inhuman enemies, but XCOM soldiers and even civilians can do this as well.
However, this ability does not seem to apply if a character falls due to the collapse of the floor which he/she/it is standing on. In this case, the character will take fall damage; the amount of the damage which is inflicted appears to be exponentially proportional to the depth of the fall.
A wily player can exploit this by knocking out any platforms which enemies are standing on. For example, there may be an enemy which has spawned on top of a watchtower. If the player can collapse the watchtower, that enemy is likely to plummet to its death.
Of course, falling damage does not apply to characters which float or fly, such as Archons or Gatekeepers.
ARMOR RATING:
In addition to hitpoints, a character may have armor points too. These act as damage reduction and generally cannot be reduced themselves without the application of explosives or attacks which shred armor.
Only the most late-game XCOM-developed armor suits will have armor ratings. For most of the game, the characters who do have armor ratings tend to be armored ADVENT troopers, robots and the heavier classes of aliens. Therefore, the player will want to always have means of shredding armor. Incidentally, the most available of these means are explosive grenades.
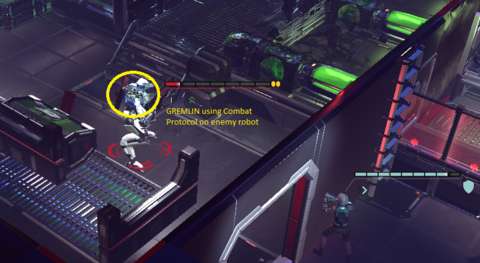
PANICKING:
Characters can be placed under duress, usually due to being injured, having allies die nearby or being subjected to psionic attacks. When these occurrences happen, they go into panic if they fail their morale rolls (usually done against their Will ratings).
The player for the side which owns the panicking characters loses control over their actions. There are only a few things that panicking characters tend to do, such as hunkering down behind cover and doing nothing, or shooting at the nearest other character with whatever is left in the magazine of their guns.
Unfortunately, in the vanilla and unmodified version of the game, the characters whom the player would see go into panic the most are XCOM soldiers, especially the inexperienced ones. This is because the probability of panicking is related to the Will rating of characters. It so happens that inexperienced XCOM soldiers have some of the lowest Will ratings around; even the early-playthrough enemies have high Will ratings.
Late in a playthrough, after the player has developed some powerful veterans, the player will see occurrences of panic less and less. Incidentally, the enemy type which mainly use psionic powers, namely the Sectoid, also appears to become fewer in number. (This may just be applicable in this reviewer’s playthrough of course, and may not happen for other people’s playthroughs.)
MIND CONTROL:
Just as there are means of controlling robots, there are means of controlling organic characters.
This is usually done via psionic attacks, the earliest of which would be seen employed by Sectoids. This makes Sectoids some of the worst enemies that the player would face early in a playthrough.
As to be expected, the control of mind-controlled characters is transferred over to whichever side that applied this de-buff on them. There is also no limit on the duration of the mind control, unlike the hacking and taking over of robots.
However, there are a few balances against this otherwise overwhelmingly devastating attack. Firstly, a mind-controlled character will not be able to do anything within the turn in which he/she has been mind-controlled. Secondly, mind-control can be forcibly removed by killing whoever applied the de-buff. Removing the de-buff in such a manner does not refund the formerly mind-controlled character’s action points, however.
All of the above is not well-communicated to the player, who will have to learn from observation if he/she has not done research on this gameplay element.
HARMING CONTROLLED ENEMIES:
Conveniently, the player has the option of deliberately harming controlled enemies, including having a character shoot them directly. This is handy, especially in the case of hacked robots, which will eventually regain control over themselves.
CONTROLLED ENEMIES DO NOT COUNT TOWARDS RESEARCH:
Having described the gameplay element of mind control and that of hacking earlier, it has to be said here that there is a design gap regarding controlled enemies, be they mentally dominated fools or hacked robots.
For the duration of their controlled status, these characters count as members of the player’s squad. In the case of ADVENT troops, they even count as wounded in the mission results screen if they have been injured before or during said duration. However, this particular example of the consequence of this game design is minor compared to a worse one.
If these controlled enemies are slain during that duration, their remains will not count towards the resources which the player obtains at the end of a successful mission. This means that, for example, if the player hacks and takes over the first ADVENT MEC which he/she encounters in a playthrough and gets it wrecked while it is still being controlled, its wreckage will not be recovered. Therefore, the research option for the MEC will not appear.
Even if the player manages to keep these controlled enemies alive until the end of the mission (they do not count as enemies with regard to the objective of securing the mission area, by the way), the player does not get to bring them back to the Avenger as assets either.
It is uncertain whether this design gap occurs for mind-controlled XCOM soldiers too, but it is likely to be the case as they would have been subjected to different scripting as well. If that is indeed the case, then the player will face problems in retrieving their corpses if they are killed during their state of being mind-controlled.
SOLDIER ABILITIES – IN GENERAL:
The XCOM soldiers which the player brings into a mission will generally number up to six, whereas there are often twice that number of enemies in any mission and each of them has special abilities. Therefore, it is understandable that the XCOM soldiers themselves have their own special abilities, in addition to options which are provided by their gear. Coupling strategic positioning with the use of these special abilities will be key to winning fights.
Most XCOM soldiers gain their special abilities upon promotion to the next ‘rank’. Like the previous game, the player is given a pair of mutually exclusive options for special abilities.
There are some options which experienced players would consider as too useful to be not chosen over the other, i.e. these are the “no-brainer” decisions. For example, it is very unlikely that the player would forgo the Haywire Protocol for the other option, which cannot turn the tide of battle like this can. As another example, for the Grenadier, the wise player is likely to pick Shredder (which makes any of the soldier’s attacks reduce the armor of the target as long as it hits) over Blast Padding (which merely adds one point of Armor to the Grenadier’s stats).
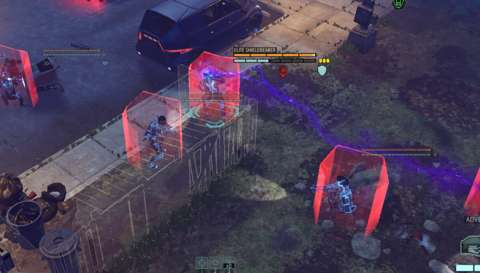
Like the ability of human soldiers to climb up and jump off tall buildings with gusto, there is not much narrative explanation to justify the implementation of the more outlandish special abilities, especially in the case of the Ranger’s and Sharpshooter’s.
THE RANGER:
Among XCOM soldiers, the Ranger is the close-combat specialist; his/her secondary weapon is, of all things, a sword. Presumably, with their enemies’ general dependency on ranged weaponry, a sword would be an unorthodox but effective weapon. Unfortunately, this is not the case.
The main problem with the sword is that it still has a to-hit roll. For a weapon which requires the Ranger to break out of cover and get very close to an enemy, the sword would have been a lot more worthwhile if it has no to-hit roll. Furthermore, this will not stop enemies from shooting a gun at point-blank range.
(Of course, the Ranger can pick a special ability that guarantees a free pre-emptive attack if the enemy tries to do this, but this attack also has a to-hit roll and taking this ability means the player forgo the other, which may be far more tactically useful.)
At best, the sword is only useful if the Ranger can end his/her attack behind cover and can kill the target with one hit.
Wise players would recognize the Ranger’s more tactically useful capabilities. In particular, the Ranger has a couple of special abilities which allow him/her to maintain concealment after the rest of the squad has already broken out of it. This makes the Ranger an excellent spotter for the Sharpshooter, as well as anyone else with long-ranged weaponry (like the wrist-launched missile which is mounted on powered armor).
GRENADIER:
Any player would find it hard-pressed not to go into a mission without a Grenadier. Although he/she does not necessarily have the highest damage potential, the Grenadier does have consistently high damage per attack and is the only one with the ability to readily shred armor. Furthermore, the Grenadier can carry up to three grenades – two more than other soldiers – and can launch these further and have them detonate with greater area of effect.
(The grenades which they are using could be of different design than hand-thrown grenades, which may explain their greater area of effect.)
Unfortunately, the usefulness of some of the Grenadier’s abilities are held back by the imposition of to-hit rolls. In particular, Demolition and Saturate Fire have to-hit rolls. These otherwise very potent abilities would be wasted if the player has poor luck.
SHARPSHOOTER:
The Sharpshooter is the team’s long-ranged solution. When paired with a concealed Ranger, the Sharpshooter can be incredibly devastating, able to pick off members of an enemy squad before they can even approach the Sharpshooter within striking distance.
What is possibly contentious about the Sharpshooter is that he/she is the only soldier with a sidearm – specifically a sidearm that does not appear to need any reloading. Furthermore, he/she has a number of special abilities that can be seen as rather overpowered. For example, Lightning Hands gives a free shot with the sidearm, and Face-Off can be devastating if the Sharpshooter can get into the right spot. Nonetheless, it should be apparent that this is somehow Firaxis’s take on having a soldier class with a risk-versus-reward theme.
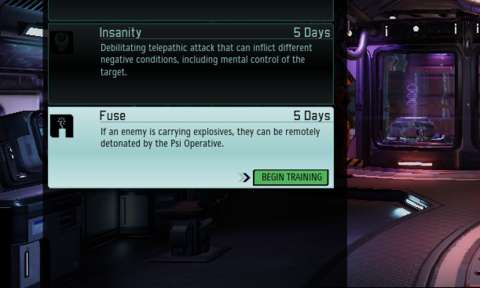
SPECIALIST:
The Specialist, despite his/her name, does not have any special weaponry like the others do; he/she can only ever equip the general-purpose rifle.
However, the Specialist does have a bonded GREMLIN, which in the narrative is a sentient flying drone that XCOM uses for technical tasks. Gameplay-wise, the GREMLIN is just there to visually differentiate the Specialist from the others; the GREMLIN does not have its own stats. Furthermore, although it appears to be modeled as a character, it is not hindered by any terrain; it hovers over anything effortlessly, and can even crash through glass windows.
The Specialist, through the GREMLIN, can apply buffs or de-buffs onto other characters. These start with the Aid Protocol, which grants a defensive bonus to an ally. Eventually, the Specialist can gain other abilities, such as the very useful Haywire Protocol, and remote healing of allies.
The Specialist can also gain other abilities, such as improvements to his/her Overwatch option. For example, there is a special ability which upgrades his/her Overwatch option to target any enemy who attempts to do anything within their field of fire, and not just moving about.
It is worth noting here that the Specialist does not need line of sight for any ability which is associated with his/her GREMLIN. As long as the target is within the ‘range’ of the GREMLIN (which is considerable), the Specialist can use his/her abilities on the target. This also includes hacking into mission-critical computers.
PSI-OPS, PSI-TRAINING & PSIONIC POWERS:
The final XCOM soldier class to be introduced to the player is the Psionic Operative, or Psi-Op for short. He/She can perhaps be described as the culmination of the mechanism of psionic powers that was in the previous game. Instead of psionic powers being supplementary abilities that any soldier with psionic talent can have, psionic powers are specifically exclusive to this class of soldier.
To obtain a Psi-Op, the player will have to train a Rookie into one; any Rookie will do. Besides, all Rookies appear to start with the same statistics. The Psi-Op always begins with just one psionic power: Soulfire, which despite what its name suggests can be used on just about anything including machines.
After that, to obtain more powers as well as grow in rank, the Psi-Op has to undergo further training in the Psionic Ops facility. Actual battlefield experience does not appear to contribute to the Psi-Op’s progress towards the next power and rank. Therefore, the player faces the choice of including a Psi-Op early on so as to benefit from his/her psionic powers but at the risk of getting the Psi-Op killed, or ‘incubating’ him/her further.
Interestingly, unlike the previous game, there are no mutually exclusive options for psionic powers. Every Psi-Op can learn every power there is. Coupled with the fact that each psionic power has its own cool-down timer (if it requires targeted use) and that some of the powers are ever-present bonuses, a fully trained Psi-Op is incredibly versatile and perhaps overwhelmingly powerful.
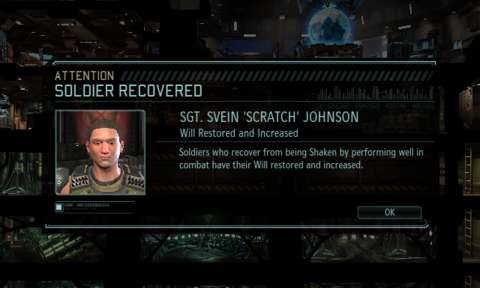
Besides, all psionic powers appear to bypass cover and armor entirely, and will always hit their targets.
Furthermore, some psionic powers do not require line-of-sight, or even a clear line-of-fire. The Void Rift and Null Lance are such examples. This means that just like how the Sharpshooter benefits from the ability of a Ranger to stay concealed and spot targets, so can the Psi-Op benefit from the Ranger’s furtive reconnaissance. Casting a Void Rift through walls can be gratifying, if seemingly a tad unfair.
WILL SHAKEN:
Sometimes, when a soldier takes damage during a mission but survives, he/she might be shaken by the ordeal. Gameplay-wise, this manifests as a penalty to the soldier’s Will rating, which actually is just set to zero. This makes the soldier a liability in any mission that he/she would go into next; if things go awry, this soldier is likely to crack, and everything goes downhill even faster when that happens.
However, if the player takes the risk of including the soldier in a mission and succeeds, there is a reward to be had. If the traumatized soldier does something productive during a mission and stays unharmed throughout it, he/she would recover and have his/her Will rating restored. There is also a permanent increase in the rating, which justifies the aforementioned risk-taking.
SHIELDS:
Late into a playthrough, the player will come across the gameplay element of shields. Shields are practically a layer of additional hitpoints, but these do not count towards the wounds of an XCOM soldier and will block any secondary effects of hits which land.
Not every character has shields, but there are characters which can grant shields onto allies. The earliest of these are ADVENT Shieldbearers, though XCOM soldiers eventually get the capability to do so through one of the special powered armor suits which are made in the Proving Ground.
CRITICAL HITS:
Like the previous XCOM reboot, there is the mechanism of critical hits, through which hits that landed would be upgraded into critical hits, which typically deal more damage. For players who do not like luck-based gameplay elements (such as this reviewer), a fight which has been won via critical hits may give the impression that the player has gotten through the encounter due to good luck instead of good skill.
On the other hand, the factors which contribute to a critical hit is more in the control of the player than it was in the previous game. For one, the percentages of having hits upgraded into critical hits are shown to the player, who can indeed try to find ways to increase the percentages.
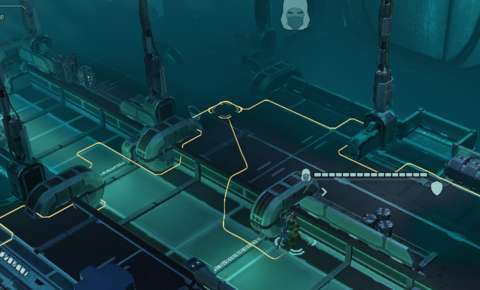
FLANKING:
Flanking as a gameplay element returns from the previous game. Like it was in the previous game, cover only provides protection if it is between a character and an attacker. If the attacker manages to attack from an angle where there is no cover to obscure the target, the target is considered to be flanked. Being flanked obviously negates the bonus due to cover and also happens to increase the chances that a hit that is suffered would be a critical hit.
The game will recommend that the player has his/her soldiers flank enemies whenever possible. In practice though, this can get the player into a lot of trouble, as the soldier whom he/she has sent out for a flanking maneuver might come across another enemy squad and thus bring more trouble.
FOG-OF-WAR:
Not all of the mission area is revealed to the player initially. The region around the objective is shown, if at all, but other than that, much of the mission area is hidden at the start of the mission. As the player’s soldiers move through the mission area, more would be revealed; the player would be wise to seek out and keep in mind whatever advantageous locations there are, such as high ground (which gives an aiming bonus to anyone who is on it and who is firing on targets below them).
Like its predecessor, XCOM 2 does not provide the knowledge of the whereabouts of the player’s soldiers to the computer-controlled enemies. This is perhaps more so in XCOM 2, because of the concealment mechanism.
Moreover, if there are enemies in the fog-of-war (i.e. the player knows that they are there but no XCOM soldier can draw a line of sight to them), the player could indirectly attack them, such as through the application of launched explosives. They will likely respond by moving in the direction of where the attack came from, but they would be none the wiser about the locations of the player’s soldiers, meaning that the player can lead them into an ambush.
ENEMIES – SQUAD COMPOSITION:
The enemies which the player encounters during a mission rarely if not never travel alone. They usually move about in groups of two to five characters, though the larger groups tend to be standing sentry instead of doing patrols around the map.
Usually, one member of each enemy squad will be more powerful than the others, whereas the others tend to be composed of the same type of enemy. For example, late into a playthrough, the player may come across squads of Codices, each of which are led by a Gatekeeper. Incidentally, when an enemy squad comes across the player’s forces and then scramble for cover in their response moves, the leader is usually the one who makes the scramble first.
ENEMY CAPABILITIES:
The individual strengths and weaknesses of each type of enemy will not be described in detail here. This is mainly because this reviewer finds very little fault in their individual designs. (In fact, I find them rather satisfactorily challenging to learn about and more importantly, learn to counter.)
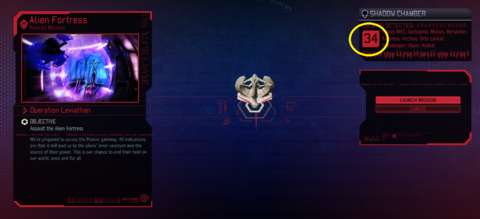
Rather, the enemy’s capabilities will be described in broad strokes, so as to provide a (hopefully) adequate description of their gameplay designs while avoiding unnecessary spoilers.
ADVENT soldiers are the most common enemies which the player would encounter, at least up to the late-game stages. They tend to be led by Officers who have abilities such as marking out specific targets, which make them easier to hit. ADVENT squads are usually filled out by regular troopers, all of whom have grenades, but there may be more specialized soldiers such as the Shieldbearer, which can give nearby allies shields.
Then, there are robots, which as mentioned earlier, provide the enemy with considerable firepower and staying power, unless the player messes them up with the Specialist’s abilities.
There are also enemies which have a predilection for close-combat, such as the ADVENT Lancers, whose stun batons can knock soldiers unconscious. Other examples include the Muton, the Viper, the Faceless and the Chrysalids, the abilities of which will not be described here.
Next, there are half-organic, half-machine enemies. These include the Archons, Codices and Gatekeepers, all of whom have traits which make battlefield obstacles and terrain a non-issue to them. Incidentally, they count as organic targets, so psionic domination does work on them.
After that, there are enemies which make use of psionic powers. There are the Sectoids initially, and the Gatekeepers. Both of them have the insidious ability to raise the dead back as zombies, which is an ability that used to be the Chrysalids’; the main difference here is that they can do this from afar.
Perhaps the most entertaining enemy to fight is the Andromedan, which is practically two enemies in one form. Learning that it turns into an entirely different enemy upon its first ‘death’ can be quite a surprise, especially if the player has been thinking that all it takes to defeat enemies is to reduce their hitpoints to zero.
MODS:
XCOM 2 has been designed with the ability to be modified in mind. In fact, its Steam package comes with the SDK (Self-Development Kit). This is something that is done by very few game-makers, so it is welcome indeed that Firaxis has included such value in its product.
On the other hand, the ability of the game to be modified can also give the impression that Firaxis has partially offloaded the work of game development onto the customers themselves. Indeed, some customers have described the game as having many flaws, but the bulk of these can be ironed out with user-made mods.
(That does not mean that Firaxis has not done much of any game improvement itself, however. Yet, looking at its rate of output of patches, they appear to occur together with the release of the DLC packs. The updates are, of course, not part of the DLC packs.)
SOUND DESIGNS:
Like the previous game, XCOM 2 makes use of orchestral music. However, this time around, it sounds a bit cheesy, especially when compared to the music in the previous game, which successfully blended inspiring tunes with ominous ones.
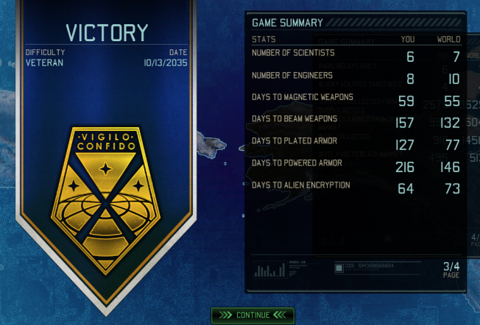
Like the previous, there is some attempt at voice-acting. Of particular mention is the voice-over for Central Officer Bradford, which perhaps delivered the most convincing performance. The voice-overs for every other major human character mostly range from just decent (such as Ms. Shen’s) to slightly corny (such as the ADVENT Speaker’s). The most disappointing are those of the Elders, whom the player will only get to listen to in a rather clichéd finale.
For better or worse, the sound effects in XCOM 2 are its best sound designs. There are plenty of sci-fi noises for the sci-fi weapons in the game and many sound clips for when things blow up, and there would be many things blowing up. Yet, they are not very memorable, to say even less of the other sound designs in the game.
SUMMARY:
It should be apparent that Firaxis does not intend XCOM 2 to be just a sequel that retreads familiar ground. There is the narrative which is based on a premise that the “good guys” did not win in the previous game, and there are the considerable additions to the mission-oriented segments of the gameplay, especially with regard to the diversity of enemies. There is also the overhauling of the gameplay of base development, as well as a stronger presence of opportunity costs than there was in the previous game.
More importantly, XCOM 2 did not go back to the roots of the series, which it could have done. Instead, it reinforces the statement that the XCOM reboot series will be steadfastly a reboot with ideas which are not recycled from the older games.
On the other hand, the game is not without flaws, which although minor, are many and some of which actually comes from what was supposed to be a plus-point for the game.
The most apparent of these is the staggering amount of visual assets, which gives the impression that a lot of development effort has gone into graphical designs instead of the gameplay. Indeed, there are signs that some gameplay elements have not been fully fleshed out, such as the ability to spend Intel on tactical advantages during missions.
There is possibly even an issue of gameplay balance that swings heavily from one side to the other as the playthrough progresses, e.g. a playthrough can seem rather challenging early on due to the overwhelming abilities of the enemy, but turns very easy later when the player has developed a cadre of highly skilled soldiers.
Nevertheless, XCOM 2 is still an entertaining game, even if there are worrying signs that the series is putting increasingly greater emphasis on visuals at the expense of gameplay.
