FOREWORD:
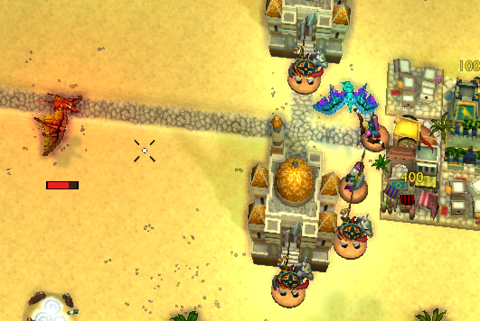
This review is mostly written through the experience of the DRM-free version of the game that was purchased through a Humble Bundle package deal. The multiplayer aspect of the game is experienced via the Steamworks version, the code for which was also provided in the deal..
INTRO:
Games with greedy dragons as the protagonists are not common, but games about racking up scores by plundering things are and they are quite fun. Thus, developer Big Sandwich has decided that these two extremes of games should be merged together into a game called, appropriately enough, “Hoard”.
Hoard’s premise is near non-existent. Its settings should be quite clear: the player takes on the role of a dragon, specifically of the European stereotype. This stereotype of dragon does nothing but terrorizes humans and plunders their wealth to build up a silly pile of riches, which among dragons of its ilk happens to reflect its stature. This statement is practically the summarization of the gameplay, and it is fun.
WEALTH:
Getting wealth is the name of the game, so it is fitting that riches are simultaneously the main means of getting a high score and upgrading the player’s dragon.
Wealth is obtained mainly by destroying the humans’ properties and gobbling up the coins that appear in their place. However, each of the humans’ properties – and the humans themselves – has its own idiosyncrasies that the player may want to learn and exploit. These will be described later.
A dragon can only carry so much wealth before it needs to return to its hoard and deposit them. Depositing wealth is not an instantaneous process however; it is always percentage-based, regardless of the carrying capacity of the dragon. This means that the player must learn to balance the expenditure of precious time between returning to the roost to deposit wealth and destroying more human properties.
In fact, it may be advantageous to take any opportunity to destroy anything weak on return trips and plan a route through the loot that the player could not pick up afterwards. This is a useful tactic if the player is the only dragon around or is playing in co-op.
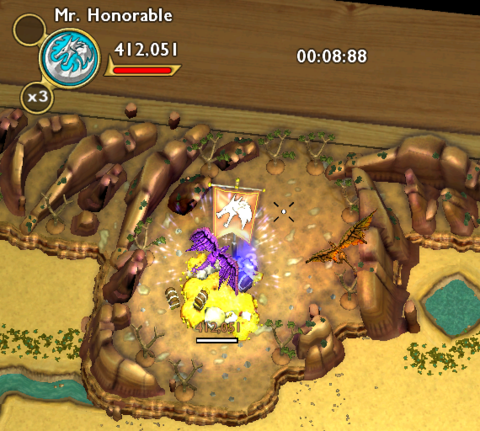
A meter under a player’s hoard shows how much more wealth is needed in order for the player’s dragon to gain a level and thus grow in effectiveness. Indeed, it may be more important for a player to get to the next level quickly in order to get an advantage in power over other competing dragons.
The last but not least design about wealth is the bonus multiplier that each dragon has. This multiplier increases on its own over time, up to a maximum of “X3”. This multiplier, for whatever plausible reason, increases the value of the plunder that the dragon would stash in its hoard. Keeping this multiplier is the only way to reach the highest performance measurement levels in some of the match types (which will be described later); getting the dragon severely injured or having wealth stolen from the player’s hoard immediately resets the multiplayer back to “X1”.

THE DRAGON:
The player’s dragon is of course a flight-capable creature. It is flying, and there does not appear to be anything in the game that can cause the dragon to fall.
Even injury does not cause a dragon to plummet. When its hitpoints drop to zero, it returns to its hoard to rest, during which it regenerates health quickly. The player loses control of the dragon as it follows the quickest route back to its hoard.
This practical immortality means that the only thing worth keeping in mind when playing as a dragon is how efficiently the player would utilize the limited time duration for each match. If the player had been causing the dragon to escape back to its hoard to heal one too many times, the player is likely already losing the match.
As mentioned earlier, the dragon can only carry so much loot before it has to return to the hoard to make deposits. A meter under the dragon shows how close it is to capacity, upon which an obnoxious “FULL!” phrase pops in its place.
The game mentions that a dragon that had its hitpoints depleted will drop whatever it is carrying before going back to its hoard. This is important to keep in mind when competing against other dragons, especially in human-versus-human multiplayer in which the player can expect a lot of skulduggery.
As to be expected of a dragon, it can breathe fire. Breathing on things is the only way that a dragon can make the latter die. However, a dragon can only have so much fire in its lungs before it figuratively runs out of steam. The player has to wait a while for the dragon to recollect its breath.
After purchasing a single level upgrade or two in breath though, it virtually becomes a non-issue if the player only wants to take out only one target. If the player has to take out many successive targets though, such as a horde of knights, he/she will need more levels in breath.
Speaking of breath, it is one of several statistics that a dragon has. The player can upgrade them after the dragon has earned a level; upgrading will be described further later, because of an issue of user-friendliness.
Each statistic is important, but for certain maps and match types, one or two are more important than the others. For example, in large maps and any map in Princess Rush mode, speed is more important than the other statistics.
ISSUE IN UPGRADING DRAGON:
When a player breaches a wealth threshold, he/she gains a few points to spend in the statistics of the dragon. Unfortunately, how many points that he/she gains from an advance, and any points that he/she has pooled from earlier advances, are not entirely clear.
The number of points that are required to purchase an advance in a statistic is not clear either. Low levels of a statistic are cheaper to purchase, but higher ones are more expensive. Yet, the progression in cost is not clear too, at least not without a lot of experimentation and recording.
The game could have been easier to learn and master if these elements were made clearer.
SOURCES OF PLUNDER:
As mentioned earlier, the player has to destroy the humans’ properties and loot whatever wealth that remained behind. In this regard, the game makes use of the theme of risk-versus-reward to design them with.
To illustrate, the easiest sources of plunder happen to be the ones that impart the least rewards. Examples include the defenceless windmills at farms and the carts of grain that come out of them. These are easy for fledgling dragons to destroy and feed off in order to gather the strength to hit more dangerous targets.
Speaking of dangerous targets, these include stupid but brave knights, which automatically assault the nearest dragon that comes into their aggro range. Other examples include the carts of fireworks that come out of towns, which will accelerate when damaged and lose health rapidly before they blow up.
Towns pose a varying degree of risk. To elaborate, towns start as just mere town centres, which are tough but practically defenceless. Eventually, they become rather built up, sprouting buildings around them and creating a militia of crossbow-equipped archers that can be dangerous in large numbers. These advanced towns produce wealth, which appears as wagons of goods that move from town to town and – of course – can be plundered.
Some of these sources of plunder have their own interesting designs that warrant further elaboration in their own sections later in this review.
However, they do have some similarities. Chief of these is that anything human that a dragon fails to destroy will eventually regain its health – even if it seems to be catching on fire. Such sights can be odd, but it does put the onus on the player to finish the dragon’s fiery deed or waste the time that had been spent burning something.
TOWNS:
Some of the most interesting things about the game are the interactions between the humans’ properties – namely their towns.
If the player has the patience and wisdom to leave them to their own devices, the humans will eventually build up their towns to a level of wealth that it produces wagons that are loaded with goods, as had been mentioned earlier.
The town centre of a town has a meter next to it that will denote the time when it produces a building. This urban development can be accelerated by allowing the carts of grain that windmills produce, the wagons that other towns send out and the princess carriages that depart from castles to reach the towns.
The number of buildings that it has determines the amount of riches that its wagons have, though it must have a minimum of three buildings before it produces any wagons.
In addition to plundering the wagons, the player can attempt to terrorize a town by roasting its buildings. It will set the town back, but eventually, after inflicting enough damage to a town, it kowtows to the player’s dragon. It sends out carts of tribute afterwards, the value of which is dependent on the wealth of the town. In addition, the town’s archer militia stops firing at the dragon, and the player can still rob the town’s wagons anyway.
However, if a subservient town has its town centre destroyed, its behaviour resets.
More importantly, the town also becomes more vulnerable to threats by other dragons, which can convert the town over to them more easily. In other words, the player should not count on them to remember the first dragon that threatened it (and which did most of the work). It is a lot of hassle, but having a tug-of-war over a town can be silly fun.
CONVEYOR VEHICLES - OVERVIEW:
Carts, wagons and carriages are moving sources of plunder for dragons, and if the dragons cannot get to them first, they become more wealth for the decadent towns that deserve to be burnt for their refusal to share.
These three seemingly self-propelled vehicles move towards the towns, usually following any roads if they can; roads help them move faster after all.
A nuance about the vehicles is that they will pick up any loose wealth in their way, thus increasing their value. This can be gleefully exploited in a few ways, though it also indirectly causes some problems. These will be elaborated when each type of these vehicles is evaluated.
If there is an issue about the vehicles in general, it is that they do not seem to have set speeds. Sometimes, a vehicle can crawl along so slowly, but some other vehicles may spawn with a blessedly high speed that can see it blazing towards towns rather quickly.
Fortunately, the vehicles are deliberately spawned with slow speeds at the starts of matches to give fledgling dragons a good start – how kind of the humans.
CARTS:
As mentioned earlier, farm carts carry produce from windmills to the towns. However, in addition to this function, each farm cart has a small chance to drop a golden egg when destroyed, which is probably homage to a certain children’s fable about peculiar geese. Anyway, the golden egg is generally worth more than the cart is carrying by default. This rewards good luck – for better or worse (usually the latter, especially if it grants a player a tremendous advantage early in a match when farm carts usually do not carry as much wealth).
There is an issue about how the golden egg supersedes the usual gold drop though. If the golden egg appears, it always appears in place of the usual chest of gold coins, and the egg only ever gives 500 points of wealth. If the cart has picked up loose wealth that brings its worth above that for a golden egg and it drops a golden egg instead, all that additional wealth is forfeit.
This can be terribly annoying when it happens, especially after the cart has taken the loot from a fallen giant (more on giants later).
Fortunately, this problem does not appear to occur for tribute carts. Therefore, the player can attempt to time significant loot drops in front of tribute carts that are heading towards the player’s hoard. Assuming that they are not waylaid, they pick up the loot and conveniently bring it into the player’s lap.
WAGONS:
Wagons have already been described in considerable detail earlier; they are very much associated with the towns. However, a different variant of the wagon may appear, if the host of the match enables the option that spawns the alternative.
Amusingly, this variant is a wagon that is loaded with fireworks instead of goods. As soon as it has been damaged by whatever means, it will lose health quickly and blows up when it perishes. Timing attacks on them such that they blow up near things that the player wants remove is tricky, but it can be advantageous. For example, having such a cart wrecking a troublesome castle and its knightly defenders can help soften them before a draconic onslaught.
CARRIAGES:
Carriages are spawned by castles, which are the abodes of the princesses that also happen to be the passengers of these vehicles. Perhaps due to a (stereotypical) lack of wisdom, these princesses decide to visit the town while the land is being terrorized by greedy dragons.
Destroying carriages release their passengers, who simply stand where they are (though not without a reason, as will be described later). Any dragon can grab the ladies to be returned to the hoard for the purpose of a gameplay element that will be described later.
It should be noted here that if a carriage picks up loot (apparently the princesses are smart enough to be greedy), the value of the princesses increase. This can be exploited in a way that will be described later.
KNIGHTS AND PRINCESSES:
Big Sandwich Games is not a developer that forgoes clichés and stereotypes, but it does utilize them in hilarious manners.
As mentioned earlier, knights are stupid but brave warriors that would charge any dragon that comes too close to them. Although they can be quite quickly toasted, failing to keep them away means that they inflict a tremendous amount of damage.
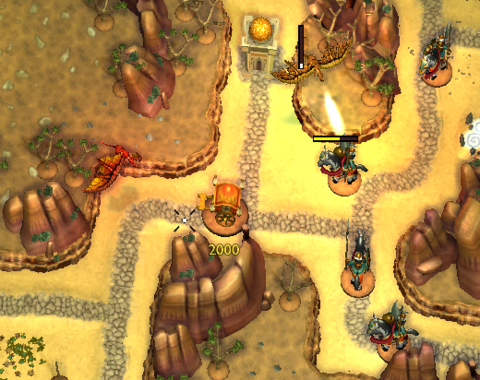
In fact, at just about every level of toughness that a dragon may have, all it takes is two hits from any knight to send it back to its hoard. Furthermore, a knight does not need to actually make an attack animation on a dragon that he challenges; he just needs to touch it.
However, smarter players would realize that the horse-mounted knights cannot move over water and through mountains. The stupid knights are not aware of their limitations, so the player can lure them to these obstacles and burn the idiotic nobles away.
As mentioned earlier, a princess is dropped as “loot” from destroying a carriage. Such a hapless and witless damsel stands in place, waiting for a (slightly smarter) knight to sweep her off her feet and carry her over to the nearest castle and thus to safety (and loss of an opportunity for the dragons). These occurrences are indicated by the princesses’ (suspiciously familiar) voices.
All knights on the map will go after the princess, unless there is another princess that happens to be closer. The player must keep this in mind when handling the princesses, because it can be easy for the player to be swamped by a considerable number of the armed and armoured gentlemen.
To obtain wealth from a princess, the player must have the dragon nab the princess and bring her back to the hoard. (It is not clear where the dragon keeps her during transit and where it stashes her within the hoard, though it is best not to know either.)
The hoard can only imprison one princess at a time, and while it does, all knights in the map would home in on the hoard, intent on rescuing her while disregarding any defending dragons.
The player can exploit the onslaught of knights by killing them and looting their wealth to get some pocket money while waiting for the ransom money to be paid for the return of the princess. However, this can get the player in a lot of trouble too; having many knights lingering around the hoard is not good for plundering.
Furthermore, if a knight manages to return a few princesses to a castle, he is promoted into a Hero, which is a much worse and tougher version of the knight. The player, or players, certainly deserves this punishment, because it should not be too difficult to prevent a knight from rescuing a princess, much less a few in a row.
Even if the player knows that the knights are too far away from the hoard to rescue the princess in time, another dragon can attempt to steal the princess and bring her to its own hoard. This is a cheeky move, but it can be even more entertaining if a couple of dragons steal the princess back-and-forth.
The value of a princess is fully paid upon receiving the ransom money for her return. This can be used to the player’s advantage when dealing with caches of wealth that are just too large for a dragon to stash into its hoard efficiently.
For example, the player can attempt to inflict the coup de grace on a loaded giant while it is in the path of carriage, which might then pick up the giant’s loot and increase the value of the princess. If the player can secure the princess and successfully ransom her, the player can save a lot of time that would have been spent gathering unwieldy amounts of wealth.
The same issue that affects the speed of vehicles also happens to affect knights. Some knights are spawned with pathetic slowness, which makes them look like they are galloping on the spot. Other knights are ridiculously fast, able to chase a dragon even as it escapes with a princess.
These unexplainable differences in the speeds of knights can result in unpleasant experiences if the player has the bad luck to encounter particularly fast knights.
MAGE TOWERS:
A game with high fantasy settings would be incomplete without wizards and their spell-casting ilk, but unlike the other humans in HOARD, they are at least smart enough to hide behind building – specifically buildings that are built on loci of power.
Loci of power are circular arrangements of stones with peculiar runes in the centre. They are not in every official map, but if there are many of these, the player should expect major trouble. These are where mage towers will pop up from, two or three minutes into the match.
Mage towers have the longest aggro range, and their magic bolts happen to travel across the map until they hit its borders. This makes mage towers an irritation that the player should attempt to remove when there is an opportunity.
The other incentive to remove mage towers is that they drop massive gems that can be picked up and hauled back to the hoard for considerable rewards.
However, to prevent wily players from abusing the feature of mage towers and to introduce risks into strategies that are oriented around destroying mage towers, picking up a gem comes with significant short-term consequences.
Chief of these is that a dragon that is hauling a gem reverts back to its original speed level. This makes it very vulnerable to knights and especially other dragons (and more so in multiplayer, in which human players are more than likely to ambush another that did the hard work of taking down a tower).
If Mage Towers are left alone for a while, they will eventually turn into upgraded versions of themselves. These upgraded towers are a lot more dangerous, but grant more valuable gems. However, considering the increased trouble that upgraded towers pose, the increase in value of the gems may not seem worthwhile.
THIEVES:
One of the most annoying things about towns is that they generate thieves. Towns that have thieves’ dens generate thieves much more frequently, but even if the player burns down any den, they will still generate thieves, albeit at a much slower pace.
Instead of plying their unscrupulous trade in the relative safety of the towns, some of them are foolhardy enough to steal from the dragons.
A thief zeroes in on one of the hoards. Which hoard that he targets is not immediately clear, but an experienced player would eventually learn to know which one from the direction that the thief is moving.
A thief cannot steal a lot from a hoard; he can only remove 500 coins at most, and even so he takes a while to gather it; this process can be interrupted in a fiery manner.
However, when a thief does remove all those coins, he causes the multiplier of the dragon that he successfully stole from to lose its multiplier; this is of course very undesirable when the player is trying to build up a lead or reach high scores. Moreover, a thief, like vehicles, also picks up any loose wealth along the way, and because thieves move rather quickly, they can be difficult to exploit.
GIANTS:
A giant is an enormous dwarf-like creature that appears at certain edges of a map. They are not always in every map and they tend to appear only in maps that are meant for advanced players.
Like dragons, giants are greedy creatures; they lack the wit to properly plan their plundering, but unlike dragons, they have plenty of space on their person to haul a large amount of wealth without resorting to hoards.
Giants plunder at will, immediately knocking out any building that it comes across, including even mage towers. They pick up any wealth that has been dropped, as well as any loose wealth along the way. They are not very thorough at looting, however, so a player may be able to follow a giant around to pick up anything it missed (though this is not very efficient).
Giants cannot be targeted by anything that the humans would throw at the dragons; the humans appear to be completely unprepared against giants. In fact, giants automatically kill anything they step on, including princesses (whose value is not added to their plunder, it has to be mentioned).
Interestingly, giants do not steal from hoards that they pass by. This can be exploited to a player’s advantage.
Giants can be injured by dragons and vice versa, though in the case of the latter, one hit from their clubs immediately sends a dragon flying back to its hoard to heal. However, their attack animations are long enough such that a quick-witted player can have his/her dragon dodging out of the way.
Continuously harassing a giant causes it to change its path, usually away from the dragon that is hurting it. This can be used to the player’s advantage, such as diverting the giant such that it passes by a player’s hoard before killing it.
Once a giant falls, it takes a while for its plunder to appear on the ground as loose wealth. Furthermore, its death groan can be heard by other (human) players, which can be a problem for the player that did the hard work of bringing it down in competitive maps. In addition, since the giant drops loose wealth, it is up for anyone to pilfer.
If a giant is not slain, it returns to whence it came. Any plunder that it has obtained is forever forfeit to any dragon in the map.
For better or worse, giants can inject significant uncertainty into a match. For example, if a player is counting on a strategy that feeds on the tribute of towns, a giant that has been directed by another player towards the towns can easily ruin the first player’s strategy. In another different example, players that manage to corral a loaded giant towards their hoard and killing it there in a co-op match can very easily meet their medal targets (more on this later).
POWER-UPS:
In just about every map, there are altars that generate power-ups, the type of which are selected at random from a limited but balanced range of power-ups.
The altars can produce power-ups within the first minute of a match. Far from a source of gameplay imbalance, any advantage brought about by retrieval of a power-up so early on is obtained at the opportunity cost of time that could have been spent on looting.
Power-ups are more useful in the middle of a competitive match, when the dragons, and their players, are looking for an edge over opponents. Late into a match, it is more than likely that players – especially human ones - would forgo most power-ups so that more precious seconds can be spent gathering wealth.
Most of the power-ups have straightforward benefits. For example, there is the Speed power-up, which temporarily sets the dragon’s speed to its maximum level. Another example is the Breath power-up, which has the same effect on the related statistic.
One could argue that power-ups that set a dragon’s level to maximum are practically rendered useless once a dragon has reached the maximum level in the associated statistic. This is true, but it takes a long time to grow a dragon to such magnitude, and there are a maximum number of advances that a dragon can have. (To be specific, dragons stop gaining advances at 400,000 points).
Other power-ups have more interesting effects. One of these has the dragon spitting fireballs instead of breathing fire. The fireballs have their own system of balancing that is different from that for the dragon’s fire-breath. Generally, the fireballs have considerable range and damage, but are slow-moving projectiles; in fact, they are actually fiery versions of the magical bolts that are fired by mage towers.
The game does not inform the player that these fireballs cannot hit the buildings in towns and the fields at farms. In fact, the game does not inform A.I.-controlled dragons of this either; there will be more elaboration on this later, when the deficiencies of the A.I.-controlled dragons are described.
Another interesting power-up only appears in competitive match types, and for good reason; this one allows a dragon to suck up the wealth from the hoards of other dragons, effectively stealing from them. This is a very cheeky power-up and it so happens to last for a long time too.
Yet another interesting power-up is one that changes a dragon’s fiery breath into one that envelops targets with rime. Against any human target and building, the dragon’s breath freezes them outright, making them utterly helpless. This is especially devastating against mage towers. Against dragons, however, the icy breath merely slows their movement but not their breath. Still, the loss of speed is considerable.
Finally, there are healing power-ups, which are the only other way to heal a wounded dragon. Interestingly, these can only be obtained by picking them up from the ashes of a settlement’s cathedral. Possible anti-religion suggestions aside, this is a risk-versus-reward design; getting a healing power-up may not be easy if a settlement is guarded by several archers. (This feature can be disabled by the host of a match, interestingly enough.)
A.I. DRAGONS:
Unfortunately, on the DRM-free version of the game (which is only offered through a limited-time-only Humble Bundle deal), the player can only play with A.I.-controlled dragons. Although they may seem a bit decent initially, there are quite a lot of holes in their intelligence. These may seem amusing at first, at least until the player realizes that they are simply poor substitutes for human players (that is, assuming that they are actually good).
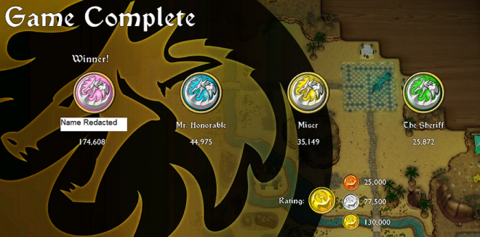
(For the purpose of writing convenience, the term “A.I.” will be used like an adjective henceforth to indicate dragons that are controlled by the A.I. scripts in the game.)
The A.I. dragons will not become active immediately at the start of the map. Where (wise) human players would mill about close to where they know buildings will pop up to make use of the first few otherwise fruitless seconds of any match, the A.I. dragons stay at their hoards until buildings appear on the map.
When the A.I. dragons do go on the move, they appear to periodically scan the map for opportunities. However, they are not so perceptive towards danger though. It is very easy to rob another dragon of its hard work in the first minute.
Later in the match, the observant player may realize that an A.I. dragon is not always aware that it has a healing power-up if it has picked up one earlier. Although it is smart enough to use the power-up when badly injured, it is not smart enough to realize that it already has a healing power-up when it goes to check the power-up altars for new ones. It would just hover over the altar, its A.I. scripts stalled.
A.I. dragons are also unaware that fireballs cannot hit town buildings (other than the centre) and the farms around windmills. They hover over a spot some distance away, spewing fireballs that would go nowhere.
A.I. dragons also will not target castles and giants. This practically gives the player a tremendous advantage in competitive maps but a major handicap in cooperative maps, at least in single-player.
Such deficiencies in the intelligence of A.I. dragons make them terribly poor opponents and team-mates in single-player.
As a side note, the game does not inform the player that A.I. dragons are named according to their preferred methods of gathering wealth. For example, an A.I. dragon that prefers catching princesses is named “Casanova” (amusingly enough). Players who figure these names out would already have an advantage over the A.I. dragons.
MULTIPLAYER:
Playing with actual humans behind the dragons is a very different experience from playing with the relatively dumb A.I. dragons, obviously. Arguably, multiplayer is perhaps the best way to experience the game, after the player has learned the fundamentals of course.
In multiplayer, all the cheap tactics and efficient dragon upgrade builds that the player has learned in single-player would be exhibited by other players as well whenever the opportunity arises. Therefore, in the competitive match types, the player must be vigilant for any attempt by other players to rob him/her of hard-earned plunder, as well as be dastardly enough to rob another player when given the chance.
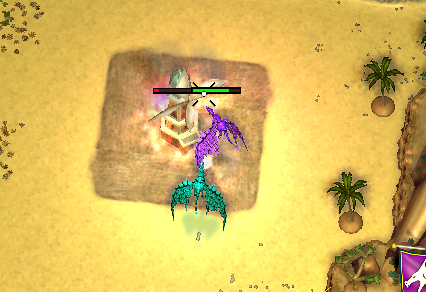
For the most pleasant experiences, it is best that the players choose the maps with the greatest freedom of movement. Lag, when it does crop up, can cause the player to waste precious seconds flying a dragon uselessly against the map boundaries (more on these later).
The most exciting – though perhaps most annoying too – experience is obtained through playing maps where the players’ hoards are located very close to each other. Anyone bearing a stealing power-up would be watched closely.
If there is an issue in multiplayer, it is that the player with the biggest, highest resolution screen may be able to have an advantage over the other players. This player can utilize the greatest zoom, allowing him/her to keep an eye on other players’ dragons with mere glances instead of relying on the icons at the edges of a screen to gauge where they are.
Perhaps it can be argued that the lack of camera movement might work against this player when he/she is trying to track his/her own dragon, but this is a down-side that practice can overcome.
(Of course, it can be argued too that it would be ludicrously rare to find such a player that is willing to afford the costs of such a screen if only to have an advantage in a game like HOARD.)
MATCH TYPES:
There are a few match types. The first and foremost is “Treasure”, which appears to be the mode with the most official maps.
In Treasure, each dragon has its own hoard and serves itself, first and foremost. The dragons only have a limited amount of time to gain wealth; the one which surpassed the others in plunder wins.
In multiplayer, human players may attempt to form impromptu alliances against the leading player, but this would only work if there is an abundance of thieving power-ups. This means that barring a major mishap, the dragon that is in the lead is more than likely to maintain its score while the others spend precious time stymieing it.
Next, there is Co-op. All dragons share a single hoard, and must work together to gather wealth. This is perhaps the most pleasant mode, if only because the players need not expect skulduggery from each other. However, the wealth target is a lot higher than when each dragon is serving itself.
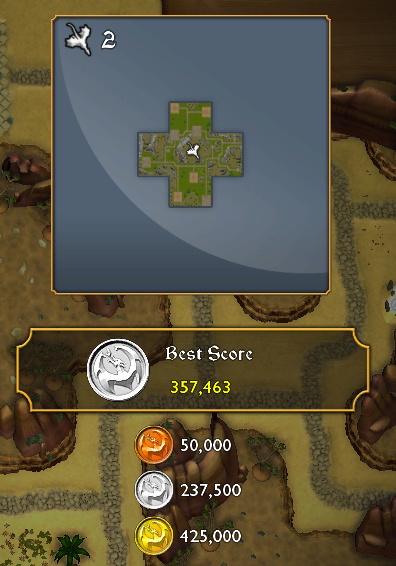
Princess Rush is a potentially hilarious match type, because the dragons must compete with each other to snatch princesses or steal them from each other’s hoards to hit a target number of ransomed princesses first. The princesses also happen to spawn more often in order to fit the gameplay of this match type.
HOARD is the last and least match type, because it does not follow the spirit of the other match types and even the settings of the game. It also has the least number of maps.
In this match type, the player does not have any hoard (oddly enough) and is upgraded automatically over time. However, the map is a lot more hostile.
The humans develop their assets a lot faster; towns build up and recruit archers a lot more quickly, and there are more mage towers than the player could suppress. More importantly, knights have terrifically increased aggro range and heroes spawn as frequently as regular knights do.
Most of the official HOARD maps do not have safe spots, but there are some maps in which the player can suppress one or two mage towers and castles and simply win the match.
DRAGON AESTHETICS:
The first thing that a high/dark fantasy aficionado would notice about the dragons in HOARD is that the dragons follow the “wyrm” mythos, in that they are more akin to serpents with wings than lizards with wings. In other words, they have no more limbs other than their two wings.
This can give rise to some funny musings, such as how the dragons could possibly pick up loot and drop it back at the hoard.
Regardless of their lack of articulated non-flying limbs, the dragons still breathe like stereotypical dragons do – and the flames happen to be satisfyingly brilliant.
The flapping of their wings is gracefully animated, but an observant player may notice that there does not appear to be any changes in the animations for when the dragons move about; they still flap their wings in vertical motions.
Some of the upgrades change the appearance of a dragon. Every few upgrade points into an aspect, the associated body part of the dragon changes, sometimes subtly. For example, upgrading speed changes the appearance of the dragon’s wings, such as adding spots and trims to it.
Another example that alludes to the musing about how the dragons in HOARD collect loot can be seen in the way that a dragon’s belly appears to increase in size when the player upgrades its carrying capacity.
Such changes are important in gameplay, because it allows the player to gauge the power of another dragon more readily. However, the player will need to have a large enough screen to be able to discern the details of any dragon.
AESTHETICS OF OTHER MODELS:
Most of the other models in the game are designed such that they have shapes and silhouettes that are easily recognizable as the stereotypical characters that they are supposed to represent. For example, knights, with their banners, plumed helmets and of course barded horse mounts, are quite easily discerned from everything else.
For players that have seen a gamut of aesthetic designs for princesses from the pompously noble to scandalously skimpily-clad, HOARD’s princesses may be a bit difficult to recognize. However, most players would eventually learn to associate their exaggerated bell gowns with hapless damsels-in-distress.
As mentioned earlier, vehicles lack of beasts of burden to pull them around. This can seem very odd, but this was perhaps intended so that their models occupy an almost square area.
A significant issue that affects these other models can be seen when they clip through buildings and each other. When moving through buildings, the models for the buildings take precedence and thus will obscure the models of these moving characters and objects.
Buildings can also obscure loose caches of wealth, but not the wealth counter underneath these caches, fortunately. (This occurs when the player destroys a building but does not pick up the wealth dropped; a new building will eventually replace the old, obscuring the loot from its predecessor.)
Most players would eventually learn to live with this clipping issue, but occasionally, they will still be surprised by knights that clip through their own castles.
LEVEL DESIGNS:
Each map ostensibly represents a “kingdom”. However, at best, any map seems to be a stretch of countryside that is populated by a handful of towns, farms and castles.
There are several terrain features that are readily visible to the player. These are the roads, the plots for farms, the (tastefully tiled) foundations for cities and loci of power. Therefore, the new but observant player may be able to quickly figure out the best strategy to beat the map (and perhaps opponents).
Another immediately noticeable terrain feature is the mountain-ringed plateau. This is always the region where a dragon’s hoard is located. The mountains make good defences against pesky knights, but generally few other humans would consider going through such a region. (There are a few maps where the A.I. scripting for the farm carts break and they take a short-cut through the mountains – usually to their fiery detriment.)
These terrain features are coloured and textured in suitably contrasting ways, making it easy for players to spot when there are opportunities to make use of the terrain for plundering runs or escapes.
The only missing terrain feature is that for the foundations of castles. The only visual hint that these are in the map are roads branching off from the main ones but leading to a seeming dead-end.
Interestingly, HOARD makes use of a board-game-like aesthetic for the boundaries of the map. At the start of any match, the player can see things like land and rocks falling onto what appears to be a wooden table, followed quickly by the amusing sight of the dragons spiralling downwards.
The boundaries of the map are the edges of the land. For some maps, the boundaries form not just their outlines. In these, there are literal gaps in them that nothing on the board, including the dragons, can travel over. Only fireballs and mage tower shots can travel over these gaps.
The consequences of such a design are particularly expressed through a certain co-op map that surrounds the dragon’s shared hoard with unreachable islands of mage towers.
MUSIC:
There are only a few soundtracks in the game, though it would take a long while before they start to grate on the player’s nerves.
The default one is the scarcely ominous orchestral track with cheesy medieval themes. It plays during the main menu and in any match type other than Princess Rush and HOARD.
Speaking of which, these two modes have their own tracks. The track for Princess Rush may sound terribly familiar to players that are fans of the Mario franchise, though the track does not exactly sound identical to any known Mario-associated soundtrack. Regardless of whether it was plagiarism or homage, the soundtrack is playfully cheery. Of course, whether it fits the theme of royal kidnappings or not is debatable.
The HOARD match type has the most exciting soundtrack, being a clearly electronic version of the default track with a much more heart-thumping tempo. This is perhaps appropriate, considering the objective of this match type.
SOUND EFFECTS:
Most of the sound effects in the game has a purpose in gameplay, though most can also be said to have been made to fit the (cheesy) settings of the game.
The most satisfying of these sound effects is of course the noise of a dragon purging something with its breath. There are variations of the default breathing noise for the purpose of aurally representing the effects of power-ups that change a dragon’s breath. This is handy because it helps an experienced player recognize when other players have invoked their breath-changing power-ups.
There are also sound-effects for when knights are spawned and when they charge, which help players deal with these pesky humans.
The noises that the player would listen out to the most in the starting couple of minutes of any match are the chimes that denote when a cart or wagon has been created. Interestingly enough, these chimes appear to cease once towns and farms incessantly create these vehicles, which is perhaps for the better.
VOICE-OVERS:
Most of the voice-overs that are heard in the game are short and not coherent words. Among these, there are the screams and groans for when humans die from being killed by dragons. As macabre as this would seem, they can be satisfying to listen to at times.
The only voice-over to be heard from the dragons is the surprised grunt that they make when they are badly injured. It is a silly noise, which helps to alleviate the frustration of having to waste time waiting for the dragon to heal.
The only characters to have legible voice-overs are the princesses. However, the princesses’ voice-overs do sound suspiciously similar to some of the things that the princesses in the Mario franchise utter.
Of course, it would be quite unseemly to accuse Big Sandwich of plagiarism when the scenario of damsels-in-distress is so pervasive in games.
CONCLUSION:
The gameplay in HOARD is not ground-breaking new; there had been plenty of older score-racking games that are oriented around the basic concept of collecting stuff and returning them to a drop-off point. However, what HOARD does is still considerably fun, and made all the more amusing with its veneer of draconic medieval terrorism.
