INTRO:
It is not easy to make a game that is about logistics and resource management and have it being fun too. Having to juggle numbers with little context other than which goes where can be boring, even with visuals and artwork.
Factorio manages to be such a game, minus the boredom.
PREMISE:
Factorio isn’t really trying to tell a story. In fact, its premise is rather flimsy; it is an excuse to have a lonesome player character with incredible technical skill single-handedly build up an industrial complex – in the outdoors.
Anyway, the player character is the sole survivor of a space-ship crash. The ship crashed on a planet that has Earth-like conditions, except that there is no inclement weather, and the “natives” are xenophobic giant bugs.
The player’s goal is to build a new space-ship that can go into space, presumably to signal to others that the engineer is on that world and has established an industry. This is easier said than done, because despite the player character’s tremendous technical capability, doing this is not possible without massive infrastructure and many resources.
TUTORIAL & DOCUMENTATION:
The tutorial is the closest that the game gets to story-telling. Even so, the chapters are there to impart lessons on the gameplay from early- to mid-stage scenarios. There is also in-game documentation on gameplay designs and best practices that the player can bring up at any time. Some of the documentation is also animated, where animation would be useful in getting the lesson across.
It would be a lot for players who are new to games that are complex as Factorio, but to those who are already experienced in such games, the in-game documentation is much welcome.
THE GAME WORLD:
The game world is a 2D plane that is mapped as a grid of squares called “tiles”. This delineation is important for the purpose of building facilities, which will be described later.
Large square groups of tiles are called “sectors”. These will be important in the matter of pollution, reconnaissance and fog-of-war, as will be described later.
At the default settings, the game world is composed of many sectors, which form a rectangular map that is wider horizontally than it is vertically. Resources, landmasses, bodies of water, forest, cliffs and “native” hives are generated and put into the game world before the start of a playthrough. (There will be more on the “natives” later.)
DAYTIME AND NIGHT-TIME:
The planet has a noticeably fast daytime and night-time cycle, though this is nothing new in video games.
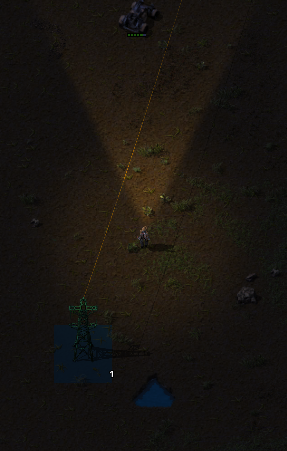
Anyway, daytime gives the best visibility. Night-time is not completely pitch-black, but it can be difficult to see things especially if the player is using far-out zooms. The engineer and any vehicles that are being driven automatically have their searchlights turned on during the night-time, though this will not help much if obstacles blend into the background. (They also do not cast long shadows when illuminated by the searchlights, so there is no help from the shadows either.)
The most important consequence of night-time is that solar cells and panels do not work at these hours. There will be more elaboration on this later.
THE “ENGINEER”:
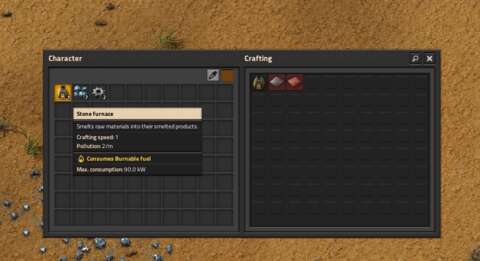
The player character has been described as an “engineer”. This person is clad in a suit that somehow renders him/her tireless and biologically self-sufficient. The engineer is also surprisingly handy with his/her/their hands, and most importantly, know how to fabricate “labs” that can perform R&D on their own. The engineer can even cobble together things – while moving and shooting (more on shooting later).
That would be surprising of course, if the engineer is actually human in the first place. There is no indication whether this is officially the case or not. (There were promotional artwork that showed that the engineer has the face of a male Caucasian human, but the engineer’s head has since been fully enclosed with a helmet – assuming that is a helmet and not a robot head.) (The engineer’s corpse also does not exhibit any bleeding or leakage of fluids for that matter.)
The engineer’s capabilities would seem absurd, even to players that have experience in survival games where the player characters can cobble things without tools. Indeed, meticulous players would make use of the engineer’s ability to cobble things on the fly throughout the game, especially for short-term jobs.
HEALTH:
The engineer does not need to eat, drink, sleep or even pass waste. However, the engineer is still mortal, and can die from taking too many wounds. Of course, the engineer can stay fighting even after taking heavy damage, but as soon as the health meter depletes completely, the engineer dies.
That said, injuries are usually due to assaults from the native bugs (more on these later). Injuries can also happen if the player made the mistake of having the player character be in the way of incoming vehicles (especially trains).
Death means that the player needs to reload a game-save. The game may be unabashedly sci-fi, but resurrection technology is not a thing in this game.
In the event of survival, the engineer automatically heals after several seconds of not receiving further attacks. (Emphasis on “further attacks”, not “damage”; there are shields in this game, by the way.)
CONSIDERABLE AUTOMATION:
Many of the machines that the engineer would make are automatic, or at least self-operating. The stone furnaces are particularly notable examples; real furnaces would require periodic stoking, even with automation.
Indeed, the player would be setting up machines to manufacture things, either to be deposited into a container or transported elsewhere to be fed to other machines.
There will be elaborations on particular machines and automation later.
DIGGING WITH PICKAXES:
In the very early-game stages, the player character has to manually extract minerals from the ground with a pickaxe. The player character does have a burner drill, but doing things by hand may be more efficient during these stages because the player only needs small quantities to set up the starting facilities.
The need for digging with pickaxes disappears quickly though. The amounts of resources that the player needs will be far, far more than what can be gained through digging with pickaxes.
FINITE RESOURCES, AND NO DISASSEMBLY OR RECYCLING:
A limitation in the base build of the game that becomes very noticeable to observant players is that there are no means to recycle or disassemble items in order to recover their constituent parts. This means that the player has to be careful about converting first-tier resources into higher ones.
This is not told to the player in any of the documentation though. This is a glaring gap in the otherwise thorough documentation. That said, wise players would likely reserve first-tier resources more than higher-tier ones.
SOLID ITEMS & DIMENSIONAL POCKETS:
Most resources occur as solids, which can be carried around on the player character’s person. In fact, many buildings and large pieces of equipment – including even entire train wagons and the locomotives – can somehow be carried around in the player character’s very roomy pockets.
The player character has a limited inventory size, of course. Unless the player has been unwisely carrying around hundreds of units of resources, there would be enough space to carry an entire base in the engineer’s inventory. This will be useful for the purpose of establishing outposts, assuming that the player has planned ahead.
CRAFTING ITEMS TEMPORARILY REMOVE INGREDIENTS FROM INVENTORY:
Interestingly, if the player sets a hand-crafting order, any viable ingredients are removed from the player character’s inventory to be reserved for the order. This indubitably frees up space – something that the player might want to keep in mind, especially when making ammunition for the player character’s own use.
Cancelling the order returns the ingredients to the player character’s inventory. If there is no space left for them, the ingredients are unceremoniously dropped onto the ground.
PLACING AND REMOVING:
In addition to having pocket dimensions in one’s pockets, the engineer can place facilities and equipment in the inventory onto the land in the blink of an eye. This is especially useful for laying down conveyors and pipelines.
The engineer can also have drones known in-game as “construction bots” do the deed instead. There can be multiple bots doing this; this is especially useful if the player already has planned the layout of factories ahead of getting the resources to make the factories in the first place.
However, removing things is not instantaneous. Removing something takes half-seconds, with more half-seconds being spent to remove larger things. Therefore, if the player is playing a scenario with tight time constraints, the player will want to be sure of the placement of his/her assets in the first place.
If time is not a constraint though, the meticulous player can have the engineer and construction drones remove entire complexes in order to restructure them. This might be useful after the player has found the resources to make the later science packs. (There will be more on “science packs” later.)
“ALT” VISUAL MODE:
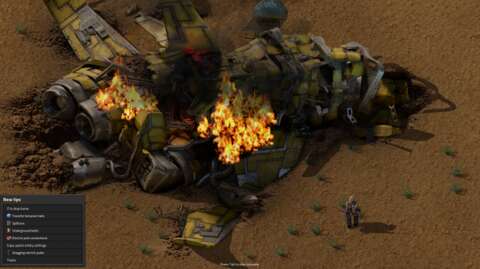
The player’s facilities will be handling substances of many kinds. To help the player observe which machines and which containers have what, there is the “Alt” visual mode, which imposes the icons for resources on top of the machines and containers. Most of the time, this visual mode is useful.
INSERTION OF SOLIDS INTO MACHINES:
Machines that receive and produce solids can do so along any point on the perimeter of their sprites. This is convenient, and also allows for some seemingly haphazard but space-efficient layouts, some of which can be seen in the screenshots of this article.
FLUIDS:
Fluids cannot be carried around in any inventory, at least not directly. They can only occur in containers, like barrels and tanks. Indeed, there are not even any liquid spills; if the containers are destroyed, drained or flushed, the fluids simply disappear. The same also applies to machines that handle fluids and can store some of them.
This will become a major concern in the mid-stages of the gameplay, when the player needs to handle fluids like crude oil. The containers themselves are not cheap things; many of them, including barrels, require a considerable amount of resources to be made.
FLUID INLETS AND OUTLETS:
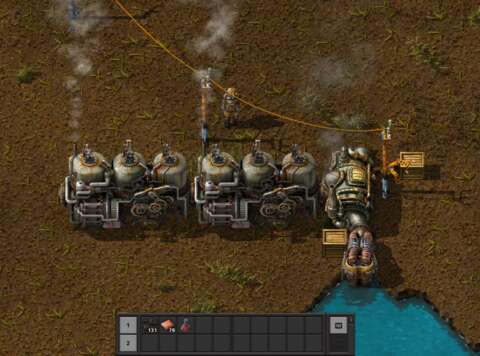
For the purpose of handling fluids, machines that receive and produce fluids have intakes that are specifically designed for this. Fluids must go into the intakes, and they must come out of the outlets. Failure to have the means to channel these fluids would have the machines processing whatever intake fluids that they have received and store whatever product fluids that they have inside them.
The outlets and inlets are clearly marked with directed arrows, which are typically next to things that look like openings. This is fortunate, but there is another problem that can vex new players.
INLETS AND OUTLETS FOR SPECIFIC FLUIDS:
Specific inlets and outlets will only channel specific fluids. The player cannot change this.
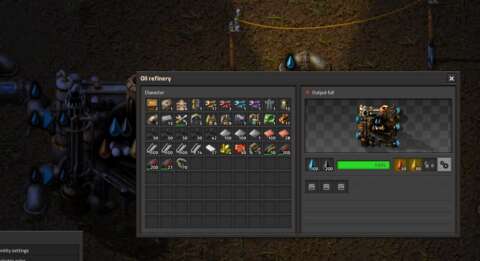
This would not have been a problem if the “Alt” visual mode shows which opening channels what kind of fluid all the time. However, the mode only shows this when a machine has been set to a task; if it is not, the icons for resources do not appear on the inlets and outlets. A notable example is the Oil Refinery, which handles five types of fluids.
This would be a frustration to new players. Unfortunately, the wiki for the game and in-game documentation do not show this important information.
ELECTRIC PUMPS:
On their own, fluid pipes and storage tanks attempt to equalize with each other in terms of percentages of their capacities. For example, pipes that are half-full with liquid will fill storage tanks to half-full.
If the player intends to completely drain a network of pipes and storage tanks to another network, the player will need electric pumps. Electric pumps consume electricity to force fluids across from one side of the pumps to the other side. Thus, electric pumps can be used to control the flow of fluids.
ELECTRICITY – OVERVIEW:
The player will need electricity to power most of the factories. This is perhaps where Factorio differs considerably from many other games that have electricity generation.
Most other games are vague and ambiguous about how electricity is generated. For example, there are “reactors” and “generators”, but how exactly they work is never elaborated upon, much less implemented as a gameplay element. The most that the player would need to do is feed them with their requisite fuel and they produce electricity. (Factorio’s contemporary, Oxygen Not Included, is particularly notorious in this matter.)
Factorio has greater complexity in this matter, but also implements some simplifications.
THERMOMECHANICAL GENERATION:
Factorio implements the feature of “working fluids”; mechanical and petrochemical engineers would recognize this term. To briefly explain this term, working fluids are fluids that carry kinetic and thermal energy, typically due to their (often dangerously) high pressure and temperature. These fluids are typically used to spin turbines and engines, thus generating the motion necessary for mechanical applications or to generate electricity through induction.
In this game, steam is the working fluid. Steam is produced from boilers or heat exchangers, with the latter being at higher temperature. Boiler steam is then channeled to steam engines, and exchanger steam is channeled into steam turbines; the steam can actually go into either, but mismatches would be inefficient.
STEAM DOES NOT COOL DOWN:
Amusingly, the law of entropy does not apply here; steam will not cool down on its own. They retain their temperature, which would be unbelievable to anyone with a realistic grasp of physics. That said, cunning players would store steam in tanks, thus making an energy reserve to be channeled into steam-consuming machines where needed.
POLLUTION & ANGERING THE NATIVES:
Most – but not all – of the player’s assets produce pollution. Fuel-burning facilities, chemical plants and mining drills, in particular, produce a lot of it.
The extent to which the player’s assets mess up the environment would not seem to be an issue to the player character. The planet is not the player character’s, and the player character’s suit is advanced enough that standing on a field of uranium ore or handling radioactive materials does not sicken the player character. (Perhaps the engineer is not even a fleshy being at all.)
However, the engineer is not alone in the world. There are creatures that the player character and the gameplay documentation refer to as the “natives”.
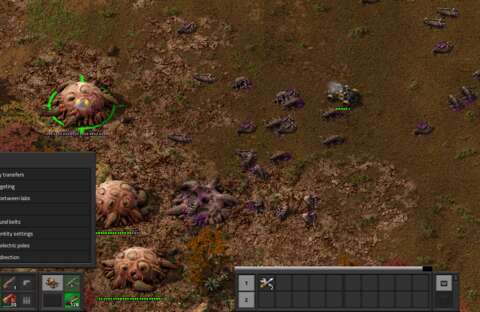
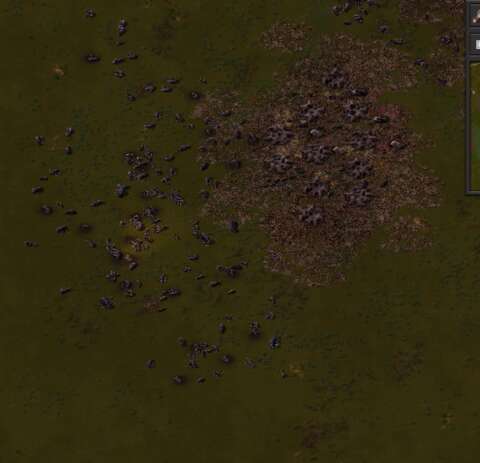
The “natives” do not appear to be sapient; they do not even have a recognizable civilization at all. Rather, they appear to be arthropods, i.e. bugs. They are also giants, the smallest being the size of a human. They are not and will never be the player character’s friends; approaching them early on in the gameplay, prior to having built anything, results in them attacking the player character.
That said, they very much dislike the pollution that the player’s holdings are pumping out. If the pollution reaches them, they react by forming a raiding force that goes after the offending factories. The natives’ attacks will be described further later.
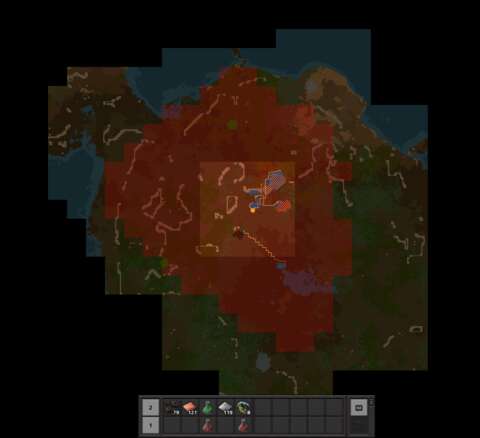
To check how far the pollution from the player’s holdings is reaching, the player can toggle on the pertinent display option in the user interface for the map view (more on this later). The map view happens to be running in real-time, so the player can see which sectors of the map are currently accumulating and/or dissipating pollution.
POLLUTION DISSIPATION:
Every sector of the map automatically dissipates pollution over time. The dissipation is significant, but not enough to alleviate the pollution from dense industrial complexes.
Thus, there is an incentive to spread out the complexes as much as possible, but the risk of reaching out further and angering native hives that are further away negates the advantage.
POLLUTION OVERFLOW:
A sector of the map can only contain so much pollution. After the pollution counter of a sector has reached its ceiling limit, any further pollution that is generated spills over to adjacent sectors instead. This means that a dense but compact industrial complex would be generating a massive pall of pollution anyway.
TREES – FOREWORD:
The world that the engineer crash-landed on is peculiarly Earth-like. There are trees that resemble Earthly ones; they are even made of wood.
The trees do matter in the gameplay. First, they impede expansions. Indeed, some map seeds would put the player smack dab in the middle of a thick forest.
Second, they serve as sources of wood. The engineer can chop them down for lumber, which can be either used as fuel or as materials for early-stage items. Either way should be done with care though; the trees do not regrow and they do not spread, i.e. cut/destroyed trees are gone forever.
TREES – POLLUTION ABSORPTION:
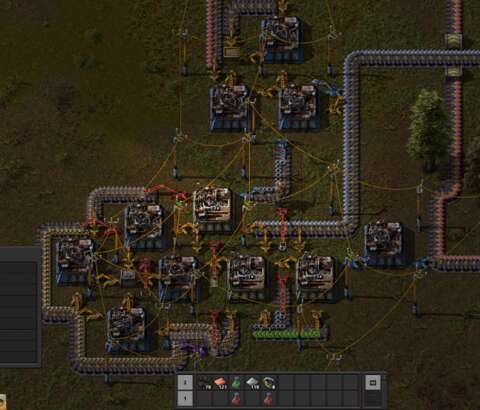
Trees can also absorb pollution. The amount that each tree can absorb is small, but sectors that have forests have many, many trees, which amount to considerable absorption.
However, trees that are closest to the sources of pollution eventually sicken and petrify. This drastically reduces their ability to absorb pollution.
ELECTRICITY CONSUMPTION TIED TO POLLUTION OUTPUT:
Interestingly, the amount of pollution that something is pumping out – if it produces pollution – is tied to its electricity consumption (assuming that it consumes electricity in the first place). Its pollution output is reduced by the same proportion if the player installs efficiency modules, which reduce their electricity consumption.
This is useful to keep in mind, especially when ranging out to find resources to feed the player’s factories. These sources of resources are often far away, and nests are likely to be uncomfortably close to them.
RESOURCES – OVERVIEW:
The following passages are for the resources that the player can draw from the earth. Most of them are minerals: ores and hydrocarbons. Typically, the player would be drilling them out of the earth, in the case of the solids, or pumping them out, in the case of liquids.
Most of the resources are finite; this is the case for all ores. In the case of liquids, they are essentially infinite: water, in particular, can be pumped rather readily from any body of water, no matter how small. Crude oil, however, follows a different mechanism, which will be described later.
Typically, as with almost any other video game that has a facsimile of mineral mining, ores occur as surface deposits that can be perceived instead of unseen and underground seams that are more likely the case in real-life.
That observation aside, such a representation of ore fields is convenient for the player, especially when placing drills.
RESOURCE TRANSPORTING – FOREWORD:
Before elaborating on the types of resources that can be had and how they are used, the matter of transporting them would be described first. This is a deceptively complicated task, despite the seeming simplicity of bringing something from point A to point B.
CONVEYOR BELTS:
In the early stages, the player character has to manually bring stuff over from one asset to another. This is very tedious work, so the player would likely switch to conveyors eventually.
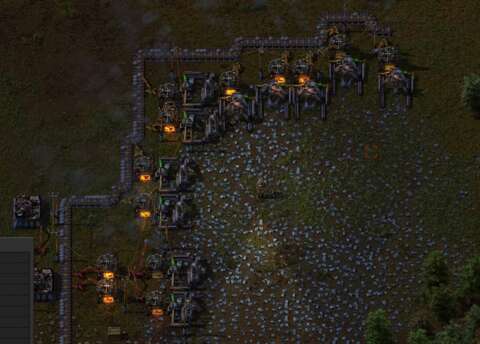
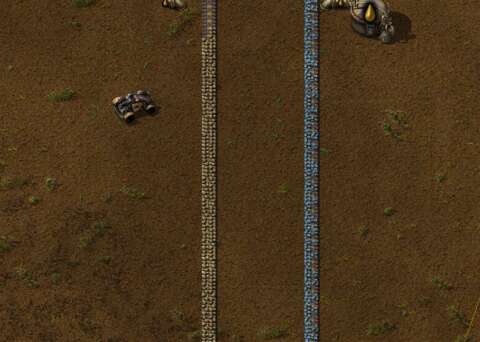
Conveyor belts have to be placed tile by tile, but can be placed rapidly as long as the player character has them in inventory. The player character can even place conveyor belts while in a vehicle, which is an amusing convenience.
Indeed, it is possible for the player to build long lines of conveyors, snaking across entire sectors. The few but significant problems to be had about them are their conveying capacity, single direction and, of course, the tedium of placing them in the first place. Still, their ability to automatically convey resources without needing electricity is a major advantage.
Vehicles like trains can also ferry resources; they will be described further later. However, it should be mentioned here that the belts are the most cost-efficient means throughout the game.
MOVING OVER CONVEYORS & BEING MOVED BY THEM:
The player character can move over conveyors without affecting the conveyors and the contents that they are conveying. The player character can even drive vehicles over them without damaging them.
However, the conveyors also move the player character and any vehicle that is on them – including even a tank (more on this later). If the player is contemplating the placing of machines at a work site or reworking their layouts, the conveyors can be a minor nuisance.
On the other hand, the player character can also use the conveyors to get to the destination of the conveyors faster.
There is a device that prevents the player character from being affected by conveyor belts, though there is little reason to have it.
PIPING:
Piping is needed to move fluids. Due to the aforementioned limitations on fluids, namely that they can only exist in piping or containers, the player will want to be careful with the placement of piping.
More importantly, above-ground piping prevents the movement of the player character, unless the engineer is piloting a Spidertron (more on this later). This is especially a problem when piping fluid across long distances.
Removing a unit of piping forces the fluids inside it to move to the next section of piping and so on, but only if there is capacity left for the fluids. Otherwise, the fluids simply cease to exist.
TRANSPORT BY TRAIN:
Trains were implemented sometime during the development of the game. They are meant to transport cargo in bulk; with train scheduling, the trains can also be automated to receive and make deliveries. More importantly, trains and rail tracks are much more difficult for the natives to destroy; indeed, trains are too fast for the “natives” to catch and they have enough momentum to crush most things in their way.
Railway tracks require the same effort to place as conveyor belts, but tracks do not use copper in their construction and so does not compete for the same resources.
However, these advantages come with major setbacks.
Firstly, moving trains are hazards; there is even an achievement for getting the player character run over, something that may happen if the player is careless. For safe travel across tracks, the player needs to place down railway crossings, which trigger the brakes on any incoming train if the player character is close by. However, this will obviously slow down the train’s circuits.
Secondly, the trains themselves also require consideration. The locomotive does nothing else other than haul wagons, and will be slower as more wagons are attached to them. The locomotive also becomes longer as more wagons are attached. Reserving entire tracks for specific trains is also an important consideration.
Then there is the matter of planning their automatic schedules. The machines that contain these schedules in turn have to be placed at the stations that the trains stop at. Speaking of which, the player also needs to design the stations that the trains stop at; means of refueling, cargo unloading and loading, and repairs for the trains, et cetera. These also have to match the length of the trains and the positions of their wagons and locomotives.
In summary, trains are not cheap to make and easy to implement. They require fuel and produce pollution, and take up more space for their stations, tracks and automation. In contrast, conveyors and piping are far simpler to implement, do not need fuel and do not produce pollution.
There would be players that profess the worth of trains; even the developers do. However, miserly players would likely go for conveyors and piping instead, especially if they are going for compact factory layouts (and they likely would; bigger factories consume exponentially more electricity, if they are to be efficient).
TRANSPORT BY “LOGISTIC ROBOTS”:
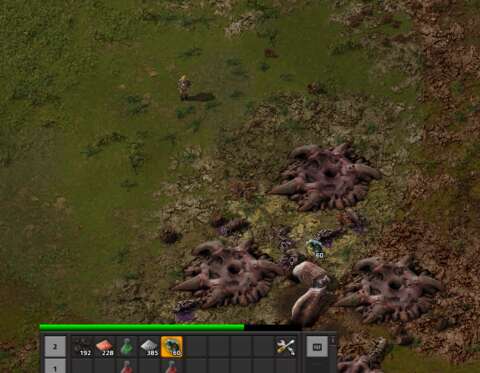
Logistic bots are essentially flight-capable delivery drones. These drones are there to carry stuff around, preferably across short distances. They consume more energy if they have to move longer distances, and they will have to recharge at “robo-ports”, which in turn consume electricity to maintain and recharge the drones.
Logistic bots have limited carrying capacity, which make them not suitable for loading goods in bulk, much less transporting them. However, being flight-capable means that aerial robotic deliveries over short distances is much simpler and more convenient than other means of shifting goods around over such distances.
On the other hand, the logistic robots and their ports require programming, which in turn require the items that enable automation. These items can take up space, so the space-savings with such a means of cargo handling are not as significant as one would think. They also require electricity.
INSERTERS:
Inserters are practically pick-and-place robotic arms. Despite their vice-like appendages, any inserter can handle anything.
The player begins with the most basic and least-cost inserter. This one will be useful throughout the game, mainly because it is suitable for handling the small amounts of goods coming out of each production machine. It is also used in the production of one of the early-stage science packs (more on science packs later).
Inserters can only ever transfer items along a single direction; there are no inserters that can transfer things across 90-degree angles. Such a limitation may seem odd in a game with so much convenient science-fiction hand-waving; this is a deliberate game design, intended to prevent the player from making compact factories. (There had been mods that implement this by the way – and they do make factory planning so much easier.)
PLACEMENT OF THINGS ON CONVEYOR BELTS AND TAKING THINGS FROM THEM:
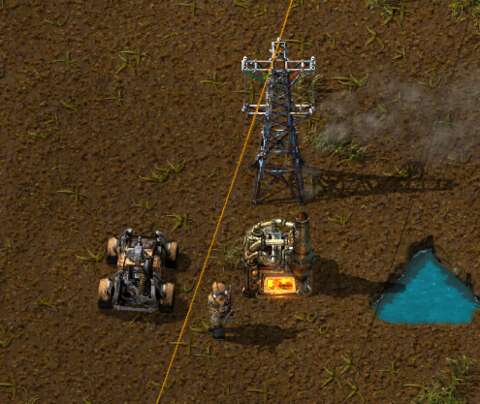
A conveyor can support the presence of up to four items. This is not just a matter of capacity; this will matter when making feed lines to machines.
When inserters place things onto conveyor belts that are running perpendicular to their direction of transfer, they place things on the far side of the belt. When inserters take things from the belt, they take it from the near side.
In the case of placing things, the non-stack inserters cannot place things on the near side of the belts. Stack inserters can do so, however. In the case of taking things, any inserter can take things from either the far or near side, but it will prioritize the near side first.
When inserters place things onto belts that are running parallel to their direction of transfer, they place it on the right side of the belts, relative to the position of the inserters. When the inserters take things from these belts, they take them from the right side of the belts first, also relative to the position of the inserters.
This is very important to keep in mind, because this can result in the belts not having their carrying capacities utilized to the fullest. The player will need to install splitters here and there to reorder the items on the belts. (Fortunately, splitters do not need electricity.)
CONVEYOR BELTS MEETING EACH OTHER:
Conveyor belts are not always contiguous. When they are not contiguous, conveyor belts can feed into other belts; for convenience of reference, the belts that are doing the feeding are called the feeding lines, whereas the belts that are receiving the feed are called the receiving lines.
Feeding lines deposit their stuff onto the receiving lines along the side of the receiving lines that the feeding lines come into contact with. The stuff does not go onto the other side of the receiving line – which means that other feeding lines can deposit other stuff onto the other side of the receiving lines.
This can be used to deliver two types of goods on the same conveyor line, which would be especially useful for assembly machines that are making things that require more than two ingredients. The late-stage science packs are particular examples.
UNDERGROUND CHANNELS:
Among the most useful of the player’s options at transporting resources are underground channels. There are two types of these: underground conveyor belts and underground piping.
Both share certain traits; underground stretches of these channels can only ever go in one of the four cardinal directions, and only up to certain distances before their terminals have to be above ground. Thus, long lines of underground channels are punctuated by short above-ground portions.
In the case of underground conveyor belts, the underground stretches have shorter maximum distances. This is a considerable limitation, but apparently it was put in place to prevent conveniently compact factory layouts.
The crafting of the terminals for either type of underground channel is quite expensive; they so happen to consume considerable amounts of the aboveground channels, and some more resources besides (usually iron plates). Therefore, factory layouts that use underground segments are quite expensive.
When a terminal for an underground conveyor belt is removed, all of the items that are being channeled underground are places into the engineer’s inventory, so nothing is lost. However, removing the terminals for underground piping pushes the fluids in the removed terminal into adjacent piping; if there is not enough spare capacity, the fluids are wasted.
RAW RESOURCES – FOREWORD:
Raw resources are the ones that are directly drawn from the earth. Generally, raw resources are useless until they are processed into something. However, raw resources are also the best choice of goods to ferry around if the player desires logistics that are as simple as possible, especially over long distances. After all, the intended work-site can have their own machines to process the resources into materials that are needed for the intended output of the work-site.
For example, iron ores can be transported to different work sites to be processed into iron plates for downstream manufacturing at these sites.
COAL:
Coal is the most common fuel source, discounting trees. Coal is needed throughout the game, first as a fuel source and later as feedstock for chemical processes.
IRON ORES:
All ores are needed throughout any playthrough. Iron ores are especially needed, and increasingly so as the player moves up the tech tree (more on this later). Incidentally, the developers are aware of this, so fields of iron ores occur more often than other fields and in higher densities of resources.
It would be common for the player to draw iron ore from multiple fields of iron ore. This poses the complication of defending those fields from “native” attacks.
Most metal ores do not have any purpose other than being processed. However, iron ore nuggets are used to make concrete.
COPPER ORES:
Copper ores are also needed throughout a playthrough, but in lesser quantities than iron ores at the early and middle stages. At the late stages, they are needed in huge quantities, mainly for the production of the higher-end circuitries.
STONE:
Stone is needed for some early-stage machines, like the first few stone furnaces. However, as soon as these machines become obsolete, the usefulness of stone plummets until the transition to the mid-game, when railway tracks would be made. The tracks need stone, and one of the science packs requires railway tracks – and lots of them. Stone is also needed to eventually make concrete, which in turn is needed for advanced factories and nuclear power.
Incidentally, stone fields are among the rarest and least dense of fields; only fields of uranium ore are rarer. Therefore, the player will need to carefully balance the expenditure of stone.
CRUDE OIL:
Crude oil is needed for late-stage production. Crude oil is eventually processed into fluid chemicals that are needed for the end-game. However, the discovery of crude oil also begins the complications of fluid handling, which would be very different from what the new player has been managing thus far.
URANIUM ORES:
There is no reason to deal with uranium ores until late into a playthrough. Besides, uranium ore mining requires sulfuric acid, which is not available until after the player has found and processed crude oil into other products.
Interestingly, uranium ores will not contribute towards the “R&D” in this game. They will only be used for energy generation and weapons production (more on these later).
WOOD:
Last – and perhaps least – is wood. As mentioned earlier, the player obtains these from cutting down trees. Only the cutting of trees yield wood; destroying them does not yield anything, but rather just wastes their wood. On the other hand, cutting them down is a slow process.
Besides, there are very few uses for wood. Wood is low-grade fuel that does not provide much thermal performance. There are few items that can be fashioned from wood. Even among these items, the most useful is the basic electrical post. (Yet, this post will be useful for players who just want specific electrical coverage.)
RESOURCING – OVERVIEW:
Where the previous passages are for descriptions of the raw resources that can be obtained, the following passages are about the means of extracting them. Factorio’s methods for doing so can be quite complicated, more so than most other games that have multitudes of mineral resources. (The only other game that equals or even surpasses Factorio in terms of complexity and complications is Oxygen Not Included, and that is because of that game’s inclusion of gravity.)
EXTRACTION THROUGH DRILLING:
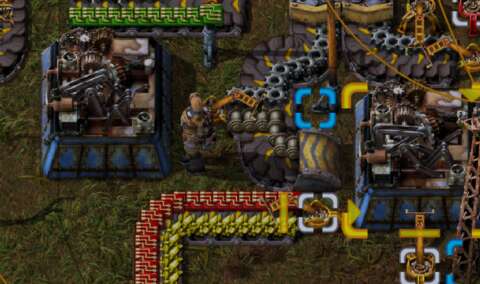
As mentioned earlier, ores are extracted through drills. Conveniently, the drills are automated, including even the basic coal-burning ones. (By the way, these “burner drills” become obsolete very quickly.)
Drills must release their yields as soon as they are produced, however; this is because they have next to no storage capacity. This also means that the player must arrange their conveyor belts carefully so that they have enough space to unload their yields and minimize their idling times. (There will be more on idling times later.)
Another thing that is important to keep in mind is that like inserters, drills place their yields on conveyors at specific sides of a conveyor belt. The player will need splitters in order to reorder the transport lines and thus utilize the carrying capacities of the conveyor lines.
PUMPING OIL:
Pumpjacks extract crude oil from oil wells. The pumpjacks consume considerable electricity, which is perhaps understandable because they are near late-stage assets.
Pumpjacks require piping to put oil into. The oil has to be channeled into a network of piping that eventually leads to refineries, which are among the very few facilities that make direct use of crude oil (in their case, to process them into derivatives).
OIL WELL EFFICIENCY:
Wells of crude oil are theoretically inexhaustible, i.e. crude oil can be continuously pumped from them. However, there is a balancing design: their productivity at yielding the resource.
As more oil is pumped out of the wells, the pumping rate of oil that can be had from the well reduces. Eventually, the rate is reduced to a trickle, barely able to feed a fifth of a refinery.
When this happens, the player might want to consider the pros and cons of trying to eke out more from the oil well, which will require the installation of modules that increase the power consumption and pollution output of the pumpjacks. Alternatively, the player could abandon the diminished wells, which is probably a wiser decision.
UNLIMITED WATER:
Bodies of water are not subjected to the same limitations. Indeed, a small pond can give the same amount of water as a lake. All the player needs is an offshore pump, which is cheap to make (but can only be used for bodies of water).
However, bodies of water impede movement and expansion of the player’s factories. They can be filled with landfills, but this is an irreversible process that may also enable the natives’ forays; more on this later.
PROCESSED RESOURCES – FOREWORD:
As mentioned earlier, raw resources are meant to be converted into processed resources. Processed resources are required for many, many things, both early-stage and advanced.
Generally, the engineer cannot process raw resources, despite the engineer’s ability to craft things on the fly. Apparently, processing technology is not portable in this game’s science fiction.
IRON & COPPER PLATES:
Iron and copper plates will be consumed throughout the gameplay. Indeed, many machines require them to be made in the first place. It is a wise player that would have the engineer carry around several stacks of the plates, if only to produce something on the fly instead of carrying finished items around.
BRICKS:
Bricks are processed from stone. Bricks are needed to make some late-stage facilities, but they are otherwise meant to be used for military defenses, namely being made into walls.
OIL DERIVATIVES:
Oil derivatives are obtained from processing crude oil. There are three types: heavy oil, light oil and petroleum gas. Heavy and light oils are also produced from coal liquefaction.
Of the three, petroleum gas is needed the most, mainly for use in chemical plants for the production of sulfur and plastic. Water and coal are also resources that are needed for these processes. Interestingly though, petroleum gas cannot be directly used as fuel; there are no gas-burning plants in this game.
Heavy oils have little use other than being broken down into light oil and petroleum gas. However, at the late stages, they are needed to make lubricants, which are in turn needed for electric engines and the fastest conveyor belts. (Things that need Lubricants to be made only need them for just one time, i.e. they do not require continuous lubrication – which is fortunately convenient.)
Light oils also have little other use until the late stage. Until then, they are broken down into petroleum gas. When they do have other uses, they are likely to be used for making rocket fuel, which is certainly needed for the end-game of launching a rocket into space.
At the rocket-making stage, the player will need to consider how to balance consumption of light oil between making rockets and breaking them down into petroleum gas. This can be quite challenging, because the proportioning also involves making the piping system that allows for it.
URANIUM-235 & U-238:
Uranium-235 and Uranium-238 are the results of processing uranium ore; they will be called “U-235” and “U-238” for ease of convenience.
Uranium ores are turned into U-238 for most outcomes of the processing cycles. There is a very small chance of U-235 being produced; for better or worse, this is one of otherwise very few luck-dependent designs in the game. It is still enough to cause some frustration, as will be elaborated further shortly.
KOVAREX ENRICHMENT:
To get more U-235 reliably, the player needs to obtain the Kovarex enrichment process, which converts U-238 into U-235 at a slow rate. The same facility that can process uranium ores is used for this process, which is convenient. (The Centrifuge is an expensive building and consumes a lot of electricity, however.)
The main problem with the enrichment process is the mandatory starting cost of having 40 units of U-235. The 40 units are not used up, of course, but they need to be obtained in the first place, which can be very frustrating if the player is unlucky enough not to have obtained enough U-235 despite having processed thousands of units of ores.
INTERMEDIARY RESOURCES – FOREWORD:
Intermediary resources are made from processed resources, but are still too rudimentary for any purpose other than being made into finished goods.
Incidentally, almost all of these resources are solids, and some of them can be made into many things, such as circuitry. The player might want to have the engineer carry some of these around, if only to make full use of the engineer’s completely free crafting service.
COPPER CABLES:
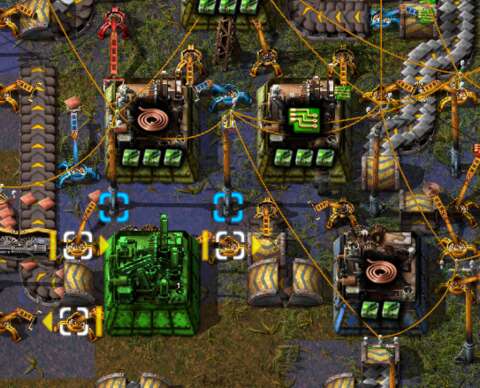
Copper cables are made from copper plates and will be needed extensively throughout the game. Indeed, one of the late-stage manufacturing plans that the player would need to consider is large-scale production of the cables, mainly to feed a manufacturing line for processing units, which are the highest-tier circuitry.
CIRCUITRY:
Speaking of which, circuitries are resources that the player will need in huge amounts. A lot of raw resources will be going into the making of these too.
There are three grades of circuitry. The first grade is needed to make the other two, and the second is needed to make the third. The cost increments from one grade to the next is very steep; having one production line for the third grade alone requires a lot of upstream factories.
STEEL PLATES:
Steel plates are generally needed to make machines and hardware. They are also needed to make railway tracks. Conveniently, making them is simple; the smelter/furnace that makes iron plates can have its products transferred to another smelter/furnace, which makes steel plates from the iron plates.
(In real-life, steel is indeed made from further purifying iron that has been smelted from iron ore.)
There is only one grade of steel, fortunately. Having to deal with multiple grades of steel (as they occur in real life) would have been complicated.
SULFUR:
Despite being a primary element on chemistry charts, sulfur is only obtained after processing petroleum gas and water into it. (Indeed, in real life and in the present day, sulfur rarely exists as a naturally occurring mineral on its own and there are few minerals that can be processed directly into sulfur.)
Sulfur has very few uses among intermediary products. On the other hand, these few uses are very important; it is directly used to make one of the science packs, it is used in explosives (which the player will need for fighting the natives with) and it can be turned into sulfuric acid, which is needed for a number of processes.
SULFURIC ACID:
Speaking of which, sulfuric acid is needed for the extraction of uranium ores. The player will need to transport the acid all the way to the uranium ore mine. Interestingly though, having a long fluid piping for this may be advantageous, because a number of other processes require the acid, namely the manufacturing of the highest grade of circuitry.
LUBRICANTS:
Lubricants have the least uses. They are made from heavy oil, which also has just as few uses. There is no reason to collect lubricants in storage tanks, because they are best used immediately after being made. However, lubricants are needed to make electric engines, which are needed for one of the science packs and some power armor components (more on these later).
GEARS:
Gears are made from iron plates, and have the fewest uses among products made from iron plates. However, they are needed for the production of two of the early-stage science packs.
PIPES:
Among the goods that are made from iron plates, pipes will see the most use, especially from the mid-stages onwards. As mentioned earlier, fluid handling is complicated; more often than not, the player will need to reserve considerable space for fluid channels to prevent mixing or problematic connections, so the player will need a lot of pipes.
ENGINES:
Engines are among the most complicated products to make; they require three ingredients. The electric ones also require three ingredients too, which include regular engines.
The most notable complication about them is that the regular engines cannot be crafted by hand, despite regular engines requiring solid components that the engineer can manually craft. Considering that the engineer can craft even nuclear reactors given enough components, this limitation is a noticeable design quirk.
The developer does have an answer for this, but it is nothing more than an excuse to complicate the gameplay for the sake of “gameplay balance”.
PRODUCTION – OVERVIEW:
Processed resources, intermediary resources and finished goods all require production machines, almost all of which require electricity to function. The player’s factories will be mostly composed of these.
Therefore, the player will need to consider the flow sequence of turning resources into other resources and finished goods, as well as the space that is needed for their layouts.
PRODUCTION MACHINES - FOREWORD:
All production machines require the means to receive input materials and the means to place their outputs. Without the former, the machines will not run and go idle. Without the latter, the machines will fill up their internal storage before going idle. It is up to the player to minimize idling time by having the machines well-fed and having somewhere to receive and accumulate their products for later use.
FURNACES & SMELTERS:
The machines that convert non-uranium ores into usable forms are the first machines that the player would build. As mentioned earlier, the player will want to upgrade quickly to the electrical smelter, which is the most versatile of them despite being the biggest. (Being big does provide more facings for inserters to put stuff into or take stuff from them, however.)
Lower-grade furnaces cannot be upgraded into smelters. Therefore, furnaces that have become obsolete (in the player’s eyes) are very much wasted.
ASSEMBLING MACHINES:
The bulk of production machines will be the versatile assembling machine. This can craft anything that the engineer can craft. Indeed, large numbers of them will be necessary.
There are three grades of the machines; they are mainly differentiated by their colours, for better or worse. (The more advanced grades appear to have more machinery, however.) All grades can handle solid materials, so the player might want to consider downgrading to the first grade when lower output is desired (and there will be times when the player would want this, if only to free up resources for other production lines).
Indeed, a meticulous player is likely to have some spare assembly machines of different grades in the engineer’s inventory, just for the purpose of swapping machines on a whim.
However, the first grade of the assembling machines cannot handle fluids, unlike the next two grades. Speaking of which, when the higher grade machines require fluids, a fluid input port magically appears somewhere on them. The port is always at the center of one of their facings.
Conveniently, lower-grade assembling machines can be upgraded into higher-grade ones, which have more slots for modules in addition to higher rate of output. However, downgrades cannot happen, so the player will want to be careful about the ratios of grades on hand and at work, in order to minimize idling time.
OIL REFINERIES:
Acquiring oil refineries is the player’s entry into handling liquid resources. Despite their name, Oil Refineries can also perform coal liquefaction, though the products of the refineries are still liquids and gases.
Oil refineries are huge and, as mentioned earlier, have fixed intakes and exits. Using them while minimizing the use of piping – especially aboveground piping – can be quite tricky. They also produce much more pollution than most other machines.
COAL LIQUEFACTION REQUIRES HEAVY OIL:
Coal liquefaction has a significant starting cost: heavy oil. The player’s first units of heavy oil will have to come from refineries that are refining crude oil, so coal liquefaction cannot be the beginning of fluid resourcing operations.
Furthermore, coal liquefaction produces heavy oil, in higher quantity than it consumes. If the player connects the output of the refinery back to the input, there would be a build-up that has to be bled off, thus requiring more complex downstream fluid processing.
CHEMICAL PLANTS:
Chemical plants make use of the products from the refineries, and from each other. Indeed, it would be a wise player that places chemical plants close to the refineries to minimize the piping that is used.
However, chemical plants also consume and produce solids, thus requiring the service of inserters. Coupled with the need to handle the fluids that go into and out of them, this can make the logistics for them to be quite a headache. Fortunately, there is only one type of chemical plant, so the player could pluck them up and place them elsewhere quite readily. (However, anal-retentive players might worry about wasting the fluids that were in the plants.)
CENTRIFUGES:
Centrifuges are needed to process uranium ores into the aforementioned uranium isotopes, and to process those isotopes further. They are also needed to reprocess spent nuclear fuel into U-238.
Centrifuges consume a lot of power, even with efficiency modules; they also produce a lot of pollution. Yet, they are very much needed, if the player intends to make use of uranium for both electricity generation and military purposes.
BONUS PRODUCTION:
Certain research outcomes and the installation of productivity modules (more on these later) introduce the “bonus production” meter under the usual progress meter for their processes. Every time that a machine that has “bonus production” completes a production cycle, the meter fills. When it is fully filled, the machine produces a unit of product for free.
This is a major incentive to have those research options acquired and those modules installed. Of course, there are setbacks, as will be described later, but the game world has ultimately finite resources.
MODULES – OVERVIEW:
"Modules” have been mentioned more than a few times already. These are components that can be installed into machines to improve some aspect of their performance.
Some of these modules have obvious and immediate drawbacks, but all of them share the same caveat: the modules require resources to be made, and these resources could have gone into something else. Furthermore, higher grades of modules require much more resources than lower-grade ones. These resources include a sizable number of the lower-grade modules themselves.
PRODUCTIVITY MODULES:
One of the improvements that the player can install into machines is the productivity module. This increases the rate of bonus production, but at the cost of greatly increasing energy consumption. The player would have to weigh this against the consumption of fuel-generating resources, namely coal and uranium ore. Furthermore, increasing energy consumption also increases the pollution output of the machines, which can lead to greater rates of conflicts with the “natives”.
Most importantly, productivity modules cannot be installed into every machine that has slots for modules. They can only be used in assembly machines and chemical plants, and only when they produce intermediary products.
Fortunately though, science packs do count as intermediary products, so productivity modules can be used to generate a few packs for free in order to reduce the amount of resources that go into making them.
SPEED MODULES:
Speed modules accelerate the process cycle of machines, in return for increased electricity consumption and higher pollution output. In certain combinations, speed modules can give a machine higher output than productivity modules could (though without “free” products of course).
EFFICIENCY MODULES:
Efficiency modules reduce the electricity consumption and pollution output of machines. These modules have no immediate setbacks. Indeed, some players may favour them, if only to minimize the consumption of fuel for electricity generation and to minimize pollution.
The other two types of modules have uses beyond being installed in machines; the first-grade of speed modules are needed for the end-game activity of making rocket control units, whereas the first-grade of productivity modules are needed for one of the science packs.
Efficiency modules are used as input materials for the creation of the Spidertron, but not production processes that have to be repeated. Therefore, the player will want to be careful about how many of these to produce.
ELECTRICITY – OVERVIEW (AGAIN):
Some machines and hardware appear to be self-powered, for gameplay convenience. For example, the early-stage stone furnaces somehow do not need any stokers or igniters; feeding them fuel immediately lights them up if they have ore to smelt. The conveyor belts are also significant examples.
However, everything else needs electricity, without which they do not function. Thus, the player needs to set up the infrastructure that is needed for the generation and delivery of electricity.
STEAM AS WORKING FLUIDS:
As mentioned earlier, generation of electricity can thermomechanical, i.e. it uses steam as working fluids. However, there are two types of steam: the 150-degree Celsius steam that is produced by fuel-burning boilers, and the 500-degree steam that is generated by heat exchangers after they have been heated by nuclear reactors.
Despite both being steam, they are considered as different fluids for the purpose of fluid handling. They do not mix, much less exchange temperatures.
That said, thanks to the unbelievably perfect insulation in the player character’s technologies, either steam can be channeled anywhere and stored indefinitely. Indeed, it might be wise to collect them, in case of any disruption of fuel supplies.
Whichever the case, the steam must go into steam-consuming machines to generate electricity.
There are some processes that do require steam, namely coal liquefaction. In such cases, which steam that is used does not appear to matter, so the wise player would likely use the lower-temperature steam for this purpose. (Conveniently, the Boiler could consume some of the coal that would be fed into the Oil Refinery anyway.)
STEAM ENGINES & TURBINES:
Steam engines are meant to be used together with boilers in the early- to mid-stages of a playthrough. They can only use 150-degree steam efficiently; giving them 500-degree steam does not produce better performance and would be a waste.
Eventually, these would be rendered obsolete, except in cases where players prefer that outposts have their own power sources.
Steam turbines can consume both types of steam, but 150-degree steam gives them lackluster performance. Due to this limitation, steam turbines are best given 500-degree steam, which, incidentally, must come from heat-exchangers and thus from nuclear reactors.
As mentioned earlier, both steam engines and steam turbines automatically adjust their steam consumption to give exactly the amount of electricity that is needed for the network that they are supplying with electricity. This is very convenient, especially when used together with storage tanks (more on these later).
BROWN-OUTS:
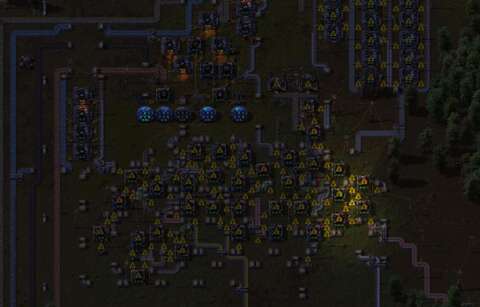
When the steam-consuming machines could not provide enough electricity – either because there is not enough steam or there are not enough of them – brown-outs happen. Other machines in the grid that is being served noticeably slow down, thus affecting their output and resource consumption.
ELECTRICITY WASTAGE DURING IDLING:
Some machines do not consume electricity when they are not running. Examples include the tech labs. However, most machines, especially the inserters, will consume electricity even when they are not running; this is denoted through their “minimum consumption” statistics.
Therefore, it is in the player’s interest to minimize idle times as much as possible, if only to reduce the amount of fuel that is wasted. This is easier said than done, however, even with the automation hardware that can be used to control the machines. (There will be more on automation controls later.)
COMPLEXITY OF NUCLEAR POWER:
Boilers and steam engines are relatively simple to use. Boilers can keep steam within them and will replenish their reserves automatically, and steam engines consume whichever amount that is needed to utilize their generation capacity.
Nuclear reactors are more complicated in operation. This is mainly due to their lack of built-in methods of controlling fuel consumption. Heat exchangers also come with their own complications.
Firstly, nuclear reactors need to be heated up to at least 500 degrees Celsius before they are any useful. Secondly, heat conduits have to be connected between the reactors and heat exchangers. Thirdly, the conduits and heat exchangers have to be heated up to 500 degrees too, and they will leech heat from the nuclear reactors. Fourth, the heat exchangers only produce steam after reaching 500 degrees themselves.
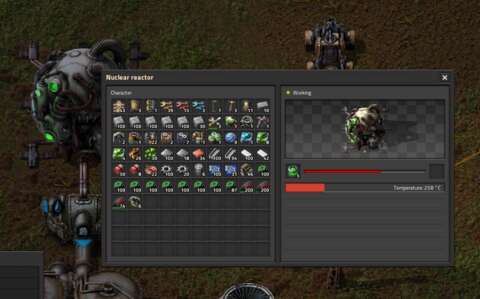
If there is any simplification to be had, it is that the entire system will maintain their temperatures at a minimum of 500 degrees when they reach this temperature. That said, conduits and exchangers can only be heated up to 500 degrees anyway. Any further heating only affects the nuclear reactors. The reactors themselves can only be heated to 999 degrees; any further heating is wasted.
In other words, heat itself is actually a resource that is being contained within the system. Any heat in excess of 500 degrees is bled off to make 500 degrees steam, and if there is not enough storage for the steam, the nuclear reactor stores the heat instead, at least until it reaches its maximum temperature.
That said, the temperature gauge of the reactor is not for nothing. If the reactor is destroyed while its temperature is over 900 degrees, it detonates like a nuclear bomb. If there are other similarly hot reactors nearby, they will be destroyed and detonate in the same way too. Obviously, this will be disastrous.
REACTOR ADJACENCY:
Speaking of nearby reactors, reactors that are directly adjacent to each other, i.e. their heating terminals are directly connected to each other along one facing, will give each other bonuses to heat build-ups. This effectively ekes out more heat from nuclear fuel. However, nuclear reactors are huge machines, causing space concerns to be quite significant when trying to have optimal reactor layouts. Furthermore, loading the reactors with nuclear fuel can be a tad difficult with intricate layouts.
SOLAR POWER:
Where most video games are not realistic about the use of solar power, Factorio somewhat is.
At the mid-stages of a playthrough, the player has the choice of building solar panels. These can produce electricity during the day, and rather freely too. However, they do not work during the night-time, which means that there have to be accumulators that can collect energy from the panels. Furthermore, there must be enough solar panels such a surplus is generated during the daytime so that the batteries can be charged.
Still, not having to deal with fuel is convenient. Furthermore, solar power does not produce pollution.
However, the main drawback of solar power is the power output; it is rather low, especially when compared to nuclear systems. In order to provide even one megawatt of power, the field of panels have to be very extensive and the number of batteries that are needed are just as considerable.
All that space and the materials to make the solar power systems could have gone into something else. Nonetheless, there are players that favor them, if only because implementing them is much easier than dealing with fuel-resourcing and pollution.
CONTAINERS – OVERVIEW:
Although the products of the player’s factories should ideally be consumed as they are made in order to progress towards the endgame, it may be prudent to hold some products in containers. Conveyors and piping originating from the containers can then be used to redistribute the products. Alternatively, the player could just have the engineer pluck the products for one’s own use, or for manual distribution, if this is more reliable and expedient than trying to set up some automated deliveries (as rare as this may seem).
CRATES:
Crates are the most common containers. Obviously, crates can only hold solid things. The types of crates are determined by the materials from which they are made from. Materials that require more processing result in crates that are tougher and have higher capacities. Curiously, all types of crates are of the same sizes, even though they have different storage capacities; again, this is likely an expression of the sci-fi trope of pocket dimensions.
STORAGE TANKS:
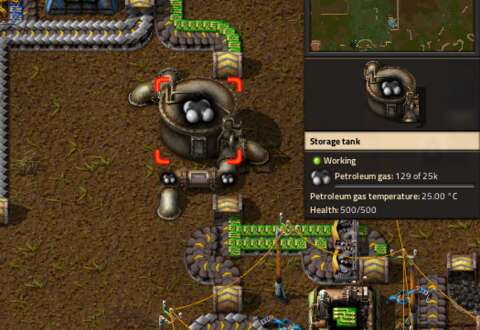
Storage tanks are meant for fluids. They are quite large, but they have eight connectors that make them incredibly versatile for the purpose of fluid handling. Indeed, it is a wise player that would plan fluid systems with storage tanks included in the layouts.
TRAIN WAGONS:
The main purpose of trains is to ferry goods around. For this purpose, they have wagons that can carry goods. There is a wagon for solid products, and a fluid wagon for fluids; both have considerable capacities. However, as mentioned earlier, the player will need to carefully design the stations that the trains stop at, so that resources can be loaded onto the correct wagons or offloaded from them.
VEHICLE TRUNKS:
Vehicles can have stuff stored in their trunks too. Even the least of the vehicles have incredibly spacious inventory; the vehicles have the same pocket dimensions as the engineer does. This is very useful if the player intends to pack everything up and migrate elsewhere.
DESTRUCTION OF VEHICLES AND CONTAINERS DESTROYS CONTENTS:
If vehicles or containers are destroyed, their contents are gone. In particular, if the player has the habit of driving the car into bases, there is the possibility of accidental collisions with containers.
RESEARCH AND DEVELOPMENT - OVERVIEW:
Apparently, the crash of the space ship also destroyed the technical database that the engineer depends on for making things, including the rocket that is needed to go into space. The database has to be made from scratch; considering the incredibly sci-fi tech that the engineer is using, this is no simple matter.
To this end, there are the tech labs, which presumably contain automated systems and pocket dimensions within which to perform experiments that yield the necessary data to form the database. These tech labs require resources in the form of “science packs”.
This is perhaps where Factorio differs greatly from most other resource management and base-building titles, in that its video-game “R&D” actually require material input.
(That said, it is unclear where the data goes after the tech labs have produced it. Presumably, they are kept in the tech labs, but the player could remove all extant tech labs without a problem. This – and some of the tutorial scenarios - suggests that the database is somewhere on the engineer’s person, though why the engineer did not keep the database in the suit in the first place boggles the mind.)
“SCIENCE PACKS”:
Science packs are packages that are made from the products of the player’s factories. There are seven grades of these; the first grade can be made quite readily at the start of the game, and the player should do so to gain more efficient and versatile techs as soon as possible.
The later grades of science packs are exponentially more complicated and demanding to make. For example, the production science pack requires entire electric smelters and many railway tracks to be made. Indeed, a single production line for this science pack alone requires more than a dozen smelters to provide the materials that the factories would use.
Curiously, the different science packs are made at different rates. For example, the chemical science pack, which is the third grade, takes the longest to be made, discounting the last grade.
Incidentally, the tech labs consume every type of science pack at equal rates, so the player will have to balance the overall production rates of the science packs so that the tech labs have enough at all times. This is not easy to achieve.
EITHER PRODUCTION OR UTILITY PACKS:
Some late-stage research options require either production or utility science packs. This can lead to disparities in the consumption rates of these science packs, which further complicate the logistics network that feed the tech labs.
HANDING ALONG SCIENCE PACKS:
Alone among many machines, tech labs have a special interaction with inserters. Inserters can transfer science packs from one tech lab to another, which greatly ease the complexity of feeding the labs with science packs.
MILITARY SCIENCE PACKS NOT NEEDED FOR END-GAME BUT STILL NEEDED ANYWAY:
None of the tech tree nodes that eventually lead to the space rocket silo require military science packs. However, the player will need to make these anyway, mainly to unlock the means of fending off or eliminating the natives.
TECH TREE:
The tech tree is visible to the player from the get-go. The tech tree is composed of nodes that represent the “research” options that can be pursued.
Each node shows the types of science packs that are needed for it, and also the number of science packs of each type that is needed. The second piece of information can be a difficult for new players to parse, but that is indeed what it means.
Anyway, the node also shows the items that become available for production. The tooltips for these items also show what they do and what ingredients go into making them. This is very convenient, especially for a new player that wishes to plan ahead.
Taken as a whole, the tech tree would seem like a convoluted mess of branches and nodes. Fortunately, the user interface for the tech tree only shows pertinent branches, which is useful if the player is making mid-term plans.
FURTHER AUTOMATION:
If the player’s factory complex is compact and is intended to stay so, the player could manually handle certain things, like loading science packs into tech labs. However, if the factory complexes are massive, the player will need to make use of further automation. This is implemented through the use of circuit networks, logic devices like automated chests and math combinators. These are especially of use to players who are versed in programming.
However, there is a major requirement that has to be satisfied if they are to be used: they take up space, just like any other machines. For example, combinators are large machines that are placed on the ground. This can complicate layout designs.
Some automation hardware also requires support that is provided by the player’s other assets. For example, the red and green wires that carry signals have to be strung via the same poles that channel electricity.
These devices also consume electricity, though this is a more acceptable cost than the aforementioned occupation of space.
ENGINEER’S EQUIPMENT – OVERVIEW:
The engineer cannot just stay around in the factories managing things. The Engineer has to scout for new fields of resources and build the infrastructure on-site to exploit them. The distances that have to be travelled can be significant. Most importantly, the engineer has to destroy nests that threaten the factories, or are in the way of expansions.
For this purpose, the engineer has a loadout that can be filled with equipment. Incidentally, the pieces of equipment are notably expensive to make, more so than the factories that the engineer can build.
GUNS:
Guns are, of course, the engineer’s main means of eliminating the “natives”.
The engineer starts with a handgun, but this quickly becomes inadequate. The submachinegun (SMG) is an upgrade over the handgun, and will be the engineer’s primary weapon until the mid-game.
There are upgrades throughout the tech tree that improves the damage output and firing rate of the SMG, but these upgrades are mainly meant for automated defenses that use bullets. The SMG becomes near-obsolete from the mid-stage onwards, when the rocket launcher and personal laser defense becomes available (more on this later).
Speaking of the rocket launcher, the player begins with direct-hitting rockets, which while powerful, are inadequate against the swarms that would be coming at the engineer. Fortunately, the regular rockets can be upgraded to carry high-explosive payloads. These are what the player needs for destroying nests throughout most of the mid-stage.
The rocket launcher is heaviest weapon that the engineer can wield. This is silly enough, so there are no other ridiculous heavy weapons like hand-held heavy or rotary machine guns or very sci-fi weaponry like plasma cannons.
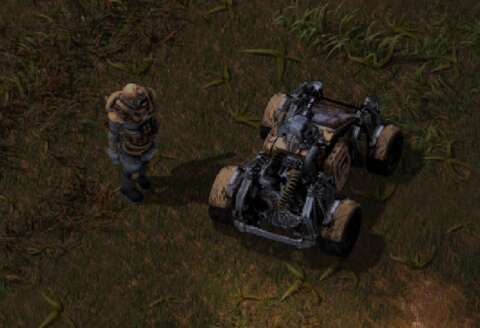
AMMUNITION:
All guns need ammunition. Ammunition can be made with assembly machines, which will consume metal plates in the case of bullets, circuitry and explosives in the case of rockets and fuel in the case of flamethrower ammo.
Incidentally, some of the guns share the same ammunition as those that is used by some turrets. Military science packs also require bullet magazines.
Therefore, the player will need to consider when to pilfer some of the ammo that is being made by the factories without affecting the supply network for defenses and the making of military science packs.
FIRING GUNS SLOW DOWN THE ENGINEER:
The main setback of using guns is that firing them slows down the engineer. Many of the “natives” happen to move much faster than the engineer when the engineer is firing guns; it would not take much to overwhelm the engineer if the damage output of the guns could not eliminate the bugs before they mob the player character.
AIM-ASSIST:
Fortunately, there are a few aids when using guns. When shooting at the “natives”, the player only needs to point the mouse cursor in their general direction, relative to the position of the engineer. The engineer will automatically shoot at the “natives” in that direction, starting with the closest one.
HOMING ROCKETS:
All rockets fly towards their intended target; they will never miss. The rockets can even turn 180 degrees, if they overshot their target.
However, the time that has elapsed from their launch to their impact is a different matter. In the case of explosive rockets, they may detonate when there are not many other enemies around the target, or even explode when the target is too close to the player character. Therefore, the player will want to time the launch of the rockets.
(Players who have experience in twin-stick shoot-‘em-ups will have a considerable advantage here.)
FLAMETHROWERS:
The flamethrowers in this game indeed function similarly like real flamethrowers. They hose liquid fuel outwards, with the fuel already partially ignited. Anything doused with the fuel is set on fire, and fuel that lands on the ground sets that ground ablaze, forming a hazard that would also set alight anything that passes through it.
This is obviously very useful for dealing with the “natives”. Indeed, there are upgrades that can greatly increase the damage that can be dealt, such that the flames can end entire nests in a few seconds.
However, for the purpose of the engineer’s flamethrower, it has to be loaded with specially-made ammo. The turret versions have more options for the fuel that they use.
PERSONAL LASER DEFENSE:
Eventually, bullets, burning fuel and rockets no longer suffice; there are just too many “natives” to handle, especially when the player eventually encounters the extensive nests that occur quite some distance away from the starting sectors. Firing guns allow the natives to swarm the player character, and eventually they will inflict enough cumulative damage to kill the engineer or force the player to withdraw. (Withdrawing saves the engineer, of course, but also gives time for nests to spawn new batches of “natives”.)
Thus, there is the personal laser defense. These are miniaturized laser turrets that are mounted on the engineer’s powered suits (which have to be unlocked and made prior to this, by the way). They can independently track and shoot at incoming “natives” without causing the engineer to slow down. Indeed, with enough of them and some deft footwork, the engineer can move into sizable nests and the laser defenses would eliminate everything.
However, personal laser defenses also mark the beginning of managing the power reserves of the engineer’s suit. This will be described shortly.
POWERED SUITS:
All of the engineer’s suits presumably have basic and inexhaustible power supplies built in, but these are enough for just basic movement. For any greater performance and versatility, the suits require power supplies and internal space for the installation of devices, including personal laser defenses.
The starting suit and the next suit of armor do not have means for either. The third suit and onwards do, however, and in increasing capacity.
The final suit, in particular, can have a lot of devices installed - enough for the player character to deal with most hives except the ones with fifty or more nests.
Conveniently, a suit’s capacity to have devices installed is represented as a grid. The player only needs to fit the icons for the devices into the grid.
POWER SOURCES AND BATTERIES:
The most important devices to be installed in suits are power sources. There are only two types of power sources for suits: personal solar cells, and internal fusion reactors. Solar cells only work during daytime, however, thus requiring the use of personal batteries.
Conveniently, internal fusion reactors do not require fuel whatsoever; this is a truly sci-fi doohickey. Anyway, the player will still need batteries anyway, if only to capture the energy that is being generated when the engineer is not engaging in combat. Furthermore, the reactors are the largest devices that can be installed into suits.
Indeed, batteries will be a major element of the suit load-outs. These are relatively small devices anyway.
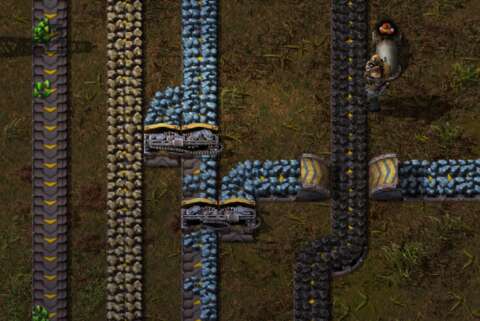
SHIELDS:
Factorio has Halo-style shields. When equipped on the engineer, these absorb all incurred damage until they are exhausted. They can recharge, but only after the engineer has not been taking any hits for a few seconds.
TEMPORARY DRONES & GRENADES:
Temporary drones and grenades are lumped under the category of “capsules”. These are consumables that can be used separately from guns and personal laser defenses. Indeed, it is possible for a deft player to use all three forms of hardware simultaneously.
Temporary drones follow the engineer closely when they are deployed; these act a lot like the orbitals in shoot-‘em-up titles. They have limited life-spans, however, and will eventually deactivate; the player needs to expend more drone capsules to spawn new drones.
Grenades are thrown explosives. They have uncomfortably short ranges, but grenades can be tossed as rapidly as the player can press the button to do so, so their potential damage output is considerable.
ATOMIC MISSILES:
The player will eventually come across the massive hives. These are the ones that have been in the playthrough since the start. By the time when they are encountered, they would have grown extensively; the hives often have more than fifty nests. The amount of “natives” that they spawn is overwhelming, and the player will lose a battle of attrition. Building a base near them is also a no-no, because their punitive assaults are outright onslaughts.
This is when atomic missiles become necessary. These are very expensive ordnance; in particular, U-235 will be needed in large quantities, more so than any other uses for U-235. The nukes also require rocket control units, which are end-game resources.
Therefore, the player will have to be efficient with their use. Conveniently, the massive hives extend across areas that are almost circular or ovoid, so landing a nuke in the middle of their masses can either eliminate the hives outright or leave so few surviving nests that mop-up would be easy.
BASE DEFENSES - OVERVIEW:
Although offense is the best defense in the gameplay, not everyone who plays this game is deft at war-waging. Thus, there are base defenses, which expend ammunition or electricity to fend off attacks by the natives.
To meticulous players, this might not be the most efficient use of resources, but sometimes it is more convenient to just have the automated defenses deal with angry “natives” instead.
WALLS
Walls are the only passive defense that is available. The “natives” do not actively attack concrete walls, unless the shortest and quickest route to whatever that they want to thrash has the walls in the way. That said, the walls can take considerable damage, and there can only be so many “natives” that can attack any stretch of wall at once. The player can also stack walls in consecutive layers, thus thickening the obstacles that the enemies have to get through.
Walls happen to be needed in the production of military science packs too, so the player will be making these anyway.
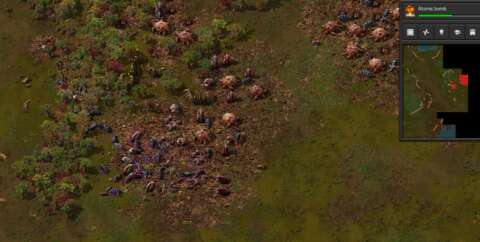
GUN TURRETS:
The most basic of defenses are the turrets with massive machine guns that fire bullets. These do not require electricity at all; they just need bullets. Thus, the player could ostensibly carry some of these around and place them close to hives that the player intend to clear, if only to have some place to fall back to if the swarms that respond are too overwhelming.
Interestingly, the gun turrets remain viable throughout the game, due to upgrades that can improve the firing rate and damage per round of bullet-shooting assets. Bullets can also be upgraded to uranium-tipped ones, thus maintaining competitive damage output.
FLAMETHROWER TURRETS:
Flamethrower turrets can use any of the hydrocarbon liquids as fuel, but they need piping to feed them with it. Flamethrower turrets can hurl burning fuel over considerable distances, but the fuel takes some time to reach the target destination. Thus, they must be used together with concrete walls (which are immune to the burning fuel, by the way).
LASER TURRETS:
Laser turrets do not need ammunition, but they do consume electricity. They can cause spikes in electricity usage, which in turn necessitate the inclusion of spare capacity at electricity generation.
Laser turrets have longer range than gun turrets, and certainly much longer range than personal laser defenses. This makes them quite ideal in the late-stages, especially if the player has opted for nuclear power and extensive storage capacity for 500-degree steam.
ARTILLERY EMPLACEMENTS:
Offense may be the best defense, but defense can also be a great form of offense too. This inane statement is made possible via the use of artillery, which is a near end-game tech option.
Artillery emplacements have incredible range – enough to pound hives from afar. Incidentally, they always prioritize nests over other targets, which further reinforce the impression that they are intended as an aggressive form of defence.
Artillery cannons require artillery shells, however. These are among the most expensive ammo to make (though they are still cheaper than atomic missiles). Still, a single hit from an artillery shell outright destroys a nest.
Artillery cannons have minimum ranges, however. Incidentally, hitting a hive will trigger reprisal attacks, and artillery cannons are generally terrible against moving targets (whom they will not attack anyway if there are still nests within range). Therefore, the cannons have to be supported with other closer-ranged defenses.
ARTILLERY WAGONS:
Trains generally do not have any defenses; they must rely on their speed to get out of the way of angry “natives”, or through them if the trains have enough momentum to simply squish the bugs.
Unlocking artillery emplacements also unlocks artillery wagons. These are intended to carry artillery shells for the purpose of restocking emplacements. However, the wagons themselves also have cannons, which draw their ammo from the same stockpile that the wagon is carrying. Thus, it is possible to have literal artillery trains that can wipe out encroaching hives while they travel their routes.
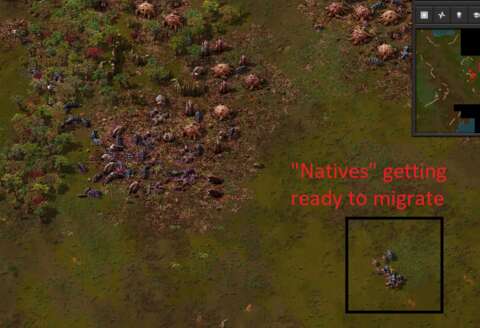
VEHICLES – OVERVIEW:
Even with powered armor and exoskeleton devices, the engineer still moves too slowly on foot to get to where one is needed. Furthermore, during combat, armor only reduces damage, and shields will not stave off the onslaught of the “natives” for long.
To facilitate travel and to give the player character an ablative layer of protection, there are vehicles.
KEEPING VEHICLES IN THE POCKET (DIMENSION):
Like any other item that the player can use, vehicles can be put inside the engineer’s inventory. These appear as items of their own and cannot be stacked with other vehicles of the same kind, however. Still, this is useful, if the player intends to have the engineer go on foot for a while, especially when assaulting multiple hives that are close to each other in very rough terrain.
There is one caveat: although ammunition that has been loaded into the vehicles’ weapons stay inside them, anything in their trunks are transferred to the player character’s inventory. This means that the player cannot bring the vehicles in and out of inventory without forgoing the use of their storage space.
PERSONAL DEVICES STILL ACTIVE:
The engineer cannot use any hand-held weapons while in a vehicle; the engineer must use the vehicle’s own weapons. However, if the engineer has personal devices installed in one’s suit, the devices are still operational when the engineer is in a vehicle. Usable consumables like grenades and drone-deploying devices are usable too.
Perhaps most importantly, personal laser defenses still function. The only exception is personal shielding on the engineer’s person; the protection from this device this is not extended to the vehicle.
THE CAR:
The car is the first vehicle that the player can get. The only vehicle that is faster is the train, but of course the train has to follow tracks and the car does not. The car is also armed with the fastest-firing machinegun in the game.
However, the car is not very tough, and certainly won’t survive any combat that occurs in the mid-stage and beyond. Still, it has its use throughout the game, if only because of its speed. Only one other vehicle can overmatch its utility, and that is only so if the map happens to have very rough terrain.
TANK:
The tank is meant to assault hives in the mid-stages of a playthrough. It is especially useful if the player does not have skills that were learned from playing shoot-‘em-up or twin-stick shooter titles.
As is typical of a tank, it is meant for straight-up fights. It has a machinegun, a flamethrower and a cannon that is unique to this vehicle. Indeed, tank shells have to be specially crafted for this weapon; it does not share the munition as artillery turrets and wagons.
The tank will not be doing much evasion, due to its slowness; the most that it can do is either backpedal, or charge straight ahead to squish anything in front of it. Indeed, it is more than likely that the tank would be mobbed. It can survive mid-stage hives and attack waves and can be repaired, but late-stage hives would be too much for a tank on its own.
The tank does not have the speed for exploration work; the car is better for that. Therefore, the tank is best kept inside the player character’s inventory until it is needed.
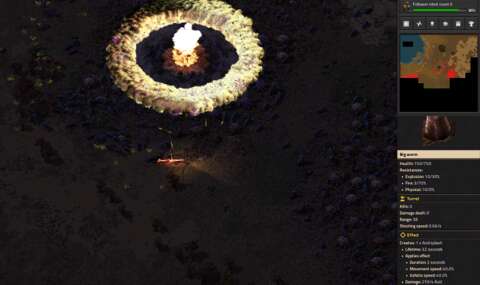
CAR & TANK HAVE POSITION-RELATIVE CONTROLS:
For better or worse, the car and the tank have movement controls that are based on their facing, and not the player’s perspective. This can take a while to get used to, because the last time that this control scheme was used for a game with a near top-down camera was way back in the 1990s; not even Brigador used this control scheme, at least not by default. Fortunately, familiarity eventually leads to better skill at handling the awkward controls.
SPIDERTRON:
The Spidertron is the last vehicle to be unlocked. Indeed, it was only implemented in the gameplay at the official release of the game (though the developers would reveal that it had been in testing for a while).
The Spidertron is very expensive to make, and one of its component is a raw fish, for whatever reason. (Speculation among fans suggest that it is used for the “brain” of the spidertron, but this is really far-fetched.) However, it may very well be worth the cost.
The Spidertron has its own control scheme, which is similar to that of the engineer’s. This means that the Spidertron is the easiest vehicle to control. There is still some delay in making complete 180-degree changes in movement directions because it needs to stop its forward-reaching legs, but it can do such turn-arounds far better than the tank and the car.
Most importantly, the Spidertron can move past just about anything except wide bodies of water. This is incredibly useful for moving past the player’s own factories, especially if the player has opted for dense layouts. The Spidertron is also not stopped by attacking natives, though it can still be damaged. Furthermore, the Spidertron does not need any fuel.
SPIDERTRON LOAD-OUT:
The Spidertron also has a device grid, similar in capacity to that of the first grade of powered armor. The player can kit out the Spidertron for efficient exploration, or kit it out for combat; this is doable thanks to the Spidertron having a trunk of its own, though the capacity for this is noticeably smaller than those of other vehicles.
MAP VIEW MODE:
The camera is pegged to the player character’s position, so the player cannot see anything further away, at least not immediately. The engineer’s suit has a built-in radar that can reveal a large area around the engineer. This is good enough for when the factories are small, but not for when they get big or when the player needs faraway outposts.
For the purpose of keeping track of outposts or massive factory complexes, there is the map view mode. This view mode shows the player’s factories and the terrain around them.
However, there is a pervasive translucent fog of war throughout the world map. This fog is lifted by the player character’s scanner, but the scanner can only reach a limited distance. Anything in the fog will not have their details updated in real-time, unless they are within the engineer’s scanner range or the range of radars (more on these shortly).
This lack of updates also extends to outposts or small complexes that have come under attack by the “natives”. The player does get warning notices that they are being attacked, but the player would likely only be able to survey the damage inflicted after the player character has arrived there.
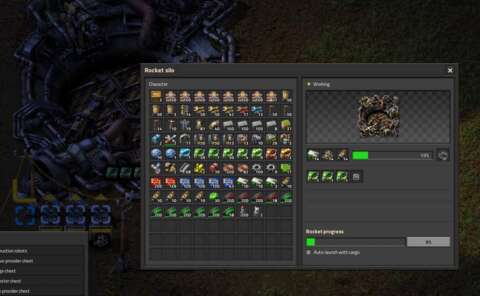
RADARS:
Radars present an option for keeping an eye on things when the engineer is away. Incidentally, radars are quite cheap and easy to build, despite being seemingly sophisticated devices.
Depending on the player’s playstyle, there may or may not be a need for radars throughout the game. Players who prefer compact factories might not need radars at all; apportioning some time to punitive patrols to destroy any encroaching nests is sufficient.
For players who wish to have massive factories for the purpose of getting achievements about high rates of production or for speed-runs, these will be necessary because patrolling the outskirts of the massive factories will cost a lot of time.
However, radars have a major drawback; they consume a lot of electricity, and they cannot have modules installed in them to lessen their consumption. Indeed, if the player relies on radar to reveal parts of the map, the costs of doing so only increase as the player’s factory complexes expand and grow.
THE “NATIVES” – OVERVIEW:
As mentioned already, the “natives” are native lifeforms and they happen to be giant bugs that can tear humans apart.
They will immediately recognize the engineer as a threat to their existence. They do not like the pollution that the player’s factories are pumping out. They want to proliferate all over the world, as is expected of lifeforms with proclivities towards breeding.
Gameplay-wise, the player will have to fight them, sooner or later. There is no place for pacifism. Indeed, there is no achievement for not having killed a single “native” in a playthrough.
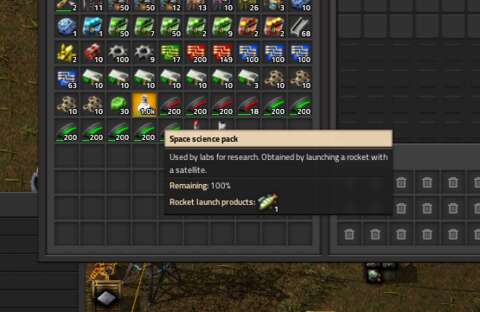
NESTS:
The nests are the main source of the bugs’ capabilities. The nests produce the “natives” that go after the player’s holdings or expand the coverage of their reach. The nests produce bugs automatically and for free, so the player will always lose a war of attrition if the player gets suckered into such a conflict.
Nests are also quite tough. They can be difficult to destroy in the early stages of a playthrough, before the player has obtained weaponry upgrades that can better deal with them. Thus, the engineer would have to be well-equipped in order to eliminate the nests that are closest to the starting area. Until then, the player needs to hold the “natives” back with base defenses.
WORMS:
Where the other species among the “natives” could not reach over land, the worms can. The player may even come across small infestations of worms but with no nests around, at least until later.
Anyway, worms act as static defenses for the natives. They can launch long-ranged acid spittle, with the biggest ones being capable of spitting across incredible distances. They also lead with their aim, so the player might not want to be predictable with the movements of the player character. Worms are also very tough.
SPITTERS:
Spitters look like wood lice. They have short range, but there are often a lot of them such that when one of them is in range, many others would be. It would not take long for a bunch of spitters to melt something down, so the player will want to maintain distance between them and the player character.
ACID SPIT:
The main danger posed by spitters and worms are the secondary effects of their spit. They are applied through direct hits, or through the patches of slime that are created wherever the spit lands.
If the player character and any vehicle that is being driven is hit with spit or moves onto spit on the ground, the player character and/or vehicle is entangled in sticky acid. The acid inflicts damage over time, more rapidly if the player character remains over the spit on the ground.
More importantly, the player character is slowed down. The slow-down effect is greater if more spit gets onto the player character. This slow-down can doom the player character to being mobbed by the “natives” if the player character could not escape before being overwhelmed.
Spitters and worms can inundate an area with spit, which can complicate attempts at making use of the player character’s mobility. The spit eventually dissipates, however.
BITERS:
Biters are the fastest of the natives. As their name suggests, they attack in melee. Peculiarly, the bigger ones are faster than the smaller ones.
Gameplay-wise, they are there to mob whatever that they intend to kill such that the latter cannot get away. Indeed, they will be the death of the player character if they manage to mob the engineer.
ATTACK ANIMATIONS HALTING MOVEMENT:
Spitters and biters have animations for their attacks that require them to stay where they are as they happen. This gives split seconds for the player character to get away.
However, in the case of the biters’ animations, their animations appear to be accelerated, especially for the bigger ones. Therefore, the player will not want to tarry in kiting the bugs around.
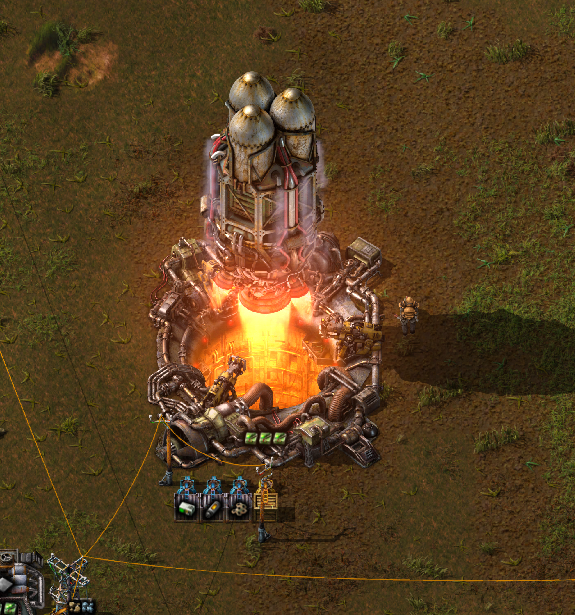
MIGRATIONS AND EXPANSIONS:
The hives grow bigger and/or numerous over time. Every hour or so, at least at the default settings for the proliferation of the “natives”, a hive may decide to do one of two things: grow more nests, or make a migration group for a new hive.
In both cases, biters and spitters at the nests appear to congregate somewhere instead of milling about the nests. If the objective is to grow the hive, they congregate at the borders of the hive. If they intend to migrate, their rendezvous point is often someplace away from the hive, but not always at the destination.
In some cases, different hives may contribute individuals to the same group, if they are close enough to each other.
After reaching the desired mass (again, it is not clear to the player how many individuals there would be), the group then moves over to the target spot. They then mill about that spot, and eventually nests appear among them. The individuals that went on the expansions or migrations will be quickly replaced with others from the existing nests.
If the migrating groups happen to come across sectors that contain any of the player’s assets that happen to produce pollution, they will trash those assets before settling down.
Groups that grow existing nests are the main reason why the hives that have been in the game world since the beginning are so onerous. More often than not, these old hives will have to be dealt with nukes.
PROVOCATION BY POLLUTION:
The “natives” really, really do not like the pollution that the player’s factories are pumping out.
Any hives in sectors that are being affected by pollution will completely absorb the pollution in those sectors, thus preventing the spread of pollution to other sectors behind them. However, this is not a good thing – not even a mixed blessing.
The amount of pollution that a hive has absorbed will be used as “currency” to spawn an assault wave. The player can see the attack group congregating at a spot away from the hive.
As for the size of the attack group, they can vary; they may launch the attack prematurely, or may accumulate their numbers for a distressing onslaught. Generally though, the more pollution that the hive has been absorbing, the bigger the attack wave would be.
As for what the attack wave would do, they will attempt to clear entire sectors of the player’s holdings. If the “natives” in the attack wave are exposed to pollution from assets in other sectors, they will attack those too later. Thus, an overwhelming onslaught can wipe out entire factory complexes.
“NATIVES” IGNORING CERTAIN THINGS:
Interestingly though, the “natives” generally do not attack anything that has not been producing pollution and has not provoked them with any pollution.
The most prominent example is any concrete wall. They will avoid attacking any concrete wall if the wall is not in their way towards anything that has raised their ire. Thus, the walls can be used to funnel attacking “natives” into prepared kill zones.
Likewise, the “natives” will not attack electricity transmitting structures that do not produce pollution, if they are not in the way. Therefore, it might be possible to rebuild an outpost after it has been wrecked.
However, the “natives” might destroy non-polluting things anyway, if these are in their way and their other paths are being blocked by their kin. They might even destroy rocks that are in their way.
“NATIVES” NEVER ATTACK TREES:
That said, the “natives” will never attack trees. Therefore, forests are a major impediment to the expansion of their hives and their migrations. It may be wise for the player to let large tracts of forests be, if only to create a buffer. Besides, the player could remove a few trees to make way for underground piping, or even underground conveyors if the player could find gaps to squeeze the terminals in.
This can also be used against the “natives” for drawing out defenders of hives; retreating into a forest can greatly diminish their attempt to bring their numbers to bear. However, this tactic takes time to execute, so the hives that they came from would have replenished their numbers anyway by the time that the initial wave has been whittled down.
GIVING UP PURSUIT:
The “natives” will always attack the engineer, if they have detected the presence of their prime target. However, if the engineer manages to stay away from and not harm them for several seconds, they give up their pursuit and return to whatever that they had been doing earlier.
This is generally for the purpose of helping the overwhelmed player keep the engineer alive. Valuable time would have been wasted, however.
EVOLUTION:
The composition of the bugs’ swarms depends on the “evolution” rating that has been accrued thus far. The rating can only ever go up as time goes by.
Initially, a low rating has the nests spawning smaller “natives”. As the rating gets higher, the nests begin to spawn bigger bugs, and more frequently too. Thus, as the evolution rating increases, the swarms of bugs become more powerful.
As for how the rating is increased, it automatically increases by small amounts over time. It also increases with the total cumulative amount of pollution that the player’s factories have produced since the beginning of the playthrough.
The highest increments happen when nests are destroyed. Therefore, players that have been proactive in finding hives and destroying them will face bigger bugs much earlier than other players.
This does not mean that the player is hosed though. The increments in the rating taper off after it has become quite high, meaning that even the “natives” eventually hit a ceiling in the power composition of their swarms. The only means that they have left is the numbers that can be had from growing more nests.
VISUAL DESIGNS – OVERVIEW:
Factorio uses 2D graphics, which is just as well because there can be many thousands of things being animated at once on-screen. That said, a computer that has been made with parts designed from 2015 onwards would have no problem running the game’s graphics.
(However, mods that can change the game’s parameters and graphics beyond its default assets and settings can tax the player’s computer.)
For better or worse, the camera is permanently pegged to the player character’s position. The player character is always at the center of the screen, so if the player wants to see something first-hand, the player needs to either have the engineer scoot over there or use the radar feature.
SPRITE-WORK:
Most of the sprites in the game are actually 2D captures of 3D models being animated. This is not a new trick in video games, of course, but the use of such graphical designs is a mark of a developer that knows how to balance visual fidelity, implementation time and computing overhead with each other. Fortunately, Factorio’s developer indeed has such caliber.
All of the factories have sprites that are animated when they are operating, which is useful because the player can tell that the factories are functional at a glance. However, there are no sprites for when factories or equipment are not powered by electricity; there is a blinking symbol that indicates this shortage instead.
Perhaps the most deceptive representation of things in the game are cliffs. These are not actually cliffs; they are just impassible objects that look like cliffs. Incidentally, there are “cliff explosives”, which are specifically meant to remove cliff sprites so that they can make way for other more useful things.
FLESHY “NATIVES”:
The natives clearly have been designed such that most players would not have issues with killing them. Being giant creepy-crawlies with too many legs and segments (or undulating bodies in the case of the worms) would not elicit much sympathy even from conscientious players who are aware that the engineer is violating an otherwise pristine world.
Of course, that the “natives” look like bugs would not perturb some people who have accepted that bugs look like bugs. The nests would be a different matter though; they look like fleshy tumors with alternatingly inflating and deflating pustules on them. It would be a very jaded player indeed if one does not consider them to be ghastly and perhaps deserving of annihilation.
VISUALS FOR RESOURCES:
As mentioned earlier, ore fields look like impossibly rich surface deposits. They are also coloured with different hues, which is another design leeway that is intended to facilitate gameplay instead of promoting believability.
Perhaps the only frustrating design decision is the poor contrast for the visual designs of oil wells. The pool of oils are small and can blend into the rest of the ground, especially at the farthest camera zoom. The map blips for oil wells are also coloured a dim purple.
NOT FRIENDLY TO THE COLOUR BLIND:
Speaking of hues and colours, the worst problem of Factorio is that it is not kind to the colour-blind; it is obvious that the developers have not thought much about colour-blind people when they were developing the game.
Of course, the developers did, but their solutions are not holistic. They implemented colour filters that changes the colours of sprites; colour-blind players have to choose the filter that works for them. However, not every filter can cater to the many, many types of colour-blindness there are.
Another solution would be redesigning the sprites for the items and icons so that every item has distinctly different shapes. For better or worse, however, the developers insist that shape distinction is for items in different categories, not for items in the same category, e.g. all machine modules have the same icons but in different colours.
Indeed, it would be followers of the game that address this issue, namely through mods for the game that change the sprites of items that are otherwise colour-coded. Even so, the mods add to the clutter of icons, which make the already busy user interfaces messier.
SOUND DESIGNS:
With so many things going on on-screen, the factories would have given off an overwhelming din of moving machinery. Fortunately, the developers have thought of that too.
The amount of noise that the player can hear is tied to the zoom level of the camera. If the camera is zoomed far out, only the sounds that originate from things that are exactly where the player character is would be heard. Examples include the noise from the engine of the car that the engineer is driving and the sounds of attacking “natives” being zinged with lasers. In other words, the farthest-out zoom is enough for the purpose of hearing and knowing that the player character is doing something.
If the player is zoomed all the way in, especially when the player is at the factories, the player can hear the din of the machines. Of course, the sounds of industry in this game have been designed so that they do not hurt the ears too much; the noise at actual factories are much worse.
Then there is the noise of combat. There are the gurgling and chomping noises that the “natives” emit when they attack, and the weapons-fire from the engineer as the engineer guns them down.
All bullet-firing weapons in this game fire at incredible speeds, so much so that they sound more like rotary guns than single-barrel autos. There are also the swooshes of missiles being fired.
However, explosions are not particularly satisfying to listen to. Even the detonation of atomic missiles is not that impressive. On the other hand, the dying “natives” compensate for that with their death rattles.
SCENARIOS:
Much of the gameplay is meant for the Free Play mode. However, there are specially designed scenarios that are intended to challenge experienced players. For example, there is one that puts a timer on the playthrough, thus necessitating quick decisions without roll-backs or factory re-designs.
MULTIPLAYER:
Last but not least of the gameplay designs, there is multiplayer. The fundamentals of the gameplay had been designed with a lonesome player character in mind, so having multiple engineers running around can be a different experience. For example, massive hives can be dealt with pincer attacks by multiple well-equipped engineers without the use of nukes. There is also a scenario that is designed for team-based player versus player battles.
Indeed, with its robust network code and mods for multiplayer, Factorio allows the hosting player to have sessions with dozens of players, if the host’s machine can handle the load. On the other hand, game worlds that are being worked on in real-time can pose a problem to joining players, whose load times have to include the changes that are being made to the game world too.
SUMMARY:
Factorio may not be the first resource management game that involves acquiring resources and processing them into something. However, it and its contemporaries like Satisfactory and Oxygen Not Included have established a sub-genre that would appeal greatly to players with meticulous streaks and/or industrial aspirations.
Juggling resource production lines against each other while maximizing cost-efficiency is a surprisingly rewarding experience in this game. The challenge that is posed by the native lifeforms is also quite well-balanced, being simple enough to understand but not so easily brushed aside.
However, Factorio is not without problems, both serious and minor. Among the more serious ones, it has poor adaptations for the sake of the colour blind. Minor problems include the frequent need for suspension of disbelief, such as the engineer being able to directly craft oil refineries and nuclear reactors but not being able to craft engines. A few parts of the in-game documentation are also incomplete.
Still, Factorio is a very well-designed game, and it is one that can provide an engrossing experience that would have players playing into the late hours of the night.

