INTRO:
The reality with video games is that if there is an in-game opponent that the player must defeat, that opponent would have to be designed to be beatable. It is inevitable that the player will claim victory, if the player is motivated to keep on going.
On the other hand, making opponents that are very powerful would lead to claims of them being overpowered and terribly unfair. The game-maker risks fallout with the consumer base, especially if seasoned players, or even the game-makers themselves, could not come up with a “fair” in-game solution to beat these opponents.
Therefore, the only remaining avenue of making a game difficult without drawing condemnation is to resort to the most fickle of factors: luck.
For better or worse, Darkest Dungeon is one such game.
PREMISE:
The setting of the world in Darkest Dungeon is a dark fantasy one. Vices and atrocities of all kinds are rife among what passes for humanity. Slavery and sacrificial rites are common in the game’s version of the Middle East. This game’s version of Europe is a cesspool of hideous inequality, if it is not already devastated by wars between supposedly civilized nations and/or with savage barbarians who greed outsiders with arrows to their heads.
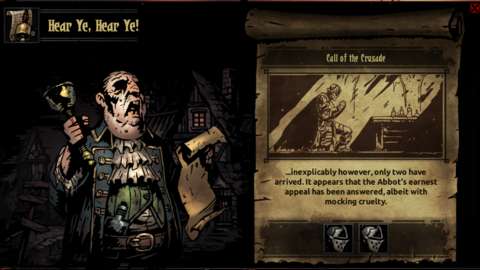
These are made all the worse by things from beyond who are always looking for opportunities to ingress into the lives of mortals – and yet, there are the foolish and/or wicked who court their favour.
One of the worst examples of the latter case occurs in the estate of a particularly (but formerly) powerful feudal lord. Seemingly after having had too much of seeking out the esoteric and the profane for the power to go beyond mortal, the aging lord committed suicide, but not before sending out a letter to his descendant. The recipient happens to be the disembodied player character.
After surviving a perilous journey that also acts as the tutorial, the player character arrives at a hamlet in the ruined estate. Next, the player character is to take on foolish adventurers who are looking for treasure and riches, and use the wealth that is gained to rebuild the hamlet so that it can function as a base for deeper forays into the estate. The final goal is to breach the titular Darkest Dungeon, where the deceased lord had spent so much of his wealth, efforts and sanity to unearth.
None of this would be easy, of course.
HAMLET:
The estate may have been reduced to ruins due to neglect and exploitation by nefarious forces (human or otherwise), but the hamlet that was populated by the lord’s peasantry is still around. The hamlet persisted, thanks to the administration of the barely-sane Caretaker and a few other establishments that doggedly held on. With the arrival of the lord’s latest descendant and the foolish adventurers who have heard of opportunities in the estate, the hamlet is poised for a revitalization of sorts.
It is up to the player character to decide which aspect of the hamlet to improve first. However, doing so is not as simple as spending money on them. Rather, for whatever strange reason, the player needs to find “heirlooms” of the lord’s family and somehow spend these to somehow improve the establishments. There will be more explanation on heirlooms later.
Generally, improvements to the hamlet are permanent and irreversible. They are there, waiting for whenever the player returns to play the game some more.
WEEKS:
The progress of time in the game is measured in weeks. Every quest, whether completed successfully or not, has time progressing by one week. One week is also presumably the time that is needed by anyone who has been bodily wounded to heal completely. That said, time can only progress this way; the player is not allowed to wait and not embark on quests.
It can be very aggravating if the player does not have adventurers that are able to go on quests. The player can just embark on a quest without making any preparations and then simply abort the quest right after starting it, but this only amplifies the impression that the requirement is arbitrary. (The adventurers are also subjected to the random acquisition of quirks and diseases; more on these later.)
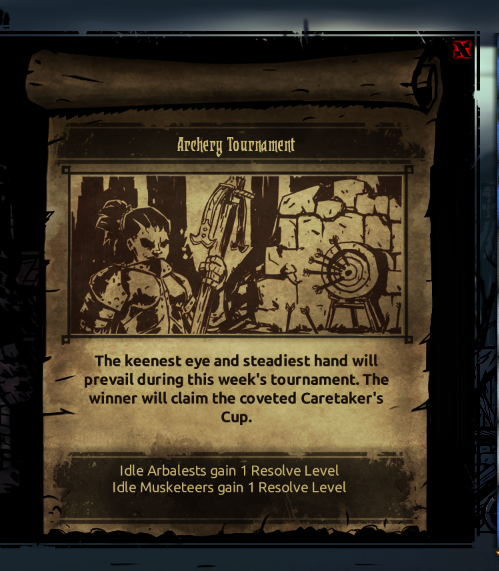
The results of putting adventurers on treatments can only be experienced after one week. Oddly though, the improvement of facilities in the hamlet and the upgrading of adventurers’ skills and gear is not time-dependent; they are applied immediately as soon as the player has paid the cost for them.
ROSTER OF ADVENTURERS:
The adventurers arrive via the stage coach system that services the hamlet. There are a handful of them that come over every week, hoping to be added to the official roster of the adventurers under the player character’s employ. Oddly, the process of hiring adventurers is completely free. (The method by which hired adventurers are paid is not entirely clear.)
Actually, the developers have explained the reason for this during the Early Access phase of the game; they expect players to lose a lot of adventurers to misfortune. Therefore, the new fools are all free to hire. In the grand scheme of things, the adventurers are disposable.
It is implied through other gameplay elements that adventurers who were not hired by the player eventually went out on their own. Inadvertently, they get themselves killed; their loot can be found throughout the various locales in the estate.
ADVENTURERS WHO DID A QUEST IN THE DARKEST DUNGEON:
Adventurers that have succeeded in any quest into the titular Darkest Dungeon are somehow placed in a different grouping. They no longer count towards the maximum of the roster, but they will also refuse to participate in any further sojourns into the Darkest Dungeon.
This is an unpleasant thing to learn first-hand, especially if the player has been counting on several particular adventurers to carry the day. Nevertheless, having heroes that do not count to the roster limit means that the player can hire more heroes – which is a good thing if the player has been using mod-introduced classes.
STRESS:
Stress is one of the most notable innovations of Darkest Dungeon, because of its significance to both long-term gameplay and the quests that the adventurers undertake.
Each adventurer in the player’s employ is ultimately a mortal, and he/she would be facing horrors, terrors and nightmares of the all too-real sort. The stress of an adventurer is a statistic that accumulates through the actions of enemies, the folly of his/her supposed friends, simply lingering in the fell places of the estate for too long and/or bad decisions on the part of the player, among many, many other things.
Stress is carried over from quests into the hamlet screen, and from the hamlet screen into quests. Therefore, the player will want to consider keeping stressed adventurers on the bench, or put them on stress treatment (more on this later). After all, the enemies are quite mean; those that can stress out adventurers will often target those that are already close to their limit.
The main reason to avoid stressing out adventurers is what happens to them when they eventually blow their top. Unfortunately, this occurrence is a matter of luck, as will be described later.
STRESS TREATMENT:
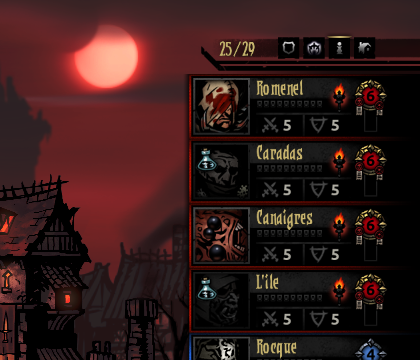
There are two particular establishments in the hamlet: the tavern and the abbey. Both provide means to reduce stress. These means can be generally categorized according to three tiers of cost; after all, the player has to pay a fee for each adventurer to undergo “treatment”.
The cheapest tier is of course the most economical, but another limitation soon presents itself; each tier can only accommodate up to three customers, and initially just only one. Therefore, if the player has the misfortune of having too many adventurers stressed out, the cheapest tiers are likely to be filled.
A week passes by, and any adventurer that is under treatment would be freed of a lot stress. However, there just have to be RNGs that complicate things. There is a chance that any adventurer would become unavailable due to excuses that are appropriate to whichever establishment that he/she went to. For example, if the adventurer had been meditating at they abbey, he/she might go on a vision quest and only return two weeks later (usually with nothing to show for that).
The adventurer might even continue to occupy the slot that he/she was in for another week. For example, an adventurer that has been drinking continues to drink; the player does not have to pay any further fees of course.
The most infuriating possibility is that the adventurer gains a negative quirk (there will be more on quirks later). This is either a quirk that makes the adventurer no longer capable of taking the same treatment again, or a quirk that makes them only able to take that particular treatment in the future. Worst of all, the adventurer might gain both, effectively preventing him/her from getting any stress treatment at all.
There is a (much smaller) chance that the character gains a positive quirk, but that would be a stroke of very good luck.
Alternatively, the player could just leave the adventurer alone. Every idle week reduces the adventurer’s stress, if only a bit. However, if the adventurer has the Antsy quirk, the reverse happens.
There are also opportunities to reduce stress during quests, but they are either rare or come with risks. There will be more elaboration on them later.
AFFLICTIONS & VIRTUES:
When an adventurer’s stress meter reaches 100, his/her resolve is tested. This is done through an RNG roll.
Most of the time, the adventurer gains an Affliction as a result of the roll. Afflictions are far worse than the worst of quirks (more on these later), because they make an adventurer terribly unreliable and sometimes uncontrollable.
Afflictions can be removed by reducing the adventurer’s stress to zero while on a quest (a feat that is incredibly difficult); failing to do so causes the surviving hero to retain the affliction after returning to the hamlet, if he/she survived. This obviously makes the adventurer unsuitable for any further questing. Fortunately, any stress treatment will remove the affliction.
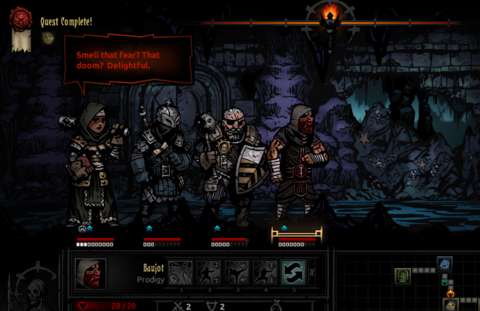
If the player is lucky, the adventurer gains a virtue instead. His/Her stress is immediately halved and he/she becomes immune to the stress build-up caused by Afflicted party members. The virtue grants wonderful benefits afterwards depending on its type, such as further stress reductions or even buffs for other party members. Virtues are not retained after a quest ends, however.
The player has some control over the RNG roll; the chance for gaining a Virtue can be increased by equipping trinkets that increase it. On the other hand, the player is taking a lot of risks by going for this strategy.
HEART ATTACKS:
After an adventurer gains an Affliction or Virtue, the adventurer can still accumulate Stress. This will not result in another resolve test, but if the adventurer gains 200 points of stress, he/she suffers a Heart Attack. This causes the adventurer to lose all of his/her hit-points and be immediately placed in the Death’s Door state (more on this later). His/her stress is reduced to 170 points, but having that accumulate to 200 again (assuming that he/she can actually survive to suffer this) causes another Heart Attack that outright kills him/her.
EMBARKING AND LIMITED INVENTORY SPACE:
To make progress in the game, the player will need to have adventurers go on quests. The game calls this “embarking”. The team of adventurers also need supplies, some of which are more important than the rest.
However, the team has rather limited inventory space, represented by a finite number of slots. Supplies take up the same slots as treasures, so the player would have to make careful considerations of exchanging supplies with treasure. (The game is all too eager to remind the player of this with a remark from the Narrator/Ancestor.) Anything that the player lets go is forfeited; it is not left behind and is practically gone from the game session.
Most items can be stacked; each stack takes up one slot. However, there are different stack sizes for different items. Some items cannot be stacked at all.
The limited pack space can be aggravating at times, but it is a prime design decision on the part of the game’s designers. There is some satisfaction to be had from being able to completely exhaust all supplies but fill up all slots with treasure at the successful end of a quest.
TEAM COMPOSITION:
The composition of the team is important to the party’s performance. The primary factor is the formation of the party; where each member is in the team’s ranks determines what he/she can do. This will be described further later.
The next factor is the role that each party member has. The game does not strictly require the following, but the player will want to have a healer and a ranged attacker at the rear two positions and the front two positions should be damage-dealers and damage-sponges.
The third factor is their level of resolve and the expected difficulty of the quest. Adventurers who are two levels above the difficulty of the quest simply refuse to participate, whereas those who are of levels lower than the difficulty will participate (after protesting), but immediately suffer considerable stress upon starting the quest. In the latter case, the lower-level adventurers do gain more resolve experience if their quest is successful. (There will be more on resolve levels and experience later.)
HEIRLOOMS:
Presumably, heirlooms are possessions of the once-lord of the estate. There are incredibly many of them in the estate and they are surprisingly durable enough to endure the years.
They are among the treasures that the player want, because they are needed for upgrades of the establishments in the hamlet, for whatever reason that mere gold cannot suffice.
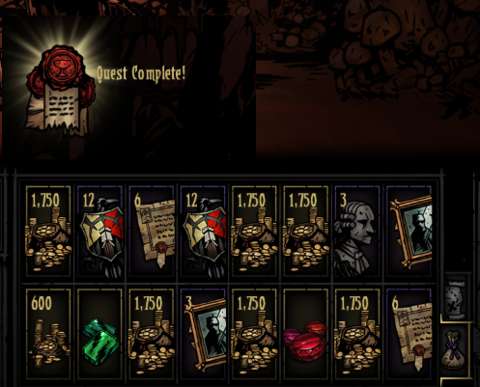
There are four types of heirlooms, in increasing order of rarity: crests, deeds, busts and portraits. The rarer heirlooms are also bigger, leading to smaller stack sizes.
At the hamlet, the player can somehow exchange heirlooms of one type for another one, presumably with other parties that had been raiding the dangerous but rich estate. The costs for buying heirlooms are higher than the gains of selling them, of course. The differences are considerable enough to discourage frequent trades, but the player might just trade heirlooms once in a while just to afford that next establishment upgrade.
In the base game, the player would eventually run out of reasons to gather heirlooms. After all establishments have been upgraded, there is no more need for heirlooms.
(The DLC expansions and mods do provide more reasons to gain heirlooms, but this is for another review article.)
WEALTH-GIVING TREASURES:
The other kinds of valuable loot that are not heirlooms are converted to gold when the player’s team returns to the hamlet. Gold is needed to treat and upgrade adventurers, so the player will need quite a lot of it in the long run.
However, collecting treasures is not a simple matter. There is a significant variety of treasures, and each type competes for space in the player’s inventory.
There are of course loose gold coins. Coins have the highest stack amount, but they have the least value per unit among treasures. There are gems of various levels of preciousness, but these are rarer than gold coins. The player might have to consider ditching a stack of gems for more precious ones, or change coins for gems.
However, there are some treasures that the player will want to hold onto. These are the big-value ones, like ancient relics and otherworldly artifacts (both of which are disturbing to look at). Getting these when the player has already run out of space can particularly rattle oneself, especially if the player is an anal-retentive min-maxing pedant.
ANTIQUARIAN’S FINDS:
The Antiquarian is an interesting character. She does not have much capacity for combat, and her healing skill is laughably lousy. However, she has one useful speed-increasing buff, and a de-buff that drastically decreases the accuracy of an enemy.
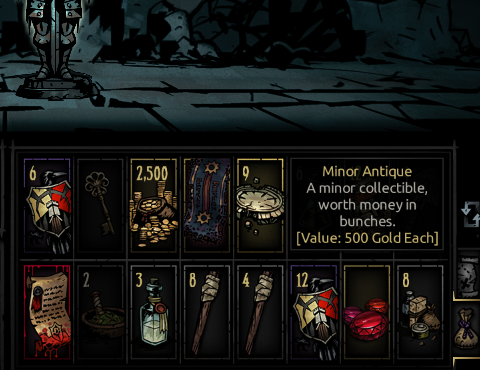
The main reason that the player might want to have her around though is that her very presence enables the appearance of special loot that cannot be found otherwise. Furthermore, she can somehow greatly increase the stack limit of treasures (presumably because she is a much better pack-rat than others).
Obviously, the only reason that the player might want to have her around is for the better loot that can be had. However, she is only useful for quests in which the player can expect to find considerable loot.
FOOD:
Among the things that the player would want to bring into a quest are food rations. Very few things in the locales of the estate are safe to eat after all, and the adventurers are the kind of video game characters that can somehow heal by eating food.
Of course, food competes for space with other things. Finding extra food during a quest is also a momentous occasion that can result in nail-biting indecision, e.g. the player might have run out of space and whatever there has been collected is deemed just as vital or desired as extra food.
Each adventurer can only eat up to 4 units of food before becoming full and could eat no more. Strangely though, this counter resets upon the next completion of the next combat encounter, as if the fight has somehow made them hungrier. This is of course a balancing measure against abusing the use of food to heal.
(Any adventurer that is already at maximum health will not eat food either, conveniently.)
The main reasons to keep some food around are to deal with hunger checks, and to have some chow to eat when the party makes camp. These will be described further in their own sections.
HUNGER CHECKS:
When the adventurers move through the corridors, alleys and trails in the locales of the estate, there is a chance that an invisible condition check script would spawn in a point along the paths that they take. This script checks another invisible piece of code, which is the “hunger” statistic.
This statistic increases as the adventurers travel across longer distances in their quest. If it is high enough when the party crosses a point with the aforementioned check script, it triggers the hunger event.
This event demands that the player feed 1 unit of food to each party member; thus, the player needs to have at least 4 units of food for this demand to be fulfilled. If all of the adventurers happen to be missing hit-points, any food that they eat is efficiently spent. If not, the food is wasted.
If the party does not have enough food to feed everyone, i.e. having less than 4 units of food, no food is spent, but everyone loses a chunk of their health and accumulates considerable stress. This is obviously undesirable.
Worst of all, hunger checks will not consider whether the adventurers had eaten food outside of hunger checks for the purpose of healing. The checks are based on the aforementioned statistic only.
Hunger checks are likely to be among the things that any player despises a lot. Having to have food around just in case they happen can be irksome, especially after the player has realized that the implementation of hunger as a gameplay element is really just a matter of luck.
LIGHT METER:
Most of the locales that the adventurers go to happen to be indoors, and they are not well lit. The Weald is outdoors, but it has become so overgrown that the sun cannot shine through. In these places, the darkness is almost tangible, filling anyone’s ears and minds with unearthly noises. To hold back the darkness, the party has to maintain their light source, which happens to be a sconce floating at the top of the screen. (Of course, this is just a visual representation of whatever light sources that the adventurers are using.)
For convenience of reference, the strength of the light source would be henceforth referred to as the “light meter”. The game sometimes has other names for it, such as simply “torch”, but this is the best phrase for it.
The light meter drops by 6 to 7 points for every ‘tile’ of the map in which the current quest takes place in (more on tiles later). It can be restored by 25 points with the consumption of each spare torch that the party has, to a maximum of 100.
There are five stages of the meter. The thresholds for four of them are the quarters of the meter. These stages control several statistics.
The purposefully positive statistics are the bonuses to the chances of scouting occurrences, the chances of surprising enemy groups and the dodge ratings of adventurers; all of these gameplay elements will be described further later. These generally go down as the meter contracts. At the third stage, the bonuses to scouting chances and dodge ratings are removed entirely.
The purposefully negative statistics are the bonuses to the chances of enemies landing critical hits, the compounding on stress gains, the chances of the party itself getting surprised, and the bonuses that enemies get to their damage output and accuracy. Generally, these increase as the meter contracts.
Then, there are statistics that weigh risks versus rewards. Perhaps due to desperation, the adventurers gain bonuses to the chances of landing critical hits as the stages progress. Also, despite the decreasing illumination, the party gains more loot from loot sources. They do not make sense, but perhaps they do not have to since they are gimmicks.
The first stage is the one that the player might want to stay at for the longest, if not all of the time. The negative statistics do not apply at all in this stage.
The second stage is when things start to get worrying. The third and fourth stages are probably when the player is either scolding himself/herself for not having enough torches, or really testing his/her luck. The fifth and worst stage occurs when the light meter is completely drained.
Even at the first stage, the player generally gains more treasure from a quest than he/she could ever stuff into the party’s inventory. There is very little practical reason to maintain a low light meter.
However, there is one scenario where the fifth stage is imposed on the player, if he/she is unlucky. This will be described later.
SUPPLY ITEMS:
The items that are not food that the player can bring into a quest are generally referred to as “supply items” in-game (though the game calls them “provisions” too). Most of them have specific uses.
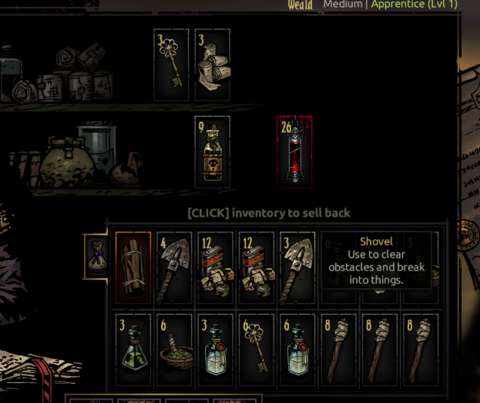
The foremost supply item is the torch; this is needed to replenish the light meter. Anti-venoms are mainly used to remove the Blight de-buff from a character, whereas Bandages remove Bleed de-buffs. Bottles of Holy Water grant temporary bonuses to a character’s resistances. Laudanum removes the Horror de-buff. Medicinal Herbs remove what the game calls “mortality debuffs” (more on these later). Shovels are used for removing barriers. Skeleton Keys can handily open any locked container, but are the least needed of the supply items.
All of these supply items cost money and they take up space; the most expensive of them is the Shovel, and being big, its stack is small.
There is a special item that the player would bring into certain quests, depending on the size of the map; this is the Firewood. This is associated with the camping gameplay element, which will be described later.
ACTIVATION/RETRIEVAL QUESTS:
There are some quests that require the player to bring some mandatory items into the map; these take up space in the inventory, and will continue to do so until they are consumed to achieve the quest objectives. Then, there are quests that require the player to retrieve items; these objective items take up space too, and cannot be discarded.
These quests can be inventory management nightmares, but their rewards are often great; each of them immediately forces a beneficial event that is associated with it for the next week. (There will be more on Events later.)
QUEST MAPS:
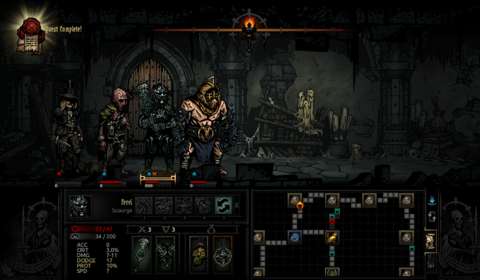
When the player embarks on a quest to anywhere but the Darkest Dungeon (and the Hamlet, but describing this particular quest would be a spoiler), the game procedurally generates a map for the quest. This is the level that the party would travel through; its layout is of considerable importance, because if the player can see threats ahead and there are ways to bypass them, the player can save the party from getting into unwanted trouble.
Anyway, maps are mainly composed of two things: “corridors” and “rooms”. In the indoors locales like the Warrens, the Ruins and the Darkest Dungeon, they are indeed corridors and rooms. However, they have facsimiles in other places, such as clearings instead of rooms in the Weald. Functionally, they work the same.
CORRIDORS:
The length of a corridor is represented as a number of consecutive tiles in the quest map. If the corridor has not been scouted out (more on this shortly) and has not been traversed, the tiles are mere grey with no icons on them. If the player can see curios ahead, the icons for curios will appear on the tiles in the corridor. However, undetected enemy groups remain invisible and only appear when the party stumbles onto their tiles.
When the party moves through corridors, they move forwards in one direction and cannot turn around, for whatever reason. They can move backwards, but doing so inflicts considerable stress on party members. The camera also zooms towards their sprites, causing unsightly blurriness in the edges of their sprites.
RETURNING TO ALREADY-TRAVERSED CORRIDORS:
Cleared corridors are not free of threats indefinitely. When the party returns to a corridor that has not been walked on for a while (usually one or two rooms since), there is a chance of something bad appearing in the corridor. This can be a fresh group of enemies, a trap, a tile containing an invisible script that inflicts exploration stress on the party or – worst of all – a tile with a hunger check. At the very least, the player can see the new enemy group or trap tile.
It is worth noting here that if a corridor tile already has an icon on it, or an invisible script, nothing else can appear on it.
ROOMS:
Rooms are where the party can take a breather from traversing through the dangerous corridors. Of course, the rooms may have threats (typically in the form of an enemy group), but they do not cause the party to incur stress from exploration and they do not have traps. They are also the only places where the party can rest.
SCOUTING:
Whenever the party enters a room, it has a chance of scouting. Striking that chance causes the game to reveal the contents of every corridor tile and the next adjoined room in every direction away from the current room. If the player is particularly lucky, the range of the scouting might be even further, revealing almost everything up to two adjoined rooms away.
The main benefit of scouting is that the player is able to see threats ahead, such as whether there are enemy groups in the corridor ahead or enemies in the next adjoined room.
CURIOS:
During the romps through the locales in the estate, the player would come across things like bags of loot, disturbing edifices and hidey-holes for knick-knacks, among other things. The game lumps them all under the category of “curios”. The player can have an adventurer interact with a curio, for good or bad.
Some of the curios are harmless, even desirable. For example, there are bags of loot and abandoned packs, which can be searched for goodies, including precious supply items.
Others carry far more risks. These curios have RNG rolls that decide the outcome of regular unprotected interactions with them. For example, corpses in the Weald may yield goodies but might instead infect anyone searching them with diseases if the player is unlucky.
Some curios only appear in rooms, some only appear in corridors and some can appear in both. Some curios are unique to specific locales. For example, books and bookcases are unique to the Ruins. Some others can be found in just about every locale, such as the archetypal opulent treasure chests.
If the Antiquarian interacts with curios, she can extract antique loot from them. On the other hand, this is a sure-fire way to get her all messed up if the player does not have the necessary supply items.
USING SUPPLY ITEMS ON CURIOS:
Speaking of which, some risky curios can have their risks neutralized with the application of a correct supply item. Returning to the aforementioned example of corpses in the Weald, the player can have an adventurer protect his/her hands with bandages while rifling through the corpse; this guarantees a yield of loot.
Without having looked at the wiki for the game, the player will not know what any supply item would do to a curio. It might do nothing at all, in which case it is wasted. If it does something on a curio, the supply item will gain an additional label that indicates what it does when the curio is highlighted. Some curios can reduce stress, if applied with the correct supply item.
Laudanum is the only supply item that cannot be used on curios, likely because it was the last supply item to be implemented during the development of the game.
The results of using a supply item on a curio might be completely different from the outcomes of unprotected interactions. For example, using a torch on a pile of scrolls in the Warrens remove a negative quirk, which is not one of the outcomes of regular interactions with the pile of scrolls.
Not all options to use supply items on curios are good however; learning about these the hard way is very unpleasant. Some of these bad outcomes drastically increase the Stress of the adventurer that is interacting with them. For example, burning books that are found in the Ruins somehow immediately subjects the adventurer to great remorse, giving him/her 100 points of stress.
NO SPECIFIC ICONS FOR SPECIFIC CURIOS:
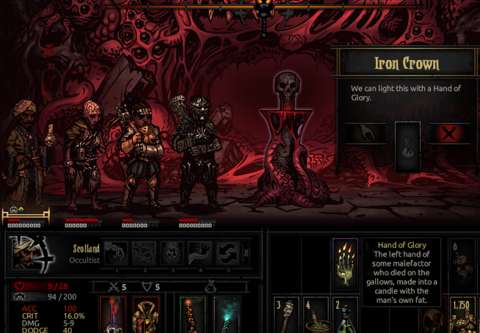
Unfortunately, all curios are marked on the quest map with the same kind of icon. There are very few ways to tell them apart, and even then, whatever ways there are is not entirely reliable. For example, there are some curios that only appear in rooms and some that only appear in corridors. Yet, there is more than one curio for either of this category for any locale.
The most that the player could do is take a manual screenshot of the map, and label this as he/she progresses in the map. Of course, this is terribly immersion-breaking.
TRAPS:
A game with a dark fantasy setting can only be complete if there are traps that harm foolish adventurers. Darkest Dungeon so happens to have a lot of them.
Traps can appear in corridors; they are generally invisible until they have been scouted out. These undetected traps will spring on an unlucky member of the party. He/She has to make an RNG roll against his/her Trap rating; failing this causes them to be struck.
Traps that have been scouted out can be disarmed, preferably with an adventurer with a high Traps rating. This is an RNG roll; failing the roll causes the trap to be triggered anyway, specifically against the unlucky adventurer. Success disarms the trap, and the adventurer who disarmed it is relieved of some stress.
The types of traps that can be found are endemic to the locale. For example, there are tentacle pits in the Cove that hit their victims with a long-lasting speed de-buff. Some traps are ubiquitous, such as the spike trap. Most traps inflict stress too.
The only way to tell which trap is which type is to get close enough to see its sprite. However, things in the foreground have a tendency to obscure it. Fortunately, there are indicators that appear when the party comes close to a trap that is supposed to be visible. These indicators are icons that appear underneath the sprites of the party members, and their tooltips show their Trap ratings.
SECRET ROOMS:
Scouting reveals most things, but if the player is really lucky in a triggered scouting, secret rooms can be revealed. Secret rooms can be revealed in places that have already been scouted earlier too (thus suggesting that the player has to be quite lucky to trigger their appearance).
Secret rooms initially appear as star icons on corridor tiles. The party has to stop at these tiles, and the player has to enter the control input for interaction with objects to have them somehow move into the secret rooms.
In the base game, a secret room is a dark small room with a stone sarcophagus. The sarcophagus can be opened to yield a guaranteed reward of gold and gems of considerable value. If the player has a Skeleton Key, the reward is even better. (Incidentally, this improved reward strongly suggests that it is associated with the supernatural being, the Collector, which happens to drop similar rewards when defeated.)
Secret rooms can also be used for camping, but they do not reduce the chances of night-time ambushes (more on these shortly).
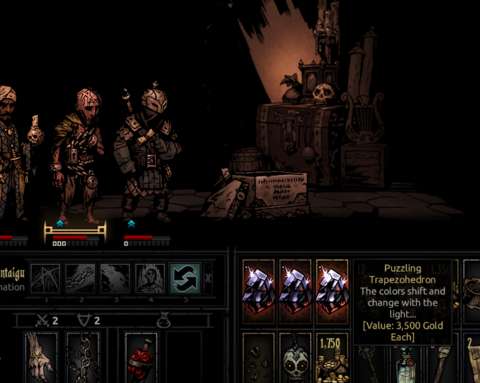
CAMPING:
Speaking of camping, rooms are where the party can stop to rest and break bread. Stopping to rest at such dangerous places can seem foolish, and the party can indeed come under attack (as will be described later). However, this is also the time for the party to regain their strength and use skills that are unique to their professions.
The first decision that the player has to make is the amount of food that they eat. Even if they have eaten earlier, they are considered to be hungry now and will suffer accordingly if the player could not or would not feed them. There is the option to give them half-rations, which sate their hunger but does not restore any hit points whatsoever.
In the base game, the highest and second-highest options of food consumption are often the best ways to gain health from food. Even with the inclusion of content from the expansions, the highest option is still a good way to restore a damaged party.
RESPITE:
The next stage of camping is the spending of Respite points. The player is given a handful of these points to activate the non-combat skills of the adventurers; each of these can only be activated once. Furthermore, if the player has any Respite points left but there is not any skill that can be activated, they are wasted.
Some of the Respite options are universal to some if not all characters. Incidentally, these were among the first few that were implemented during the Early Access phase of the game. These include restoration of a percentage of a person’s health, the removal of still-active de-buffs and stress reduction.
The other Respite options are unique to the profession classes of the adventurers. Most do things that the generic camping skills cannot, such as the Grave Robber coming up with some supply items. Some others are powerful, but come at a price. For example, the Occultist has an option that grants a considerable buff to another adventurer, but stresses out the Occultist.
Most of the buffs (and de-buffs) from Respite options last for a number of battles, instead of a number of rounds. These buffs are best utilized if the player can see fights that might occur ahead.
NIGHT-TIME AMBUSH:
Unfortunately, there just has to be an RNG roll for camping too. After the player has spent all Respite points that can be spent and has the party rest, there is a chance for the party to suffer a night-time ambush. This can be prevented, but the player would have to spend considerable Respite points just for this precaution.
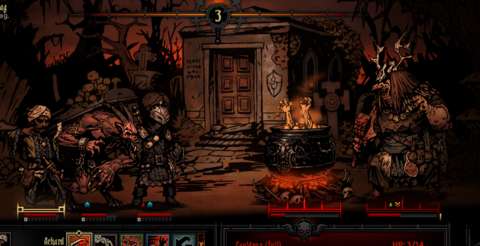
When a night-time ambush occurs, the party is Surprised, thus messing up its formation. (There will be more on Surprise later.) The light meter also immediately drops to zero and the party is attacked by a randomized group of enemies. The light meter cannot be restored with torches. However, it can be increased through the use of light-enhancing skills. (This is likely a coding oversight.) On the other hand, party members that are doing this is not helping the team return to their original formation.
This means that the first few exchanges will be to the advantage of the enemies. Obviously, these fights are very undesirable if the player has relied on the camping to restore the party’s strength.
SURPRISE:
When the party chances upon regular groups of enemies in the corridors and rooms, the party has a chance of being surprised. If they are surprised, their ranks are immediately messed up; this is a terrible way to start a fight with.
However, if the player is lucky (perhaps because he/she has boosted his/her chances with trinkets or camping skills), the enemy group is surprised instead. Their formation does not get messed up, but the player’s party gets to go first, which is a major advantage.
ADVENTURER CLASSES:
The player character may be their bosses and the player is the one who decides what they do, but the adventurers are the ones who carry the day, and/or suffer the consequences of bad luck and bad decisions on the player’s part.
There are many classes of adventurers. Each and every one of them does not exactly follow typical fantasy archetypes. For example, the Vestal is the most effective healer among the official classes, but she also has a ranged attack that can injure enemies from afar while healing herself and the ability to stun enemies while increasing the light meter.
Nevertheless, they can be grouped according to their overarching roles in combat.
POSITION REQUIREMENTS:
The main factors that decide their roles are the requirements of their positions in the party.
For example, the front-liners generally have a few skills that can only be used if they are at the first or second positions, which are the positions closest to the enemy. Conversely, the rear-liners have skills that can only be used if they are at the third or fourth positions, which are further from the enemy.
There are also position-based rules on which enemies can be hit by which skills. For example, as a rule of thumb, the front-liners can only hit enemies that are in the first and second positions in their own group. These rules are not always so believable, such as the Occultist not being able to hit the front-liners with his summoning of otherworldly tentacles.
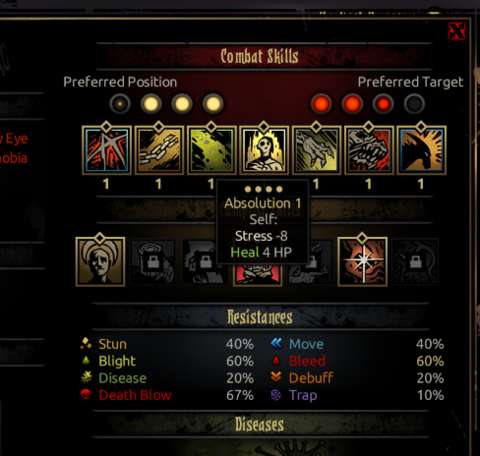
This means that if the adventurers are displaced from their optimal positions, they might be rendered useless until they are shifted back in place. Shifting back in place during combat spends their turns, which is of course undesirable.
For the most part, this also applies to enemies. For example, there are some enemies whose main gimmicks are the application of de-buffs, but they cannot use these when they are forced into the first or second positions of their group.
CHANGING POSITIONS:
The player can have party members change their positions in the party, but this spends their turn. Generally, the only reason that the player would do this is because the party’s formation has been messed up, perhaps due to bad luck, bad decisions or the action of enemies.
If it is bad luck, it is due the party being Surprised, or some party members have Afflictions that make them unreliable. If it is a bad decision, this would be so because the player has not kept in mind that some skills cause adventurers to move around. Then, there are enemies that can push or pull party members around with their attacks.
Changing positions is not a simple matter of swapping locations. Rather, a party member is shifted around, displacing the other party members. The player should be wary of this displacement, because it can cause party members to lose the use of some of their skills.
The exact rules on where he/she can be shifted to are not entirely clear, but they appear to be based on what skills that party members have at the time. For example, if the party member does not have any skills that work at the rear ranks (such as the Leper), he/she can only shifted to the front ranks.
ACCURACY & DODGE:
For better or worse, attacks are a hit or miss affair. An attack on a character has to make an RNG roll against a threshold that is decided by the difference between the Accuracy rating of the attacker and the Dodge rating of the defender. Furthermore, there is always a 5% chance of missing outright, and a 5% chance of landing a hit, regardless of the ratings.
The game has text strings that appear whenever an attack did not land. Presumably, if the RNG roll landed anywhere but the 5% fringe for guaranteed misses, the text is “Dodged!”; if it landed in the fringe, it is “Missed!”.
CRITICAL HITS:
For an attack that landed, there is the chance for a critical hit to happen. Critical hits can be scored by both party members and enemies.
Critical hits by enemies are much dreaded, and in some cases, ruinous for the party. They do much more damage (by a 150% modifier, presumably), and they inflict stress on the defender and possibly some more on other party members. If the enemy attack critically hits multiple party members, all of these stresses stack; this is definitely bad.
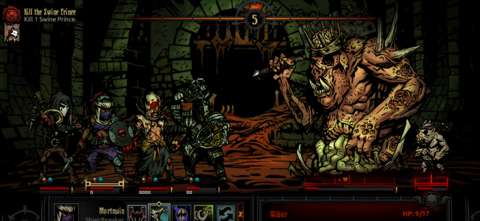
Of course, critical hits inflicted by party members are much welcome. In addition to getting rid of enemies earlier, the party member that inflicted the critical hit is relieved of some stress, and the other party members might get some relief too. If the party member managed to land critical hits on multiple enemies, all of the benefits are cumulative.
In the current build of the game, critical hits by party members that have zero stress (lucky them) give them a small buff to their stress resistance.
Critical hits increase the durations of Bleed or Blight de-buffs that come with an attack. Any de-buff that comes with a critical hit is also much more difficult to resist.
Critical hit chances are low by default, but can be modified through buffs (or de-buffs), trinkets and the use of certain skills. Nevertheless, critical hits are still a matter of luck.
DAMAGE ROLL & PROTECTION:
As if the RNG rolls for hits or misses and critical hits are not enough, there is another roll for the damage that is inflicted by an attack. Every attack has a damage range, which may be modified by whatever skill that is used by a character (and by critical hits of course). The modification will not affect the probabilities of the roll; it can land whichever way in the range.
Then, the protection rating of the defender, if it has any, reduces the damage. Incidentally, no adventurers have a protection rating by default, but some enemies do. For example, one of the creatures of the deep in the Cove happens to have a considerable Protection rating due to its natural armor and shield. Protection de-buffs help in applying pressure on them, but their Protection ratings can never be permanently reduced.
In the base game, the Grave Robber happens to have an ability that bypasses the protection rating of her target. She will not be the only one in the game.
ADVENTURER SKILLS:
Every adventurer class has some skills that harm the enemy. These can inflict damage, apply de-buffs, shuffle them around or a combination of these. The player will want to use them in sequences that produce the best effect. For example, the Bounty Hunter can yank an enemy over so that the Leper can hack it apart.
Other skills are meant to be used on party members. Some apply buffs, healing, remove de-buffs or reduce stress. Some of these skills do what supply items do, but the player is spending their turns using these skills; the use of supply items do not consume turns. Furthermore, using these skills means that the adventurers are not applying pressure on the enemy.
Yet, the player will want them to use these skills whenever possible. For example, there are adventurers with skills that can reduce stress, and/or bolster resistance to stress. They are best used when the player is sure that the opposition is doomed, and that the party is not at risk of suffering further significant harm, in which case restoring hit points would become more important than reducing stress.
There is always a chance that a team can come out of a fight better than before they went into it. This can be unbelievable, but it is still very satisfying when it happens.
JESTER:
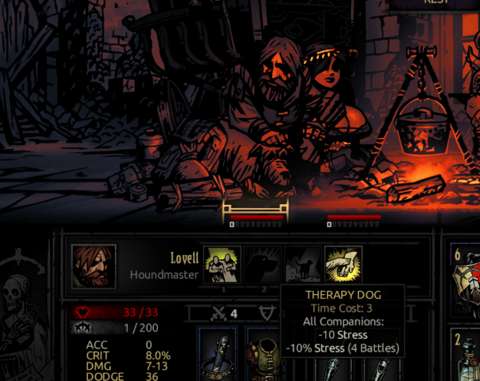
The Jester would likely be included in most player’s choices of team composition, if only for his ability to reduce the stress of others during battle. The Crusader is another such adventurer on the official roster, but he is better off applying damage on the enemy; the Jester’s damage output is small enough that it could be forgone in favour of reducing the stress of others.
There could have been more adventurers with stress-reducing skills, but if the player wants them, they would have to come from mods. Even so, stress is a major lynchpin of the gameplay, so the player risks gameplay imbalance.
RESISTANCES:
For better or worse, Resistances are variables that are used in RNG rolls with binary results. Higher resistances for an individual mean that attacks that apply de-buffs are less likely to work, but that is all.
BLEED AND BLIGHT:
The main ways of applying damage over time are the application of the Blight and Bleed de-buffs. Both do practically the same thing: remove hit points over every round. Damage from Blight and Bleed is always applied before the start of an affected individual’s turn, meaning that he/she/it can die from this before he/she/it can even make his/her/its move.
Enemies have practically no means of removing Blight or Bleed; they can only resist their application. Therefore, it is in the player’s interest to consider applying them when feasible; this can free up some party members to do something to bolster the team instead of applying pressure on enemies.
STUNNED DE-BUFF & INCREASING STUN RESISTANCE:
The Stunned de-buff causes the affected individual to lose his/her next turn. Obviously, having this happen to enemies is good; having this happen to party members is bad. Getting individuals repeatedly stunned is something that can quickly get out of hand and imbalance the gameplay.
To allay this concern, the Stun resistance of the affected individual increases by a considerable amount after he/she/it loses its turn. This makes the individual more difficult to stun for a second consecutive time. However, the buff goes away after just one turn.
OTHER DE-BUFFS:
There are other kinds of de-buffs. Resistances can be reduced, accuracy can be diminished, characters cannot be guarded (more on this later), et cetera. If there is a statistic or variable that is involved in combat, there is a de-buff for that.
TRAIPSING THROUGH CORRIDORS TO CLEAR DE-BUFFS:
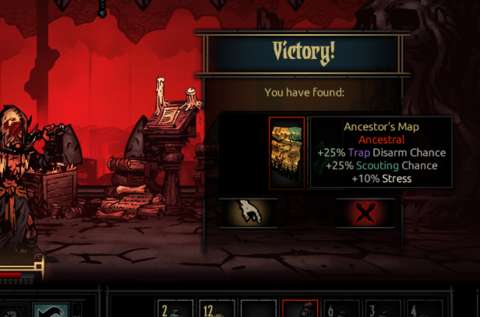
There are de-buffs and buffs with durations that are measured in rounds. They can last beyond a fight that has concluded. Buffs of this kind dissipate quickly, so it is not likely that the player could go into another fight with them still active, unless the other fight happens to be close by.
Some de-buffs can last for a long time though, especially those applied by particularly powerful enemies and (especially) traps. In these cases, the player should apply remedies, especially for Blight and Bleed. The other kinds of de-buffs can be completely wiped out with Medicinal Herbs, but the player can only have so many of these and they are often less in supply than the other supply items.
Fortunately, the player could just have the adventurers go to and fro between two rooms to clear the de-buffs. Of course, if the corridor between the rooms has hunger checks and exploration stress accumulators, this is a bad idea.
STACKING BUFFS AND DEBUFFS:
If buffs that affect a specific statistic are applied on the same character, all of their effects stack; the same goes for de-buffs. However, each buff or de-buff has its own timer; when the timer runs out, its effect is taken away and the buff or de-buff is diminished.
This feature has been used to great effect by fans of the game in some cases. Perhaps the most noteworthy of these is that the Leper could have his damage heavily buffed by three Plague Doctors before striking the Heart of Darkness boss with a critical hit that does triple-digit damage.
DEATH’S DOOR:
Indubitably, some of the adventurers might have their hit-points depleted to zero, either due to bad decisions on the part of the player or just really bad luck (or both). When this happens, they are at Death’s Door.
At Death’s Door, they suffer severe de-buffs. The next hit that they take might well be their last, but adventurers being heroes and all, there is a chance that they will hang on to dear life. This is their resistance to the Death-blow, which is any hit that would kill them. This resistance is invisible to the player, however, but people who have examined the code for it have discovered that it is quite low. This can be altered with the use of Trinkets (more on these later), but the player is better off not relying on such a risky mechanism to keep the adventurers alive.
Interestingly, damage from Blight and Bleed does not force a Death Blow roll. It might be tempting to just let the de-buffs run their course before saving a dying party member from the brink.
Speaking of which, characters that have been rescued (typically by healing) are permanently gimped with a small penalty for the entirety of the quest. This penalty will not stack however, in case they are brought to near-death again.
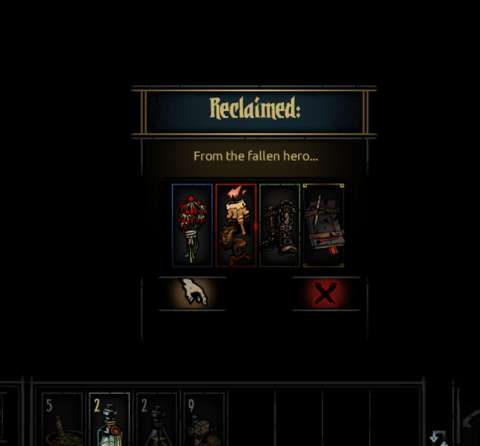
Of course, if a character dies, he/she/it is dead permanently. The remaining party members, of course, suffer stress from their passing. Any Trinkets that they have on their person are returned to the player, but this might mean that the player has to exchange things in the inventory with the trinkets.
GUARD:
A few adventurer classes have the ability to let them handle an incoming attack that is intended for another party member; one class even has an ability that has another party member handling incoming attacks for her. In these cases, the attack is resolved against the guarding character’s Dodge and Protection ratings. Obviously, this is a good way to protect vulnerable party members, especially those that are close to breaking or dying.
Guards can be nullified by stunning the guarding character; this is handy if the player wants to remove them before their durations run out. Alternatively, the player could exploit the guards so as to apply de-buffs on the guarding character.
RIPOSTE:
Some classes – and enemies – have abilities that let them retaliate against incoming attacks, regardless of whether these landed or not. These retaliatory attacks are usually a bit weaker than regular attacks, but they can be upgraded to critical hits. Oddly though, Riposte does not end if the individual is stunned.
DISEASES:
There are some de-buffs that follow party members back to the hamlet; these are Diseases. Diseases can be removed through some characters’ camping skills, but if the player is not able to apply these, the Sanitarium in the hamlet is there to provide this service for a fee. One disease is cured at a time, but if the player is lucky, more than one disease is cured.
Most diseases are bad, but some have positive benefits, such as the Fits and Grey Rot. Generally though, the setbacks outweigh the benefits.
QUIRKS:
Quirks are personality traits that can be positive or negative. Positive quirks generally grant permanent buffs with no setbacks. Conversely, some negative quirks inflict permanent setbacks, but some others do grant benefits, such as Risktaker.
The worst negative quirks are those that make a character unreliable when coming across a curio. These quirks cause the character to automatically interact with the curio that is associated with their quirks, thus forcing a regular outcome (which is generally bad, as mentioned earlier). Two of these are particularly irksome, because they cause the character to just outright pilfer loot for themselves (the player gains nothing in this case).
A character can only have up to five positive quirks and five negative quirks. These limits come into play when new quirks are gained.
RANDOM GAINING OF QUIRKS AND DISEASES UPON RETURN TO HAMLET:
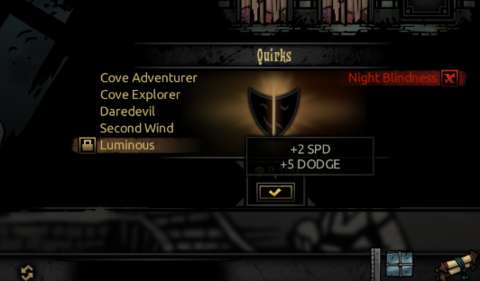
Whenever the party returns to the hamlet, any surviving party member might gain quirks. If they failed their quest, the chances of gaining negative quirks is considerable; if they succeeded, they stand a significant chance to gain positive quirks. The stress level of a character is also a factor in the chance for getting bad quirks. These two chances are separately rolled, so a character might gain both kinds of quirks in the same run.
The locale of the quest is also a factor in the quirks that are gained. For example, returning from the Cove might cause an adventurer to gain quirks that are associated with exploration in the Cove or the denizens of the Cove.
Adventurers also have the chance of getting a disease. Obviously, this is all bad.
Some of the quirk and disease gains are goofy or just do not make sense. For example, a character might gain herpes upon returning from the Ruins, despite Herpes being an STD and the Ruins not being a place that is associated with the disease.
QUIRK CHANGES:
The aforementioned mechanism of gaining quirks and the limits on quirks can result in existing quirks being exchanged for new ones. This might be desirable, if the new quirk is one of the better positive ones or the old quirk is a nasty one. Diseases can also be exchanged in a similar manner, which is rather goofy and unbelievable.
QUIRK REMOVAL & REINFORCEMENT:
Generally, it is in the player’s interest to remove negative quirks through the Sanitarium, but retain any positive ones. The Sanitarium also offers the option of removing positive quirks, but there are few reasons to do this if the player has been making good decisions on which positive quirks to reinforce (more on this shortly).
If a character with existing negative quirks survives a quest, the quirks might be reinforced. This does not make the quirk worse, but it becomes impossible to be exchanged for another. It is also more expensive to remove (and even more so as the character gains resolve levels).
Negative quirks cannot be reinforced in the Sanitarium (for obvious reasons), but positive quirks can be. Reinforcing positive quirks is very expensive, but it can be worthwhile if the positive quirk is fantastic. However, a character can only have three reinforced positive quirks, so the player will want to choose carefully.
The Sanitarium can work on one positive and one negative quirk simultaneously, if the player can afford the fees.
Some curios apply specific quirks on a character. If the character already has the quirks, the quirks are reinforced. This can circumvent the limit on positive reinforced quirks, which of course makes the character more valuable.
RESOLVE:
Resolve is Darkest Dungeon’s take on experience levels in progression systems. In other games, it is in the player’s interest to have characters gain as much experience as possible. In this game, Resolve is a double-edged sword.
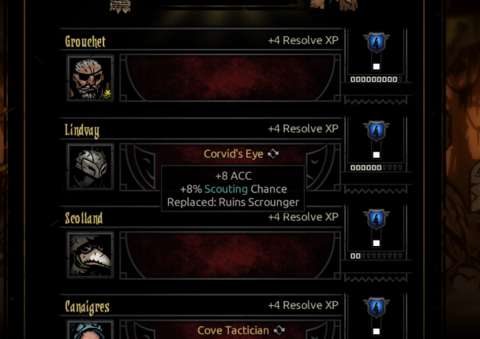
Characters gain resolve just like experience points and levels; gaining enough resolve has them levelling up. Resolve points are gained from the completion of quests.
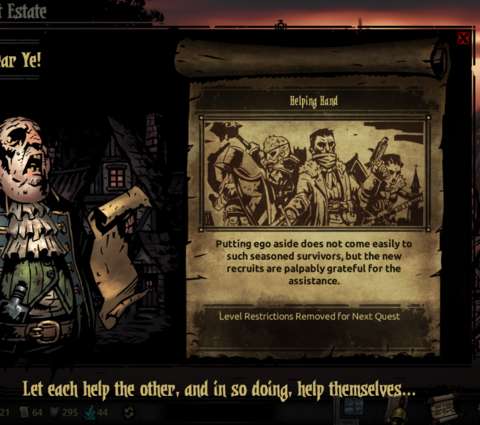
Gaining a resolve level increases a character’s resistances by 10% across the board. His/her skill at traps is also improved. However, these improvements are countered in ways that will be described shortly.
If a character has a resolve level that is two levels higher than the difficulty rating of a quest, he/she refuses to participate in the quest. This means that the character can only participate in quests of comparable levels, where the dangers are worse; the increased resistances will not give much of an advantage.
Most importantly, gaining resolve levels does not improve the combat capabilities of a character. This is done through upgrading their arms, armor (or what passes as their body-wear) and their skills.
GEAR & SKILL UPGRADES:
Each adventurer class favours only one weapon and only ever wears what he/she wore when they arrived. There is no such thing as a system of gear, much less any versatility in the equipment that they can use. Their gear can be upgraded, but these upgrades are merely Accuracy and Damage improvements in the case of weapons, and Dodge and base HP levels in the case of their clothing. In other words, their gear is reduced to just a simplistic representation of their combat performance.
The player has more choices in the improvement of the adventurers’ skills. This is just as well, because depending on the player’s preferred playstyle, the player would be focusing on only a few of an adventurer’s skills.
TRINKETS:
Trinkets are baubles, jewellery and accessories that are presumably portable enough for characters to carry on their persons (though there are things like cauldrons for the Occultist that could seem too heavy to lug around).
Most trinkets provide benefits while inflicting some penalties. It is not clear how these things do so, but magic explains away most of them, especially the ones that appear to be paranormal paraphernalia. Some others are steeped in the deceased lord’s sordid and dark histories, such as otherwise high quality items that have been used for the lord’s dread purposes.
Some others are associated with the adventurer classes, and as such can only be used by them. Some may be reminders of their professions, such as small antiques that the Antiquarian carry around, or their current predicament, such as padlocks for the Abomination’s chains.
There can be more than one example of each trinket, if they are not one-time rewards or trophies from defeating certain powerful enemies. However, only one trinket of any type can be worn by a character.
There could have been plenty of min-maxing opportunities to be had from trinkets, but the game limits their potential by allowing characters to carry only up to two of them. Considering the lack of an actual system of gear for characters, this limitation is quite disappointing.
Trinkets cannot be stacked, if the player found more than one trinket of the same type during a quest. Therefore, trinkets are also rare loot.
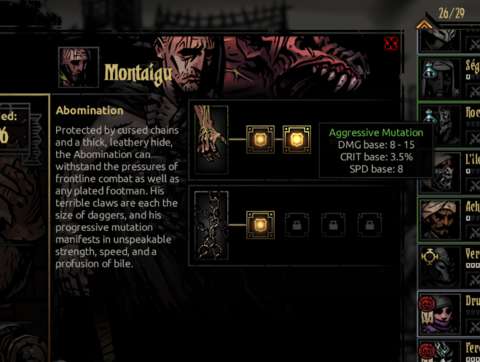
NO LOAD-OUT SAVES:
For a rather simple system, the trinkets feature does not provide the convenience of saving load-outs. The player has to manually remove and re-equip trinkets, which can get tedious quickly.
SPEED AND INITIATIVE:
Every character has a speed rating. It is one of the factors that determines who gets to make a move before the others in combat. Unfortunately, the other factor is luck.
At the start of every turn in combat, an RNG roll is made for every character. The number that comes up is then added with the character’s speed to produce the Initiative rating. Characters with the highest Initiative rating goes first, followed by the second highest and so on until everyone has made a move (or not, if he/she/it is stunned).
Due to the aforementioned RNG roll, the effect of Speed buffs and de-buffs on initiative order is diminished. For example, it can be infuriating to find that an enemy that has its Speed de-buffed somehow gets to move first in the next turn because it rolled well and everyone else rolled poorly.
ENEMIES, DANGERS & QUEST DIFFICULTY:
The difficulty rating of a quest determines the level of potency of the dangers and enemies that the player would encounter. Enemies that had been encountered earlier have slightly different names on higher quest ratings (usually an adjective or adverb that makes them sound more threatening, which they are). They may also have additional attacks that can be worrisome. Their previously seen attacks are also enhanced, usually with higher damage and additional de-buffs. They also have higher statistics, of course.
Some enemies only appear at higher quest ratings. These are particularly nasty, such as hideous things that can inflict a lot of stress or mess up the party’s ranks.
ENEMIES & LOCALES:
Most enemy types are unique to the locales that they are associated with, as mentioned earlier. This can mean that the ‘locals’ have certain traits that are common to all of them. For example, the Swine in the Warrens have high Blight resistances. These similarities help the player select appropriate adventurers and in some cases, appropriate provisions.
ENEMY SIZES:
At quest ratings of 3 or higher, large enemies that occupy two or more slots begin to appear. Due to their size, they are much easier to hit. In fact, the player could choose to pile attacks on them, and there is little that they can do.
To compensate for their larger size and reduced number of allies, these larger enemies have doles of hit points, protection ratings and considerable damage output. Thus, the player has to balance between wearing down the brutes and removing the punier enemies first.
ENEMY CORPSES:
Some enemies leave behind corpses when they die.
This has more consequence than just for the player’s gratification. Corpses maintain the enemy group’s formation, which may or may not be undesirable. For example, the corpses of front-line enemies generally prevent the player’s own front-liners from smashing their rear-liners. However, if the player has pushed their front-liners to the rear ranks, the corpses of the squishy rear-liners would be quite handy at stalling the former from returning to the front ranks.
Also, for the case of the undead soldiers in the Ruins, they can be returned to full health if their corpses are still around for their standard bearers to reanimate. This is of course very bad for the player.
Enemies do not leave corpses behind if they are killed with critical hits, or die from Blight or Bleeding. This is important to keep in mind, especially when facing the aforementioned undead.
BOSSES:
Bosses are particularly powerful enemies that are only ever encountered just once on a quest, and they have abilities that are unique to themselves. They also have high statistics.
The bosses’ main weakness is their size. Most of them are huge, and generally can have only one minion (though this minion is specifically unique to them). Some bosses are smaller, such as the Brigands’ cannon, the Necromancers and the Collector, but there are not a lot of them.
Some bosses depend on hard-hitting attacks to apply pressure on the party, such as the Swine monarchs and the Prophet. In their cases, the player would have to balance between mending party members and hurting the bosses.
Some bosses relentlessly summon reinforcements, such as the Necromancers and the Collector; these are battles of attrition. They also require the player to have characters that can hit the rear ranks of the enemy group, mainly because the bosses often cower in the rear ranks.
Some bosses hinder the party, usually by taking party members temporarily out of action. For example, the Hags often toss party members into their cauldrons, and the Drowned Crew lock the lead party member in place. These fights require the player to free the affected party members, while maintaining pressure on the bosses.
Most bosses have behaviours that can be carefully exploited, if the player could spot these and take advantage of them when the opportunity comes up. For example, the Swine monarch requires the aid of its aide, the cute but mean Wilbur. Hurting Wilbur will cause the monarch to get a free attack that hits the entire party. However, Wilbur provides direction with marks, so the player can bring along the Arbalest (or the Musketeer) to clear the marks and render the Monarch ineffective.
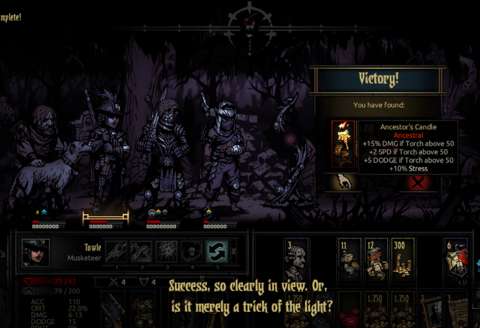
MULTIPLE-MOVES BOSSES:
Some bosses have multiple moves that they can make in one round. These extra moves compensate for their large sizes or their need to summon minions as meat-shields. Such bosses can be overwhelming if the player has not chosen a team that is specifically meant to kill them.
Each move reduces their Initiative order, meaning that their next move might occur later after the party members’ own. This is important to keep in mind, because the player might be able to stun them and cause them to lose their moves. Of course, this is not reliably repeatable because of their increasing Stun resistance.
It is worth noting here that Bleed and Blight de-buffs trigger for each of their moves, meaning that these de-buffs inflict their damage quickly on such bosses.
LOCALE BOSSES:
Each locale other than the Darkest Dungeon has two types of bosses. Presumably, the bosses of any type are actually the same person, but they come back at least twice after being defeated. Their third forms are the most powerful, of course. If they are defeated for the third time, they do not return, ever. (The player is not likely to want them to anyway, unless he/she is a masochist.) The player’s reward for defeating them are special one-of-a-kind trinkets that have only positive benefits, and potent ones too.
THE COLLECTOR:
In the base game, most bosses are the focus of quests and are only ever found in rooms. The Collector is one of the exceptions. It can only be found in corridors; if the player is unlucky, it replaces an enemy group. The fight with this hideous pervert is one of attrition; it will keep summoning minions whenever it loses any, and it can drain health from party members.
Incidentally, the code that is used to determine the Collector’s appearance will be used in later expansions for much nastier encounters.
THE SHRIEKER:
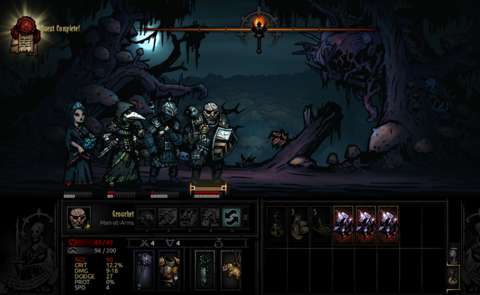
The Shrieker is another notable boss. It has a quest that is associated with it, but the quest plonks the player’s party immediately into a fight with it. This boss has three moves, each of which it will use for its abilities, all of which are distressingly powerful.
The Shrieker is perhaps one of the two hardest bosses in the game; incidentally, it was included in an update for the game that introduced difficulty options for playthroughs.
The reward for killing them is considerable though; it is a special quirk that cannot be obtained any other way. The quirk is randomly given to one of the adventurers though, so it might not always be effective. The quirk might also be a negative one.
Even if the player could not kill the Shrieker, the player could destroy its nest, which yields splendid loot rewards.
THE SHAMBLER:
The Shambler is an optional boss. Throughout the locales in the estate, the player would find strange edifices that warn the player about using a torch on them. If the player does so anyway, the party is plunged into a fight with the Shambler with the light meter immediately reduced to zero.
The Shambler’s main advantage is that it can shuffle the party members around. Of course, if the player has prepared for this by switching the skills of the adventurers so that they can do something in any position, the fight with the Shambler would be a lot more manageable. However, the appearance of the aforementioned edifices is a matter of luck.
ENEMIES STRESSING OUT ALREADY-STRUNG ADVENTURERS:
Most enemies are mean enough to pile pressure on adventurers that are already on the verge of breaking; this is especially so on quests with Veteran ratings and above. This is nasty, but it also makes enemies predictable and exploitable.
The player could buff the targeted adventurers with Riposte, if they have the skills with this buff. Most enemies that cause serious stress happen to be squishy, and adventurers with Riposte tend to be heavy-hitters that can quickly trounce squishy enemies.
The enemies also do not consider any stress-reducing buffs on the targeted adventurers. This means that the player could still use these adventurers as stress sponges, absorbing and diminishing stress that could have been applied on other adventurers instead.
EXACT STATISTICS OF ENEMY ATTACKS NOT SHOWN:
The player does not initially know about the attacks that enemies have, unless the player has been referring to the wiki. As a type of enemy uses and shows off its attacks, the game updates the list of attacks that it has. Icons appear next to the entry of an attack to indicate whether it has any secondary effects.
Unfortunately, the exact statistics of an attack is not shown; fans of the game have to discover them by checking the coding for the attack. Considering that the game does show the Dodge and Protection ratings of enemies, this omission is rather glaring.
RETREATING FROM FIGHTS:
If the party is doing poorly against an enemy group, the player has the option of having them retreat; this appears to be an instantaneous option in most cases. The party returns to the nearest already-explored room. The party members do take considerable stress damage, so retreating is not to be done lightly.
In any case though, the party is probably in no shape to continue further. The player likely had them retreat to save their lives, and the considerable stress penalty makes it even less possible that the party can continue onwards without getting killed.
STRESS FROM DILLY-DALLYING:
Considering that there are adventurers that can reduce stress and heal party members, the player might be tempted to spare one weak enemy that can do nothing much, at least until the party is restored. The game designers have noticed this, and have implemented scripts that cause the adventurers to accumulate stress past the sixth turn if the player does this. The stress penalties get worse.
Interestingly though, this penalty does not trigger if there are two enemies left in the group. There are rarely permutations for which these two enemies can do nothing much, but there are some in the game, such as two Bone Arbalests stuck in the front ranks.
RNG SEEDS:
Each and every character has a set of numbers when they are spawned into a map. This set of numbers are used for RNG rolls. Whenever each number is used for its associated roll, it is updated.
Presumably, the player could cheat by restoring the game to an earlier state (with manual file replacements) and alter those numbers with actions that are different from what were taken earlier.
Some RNG rolls do not make use of seeded statistics, however. Examples of these are the RNG roll for night-time ambushes and the chances of having enemies or the party surprised.
TOWN EVENTS:
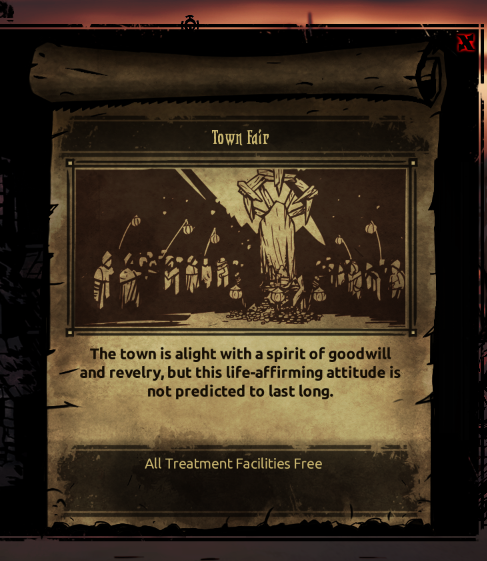
The last but not least gameplay element are events that occur at the hamlet. Events have a chance of occurring when an in-game week passes by, but only one of them can occur in any week.
Expectedly, some events are good, and some are bad. The good ones usually provide the player with some convenience, such as free provisions for the next quest. The bad ones usually take away some of the player’s options, or introduce more risk into the next quest.
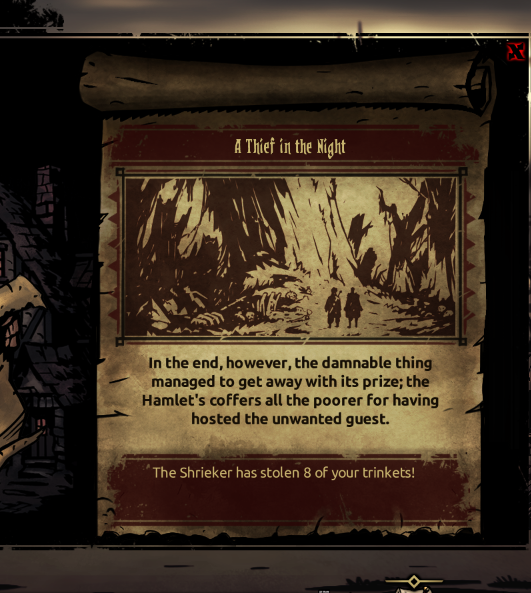
Incidentally, certain quests are only brought about by events. These are those that are associated with the Shrieker, and they are unpleasant. The Shrieker, being a particularly monstrous corvid, often steals a bunch of trinkets, thus enabling the quest to go after it to take the trinkets back. Failure to do so means that the trinkets are lost.
There are also quests that force certain events to occur, usually as part of the rewards of the quests.
EASY TO GET IN, GET OUT AND BACK IN AGAIN:
It is the synergy between the system of the hamlet development and the management of the adventurers that makes the game so engrossing. For every victory that the player claims, the hamlet gets a bit more developed, the adventurers become a bit tougher, or they get more amenities to become tougher.
Yet, the gains are also little. It can be disheartening that a victory came at terrible cost, or a fluke of bad luck resulted in a party wipe. These are moments when the player might just be dismayed to the point of leaving the game.
On the other hand, the hamlet is still there, and so are the surviving adventurers. There are forays into the awful places of the estate that can be had later, and they can turn out to be very fruitful – enough to entice the player into playing the game some more after returning to it after a while.
SOME INCONSISTENCIES IN TOOLTIPS AND GAMEPLAY TERMS:
Throughout this article, you, the reader, might have noticed some statements about an in-game term being called by another name, or even other names. This is the result of the inconsistent terminology used by Red Hook Studios.
There are some harmless examples, such as “supply items” and “provisions” being used interchangeably. There are others that are a bit more problematic, such as “torch” being used to describe the light meter in the tool-tips for skills that increase the light meter.
LOST OPPORTUNITIES FOR CHARACTER DEVELOPMENT:
Considering how colourful the adventurers are (or to be more precise, the many dark shades that they have), there could have been narratives that are spun around them, together with gameplay features that involve their backstories or even relationships with each other.
Ultimately though, the original overarching design policy for the adventurers is that they are meant to be disposable. Nevertheless, Red Hook’s writers (and artists) have noted this potential and introduced some features that concern the stories behind the adventurer in the expansions for the game.
VISUAL DESIGNS:
Darkest Dungeon makes use of layers of 2D artwork and spliced sprites with animation skeletons. Consequently, the game runs quite well even on fossil computers.
This also means that much of the artwork is static. The game depends greatly on the atmosphere that it projects. Fortunately, it exudes doles of it, thanks to an artstyle that uses a lot of oppressive shadows and harsh lines.
The artstyle is also not too difficult to copy, as countless mods have shown. At least two fans of the game have shown the skill to copy the artstyle in very convincing manners.
Red Hook’s artists do have to make some compromises though. The most obvious of these are the animated sprites for humanoid characters, all of whom look like they have disproportioned head sizes. Apparently, this was done so that they can fit on the screen without obscuring too many things while also making them immediately recognizable.
SOUND DESIGNS:
The adventurers have no voice-overs, but enemies do. Incidentally, the voice-overs were provided by fans of the game that contributed to its development during the Early Access years. There are no legible voice-overs for enemies though.
The only legible voice-overs that the player would listen are the many, many lines by the Narrator/Ancestor, who presumably is now a voice in the player character’s head. He has a gravelly baritone that can seem goofily phlegmy at times. Otherwise, he has appropriate inflections for his expressions, many of which would become sub-culture memes among the fans and followers of the game.
Most of the sound effects can be heard during combat. There is the sound of metal cutting through flesh, heavy objects crushing things, the cracks of gunshots and less believable noises for magical occurrences, to name some examples.
Some others are used for ambience, such as the footsteps of the party as they trudge through corridors and the howls of otherworldly things in the distance.
Perhaps the most memorable sound clip would be the dreaded whoop that accompanies the accumulation of stress.
CONCLUSION:
There are some good ideas at work in this game. There is the trinket system, where trinkets are not gear pieces that can be equipped with hard-and-fast rules in mind. There is the stress system, which gives the player a long-term statistic to worry about. There is the positioning system, which adds a layer of complexity to the make-up of a team. The game also has surprisingly memorable style and presentation.
Yet, these ideas are not always great in execution, and neither are they new; they are just not commonly used in video games. The trinket system is held back by a rudimentary gear system for player characters. The stress system culminates in what is practically a simplistic RNG roll. The positioning system is subjected to the element of surprise, which is luck-dependent. There are lost opportunities to introduce character development.
This shows that for every innovation that Red Hook has thought of, it muddles it with ages-old or just lazy designs.
Nevertheless, Darkest Dungeon is still one of those games that do reward meticulousness on the part of the player – when Lady Fortune is not scowling or leering in the player’s direction of course.
