The Last Of Us Part 2 Workbench Locations - Where To Find All Workbenches
You'll want to upgrade your weapons throughout The Last of Us Part 2 to deal with some deadly threats--here's every place you can.
Note: We've gone out of our way not to include spoilers for anything that happens in The Last of Us Part 2, but looking at any photos or reading any descriptions might give away plot details you'd rather now know. You've been warned.
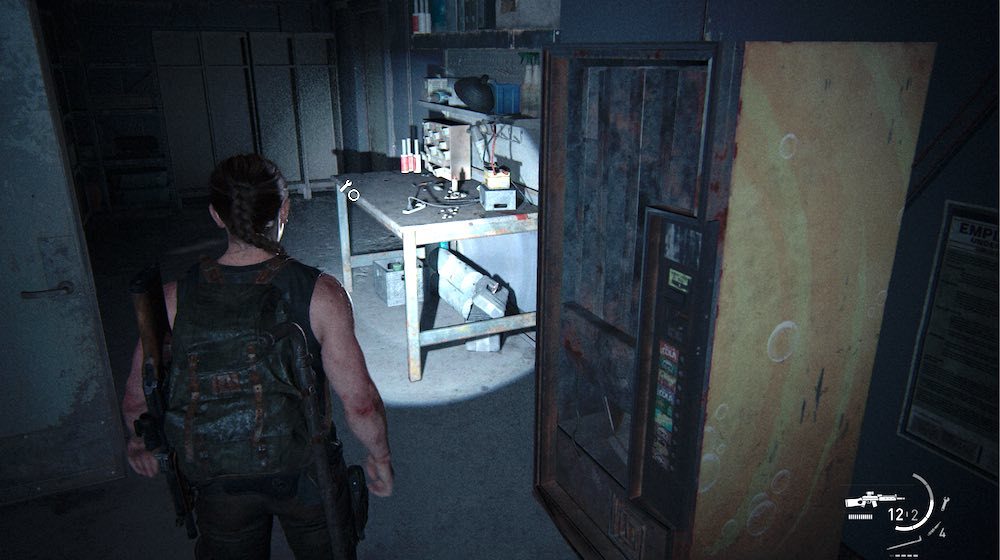
There are 25 Workbenches scattered throughout The Last of Us Part 2, and they can be pretty essential to your survival. They're the only places that you can use gun parts you scavenge throughout the game to upgrade your weapons. What's more, finding and using every Workbench in the game unlocks a Trophy you'll need if you want to get Platinum for The Last of Us Part 2. Here's every single Workbench in the game, divided by chapter, to help you get the most out of your weapons and stay alive as you seek revenge.
There's tons of more coverage of The Last of Us Part 2 for your enjoyment now that the game is out, including the first part of this walkthrough. You can check out the rest of the walkthrough, as well as a suite of other guides in our huge The Last of Us Part II guide roundup--which also includes some essential tips you should know. If you're curious about how the game stacks up, check out our The Last of Us Part II review.
Jackson
Patrol
Workbench 1: Library
After the blizzard kicks up, you'll shelter in a library. As you explore, Dina will point out the Workbench and suggest you upgrade your guns. You can't miss this one.
Seattle Day 1
Downtown
Workbench 2:5th and Marion Checkpoint

Use your map to navigate to the corner of 5th and Marion, where you'll find an old FEDRA checkpoint and a sealed gated marked West Gate 2. Find a ladder near West Gate 2 and climb to get onto the checkpoint wall. Head around to the side to find some tents. Inside is your Workbench.
Capitol Hill (after leaving Eastbrook Elementary)
Workbench 3: Gas Station Garage
Head to the left from after passing through the motel to find a gas station down the road some. Attached to it is a garage whose door you can slip under to find the Workbench.
Workbench 4: Gym

As you continue toward the TV station, you'll find an area with tripwire bombs. To get around them, break a nearby window on the right side of the street to get into a gym. Past the training dummies, in the back of the building, is the Workbench.
Tunnels
Workbench 5: Subway
Your path will divert into the subway after reaching the TV station. Keep moving until you come into a red-lit room with an acid-scoured body hung up in a hole in a fence--Ellie will comment on it. To the right of the body is a ladder you can climb, with the Workbench waiting at the top.
Seattle Day 2
Hillcrest
Workbench 6: Rosemont
Right after you enter Hillcrest, you'll find stores you can go inside: Natural Remedies is right ahead, and The Rosemont clothing store is across from it on the other side of the street. Go inside Rosemont and to the back of the shop, where you'll find a hole in the wall leading to the basement. You'll find a Workbench waiting there, along with artifacts suggesting the place belonged to an archer named Boris.
Workbench 7: Bike Shop
Your path through Hillcrest will drop you into the basement of the bike shop and the Workbench that waits there. This is another one you can't miss.
The Seraphites (Seattle Day 2 - Dusk)
Workbench 8: WLF Apartment Safehouse

Your path will bring you to a locked metal gate that you can't open (if you hop to the other side, you'll find a puzzle involving a dumpster you'll need to solve). On the other side of the street is an apartment building with a truck you can climb to access the second floor. Get inside to find an apartment you can scavenge, then leave to access the hallway. Across from the apartment you left is another one--in the back, you'll find the Workbench.
Workbench 9: Weston's Pharmacy

Once you've passed through the Merci building, you'll drop into a pool and climb out on the other side of the road. Look for Weston's on the left side of the path forward. There are a lot of supplies inside, as well as a safe, and a Workbench in the pharmacy's back room.
Seattle Day 3
Road to the Aquarium
Workbench 10: Store's Barricaded Room
After you leave the theater, your path toward the aquarium will divert you through a storefront, and then into the back hallways of the building between shops. As you head down the hall, look for a blocked door on your right, which you can crawl under. The Workbench is inside.
Workbench 11: Department Store Office
You'll pass an area with a lot of scaffolding in front of storefronts before attempting to make your way up to a footbridge between two buildings. Your path will take you to the left through a destroyed, multi-level department store. Climb to the top floor, but instead of heading to the bridge, turn around and look for a path to the offices behind you. The Workbench is waiting among them.
The Flooded City
Workbench 12: Manufacturing Building

Once you're done with the mall, you'll get a boat that you can use to traverse the rest of Seattle to get to the aquarium. Continue until you ride down some rapids and Ellie is forced to restart the boat's motor. From here, look ahead for a storefront with a blue awning and a sign that reads "Manufacturing." Hop out of the boat and go in to find the Workbench.
Workbench 13: Barcade
Eventually, you'll take your boat into the flooded front of a barcade restaurant. The path is blocked here by a gate you have to raise, but the chain is obstructed by debris, forcing you to get out. You'll find stairs in the back to get to the barcade's second floor; head to the right, past the arcade machines and pool table, to find the Workbench against the right wall.
Seattle Day 1
On Foot
Workbench 14: Boat Repair Shop
After passing through the hardware store, you'll use a rope to climb up on top of a boat shop and enter it from the roof. The Workbench is inside and hard to miss as you pass through the building.
The Forward Base
Workbench 15: Tents Outside Hotel
Another one that's tough to miss, this Workbench is located in one of the green tents as you walk toward Serevena Hotel.
Hostile Territory (Seattle Day 1 - Dusk)
Workbench 16: Scar Camp
Once you've pushed through the destroyed building and climbed to the top, you'll exit into an abandoned Scar camp on an outdoor patio. You'll find the Workbench in the back corner before you leave.
The Forest
Workbench 17: Garage

After you exit the forest, you'll slip under the door of an auto garage. The Workbench is against the back wall of the building.
The Coast
Workbench 18: Construction Site Office
Keep moving until you hit a construction site. Climb over the fence and enter the building on the far side to find the Workbench inside.
Seattle Day 2
The Shortcut
Workbench 19: Cellphone Store
Your meandering path will take you up the rapids that have flooded the street, through several stores. After you've gone through the apartment that takes you to the roof with the arrows, you'll soon enter a cellphone store. Look to the left of the entrance to find a Workbench against the wall.
Workbench 20: Near the Prophet Shrine
Once you've entered the skyscraper, you'll ascend toward the sky bridge. Keep going until you see the Prophet Shrine; in the next room is the Workbench.
Ground Zero
Hospital
Workbench 21: Electrical Room
Working through the hospital, you'll find several of the doors are locked without power. Eventually, you'll climb into the electrical room, where you can restore the hospital's generator and power up the doors. There's a Workbench in the same room.
Seattle Day 3
The Island
Workbench 22: Past The Logging Camp

Making your way across the island will take you to the Logging Camp, and you'll have to cross through the mill on the far side to continue. The other side is empty of Seraphites, and just ahead, you'll come to a pair of buildings. The one on the right contains another shrine, but the one on the left has a Workbench inside.
The Escape - Old Town
Workbench 23: Radio Station
When you get to the Old Town section of the island, you'll make your way to a radio station, which you'll enter from the roof. The Workbench is inside.
Santa Barbara
Pushing Inland
Workbench 24: Mansion Kitchen
You trip through Santa Barbara will take you down a street where you'll encounter some infected, and you'll then spot a clicker on a rooftop. Heading through the hole in the roof, you'll enter the mansion and then drop down to floor below. Check to your right to find a Workbench in the kitchen.
The Resort
Workbench 25: Workshop

You'll enter the resort by crawling through a hole in the fence after following the train tracks. Once you get inside, just ahead of you will be a workshop building, past a tent, in the center of the yard. The final Workbench is inside.
The Last of Us 2 News
Got a news tip or want to contact us directly? Email news@gamespot.com
Join the conversation