Star Wars Jedi: Survivor - Perk Locations And Best Perks Guide
Find the perk badges and equip the best ones in Star Wars Jedi: Survivor.
Star Wars Jedi: Survivor has 25 perks for you to discover, and they can be equipped by interacting with a Meditation Point. Naturally, with only a limited number of perk slots, you'll want to make sure that you're using the ideal options. Here's our guide to help you with the perk locations and best perks in Star Wars Jedi: Survivor.
- Star Wars Jedi: Survivor - Where to find perks and how to equip them
- Vendor Perks
- Shatter Perk
- Resilience Perk
- Dexterity Perk
- Fortification Perk
- Fellowship Perk
- Precision Perk
- Marksmanship Perk
- Gambler Perk
- Centered Perk
- Perplexity Perk
- Recuperation Perk
- Persistence Perk
- Fortitude Perk
- Unflinching Perk
- Patience Perk
- Ambidexterity Perk
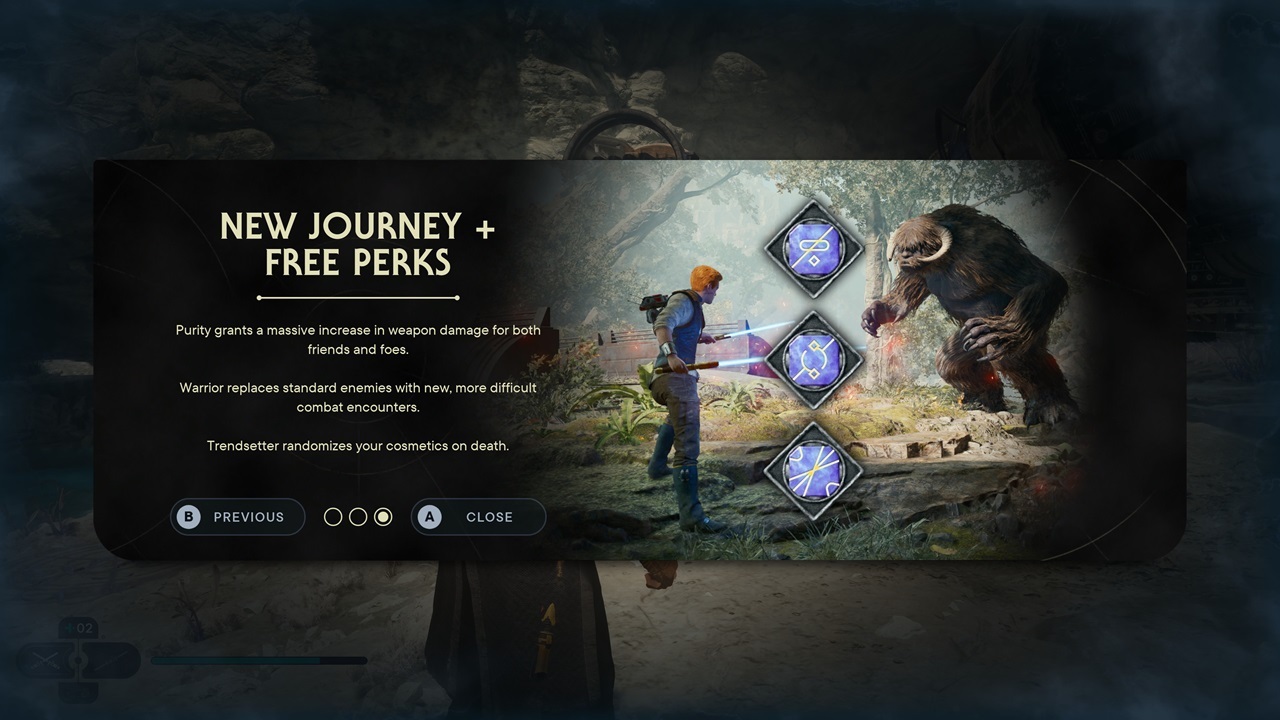
- New Game Plus Bonus Perks
- The best perks in Star Wars Jedi: Survivor
Star Wars Jedi: Survivor - Where to find perks and how to equip them
Star Wars Jedi: Survivor perks are akin to passive skills. You can acquire most of these by purchasing from a Zee the Droid in Pyloon's Saloon or by interacting with blue Essence Crystals. Still, it's worth noting that some of these crystals provide boosts to your max HP, Force, and XP, while only a select few grant new perks. For the stat boosts, you can refer to our Essence Crystal locations guide.
Once you have a perk badge, you may equip it to gain a boon. You can do this by interacting with a fast travel point and going to the corresponding Perks menu. However, bear in mind that each perk has a cost in terms of slots. By default, there are three perk slots. You can gain an additional one by exchanging Datadiscs with Zee. As for the other extra slots, you'll have to discover them as you explore the game world.
In any case, our Star Wars Jedi: Survivor perk locations guide takes a look at where you'll find these passive boons, as well as their effects and slot cost. Then, after listing them down, we'll take note of the ideal options for the campaign.
Vendor Perks
These Star Wars Jedi: Survivor perks are sold by Zee in exchange for Datadiscs. She'll become a vendor NPC after you complete the Forest Array main mission. You'll then find her on the second floor of Pyloon's Saloon.
- Equilibrium - Using a Force Power increases the damage of your next Lightsaber attack; costs three slots.
- Versatility - Deal extra damage temporarily after switching Lightsaber stances; costs three slots.
- Wisdom - Gain more experience when you defeat enemies; costs three slots.
- Elixir - Healing Stims also fill a small amount of the super meter; costs two slots.
- Flux - Regenerate a small amount of Force over time, but maximum Force is reduced; costs one slot.
- Steadfast - Absorb one hit without being interrupted while you're sprinting; costs one slot.

Shatter Perk
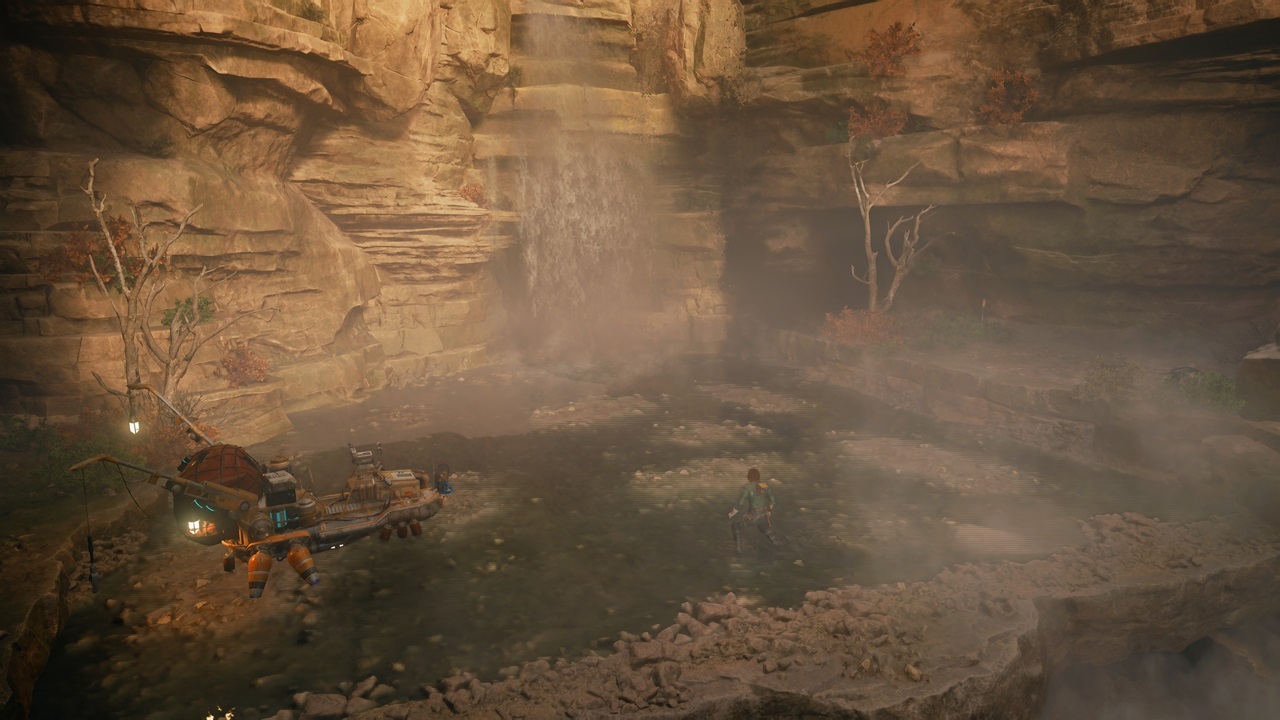
- Location: Koboh (Sodden Grotto) - This mini-dungeon is close to the Rambler's Reach Outpost fast travle point. The crystal itself is in the Rancor's cave. Beat this Legendary Enemy so you can interact with the crystal.
- Effect: Attacks are more effective at breaking enemies' guard; costs two slots.
Resilience Perk
- Location: Koboh (Chamber of Duality) - This is your reward after clearing your first High Republic Chamber (i.e., Jedi Temple). It's also where you'll meet Zee.
- Effect: Increases your block meter; costs one slot.
Dexterity Perk
- Location: Koboh (Chamber of Reason) - This particular Jedi Temple can be found in the Basalt Rifts. Follow the sloping path uphill and you'll see the entrance just before you fight a Mogu (i.e., Forest Wampa).
- Effect: Lightsaber Throws deal more damage; costs two slots.
Fortification Perk
- Location: Koboh (Forest Array) - As you're making your way through the Forest Array, you'll have to take a side path to avoid the gunner. There's a narrow passageway that you can squeeze through, which takes you to a small area with a BD-1 component. If you cross the gap to the other side, you'll find this crystal.
- Effect: HP regenerates up to a minimum amount; costs three slots.


Fellowship Perk
- Location: Koboh (Chamber of Clarity) - This is your reward for clearing this Jedi Temple in Untamed Downs. You can't miss it as it's near Fort Kah'lin, a Bedlam Raider stronghold.
- Effect: Allows BD-1 to carry an extra Stim charge; costs four slots.
Precision Perk
- Location: Koboh (Stone Spires) - While you're activating the laser conduits using the Koboh Grinder, you'll notice a crystal that's blocked off by gunk. Use the Koboh Grinder to spread the flames toward it.
- Effect: Parry timing is shorter but you deal more stamina damage when you parry; costs two slots.
Marksmanship Perk
- Location: Koboh (Stone Spires) - After clearing the encounter in the manse (i.e., that building that looks like it's from The Lord of the Rings), head to the top and check the roof.
- Effect: Your Blaster shots deal more damage when you're using Blaster stance; costs three slots.
Gambler Perk
- Location: Jedha (Crypt of Uhrma) - This is your reward after beating the Sutaban Alpha. You can learn more in our Legendary Enemies guide.
- Effect: Increases the XP you earn, but you can no longer restore after death; costs four slots.

Centered Perk
- Location: Shattered Moon - This is your reward after defeating the campaign boss in this zone.
- Effect: Stagger enemies around you while you're healing; allows you to take one hit without the action getting interrupted; costs two slots.
Perplexity Perk
- Location: Koboh (Mountain Observatory) - This is your reward after defeating the campaign boss in this zone. Ride the elevator after the fight to get this crystal.
- Effect: Increases the damage dealt by enemies affected by Confusion; costs two slots.
Recuperation Perk
- Location: Koboh (Chamber of Connection) - The entrance to this Jedi Temple is in Viscid Bog. However, you can only get there via the Gorge Crash Site (i.e., the first fast travel point in Koboh). Use your Force Lift to open the metal door next to the fast travel point, then go down the elevator shaft. From there, ride the Relter to your right, all the way to a zipline. You have to take the first zipline, then jump off to a second one, which will eventually take you to the Jedi Temple. Here's the kicker: the puzzle inside is fairly tricky, as you need to connect the flames using the Koboh Grinder.
- Effect: Increases the minimum level that the Force Meter can regenerate to; costs three slots.
Persistence Perk
- Location: Koboh (Chamber of Fortitude) - The entrance to this Jedi Temple is in Southern Reach, just below the hilltop where you initially met Mosey. There's a building here with a dome that you can open by using your Force Lift. From there, traverse the interior of the Corroded Silo until you reach the temple's entrance. Inside, you'll battle a boss named Anoth Estra, and you'll acquire this perk once you're done.
- Effect: Each enemy you kill while Slow Time is active replenishes a small amount of HP; costs two slots.

Fortitude Perk
- Location: Koboh (Fogged Expanse) - You can grab this after defeating the Vile Bilemaw Legendary Enemy. Continue along the Fogged Expanse zone until you reach a cliffside area with half a dozen Roller Mines. You'll see a ledge that drops you down to a mudslide, leading to this creature's lair.
- Effect: Increases Lightsaber damage and all incoming damage; costs four slots.
Unflinching Perk
- Location: Jedha (Desert Ridge) - Head to Desert Ridge by way of Anchorite Base. There's a narrow pathway that has a crystal at the back. As you approach it, the Golden Skriton Legendary Enemy will spawn.
- Effect: Take a single hit while charging your Blaster without getting interrupted; costs one slot.
Patience Perk
- Location: Koboh (Chamber of Detachment) - This temple's entrance is in the Mountain Ascent zone. From the fast travel point, go through the two green barriers and check behind the waterfall. The puzzle here requires you to move around two large blocks. The goal is to have one block on the ground plate, which will lift the second block.
- Effect: Activating Slow Time will restore some health; costs three slots.
Ambidexterity Perk
- Location: Koboh (Stone Spires/Chamber of Ambidexterity) - This is yet another perk found in the Stone Spires zone. From the manse/courtyard, ride the Relter to the well-hidden nook below the Force Tear. There's a section that's covered by gunk. You'll need to ride another Relter to the opposite side of this part, then redirect the laser to a point close to the cave. With that done, you'll be able to use your Koboh Grinder to trace a line of fire to the interior.
- Effect: Shoot enemies with your Blaster to increase the damage of your Lightsaber's attacks; costs three slots.
New Game Plus Bonus Perks
Apart from the above, do take note that you also receive three additional perks once you unlock New Game Plus Mode. These don't use up a perk slot, so you're free to combine them with your usual selections. For the other facets related to this particular run, you can check out our New Game Plus guide.
- Warrior - Remixes encounters by adding tougher enemies (i.e., Purge Troopers and Sentry Droids in Coruscant).
- Purity - Increases all damage dealt by Cal Kestis, friendlies, and enemies.
- Trendsetter - Randomizes all cosmetics you have equipped when you die.
The best perks in Star Wars Jedi: Survivor
Resilience - The Resilience perk remains useful for most of the campaign. It only costs one slot, and it increases your block meter, allowing you to mitigate and deflect more melee hits and ranged projectiles. This is great if you like using the Dual-Wield stance, as that has lower block stamina.
Shatter - Shatter improves your ability to break the guard of enemies with your attacks. As such, successive strikes will see them falter more often.
Wisdom - The Wisdom perk might cost three slots, but it's one of the best perks in Star Wars Jedi: Survivor. This is because it increases your XP gains from kills. As such, all you need to do is keep beating up hapless foes and earn more XP to receive skill points.
Gambler - Gambler is more expensive at four slots. However, it provides a bigger XP boost compared to Wisdom. The downside is that you will no longer be able to use the Restore action on death (i.e., regain lost XP). This is ideal for XP farming runs where you're just taking out the same groups of enemies and respawning them via Meditation Circles.
Unflinching - This is one of the best Star Wars Jedi: Survivor perks, especially if you like using Blaster stance. You'll still be able to charge and fire your shot without being interrupted after a single hit.
Fortitude - Similar to Gambler, this is a high-risk, high-reward option. It will increase the damage you deal with Lightsabers, but all incoming damage will get boosted as well. As such, if you're great at dodging and parrying, this is a good pick for you.
These are the Star Wars Jedi: Survivor perk locations the you can obtain in the campaign. Try to make use of the ones that suit your playstyle, and don't forget to unlock new perk slots so you can equip more of them.
Star Wars Jedi Survivor is a massive, open-world game, with numerous facets and secrets to discover. You can learn more in our guides hub.
Got a news tip or want to contact us directly? Email news@gamespot.com
Join the conversation