Resident Evil Village Walkthrough (Spoiler-Free)
We take you through every inch of Resident Evil Village to help you make sure you don't miss a thing--while leaving you free to enjoy the story at your own pace.
Ethan Winters just cannot catch a break. First the whole mold business at the Dulvey house in Louisiana, then the thing on the ship
with the killer child, and now, he's stuck in an Eastern European village being hunted by a whole Brady Bunch of murderous freaks and their Lycan pals.
Ethan can use all the help he can get, and we're here to provide assistance with a comprehensive walkthrough on how to (hopefully) survive Resident Evil Village. And don't worry, we'll go as spoiler-free as possible, and offer plenty of warning when we can't.
- Part 1: Introduction and the Village
- Part 2: Castle Dimitrescu
- Part 3: Returning To The Village
- Part 4: House Beneviento
- Part 5: Back To The Village, Post-Beneviento
- Part 6: Moreau's Reservoir
- Part 7: Back To The Village, Post-Moreau
- Part 8: The Forbidden Forest and the Stronghold
- Part 9: Heisenberg's Factory
- Part 10: The Endgame
Part 1: Introduction and the Village
So before you even get started with the game, we highly recommend giving the Baker Incident Report a read. It says it's 80 pages, but don't panic; it's only a couple of sentences per page, and it gives a really nice rundown of everything that's happened since the events of Resident Evil 7, as well as an eye-opener of a reveal when you find out who wrote this thing in the first place. It also provides some context for where you find yourself after starting the game. When you first get control, take the wee baby Rose upstairs. Her crib's in the room at the end of the hall. After the baby's tucked in, check out the laptop for a couple pages of Ethan’s Diary. The Medical Checkup Report is hanging out in the next room, as well as a photo album. Head downstairs to the kitchen when you're ready.

Once a long cutscene happens, you'll wake up in the snow, next to a crashed van, a dead cell phone, and an even-deader soldier. Take a look at the Mission Briefing if you're curious, and then follow the only path forward. There's a trail in the snow to follow if you get turned around. Follow the trail until you get to a bridge leading to a run-down shack of a house. Stroll through the house until you get to the basement and the closet at the dead end. Open the closet. Congratulations, you've found...a mouse.
Something will start kicking up a racket upstairs, so head back up. A collapsed shelf will block your path but just walk towards it, and Ethan will slip underneath. Walk out of the giant hole in the wall, and follow the path. Most of the side houses are full of locked doors and drawers you can't open yet. For right now, the only house you need to concern yourself with is the nicer one with the lantern burning out front. Walk through the front door, go straight forward, and grab the knife. Test out your new best friend on the crate behind you for a first aid medicine. For you Resident Evil 4 veterans: the good news is you can break crates with the knife just by interacting with them, no need to switch to it. The bad news is it's just the dilapidated crates with the yellow tape you can break. So, save your energy, you can't bust every barrel you see here.
Proceed a little further into the house and open the curtain. You’ll get the LEMI handgun during the cutscene, then get dragged down into the basement. After getting your current, grisly bearings, you'll have your first actual fight in the game against a couple of Lycans. The usual rules apply; headshots are best, but these guys are awfully agile, and you don't have a lot of ammo. You're better served keeping your distance, trying to kneecap 'em before going for your headshot. If you run out of ammo, which is likely to happen, you'll have to finish the job with the knife. Don't forget to block when you see Lycans try to move in for a bite. You'll still take damage, but not nearly as much.
After dispatching the Lycans, use the exit, head back up to the house, and fetch the bolt cutters. After you get the Fiona Apple song out of your head, check out the adjacent shed for a Chem Fluid. Use the bolt cutters on the gate ahead, and move on down the road to the next house, across the tiny bridge. Grab the bullets straight ahead, and prepare for more danger. Go back to the door, grab the edge of the shelf closest to the door, and block off the entrance. Head upstairs. There's more ammo and another Chem Fluid. You'll have to take down a couple more Lycans. If you can run past and bottleneck them on the stairs, you'll have a nice straightforward shot, but watch your back regardless, as the shelf blocking the door isn't invincible. After taking care of business, you'll hear a friendly voice on the radio tell you to go to Luiza's past the fields. Great idea, but you've got one hell of a roadblock ahead.
Exit the house, turn left and go through the now-broken gate. Once you're in the open area and the music changes, it's game time. There be bastards on the right path in the house on the hill, so cut left. Open the crate against the wall and grab the herb within. It's not the worst idea at the moment to head into your menu, craft a first aid medicine and patch up before moving on. Head up the stairs directly to the right of the crate, and follow the porch. Over the divider, you'll see a gang of Lycans drop in from the trees, in case you weren't already motivated to run like hell. Head into the house and block the entrance with the shelf. There's only the one entrance here, and there's a bunch of loot, so you've got a quick minute to gear up. There's an herb, gunpowder, and handgun ammo lying around the edges of the two rooms, but the main event is the shotgun on the table. There are only two shells in it, though. Make 'em count.
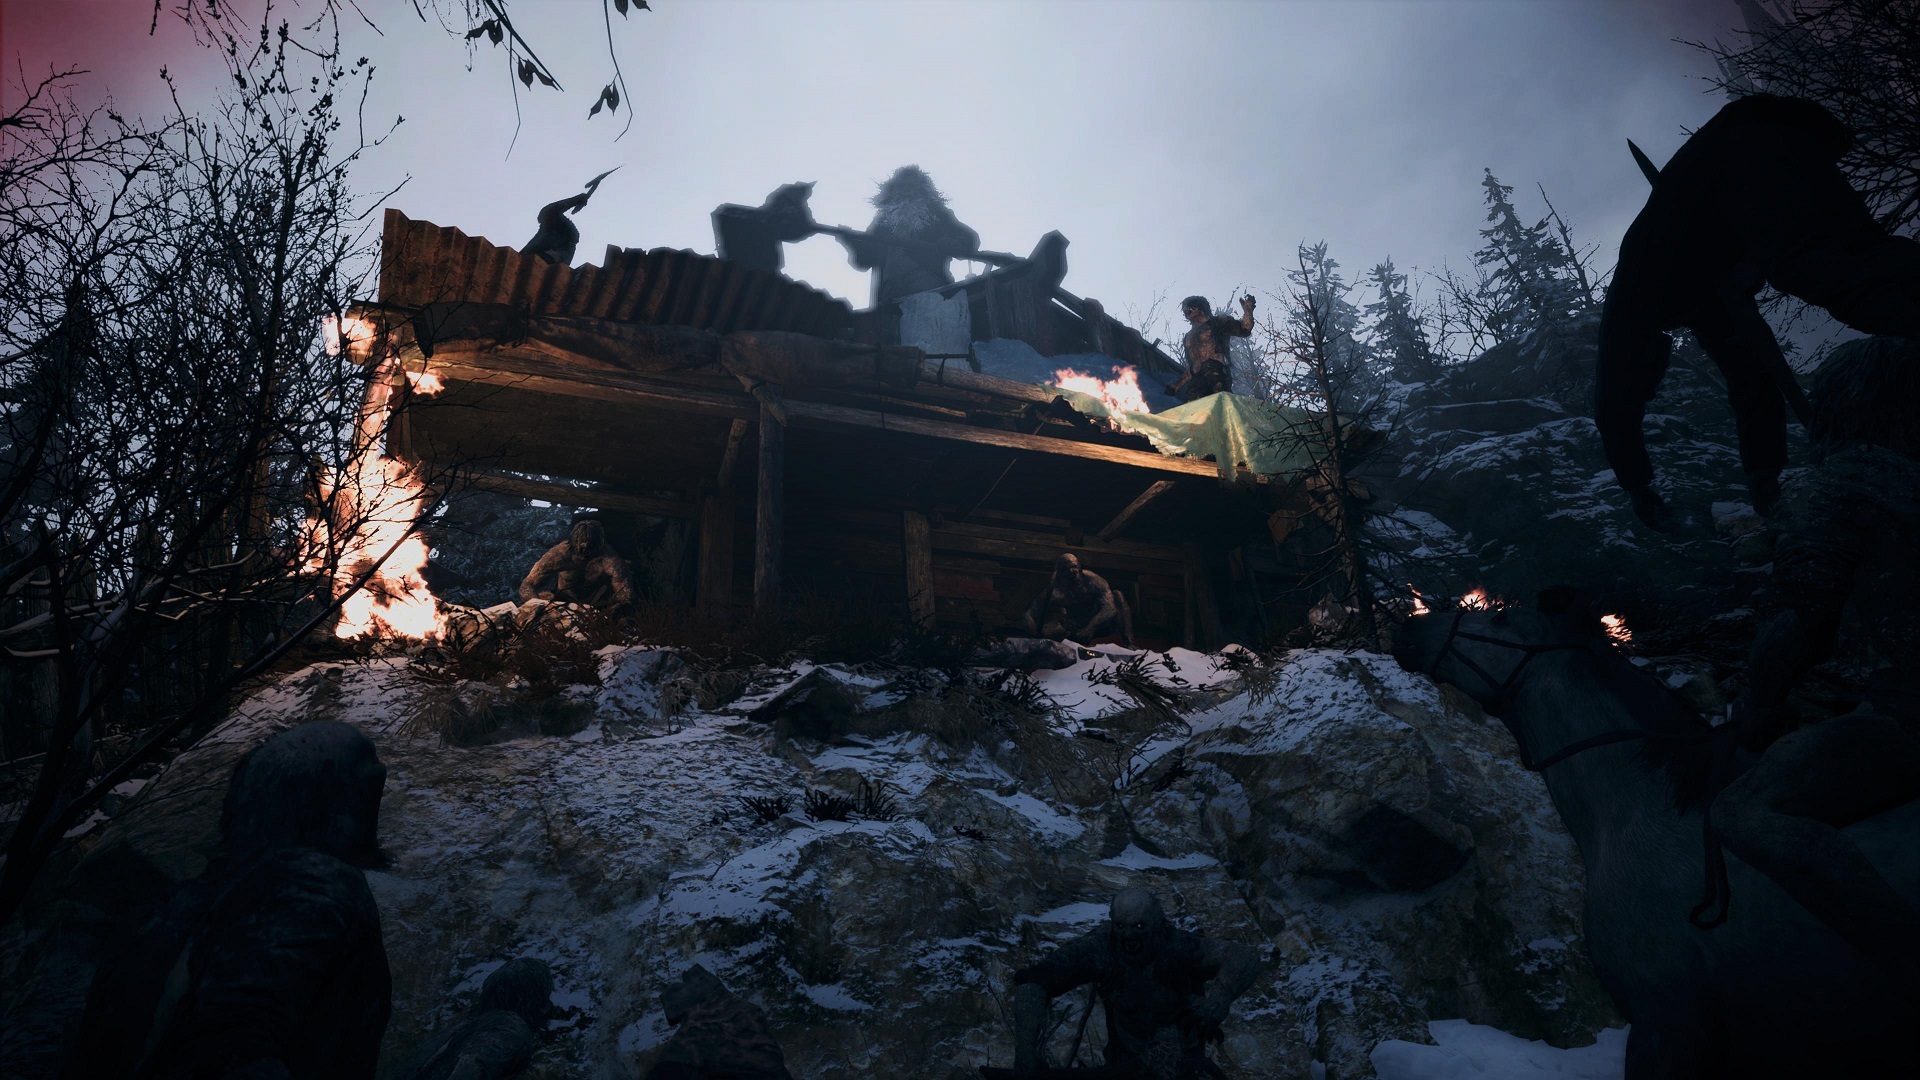
Eventually, the mob will break in, and your mantra here, and, really, for the rest of the game, is "Fight smarter, not harder." That especially goes for this sequence since your actual goal is just to survive the onslaught of Lycans for a few minutes. Once the mob gets in, retreat into the back room, wait until they cross that threshold, and shoot the pile of flour by the door. That'll create a cloud that'll let you make like Batman and slip down the ladder to the basement unseen. Grab the Rusted Scrap at the bottom, but from here, the key is to keep moving. The path leading outside can eat a little time since it goes to the back alley behind the house, but you'll be found eventually. The next house over is another place where you can block the entrance with a shelf, but there's also a red barrel by the door that will explode when you shoot it. Use it wisely, while also keeping an eye on the windows. If there's a Lycan already hanging off the boards there, don't be in front of it when it breaks. After wandering around a bit, the house on the hill empties out, which means you can definitely slip in there if it suits your fancy. There's a ladder in there that leads to the roof, which is a decent place to breathe for a second if you get overwhelmed. Along the way, feel free to try to take out a few Lycans, but don't get too spendy with the ammo, especially for the shotgun. There's also a Lycan with a giant hammer to worry about. Don't even bother trying to start that fight. There's ammo and herbs scattered around; grab whatever you can but not if it forces you to stay in one spot too long.
After a few minutes, a cutscene will trigger, and the Lycans will clear out. With them gone, feel free to roam the area, grab all the loot you couldn't grab during the fight. If you managed to kill any Lycans along the way, most of them will drop cold, hard cash when they die. Search wherever you might've killed one. Congratulations. You've survived Village's first major battle. Head to the gate to trigger the next cutscene.
The Crests and the Castle Gate
After your loot frenzy, go through the gate. After the cutscene, go inside the house on the left. There is a Chem Fluid on the table, along with a drawer with a lock you can't pick. By the way, if you haven't sussed it out already: crafting supplies like herbs and gunpowder don't take up space in your inventory, but the ammo and first aid meds you make do. Ammo is a bit more of an immediate need, but we recommend holding off on making meds until you actually need them, at least until you can buy your first inventory expansion. Move along to the open square with the statue and a few different roads. The one on your immediate left leads to a locked door. Ignore that for right now. Pick up the gunpowder on the bench to your right. Dead center leads to a well you can't do anything with yet, and a tractor with some Rusted Scrap. Take the other path on the left of the statue to move on. There will be some crows in the road here. More good news for RE4 vets: yes, you can and should pop a cap in the crows for some extra money--a.k.a. Lei--wherever you see them. You'll also see a shrine on the right with a model of a goat. Shoot this Goat of Warding for an easy achievement/trophy. There's over a dozen of these guys around, and they all make a weird wood-knocking noise when you're close.
At the end of the road is the castle gate, which needs the Maiden and Demon Crests to open. Before getting to that, take a quick stroll to your left. There's an herb on one of the graves there. Head to the right of the castle gate to the smaller gate leading to the village's humble church. The Maiden Crest is in here, on the shrine, along with the first typewriter in the game.

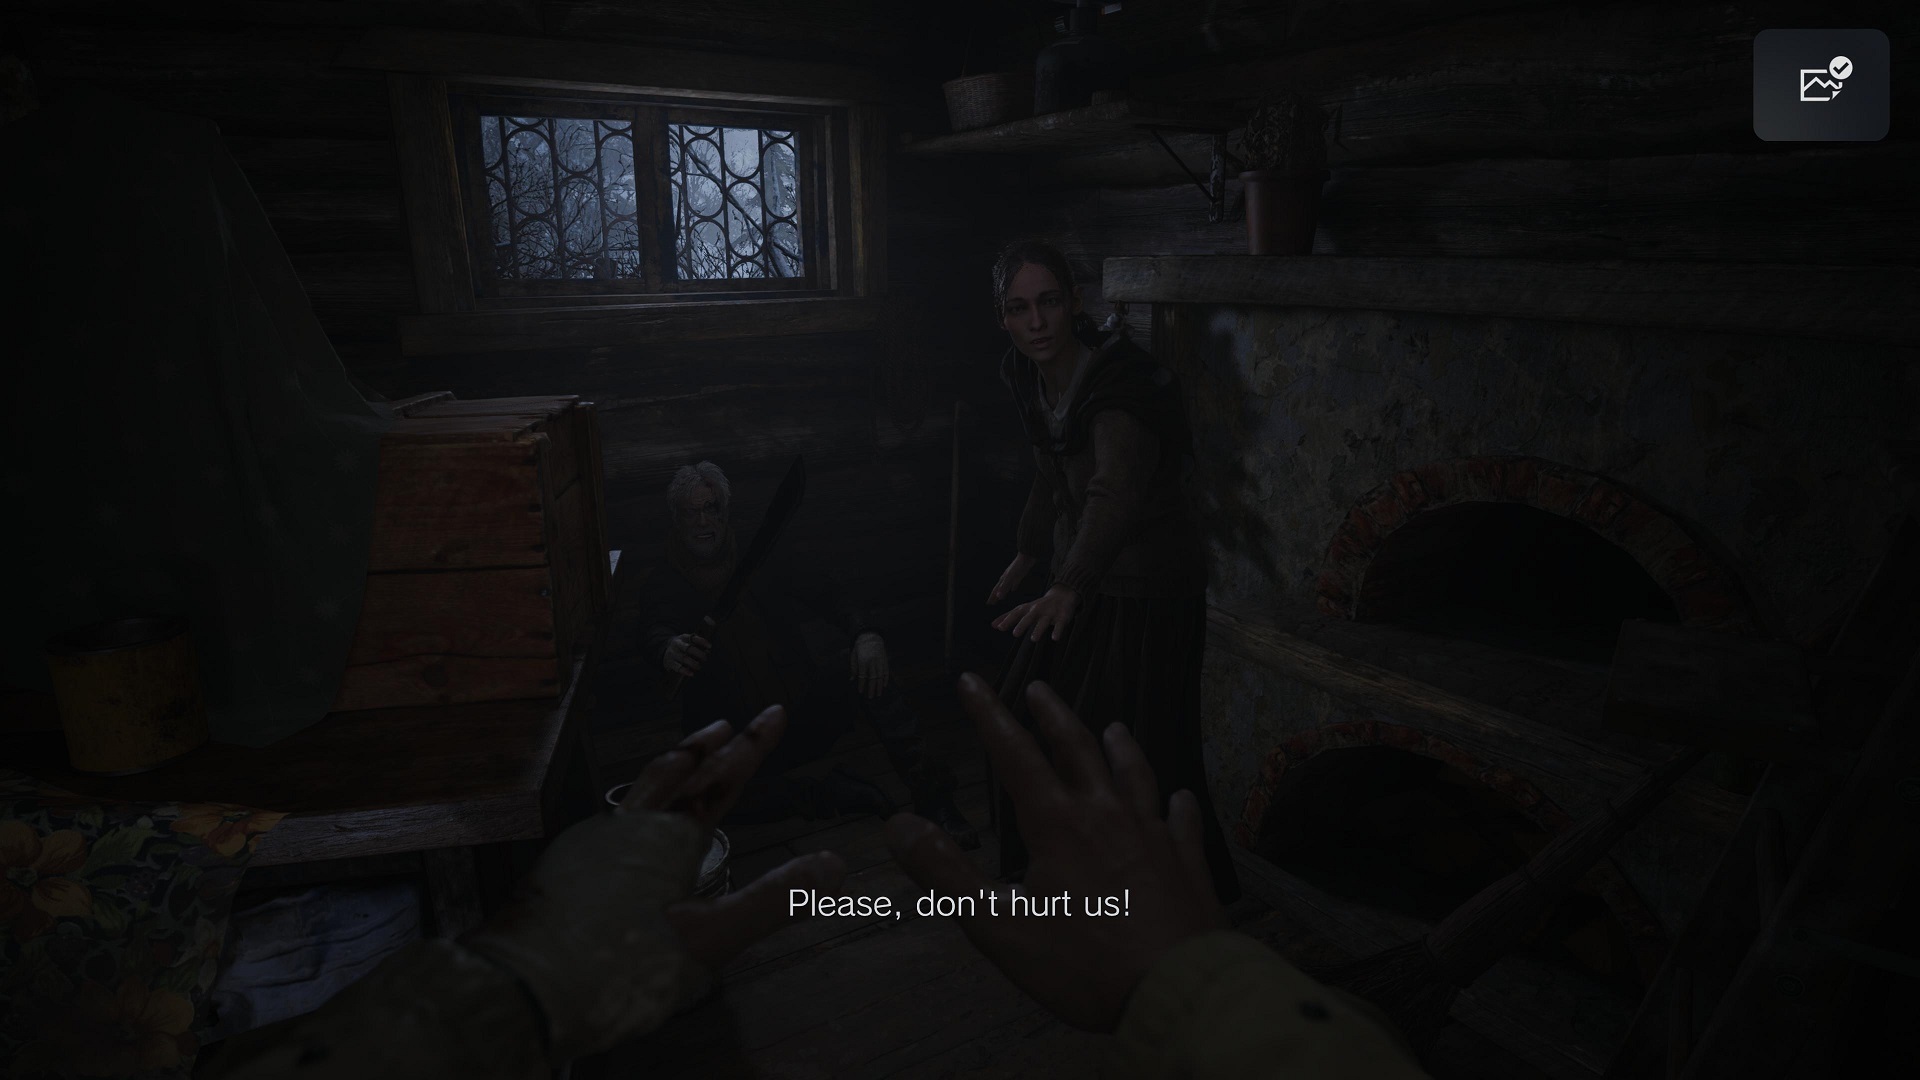
Head out the front door and down the path towards the scarecrow. Duck into the shack on the left. You'll hear growls off in the distance when you get inside. Grab the scrap, the gunpowder, the mine, and the handgun ammo in the drawer. When you're ready, move further up the trail. Your enemies are hanging out in the tall grass. Ideally, what you want to do is reach Luiza's house up at the top of the hill without alerting the Lycans. Get low and stay away from any swaying grass. As long as there's no one visibly looking at you, you can smash the crate on top of the rock without raising an alarm. There's Rusted Scrap on the other side of the cart stuck in the road and in the second shack on the left if you're feeling ambitious, but between a couple bits of scrap or not having to waste time, health, and ammo dealing with three very pissed-off Lycans, choose the latter.
However you end up doing it, you're safe once you get up to the house at the top of the hill. Watch the cutscene, then slip out of the open window. Break the crate immediately ahead for some scrap. Turn around and grab the gunpowder on the ledge before climbing it to get through the broken wall. Once through, grab the Chem Fluid from the outhouse to the right. Note that if you open the doors of all the outhouses in the village in a single playthrough, you'll unlock the "When You Gotta Go..." Trophy/Achievement. If you follow along with this guide, we'll bring you to each one.
At the other end of the courtyard is the Demon Crest, locked in a shrine that requires a screwdriver because nothing is ever simple in Resident Evil. Ignore that for right now, unlock the front gate, and watch the cutscenes.
Once you're in the house, save at the typewriter to the right. There's nothing else in here except a photo album and a brief note. Continue on down the hall for a much longer cutscene. When you get control back, you'll be in a garage. Head into the next room, then the kitchen. One of the bottom cupboards under the sink has some money. One of the top drawers under the sink has the key to the truck. Examine the keychain a bit further to take the screwdriver. Grab the shotgun shells at the end of the room, and head back to the garage. Jump in the truck, and hit the gas when prompted. When Ethan's little plan fails to pan out, follow the stairway up. Watch the cutscene. There's nothing else up here, so climb out the window.
You'll wind up back in the courtyard. Go to the shrine, use the screwdriver, and you've got yourself a Demon Crest. Head through the gate, but before continuing back through the field, turn to your right and hop the fence over the dirt road. You'll find a small area on the other side of the road where you can walk up the hill a bit toward the wall that rings Luiza's property. On the stone wall at the end of the path, right at the top of a small set of stairs, is a Goat of Warding you can shoot.
Now continue back down the path. Save at the typewriter in the church, and go back to the Castle Gate. Plug the crests in one by one--Demon Crest on the right, Maiden on the left--and spin them, so the demon faces left, and the maiden's looking right. The Castle Gate will open.
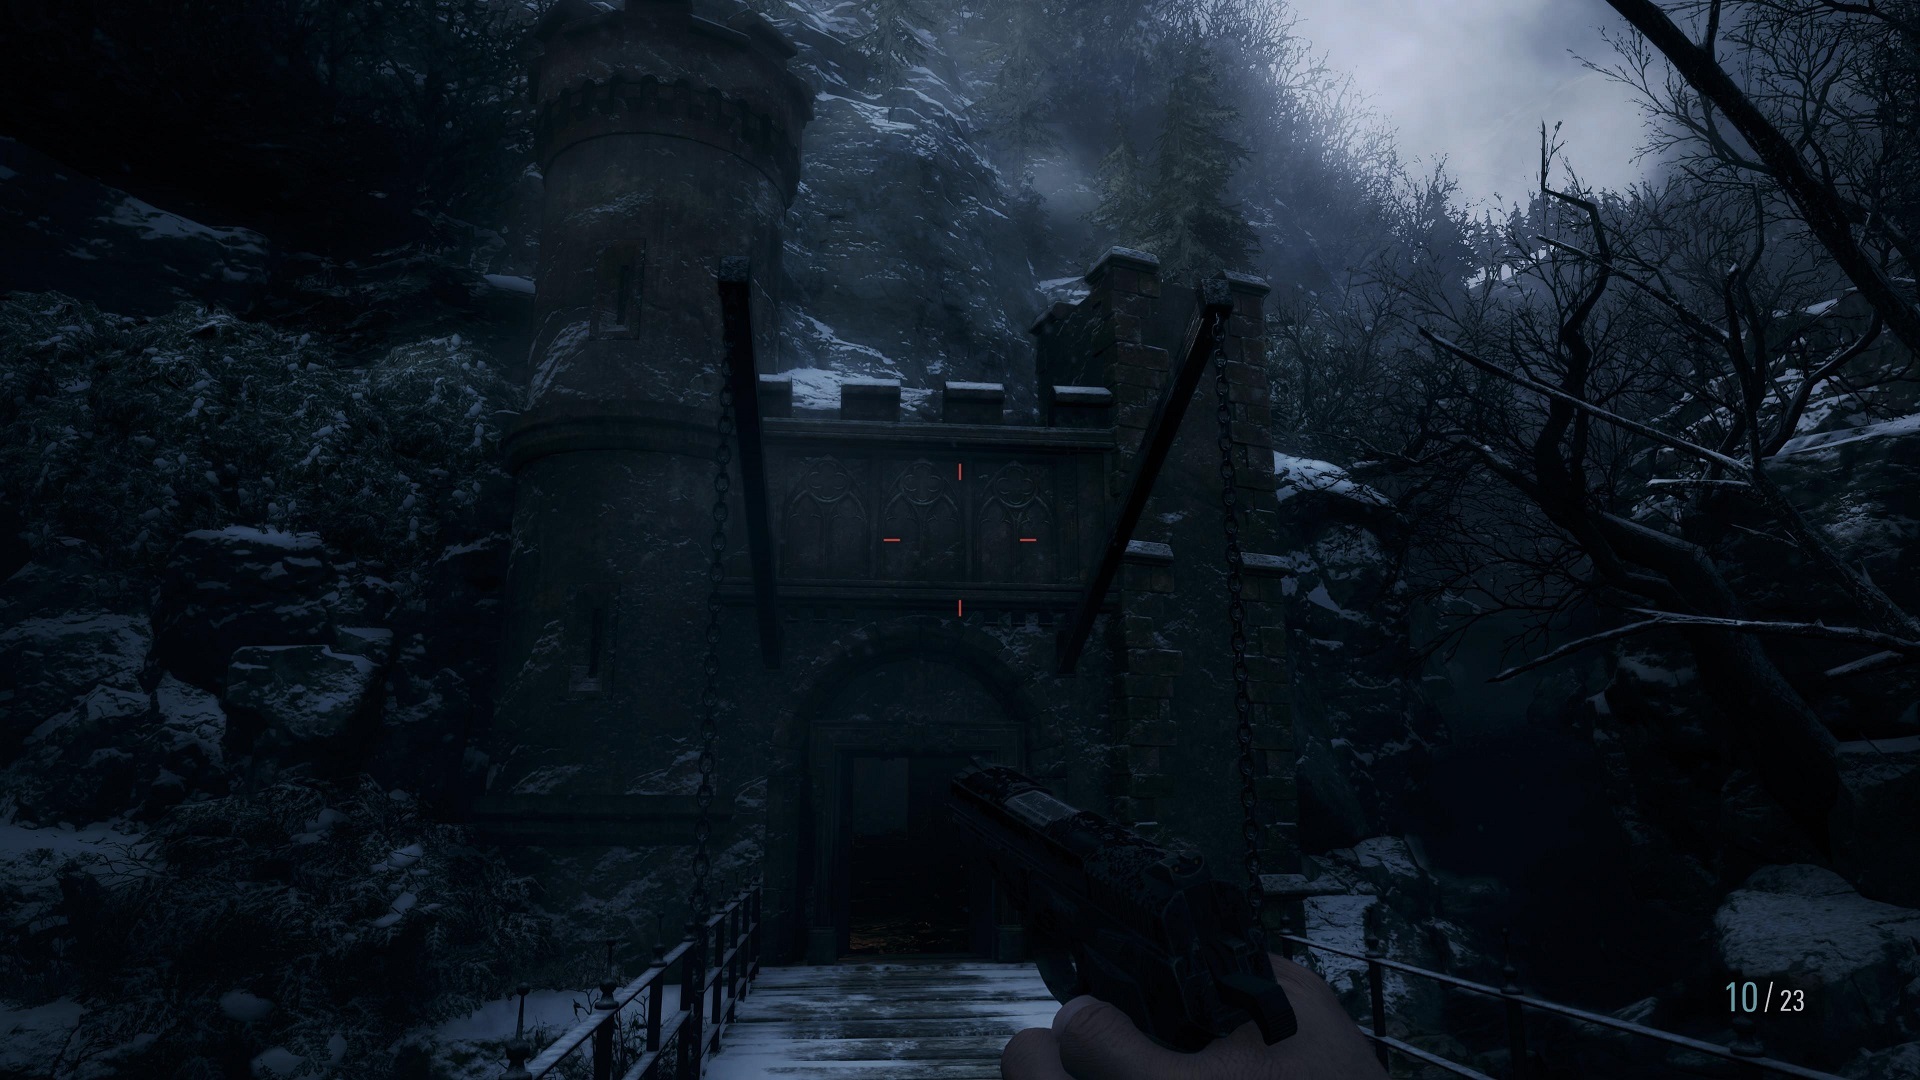
Approach slowly, pop one of the crows on the bridge for some cash, then head inside. Flip the giant switch on the left, and it's time to meet Mother Miranda and the Funky Bunch. After the cutscene, run the path forward until you get stopped by Hammer Lycan again. You'll get control again in a room with a spiked ceiling. Your exit is straight ahead; crouch down, and you can see the crawlspace you'll need to get through; just interact with it to pull the boards away. Follow the path forward again until you reach a room with a giant spike trap. Go to the far left, and you'll see an indent in the wall just large enough for Ethan to back into and wait for the spike trap to shut down. Once it's safe, press forward to get around the trap. Before leaving, however, there's a demolished crate on the left and right sides of the room. Grab the items before you go.
Exit the room and follow the path forward, which will lead you back to the giant switch. Let's try this again, shall we? Throw the switch, and follow the newly opened path outside. Shoot one of the crows hanging out on the scarecrow, then turn to your right and walk to the north end of this little vineyard. Listen carefully and you'll hear the clacking of a Goat of Warding, which is nestled among the cliff wall ringing the field, near where it curves to the left back toward the road. Shoot it before heading up the hill.
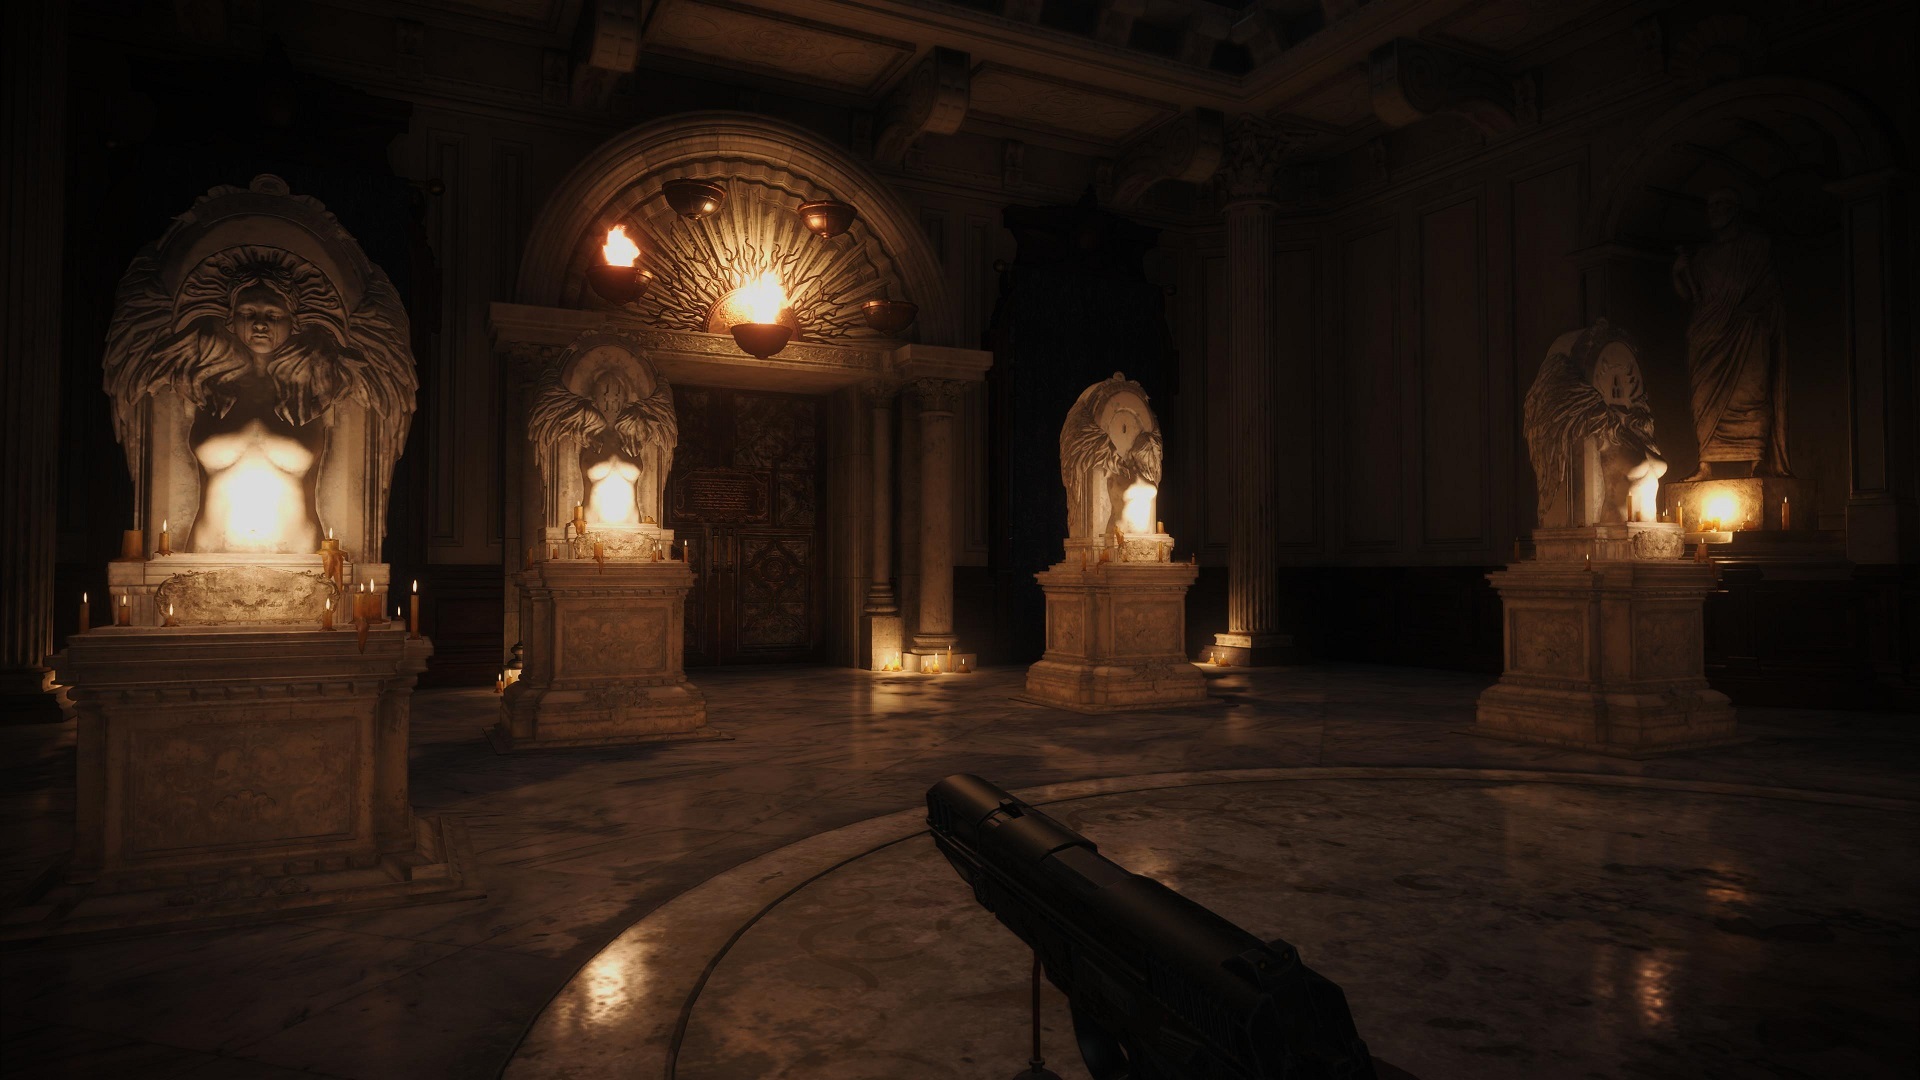
A few steps later, you'll meet The Duke: weapons merchant, fence for your ill-gotten goods, and the closest thing you've got to a friend in this godforsaken place. As tempting as his weapon upgrades might be, right this second, ammo is more useful than anything else, especially shotgun shells. You shouldn't have burned through your handgun ammo if you've tread carefully so far, but a nice goal is to have a fully loaded magazine of five shotgun shells and save ‘em for close encounters. Once you're done shopping, head on down the path, and open the doors. Welcome to Castle Dimitrescu.
Part 2: Castle Dimitrescu

From the entrance, head up the stairs. On your left, look behind you and break the vase for some Lei. Break the glass case on the right for a Gunpowder. There's a bit more in the elevator room to the right, as well as a Crystal Fragment hanging high on the wall, but you can't actually use the elevator in there yet. Take the left door. In the new hallway, the door on the right is locked. Ignore that, go straight ahead down the stairs. Break the fancy vase on the right for some shotgun shells, and go through the door. Head to the large door on the left and read the plaque to trigger a cutscene where you're properly introduced to Lady Dimitrescu and her lovely daughters.
After the cutscene, look up at your hand, and you'll be able to free yourself. Walk forward, grab the Crimson Glass off the table, and go through the door on your left. In the next room, head for the fireplace. Crouch down and crawl through the tunnel. Once out of there, check the tall box to your left for a Rusted Scrap. Go to the end of the hall, grab the Maroon Eye Ring from the angel. Examine it in your inventory so you can break the ring part off of it, and you'll just have a Maroon Eye. Once you've got the ring, the Angel door will open; go ahead and walk through it. There's Chem Fluid in the drawer right ahead and some Gunpowder in the drawer at the end of the long hall to the right leading back to the fireplace room.

Unlock the door at the shorter end of the hall. You'll be back in the larger room where you triggered the last cutscene, and some angel statues will pop up out of the ground. Walk straight ahead to the unopened door, and you'll find a safe room where The Duke has opened up shop. Sell the Crimson Glass for some extra cash, though if you're good on ammo, try to save up for the inventory expansion. Save at the typewriter. Don't worry about the model castle just yet, though you can grab the Labyrinths note next to it if you want.
Once you're done, exit the safe room. Head up the stairs to the right, and hey, it's the foyer from the Maiden demo. Turn right and check the drawers for some handgun ammo. The door closest to you leads to the hallway where you entered the castle. Unlock it for now, and move along. Go upstairs, and at the top, go left. Just around the corner, there's a bit of pottery on a mantle you can break for some money, then go all the way to the end of the balcony. Break the vase for some Gunpowder. Go back to the top of the staircase, and head into the Wine Room across from it. Grab the Chem Fluid, and the Winemaking History note. There's a bottle holder in back. We'll get back to that later.
Now exit, and go to the balcony on the other side. Grab the shotgun shells at the end, and make sure said shotgun is loaded and ready. Interact with the relief of the angel carved into the wall behind you, put the Maroon Eye in, and prepare for a more intimate chat with one of Lady Dimitrescu's daughters. This isn't a boss fight, though. Your job here is to pump enough lead into her to shift her into the less dangerous swarm of bugs that'll let you safely slip into the Angel door. Good thing you picked up those shotgun shells; one blast will get that job done. Once you're not in danger of being chomped on, hang left, and run to the end of the hall. Look to your right, and there's a boarded-up hole. Interact with it to climb into the wall.
Once you've got control again, check the cart for the Maid's Diary. Head down the stairs. At the bottom, the lit alcove at your feet has some Rusted Scrap. Continue down the passageway, and duck down to sneak into the hole in the wall. You'll catch a brief glimpse of Lady Dimitrescu, so don't proceed until she's out of the room. Once she's gone, climb out, grab the handgun bullets on your right, then head downstairs. At the bottom, on your left, break the box on the shelf for some shotgun shells.
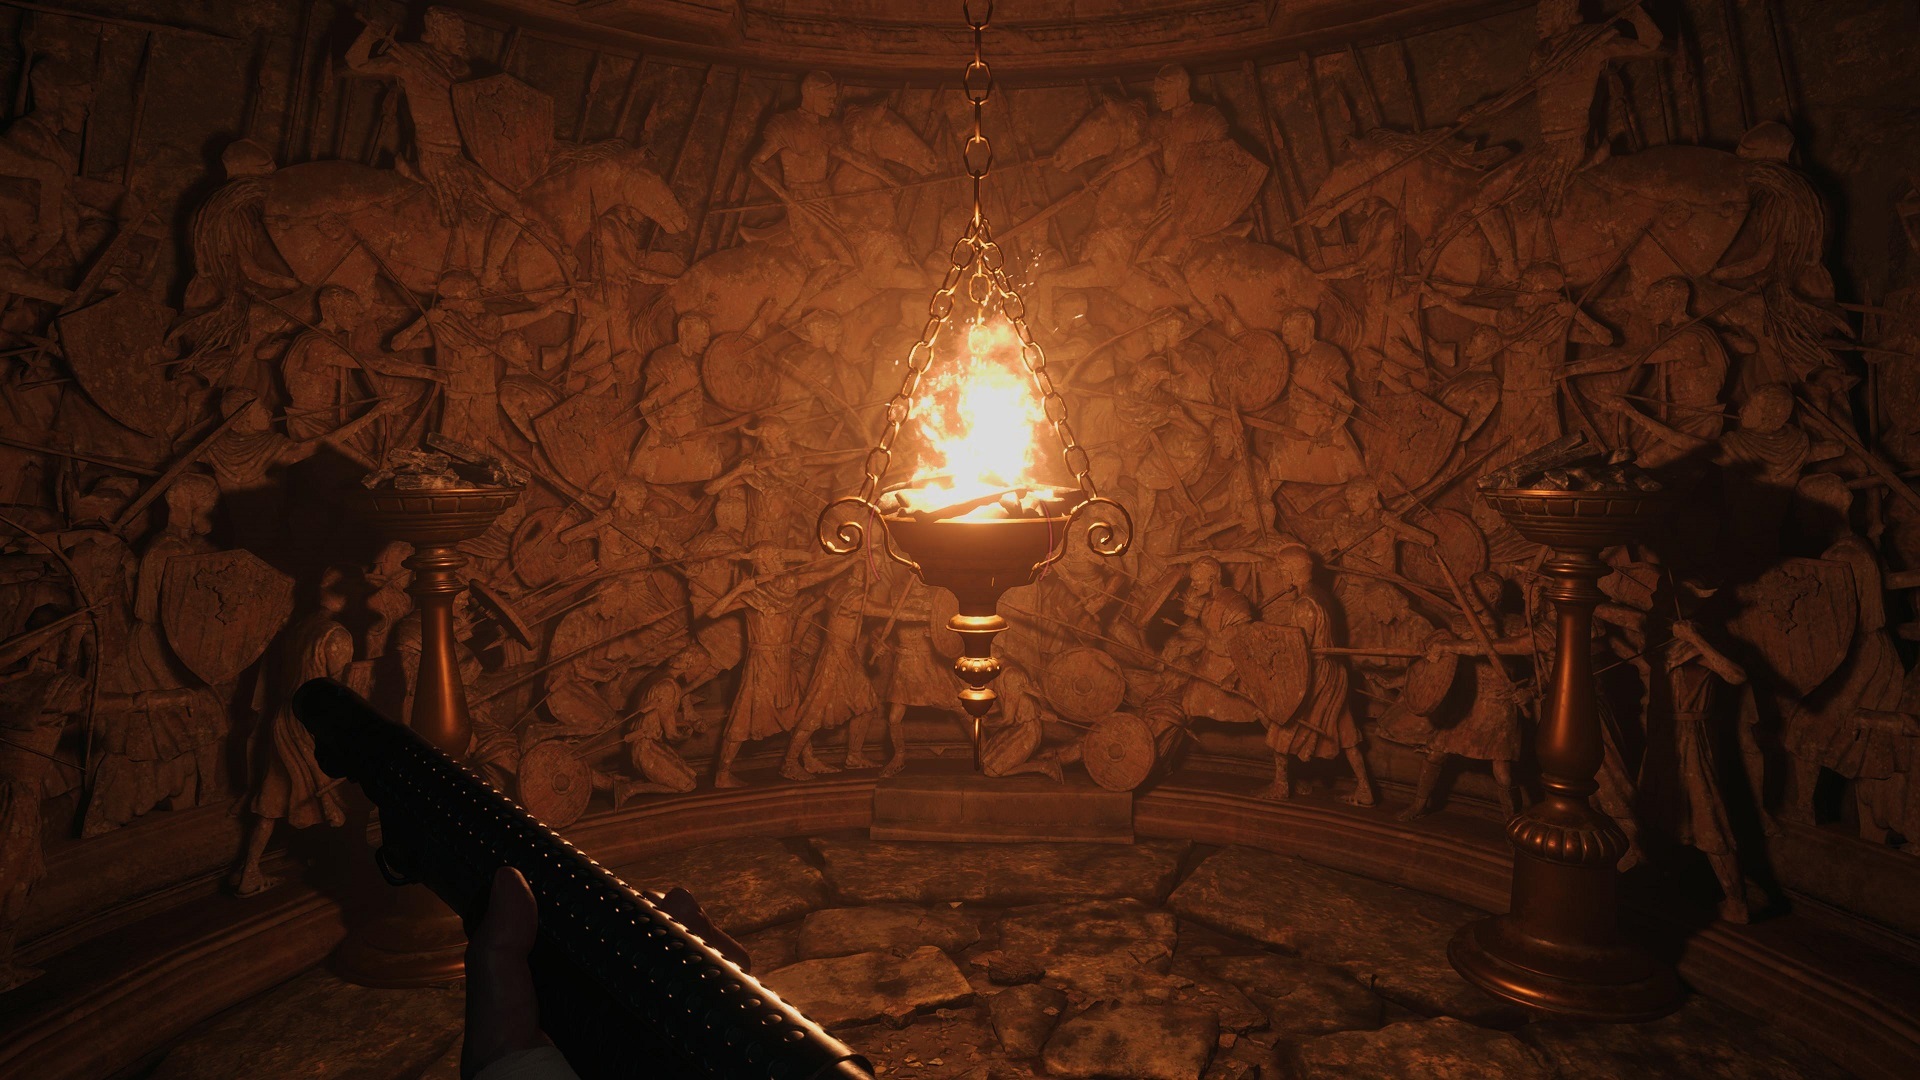
You'll come to a fancy chamber with torches on both sides, and a fiery lantern in between. You'll need to swing the lantern back and forth until it gets enough height to light both torches. If you can spare the ammo, a couple of shots with your handgun will give the lantern quite a bit of momentum, and that's easier than trying to swing it with your face. Once they're lit, the way forward will open. You'll be in a torture chamber. An Observation Report will be on the cart in front of a blockage as you walk straight ahead. The cell to the left of that has a broken wall to pass through to get around. Another note is in the cell straight ahead. In the next room, the cells on the left have a crate, a Rusted Scrap, and a Metal Scrap.
Once you enter the next room, you'll have some company. Duck into the cell immediately to your left. Three ghouls will show up to ruin your day. Thankfully, they're a lot easier to deal with than the Lycans. Keep your distance and go for the heads if you can. If you can line them up just right as they're coming through the door, one shotgun blast can do some serious damage to the whole bunch of ‘em. Additionally, the armed ones are slow enough and with such an easy tell for their attacks that if it's a one-on-one fight, you can slash these guys Dark Souls-style with your knife if you get close and stabby immediately after they take a swing. It might take a minute, but saving bullets is always a good thing. That only goes for the ones with weapons, though. The unarmed ghouls get bitey. Stay out of arm's reach from them.
Daniela Dimitrescu, The First Daughter
After you're done with the first bunch, follow the broken walls around the corner. Another ghoul will climb out of the hole at your feet. If you're quick, get a shot or two off while it's getting up. Back away, take him down, and open the crate behind him for a Pipe Bomb. Exit the cell, move into the next area, and a few more ghouls will show up. Same strategy as the previous bunch, keep your distance until you can thin the herd. Once they're dead, head to the cell across from the lit fire in the wall to grab a Rusted Scrap. There's one more ghoul in the room with the sunlit rock. Once he's done for, you can take a breath. Check the cell on the right for another crate, load all your weapons, craft any items you need, and move forward to the crate straight ahead.
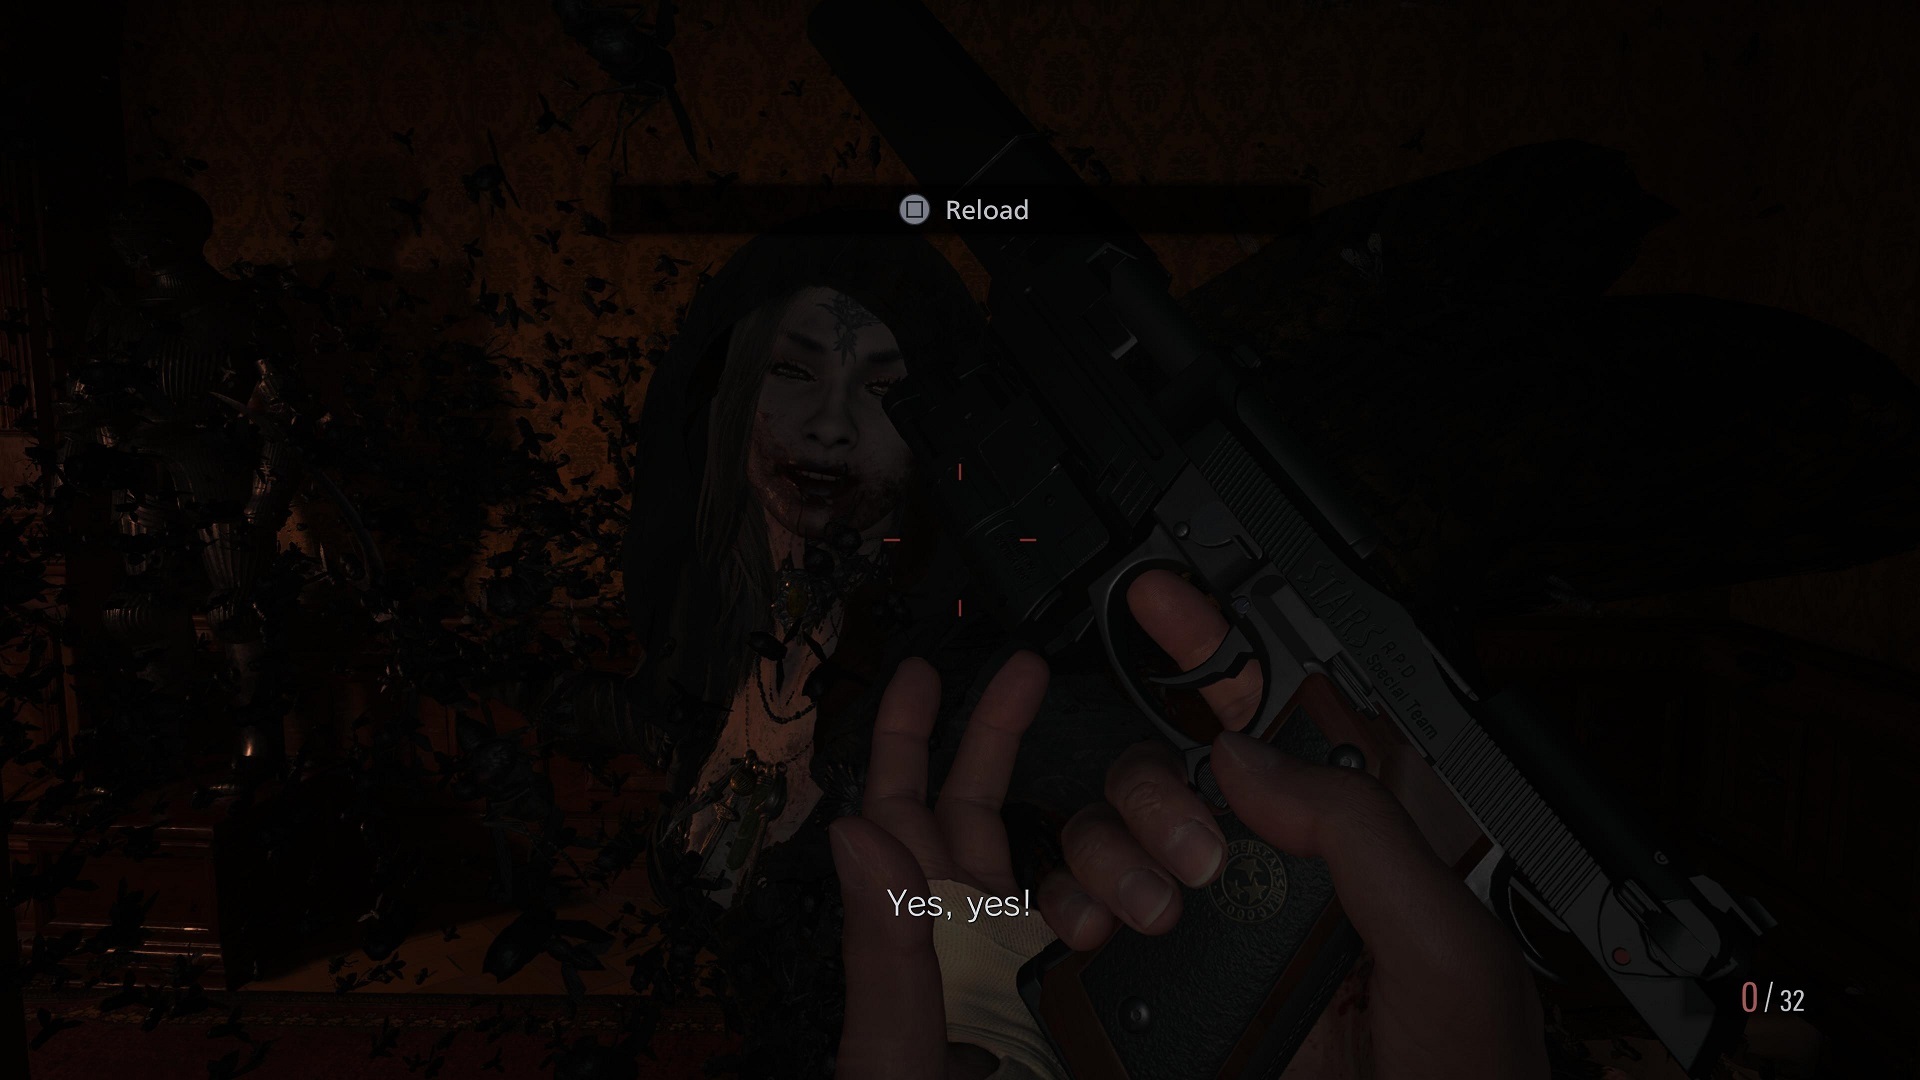
A cutscene will trigger, and you'll be uncomfortably close to one of Dimitrescu's daughters, Daniela. Forget a fight. Turn around immediately (as in, move backward and Circle/B), and run for it. Do not look back, do not try to shoot the daughter unless she's directly in front of you, do not pick up any of the items along the way. Just RUN. Take the first left from the crate area. Run into the open cell straight ahead, turn left into the next cell through the hole in the wall, and out that door. Follow the hall, take the stairway on your right, and turn right at the top. You'll get to a boarded-up door. You'll get a quick cutscene where it becomes obvious Little Miss Bugface doesn't like the cold. Now that she's solid, you can get to work. Use your shotgun to keep her staggering backward into the freezing wind from the outside. After she's caught enough of a cold, she'll crystalize and crumble, leaving nothing but a precious Crystal Torso for you to collect. Now that it's safe, you're free to loot the place blind, starting with the ammo on the shelf in this room. Walk back downstairs into the dungeon, grab everything not nailed down. Ingrid's Necklace will also be down here, which on top of being a nice callback to the Maiden demo, is also worth a nice bit of cash to The Duke. Head back up and into the kitchen.
Grab the Sanguis Virginia from the bloody basin, the Rusted Scrap in the trough to the right of that, open the crate to the left, and read the Cook's Diary behind you. In the next room, straight ahead is a Recoil Compensator for the LEMI handgun. The bureau down the hall on the left contains a Lockpick, which you'll use immediately on the drawer down the other end of the hall to grab a Wooden Angel.
In the next room, walk straight ahead to the back, and grab the Gunpowder from the drawer. The Courtyard's locked, so head out the smaller single door back to the Main Hall and head to the Duke's Room for a well-earned break.
The Courtyard and the Dimitrescu Key
While you’re here, sell the Crystal Torso, the Wooden Angel, and Ingrid’s Necklace. If you didn’t have enough to buy the inventory expansion before, you certainly do now, plus a little left over. Upgrading the handgun’s power would be our second-place suggestion, but it’s your money. When you’re done, go back to the Main Hall, and upstairs to the Wine Room. Place the Sanguis Virginia on the bottle holder. When the room opens, grab the Gunpowder on the left, and the Courtyard Key on the right. Head downstairs, and daughter No. 2, Cassandra, will be there to welcome you. Thank her for her family’s hospitality with a shotgun blast to the face. Run forward to the Dining Room when she dissipates, and get to the Courtyard. Once outside, head left to break the vase for some ammo. Go to the door in the southeast corner.
Back inside, you’ll catch a glimpse of Lady Dimitrescu sauntering upstairs. Before following after her, look in the drawers to your left for a Chem Fluid. At the top of the stairs, there’s a vase with ammo. Move on down the hall and grab the Castle Map directly ahead. Go all the way to the end of this hall for some ammo before heading into the center room full of statues and the worst wading pool ever. This puzzle has you turning the statues, the clues for which are on a nearby piece of paper. Here's the solution if you need it: Turn the nun and the woman in the fancy hat towards each other, then turn the beggars towards the horseman. The pool will drain, revealing a staircase. Head on down.

There’s another one of those little Goat of Warding idols here in the corner, and the noise he makes is maddening. Shut him up, and then head down into the worst flooded basement ever. Walk straight ahead, grab the Rusted Scrap. Turn left, and follow the path. Save your bullets--don’t bother with the ghoul who crawls out of the wine barrels. Go forward, open the crate in front of you, then start down the next hall. You’ll be face to face with a different ghoul. Take out this guy instead. Keep moving and you’ll see another ghoul rise up on the other side of the wine rack, which gives you plenty of time and space to take him down at your leisure. Once he’s down, back up a little bit to the entrance to this area. To the left is a long passage leading to a shrine. Take out the ghoul here, then grab the ammo on the little candle-lit area.
Continue forward. There’s another ghoul, but plenty of space to maneuver. Drop him, then open the crate on the left. Head down the passageway with the hanging bodies. The lit alcove to your right has a Rusted Scrap. Another ghoul will drop down at the end of the passage. Once he’s dead, walk straight ahead and check behind the box with the boots on top for a Gunpowder. Move slowly into the slightly open area, and you’ll have three ghouls to worry about at once. Just like in the dungeons, lead these guys just enough to group them together, and one or two shotgun blasts can put all three of ‘em down but good.

Open the crate on the bottom shelf of the open area before moving on. There’s one more unarmed ghoul to take out at the top of the stairs. Move up, pull the lever, and you’ll come to a balcony. Once you’re done admiring the view, turn around and grab the Herb behind you. The first open room on the left as you walk along is a Safe Room with a Typewriter and some money on the floor. Once you’re ready, continue along the balcony for a quick cutscene with Lady Dimitrescu. When it’s over, break the vase at the end of the balcony, then enter Lady Dimitrescu’s Chambers.
While you’re invading a girl’s privacy, might as well read Lady Dimitrescu’s Diary on the bench to the left. When you’re done, grab Dimitrescu’s Key, hanging on the wall to the right of the bench where she answered the phone. Use the key on the door and you’ll trigger another cutscene. Once that’s done, head into the narrow room on your right. Turn around for a Gunpowder. Follow the path, break the crate on your left, then crawl into the hole in the wall. Once you’re out, flip the switch to the door and enter the Dungeon. From the entrance, head to the room as far to your right as possible. It has a crate surrounded by candles, and a Chem Fluid in the blocked doorway. We also recommend getting real familiar with the layout of this area, what openings lead where, which rooms have ample space to move around, escape routes, everything. When you feel comfortable moving around in here, go ahead and flip the second switch by the large gate.
After a quick scene, you now have the fun task of having to run back to the second switch, with a very tall, sharp obstacle in your way, and no weapons to fight back. There’s no real hard and fast strategy here other than knowing your way around this room enough to circle around Lady Dimitrescu and get to the switch. Even once you get there and activate the switch, though, it still takes another 10 seconds or so for the gate to fully open. When the gate is finally open, sprint down the hallway, use the Dimitrescu Key on the door. Grab the Mask of Sorrow from the statue, and enjoy the ride up. You’ll find yourself in the middle of the Courtyard, which unfortunately isn’t as empty as it was the last time you were here. You do have access to your weapons again, though. There’s a door here that takes the Dimitrescu Key, but you’re definitely going to want to save after that ordeal. Head back to the Dining Room, kill any ghouls in your way, and make a beeline for The Duke’s Safe Room. You survived. Give yourself a hand.
The Masks of Joy, Pleasure, and Rage
You’ve just been through a lot, so rest a minute, make any purchases from The Duke you might need, craft if you’ve got the resources. When you’re ready, head to the Main Hall. Because things just weren’t tense enough around here, you’ve now got to contend with the fact that Lady Dimitrescu will now be freely roaming the larger areas of the castle looking to make kebobs out of your vital organs. She’ll show up dead ahead in the Main Hall coming out of the Dining Room door. Thankfully, in this instance, there’s enough room in the hall where you can swerve around her to get to the Courtyard. You won’t always be so lucky, though. Whether scripted or just bad luck, she has a habit of showing up on stairways when you’re trying to move around, and unlike, say, Mr. X in Resident Evil 2, there’s no way to stop or stagger her--she’ll literally smile and laugh at any firepower you try to hit her with.
Here’s the good news, though: One, every location where she shows up always has more than one way to get to the exit, and it’s usually easy to turn tail and double back around her to get where you need to go. Two, thankfully, she’s also not nearly as acute a hunter as Mr. X. As long as you’re not in her line of sight, you can sneak around pretty easily. Three, if you’re able to play with headphones or good surround sound, you’ll be able to hear her coming long before you actually see her, and the positioning of the audio is incredibly accurate for telling whether you’re going to have a problem above, below, or in your room. We’ll call out the major points when the Tall Kiss Goodnight is definitely showing up, but in general, be cautious and careful about every room you enter from here forward.
Anyway, once you’ve sprinted to the Courtyard, you’ll still have ghouls to deal with. Don’t waste ammo trying to kill ‘em all, though, just the ones standing between you and the north door. Use the Dimitrescu Key and slip inside. Take the map against the wall straight ahead, then head upstairs. At the top, there’ll be a note about Lady Dimitrescu’s lipstick, handgun ammo in the drawer, and Gunpowder you’ll need to break out of the display case behind you. Head to the door on the left to the balcony above the Opera Room.

Straight ahead, grab the Insect Observation Diary. Follow the balcony left. There’ll be a single ghoul to deal with in the room here. Grab the Flower Sword Ball inside. Go to the other side of the balcony and kill another ghoul. There’s a drawer that needs a lockpick, but otherwise, head downstairs. At the bottom, turn round and break the vase. Before you start noodling around on the piano, grab the Insect Observation Diary #2, the Gunpowder in the corner next to the stage, and the Rusted Scrap in the Fireplace.
Now for the piano. It’s actually rather forgiving if you want to just go up the scale of notes until you find the right one, but allow us to save you some time--just select the notes in the order listed:

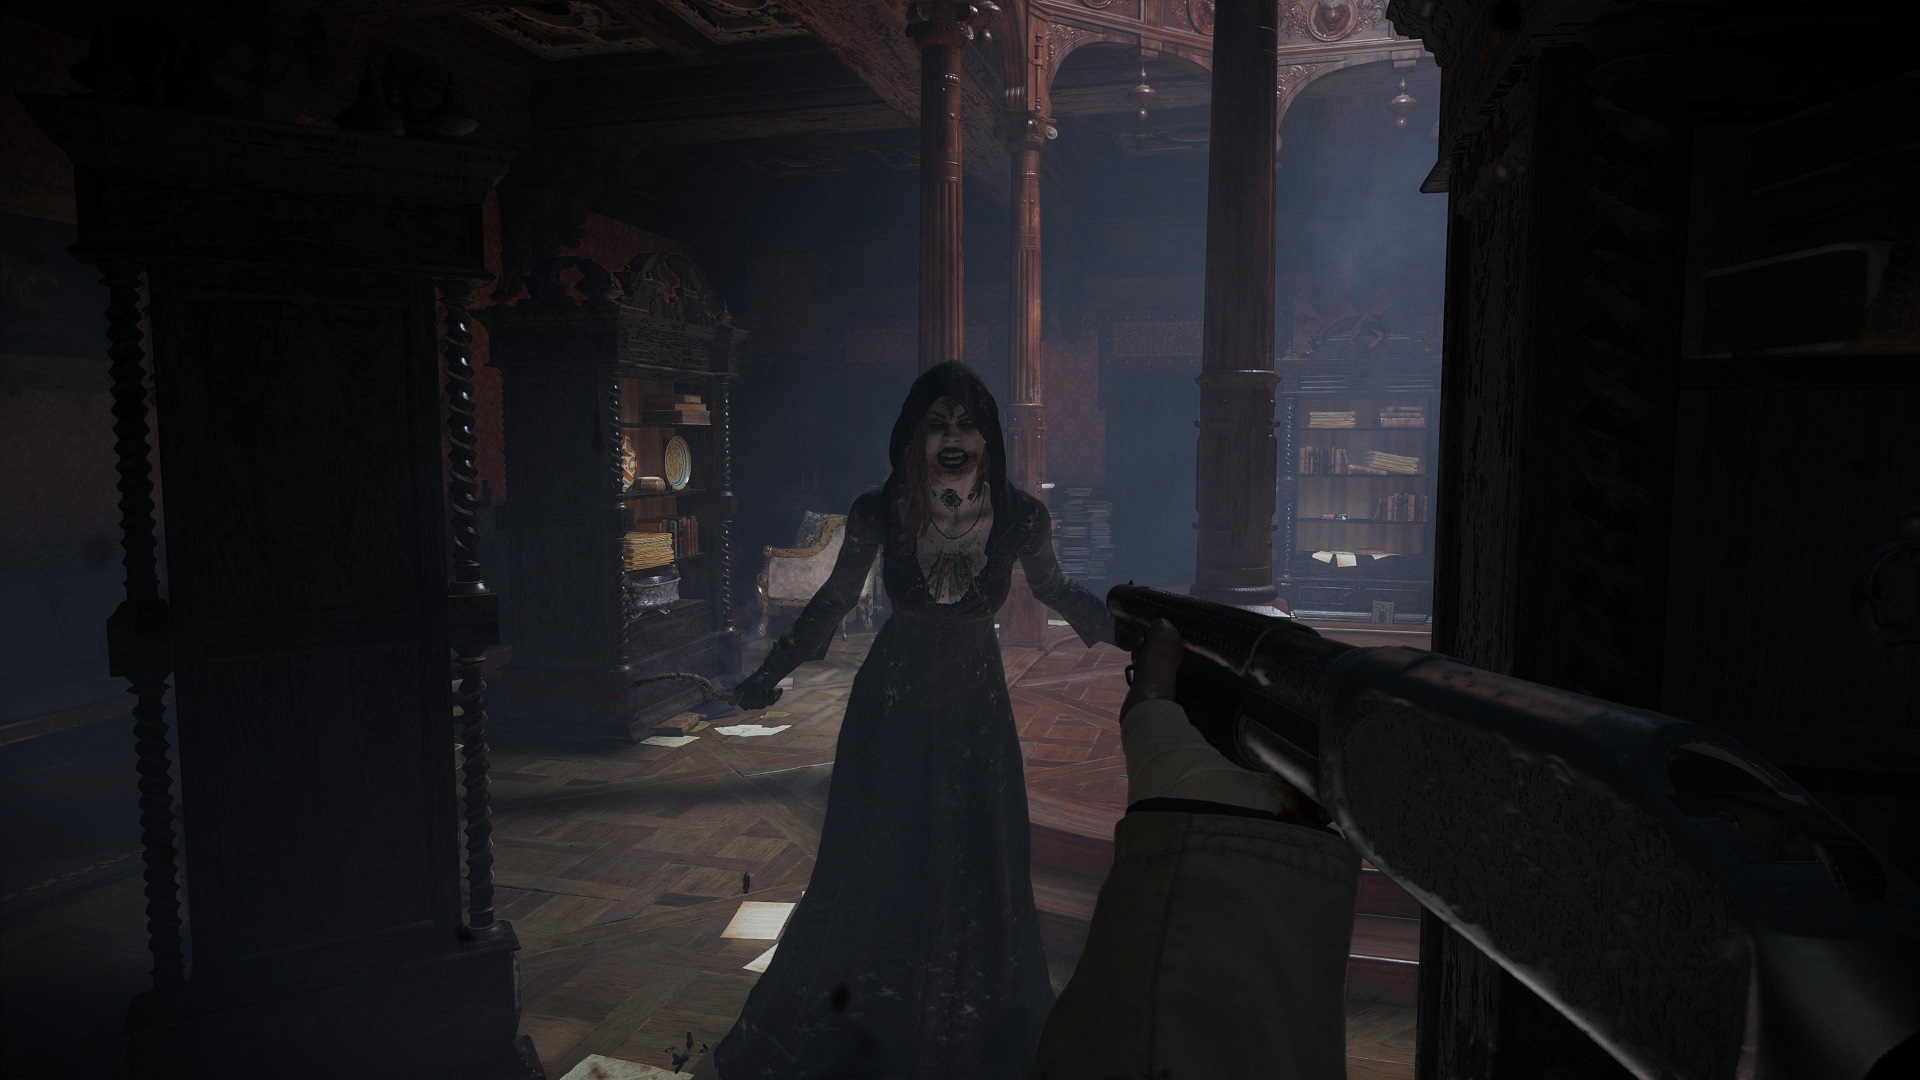
The piano will open up and give you the Iron Insignia Key. The castle is pretty much your oyster from here. You can use the door in the back of the room or go back to the balcony to head to the hallway to open the previously locked door upstairs, but Lady Steps-On-You will be outside regardless. Lose her any way you can before heading to the door to the library. Once inside, you’ve got a different kind of girl trouble. Daughter No. 2, Cassandra, will attack.
Cassandra Dimitrescu, The Second Daughter
The idea is still the same: A shotgun blast will force her to dissipate but the goal is to let in enough of a cold breeze to keep her solid. Across the room from the entrance, behind one of the pillars, is a lever that will do just that. Try to lure Cassandra into the middle of the room before throwing the lever, and you’ll have a good five seconds before she decides to hide behind a bookshelf until the cold is gone. Keep blasting away at her in solid form and eventually, she’ll petrify and crumble just like her sister. Another day, another Crystallized Torso to collect. Loot the room, leave through the west door, and take the Mask of Joy from the statue.
The door across from the statue leads to the balcony above the Main Hall. Get down to the Safe Room. Be careful, since both Lady Stabberley and her last surviving daughter are lurking around up here. You’ll want to save, of course, but there’s two big things you should do in here. First, use the Flower Sword Ball in the model castle to play a little game of skill where you have to tilt the model to get the ball into the tower in the center. It’s fairly straightforward, the only tricky bit is getting the ball into the courtyard where the tower is without falling in a hole and starting over. Subtle movements are key in that section. You’ll get a Crimson Skull for your trouble, and not a moment too soon: After selling that and the Crystallized Torso to The Duke, buy the recipe for Sniper Rifle Ammo. It’s about to come in very handy. Once you’re done, head back upstairs and take a left into the door to the left of the Mask of Joy statue.

Here, you’ve got a giant portrait of a giant woman, and a note about needing to ring five bells. Directly across from the note, break the glass case for some handgun bullets. You’ll need them. Basically, you need to ring the five bells in this immediate area. Here’s where they are.
- The most obvious. It’s right across from the entrance. Save a bullet, use your knife on this one.
- Inside the open section of the wall above. It’s swinging like a pendulum, so you’ll need to time this perfectly.
- Above the case that had the handgun bullets. Back yourself all the way against the pendulum wall for the clearest shot.
- In the chandelier. Use the stairs on the left side of the room. Shoot the chandelier once to tilt it away from you, then shoot again when you can see the bell.
- The fifth bell is actually outside. From the top of the staircase, look in the direction of the giant portrait, then out the ceiling window. You’ll see the bell in the distance. Shoot once to break the glass, shoot again to ring the bell.
- The passage behind the painting will open. Step through, grab the Herb on your left. Follow the path right, take the ladder up to the Attic. Shoot the Goat of Warding idol behind you at the top. Turn around when you reach the more open area, and go right. That corpse on the floor over there ain’t dead, so put a few bullets in it before it gets up. Grab the Lockpick behind him. Break the crate in the center of the room, and grab the treasure map. Go down the right side ahead to read the Rumors of a Dagger note. Head left, and grab the F2 Sniper Rifle off the chair. If you haven’t already, craft a few more rounds of sniper ammo, and move on to the Rooftops.
Naturally, you get a chance to try out your new toy on the winged ghouls infesting the roof. Stay close to the doorway you just came out of and watch the skies. A few of the ghouls will land on the spires, giving you a nice clear shot. Once you’ve cleared the initial area, or just plain run out of ammo for the sniper rifle, continue onward. If there’s any straggler ghouls left over, aim your pistol or shotgun at them, and let them fly into your aim instead of trying to follow their erratic pattern. They’re relative lightweights, though, two or three shots will take them down.
The tiny path left to the roof leads to a vase. Head into the covered area. Hey, remember when we passed an elevator when we first got into the castle? Well, here’s where it leads. You can use it to get a quick save/visit to The Duke in before moving forward, just be cautious, as Lady Dimitrescu can actually get into the elevator room. Back at the rooftop, proceed forward. There are vases on the left and right as you proceed. It’s a nice linear path, just with more winged ghouls. They don’t have a lot of room to move here, though, so taking them out should be easy.
At the end of this path, climb the roof to the other side. There’s a vase at the far left at the end with ammo. Follow the stairs up to the stone archway area. On the left outside it is a Chem Fluid. Inside there are two vases to break. On the right, just over the railing when you crouch down, is another Chem Fluid. Once you’ve grabbed those, use the zipline ahead to get to the statue with the Mask of Rage. A ladder will drop, leading you back to the elevator. Make your way back to the Safe Room to stock up and get your bearings.
Three masks down, one to go. Head upstairs in the Main Hall, and go to the Angel door on the right . You’ll run into the last daughter, Bela, on the way. Get her out of your way with a shotgun blast, then run down the hall. This time, though, head right to the door with the flower/sword insignia, and use the Dimitrescu Key to open it. The Mask of Pleasure is right ahead, but once you grab it, the exit will slam shut. Loot the current room first. Break the vase to the left of the statue for a Chem Fluid. The drawer to the right of the fireplace has a Silver Ring. Look up at the ceiling and shoot the sparkly spot for a Crystal Fragment. Head through the hole in the fireplace. There’s a Rusted Scrap in the area with the window as you go up the stairs.
Bela Dimitrescu, The Third Daughter
The Armory is at the top. Pick up the shotgun ammo on the left, and break the crate next to it. Take a quick gander at the moveable shelf to the right of that, and remember that spot. Proceed further into the room, and Bela will attack. As always, a single shotgun blast is a hell of a motivational tool for getting the sisters to vanish, but you’ll need to get some cold air in here to finish the job. Once you’ve gotten Bela to disperse a moment, move the shelf you saw earlier. You’ll see a crack in the wall behind it. If you already have a Pipe Bomb in your inventory, throw one towards the crack. If not, you can grab one off the desk in the back of the room. Once the wall is destroyed, blast Bela with everything you’ve got until she’s dust. Grab the last Crystallized Torso, and that’s it for the debutantes.
Grab the lockpick off the desk in back, and the Animal Skull Trophy from atop the fireplace. Examine the back of the trophy in your inventory to find a switch to detach the plate, and reveal some protrusions that just so happen to look like they’d fit on the freaky knife party statue downstairs. Head down there, place the animal skull, and the exit will open. You can now make your way back to the safe room, hopefully without running into Mommy Dead and Dearest.
Leaving Castle Dimitrescu
Ethan has all four masks, which means it's time to blow this scene altogether. Now's the time to take care of any outstanding business. If you really want to go turn the whole map blue looking for the meager goodies still scattered around, be our guest. There is one last little errand that's worth a trip, but it'll cost you a bunch of ammo, and it's ultimately optional. Feel free to skip down to the section marked The Church if you're just looking to get the hell out of here.
The Azure Eye (optional)

You might've noticed the description when you picked up that Silver Ring from the Mask of Pleasure room that it can be combined with something to improve its worth. Well, that something is the Azure Eye, and it's in the last room you haven't opened with the Iron insignia Key in the dungeons where you faced Daniela.
If you haven't already, spend the money to upgrade the power for your handgun and shotgun, then head back to the dungeon by going straight down the Main Hall to the Dining Room, and taking the left door towards the Kitchen. Unfortunately, there are ghouls to deal with in between you and your destination. The one in the kitchen can actually be avoided altogether if you just run down the other side of the table where it's shambling toward you. Once down in the dungeon, however, you're going to have five ghouls to deal with, and these guys can't be avoided. No matter how you decide to take them down, you're gonna be spending some ammo here. Fight carefully to see if you can stagger waking up some of the ghouls so they can bunch up and be taken down with the shotgun. You'll know you got ‘em all when you stop hearing growling in this room, don't let your guard down until that's the case.
When they're finally done, head to the door and use the Iron Insignia Key. Pick up the Pipe Bomb on the right, and break the crate next to it. There's handgun ammo on the ledge to the left. These aren't just here to be generous, though, they're the keys to this puzzle, which is similar to the puzzle that got you into the dungeon in the first place.
On the other side of the room, you'll see a torch behind a partially broken wall. Throw the Pipe Bomb you just picked up at it, and you'll blast the wall open. Head into the little area with the torch for some ammo from the broken crate, and a Crystal Fragment. In the main area, same as before, stand at just the right angle where you can shoot the hanging lamp and swing it directly into the torch to light it up.
Now for the tricky part: you'll need to swing the lamp you just lit up into the second lamp to light it on fire. They don't exactly line up perfectly, so there's a little bit of trial and error involved here. You'll have the best luck, however, standing on the left side of the room where the torch is, lining both lamps up directly in front of you, shooting the lit lamp till it's out of view, then the second lamp behind it to get it swinging. With the right timing, they'll meet just enough in the middle. The gate around the coffin in the middle of the room will drop; open the coffin to get the Azure Eye, and combine it with the Silver Ring to make the Azure Eye Ring. Make your way back to The Duke, and you can sell it for a whopping 12,000 Lei. Worth it? Worth it.
The Four Masks
If you haven't already, talk to The Duke and upgrade the power for your pistol, shotgun, and sniper rifle. The Hair Trigger item to upgrade your shotgun's rate of fire will come in handy, but it is on the expensive side. Craft any ammo and health you feel you need. Step into the Hall, and plug the masks into the Angel statues. The plates underneath will tell you which mask goes where. Keep an ear out, though, as Lady Dimitrescu is still wandering around here. Duck into the Safe Room if you hear her coming.
Once all four masks are in, the door will open. Break the vases in this tiny lobby beyond. Once outside, there are vases in the open areas to the left and right of the door. Head up to the Church. Check out the coffin at the end of the room to trigger a cutscene.
Boss Fight: Lady Dimitrescu
When you get control, your target for this whole fight will be the part of Dimitrescu that's still somewhat lady-like, sitting on top of the monstrosity. Fire a few pistol rounds up there to get her off the stairs, then continue up. There's a bunch of ammo and health items up here, but that doesn't mean you can get wasteful.
Keep running laps around this area. Bear in mind the covered areas aren't safe, she'll just charge through them like the Kool-Aid Man if you stand there long enough. You can use that overzealousness to your advantage, though, if you've still got any Pipe Bombs or Mines left. Make her charge into one, and they'll stun her long enough to get two or three shots in. The main thing is that she can only charge in a straight line, so stay just around the corner from her, blasting at her when her weak part comes into view, running around the next corner when she gets too close. Eventually, she'll fly off, and send a swarm of insects after you. Use the sniper rifle to get her out of the sky, but when the insects come, start running again.
After she's taken enough damage, she'll fly to the castle's rooftop. Snipe her again before Dimitrescu can send an insect swarm after you. She'll come flying back eventually, but after pumping a bit more lead into her, a quick cutscene will trigger where you break through the center of the tower. When you get control again, don't shoot yet--run to the top of the stairs and crack open the two vases for an ammo refill. Eventually she'll come after you, and from here, it's just a war of attrition. Go to town with the shotgun and keep weaving around to avoid getting bitten. Heal if one of her attacks puts you in the red, but above all, keep firing. Eventually the entire roof comes crashing down, and so passes Lady Dimitrescu, Thirst of Her Name. Grab the Crystallized Dimitrescu right in front of you, the Dirty Flask from the altar, and step outside for some fresh air. Head to the Craftsman's shack to the right. Save. And exhale.
Part 3: Returning To The Village
The House with the Red Chimney
After enjoying a brief moment of quiet in the Craftsman's House, grab the Craftman's Note off the desk, and the Rusted Scrap under the sink. Slip out the back window, and go to the outhouse on the left for a Gunpowder. Ignore the well for right now, exit the house, and go through the giant gate into the cave.

Follow the path. You'll come across a little pond with three fish swimming around. Use your knife to kill all three and collect them. Steel yourself, anyone sensitive to animal slaughter, there's a lot of this coming. Continue on when you're done, walk through the door for a cutscene. When you have control, turn to your left and grab the Winged Key. Open the giant, wooden door and move on.
When you reach the door that takes you back outside, don't run forward just yet, take a quick second to shoot a crow off on the other side of the area. They're a little hard to make out, but they're over there. Head past the open area and through the archway. Go down the little pathway on the right for a crate. Move along, but slow down when you reach the bridge. Look down on the left-hand side and spot the Lycan wandering around. Take him down with your sniper rifle, and prepare for two of his buddies to try and avenge his death. They're a little easier to put down with your upgraded gear, but you still don't want these guys too close. If you can snipe these two, it's worth spending the ammo. At the end of the bridge, head left and down the stairs, go into the little room behind where the Lycan was to destroy another Goat of Warding.
Head to the grisly area past the bridge. The first door on the right has a Rusted Scrap. The first door on the left has a crate and a Lycan to deal with. The second room on the right needs a key you don't have. Go through the big door and walk down the path to trigger a cutscene with The Duke. Once that's done, you can talk business with him. First things first, sell the Crystal Dimitrescu to him for a sweet 25,000 Lei. Unless you're really struggling for space, hold off on the new inventory expansion. Opt instead for the next level upgrades for your shotgun and sniper rifle. Wait on upgrading the pistol, as you're about to have a new option to consider there. If you don't currently have a Mine in your inventory, get one. Also, whether you craft it or buy it from The Duke, sniper rifle ammo is also going to come in extremely handy in a little bit. Use the Typewriter next to The Duke when you're done, then go through the door to the right.
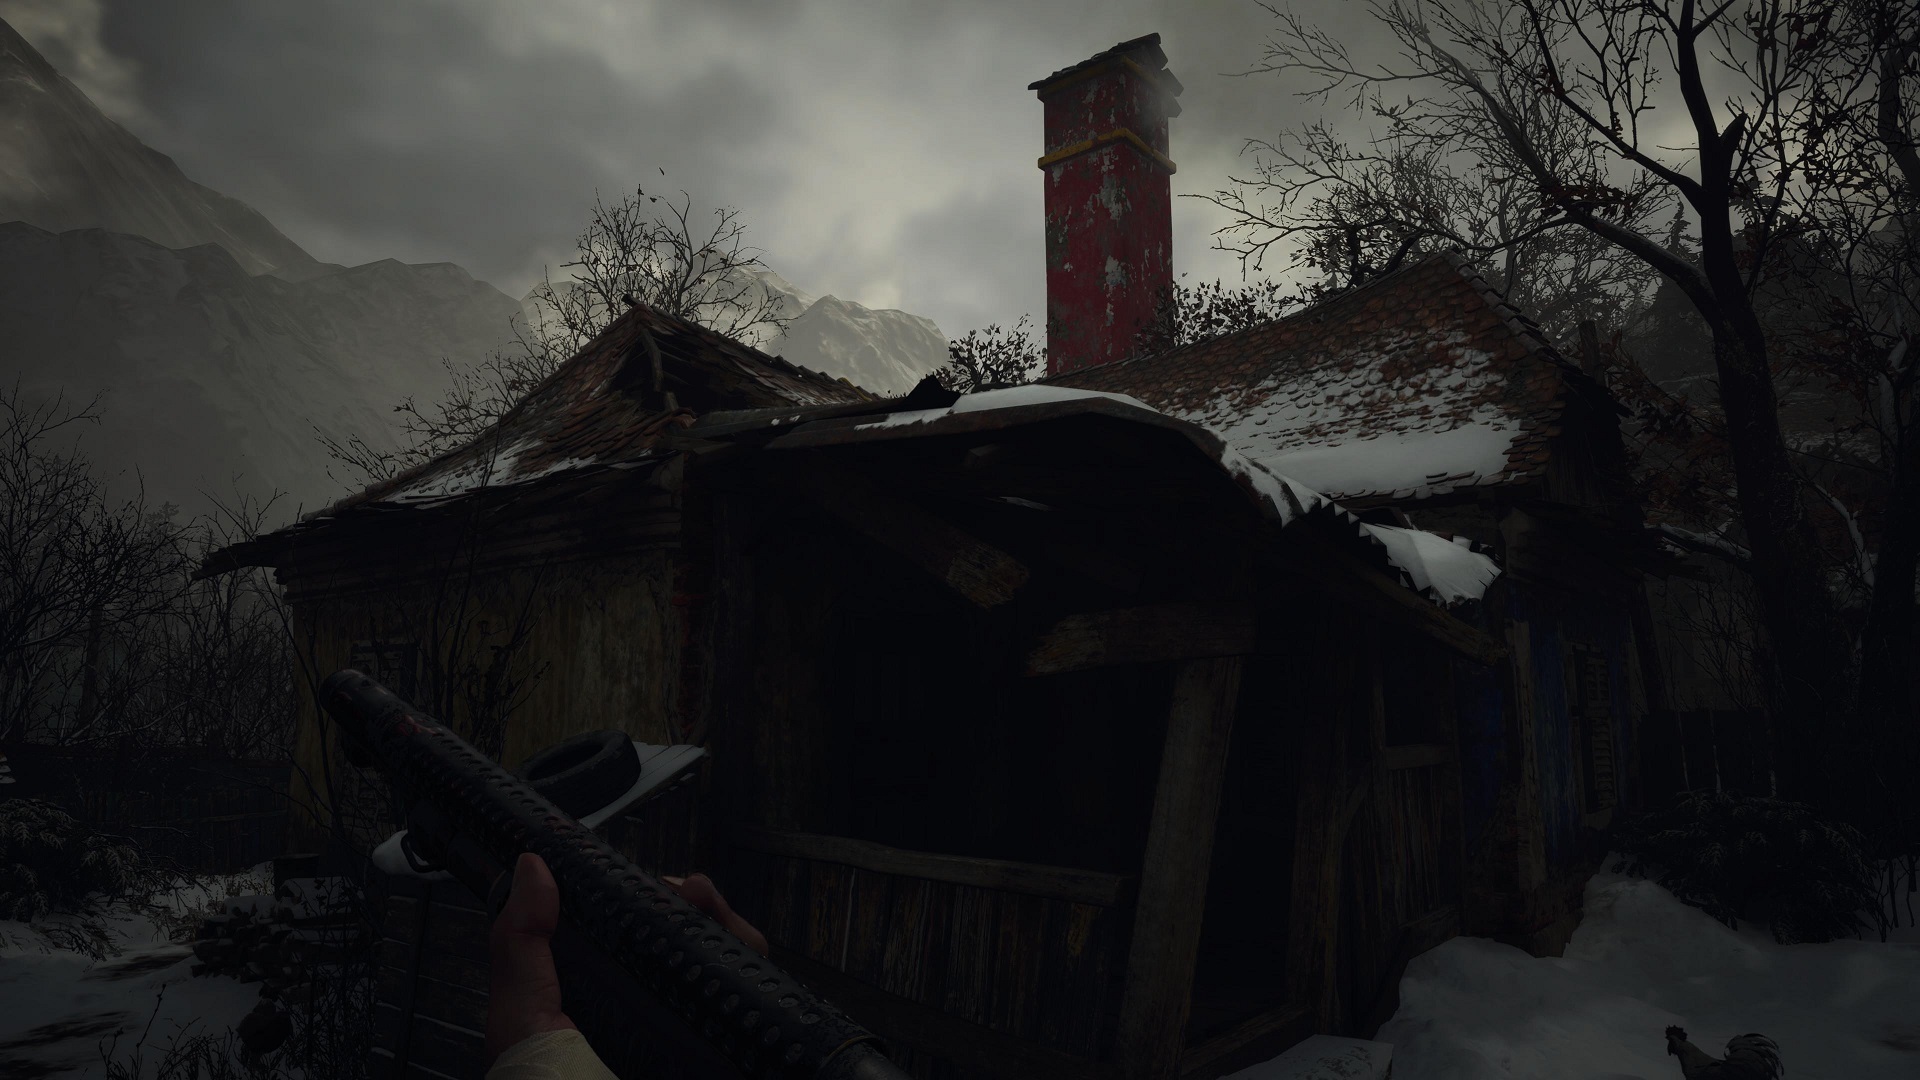
We're finally back to the Maiden of War area in the village. Your destination is the house with the red chimney, and of course, the front gate is locked and you'll have to take the long way around. Of course it is. The gate to the left of that is open now, though. Head that way, and go in the house on your left. Grab the note on the table, check the closet for some ammo, and continue to the back door to take the Wooden Animal Body off a table. Outside the back door, unlock the door to your right, grab a Rusted Scrap from the outhouse. Go into the stable, and move the shelf.
There's a Lycan to take care of the second you step outside the stable. Straight ahead is your next obstacle: a tractor you'll need a jack to move. Follow the trail, and check out the barn on the right. Look up and shoot the birdcage with your pistol for some shotgun shells. The other house door is locked for now, so move on to the big gate, and shoot the lock. There's a crate and a Rusted Scrap on the right. Head into the shack on the left. Read the note on the desk and do what it says. When you're done swearing vengeance on the author, get the code for the safe in this room: 07-04-08. The two numbers on the window should be in the middle of the ones in the distance. Open the safe to get the Jack Handle, and the M1911 fully automatic handgun. Exit this area.

You'll hear the Lycans growling when you exit the gate. Stop in your tracks when you do, and equip your sniper rifle. There's a Lycan on the rooftop to your left. Headshot him first. His buddies won't like that, but if you're quick, you'll see the Lycan slightly to the right howl, making his big stupid head an easy sniping target. Mop up the rest with your shotgun. Get back to the tractor, and use the Jack Handle. Crawl under, and move forward to the intersection. Go left first. Equip your shotgun, and take the first door on the left. There's an extremely angry little piggy on the other side of the room here who'll charge you at full speed. Start firing the second you hear a squeal, and take the Meat. The house next door has a drawer that needs a Lockpick. Go around the right hand side of the house for a crate.

Go back to the intersection, and equip your sniper rifle again. Look a little further down the road. You'll see a Lycan on a tractor keeping lookout for his buddy while he eats. Snipe the one up top, then when the second pops out from behind the tractor, put him down too. Move up the road. When you hear growls again, look up on the roof to your left. Take down the Lycan up there, then start backing up towards the tractor you passed. Snipe the other two Lycans when they come around the corner. At the intersection ahead, slip in the window to the right for some ammo. What a shocker, the door to the red chimney house is locked. Go back to the intersection, and make sure you're reloaded, healthy, and ready for a fight. An armored Lycan is waiting for you up ahead. Here's where that Mine's going to come in handy. Equip it, and sneak down the road as far as you can before he appears. The second he does, drop the Mine, and start backing away. Snipe him a couple times in the chest as he approaches. Eventually, he'll walk right into your mine, and after that, he's a pushover. If you get really lucky, the mine will blast his helmet off, which means headshots are back on the menu. Switch to the shotgun if he gets too close, but you shouldn't have too much of a problem with him otherwise. Grab the Perfect Crystal Skull off him when he's dead.
Head down the path. On the left, shoot the lock to get through the gate. The outhouse on the right has a Lockpick. Straight ahead is a crate, and another Goat of Warding to destroy. The house on the left just has a note about the Luthier's Key. The house on the right has bullets, the Madalina doll body, a Gunpowder, and one angry Lycan you need to take down before you get to any of it. Back to the road, there's a door that takes the Iron Insignia Key. Go into the house for a crate and a big key item, the Well Wheel. Head up the ladder outside, go to the end for a Metal Scrap. Drop down into the Red Chimney House's yard. Finally, we're getting somewhere. Behind you when you drop is a Gunpowder. The outhouse to the left has a Large Crystal. Head up the ladder to the right, and drop in through the roof.
Take down the Lycan in the bedroom. Grab the handgun ammo in the closet, but the main event is on the kitchen table. Read Eugen's Diary, and open the box to get the Four Winged Key. Exit through the front door. No use letting good meat go to waste, so kill the three chickens and collect the Poultry. While you're at it, since the coast is clear, open up the door to the shed and head back down the road to the house where you met the pig. Go to the well just outside the pig sty door, and try out your new Well Wheel to get a Lockpick. Head back to the Maiden of War area and use the wheel on the well here for the Wooden Goat Head.

Combine that with the Wooden Animal Body to get a Wooden Goat, and you know who just loves random crap? The Duke. Head back up the road to see him, and trigger a cutscene that'll point the way forward.
Part 4: House Beneviento
Now, before we head up to Angie's Playhouse, there is the little matter of all the treasure The Duke just marked on your map during the last big cutscene. Now, you can absolutely get through the rest of the game and never stray from the main story areas, so for you folks who just want a clear way out of this mess, going forward, we'll mark these little excursions off the beaten path as Treasure Hunts. Feel free to skip down to the House Beneviento section if you want to stay on target. So, with that in mind:
Treasure Hunt: Luiza's Necklace
Compared to some of the other jaunts you'll be taking later, this one's pretty much a breeze, and it'll involve a nice sweep of the village for goodies you weren't able to get before. After the cutscene with The Duke, head back to the village, and up the hill to the Church. Check the laptop--yes, laptop--next to the altar for a concerning note, then save. Exit, then hit up the well around back, which will get you the Necklace With Two Holes.
From this spot, back away from the Church a little, and look up. Shoot the Goat of Warding on the roof. A little further from the Church entrance, on the left, is a gate you can open with the Iron Insignia Key. Kill the chickens inside on the left, break the nearby crate, then head to the far end of this area and look next to the last mausoleum to destroy another Goat of Warding.
Start heading towards Luiza's. Shoot another crow off the scarecrows as you approach. This time instead of Lycans, you'll have winged ghouls to deal with. Fortunately, they're far enough away where you can snipe ‘em right out of the sky before they even get close enough to breathe on you. Just keep track of where the corpses land in the tall grass, as the items they drop basically become needles in a very large haystack otherwise.
Make a quick stop in Elena's house on the right. Kill the giant hog through the window, which surprisingly might take a few blasts from either the shotgun or even your sniper rifle. Collect the Quality Meat when it's dead, then use the wheel on the well here for a Pipe Bomb. Head up to Luiza's front door, where you'll find Luiza's Necklace in a box. Examine it once to get the Necklace Stone. But wait, there's more! Examine it a second time, and you'll also find Luiza's Key. Look to the left of the box, and you'll also find some ammo, as well as some Explosive Rounds in need of a Grenade Launcher. Oh, don't worry, we'll get to that later.
Get back to The Duke at the Altar, but before we get to business, go past him, back to the square with all the dead bodies strewn around in the direction of the Ceremony Site. Remember the one passageway here with the box you couldn't open? Well, you can now, with Luiza's Key. Your reward is Cesare's Goblet, which you can now take back to The Duke, and sell for a really nice chunk of change.
Entering House Beneviento

So, first thing's first, sell any and all treasure you've collected from your trip to the red chimney house. You'll also notice on the shop page that The Duke has apparently taken up cooking, and can turn the poor defenseless animals you've been killing into delicious meals that permanently raise your stats. At bare minimum, if you've been following the main guide so far, you should have enough to make some Herbed Fish, which will raise your maximum health a little. Buy any upgrades or items you see fit. Inventory Expansion #2 is definitely a smart investment right about now as well. When you're ready, open the gate behind The Duke with the Four-Winged Key.
Walk straight ahead through the brush until you get to a creepy clearing full of hanging bodies. There will be crows you can shoot on the way. When you reach the fork, take a left and cross the suspension bridge. Follow the path forward until you get to a grave with a building behind it. Go to the door and use the Family Photo to get inside. Use the elevator, and continue straight on to House Beneviento. Before heading in, go around the left side of the porch, and down the stairs. There's a Goat of Warding just over the railing on a ledge.
Step inside, and go straight ahead into the Living Room. There's nothing actually in here aside from an unreadable note, so go through the next door and take the elevator. Walk down the new hall and interact with the doll to trigger a cutscene. When it's over, use the Typewriter on the desk in the corner. Go to the doll on the slab. Examine its right shoulder to get a Silver Key, its left leg for a Winding Key, and left arm for the Bloody Ring. We wouldn't recommend looking at the picture on the corner of the table, but it's there anyway. Use the Silver Key on the door with the key's insignia to get to the Medical Room. Use the sink to clean off the blood and get the Wedding Ring. Examine the inside of the band for the date: 05/29/11. Head to the entrance, and plug that into the combination lock.
Walk back down the hall, and slip into the Storage Room on the left. Use the Winding Key on the music box on the table. The idea here is that you need to get the scratches on the cylinders to line up, using the notches on the far right and left as guides, but even in 4K, this one's a little hard to get right. Here's how it should look, however:
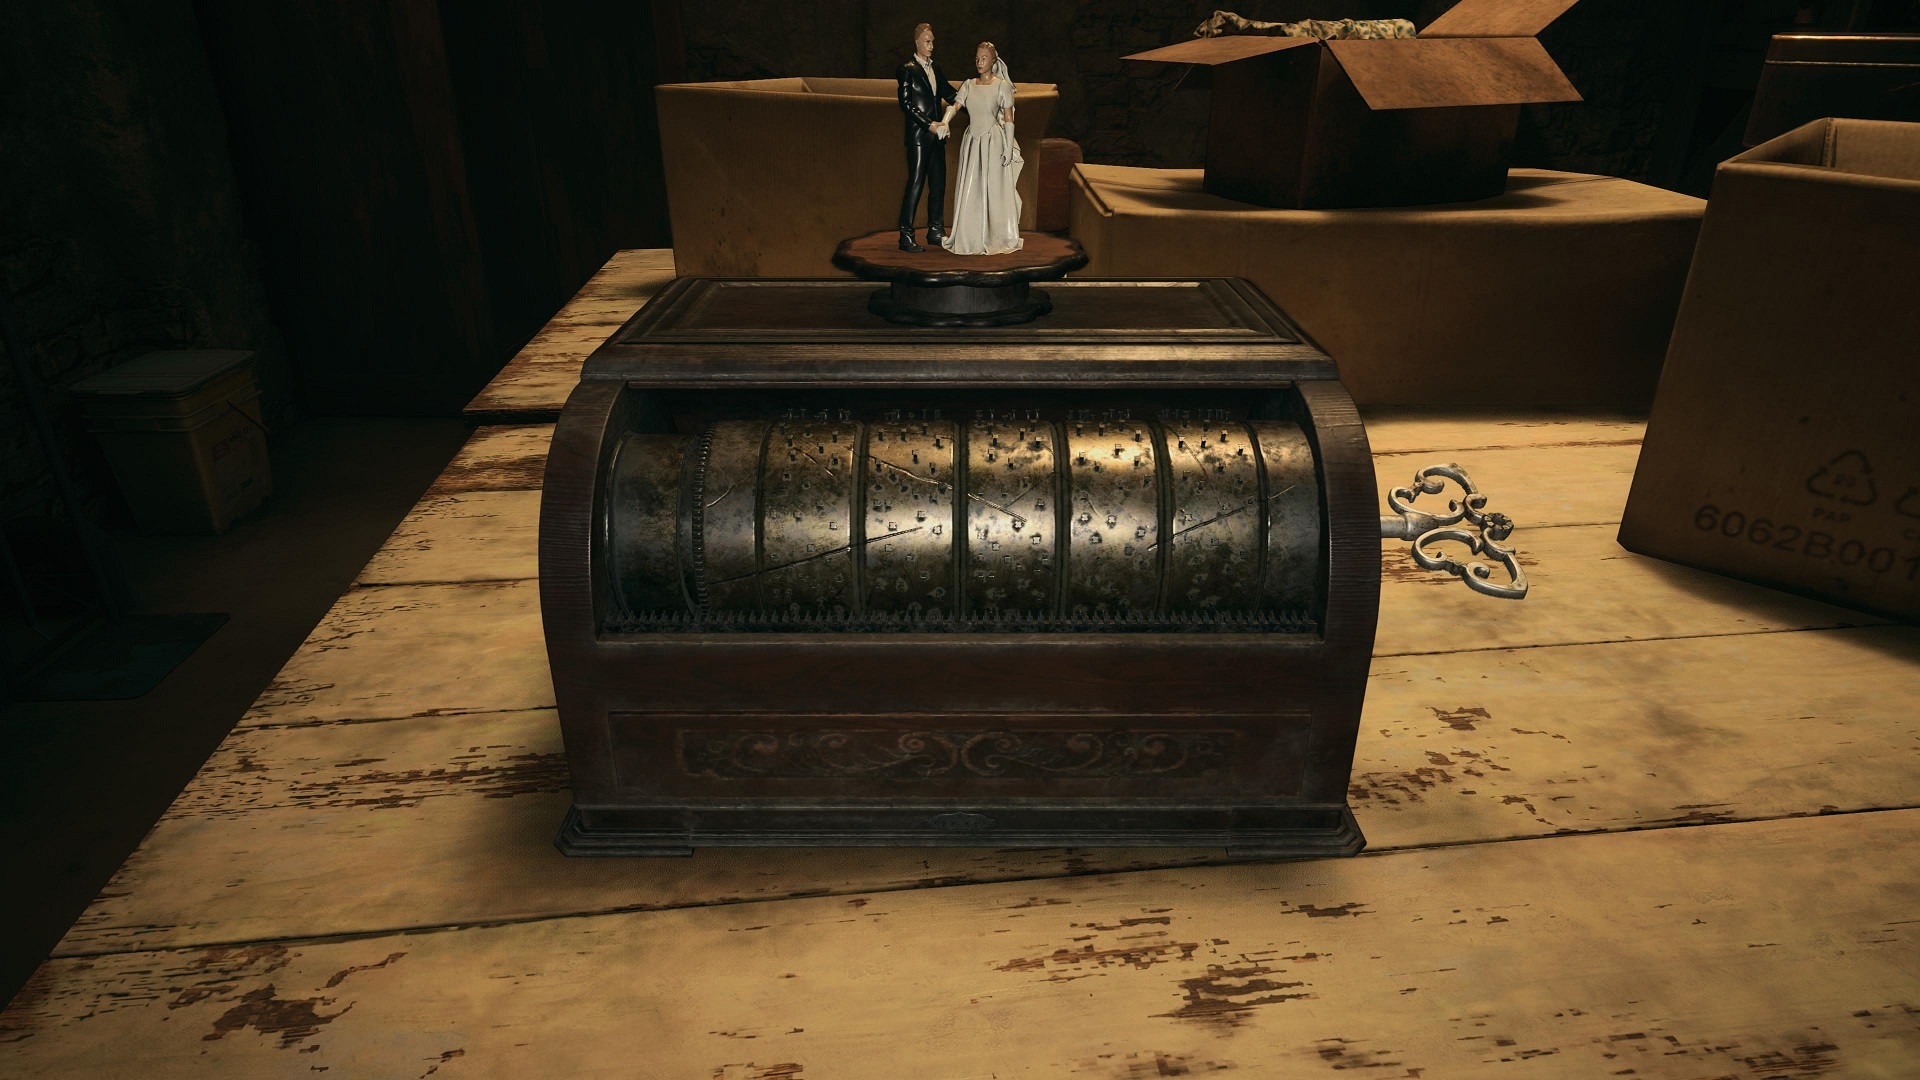
You'll get a pair of Tweezers for your trouble. Take them back to the Doll Workshop, examine the doll's mouth, and use the Tweezers to pull out the Film. Head back down the hallway you just came from, and go into the Study, right next to the elevator. Read the note if you want, but it's essentially telling you what we're about to tell you: the order the film strips should be placed on the rack next to the projector.
- The monkey
- Village of Shadows
- The baby
- The music box
- The wedding ring
After the film plays, a bookshelf will move. Go into the hidden room, and get the scissors from the doll at the end. Try not to think about why it was holding them like that as you make your way back to the Workshop. Cut the bandages covering the hole in the wall below you to create a path back into the hall. Follow it and you can unlock the door that leads back into the Medical Room. Use the scissors to cut the bandages off the doll, and get the Brass Medallion from its chest. Head down the long hallway to the left of the main entrance. Plug in the Brass Medallion, then fix the other two. The medallion on the left should have the crow facing right. The bottom medallion should have all three eyes closed. Once all three are set, go downstairs to the Old Well. Take the ladder down, and get the Breaker Box key at the bottom.

Head back upstairs, save, and make your way back to the elevator. Your path will be, uh, blocked. Run into the Medicine Room next to the Workshop. Duck into the passageway you opened in the Scissor Room. You’re in the clear when the sound dies down.
Head back towards the elevator. Use the key you got on the Breaker Box to collect the Relief of a Child. Backtrack through the Study, and then into the room where you got the Scissors. Use those Scissors to cut through the bloody bandages at your feet. Follow the hallway all the way to the end, and take a right. Unlock the door, and you've got yourself a shortcut back to the Medicine Room. Save if you're so inclined.
Head back through the door in the Medicine Room, and take the other path to your right. Plug the Relief of a Child into the door, and follow the path forward till you reach the Bedroom. Keep a mental note of the layout while you're at it. Grab the Fuse off of the back wall. Make your way to the Relief Door upstairs, reach the top aaaaaaand go back to the Bedroom, run so very fast back to the Bedroom.
As soon as you get back there, suck up whatever pride you have, crouch and hide under the bed. When the coast is clear, back away, stand up, and scramble upstairs.
Head back to the Breaker Box and plug in the Fuse. It'll take the elevator a moment to arrive, so run into the Study. At the other end of the room to your left is a desk with a giant stack of books. Get back there, and crouch. You'll know you're fully hidden when Ethan turns off his light. Peek carefully around the corner, and when you can, use the right side of the room--i.e. the space behind the projector--to run out of the room.
Open the elevator, and head upstairs. After taking a couple minutes to breathe into a paper bag, head down the hallway, back into the Living Room for a cutscene.
Boss Fight: Donna Beneviento And Angie

Hey kids! It's time to play Hide & Seek with Angie the Murder Doll! You'll need to find her three times before this madness can end. And you'll need to do it quick; take too long finding Mistress of Puppets, and all of her friends will attack you all at once.
But wait, it gets even better: Angie's locations are slightly different every time you play, so while we can give you the most common places to find her, the little plastic goblin might change it up, and be somewhere else in the general vicinity of that location. Hence the word we're about to employ: "usually." However, every time you find and attack Angie, you'll injure her, so look for blood smears on the walls for clues to her location.
So, with all that in mind:
- Location 1: Go up to the second floor of the Foyer, and follow the balcony to the Guest Room. She's usually on the ground at the back wall.
- Location 2: Go back to the Living Room. She's usually in the sitting area, on the floor to the left of the couch. Look near the fireplace if she's not.
- Location 3: Head back to the elevator area. She's usually right in front of the doors.
After Ethan puts Slipknot Barbie down for good, you get a key with a fetus engraved on it. Examine it to combine it with your key to get the Four Winged Unborn Key. Look to your left, and take Angie with you. Grab the new Flask from the altar, and dear God get the hell out of that house.
Part 5: Back To The Village, Post-Beneviento
Leaving House Beneviento
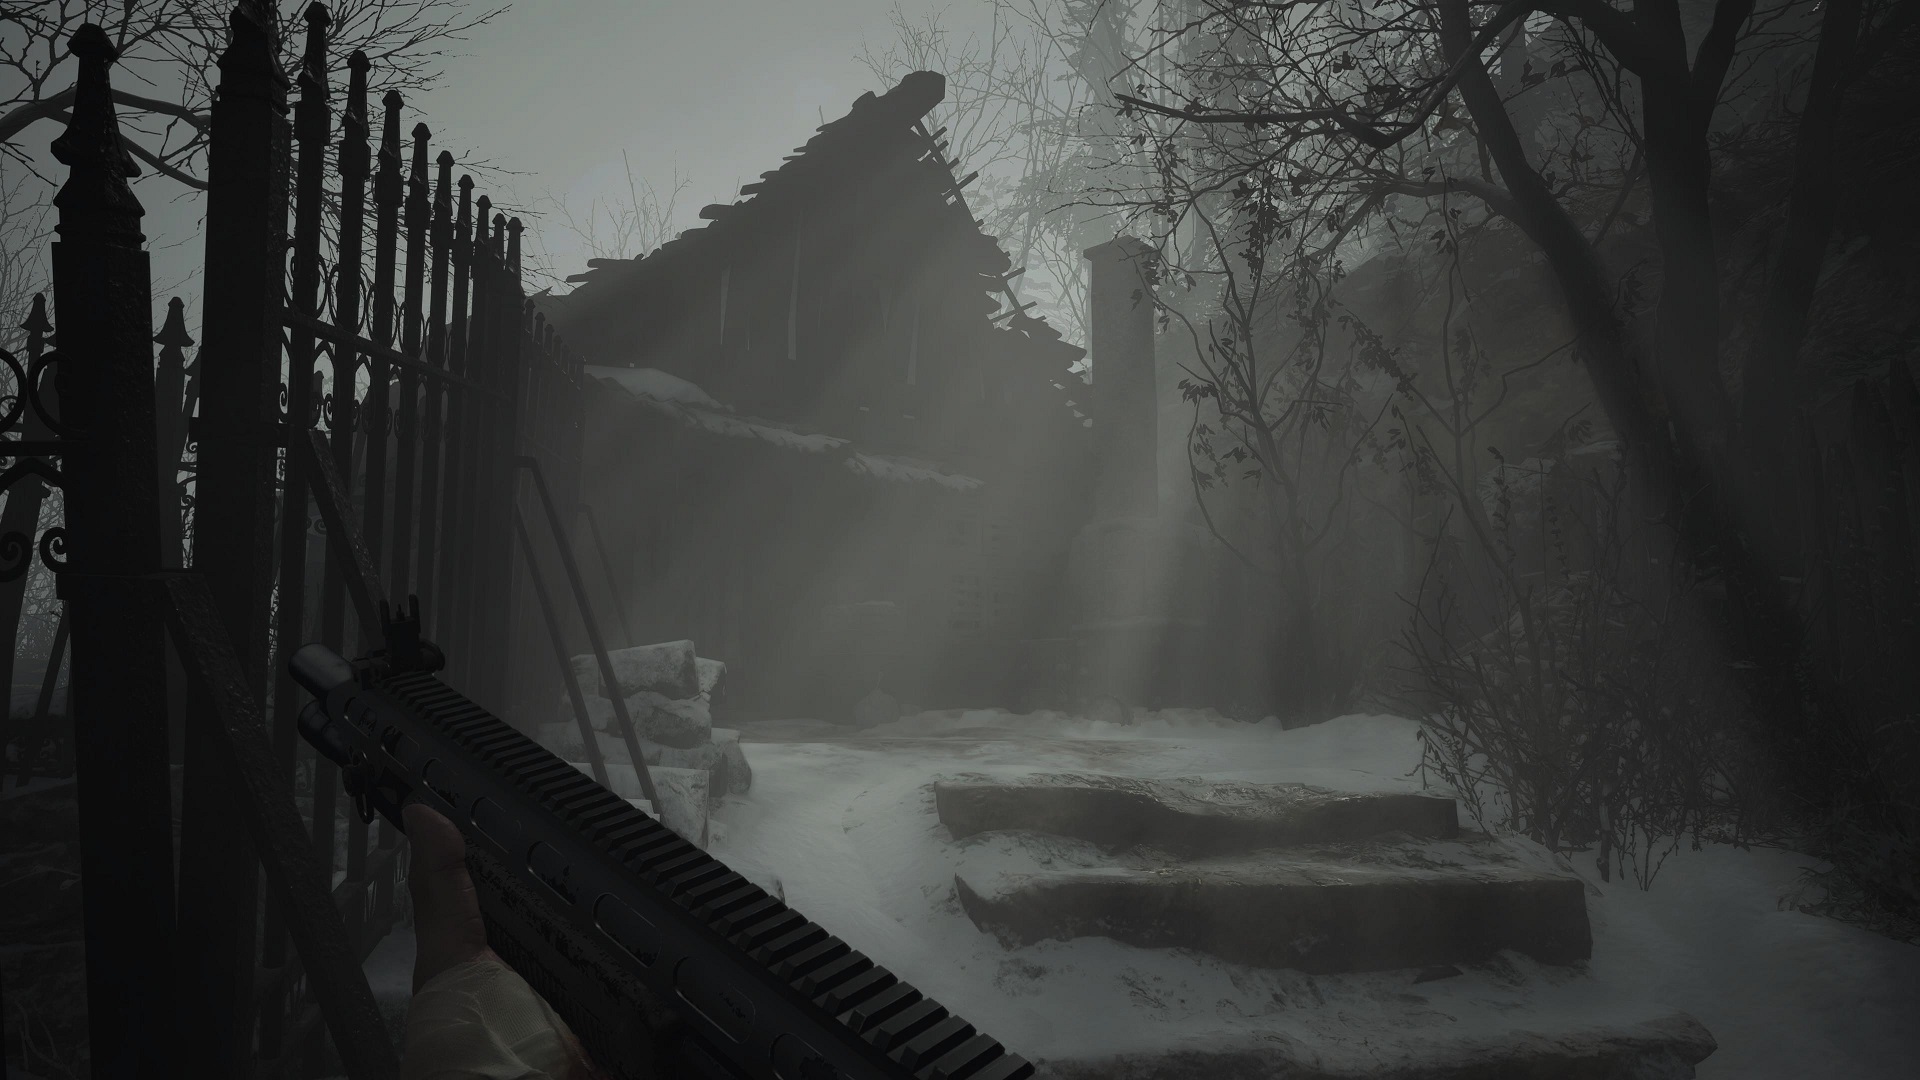
Things aren't nearly as eerie around here after your last ordeal, so take a nice stroll back down the road whence you came. You will, however, come to a roadblock, forcing you around a house. Break the crate on your left as you circle around to the entrance. A whole gaggle of ghouls will come out of the woodwork. Now's a good time to get acquainted with your new friend, the automatic pistol. Your shotgun will work just as well, but you're gonna want to conserve that ammo. Careful if you decide to step back down the path you just came from, a ghoul spawns down there too. If you want to make a stand inside the house, you can barricade the door with a shelf.
Once you're done with this bunch, check the grave under the tree across from the house to pick up the Sun & Moon Ball. Shoot the birdcage above that for 2,000 Lei. Break the crate in the shed to the left of that. Head into the house. Break the crate, grab the lockpick, and take the big, beautiful W870 TAC Shotgun sitting on the table. Exit, and go left through the wooded tunnel to get back on the road.
Take the next gate on your left and go up to the Gardener's House. The well on the left when you get up there has the head to complete the Madalina doll you picked up in House Beneviento. Go further back in the yard for a crate. The outhouse has a Photo we'll be using on our treasure hunt in a bit.

Enter the house. On the right is another labyrinth game. Use the Sun & Moon Ball. The key to this one is just move as slowly as possible around the curves. Use left and right more than up and down to do that. You'll get an Onyx Skull for your trouble. Head towards the back room. There will be Explosive Rounds on the floor near the door. In the back room itself, read the Gardener's Diary, grab the Luthier's Key from the desk, and use the Typewriter.
Leave and cross the suspension bridge. Pay no mind to the baddies below you as they pass, but take a look over at the bridge to your right. There's a Goat of Warding to shoot right in the middle of it. A ghoul will drop down from a tree when you get to the other side of the bridge. Take him out, then take a left up the path. There's a crate, and a Large Crystal on a headstone. Kill the ghoul who rises out of the ground up here. Continue up the path, and drop down. Kill the ghoul to your left before going right towards the tree. There'll be two more ghouls to deal with here. Once you're all clear, grab the Vivianite off the grave, then shoot the two birdcages on each side of the tree for some Lei.
Continue down through the brush and we're finally back at the Duke. After selling Angie, Madalina, the Onyx Skull, and the gems you've picked up, you should have well over six figures in cash to spend. Treat yourself. Our one big recommendation is to make a decision on which pistol and shotgun you plan to use going forward. Sell the ones you don't to clear some inventory space. Don't worry, if you get sentimental, you can actually buy back your weapons at any time. From here, there's some treasure hunting to do, but if you'd rather get back on the trail, skip down to The Beast and the Third Flask.
Treasure Hunt: The Maestro's Collection and Berengario's Chalice
We're gonna be killing two birds with one trip here, so settle up with The Duke, and head back down towards the village. Take a left towards the cemetery. There will be three ghouls to tackle here. There's a mausoleum on the left that was locked the last time you were here. It's open now. Take the Broken Slab inside.

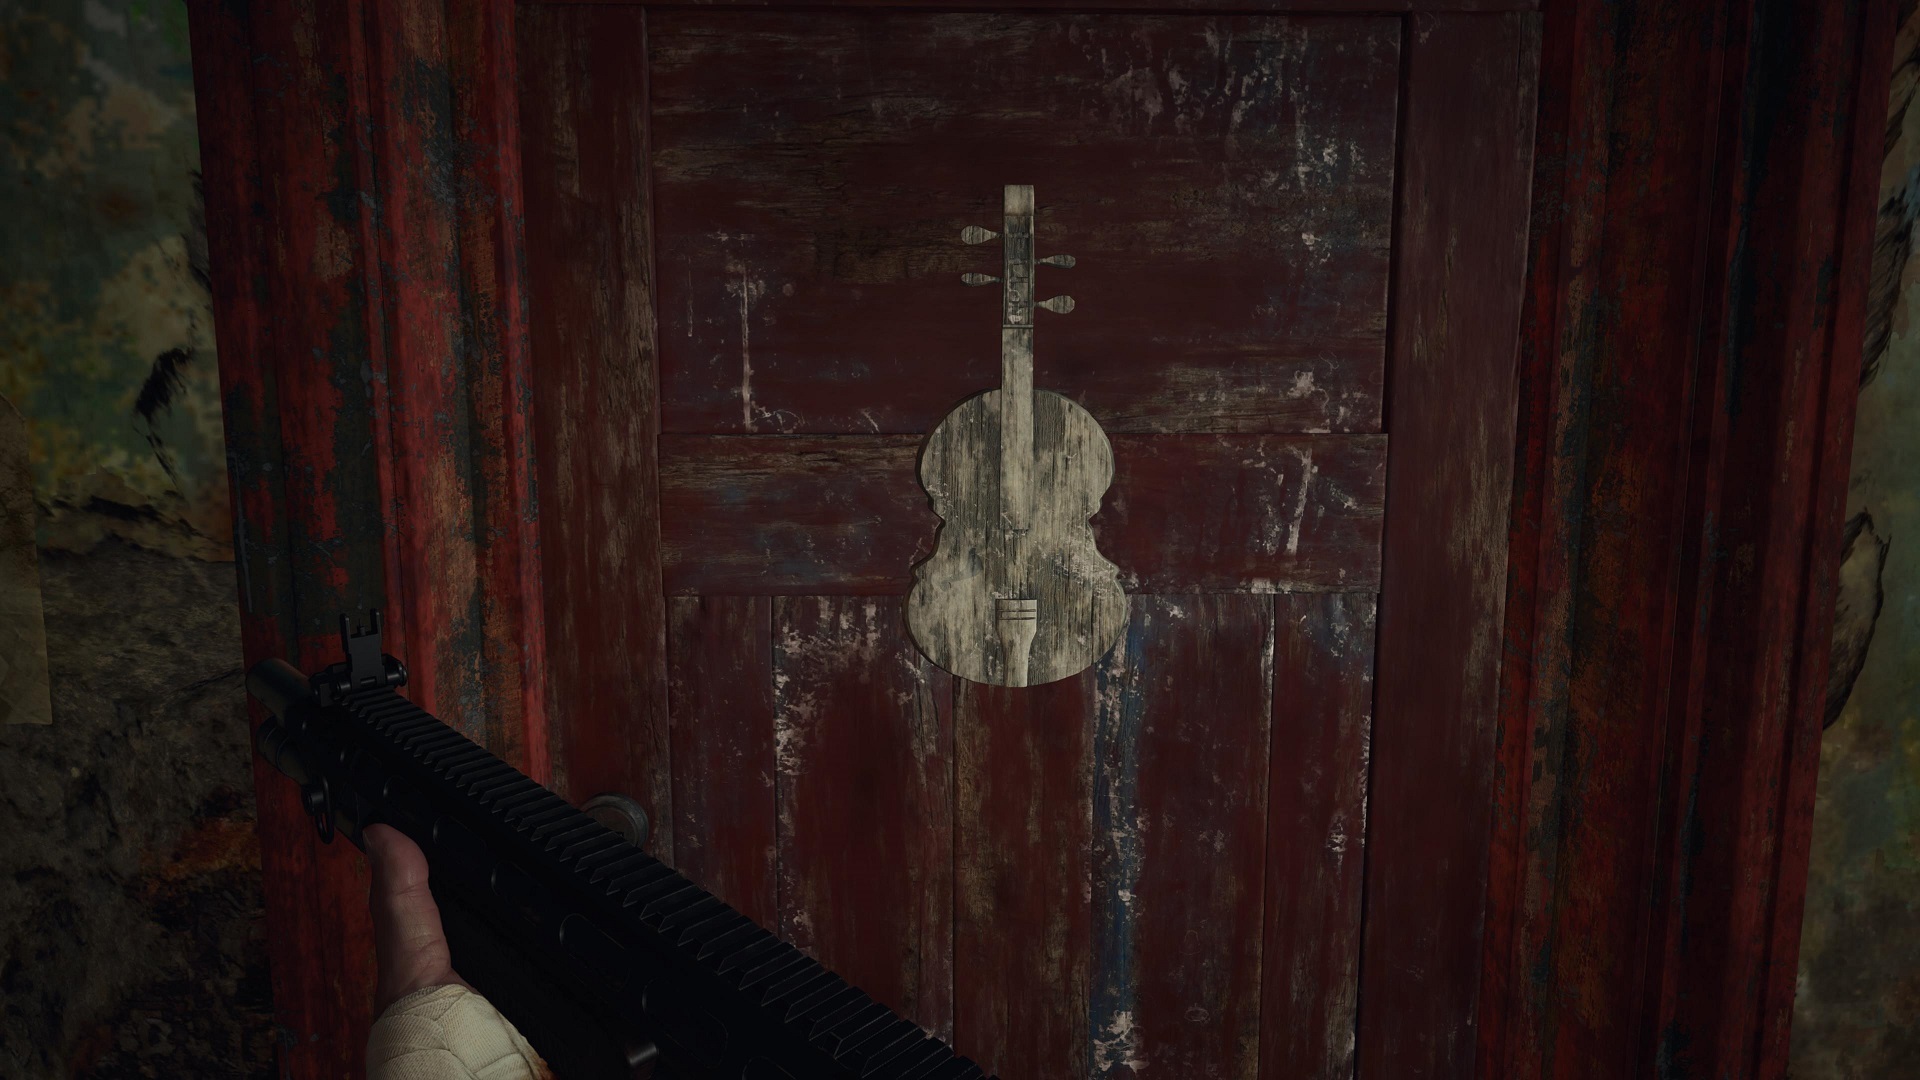
From here, stroll back to the red chimney house, and use the window in the shed to get you back to the intersection where you fought the Armored Lycan. Take the path down, go through the gate on the left. Turn left again to get to the Luthier's House. Use your new key. There's Lei under the sink on your right. Further in, there's a Chem Fluid in a drawer, and a crate next to that. Open the closet at the end with the code 270917. Grab the Steel Hraesvelgr. When you're done Googling how to pronounce that, take the High Capacity Mag for the Sniper Rifle underneath it. Head back to The Duke and save.
Before the next step, take a minute to craft or buy Every. Single. Explosive. you can make and/or carry. You should still be pretty flush right now, so this shouldn't even break the bank. When you're ready, head through the gate behind The Duke, and make your way back towards House Beneviento. Save at the Gardener's House along the way. When you get back to the house where you got the TAC shotgun, take a quick moment to kill the giant goat hanging out in the yard. Black Phillip here's no pushover, though; snipe him from afar a couple times if you have the ability. Once he's dead, collect the Meat, and move on.
Your destination's the grave surrounded by dolls before you get to the elevator that took you to House Beneviento. Unfortunately, there's a giant axe-wielding maniac who's also come to pay his respects. Yes, he's big, yes, he's powerful, and yes, he takes an utterly absurd amount of damage to kill, but the good news is he ain't smart. What you want to do is stay on the footpath leading to the grave and stay out of the open area for right now. Lay mines down along the path, then snipe the big lummox to get his attention. He'll come running into your mines each and every time. It will only stagger him for a second though, and he's fast enough where he might be able to close in on you faster than you can get away. Thankfully, his axe is (somehow?!) blockable.

If you should run out of mines, throw every Pipe Bomb you have at him. Even then, you might have to snipe him a few more times to finish him. And even after all that, there's stray ghouls hanging out near the grave you'll need to take out as well. Have we mentioned how much we hate this place?
When it's finally all clear, collect the Crystal Axe from the giant's corpse, then use the Broken Slab on the grave to collect Berengario's Chalice. Head back to The Duke, and sell 'em both for a massive amount of Lei.
The Beast and the Third Flask
When you're done with The Duke, turn around, and go to the gate all the way across the Altar area, and use the Four Winged Unborn Key. Head down the stairs for a cutscene. Catch your breath, then turn around and take the note off the dead body. Slip out of the back window, and make sure Man's Worst Friend isn't close by.

Once the coast is clear, go back to the main path here, cross the creek, and go to the building directly northeast marked with the Iron insignia. Use your key in the lock, and grab the Waterwheel Weapon, which turns out to be the GM79 Grenade Launcher. Break the crate in here for some Explosive Rounds, which, if you've been back to Luiza's House before now, should bring you to a grand total of five, which is exactly as many as you need. Grab the lockpick on the windowsill, and go back across the creek to the house you started in.
It's time to call Lassie home. Use the ladder here, and head up to the roof. Use your vantage point to spot the beast, and get his attention by firing a grenade at him when you've got a clear shot. He'll be coming up to the roof, but it'll take enough time for you to reload. Back away from him, and fire again. From here, use the roof structure you came out of as cover, since Snoopy can't pounce on you through it. There's no extra ammo here, so be precise when using your grenades. If you run out, and you still have Pipe Bombs, use those as well. Your shotgun can also finish the job pretty well. Still, ideally, you'll be able to land hits with all five Explosive Shells, which will bring Mr. Peanutbutter down the easiest.
Grab the Crystal Beast when he's dead, and follow the creek south.
Part 6: Moreau's Reservoir
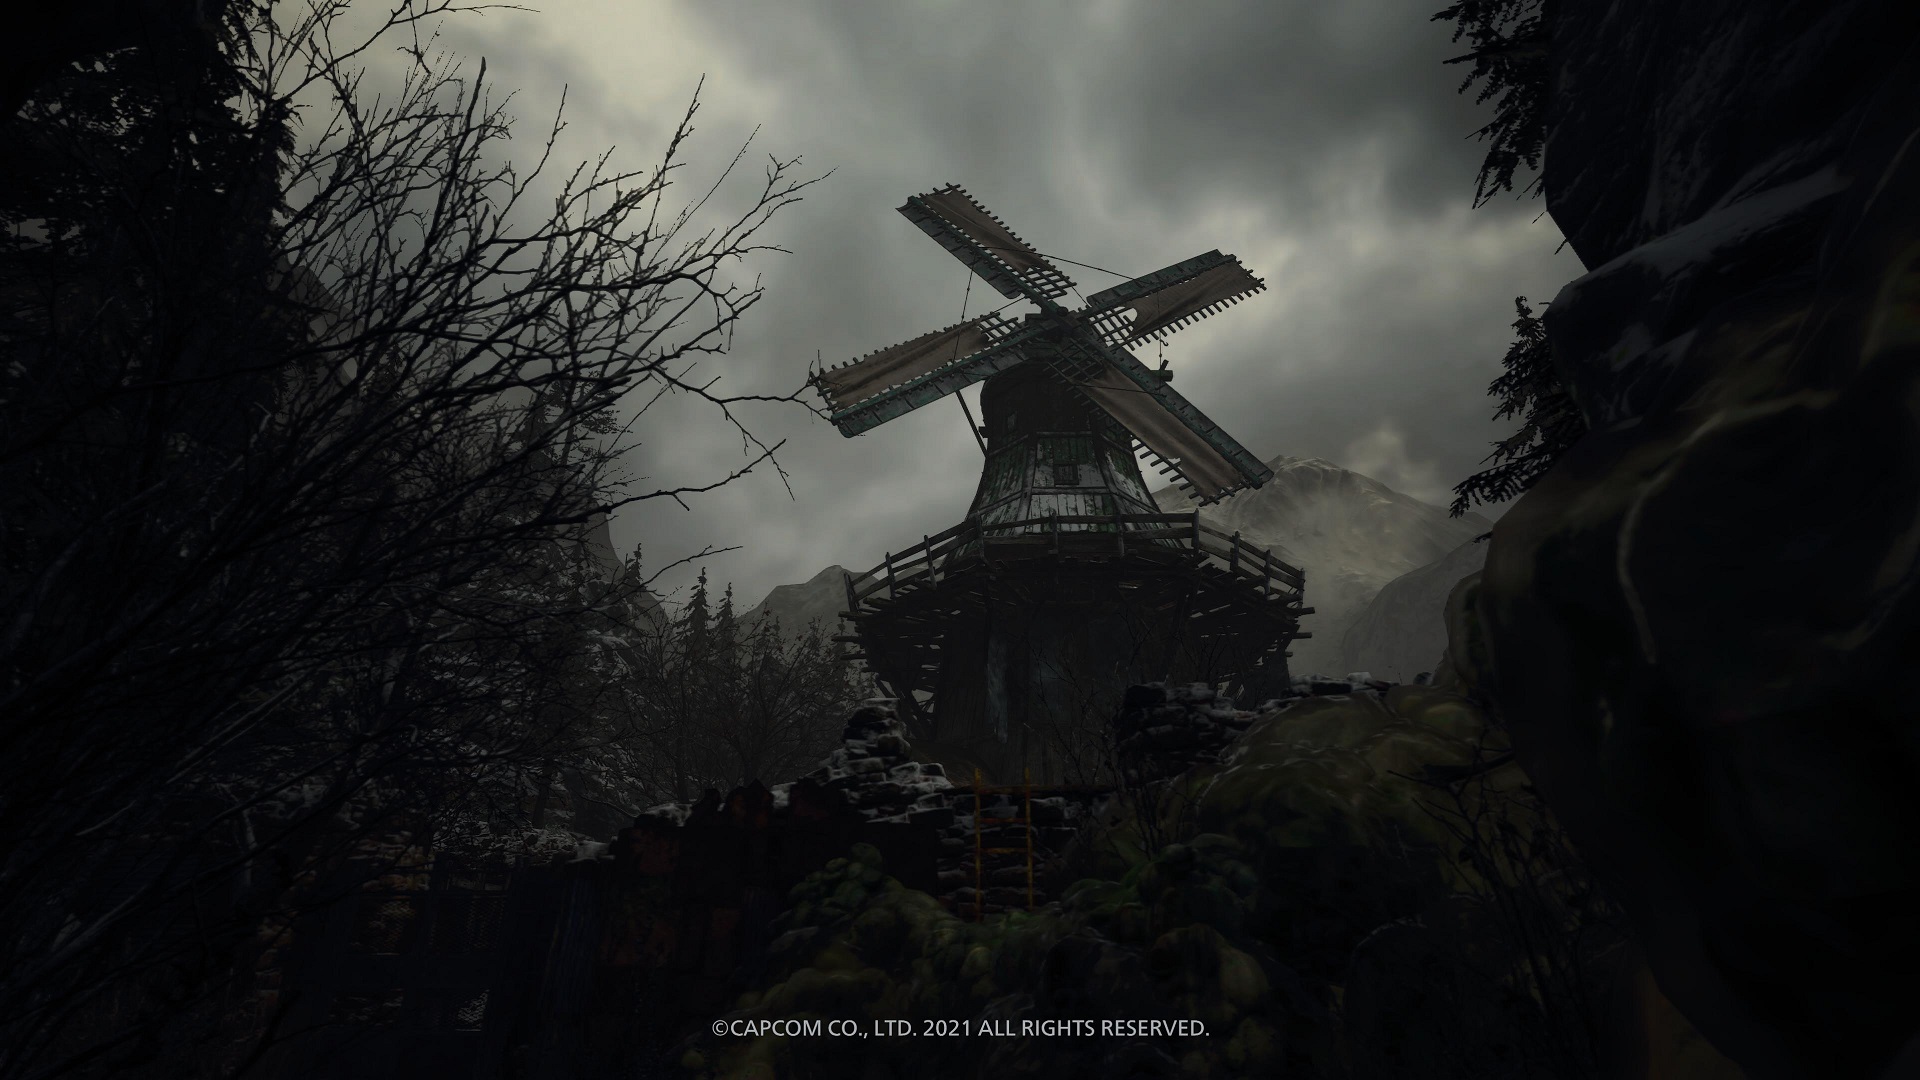
When the creek ends, take a right. Use your knife to cut through the gross slime barrier here. Do it again when you reach the slime covering the ladder ahead, and climb up. Off the pigs in this area before you jump down, and collect the Meat. Unlock the door to your left, and enter the Windmill. There's a photo here of a rare pig, but if you've done our treasure hunt for Luiza's Necklace, that pig's already pork. Save at the Typewriter, then follow the path right to the elevator.
At the bottom, take a right, then a left at the gate. On your way through this mineshaft, check out the ceiling for a shiny point you can cut down with your knife for a Crystal Fragment. Keep moving along this path and slip through the gap in the slime at the end. Good news, you've found the third flask. Bad news, you'll meet Moreau, who absolutely does not want you to have the third flask. When the cutscene's over, head back through the mineshaft. The previously locked gate on the left is now open. Once past it, take a right up the stairs. There will be Handgun Bullets to your right. Grab those, and take the path north. Use your knife to cut the beams with the yellow tape on the right to create a bridge. Climb down the ladder ahead, then look behind it for a barrel.
When you see the Lycans up top, crouch, and pull your sniper rifle. There's a Lycan feeding to the left that you can headshot through the boards. His friend will come running; drop him when he comes around the corner. Take stock of any explosives you've got left, craft one or two Mines or Pipe Bombs if you can.

Proceed into the area with the tree, and an Armored Lycan will drop down. Same as last time, back away shooting, while leading him into any Mines or Pipe Bombs you've placed in his path. He's a pushover once you've got his armor off. He's not alone, though, so keep an eye out for his more zealous buddies, take them down with the sniper rifle or shotgun. Keep an ear out, and make sure everybody's dead before moving in. Look carefully to the left of the campfire under the tree for an Herb.
Grab the Boat Key off the wall in the shack, break the barrel to the left of that, and the one on the little pier further ahead. Head back to the gate, and follow the path outside. There are a couple more Lycans here. Snipe the one on the roof, then his friend on the ground. Break the barrel on the first pier. Read the note in the shack, then use the Boat Key on the boat. Drive into the two tunnels ahead.
After you dock, walk straight ahead for a cutscene. When you've got control again, get off this pier, immediately, by running straight ahead. Jump down off the rock. You'll see a sign pointing left to Moreau's Clinic. You wanna go right, to the Gatehouse. Step into the back room, where you've got a chance to dry off with The Duke and a Typewriter.
Draining The Reservoir
After you're done with The Duke, exit his room, and walk to the other end of the Gatehouse. Our mission is to drain this reservoir, and leave our new underwater friend with nowhere to hide. But, of course, when you flip the switch here, there's no power.
Turn around and go down the long hallway to your left. Take a right to the outhouse, get the Chem Fluid inside. Also, if you've been following this guide, congratulations, that's the last outhouse you'll have to open, so enjoy the "When You Gotta Go..." trophy/achievement. Go up the hill.
Read the note in the truck ahead, then kill the chickens for some Poultry. There's a Crystal Fragment in a box in the shed, and a Rusted Scrap on the barrel. Hope over to the windmill. On your left is some handgun ammo on a box, to the right is a barrel to break. In the middle is a wheel with a crank. Use the crank, and naturally, it breaks. And so, we go on a harrowing quest for this seemingly simple household item. Head right to enter the windmill, and take the ladder down to the exit. You'll be surrounded by a lot of floating debris from destroyed houses. Head right. There's handgun ammo hidden among the pile of dead fish straight ahead. And no, somehow, these fish just aren't good enough eating to take to the Duke.
Walk all the way to the end of this roof, and use your knife to cut the boards marked with yellow tape to make a new platform. When you cross, you'll have a new problem in the form of Moreau. Wait for him to cross your path twice, then run over to the next house/platform. There are yellow boards on both the left and right of this tower. Shoot them both, then cross the bridge it makes. Go into the shed. Take a left for a barrel. Head up the stairs, and push the cart into the water. Drop down to your left, and open the switch box. Dry heave for a second, then throw the switch. Turn around, and cross the platform. Use the blue switch to raise the path directly in front of you. Take a right. Hit the switches in front of you as fast as you can get to them so you're not stuck on a platform while the other sinks. Once you reach the shack, break the crate for some Magnum Rounds. Get hyped for that later. Flip the blue, orange, and green switches, in that order, to give yourself the most time to get back to the main path, then take a right.

Once you're over the orange platform, slow your roll, let Moreau do his thing a second, then step onto the wooden platforms. The first dock to your left has a barrel with Explosive Rounds. Grab those, wait for Moreau to cross your path again before running to the next dock. Once you're safe on the roof of the sunken house, turn left to get on the next pier, and knock the cart into the water. You're now back where you started. Head up the stairs, and push the second cart into the water. Now you've got a full bridge to cross in front of you. Wait for Moreau to pass again, then run over.
Break the barrel at the top of the stairs, then climb the ladder dead ahead. Throw the switch at the top to raise a shipwreck. Drop down onto it, and move down the deck to the left. Moreau will throw a temper tantrum here, so run into the next room. You don't have time to save ammo here; shoot the slime wall and get on the dock.
Head inside the windmill, and turn right. Once you hit the fence, look up and cut the lock with your knife to drop the ladder, Exit the windmill at the top, break the barrel in front of you, and head left. Grab the new Crank off the wheel. Back away from the wheel a few feet until you get the prompt to actually use the Crank. Once you've done that, go to the far end of the platform. The windmill's stopped, and you can climb the blade. Take the zipline at the top, and you'll be safe and sound back at the first windmill. Use the crank on the wheel here, and the reservoir is officially empowered.
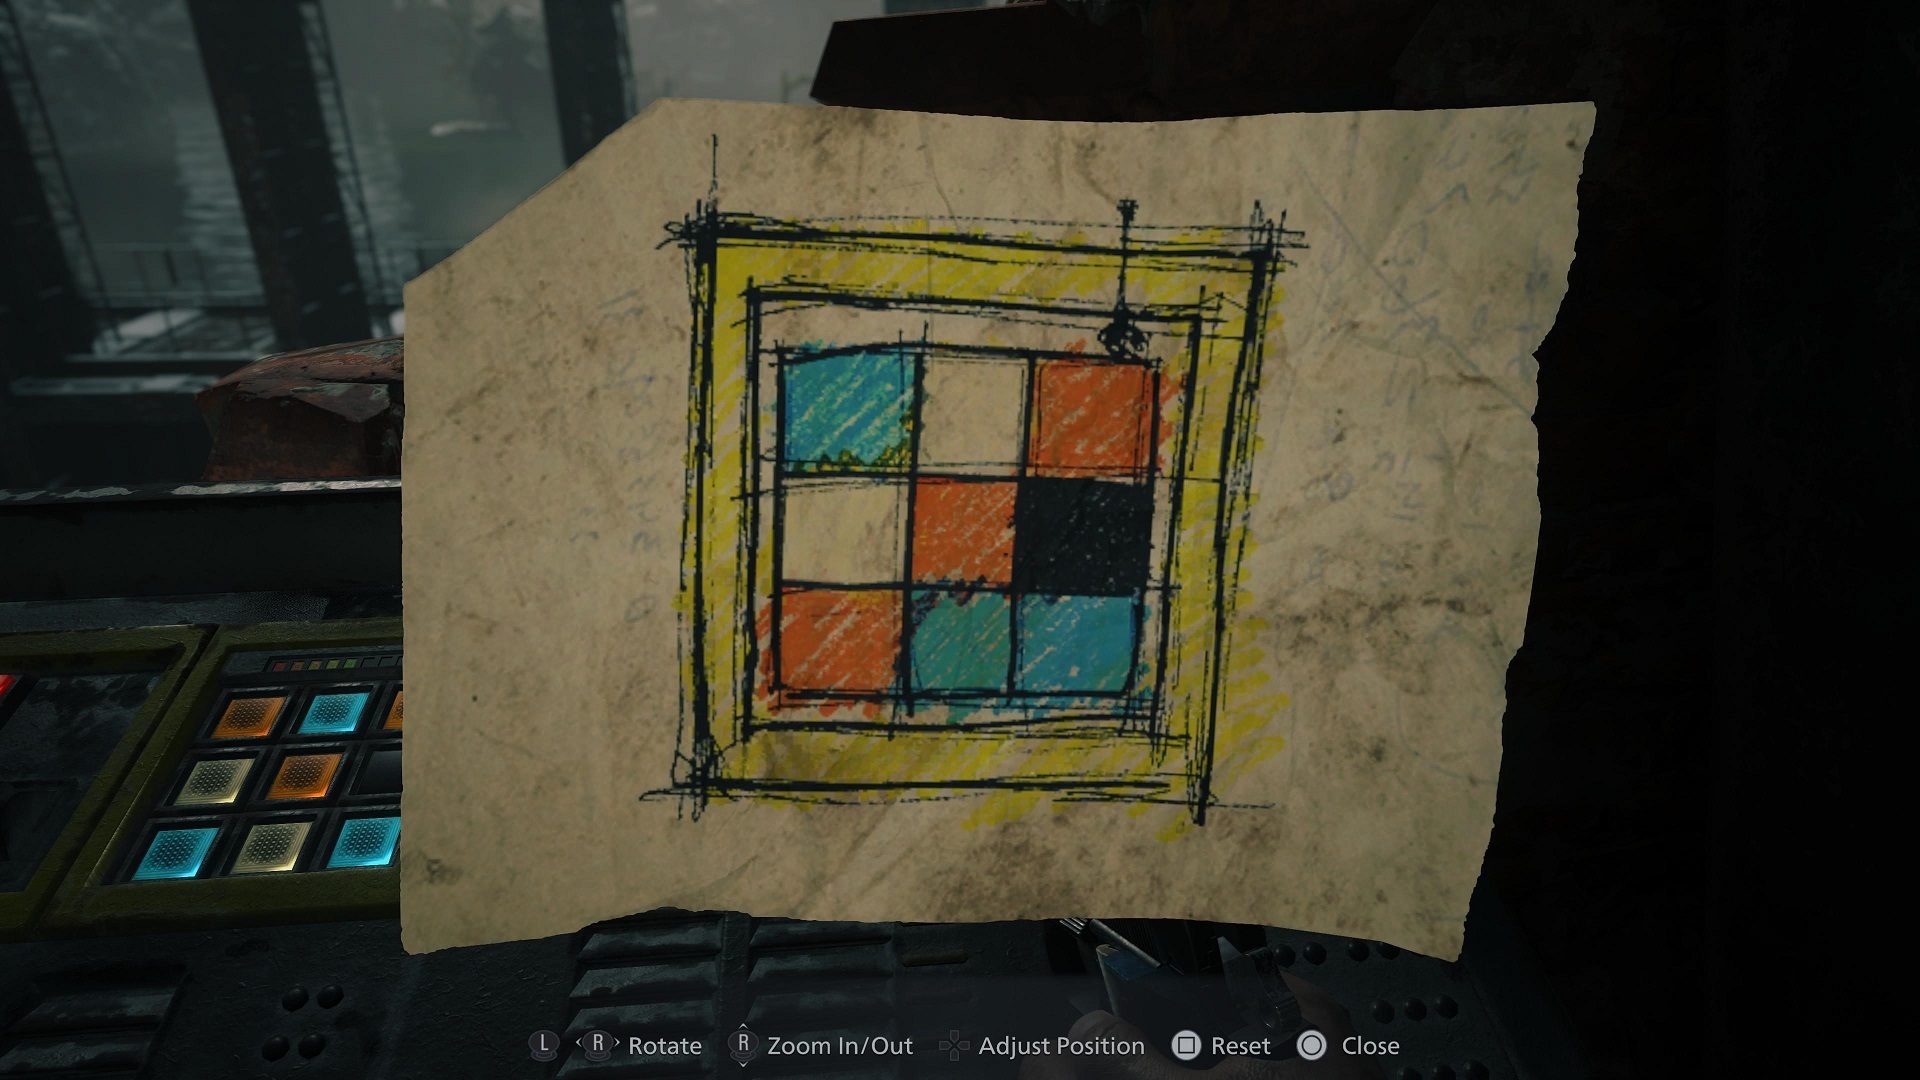
Head back down the hill to the Gatehouse and save. If The Duke's still got explosives you haven't bought yet, buy 'em now. You should also get the Explosive Round recipe if you don't already. Head to the Reservoir Controls. There's a note here showing how the console needs to be lit up to open the floodgates, and you just need to cycle through each box to get to the color you need. The problem is that the note's turned sideways. Turn the note left so the little antenna drawn on is in the upper right of the diagram. Or, you know, just follow this screenshot:
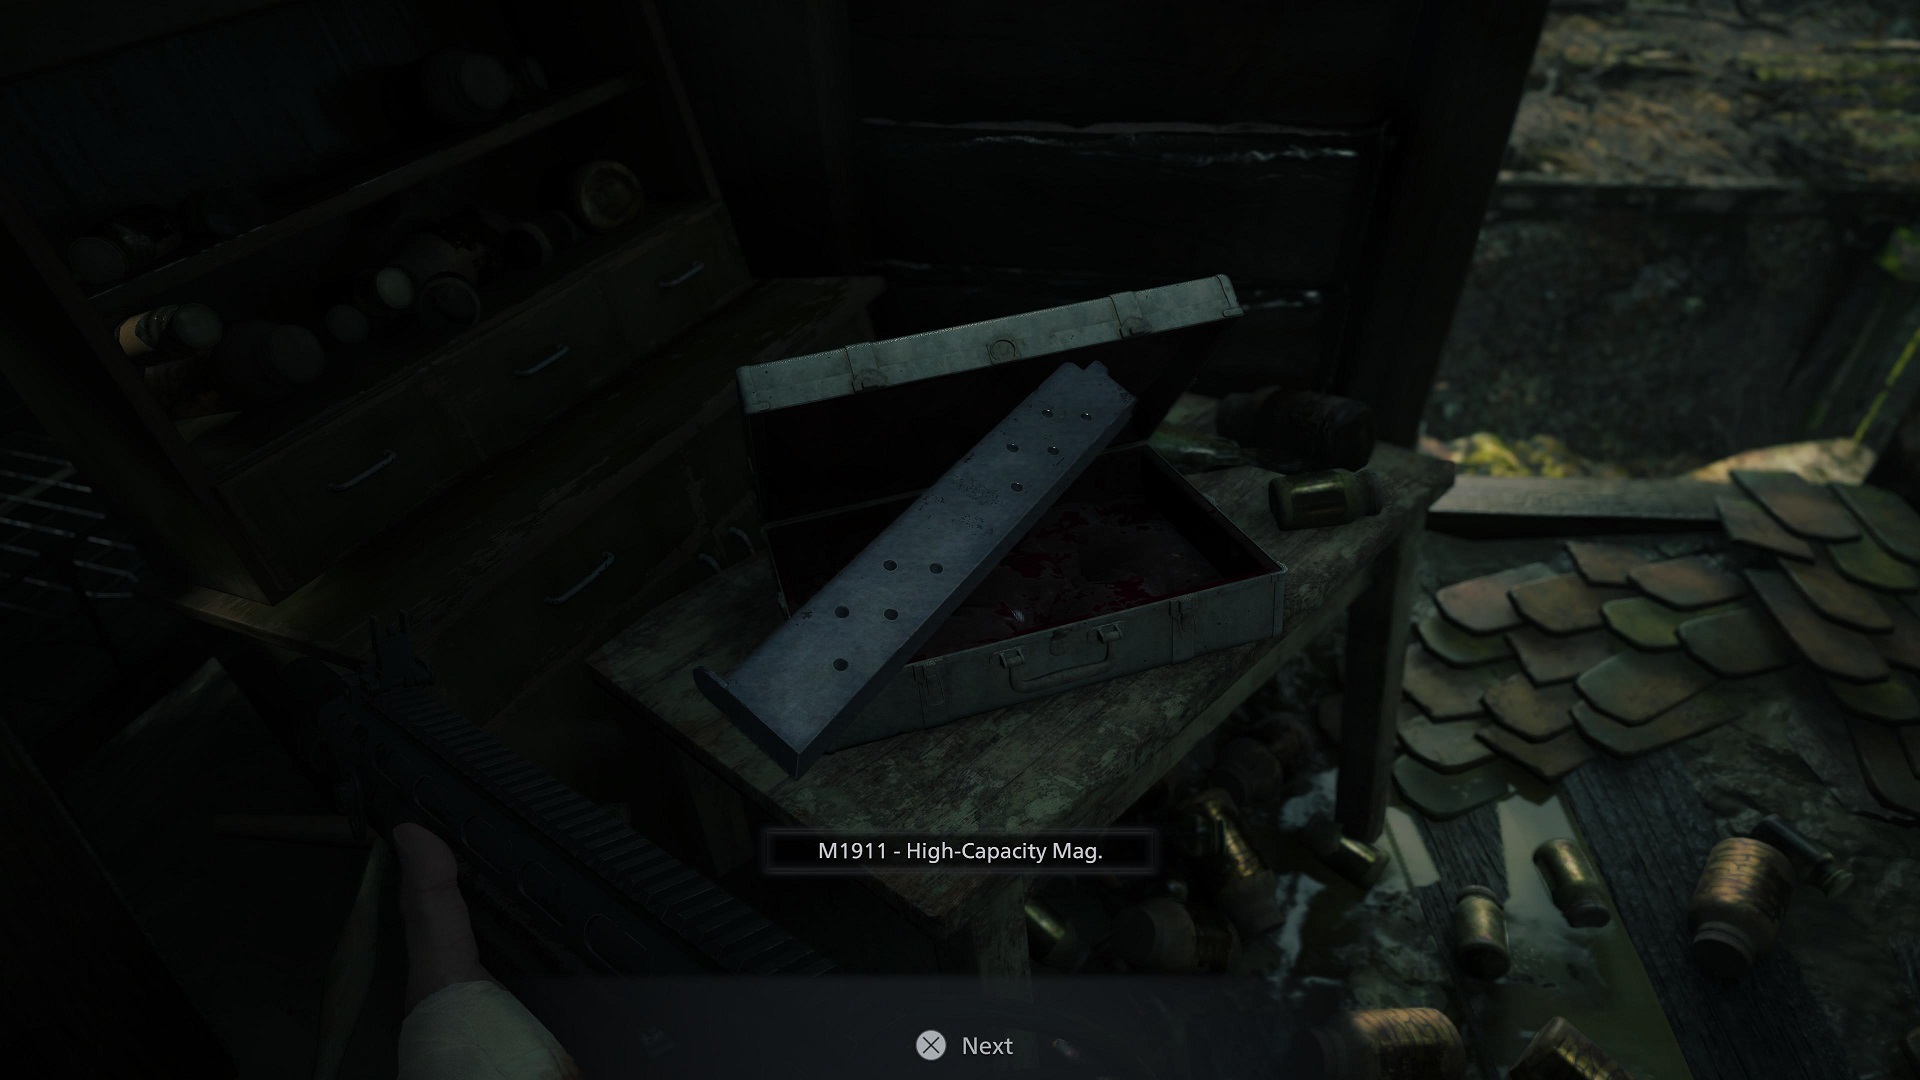
Once the gate's powered up, throw the switch. Once the reservoir's been drained, exit through the front door. You'll see Moreau waddling down the path leading right. Follow him. Break the barrel to the left of the shack ahead. Inside, near the back door, check the door for Moreau's Diary, then the briefcase to the left for the High Capacity Mag for the M1911.
Exit the back door, then drop into the water. To the right is a yellow pipe. Right around the corner is a barrel, a Rusted Scrap, and a Chem Fluid. Before you move on, craft as many Explosive Rounds as you can. When that's done, craft as many shotgun shells as you can. And when that's done, craft Mines and Pipe Bombs. If you have crafting materials left after that, maybe get a First Aid Medicine just in case. Reload everything, and shortcut the Grenade Launcher and Shotgun. Head down the passage.
Boss Fight: Moreau
When you hit the boarded-up area on the left, drop two Mines, then equip the Grenade Launcher. Walk a little further on, and Moreau will appear. Time to do some blast fishing. The basic idea here is you'll need to do enough damage to Moreau to get him to open his mouth, and stick his vulnerable person-shaped tongue out at you. You'll use explosives for the first part, then follow up with your shotgun on the second. Grenade Rounds are the best tool for the job here; one shot stops Flounder here dead in his tracks. Typically, you'll only get the chance to hit him twice with your shotgun before you need to start running again. He will, occasionally, just randomly flop around in a blind rage with his tongue out, which is a good time to land some free damage. Aim carefully, though, the tongue undulates around, making it a tricky target. Load your Grenade Launcher while you're backing away from him.
The Mines you just laid in his path in this first passage will stop him again when he passes, so fire at will when he opens wide. From here, it's a game of keeping enough distance to avoid getting trampled, but not so much distance you can't attack the tongue, and avoiding getting trapped in a corner you can't escape. That gets easier after he breaks the barrier in this first area, though some of the passages may be blocked with slime walls. Shoot those down on sight, but keep an eye on your ammo. Explosive Rounds, Mines, and such are still at a premium, but they're the most efficient way to get him to open up. If you run out, you can either use the red barrels scattered around the area, or seek out the little caches of resources and ammo around almost every corner.

If you're running around a bit more panicked, look for areas marked with yellow pipes or tape. These are also crucial for avoiding Moreau's special attack, where he rains acid down on the entire area. If you see him crawl up to higher ground, find a cache area with a roof to wait him out. They provide cover from the rain, which will give you a quick minute to reload your weaponry and/or heal up. If you're caught out in the acid rain, it will kill you, so make sure to hustle for cover.
Keep the pressure on him, and you'll be serving up sushi in no time. You'll automatically receive the Crystal Moreau when it's over. Do a quick sweep of the area for any resource caches you didn't visit during the fight, then exit through the path in the north.
Break the barrel before entering the mineshaft, then the next one on the left, which will be right beside a narrow passage leading to a room with a TV. Take the wing key off the desk, and examine it to combine it with yours. You now have a Six Winged Unborn Key. Watch the cutscene. Look down after it's done to read Moreau's second diary. Examine the Cadou on the table for a quick dose of the creeps, then exit the room. Open the gate with your new key, and go straightforward to the elevator. You'll be safe and sound back in the very first windmill. Save at the Typewriter.
Part 7: Back To The Village, Post-Moreau
After our little conversation with the TV, the main objective has changed to head up to Heisenberg's stronghold. That part's fairly simple; go through the door on the left outside the windmill, follow the creek (and Heisenberg's signs, that wiseass) back to The Duke, save/sell any treasure you've picked up.
However, with both the Crank and the Six Winged Key, there is a lot--and we mean a lot--of stuff to go get. That includes one of the best weapons in the game, the road to which is right in front of you when you exit the windmill, and it's all useful against what's coming. Still, if you'd prefer not to keep freegan McCree waiting, skip down to the section marked The Forbidden Woods and the Stronghold. If you'd like to join the ranks of the rich and powerful, though, read on:
Treasure Hunt: Moreau's Hidden Weapon
As mentioned, right in front of the Windmill is a door you need to use the Crank to open. Shoot a crow as you walk in and follow the path. Take a right at the fork and break the crate on the right. There'll be a couple of flying ghouls screeching around as you cross the bridge. Switch to your sniper rifle, and take your stand right in the middle of this bridge. One of the ghouls will frequently land on the rooftop to your left for a nice easy kill. The other will circle around, but won't swoop in for the kill long as you stay where you are. Take your time to get the perfect shot and bring him down.

When they're dead, cross the bridge, and grab the Mermaid Ball to your left. Turn around, and stroll over to the house directly ahead. There are Magnum Rounds on the barrels in front of you. You'll hear chattering up ahead. Crouch down, and sneak around left to the back of this house. Peek around the corner and look up. You'll see the last flying ghoul perched on top of a zipline. Snipe him for some peace and quiet. Slip into the hole in the side of the house here, and deal with the ghoul inside as he wakes up from his nap in the hay. Break the crate, grab the sniper ammo from the chicken cages in the corner, and exit. Pass this gross pile of dead animals to the shed across the path. There's a corpse on the floor here who's not fooling anybody. Unload on him and his buddy off to the right. Grab the handgun ammo off the windowsill. There's a Lycan in that third shed on the hill who's awfully excited to meet you, but before you face him, head up the little hill where you shot the perched ghoul a minute ago. Grab the Herb up here, then take the zipline over. Sneak around to the back of the house. Crawl into the hole in the wall. Surprise your new friend with a couple of shotgun blasts.

Read Moreau's Diary of Experiments, and open the chest to meet your actual new best friend, the M1851 Wolfsbane Magnum Revolver. She likes nature, sunrises, and absolutely obliterating werewolves, so let her get some of all three by stepping outside, and letting loose on the Beast prowling around straight ahead near the pile of animal corpses. Three(!) shots is all it takes to bring him down. Collect the Crystal Beast from its carcass.
Take a quick walk southwest for a beautiful view, a crate, and a well with some Flashbang Grenade ammo. Head back to the Windmill. When you come back through the crank door, take a left and use the Mermaid Ball in the Labyrinth puzzle here. This one's super easy, just hang right and go slow around the piece of track that's missing after the ball rides the water wheel. Zig-zag around the next couple of curves, and that's one Chartreuse Skull to the man with the breathing problem. Save at the Typewriter.
Start making your way back towards the Altar, following the creek, but you'll be making one minor detour. When you get to the bridge, take a left when you see the tractor on the right. Remember the house you grabbed the first shotgun from way back when? Go around the right side of it, to the back alley. Use the Crank on the door back here. Kill the two chickens for some more Poultry, then climb the ladder. Follow the ledge left until you can drop down on the metal roof. Open the chest next to the dead body for a Pigeon Blood Ruby. Go ahead and combine that with the Necklace With Two Holes now so you don't make a mistake and accidentally sell it to The Duke with the other gems. Speaking of....

Save at the Typewriter at the Altar, and talk to The Duke. He's restocked, and has the next level of upgrades for a bunch of your weapons. Sell your treasures, gear up to your liking, and let's go on a riverboat tour. Head west from the Altar back to the bridge, and go right down the stairs to the area where you destroyed the Goat of Warding before. This time, however, go straight ahead. Use your Crank on the drawbridge down there. Cross over, break the crate on the right, then jump in the boat at the end of the dock.
Treasure Hunt: Dimitrescu's Necklace and The Riverbank Treasure House
Let's go for the easy score first. Follow the river south until you reach the dock. Jump out, and go left first for a tiny pond with two regular fish and the Finest Fish. Head down the path to the right of the dock, and into the cave. Follow the passage until you reach yet another laptop, with some radio equipment. Help yourself to the Explosive Rounds, Flashbangs, and Mines on the chest to the right, the handgun ammo, Antique Coin, and Foregrip for the TAC Shotgun on the left. Check the laptop for the disturbing Analysis Results. You'll have some company on the way out. Drop these guys any way you see fit.
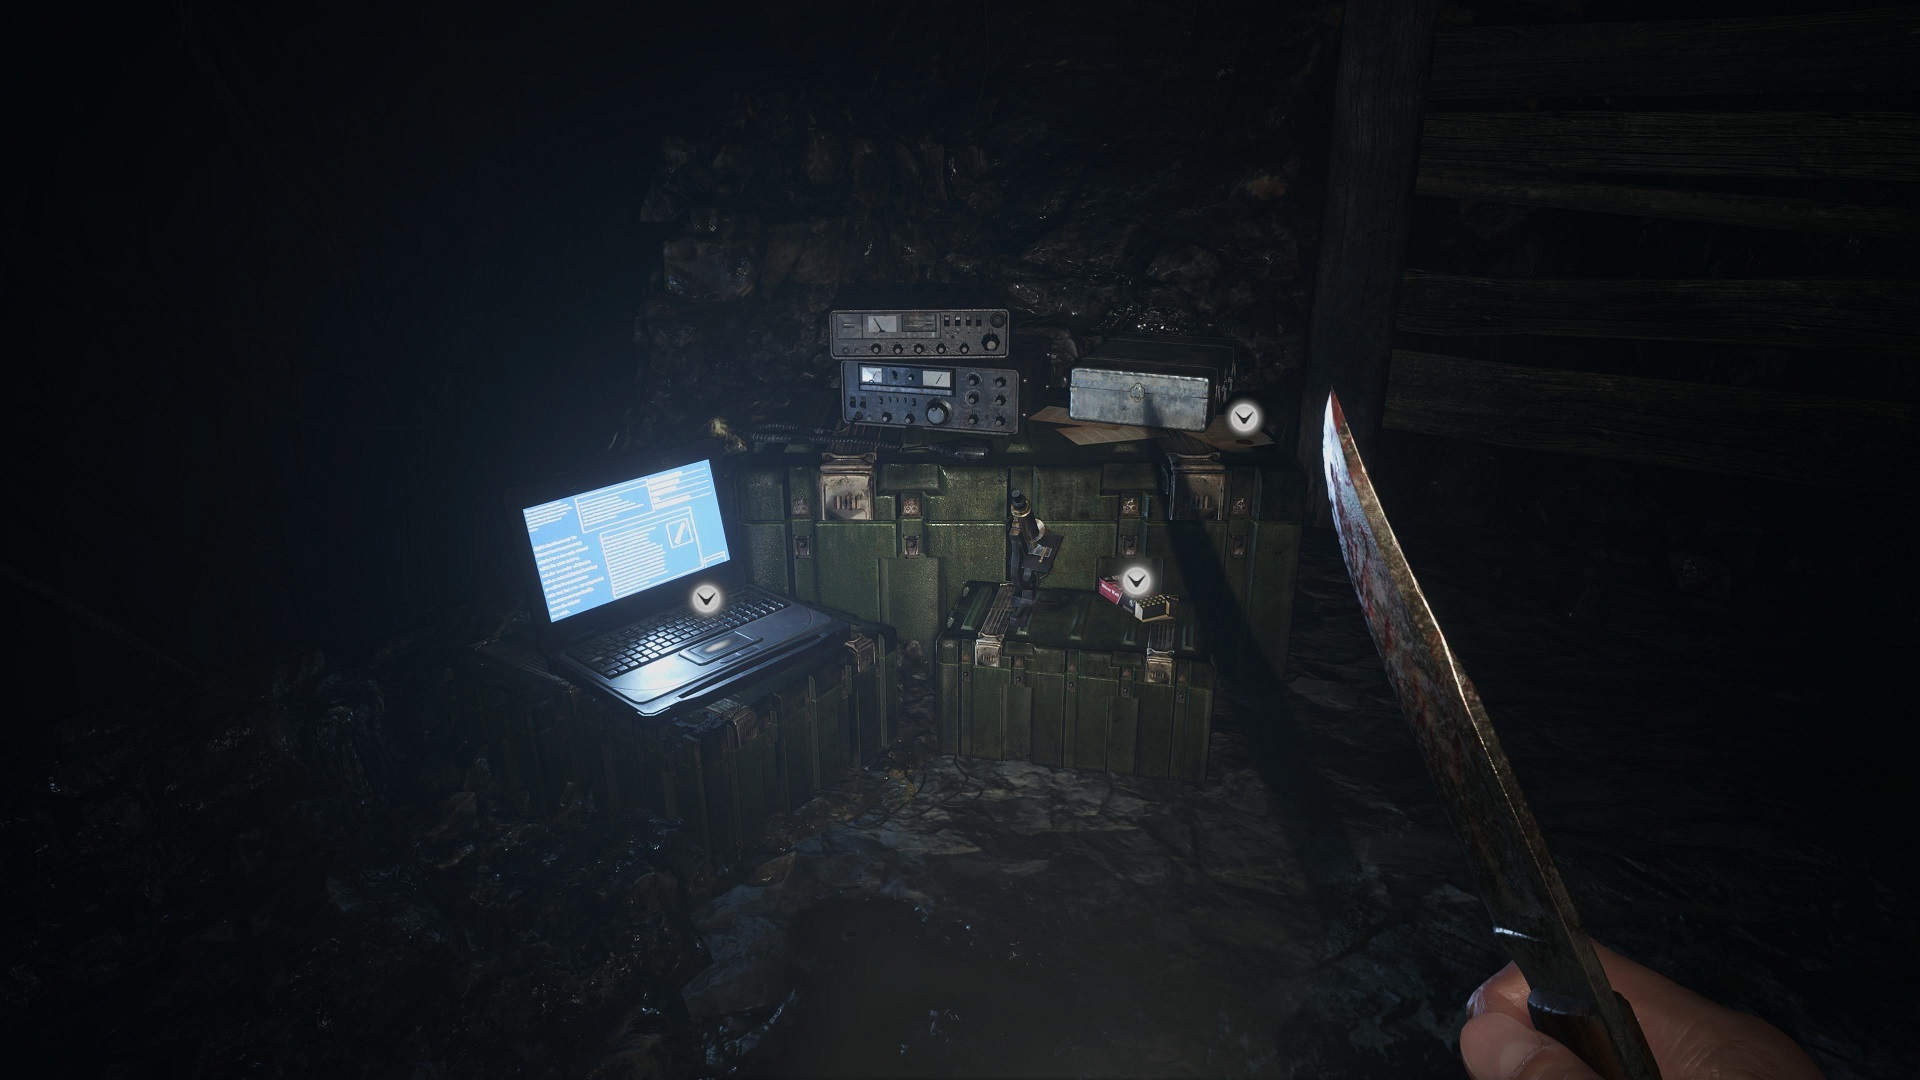
Get back in the boat and this time, head as far north as you can go. Disembark at the dock, and head left. Use your Crank to bring down the drawbridge. Hey look at that, it's the Craftsman's House outside Castle Dimitrescu. Save at the Typewriter if you want, then use your wheel on the well in the backyard. It'll bring up a ladder you can use to climb down. In the next room with the spike platforms, look to your right and grab the Mine. Start climbing up the platforms to get up to the ledge above where you picked up the Mine. Grab the Pipe Bomb here, then check out the industrial Lite Brite off to your left. Turn all the lights on this thing green, then cross over to the other side of the room. Push the first cart as far as it'll go, then push the second cart off the spike platform.
Grab the shotgun shells on the end of this platform, then drop down onto the cart you just pushed down. Use it to climb up the middle platform towards the crate towards the crate, which you can break for some Explosive Rounds. Drop down the hole here. Grab the Flashbangs and Magnum ammo on the floor, then take the big prize from the chest: The Large Pigeon Blood Ruby. Combine it with the Necklace With One Hole and voila, you've got Lady Dimitrescu's obscenely expensive Necklace. Unlock the door behind you, grab the Lockpick at the bottom of the ladder, and head back up.

Last stop on our little pleasure cruise is back across the drawbridge, through the red doors straight ahead. Head down the stairs and through the big stone door. You'll come to another one of those lantern/torch puzzles we had so much fun with back in Castle Dimitrescu. Shoot the lantern to swing it to the torch on the left and light it. Behind door number one is a table full of money. Grab it all, then head back to the center room. Shoot the lantern to the torch on the right to open door number two. Kill the ghoul here, then break the two crates.
But wait, there's a problem. Ghouls will crawl out of that hole in the wall nonstop, no matter how many you kill. Well, long as they're here, they might as well make themselves useful. There's one final torch in the next room to the east that the swinging torch definitely can't reach. Lead a ghoul out of the south room, and shoot the lantern into him to light him on fire. You'll get the Medium Rare trophy/achievement for that little stunt alone. Lead your little firestarter into the east room so he can light the torch. Drop him once he's outlived his usefulness, and head into the next room to collect the Golden Lady statue. There's also some magnum rounds on the other side of the table, and a crate to break on the right on your way out. Head back to the boat and make your way back to The Duke to unload your goods for a fat payday.
Treasure Hunt: Cannibal's Plunder
We have one last trip to make, and it's a doozy. Load up on explosives, maybe get a save in, then head back down to the village. Hang back at the Maiden of War statue a minute. There's two of those giant black goats wandering the cemetery. Snipe em both. While you're here, look up in the trees above the vault where you found the Broken Slab. If you bought the extra sight attachment for your sniper rifle, use it to zoom in if need be. You'll see the prettiest, most delicate little blue bird, chirping away. Anyway, put a bullet between its eyes, collect the Juicy Meat from it, and the regular Meat from the two dead goats. Head up through the Castle Gate, and into the moat on the left. There's three Fish to stab and grab.

Once you're done hunting, follow Heisenberg's signs, and open the gate on the hill with the Six Winged Unborn Key. The dark, creepy staircase is where we're headed after this. Right now, though, take a left and follow the path through the brush to reach Otto's Mill. When you arrive, shoot a crow on the right for some Lei. Get in the water, but take a right first, head under the mill, and destroy the Goat of Warding in the shrine.

Continue across the stream. Break the crate on the right as you walk up the hill. Break the lock on the gate with your knife. Kill the pig inside for some meat, collect the mines on the shelf, and break the crate. Turn around from there for a Crystal Fragment, then head up the stairs to the door. Follow the hallway to the main milling room, and, welp, it's another giant axe-wielding maniac. His back is turned, so you have a little bit of time here to prepare.
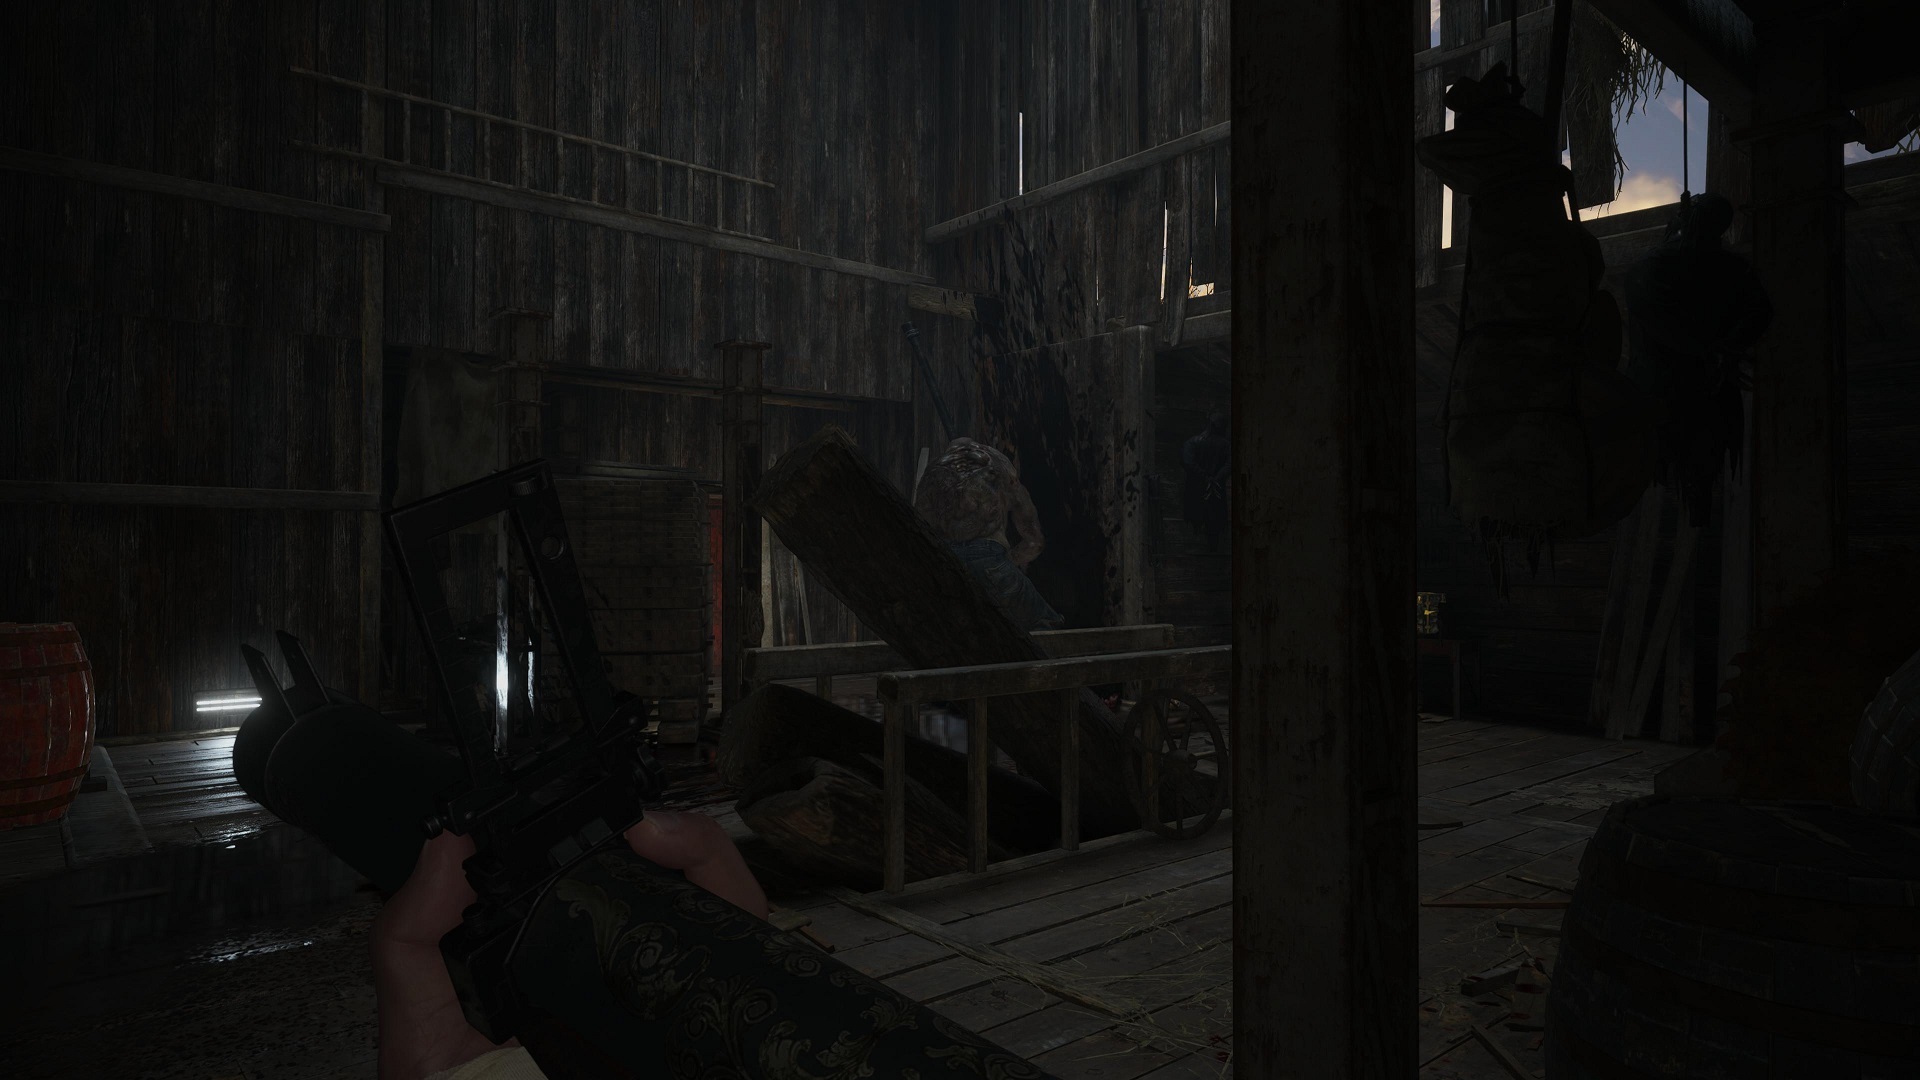
Reload all your weapons. Crouch down, plant some mines around the room. When you've found a vantage point you like, get to work. Somehow, even after all your upgrades, all your new firepower, it still takes an incredible amount of damage to bring this sucker down. And this time, you don't really have the option of cheesing him, there's nowhere to really hide. All you can really do is try to keep your distance. It'll be easy at first. Hit him with every Explosive Round you've got, each one will stun him briefly. Switch to Pipe Bombs after that. By now, he'll be making his way around the room, hopefully running into a bunch of your mines along the way. When all that's spent, switch to the Wolfsbane, empty that into him. Even after all that, the big bastard might still be standing. Try either hip-firing the sniper rifle, or unloading with the shotgun. He's gonna get close from time to time. You can still (inexplicably?!) block his axe, but with less room to retreat, he might even get a second hit in before you can get too far away. Turn tail and run if you have to take a hit. There is ammo scattered around if you start running on fumes.
Eventually, he'll die, we swear. Don't unclench your teeth just yet, though. After that whole ordeal, two flying ghouls will come out of the literal woodwork. Use your pistol or shotgun to take care of them. Grab the Crystal Axe off Gigantor's corpse, sweep both floors here to collect any ammo you didn't use, then cut the locks off of the big red door.
At least the rewards are plentiful. Grab the Herb on the right, then all the Meat, Poultry, and Fish off the shelves and the table. Don't miss the Metal Scrap in the corner on your left across the table. Read Ernest's Diary, then go through the door in back. Take the statue of Nichola's Angel from the chest. Have a mild chuckle if you've seen Hot Fuzz, then break the crate and grab the handgun ammo off the shelf to the right. Exit through the door ahead. Snipe the Lycan casually wandering around down the lane here, then deal with his friends when they come running. Once they're dead, you can finally relax. Head back to The Duke, and we can now return to our regularly scheduled obvious trap, already in progress.
Part 8: The Forbidden Forest and the Stronghold
Make Some Meals
So, even if you skip Ethan's Big Treasure Adventure above, there are two quick zero effort detours mentioned in there worth taking so you can put a couple of hot meals in you before moving on. On the way back to The Duke following the creek, take a left at the tractor just past the bridge, go around the back of the house where you got your first shotgun, and open the door in the alley with your Crank to kill the two chickens here. After you've made it back to The Duke, head down into the village. Hang back at the Maiden of War, use your sniper rifle to kill the two black goats here, then look in the trees above the mausoleum on the left for a bluebird. Shoot the poor thing down. Collect the Juicy Meat from the bird, then the regular Meat from the goats. Lastly, head past the Castle Gate, and go into the moat on the left to kill the three Fish swimming around.
Head back to The Duke. If you've been following our guide to the letter, even without going on any treasure hunts, you should now have enough ingredients to have him cook you the Tochitura de Pui, which gives you a massive, permanent health boost. If you have been doing our treasure hunts, however, make all the food you can. The Three-Flavored Mititei should be the priority, since that's the final health boost, but grab one or both of the guard increase dishes as well. The Sarmale De Peste is nice to have, but it's not nearly as much a lifesaver as the others will be going forward. Eat hearty, for tonight we dine in Hell.
There are no more animals to kill going forward (and the vegan crowd goes wild), so sell any ingredients you can't currently make into a full meal, do any other shopping you need to do, then follow Heisenberg's convenient signage through the village, and into the dark stairway.
Entering The Stronghold
Once you come out, take the path up this little hill in the middle, and move along the wooden bridge. You'll have some Lycan company as you walk past this tower made of bones. Take out as many as you can from a distance with the sniper rifle, including the one you can headshot much further out towards the archway, drop down and deal with the next bunch with your shotgun. Grab the Herb from the tree stump on the left of the crucifixion structure here, then the Rusted Scrap in the crashed cart to the right. Further up, you'll have a couple of Lycan archers who think they're in Lord of the Rings. Snipe them, but be prepared to weave around any arrows they shoot. If you're feeling brave and can manage to knock an arrow out of the air with your knife, you'll snag the Fast Reflexes Achievement/Trophy.

Break the crate buried in the broken wall in the center here, as well as the one on the far right as you step up stairs. Move through the archways, take the Mine, and break two more crates in the middle of this open room. Head up the ramp on the right. When Lycans start showing up again, block, and run up. Deal with these guys up close and personal with your shotgun. Watch your back, however, there's a Lycan who spawns on the ground who might sneak up behind you while you're headed to the top of the ramp. Once all the growling dies down, break the crate and grab the ammo from the right side of the room, then grab the shotgun ammo on a shelf to the left, and break the crate under the staircase further ahead.
There's a giant metal door to open here. There are two levers up the stairs on the left and right you'll need to pull to open it, but you're going to have a veritable Lycan frat party on your hands when you pull the first one. Set a few mines up around the area, especially on the stairs to the left of the door, but leave enough space so a Lycan triggering one of them doesn't also blow one of the two red barrels here, which might come in handy as you run around. Climb the ladder on the right, pull the lever here first. The second it's pulled, drop down, run to the stairs on the left to pull the other. Now clean house. The mines you laid should thin the herd quite a bit, but there's still plenty more where that came from. Bottleneck as many as you can on the stairs, but watch your back, a couple may try to jump over to your platform from the higher pillars. If things get too hairy up there, jump down, and bait the leftovers towards a red barrel. You're good to go when the music chills out. Sweep the area for any goodies the Lycans dropped, then move on into the Stronghold.
Once inside, make a pass around the room, breaking the crates, grabbing the Rusted Scrap from the barrel, and the Pipe Bomb next to the Typewriter. Look up above the left hand side of the entrance for a sparkly Vivianite you can shoot down. Save, load all your weapons, and craft everything you can, especially Shotgun and Explosive Rounds. Welcome to the Terrordome. You'll have about 10-15 seconds before the thousand nations of the werewolf empire descend upon you. Pepper all the mines you have around the area, leading all the way back to the entrance. Equip the shotgun, say a quick prayer and go to work. Forget Resident Evil for a moment. This section is one Mick Gordon banger away from being a Doom 2016 level, and it needs to be treated as such. You need to be moving. Constantly.

You'll start on the middle level of a three-level killzone. Do not be afraid to drop down off the edge of this platform to escape a mob, especially since there are red barrels down here you can blow to take them out, just don't lose the location of the stairs on the east side of the room going back up.. Once again, the Mines will come in handy to thin the herd, but leave nothing to chance. Any Lycan that's not twitching and hasn't dropped an item, spend the ammo to double tap him while on the ground. Don't pass up the opportunity to pick up the items they drop, but do it on the run. Every one of these things is going to get close, so don't ever worry if the shotgun's the right tool for the job, but the proximity means that if you miss a shot, you need to immediately block to avoid getting bitten.
You almost certainly will run out of shotgun shells, but for better and for worse, the sheer number of Lycans you're facing means they will absolutely drop either more ammo, or enough resources for you to craft some every couple of minutes. There will be minor breaks in the action while more Lycans get called in, so load that shotgun when it happens. If no Lycans show up for a count of about 30 seconds, it's safe to proceed.
There's a stairway on the west side of the room with a zipline. Take that, equip your grenade launcher, then follow the stairs to the third floor. When you cross the platform and turn left, more Lycans will show up, and the Leader will be armored. Use the grenade launcher to disperse the crowd. If you did the treasure hunts before, switch to your friend the Wolfsbane, and the second you get a clear shot after firing that grenade, put a single hot one right through the leader's chest and he's dead. Mop up the rest with whatever firepower you've got left. Once the adrenaline shakes have worn off, take a deep breath, and sweep the room for any items left behind.Exit through the door at the top. Take the Magnum ammo and Gunpowder next to the suit of armor on the left. Grab the Metal Scrap, and break the crate on the way down the stairs. Look to the ledge on the right when you reach the bottom, and destroy the Goat of Warding.

Squeeze through the passage ahead. When you come out, look right for a First Aid Med. Go left for the Officer's Diary, the sniper rifle ammo, and the Explosive Rounds. Save at the Typewriter, craft even more Explosive Rounds, Mines, and Pipe Bombs, then head downstairs.
Boss Fight: Urias

Ah, right, remember that Lycan with the giant sledgehammer from way back at the beginning? Well, dude's got a name: Urias. Also, he's got you cornered. Actually, compared to a bunch of the scrapes you've been in--hell, compared to the scrape you were just in--this guy's a walk in the park. The main thing is that he hits hard. One good smack with that hammer knocks you down to the red, and that's even if you've got all the health boosts. It doesn't help that this little arena is the size of a broom closet, so there's not a lot of room to squeak by if he gets you in a tight spot. But other than that, this fight's just a matter of hitting him back just as hard.
When he makes his appearance, he'll be on the ledge above you. He'll hang out here a while, actually, which makes for a pretty good time to let the Wolfsbane off the chain if you've got it. If not, Explosive Rounds should be option 2. Get two or three good hits in, then make a run for it while he jumps down to your level. If you're really quick, plant some Mines in your path. The area's small enough where eventually, he'll run into them, no matter what. His attacks all have pretty obvious tells. Once you see the wind-up, start looking for an escape route around him, or take cover behind the pillars here. If there isn't an easy way to avoid him, though, block it anyway. And this is why you ate the guard damage meals earlier, kids.
After you've done enough damage to him, three or four lesser Lycans will drop down to provide backup. If you’re super quick, and you still have one left, you can shoot a grenade up to the ledge where they first spawn, and take 'em all down at once. If they manage to make it to the ground, though, they're less dangerous than they are taking up precious maneuvering space. Put them down as fast as you can, so you can resume business as usual. Throw everything you've got at Urias, check the shelves along the wall for supplies if you start running out of weaponry, but especially if you've hit him with the Wolfsbane a few times at the start, it won't take much to bring Hammer Hagrid down. Collect the Crystal Hammer, any goodies left on the shelves, and exit stage right.

In the next room, check the ceilings and walls, shoot anything more sparkly than usual, until you've picked up a Yellow Quartz, and a Vivianite, and four Crystal Fragments. Once the room's turned blue on the map, head downstairs. Break the crates on the left, then take the fourth Flask off the table. Have a quick conversation with the TV again, then go downstairs.
Treasure Hunt: Treasure Under The Stronghold

It's on your left at the bottom of the stairs. Seriously. It's just sitting there.
Leaving The Stronghold
Anyway, take the boat to the right to the next dock. You'll see a ladder in front of you, but take a left first, and head down into the little jail here. When you can see the desk in front of you, the left cell has a crate, the right has a Chem Fluid. The Desk has some real interesting Experiment Notes. There's shotgun ammo and a Pipe Bomb to the right of that. Start back down the hall. Two ghouls will show up in front of you, but one will also spawn behind you. Drop 'em all. Head up to the ladder, unlock the door at the top. You're in the little mausoleum area behind the Church. Make your way back to The Duke and save.
Part 9: Heisenberg's Factory
The Duke hasn't restocked just yet, so there's nothing you need from him at the moment. Turn around from him, and interact with the stone chalice in the middle of the Altar. Place all your Flasks inside. You'll get the Giant's Chalice, and some torches will guide you westward to the Ceremony Site. Place the Giant's Chalice on the pedestal, which will take you downstairs. When you've got control again, head outside, save at the Typewriter on the right, then cross the bridge to Heisenberg's Factory.

Follow the path up into the garage. There's a Gunpowder on the shelf to the left. Use the door on the south side of the room and head downstairs. Hang a left into the next room. There's a Chem Fluid straight ahead. Go into the larger room, and pull back the cloth for a cutscene. When you get control again, run like hell through the hallway ahead. Duck when you see the two pipes crossing your path. When you reach the dead end, look to your right, and into the garbage chute, flyboy.
When you've got control again, follow the only path up and out of the scrap. There's Rusted Scrap and Gunpowder directly in your line of sight as you walk along. Before you climb the last ledge to your left, take a right, and get the last Rusted Scrap sitting in the lone pile of plastic there. Climb back up the ledges. There's also a Metal Scrap in the hood of the wrecked car right in front of you as you do. Grab it, and climb up the ladder.
Take out the three ghouls waiting for you down the path here. Break the crate at the end of the walkway, then get into the air duct at your feet. Follow it, and climb up the ladder. Get an eyeful of this place, then check behind you to the left for a crate. Head across the walkway and duck into the elevator, which also happens to be where The Duke has set up shop. Now he's restocked, not just with extra ammo, but with two new weapons, the V61 Custom Machine Pistol, and the SYG-12 Semi-Automatic Shotgun. Both of them aren't cheap, even after trading in your old weapons, but once you start throwing upgrades at them, you will know where that money went. The Duke's also got a third inventory expansion to sell you, but that money's better spent on attachments or upgrades for your new arsenal at the moment.
Once you're done with The Duke, head to the hallway at the north side of the room. Follow it to the end, and grab the gunpowder off the desk. Break the seal on this door with your knife, then deal with the ghouls and their fancy new headgear behind the door. Follow the stairs up, and keep moving along the walkway until you're downstairs in the next room. Two ghouls will burst through the door. When you're done with them, break the crates on the left and right sides of the room.
The Casting Room
In the next room, grab the Rusted Scrap on the table. Straight ahead, grab the Chem Fluid from the corner, and look at the freaky X-Ray on the wall. We'll come back to the Casting Machine here soon enough. Take a left, and head upstairs. Three ghouls will be milling around here. When they're dead, if you've still got a lockpick to spare, open the cabinet on the left for a Yellow Quartz. Around the corner, there's a Gunpowder on a green barrel.
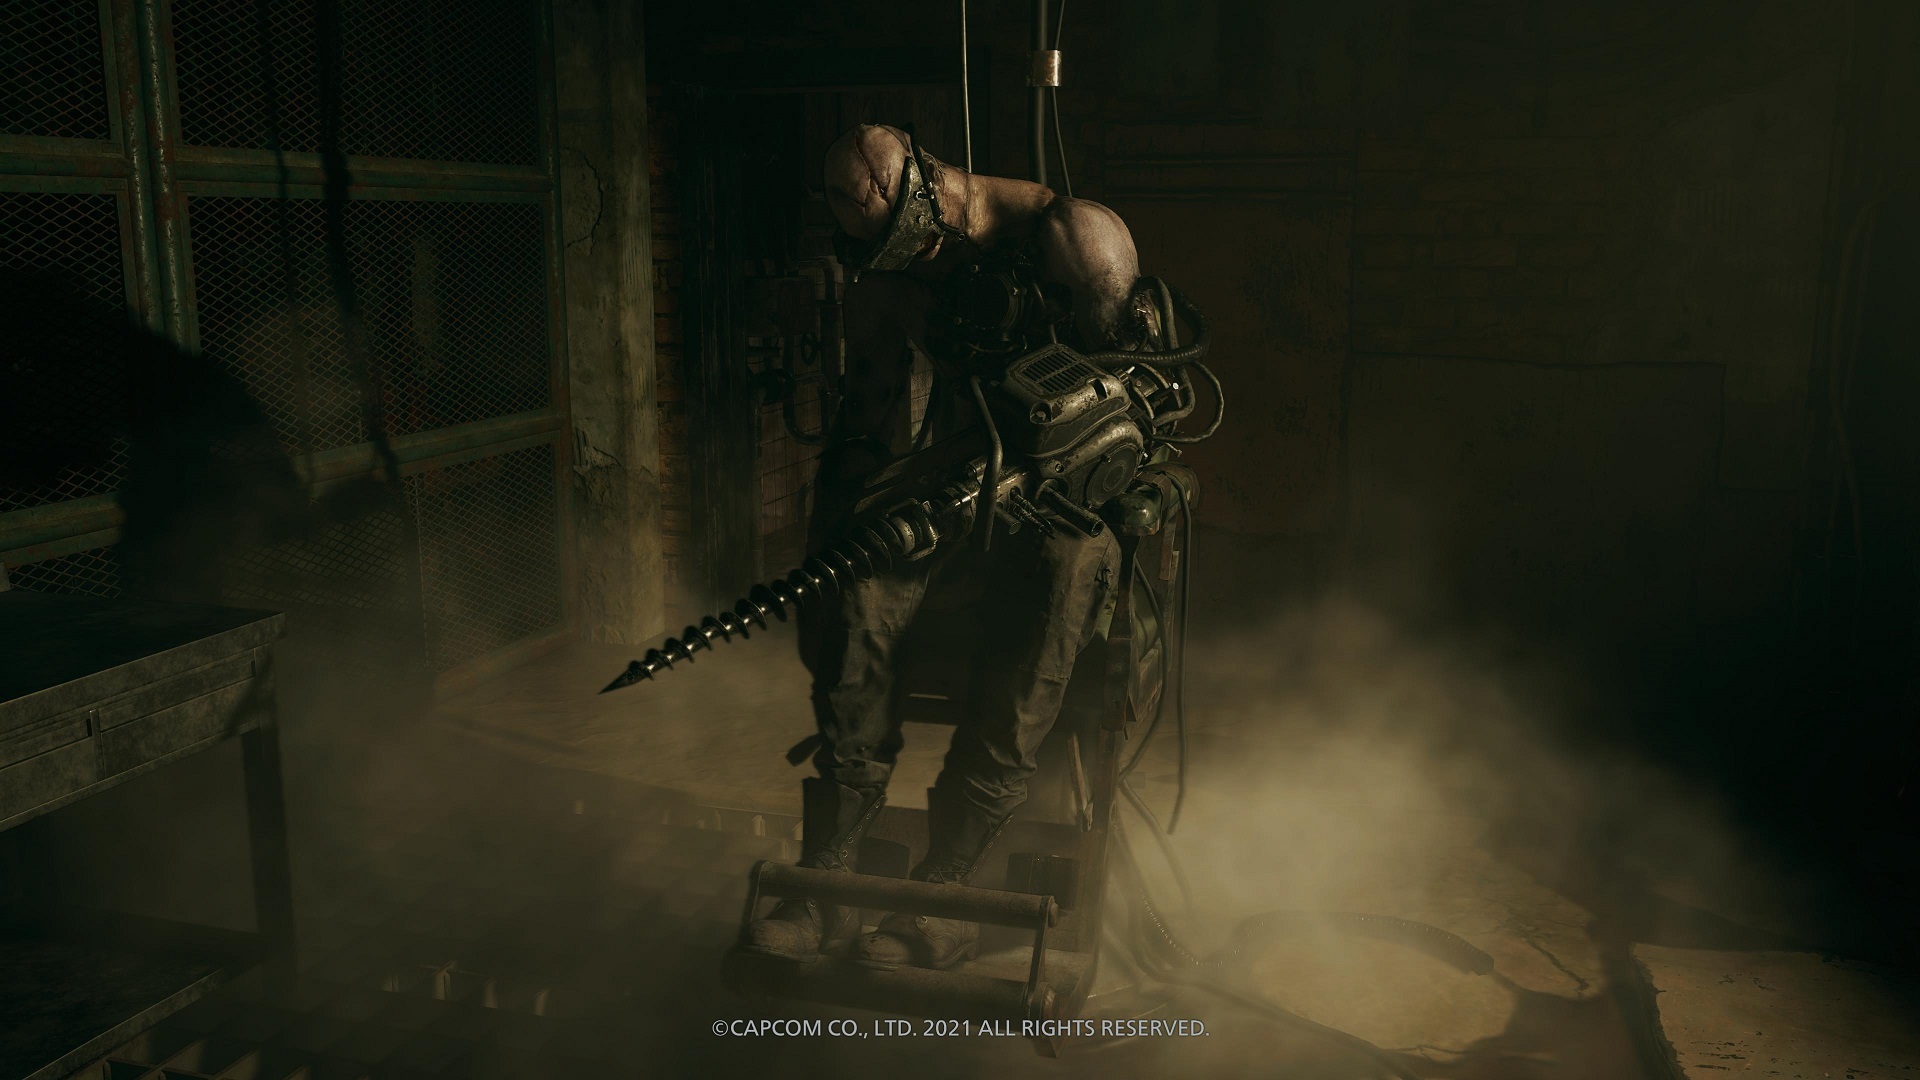
Go through the door on the opposite side of the walkway. Grab the Rusted Scrap on the table to your left. Go around the divider. Walk around the guy in the chair for now. Gee, sure hope he doesn't suddenly spring to life and try to kill you after grabbing something important. Head into the back room, open the case to get the Relief Mold. Sprint past Mr. Driller, get on the other side of the table, and get your shotgun. In case it's not obvious, your target is the red glowing light on his heart. Once he's on his feet, blast it, then back away. He'll guard his weak spot a few seconds after he lurches after you, so keep your distance. About four hits with the shotgun will put Crash Man away for good. Grab the Crystal Mechanical Heart and head downstairs.
Put the Relief Mold in the Casting Machine to get the Relief of a Horse. Turn right, and examine the door-shaped indent in the wall. Place the Relief, and head up the stairs. Kill the ghoul at the top. Move down the hallway. When the area opens up again, use a Lockpick on the desk to the left for some Magnum ammo. Drop off the ledge. Turn around, and drop down to break the crate in the corner. Follow the walkway. You can stop the giant hydraulic engines here by shooting the giant orange lights on the arms; If you've got sniper ammo to spare, you can take out a few of the ghouls on the far side of the room with the arms out of your way. You can also just shoot the ghouls once just to get their attention, and in their anger, they’ll just wander into the pistons like idiots. When you reach the center area with the generator, a few more ghouls will come to meet you. Lead 'em back along the walkway to set them up like a shooting gallery. Make sure there aren't any lurking behind the generator, then take a right. Break the crate in the corner, then grab the explosive rounds in the corner across from it.
Follow the walkway, and climb the ladder at the end of it. Grab the Rusted Scrap from the corner before going through the air duct. When you come out, take a left. Unlock the door at the end of this hall to get back to the room with the Casting Machine. It's a bit of a hike, but if you want to get a quick save in back at The Duke, the way is clear.
Continue down the hallway. Craft yourself a Pipe Bomb if you don't have one already, and toss one at the wall with the yellow X. There's shotgun shells, and a Mechanical Part (Cylinder). In the next room, break the crate off to the right and go down the stairs. On the far other side of the room is a white cabinet with a Mine. There's Gunpowder on a table to the right of that. Go up the stairs marked by the green light. Break the two orange lights on the door with your knife. There's Gunpowder and a Factory Map of the lower levels off to the right. To the left of the entrance is a Development Note with some info about Soldats, a.k.a the guy with the drill you blasted apart a while ago. Open the door in back, and follow the hallway forward. You'll find out first hand the note wasn't lying, there's a lot more Soldats, one of which will pop out of a wall up ahead. Same strategy, back away slowly and aim for the glowy bit. Grab the Crystal Heart from him, then onto the room with the Casting Machine.

Powering The Generator
Use the mold to make a Large Cog, then exit out the door you just came in. Take a left back to the generator room, and use the Cog in the Backup Generator straight ahead. The lights are on now. Unfortunately, so's the conveyor belt carrying more Soldats, one of which will drop in your path when you head towards the door downstairs. You know what to do by now, just be aware when leading this guy around the room that he can break through the grated walls in here. Head downstairs, take the newly open door, and break the crate along the way.
There's another Soldat wandering around the next hallway. Let him pass, then sneak left for a crate. Take Drillbit Taylor down at your leisure. In the next room, head right for a white cabinet with a Gunpowder, then walk around the corner for a crate. Keep following the path, take a right, and head into the storage room ahead. Grab the sniper ammo in the cabinet, break the crate, and shoot the sparkle on the PA box above and to the left of the door for a Large Crystal. Take a right up the stairs when you exit.
Follow the walkway. Another Soldat will pop out of hibernation ahead. Once he's dead, check out his sleeping quarters for some Explosive Rounds. Go around the divider, break the five lights with your knife, and head into the next room. Straight ahead, there's a Mine next to the yellow equipment. Go all the way to the left and deal with the ghoul problem. Keep heading left to get to a white cabinet with a Mine, and a crate to the left of that. Circle around to the west side of the area for a room with a grated wall, and a sleeping Soldat. Get Sleeping Beauty out of bed with a shotgun blast. He'll knock down the barrier to get to you. Once he's dead, get the bags of Lei and the Magnum ammo from the room where he slept.
Exit that room, and take a left up the stairs. Follow the walkway until a shipping container drops a Soldat in your path. This guy's a little different though: two drills, and no orange weak spot. Turn around, use three of those handy Mines you've been picking up, spread 'em out, and lead him back towards the stairs. The third mine will drop him like a sack of potatoes. Grab the Large Crystal Heart from his remains, then open the cabinet on the other side of the Amazon box he came in for some shotgun ammo. Head east, and break the lights to move on. You'll be in a familiar area, except now the lights are on. Hit the button in front of you, and cross the elevator. Look at the pipes above the door ahead for a sparkly Yellow Quartz you can shoot down. In the next room, grab the Gunpowder on the right, shotgun ammo in the drawer on the left.
Follow the hallway up the stairs, break the crate at the top. You'll have another Soldat to deal with in the next room. His weak spot's on his back. Shooting the red electric coils on the far side of the room when he walks in will do most of your job for you. Tossing a Pipe Bomb at his feet right after that should do the rest. There's a door with five lights up ahead on the left. Open it up, then immediately break left and run like hell. Duck under the pipes, then open the door at the end of the hall. Once you're through, ignore the banging and grab the Rusted Scrap on the left, the Metal Scrap and Gunpowder to your right. Head through the next door, flip the switch to call The Duke's elevator up to you, and save. You've earned a break.
Casting Heisenberg's Key
Once you've saved, do some shopping with The Duke. You'll get the most bang for your buck upgrading the power on the shotgun, and grabbing the attachments for it or the pistol, but, as always, it's your money. Once you're done, head up the ladder just outside The Duke's elevator. Follow the path, breaking the crate on the right as you go. By the way, if you stand where you break that crate, and use your sniper rifle to shoot down one of the Soldats on the conveyor belt, you'll get the Quit Hanging Around trophy/achievement.
Head into the tunnel. There'll be a fork in the road with some miner ghouls chiseling away to the right. End their shift permanently, then walk further that path, an Herb, and a couple of Pipe Bombs. Come out and head right when you're done. Break the birdcage on the left for some handgun ammo. There are more miners in the room with the giant drill. Sneak in, snipe the one on the left, then back out and waste the other two when they come around the corner. Open the white cabinet to the right for a Lockpick. Check around the base of the giant drill for a Crystal Fragment and a Large Crystal.

Head into the air duct in the south side of the room, then climb down the ladder at the end. Turn right, and blow up the wall with the yellow X. Grab the Large Crystals, the Yellow Quartz, and the Vivianite. Turn around, and go through the gate at the end of the passage. When you get under the giant fan, look straight up, and shoot out the two lights you can hit from here. Take a right from here for a Gunpowder. Take the next right to break open a crate, then head upstairs. Two brand spanking new Soldats with jetpacks will drop down. Don't even screw around with these guys, whip out the Grenade Launcher, and the second you see orange, hit 'em with Explosive Rounds. In the absence of grenades, Pipe Bombs seem to also do a pretty decent job. Do it right, they won't even get away from the spot where they landed. Your shotgun can do the trick eventually, but trust us, you do not want to get too close to these two if possible. Grab the Crystal Hearts from them when they're dead.
In the center of the second floor, grab the Rusted Scrap on the right, stand right there, and aim up to take out another light on the fan. Smash the crate at the end of the walkway. You can hit the last light halfway up the next staircase. Continue onward, smash the crate at the very end before climbing the ladder. Walk up the fan blades, break the crate at the top, and exit. At the top of the stairs, turn left for another Development Note about Soldat Jet, who you just met, and something else called a Soldat Panzer. Great, can't wait to meet 'em. Open the desk drawer for a Chem Fluid. Take the Factory Map for the Upper Levels from the boxes here.
On the other side of the room, move the cart out of the way and crawl into the tunnel. It'll lead to a tiny room with handgun ammo in a drawer, a Gunpowder to the right of that, and a Ball Mold. Have yourself an immature chuckle, then crawl back through the tunnel. Head upstairs and through the door. Shoot the orange light when the fan sucks you in. Once you're back on your feet, turn around. Look up at the walkway you were on, and shoot the sparkly spot for a Yellow Quartz. Go all the way to the end of the chamber where the fan just flew off for a Metal Scrap, a Rusted Scrap, and another Goat of Warding to destroy.

Now head to the other side of the chamber, and step into the shaft where the fan was. It'll be a little hard to see through the smoke, but there's a pipe off to the right. Step onto it, and follow it right till you reach the ladder leading up to the green light. Once you're through the hole, look right and grab the Chem Fluid in the yellow crate before jumping in the elevator at the end of the room. Follow the hall. In the next room, turn right, and cut down the birdcage. Behind you is a white cabinet with shotgun shells. On the other side of the room, grab the Explosive Rounds and the Key Mold. Exit through the door on your right, and follow the walkways till you get to another elevator. Before you call up The Duke, though, break the crate to the left for some shotgun ammo. Go down the walkway. Once you pass the sealed door, turn left, and drop down off the ledge to the pipe below. Turn around, and follow the pipe all the way to the walkway. There's a Mine and some shotgun shells straight ahead. Circle around the zipline machine for another Mine. Take the zipline and grab the Yellow Quartz off the wall when you get across. Drop down and follow the path back upstairs. Now go ahead and call up The Duke.
Do any shopping you need, and save. When you're done, turn around, and take the elevator down to B4, where we started. Head into the hallway and follow the now-pitch black path back to the room with the Casting Machine. There'll be two basic Soldats in your way. Keep that shotgun ready. Once you're at the Machine, use the Key Mold to make Heisenberg's Key, and use the Ball Mold to make the Iron Horse Ball. After yet another bout of immature giggling, you could skip down to the section marked Sturm and Heisenberg. Or...
Treasure Hunt: Heisenberg's Hammer and the Wolfsbane Long Barrel
...you can go on two really quick detours for some treasure, and a useful add-on for your bestie, the Wolfsbane.
From the Casting Machine, take a right up the stairs. Before you use your new key on the door ahead, look through the bars of the room, and try to take out as many of the ghouls inside with either your sniper rifle or pistol. Once everybody's out of sight, use your key on the door, back away, and clean up the rest. Grab the Rusted Scrap off the table to the left, then grab more off the gurney in back, along with a Gunpowder. Open the case in the middle of the room for the Mechanical Part (Shaft). Combine that with the Cylinder in your inventory to get Heisenberg's Hammer.

Next, head back to the Casting Machine room, and straight ahead up the stairs. The door on your left up here is finally powered up. The desk against the wall on the right has some sniper ammo. Grab the Lockpick and Flashbangs on your left as soon as you walk into the Operating Room. Despite the deactivated Soldats around you, the only one you need worry about will slice through the next door as you approach. Take him down, grab the handgun bullets to the right of the door before walking to the back. Listen to the audio log of Heisenberg getting his mad scientist vibe on, then take the Long Barrel for the Wolfsbane from the case. Head back to the Casting Machine room, and carry on.
Sturm and Heisenberg
Make your way back to The Duke. On your way, you'll run into two of those Soldat Panzers you read about earlier. The first one who shows up in the room immediately after the Casting Machine room's fairly simple: Lay down some Mines, let him walk into one or two, which should break off his armor enough to go to work on him like you normally would. He takes a few more shots than his inferior brethren, but he's just as dumb and vulnerable. The second one shows up down the long hallway immediately after. Same principles apply, just be careful that you're backing away up the stairs, and not into a wall. Collect the Perfect Crystal Mechanical Hearts from them both when they're done.
Once you're back at the elevator area, head into the room on your left you haven't opened yet. There's a Rusted Scrap to the left, and a Chem Fluid in the next room, but you're really here to do this Labyrinth. The big obstacle with this one is a section where you have to ride one of the gears around a corner. Time it just right so your ball gets right in between the gears when it moves. Too early or late, and it's getting pushed off the edge. Use the triggers to rotate the camera, make sure you're tilted towards the gear until it lets out on the rail. Be careful of the section of missing track right after that. Once you're past that, you're home free, and you get the Bister Skull for your trouble.
Head back to The Duke, do some shopping, then head up to B1. Craft some Explosive Rounds and First Aid if you can, then head down the hall straight ahead into the storage room. Read a note about your propeller-faced friend on the right. Grab the Mine from the cabinet, the first aid kit and handgun ammo from the desk, then break the two crates here and in the room to the left with the pipes. Exit, and follow the path left through the door.
Boss Fight: Sturm
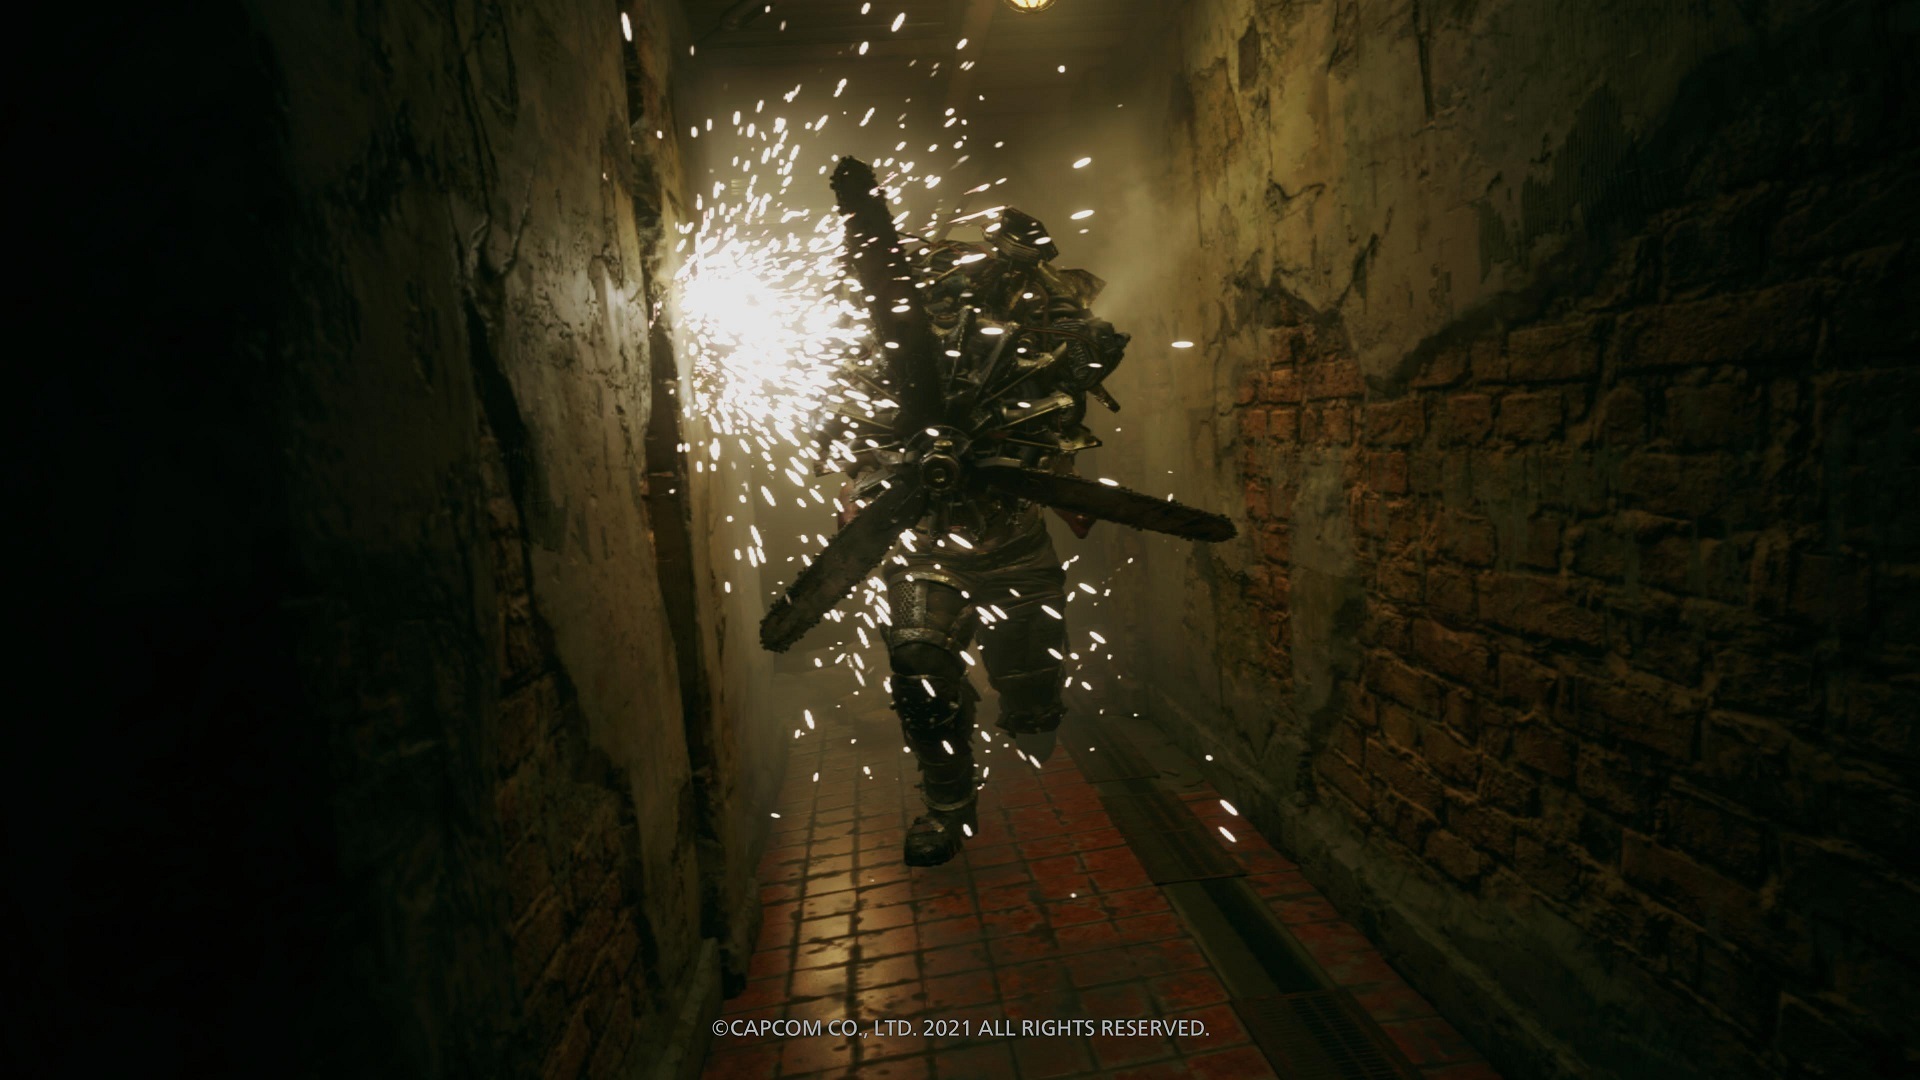
The funny thing about this fight is Sturm actually makes it easier for you as it goes on. The first time he charges right at you will be a surprise; try your best to duck out of the way, but if you take a hit, you take a hit. What you'll notice, however, is that Sturm can only charge at you in a straight line. Granted, he can break the walls in this area if they're in his way, but that's a good thing, this area is painfully cramped when you start out and he'll open this place up for you. But more than that, Sturm is extremely easy to dodge as long as there's enough room to run to the immediate left or right of where he's pointed. When he's run past you, he'll tire out, so whip around (holding back and Circle/B), and hit the orange weak spot in his back.
After you've done enough damage, the propeller will light on fire, and he'll actually charge you three times before he gets winded. He'll also start breathing fire at this point, but, again, the dude only works in straight lines, you just need to stay out of his way, and be quick about firing when he stops. The Wolfsbane put Propellerhead down in five shots, but Explosive Rounds will also make this a quick fight. Grab the Complex Mechanical Heart--which sounds like an album of Nine Inch Nails remixes--sweep the edges of the room for a Mine and some handgun and sniper ammo, You might wanna make a quick trip back to the elevator to save with The Duke before you move on.
When you're done, exit through the door to the north. The cabinet to your right when you walk in has a Chem Fluid. In the corner around the shelves, grab the Cigar, and read Heisenberg's Diary. Turn to your right, and crawl through the air duct at your feet. In the next room, pick up the Chem Fluid and the Herb, take the shotgun ammo from the desk, and destroy the Goat of Warding.

Go back through the duct, and take the left door into the Cargo Bay. Follow the walkway, and drop down. Break the crate on the right when you land. There's another in the corner to the right of the ladder ahead as well. Use the ladder, and walk out to the basket at the end. Throw the switch to get a lift up. Walk through the next two sets of doors, then watch the cutscene. When you have control again, go through the duct straight ahead. Turn to your left, and move the debris to start a big cutscene. When it's over, read the laptop straight ahead, go to the north side of the room to grab the First Aid Med and break the crate. Save at the Typewriter. Maybe scream “Witness me!” at the top of your lungs.
Boss Fight: Heisenberg
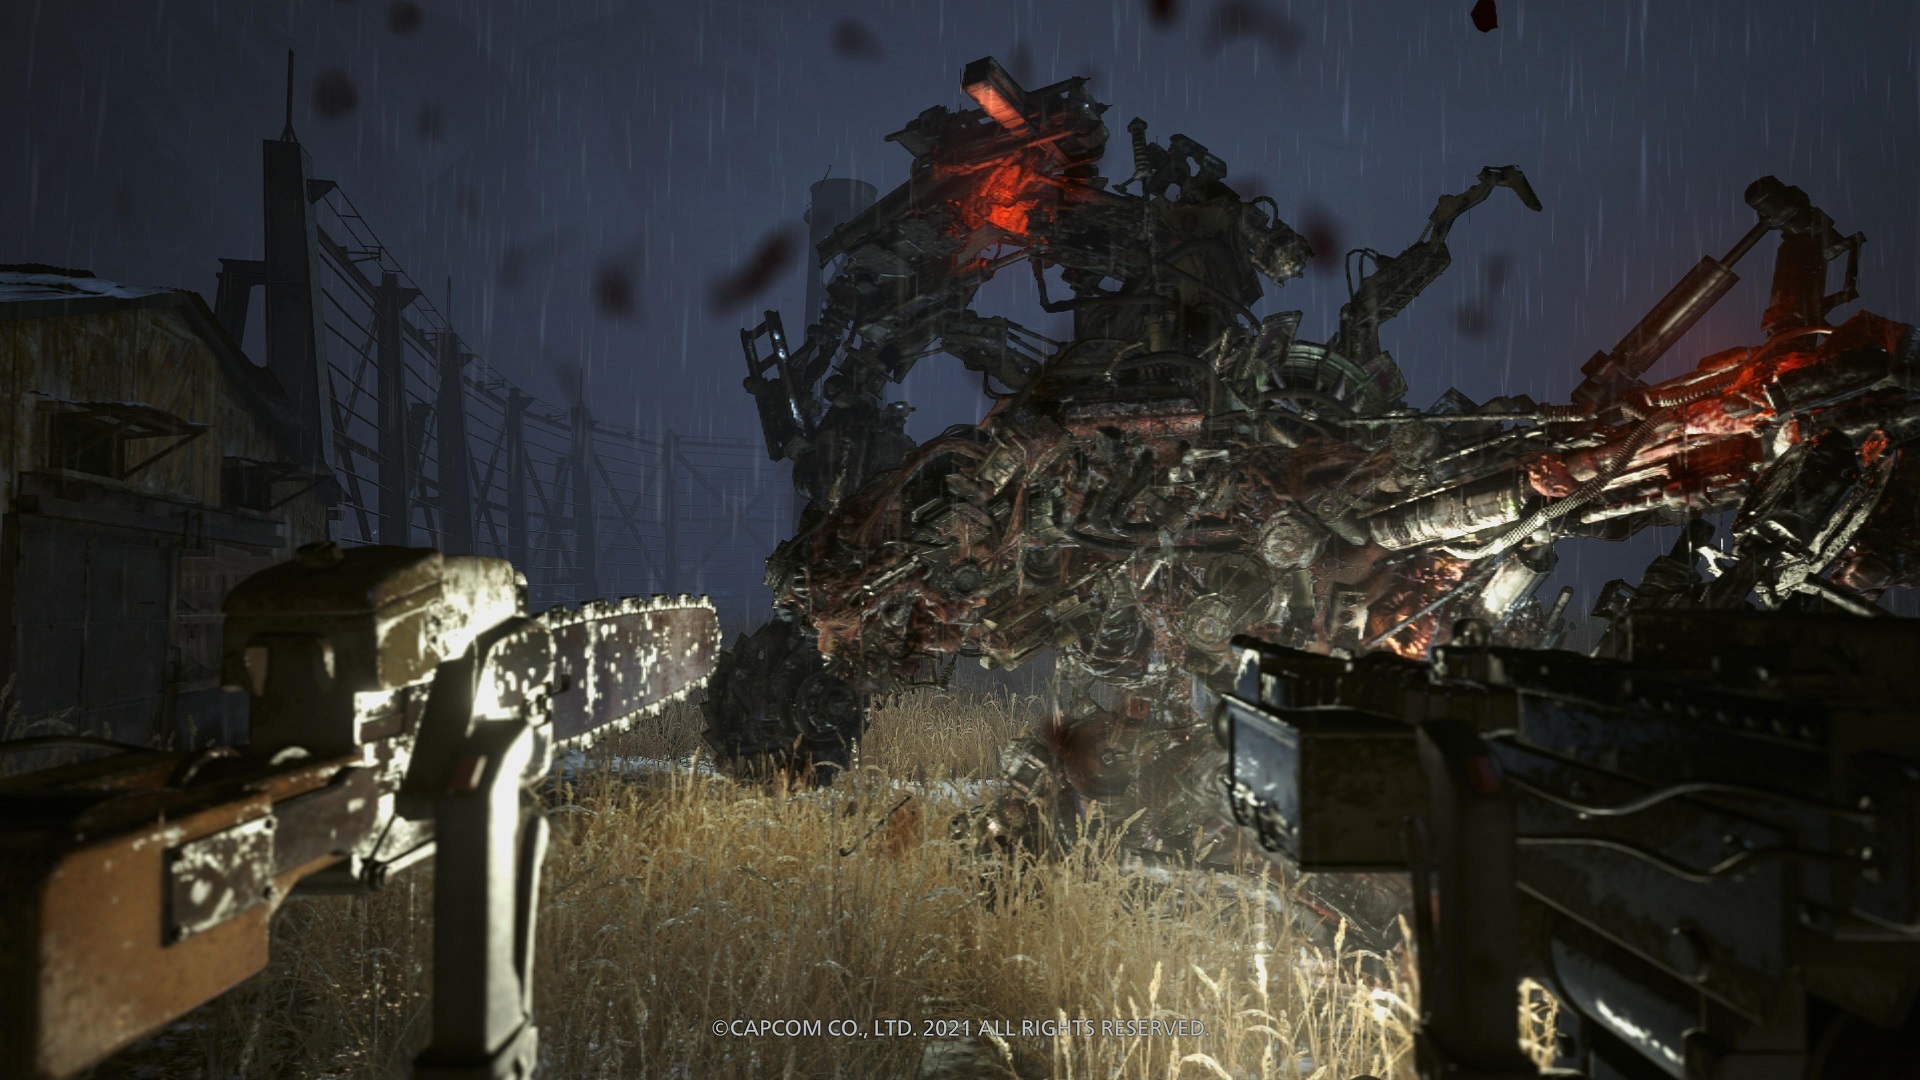
Use the elevator ride to get familiar with the controls, but the key is you should be firing the machine gun at Heisenberg at all times. When he comes in close, block and move the opposite direction away from the arm he's got cocked. If he hits, you actually won't take a lot of damage at all, but there's also a pretty good chance he'll miss. For his next trick, he'll gather a bunch of metal siding to use as a shield before firing them off at you like razor blades. He'll still have a glowing red weak spot you can hit while he's charging, though. Hit it hard enough, and he won't even get to fire. Your targets are the glowing red points on his arms, and the one on his right side. Fire the machine gun until your big cannon is charged, then blast away. His arms will regenerate after taking enough damage, leaving his side wide open.
Hammer away at him long enough, he'll try to pull you in close. Target his head, and fire away, which will let you escape, but, unfortunately, as a pedestrian. Fortunately, he doesn't have much left. He's a little too squirmy a target for the Wolfsbane, so switch to the Grenade Launcher, craft as many rounds for it as you're able, and unload everything you've got at his head while trying your damnedest to keep a safe distance. He'll roll up occasionally like he did before. You can still block him, just keep a closer eye on your health. If you run out of Explosive Rounds, snipe him from a distance, switch to shotgun when he comes in close, but only shoot after blocking his attack. After a few more hits, Heisenberg The Iron Man goes down in flames. You'll get the Crystal Heisenberg and then a long cutscene.
Part 10: The Endgame
And here is where we stop a moment. We're in the home stretch, and we're going to try and keep at least some of the surprises intact, but we are now in absolutely unavoidable spoiler territory. If you're ducking out, for what it's worth, this is a fairly straightforward area that mostly relies on you having a good memory of where you've been thus far, and the final boss isn't necessarily hard, it's just gonna take a lot of ammo. Other than that, godspeed. For everyone else, let this obnoxiously large Umbrella logo serve as your last warning. Spoilers abound from here on.

The Village Consumed By Mold
So, when you gain control as Chris Redfield--cue the music--proceed forward over the hill and watch the cutscene. Turn right, and make your way down this path into the village. Eliminate absolutely everything in your way with extreme prejudice, with the Dragoon assault rifle as your main. At the end, step through the broken wall, and grab the ammo/grenade supply drop at the green smoke. As it turns out, you just took the back way to Luiza's House. Open the front gate, head down the hill. A couple of Beasts will show up. It's not quite Wolfsbane powerful, but the Dragoon puts these puppies down good; just block if they get too close.
The Megamycete branches and the fires will block your normal routes, so just follow the available trail until you get to an intersection. Take a left to the Workshop where you got the automatic pistol, and pick up the supply drop before heading downhill. Cut left through the house where you shot your first pig, and head down the road towards the red chimney house. There's a hell of a lot of Lycans coming your way, including one with Armor. When there are two or three enemies around, just let loose with the Dragoon, though be aware it's got a bit of a long reload time. Any more than three around, toss a grenade. It'll be slow going down this road, but you'll get there after enough Lycans die.
You'll get to the Maiden of War statue, and a massive structure being strangled by Megamycete branches. When you get control, shortcut your Grenades and the Target Locator. You'll need to use the Target Locator to call in an airstrike, Call of Duty-style. The first one's a freebie: aim at the structure, hold the right trigger until the reticle fills up, and the fast movers drop the bombs. After the first one, the Target Locator will need to recharge; meanwhile, a legion of Lycans will come running for you like it's Helm's Deep.
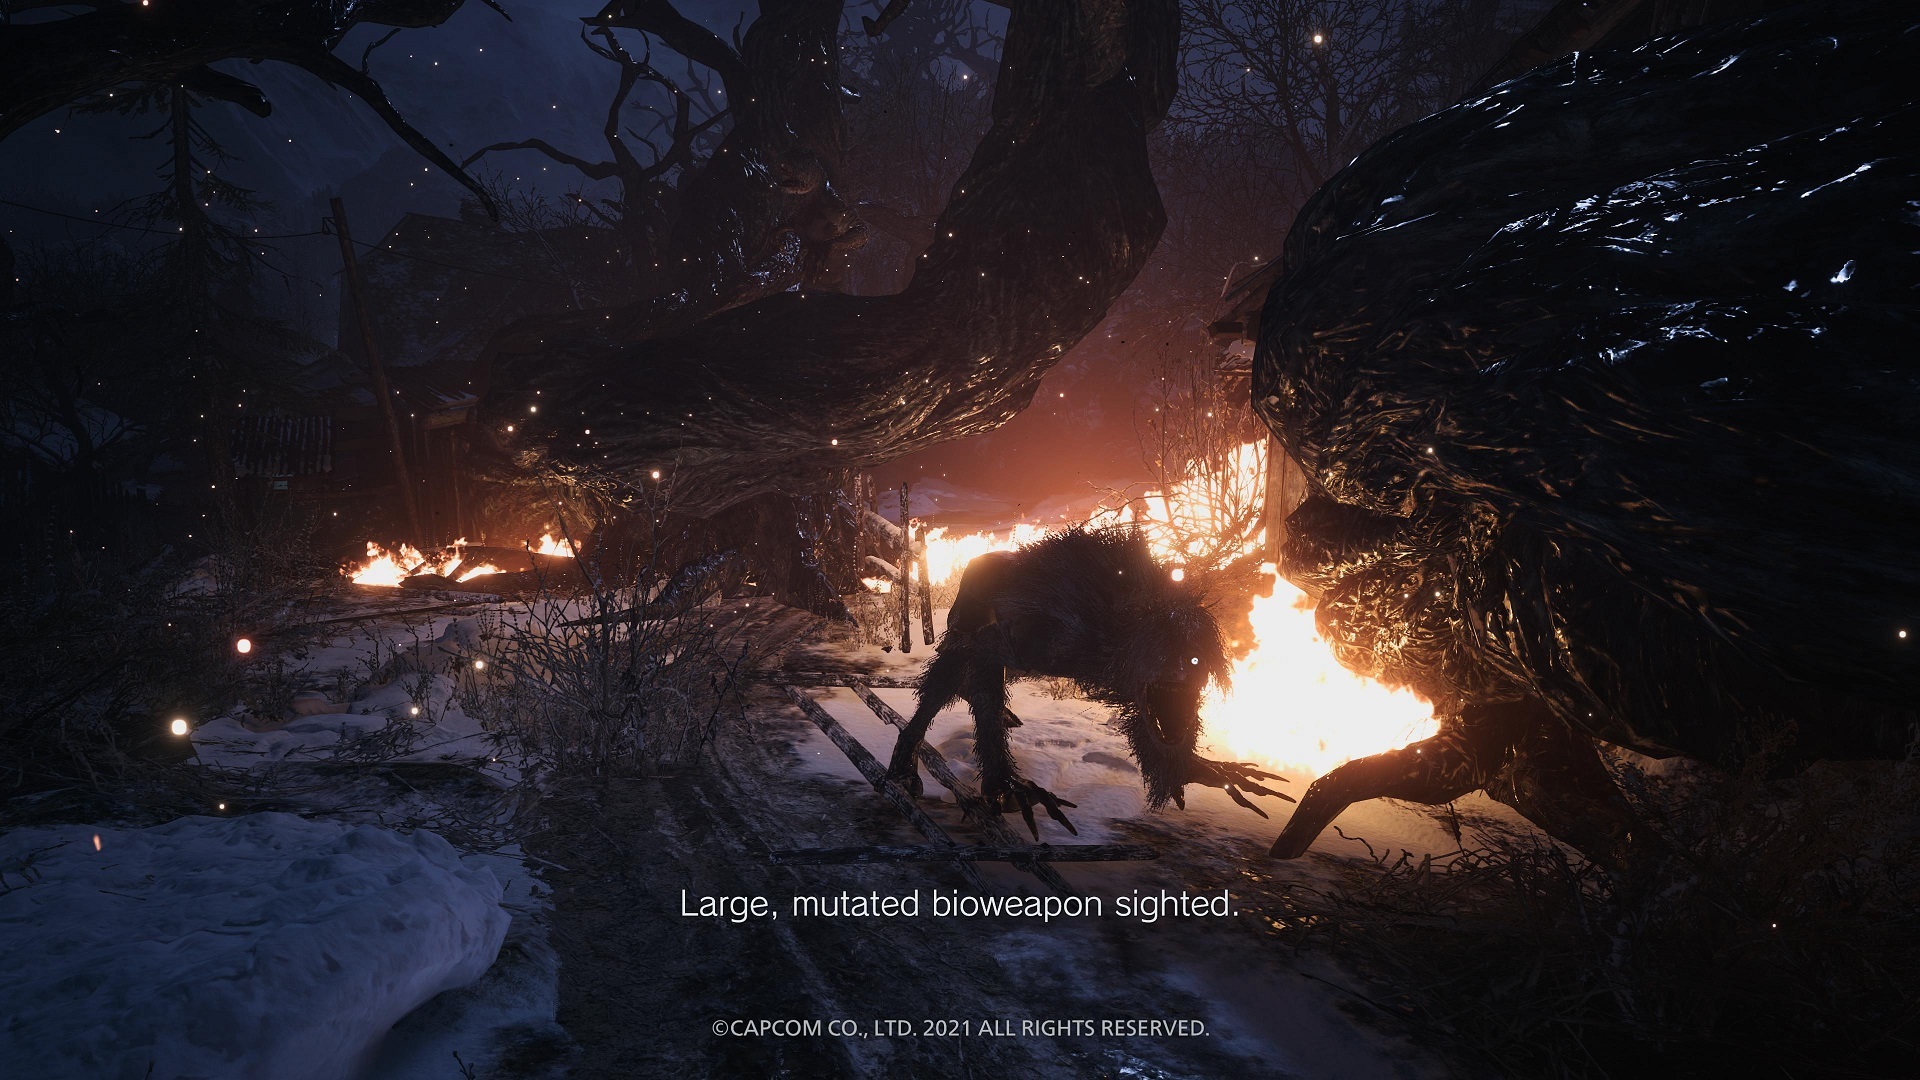
Back up into the road you came from, let the Lycans bottleneck, toss a Grenade, and watch a whole crowd of hot dogs go flying. You may have to grenade a couple of waves of these guys before you have enough time to lase another target, and one of said waves may have some Armored Lycans who won't go down so easy. Once they show up, start weaving around the area a bit until you can put them down for good. Eventually, you'll have enough time to hit the structure with the Locator again.
Use the last of your grenades on the next waves if you can. When you inevitably run out of Grenades, run to the back of the red chimney house, where the outhouse is located. Hopefully, you can do it without getting slashed at. Grab the supplies next to the green flare, then take the ladder to the roof. You'll have ample time from here to call in the airstrike, and turn that structure into a parking lot.

From here, head up the road towards the Castle Gate. Take a left into the smoldering crater formerly known as the cemetery. Drop in using the ledges on the left. Aim for the green flare for more supplies, then keep moving down into the cave. Eventually, you'll meet Urias' pissed-off older brother, wielding a spiked mace instead of a hammer. Again, try to keep your distance--as much as you can in this cramped space--and unload using the Dragoon. Surprisingly, Chris can block the mace without taking much damage. Let big boy take a swing, then empty a clip at his face. Eventually, you'll get a call that airstrikes are ready to go. Stay carefully out of range while you let the Target Locator do its thing. Three bombings will fell Wun Wun here for good. Pick up the Giant Crystal Mace, and take the newly opened tunnel until you hit a cutscene.
Once you have control again, take a right. There's a little pond here you can't enter, with a statue a little ways off in the distance. Check the base of the statue for a Goat of Warding.

Take the stairs up, and follow the hallway to Miranda's Lab. Make your way around the room, checking every surface for books, notes, pictures, and letters. If you had questions, this room's got really, really disturbing answers. When you're done exploring, break the lock on the door on the other side of the room to trigger a couple of long cutscenes, and one barn-burner of a twist.
The Ceremony
When you finally have control of Ethan again, you'll be back at the Altar. Walk around the wagon, talk to The Duke. Time has come to close down shop. Sell anything that isn't ammo, explosives, or First Aid Meds, then clean him out of those three things. The gun attachments are optional, but there is a Long Barrel for the V61 that's definitely worth the money. If you're going to upgrade your weapons, invest in power for the Wolfsbane or the shotgun.
Even if you don't need a particular upgrade, spend until you can't afford anything else. When you're done, turn around, and grab everything off the crate behind you, following the wall behind it for even more stuff. There's a few rounds of ammo for everything, as well as a First Aid Med here. When you're as loaded for bear as you can be, save at the Typewriter. Head west to the Ceremony Site. The branches will drop a few ghouls in your way. Don't waste the good stuff, take 'em down with your pistol. You'll get a cutscene at the end of the road.
Final Boss: Mother Miranda

You'll face Miranda in the tight arena of the Ceremony Site, where she'll come after you with various melee attacks, and a few ranged strikes. There's some gear scattered around the area for you to pick up, and in some cases when she calls up those big pillars of mold, more can drop if you bait her into crashing through and destroying them. Mostly, though, supplies are limited and you need to do a lot of damage to bring her down, so fire away when she gets close with your powerful guns. Save grenades for later, as they're very useful in particular moments in one of the later stages of the fight.
You can avoid a lot of damage from Mother Miranda's attacks by watching her telegraph her strikes and running to the sides of the arena when she comes at you. Her first set of attacks, when she still looks mostly human, will come at you in a straight line, giving you time to dodge to the sides and spin around to nail her with something strong like your shotgun. She'll also summon those two big columns of mold, between which a brown blob will rise up, catch fire, and fling death in all directions. Run behind the mold columns to avoid taking any damage from the blobs.
Hit her enough and she'll start to mutate, becoming dangerous in different ways.
Stage 1: She'll start out on spidery legs, taking swings at you any time she's close. Block, and move around to try and keep your distance. When she charges at you, run sideways to dodge, but note that unlike her first set of attacks, she can pivot with her last strike in the combo and hit you if you've moved clear, so keep running until you hear her stop attacking before you stop, turn, and take your shots. Miranda will also climb up on the statutes around the arena during this phase, then jump down to wherever you're standing. You might get a shot or two off with the sniper rifle when she climbs up, but make sure you're moving before she leaps to avoid the damage.

Stage 2: She'll form wings, and dive bomb you. Block again or run sideways when she preps her attack, as she comes in straight lines again, and keep your distance. At the end of some of her dives, she'll form brown blobs in the air that will catch fire after a few seconds then fly towards you. Use your pistol to destroy them while they're brown, or hit Miranda with a grenade in the face to blow up all the blobs with the explosion, while dealing damage as well. When she hovers between strikes, hit her with your sniper rifle.
Stage 3: Miranda will turn out the lights, and attack you in the dark. Find the nearest set of candles, run to them, and turn around. Fire twice at her silhouette when it appears, then block or run sideways. During this portion, she's using the same attack she did when you first started the fight, so while you're blinded, it's easy to dodge if you're quick.
Stage 4: She'll start by raising a ball of lava out of the ground. Block the debris as you make your way behind a pillar. After which, she'll alternate between stages 1 and 2. Hold out till you're in the red before topping off your health with a First Aid. Occasionally, the brown blobs will drop shotgun shells. Pick them up while you're on the move. Those are the only warnings necessary for a fight that is otherwise about mercilessly unloading every single damn gun you have into that woman.
You've reached the end when Miranda wraps branches around Ethan's legs and lifts him up for the kill. Switch to your pistol, and fire away. Once Miranda is dust, sit back, and watch how it all ends. Stick around through the credits for one last scene. And exhale.
Got a news tip or want to contact us directly? Email news@gamespot.com
Join the conversation