Destiny 2 King's Fall Raid Guide: How To Beat Every Encounter And Open Every Secret Chest
King's Fall is back in Destiny 2--with a few surprises. Here's everything you need to know to defeat King's Fall and find all the hidden secrets and rewards within.
King's Fall was a huge moment in the original Destiny: the culmination of the game's biggest expansion, The Taken King, and the climax of the story of the Hive god Oryx's quest for revenge against the Guardians. King's Fall is back in Destiny 2, and while it's mostly the same as Destiny veterans will remember, it also has undergone a few changes along the way. These include the introduction of Champions and some extra hidden rewards you can claim if you know where to look.
Below, you'll find a complete and extensive rundown of everything you need to know to complete a normal difficulty run of King's Fall (since the Master difficulty is not yet available). That includes tips and strategies for every encounter, as well as a rundown of where to find the raid's three secret treasure chests. Bungie has added a fourth hidden reward as well, taking a page from Vow of the Disciple, with an extra reward chest you can unlock at the end of the raid; here's how to nab it and take down Oryx once again.
Loadout recommendations
King's Fall is a wily mix of fighting hordes of enemies and dealing major damage to huge bosses, so you'll want to keep that in mind as you plan your loadouts. Generally, most strategies you'd use in a high-level activity against common enemies are viable--Arc 3.0, while doing less to reduce your damage, can be great for chaining lightning and quickly killing an annoying swarm of Thralls. If survivability is more important to you, Solar builds are likely the way to go, especially with additions like Healing grenades, Loreley Splendor Sunspots for Titans, and other handy means of healing yourself and your teammates. Generally, though, Warlocks should have Well of Radiance at the ready, as it's always extremely useful, and you'll be standing your ground to deal damage to bosses on several occasions.
As for weapons, these vary by encounter, but King's Fall often has you fighting small enemies at close range, so your most reliable "add-clear" weapons are great here. A reliable shotgun for killing tough Major enemies with yellow or orange health bars is good to have on-hand, as is your favorite high-damage sniper rifle; you'll be using this to drop either VIP enemies at a distance before they can mess up your plans, or to deal direct damage to bosses after you've run out of Heavy ammo. Again, comfort level is important and there are lots of alternative weapons that will work well for dealing critical damage to enemies. Heavy weapons can also vary, but linear fusion rifles are generally favored at the moment for high precision damage and low risk; rockets might also do the job, but you're much more likely to accidentally blow yourself up. Grenade launchers, particularly those with Spike Grenades, may also be highly useful, but as of this writing, Bungie has disabled them because of a damage bug.
It's standard procedure at this point, but one player on every raid team should pack Divinity to help increase the critical hit damage of the rest of the team. Other great choices are Izanagi's Burden for its Honed Edge damage boost, Sleeper Simulant if you don't have another, better linear fusion rifle, and Outbreak Perfected to both kill small enemies and work as a boss damage weapon in a pinch.
Opening the door
Though it's not technically an "encounter," like Vault of Glass, your first job is to open the path into the King's Fall raid by completing a series of objectives. When you load into the raid, you'll find a big door blocked by Taken energy at the front of the room where you start. Starting the encounter will clear that energy, opening a hallway ahead that's filled with statues of Thralls. There are six of these in total, and one will have a ball of black energy in front of it. Your goal is to find a pair of similar black energy balls, called Relics, and to take them to this statue. "Dunking" the two relics into the statue at roughly the same time will empower it; your team will then need to find two more relics and dunk them into the next statue, and so on until you've done all six.
The relics, meanwhile, are scattered throughout the rest of the area. The room where you spawn has two wings, one to the left and one to the right when facing toward the statues. Relics will spawn in these wings, as will enemies. Thus, you'll need to split your squad in order to collect the relics and bring them back to the statues. Each time you pick up relics, you start a timer, and both relics need to be dunked into their statue before the timer expires, or you'll need to start your attempt for that statue over again. You also only have about three seconds once one relic is dunked into a statue to dunk the second relic, so you need to get them to the goal at roughly the same time--although you can use that three-second timer as a means of extending the overall timer if one team is lagging a bit behind.

You'll find the first two relics right in front of the doorway blocking the statue hallway, and picking them up starts this activity. The best strategy for this fight is to split your team into three teams of two. Send one pair of players into the left wing and one pair into the right wing, while the last team stays in the middle, clearing enemies. Your relic-grabbing players will need at least one escort each, because once they pick up a relic, they can't shoot their weapons. Grabbing the relics creates a Taken energy block on the doorway leading back to the area with the statues, so the escort player will need to shoot the Taken Blight creating that energy in order to open the patch back to the start of the encounter. Picking up relics also spawns a bunch of enemies, so as the escort player, you want to try to clear them out as fast as possible.
Each time you pick up a pair of relics and bring them back to a statue, the next relic will spawn further out in the wings, requiring you to run farther to find it and farther to get back to the statue to dunk it. The timer can be a little tight here, but don't worry; if you fail to get a relic back to the statue in time, the next timer will be more generous. The relics are occasionally in weird places, like floating over a chasm, requiring you to carefully time your jumps in order to get it; once you pick up a relic, you can't use your abilities, so you'll fall like a rock if you expect to hit your last Hunter jump or Warlock glide after picking up the relic.
The whole encounter is pretty simple, however, and you're not in a Darkness zone or otherwise timed, so you can fail as much as you need to before you get the door open. Once you've dunked the final statue, you'll enter a disc-shaped room called the Court of Oryx with a Hive Wizard on either side of the door as you enter. Kill them both to open a portal that'll let you advance into the raid proper--but don't enter it just yet.
Deepsight Resonance chest puzzle
Like Vow of the Disciple, the reprised King's Fall raid includes weapons that you can craft at the Enclave as part of the Witch Queen expansion. And just like Vow, there's a secret chest you can unlock in the raid that will give you a guaranteed Deepsight Resonance weapon on every run. To unlock it, though, you'll need to activate several hidden runes scattered throughout the raid. There are nine runes in total, but you'll only need a specific set of three to activate the chest. Finding out which runes you need requires you to check the entrance of King's Fall before you head through the big portal at the Court of Oryx.

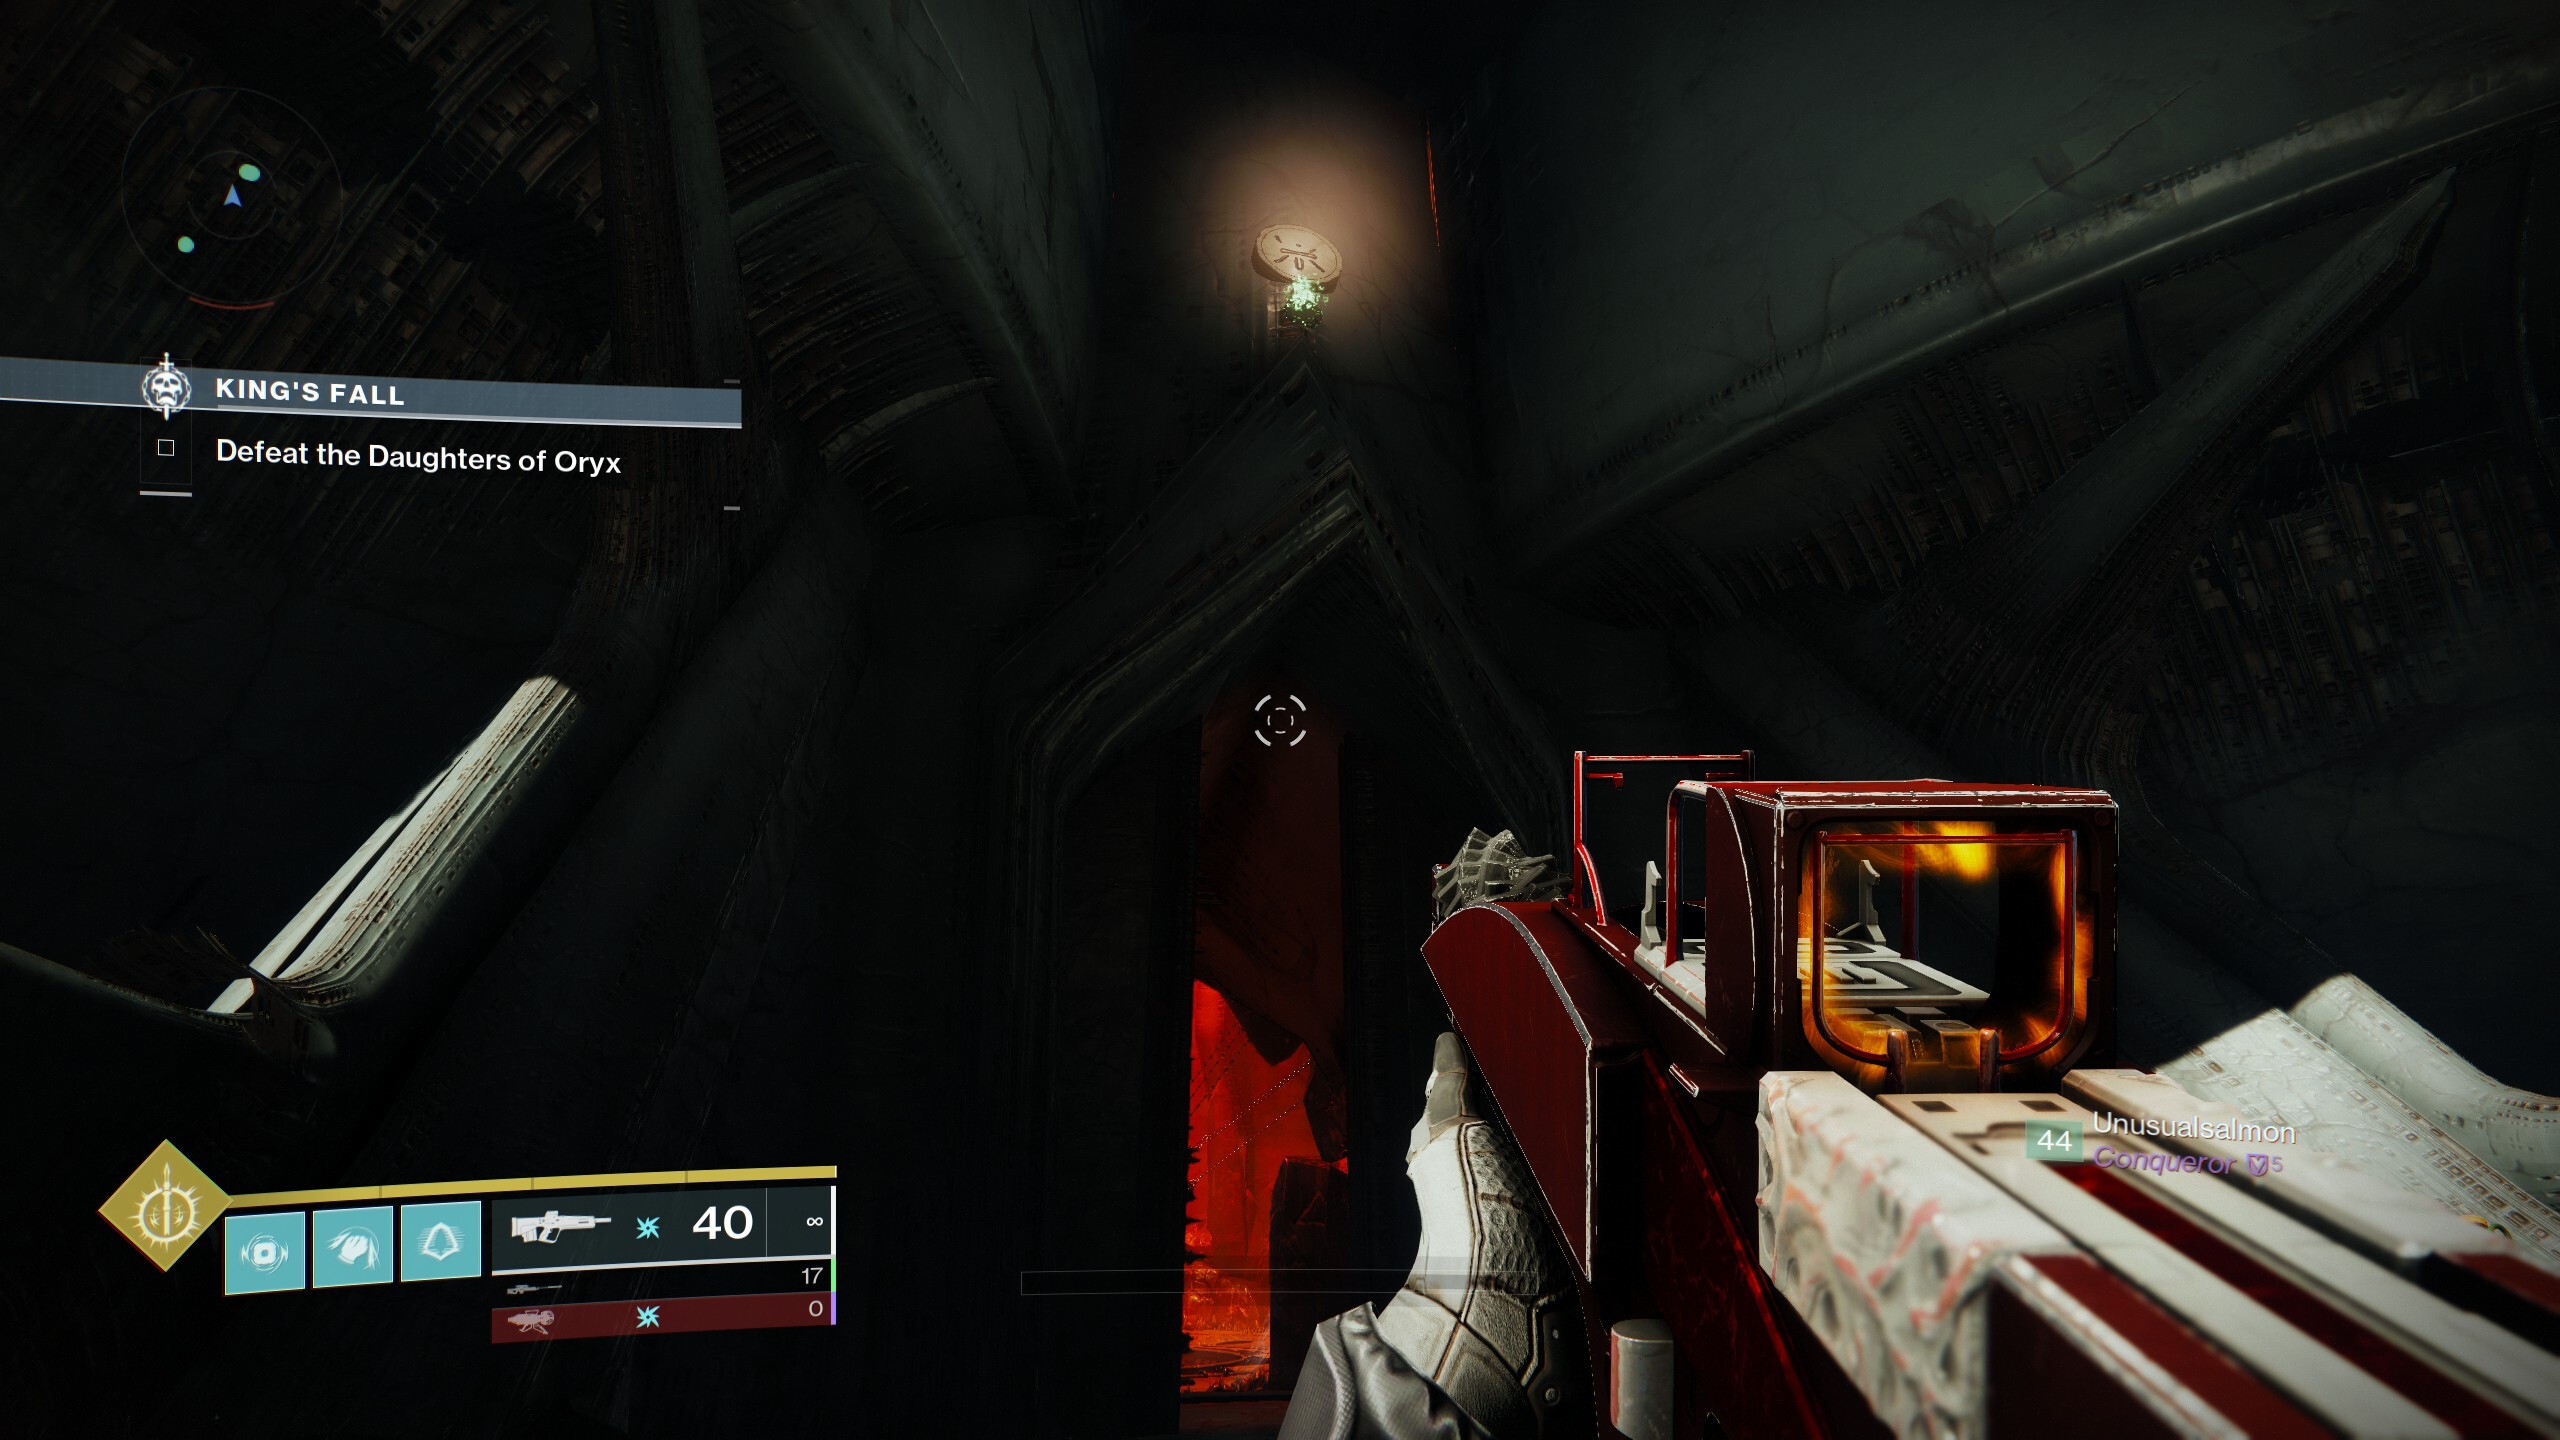
To find the code, head beneath the platform that holds the portal, where you'll see a series of three Hive runes. Make note of what they are--the best way to do so is usually with a screenshot, which is now pretty easy to take on any platform. Note that you cannot return through this portal once you pass through it, so make sure you get the code for the Resonance weapon chest before you go in, or you'll miss the opportunity.
Once you have the code, you can pass through the portal into King's Fall proper. Upon arrival, make sure you grab the reward chest from opening the door, as it's easy to run right past it.
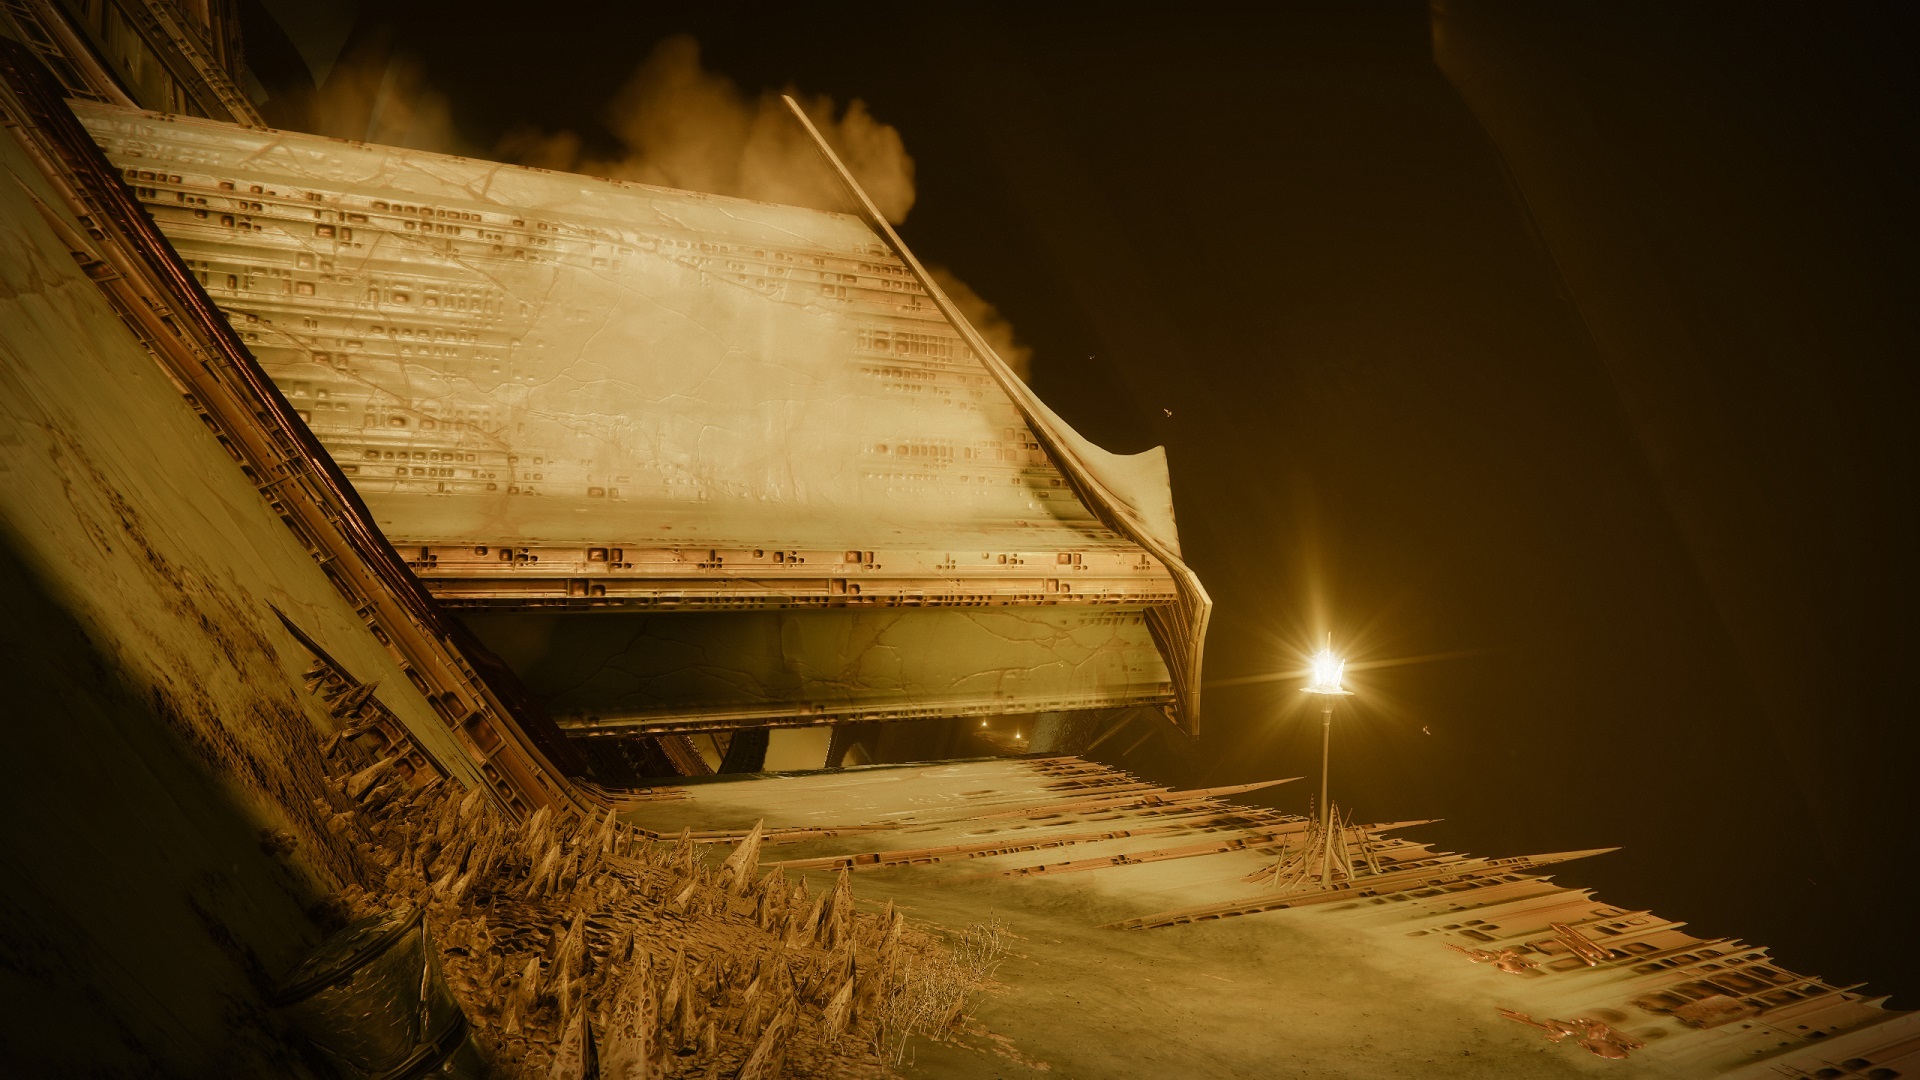
Portico: Tomb ship jumping puzzle
Continue forward until you reach your next major obstacle: a big open room where Hive tomb ships are continually appearing and disappearing. In order to pass to the other side of the chasm, you'll have to jump onto the ships as they appear, ride them a short distance, and then leap to another ship before the one you're standing on vanishes. It's not an especially difficult jumping puzzle from a platforming standpoint. Instead, the difficulty comes from knowing where to jump to and when to make your leaps.
Your first jump challenge will be just ahead of the portal, with a series of pendulums swinging back and forth. The pendulums linger for a long time at either side of the room, so go slowly and make sure your timing is on point to cross this gap.
Deepsight Resonance Rune 1

Before you cross the pendulums, jump out onto the first one and turn 180 degrees so you're facing the way you came. You'll see a round bit of glowing green flame just under the lip of the ledge you jumped down from. This is the first of the nine Hive runs that can activate the Deepsight Resonance chest at the end of the raid, the code for which you just got from beneath the portal after clearing the statue encounter. Shoot the green fire to make the rune appear, and if it's one of the three you saw beneath the portal, leave it activated. If not, shoot the green fire again to make the rune disappear. You only want three total runes to remain activated throughout the course of the raid, but you can turn them on and off whenever you want--just make sure you only leave three "on" by the end.
Tomb ship room
Continue on until you find the huge room with a Hive tomb ship docked directly ahead of you. To start the jumping puzzle, you and your team should jump onto the top of the ship, which will cause it to start moving. The ship will continue forward for a bit, then slowly crack up and disappear. You need to jump off it to the next ship before it vanishes or you'll fall to your death, although the only thing you have to lose during this jumping puzzle is your time. In order to follow this guide's directions, whenever you jump onto a ship, turn to face the direction it's traveling, which marks the ship's "front." You generally want to be toward the front edge so you can see where you'll need to jump.
While standing on the first ship, facing the far side of the chasm, look off the right side and down to find the second ship to jump to. Face where this ship is going and look off the front-right corner to spot your next ship, coming at an angle. Once aboard that one, run to the front of the ship to see it driving toward another ship that's moving almost perpendicular to your current ship. Leap to that ship and look toward its front, in the direction of travel, to see a ledge you can jump onto that's circling a support beam on the side of the chasm room.
This round ledge marks a checkpoint, so you can catch your breath and scope out the next part of the puzzle from here. If you fall to your death, you'll return to this ledge. The second part of the jumping puzzle contains a few moments in which it feels like you'll need to stay on a tomb ship too long for comfort, and you'll have instances in which you'll see a ship that looks like the one you should jump to, but isn't really.
First, run to the far edge of the ledge you're on. The ship you just jumped off of should have disintegrated on your right, but another ship will have appeared nearly in the same place, continuing forward and down toward your destination. Jump onto that ship and ride it until it starts to break up, when another ship will spawn to your left and cross perpendicular through the path of the ship you're riding. Hop to the ship that crosses, which will now be heading to the right, parallel to the exit of the area.

The next ship that appears will cross directly over top of the ship you're on, and it'll be a little high. Ignore this ship altogether; some characters can jump onto it depending on their builds, but you don't need to and you risk dying if you try to. Instead, duck and travel on your ship beneath this crossing ship. Your ship will start to disintegrate just as it reaches another ship, which will appear on your right side and cross in front of you, back toward the exit. Jump aboard.
As your ship approaches the wall beneath the exit door, another ship will appear in front and slightly above you, moving parallel to you but headed in the opposite direction. Jump onto it. You'll now be facing back toward the beginning of the puzzle. Right away, a ship will appear slightly on your left, crossing your ship's path. This one is also above you and requires you to react quickly; jump on top of it. You'll see ships spawn beneath you, but you should ignore them. Your ship will start to disintegrate, seemingly with nowhere for you to go, but don't panic. Keep on this ship longer than you think is safe and eventually, right in front of you and to the right, the final ship will appear. Hop aboard and ride it to the big platform at the exit.
That's the jumping puzzle handled. When your team is all across, run around the outside edge of the ledge you're on, clearing out enemies along the way, to find another tomb ship. You'll ride this one across the gap ahead to the far side--but first, there's a hidden chest to grab along the way.
Hidden Chest 1

Your first hidden chest requires you to break into two teams in order to unlock it. On the big ledge where you ended the tomb ship jumping puzzle, but before you jump on the second tomb ship to cross the big gap, look for two round plates, one at either extremity of the ledge to the left and right of the tomb ship you need to board. These are pressure plates, and you'll need to leave behind one player for each to stand on the plate in order to open the way to the chest.

Now, send the remaining four players to jump onto the tomb ship and ride it across the chasm. You'll move toward an archway that the ship will pass under; look on the wall on the left side and you'll see what looks like a ramp heading upward and to the left, toward a hole in the wall. Jump off the tomb ship as it nears this wall and make your way to that ramp ledge. Be careful here, as the wall has several protrusions near the ramp that can knock you off if you run straight up toward the hole. When you reach the top of the ramp, enter the hole and you'll find yourself on a ledge above where the tomb ship lands; there's a closed door here normally, but since your teammates are on the pressure plates, that door is open. The chest is on the other side.
Once the first four players have the chest, jump down from this location toward where the tomb ship would have taken you. A host of Hive enemies are waiting, including a Shrieker. Clear them out and look for two more round pressure plates on either side of where the tomb ship lands. Leave one player for each plate--that'll hold the door to the chest open so the two players you left behind on the far side of the chasm can now ride the tomb ship to the ramp and claim the chest themselves.
Deepsight Resonance Rune 2

After you find the hidden chest, turn around and face the door you just passed through. The rune flame is directly over it; you should be able to shoot it even from down below if you skip getting the chest.
From here, continue on to the first true encounter of the raid: the Annihilator Totems.
Annihilator Totems

Technically, this is another "open the door" encounter, but this one is much more involved than the first. It works on the same principle--you'll need to pick up a special object, in this case one of two "brands," and use them to open the door. This is where King's Fall starts adding additional mechanics, however. The Annihilator Totems encounter is something of a relay race, and you'll need your whole team on the ball in order to complete it without too much trouble.
As you enter the Annihilator Totems room, take note of the big round plate in the center. You'll need to charge this plate by standing on it after you complete the rest of your objectives in this room. On either side of the plate are two wings, like in the first door-opening encounter. At the opening doorway of each of these wings, you'll find two more items to pick up, similar to the relics at the first door. These are the Brand of Weaving and Brand of Unmaking, although their names aren't important. For our purposes, we'll call these the "buffs."
For this encounter, it's highly recommended you bring weapons that can very quickly kill tough Elite enemies, the kind that sport a yellow health bar. Our team found great success with the Xenophage Exotic machine gun, but other useful weapons include the Gjallarhorn Exotic rocket launcher and shotguns. It's also good to keep something with decent range, like a pulse rifle. You'll also need weapons and mods to deal with Unstoppable Champions--in this case, Hive Ogres.
Split your team into two groups of three, one for each side of the room. If you look into either of these wings, you'll see a big floating obelisk at the far end, with a round plate beneath it. These two obelisks are the aforementioned Annihilator Totems, and they work very much like a similar totem found in the Pit of Heresy dungeon. You want someone standing beneath the totem on the plate at nearly all times; if you leave either of the plates for too long, your team will be wiped out.

Standing in the Annihilator Totem rooms, however, will kill you, unless you have one of the two Brand buffs. When a player holds a buff, it creates a big bubble around them that grants immunity to the miasma of death lingering near each of the totems. Therefore, you can have more than one player near a totem at a time, so long as one of them holds the buff. If you're having trouble with the totem wipe mechanic, try leaving one of the players on that side's team under the totem pretty much constantly just to keep from wiping. Just make sure to keep them from dying to the miasma as much as possible.
Generally, though, the best way to handle this room is with either a two- or three-player relay. You start the encounter by picking up the Brand buff at the entrance to each room and racing out to the Annihilator Totem to keep the wipe mechanic from triggering. Leave one player in the central room to kill enemies for a moment, although their main goal is up on the ledges on the left and right sides of the room; more on that in a minute.
If you're holding a Brand buff, your goal is to kill as many enemies as you can, while standing near the Annihilator Totem in order to fight back the miasma and keep from wiping. As you kill enemies while holding the buff, you build up stacks of something called Deathsinger's Power. You want to get as many stacks of this as you can by killing as many enemies as possible. Regular enemies give one stack, while Elite enemies with yellow health bars give three stacks. There seems to be no upper limit for stacks, so go nuts.
If you're carrying the buff, you'll also have a timer counting down; if it runs out, you'll die. In order to avoid an untimely death, you need another teammate to "steal" the Brand buff from you, and this is where the relay part of the encounter comes in.
Back in the center room, at least one teammate for each side should have stayed behind at the start of the encounter. Each player in the center should hop up on to the upper balcony ledge on their side of the room. There, a Hive Wizard will spawn; kill it as quickly as possible. When the Wizard is down, it'll be replaced by a Taken Knight. Kill this Knight fast as well--this is why you want a shotgun or something comparable--and a second buff called "Brand Claimer" will appear in the center of the ledge (not where the Taken Knight dies, incidentally; the buff will always be in the same place). Pick up the Brand Claimer and then head to your side's Annihilator Totem. With the Claimer buff equipped, you can steal the Brand buff from your teammate by using your Activate button. This is how you'll swap to keep the timer from running out on a player; one person is always holding the Brand buff near the Annihilator totem, killing enemies, while another player is always preparing to use the Claimer buff to steal the Brand when the timer gets low.
The cool thing about the Claimer buff is that you don't need to be that close to the Brand buff player in order to take it; it seems as long as you're in their miasma protection bubble, the prompt will appear. It's also fast, so you can actually steal the buff while running past the other player, allowing them to continue their role while you head to the Annihilator Totem without stopping. Once the Claimer player has swapped and taken the Brand buff from the first player, they take on that same role, staying near the totem and killing enemies.
Meanwhile, the player who first carried the Brand buff will no longer have a timer, but they'll have kept their Deathsinger's Power stacks. Head immediately to that round plate in the center of the middle room and stand on it; the plate will slowly absorb your Deathsinger's Power, two stacks at a time. Make sure all your Deathsinger's Power is gone before you leave the plate. This is how you complete the encounter--both teams deposit their Deathsinger's Power to power up the door and open it. You need a total of 200 Deathsinger's Power to complete the encounter.
Once you've made your first buff swap, a new Wizard will appear on each balcony, so you'll want to kill it quickly. That'll spawn in a new Taken Knight, allowing the player dumping their Deathsinger's Power to quickly grab a new Brand Claimer buff. Right about the time you head back to the Annihilator Totem, your teammate's Brand buff timer should be close to running out. Swap again, return to the totem, and keep killing enemies. Meanwhile, the person who swapped repeats the process of dumping their Deathsinger's Power at the middle room's plate to charge the door, while also quickly trying to kill the Hive Wizard and Taken Knight that appears on the balcony in order to prepare for the next swap.
How you set up your teams in this case is up to you, depending on where you're struggling. It's possible to have a two-player relay of Brand buff-swapping if you can get the timing down--Xenophage is great for this, as it can one-shot the Hive Wizards from the Deathsinger's Power plate, causing the Taken Knights to spawn in sooner so you can quickly shut them down. Your third player can then hang out at the Annihilator Totem, shooting enemies to weaken them so the player with the Brand buff can finish them off for Deathsinger's Power. That third player at the totem can be very helpful in keeping your buff player from getting overwhelmed, as the side rooms can fill with tough enemies. It'll also help you keep from getting wiped by the Annihilator Totem, so long as the player on the totem isn't overwhelmed by the room's deadly miasma during each buff swap.
If you find you can't kill the Taken Knights quickly enough to make clean swaps with just two players, however, your third player can also join the relay. This way, whoever is not currently buffed or swapping for the buff is standing by in the middle room, clearing enemies and waiting for the next Hive Wizard to spawn. As soon as the Wizard appears, kill it, then kill the Knight that appears as quickly as possible. With a three-player rotation, you should almost always be moving so fast that you can swap buffs at the Annihilator Totem itself. This can take the pressure off scrambling to take out the Knight and swap buffs. (Note also that if the Brand buff player dies, the buff will return to its spawn point at the opening of their corresponding room. Whoever's nearest should quickly grab it and get back out to the Annihilator Totem to make sure your team doesn't wipe.) Use whichever strategy is most comfortable for you and your team.
As you deposit your Deathsinger's Power at the plate, you'll notice that Hive runes running along the sides of the doorway will slowly start to light up. There are 10 runes in total, indicating your progress through the encounter; you need 20 Deathsinger's Power to light up each set of runes. At about the fourth and eighth runes, an Unstoppable Ogre will appear in the center of the room, so make sure you're ready to deal with it. It's best for all your players to have an Unstoppable mod at the ready, and then to just hit the Ogre with Heavy weapons to kill it as fast as possible. These are the only Champions in the normal version of the raid, so once you've dealt with these, you won't have to worry about any others.
Continue the relay process with both teams until you've deposited enough Deathsinger's Power, and the fight will end, opening a new path forward. Don't go through it just yet, however.
Deepsight Rune 3

Before you leave the Annihilator Totems room, head into the left wing if you're facing the exit door. Head to the totem and turn back toward the entrance. On the upper ledge on the wall of the room, to the right of the door, is another Hive rune needed to activate the Deepsight chest at the end of the raid. You can reach it by hopping up on the ledge, and you should also be able to get an angle on the rune's green fire marker from on or near the Annihilator Totem plate.
Head through the door you just opened to your first big boss fight.
Boss Fight: Warpriest

You're going directly into a fight with your first real adversary. The battle you just fought to get through the doorway will have prepared you for what you're dealing with against the Warpriest, to some degree; you're again dealing with a Brand buff and a swapping mechanic. This time, though, the Brand buff is needed to deal damage to the Warpriest boss.
For weapons, you'll want strong, long-range damage-dealers, like linear fusion rifles and sniper rifles. Two of your team should also keep shotguns, or their favorite weapons for dealing with the Brand Claimer Taken Knights from the last encounter. You'll be seeing those again and need to kill them fast. Otherwise, much of this encounter boils down to clearing out enemies, so keep a primary you like for quickly clearing everything from Hive Thralls to Knights. You'll see Wizards, as well, who sport Solar shields, but in the normal version of this fight, that's it; no Champions to deal with. Divinity, as always, is highly recommend to help channel your boss damage, as well, and Warlock Wells of Radiance are great for keeping your team alive and out of danger while they deal damage to the boss.
You'll notice three pressure plates scattered around the Warpriest's room, and you'll want to split your team up into three groups of two, with each team assigned to a plate. In addition, assign two players as "Knight Hunters," and make sure they're assigned to separate plates. When you hit the damage phase of this fight, those two players will seek out out the two Brand Claimer Knights and kill them, so they'll be ready for the relay portion of the fight. More on that in a second.
First, though, notice that there are three big stone columns in the room, one standing in front of each plate and casting a shadow over it. If you stand on one of the plates (but not all three, which starts the encounter) and look up at the columns to the left and the right, you should see a white glow on one of them. This is what you'll be looking for during the fight.
You can start the battle by stepping on all three plates at once, which will fill the room with enemies while the Warpriest takes shots at your team. Avoid getting hit, and watch out for the Warpriest's special attacks--he can use the powers of Taken enemies against you, including the flying, seeking Axion Dart orbs of Taken Centurions, the blinding Darkness Bolt of Taken Captains, and the three-shot Retaliation Swarm of Taken Hobgoblins. The Axion Darts in particular are dangerous, so watch for them and shoot them down.
When you've killed enough enemies, two Wizards will spawn on each side of the room. Kill these, and you'll cause sword-wielding Knights to spawn at each plate. When they're dead, you'll see a message on your screen stating "Glyph sequence initiated." At this point, you can start the damage phase, but you have to do so carefully.
The "Glyph sequence" requires you to stand on each of the three pressure plates in a specific order; if you mess it up, the Warpriest will use his giant Oversoul orb, the Oculus, to wipe your team. To find out the sequence, the person at the middle plate should step onto their plate and look up at the obelisks in front of them. If the left obelisk is glowing, then the left plate is the first in the sequence; if the right obelisk is glowing, then the right plate is first. If neither is glowing, the middle plate is first. Once the player in the middle has identified which plate is first, they should step off, and then start the sequence.
If the sequence starts on the left, for example, one player from the left team should step on and stay on the plate until the end of the sequence. From the left plate, look at the other two obelisks to see which is glowing; that's the second plate in the sequence. The person on the first plate relays the next plate to the rest of the team, and the remaining plate is last. Once all three plates are activated, the damage phase begins. The player who steps on the last plate in the sequence will gain a buff called Aura of the Initiate, and like the Brand buff from the Annihilator Totems encounter, it'll create a big bubble around that player. The Aura of the Initiate comes with a timer that counts down; when the timer runs out, the aura player dies, so like in the Annihilator Totems encounter, your goal is to swap the buff to another player before that happens.
Everyone but the two players assigned as Knight Hunters should quickly converge on the player with the Aura of the Initiate--you need to be standing within the aura bubble in order to damage the Warpriest. Hit it with your best weapons. Meanwhile, the Knight Hunters need to go find their Taken Knights, which will spawn at the two plates that are not the one where your team is standing to deal damage; spread out with one player heading to each plate. The Knights spawn in sequence, one and then the other. When you kill your first Knight, you'll be able to pick up a Brand Claimer buff. When a Knight Hunter gets Brand Claimer, they should immediately head back to where the rest of the team is doing damage. The Aura of the Initiate player should watch their timer and count down; when they hit one or two seconds, the Brand Claimer player swaps with their Activate button, just like with the Annihilator Totems. That resets the timer for Aura of the Initiate by giving it to the new player, extending the time the rest of the squad has to do damage to the Warpriest.
Repeat the swap process again with the second Knight Hunter player so that you get a total of three Aura of the Initiate timers to do damage; that third timer won't kill you, so don't worry about it. However, when the damage phase ends, stay where you are. The Warpriest will use the big ball behind it, the Oculus, to initiate a mechanic to wipe out your team. To avoid it, stay behind the big stone monolith near where you did your damage, within its shadow. That'll keep the Oculus from seeing you and stop the wipe from killing you. It will, however, destroy the monolith, which means you can't stand in the same place to avoid the wipe again. Thus, you'll have four damage phases to kill the Warpriest before you'll have nowhere left to hide and the Oculus will take you out.
The destruction of the stone obelisk doesn't change the fight, except that it limits where you can stand for your damage phase. Instead of the glowing stone, you'll see a green flame over the destroyed monolith to indicate the corresponding plate.
Repeat the whole process over until you've done enough damage to defeat the Warpriest. Before you go, there's another Hive rune to shoot.
Deepsight Resonance Rune 4

On the right side of the Warpriest's arena, while facing where the boss stood, you'll find a circular ramp that leads up to an upper floor, kind of like a balcony section at a theater. Continue to the opening ahead on the second floor, which is right over the door you used to enter the room. If you turn and face toward the Warpriest, you'll find the rune on the wall here.
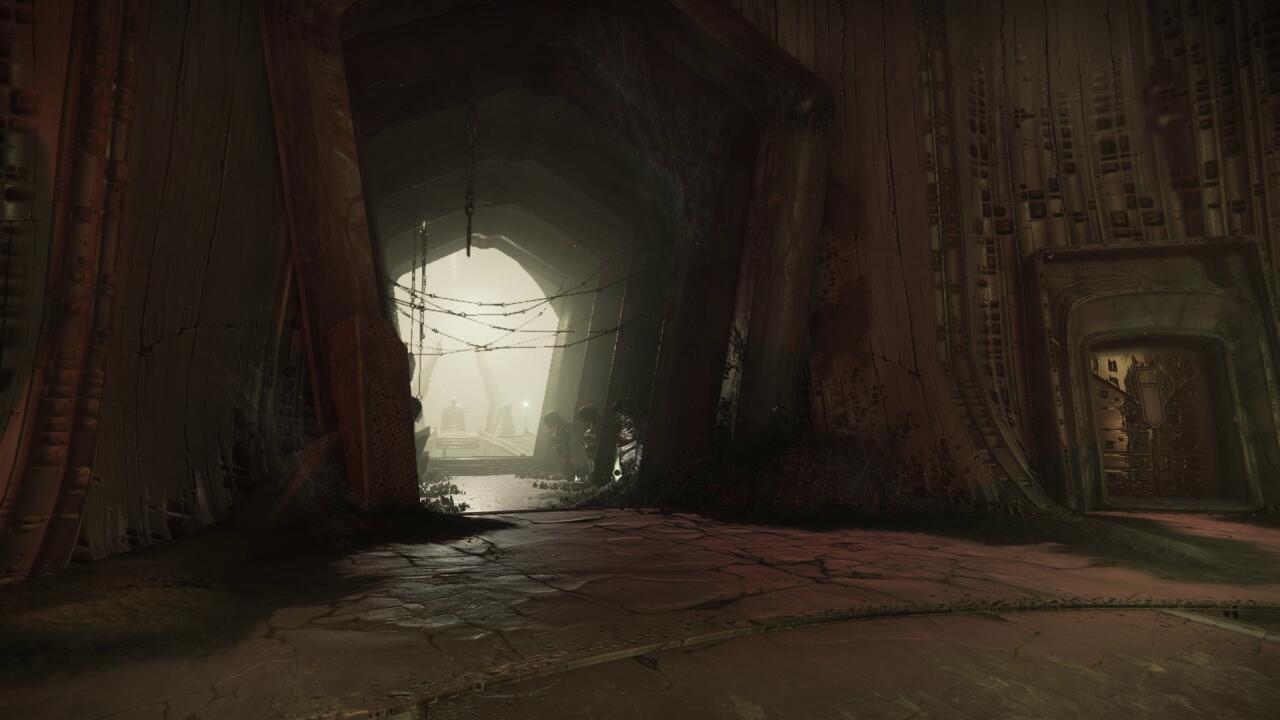
Descending to Golgoroth's Cellar
After the defeat of the Warpriest, you've got another traversal section of the raid to complete, although this one isn't a jumping puzzle. Instead, you're facing a maze through the darkened Golgoroth's Cellar. Be careful as you move through the area, as many of the pathways have big round holes in the floor, and leaping over the rocks and debris that block the pathway without looking where you'll land can get you killed.
The maze is actually pretty simple, but is deceptive because of the lack of lights. It's actually laid out like a grid; when you enter, there will be paths to your left and right, but with the entrance at your back, you're actually facing the exit. The paths are parallel to each other and square. To find the exit, at the first junction, turn right; when you hit the next, turn left, the only path; the next turn is also left, and again your only option. You'll then hit another junction, where you can continue straight or turn right. Go right, leap over the hole, and continue forward to reach the exit.
As you move through the maze, look for floating moths at the junctions, which will indicate which way you should be going, making the maze even easier.
Don't exit the maze altogether, however, as there's a hidden chest here.
Hidden Chest 2
Like the first hidden chest, the second of King's Fall requires you to open a door using special pressure plates. But the chest in Golgoroth's Cellar takes a page from the Warpriest fight--you don't just need to find the plates, but to activate them in a specific order. There are five in total.
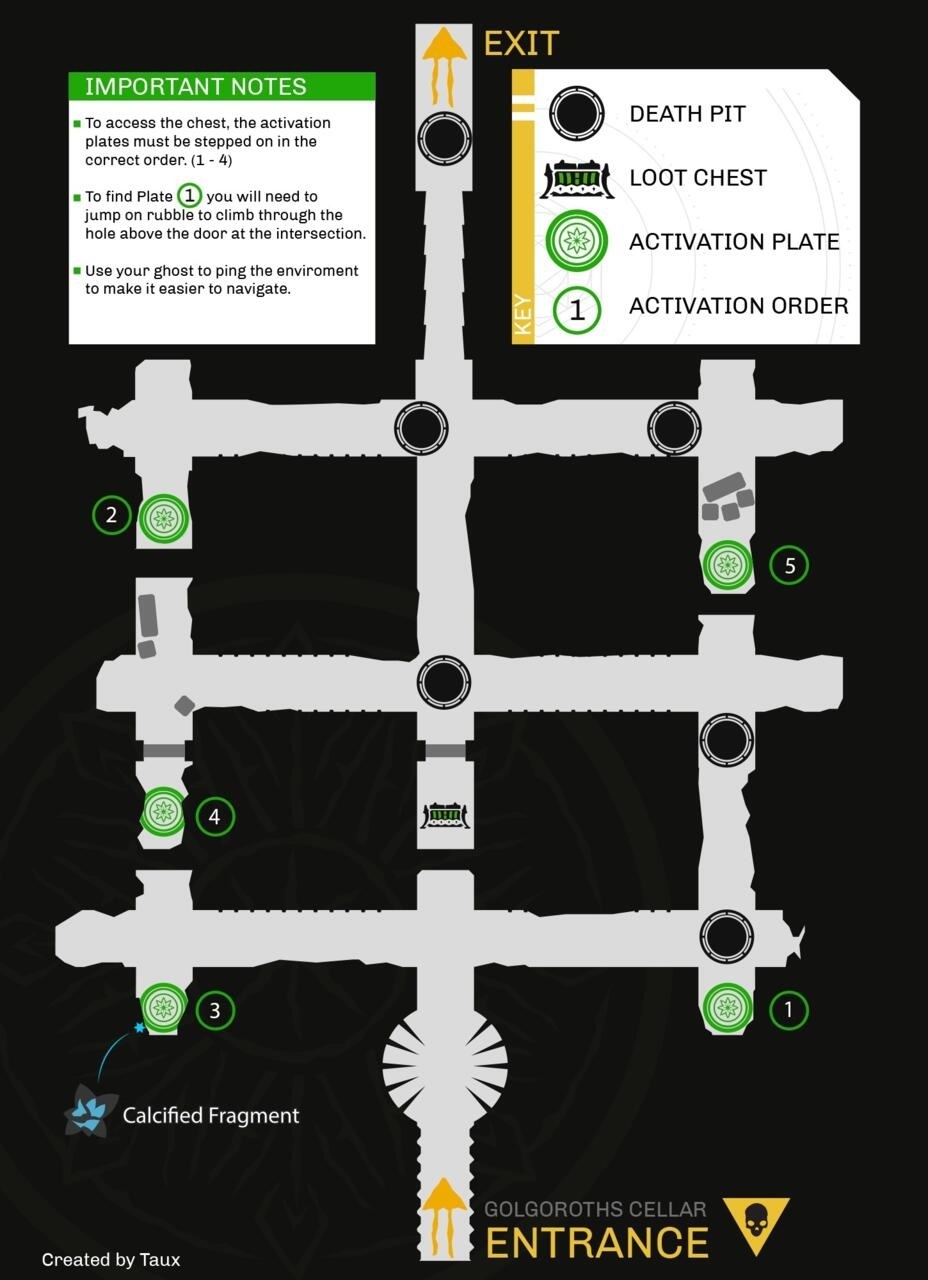
The maze is designed as a box divided into four squares, with each of the plates in one of the corners, with the last plate in the middle between the two boxes on the left. So from the start, turn down the left path until it dead ends, then turn left to find a plate; from the start, take the right path to the dead end and check in the alcove on the right to find a second plate. Since King's Fall is an old raid, maps already exist; Redditor Taux created this one back in the day that can help you find the plates. You can tell if you've messed up because the plate you're standing on will turn red if it's out of order. If the order is correct, the plates will turn green. As with the Warpriest plates, stay on each one after you've activated it until all five are activated to open the door to the chest, which is opposite the exit.
Deepsight Resonance Rune 5

Before you exit the maze, turn around and look into the round hole you hopped over to get to the door to leave. Just inside and against the back wall, you'll find the Hive rune.
Boss Fight: Golgoroth
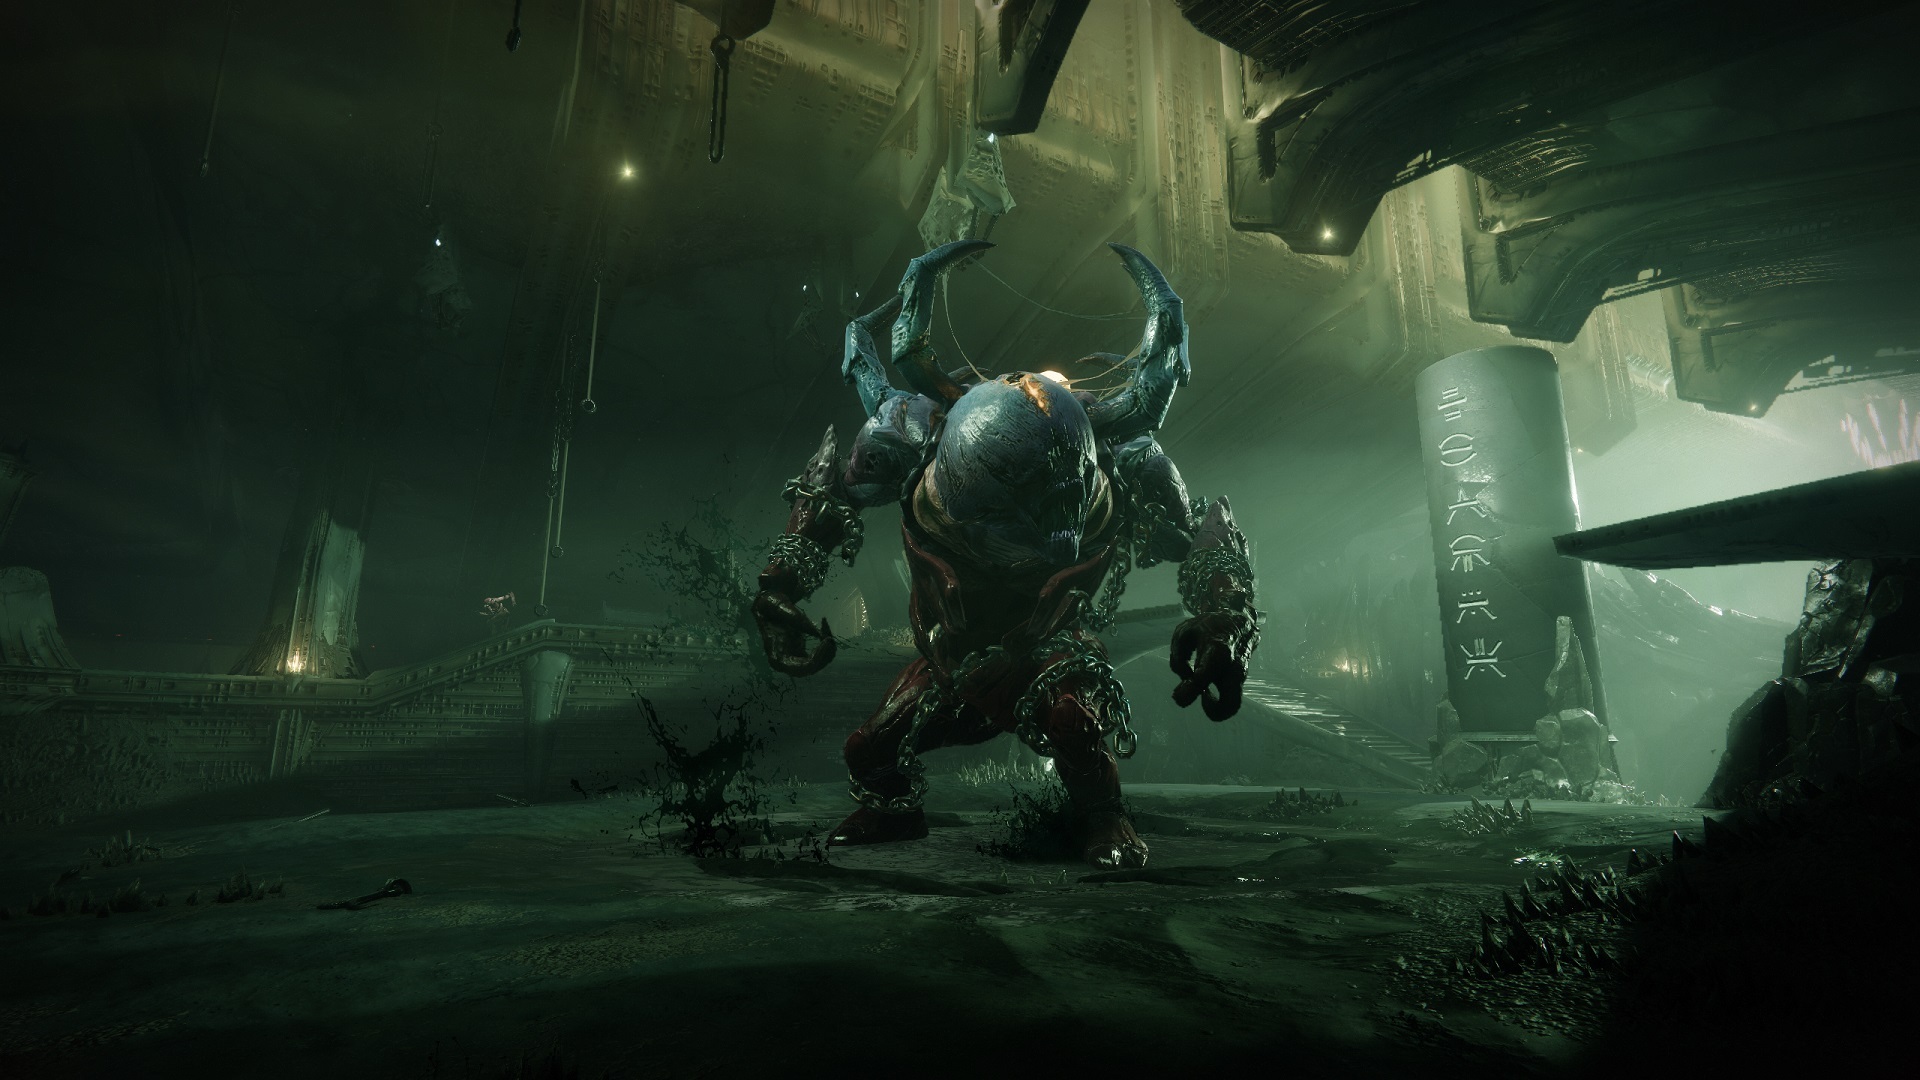
As you leave the maze, you'll find your way into a big dank arena with a lower floor below and a raised area ringing the outside. This is where you'll fight Golgoroth, a big Hive Ogre who likes to laser his enemies down and kill them with a barrage of Axion Darts. Golgoroth isn't too tough a fight, but damaging him is difficult because you'll have a lot of incoming damage to contend with, so Wells of Radiance from Warlocks are particularly useful here.
For weapons, bring your favorites for close-range, high-damage combat when hitting a critical hit spot. Slug shotguns can definitely be useful, and linear fusion rifles are usually the play. You'll need to assign two players to be separated from the rest of the team during the damage phase, but they can still contribute with very high-damage weapons such as Izanagi's Burden. As mentioned, Wells are great, as are healing rifts; for Titans, the Ward of Dawn bubble can be useful provided it's placed well and doesn't obstruct your ability to damage enemies. Otherwise, pick high-damage Supers such as Hunters' Gathering Storm or Titans' Thundercrash.
To fight Golgoroth, you'll first need to shoot the weird watery bubble hanging from the ceiling above the center of the arena. When it drops, the Ogre will climb out of the pool it creates. A new bubble will also appear, hanging from the ceiling, on the left side when your back is to the entrance. Make note of the hook-like object the bubble is hanging from; there are six of these, and each will eventually have a bubble. This is going to be essential information for your damage phase.
When the fight starts, the room will fill with enemies, so make your first priority clearing them out; they won't respawn, and you'll need as few distractions as possible when facing Golgoroth directly. Divide the team into two groups, designating two players as the holders of "Golgoroth's Gaze." Everyone else will group together on the floor in front of Golgoroth and do damage as usual. The gaze-holders will have work to do, however.
Gaze-holders should head to the left and right sides of the room. Their job is to draw Golgoroth's attention by shooting him in the big glowing critical hit spot on his back, but only one player should shoot the critical spot at a time; like swapping Brand buffs, the idea is to alternate. Shooting Golgoroth's back will give you a debuff called Golgoroth's Gaze with an attached timer. When the timer runs out, the player with the gaze will die, so the second player on the other side's job is to coordinate with the first player and shoot Golgoroth's back before the timer expires in order to take the gaze and restart the timer.
The gaze-holders have a second job as well. Since Golgoroth attacks the person with Golgoroth's Gaze, the afflicted gaze-holder needs to move around the outside of the room in order to position Golgoroth so the rest of the team can shoot him in the chest, where he'll have a critical damage spot. However, Golgoroth will not only shoot at you with Ogre eye-lasers when you're a gaze-holder, but he'll send Axion Dart bolts to kill you, as well. Keep a primary weapon handy to shoot these down, as they'll come in big groups and do massive damage.
When the first player takes Golgoroth's Gaze, the four players who are damaging the boss should look up at the ceiling, where a bubble will have formed on the left side of the room. Shoot it and it'll drop down, forming a puddle on the ground. Standing in this puddle gives you a massive buff in damage against Golgoroth; without it, your hits will do next to nothing. This is why the gaze-holder needs to move so that Golgoroth is facing the damage party, because they're stuck in a specific place and can't move around to get better angles on the boss.
As the first Golgoroth's Gaze timer runs out, the second gaze-holder, on the right side of the room, shoots Golgoroth's back to take the gaze. At the same time, another bubble will appear on the ceiling, so the damage team needs to shoot it down and move to the right side of the room for a second puddle. This process repeats for a total of six bubbles, alternating sides of the room: When the left-side player takes Golgoroth's Gaze, a bubble appears on the left side, and when the right-side player takes it, a bubble appears on the right. The damage team needs to move from puddle to puddle as each new one appears to keep damaging the boss.

There are a couple of things the damage group needs to watch for, however. First, Taken and Hive enemies will continually spawn in the lower area of the room and rush the team, so Wells of Radiance are extremely helpful in keeping everyone alive. The gaze-holder players can throw grenades and Supers down to help with killing those enemies, especially when they don't currently have Golgoroth's Gaze, since they won't be doing much of anything else. Generally, though, if you're on the damage team, watch for enemies appearing both in front of and behind you. Don't be afraid to stop dealing damage to quickly kill a Hive Knight or some other threat to keep the rest of the team going.
With each new puddle, after a short time, one member of the damage team will gain a debuff called Unstable Light, which comes with a timer. Everyone absolutely needs to watch for this to appear in their messages in the bottom-left corner of their screen. Unstable Light means that you are about to explode, but that explosion won't kill you--it'll only kill your teammates. Thus, when you have Unstable Light, you want to get away from your squad quickly. The timer is pretty generous, however, and the explosion can also damage Golgoroth, so an effective strategy when you have Unstable Light is just to run up to the boss, wait for the explosion to go off, and then return to your teammates to continue the damage phase.
Once you've dropped six bubbles (or you've failed to pass Golgoroth's Gaze), the damage phase will end. Repeat the process over again, clearing enemies and restarting the gaze-passing, bubble-dropping damage portion. You have six rounds to defeat Golgoroth before he wipes you out, as indicated by the big monolith marked with Hive runes behind the boss. That's plenty, though, especially if you're good at getting all six bubbles. Keep dishing out damage and you'll defeat Golgoroth no problem.
Deepsight Resonance Rune 6

Before you leave Golgoroth's arena, drop down into the area where you fought the boss with your back to the door. On the left and right of you are small alcoves. Check the wall of the left alcove to find the rune inside.
The path out of Golgoroth's arena soon takes you to the last big jumping puzzle of the raid, a huge and dangerous chasm called the Transept.
Transept Jumping Puzzle
You'll know the Transept by the huge gap in the center. To traverse it, you'll need to move along ledges on the left and right sides of the chasm and cross some invisible platforms that only appear as you draw near to them (or if you scan them with your Ghost by pulling it out). This section is mostly for laughs, as all the ledges are littered with huge objects that will send you flying. Those pointed-looking protrusions are spear-like pistons that periodically pop out of the wall, so move near them with extreme caution.
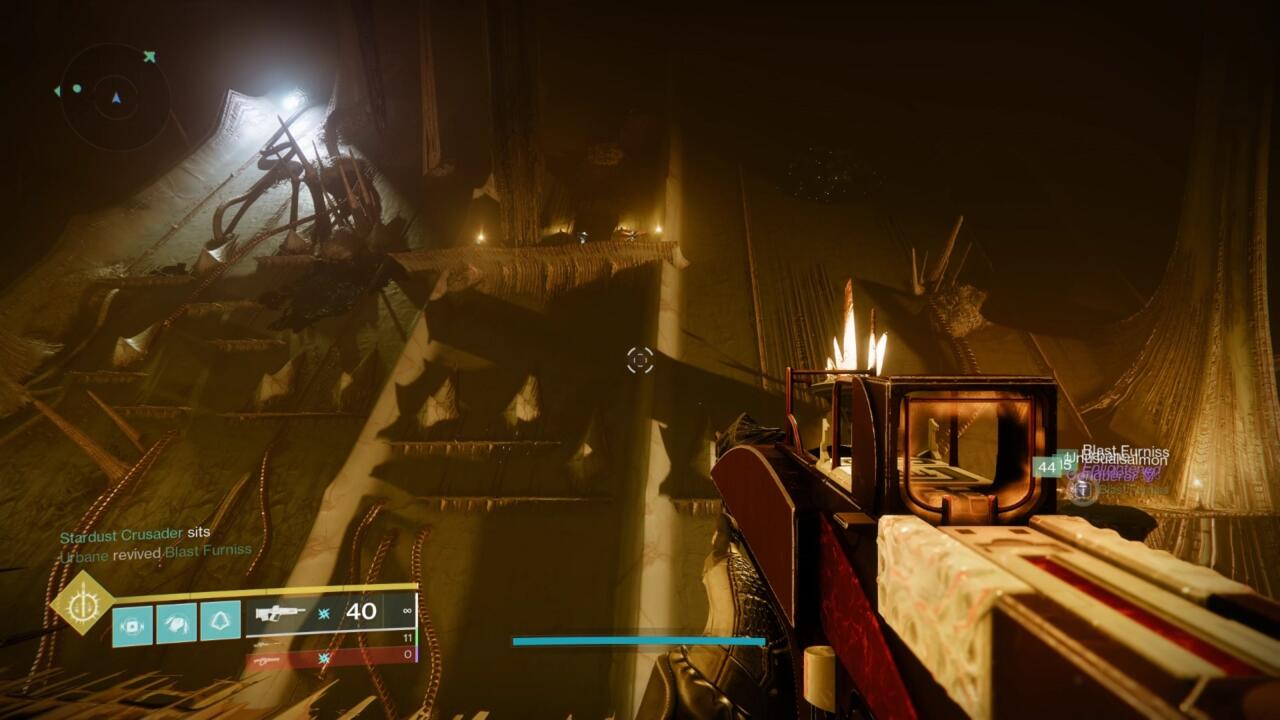
There's really not much to explain here, as the path is pretty straightforward; hug the wall until you can't anymore, then pull out your Ghost to illuminate hidden platforms that will carry you over to the far side of the chasm. From there, you can continue until you can cross over again, where you'll climb upward to the exit. First, though, you'll want to grab the final hidden chest of the raid, while also finding another Deepsight Resonance rune.
Hidden Chest 3
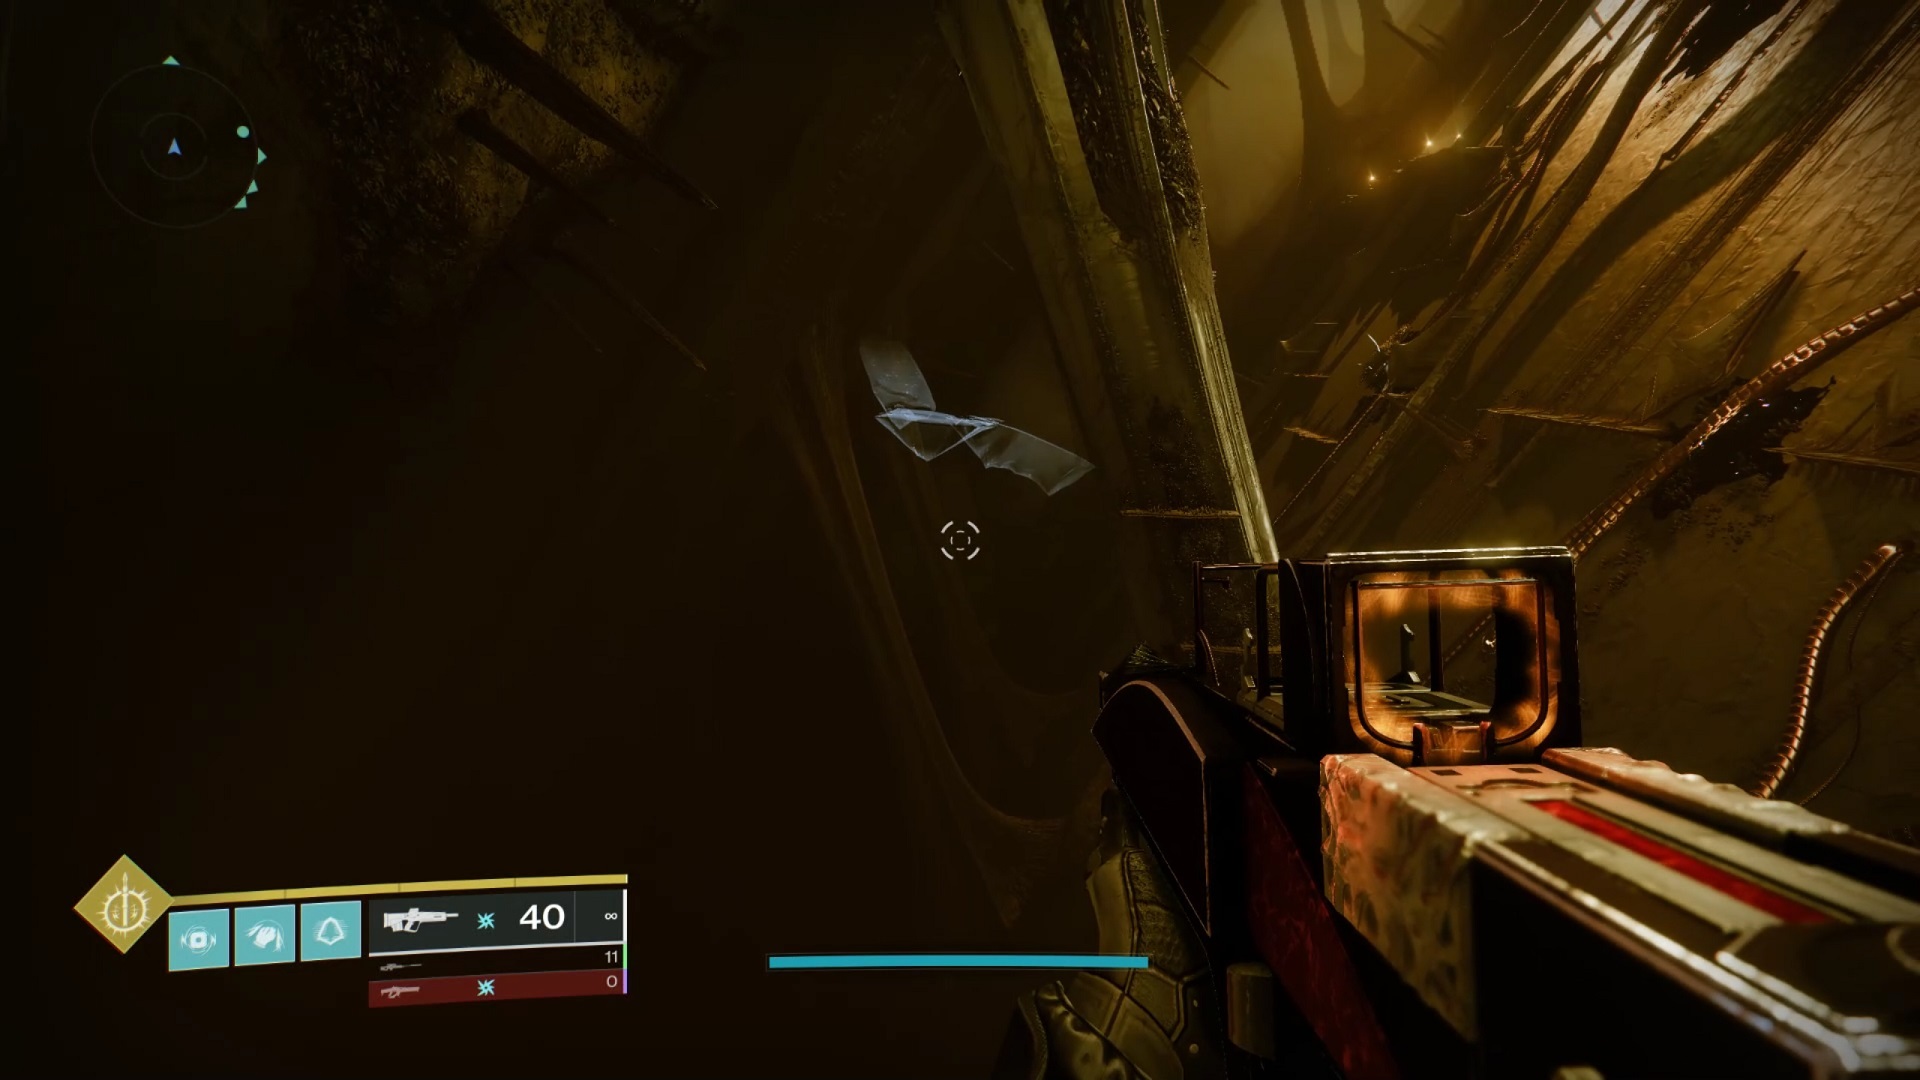
Make your way through the Transept until you find the spot where you need to cross over to the far side of the area. As you go across, look to your right. You should see a vertical column with some small ledges protruding from it. Use your Ghost to search for some more hidden platforms that can take you to the column, then jump across to the ledge and use it to climb up and around. Jump up to a higher ledge, then look at the wall of the room; you'll see an opening where you can jump in. The big room you find there hides the last hidden chest at its back.
Deepsight Resonance Rune 7

Right above where you find the third hidden chest is a Deepsight Resonance rune; you can't miss it once you've found this secret room.
Back in the Transept, kill the enemies and follow the ledges until you can't go any further, then look for more hidden platforms to take you back to the wall you started on. When you get there, look up for more ledges; they'll carry you back toward the start, but you'll climb to find the exit.
Deepsight Resonance Rune 8

As you're leaving the Transept, just above the door that takes you out. You'll see the rune above you on the ceiling.
You'll ascend through some more light platforming until you finally reach the final arena of the raid, which will house the final two boss fights. The first is a bit of an audition for the second, in fact.
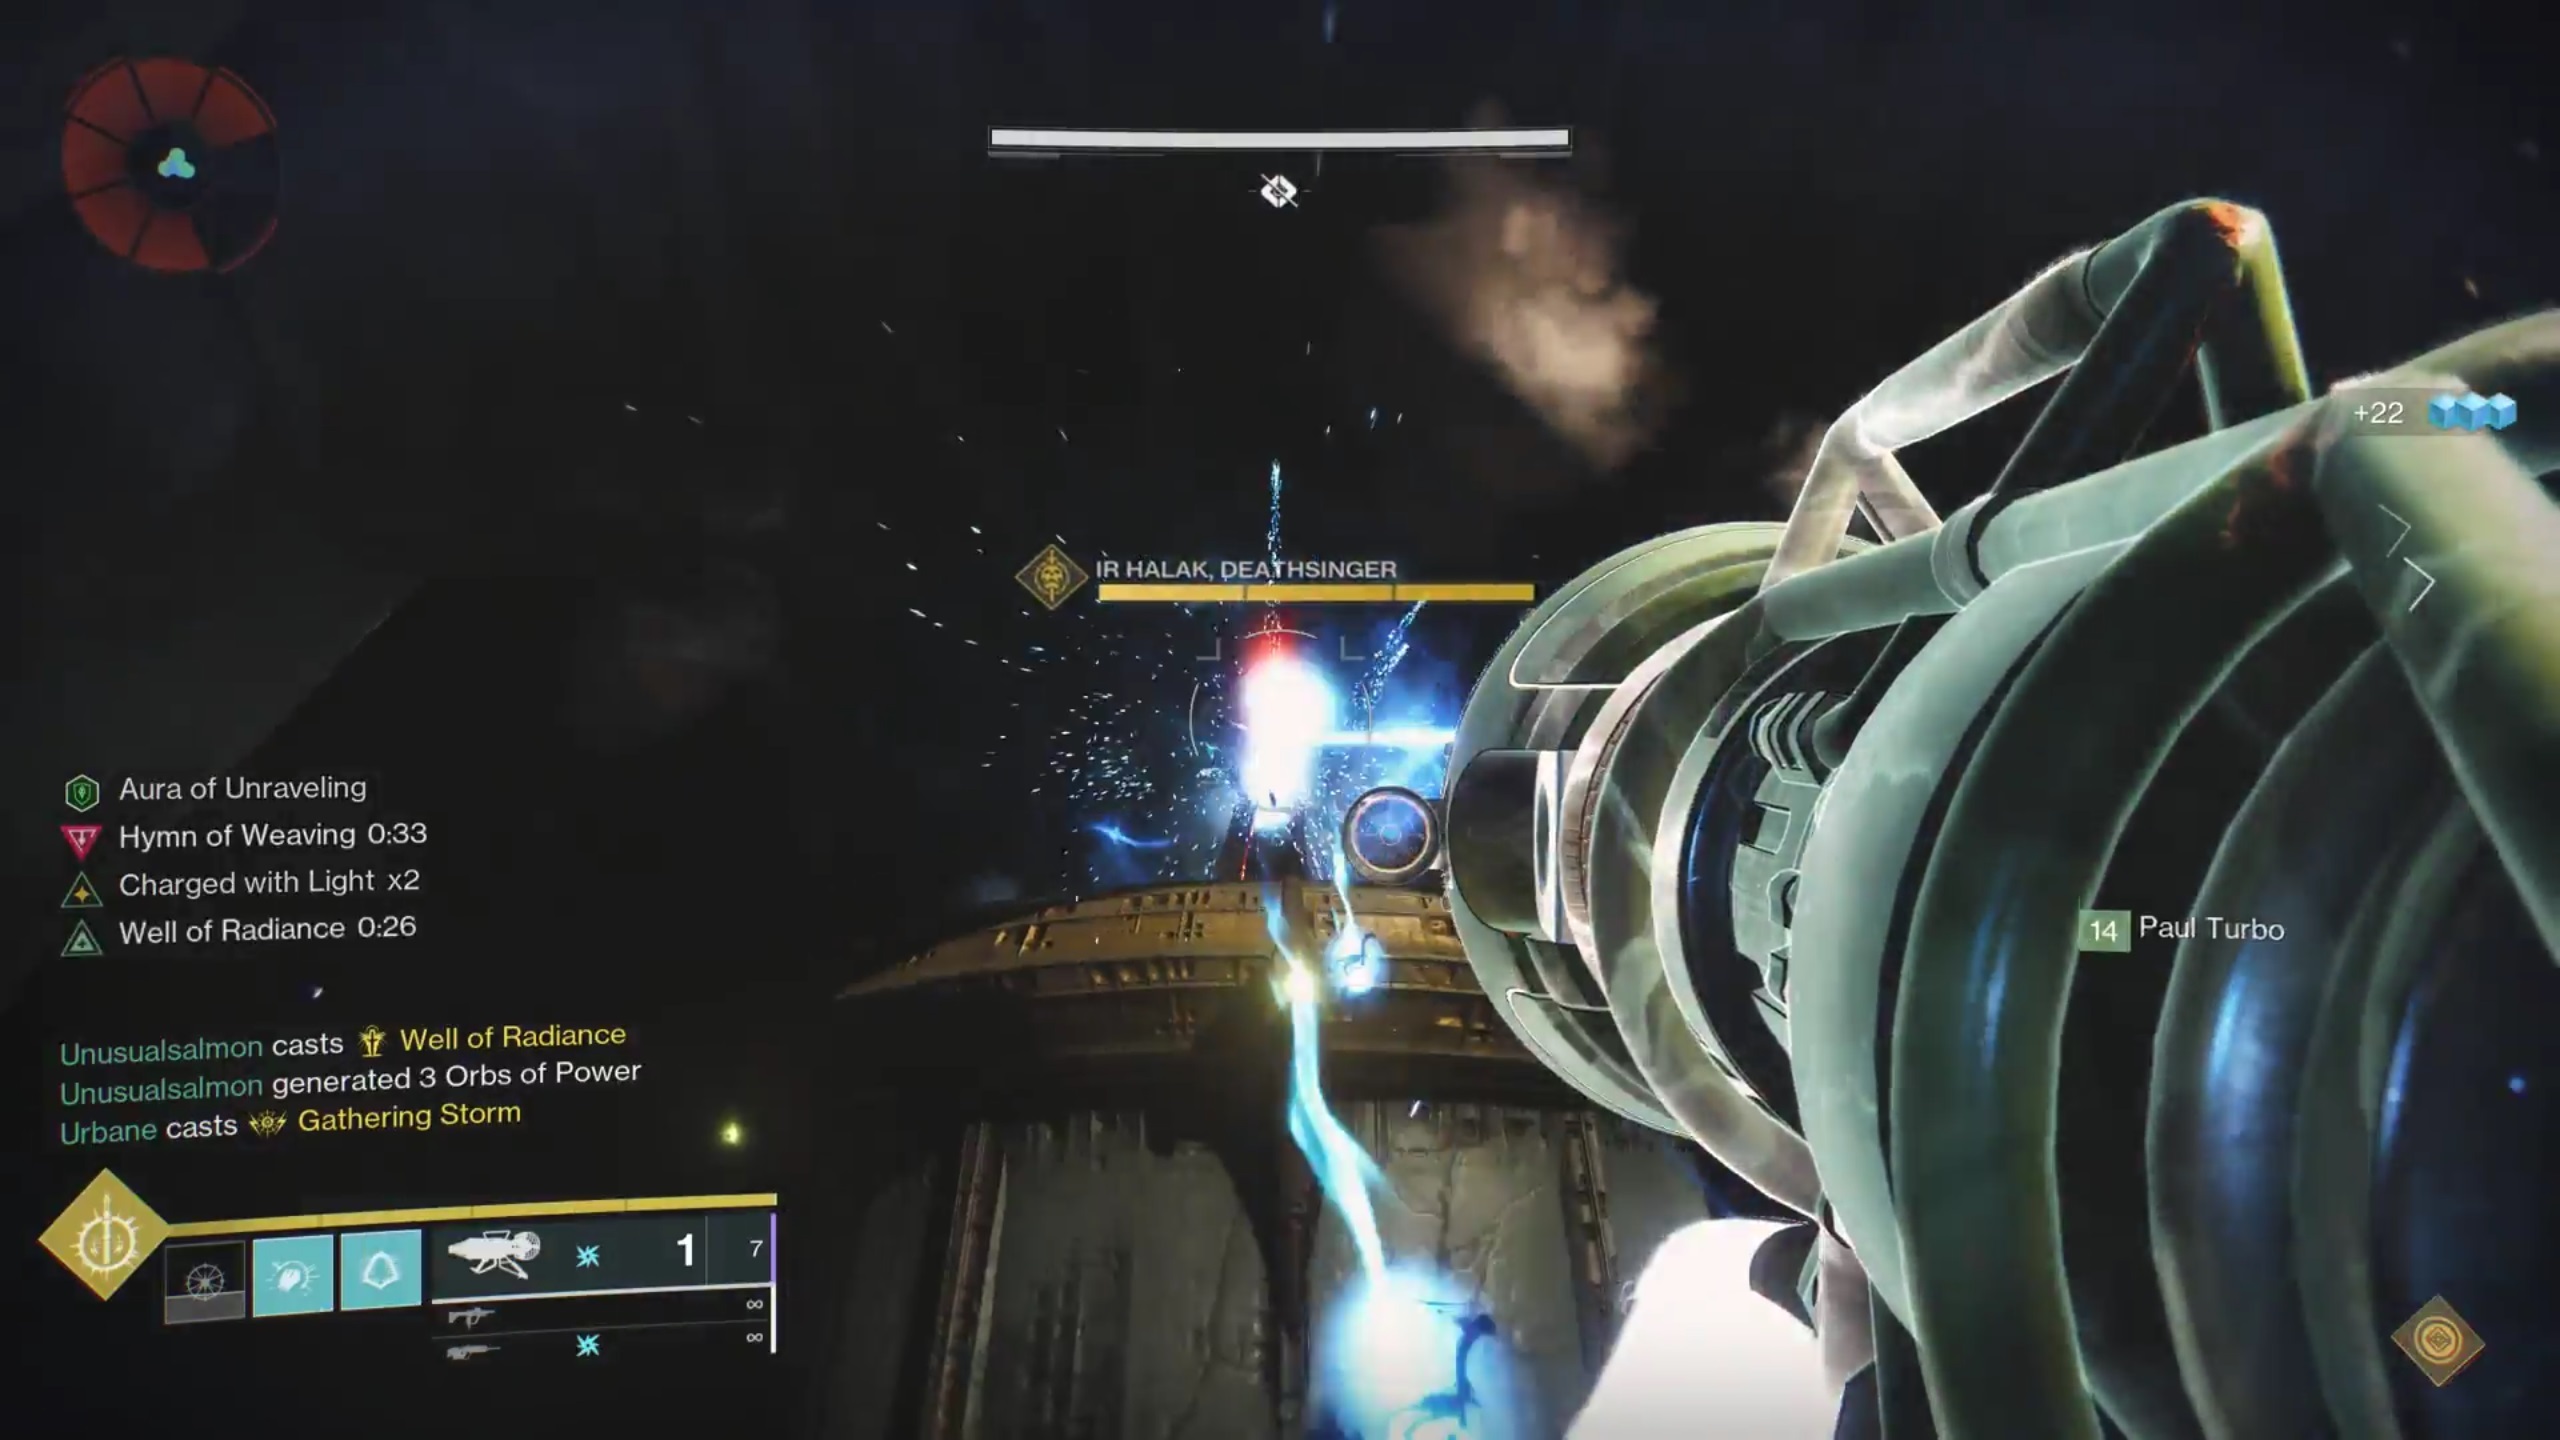
Boss Fight: Daughters Of Oryx

When you reach the arena for the final two fights, you'll see space out the sides of the area and two big columns in the center of the room. Flanking those columns are smaller platforms: two in the front of the room (closest to you) and two in the back of the room (farthest from you). Make note of these four columns, as they're essential to everything you're about to deal with.
You're actually killing two big boss enemies in this fight, which you'll see on the two large columns above you. These are the Daughters of Oryx, a pair of Deathsingers who will try their hardest to wipe you out by completing their Deathsong, the Hymn of Weaving, during the encounter. You'll see a timer when the encounter starts marking the time you have remaining until the Hymn is completed, counting down from two minutes; that's how long you have to enter the damage phase of the fight, or your team will be wiped out.
For this fight, bring enemy-clearing weapons and your boss damage gear--something like a burst-damage sniper rifle is a good secondary weapon. As for your heavy weapon, pairing rocket launchers, particularly at least one Gjallarhorn, with Divinity rips the Daughters of Oryx apart. As with the past boss encounters, a Well of Radiance or two is very handy, as are damage Supers that can let you put a big hurt on the Daughters to go with your rockets.
This encounter isn't too difficult once you know what the mechanics require of you; mostly, the tough part is in staying alive. When you first enter, you'll see that of the four platforms, one will be glowing green, with a Hive Knight kneeling on it. You'll start the encounter by killing that Knight.

The green platforms are pressure plates, as elsewhere in the raid, and they are the key to this whole fight, as well as the one following this one. Like the other encounters in the King's Fall raid, the green platform marks the path to a special buff that will allow you to do damage to the bosses. The trouble is that the buff is hidden in the Ascendant Plane, and you can't see where it is or how to get to it unless you're standing on one of the platforms.
When the encounter starts, one player at random will be "Torn Between Dimensions," kicking them into a third-person perspective and causing them to glow like a Taken enemy. This is the only player who can claim the buff, and they need to head to the green platform along with another player, who has to stand on that pressure plate for the time being. The player standing on the plate should then look above the three other platforms, searching for a round ball that looks like the other buff relics you've been picking up throughout the raid. Only the players on the platform can see the buff, so they'll have to call out the buff's location. It's recommended you name the platforms for this purpose: something like L1, L2, R1, and R2 for the left and right platforms. How you number them is up to you; we like the numbered L and R strategy, with L1/R1 being those closest to the rally flag.
Once the person on the first pressure plate identifies the location of the buff and calls it out, another player should jump on the corresponding plate and stay there. That will create a series of platforms the player who is Torn Between Dimensions can climb. These platforms always go from the first plate to the second one, and always pass through the middle. Once the Torn Between Dimensions player collects the buff from the platforms, they can jump back down; they should also notify the rest of the team once they've got the buff, with the players standing on the pressure plates also jumping down. If you stay on the plates too long after the buff has been claimed, you'll take damage.
During this plate-and-platform performance, the rest of the team's job is to kill enemies, which will spawn all over the place. Pay special attention to the snipers who appear past the pressure plates, out in the space to the sides of the arena. You'll also need to take care to avoid getting killed by one of the Daughters of Oryx. One of the two Deathsingers will sing the Hymn, while the other will unload on you with blasts of energy. The Torn Between Dimensions player has it particularly rough for this, since she tends to target that player, so try to move fast.
Gathering the buff gives you a "Piece of the Blightguard," which is what you'll need to survive the completed Hymn. Repeat the process to grab the buff twice more; each time, a player will randomly become Torn Between Dimensions. The third player to claim a Piece of the Blightguard will get the Brand Claimer buff, allowing you to steal an aura that will allow you to damage one of the two Deathsingers, just like in the Warpriest fight. When you have the Brand Claimer, go to the column with the Deathsinger who is shooting at you and use the Activate button to claim the aura.
On the side of each column, halfway up, is a small ledge. Your whole team should converge on this ledge and face toward the Deathsinger who is shooting at you. This is a great place for a Well of Radiance to protect you, but make sure everyone stays close on this ledge. The Brand of Weaving the last Torn Between Dimensions player took from the Deathsinger protects you from the Hymn, while also providing you with a buff to damage the bosses, so hit the Deathsinger who's shooting at you with everything you've got. Gjallarhorn with Divinity absolutely wrecks here, and mods to help you find additional rocket ammo and to reload rocket launchers more quickly are extremely useful. Feel free to fire off damage Supers here too, particularly if they're fast ones.
With a lot of rocket launchers and some good coordination, you should melt the first Deathsinger pretty easily--in two phases, if not just one. However, even if the Deathsinger dies and the damage phase ends, do not leave the ledge you're standing on. Wait for the other Deathsinger to finish the Hymn of Weaving; you'll know it from the big burst of white light that spreads across the screen. If you leave the aura before that happens, you'll be killed by the completed Hymn, so make sure your team sticks together until it's over.
Once you've completed a damage phase, you just need to repeat the process to kill the Deathsingers. Grab three relics, activate them on the Deathsinger who's shooting at you, and converge on the ledge to do damage. Provided you work together with your teammates to stay alive and clear enemies, it's possibly the easiest encounter in the entire raid.
Deepsight Resonance Rune 9
After the Deathsingers are dead, you can activate the final rune in the raid, if you need it. Look above the doorway you used to enter the arena to find it.
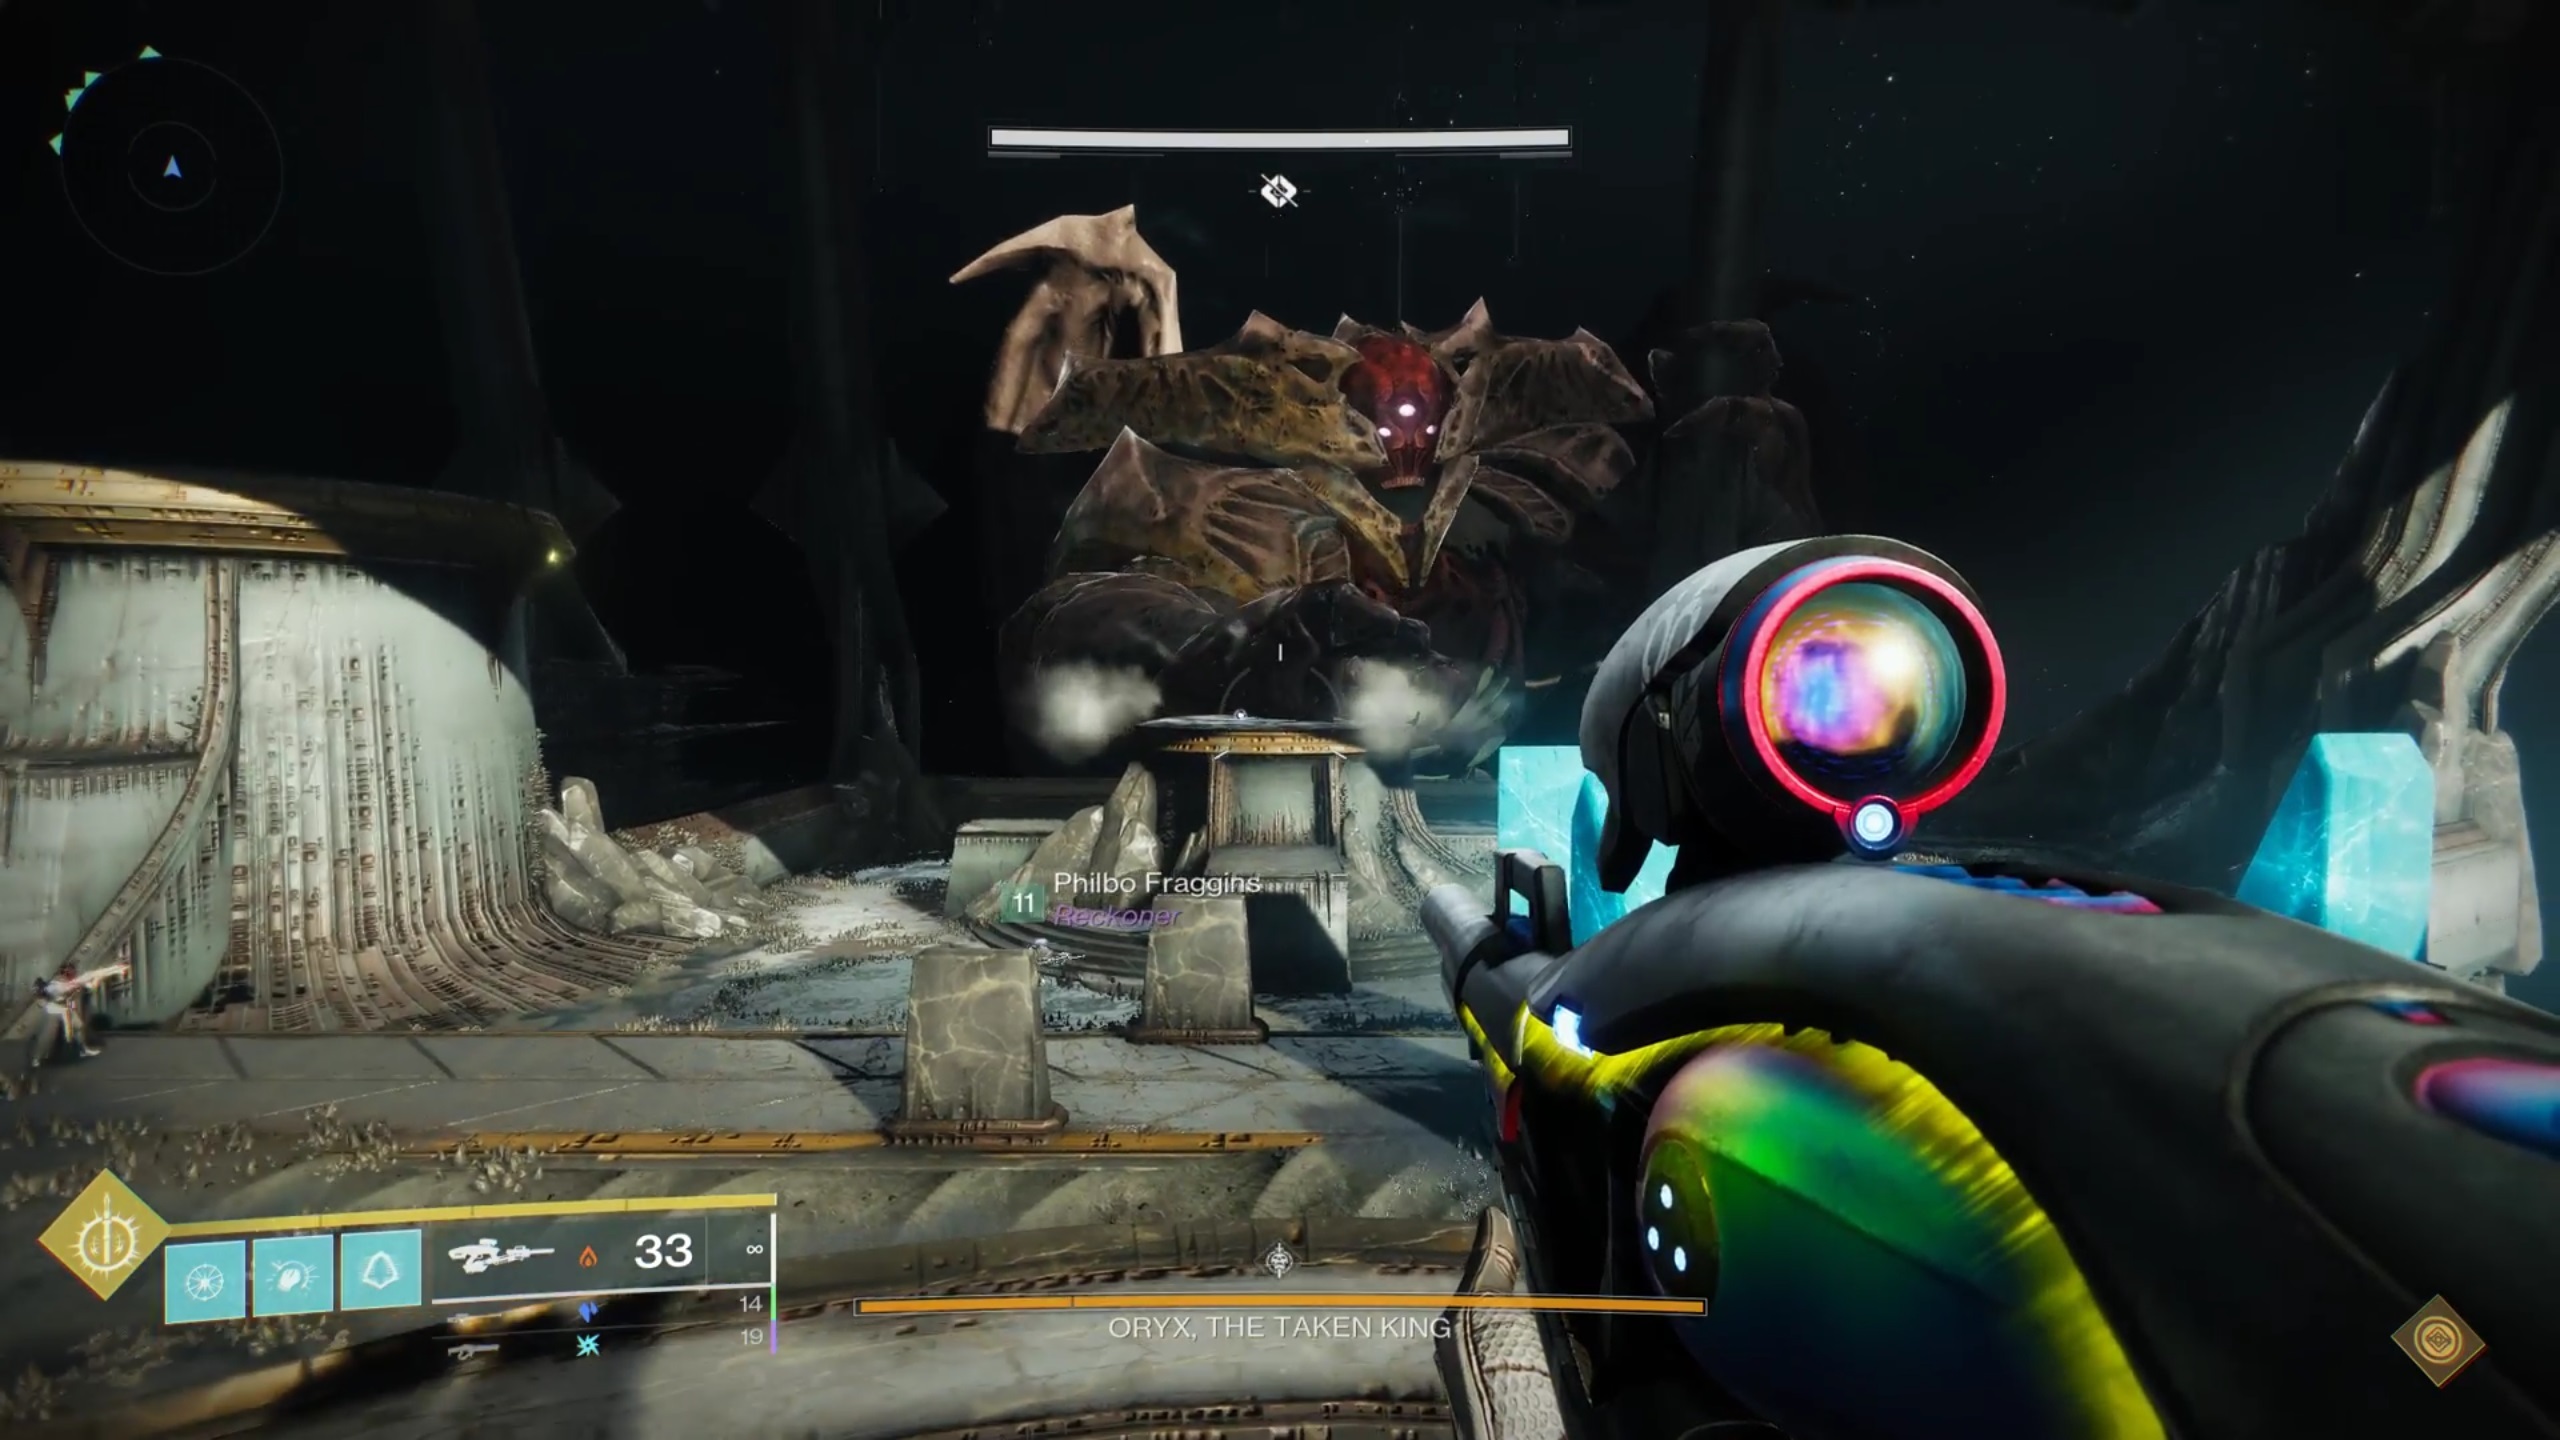
Boss Fight: Oryx

This is it: You're finally about to face the Taken King. You'll stay in this same arena for the Oryx fight, and the mechanics are remarkably similar to the last fight--with several additional wrinkles for you to keep track of. The encounter starts when you approach the glowing orb at the far end of the arena, but you're free to look around before doing that.
Your weapons here should be similar to what you've been using throughout the raid: namely, powerful linear fusion rifles for damage with as much ammo as you can carry. As a secondary weapon, burst sniper rifles are good, as you'll need them both for damage and for taking out tough enemies at a distance. For a primary weapon, an Exotic is recommended if you can make the room for it, since Exotic primaries tend to produce additional Heavy ammo, which will help you for the damage phases. Trinity Ghoul is particularly excellent in this encounter, especially if you have the Exotic catalyst completed. Anything that helps you clear enemies is good, though. For Supers, you'll still need those Wells of Radiance, and Ward of Dawn bubbles can be helpful, too, as long as they don't obstruct your firing line. Damage Supers are less helpful than enemy-clearing ones that can help you mop up tough baddies quickly; if you do choose a damage Super, pick ones like Golden Gun that are quick and have considerable range.
Much like the fight against the Daughters of Oryx, this fight hinges on gathering three pieces of the Blightguard buff, which allows you to damage the boss. Before starting the encounter, it's generally best to assign each of four players to one of the pressure plates, with the last two players floating to help clear enemies, one in the front of the room and one in the back. The floaters can take over the role of any player who becomes Torn Between Dimensions, while also helping to kill some particularly tough enemies that must die as quickly as possible.
When you start the encounter, Oryx will appear and the room will flood with enemies. Kill as many as you can until Taken Knights appear on each of the pressure plates; take them out quickly, but stay off the plates. Oryx will then move around the outside of the arena and stop at one of the plates, before reaching in and smashing his fist down on it. This will turn the platform green, just like in the last encounter, marking it as the first pressure plate. At the same time, one player will become Torn Between Dimensions. The player assigned to the plate Oryx hit should jump on it to activate it and search for the Blightguard buff, just like in the last fight, then call it out. The player assigned to it jumps onto their plate, creating the path for the Torn player to cross. If your plate is not one of the active ones, be sure to stay off it, or everyone on a plate will take damage.
While the Torn Between Dimensions player is climbing to get the buff, a Taken Ogre will appear from a pit of goo next to the pressure plate that Oryx hit, as well as the plate the buff is hovering over. Kill these Ogres as quickly as possible, but stay away from them. Each player assigned to a pressure plate is responsible for their Ogre, but don't be afraid to help out on other people's Ogres--theyr'e tough to bring down. Kill them as fast as possible, preferably before they even manage to climb out of their spawning pit. When the Taken Ogre dies, a Taken Blight will appear in their place. Do not walk into the Blight! The Blight is "activated" when you step inside it, and that's a mechanic you'll need later.
Meanwhile, when your Ogre is killed, a Taken Knight will spawn across from you near the opposite plate on your side of the arena. So if your plate is the back-left, or L2 plate, and you kill your Ogre, a Knight will spawn near where Oryx first appeared, in the corner of the arena near the back-right, or R2, plate. Similarly, the front plates will have Light-Eater Knights appear in the corners closest to the entryway, but opposite from their plates. Kill these Knights as fast as you can! Your sniper rifles are great for this. Each Knight will bee-line for the corresponding Taken Blight that dropped from the Ogres that spawned them, and if the Knights reach the Blights, they can foil your damage phase and wipe your team. Kill the Ogre as soon as it appear, then look across the arena to the opposite corner and kill the Knight as soon as it appears.
While everyone is taking out Ogres and Knights, the process of players becoming Torn Between Dimensions will continue, just like it did with the Deathsinger fight. The third player to pick up the buff above the pressure plates will gain the Brand Claimer buff, just as before. At the same time, a Hive Knight called the Vessel of Oryx with a big aura around it will appear where Oryx did at the start of the encounter and run into the center of the room. One floating player in the center of the room should engage the Knight to try to keep it busy until the Torn player can come down to it and steal its buff, just like you did during the Annihilator Totem fight with other players.
Meanwhile, all players assigned to pressure plates should now have Taken Blights next to their plates, dropped by the Ogres they've killed. While the buffed player is dealing with the Knight, everyone assigned to a plate (or one of the floating players covering for one of the plate players) should approach their Taken Blight but not step into it, while watching for a message in the corner of the screen that says "Oryx calls upon the Darkness." This is an indication that Oryx is preparing to perform his team-wipe mechanic. The only way to stop him is to detonate the Taken Blights dropped by the Ogres.

When "Oryx calls upon the Darkness" appears in the corner, all four players should step into their Taken Blights and stay there until they see a message with their name that says "[Player] has detonated a Corrupted Light." As soon as that happens, everyone needs to run to the player with the aura taken from the Knight, who should be standing in the middle of the room.
What's happening here is that detonating the Corrupted Light Blights by standing in them staggers Oryx, stopping him from performing his wipe mechanic, while the aura both protects players and buffs them so they can damage the boss. Oryx will remain at the pressure plate he initially hit with his hand earlier in the fight, but with the Blights detonated, his chest will open up, revealing a weak spot. While standing in the aura, unload on that spot; this is a good time to pop a Well of Radiance to protect your team from damage. Hit Oryx with as much damage here as you can, while occasionally picking off any smaller enemies giving you trouble.
After a bit, Oryx's chest will close, ending the damage phase. At this point, Oryx moves back to where started at the far end of the arena, where he'll one of two things: summon more bombs, or force you to fight a Shade of Oryx. In either case, everyone should move roughly back to their assigned locations, giving plenty of space to everyone else. Do not run up near Oryx, because if he summons the Shade, you can be killed instantly.
If Oryx summons the Shade, he'll create a big blue bubble in the back of the arena near him. You can't touch this bubble or you'll die, but Oryx will slowly teleport players into the bubble one at a time; inside, the Shade of Oryx waits. You're operating on a timer here and need to kill this Shade before the time runs out, sometime not long after all six players are teleported into the bubble. If you've got damage or enemy-clearing Supers you didn't know what to do with previously, this is where they shine. The Shade of Oryx can be tough to deal with because it's very mobile and likes to teleport, so wait for it to stalk toward you with its sword before going ham with a Super. Also note that Taken enemies can wander into the bubble from outside and attack you, so rifts and other means of healing your team are very helpful here. When you've destroyed the Shade, you'll be released from the bubble, and the entire fight begins again for another round.

If Oryx summons bombs, no big bubble will appear. Instead, Oryx will start materializing Taken Blight bombs on top of each of the players. The only way to escape these bombs is to run. They show up right on top of you, but you'll see ahead of yourself a slight shimmer that looks like the edge of a Blight. That's the bomb's detonation radius, marking the fact that you can escape these if you move quickly and get out of them. Oryx doesn't stop at one bomb, though, and he'll continually drop them on you for several seconds, so you'll need to be moving constantly.
The best way to deal with this is to send everyone to their assigned locations at their plates and have them run in a circle around the base of the plate's platform. The platform is wide enough that you'll always get yourself out of the blast radius before a bomb goes off, while keeping yourself more or less contained. This is because if you start running around in the open, you run the risk of passing too close to other players and either dying from their bombs or leaving a bomb behind that could kill them. Meanwhile, the two floaters should divide up the rest of the arena and stick to the center strip as much as possible. Often, one floater will head up to one of the columns where the Deathsingers waited, while the other will use the whole length of the arena to avoid bombs. Whatever your strategy, just make sure you keep away from one another to avoid unintended consequences.
When the bombs stop coming, Oryx will start another round of the fight. Repeat the whole process with the Blightguard buff, killing the Ogres and Knights, and detonating the Blight bombs, in order to get another damage phase. When Oryx's health is low enough, you'll reach his Final Stand mechanic--you can tell where it starts by the demarcation on his health bar near its end.
For his final stand, immediately following your last damage phase, Oryx moves back to where he started the fight at the far end of the arena and begins his wipe mechanic, Doxology, once again. Move everyone close enough to Oryx to lay into him and keep firing away with your best weapons. During this, a pair of Ogres will again appear, one beside the L2 plate, and one beside the R2 plate. Ahead of time, assign two players to deal with these Ogres; they should not be the person with the Blightguard aura you need to damage Oryx. When the Ogres appear, kill them as quickly as possible, just like during a normal round of the fight. Again, they'll drop two Blight bombs, so the two Ogre-killer players should stand beside the bombs, ready to detonate them as normal.

As before, you'll see the message "Oryx calls on the Darkness." This is the cue to detonate the bombs. Both players step into their bombs at the same time, and then leave when they see their name appear with the "[Player] has detonated a Concentrated Light" message. At that point, everyone returns to the aura and hits Oryx with everything they've got in order to kill him.
Alternatively, you can extend the final stand phase a bit by staggering your detonation of the Blight bombs. To do that, assign one Ogre-killer to go first and one to go second. When you see the first "Oryx calls upon the Darkness" message, only the first Ogre-killer steps into their Blight. The second player at a bomb waits on standby. The first player detonates their bomb and then returns to the aura to do damage to Oryx. Since both bombs didn't go off, after a short while, Oryx will again start his wipe mechanic with a new "Oryx calls upon the Darkness" message. When that happens, the second player detonates their bomb, staggering the boss again. This way, you can extend your final stand damage phase somewhat, which can be helpful if it feels like you're not getting enough damage in time to win the fight. It takes more coordination, but should give you a slight edge if you're struggling.
Another useful strategy is to take advantage of an extra damage phase if you're low on ammo. If it seems like your team is going to hit the Final Stand phase but won't have any Heavy ammo when they get there, it's okay to pull back and swap to secondaries, and leave Oryx with a little health before the start of another round. You have three total damage phases to get Oryx to final stand, and if you're consistently getting him right to the line with two damage phases, it can be beneficial to force the third as an opportunity to kill more enemies and find more ammo. Exotic primaries and Aeon Exotics with Sect of Insight mod equipped can also help generate more Heavy ammo.
Smash through Oryx's Final Stand and the Taken King will finally die, his ruined body plummeting toward Saturn. If you found the three Hive runes that corresponded with the code from the beginning of the raid, you should now receive an additional chest that guarantees a raid weapon with Deepsight Resonance.
There's also a random chance that you'll get the King's Fall Exotic scout rifle, Touch of Malice, for defeating Oryx. This is an excellent returning weapon from Destiny 1 that fits the same role as something like Outbreak Perfected--it's a great primary weapon that can do the job of damaging bosses, should you need it.
If you found the right three Hive runes throughout the raid, you'll receive an extra treasure chest after killing Oryx that guarantees a Deepsight Resonance weapon. You can earn one of these weapons per week, per account, so if you repeat the raid on additional characters, you won't get another guaranteed Deepsight gun from this chest.
You can also get another guaranteed Deepsight Resonance weapon per week when you complete the raid. By interacting with the final chest in the raid, you can access a menu that allows you to purchase new random rolls on any weapons or pieces of armor you've already received throughout the raid. The first gun you purchase each week is guaranteed to be a Deepsight gun, and you need five of each to unlock a raid weapon's pattern, so it's a good idea to purchase them. You'll need to gather Spoils of Conquest to make those purchases. That's a special currency you can earn in raids and dungeons, and by finding hidden chests during your raid runs.
Got a news tip or want to contact us directly? Email news@gamespot.com
Join the conversation