Destiny 2: Vow Of The Disciple Raid Guide
The Witch Queen's new raid shakes up Destiny 2's lore and is filled with secrets--here's how to complete every encounter and find everything hidden in the Vow of the Disciple.
The Vow of the Disciple raid brings a whole lot of new challenges and secrets to Destiny 2: The Witch Queen. The raid isn't the game's biggest, but it is substantial, putting you through your paces in puzzle-solving, team communication, and boss-fighting. There's a lot to uncover within this raid, though, and it's very easy to miss some of its best components--like the free Deepsight Resonance guns you can earn with every run, provided you know where to look for them.
We've scoured every inch of Vow of the Disciple and the Sunken Pyramid, uncovering all its secrets, unlocking all its hidden chests, and digging through all its lore. The raid does a lot to recontextualize the story of Destiny 2, changing huge pieces about what we know about the Destiny universe, while also offering some extremely tough fights for high-level players. Here's everything you need to know about how to deal with Vow of the Disciple, from completing its encounters to unlocking its secrets.
The door to Disciple's Bog
Your first step is gaining entry to the section of the throne world that contains the Sunken Pyramid, the location where the raid will take place. You'll need to fight your way through the door here, primarily by killing the Aspect of Savathun at the front gate. It can be a tough battle, but don't worry--dying isn't penalized throughout this whole section, so you won't be forced to restart if you should fall in battle.
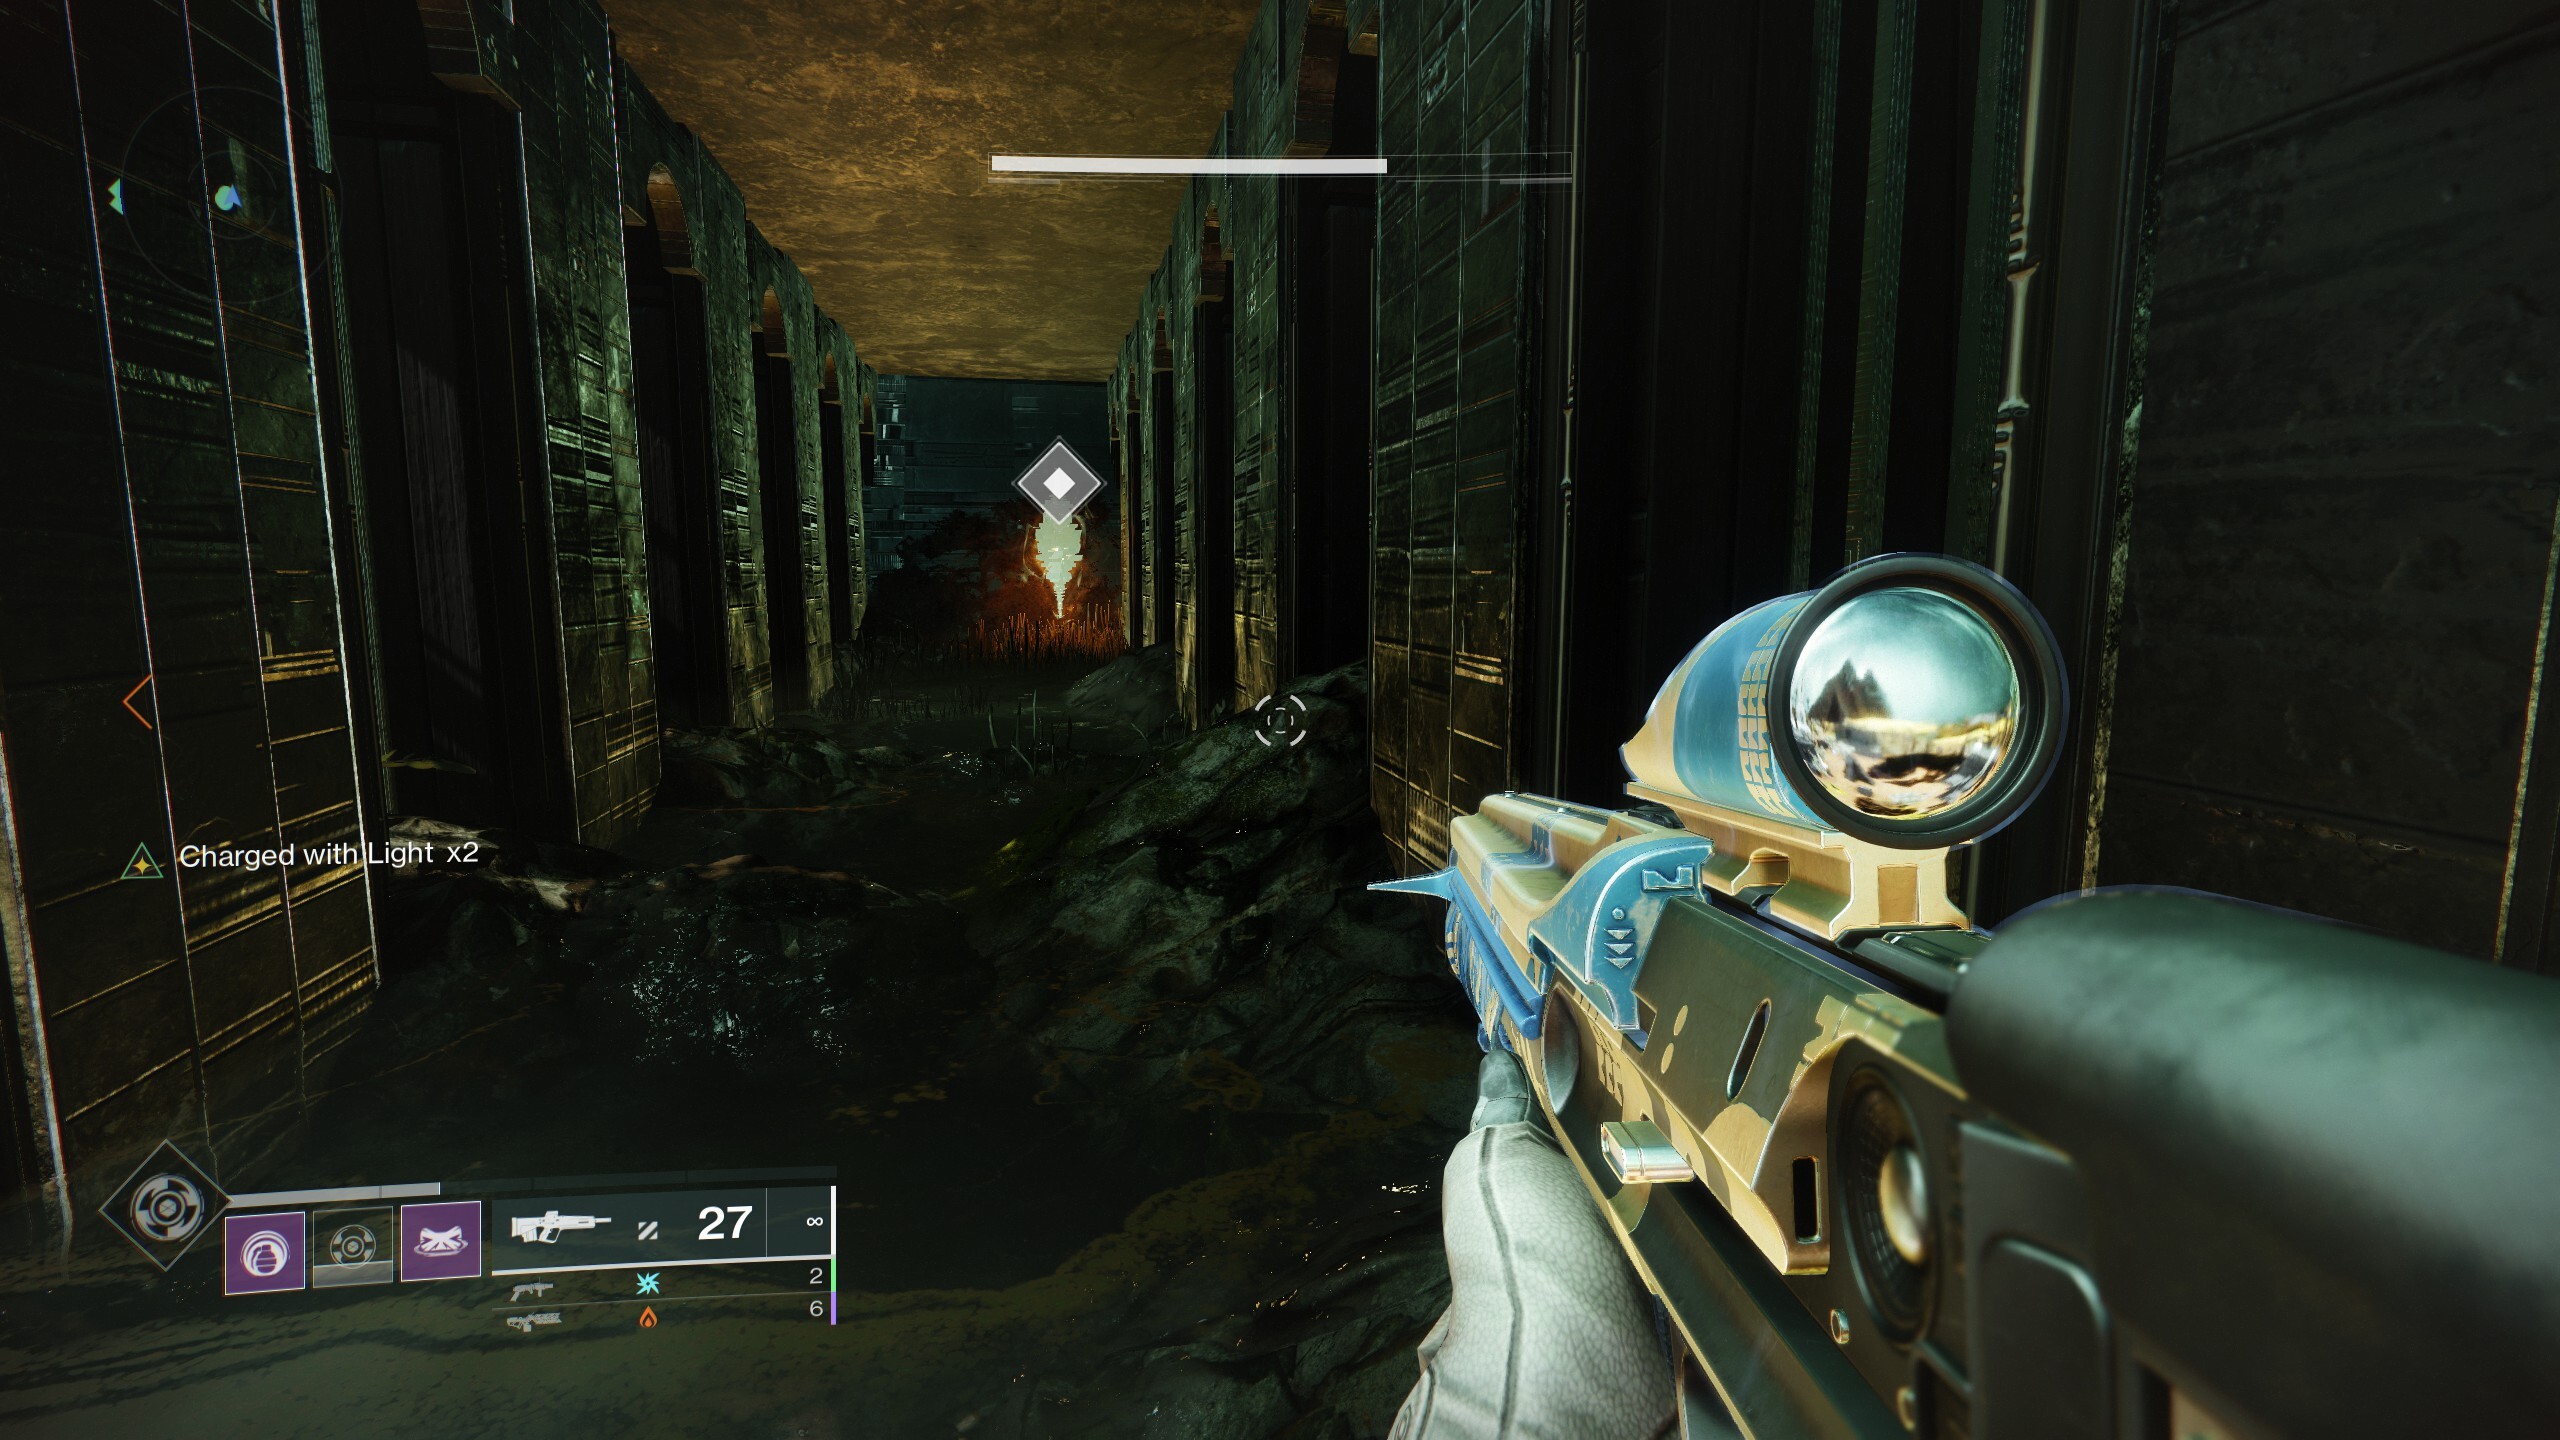
Clear out the Hive at the door and head into the Bog of the Disciple. Before long, you'll come across a cylindrical Pyramid-tech object on some kind of floating sled. You'll need to escort the sled to the Sunken Pyramid in order to get inside, much like the public events that take place in the rest of Savathun's Throne World. There's a new wrinkle here, though--venture too far away from the sled (or payload for you Overwatch players) and you'll start to accrue a debuff called Pervading Darkness. If your Pervading Darkness count reaches 10, you'll die, but even as it accumulates, it'll darken your screen and make it difficult to see. Standing close to the sled clears the debuff slowly, so stick near it for most of the fight.
The sled moves fast, so you can ride it to get where you're going or use your sparrow to keep up with it. Periodically, the sled will stop, forcing you to fight a bunch of Scorn enemies to get it going again. When this happens, you'll want to keep an eye out for Abominations called Knowledge Bearers. Kill these, and a bunch of black crystals that glow orange will appear around the battlefield. Picking these items up give you a buff called Knowledge, and you can hold up to three of them at a time. When you have the Knowledge buff, your Pervading Darkness debuff is eliminated.
Your goal is to gather up the Knowledge crystals and then return to the sled, where your Knowledge buff will power it up and allow you to keep moving forward. As mentioned, you can stack up to three Knowledge crystals at a time, so you can divide your team up in half--three runners gathering crystals and three people staying back with the sled to clear enemies. Any approach will work, however, and again, dying doesn't matter. Just pick up Knowledge and return it to the sled until you've cleared all the crystals from the battlefield. The sled will start back up again, and you can continue riding it. Keep repeating this process as you travel through the bog.
Note that you're going to have to fight along the way, even between stops--this is a bit of a combat-centric theme park ride. It's not an especially tough battle, though, especially if your team works together to prioritize eliminating Knowledge Keepers and snipers.
Hidden chest No. 1
The first hidden chest requires some work to access, requiring you to shoot three Darkness Spikes similar to those you've seen in the Wellspring activity or in Public Events in the Throne World. These are hidden along the path toward the Sunken Pyramid: the first is to immediate the left of the sled at your second stop, nestled against a rock wall, beside a fallen tree; the second is behind the building all the way at the end of the path flanked with columns at the third stop, around the corner to the left (or to the far right of the area where the Abominations spawn, but around the corner behind you); and the third is under the wall at the fourth stop, which you can access through a hole on the side opposite where the sled stops.


On the sled's fifth stop, after it carries you over the wall that blocks the path forward, it'll stop beside some more buildings in something of a courtyard in the middle of a Pyramid-tech city. Just ahead of where the sled stops, you'll see a building shaped like a trapezoidal prism on the right side of the path. There's a door on the side that runs parallel to the path ahead; enter it and go around the back of the sarcophagus-looking object in the middle of the room to find the chest waiting for you. This is pretty much your last stop before entering the pyramid, but if you missed the chest, you should be able to run back and open it.
Note that if this is your first time through, you won't get much out of this chest or its later counterpart, other than raid-specific mods. Hidden chests only drop weapons and armor you've already earned from the raid's encounters, so they're good for new rolls of things you already have. Opening both hidden chests in the raid also unlocks the "Secrets of the Sunken Pyramid" Triumph.
The Sunken Pyramid
Once you're inside the Pyramid, you'll need to make your way inside. There's a lot to see along the way, so take your time. The first room has a specific piece of information you'll want to grab before you drop down the huge hole in the back-right corner.
Resonance code and secret room No. 1 - Pyramid glyph

As you enter the Pyramid, you should see a column appear sporting three pictographic symbols, called glyphs. Make note of what they are--these glyphs are actually a code you can enter in secret rooms throughout the raid, and if you do so, the first weapon you receive from defeating the final boss will be Resonant, making it slightly easier to get raid weapon patterns for crafting at the Relic.

After you land from your long drop, spin around and face behind you, the direction with a blank black wall. Look up to find a diamond-shaped black object. Shoot it and you'll reveal a door hiding a hidden room. Head to the back and you should see a small frame on the wall, the same shape as the glyphs from before. Shoot it and a glyph will appear; if it matches one of the three symbols from the entrance, leave it. If it doesn't match, shoot it again to turn it off. You'll repeat this process ahead, with the goal of finding all these secret rooms and activating the glyphs from the code at the entrance.
Glyph gallery, lore code, and Imperious Sun Ghost Shell

Turn around and head down the hall to enter the Sunken Pyramid for real. Keep going until you hit a big room that looks like an art gallery sporting more of the glyphs you saw at the entrance and in the secret room. Take some time in this room; if you approach any of the glyphs, you'll see its name presented on the left side of your screen. These glyphs are key to all the puzzles and encounters you'll face in the raid, so getting a sense of their names and callouts now is a good idea. You're going to need to communicate to your teammates which glyphs you see in certain locations during the raid, so having everyone agree on their names and what they represent now will save you time later. Bungie has helpfully given you names for all of them (as opposed to forcing players to come up with their own, as in The Last Wish), so take the assistance to speed yourself along.

As you enter this room, you can also turn right to the wall into which the entry door is set, where you'll see some windows. All of those windows are barred, save one. Jump through it, and you'll enter a smaller, hidden room with three rows of glyphs on the wall beneath the windows. These glyphs give you a clue about how to unlock the Shattered Suns lore book for the raid; earning all of it gets you the Imperious Sun Ghost shell. The top row of the code is unimportant, but the bottom two rows communicate how to enter the code, and what the code is.

It turns out that the middle row is always the same, depicting the Enter glyph twice, then the Commune glyph, and finally the Kill glyph. This row tells you the code: Enter means someone needs to stand close to the glyph, Commune means "activate," and Kill means "shoot." Beneath each of those symbols are another row of glyphs, and matching each glyph in the bottom row with the one above it tells you how to enter it into the code in the main room. So if you have a bottom row that shows Love, Guardian, Witness, Darkness, you would go into the main room and set one player to stand beside the Love glyph, a second beside the Guardian glyph, a third to use the activate button on the Witness glyph, and a fourth to shoot the Darkness glyph. Do this simultaneously as a team to open an entry in the Shattered Suns book.
You can also enter the code alone in the Preservation mission that takes you back to the Pyramid. When solo, you can punch the glyphs marked with the "Enter" symbol, and one you've activated all four, return to the first glyph in the sequence and punch it again. If you mess up, get close to the code mural through the window for the option to reset the room. Note also that the code sequence will always be the same: It will always be "Enter, Enter, Commune, Kill." Only the glyphs that you need to interact with will change. You'll need to enter codes on five separate visits to the Pyramid to unlock the full lore book (the other five entries are found in the Preservation mission) and earn the Imperious Sun Ghost Shell.
Secret room No. 2 - Give glyph
Just before you hit the large arena room called Acquisitions, you'll find a big room with what look like Scorn and Hive creatures in ice. Before going on, check the back corner of the room for another secret door. You'll find the switch to open it over its frame. Check the glyph in the back of the room to see if it matches your code before moving on.
With all that handled, you're free to continue on to your first major encounter in the Acquisitions area.
Acquisitions
Your first real encounter of the raid takes place in the huge room not long after the glyph room, which features a massive rib bone in the center of it and several doors marked with glyphs scattered around the outsides. Get to know the layout of the area before you start the encounter, particularly where each door is. There are nine in total, and a few, like the one for Kill (which is down a small set of stairs to the right of the center) and Enter (immediately beneath the entry door when you drop in), can be tough to spot.

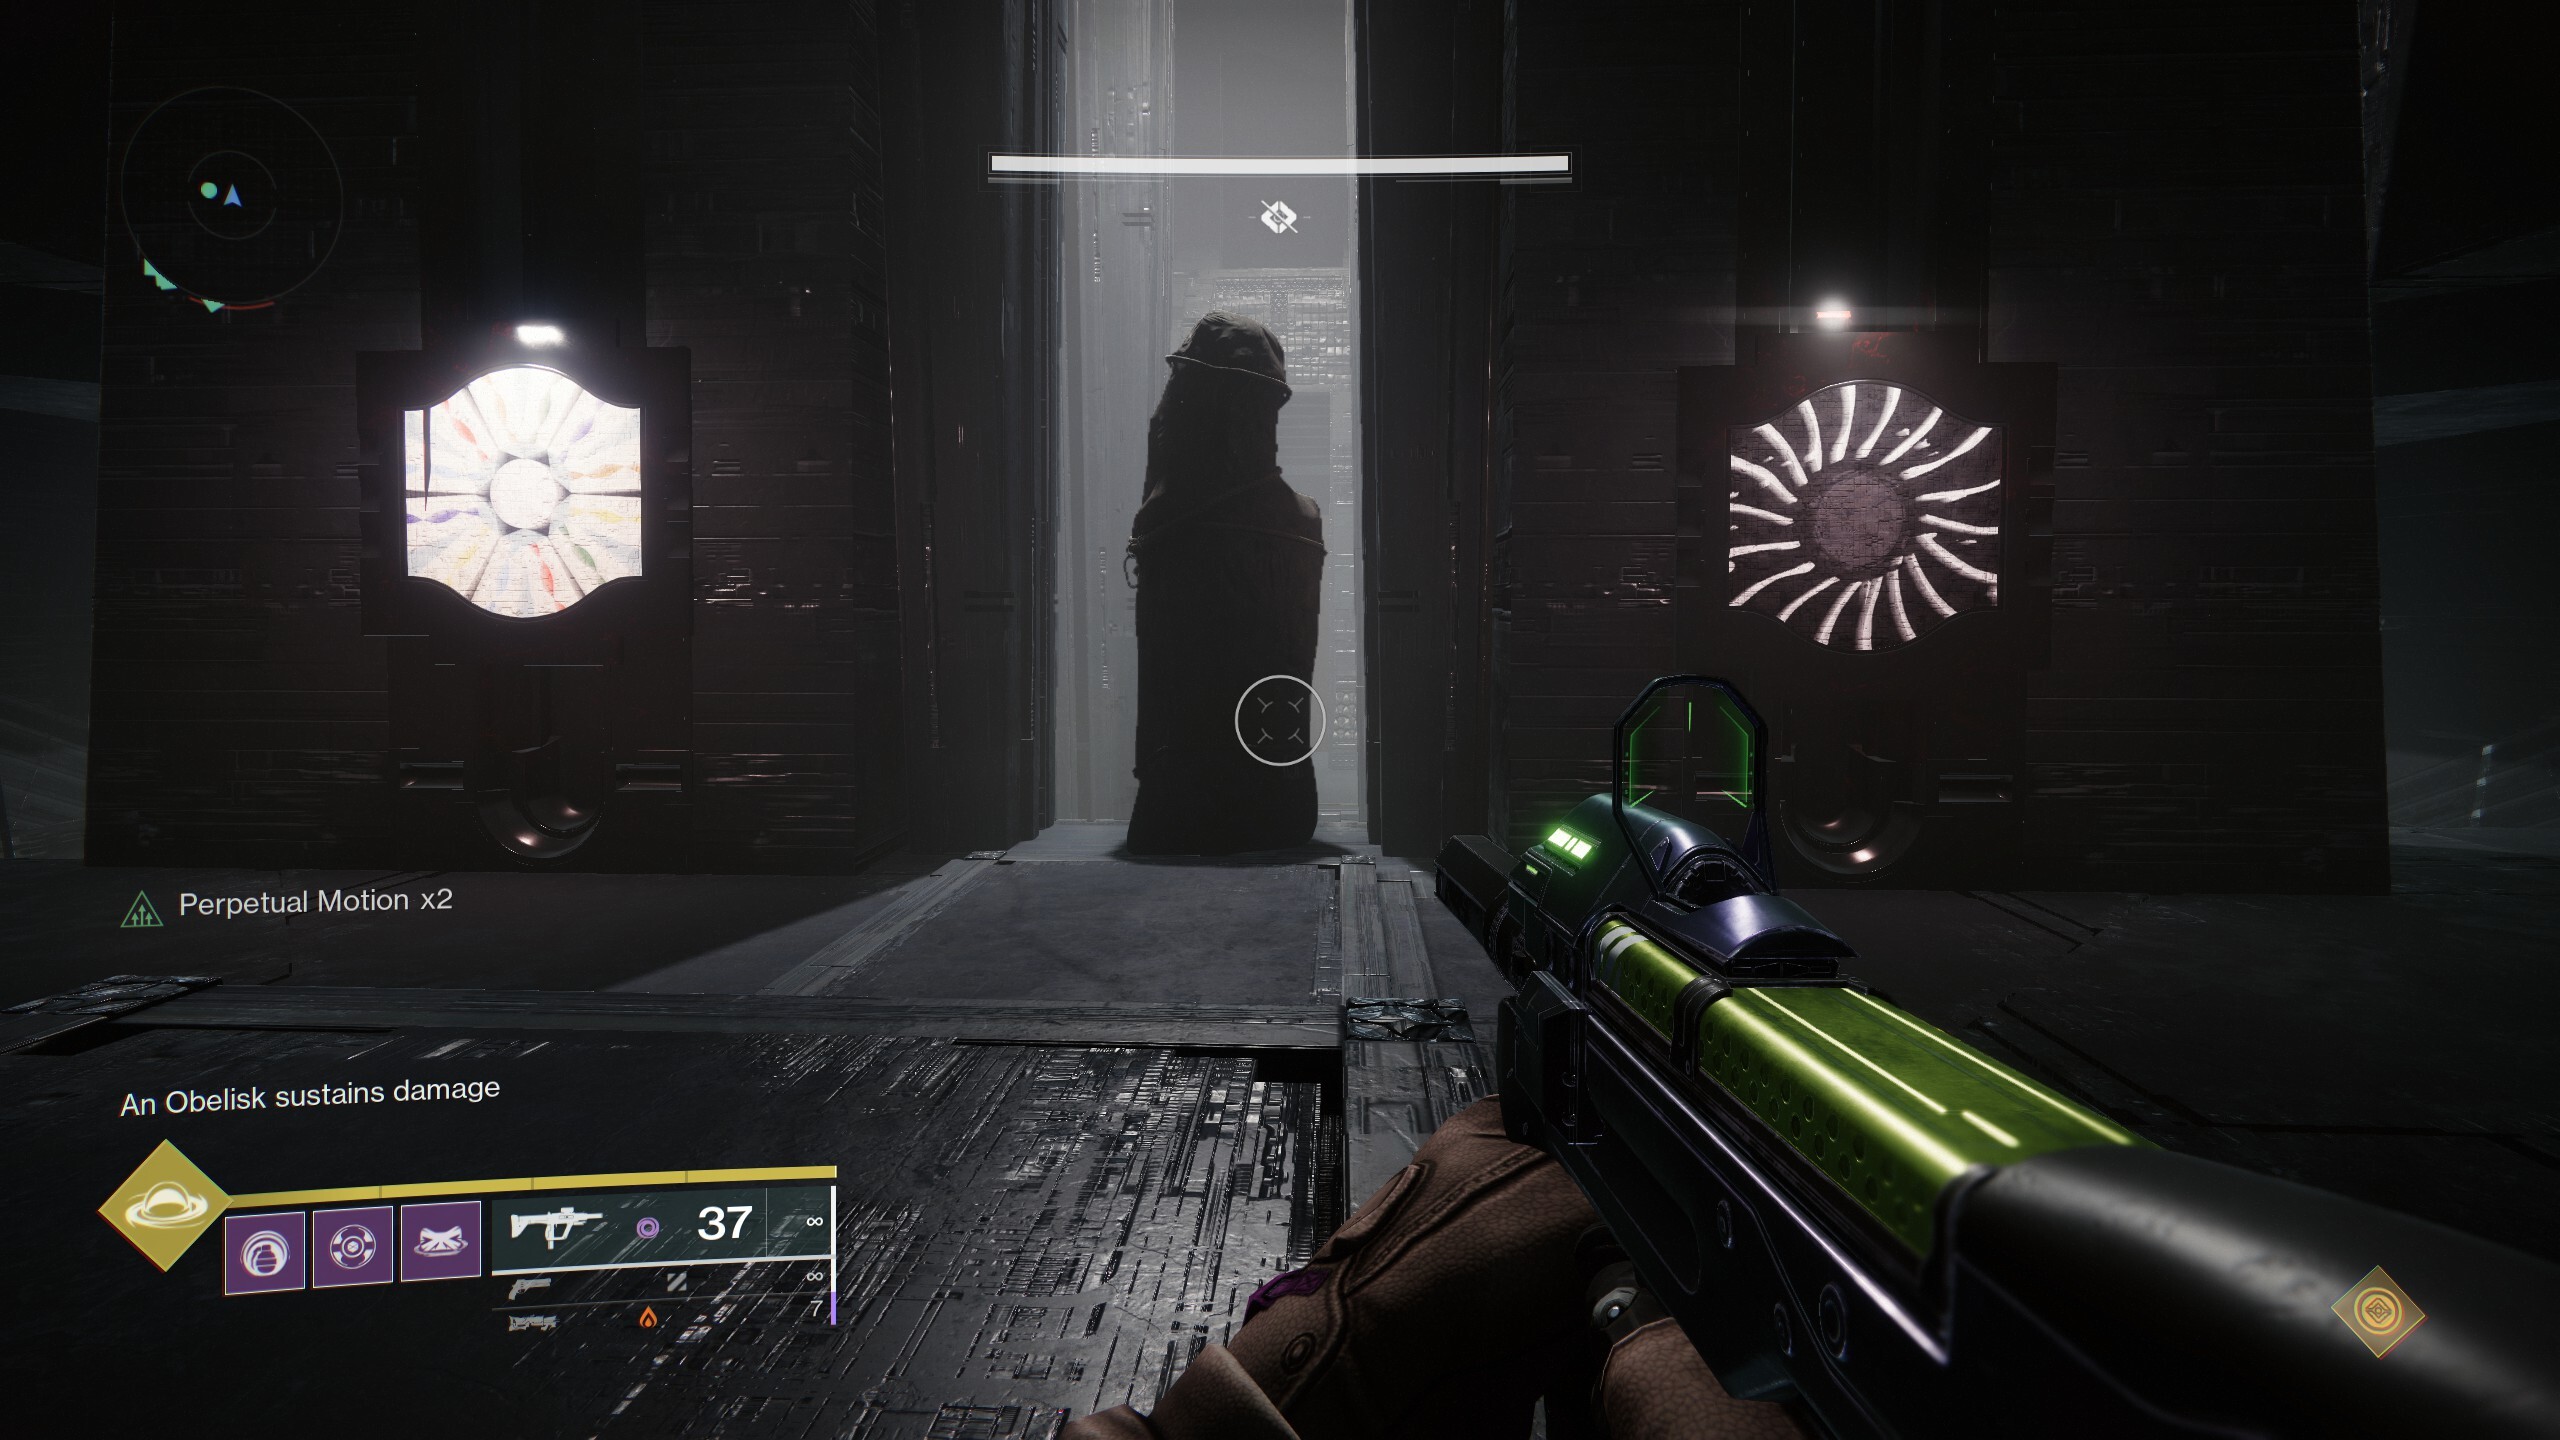
In the center of the room, you'll see two large glyphs placed on the wall, one showing the Traveler, and the other the Pyramid. These glyphs are meant to divide the room in half, allowing you to navigate it later--one half is the Traveler side, the other the Pyramid side (or alternatively, Light and Dark, or whatever designations are easy for you to remember). Scattered around the lowest, central area of the room are three obelisks. If you look at them, the obelisks have three faces, and each of those faces sports three spots where glyphs can appear. In front of each obelisk is also a wall that has three more spaces for glyphs. Get ready, because you're going to be communicating the names of the glyphs you see a lot.
Split your group into three teams of two, with each team assigned to one obelisk. Your main job in this encounter is to protect the obelisks from attacking Scorn. The obelisks slowly fill with orange energy from the bottom, and when the energy completely fills them, your team will be wiped. When Scorn attack an obelisk, they cause it to fill faster, so you need to keep them away from it--particularly, the Scorn called Abated Adherents. These are the only guys who can actually damage the obelisk, so prioritize them.
When the encounter starts, one of the glyph walls in front of one of the obelisks will light up with a glyph in its top position. This is random, so everyone should be watching for glyphs after clearing the first wave of enemies. When the glyph appears, it means a Taken Knight called Disciple's Compass has spawned somewhere in the room. The first glyph will always be either the Traveler or the Pyramid, indicating which side of the room the Disciple's Compass appears on. The Knight tends to spawn toward the edges of the room in out-of-the-way places, so keep a close eye on your radar. On the Darkness side, he can be particularly tough to find near the big columns, or by the Enter door on the Traveler side.
Kill the Taken Knight and a second glyph will appear, denoting one of the nine doors around the room. One member of your team will need to enter that door and destroy one of two other enemies hidden within, called Glyph Keepers. The best way to designate who runs is to split each of your teams again: If your glyph wall is showing the glyphs for the Taken enemy and the door, then your team's runner should go kill the Glyph Keepers. Note that only half the doors in the room will be open at a time, either on the Light or Dark side. You can toggle which set of doors opens by shooting the diamond switch in the middle of the main room, between the Traveler and Pyramid glyphs.
Be careful as you enter the room indicated on your glyphs, as Screebs will spawn here like an Indiana Jones trap, attempting to blow you up. Inside, you'll find the room divided in half just like the main arena. One side sports a glyph of a black circle with white lines (Darkness) and the other a white circle with rainbow-colored diamonds (Light). You'll also find two Scorn Chieftains called Glyph Keepers, one for each side of the room.
Back at the obelisk, a third glyph will appear on the wall, indicating either the Darkness or Light side of the room. The player defending the obelisk needs to communicate that glyph to the person inside the marked room; it tells you which Glyph Keeper to kill. When the Glyph Keeper dies, a hologram of another glyph will appear. Make note of this last glyph (it's handy to do so in text chat if you can), because you'll need it later. It's fine to kill both Glyph Keepers if you must (Gjallarhorn is excellent here), just as long as you read the correct glyph.
While one team's runner is down in their marked room getting the first glyph, more glyphs will have appeared at another team's obelisk, repeating the whole process. Eventually all three of the two-player teams will have collected one glyph from their rooms. When that's done, everyone needs to return to their obelisk and check it for the three glyphs the entire squad found. Only one obelisk will have all three. Identify the one with all three glyphs: your job is then to shoot all three of those glyphs to activate them. The timing on this is tight, with all three glyphs needing to be activated within about a second of one another, so make sure you've got them identified correctly first and you and your teammate are ready to fire at the same time. If you shoot the three glyphs fast enough, you'll see a message saying, "The obelisk accepts your offering." If you fail, the obelisk will scramble and you'll need to find the glyphs on it and try again. Three failed attempts to activate the three glyphs on the obelisk will kill your whole team, but the good news is that the three glyphs will still be on the obelisk where you first found them--they won't shift to one of the other two.
Activating the three glyphs will "lock" an obelisk, completing one phase of this encounter. You'll need to lock all three obelisks, and mercifully, you won't have to lock an obelisk twice, which means it should be easier to figure out which obelisk has the three glyphs on each subsequent phase. Note, however, that even once your obelisk is locked, you still must defend it, and you still will receive glyphs on the wall that tell you to venture down into specific rooms. Each team is still responsible for finding a glyph to lock the other obelisks, so don't relax once your obelisk is locked.
Once you've locked all three of these obelisks, the encounter ends. Make note of everything you just did in here, because you'll be using similar processes in future encounters.
Secret room No. 3 - Darkness glyph

Before you leave the Acquisitions room, there's another secret room you can deal with if you need to. The secret door is located to the left of and behind the "Stop" door you used during the encounter. To get to the switch for this door, climb up on the platform with the greenish-yellow sphinx-like statue; the switch is on the left side, just beneath what would be the "head." The door this switch opens will be on the wall right behind this platform.
Secret room No. 4 - Traveler glyph

You'll find another secret room just as you're approaching the next encounter, the Caretaker. Look for a room with purple-lit statues on a high platform ahead. The path will be to your right, but hop up on the platform and check behind the statues to find the switch to open another nearby hidden room and check its glyph.
Boss fight: The Caretaker
Not much further in, you'll find your first boss fight as you pass a giant Scorn abomination doing...something...to a Pyramid-tech crystal thing that looks strikingly similar to the item you brought into the Pyramid from the Disciple's Bog. Keep moving further up to find your arena, where you'll also discover another obelisk. This is where you'll fight the Caretaker. Note that at the back of the room behind the obelisk is a door with two diamond-shaped triggers that can be used to open it. Shoot them when you're ready to start the encounter.
The fight against the Caretaker is a combination of the entrance puzzle, in which you gathered Knowledge items, and the Acquisitions encounter, in which you found and remembered glyphs to enter onto the obelisk. Divide into two teams of three for this one. The "outside" team will manage the arena and the boss, while the "inside" team will go through the door to gather Knowledge, find glyphs, and work on the obelisk.
For this fight, you'll want solid range DPS weapons, such as Sleeper Simulant or Reed's Regret, as well as a solid damage secondary weapon with some range, like a sniper rifle. Rockets are also solid alternatives, especially if someone in the squad has Gjallarhorn to provide Wolfpack Rounds. Outbreak Perfected can also be very useful here, both for killing enemies and piling on damage to the boss in a pinch. Finally, you'll want a teammate with Divinity for additional damage. Anyone who's not a Warlock providing Wells of Radiance can go ahead with burst damage Supers here, such as Thundercrash, Golden Gun, or Moebius Quiver.
The inside team
The job of the inside team is to open the door and enter the room, which they'll find dark and tough to navigate like a bit of a maze. As soon as you enter the room, you'll start to gain stacks of Pervading Darkness, the screen-obscuring, killing debuff from the Disciple's Bog entrance encounter. When you have 10 stacks of Pervading Darkness, you die, which means you can only survive about 10 seconds inside the room to grab Knowledge. You're going to want to keep your forays into the room as quick as possible.
Also waiting in the room are two powerful Taken Wizards that are more or less impossible to kill. Clock their locations, dodge their attacks, but otherwise, ignore them. They're only there to make your life a little more difficult, but the thing you really need to worry about is Pervading Darkness. When the door opens, run in, find Knowledge, and run out.
Your strategy on this section may vary depending on how fast you want to clear the obelisk portion of the fight, but for simplicity's sake, we'll explain the long version. When the encounter starts, one person enters the room and looks for two Knowledge items. (You can go for three, but that's more difficult; if the outside team is doing its job, you should have enough time to have each player limit themselves to two at a time.) Note that, unlike outside, the Knowledge items also have glyphs projected above them. When you pick up a Knowledge, remember the glyph. Once you have two, return to the door and let your outside teammates know, as they'll need to shoot the switch to let you out.
When one player exits the door with their Knowledge, another goes in and repeats the process, remembering their own glyphs. This is almost exactly like Acquisitions, except you don't have to communicate which glyphs you see--you only need to remember them yourself. Once you're back outside the room, wait for a message in the bottom-left corner of the screen that says, "The obelisk awaits [player name's] offering." This will indicate which player who has Knowledge needs to shoot their glyphs on the obelisk. Make sure to find your glyphs first and shoot them fast, as this is timed, just like in Acquisitions--do not shoot one glyph as soon as you find it and then start hunting the next one, or your offering will be rejected. Locate the glyphs first, then fire, because three failures results in everyone dying.
Keep repeating this process until all the glyphs on the obelisk have been activated; the three-player relay team should be able to do so relatively quickly and easily, and there are only as many Knowledge items as you need to complete the obelisk. Note also that if you mess up entering your glyphs on the obelisk, you'll need to go in an additional time to get more Knowledge. Finally, keep in mind that once you're inside, you can't leave the room unless someone outside opens the door for you, so make sure the inside team always has someone ready to open the door.
The outside team
Back in the main section of the arena, you'll need three players whose job is to protect the obelisk from Abated Adherents, just like in the last encounter. They'll attack the obelisk, causing it to fill with energy more quickly; if it fills completely either from time or attacks, everyone dies. The arena will also flood with other enemies, and you'll need to do your best to manage them, as they can become overwhelming. Your main priorities are the Abated Adherents, however, as they can attack the obelisk and kill you, and the Caretaker himself, who is working on annihilating your whole team if you don't stop him.
The Caretaker appears in the center of the room and then slowly moves up one of two paths toward the obelisk. If he reaches it, he'll activate it, killing your whole squad. You can't damage him during this portion of the fight, but you can delay him by stunning him. It's actually pretty easy to do so, in fact, and stunning him will give the inside team enough time to complete their portion of the fight.
To stun the Caretaker, you need to get close to him and bait him to slam his fists into the ground to try to kill you. When he does this, his face will glow yellow and become vulnerable to damage. Blast it with a few bullets--your primary weapon will do the job--and he'll stagger slightly while the big Darkness launcher he wears on his back will open. That'll reveal another yellow weak spot, and if you shoot that with a few rounds, you'll stun him.
So in order to successfully execute a stun, you need players on either side of the boss: one to bait him and shoot his face, and the other to shoot his back. The best way to do this is to send a member of the team to the left and right edges of the room, where they can fight enemies, including Taken Hobgoblin snipers who can wreck your day, and the Abated Adherents. That should also put one member of your outside team in position to shoot the boss's back and execute a stun whenever you need it. The third member of the outside team stays in the center of the room and baits the boss's slam attack, moving along the pathways with him as he heads toward the obelisk. In this way, you can stun the boss pretty much constantly all the way up the ramps, which should provide plenty of time for the inside team to finish.
The outside team's job is a lot less complicated than the inside team's, but often hairier. Clearing enemies is essential for this fight, as is shooting down the Darkness spikes the boss launches from his back. These will seek players and do serious damage if they hit, while also giving you stacks of Pervading Darkness, so make sure to eliminate or dodge them as much as possible. The Pervading Darkness debuff will slowly go away on its own, so you only need to make sure it doesn't build up high enough to kill you.
When the obelisk is locked, you'll see a notification saying something about a ritual being completed. Gather everyone in the center of the room. You'll notice three round plates surrounding the obelisk: one on the left, one in the center, and one on the right. These mark where you need to stand for the damage phase, and it's a good idea to have Warlocks with Well of Radiance Supers or Rifts ready to go to protect your team as they stand on these spots.
Wait for the Caretaker to reach the obelisk and watch for one of the plates to light up orange--this indicates that you need to jump onto it. The first plate will always be the one on the side of the room the boss took to reach the obelisk. When it glows orange, have everyone step onto it simultaneously to maximize your damage time, since an invisible timer starts the second someone touches the plate. Unload on the boss, keeping an eye on the next plate over, which will soon glow orange. That means you need to move to this plate to continue doing damage. A Well of Radiance or Healing Rift can be very helpful here in keeping your team alive so they can do damage, so plan to have some members of your team provide them on each of the plates. You should also be careful not to move while doing damage--you don't want to accidentally step into a teammate's rocket and get them killed.
Note that the boss's health bar will show a particular section illuminated when you enter the damage phase. This shows how much damage you can do, but not how much you must do. Once you completely eliminate the illuminated portion, however, the boss will vanish and a new set of stairs will appear, guiding you up to the next floor of the room. You'll need to fight the Caretaker on each floor no matter how much damage you do, and you can only kill him in the final hallway at the very top of this arena, so settle in for a relatively long fight.
The upper floors
On the second and third floors, you'll repeat the process again the same way you did below, but things change slightly. First, the outside arena will have a different layout, forcing the outside team to shift their positions slightly and to watch for enemies spawning in new locations. Primarily, the corners nearest the boss are the danger zones, so be careful.
As for the inside team, on the second floor, they'll find two doors they need to enter to find their Knowledge pickups; on the third floor, there are three. This doesn't change your strategy, it only means that Knowledge is more spread out and can be tougher to find, so make sure you clock how many Knowledge items total are in each room so you don't wind up in an empty location when your turn comes. The best way to handle this is to have each runner pick one particular room to search, so they can get an idea of what Knowledge pickups are left for subsequent runs. Also note that, while there are more door switches to correspond with more doors, shooting any door switch will open all the doors. So don't worry about matching the switch with the appropriate door when an inside team member needs to be let out.
The second and third floors are more hectic, but not really more difficult. Repeat the same strategy, stunning the boss as much as possible while the obelisk team finds their Knowledge and powers up the obelisk. When that's done, you'll damage the boss as before, until you've done so on all three floors. (Note that the staircase up to the third floor has a gap at the top--be careful not to fall.)
That'll lower a final set of bigger stairs (which also have gaps, so be careful), which will take you to the top of the area for one final damage burst against the boss.
The final stand
This is pretty simple. Instead of the arena with plates arranged in a circle around the obelisk, the last part of the fight is a long hallway where each plate is closer to the boss. Be sure to save Heavy ammo for this section, as well as some Supers if you have them. As soon as you get up the stairs, get on the first plate and fire away. You don't have to do a ton of damage to the boss to win here, but prepare for this portion of the fight by saving ammo and Supers to guarantee you'll bring the boss down.
Congratulations on defeating the Caretaker. The first jumping puzzle awaits.
Secret room No. 5 - Worship glyph

As in the Acquisitions room, there's another secret room in the area where you fought the Caretaker during its final stand. You'll see the switch on the left side of the room if you're facing toward where the Caretaker stood when you fought it; the switch glows orange, which will help you spot it in the shadows. Shoot it and you'll see the door open on the right side of the room opposite the switch. Inside is the Worship glyph.
Jumping puzzle
Ah, the obligatory jumping puzzle. Ascend from the spot where you kill the Caretaker and you'll find your path around the outside of the Pyramid to your right. Be careful here, because the platforms can be tough to see and the walls in which they're set are angled. Smacking your head on the ceiling through this portion is liable to kill your jump or bounce you out into space. You'll probably want to equip Exotics or subclasses that give you added maneuverability in the air, as well as swords with Eager Edge to help you correct mid-flight.

The jumping puzzle begins as you ascend the new stairs that appear after defeating the Caretaker. Follow the path until you reach a gap. Leap across to the far side and follow the path around the outside of the Pyramid structure. From here, you'll get a sense of what the platforms will look like--they're thin and mostly appear above you as you round the corner, and are often marked with orange lines to illuminate their edges. The first platform will be to your right as you go around the corner, but the rest are above you and back in the other direction.
Secret room No. 6 - Light glyph
At the top of this first set of platforms, you'll find an arena filled with Scorn. First, check the far wall to the left to find a door with a switch above it, which hides the next hidden room you'll need to check for the Resonance code from the beginning of the raid.

After dealing with the secret room, you have time to check out this arena. It will constantly fill with Scorn enemies, so don't worry too much about clearing them out. Near the edge of the arena that looks out over the worm god and Upended device, you'll find a raised area with another switch on it. This switch reveals the jumping path just ahead, and you may need someone to stay back and shoot the switch in order to create the path for the rest of the team. Looking down from later on the jumping path, you'll be able to see this switch, should you need to shoot it again.
When you're ready, leave through the big open door at the end of the arena. You'll find a giant wall here that may show glyphs on it. These glyphs change every time you enter the raid, and you can only see a few at a time. Taken together, however, they seem to foretell doom coming to the Solar system--maybe. Bypassing the wall will take you back outside and to a jumping path that extends around the wall to the right. If a jump seems too long to reasonably make, it's because you need to trigger the switch back in the Scorn arena, which will cause additional platforms (marked with orange lines) appear to make those jumps more reasonable. Once one person clears this whole path, you'll see a message in the bottom-left of your screen that says "path stabilized," meaning that the platforms will remain in place for the rest of your squad.

The path extends along the wall to the right; when it feels like you have nowhere else to go, look up for more platforms above you. You'll eventually make your way to another corner where you won't be able to see the path ahead. This is a blind corner where you'll need to jump around, revealing a platform ahead and below you. This is the key point where swords and jumping Exotics can help.
Once you're around the corner, follow the path until it ends, then turn around to ascend and make your way to a hole in the wall that's lit up. This path will eventually drop you into a larger room.
Hidden chest No. 2

You'll now enter another arena, this one with statuesque columns that also have red diagrams on their bases. At the far end of this room is another switch. Your teammates will need to switch it repeatedly to move the platform in the next area to create a path for you.
Turn right out of this arena and you'll find your next jumping section. The path leads around the corner to the right. Climb it to its highest point--if you turn around and look back the way you came, you'll see a path that takes you toward some barred windows that are lit red. That's the normal way forward; the hidden chest in this section is in the opposite direction.

Instead of following that path toward the windows, flip a 180 so that you're facing the wall. To your left will be a blind corner; you need to jump around it to find a platform right on the other side. As before, a sword can be helpful here to give you added maneuverability in a pinch. Follow this new path to its end and look up--you'll find a hole you can enter in the ceiling.

Ahead will be a series of hexagonal cylinders you can use as jumping platforms. Make your way to the end and look up and to the left to find a hole in the wall. Inside is a hidden room with your second hidden chest. Unlocking this one for the first time will earn you the "Secrets of the Sunken Pyramid" Triumph and unlock the Echoed Anger shader.
Once you've opened the chest, you can look on the raised area to its right to find a trap door that will drop you into the final section of the jumping puzzle, so you won't have to backtrack the way you came to advance. This is also the room you can reach through those barred windows you saw back at the last set of jumping platforms, and you'll find it filled with enemies.
Secret room No. 7 - Stop glyph
When you drop out of the ceiling, you'll land next to the next secret room. Look in the back-right corner of the room, near a yellow slab of stone, for the switch. Shoot it and the door will open just to the left of the switch, where you'll find the Stop glyph.
This room also leads you to the final portion of the jumping puzzle. Find the opening on the left side of the area, which has another crystal switch you can shoot. Hitting the switch causes several hexagonal barrels to move across the opening ahead, creating a path. However, those barrels will spin and move across the gap and into the wall on the far side. Send one person who's confident with jumping across, while a second person stands at the switch.

Continually hit the switch to keep the barrels moving across the center of the gap. Once a player makes it to the far side of this part of the puzzle, the path will stabilize, leaving each of the barrels sticking out of the walls so you can hop across. Above the last platform you reach on the right, you'll find a flat area above with more Scorn. Clear them out and gather everyone up to open the final door and move on.
Exhibition
Not much further from the end of the jumping puzzle is your next encounter. There's no boss to deal with here, so you want weapons that allow you to quickly clear out enemies and possibly to eliminate Solar shields. Osteo Striga is a great choice here, but any weapon you like for quickly dealing with hordes of enemies will do the job. Overload champions also show up on occasion, so bring the weapons and mods you need to deal with them. Survivability Supers such as Well of Radiance are also recommended. The goal here is to move as quickly as possible--this entire encounter is timed, requiring you to move through four different rooms and eliminate several key enemies before time runs out. Thus, staying alive is also key, as diverting from goals to revive teammates can kill your run.

The Exhibition encounter is actually a combination of mechanics from earlier in Vow of the Disciple, as well as from raids of the past: specifically, Leviathan, The Last Wish, and the Vault of Glass. You'll use items from each of those raids as you move forward, and they interact with the Vow mechanics in strange ways, so you'll want to pay attention and potentially have several people on your team try different roles so they can get familiar with what's going on.
The gist is this: In each room as you move through Exhibition, two Glyph Keepers will spawn, similar to those you saw in the Acquisitions encounter in each of the side rooms. Instead of two Scorn Chieftains, however, you'll only see one--one of the Glyph Keepers here will be a Taken Phalanx, known as a "Resonant Glyph Keeper." Eliminate both Glyph Keepers and a shielded Taken Knight will spawn in near the center of the room. Kill that guy to extend the (very short) timer that's running in each room. You only have one minute and 14 seconds to either complete each room or kill the Taken Knight, so try to figure out where it spawns and knock it out quickly.
However, the Taken Knight is, as mentioned, shielded. The only way to damage it is with a specific "relic." In the first room of Exhibition, you'll find an orange crystal on a podium--you might recognize this from the stealthy Pleasure Gardens section of Leviathan. Picking that up starts the encounter; the crystal also shoots a beam that almost instantly annihilates the Taken Knight. So whichever member of your team is carrying the orange crystal is responsible for finding and eliminating the Taken Knight, preferably as quickly as possible, to keep the timer going. Every time your group eliminates two Glyph Keepers, a Knight will spawn--which means that in rooms with more Glyph Keepers, look out for additional Knights.
As in Acquisitions, killing a Glyph Keeper produces a holographic glyph projection near where their body fell. These glyphs are necessary for opening the door at the end of the room, which you'll see in the first room after both Glyph Keepers. The normal Glyph Keeper drops a glyph projection that normal players can see; the Resonant Glyph Keeper drops glyphs that only players holding one of the relics, like the Leviathan crystal, can see. Thus, you'll need to identify the Resonant Glyph Keeper quickly in each room and get someone with a relic to where they can read their glyphs. You'll have multiple relics in every room past the first, so it's a good idea to split them up as much as you can to make reading glyphs easier.
Both Glyph Keepers drop their set of three glyphs, and they'll be different--except for one glyph both keepers have in common. Have a player read each set of glyphs so you can determine which one overlaps between both sets. When you reach the door to exit a room after you've killed all the Glyph Keepers, you'll find six symbols flanking it. The common symbols between each set of two Glyph Keepers will also appear at the door, and you need to shoot those glyphs in order to open it. So if you killed only two Glyph Keepers (as in the first room), they'll have one symbol in common; shoot it and the door will open. In each of the other rooms, you'll fight two sets of two Glyph Keepers. The first two Glyph Keepers will have a symbol in common, as will the second set. You'll need to quickly shoot both glyphs at the door in order to open it. So expect two sets of two Glyph Keepers in every room after the first. Those sets of Glyph Keepers will usually spawn on opposite sides of the room, but not in the same places; the first set will usually appear closer to the door you enter through, and the second set will be closer to the exit, giving the whole encounter the feel of forward momentum.

After shooting the first symbol and opening the first door in Exhibition, you'll enter an antechamber before you go into the second room, which will have two relic pedestals identical to the one from which you picked up the Leviathan crystal. You'll need to put down the crystal on one of these pedestals to advance, and any person carrying a relic will have a short debuff that prevents them from picking up a relic for a period after putting one down. Thus, you'll need to rotate relic carriers in each room, so keep that in mind if you want to organize your team's roles. The person who uses the Leviathan crystal in the first room can't carry a relic in the second; they can in the third, and can't in the fourth. This also goes if anyone dies. A relic carrier can die and drop a relic, and if you revive them, they should be able to pick that relic up again. But if you switch carriers mid-room, the person who picks up the relic will be debuffed after they put the relic down again. This can confuse your rotation, so make sure you know who's ready to pick up a relic and who isn't.
Exhibition: second room
The first antechamber has your second relic: the Vault of Glass shield. If you're familiar with that raid, you know that the shield can be used to "cleanse" a debuff that builds up on players, slowly blinding them. In fact, you'll use it to do the same thing here, cleansing players of the Pervading Darkness debuff. The shield carrier has to be quick and pay attention to the locations of all their other teammates, as the debuff will blind and kill players once it reaches a count of 10. You can cleanse other players with the same button you use for guarding with a sword, which will create a white bubble around you. In general, it's good to set a central location for the shield carrier to head to when they're not needed elsewhere (like reading Resonant glyphs), so players know where to go when they need a cleanse.
The second room contains two paths that split left and right, then converge at the back of the room near the exit door. This back location is where the shielded Taken Knight that extends your timer will spawn, so get ready to run there if you're carrying the Leviathan crystal. Split your squad into two groups of three to cover both sides of the room. Your first two Glyph Keepers will spawn on opposite sides of the room; on the right side, the Glyph Keeper will be up on the second floor, while the left side will see their Glyph Keeper on the raised area near the edge of the room. Kill both, read your glyphs and remember the common one--you'll need two to open the door. It's recommended that everyone then head toward the exit door and convene for cleanses and to kill the Taken Knight. This is a good spot for a Well of Radiance or Ward of Dawn bubble as well, to help your group's survivability as you fight off a horde of Scorn.
Once the timer Knight dies, turn back and look for a second Glyph Keeper. Near the edge of the room (the left side if your back is to the entrance), you'll find him near the corner just ahead of the exit door; on the two-story side (right if your back is to the entrance), he'll spawn on the lower floor. Watch out for an Overload champion on the second floor; you can safely ignore it as long as it can't see you. Kill both Glyph Keepers and get your second glyph for the door. Head back to the exit, kill another timer-extending Taken Knight, and shoot the two glyphs to enter another antechamber ahead of the third room. Screebs will spawn here to basically act as a minefield, so make sure you clear them so you don't get surprised (and exploded).
Exhibition: third room
In the antechamber, drop your relics to reset the timer. You'll now add a third relic to the rotation: the Taken Power from The Last Wish. This relic functions the same here as it does in that raid. In the next room, you'll see small Taken Blights that appear near groups of enemies, rendering them invincible. The person carrying the Taken Power relic needs to get close to these blights and hold the Grenade button in order to use the relic to destroy them. The job will have you ping-ponging back and forth across the room to clear these blights; you'll find four of them in total in this room, and they'll often protect Glyph Keepers, so nobody can do their job until the blights are destroyed. Generally, just move forward, crossing the room back and forth as quickly as you can to destroy the blights. The relic can also shoot, so use it to defend yourself, and don't forget to get cleansed by the Vault of Glass shield every now and again.
This room is tough because, like the last, it splits to the left and the right--but this time, there's a huge gap in between the sides. You can cross it by jumping between platforms, but you'll have to contend with Taken Hobgoblin snipers in addition to everything else. Watch out for Overload champions to appear on one of the sides of the room toward the back, as well. Note also that if you die and drop a relic off the side, it will seem to disappear. It actually spawns back in the antechamber at the beginning of the room. You can retrieve it from its podium if you're quick about it, but remember that the timer is ticking, and it might be better to die and restart the encounter than to scramble to try to save it.

While this room looks complex, however, it isn't especially bad. When you first enter, you'll see your first Taken blight near a group of enemies. It'll either be at the top of the stairs ahead or the bottom; if it's at the top, the next blight will be on the left side; at the bottom, and the next blight will appear on the right side. Again, try to split into two groups, noting that the Taken Power and Vault of Glass shield carriers will need to cross the room in order to destroy additional blights and cleanse teammates. Generally, our team sends the Leviathan crystal carrier and a teammate to the right side, and the shield carrier and the other two teammates to the left, with the Taken Power carrier going wherever they're needed. If the blight is on the left side, the shield carrier can quickly cross to the right to help out there; if the blight is on the right, the shield carrier can wait with the left side team until they're needed, after the first two Glyph Keepers are dead.
Either way, at the top of those first sets of stairs, you'll find your first two Glyph Keepers. Get your first common glyph and be sure to remember it--text chat is especially helpful for this on PC, but use a pen and paper or some other solution if that works for you. When both Glyph Keepers die, the person carrying the Leviathan crystal should immediately look to the center of the room, to the two platforms waiting there. The timer Taken Knight will spawn on the platform furthest away (and closest to the exit), so take them out quickly. When you kill the second set of Glyph Keepers, the Knight will spawn in this same place, so make note of it.
You'll now advance to the second half of the room; on either side, you'll find stairs leading up. One side will have a Taken blight that needs to be destroyed, and it'll be opposite of where the last one was when you destroyed it to take out the first set of Glyph Keepers. There will also be an Overload champion on one of those sides (usually opposite where the blight is), so make sure you're ready to deal with it.
Head up to the next level and eliminate your Glyph Keepers again as quickly as possible. Your shield carrier will need to cleanse both teams, so be ready for quick movement. After all Taken blights are destroyed and Glyph Keepers dead, you can move to the back of the room, where stairs will carry you to the exit. The Leviathan crystal carrier should look down toward the center of the room from here to kill the timer Knight one more time, while everyone else opens the door using the two glyphs you took off the Glyph Keepers. Be wary for Screebs inside the next chamber, once again--they spawn much more closely to the door and are even more surprising.
Exhibition: fourth room
You're in another antechamber, so quickly drop off your relics and rotate them again to open the door and leave. The fourth and final room is the biggest nightmare--it's again split into left and right sides, this time with a huge gap across the middle and lots of platforms. With the door at your back, note that the timer Taken Knight will spawn on the platform in the center, on the right side. You'll need to zap him fast to keep this going.
Once again, split into two teams and head to the sides of the room. You'll find a Taken blight immediately in front of the entrance door, either on the left or the right side. Just ahead on either side of the room are two alcoves that hide Glyph Keepers, and you'll find a Taken blight opposite whichever side of the entrance door the first one was on. (If the blight was to your left as you entered, the next one will be in the right alcove.)
Just as in the last room, the job here is to quickly clear blights and Glyph Keepers while moving toward the end of the room, but this one is more open, with more snipers that can hit you from various locations. You have more time here than you think, though; send your teams to the their first sets of Glyph Keepers and quickly kill them, then convene in the center for cleanses, Ward of Dawn bubbles or Wells of Radiance, healing rifts and grenades, Void Overshields, and any other means by which you can make your team more survivable. It's good practice to jump everyone to the center of the room to help keep each other alive and kill the timer Knight before moving on.
Note also that if someone dies and drops a relic into the pit below, you can retrieve it from the entrance room if you're quick about it.
After killing the timer Knight, you'll see your next set of Taken blights and Glyph Keepers, which spawn more in the back corners of the room. Take a second and clear the snipers and the Overload champion before moving up, as they can be deadly. Identify and destroy any blights, then take down the Glyph Keepers to get your second symbol. Another timer Knight will spawn in the same place as the first if you need to eliminate it, but mostly, you can head for the door, provided you're not about to get murdered. Once it's open, beware of Screebs one last time. Deposit all the relics into their podiums before the time runs out to end the encounter.
You'll next walk out into a big open dais with stairs heading left and right. You're approaching the final encounter, and while there's not necessarily another jumping puzzle to deal with, there are a few things to take care of along the way.
Secret room No. 8 - Guardian glyph
First, head to the far left side of this area and check along the leftmost edge of the furthest platform. You'll find a thin strip here behind a wall, where a switch is located. Shoot it to open another secret room, which won't immediately be obvious. To get to it, turn 180 degrees. You'll see statue chunks on your left and a thin pathway on the left side of the wall ahead, which hugs the corner and then turns to the left behind the statues. Follow that path around, keeping the gap in the floor on your left, and you'll find the door your switch opened.
Head back to the middle of the area with the staircases where you started, and take the path to the middle of this area ahead of you. You'll find two staircases there that go up. Take those and then look up again; you'll see a bridge above that you can jump to. Kill all the enemies here and keep moving up until you've killed everything you find. If you face forward, you should see the white boss arena just ahead. That's your eventual destination.
Secret room No. 9 - Kill glyph
Before going any further, turn around and face the way you came, away from the boss arena ahead. Look toward the top of the wall behind you, all the way at the far end of this area, and you should see an orange switch waiting there. Shoot it and check the alcove on the right side of this area if you're facing the boss arena, where you killed several Scorn and Taken enemies already. The door should open, revealing the Kill glyph, the final of the nine you can find in the raid.
With that done, you can leap ahead to another platform along the wall--there's one of these on each side of the big central area. It'll seem like you've hit a dead end, but get all your teammates together on the same platform and a door will open. Proceed through and to the end of the hallway ahead and you'll find you can drop down onto an arena below. This is where you'll fight Vow of the Disciple's final boss: Rhulk.
Boss fight: Rhulk
Once again, prepare to use the knowledge you've gained throughout the rest of the raid to take down Rhulk. The boss fight carries multiple stages, with the first requiring you to simply get into a position to do damage to him. You'll notice right away that Rhulk produces a big orange forcefield around this arena, pushing you toward the back (and bouncing you off the side of the arena if you're not careful). The first phase of the fight has you removing the forcefield so you can get to him.
You'll want to bring high-damage weapons to this fight, as well as damage Supers. The first half of the fight is mostly about clearing enemies, so a weapon keyed to do that, like a submachine gun or Witherhoard, is a good idea. The usual strategy for Rhulk is to bring a rocket launcher (with perks such as Auto-Loading Holster) and a sniper rifle, with one or more Gjallarhorns in tow on the team to give all players Wolfpack Rounds, and one Divinity to increase the critical damage spot on Rhulk. When your rockets run out, switch to snipers (Izanagi's Burden is a favorite) to continue damaging the boss.
Rockets and snipers are often recommended, but anything that does big burst damage will work here, including linear fusion rifles such as Reed's Regret or Sleeper Simulant. Also viable are Exotics such as Outbreak Perfected or Osteo Striga, which are great for clearing smaller enemies and can also be relied upon for boss damage in a pinch. In any event, bring weapons you feel comfortable with that will allow you to quickly deal a lot of damage to the boss.
Dominion
This first arena is called Dominion, and you'll quickly notice there are six obelisks scattered around the room with blank spots on them where glyphs will appear. Note the locations of the obelisks--there are three on the left and three on the right. It's a good idea to designate each one with a name or number because you'll need to communicate and coordinate with teammates to send them to the correct obelisk. Our team uses the numbers L1, L2, and L3 for the left columns, starting with the one closest to the spawn, and R1, R2, and R3 for the right side.
There are no relics in this fight, but the rules of Exhibition remain in play. When the encounter starts, two Glyph Keepers will spawn on either side of the room. The left Glyph Keeper will be "Resonant," while the right Glyph Keeper will be normal. As before, only some players can see the glyphs dropped by these two Glyph Keepers; normal players can see the right glyphs, which will appear above the column on the right side, but only players with either the Leeching Force or Emanating Force buffs can see the glyphs on the left. We'll talk about those buffs in a second.
When the Glyph Keepers die, two sets of glyphs will appear close to the front of the room. Communicate with your teammates to figure out which glyph the two Glyph Keepers have in common and remember it--this will indicate which obelisks you need to interact with throughout this phase. You should see that each of the obelisks in the room has three glyphs on it. A random selection of two of them will include the common glyph from the Glyph Keepers. Someone without a buff will need to identify these obelisks so that players with buffs can interact with them, so designate someone to be your glyph reader throughout this encounter.
Again, split your team--three players will focus on clearing enemies, and one or two of those folks will also read obelisk glyphs. The other three players are the buff team, and their job is to pass buffs back and forth throughout the encounter.
The buff comes in two types: Leeching Force and Emanating Force. After starting the encounter by approaching the forcefield, one player should shoot the spinning darkness "crystal" that appears above Rhulk's head. Do so and that player will gain the Leeching Force buff. This comes with a timer, and when it expires, the player with Leeching Force dies. However, near where you spawn in at the start of the arena is a big glyph marker on the ground. If the Leeching Force players stands on this glyph, two more crystals will appear at the far end of the arena, one on either side of the room. The other two members of the buff team need to shoot these crystals, and each will gain Leeching Force, while the player who stood on the glyph will lose Leeching Force.
So the goal here is to pass this buff back and forth without losing it, and the buff team will need to pay attention to who has Leeching Force and who needs it. If you die or otherwise accidentally lose the buff at the wrong time, it can result in a wipe for the whole team, so the non-buff team's job is to clear enemies as fast as possible to protect the buff team.
Every so often, Rhulk will jump around the room and fire off a blast of Darkness energy that will fill about a third of the arena--either on the left side, the right side, or the center. Most everyone on the team wants to avoid that beam, which will stack Pervading Darkness on you, and can kill you straight-out through damage. However, if you have Leeching Force and get hit by the beam, the buff will transform into Emanating Force. This will have a fresh timer, and the buff will allow you to pass through Rhulk's forcefield to interact with the obelisks.
When two members of the buff team gain Leeching Force, one moves off to protect themselves while the other makes sure to be hit by Rhulk's Darkness beam, thereby gaining Emanating Force. That person then goes to one of the obelisks identified by the unbuffed team as containing the common glyph from the Glyph Keepers at the start of the fight and "dunks" their Emanating Force buff into the obelisk. The Emanating Force players cannot see the glyphs on the obelisks, so their teammates will need to tell them where to go. Every time you dunk Emanating Force into an obelisk, Rhulk's forcefield retreats slightly. You'll need to dunk a total of six times in order to eliminate the field completely.
As soon as the Emanating Force player has successfully dunked their buff, the player who still has Leeching Force should step onto the central glyph to make those two crystals appear again. At that point, the two other players on the buff team again shoot the crystals to gain their own Leeching Force buffs. Again, one player should wait it out, while the other gets hit by Rhulk's Darkness beam and acquires Emanating Force again, and can repeat the dunking process. It's slightly slower, but easiest to do, if you designate a single Emanating Force dunker. The other two players on the buff team only need to pass Leeching Force back and forth and avoid Rhulk's attacks. The dunk player always has to shoot a crystal to get Leeching Force immediately after dunking, and then has to get Emanating Force in order to dunk again.
Note also that after each dunk, the glyphs on the obelisks are randomized. The non-buffed team will need to identify which obelisks have the correct glyphs for every single dunk, so make sure you're paying attention when they switch.
(An alternative way to do this is to use four players on your buff team, passing Leeching Force twice before each dunk. Thus, you'll have three players with the buff at once--one person to keep Leeching Force and two to gain Emanating Force with each blast of Rhulk's attack. You can then dunk two buffs instead of one, pushing the forcefield back faster. This is slightly tougher to coordinate and a little riskier, since if the Leeching Force player is killed, it'll likely mean you have to restart the encounter. Doing it this way cuts the time of the encounter down, however, and can unlock the "Symmetrical Energy" Triumph for the Vow of the Disciple seal. Just make sure your Emanating Force players dunk at the same time or the obelisks will randomize.)
As the forcefield pushes back, you'll fight some tougher enemies. After two dunks, an Abomination will spawn in the center of the arena. After three, Taken Hobgoblins will appear in the back corners, and you'll want to prioritize them. Another Abomination will appear at the foot of Rhulk's stairs as you dunk more. These enemies in particular can be difficult to deal with and threaten your Emanating Force players, so be sure to eliminate them fast.
Once the forcefield has been eliminated, Rhulk will retreat up the stairs. Chase him, and you'll enter the damage phase of the fight.
Fighting Rhulk
At the top of the stairs, you'll face Rhulk himself, who will walk around the battlefield engaging you with melee attacks. In general, keep your distance--it's often handy to designate one player to stand on one side of the arena to try to bait Rhulk's attacks by shooting at him, while the rest of the team stands on the other.
If Rhulk walks toward you, give him a wide berth. When he's within a certain distance, he'll execute a roundhouse kick that can be very painful, while occasionally throwing you off the arena. Watch the floor in front of him as well: If a big yellow bar appears in front of him, like an arrow, it indicates that he's about to do a dash attack, which you can avoid by running sideways from (and perpendicular to) its direction. Rhulk will also occasionally do the same Darkness laser blast he did in the Dominion arena, but in six directions in a circle around him. You'll see the lasers telegraphed as he charges up, so try to move between them to avoid their damage.
You can't damage Rhulk at first during this fight, so make avoiding him your priority in the beginning. He'll carry his Glaive and use it to attack you with his dash, but every so often, Rhulk will drop the Glaive and it'll expand to resemble the crystals you've been shooting in Dominion to gain Leeching Force. One player should shoot the Glaive crystal when it expands this way until it pops, which will give them the Leeching Force buff. At the same time, a glyph will appear near where the crystal was destroyed. The buffed player can't see this glyph, so their unbuffed teammates will need to identify it for them.
The glyphs correspond to four more obelisks located in the corners of this top arena. Standing with your back to the stairs, the obelisk in the close-left corner is marked with the Traveler glyph; the back-left corner has the Pyramid glyph; the close-right corner has the Light glyph; and the back-right corner has the Darkness glyph. So when a player shoots the Glaive crystal and gains Leeching Force, the other players will need to identify the glyph that appears and tell them which obelisk to go to. Your identification system may vary, but our team uses L1 for Traveler, L2 for Pyramid, R1 for Light, and R2 for Darkness.
Once a player has Leeching Force and knows which obelisk they need to go to, they'll have to gain Emanating Force, just as in the Dominion arena. When Rhulk does his Darkness beam attack, step into it with Leeching Force to gain Emanating Force, then dunk in the designated obelisk. If you dunk in the wrong obelisk, you'll die, so make sure your team is clear about their callouts.
Each time you dunk an Emanating Force buff in an obelisk, a glowing yellow weak point will appear on Rhulk: first his left shoulder, then his right shoulder, then left hip and right hip. When these weak points appear, the rest of the team should shoot them until they explode (while also being careful not to shoot the Glaive crystal). Each time you destroy a weak point, note that several Shadow Thralls will appear around the arena. It's a good idea to quickly eliminate these Thralls; they're not especially deadly, but they tend to swarm a single teammate who's not paying attention, preventing that person from moving and making them easy pickings for one of Rhulk's melee attacks.
Blow up all four of Rhulk's weak points and he'll transform slightly, stalking around the arena more quickly but becoming fully vulnerable to damage. When Rhulk transforms after all four weak points are broken, you should use your damage Supers and hit him as hard as you can. Those four weak points you blew up will now glow yellow--shoot those glowing yellow spots on Rhulk to damage him. Alternatively, if someone on your team is using Divinity, you can ignore those spots for the most part, but Rhulk moves around fast enough that if you're ever not able to shoot the Divinity critical sphere, shoot the yellow spots instead. Tracking rockets can take a lot of the headache of aiming out of the fight. Rhulk will do all three of his attacks during this fight, but more quickly, so be careful not to get nailed by his Darkness beam or dash attack, and to factor those in as you're doing damage.
After a short period, Rhulk will take a knee and become immune to attacks. When that happens, your whole team should clear out and return to the start of the Dominion arena. Grab ammo if there's any to be had on your way down, but don't dawdle. After 15 or 20 seconds, Rhulk will reinstate his forcefield, and anyone who's not back at the start of the arena can get bounced off and killed by it.
The good news is that you've completed a damage phase. From here, you only need to repeat the process to continue hammering at Rhulk. Note, however, that you only have three total phases to complete this fight; if you don't kill him by the end of the third damage phase, he'll "Enrage," wiping out your team.
Rhulk's final stand
Like the Caretaker, Rhulk's health bar has a small chunk portioned off at the end. This indicates that he has a "final stand" state, just like past raid bosses such as Taniks. When Rhulk's health bar hits this mark, he'll start piling Pervading Darkness debuffs on your entire team; once you hit 10 stacks of the debuff, everyone dies. So you only have about 10 seconds to do enough damage to Rhulk to complete the fight, or he'll take you out.
The trick to this is mostly just to pay attention to Rhulk's health as you're damaging him. If you're on two phases and are approaching the final stand, it might be good to stop damaging and do a third rotation through Dominion in order to gather more ammo for your team and charge Supers. Similarly, if you're heading up for a third phase and expect to hit the final stand while you're there, save your Supers and possibly some Heavy ammo for the final stand to guarantee you can do enough damage to clear it.
Hit Rhulk hard enough and he'll die once and for all. If you completed the Resonance code in the secret rooms along the way, you should get a second chest at the end of this fight with a guaranteed red-border Resonance weapon--although you can only get one of these per account per week. You can also interact with Rhulk's Glaive to purchase weapons and armor you've unlocked using Spoils of Conquest, and the first purchase you make per account per week is also guaranteed to be a Deepsight Resonance weapon. That's good, because if you intend to craft these raid weapons, you'll need to complete a total of five Resonance versions in order to unlock each Pattern.
That's it for the Vow of the Disciple, although there are ways to up the difficulty for the raid. There are multiple additional challenges to complete in order to earn the Vow of the Disciple Triumph seal, and the Master difficulty version of the raid drops on April 19, with additional Adept versions of its guns to incentivize you to check out the tougher difficulty.
Got a news tip or want to contact us directly? Email news@gamespot.com
Join the conversation