Unreal Tournament 2004 Walkthrough
This walkthrough includes tips on all the game's weapons, game modes, as well as the dozens of new maps. Can't quite figure out what to do in assault, or wondering which are the key nodes to control in an onslaught map? This guide tells all!
Design by Collin Oguro
Epic Games continues to perfect the multiplayer first-person shooter with the release of Unreal Tournament 2004. Enhancements to the stellar series include new deathmatch, CTF, double domination, and bombing run maps, the return of the classic Assault game mode, and the birth of Onslaught, a classic-in-the-making team game developed by Psyonix Studios that introduces vehicular combat into the tournament.
This comprehensive GameSpot Unreal Tournament 2004 game guide features:
- Weapons and Vehicles: Look here for weapon and vehicle strategies for all game types. Also includes the special adrenaline combos.
- Deathmatch: Hone your deathmatch skills with these strategies and map tips, which reveal key locations and power-ups.
- Capture the Flag: Dominate the competition with capture the flag strategies and coverage of the new 2004 maps.
- Double Domination: This section provides tips for double domination and its maps.
- Bombing Run: Score a goal with these bombing run tips and map strategies.
- Assault: This section covers guides and objectives for attackers and defenders for UT 2004’s assault maps.
- Onslaught: Check this section for strategies and map coverage of UT 2004’s exciting new onslaught mode.
- Cheat Codes: Use cheats against tough bots, summon weapons and vehicles on any solo map, bind a horn, spawn the hidden TC-1200 vehicle, and learn about Vehicle CTF.
Table of Contents
WeaponsVehicles
Deathmatch
Capture the Flag
Double Domination
Bombing Run
Assault
Onslaught
Cheat Codes
Chapter 1 - Weapons and Vehicles
This section provides tips and strategies for Unreal Tournament 2004’s weapons and vehicles. Weapon strategies are applicable for all game types; vehicle strategies are primarily focused on the onslaught game mode.
Shield Gun
The multi-purpose shield gun serves as an offensive melee weapon, a defensive shield, and as a means (albeit painful) of extending your jump height. Hold down the primary fire button and run into an enemy to inflict a heavily damaging melee strike. It’s fun (and effective) against a sniper that doesn’t see you coming or a player currently guiding a redeemer rocket.
The shield gun’s secondary fire mode creates a shield that blocks damaging projectiles (and repels energy-based projectiles). The shield drains quickly while taking damage so don’t expect it to defend you for an extended duration. But the shield also provides another service: activate the shield during a long fall, point to the ground, and the fall won’t be quite as painful.
Finally, you can use the shield’s primary fire as a means of boosting your jumping ability. Charge the primary fire, point at the ground, and hit the jump button as you release the fire button. You can combine this technique with a running jump to reach high ledges or the top of buildings. You can also use it as a means of traversing a section of the map quickly (such as grabbing that power-up sooner or reaching the flag position faster). Note that the technique does inflict self-damage! Be healthy or, ideally, have a shield pack.
Assault Rifle
The assault rifle is a decent starting weapon that may get you out of a jam if you’ve just spawned in a really bad predicament. However, expect to find yourself running for the nearest new weapon as soon as possible. The assault rifle’s primary fire is similar to a machine gun: high rate of fire with moderate accuracy. Its secondary fire launches a timed grenade. Hold down the alternate fire button to shoot the grenade further.
It is possible to pick up a second assault rifle (if an enemy had one equipped when he or she died) and wield dual assault rifles. In this configuration the weapon becomes more potent. In deathmatch games, toss grenades into crowded rooms to score a kill against a wounded foe. If you spawn near an enemy vehicle in onslaught, toss a grenade at it while you move to the nearest weapons locker; you may score a kill against a damaged vehicle.
Bio-Rifle
The bio-rifle, or goo gun, has one of the quickest kill capabilities in the game. Hold down secondary fire mode to charge a full glop of goo, move within close-range of your foe, aim, and release the secondary fire button. A fully charged goo gun will kill most opponents in a single blast. It’s a sudden, and often annoying, way to perish; though certainly not so annoying when you’re on the dealing end!
The primary fire button pumps out smaller globs of goo. Litter the ground around your opponent. Trap your opponent in a corner and force him through the goo to escape. If you’re chased down a narrow hall, drop some goo to create a literal minefield of glop behind you. The bio-rifle is decent as a defensive weapon in assault games. While other defenders support with sniper rifles, lightning guns, and rocket launchers, use your bio-rifle in close proximity and blast attackers with a full green sandwich.
Shock Rifle
The shock rifle offers a primary fire mode, a secondary fire mode, and a combination of the two. In its primary fire mode, the shock rifle unleashes a highly accurate, instant hit beam. Think of it as a rail gun (though a single hit isn’t life threatening). The primary fire mode works well against approaching enemies, particularly players who don’t move much or aren’t equipped with a long-range counter weapon. Its decent rate of fire also makes the shock rifle a good weapon for on-foot node killing in onslaught.
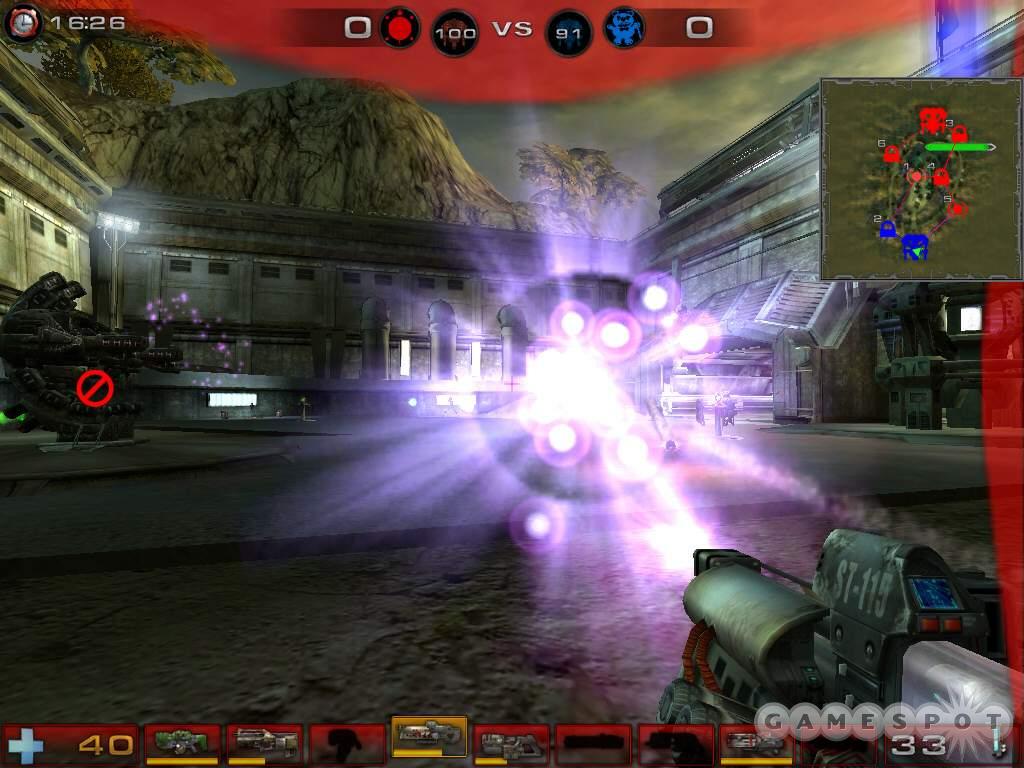
The weapon’s secondary fire launches a plasma ball. It’s a large projectile but isn’t an instant hit. The plasma ball is better suited for close ranges; at long distances it’s too easy to avoid and dodge. But the plasma ball is required for the shock rifle’s ultimate weapon: the shock combo. Launch a plasma ball then shoot it with the weapon’s primary fire. If you connect, the plasma ball explodes into a heavily damaging eruption. The shock combo is great in crowded deathmatch rooms, narrow assault defenses, or even as a means of taking down a vehicle in onslaught.
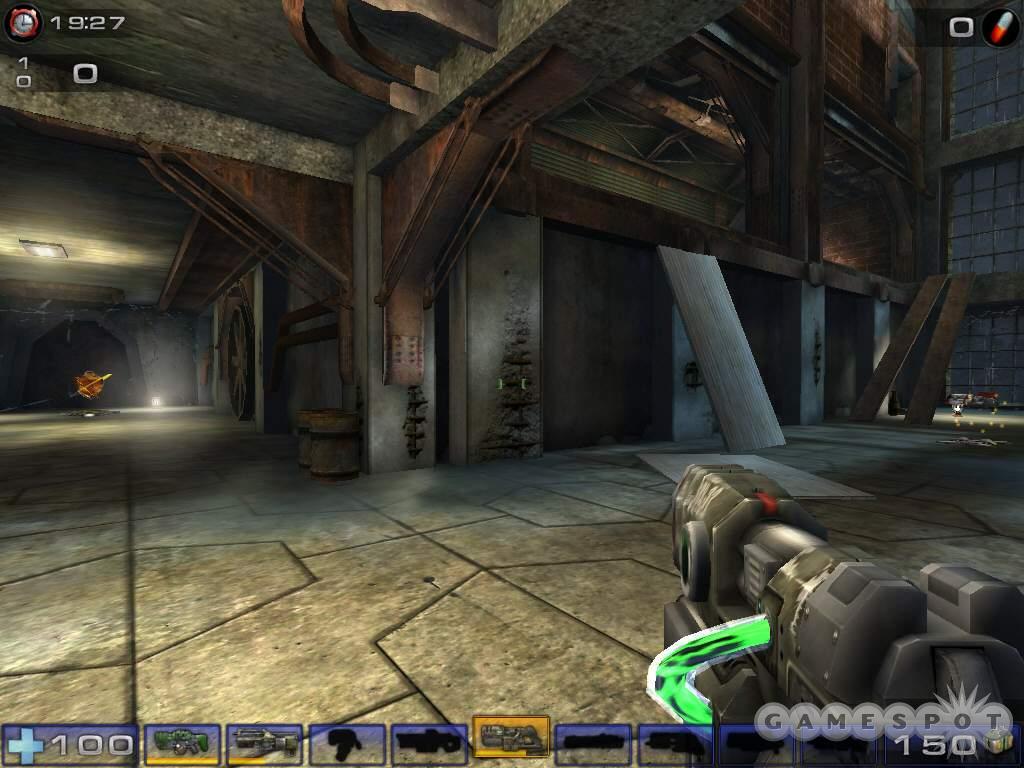
Minigun
Unreal Tournament 2004’s minigun is the quintessential machine gun: extremely high rate of fire with mediocre accuracy. But don’t let that sway you; the minigun is an effective weapon. Upon damaging your deathmatch foe with a rocket or flak blast, make the switch to the minigun to finish the job. The high rate of fire may be inaccurate but with so many projectiles out there you’re bound to strike the target a few times, which will likely be enough to score the kill. Use the secondary fire mode for additional damage.
Link Gun
The link gun offers two combat modes: its primary fire launches plasma projectiles while the secondary mode unleashes a plasma cutting torch. Both modes offer decent damage. The primary fire mode has a good rate of fire but the projectiles aren’t tough to dodge at longer range. Use the secondary fire mode in close range. Hold the cursor on your enemy and unleash the cutting torch. Follow your enemy’s movements to continue to inflict damage.

It’s in assault and onslaught where the link gun becomes one of the most important weapons. In fact, it’s probably the most important tool in onslaught. In both modes the link gun can repair certain objects, or in the case of onslaught, it can repair vehicles. For instance, in assault you can use the link gun to repair turrets or even objectives, such as the sentinels in AS-Mothership.
Without the link gun, onslaught barely exists! In onslaught, the link gun is used to build and repair the power nodes. You’ll also use the link gun to repair vehicles, particularly important for the goliath and leviathan, the two powerhouse ground vehicles. Strive to have link gun ammunition at all time. You never know when you may need to repair a vehicle or fix a power node, which would spawn additional vehicles. Finally, as its name suggests, the link gun can be "linked" between players to cause more damage against enemies or build and repair faster. To link, shoot at the other player firing the link gun, don’t fire at the enemy or the object you’re trying to repair.
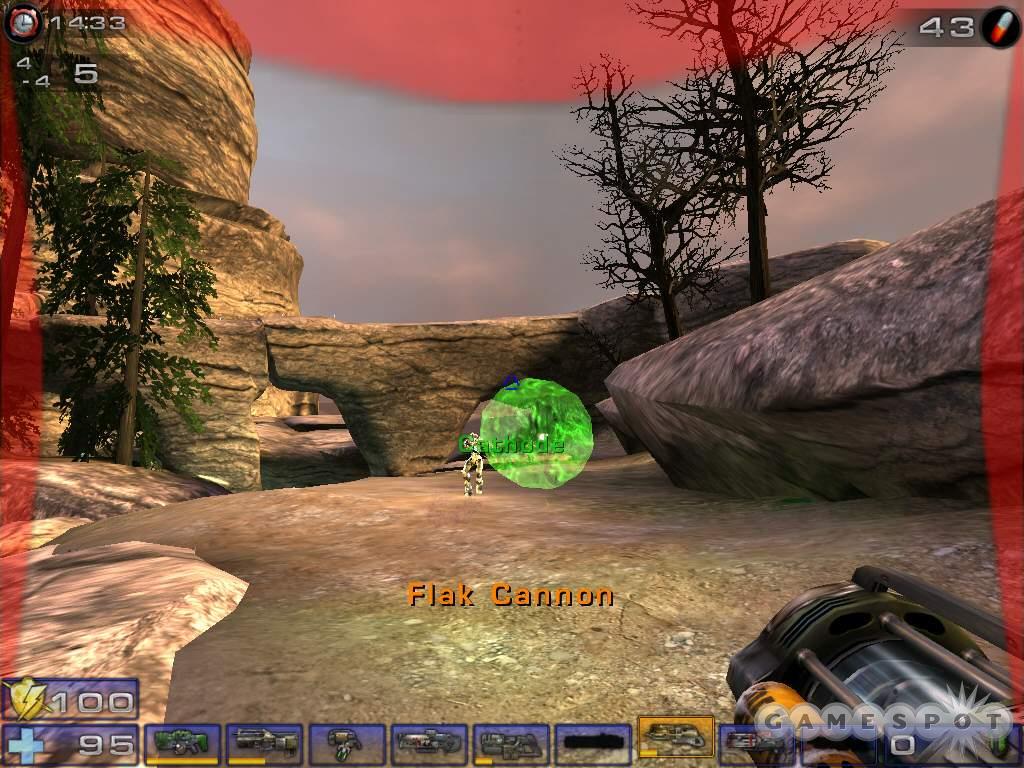
Flak Cannon
The flak cannon’s primary fire mode resembles a shotgun: deadly at close-range but nearly useless at longer ranges. The "ionized flechettes" bounce off of walls so it’s possible to damage a foe around a corner, though probably not heavily. At close-range the flak cannon is potent; at close-range it’s much more likely that all flak projectiles will strike the target inflicting major damage.
The weapon’s secondary fire mode launches a fragmentation grenade. This attack inflicts excellent damage if the grenade strikes the target directly, though you can also inflict splash damage if the detonation occurs near an enemy or enemies. You can also use the grenade to fire an attack at an enemy on higher ground. For instance, on the assault map AS-Convoy, you notice an enemy manning a turret on a ledge above you. Launch flak cannon fragmentation grenades onto the ledge to damage the enemy and turret.
Rocket Launcher
What can be said about a rocket launcher that hasn’t been said hundreds of times before? The rocket launcher is a staple of first-person shooter games and Unreal Tournament 2004 wouldn’t be the same without it.
Its primary fire mode launches a single rocket at the intended target; hold down the alternate fire mode to cue up one, two, or three rockets depending on how long you hold down the button. Multiple rockets fire in spread unless you press the primary fire button to launch then the multiple rockets fire in a tighter spiral pattern. This is extremely handy when firing at an enemy turret in assault or a power node in onslaught.
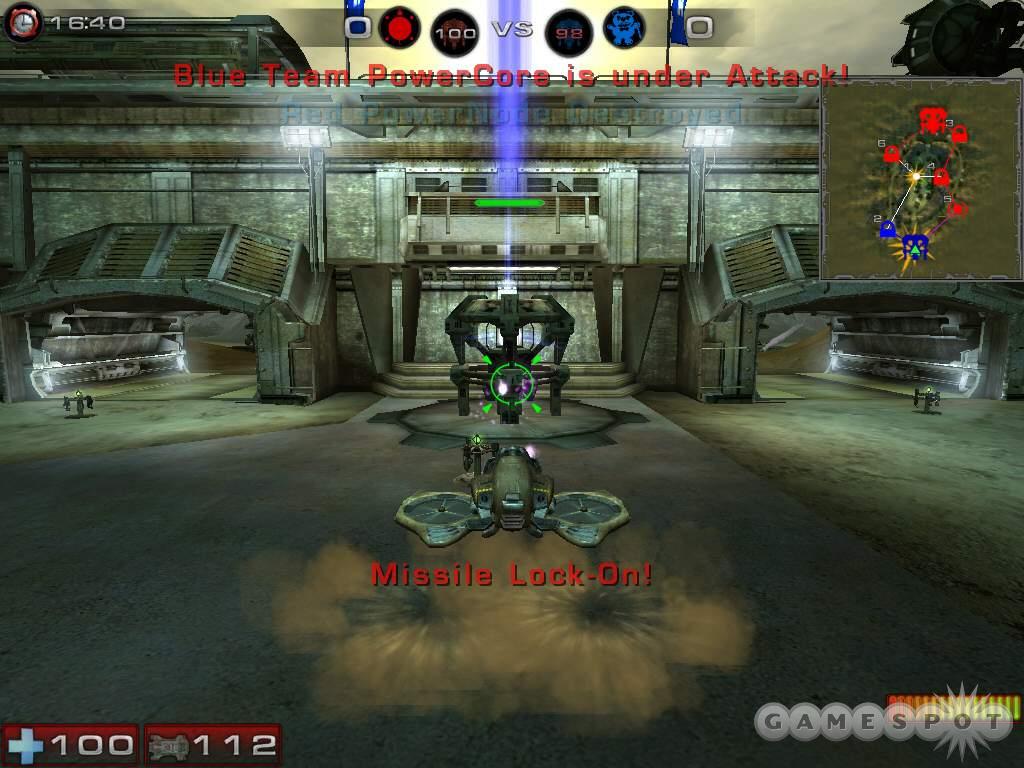
All of the rocket launcher tactics ring true here. In deathmatch situations, aim for your opponent’s feet instead of their upper body. Going for their feet will likely ensure damage; even if you miss the target, the nearby explosion will inflict splash damage. If you stay on target long enough you’ll hear a "missile lock" sound. Fire the rocket and the projectile tracks the target.
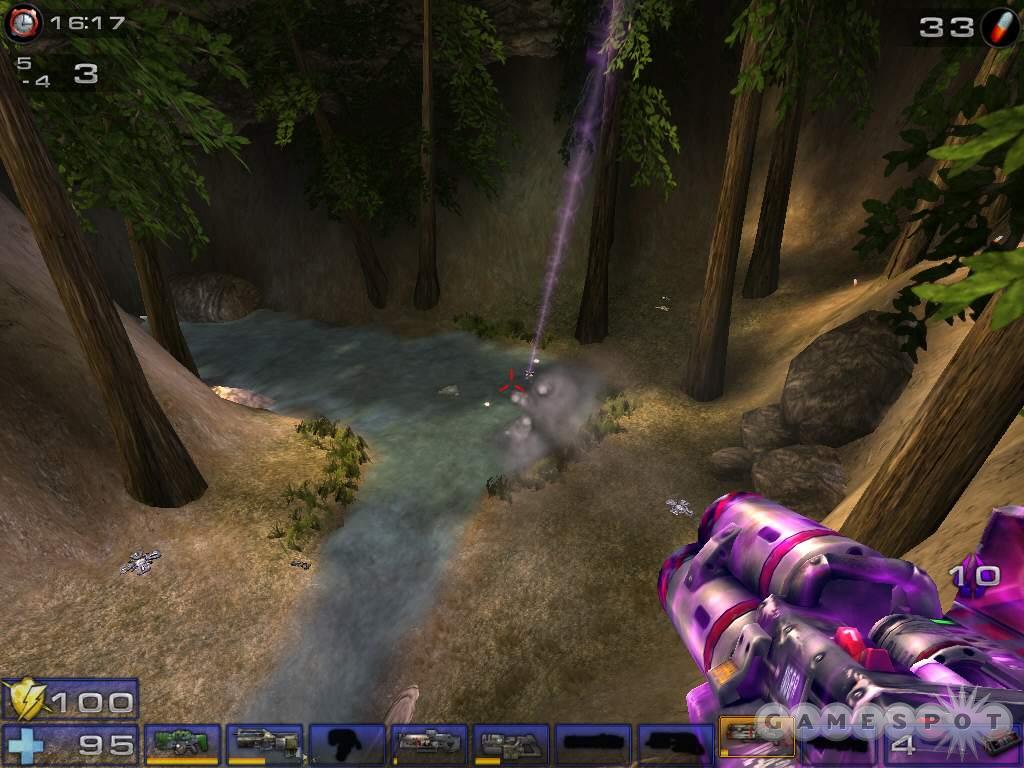
Lightning Gun
The lightning gun is similar to the shock rifle’s primary fire mode...on steroids. The refire rate is slower but the instant-hit bolt packs a wallop. It won’t take more than a couple direct hits (headshots are particularly damaging) against an enemy to score a lightning gun kill. Alternate fire mode serves as a zoom; hold down the alternate fire button to zoom in to a desired level.
Its primary weakness is rate of fire. The lightning gun recharges slowly. This creates a huge problem if you aren’t sniping. Trying to use the lightning gun in a hectic, close-range deathmatch battle is essentially hit or miss. If you have steady aim, it could work. By the time you miss one or two shots, you’re likely dead. Its true role is sniping. Find a secluded corner and zoom down a hallway or across the terrain of an expansive CTF or onslaught map. It’s also decent for pecking at vehicles (can even nail a driver) or power nodes at longer range.
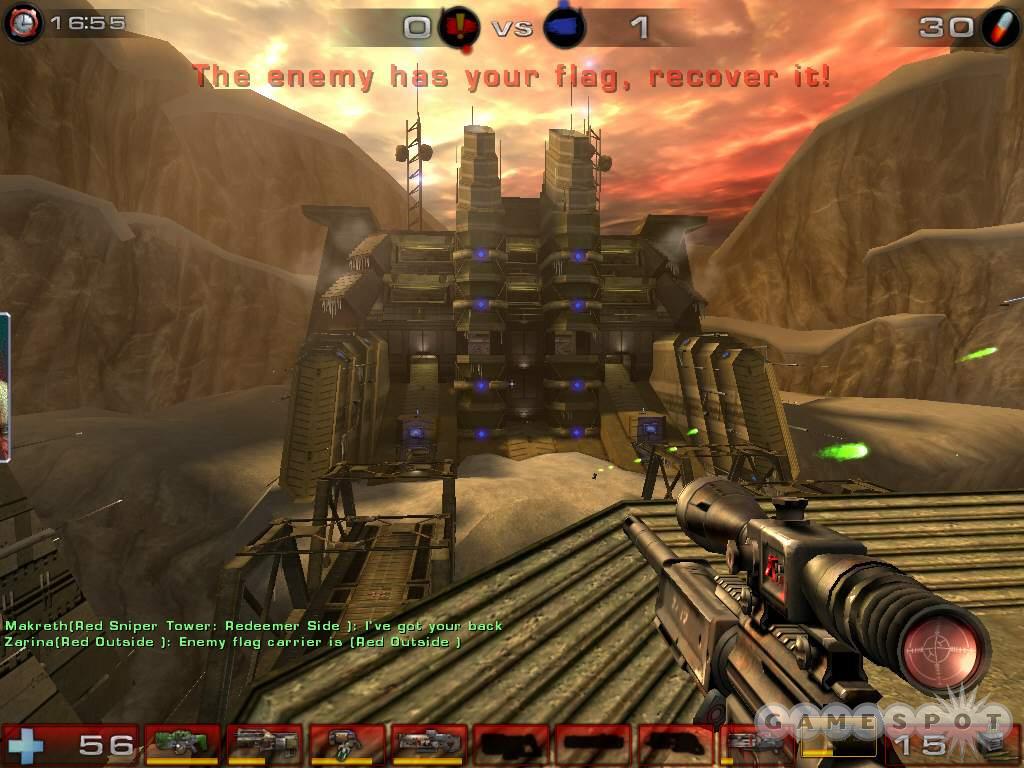
Sniper Rifle
The lightning gun served as a sniper rifle replacement in Unreal Tournament 2003...but the traditional sniper rifle is back in 2004. Like the lightning gun, the sniper rifle boasts an incredibly powerful shot against other players with a headshot causing the most damage. Use the sniper rifle’s alternate fire mode to zoom in on your unsuspecting target.
The sniper rifle’s primary weaknesses are rate of fire, close-range difficultly, and the smoke that emits after each shot. After firing the sniper rifle, a cloud of smoke appears and blocks your view of the target. This creates a lot of difficulty when trying to score follow up hits or to hit the target period. Make every shot count!
AVRiL
The AVRiL is the anti-vehicle weapon for assault and onslaught games. It’s essentially a rocket launcher but basically worthless against ground troops (the weapon’s rate of fire is abysmal). Instead, the slow-moving projectile packs a major punch against vehicles. Lock on to the enemy vehicle and fire the AVRiL. Maintain the cursor on the target and watch the missile reach its payload destination.
If you want to play onslaught, get used to the AVRiL quick. Use it to counter every vehicle in the game (especially important in countering the raptor air unit). The beauty is you can fire the AVRiL from huge distances. Spot a goliath tank in the far distance, equip the AVRiL, lock on, and fire the rocket. It doesn’t take many successful connects to destroy a vehicle, especially the smaller manta or scorpion. A squad of AVRiL users is a powerful defense of an important map position, such as your power core in the late stages of an overtime onslaught game.
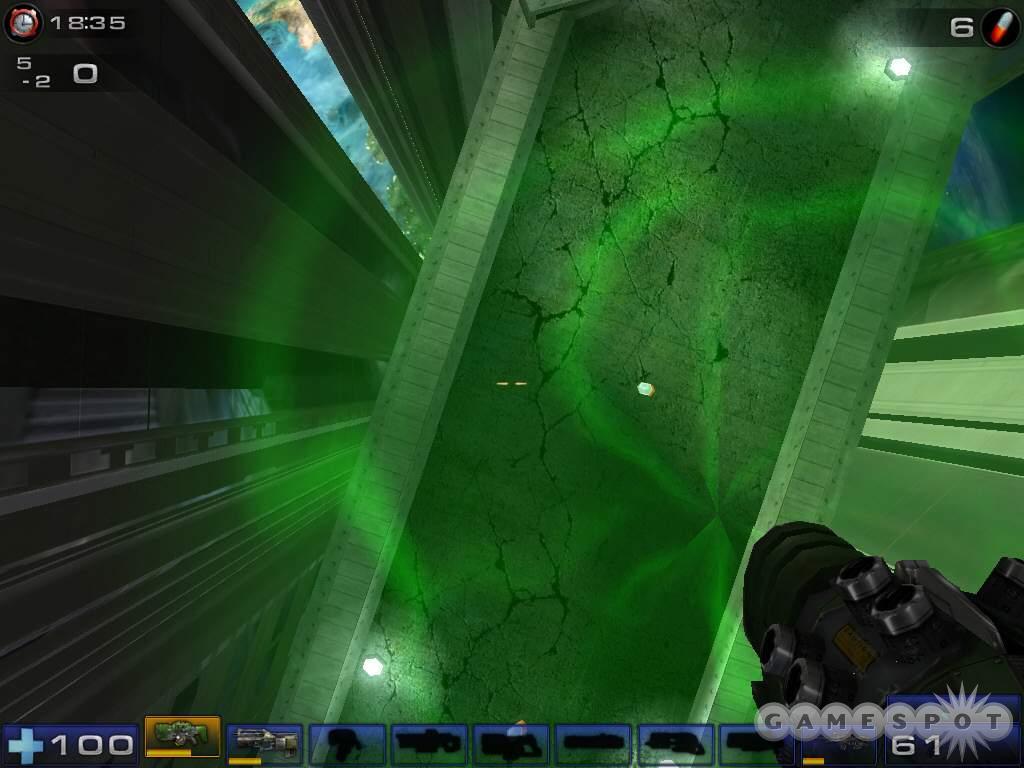
Ion Painter
Set a target or area up for a blast from above. Pinpoint a target and use the ion painter’s primary fire to emit a low-power laser beam at the target. The laser beam isn’t the weapon. After a few seconds, ion cannons from far above bombard the area with ionized plasma causing major area effect damage. Want to clear out defenders from a power node in onslaught? Use the painter! Also effective on an unshielded power core.
Grenade Launcher
The grenade launcher operates like a standard grenade launcher--fires bouncing grenades toward an intended target--but does offer some unique twists. First, you control when the grenade detonates with the alternate fire button. Toss a few grenades in your opponent’s path, wait for him to walk near the explosives, and press the alternate fire button to detonate them.
But perhaps the most unique feature is the grenades’ ability to stick on vehicles, humans, and other objects (such as an onslaught power node). Toss a few grenades on an enemy vehicle, hide in a corner, and wait for the clueless enemy to hop inside. Fire some grenades on an enemy player and detonate when he walks close to another foe. Place grenades around a power-up, wait for an enemy to go for it, and detonate the explosives for a sneaky kill!
Target Painter

The target painter is similar to the ion painter except it calls in an air strike on a designated area. The air strike takes longer to commence so it’s best used on a defensive position and not on a group of enemies (who could be long gone before the bombs fall). Note that the bomber can be shot down. So if you hear an air strike called, see if it’s headed your way (or to one of your nodes) and shoot the bomber down!
Mine Layer
The mine layer provides additional base defense and anti-vehicle support. Use the mine layer’s primary fire to drop spider mines at your desired location. The mines explode upon contact (chasing human players) but you can also control them by using the alternate fire mode. For instance, you spot an approaching goliath but its not moving toward your mine field. Press the alternate fire button to create a guidance laser. Move the laser around and watch the spider mines follow. Guide them to your target!
Create even better mines by attaching grenades to the spider mines. The grenade launcher fires grenades that stick to a variety of surfaces including spider mines! Protect a key power node in onslaught or your flag in CTF with spider mines enhanced with grenade power.
Redeemer
The super weapon from the original Unreal Tournament returns. Launch the redeemer missile at an area. Upon detonate the explosion creates heavy area effect damage. Don’t be within the blast radius or suffer the consequences! The super weapon’s best feature is alternate fire mode. Press it to launch a self-guided version of the redeemer missile. You can pilot the missile to the intended target.
This is a great tactic for finding a group of foes in a deathmatch game, weaving into a CTF base, or for targeting the power core from long-range in onslaught. Move to a safe location. While you’re guiding the missile you can’t see what’s happening around you. Someone could sneak up and pulverize you with a shield gun, stopping your sneaky tactic in a hurry. Note also that the redeemer missile can be shot down. If you see one headed your way (or into your base), target it!
Adrenaline
When your adrenaline reaches 100, you can perform one of four special combo maneuvers to gain a special power-up. The power-up lasts as long as you have adrenaline (which quickly counts down at the start of the power-up). Grab some extra adrenaline capsules to keep the power-up going.
- Speed (Forward, Forward, Forward, Forward): Provides a burst of speed. Great for capture the flag and bombing run games. Get the flag back to your base quicker or take the ball to the goal in bombing run with the help of speed.
- Booster (Back, Back, Back, Back): Adds five health per second until you reach the maximum of 199 then begins to add to your shield. Best used when you already have high health so the power-up’s time is best spent adding to your shield reserve. You can grab health or shield during the power-up and booster will continue to add to your new reserve level.
- Invisible (Left, Left, Right, Right): Sneak through flag defenses with the help of invisibility. Or move around a deathmatch map, surprising foes with your rocket launcher. Note that you aren’t completely invisible. An observant player can still see your faint outline.
- Berserk (Forward, Forward, Back, Back): Increases your rate of fire. Excellent for deathmatch games or for helping punch through a tough defense in CTF. Combine with double damage for a devastating combination.
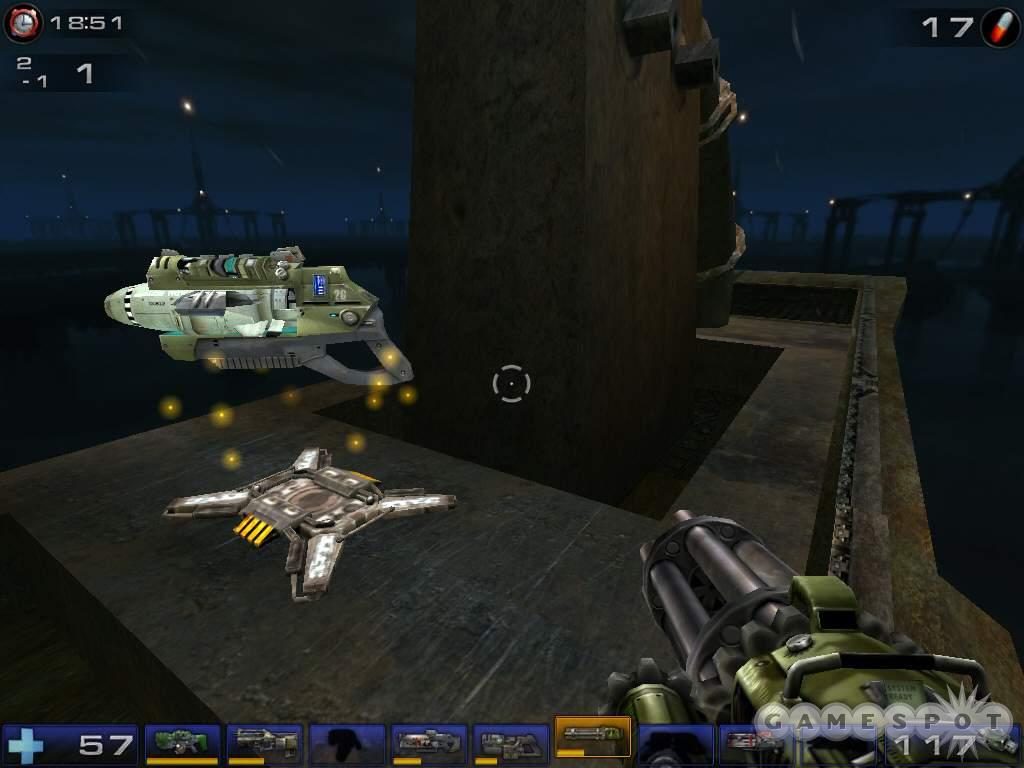
Manta
The manta is a light but fast attack vehicle that excels where speed is more important than firepower. For instance, your team has just linked to the enemy power core and you must inflict damage quickly against a defended base. Pilot the speedy manta and weave toward and into the enemy base to the core. Fire several plasma bolts and strafe around the core to avoid enemy counters as long as possible. Use the manta to reach power nodes quickly. The vehicle can also be used as a fast troop transport; teammates hop on the side and the pilot charges toward the desired location.
But what the manta has in speed it lacks in armor. A few shots are all it takes to dismantle the fragile manta. Use the manta’s speed to help avoid incoming fire. For instance, against a goliath you could strafe around to avoid the goliath’s main turret. Meanwhile, you’re pelting the goliath tank with plasma fire. But if the goliath has a secondary gunner, dodging becomes much more difficult. The manta also features the ability to jump and slam. Perform the jump over particular terrain to move quickly and press the alternate fire button to perform the slam maneuver. Score a "road kill" by slamming the manta on an enemy. It’s also possible to simply ram an enemy with the fast manta for a rather easy kill.
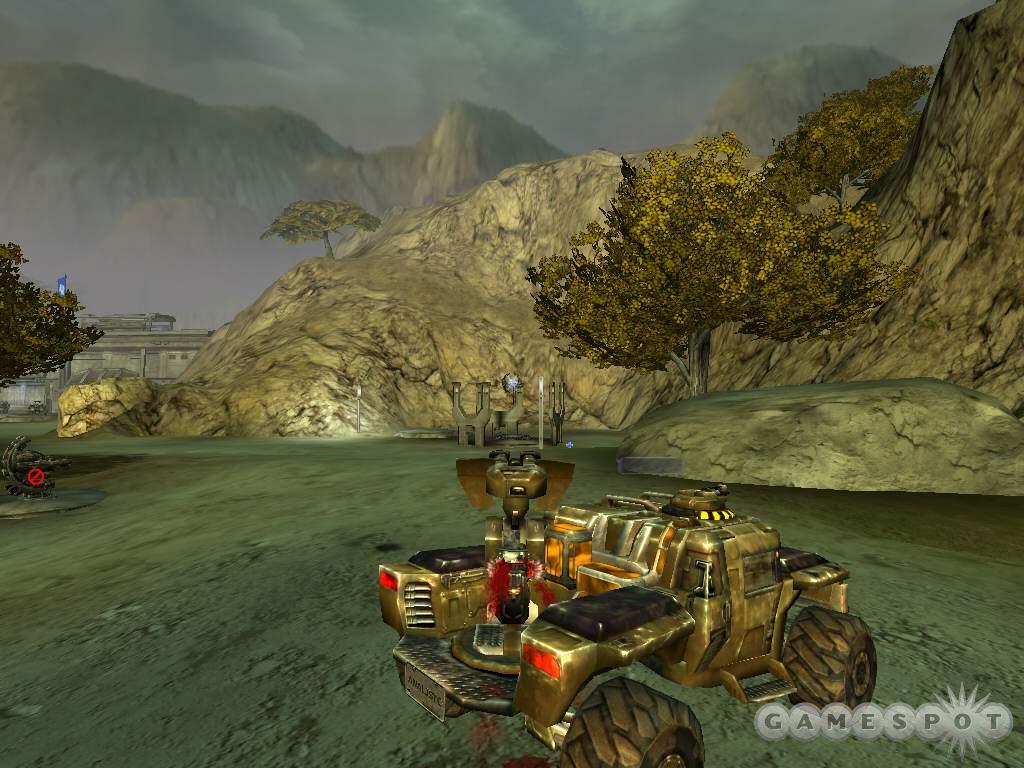
Scorpion
The speedy scorpion shares some similarities to the manta: its primary strength is speed and primary weakness is armor leaving it best suited for duties that require speed over brute force. Drive the scorpion to an unshielded power core and fire away or use the vehicle to quickly reach a particular power node (and like the manta, have teammates jump on for the ride). The scorpion offers a unique primary weapon, an energy ribbon that actually wraps around targets. Hold down the fire button for a more potent ribbon and release the launch the projectile. Wrap the ribbon around ground troops, a vehicle, or even as an effective attack against the enemy’s power core.
Pressing the alternate fire button while piloting the scorpion deploys twin industrial-grade steel shears from either side of the vehicle. Drive next to enemy infantry and deploy the blades for instant road kill. Note that the blades can be broken off. Don’t deploy when next to a stationary object. Like the manta, use the scorpion’s speed to survive encounters with larger vehicles. Launch the ribbon and retreat while mowing down any enemy infantry with the slicing shears.
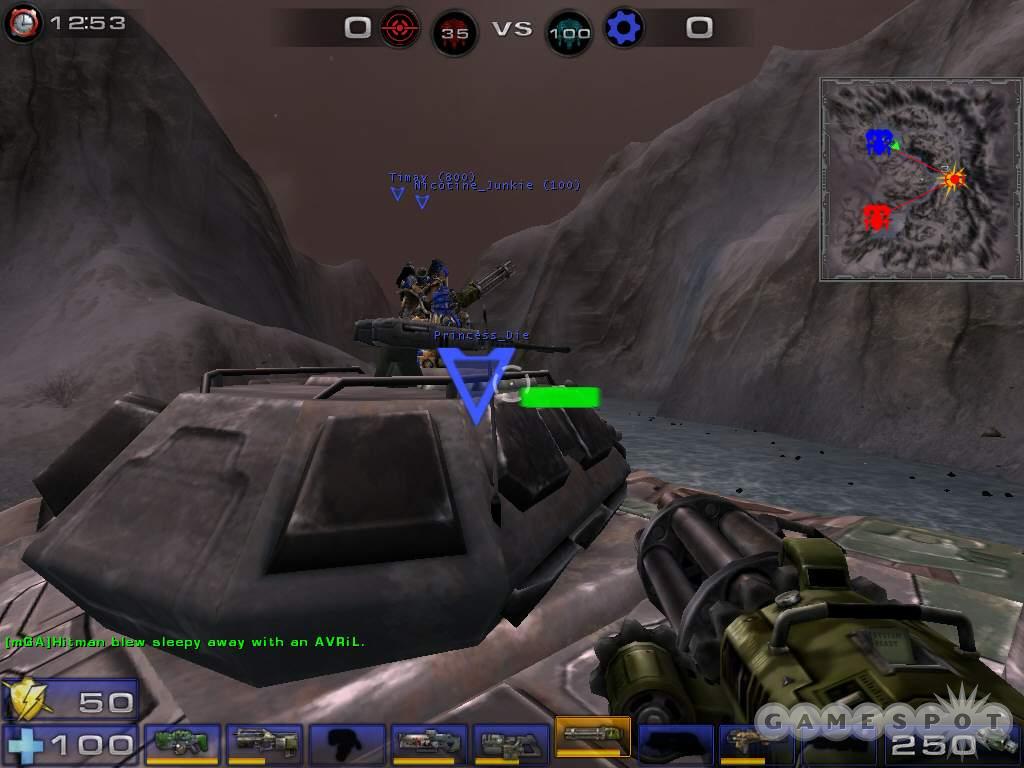
Hellbender
The hellbender provides a good balance of speed, armor, and firepower. The vehicle possesses the speed to get to the front line quickly or to infiltrate the enemy base quickly to mount an attack on an unshielded node. The hellbender’s armor is much more durable than the manta or scorpion and the hellbender features two weapon stations with varied attacks. But that’s the kicker: the two weapon stations are in addition to the driver.
The driver simply drives the vehicle (and honks the horn while driving over enemies like a maniac!) while additional teammates man each weapon station for a total of three passengers in a fully loaded hellbender. Note that a driver could switch from station to station and use the hellbender as a stationary weapon system but it’s much more effective in mobile attack situations.
One of the gun stations fires EMP projectiles (similar to the shock rifle’s alternate fire mode). The same gunner uses the alt-fire button to detonate the projectiles; hit one and cause a chain reaction among all fired EMP projectiles. Use it to blast a group of enemy infantry or to counter a small pack of vehicles. The other gun station is similar to a sniper rifle offering an instant-hit bolt; hold down the primary fire button for additional charge and use the alternate fire for zoom.
Raptor

The raptor is the primary air vehicle in Unreal Tournament 2004’s onslaught mode. The beauty of the raptor is the ability to traverse long distances in a short amount of time. Sure the manta and scorpion or fast but you still must weave through canyons, dodge pillars, and maneuver across the appropriate terrain. That’s no problem in the raptor. Just pilot the air unit and ascend to the skies. Cross the map to wherever you wish to go, such as an unguarded power node or to the top of a tower that holds power-ups.
The raptor’s primary weapon is a plasma projector and fires bolts similar to the manta. The air unit’s secondary weapon is a homing missile that locks on only against other raptors and the manta. Though flying high will certainly allow you to maneuver around the map quickly it also leaves you most vulnerable to enemy weapons fire, particularly the AVRiL. Fly low and you won’t be seen by as many enemies and may be able to reach your destination a lot easier. The raptor can effectively dodge most other weapon fire but beware of the goliath’s secondary attack (if you come across a single piloted goliath then the raptor reigns supreme) and certainly the leviathan’s tracking rockets. Get lower to avoid the homing projectiles.
Goliath
The goliath tank is a beast and typically the heaviest weapon on the map (other than the two maps that feature the Leviathan). Controlling positions that offer goliaths is one of the keys to consistent onslaught success. Goliath tanks feature heavy armor, excellent weaponry, but lack the speed of other vehicles. The tank may not reach the destination quickly but once it does it has the armor and firepower to stay around for awhile. Since the tank is so powerful and important, be sure to repair the vehicle with link guns as much as possible. Even if you aren’t in the tank, repair an ally’s tank to keep it intact for as long as possible.
The tank has two gun stations: the driver fires the primary cannon while a second occupant can man the machine gun controls. It’s extremely important to maximize the goliath’s potential with two gunners. The main cannon moves and fires very slowly. A machine gunner helps target close-range infantry (often too close for the main gun) and to counter aerial assaults from raptors. You can also use the guns in combination to demolish a power node quickly.
The primary cannon is powerful and equally efficient in killing infantry, vehicles, and power nodes. Since the cannon is so slow, it’s best utilized at longer range so you can adjust for the enemy’s movement. Be careful when firing around hills and other objects. It can be difficult to accurately line-up your shot. If you aren’t careful the projectile may impact on the top of the hill instead of toward your intended target.
Leviathan
The leviathan is a mobile super weapon and only found on two onslaught maps included in Unreal Tournament 2004 (ONS-RedPlanet and ONS-Severance). The mammoth vehicle includes five stations: a driver and four support gunners. The driver pilots the slow vehicle, fires its primary homing missile weapon (which tracks any enemy), and uses the alternate fire button to deploy the leviathan in its turret mode. Secondary gunners provide anti-vehicle support at the four gun stations. Like the goliath, it’s extremely important to keep the leviathan intact for as long as possible. Secondary gunners should be prepared to exit and use link guns to repair the super vehicle.
The leviathan becomes much more deadly and vulnerable (the vehicle seems to incur more damage) in deployed mode. Once deployed, a massive ion cannon enhances the leviathan’s primary fire mode. It’s not a fast shot by any means but it’s utterly devastating. Clear out an enemy power node in a single barrage with the leviathan’s cannon. A shockwave explosion appears at the target causing major area effect damage. Obliterate infantry, vehicles, and cause major damage to an enemy power core if you’re fortunate enough to maneuver into range.
The most important thing is to keep the leviathan repaired and protected. It moves so slowly that it takes a lot of time to maneuver the super vehicle to the front line and into a strategic firing position. Protect it with infantry and vehicle escort and keep it repaired with link guns. Once it’s deployed, the main gun should concentrate on primary base targets and nodes (or tightly packed vehicles). Support should focus on clearing out infantry and other vehicles from around the leviathan. Stay armed with AVRiLs to take down aerial attacks and approaching vehicles.
Chapter 2 - Deathmatch
From the days of Doom, the deathmatch game mode hasn’t changed a significant amount...which isn’t to say it isn’t as fun as ever. The weapons may change, the power-ups may change, and the maps become more refined, exciting, and often breathtaking but the core strategies for deathmatch remains essentially the same.
- Map knowledge is one of the most fundamental skills for the seasoned deathmatch gamer. Know the quickest route to your favorite weapon, health packs, or power-up. Plan a route that takes you along a path that moves through your favorite weapon, adrenaline capsules, and power-ups. In smaller "1-on-1" deathmatch maps, control certain areas of the map to keep your opponent away from particular weaponry and power-ups. In smaller games, controlling the double damage or super shield becomes extremely important. Double damage provides 30 seconds of increased damage, which can add up to a lot of kills in a small map. This section provides map strategies for all new deathmatch maps included in Unreal Tournament 2004. Check our Unreal Tournament 2003 game guide for strategies for maps included in both games.
- Practice certain movement techniques to become a more elusive deathmatch player. For example, double-tap in any direction to perform a dodge. This can be used to dodge a variety of weapons fire, such as an incoming rocket blast. Hit the jump button after a dodge to combine two moves. Perform a double-jump by pressing the jump button again at the apex of your original jump. It’s also possible to dodge off of a wall. Jump against a wall and double-tap in the opposite direction to dodge off the surface. As explained in the weapons section, you can use the shield gun to gain extra height on a jump at the expense of health. Also, when riding a lift, hit the jump button at the apex to bounce off of the lift. All of these moves can help you get to particular locations quickly and easily as well as help avoid enemy fire.
- Look for opportunities to leech off of other deathmatch players’ success and failures. Find a group of players engaged in battle and shoot into the fray to eliminate wounded players. When you spot a player emerge victorious from a battle, engage him quickly; he’s likely wounded and will fall quickly to your weapons fire. Know the battle situation in a tight game. If you’re low on health and out of ammunition, it’s often better to run and find health or new weaponry then stand and fight an inevitable losing battle.
- Know the strengths and weaknesses of all of your weaponry. Trying to kill a player at long-range with the flak cannon simply won’t work. If you happen to recover the redeemer, maximize its damage potential by launching it into a crowded room. Be clear of the blast radius! Fire the rocket launcher’s alternate fire mode in a tight spiral to maximize damage potential at close-range. Utilize the minigun or link gun’s alternate fire mode to finish off an already wounded enemy.
- Mix up your gameplay. Run around the map choosing your favorite route through weapons, adrenaline, and power-ups. Then take a few minutes to find a secluded location (preferably looking down a hall or room where you expect an opponent to frequent) and blast the foe with the lightning gun or sniper rifle. Don’t go to the well too often, though; human players catch on quickly to sneaky tactics.
DM-1-on-1-Albatross
Albatross is an outdoor one-on-one map built around the ruins of an ancient castle or fortress. Its open paths and multi-tiered battleground allows you to keep decent tabs on your opponent’s whereabouts. One of its most important aspects to master on the map is to know the entrances and exits to each location. For instance, when you spot your opponent moving through the tunnel under the bio-rifle, you know he’ll have to either come back through the same way or use the lift at the end to the two health packs. Either way you will know his location and can use your weapons accordingly.
The bottom of Albatross is the most dangerous place to be. It’s easy for an opponent to track you from the upper walkways and fire down rockets, flak, or bio-rifle goop in your path (or to track you through the entrances and exits). However, the lower area is also extremely valuable. It houses the rocket launcher in a short tunnel that connects the map’s two halves. Also, across from the rocket launcher is an interior route containing health vials. Follow the vials to the end and find the super shield pack. Note that you can also grab the super shield pack from underneath. Follow the short tunnel and spot the super shield pack on the ledge to the left. Use a shield gun jump to reach the ledge. You’ll lose some health but gain the shield.
The regular shield pack is found on the wooden walkways on the upper level (reach it quickly by using the lift to the right of the super shield pack entrance). Make loops around the vials to keep your health above 100 (there are plentiful vials along the map’s bottom area). If you’re low on health, charge to the map’s other half (other side from the shield packs) to find two health packs at the top of a lift. The lightning gun is on an upper ledge to your left. You can reach it by traversing a hill around the left side or, if you’re adventurous, you can use a shield jump from the lift to reach the lightning gun and this sniping perch.
After acquiring your preferred weapon (the rocket launcher being ideal), return to the upper section and hoard the shield pack. Drop down and make a loop through the vials and super shield pack on occasion and return to the upper section. Here you have cover (the large crates), a view to the level’s bottom (through the open areas and even the holes in the floor), and access to the highest parts of the map. You can shield gun jump to the roof above the lightning gun for the map’s ultimate sniping area. Plus, perform a shield gun jump to reach the top of structure at the end of the wooden bridge--on top you’ll find the double damage power-up!
DM-1-on-1-Desolation
The Tower of Desolation, a series of rooms, ramps, and foliage, is an art museum converted into a battleground. The narrow, but open, layout means you’ll likely take fire from your opponent and have no clue where the projectiles are coming from. This is most dangerous on the rocket launcher ramp. There are many spots with a view of this ramp; since it’s a hotly contested area, beware of an ambush when grabbing the rocket launcher and the nearby adrenaline capsules.

If you go down the same ramp, you can spot the ledge where the double damage appears. You can use a shield gun jump to leap from the rocket launcher to the double damage very quickly. Otherwise use the nearby ramp (where the lightning gun rests) to reach the double damage in slower time. Likewise, if you’re near the double damage along the map’s top, grab it then drop down to the rocket launcher.
You can jump on the tops of the large plants. You can use them as sniping positions. For instance, at the top of the rocket launcher ramp you can jump over the two spires toward the planting in the distance. Navigate the narrow ledge and look to the hall below to keep an eye out for your opponent. Be careful fighting on the ramps along the tower’s edges. Should you fall off of these ramps, you’ll land in a corner leaving you vulnerable to splash damage. Because of the narrow passages, the minigun is a great finisher on this map. Inflict your initial damage with a better weapon then switch to the minigun for the finishing blow. The narrow passages leave little room to avoid the minigun’s high rate of fire.
DM-1-on-1-Idoma
Idoma is another organic one-on-one deathmatch level. The layout features wooden walkways, stone walls, and trees serving as pillars and supports for most of the map’s doorways and ceilings. You’ll first notice that the hallways are quite wide. It’s easier to dodge rockets and other projectiles within Idoma’s layout than a tighter map like Desolation. Weapons like the shock rifle’s primary fire and the lightning gun gain more importance with the long open hallways. The rocket is easily dodged at long-range unlike the shock rifle and lightning gun projectiles.
A short tunnel connects the lower section housing the rocket launcher on one side and the shock rifle on the other. These recessed areas are danger zones if you’re moving through here and your opponent is on the higher floor waiting for you. The shield pack and lightning gun are found on the highest ledge overlooking the shock rifle. You can use the ramps to reach the position or use a shield gun jump to reach the shield pack from the opposite ledge. Sticking close to the rocket launcher does keep you away from the shield pack but closer to adrenaline capsules and health.
Take command of the rocket launcher, flak cannon, shock rifle, and lightning gun as much as possible. After obtaining the rocket launcher, get the adrenaline capsules and stick closer to the shield pack to gain the power-up at each respawn. Stick with the flak and rocket launcher in close skirmishes (the shock rifle combo isn’t a bad choice either) then switch to the shock rifle or lightning gun when you spot an opponent at the end of a long hallway.
DM-1-on-1-Irondust

Irondust is an all-out power-up war. The double damage, super shield pack, and shield pack are all present on the map and they’re all out in the open--but on opposite ends of the map from one another. So controlling every power-up is virtually impossible. But that doesn’t mean you can neglect them. You’ll have to make the most of every power-up opportunity and keep frequent tabs on their spawn locations. The super shield pack is located on the upper floor. Reach it either by a long-lift from the lower section or moving left from the rocket launcher or right from the lightning gun (when facing the long open hallway that connects those two weapons).
The shield pack is on the lower level in a relatively small room near the flak cannon. You can exit this room via the lift inside if you become trapped inside. You can also reach this room by dropping down the lift shaft. Move forward against the open room to avoid immediately taking the lift back up. The double damage is also on the lower section in a multi-level room. Find the double damage power-up at the end of a short catwalk. One of the best ways to reach this room is actually from above. Move through the long hall connecting the rocket launcher and lightning gun. Before the stairs leading to the lightning gun, drop down onto the pipes on either side of the stairs. From there, hop down onto the catwalk containing the double damage.
Irondust is a mix of small and large spaces. The hallway connecting the rocket launcher and lightning gun is expansive, which makes the lightning gun your optimum choice when battling here. Also look for unique sniping areas. For example, near the super shield pack you can maneuver onto the girders and watch for your opponent to pass by below (or to move up the lift to reach the super shield pack). You’re a relatively easy target here, however; don’t expect to be able to venture into this well very often.
DM-1-on-1-Roughinery
The remnants of an old refinery serve as the one-on-one battleground for Roughinery, a maze-like series of narrow pathways and ramps. Despite the crisscross routes, Roughinery is a fairly open map meaning you can see a lot of areas from any given part of the map. This allows for both lightning gun sniping and for pinpointing where your opponent is headed so you can greet him with bio-rifle goop or shock combo. Remember that the same is being done to you so don’t predictably follow the paths and ramps around the map. Drop down from the highest level to the lowest level (using your shield gun to break the fall if necessary) or use double jumps to leap from ledge to ledge bypassing a ramp or other route.
The super shield pack is found in a dangerous area--the lowest section of the map in a virtually dead-end tunnel (though with multiple entrances). Hanging out in here waiting for the super shield pack is a challenge as its tough to watch the entrances. Plus it’s narrow so unless you’re well equipped, an opponent carrying a shock rifle, flak cannon, or rocket launcher can inflict serious damage in a short amount of time. Note that you can exit the tunnel using a shield gun jump to the upper ledges. That way you bypass the entrance ramp and, hopefully, an opponent trying to score a successful ambush.
The double damage and shield pack are on upper pathways. Find the double damage at the end of the path containing the ample adrenaline capsules. If you’re lost somewhere on the map, scan around for the capsules and move toward that location. Use the ramps on the right side to ascend to the path connecting to the capsules and the power-up. From the double damage, drop down to the path below and find the rocket launcher. The shield pack is found on the opposite side of the map. Move up the ramp from the shock rifle to find the shield pack on a very narrow catwalk. There’s also a lot of health in this area (packs near the shock rifle and vials on the ramp). If you’re low on health you’ll find enough here to replenish above 100.
DM-1-on-1-Spirit
An ancient religious structure houses the one-on-one battleground called Spirit. Height advantage will certainly play a role here. Spirit is a connected set of multi-tiered rooms. Use the ramps (and the occasional lift) to reach the upper sections. You’re most vulnerable moving around the lower floor. An opponent on the highest level won’t have much trouble nailing you with explosive weapons from above. The map’s shield packs rest on opposite corners of the map from one another.
Find the super shield pack at the end of a wooden walkway on the upper level. Cut the corner and perform a double jump to the walkway to shave a few seconds off its acquisition. You can also reach it from below by using a shield gun jump. The shield pack is found in the opposite corner near the lightning gun. It can also be reached with a shield gun jump from the level below.
Adrenaline capsules crowd the map. Make them a priority when maneuvering through Spirit. Find the rocket launcher at the lowest level near a couple helpful health packs. From the rocket launcher, ascend the ramps and you’ll be close to the super shield pack in the adjacent room. The flak cannon and bio-rifle are found at the bottom of the other sections; find the shock rifle in a central tunnel connecting all of Spirit’s sides.
DM-1-on-1-Squader
Squader was once a section of a hidden military research facility. Now it has been converted into a one-on-one deathmatch arena. The map is very tight; the hallways are narrow leaving little room to dodge incoming projectiles. Explosive splash damage weaponry, particularly the rocket launcher and flak cannon, will prove most effective. But don’t underestimate the shock combo or a full load of bio-rifle goop for an easy frag in one of Squader’s claustrophobic corridors.
One of the key locations is the rocket launcher, found on one of the highest perches on the map. The rocket launcher is virtually a central location for the map’s three power-ups. You can drop down a hole adjacent to the rocket launcher and land directly on the double damage. Move past the hole and around the corner to find the shield pack. Go to the opposite side of the hole and spot the super shield pack by the window in the distance. To reach the super shield pack from here, drop down then perform a double jump to reach the pack’s ledge. That will nearly always be the quickest route to the super shield instead of using the standard entrance to its left.
The ramps near the large window are another important area of contention. You’ll find the shock rifle at the bottom, a scattered set of health vials on upper ramps, and the ability to reach the double damage power-up with a double jump. You can also use the lift to its right to reach the upper catwalk containing the shield pack. And then you’re just a few steps from the rocket launcher. Control these areas--the ramps and the rocket launcher perch--to maintain a close watch on the nearby power-ups.
DM-1-on-1-Trite
The abandoned facility called Trite closely resembles the religious structure Spirit. Both feature a series of multi-tiered rooms connected by ramps and narrow pathways. Like Spirit, Trite features all three primary power-ups. The double damage is found in one of Trite’s corners. You can reach the power-up by the ramps leading up to the lightning gun. Then follow the adjacent path to the double damage.
However, a couple alternate routes should be mastered to maintain control of the power-up. You can perform a double jump from the bio-rifle to reach the double damage. Also, you can use a shield gun jump from the opposite lower ledge (the one containing the four adrenaline capsules). Both give you quicker access to the power-up.
Find the super shield pack positioned in a dangerously small room on Trite’s opposite side. A window forms one of the super shield pack room’s walls; a savvy opponent can spot you entering the room and make it very difficult to leave in one piece. Whenever entering this side of the map (above the flak cannon), perform a visual check through the window to see if the super shield has spawned. Find the regular shield pack on a ramp leading from the minigun to the bio-rifle ledge.
DM-Corrugation
The ruins of an old building form the deathmatch map Corrugation. It’s essentially two levels--the building floor and the damp space underneath the structure. Utilize the lifts and the occasional staircase to maneuver between floors. The upper floor has considerable damage; the holes in the flooring allow you to see what’s happening on the lower section. This is an ideal means of getting a jump on an opponent who may be maneuvering underneath unaware of your attack from above. Obliterate your opponent with a shock combo, close-range flak cannon blast, or a barrage of three rockets in alternate fire mode.
One of the largest upper floor rooms is also the most damaged; huge holes provide gaps in the flooring. A super shield pack rests in the room’s center. Note that the gaps can be jumped over. If you’re trying to flee a pursuer (or perhaps you’re the chaser!), jump over the gaps instead of moving around them.
From the super shield pack power-up, move through the doorway containing the minigun to the right; nearby you’ll find the regular shield pack. On the damp bottom section, you’ll find the double damage at the intersection of the sewer tunnels. If you’re around the tunnels, move through to check on the power-up. A nearby bio-rifle (inside the sewer tunnel) is an ideal weapon in the tunnel, especially boosted by double damage.
DM-Deck17
Deck17 is an update of the classic Unreal Tournament map Deck16. In fact, if you look closely around the map you can see the entrance into Deck16 barricaded off--it’s under reconstruction! It’s an extremely hectic map, particularly with six to eight players. The ramp-filled central section is where most of the action will take place. Classic Unreal Tournament sniper rifles can be effective here; though don’t expect to find a hidden sniping roost. You’re easily found just about anywhere. Just as you get comfortable with a zoomed scope, someone is bound to sneak up behind you. One of the optimum positions is on the top ledge in the central section. Get there by moving up the ramps to the top and jump to the corner alcove.
You can drop all the way to the magma at the bottom of the map. Naturally watch your footing here as its basically instant death should you fall inside the scorching substance. When on the middle catwalk, drop down onto the perpendicular beam to find the super shield pack. Drop down to the bottom (along the edges to avoid the lava) and use the red teleporter near the rocket launcher. This sends you to a hidden room containing the redeemer.
You’ll be able to spot the double damage from the central room; the power-up spawns on one of the Deck17 crates below the sniper ledge. Drop onto the crate from the higher ramps or use a shield gun jump to quickly bounce onto the crate. Standard shield packs are found on the ledge at the top of the ramps (near the jump to the sniping ledge) and another on crates at the bottom area (opposite side from the teleporter). Get this shield pack by riding the side lifts up and dropping down onto the power-up.
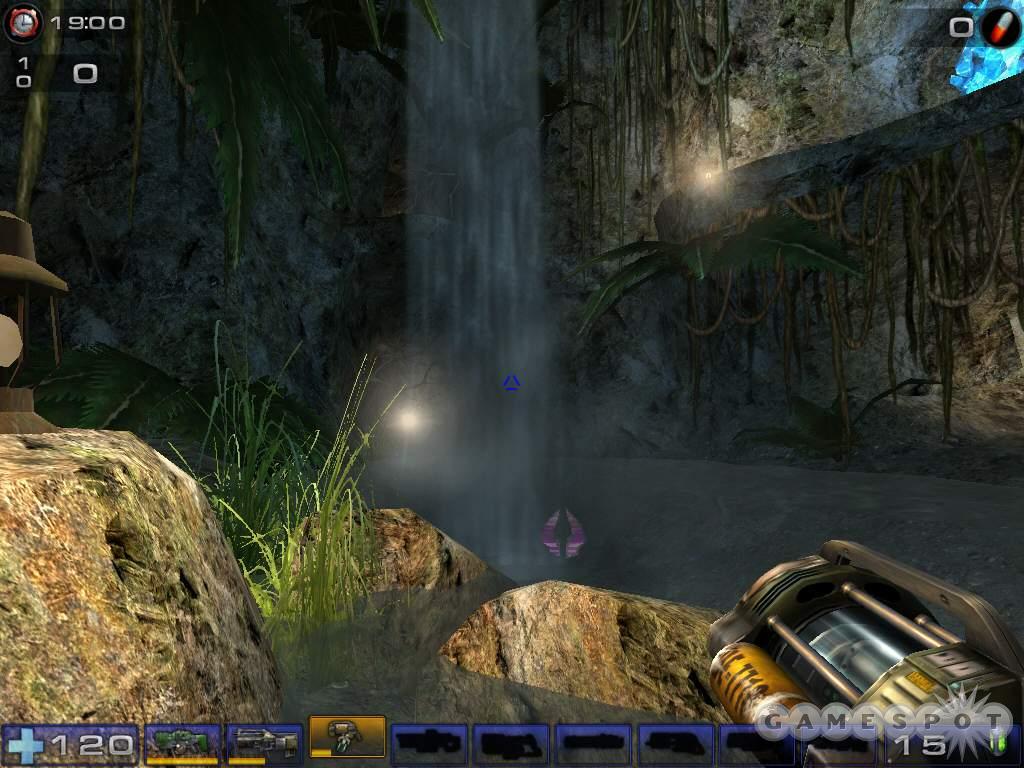
DM-DesertIsle
A peaceful stream, a serene waterfall, and a gorgeous canyon--something you might see in the next version of Myst. But it’s also one of the sharpest Unreal Tournament 2004 deathmatch arenas. When you venture to Desert Isle’s highest point, you may think it’s one of the largest deathmatch maps in history. But as you move away from the map’s center, you realize an invisible force field encloses the arena (the force field materializes as you near the map’s edge).
The basin at the bottom of the waterfall is one of the map’s key areas. While standing on the cliff above, use the rocket launcher, shock rifle, and lightning gun to fire on players below. The super shield pack also spawns here. From the basin you can move up the path containing the adrenaline capsules or use the long lift back up to the cliffs. Both routes connect to the stream that leads to the waterfall; the stream runs in a circular pattern around the map’s edge.

The stream is also key because one of the quickest ways to the map’s other important power-ups. The double damage rests on a cliff on the other side of the stream. You can reach it by using lifts to reach the map’s top and its series of land bridges. You can jump from the land bridge after procuring the shield pack. Or you can jump from the top of the lift (after riding it up) toward the double damage. Finally, search the land bridge adjacent to the one containing the shield pack to find the redeemer at the map’s edge.
DM-Gestalt
The Gestalt Research Center sits below the thinning polar ice caps. The map is a stark contrast to the colorful exterior of Desert Isle; the gloomy Gestalt Research Center interior mirrors the icy ceiling that hovers ominously above the facility.
Gestalt contains three levels. Ramps and lifts connect the bottom and middle floor; to reach the third floor, perform a double jump from the top of the pillar holding the double damage and land at the rocket launcher. From there you can explore the upper floor containing tight hallways (with health vials) and a sniping post with the lightning gun. Two shield packs rest on opposite ends of the center on Gestalt’s middle level.
The large room housing the double damage will provide the biggest battles. All floors are visible here so you’re vulnerable to fire from nearly every direction. Height advantage will prove effective here, particularly if you score the double damage and rocket launcher in successive jumps. From the lightning gun you can shield jump to the highest part of the map, the girders overlooking the large room below (with a great view of the double damage). You will likely score easy sniping kills from these ledges but may not keep up with more aggressive opponents roaming Gestalt’s other hallways.
DM-Goliath
The aptly named Goliath is an orbital power station...an immense orbital power station. The map has several very large areas. Long-range accuracy will be extremely important. Mastering the shock combo or a precise lightning gun bolt will send your score to the top of the leaderboard.
One of the key smaller rooms contains the double damage. It’s the side room with the shallow water and the generator overhead. The double damage spawns on the lower ledge above the water. Also, if you maneuver to the higher ledge, you can use a shield gun jump to reach the platform underneath the generator. There you’ll find the redeemer! You can reach this room by teleporter (near the flak cannon below the super shield pack) or through both upper and lower routes from Goliath’s large areas.
Goliath contains both shield packs. Find the super shield pack on an upper catwalk in one of Goliath’s larger areas. It’s possible to use a shield gun jump to reach this upper catwalk without taking the long way through the station interior. Locate the shield pack in the opposite open area. It’s at the far end of a ledge containing a string of health vials. Instead of using the long staircase and following the ledge to its end, use a double jump from the ledge below the shield pack or a shield gun jump from the opposite direction.
DM-Hyperblast2
Hyperblast2 is a remake of a classic Unreal Tournament map. The battle takes place on a speeding spacecraft. The presence of both interior and exterior areas makes the map unique. Additionally, the exterior area is low gravity. Your jumps and double jumps will be much higher--and slower making you an easier target floating around the depths of space. And watch your step on the ship’s exterior. Infinite space is a long way down and instant death.
You’ll find the rocket launcher on the ship’s top. It’s a great weapon for the ship’s interior but not as useful in the low gravity exterior. Since most players will be jumping around the exterior, you’ll have to be extremely accurate to score a successful rocket hit (or manage to lock on). Better exterior weapons include the minigun, shock rifle, and link gun.
Locate the super shield pack at the edge of the ship’s large front exit (the standard shield pack rests in a similar location at the ship’s rear). You can reach this location from the half-circle interior at the ship’s front or take advantage of the low gravity and use double or shield jumps to reach the super shield pack platform from the ship’s middle or exterior.
DM-Metallurgy
An abandoned processing plant is the home of Metallurgy, a deathmatch map with a mix of interior and exterior spaces. All areas are fairly wide open and consistent success requires precise aim. One of the most populated areas is sure to be the bottom floor of the interior. One of the map’s two rocket launchers is found on the ground floor at the plant’s side entrance. When grabbing this rocket launcher, be sure to grab the two ammo packs resting nearby.
A tall lift on the opposite side of the rocket launcher ascends to the plant’s top where you’ll find the double damage power-up. From the double damage, move onto the catwalk containing the adrenaline capsules and drop straight down to the ledge below to find the shield pack. You can use the stairs just outside the rocket launcher to ascend to the halls that line the side of the plant; this route also takes you to the top, though much slower. You’ll end up below the double damage. Use a shield jump to reach the ledge.
It should go without saying that molten lava is hot--avoid the heat on Metallurgy or pay the price. Height advantage certainly plays a role inside the plant. Watch frequently for opponents to battle on the ground floor. While distracted by their own weapons fire, drop your own blasts down into the fray.
DM-Morpheus3
Morpheus3 is another update of a classic Unreal Tournament map. The battle is mostly exterior and takes place on three skyscrapers--and it’s low gravity! You can easily make double jumps from skyscraper to skyscraper. You’ll find the map’s best pick-ups at its highest points. At the peak of each skyscraper you’ll find the big keg o’health (or double damage), super shield pack, and redeemer. When you’re on the skyscraper, use double jumps combined with low gravity to ascend the pillars holding the goods.
Another way to reach them is to use the bounce pad at the very bottom of the map (look down toward the middle of the skyscrapers). The bounce pad launches you ridiculously high in the air; you can easily maneuver to any of the three pick-ups on top of the skyscrapers. However, you’re extremely vulnerable after using the bounce pad. You move so slow through low gravity that you’re easily picked off by a sniper rifle. The bottom of the map also houses a rocket launcher and an ion painter.
The low gravity generally neutralizes the importance of the rocket launcher (since most of the time your adversaries will be in the air, it’s much harder to score successful damage) but increases the effectiveness of instant-hit or faster fire rate weapons. Switch to the shock rifle, link gun, minigun, or sniper rifle. Watch for your opponents to jump between skyscrapers; this leaves them wide open to be sniped.
DM-Rankin
A thunderstorm rages outside an old industrial building that forms Rankin. The battleground is a collection of levels, ramps, and tight corridors. Be prepared consistently; the numerous turns and corners means an encounter can happen at any moment. The structure’s ground floor contains the most contested items. Find the rocket launcher at the bottom of a multi-tiered room. Beware of opponents attempting to ambush you from the height advantage above.
Check the right hall from the rocket launcher for the super shield pack. This is a tight, dead-end alcove; watch out for ambushes as you make a run for the power-up. Note that you can also drop down onto the super shield pack from above. Find the hole in the wall on the middle floor (spot the health vial inside) and drop down to land behind the super shield pack.
Move down the hall across from the super shield pack to find the flak cannon also on the lower floor. Follow the health vials through the curved corridor to locate the double damage power-up. Find the standard shield pack on the second level above the flak cannon (the lightning gun is also here). You can reach the second floor from the flak cannon by using a shield gun jump off of the slanted piece of plywood leaning against the upper floor. Reach the shield pack by moving through the hole in the wall to the right of the lightning gun or by going around the hall to the right side.
DM-Rrajigar
The desolate Rrajigat mine is home to a varied deathmatch map. There are tight tunnels, wide open areas, narrow wooden walkways, and multi-tiered chambers. The area containing the rocket launcher (and a couple ammo packs) features multiple entrances and exits. Expect plenty of encounters here given the presence of the rocket launcher. But there’s little else of value in the room. From the rocket launcher room, move through the tunnel that contains the health vials. Here you’ll find the waterfall--the double damage power-up spawns at the bottom of the falls. It can be a dangerous grab, though; the deep water slows you down and will leave you extremely vulnerable to any other player that spots you going for the power-up.
At the mine’s opposite end (follow the stream away from the falls to its end) you’ll find the super shield pack. It’s also in a dangerous location tucked away in a dead-end alcove. There’s little room to maneuver in the alcove and an opponent launching a trio of rockets while you attempt to snag the shield will have an easy frag.
The upper section of the mine is one of the better locations on the map. You’ll have a good angle on enemies fighting below (punish them with shock combos or rockets). Watch your step on the narrow wooden planks. It’s easy to fall off if you aren’t watching your step (or you’re shot off). You could drop unprepared into the middle of a battle! The upper section also reaches areas above the double damage and super shield pack so you can check and drop down on them from above.
DM-Sulphur
The future is a bleak place. The ozone layer is gone; the world’s weather consists of nothing but endless storms of sulphuric acid rain; and Weather Control Stations have become the battleground for Unreal Tournament combatants.
Sulphur is a frenetic vertical map. Bounce pads can quickly propel you to the station’s higher sections (or you can just use the ramps if you’re taking the scenic route, which does contain adrenaline). The highest part of the map is really, really high. It’s possible to snipe from here but it’s difficult to see many players below; most of the station’s flooring obstructs your view to the lower sections. But the map’s peak does house a prize: the redeemer.
The center catwalk just above Sulphur’s lowest level holds the map’s other power-ups--the super shield pack, double damage, and big keg o’health all respawn at this point. You’ll find the rocket launcher and lightning gun on the level above and the flak cannon on the level below. Watch your footing around the station; step off and it’s a long way down (meaning instant death).
Chapter 3 - Capture the Flag
Capture the flag is a classic team game mode (though UT 2004 adds a 1-on-1 map called Joust!). An organized team will decimate an unorganized team every time. Players must focus on close-range and long-range defense, offense, flag escort, and flag retrieval. Teams can’t win on one player alone. Successful CTF begins with teamwork.
- The translocator is a staple of Unreal Tournament CTF. Use it to traverse the map quickly (fire the translocator then translocate and repeat) and to reach ledges or maneuver through windows easily. It also doubles as a spy camera. Drop a translocator in a secluded corner of the enemy’s flag room and monitor defensive strength
- Like deathmatch, map knowledge is extremely important in CTF. Know the quickest way in and out of every base. Upon grabbing the enemy flag, chances are you won’t have much time before enemy defenders converge on your position. Know how to escape quickly and reach the safety of your own team. This section includes map strategies for the new capture the flag maps offered in Unreal Tournament 2004. See GameSpot’s Unreal Tournament 2003 game guide for additional map strategies for the maps included in both games.
- Memorize the location of the map’s key weapons and power-ups. Defenders should remain with full health and, ideally, with a shield reserve. Stock up on your favorite weapon and its ammunition to facilitate defensive success. Likewise, an attacker should know the location of power-ups and use them to enhance the ability to clear out enemy defenders around the flag position.
- Focus defenses on long-range and close-range support. Many CTF maps include excellent sniper locations. Use them! But once the enemy penetrates the outer defenses, you must have close-range support in place to prevent a flag grab.
- If you’re captured the flag, report your ongoing location to your teammates and call for escort. It’s difficult to complete a flag run without assistance. You may have to successfully combat multiple enemies on the way back. Not an easy task in any game. Intercept your flag carrier and help escort the flag back to your base.
CTF-1-on-1-Joust
Joust is about as straight forward as a capture the flag can be--and the most different from your typical CTF arena. It’s one-on-one, there are only two additional weapons (the lightning gun and the rocket launcher), you actually begin adjacent to the enemy's flag, and there’s only one route back to your own base.

Your opponent starts near your base and flag and both of you must travel through the narrow path connecting each base, like two medieval knights on horses--hence the name Joust! At the full range of the narrow path, the lightning gun will be useful but the rocket launcher will always be better as you close on your opponent. The lightning gun’s fire rate is a hindrance here.
Becoming extremely proficient with the rocket launcher and its alternate fire mode (firing all three in a tight spiral) is key to success here. Keep pushing your opponent back toward your flag. When your opponent drops your flag, touch it quickly. You can’t score unless it’s returned to your base. It’s all about speed. Since your opponent respawns adjacent to your base you must touch your flag quickly every time to have a hope of scoring.
CTF-AbsoluteZero
AbsoluteZero features two mammoth symmetrical structures separated by two bridges. Think of it as the classic Unreal Tournament CTF map Face on steroids. Several entrances penetrate each base. You can use the lower route, which attacks the flag position from below or the upper route, which attacks the flag position from above.
If you attack from below, grab the rocket launcher and shield packs in the enemy’s base (likewise, flag defenders need to make sure they grab these weapons and power-ups for defense). Attackers will need the firepower and protection to push up the single staircase toward the flag. This is an easily defensible position. It’s likely better to translocate up the stairwell or be sure some of your allies are engaging the flag defenders from the upper entrance.
Like Face, the base exterior is an offensive and defensive sniper’s dream. You’re well within range to scan the opposing base ledges and keep an eye on the two bridges connecting the bases. Speaking of the bridges, a super weapon spawns on each bridge--the ion painter and redeemer. Nothing clears a group of attackers like the painter or redeemer. And firing the redeemer up the staircase to the enemy flag position is a potent way of cleaning house. Also, look for the big keg o’health to respawn at the bottom of each base exterior (between the two entrances).
CTF-Bridge of Fate
Three bridges connect the gap between two expansive bases. The Bridge of Fate CTF map is symmetrical; both team bases feature identical--quite large--layouts. The three bridges connecting the bases offer separate attack routes. Crossing the center bridge assaults the enemy base through its center. Move through the large opening chamber to find the entrance to the flag room at the far end. The two side bridges penetrate the enemy base from the longer side routes. These paths connect to the middle room or you can move through a short damp tunnel directly into the flag chamber.
When exiting your base to a side bridge, go toward the bridge on the right. That’s where the super shield pack spawns (another spawns on the opposite bridge adjacent to the enemy base). A double damage power-up appears at the center of the middle bridge and you’ll find a standard shield pack in the large middle room inside each base.
Defending the large rooms can be a challenge. Without precise aim, an enemy can cruise by using the translocator and escape into one of the side routes. Look toward the ceiling as another means of defense. You’ll spot a lot of small ledges above rooms. For instance, you can use the translocator to reach a ledge above the flag. Grab the rocket launcher from a side room and wait for an opponent to try and grab your team’s flag. You’ll also find ledges along the side routes (above doorways) and you can also use the translocator to reach the top of the base overlooking the central bridge.
CTF-Colossus
Colossus consists of two large arenas separated by a towering stonewall. The expansive arenas permit many attack possibilities; the enemy flag lies out in the open so there’s no specific chokepoint to protect. It’s fairly easy to traverse the map quickly via the translocator. You can use the upper catwalks and reach a bounce pad that propels you straight to the enemy flag; or you could traverse the less exposed lower route underneath the catwalks or even around the left and right edge of the map to approach the flag from the side. The upper route is fast but you’re exposed to defending snipers (find the lightning gun toward the stone wall in the arena’s center); the lower route is slower but you’re mostly hidden from defenders’ eyes.
If you move through the lower route, check the underground tunnel for the double damage; the boost will certainly help on your attack run. The sides of the stone wall contain valuable pick-ups; one side holds the super shield pack and the other features the ion painter. Use the painter to help clear enemy defenders from around the flag or to even defend your own flag. When you spot an enemy approaching your flag, paint the flag post and watch the explosion clear the threat.
CTF-GrassyKnoll
A serene grass field masks the bloodshed of Unreal Tournament 2004’s GrassyKnoll CTF map. Two tight symmetrical bases lie at the either end of a wide grass field. Base entrances include upper and lower side entrances and a center lift that ascends behind a shield pack across from the flag. You can also reach the flag with an accurately placed translocator; fire the translocator through the narrow base window next to the enemy flag. Getting in that way is easy but getting out is much more difficult if enemy defenders are present. Scurry quickly across toward either side exit. You can exit through the upper route or drop down and maneuver out the lower exit.
The narrow window also offers a great sniping position but you’ll have to venture to the grass field’s center to find the lightning gun (hidden in trees along the side near the super shield pack respawn spot). Defenders should grab the standard shield pack inside each base to remain as protected as possible. Tight base construction increases the importance of the rocket launcher in base defense (find it along the side entrances to the base). Attackers should explore the grass field’s edge (opposite side of the field’s center from the super shield pack) to find the double damage.
CTF-GrendelKeep
The battlements of the cruel leader Prieth Callas is home to UT 2004’s GrendelKeep CTF map. The contest takes place through the structure’s interior. Each base features multiple entrances and exits; it’s nearly impossible to protect every route to the flag. There are multi-level side routes, a center route, and even an opportunity to approach the flag from nearly above if you’re sneaky. When maneuvering across the upper side routes, jump to the far platform to reach a ledge hovering approximately above the flag. A rocket launcher rests here.
Across from the rocket launcher you’ll find the double damage spawn spot. Check for the power-up when attacking from this route. This ledge is also a decent spot to defend from as you have good line of fire on the flag position. Reach the double damage with the translocator or a double jump from the rocket launcher area. Defenders should also acquire the shield pack just outside the base’s center route.
Traveling through the keep’s center is also a multi-leveled affair. The upper route meets at the structure’s center where the super shield pack spawns. A successful base attack will often consist of at least two fronts. The multiple entrances create a difficult defense; at least one defender should focus on the flag position and use the rocket launcher while other defenders protect the side entrances from the assault.
CTF-January
Unreal Tournament 2004’s January is an update to the classic maps November and December (from Unreal Tournament and Unreal Tournament 2003 respectively). A submarine in its bay separates the two symmetrical bases (find the double damage at the sub’s peak). The docking bay is once again filled with water. There’s now an underwater entrance into each base; both routes feature the super shield pack. Defenders at this position should grab the super shield pack at each respawn then defend the surrounding halls to prevent base invasion from this entrance.
If you’re assigned to defend the flag station, explore the room above the flag to recover the big keg o’health and a shield pack at each respawn. There are also a couple of rocket launcher ammo packs here; find the rocket launcher down the ramp on the right side (facing away from the flag). Keep stocked on the adrenaline capsules scattered around the base and use the translocator to ascend to the ledges around the flag area. Use the rocket launcher or lightning gun (near the keg o’health and shield pack) to pick off invaders.
When attacking, look for the hole in the ceiling up the left ramp from the underwater entrance (where the minigun rests). Translocate through the hole to reach the upper room of the flag area. Stock up on your enemy’s power-ups before assaulting the flag station. It’s also a decent escape route. Grab the flag, head up the ramp, drop through the hole, then go down the ramp and to the right into the underwater exit.
CTF-MoonDragon
The mountain of Moon Dragon is home to one of the most visually impressive--and largest--maps in Unreal Tournament 2004. Expansive mountainous terrain lies between the two formidable citadels. Routes between bases are numerous and then coverage within a central cavern. Take an aboveground route to the left, right, or over or under a bridge toward the map’s center. Navigate through the central cavern taking the high route (a super shield pack spawns at the middle of the high land bridge) or the lower routes (locate rocket launchers across these paths).
The massive bases look mighty from the outside but are much tighter within. Hallways through the structure are plentiful but narrow. There’s a main entrance through the structure’s front and alternate upper and lower doorways on the left and right side of base. The shock rifle and flak cannon are optimum base defense weapons (use the shock combo in the tight hallways) since both are found within the base walls. You’ll have to venture out into the caves to recover a rocket launcher or the exterior bridge to find the lightning gun.
Snipers can use the translocator to reach the ledges and overhangs along the structure’s front. But snipers will likely miss attackers penetrating the base’s side entrances. It’s the likely attack point because the main entrance is easily defensible--defenders should fire down staircases with flak cannons or shock rifles. Continue to back pedal toward the flag room and inflict as much damage as possible against any incoming threat. Within the flag room, use the translocator to reach the upper ledges or even the top of the dragon head statues to maintain a close watch on the flag station below.
CTF-Smote

The CTF map Smote features two imposing, identical castle bases separated by a fiery volcano. There are multiple entrances into each base. Move through the front entrance and either attack the flag directly by continuing through the hall on the right or scurry toward the left tunnel and end up below the flag position. Each base also features a side entrance and an upper entrance (use a translocator to reach the upper ledge). Search a hidden alcove across from the castle’s side entrance to find the double damage power-up--ideal for attackers looking for an extra boost moving into the castle’s side entrance.
Snipers should move out to the castle’s upper ledge; the sniper rifle and its ammunition are positioned here. A couple sniping defenders is ideal. One watches the path through the volcano’s base and the other watches the alternate side route around the volcano (this route also features the big keg o’health). These interior paths connect to one another. Flag defenders can use the translocator to reach the dark beams above and across from the flag position. This offers good line of sight at the flag and at the entrance below the flag position.
Chapter 4 - Double Domination
In double domination, teams fight to control two control points on the map. If a team controls both points, a countdown begins. After 10 seconds, if the points remain in the same team’s control, that team is awarded a point. Break control of the points to cut the countdown. Double domination is a fast paced game where momentum can change quickly.
- Map knowledge! Know the quickest routes to each control point and the routes from one control point to the other. If the opposing team maintains a hold on a particular control point, know how to get there fast. Or if you have to wrestle a control point from the enemy team, you’ll need to know how to reach that area quickly. Likewise you should also know the location of key weapons and power-ups. This section offers strategies for the new double domination maps offered in Unreal Tournament 2004. See GameSpot’s Unreal Tournament 2003 game guide for strategies for the maps included in both games.
- Don’t neglect control point defense. If you can’t hold a control point, you’ll likely never score a point. Some team members should remain at the control point and equip themselves to the hilt. Remaining players move on the attack to break the other team’s hold on the other control point.
- If time is counting down and you’ve reached an enemy control point, go directly to the point while firing at any nearby defenders. Don’t stop to kill the defender. All you have to do is touch the control point to stop the countdown. If you die on the way then it’s no different than if you wasted time trying to kill the enemy instead of capturing the point for your team.
DOM-Access
Access is an extremely frantic double domination map with a unique twist. A button in the map’s center controls the access to each control point. When the switch is pressed, access switches to the opposite control point. After several seconds the switch resets and once it’s pressed again, access switches to the other control point. The switch will be used to gain access on offense or close off a control point for defense. At least one player should stick close to the switch and listen for other teammates to switch access to a particular control point.
Players spawn near miniguns just outside the switch room, which lies forward from the start position. You can instantly move left or right toward the open control room. The control points are found on the far left and right side of the map. You can enter the control rooms from upper and lower routes; both routes are blocked if the switch denies access. Minigun proficiency (along with well-placed grenades or a brave shield gun melee attack) will help within the switch room.
Once within a control room, find the flak cannon, link gun, and shock rifle within the area to aid in defense. Ride a rear lift to the top catwalk and find a shield pack to further bolster defense (or offense if you arrived from this route). There’s also a rocket launcher along the upper catwalk that runs between the two control points. Note that this route is never blocked. You can move freely between control points. Once you gain a control point, ride this lift so you avoid being trapped in the control room or blocked out of the other.
DOM-Aswan
The Temple of Aswan is an excellent double domination map. The control points lie close to one another--at least if you use a daring route to move between them--and combat begins extremely quickly and continuous furiously around the temple’s open center area. Control points rest on ledges to the left and right of the center arena. Move into the left or right side and use either the ramp (the long route) or the side lifts (the quick route) to reach the point. There’s an underground route (reach it by the lift) that offers the flak cannon and rocket launcher--two weapons that will certainly be invaluable in control point defense.
The quickest route from one control to the other is through the center of the map--above the ground battle! When standing at a control point and facing the map’s center you can see the other control point in the distance. A structure (with double damage power-up on top) is found between the control points. It’s possible to use a shield gun jump to leap to the structure then another shield gun jump to reach the second control point. The super shield pack, found at the bottom of the ramps within the side temples, certainly helps because it decreases self-inflicted damage from the shield gun jump. Also, don’t grab the double damage if you intend to shield gun jump to the other control point.
DOM-Atlantis
The battle of Atlantis takes place in a self-contained underwater bubble. Shimmering water surrounds every inch of the arena’s edge; combatants are safe inside--don’t worry about puncturing the bubble with your rocket launcher! The map’s two control points aren’t particularly close and are featured in their own multi-tiered room. Reach the control point from the lower route that runs through the map’s center or along an upper catwalk, which can be reached via side staircases or via shield gun jump through the middle entrance. A large arch stretches across each control point area; at the top you’ll find the shield pack spawn spot.
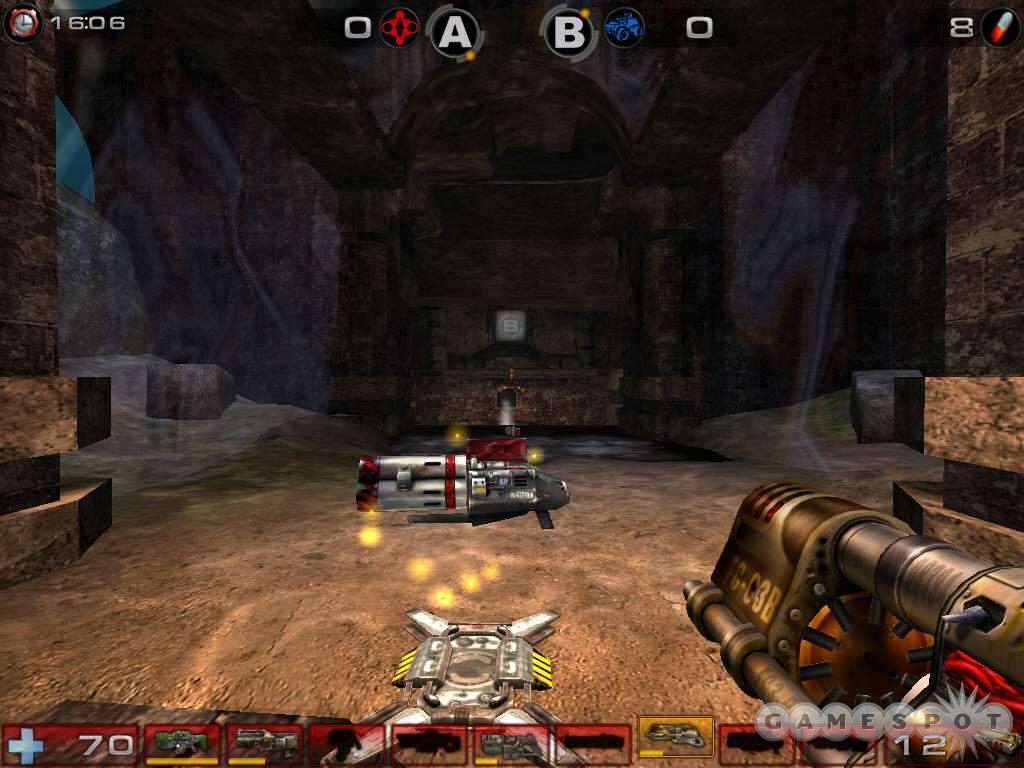
Travel between control points through a short, but congested middle area or through longer left and right side tunnels (that hold the flak cannon and rocket launcher). There’s also another route, an adrenaline capsule-filled passage that runs from the side of the middle entrance, underneath the congested center area, and into the other control point area. Defend control points from the upper catwalk so you can overlook the control point itself and the lower approach. Snag a lightning gun from the far end of the upper route to snipe approaching enemies.
DOM-Conduit
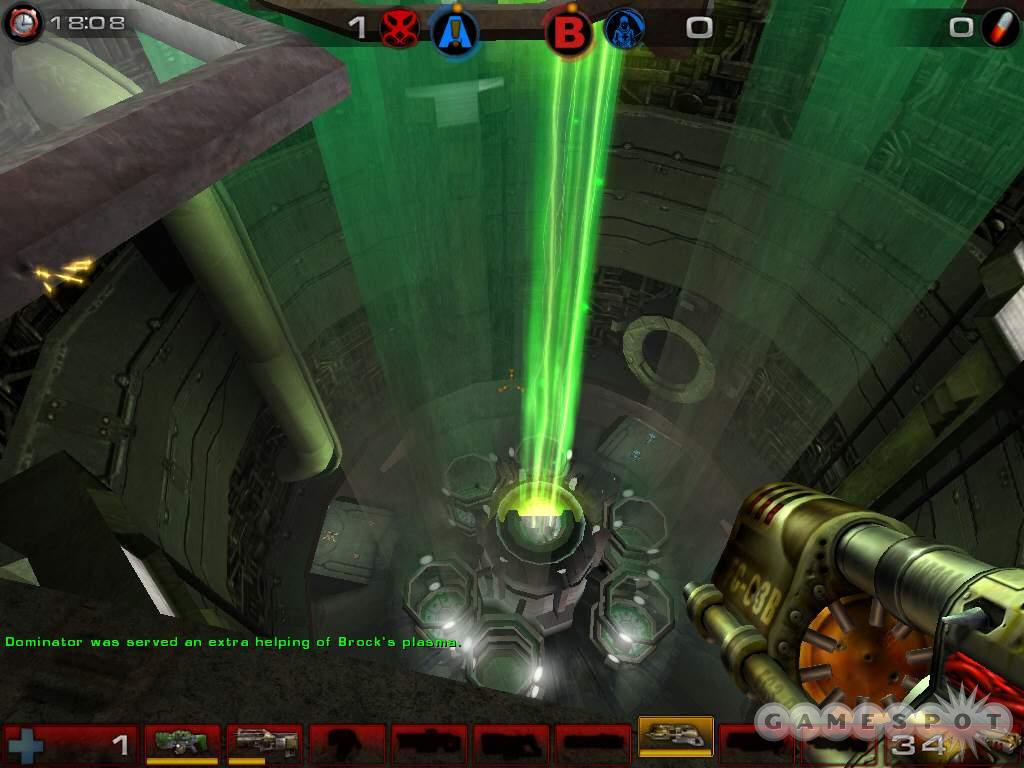
Unreal Tournament 2004’s Conduit is a vertical double domination map. Control point A is found at the bottom of the map underneath the platform; control point B lies at the top of the map on top of the elevators (use the bounce pads to reach the control point). Both teams spawn inside similar chambers containing two weapons and six teleporters--the three teleporters on your left send you to the bottom and the three teleporters on the right send you to the map’s top. Before scampering into a random teleporter, check the current game status or listen to your teammate requests. If more defense is needed at A, enter the left teleporters; if your teammates are looking to capture point B, enter the right teleporters and assist their efforts.
Both floors offer the rocket launcher (with plentiful ammo) and a shield pack. Grab them to attack or hold the tight control point positions. When holding control point A, back up into a corner so you can see all entrances. If you stand in the middle, your back is turned and an incoming attacker may ambush you. Use the lifts to travel between control points. Watch your step when on the map’s top; a fall down the shaft is usually instant death (use the shield gun to soften the blow).
DOM-Renascent
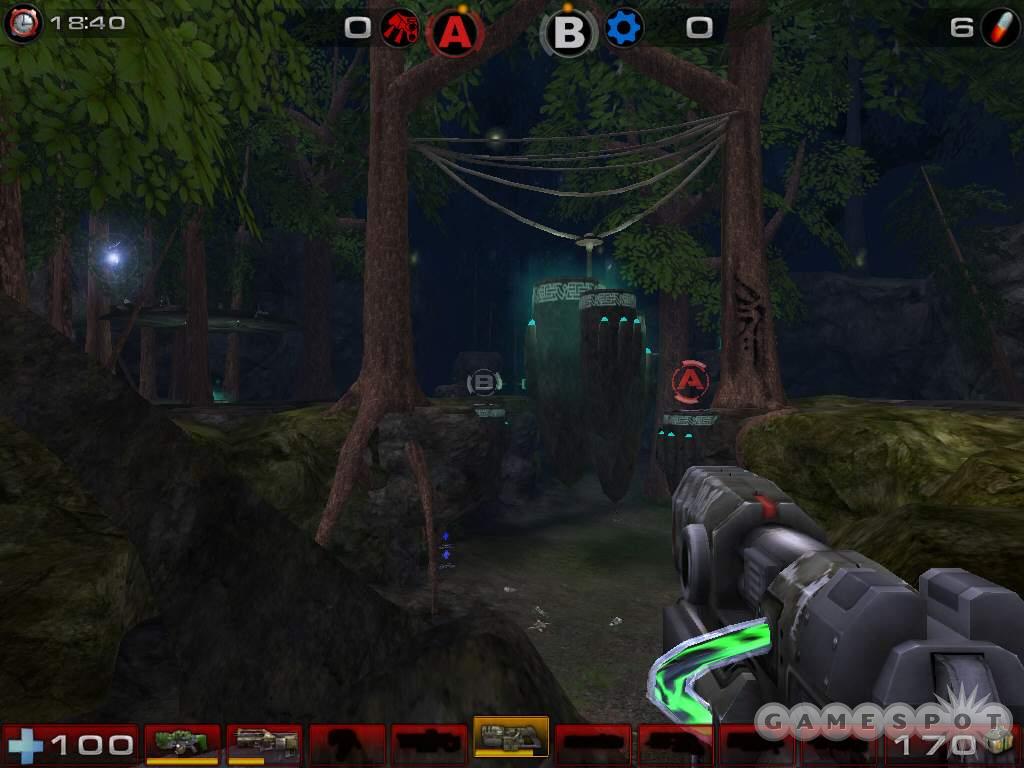
Renascent is a gorgeous forest map with deceptively close control points, bounce pads, and two shrines holding the double damage and shield pack power-ups. From a distance, the control points appear within feet of each other. But as you get close you spot a large hanging obstruction blocking a jump from one control point to the other. Both points are out in the open. A successful offense attacks from all sides, including from below (for instance, firing shock combos from below to weaken or kill enemy defenders). Control point defenders must counter attacks from the side and below.
Check the bridges on the map’s edges to find shrines containing the primary power-ups--the double damage and shield pack. The rocket launcher also rests nearby with the lightning gun stuffed in a far corner (sniping the control points, especially facing both in view--can be effective support for your team).
Chapter 5 - Bombing Run
Bombing run mixes capture the flag with football. Grab the ball and pass and carry it to your opponent’s goal. Score seven points by running with the ball into the goal and score three points by shooting the ball into the goal. Since you can’t shoot weapons and carry the ball at the same time, teamwork becomes incredibly essential.
- Learn the pass the ball, especially if you’re about to die. Instead of suffering the fate of three rockets headed your way, toss the ball toward a teammate instead of just dropping the ball upon death (likely easily grabbed by your killer). Pass the ball to a teammate on a higher ledge or to a teammate on an alternate route to shake defenders and open a lane toward the enemy goal.
- Memorize the location of the enemy goal and how to reach it. For instance, on BR-Colossus you’ll use the bounce pad to run into the enemy goal. This section provides map strategies for the new bombing run maps included in Unreal Tournament 2004. See GameSpot’s Unreal Tournament 2003 game guide for additional strategies for the bombing run maps included in both games.
- If you’re pursued by just one player, drop the ball and retaliate with your weaponry (assuming you have something better than just the assault rifle). You can’t attack with the ball so you’re essentially a sitting duck unless you can elude the weapons fire all the way to the goal. A one-on-one situation is a good match-up. Dropping the ball to fight three pursuers likely won’t have the same success rate.
- Know the game situation. If you need seven points for a victory, go for the seven-point score instead of settling for the three. It takes three three-point goals to reach the seven needed for victory. Likewise if you just need a three to reach victory, fire the ball into the goal and don’t be a hero trying to run it in.
BR-BridgeofFate
The BridgeofFate bombing run map features a near-identical layout to the CTF map of the same name. The ball replaces the super shield power-up at the bridge’s center and the goals replace each team flag. The extremely high ceilings in each base’s initial room offer some unique passing and ball fight situations. If you’re under attack, shoot the ball high in the air toward the enemy goal. Present allies can move toward the ball’s landing spot while defending the area from the enemy players. The center bridge area also provides an area for daring passes. Launch the ball to a fellow teammate on an adjacent bridge who can then use the side entrance into the base.
Defenders shouldn’t have much trouble spotting incoming players. The goal room’s pillars obstruct the view somewhat but the elevated goal position offers a wide view of the front and side entrances. The biggest problem is the open goal. It’s not difficult to launch the ball from a great distance and score a three-point goal. At least one defender should attempt to intercept attackers on the ground level. If attempting to score a seven-pointer, note that you can double jump up the ledges instead of taking the staircase. Either route will be difficult with defenders positioned near the goal. Multiple attackers should assault from both staircases to avoid easy double or multi-kills.
BR-Colossus
Like BridgeofFate, BR-Colossus closely mirrors CTF-Colossus with a few tweaks. It’s a wide open map and will be dominated by long-range passes and clear outs. Think of a hockey game when a team is penalty killing without worry of an icing penalty. Teams can use the massive propellants to launch the ball out of their own side of the field. If you’re a defender and stolen the ball near your own goal, fire it into the propellant over your goal, the one underneath the goal, or along the map’s sides (one of the changes in the bombing run version of Colossus) to launch the ball on the other side of the map.
An accurate passing game will pay dividends as a ball carrier can maneuver around the safer lower area of Colossus then pass the ball to an attacker on the upper catwalk. A bounce pad lies near the goal; hop on the bounce pad and drop onto the goal for a seven-pointer. Three-pointers will be more difficult and aren’t unlike long-range threes in a basketball game. Locate double damage power-ups in the underground tunnel on each side; the redeemer and the super shield pack spawn on ledges on the left and right side of the map’s center.
BR-Serenity
A serene forest valley is home to the bombing run map Serenity. The map is essentially one long course from one goal to the other. The war of field position becomes increasingly important as the game progresses. Making it all the way to your opponent’s goal isn’t easy; therefore, it’s important to try and keep the ball on your opponent’s side of the map and keep the pressure on. Since routes are limited, teamwork is even more important. Stick together as a team so you can wipe out opponent interceptors in force. The lightning gun works well, particularly in long-range support, since it can terminate an enemy in a single hit. Make sure you grab the health packs around the map edges to keep your team healthy--and to keep the packs away from the enemy!
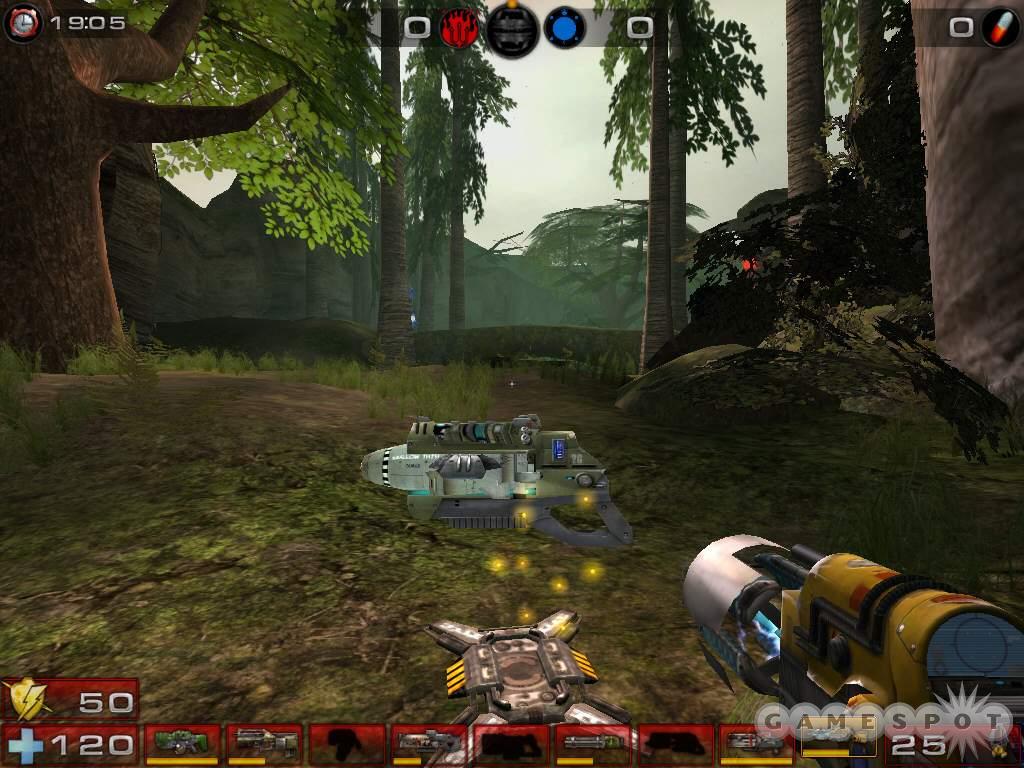
There are two redeemers on the map. Each spawns near the center bridge (upon which the ball appears) with one on each team’s side. Find the red team’s redeemer along the right edge and the blue team’s redeemer along the left edge (just past the waterfall and pool). Grabbing and utilizing the redeemers is invaluable to clearing out defenders and maintaining a strong push toward the goal. Use the redeemer’s alternate fire mode to guide the rocket beyond your offense and into the heart of the enemy’s defense. If you’re on the receiving end of this tactic, remember you can shoot down the redeemer missile! Defenders should also utilize the arch bridges as long-range defense against incoming ball carriers.
Chapter 6 - Assault
The classic assault game mode is back in a big way. Unreal Tournament 2004 includes six exhilarating (and varied) assault maps. Attack a convoy to recover a weapon of mass destruction, capture an ion tank out from under the defenders’ noses, or infiltrate a mothership from the depths of space. This section offers general tips and map strategies for UT 2004’s assault game mode.
- Successful assault attackers must balance speed and combat efficiency. If you work slowly, you won’t be able to complete the map’s objectives in a timely fashion. If you work too quickly at the price of combat effectiveness, you won’t be able to complete the objectives either! It’s all about balance and as well as patience. Attackers should strive to attack objectives as a team. Spread too thin and the defenders have a much easier time picking off each attacker and holding the objective. For example, charging through the repair vehicle door on AS-Convoy. Go in staggered and the defenders (usually all covering the rear door switch) have little trouble wiping you out. Charge in and a group and overwhelm the position.
- On applicable maps, a few attackers (or at least one) should pinpoint defensive turrets and take them out as quickly as possible. For example, the turret overlooking the barricade on AS-FallenCity. Launch rockets or use a sniper rifle to kill the turret operator. Don’t leave turrets in play for long. It’s not hard for a turret operator to mow down countless attackers. Destroy the turret and complete the objective sooner.
- In many cases, defenders should implement both long and close-range defenses. For example, setting up snipers to pick off attackers approaching from long-range and using defenders armed with close-range weaponry to block access to the objective. Utilize turrets when available and repair them with the link gun.
- Strategies vary greatly across maps. Unlike deathmatch or CTF where the objective is essentially the same, in assault the objectives change drastically from one map to the other. In AS-MotherShip you’re piloting a spacefighter and in AS-Junkyard you might be driving a hellbender. Use the map strategies provided in this section to learn how best to attack or defend each objective.
AS-Convoy
Briefing: This scenario is a recreation of the recovery of the Nexus prototype missions by the NEG military after they were stolen by the Hellions.
Attacking
Attackers Objectives:
1 - Extend the boarding platform. Optional: Open the panel.
2 - Place explosives on the door.
3 - Open rear door.
4 - Open the side doors.
5 - Retrieve the N.E.X.U.S. missile trailer.
6 - Retrieve the N.E.X.U.S. missiles.
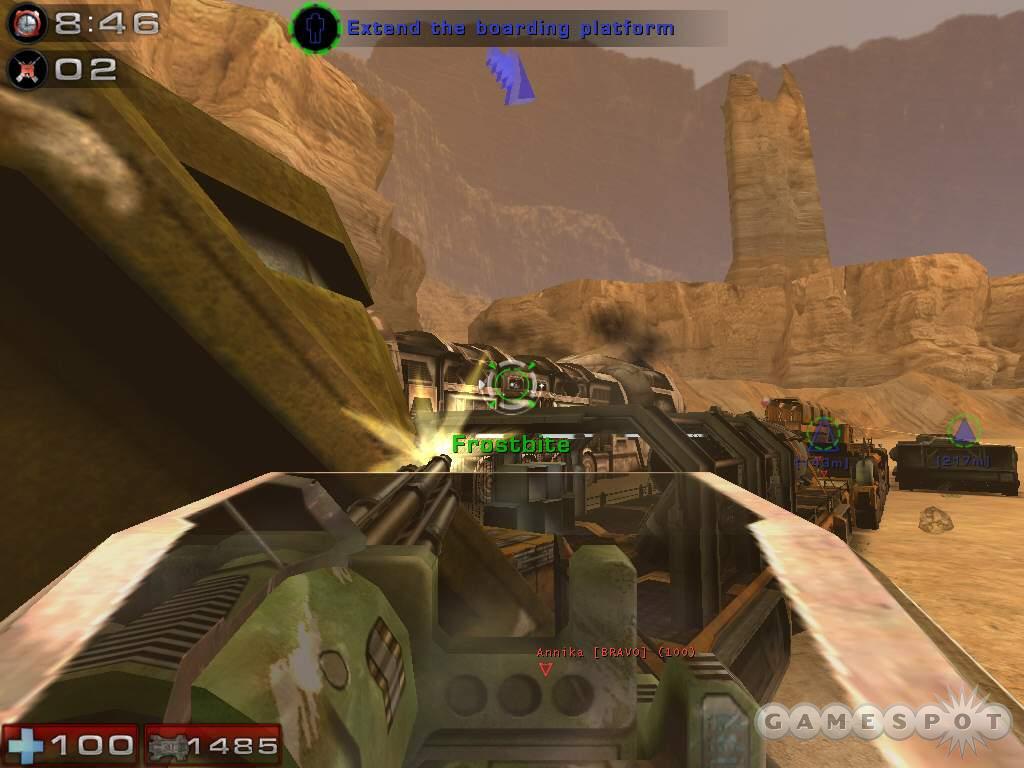
One attacker should exit to the right and use the turret to destroy the defender’s repair vessel turret. Others moving toward the boarding platform can fire the rocket launcher at the turret. Use its alt-fire mode to launch three rockets in a tight spiral formation. An attacker can also use a sniper rifle to eliminate the turret’s operator or other defending snipers. Majority of attackers should press toward the boarding platform switch. Watch your flank as defenders will bounce over to the boarding platform area. One player should remain in the rear turret and help clear out flanking defenders. Get one attacker to the panel and steal the weapon cache--it helps immensely in completing the next objectives.
Once the boarding platform is extended, move along the catwalk to the rear door. It’s an all out rocket launcher fest toward the door. Fire your rockets toward the door while still on the boarding platform to help clear defenders from long-range. Push as group and overpower the defenders. A few snipers can provide long-range support to help clear defenders quickly. Once inside the repair vehicle, it’s another battle dominated by explosions. A few attackers should go for the rear door switch while the remaining fire at defenders. Use similar tactics for completing the side door switch objective.
Exit the other side of the repair vessel and spot the N.E.X.U.S. trailer in the distance. A few attackers should concentrate on two turrets--one on the vessel and one high on the repair vessel. Use multiple rockets to knock out the trailer’s turret; use the flak cannon’s alternate fire mode to lob shells onto the repair vessel’s upper turret. Note that you can also command these turrets for the attackers. Once they’re destroyed or controlled, push into the trailer and to the switch that completes the final objective.
Defending
Defenders Objectives:
1 - Defend the boarding platform. Optional: Defend the panel.
2 - Defend the door.
3 - Defend rear door.
4 - Defend the side door switch.
5 - Defend the N.E.X.U.S. missile trailer.
6 - Defend the N.E.X.U.S. missiles.
Have a defender take control of the turret on the repair vessel. Fire at the attackers’ initial turret if an enemy takes control of it. Otherwise, fire at the attackers moving toward the boarding platform. Other defenders should snipe from the repair vessel or use the bounce pads to defend the position at close-range. Look for the shield pack near the platform for assistance. Watch for attackers moving to the weapons cache. Take control of the turret there and use it to repel attackers from the cache and the boarding platform.
Once the boarding platform is extended, defenders should move to the catwalk leading to the repair vessel door. Turret operator aims at the boarding platform entrance and exit. Use sniper rifles to maintain control of the catwalk; use the minigun as a backup weapon to repel the attack. Once the door falls, retreat to the switch and fire your weaponry toward the exposed wall. If an attacker drops a rocket launcher, grab it! Make your way back to the side switch and use the elevated ground to defend the position.
When the battle moves to the N.E.X.U.S. trailer, take control of the two turrets (one on trailer, one on repair vessel). Concentrate your turret fire on the attackers’ exit from the repair vessel. Other defenders should grab a rocket launcher from off of the trailer and use it to protect the narrow path toward the trailer entrance. Stagger your defense through the hall in case a wounded attacker gets by you’ll have additional defenders to finish off the damaged foe.
AS-FallenCity
Briefing: This scenario recreates the destruction of a rebel command center by NEG forces. In keeping with the historical battle, the attackers’ insertion point is a distance away from the command center, because of the heavy anti-aircraft protection around the bunker.
Attacking
Attackers Objectives:
1 - Destroy barricade.
2 - Secure forward outpost.
3 - Destroy gate lock.
4 - Destroy command center.
Push toward the barricade. A few attackers should target the defenders’ turret in the upper floor of the parking garage. Hit the adjacent barrels to cause damage. Launch multiple rockets in a tight spiral; offer long-range sniper support as well to eliminate the turret operator and any defending snipers. Eliminating the barricade isn’t easy. Move to the far right to find a shield pack. Try and fire at the barricade away from the fray to get in some damaging blows from a safe distance. Use multiple rockets if possible.
After destroying the barricade, mover under the overpass; there are two defending turrets up here. Shoot them with rockets as you move underneath (ideally destroy them completely). Shoot the barrels near the forward outpost. Once it’s secure, move toward the gate locks. You can take a high or low route. Split the group between each route; make sure at least a few attackers target the defending turret above the gate lock (as well as any snipers located nearby).
The gate locks are positioned on the other side of the barrier. Make it to the other side of the wall and shoot the gate locks (concentrate on any already damaged lock). If you try and target enemies, you may die before inflicting any damage to the locks. Note that there is a shield pack spawn spot along the high route and another just outside the gate locks. Position support players at the end of the high route and fire rockets toward the gate locks and the defenders’ spawn area (above the gate locks).
After destroying the locks, push through the gate. You can go up the ramps and grab rocket launchers and ammo, but at the expense of several seconds. The launchers will certainly help push down the ramp into the command center room. You must place two charges--one on the pillar and one in the locker room to the right. A few attackers should go for the explosives while others provide covering fire.
Defending
Defenders Objectives:
1 - Defend barricade.
2 - Defend forward outpost.
3 - Defend gate lock.
4 - Defend command center.
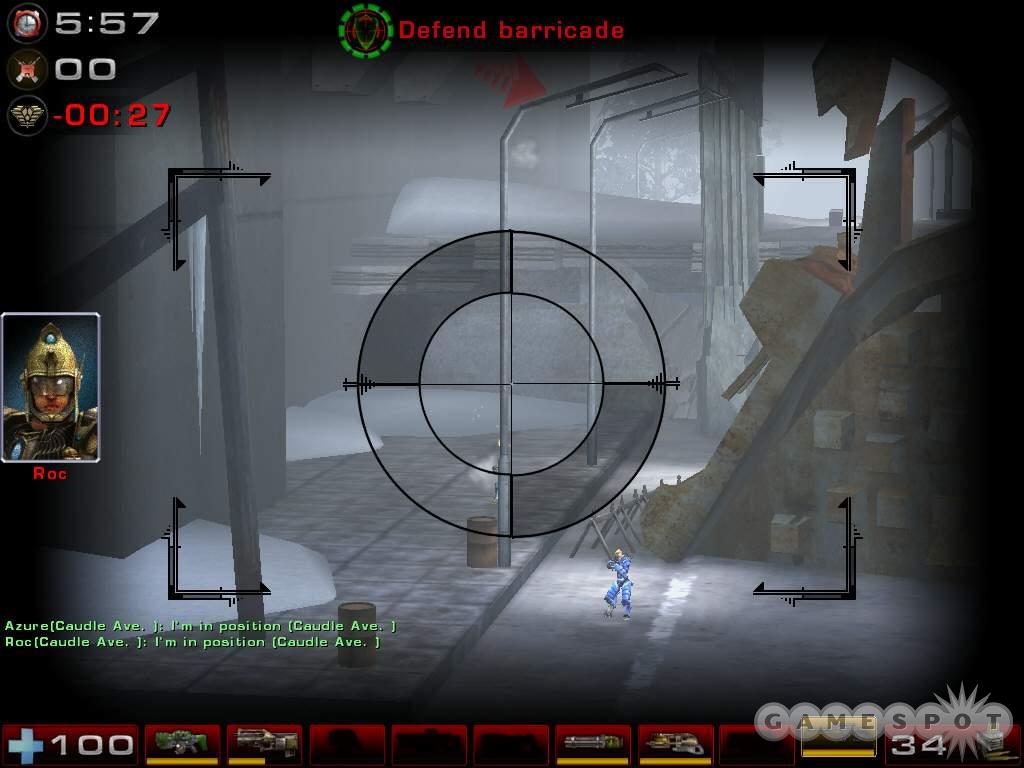
Hold the approach to the barricade with the turret and a group of supporting snipers. The majority of defenders should engage the attackers on the ground. If there are too many people sniping, attackers may slip through, take cover, and easily destroy the barricade. Cover the passages through the debris and be sure to grab the shield pack on the left side of the approach. Move to the other side of the debris and steal a rocket launcher from the weapons locker.
Once the attackers break through, two defenders man the turrets while others retreat to ground level. Position some defenders along the right wall near the forward outpost and some on the other side. When attackers approach, engage from both sides.
After losing the forward outpost, one defender should take the turret next to supporting snipers. Most defenders should engage on the ground to ensure as few attackers as possible strike the gate locks, especially unchallenged. A few people on miniguns helps mop up wounded attackers that have already been struck by rockets. When you’re pushed to the command center, concentrate firepower on the entrance ramp. Order teammates to watch for attackers slipping by toward the bomb positions (especially the locker area) and to intercept when necessary.
AS-Glacier
Briefing: In one of the most daring acts of the mostly covert Corporation Wars, Izanagi Corporation’s research facility on Lamdon 3 was raided and destroyed by a strike force from Axon Research Corporation, despite protection offers by the NEG ThunderCrash force. This scenario recreates that mission.
Attacking
Attackers Objectives:
1 - Infiltrate the base. Optional: Raise the bridge.
2 - Activate the ion core.
3 - Capture the tank.
4 - Destroy access doors.
5 - Open security gate.
6 - Shutdown primary dam.
7 - Destroy the depot door.
8 - Shutdown secondary dam.
9 - Destroy the blast door.
10 - Escape the base.
Send at least one attacker to raise the bridge (more if the defenders guard the bridge controls). It’s worth the effort since you’ll have to return over the bridge during the second objective as well. There are two spots to activate the ion core. Rush one spot instead of splitting the team up. Have several attackers provide covering fire for the team members moving to the switch. Steal defenders weaponry if possible; the rocket launcher comes in handy in clearing out the room. Note that there’s a big keg o’health in one of the large crates just outside the base. Upon activating the ion core, it’s time to steal the tank.
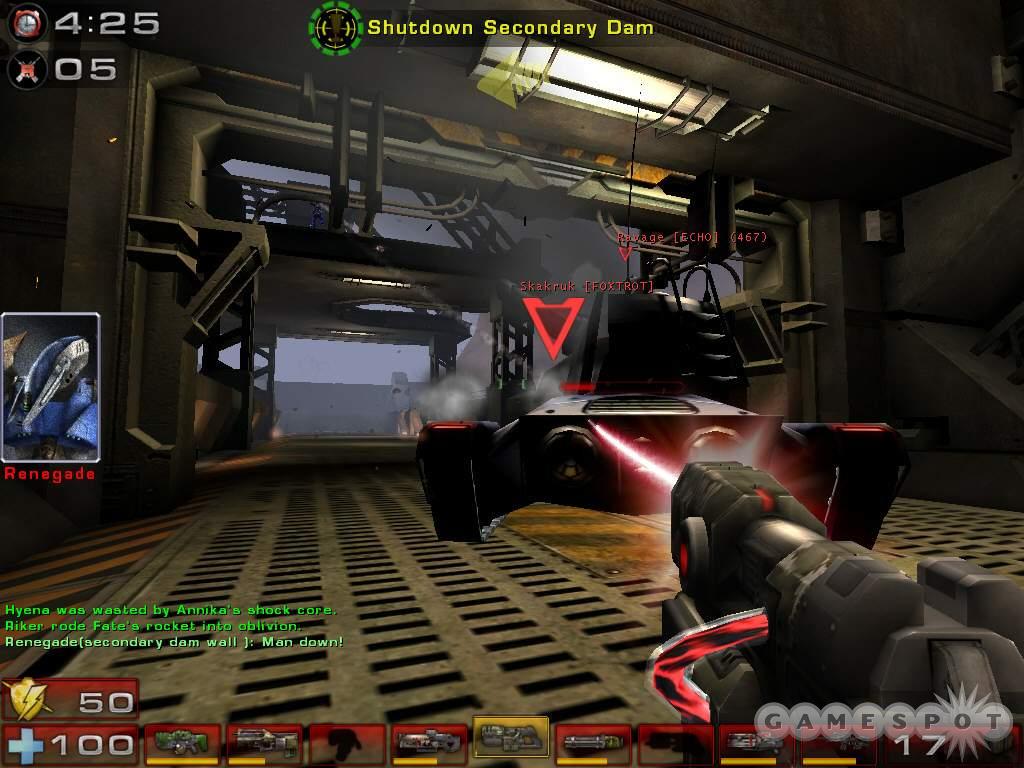
The tank will be under heavy fire constantly (repair with the link gun). If it explodes, the tank returns to a nearby spawn spot. Two attackers ride in the tank: one attacker assuming the role of driver and primary fire controller and another attacker using the secondary fire controls (primarily used to fend off nearby defenders). Move the tank toward the next objective at all time. Move around the corner and destroy the access door with an ion blast. Move through to the tunnel. Note there are pads inside the tunnel to help walkers through quickly.
When you round the last corner, use the tank’s ion blast to destroy the turret in the distance. Another turret lies to the left. Destroy it with the tank as quickly as possible. Search the crates in this area for double damage and super shield. Park the tank on the objective; this opens access into the next room. Use the tank to provide cover fire for the attackers inside opening the security gate.
With the security gate open, escort the tank into the next area. Eliminate any defenders engaging the tank. Use the tank’s ion blast to clear the path ahead. Tank driver should cover the attackers entering the primary dam controllers. Shoot the controls with your weaponry (shock rifle’s primary fire works quickly). Be ready with the tank to destroy the depot door as soon as the dam has been shutdown. Drive through! Repeat the task at the secondary dam. There are two routes to the final blast door. Following the right path is quicker but you don’t have a great shoot on the final blast door until you’re very close; moving around the left route offers a better shot but takes longer. Escorts should fend off defenders and attempt to repair the tank as needed until it escapes. If the tank is destroyed here, it returns near the secondary dam controls.
Defending
Defenders Objectives:
1 - Defend the base. Optional: Protect the bridge.
2 - Defend the ion core.
3 - Defend the tank.
4 - Protect access doors.
5 - Defend power station.
6 - Defend primary dam.
7 - Defend the depot door.
8 - Defend secondary dam.
9 - Defend blast door.
10 - Prevent tank from escaping.
Drop down and defend the base exterior. Order defenders near the bridge controls to prevent attackers from raising the bridge for as long as possible. Guard the entrance hallways with rocket launchers once the base has been penetrated. Retreat to the core as necessary and eliminate any attackers that get close. When the tank is exposed, stick close and defend the core room. A supply room opens across from the tank; snag the shield packs inside. Once the attackers capture the tank, destroy it as quickly as possible.
With the access door down, it’s time to protect approach to the power station. Take control of the turrets (though they’re easily destroyed by the tank). As the tank approaches, fire multiple rockets at its base. Turret operators should concentrate on the lead tank escorts. Other defenders should not be close to the turrets since they’ll be the first targets for the tank’s ion blast. Some defenders should stick close to the controls in case attackers slip through. Don’t forget the double damage and super shield pack power-ups in the crates.
Retreat inside the primary then secondary dam control room once the security gate falls. Stick one defender inside the small room as the last line of defense in case someone tries to attack the controls from close-range. When you reach the final blast door, target the tank with everything. Note its route around the mountain and intercept it with full rocket launcher barrage. As soon as you respawn (expect to die a lot here under the tank’s ion blast), grab the weapons, any shield packs, and return outside to intercept the tank.
AS-Junkyard
Briefing: This scenario is based on an infamous episode of a popular Holovision program. In the original episode, two teams of mechanics were competing to make their vehicle operational and escape the junkyard. The unexpected twist occurred when the losing team pulled out some makeshift weapons and pounded the other team into oblivion before they could make their escape.
Attacking
Attackers Objectives:
1 - Find the energy core.
2 - Return the core to the vehicle.
3 - Lower the bridge.
4 - Cross the bridge.
5 - Open the checkpoint gate.
6 - Secure the checkpoint.
7 - Proceed to the main gates.
Rush the energy core. Some attackers should provide sniper support to help clear out defenders. As soon as an attacker obtains the core, defend him with sniper rifles and miniguns and retreat to the vehicle. Some attackers should proceed to the bridge controls when the core is close to the vehicle. Once the vehicle is powered, fill it with attackers and begin driving to the bridge. Gunners should target any ground defender resistance and the enemy turret positioned just before the bridge. Don’t neglect to use the Hellbender’s "shock combo" which works like the shock rifle. Fire the EMP projectiles and use the alternate fire button to detonate them.
When driving, take a left at the intersection (after the broken fence), leap off the ramp, and cross the bridge to the far spawn pad. If the vehicle is destroyed before reaching the spawn pad, it returns to its original location! That’s a long drive so other attackers should keep close to the vehicle if possible and administer link gun repairs or annihilate defenders blocking the route.
At the next intersection, the vehicle can go left to the magnet or turn right to take the longer route. The magnet carries the vehicle straight over to the checkpoint but it’s extremely vulnerable to enemy fire. The right path splits again: the left hand route offers more cover toward the checkpoint but it’s longer while the right is shorter but not as protected. Either way be sure to avoid the explosive barrels; they will inflict damage to the vehicle if detonated nearby. Other attackers should work ahead to open the checkpoint and clear any defenders along the route to help protect the vehicle. Use the bounce pads to move around the map quickly.
The final stretch remains once the checkpoint is secure (the vehicle now spawns here if destroyed). Race to the main gate! The path splits once again: the left is the shorter but more dangerous route, the right is longer but a bit more protected. Dodge explosive barrels and be sure gunners are inside and helping to defend the vehicle to the finish line.
Defending
Defenders Objectives:
1 - Protect the energy core.
2 - Prevent the attackers from returning the core.
3 - Defend the bridge switch.
4 - Defend the bridge.
5 - Protect the checkpoint switch.
6 - Protect the checkpoint.
7 - Protect the main gates.
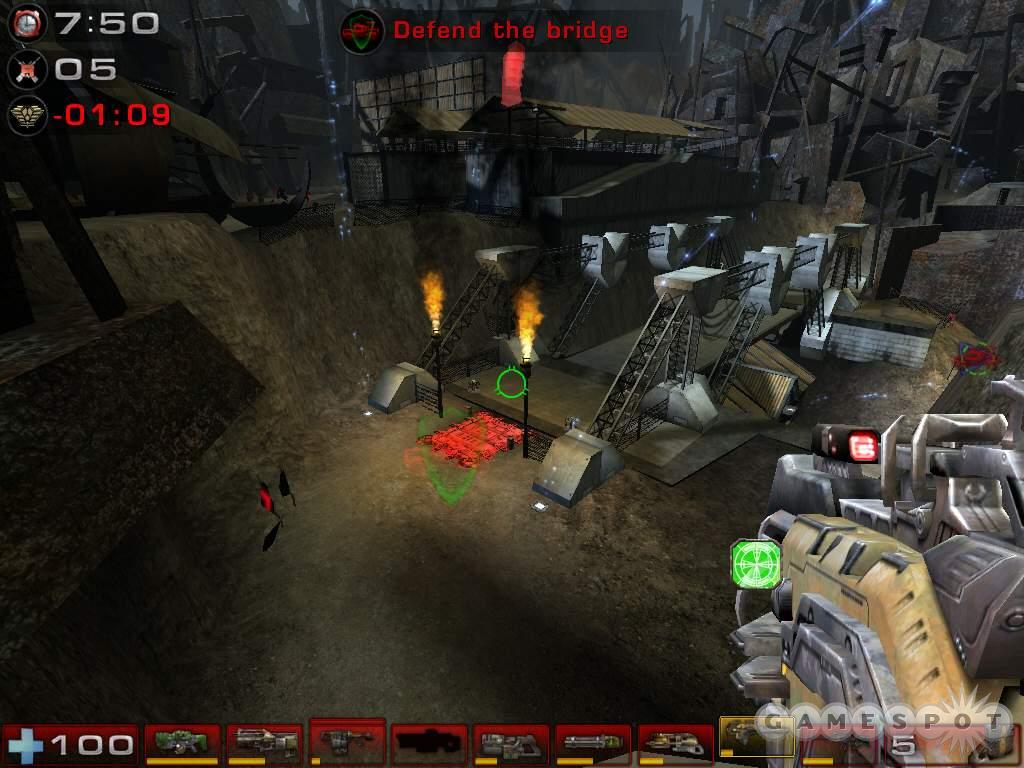
Some defenders should snipe incoming attackers while others protect the core at close-range. Once the core is taken, go after the thief with sniper rifles. Delay the core reaching the vehicle as much as possible. A few defenders can also move to the bridge controls to guard the station. Concentrate attacks on the vehicle once it’s on the move. Use the bounce pads to move around the map and take control of the turrets overlooking the valley below. At least one defender should move to the magnet; there’s an AVRiL on the platform adjacent to the magnet. The platform overlooks the bridge below. Lock onto the vehicle as it crosses the bridge.
Defend the checkpoint switch as long as possible. Most defenders should continue to annihilate the vehicle. Continue to use the bounce pads to maneuver around the map. Take control of the turret above the checkpoint. There’s also a minelayer in the left side of the checkpoint structure. Use it to mine the entrance and the area just before the spawn pad. Watch the path the vehicle takes. If it uses the magnet, be prepared to shoot it out of the air. One the final stretch run, take control of the turrets for added defense. Ground forces should use bounce pads to reach and intercept the vehicle.
AS-Mothership
Briefing: This scenario replicates the final battle for Earth and the stunning victory by humans in the face of almost certain defeat by the Skaarj. A Skaarj mothership orbited the Earth and rained death upon the planet in preparation for the final landing. In a daring suicide mission, the humans attacked the Skaarj mothership in small one man fighters, hoping to exploit a flaw in the mothership defenses their analysis had revealed.
Attacking
Attackers Objectives:
1 - Destroy lower shield generator.
2 - Destroy upper shield generator.
3 - Proceed to landing bay.
4 - Destroy energy bypass.
5 - Destroy sentinels.
6 - Use panels to unlock core hatch.
7 - Destroy the conductor
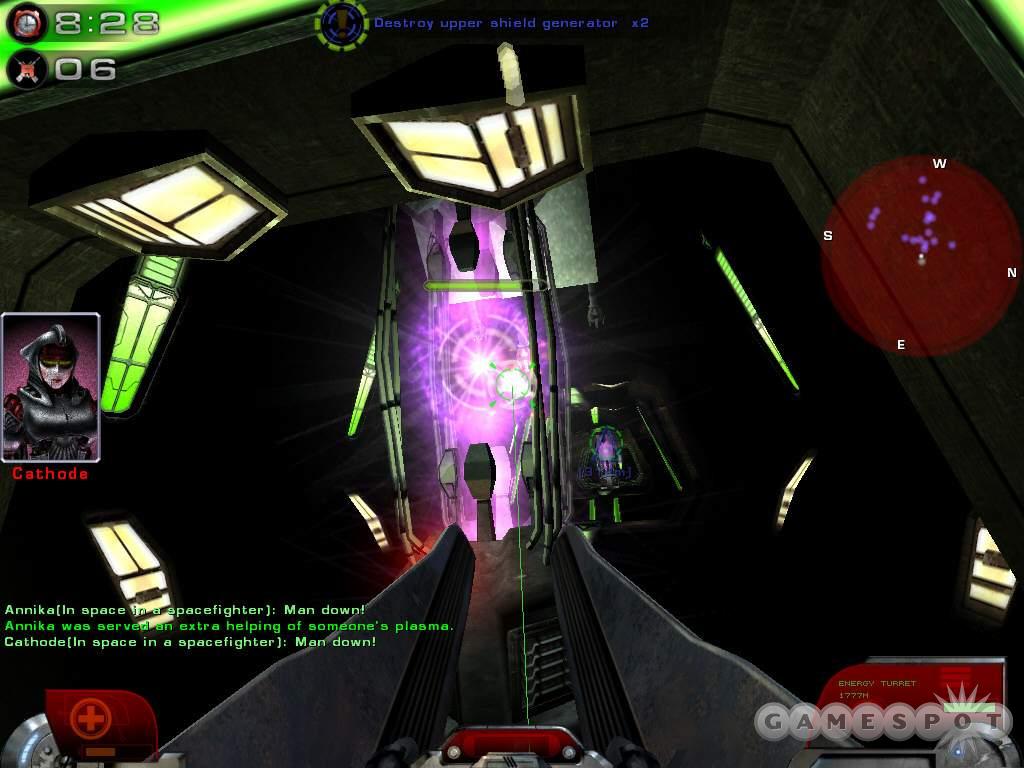
Get to the lower shield generator quickly! Use the forward key to speed up your spacefighter. Once inside the mothership, slow down to maximize your shots against the shield generator (don’t forget to use missiles too). Cycle through targets using the previous and next weapon buttons. Fire homing missiles at targets as you approach the mothership. As you attack generators, turn the ship’s nose around them to maximize your line of fire as you pass the devices. If you destroy the lower shield generator, fly to the top of the mothership where the two upper shield generators are located. Attack them quickly. Beware of the interior turrets. Note that crashing into the generator doesn’t damage the device. Once all shield generators are down, fly into the docking bay. Target the turrets on the approach and fire your homing missiles.
When a teammate reaches the landing bay, all attackers enter the bay to commence the attack on the energy bypass. A few attackers should fire toward the defenders’ entrance while remaining attackers shoot the two bypasses. Try and gather a defenders’ discarded rocket launcher for added firepower. Once both bypasses are down, start the assault on the sentinels. Coordinate an attack on a single sentinel instead of spreading your force thin among all three. The defenders can heal the sentinels with the link gun so it’s important to finish off a damaged sentinel gun quickly.
Destroy all three guns and maneuver through the bridge. Some attackers should assault the turrets protecting the route to the core hatch panels. Once inside, clear the room of defenders and activate the panels. Now just concentrate all fire on the conductors to complete the assault!
Defending
Defenders Objectives:
1 - Defend lower shield generator.
2 - Defend upper shield generators.
3 - Stop the humans from landing.
4 - Defend energy bypass.
5 - Defend sentinels.
6 - Stop any usage of the core panels.
7 - Defend the conductor
Pilot a ship or take control of an inner or outer turret. Take control of the lower turrets first to defend the lower shield generator; once it falls, move to the upper turrets. Finally, assume control of the landing bay turret to defend the entrance to the mothership. Watch for laser fire to indicate an approaching enemy ship (the color will be opposite of your team color). You can also use link turrets when the energy turrets fall. Adjacent link turrets can heal each other if needed. Note also that the energy turrets have shielding; use the alternate fire button to use but it drains quickly and must recharge between uses. Spacefighter pilots should cycle through targets and utilize homing missiles.
Once the attackers have boarded, gather your weapons and punish the incoming enemies entering from the two side tunnels. You can also remain on higher ground and launch rockets at the entrances below. Move to the sentinel guns and use link guns to heal them. Grab additional link gun ammunition from the locker or from the ground if you run out.
If and when all sentinels fall, two defenders take control of the link turrets overlooking the route to the core panels. Other defenders should divide between the two sides and prevent any attackers from moving through. Don’t keep the core panel room unguarded or a single attacker could release the panels easily. The remainder of the mission becomes a hectic defense in the core room. Protect the two entrances with ample rockets, lightning bolts, and shock combos.
AS-RobotFactory
Briefing: This scenario is a recreation of the Liandri robot uprising on the mechanical asteroid LBX-7683 and the subsequent quelling of this rebellion by human forces.
Attacking
Attackers Objectives:
1 - Align the satellite dish.
2 - Destroy the gate.
3 - Cut the data cables.
4 - Destroy shield components.
5 - Destroy the AI generator
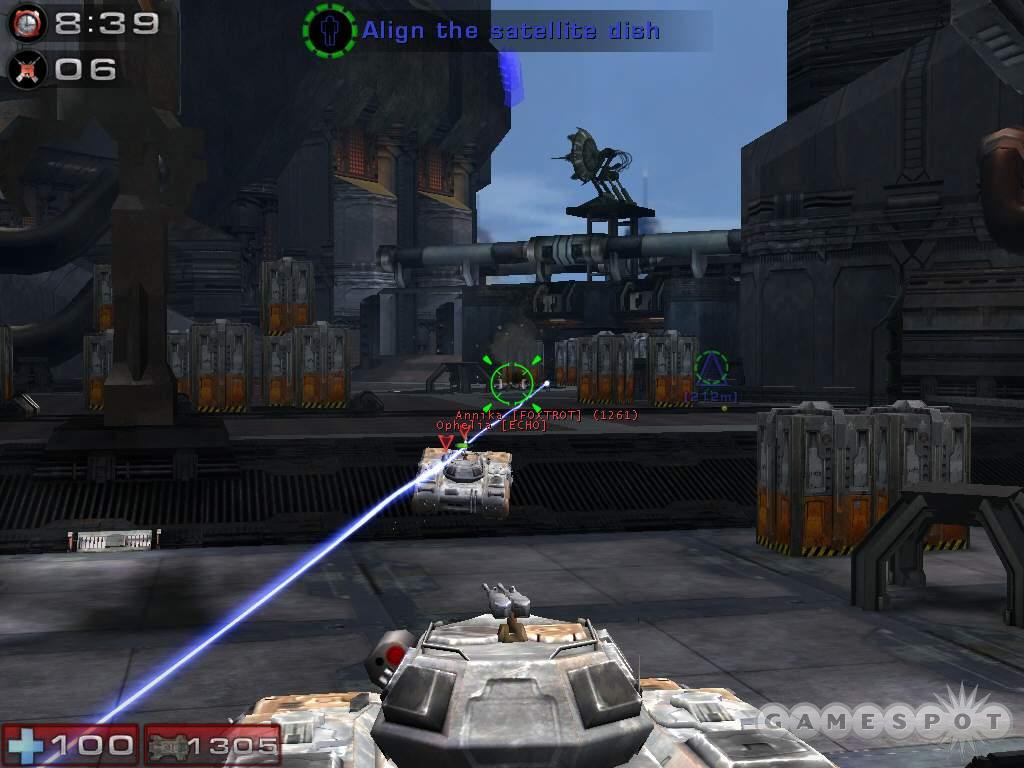
Use the Goliath tanks and lightning guns to destroy the link turrets defending the approach to the satellite controls. Secondary gunners in the tanks can protect the vehicle against defenders. The approach to the gate is much more challenging--an ion turret (and more link turrets) protect the approach. Destroy the ion turret as quickly as possible. Without the turrets, defenses will fall quickly to the Goliath tanks and ground forces. Once the gate is destroyed, you lose the tanks.
Charge into the facility and assault the data cables. Concentrate fire on the cables as you approach the room; there are two entrances so mix up your attack to keep defenders out of position. The three shield components are your next target. You can take a high or low route to the shield nexus (use the bounce pad at the spawn spot). Mix up your attack and you may get some easy shots against the shield components if defenders focus on one entrance. Also don’t neglect the shield pack along the way. Note that the center shield component is covered in its front so you must attack from its rear. Take the short route to the AI generator once the shield is down. Drop down on the left or right edge of the circular platform below the AI generator and circle strafe around the device firing rockets until the generator finally falls. Or you could crouch at the edge of the entrance and shoot the generator from longer range.
Defending
Defenders Objectives:
1 - Defend the satellite controls.
2 - Defend the main gate.
3 - Defend the data cables.
4 - Defend the shield nexus.
5 - Defend the AI generator
Use the link turret to defend the entrance to the satellite controllers. A few other defenders can use the grenade launcher against approaching enemies. Other defenders support the link turrets in eliminating the vehicles as frequently as possible. Once the satellite is aligned, fall back to the ion turret. Prevent the vehicle advance using the ion turret. After a vehicle explodes, don’t forget to shoot any surviving occupants.
Defend both routes into the data cable room. Grab the nearby shield pack to aid in your defense. Use the bounce pad to quickly adjust from lower to upper path as necessary. Move into the shield nexus and defend the lower and upper entrances. Finally, back into the AI generator room and protect the three lower entrances. Watch for attackers to shoot at the generator from longer range. Don’t allow an attacker to stay uncontested for long.
Chapter 7 - Onslaught
Onslaught is a fantastic addition to Unreal Tournament 2004 and combines the best of deathmatch, capture the flag, and assault with vehicular combat! Six vehicles are featured throughout the onslaught maps. For additional tips on using the vehicles effectively, check the "Weapons and Vehicles" section of this game guide. This section offers general onslaught strategies along with specific tips for each map.
- Onslaught is a team game not an individual competition. Team play is emphasized heavily in onslaught and it starts from the very beginning of the game. Several vehicles can hold multiple occupants (and players can jump on others for a ride) so listen or wait for your teammates to hop in before driving away. These vehicles are much more potent with additional passengers. Also, taking passengers moves your players to front line positions quickly. Many onslaught maps are big and traversing from node to node on foot takes awhile.
- Building and repairing power nodes also emphasizes team play. One player can build and repair a node but two players can do it faster. One player fires the link gun at the node while a second player (or more) fires the link gun at the player. The additional link increases the speed at which the power node builds. Getting a node up quickly means quicker access to the area’s turrets and vehicles. This will be important in mounting a fast offense or getting up necessary defense to hold off an attack.
- When the game starts, spread team members to the nearest linked power nodes to begin construction. Don’t move all to the same node. Branch out, build the node, and then adjust team members toward the most important location. Perhaps it’s an attack on an enemy node or protecting your own team’s power node. Use vehicles to reach the initial nodes quickly.
- Establishing a link to the enemy’s power core makes it vulnerable to attack. As soon as the other team breaks the link, the core becomes invulnerable. This means as soon as you establish the link, you must work fast to damage the enemy core. Even if you only score five or ten points of damage it may be enough to win the game. When the enemy core is vulnerable, pilot a fast vehicle (such as the manta or scorpion) into the enemy base and shoot at the core.
- Memorize the location of super weapons, the ion painter, target painter, and redeemer. These weapons help turn the tide of battle. Clear defenses around a key node or bombard an attack around your own node. The redeemer can be especially powerful when used against the enemy’s vulnerable power core. Find a secluded location and fire the redeemer with the alternate fire button. Guide the redeemer missile into the enemy’s base and bombard the core!
- Repair, repair, repair! The link gun has several uses in onslaught and one is to repair vehicles. It takes time to get that goliath tank to the front line. Between battles take the time to repair the tank before moving forward. With two passengers turning into repairmen, the process goes even faster. This is paramount on maps that feature the leviathan (ONS-RedPlanet and ONS-Severance).
- Be ready to adjust quickly to a new location on the map. Listen and watch for the cues that reveal which power node the enemy currently attacks. Use the nodes to teleport closer to the enemy’s attack point or grab a vehicle and maneuver there as quickly as possible. Don’t do your own thing. Assist your team by assisting in the defense of your own node or assisting your team in the attack on the enemy’s node.
- Certain vehicles spawn at certain power nodes. This is particularly important on ONS-Severance where the monstrous leviathan spawns at the center node. It can also be important for the goliath tank as well. Controlling those nodes means controlling those vehicles. If you control a node but the vehicles aren’t appearing, repair the power node to full.
- The AVRiL is one of the most important weapons in onslaught. Check the "Weapons and Vehicles" section of this guide for tips on using the AVRiL applicable to onslaught. You should also learn about the mine layer, another weapon featured primarily in onslaught.
- Just for fun: the hellbender isn’t the only vehicle with a horn! Pilot another vehicle and press the ";" key to honk the horn. Bind honking to a different key by opening the console with the "~" key and typing (without quotes) "set input key playvehiclehorn 1" where "key" is the keystroke you wish to use.
ONS-Arctic Stronghold
Set on mountaintops at 24,000 feet, Arctic Stronghold is a chilly and hilly Onslaught map. The varied terrain creates tough driving conditions for the hellbender and scorpion. A slipup and you could be tumbling down the side of a mountain. But the hills do work well for elevated support fire, particularly from the goliath tank.
There are five total nodes on the map; the center node is underneath the bridge connecting the north and south sides of the map. The team that controls the center node gains a goliath on the bridge. Note that there’s a bounce pad underneath the bridge and can be used to move from the node to the tank. Also look on the icy ledges around the bridge node to find the redeemer.
Both bases are fairly open. As soon as you gain the node linking to the enemy base, grab fast vehicles (manta, scorpion, hellbender) and drive into the enemy base to fire on the power core. At the game’s start, split up to two nodes and send the rest of the team to the center node. Use vehicles to reach it quickly. If you drop into the valley, expect to lose the vehicle but at least not your life. If you’re outside of a vehicle, use the shield gun to soften the fall.
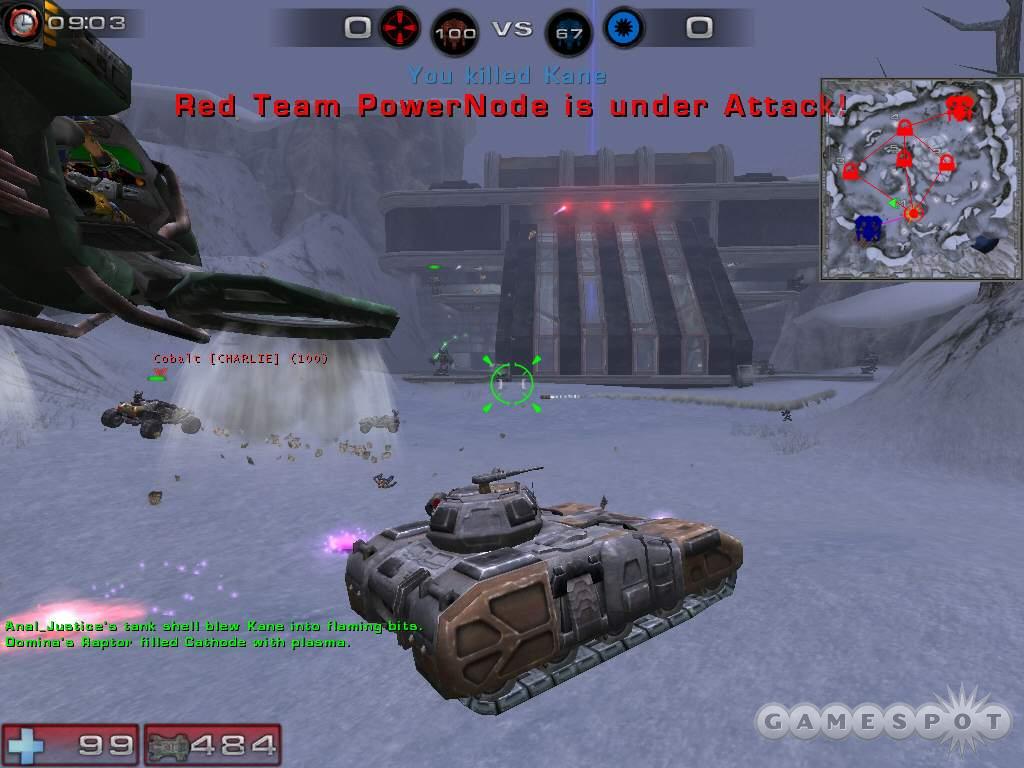
Once the bridge is controlled, keep hold of the position with the turrets and tank while most players push through the side nodes. Check the bridge often if you control the node and use the goliath that appears. Support it with the goliath from your base to hold the final node as other team members in faster vehicles cause havoc inside the enemy base.
ONS-Crossfire
The unearthed ruins of a lost city are home to Crossfire, a map likely named for its many intersecting paths creating ambushes, flank attacks, and of course, crossfire. Rocky paths weave throughout the city ruins. A key to success here is to know the shortest route to each of the map’s five nodes (and the shortest route between them). For instance, if you start in the southern base, reach the center node through the arched exit from the base. Follow the path straight beyond the large ruins to the center node near the double damage power-up.
The ruins aren’t simply for decoration. Many hold health packs, power-ups, or weaponry. For instance, find the ion painter on top of the ruins just north of the center node (the ruins with the statue of the woman holding the bowl of light). The target painter is on the same ruins; it’s on the northeast side of the same ruins near the cauldron. Both weapons are extremely useful in clearing a power node of enemies.
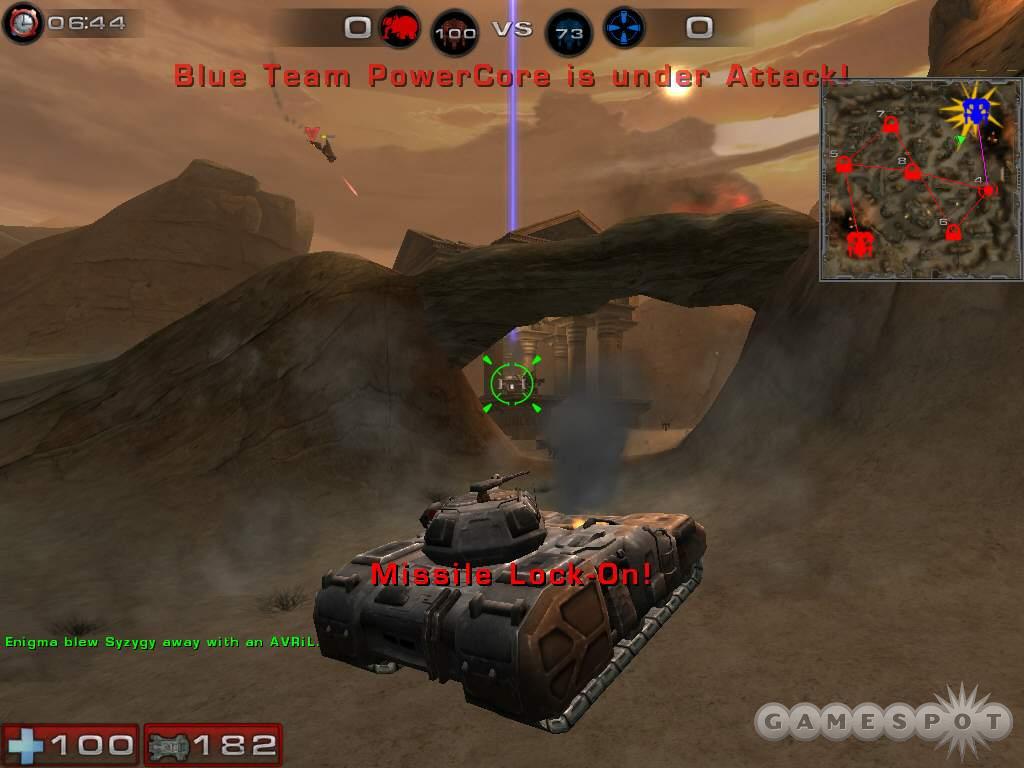
Crossfire’s many intersections and routes offer excellent line of fire opportunities on most power nodes and especially the enemy core. You don’t have to be adjacent to the node or core to score a damaging strike. Look for chances to blast from the relative safety of long-range. Coordinate a multi-pronged attack to keep the long-range attacker safe for as long as possible.
ONS-Dawn
Christen a new world with the bloodshed and wanton destruction of Onslaught. There are six nodes; two nodes lie in the congested center section. You can move straight up the map’s center to reach the adjacent nodes but maneuvering vehicles (other than the raptor) will be a challenge through the rocks and trees. You can also move up the map’s sides to reach the other nodes and find a cleared entrance into the center nodes. Find power-ups on these side routes: the super shield pack on one side and the big keg o’health on the other. The side routes also offer additional rewards for the thorough explorer. Find the target painter in a crowd of trees on the super shield pack side and locate the redeemer in a crashed ship on the keg o’health side.
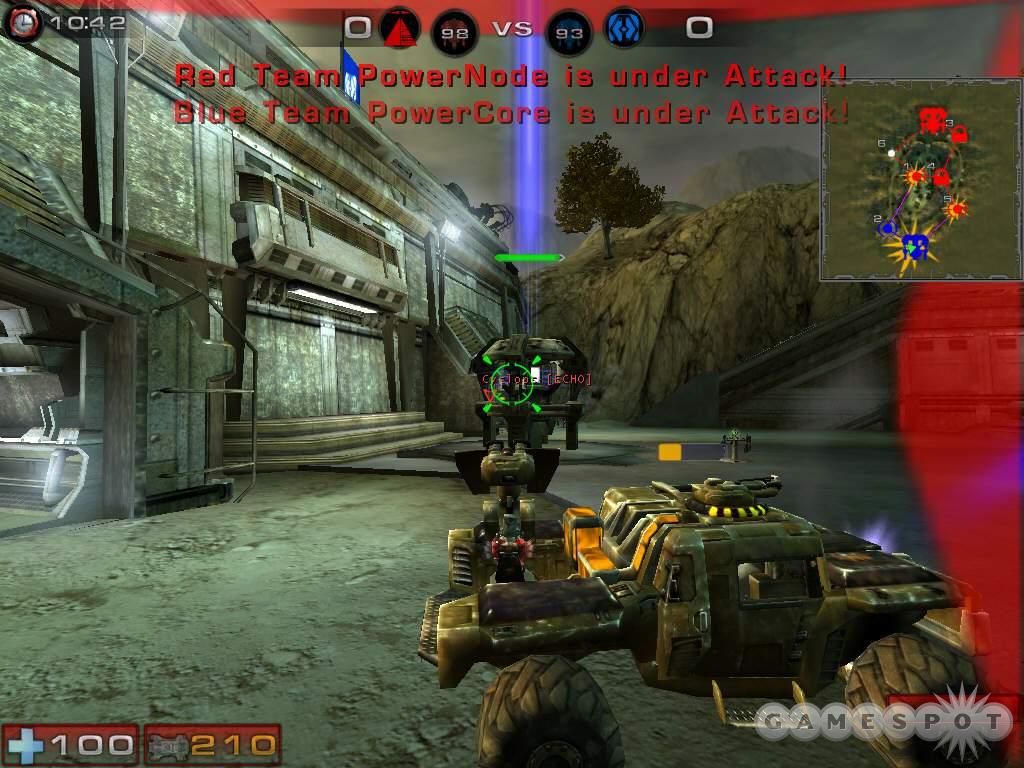
Obtaining line of fire on a vulnerable enemy power core is much more of a challenge on Dawn. The front base wall essentially protects the core. To gain line of fire on the enemy structure you must either fly above the base or enter through the left or right entrance. With a vulnerable enemy core, charge the enemy base with quick vehicles and damage the core as much as possible.
If you’re defending, use a node to teleport to your base and prepare to equip the AVRiL. Guard against the incoming vehicle rush while other defenders take down the linked node. At the game’s start, rush up the side routes to gain the super weapons and use them to gain a quick advantage either up the side or in the congested center.
ONS-Dria
Dria is set among the crumbling ruins of the last Nali fortress--the final stand of the Nali against the Skaarj. It’s a large map. Two bridges and a frozen river split up eight nodes into four on the western and eastern sides of the map. The map’s size puts an even great emphasis on solid vehicle usage. Teammates need to support one another and vehicles such as the hellbender should be filled with team members to increases its firepower for offensive and defensive support.
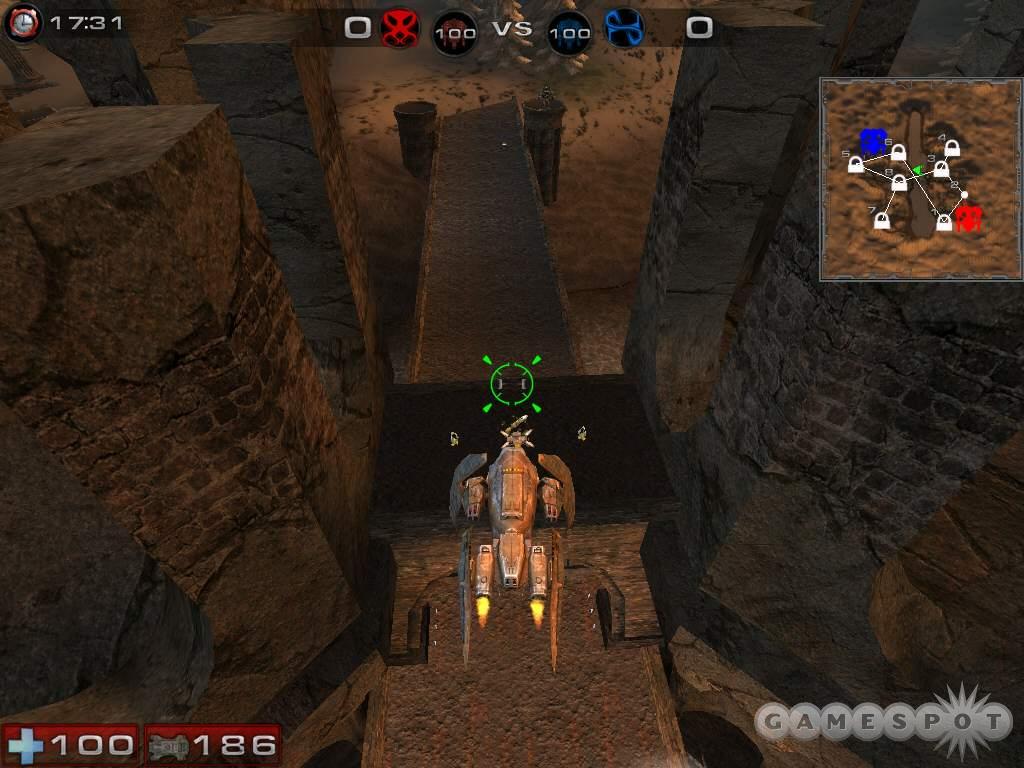
Towers litter the landscape throughout Dria. These high positions provide excellent sniper opportunities. Use the raptor to reach the high towers, many of which hold lightning guns and ammunition. Thorough exploration also reveals a target painter on a tower near the northeastern power node and another near the southwestern power node--one on each side of the map.
Power cores are somewhat protected inside the crumbling barn. But the lack of a roof leaves it most vulnerable to raptor assault. A ground assault can cross the hill in front of the enemy base instead of using the cleared side paths. All across the map, the forest-covered hills provide great vantage points for the attacks on various enemy nodes.
ONS-FrostBite
FrostBite is an extremely small, extremely frenetic Onslaught map. Just one power node separates the two bases. The war for that one node is the map. Control that node, even for a minute or two, and you must be ready to take advantage and inflict damage on the enemy core. Defending the central power node is important for buying your offense enough time to inflict damage against the core. Thankfully there are plenty of tools at your disposal.
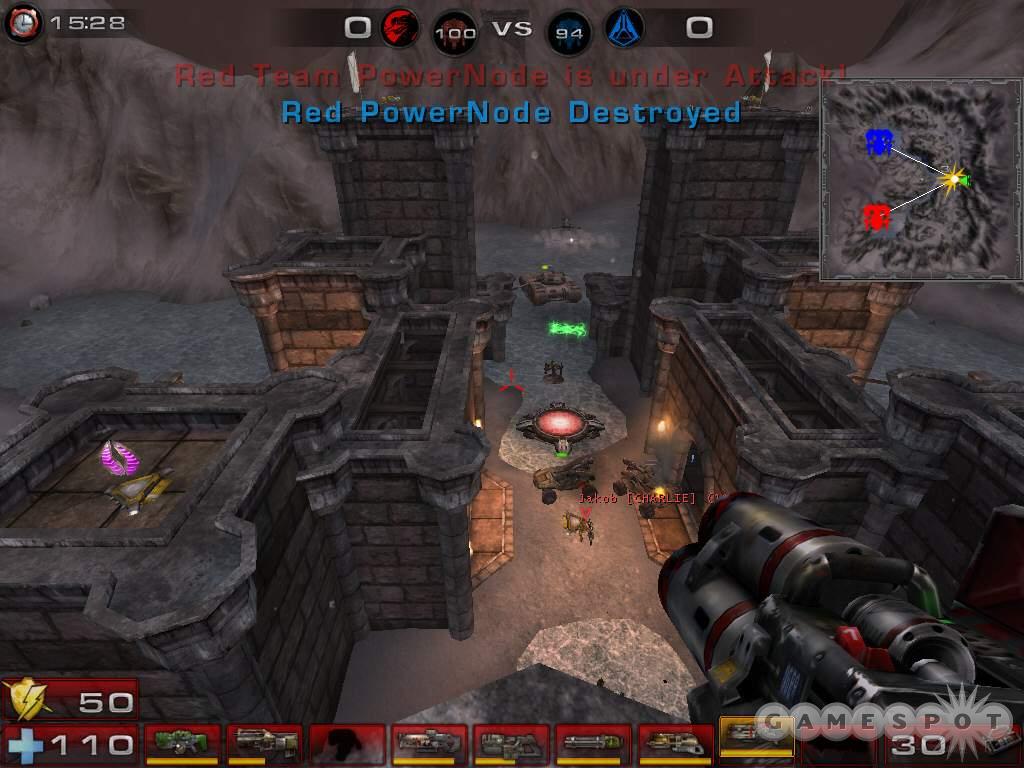
Man the turret at the center node to counter incoming troops and vehicles; grab the power-ups (double damage and big keg o’health) on top of the towers; snag the super shield pack near the node itself; and use a raptor to reach the rampart and equip the lightning gun there to snipe incoming enemy attackers. Note that you can make the double jump from the area with the double damage to the keg o’health. Defenders should equip AVRiLs to counter incoming vehicles and hold the node as long as possible.
There’s another tower near the center node; it’s on the adjacent mountaintop and can be reached by a raptor (quickly) or by foot (slowly). Find the target painter on top and utilize it to either help wrestle the node from your enemy or to bombard an incoming attack to aid in the node’s defense. This high tower is also a great vantage point for using the AVRiL against ground vehicles below. Attacks against the enemy core should arrive from the frozen valley and the hilly snow-covered routes to the bases’ side.
ONS-Primeval
Primeval is another tight Onslaught map. Three power nodes lie in the narrow paths through a dark forest. The middle node will certainly be heavily contested but teams can mount an attack on the enemy's closer node, which is also attached to the power core. But control the middle and control the goliath tank there. Mount the attack on the enemy core from the middle node with goliath support.
Each team’s core is completely unprotected. There are turrets nearby but there’s nothing blocking a shot between an approaching vehicle and the core itself. The forest paths are narrow, which means you must get close to get a shot but damaging the core with a fast vehicle strike (such as the manta or scorpion) will be an effective tactic once you have linked to the enemy’s base.
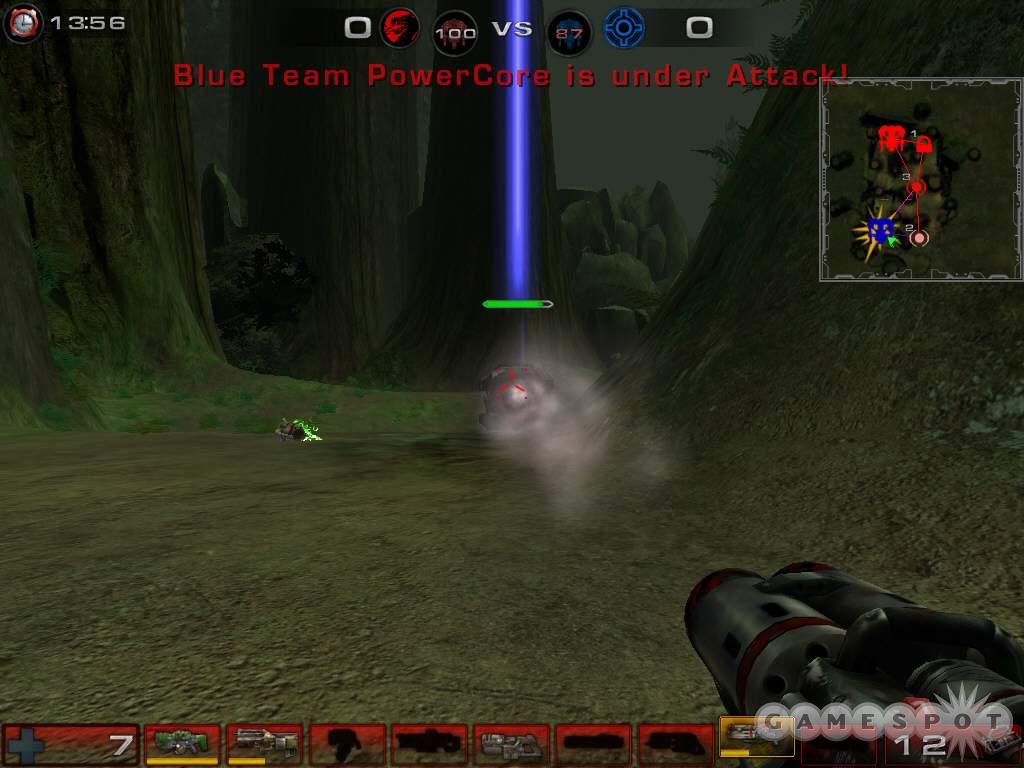
There’s also a backdoor into the enemies base. Instead of using the front entrance, find a path to squeeze through near the closer power node. Send attackers through the backdoor while defenders attempt to hold off the vehicle advance through the center.
ONS-RedPlanet
There’s an epic battle raging on the Red Planet. There are five power nodes connecting the two bases and each base possesses the mighty Leviathan. One of the keys to winning on RedPlanet is using your team’s Leviathan effectively and efficiently...and healed!
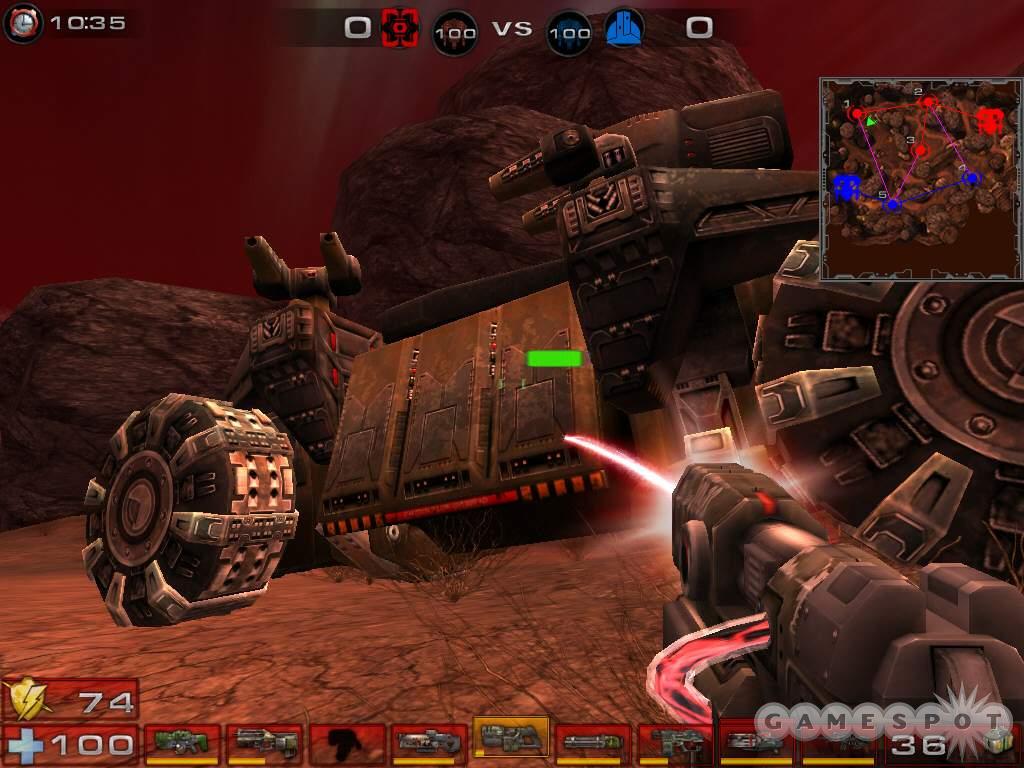
Protecting your Leviathan at the forward positions is paramount to team success. If you lose the Leviathan you must move the slow vehicle from your team’s base back to the front lines. Deploy it within firing range of the last power node to hold the position. Attempt to inflict damage to the core as you move the Leviathan up to defend the approach to the linked power node.
If you engage in a Leviathan versus Leviathan battle, fire at the enemy’s super vehicle on sight. Even if you are killed, the enemy Leviathan will be damaged. Don’t let the enemy to emerge unscathed. The power nodes are somewhat protected but certainly not from precise long-range vehicle fire and certainly not from a deployed Leviathan. Power-ups are also scattered near each node (such as the big keg o’health, super shield, and double damage) to aid in ground combat.
ONS-Severance
Severance is a medium-sized Onslaught map with one primary unique feature: the team that controls the center power node also gains a Leviathan at that position. This creates an all-out war for the center node. The power node configuration requires that you acquire your team’s side nodes before you can construct the center node. But that doesn’t mean you don’t need a presence there. Send two vehicles to your team’s two outer nodes and the rest of the vehicles and troops to the center node. Hold that position until you link there and can construct the node.
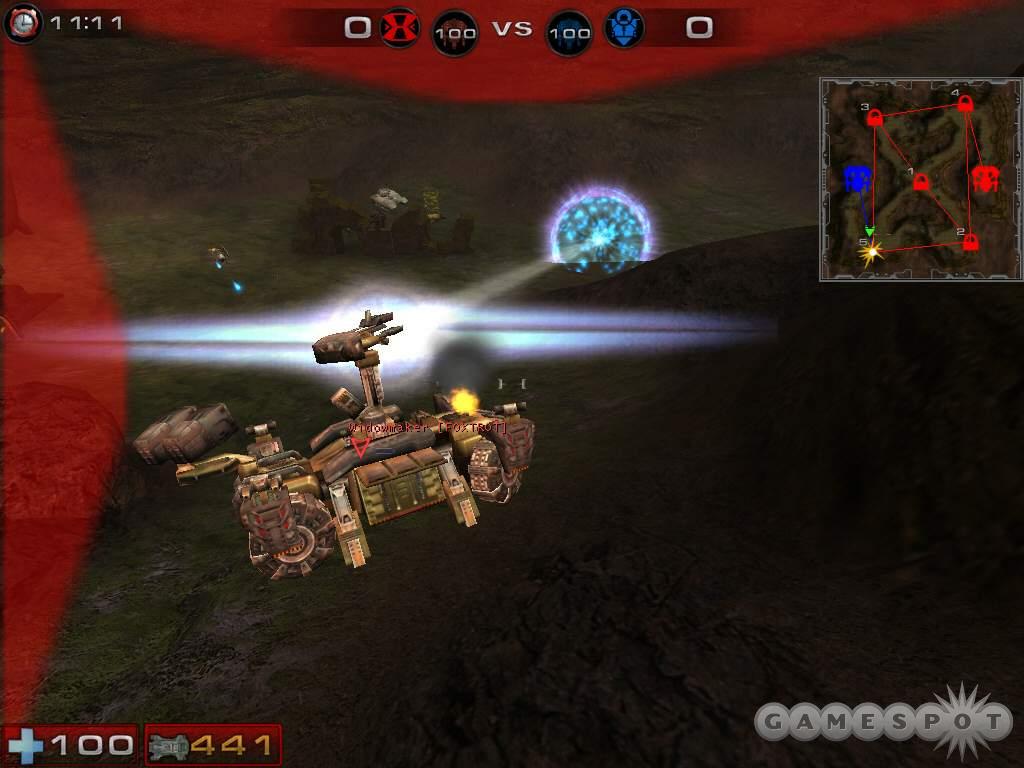
The center node isn’t well protected within the surrounding pillars but there are towers providing sniper positions as well as power-ups (super shield pack and big keg o’health) to increase your defense. But it will be all about the Leviathan. Use it to secure the area then push toward the node that links to the enemy base. The northwest and southwest nodes possess redeemers, which will certainly help take back (or defend) the center node from the enemy team. This map can quickly turn into a humiliating defeat if one team remains unorganized and fails to mount a significant offense for the center node and its prized Leviathan.
ONS-Torlan
The bases on Torlan are large with the power core tucked into the rear corner. The bases are heavily defensible--turrets, teleporter to a sniper roost, shield pack and keg o’health, and plenty of room for AVRiL gunners to mow down approaching vehicles--so you must move in quickly to damage the core. Once you obtain a link to the enemy base, pilot a fast vehicle and get to the core. Inflict as much damage as possible. Repeat until the link to the enemy base falls.
There are five nodes on the map. Two outer nodes for each base and a center node found underneath a mammoth tower. Controlling the center node is the quickest route to launch an attack on the enemy base’s closest power node (there’s a double damage power-up spawn here to help defend the node).
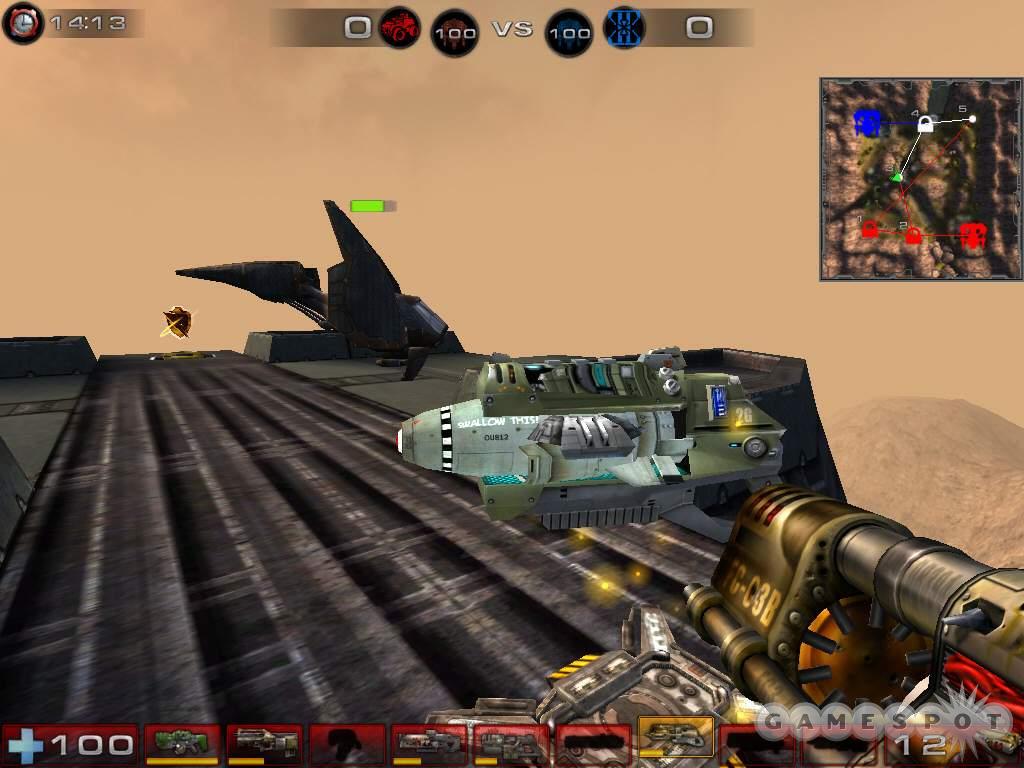
Upon gaining the middle node, vehicles spawn in the valley and in and around the tower above. Also, take a raptor and search the very peak of the tower (it’s way up there!) to find a redeemer and super shield pack. If the enemy core is unshielded, fire the redeemer from the tower’s top using alt-fire mode and guide the missile to the enemy core.
Goliath tanks spawn at the northeast and southwest nodes. Capture the enemy’s node and command the dual goliaths in a charge against the closest node and the core itself. Pilot the side goliaths up along the map’s edge toward the enemy’s base.
Chapter 8 - Cheat Codes
Open the console using the "~" key and enter the following cheats. Note that these codes only work during single-player and instant action modes. You can cheat against bots but not against other human players!
behindview 0 - First-person view
behindview 1 - Third-person view
allammo - Max ammunition for every weapon.
addbots # - Adds the number of bots to the game.
loaded - Provides all weapons
playersonly - Toggles frozen time
god - Toggles invincibility
killbots - Terminates all bots
setgravity # - Sets an amount of gravity
setjumpz # - Sets the height of jumps
setspeed # - Sets the speed of gameplay
stat fps - Reveals frames per second
fly - Allows you to fly around the map
ghost - Allows you to fly and move through objects and walls
walk - Toggles off fly mode
playvehiclehorn 1 - Honks your vehicle’s unique horn sound. Bind to a key to use it repeatedly! Just open the console with the "~" key and type in "set input key playvehiclehorn 1" without the quotes. Key represents the keystroke you wish to use. Note that this can be done in multiplayer...so honk away!
summon xweapons.shieldgunpickup - Summons a shield gun
summon xweapons.assaultriflepickup - Summons an assault rifle
summon xweapons.bioriflepickup - Summons a bio-rifle
summon xweapons.shockriflepickup - Summons a shock rifle
summon xweapons.minigunpickup - Summons the minigun
summon xweapons.linkgunpickup - Summons a link gun
summon xweapons.flakcannonpickup - Summons a flak cannon
summon onslaught.onsgrenadepickup - Summons the grenade launcher
summon xweapons.rocketlauncherpickup - Summons the rocket launcher
summon onslaught.onsminelayerpickup - Summons the mine layer
summon onslaught.onsavrilpickup - Summons the AVRiL
summon xweapons.sniperriflepickup - Summons the lightning gun
summon utclassic.classicsniperriflepickup - Summons a sniper rifle
summon xweapons.redeemerpickup - Summons the redeemer
summon xweapons.painterpickup - Summons an ion painter
summon xweapons.supershockriflepickup - Summons an "Instagib" shock rifle
summon onslaught.onshovertank - Summons a Goliath
summon onslaught.onsprv - Summons a Hellbender
summon onslaught.onshoverbike - Summons a Manta
summon onslaught.onsattackcraft - Summons a Raptor
summon onslaught.onsrv - Summons a Scorpion
summon onslaughtfull.onsmobileassaultstation - Summons a Leviathan
summon onslaughtfull.onshovertank_ionplasma - Summons an Ion Plasma tank.
summon ut2k4assaultfull.asvehicle_spacefighter_human - Summons a human spacefighter. Type in playersonly before hand to stop the spacecraft from moving. Once inside, type playersonly again and you can fire the craft.
summon ut2k4assaultfull.asvehicle_spacefighter_skaarj - Summons a Skaarj spacefighter. Type in playersonly before hand to stop the spacecraft from moving. Once inside, type playersonly again and you can fire the craft.
summon onslaughtfull.onsgenericsd - Summons a secret vehicle! Be sure to check out the bumper sticker.
Epic included the Vehicle CTF game type in the game but no maps. Players are already begun creating maps for the gametype. Check the conversion of BR-Canyon to a vehicle CTF map on GameSpot DLX and expect to see many more released through the Unreal community.
Got a news tip or want to contact us directly? Email news@gamespot.com
Join the conversation