Tom Clancy's Splinter Cell Walkthrough
Sam Fisher and Third Echelon need your help to rid the free world of cyber-terrorists in Tom Clancy's Splinter Cell. Consult our comprehensive walkthrough if you need help, too.
Design by Katie Bush
Sam Fisher is an operative for the Third Echelon, a top-secret initiative that marks a return of classical espionage. Leading-edge surveillance and combat technology enhance a Third Echelon operative's methods. When intelligence deemed critical to national security cannot be obtained by traditional means, Third Echelon is granted the clearance to conduct physical operations.
You are Sam Fisher, a Splinter Cell. You must leave no trace on the physical or political map. You do not exist. Ubi Soft's Tom Clancy's Splinter Cell combines challenging stealth gameplay with a powerful 3D engine that immerses you in Sam Fisher's world.
This comprehensive Splinter Cell Game Guide includes:
- General stealth strategies: This section offers general techniques for maintaining stealth, avoiding enemies, and incapacitating guards.
- Weapons and equipment: This section covers Sam Fisher's weapons and equipment. You'll find specific tactics for engaging in combat and utilizing special gadgets such as sticky shockers, diversion cameras, and optic cables.
- Mission walk-throughs: Complete solutions for all nine missions. Walk-throughs include specific strategies for completing objectives, sneaking past guards, disabling enemies, and locating important items, such as medical kits, equipment, and ammunition.
- All keypad codes and a hidden training Easter egg: If you just need a keypad code, this section includes all codes sorted by mission. Plus, thorough exploration of the training area reveals a hidden room. Look here for instructions on how to get there.
Table of Contents
Chapter 1: General Stealth StrategiesChapter 2: Weapons and Equipment
SC-20K
Frag Grenade
Wall Mine
Ring Airfoil Round
Sticky Shocker
Diversion Camera
Sticky Camera
Gas Grenade
Lock Pick and Disposable Pick
Optic Cable
Camera Jammer
Flares
Goggles
Chapter 4: Defense Ministry Walk-Through
Chapter 5: Oil Refinery Walk-Through
Chapter 6: CIA HQ Walk-Through
Chapter 7: Kalinatek Walk-Through
Chapter 8: Chinese Embassy, Part I Walk-Through
Chapter 9: Abattoir Walk-Through
Chapter 10: Chinese Embassy, Part II Walk-Through
Chapter 11: Presidential Palace Walk-Through
Chapter 12: All Keypad Codes and a Hidden Training Easter Egg
Chapter 1: General Stealth Strategies
Although Sam Fisher carries two firearms, and even grenades on occasion, his primary role revolves around stealth. In most instances, stealth is a safer option than combat. Sam Fisher isn't a first-person shooter juggernaut--he can sustain only a few shots before he's killed. In some missions combat isn't even an option. Therefore, it's important to master as many stealth techniques as possible.
You've entered a new area and want to bypass a guard without killing or incapacitating him. What's your plan? Here are some considerations when attempting to safely bypass the guard.
- If the area is illuminated, shoot out the lights with your pistol. Use the pistol because it's quieter than the SC-20K. If the light is at long range, consider using the SC-20K in sniper mode, but do so when guards are far away or facing the other direction. If you ever have trouble pinpointing a light, switch your goggles to thermal mode; the heat from the light source should enhance your accuracy.
- Always move as quietly as possible. Sam moves at his quietest when he's crouched. Never walk upright when trying to be silent. While crouched, move slowly by gently moving the thumbstick forward. Pressing the thumbstick all the way increases Sam's speed and noise, so move carefully.
- Look for cover in shadows. Hide behind a dumpster, scurry to a corner, duck behind a desk--whatever it takes to remain hidden and in the dark.
- Monitor your visibility meter at all times. When the visibility meter is to the far left, Sam is completely invisible to unaware enemies, though alerted enemies may be able to find Sam. Also, if you happen to be in an unaware enemy's path, he will detect you. While the visibility meter is to the far left, Sam can be right next to an enemy and remain invisible. Avoid moving near enemies when the visibility meter is to the right, even just halfway. Hiding in shadows and decreasing the amount of light in a room (by shooting out lights or flipping light switches) keeps your visibility meter safely to the left.
- Be aware of the floor surface. Walking slowly over broken glass still makes noise. Look for an alternate route if possible. Sam can pull himself over obstacles quietly, and it's better than walking over a loud or creaky surface.
- Cause a distraction. Toss a soda can or bottle away from your position. When the guard takes a look, head the other way.
- Drop quietly. When Sam drops from a ledge or after hanging from a wire, his landing is quite loud if you aren't careful. Press the crouch button when Sam lands to perform a quiet landing. This is extremely vital when guards are in the area.
- Be prepared to use night vision often. Darkness is your ally, and Sam's night-vision goggles are your primary way to navigate in pitch black.
- Always make movements when guards are looking in the other direction or walking away. If it's impossible to create total darkness, then quietly scurry through the light when guards are facing the other direction. Guards have fixed patrols. Just wait for them to turn or walk away. If they don't, you may need to incapacitate them.
So sneaking around a guard just doesn't seem possible, but you still can't kill him. Here are some techniques for disabling the guard:
- First, keep in mind all the techniques for remaining quiet. If a guard sees you, it's very difficult to disable him with any of these tactics. Keep in the dark and stay quiet.
- Watch the guard's patrol pattern carefully. Does he come to a stop for any period of time? Is he walking away from you? If he comes to a stop or walks away from you, sneak up behind him and grab him. Crouch and gently advance with the thumbstick. Don't make a sound. When you near the guard, repeatedly tap the interaction button, and Sam will automatically grab the guard once he's within range.
- Soda cans and glass bottles are scattered throughout the missions. Grab one--it's perfect for distraction. Equip the can or bottle and toss it where you want the guard to investigate (nearly always away from you). When the guard investigates, he comes to a stop to look in the area. Take the opportunity to sneak up behind him and grab him. You could also incapacitate the guard with a ring airfoil or sticky shocker.
- Hide in the shadows and fire a ring airfoil round or sticky shocker at the guard. A headshot with the ring airfoil round is an instant knockout. Hit him anywhere else and you must grab the guard before he recovers from the blow. A direct hit on any body part with the sticky shocker is a knockout. These gadgets knock out dogs as well.
- Launch a diversion camera where you want a guard to investigate (typically away from your current position). Activate its whistle sound until the guard approaches at close range. Release the gas to knock out the guard. It even works on guard dogs.
- Fire a gas grenade at a group of enemies (it's really a waste to use a gas grenade on a single guard), and the knockout gas should incapacitate the entire group.
- If the situation arises, it's possible to land on a guard and instantly knock him out. You might be hanging from a wire or on a ledge. Drop off onto the guard to knock him out cold. The guard even breaks your fall.
- Launch a sticky camera at a guard's forehead. A direct hit in the middle of the forehead knocks the guard out.
- You can knock out a guard without grabbing him with a few punches to the head. It takes a couple of hits, however, and is definitely not recommended in most instances. While you're punching the guard's head, he's likely firing his weapon into your gut. It's not a fair trade-off.
- No matter how you incapacitate a guard, always pick up his body and place it in darkness (where the visibility meter is at the far left). Failing to do so sets off alarms later in the level. This can be disastrous if there's an alarm limit in the mission (such as in the CIA Headquarters mission).
If you'd rather play with firearms than stealthy gadgets (and as long as Lambert has given the go-ahead to use lethal force), then combining stealth with combat is your best option. You won't be able to run around Rambo-style and survive for very long. Still seek out dark corners and destroy lights at every opportunity. A safe hiding spot will increase your combat ability. Always go for headshots. If the guard survives a first hit, he could run to an alarm, alert other guards, or even fire in your direction. Look for opportunities to use the SC-20K's sniper scope. It makes combat much easier and safer. And don't forget to hide the bodies! One alarm can ruin your day.
Chapter 2: Weapons and Equipment
This section covers Sam Fisher's diverse set of weapons and equipment. There are many enemies to avoid throughout the game, and stealth is often much more useful than a risky firefight. Master Sam's gadgets and you can bypass or disable any enemy in the game at any time.
SC Pistol
Sam Fisher's SC Pistol uses 5.72x28mm rounds with a 20-round magazine. It's available in all missions and will be your primary weapon up to the fourth mission, CIA Headquarters. This is a semiautomatic weapon, so it fires slower than the SC-20K's automatic mode. After the fourth mission, the pistol becomes your secondary combat weapon because the SC-20K is much more powerful in combat.
The pistol is a quieter firearm, so use the pistol to shoot out lights or cameras and save the SC-20K ammunition for combat. Switch to the pistol when you want to conserve SC-20K ammo. Although the pistol lacks the long range of the SC-20K (it doesn't have a sniper scope), it's an effective close- to medium-range weapon that can disable an enemy in a single headshot.
SC-20K
Sam acquires the SC-20K MAWS (modular assault weapon system) during the fourth mission, CIA Headquarters, and it becomes your primary combat weapon through the remainder of the game. You can toggle between semiautomatic and automatic fire modes. Use semiautomatic mode in long-range combat (such as sniper mode) and automatic mode for furious close-range firefights. Ammunition (the SC-20K uses 5.56x45mm rounds) is limited, so be very careful when firing in automatic mode. Fire quick bursts instead of a sustained stream.
The SC-20K's sniper mode is extremely effective for long-range, quiet combat. With sniper mode active, line up your targeting cursor as close as possible and press the left trigger to make Sam hold his breath. This steadies the targeting cursor and permits more precise movement. Sam can't hold his breath for long, so adjust the cursor as quickly as possible to ensure an accurate shot. Although the pistol should be used most often to destroy lights, the SC-20K's sniper mode helps destroy lights at long range.
The SC-20K is a multipurpose launcher, and it carries the following miscellaneous gadgets: ring airfoil rounds, sticky shockers, diversion cameras, sticky cameras, and gas grenades. Specific descriptions and strategies for these gadgets are discussed later in this section.
Frag Grenade
The 14-ounce M67 fragmentation grenade is easy to use. Equip the grenade and toss it where you want to create a rather painful explosion. Frag grenades are extremely limited; you won't find very many throughout the missions. Take advantage of their power and save the frag grenades for optimum situations. Wait until you come across a group of enemies and toss the grenade at their feet.
Also, don't hesitate to use a frag grenade near the end of a mission, even if it's only against a single guard. You can't keep grenades across missions, so if you don't use it, you waste it. Remember that grenades aren't entirely accurate. The grenade will bounce around before detonation. Aim the grenade just before the target and hope it stops at your desired location. You could even bounce one around a corner, though it's quite difficult to be accurate or consistent.
Wall Mine
The wall mine is a motion-sensitive explosive. You can attach the mine to most surfaces within the game. It's most useful in setting traps for enemy guards. Place a wall mine in a concealed area of a hallway or doorway and lure an enemy guard (or hopefully a group of guards) near the explosive. It's certainly best saved for opportunities against multiple foes. It's a limited device and one that must be gathered from guards' satchels or found on a wall hoping to trap intruders such as Sam Fisher.
One mission requires Sam to disable several wall mines. To do so, crouch and slowly approach the mine. Move scant inches at a time as you close in on the device. As soon as the interaction window pops up, remain still. Note the alternating red and green light on the mine. You can disable the mine only when the green light is active. When the green light appears, interact with the mine, and Sam disables the explosive and puts it in his inventory.
Shooting a wall mine also detonates the explosive. This is another fantastic way to set up a trap. Place a wall mine on a surface and hide at long range. Use the SC-20K's sniper scope to focus in on the mine. Wait until guards are nearby, then shoot the wall mine to create the explosion.
Ring Airfoil Round
The ring airfoil round is a viable option when killing is not. The ring airfoil round is part of the SC-20K's multipurpose launcher system. With the SC-20K equipped, select the ring airfoil round and use the secondary fire button to launch the rubber projectile. You can't fire the ring airfoil while in sniper mode. Shoot the round at an enemy's torso to temporarily disable him (he remains standing) or in the head to immediately knock him out. You can also shoot two rounds into the torso to knock the enemy out, but that wouldn't be a recommended use for these limited gadgets.
When the guard remains disabled and standing, approach him quickly and grab him before he can retaliate and fire. Shoot the enemy at as close a range as possible so you don't have to run far to grab him. If you need to interrogate a guard or use him for a retinal scanner, shoot him in the torso and not in the head. These devices are extremely limited and should be used sparingly.
Sticky Shocker
The sticky shocker is similar to the ring airfoil round in that it's a means of incapacitating a foe without killing him. Again, the sticky shocker is part of the SC-20K's multipurpose launcher system. Equip the SC-20K and a sticky shocker, then use the secondary fire button to launch the projectile (it doesn't work in sniper mode). It doesn't matter where you strike the enemy; a successful hit with the sticky shocker has the same effect. Also, there is an opportunity to use a sticky shocker while a couple of guards stand in a puddle. The combination of sticky shocker and water is a potent one--a single shocker can incapacitate multiple guards.
Unlike with the ring airfoil round, there's no way to grab an enemy struck with the shocker. He's incapacitated seconds after being hit. Don't use the gadget on any enemy you need to speak with or need for a retinal scanner.
Diversion Camera
The diversion camera, part of the SC-20K's multipurpose launcher system, is part surveillance camera and part incapacitating device. It's an excellent way to knock out an enemy that's around a corner or otherwise out of your line of fire--and certainly if you're currently out of ring airfoil rounds or sticky shockers. To operate the diversion camera, fire it (using the SC-20K's secondary fire button) at a wall that the enemy can reach and approach. However, make sure to fire the diversion camera at a place where the enemy won't see you.
The diversion camera has three abilities after it's fired. First, it acts like a standard camera and can be used to survey a hallway or other location. Second, the diversion camera can create a whistling noise as often as you'd like. The sound attracts guards, including dogs. Finally, when a guard (or dog) is investigating the camera up close, activate its third ability--knockout gas. The diversion camera doesn't kill the guards but knocks them out.
Sticky Camera
The sticky camera is a small portable surveillance camera that's launched from the SC-20K. It's an optimal way to peer around corners and hallways that are too dangerous to enter. The camera possesses the same night-vision and thermal views as Sam's goggles and even has the ability to zoom. You can even pick up the sticky camera after it's launched at a surface and reuse it later in the mission. And perhaps its most unique use: Fire the sticky camera at the middle of an enemy's forehead to deliver a knockout blow. It's an option if you can't use lethal force and are out of ring airfoil rounds, sticky shockers, and diversion cameras.
Gas Grenade
Also referred to as a smoke grenade on the inventory screen, the gas grenade is launched from the SC-20K and releases a knockout gas that can incapacitate any enemy within its cloud. Sam can also suffer damage from the gas, so steer clear of the smoke if you're near. There are very few gas grenades available in the game, so use the weapon wisely. It's best used in a tight hallway or room and against a group of enemies. Like the frag grenade, the gas grenade will bounce around upon impact with the ground. Target slightly in front of the intended destination.
Lock Pick and Disposable Pick
Sam Fisher has two means of entering a locked door (if there isn't a keypad available). The lock pick is more time consuming but can be used multiple times. Equip the lock pick and use it on the door. When the lock pick interface appears, move the left thumbstick along its four corners (upper left, lower left, upper right, lower right) until you feel a vibration. Wiggle the stick in that area until the lock pick releases the pin in that part of the lock. Continue until all pins are released to unlock the door.
The disposable pick is much faster, but, as its name suggests, it's a one-time-use gadget. Use the disposable pick on a locked door to unlock the door within seconds. It's a better option than the lock pick when there are guards in the area or if you're pressed for time. Once again, however, as soon as you use the disposable pick to unlock a door, it can't be used again.
Optic Cable
The optic cable is a small camera attached to a flexible cable; the gadget is slid under doors to investigate a hallway or room without creating the noise or light caused by opening the door. The optic camera provides a night-vision image. It's certainly wise to use the optic cable when approaching each new closed door. It could be the difference between alerting a guard walking toward the door and avoiding that same guard as he walks away from the door.
Camera Jammer
The camera jammer's name tells it all--use the gadget to temporarily jam enemy security cameras, which permits you to pass by undetected. Your pistol can destroy some cameras in the game, but other cameras are armored and invulnerable to your weapons. Use the camera jammer to bypass armored cameras (though you can simply move by the camera once it pans away from your view). The camera jammer runs on a short-lived battery that recharges over time.
Flares
You'll discover a few flares throughout the game; they're used to distract guards and automated turrets. Naturally there are many other ways to bypass guards. Automated turrets will fire if panning in your direction (if you're visible to the turret). You can avoid the turret without a flare by waiting until the turret pans completely away from your position then moving in the direction away from the turret's line of fire.
Goggles
Sam Fisher's goggles provide two alternate views: night vision and thermal. Night vision is self-explanatory. Switch to night vision in dark areas. You'll shoot out lights often in the game to create the darkness required to hide within, and night vision will help you navigate the dark hallways and rooms. Thermal view detects heat, particularly that of guards. You can use thermal view in darkness, but it's best used in other conditions, such as a misty freezer late in the game. On some occasions you can use thermal view to see enemies through thin walls or flooring. You'll also use the thermal view in the single-player game to detect land mines and heat left on keypads.
Chapter 3: Police Station Walk-Through
Agent Alison Madison worked covertly in the Georgian political arena for two years, securing a role in President Nikoladze's cabinet after his coup d'etat. She vanished on October 3. On October 7, Special Agent Robert Blaustein was sent in to find her. He vanished on October 11.
Objectives: Rendezvous with local NSA informant Thomas Gurgenidze for information on Blaustein's area of operation. Killing civilians will result in mission failure. Touching the street will result in mission failure.
Sam Fisher begins at the insertion point just outside the Hotel Bergurebi. As soon as the mission opens, Lambert contacts Sam with further instructions. Agent Blaustein is the mission's top priority--locate him through a local NSA informant. Lambert also warns about the local streets. There's heavy cop presence in the area, and reaching the streets results in an instant mission failure.
Crouch and hug the right wall, making a right turn just around the corner. There's a staircase just ahead of your position. Remain in the shadows by sticking close to the right edge of the deck area. Remain crouched and ascend the staircase. At the top of the stairs, spot the ladder attached to the wall just in front of you. Stand below the ladder and jump straight up. Sam grabs onto the ladder. Ascend the ladder all the way to its top and leap onto the section of roof.
Walk straight toward the wall (directly away from the ladder) and spot a pipe running down adjacent to a hatch on the roof's surface. Crouch and open the hatch. Fall down into the crawl space. Turn to the right of the pipes in this hole and locate a narrow passageway. Remain crouched and crawl through the tight corridor. The small passageway eventually opens into a wider clearing. Turn to the left and spot the vertical pipe--prime for climbing.
Approach the pipe and press the jump button. Sam grabs hold of the pipe. Ascend the pipe to its peak and leap onto the ledge. Spot the burning warehouse in the distance. You're headed that way. There's a wire just to the left of your current position--it's a perfect zip line that can take you straight to the burning building. Lambert offers some encouragement (you'll have help in navigating the burning building). Stand below the wire and leap straight up; Sam grabs hold of it and slides into an open warehouse window.
Grimsdottir contacts you as soon as you've reached the window ledge and basically reiterates that Sam must follow instructions to survive. She says to move into the room across the hall. Move forward and drop from the window's ledge into the room. There's a door in the far left corner of the room. Scurry in its direction. Save your game at the checkpoint on the way to the door.
Open the door and move slowly toward the room across the hall. If you peer left, you'll notice the hallway blocked by a tremendous blaze. As stated, move slowly into the room because as soon as you step inside, the floor gives way. Grimsdottir apologizes for your predicament and suggests a detour to a nearby stairwell.
Exit the room quickly (stand up and run if you're currently crouching) and head toward the blaze at the end of the hall. You'll spot an open doorway on the left. Run inside. Move to the far end of the room and notice another open doorway, this time on the right. You've bypassed the blaze by taking the route through this open room. Run to the stairwell at the end of the hall. Note the ceiling caving in behind you--but you're safe in the stairwell, as long as you don't step into the fire.
Start down the stairwell. Hug the left railing so you avoid the patch of fire raging on the stairwell's right side. Proceed down one flight of stairs and spot the open hallway to the right. The floor has given way to the blaze, but there's a well-placed pipe just overhead. Stand under the pipe and leap straight up; Sam grabs hold. Maneuver down the hall by going hand-over-hand along the pipe. You can pull Sam's legs up if you wish.
Grimsdottir provides some further instructions as you cross the pipe. Drop down on the other side of the crumbling floor. Move forward and take the first left and then the first right into a burning office room. Cross the room along its left side and proceed through the only open doorway. Exit into the hallway and turn right. It's a stairwell. Head up the staircase, taking care to avoid stepping on the fire. When you reach the top, exit into another hallway and maneuver into the room on the left.
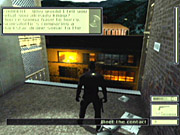
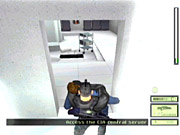
Grimsdottir provides an important update--the contact is in this room. You'll find him under some debris to the right of the room's raging fire. Approach the contact and speak with him. After providing some useful information and a new objective, the informant succumbs to his injuries.
Objective: Find the black box hidden in Blaustein's apartment.
Grimsdottir alerts you to the room's exit on the western side. Locate the closed door (left from the entrance you used). Open the door. You exit into a hall, but there's fire on either side. Even though it's difficult to see, there's a room just ahead of you, but it's filled with smoke. You can make it through the room, but it's easier to get rid of the smoke before attempting to maneuver through.
Activate your night-vision goggles and take out your pistol. Crouch and slowly enter the room. Aim toward the ceiling and spot the windows. Fire your pistol at the windows. Smoke rises and dissipates out of the opening you've just created. Wait a few moments for the smoke to leave the room. Enter and turn right to locate the closed door. Open it and enter.
Save your game at the checkpoint then move forward and open the door. Lambert offers a clue to the whereabouts of Blaustein's black box--search behind a fake bookshelf or wall panel. Approach the door ahead of you, open it, and proceed out onto the balcony.
Turn right, crouch, and hug the right wall. Stick to the shadows and follow the balcony to the left. Just beyond the corner you'll spot an opening in the railing. Face the opening and note a second opening on the far side. Stand up and leap to the far balcony. Crouch again and turn right. Follow this balcony to the left turn ahead. Move very slowly and keep in the shadows--there's a guard ahead, and his voice is a cue for you to use extreme caution.
Slowly move behind the lattice wall so you can see the talking guard. You'll make your move after he stops talking and heads in the other direction. When he's headed the other way, drop down into the planter. Turn right and maneuver across the planter toward the apartment entrance. There's a soda can on the deck that can be used to distract the guards, or you can simply remain stealthy and accomplish the same task without the can.
Move onto the deck and into the dark corner adjacent to the window on the door's left side. You can slide this window open or just remain in the dark corner and wait until a second guard--he's about to exit through the front entrance--passes by and unknowingly permits easy access through the double doors. Watch the guard march by. When he's off the deck, slowly move through the apartment entrance.
Enter the apartment--apparently others are looking for that black box. Move straight ahead, then take a left through some curtains. Continue down this hallway (it takes a left turn) and enter the last room on the right. Spot the painting on the left side of the room. Approach the painting and interact with it--Sam slides the painting, exposing a hidden computer.
Use the computer, which provides a data stick that reveals a code for a keypad across the room. Lambert chimes in with new information on Blaustein--he's dead and his last known position was a local police precinct.
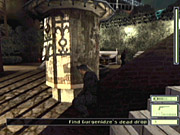
Objective: Find Gurgenidze's dead drop in Morevi Square to figure out how to get into the police precinct.
Check your inventory notes to discover the code for the keypad in this room. Approach the door on the far side of the room and use the keypad. Enter the code: 091772. The door unlocks. Open it and walk onto another balcony. Turn left and spot the wire running from the ceiling to an adjacent building. It's time to take another zip ride. Leap onto the railing then up to the wire. Sam slides down and lands on another roof.
Walk up the roof and to the door on the left. Open the door. It's an elevator shaft--but there's no elevator. Face the shaft and leap onto the cables. Slide down the cables to the top of the elevator below. Crouch and open the hatch. Drop down into the elevator. Lambert radios and lifts the street restriction. Exit the elevator into the room. Approach the door on the left. It's locked. Cycle through Sam's inventory and select the lock pick. Use the lock pick interface and unlock the door. Proceed through and save your game at the checkpoint.
You're about to come close to some of those cops Lambert talked about. Crouch and slowly move along this deck until you reach the staircase. Spot a couple of cops ahead of you; they're in conversation. You don't want to alert them. Thankfully the area is fairly dark--perfect for stealth concealment. Slowly move down the staircase in a crouched position and descend the second staircase on the right. You're now just below the cops.
At the middle of this second staircase, turn and face the wall that's closest to the cops. Leap straight up and Sam grabs hold of the ledge. Shimmy to the right. When Sam reaches the corner, he adjusts his position. Continue to the right until you're below the planter. Pull yourself up and drop into the planter and out of sight of those cops.
The dangers aren't over, however. Crouch and slowly move forward, being sure to remain concealed in the planter. Face the alley and spot the guard patrolling the area. Wait for the guard to move away from you. Crouch and slowly move until you reach a small alcove on the left. It's dark enough to keep you hidden from the guard. Remain in the alcove until the guard heads back toward the planter. Exit the alcove and turn left. Scurry to the staircase on the far left side. Ascend the stairs.
You're now in a small courtyard with a fountain in its center. Local police have been alerted and are patrolling this courtyard. Getting through without a firefight isn't easy. You can resort to gunplay if you wish, but it's definitely possible to remain hidden. Enter the courtyard and hug the left side. Hide in the corner near the cylindrical column. It's a dark corner, and you can move around the column to keep out of sight of the guards.
Your goal is to reach the far right side of the courtyard. There's a hidden crawl space behind the bushes. With the guards facing the other way, maneuver (remaining crouched and, if possible, in the shadows) to the far side and into the crawl space. Save at the checkpoint inside the hidden room.
Search the room for two medical kits (one on the left side and another one on the right) and some pistol ammunition on the shelves to the right. Access the computer inside this room to receive a data stick containing new information. A new objective appears.
Objective: Use the info in Gurgenidze's computer to gain access to the police precinct.
Time to exit back into the courtyard, still occupied by guards. If the guards were alerted at all, wait until the situation has calmed down (no up-tempo music) before exiting. Crawl out of the hidden room and crouch inside the bushes. You're headed down the alley on the right side, so your goal isn't far. Wait patiently and note the location of any guards. They patrol this area and that alley.
When the coast is clear, crouch and turn right down the alley. If needed, there's an alcove on the right that's dark enough to hide in. Return to the alley and cross to the alcove on the left side. Hide in the corner. Look to the left and down the alley. It's extremely bright, and it's to your advantage to shoot out the lights. It's easier to stay hidden but be prepared to avoid others alerted to the possible presence of an intruder.
Equip your pistol and destroy the first light along the left side of the alley, then a second light further down above a dumpster. Switch on your night-vision goggles if necessary. A civilian investigates the disturbance. Hide along the wall or in a corner and avoid detection. There are also bottles near the dumpster that can be used to distract others, including upcoming guards.
After the dumpster, turn right down another well-lit alley (there's also an alcove on the left if you need to hide). Shoot out the light along the right wall. A guard comes down to investigate. Avoid detection, remain crouched and in the shadows, and proceed down the alley. Take a right and ascend a pipe onto the top of an overhang.
Turn left, crouch, and maneuver to the edge of the overhang. There's a guard below you. Drop down and incapacitate the guard. Pick up his body and place him in the shadows. Turn left and proceed to the dumpster adjacent to the giant star symbol on the brick wall. Pull up onto the dumpster and face the wall to the left of the star. Perform a wall jump on this wall and to the right to leap over the wall with the star.
The stairwell is to your left. There's also a bottle near the benches to the right if you need to cause a distraction. Descend the staircase to the door (there are more objects on the ground beneath the staircase). Face the door and use the keypad. You retrieved the code from Gurgenidze's computer--enter the code 5929 into the keypad to open the door. You're in the police precinct.
Objective: Locate Agent Blaustein in the police precinct.
Notice the guard walking away from you at the end of the hall. Remain crouched and slowly maneuver down the hall (there are jail cells on either side). The guard enters through a door on the left side at the end of the hall. Wait for him to enter through the door. You'll see him through the window operating a computer. While he's on the computer, enter the door. Crouch and hide in the shadows between the shelves. Face toward the guard and wait for him to leave the room. Maneuver to the desk and use the computer to obtain a data stick.
Exit the room (ensure the guard exited and is walking down the hall with the cells) and head straight. Take the second left. Remain crouched so the guards in the rooms to the left don't detect you. Enter the first room on the left. There's a technician inside with some information. You can interrogate him if you wish. Sneak up behind him and grab him. Interrogate him then knock him out. You'll need to leave the room and hide the body; if not, an alarm is activated when you reach the next section.
Locate another door on the far side of the room and enter the medical room. Approach the gurneys to receive word from Lambert--those bodies on the gurneys are Blaustein and Madison. Search the wall across from the bodies to locate a medical kit.
Objective: Access the police precinct's security surveillance system.
Exit the medical room and the technician's room and turn left down the hallway. Open the door at the end of the hall into a stairwell. Turn left and ascend the staircase. Save your game at the checkpoint at the top of the stairs. Open the door into the lobby. There are others in the room; to remain undetected, hug the wall on the right side.
Remain crouched and move slowly. Maneuver around the room in a counterclockwise rotation. You'll reach the far side of the room and locate an entrance. It's dark here, so activate your night-vision goggles if you have trouble locating the entrance. Ascend the staircase and save at the checkpoint on the way up.

There's a dimly lit room at the top of the stairs. Remain crouched and slowly move along the right-hand wall. Enter the second door on the right. You'll spot a giant shadow--it's a guard on the right side of the room on the other side of a curtain. Stay crouched and move through the curtain and toward the guard--he's facing away from you. Grab the guard and knock him out. Deposit his body in a dark corner. Search his body to recover a data stick.
Use the computer in the room. Lambert chimes in--they're scanning the videotapes. Upon conclusion of the scan, Lambert orders you to rendezvous with Wilkes at the extraction point.
Objective: Meet Junior Wilkes in front of the police precinct for extraction.
Exit the room and return to the dimly lit room with the guards working on their computers. Turn left and slowly maneuver to the stairwell. Exit back into the lobby. It's still populated, so use caution when moving around. Head in a clockwise direction from the bottom of the stairwell to locate the double doors that exit the precinct. Run outside--Wilkes is pulling up in a van. Mission complete!
Chapter 4: Defense Ministry Walk-Through
CIA Agents Blaustein and Madison were killed for getting too close to information President Kombayn Nikoladze of Georgia needed to protect. Vyacheslav Grinko, a Russian mercenary, is closely tied to Nikoladze's secret. They have arranged to meet at the Ministry of Defense.
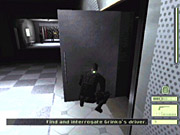
Objectives: Infiltrate the east wing of the Georgian Defense Ministry. Discover Vyacheslav Grinko's whereabouts by interrogating his driver. Tripping an alarm will result in mission failure.
Lambert provides mission details, while Sam waits at the insertion point. Orders are to seek out the target identified on the police surveillance tapes--Vyacheslav Grinko. Lambert also notifies Sam of the laser grid security system in the courtyard. Don't trigger any alarms, or the mission ends in immediate failure! Walk forward and left to the edge of the rooftop. You'll spot a stovepipe near a waving flag. Approach the stovepipe and interact with it--Sam latches on a rope and maneuvers into rappelling position.
Rappel downward and into the open window (it's the second one down). Leap into the dark room. There's a guard inside patrolling around the room; he's about to sit at the desk and use the computer but not before he conducts one more search. Hide in the dark shadows in the corner behind the first bookcase (just left after you enter through the window). If you hide between the bookcases, the guard can spot you.
Hide until the guard ceases his patrol and sits at the desk. Once he's at the desk, exit the shadows and approach the guard from behind. Move between the table and the bookcase to remain concealed. Grab the guard once you reach his chair. Pull the guard back behind the bookcases into the dark corner. Knock him out and leave his body there.
There's also a camera along the right wall, and it faces the desk. Pull out your weapon and shoot the camera. Walk up to the desk on the far side of the room (not the one the guard was using) and activate the computer to receive a data stick. Read the note for information about the laser grid.
Approach the door to the right of this desk. There's a light switch to the left of the door. You want to use the switch, which turns the lights off in this room. You do so because the lights will cast your shadow into the hall on the other side of the door. There are guards out there, and your shadow can be seen. Turn off the lights then open the door. With the door open, maintain a crouched position and look down the hall to the right to spot the patrolling guards.
When the guard is moving away from you, hug the left wall (remaining crouched and in the dark) and enter the first door on the left. Head upstairs to fetch some supplies. You'll find one medical kit on the wall after one set of stairs. Retrieving the additional supplies is tricky. You must leap onto the girders above your head. Pull yourself up then leap to the next girder. At the top you'll find another medical kit and some disposable picks (instant, one-time-use lock picks). Drop back down by using the same girders. Don't fall all the way or Sam could die (depending on how much health you have).
Return downstairs and past the door you entered. Continue down the stairwell. There are lights throughout this stairwell as well as cameras. Shoot out the lights with your pistol to remain in the dark. This helps keep you out of view of the cameras, which you must shoot out as well. Take out the lights, switch on your night-vision goggles, and continue downstairs until you hear the sound of a panning camera. Shoot out the camera and continue downstairs. Save your game at the checkpoint at the bottom of the stairwell.
Open the door, which leads out into a parking garage. Before moving out, spot the camera on the right wall in front of you. Shoot it with your pistol. Although the garage is amply lit, it's easy to remain on the far left wall and keep in the shadows. Remain crouched and hug the left wall. You'll spot some cars on your right. Keep hugging the wall all the way to the cars. Remain on the left side of the cars.
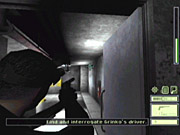
You'll spot a car with its engine running ahead of you. That's Grinko's car. His driver must not be far--in fact, he's on a bathroom break. Turn left at Grinko's car and switch on your night-vision goggles. Crouch and slowly maneuver behind Grinko's driver, standing in the corner. Grab him and interrogate him about Grinko's whereabouts. Grinko and Masse are meeting in an elevator, and Lambert wants to know what they have to say.
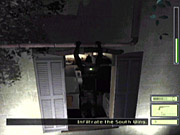
Objectives: Infiltrate the south wing of the Georgian Defense Ministry. Deactivate the courtyard security laser grid. Use the laser mic to listen to Grinko and Masse's conversation in the glass elevator leading to Nikoladze's office.
Turn around and retrace your steps out of the parking garage. Use the same path, this time hugging the right wall. You'll spot a guard standing in front of the door you used to enter the parking garage. You can pass this guard several ways, including by finding a bottle on the parking garage floor and tossing it away from the exit. The distracted guard will investigate and give you time to enter the door and return up the stairwell.
Maneuver to the door that you used to enter the stairwell originally. Open it and slowly advance so you can look down the hall to the left. Notice the nearby guard. Sneak up behind him (in a crouched position) and grab him. Drag him into a dark section of the hallway (near the stairwell door) and knock him out. Move down the hall and open the door on the right side. Don't go into the room yet!
There's a camera above the door. If you run into the room, you'll be spotted. Crouch in the doorway and look up. Take out your pistol and destroy the camera. Enter the room and walk around the desk. Use the computer to receive a data stick. Read the note for more information regarding the laser grid.
From the desk, approach the door on the left side of the room. It's locked. Equip your lock pick and unlock the door. Remain crouched and maneuver out onto the balcony. You're over the courtyard now--the laser grid still protects the courtyard, so be very careful when maneuvering around the balcony! Note the animation of the opening window across the courtyard.
Save your game at the checkpoint then turn left on the balcony. Leap onto the railing then turn left to face the wall. Leap straight up and Sam grabs hold of the ledge. Shimmy to the right until you're within the open window. Drop inside and enter the kitchen.
Now you're in a predicament. There are a couple of cooks in the kitchen, and they don't seem to be leaving. A guard enters and adds his own ingredient to the meal and promptly leaves the kitchen through a door on the right side. Look on the table to the right of the kitchen window. Grab a bottle. Toss the bottle into the freezer to the left of the window. Both cooks investigate. Remain crouched and hidden behind the appliances until the cooks reach the freezer. Cross the room and move through the door on the right.
Turn your night-vision goggles on because it's hard to see in this dark room. The guard enters this cafeteria from the doors on the left. He then moves to the light switch on the left wall. Maneuver in behind the guard and grab him. Knock him out and deposit him in a dark corner. Exit the cafeteria through the open doors on the left side.
Head to the right after exiting the doors and spot the staircase along the right wall. Crouch and descend the stairs quietly--there's a guard standing between two columns on the floor below. Sneak up behind the guard and grab him. Knock him out and deposit his body in the dark (the area to the left of the columns is a good spot).

Now it gets tricky. There's an important computer on the floor below--it disables the security grid--but there are two guards stationed nearby. There are two staircases that descend to the lower floor. Take the left staircase. This will position you behind the nearest guard. Crouch and move slowly, and don't make a sound. Grab the first guard and pull him below the staircase; it's plenty dark under there. Knock him out.
Sneak over to the second guard by the front doors and grab him as well. You should come at him from the right side. You can also shoot him if you wish, but make sure you deposit his body under the stairs. Use the computer and receive a message from Lambert. There's an incoming colonel. You'll need him to bypass a nearby retinal scanner.
The colonel arrives shortly. If you've caused a disturbance, he'll be on edge and patrol the floor in search of you and the guards. If not, he'll go to the computer. Either way, sneak up behind him and grab him. Don't kill him! You need his eyes. Pull him down the hall beyond the left staircase and interact with the retinal scanner to the left of the door. Drag him under the stairs and knock him out. Search his body for a medical kit.
Proceed through the open door and save your game at the checkpoint. Head left and hug the wall across from the door. There's a camera around the corner above an exit door. You can shoot the camera or wait until it pans to the left and quickly scurry to the door. Equip the laser mic and maneuver outside.
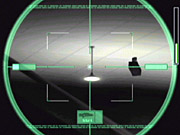
You're now in the courtyard. An animation reveals Grinko and Masse entering the glass elevator at the far left end of the courtyard. With the laser mic equipped, press the fire button. On the laser mic interface, adjust the square in the middle of the screen to point at the glass elevator. Follow the elevator all the way up to the top to listen to the conversation.
Objectives: Infiltrate the north wing of the Georgian Defense Ministry. Access Nikoladze's personal computer in his office.
As soon as the conversation ends and Lambert begins speaking, scurry fast to the far right side of the courtyard. A trio of guards enters the area from the door to the right of the elevator. Your goal is to climb the lattice to the right of that door. Hide in the dark on the right side of the courtyard. When the guards are looking the other way, ascend the lattice to the open window--it's second from the right.
Pull yourself onto the window ledge then drop down into the hall below. Save your game at the checkpoint. You're facing a storage room on the left and an elevator on the right--and someone is coming up the elevator! Enter the storage room quickly; two heavily armed soldiers are arriving via the elevator. Inside the storage room, grab the disposable pick from the shelf. Equip the optic cable and interact with the door. You can now see outside the door. Wait until the soldiers are on the right side of the hall (or at least facing away from the storage room) and then exit. Quickly move inside the elevator and press the "Up" button.
Exit the elevator and save your game at the checkpoint. Turn left and approach the first door on the left. Once again there are soldiers in the area so it's important to work quickly. The door is locked. It's best to use a disposable pick on this door so you can unlock the door quickly. Maneuver inside and use the computer to receive a data stick.
Notice the grating on the floor. Hop onto the desk and look up to spot the exposed vent shaft. Leap up and pull yourself into the vent shaft. Crawl to the left and through the vent. Drop down at the first hole you come to.
You'll hear a camera at the end of the hall. Hug the left wall (to be behind an obstruction) and shoot the camera. Enter the first door on the left. You may want to switch on your night vision; it's plenty dark in here. Grab the medical kit off the left wall then climb the ladder.
Emerge onto the roof. Move to the roof edge that's adjacent to the stovepipe. Save your game at the checkpoint then interact with the stovepipe--time for some more rappelling. As you rappel, don't move down quickly--no leaps! You just want to move to the first large window below the roof. There's a guard inside this room--Nikoladze's office--with his back turned. Pull out your pistol and aim for the soldier's head. Fire two to three shots to break the window and terminate the soldier. Search the soldier's body for a frag grenade.
Use Nikoladze's computer. Lambert is receiving the information, but enemy soldiers are on the way. As Lambert talks, return to the window ledge and drop down so Sam grabs hold of the ledge (if you fall all the way, you die). This is an effective hiding spot against the soldiers that search the room. Wait until the three soldiers enter, search, and finally leave the room before pulling yourself back up. When it's clear, pull yourself up and access the computer again.
Objective: Rendezvous with Junior Wilkes in the basement parking garage for extraction.
Time to leave! Exit through Nikoladze's office door and save your game at the checkpoint. Follow the hall to the left and enter the first doorway on your left. Descend the staircase one flight, and pick up the medical kit on the right wall. Open the door to exit onto another section of roof. Move forward and stick to the left (don't turn around). There's an elevator shaft on the right far up ahead. Face the elevator shaft and leap to the pipe on the far wall. Slide down the pipe into the parking garage. At the bottom, follow the sound of gunfire (it's Wilkes blasting some bad guys). Approach Wilkes to complete the mission.
Chapter 5: Oil Refinery Walk-Through
NATO and US intervention has pushed most of the Georgian commandos from Azerbaijan, with only a few well-hidden cells remaining. One of those cells, entrenched in an oil rig on the Caspian Sea, is exchanging data with the presidential palace in Georgia via a secure network.
Objectives: Infiltrate the oil refinery by the main pipeline. Trail the mercenary technician.
As you listen to Lambert's instructions, turn right and locate the ladder. Ascend the ladder to its top. Your notes reveal that you must avoid coming into contact with the mercenary technician and his escort before the encryption key is used. Revealing your presence will compromise the mission. First things first, however; you must infiltrate the oil refinery.
At the top of the ladder turn right and walk out onto the wide pipeline. There's another smaller pipe overhead. Leap up and grab hold of it. Pull your legs up so you can squirm through the small opening ahead. Drop down on the other side. You'll hear some radio chatter about a bridge being blown up. Don't worry about it.
Now you must maneuver around the obstruction ahead--the hole above is too small to squirm through. Drop down on either side of the main pipeline and shimmy away from your start position so you move past the obstruction. Pull yourself up on the other side. Crouch and continue forward. Hop onto the platform on the right side. Save your game at the checkpoint.
While on the platform, leap straight up and grab hold of the zip line. Sam automatically slides down. Don't worry about the explosions ahead of you. You'll automatically land on the far platform. If you miss and Sam hangs on to the edge, just pull yourself up. Turn left and crawl under the pipeline. Lambert radios in--NATO has authorized an attack on the refinery. Leap up onto the pole and drop down onto the pipeline (you may need to twist Sam around the pole so the pipeline is straight below). Crawl into the hole in the pipeline and listen to the radio chatter. Save your game at the checkpoint at the end of the pipeline.
You've made it into the oil rig! Move forward and approach the ladder. Grab hold of it and climb. Open the hatch at the top. Pull yourself up. A brief animation reveals that the technician and his soldier escorts have arrived. You must trail the technician closely but without alerting your presence to the technician or his close escorts. It's a challenging task so be prepared to move quickly.
From your position at the hatch, head to the right and ascend the ladder that's attached to the column. Climb the ladder to its top. Drop off of the ladder to the right onto the catwalk. Turn right and walk to the tool cabinet--a makeshift ladder! Climb on top of the tool cabinet. From the top of the tools, leap straight up to the pipe overhead. Move hand-over-hand and pull Sam's legs up to avoid the girders. NATO's air strikes arrive during your maneuver across the pipe. Move to the end of the pipe and pan the camera down. One of the escorts has conveniently stopped right below the pipe. Drop down onto his head, knocking out the guard. If he's not there yet, just wait a few moments for him to arrive.
Turn left and continue along the catwalk and up the stairs. When you reach the top, an explosion rocks the area in front of you. The technician and the escorts hang a left up ahead. Follow them and hide in an alcove to the left if needed. If any soldiers remain in the area, don't hesitate to take them out with your pistol. Take the left turn to trail the technician. If you ever lose them, follow the oil-soaked footprints on the ground.
Take a right (it's across from a jammed gate) and hug the left wall. Remain crouched and peer around the corner and wait for the guards to leave. As you follow them, save your game at the checkpoint. Crouch and slowly move to the next corner; remain against the left wall. Peer around the corner and spot the technician and remaining escorts entering a room on the left.
You'll spot a couple of guards at their post just outside the room. Pick up the bottle behind you (search near the pipes). You can use the bottle to lure the soldiers into an ambush. On the other hand, you can simply terminate them from your position at the corner. Search the bodies to grab a data stick. Remain crouched to the left of the doorway. Don't go in or the technician will spot you. Listen to the conversation and wait for it to end.
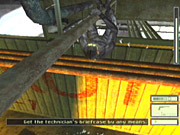
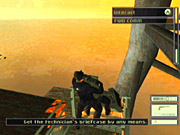
The technician and his escort proceed down the hallway to the right of the doorway. Trail them closely, but remain in a crouched position and move slowly to keep quiet. Peer around corners to spot their path. As you near the door the group just entered, Lambert radios with a change of plans. You must acquire the briefcase latched to the technician's wrist.
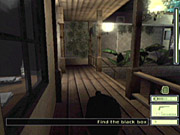
Objective: Retrieve the laptop from the mercenary technician's briefcase.
You can't open that door so turn around and retrace your steps out the door on the left. Take a left and spot the flames ahead. Just crouch and hug the left wall to avoid the flames. Save your game at the checkpoint as you move past. Continue forward and spot the large machinery on the right--there are three cylindrical things on top. Leap onto this machinery and grab hold of the pipe overhead. Pull your legs up and go hand-over-hand into the room. An animation reveals the soldiers destroying computers while the technician attempts to make his escape.
There's still a guard in the room blasting apart computers. Drop down inside so you land with some equipment between you and the guard. Shoot the guard with your pistol or knock him out. Exit through the door on the right side of the room. An animation reveals the technician's getaway helicopter destroyed. He's going to make a run for another vehicle.
Ascend the stairs ahead of you and pull out your pistol. When you reach the top of the stairs, look ahead and spot the barrel against the far wall. Aim at the barrel and fire several times until the barrel explodes, causing a chain reaction of other explosions. The result should clear out some of the soldiers in the area. Keep to the right and go down the staircase. Terminate the soldier at the bottom.
Enter the door on the left (the one you just saw the technician move through). Save your game at the checkpoint inside this room. Approach the door ahead of you and open it. Take two lefts and spot the technician ahead of you. Take another left when you reach the next intersection. The technician is just ahead and descends a staircase on the right. Follow him.
You'll emerge just behind him in the catwalk. Catch up to him and grab him. Interrogate the technician. When you've pumped him for all the information, knock him out. Grab the data stick from his satchel and then the briefcase to conclude the mission.
Chapter 6: CIA HQ Walk-Through
Hours after the attack on the oil rig, Georgian President Nikoladze launched a devastating wave of remote, technology-based terrorist attacks as retaliation against the US. The only lead to Nikoladze's whereabouts is a mole thought to be operating out of the Central Intelligence Agency.
Objectives: Access the CIA central server to identify and locate the information leak. Any agency fatalities will result in mission failure.
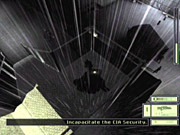
This is the toughest mission so far and one of the most challenging in the game. You can't kill any CIA employees and must resort to disabling them with your swift hands or, once you retrieve the SC-20K, with sticky shockers or ring airfoil rounds. Also, you must attempt to avoid setting off alarms. Lambert allows approximately three alarms before aborting the mission.
You're just outside the CIA headquarters and in the rain. Lambert sends further information, including the fact that you have only 100 seconds to enter the building through the ventilation shaft. After 100 seconds, the fans turn on and block the entrance. The timer begins once Lambert concludes his instructions, so start moving immediately to gain extra time--toggle your night-vision goggles, turn left, and run. There are guards patrolling the area, so stick to the left side of the courtyard.
Maneuver to the right toward the building and spot the fence blocking the entrance to the vent shafts. Climb the fence and drop down on the other side. Stand below the left vent shaft and against the right wall. Perform a wall jump up to the ledge just below the vent shaft. Pull yourself up. Interact with the vent grate to slide it open. The fan blades are just ahead. Crouch and maneuver around the fan blades and into the shaft. The timer ends.
Save your game at the checkpoint and maneuver onto the catwalk at the end of the shaft. There's a maintenance worker below and to the left of your current position. There are several ways to avoid or incapacitate this worker. Your main goal is to prevent him from reaching an alarm. Remain on the catwalk and make careful, quiet movements. Wait until the worker heads to the left and around the corner.
Drop off the catwalk just next to the fence. Climb the fence between the two vents and drop down over the other side. If the worker is in this area, quickly incapacitate him. Don't kill him! Any deaths result in mission failure! After knocking him out, deposit his body in a dark corner. Follow the tunnel around to the right. You'll reach a left turn. There's a camera at the end of the hall. Hug the left wall and keep quiet and in the shadows to remain hidden.
When the camera pans to the right, quickly scurry into an alcove along the left wall. Watch the camera and wait until it pans right ahead. Maneuver underneath the camera--its blind spot. When the camera pans left, head into the stairwell to the right. Don't charge up the stairs--you've reached another challenging area.
There are two guards at the top of the stairs. Maneuver silently around the bottom of the stairs and you can see one at the top patrolling back and forth. You must wait until his back is turned before ascending the staircase and grabbing him. Quickly retreat down the stairs with the guard, knock him out, and deposit him in the dark below the stairs. If the guard spots you, knock him out quickly. You can't kill him with your pistol. There are two guards to deal with. It's much easier to do it quietly, but a couple of swift punches to the head will knock them out. Deposit both below the stairs.
Descend the staircase on the other side. The hallway continues to the right. Crouch and move quietly to the first door on the right. You're provided with the optic cable for this mission. Use it on the door to ensure there are no guards inside the room. Open the door and walk into the room. Access the nearest computer on the desk to receive a data stick. There are other items on the desk, including ring airfoil rounds, a sticky shocker, and a medical kit. The ring airfoil rounds and sticker shocker are used later after you acquire the SC-20K weapon.
Cross the room to the closed door on the other side. Use the optic cable on the door; there are several guards posted in this lobby so it's important to see where they are and which way they're facing. When the guards are on the left side of the room and facing left, open the door in a crouched position and maneuver along the right side of the room. Pass through the metal detector on the right side and save your game at the checkpoint.
Slowly move to the doorway on the left. There's a civilian in the next room talking on a cell phone. Quickly enter the room and hug the wall on the right. Move crouched and quietly. Follow the wall along the left turn and spot the guard standing at his post next to the elevator. The easiest way to get by the guard is with a distraction. Move carefully to the bench next to the guard and grab the soda can. Toss the soda can in the room's center. When the guard investigates, move slowly to the elevator. Activate the call button and step inside. Use the controls inside the elevator to go down. Save your game at the checkpoint on the next floor.
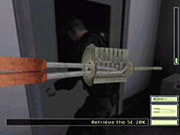
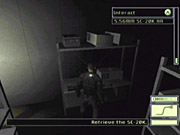
Lambert chimes in with another objective: Your man inside says your SC-20K is in place and can be retrieved from the storage room behind the generator backup. But the mission parameters still remain the same--no fatalities!
Objective: Retrieve the SC-20K from the storage room behind the battery generator backup.
Turn the corner down the hallway and hug the right wall. Remain in the darkness before the two doors on either side of the hall. A man exits the door on the right side and enters the door on the left. When he's clear, enter the door on the right. Once inside the room, turn right and use the computer on the desk to receive a data stick with the code to the main server room.
You've reached the toughest part of this level and certainly the most challenging portion of the game so far. It requires patience yet quick thinking and action. And don't forget, you can't kill any of the CIA employees! Exit the office to the right and stick in the shadows. There's a guard that patrols the intersection in front of you. You can turn right to head toward the next goal or go left to complete an optional task and retrieve some supplies.
Take a left and head down the hall to the door at the end; it's on the right. You may hear a conversation inside. But you're safe enough to open the door. Once it's open, remain crouched and hug the left wall. Move quietly and don't disturb the guard in the room. The supply room is on the left side. Equip the lock pick and unlock the door. It's dark inside the room so toggle your night-vision goggles. Grab the medical kit and two sticky shockers from the shelves.
Retrace your steps--quietly and carefully--to the intersection. Remember that there's a guard patrolling the intersection, so keep your night vision on so you can spot his location. Remain in the shadows along the right wall and wait for the guard to pass.
Once the guard passes, move to the left wall and move slowly down to the second window. Make sure your night vision is on so you can see that there's a maintenance worker checking out a keypad on the right wall. There's also a security guard pacing a room to the left. Your object here is to grab the maintenance worker while the guard on the left has his back turned. Don't forget about the original guard. Make sure he's not in the area before you grab the worker.
Drag the worker into the janitor's closet in the upper right corner of the hall and knock the worker out. Turn off the light inside the room to conceal the body. There's also a disposable pick on the shelf. Exit the closet and hide behind the open door. The patrolling guard is likely back in the hall by now. Wait for him to make his rounds and start heading away from you. Look around the door and wait until the security guard in the right-hand room is walking away from you. When he does, sneak inside and grab him. Pull him into the janitor's closer and knock him out. Pick up the satchel he drops to secure a data stick containing the keypad code.
Hide behind the door again and wait until the patrolling guard makes his rounds and leaves down the hall. Silently move to the keypad and punch in the code obtained from the security guard: 7697. Before entering the room, use an optic cable on the door to see inside. There's another worker inside who paces the room from left to right. Wait until he's to the far left before opening the door.
Open the door and move silently to the left side of the room behind the shelf. You'll spot another guard to the left. Wait until the worker moves back to the right and around the shelves. Make your move by silently going to the wall across the room and taking a left down the hall. Move very quietly or the guard will hear. Turn left at the end of the hall and use the computer. You obtain another code for a keypad.
Move to the nearby keypad and enter the code 110598 and save your game at the checkpoint. Head to the right then move quietly down the stairs. You'll spot a worker in the area mumbling things to himself. Stick close behind the shelves and peer around the corner to spot a second worker. These guys go down in one punch so don't hesitate to sneak up on them and knock them out. Go to the far exit door and switch off the lights to conceal the bodies.
Head down the hallway and ascend the staircase on the left at the end. You're in the storage room with the SC-20K. Pick it up from the shelf against the far wall just as you enter the storage room. Make sure you get the sticky shocker and ring airfoil rounds also. Turn left toward the exit and save your game at the checkpoint.
Exit into the dark hallway. Hug the right wall and move quietly and slowly. There's a worker in the break room on the left side of the hall up ahead. Listen to him complete his conversation and leave. Scurry into the break room and grab the medical kit and a soda can for an upcoming distraction maneuver.
At the intersection, go left. You're nearing the server room, and Lambert radios more information. You've reached another tough section. There's a guard patrolling the room on the right. There's a second guard patrolling the hallway; he pauses and turns around just at the server room entrance.
There are several ways to avoid these guards and get into the server room. One way is to use the soda can to distract the guard in the room on the right. With him looking away and the second guard looking away, it's easy to sneak into the server room on the left. However, you must exit this room and deal with these guards again. Secondly, you can incapacitate both guards starting with the one in the room on the right. Wait until his back is turned, sneak up on him and drag him into the shadows of the hall. Do the same with the second guard when he pauses and turns his back.
Enter through the server room entrance and face the keypad on the right. Enter the code 2019 to gain access. Once inside, move forward then down the staircase on the right. Hide in the right-hand corner of the room and wait for a worker to patrol the room. Grab him, knock him out, and deposit him in the dark corner.
Move across the room and toward a hall on the left. Spot a second worker in an adjacent room; he's kneeling and doing some maintenance on the server. Sneak up behind him and grab him. Knock him out and deposit his body back in a dark corner. Retrace your steps back into this room and use the computer on the other side of the room. Grimsdottir traces the information leak to the PC of Mitchell Dougherty.
Objective: Tap Dougherty's computer to trace the intelligence leak to the Georgians.
Return out of the server room and to the doors you entered from. If the guards remain outside, your exit is much more difficult. Wait until the guard in the room across the hall turns to the right before exiting into the darkness on the left. You can also attempt to distract the guard with noises. When he moves out of view, exit the server room. Don't forget to dodge the patrolling guard on the left.
Continue down the left hall. Hug the left wall as you approach a small security station window on the left. A guard peers out. You can toss a soda can to distract him or just make a noise. He'll turn around and head through a back exit to investigate. It's best to dispatch him now. Jump through the window and scamper up behind the guard. Grab him, knock him out, and drop his body just out the door and to the left. It's quite dark at the edge of the stairs.
There are two armored cameras in this well-lit lobby. You must shoot out the lights to avoid detection. There are also guards that will investigate the lights going out. You can still shoot lights when they're in the room and remain concealed. Equip the SC-20K and use the sniper mode to eliminate all nine lights. Once that's completed, sneak across the room through the hall on the other side.
Make the first left turn and don't move in front of the window just yet. There may be a worker inside at the copy machines. If you were especially noisy in the previous room, he may have investigated there as well. Move past him and head down a staircase on the left.
Move slowly down the stairs--there's a camera on the left at the bottom. It's armored so you must take out the lights to remain hidden. Wait until the camera pans away from you then destroy the light with your pistol. Head right and go to the keypad. Enter the code 110700 to open the door. Save your game at the checkpoint as you enter.
Hug the right wall in the next area. Don't move in front of the window on the left or the guard inside will see you. Shoot out the light above you; take out the next one as well. The guard will investigate. Maneuver to the right side of the room and cross. You can also sneak up on the guard in the dark and disable him. Enter the second door on the left. Grab the flares from the table (there's another by the turret on the other side of the room). Use the computer to receive a data stick. Move to the door to the turret's right. Equip the lock pick and use it to unlock the door. Enter the elevator on the left and use the controls to ascend. Exit on the next floor and save your game at the checkpoint.
Lambert sends information on Dougherty--he's in information retrieval, office 508. Enter the door marked "Media Room" at the end of the hall. Hide along the left corner and wait until the two workers conclude their conversation. One remains at the desk and the other leaves to the left. Hug the left wall and peer around the corner and wait until the worker to the left is looking away. Scurry across the room quietly and under the computers along the right wall.
Cross the office to the left and peer into the lighted room on the left. That's Dougherty's office. He's either in there or down the hall. If the room is empty, scamper inside and use his computer. Lambert sends his congratulations and a new objective. Leave the room and head down the hall on the right.
Objective: Kidnap Mitchell Dougherty.
A helpful clue in your mission notes suggests nabbing Dougherty while he's on a smoke break in the smoking courtyard. Continue down the hall until you reach the auditorium doors on the left. Move toward the stage quietly and cross through the seats where you can crouch below the light. On the other side of the seats, go right and then left up along the left wall. Grab and disable the guard standing away from you. Use the lock pick to open the door on the right.
Hug the right wall and listen to the conversation in the break room on the right. It's Dougherty. After the conversation concludes, he exits and heads down the hall away from your position. Follow him quietly. Remain crouched and move slowly so you don't disturb the guards in the break room.
Dougherty uses a code to open the door at the end of the hall. The optimum goal is to follow him through the open doors so you don't need the code. If the doors close, you must enter the door on the right side of the hall. Disable the workers in there and obtain the code--0614--from them.
Follow Dougherty into the next hall. Remain in the shadows as he stops for a drink of water. The door at the end of the hall leads to the smoking courtyard. When he stops and looks away from you, grab him and interrogate him.
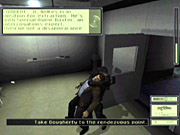
Objective: Take Mitchell Dougherty to the rendezvous point near the document-disposal loading dock.
The easiest way to tote Dougherty around is to disable him. You can then carry his body around as needed and just drop him when you need to disable some guards. If you've saved your sticky shocker and ring airfoil rounds up to this point, disabling the remaining guards should be easy. If not, you must carefully sneak up on them and disable them. Leaving the smoking courtyard through its exit outside initiates a checkpoint save.
There's a guard patrolling out in the dark. Let him pass to the left then sneak up on him and disable him. Grab Dougherty and take him to the left toward the fans. Hang a right and locate the catwalk on the left. At the intersection, go left and descend the staircase at the end.
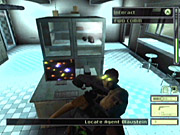
Objective: Incapacitate the CIA security officer speaking with Wilkes and Baxter.
There are some guards and workers in the next room. Drop Dougherty and enter (save your game at the checkpoint as you enter the room). Descend the staircase and hug the right wall. Peer around the corner to see if any guards or workers are nearby. Enter the room and use the large obstructions as cover. Don't hesitate to use a sticky shocker or ring airfoil round to disable the guards. The worker will sound an alarm upon seeing you, so sneak up on him if at all possible.
After clearing the room, exit onto the top of a staircase. Remain at the top and look down to find the patrolling guard. Shoot him with a sticky shocker. Move down the staircase and seek out the last remaining patrolling guard along the right path. Take him out with a sticky shocker or ring airfoil round. Retrace your steps and grab Dougherty. Move through all these areas and down the stairs leading to Wilkes and the loading dock.
One final guard remains; he's standing near Wilkes and the van. Either sneak up on him and disable him or fire a sticky shocker to knock him out. Bring Dougherty's body to Wilkes to conclude the mission.
Chapter 7: Kalinatek Walk-Through
Russian mercenaries have begun to destroy evidence of Georgian activities at Kalinatek. Before her detection in the network, Grimsdottir discovered that a technician named Ivan was hiding in the building. Ivan possesses an encryption key that could help Third Echelon find Nikoladze.
Objectives: Infiltrate Kalinatek. Access Kalinatek's fire emergency system to open the fire doors surrounding Ivan. Find Ivan before the Russian Mafiosi kill him.
This mission is the opposite of the last in terms of gunplay. Though it's still challenging, you're free to use your weapons--including the new SC-20K--to terminate the Russian mercenaries. You can still disable them the old-fashioned way, but don't hesitate to use your weapons if the need arises. And don't forget the sniper scope, it's a powerful tool against this mission's enemies.
Cross the parking garage around the white van and hide behind the yellow car. Two guards emerge in the area ahead of you. One leaves and the other turns his back to you. Grab him, knock him out, and deposit him around the car. Alternatively, you can just shoot both guards. There are also plenty of soda cans in the garage to cause a distraction (great for distracting the second guard if you were quiet in disabling the first).

Enter the room on the left and snag the medical kit from off the wall. Exit the room and open the door to the room's left. Ascend the staircase one flight to another level of the parking garage. You'll spot the head of a guard just above the yellow car in front of you. Sneak up behind him (going to the right of the yellow car) and disable him. Recover a data stick from his satchel.
There are two more guards on the other side of the van. Distract them with a bottle (in the room on the left) or terminate them with your SC-20K using the room or yellow car as cover. Cross the parking garage until you spot the crates on the right. Leap onto the crates then jump out onto the suspended bricks. Save your game at the checkpoint while doing so.
While on the bricks, leap straight up and grab the girder that stretches from the bricks to a platform adjacent to a far building. Move hand-over-hand toward the platform. Sam automatically zips toward and falls onto the platform. Face the building and perform a running jump. Go forward to the stovepipe and rappel. There are a couple of guards in the room to the left. Ignore them and drop straight down onto the glass roof. If it doesn't break, jump straight up to break the glass and fall through.
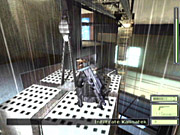
Start down the hall. A guard emerges from the doors on the right. Sneak up on him and knock him out or just shoot him. Search his satchel for a data stick. Enter the door he emerged from then approach the first door on the right. Use the keypad and enter the code 97531 obtained from the guard.
Search the room. Pick up some SC-20K ammo from the desk. There are also several soda cans scattered around the room that can be used for future distractions. Open the door on the opposite side of the office. The next room is extremely dark, and there's glass on the floor. The guards nearby can hear you move over the glass. Avoid the glass by climbing onto the equipment on the room's edge. Traverse the equipment and enter the open vent. You can also shoot the guard; be sure to deposit his body in the dark. Follow the vent to its end. Drop out and save your game at the checkpoint.
Watch the animation of the mercenaries destroying the offices. Approach the light switch and turn off the lights. Open the door quietly. Take out your SC-20K and aim it at the right wall. Locate the small square object--it's a wall mine. Shoot the wall mine using the sniper view to eliminate the two guards. Other guards may investigate; terminate them with the SC-20K. Search the bodies and recover the data stick and a wall mine. Turn off the hallway lights to keep the bodies in the dark.
Explore the slim room on the right and recover a medical kit. Move to the end of the hall and hang a right. Take a left at the "4" on the wall and enter the elevator shaft. Drop down onto the elevator and save your game at the checkpoint.
Drop down out of the elevator and scamper quickly to the right corner of this waiting room. A couple of guards trash the office to your left. Pick up the box of frag grenades from the desk. The guards exit from a door on the left side of the office. Wait for them to emerge and terminate them with your SC-20K. Search their bodies to recover a data stick. Drop their bodies in the dark to conceal them.
Slowly advance down the hall. Equip your SC-20K and its sniper view. Zoom down the hall along the right wall to discover another wall mine. Wait until the two guards approach near the mine, then shoot the wall mine. If any guard survives, eliminate him with the SC-20K.
Continue forward and enter the room on the left. A couple of wall mines trap two programmers--you must free them. Disabling wall mines is explained in one of your data sticks. Simply approach the wall mine quietly crouched. Move close enough so Sam can interact with the wall mine. The wall mine alternately flashes green and red. When the wall mine flashes green, interact with it to disable the mine. You must interact when the wall mine is flashing green; if it's flashing red, it will explode. Disable both mines and save your game at the checkpoint. Speak with the programmers to discover a new problem--a bomb in the archives room.
Objective: Disarm the bomb planted in the archives room.
You have two minutes and 30 seconds to disarm the bomb. You can get a head start by moving before Lambert finishes his instructions. Exit the room with the two programmers and run to the left straight through the flames ahead of you (if they remain). A janitor's closet on the left contains a medical kit if you think you have time to pick it up. Go to the end of the hall and interact with the keypad. Enter the code 33575.
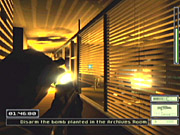
Enter the burning hall and shoot out the glass on the right side of the hall. Crouch and enter the room. Keep the SC-20K equipped because you need to destroy four wall mines impeding progress to the bomb. The first wall mine is across the room after you enter through the broken glass. It's just above a desk. Move to the right and find the second wall mine down a hall in the upper left corner of the room. Destroy it.
Enter through this hall into the adjacent room. Shoot the wall mine on the left side of the room just above a desk (it's on the far wall of the room between the glass panes). Exit through the room into the hall and face right. The fourth wall mine is on the wall to the left of the fire. Blast it to finish off the wall mines.
Run straight down the hall (it's to the right of the room you just left) and leap over the flames to avoid significant damage. The door at the end of the hall is locked. Use your lock pick to unlock the door. Open it and enter. Flames help protect the bomb. You can roll through the flames to reach the bomb and take less damage or pull yourself over the center equipment and drop down near the bomb. Get to the bomb and interact with it to disable the threat. Save your game at the checkpoint after disabling the bomb.
Objective: Restore power to the fire door circuit by accessing the fuse box behind the auditorium.
Exit the office that contained the bomb. Turn right and advance toward the auditorium. You'll spot two guards--one to the left in the balcony seats and another down some stairs below. Move crouched and quietly and grab the one in the balcony seats. Knock him out and deposit him in the dark. Take out the second guard in a similar fashion.
Proceed down into the auditorium and along the left side of the stage. Descend a staircase there until a cutscene interrupts the action. Guards are on their way up the stairs. Terminate them or knock them out with your weaponry or avoid them completely by running to the right of the stage. You can observe the stairs from that position and spot the two guards ascending the stairs and leaving. Drop down onto the stairs and complete your descent.
Another guard remains down here. Lure him with noise and take him out, or shoot out the lights and hide before baiting the guard into an ambush. Search his satchel for a data stick. Continue through this basement area and to the right to locate a small station. Grab the frag grenade, ammunition, and medical kit from the desk. Face to the right and use the fuse box to restore power to the fire door. Save your game at the checkpoint.
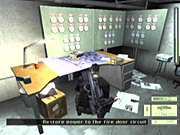
Exit the basement and return to the stairs to the auditorium. Those guards are patrolling the auditorium in search of you. There's another up in the balcony seats. Take out these guards with your SC-20K. Toggle sniper mode to pinpoint the guard in the balcony seats. Get up to the balcony seats and search the guard's body for a data stick containing a keypad code.
Exit the balcony seats and go right. Use the keypad by the door and enter the code 1250. Enter this lobby and stick to the right (you can see a couple of guards on the upper floor). Ascend the stairs on the right. At the top of the stairs, snag the frag grenade from the table. Use your sniper scope to eliminate the two guards on the upper level (break the glass to do so).
Maneuver down the hall and into the second office on the left. Talk with the wounded man and bring him to the infirmary if you wish (around the corner and to the left). Watch out for the patrolling guard nearby. Grab the two medical kits from the infirmary.
Scurry down the hall and to the right past the server room. Remain crouched and quiet to avoid detection by the guards inside. Enter the room and duck behind the large servers. There's a guard at the desk. Sneak up on him and knock him out. Search his satchel for a data stick. Use the computer to open the fire doors. Time to find Ivan!
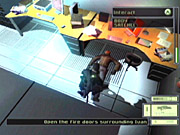
Exit the server room and head to the right through the opened fire door. Save your game at the checkpoint while doing so. Enter the door then head up the stairs. Crouch and open the next door into a cafeteria area. Remain crouched behind the short wall until the two guards complete their conversation. One guard goes to the bathroom while the other walks over to get some grub. Sneak up on him by coming at him from the right side. Deposit his body on the floor (it'll be dark soon enough). Go into the bathroom and eliminate the second guard. Take him out into the cafeteria. Turn off the lights by locating the switch just left of the bathroom hall entrance.
Return to the bathroom and leap into the open vent. Crawl quickly to the next open vent on the left. It's Ivan, and a Russian has a gun to Ivan's head! Shoot the Russian quickly to save Ivan. Drop down inside this bathroom to search the guard's satchel for a data stick. Speak with Ivan.
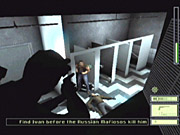
Objective: Take Ivan's encryption key. Leave Ivan behind for the FBI. Rendezvous with the Osprey for extraction.
Exit the bathroom and advance to the lobby. Press the call button for the elevator and enter. Use the controls and go up. Save your game at the checkpoint. Enter the construction area. Move forward quietly and look to the left near the forklift. There are several guards standing post here. Toss a frag grenade at their feet or lure them into an ambush and use a wall mine or your SC-20K to take them out. Search their satchels for a data stick.
Proceed through the doorway beyond the guards. Leap onto the drywall and bricks then onto the girder. Drop down near the scaffolding and pick up the medical kit on the wall. Head left and hide behind the drywall. Lure the guards at the far doorway into an ambush with a distraction (there are some soda cans in the area). Grab the ammunition off the bricks to the right of the path and snag the medical kit off the wall. Save your game at the checkpoint.
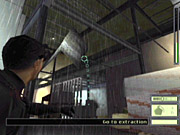
Move quietly to the next entrance. There are a few more guards in the next area. Spot the ladder to the right--that's your destination. Use your sniper scope to pinpoint and eliminate the room's guards. Lure them to the entrance and take them out with the SC-20K at close range. Ascend the ladder and drop down on the other side. Grab the two medical kits from off the wall and take two rights and go through the doorway. Save your game at the checkpoint.
Ascend the staircase quietly and take out the SC-20K. Use the sniper scope to search for the room's guards. If you get into a heated firefight, use the ample cover, and use the sniper scope to take out the guards with headshots. Watch out for the guard in the high window at the far end of the room. Cross the area to the left and go up the stairs. Go left and into the next room. Save your game at the checkpoint.
Snag more ammo off the wooden boards. Spot the guards at the end of the long hall. Toss them a frag grenade or use your sniper scope to eliminate them. You can also use the rooms on the right to maneuver around and get up-close and personal with the group of guards. Round the corner at the end of the hall and peer into the bathroom area--don't go in! Spot the wall mine on the pillar. Destroy it with your pistol. A guard comes to investigate and sets off the second mine. If he doesn't, just kill him then destroy the second wall mine.
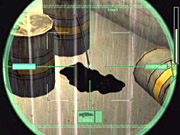
Walk around the bathroom area and into the far entrance. Follow the path around to the right. Enter the side room to save your game at the checkpoint and collect another medical kit and some ammunition. Keep going into the wider clearing. There are several guards in the area. Eliminate them if you wish from the ground level or head up the stairs quietly. You have a couple of options. Note the barrels on the ground floor. From the upper level, shoot a barrel to release its flammable contents. Shoot the puddle to cause an explosion. You can terminate several guards this way or just eliminate the hostiles the old-fashioned way either from the upper or lower floor.
Continue through the lower floor and around the corner. A cutscene reveals Wilkes under heavy attack from the Russians. You begin at the lowest point of the extraction area. You'll use the scaffolding to reach the Osprey. The guards are hidden well. Use your sniper scope to scan the scaffolding and locate the guards. Climb up the crates to the right and leap to the scaffolding. Ascend to the top and approach the Osprey to complete the mission.
Chapter 8: Chinese Embassy, Part I Walk-Through
Using intelligence gleaned from the Pickett Gap program, Third Echelon has traced communications between Nikoladze and the Chinese Embassy to Hyanmar. Any suspected connection between Nikoladze and the People's Republic of China must be proven before any action can be taken.
Objectives: Rendezvous with the agency contact. Collect intelligence from the embassy with the laser mic. Any embassy fatalities will result in mission failure.
Lambert offers final instructions, including the name and location of your contact and important mission parameters: If you kill anybody, the mission's over. Speak with your new handler, Coen, standing next to the van. Turn left down the alley and approach the dumpster. Quietly climb on top of the dumpster then on top of the wall. You'll spot two guards in the distance; one patrols from left to right, and the other stands guard at the end of the alley (you'll see this guard patrolling this alley if you speed through the conversation with Coen).
Quietly drop down and approach the standing guard. Use the dumpsters on either side of the alley as cover. When the patrolling guard is facing away, grab the standing guard and pull him into the dark. Knock him out. Pick up a data stick from his satchel.
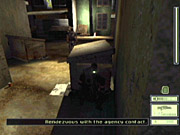
The other guard poses a trickier problem. There are plenty of cans and bottles around to cause a distraction. You could use a sticky shocker, but it's best to save these for the tougher parts of the mission. Distract the guard with a bottle, and as he stops to investigate, sneak up behind him and grab him. Make sure you deposit his body in the darkness.
Continue down to the far left of the area where the fire burns inside a barrel. Look in the right corner for a ladder (if it's too dark, switch on your night-vision goggles). Ascend the ladder and save your game at the checkpoint. Cross the room to the scaffolding. You'll spot a guard patrolling below. When he moves away, advance quietly and climb the ladder. On the far side of the scaffolding, face to the right and spot the wire connected to a balcony on the other side. It's bright over there so use your pistol to destroy the light bulb. Jump up to the wire and move hand-over-hand to the other side. Save your game at the checkpoint.
Turn to the right and pick up the medical kit. Turn to the left and quietly move, while crouched, along the ledge. You may spot a ladder to the right. Ignore it and jump across the alley to the ledge on the far side. Cross the next section of roof around the corner and drop down onto the dumpster. You'll hear guards nearby approaching from the left. Keep crouched in the dark corner until they pass.
While the guards face the opposite direction, cross the street through the opening in the fence. Turn left and spot the opening into the sewers. You may want to take out some lights to remain hidden and in the dark. Descend the ladder into the sewers and save your game at the checkpoint.
Advance quietly down the tunnel and take a left at the intersection. A trio of guards patrols the end of the hall. Wait for them to continue to the right, then follow them. Hide in the side tunnels. One guard doubles back briefly to investigate with a flashlight. Wait until all guards are stopped and in conversation at the illuminated portion of the tunnel.
You need to get past them. Remember you can't kill anyone in this mission! You could use a combination of supplies, including diversion cameras and sticky shockers, or you could toss a smoke grenade at their feet (the smoke isn't for cover, it's to knock them out). You could even take them out earlier. Follow them down the sewer and fire a sticky shocker when all three are moving through a puddle. The combination of shocker and water incapacitates all three.
Move past their bodies and down the tunnel. Take the first right and locate the ladder. Climb it but don't ascend all the way. Look up and wait until the nearby guard is facing away from you.

Exit the sewer and quietly cross the alley to the scaffolding. You don't need to deal with the guards. Ascend the ladder on the scaffolding. Spot the bright billboard above you--your contact stands behind that billboard. After reaching the top of the ladder, turn right and grab onto the horizontal pipe. Cross the pipe hand-over-hand to the far side of the scaffolding. Hop through the open window into the dark room. Save your game at the checkpoint.
Cross the room to the left corner and ascend the pipe. When you reach the top, spot the man behind the billboard. He's through the doorway. Approach him and speak with him. Sam automatically provides the code phrase. The contact provides information on sneaking into the Chinese Embassy.
Objective: Follow the truck into the embassy grounds from the warehouse.
Explore the area behind the billboard and grab the medical kit and ammunition. Climb the ledge to the right of the billboard. Approach the stovepipe and use it to rappel. Descend to the ground floor and save your game at the checkpoint.
Turn right. There's a guard in the building to the right. Create darkness by shooting out the light above the dumpster. Sneak around the building to the other side. The guard eventually exits the building and stands guard at the end of the alley. Grab him at this point, knock him out, and deposit his body in the shadows. Recover a data stick from the guard's satchel.
Two other guards patrol to the right on the street. One moves from right to left. Shoot out the light in the corner across the street. When the guard faces right, scurry into the corner and hide in the dark. Climb the scaffolding to the right then climb the ladder on the wall.
From the top of the ladder, leap to the right and onto the ledge. Toggle your night vision in this dark area. Slowly advance through the rooms until you spot the balcony on the right. There's a guard outside. Create a distraction or wait until he turns around and grab him. You can also use a sticky shocker or ring airfoil round. Drag him into the dark and knock him out. Check his satchel for a data stick.
Save your game at the checkpoint. Exit onto the balcony and look up at the wire. Shoot out the nearby light to create some darkness. Leap up onto the wire and zip across the street to the other roof. Cross the street heading right. Turn down the first alley to the left and receive word from Lambert. Hide in the shadows until the guard passes and stops. You can also distract him with a bottle. Grab him and knock him out. Place him in the dark.
Proceed down the alley and to the right. Save your game at the checkpoint. Hide behind the van until the guard passes and stops to the left. While the guard looks away, you can scurry across the street to the dark corner or knock him out and dump him in the shadows. A second guard patrols to the right. Use a distraction to nab him or fire a sticky shocker to immobilize him.
The truck is checking in just ahead. Enter through the gate and hug the right side of the truck. Move into the darkness by the trailer to steer clear of the plentiful guards. This is a difficult area of the game--there are so many guards patrolling this area. To make matters more difficult, a guard dog also patrols. The dog can pick up your scent and seek you out even in a hiding spot.
You can shoot out the floodlights, but they require several bullets and direct shots. You can also immobilize guards that approach near the trailer. The truck you follow eventually turns left and stops. It makes a great hiding spot if you can reach it (especially in combination with knocking out the floodlight). Move when the guards look away and stick close to the darkness. It's also possible to immobilize the guard dog with a sticky shocker. If you're hiding in the dark and the dog's getting close, nail him with a sticky shocker before you're detected and bitten.
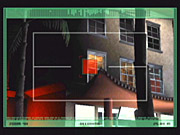
The embassy is to the right of the truck. Scurry through the dark and across a small stream. Turn left at a gazebo and hide in the plants along the embassy's perimeter. If the guard dog remains in the area, it may eventually sniff you out even over here. Before advancing toward the embassy, turn around and use your night vision to ensure the dog isn't in the area. If he is, knock him out with a sticky shocker (beware, because his master may follow).
As you slowly approach the embassy, you spot a man in an upper window. Equip the laser mic and listen to the conversation. Lambert issues a new objective--Kong Feirong is on the move.
Objective: Trail Kong Feirong to his car, and use the laser mic to listen to his conversation.
Keep the laser mic interface open but remain in the bushes. Kong exits the embassy and enters a limo. Wait until the limo reaches the gate, then focus the mic on the limo's back door to listen to the rest of the conversation.
Objective: Rendezvous with Coen for transportation to Mouke Tsoe Bo Meats.
Now the tough part--getting out. Remain in the shadows and move quietly to the area on the right side of the embassy. Hide near the red-lit corner. There are two guards patrolling the front of the embassy. Wait until both face to the right, then move across the front of the embassy to the darkness on the far side.
Hug the wall and move toward the palm trees. Look to the left and spot the pipe. Ascend and drop on the other side of the wall. Run down the alley to the van and speak with Coen to complete the mission.
Chapter 9: Abattoir Walk-Through
In a desperate act of defiance against the US, Nikoladze arranges the immediate, live webcast executions of the captured US soldiers. Vyacheslav Grinko will direct the soldiers' deaths. The executions must be prevented to preserve any hope of stabilizing political relations with the Chinese.
Objective: Access the antenna on the abattoir roof and destroy its broadcast ability.
Listen to Lambert's final instructions then quickly move to the opening in the fence to the right. There are guards in the area--fortunately you can use any means necessary in dealing with hostiles. Attract the closest guard with some noise and take him out with the SC-20K (hide in the shadows while doing so). If you want a quieter kill, use a diversion camera or sneak up on him. Terminate all three guards (search their bodies for a data stick) then hide them in the dark. Cross the area into a small room. Use the computer for a data stick and grab a medical kit from the corner. Save your game at the checkpoint.
This is another difficult portion of the game--the minefield. On the other side of the door is a courtyard littered with mines. To make matters more difficult, two spotlights sweep the courtyard. You can detect the mines only with the thermal view, but you can't see the spotlights with the thermal view. There are also several guards in the area. If the spotlights detect you, the guards open fire--and they're accurate and powerful. You can survive one mine with full health but not two. You must memorize the location of the mines and observe the pattern of the spotlights to survive.
Here's an effective way to cross the courtyard. First, shoot out the lights inside the room. Next you should eliminate the nearest guard. Do so by using a bottle from the room to lure him close to the door. You can also make a noise near the door, and he'll enter the room to investigate. Take him out and leave him in the dark. Exit the room and face to the right. Use your SC-20K in sniper view and spot the guard's head on the upper balcony. Take him out with a headshot.
Now you must do some minefield navigation. Enter the courtyard and keep in the dark to the right. Switch on thermal view and advance close to the two mines next to one another. Equip your SC-20K again and zoom in on the upper balcony. There's a guard patrolling back and forth. When he stops to the left, take him out with a headshot.
Taking out these upper guards helps, should you trigger the alarm. From the two mines, turn to the left and wait for the spotlight to comb the area and move on. Cross and take the first left. Move toward the upper left corner of the courtyard. Turn right, hug the left wall, and advance to the box in front of you. You can safely hide here from the spotlight. Both spotlights converge on this area. Wait until both comb the area at the same time and move on.
Turn on thermal vision to gauge the location of the mines. Proceed forward then turn left and spot the small crate. There are mines on either side. Quickly pull yourself over the crate and fall on the other side. The door ahead isn't the exit, and there's a mine in front so don't get close. Turn right and proceed to the corner and the courtyard exit.
Hop onto the dumpster on the right side. Spot the ledge above you. Leap onto the wall then perform a wall jump to the high ledge. Pull yourself up. Save your game at the checkpoint. Continue through the small tunnel to the second window on the left. You must cross this roof area and reach the antenna. You must avoid walking on the wood because the guards below can hear. You must also time your advance when the light is off to avoid detection.
Exit onto the roof and turn left. Cross at the white bricks. When the light is off, cross the metal vent between the skylights. Move up to the sign. Leap straight up and grab the sign's edge. Shimmy to the left and drop down on the metal vent. This is a tougher course to navigate. You must cross the metal then several narrow planks while the light remains off. If you haven't created any noise, it may be easier just to move quickly over the wood. You'll hear the guards mention a noise, but you'll be safe. Move over the wood and jump up to the wire (when the light is off). Cross the wire to the far side.
Approach the antenna. Walk around the antenna and use the controls to disable it. Guards are alerted to the disabled antenna and are on the way. Save your game at the checkpoint.
Objective: Locate the captured American soldiers and Chinese dignitaries.
Run up the stairs and along the catwalk. Go beyond the door on the right. Hide to the left of the door with your SC-20K armed. The guards emerge from the door. Take them out as they emerge (there are two total). Drag their bodies into the dark to prevent pesky alarms.
Return to the closed door and equip your lock pick. Unlock the door and open it. Descend the staircase on the left. Locate the computer desk in the lower room (use it to obtain a data stick). Approach it quietly because there's a wall mine on the right. Disable it (approach it slowly and grab it when the light is green). Snag more wall mines and a frag grenade from the desk.

Return up the stairs and enter the door ahead. Maneuver around the barrels and to the next door on the left. Open and enter. Move very quietly; there are guards below, and it's best to leave them to their routine. Once inside the room, leap onto the barrels on the left. Jump up to the girder and cross to the far side of the room by pulling up Sam's legs and crossing hand-over-hand.
When you reach the far side of the room, look down and spot the guard directly below you at the sink. Drop down; this knocks out the guard while keeping you safe from the long fall. Keep quiet; there's another guard around the corner to the left. Lure him by whatever means you prefer. You can fire a diversion camera into the stalls or make some noise and take him out with your SC-20K. Lure another guard that patrols outside and eliminate him. Move all bodies into the bathroom and turn off the lights (the switch is near the exit). Use the computer in the area to obtain a data stick.
Exit the bathroom and proceed to the left. Open the double doors. Remain crouched and quiet as you pass the window on the right. Follow the hall around to the left and quietly enter the door on the left. Sneak up behind the guard and interrogate him. Knock him out and toss him in the dark. Snag a data stick from the computer and search the desk for ammunition.
Objective: Get to the captured US soldiers before the executioners do.
Exit the office and find the open grate on the right. Drop down inside the grate. Toggle your night-vision goggles and proceed through the shaft (save your game at the checkpoint). At the end, ascend the pipe. Turn right and move quietly over this surface. Go to the far end and spot the hole in the surface. Spot the trio of guards standing below. You can drop a smoke grenade near them and gas them out or eliminate them with the SC-20K.
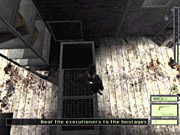
Drop down and search the bodies for a data stick and a medical kit. Shoot out the hallway's lights to create the darkness needed to hide the bodies. Turn toward the mist--it's the entrance to a freezer. Enter and save your game at the checkpoint.
You must now traverse several rooms of this cold, misty meat freezer. Use your thermal view to spot the guards and other obstructions. There are also a couple of turrets in the area that should be disabled.
One of the easiest ways to cross through the rooms is to lure the guards into an ambush. Don't think they can't see you, however; they can see through the mist with their own aids. Take cover behind obstructions and lure the guards around corners and into your SC-20K's line of fire.
The first room contains a guard patrolling its right side. Take cover behind the small wall then eliminate the guard. The noise should alert a second guard in an adjacent room. Wait until he comes into view and eliminate him.
Hug the left wall until you reach a tall obstruction (listen for the whine of the nearby turret). Climb over the obstruction and drop next to the turret. Use the controls and disable the turret.
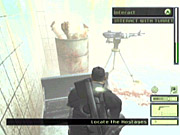
Pass through the barrier beyond the turret and go to the right and to the entrance to the next room (there are three guards in here). There's a guard just inside and to the left. Quietly move into the room and take him out with the SC-20K. The commotion alerts the other two. Take cover around the corner and wait for the guards to emerge into view. Eliminate them.
You need to enter the next room via the high girder, but it's wise to take out the room's guard before using the girder. Alert the guard with some noise and take cover behind the lockers. Take him out with your SC-20K. Cross the room's center until you reach a small bench between the lockers. Jump onto the bench then up to the girder above. Pull up your legs and traverse the girder into the next room.
Drop down on the far side of the room. Go right and grab the medical kit. Move around the left side to disable the turret. Exit into the next freezer room and follow it around to the left. Save your game at the checkpoint. Quietly move forward and spot the guard on the right. There are three guards in this room. Eliminate them with your weaponry (which creates a lot of noise) or sneak up and grab the first then lure the rest.
Enter the room and follow it around on its left side. Drop down into the hole in the floor. Move through the shaft (save your game at the checkpoint) until you reach the opening above you. Leap out. Grab the medical kit to the right of the staircase. There's a guard that patrols at the bottom of the stairs. Descend quietly and wait for him to come into view, and then grab him or eliminate him with the SC-20K. Drop him in the darkness. Turn right in the next room and use the controls to open the door below. Hop down and head through the door.
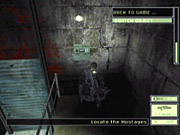
Save your game at the checkpoint. Move down this hallway quietly. You'll spot an opening on the right; it leads into a stable. Wait for the guard to pass from left to right. Sneak up on the guard and disable him. Drop him in the dark stables. If you alert the second guard patrolling the hall outside the stables, hide within the stable and eliminate him when he comes to investigate.
Exit into the hall and enter the first hall on the right. Arm yourself. A guard will appear at the end of the hall. Don't move too far down the hall; you'll eventually hear the whine of a turret in the far right stall. Take out the guard. Avoid the turret by ducking into the stall across from the turret. There's some ammunition, a flare, and a frag grenade inside. Wait until the turret pans completely away from your position to avoid its line of fire. You can also use the flare to distract the turret; toss the flare to the left of the turret and escape the stall when it fires.
Scurry to the hall. Shoot out the light and drop the body in the dark. Quietly move past the stable on the right and grab the medical kit off the bench in the corner. Enter the stables with the guards at the far end. Scurry into the first stable on the left. Leap up onto the ledge and crawl along the left edge of the area. Drop behind the two turrets and disable them. Return to the first stable. Take out the two guards with a frag grenade or a couple of accurate headshots.
There's one more turret on the left. Avoid it by using a flare or by waiting until it pans to the right, then move either all the way through the curtain or to the small wall in front of the turret. Move into the hall and save your game at the checkpoint. Go right and duck into the small archlike alcove on the left (the one with the cobwebs). Wait for the two guards to pass. Continue down the hall and into the large stable on the right. Go down the middle path and spot the two turrets at the end. Be sure to grab the medical kit next to the turrets.
Disable the turrets' IFF, which is their enemy-recognition software. With it off, the turrets fire at anything, including your enemies. But don't expect the turrets to be your savior. This room is about to become a war zone, so it's wise to prepare beforehand. Instead of seeking out the hostages that are in the area, use your wall mines (you should have three if you collected them all) to set a trap.
Move to the front of the room and place a wall mine near the center path on the short walls. Place another on the second row. Spread them out to cover both the left and right sides of the room--the enemies enter from those doors. The enemies will trigger the wall mines.
Carefully move to the right side of the room (along the wall next to the turrets) and locate the Chinese dignitaries. Speak with them to complete the objective.
Objective: Protect the US soldiers and Chinese dignitaries.
Save your game after speaking with the dignitaries. Use available medical kits to make your health full. The room is under siege and you must protect the hostages (who are in a room on the other side of the dignitaries) and the dignitaries from attack. The first enemy batch enters from the other end of the area. Your wall mines should take them out. If not, use a frag grenade or your SC-20K (duck behind the small walls). If you placed the wall mines, remain near the dignitaries. If you're too close, the wall mines' blast will inflict damage.
A tougher guard (wearing a red beret) enters after the others die. He emerges from the left entrance. He stops long enough to become an easy target for your SC-20K. After he dies, quickly move to the right side of the room. Another enemy enters from the right side and makes a beeline to the hostages. He's equipped with grenades and will toss one at the hostages if left alone. If you try to guard one hostage room, he'll attack the other. When he enters, shoot him with your SC-20K. Stop him in his tracks and force him to fire back. Nail him with a headshot to take him out.
Objective: Kill Grinko.
The final enemy is Grinko. He remains in the hall and moves from entrance to entrance looking for opportunities to shoot you. You can toss grenades at him or stick behind cover and retaliate, but the best way to beat him is to scamper to the right entrance (while he is moving) and shoot him out in the hall. He doesn't have cover from this direction so he's an easy target. Once Grinko dies, the mission ends.
Chapter 10: Chinese Embassy, Part II Walk-Through
Following the rescue at the slaughterhouse, Feirong prepares to flee the embassy with a near-complete nuclear device. The only hope to prevent war between the US and China over alleged Chinese support of Kombayn Nikoladze is for Third Echelon to find proof that Feirong is acting alone.
Objectives: Infiltrate the embassy via the upper floor. Access Feirong's communications archives from the embassy's server in the basement. Killing Kong Feirong will result in mission failure.
Lambert sends final instructions--you're no longer on a leash and are authorized to use lethal force. Speak to Coen. Turn around and proceed down the alley to the right. There's a light over a door. Blast out the light with your pistol. Open the door into the kitchen area. There's a chef on the right side. Turn out the lights using the switch just to the right of the doorway. Quietly move across the kitchen then to the right. There are bottles outside near the doorway if you wish to create a distraction.
Move into the upper right corner of the kitchen and spot the ladder against the shelving. Ascend the ladder and then another ladder up into a filthy alcove. It's really bright so blast out the light to the ladder's right. Quietly cross the planks to the far entrance. A guard appears from the hall to the room's upper right. If you're fast enough, duck into the hall at the immediate right and wait for him to pause, and then take him out with a headshot.
Proceed down the hall he emerged from and crawl out to the balcony. You're right near the embassy now. Climb the pipe behind you and grab onto the wire. Zip to the edge of the embassy. You automatically fall onto a thin ledge. Shimmy to the left and around to the embassy's front side. A man goes from window to window. Don't cross the window if he's looking out. Wait until he moves then continue to shimmy to the left. Go all the way around until you can't shimmy any longer. Drop down onto the ledge below. Locate the pipe and ascend into a tight crawl space. Plop down into the grate on the floor.
Lambert and Grim provide the instructions for bypassing the keypads--you have no access to codes so you must use your thermal goggles to see the differences in heat on the keypad. Maneuver down the hall and into the janitor's closet. Snag the medical kit off the wall. Enter the hole in the wall. It's an extremely narrow path. Perform the back-to-wall maneuver and slide through the opening to its end.
Locate the pipe in the corner (use night vision if necessary) and slide down. Another narrow path awaits you. Perform the back-to-wall maneuver and slide to the opening. Move quietly, as there are three armed guards in the adjacent room. They're destroying evidence, and Feirong's computer is next. The best way to tackle the guards is to wait until they're done in this room and move as a trio toward Feirong's office. Toss a frag grenade at their feet to eliminate all three in one shot. Search their bodies for a wall mine and data stick.
Enter the adjacent office (it's the one with the red light) and use the computer to complete the first objective. Lambert and Grim contact you with further information. There's a nuclear device on the embassy grounds, and it must be neutralized.
Objective: Detonate the gas tanks to destroy the trucks carrying Feirong's nuclear weapons.
Exit the office through the door on the right side. Move forward to save your game at the checkpoint. Enter a janitor's closet on the left side to snag two medical kits. Approach the other door in the hall and open it. Quietly advance to the staircase. There's a guard above and he's easily disturbed. Crouch and ascend the staircase. The guard at the top has his back to you. A second guard patrols the room. You could sneak up on the standing guard or simply take him out with a headshot. The other guard will investigate and be an easy target for a second round from your SC-20K.
Don't enter the room fully. At the doorway, spot the camera on the far wall just a bit to the left. Use your pistol and disable the camera. Pick up both bodies and drop them in the darkness in the room's left corner. Search the bodies for a data stick.
Cross the room and enter the door in front of you. Quietly cross this office to the dark sleeping quarters on the left. Remain crouched and move slowly so you don't disturb the sleeping guard. Snag the medical kit off the cot to the left. Don't walk through the area between the beds--there's glass on the ground. Instead, return to the bunks on the right side and climb over. You should also grab a bottle for an upcoming task.
Maneuver to the far doorway by climbing over the bunks. Move quietly through this office to the door. Don't open the door; there are guards outside. Use your optic cable on the door to spot them. They use a keypad then enter the double doors. Time to put those thermal goggles to use. You must decipher the keypad's code by the heat left on the buttons.
When the two guards enter the room, exit into the hall and approach the keypad. Interact with the keypad and switch on your thermal goggles to spot the heat left by the guard's fingers. You don't have long to decipher the code; the heat will dissipate and Lambert will abort the mission. Notice the different colors registered by the heat. The keys pressed are in the following color order: darkest blue, lightest blue, green, yellow. Each keypad you'll encounter here has a four-digit code. The numbers go in the same order as these colors.

Enter the code 1436 to unlock the door. Open the door but don't go all the way inside. Peer around the open door on the right to spot a guard and a turret. You need to get rid of the guard. Toss a bottle in the room's center and snipe him when he investigates. You could also use a diversion camera to get him on the other side of the room.
Next it's time to deal with the turret. When the turret faces completely away from you, scurry around the door. Hug the right wall and maneuver behind the turret. Use the turret's controls to disable it. Leap up to the ledge above the turret. Keep quiet; there's a guard on the upper walkway. Hop up onto the vase, turn left, and climb up onto the walkway behind the turret.
You'll spot a guard down the hall--and two more are on their way. The easiest way to combat them is to use the turret controls and disable the IFF. Now the turret shoots guards. Duck behind the turret just in case a guard manages to get off a round. Once all three guards are eliminated, use the turret controls to deactivate the turret. Scurry to the guards, search their bodies, and deposit them in the dark.
Return to the turret. Leap straight up and grab the pole that holds the giant flags in the room. Pull your legs up and start toward the far walkway. Keep your eye on the left side of the walkway; two guards enter from the double doors on the left side. Remain concealed behind a flag while they head to the right. One guard uses a retinal scanner to let the other inside a room. You need that guard alive. After using the scanner, he stands guard on the right side of the walkway.
Quietly traverse the pole until you're behind the guard. Drop down from the pole and press the crouch button as you land so it's nice and quiet. Grab the guard from behind. Force him to use the retinal scanner then knock him out. Enter the room and quietly grab the guard at the computer. Knock him out. Open the window on the left side of the room and drop outside. Save your game at the checkpoint.
You're outside now. Create some darkness by shooting out the lights. Hug the right wall and turn the corner to the right. Traverse the stream to the right side of the bridge. Enter the door at the far right end of the path.
Remain crouched and quiet. Open a second door then peer to the right and spot a guard near a building. Wait for the guard to walk away from you then shoot out the light near the camera. Next, disable the camera. The guard may investigate. Take him out in the safety of darkness. Approach the structure's door and open it. Save your game at the checkpoint.
Grab the medical kit down the hall on the left. Open the door on the right and descend into the warehouse. Move down the second row and wait for the guard on the far side to use the keypad. When he does, leap through the shelving and approach the door. Toggle your thermal goggles as you look at the keypad and decipher the code. Enter 9753 into the keypad to open the door.
Quietly enter the room and save your game at the checkpoint. Search the room for ammunition and a medical kit. The guard is to the left and stands with his back away from you. Grab the guard and drag him into the room. Knock him out and switch out the lights.
Another guard patrols near the doorway, and there's a camera on the wall to the right of the doorway. Wait until the guard moves away from you and disable the camera. When the guard returns, take him out with a headshot. Other guards may be alerted now. Keep in the darkness near the doorway and eliminate them. You could also use a diversion camera to take out a few guards.
Maneuver into the rows to the right of the doorway. Find the empty shelf and pull yourself through. Disable the camera on the far wall before falling on the other side. Approach the crate under the light. Perform a double jump (off the boxes on the right) to land on the left boxes. Cross the catwalk.
The trucks are being fueled. Here's your chance! Descend the staircase and move down the hall beyond the forklift. Wait for the trucks to leave the fuel station and approach the gate. Equip your SC-20K and zoom in on the cylindrical fuel tank near the driver's door. Shoot each truck's fuel tank once to detonate the vehicle.
Objective: Access Feirong's computer to transmit the data back to Fort Meade.
Retrace your steps down the hallway and locate the hatch to the right of the stairs. Open the hatch and descend the ladder. Save your game at the checkpoint. Spot the guard walking away from you. You need to disable him, and it's wisest to take him out in the dark. The easiest way is to use a sticky shocker or ring airfoil round if you still have one. Shoot him while he stands in a dark area. Knock him out if necessary.
Slowly advance toward the end of this hall. Keep in the dark. As you near the end, a second guard approaches. Don't shoot him! You need him to open several keypad doors on the way to Feirong. As he nears you, the guard receives a message to get to Feirong's office.
He scrambles back around the corner toward an elevator. Get to the corner and slowly follow him toward the elevator. Grab the medical kit off the right wall. Wait for him to use the keypad and enter the elevator. Follow him and use the keypad. Decipher the code using thermal goggles--enter the code 1456. Press the elevator call button. Move inside and use the elevator controls to ascend.
The guard enters through a door at the end of the hall--it's locked by keypad. Approach the keypad and use the thermal goggles to spot the heat left by the guard's fingers. Enter the code 1834 to unlock the door. Enter and hang to the right. Approach the keypad next to the door. Decipher the code with your thermal goggles. Enter the code 7921 to unlock the door. Enter the room and save your game at the checkpoint.
Feirong sits drunk and suicidal at his desk. After his rant, Feirong stands up and attacks. Fire a ring airfoil round to disable him (make sure you hit him in the chest and not the head). Don't knock him out, because you need him. While he's disabled, run behind him and grab him. You can accomplish the task without a ring airfoil round. Feirong's fairly slow in this state and easily grabbed. Interrogate him then force him to use the computer.
Objective: Meet Coen for Osprey extraction at the helicopter pad by the garden.
The embassy is exploding around you. Move cautiously because several explosions happen right in front of you. Exit Feirong's office. Spot the door to the right of the fire. Slowly approach the door to avoid the explosion. Open the door and head to the left. Maneuver carefully between the flames to the right (you can roll through them if it's easier). Move around the railing to the staircase ahead.
Descend the staircase until you reach the window on the right--it's not far. If you go too far, the flames will kill you. Slide open the window and drop outside. Cross to the Osprey to complete the mission.
Chapter 11: Presidential Palace Walk-Through
Kombayn Nikoladze has returned to the Georgian presidential palace in order to retrieve a weapon known only as "The Ark." The great risk involved in Nikoladze's personal return to Tbilisi suggests its enormous value. Any threat posed by Nikoladze or the Ark must be dealt with.
Objective: Recover the Ark interrogation file--the record of an interrogation conducted by Georgian agents representing current Georgian President Crustaus. The file details an interrogation of one of Nikoladze's high-ranking mercenaries, possibly revealing the identity of the Ark.
You begin on the side of a mountain with the presidential palace high above. Watch your step because it's a long way down. To reach the high ledge in front of you, perform a double jump off the mountain wall. Pull yourself onto the ledge. Drop down on the other side so Sam hangs on. Drop and grab onto two ledges below the one you're currently hanging on.
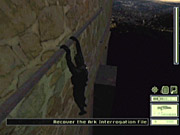
Pull up onto the next ledge. Perform a double jump off the side of the next ledge to reach the pipe against the mountain. Ascend the pipe to its peak. Drop off to the right and grab onto the next ledge. Pull yourself up. Leap up to the pipe fixed to the mountainside. Shimmy to the right and drop down on the next ledge. Hop up to the next pipe and shimmy to the right until the ledge is below you. Drop down and shimmy to the right around the corner.
Shimmy as far right as possible then leap off to the right and grab hold of the ledge. Pull yourself up. Although it appears daunting, it's possible to make the leap to the next ledge. Perform a running jump; Sam grabs the next platform. Pull him up. Make the leap to the next ledge; it's hard to see but just perform a running jump and you'll make it. Drop off the right of this ledge so Sam hangs on to the side. Shimmy to the right around the obstruction. Pull him up on the other side. Save your game at the checkpoint.
Locate the pipe along the left wall. Grab hold and climb the pipe quietly. You've reached another challenging segment of the game. As you ascend, you hear some radio chatter about a sniper in a tower and something about guard dogs. The sniper is to the left and also controls a spotlight. There are two guards with dogs patrolling this courtyard just outside the palace. Getting past all of these dangers is tricky.
Climb slowly to the ledge because there's a guard and a dog near your position, and you'll trigger the dog if you're too quick. As with most segments of Splinter Cell, there are many ways to complete this area. Pull yourself up when no one is looking and move into the darkness of the far right away from the tower. Use your SC-20K to take out the sniper with a headshot.
To get rid of the dogs, you can either snipe them (hit them in the head) or even fool one into following a phony scent. Run around near the fenced-in staircase in this right corner. When the guard and dog approach, the dog thinks someone went over there. This makes one guard and dog leave the area.
You can sneak through the dark (avoiding the spotlight) along the left side of the courtyard to bypass the second guard and dog. Your destination is the hedge maze across the courtyard. Its entrance is on the left side.
You could also snipe the dogs and the guards (make sure to hit the sniper too). Try to take the bodies out of the spotlight's view or the alarm will be set off when the light discovers the corpses. If you set off the alarm here, don't worry. It's possible to complete the mission while setting off the alarm several times. If you do trigger an alarm, other guards will enter the area, particularly from the hedge maze. Take cover and shoot them at long range with your sniper scope. Be sure to search every guard, because one holds a code you need for a keypad.
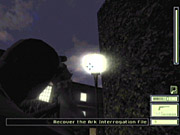
Enter the hedge maze and keep to the right. There's a guard around if you didn't set off the alarm or create a racket in the courtyard. Disable him and search his body for a keypad code. Approach the area with the fountain. There's a guard patrolling on the other side of the far fence. You can ensure safety by shooting out all the lights in the area (also shoot out the lights on the other side of the fence). Sneak up to the gate and use the keypad. Enter the code 2126 to open the gate.
The guard may investigate. Grab him and knock him out if he does. If he's moving away from you, pass through the gate and proceed to the left. Descend the stairs toward the illuminated door. Open the grate on the right. Save your game at the checkpoint inside.
Toggle your night vision to see in this dark area. Grab the medical kit and disposable pick on the right of the stairs. Ascend the staircase and snag another medical kit off the desk. Approach the next door into the art room. Lasers protect the sides of the room so stick to the middle (use thermal view to spot them). Walk to the far double doors. Use your lock pick to unlock the doors, then open them and enter the room.
Grab the disposable pick off the table. There are now guards outside patrolling the art room. Shoot out the light in this room to avoid detection. Open the door and wait for the guards to walk away from you or stare at the art on the walls. Quietly move across the room and enter the double doors on the left.
Move to the staircase but don't ascend. Lasers protect the first few steps. Perform a double jump off the right wall to land on the railing. Leap up the stairs to avoid the lasers. Don't go all the way up the stairs. More lasers protect the top of the staircase. Jump over the railing to the right to avoid the lasers. If you do touch a laser, the alarm goes off and more guards enter from the door at the bottom of the stairs. Pick them off as they head up the stairs. Save your game at the checkpoint at the top of the stairs.
Open the door and hide in the dark alcove to the right. This multilevel room is teeming with guards. There are two elite guards on your current level and the next-highest level. These guards patrol the walkway. Two more guards are on a lower level. Wait until both of the elite guards head to the right, and then start following the elite guard that's on your floor. Crouch and move quietly against the left wall to stay out of view of the guards on the lower level.
Hide under the staircase until the elite guard passes and resumes patrol to the right. Quietly ascend the staircase. The elite guard on the upper floor has his back turned, but you don't have too much time. Fire a sticky shocker or ring airfoil round into his back. If you use the airfoil, grab him and knock him out. Hide him in the corner. Search his body for a satchel containing a keypad code.
Use the keypad next to the door. Enter the code 70021. Use the optic cable on the door to make sure the guards inside are walking away from you. If so, open it and enter. Save your game at the checkpoint. Hide in the corner to the right.
When the two guards return, follow them while hugging the left wall. The guard on the left side stops to check a hallway. Hide behind the artwork while he does. When he resumes the patrol, duck into the hallway. There's a camera overhead. Wait until it pans away, and scamper underneath. Equip a disposable pick and quickly open the door on the left at the hall's end. Save your game at the checkpoint inside.
Toggle your night vision or thermal vision to spot the lasers in the next room. The lasers near the floor appear and disappear at a regular interval. Wait until they've disappeared, and scurry quickly past while crouched. Turn to the right and spot more lasers. Jump through the middle while the lasers disappear.
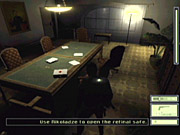
There's a guard on the far side of the room. Wait for him to stop talking. When he faces the other way, grab him and knock him out. Search his body for a data stick. Turn out the lights to conceal the body. Enter the room on the left and grab the medical kit. Return to the previous room and use the computer to complete the objective and receive more instructions from Lambert.
Objectives: Use Nikoladze's retina to unlock the safe inside the vault in the library. Retrieve the Ark from the safe inside a vault in the library. The death of Nikoladze before retrieval of the Ark will result in mission failure.
Retrace your steps through the lasers (following the same instructions as before). Open the door and remember there's a camera out there. Peer around the corner and wait for the patrolling guards to move to the right. Traverse the hall when the camera pans away. Take a left inside the main hallway and move quickly into the left corner near the lamp.
The double doors to the right swing open. A guard enters the hall but doesn't see you. Sneak behind him and through the open doors. A camera guards the next room. It's armored so you can't disable it. Instead, shoot out the lights and maneuver through the darkness to the far door. Open the door and enter the next hall. Save your game at the checkpoint.
Approach the far door and use the keypad. Enter the code 66768. Open the door. There is a trio of guards down the hall to the left. Create darkness by shooting out the light. Quietly move down the hall to the left. Shoot out the two lights at the end of the hall without disturbing the guards (shoot the light when they're facing away).
Hide behind the pillar. When the left guard walks away, move to the left side and quietly move up behind the guard. Grab him and knock him out. Another guard patrols around the elevator, and the last is facing away from the elevator and toward a door. Sneak up on them one at a time and knock them out. Keep their bodies in the dark. Search the room for some ammunition, which you'll need shortly. Use the elevator's call button and ride the elevator down. Save your game at the checkpoint and prepare for battle!
Elite guards have pinpointed your location and are on the way. This is a difficult battle against four guards. Hopefully you've saved your frag and smoke grenades up to this point. Equip your SC-20K and exit the elevator to the right. Use a medical kit if your health isn't full. The guards emerge from the area to the right of the staircase. Toss the frag grenade into this alcove. If you wish, launch the smoke grenade as well. Hide in the corner and face toward the elevator. The guards will emerge from around the elevator. You'll have the chance to get off a few shots before you're discovered. Aim for the head. You may have wounded them with the grenade so the guards may fall after just a few shots. Upon killing all four, search their bodies to collect a medical kit, a frag grenade, and a data stick.
Enter the alcove to the right of the staircase. Descend into the basement area. Take the next ramp down on the left. Cross this basement area to find Nikoladze huddled in the corner. Grab him and interrogate him. When you're finished, force him to use the retinal scanner. Save your game at the checkpoint.
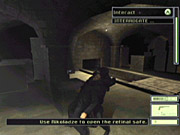
Unfortunately, Georgian soldiers arrive and disrupt the party. Don't move or the soldiers will open fire! These guys aren't friendly, and the situation becomes worse the longer the conversation goes on. Lambert sends you a radio message--he's organized a blackout, which will be your opportunity to retaliate against these soldiers. Toggle your night vision in advance.
Listen for the soldier's countdown and prepare to equip your SC-20K at the sound of "two." Immediately shoot the nearest soldier in the head. Scurry behind the crates to the right. Face toward the room's center and eliminate the guard that appears into view. The three other guards hold position. Use your sniper scope to eliminate the guard near the exit.
Take out a fourth guard by peering around the crate on its right side. The final guard hangs near the room's center. It's possible to quietly move along the right side of the room and sneak beside him. Take him out with a headshot. If you have trouble, don't hesitate to use the frag grenade you gathered from the earlier battle. Exit the area toward the elevator to receive a new objective.
Objective: Kill Kombayn Nikoladze.
Return to the room with the elevator and hang a left out the double doors. A cutscene reveals Nikoladze in motion. Save your game at the checkpoint. Hide in the shadows and look to the left. Wait until the guards move away from you. Go to the left corner and ascend the pipe.
Pull yourself up onto this second floor. Equip a sticky shocker or ring airfoil round and disable the guard when he comes toward you. Drop him in a dark corner. Cross the walkway to the far door. Use the lock pick (or a disposable pick if you still have one) to unlock the door.
Enter the next hall and shoot out the lights. Save your game at the checkpoint. Slowly maneuver to the windows on the right. You spot Nikoladze through a window. Peer out and spot his open window on the upper right side of the courtyard. Take out the SC-20K and use sniper mode to focus on his head. Take him out to complete the objective.
Objective: Rendezvous with the Osprey for extraction.
Turn around and take out the guard that investigates your sniper's roost. Enter the door on the right and save your game at the checkpoint. Descend the staircase quietly. The dining room is on your right. Hide in the corner; there are three guards on the way, and it's easier to avoid most of them.
When two guards pass, the third remains on the staircase. It's dark enough to sneak around him, grab him, and knock him out. Leave him in the dark. Scurry into the dining room and keep along the left wall. When you reach the cabinet, leap up on top. Turn right and leap onto the railing.
Open the door. This room should look familiar; you passed through it earlier in the mission. Don't head down the stairs. Guards are waiting for you. Instead, quietly move to the left and around to the staircase. Look at the floor below to see the two guards facing the other way. Drop down from the railing to this floor. You must make a quiet landing; press the crouch button as you land. Exit through the front door to complete the mission and the game!
Chapter 12: All Keypad Codes and a Hidden Training Easter Egg
Can't find that keypad code anywhere? This section reveals all the keypad codes in order by mission.
Mission 1 - Police Station
Keypad #1: 091772
Keypad #2: 5929
Mission 4 - CIA HQ
Keypad #1: 7687
Keypad #2: 110598
Keypad #3: 2019
Keypad #4: 110700
Keypad #5: 0614 (if Dougherty gets through the door before you can)
Mission 5 - Kalinatek
Keypad #1: 97531
Keypad #2: 33575
Keypad #3: 1250
Mission 8 - Chinese Embassy, Part II
Keypad #1: 1436
Keypad #2: 9753
Keypad #3: 1456
Keypad #4: 1834
Keypad #5: 7921
Mission 9 - Presidential Palace
Keypad #1: 2126
Keypad #2: 70021
Keypad #3: 66768
The training area includes more than meets the eye. In fact, there are a few hidden rooms to explore.
Here's the shortcut to the Easter egg: At the very beginning of Sam's training, turn to his left and perform a double jump to reach the ledge (it's near the light Sam's instructed to look at). Pull yourself up onto the ledge and move left to the observation room. Use the keypad next to the door and enter the code 5656. Go inside and meet Anne Grimsdottir, a key player throughout the missions. Although we don't encourage such things, after you conclude the conversation with Grim, knock her out--but be prepared to reload your game because Lambert doesn't look too kindly on such acts. Lambert ends Sam's mission before it even starts.
Here's the long way: To obtain the 5656 code, turn right from Sam's training start position and perform a double jump to reach the ledge. Go right and open the door into a dark storage room. Grab the lock pick off the shelf. Begin your training. After completing the first segment, use the lock pick on the locked door. You'll find a computer inside the room. Access the computer for the 5656 code. Return to the training's start and follow the shortcut detailed above.
Got a news tip or want to contact us directly? Email news@gamespot.com
Join the conversation