Resident Evil Outbreak Walkthrough
The zombies just never quit. That's why you need our Resident Evil: Outbreak guide, with full walkthroughs, and a collection list.
Design by Marty Smith
Capcom continues their mastery of the survivor horror genre with Resident Evil Outbreak. Players choose from one of eight playable characters; each character offers a unique personal item and special ability. Resident Evil Outbreak is also the first Resident Evil game to feature online play. Complete tasks, solve puzzles, and battle zombies individually or as a group.
This GameSpot game guide for Resident Evil Outbreak includes:
- General Strategies: Check this section for general strategies and online tips.
- Characters: This section features vital information on the eight playable characters.
- Weapons and Items: Look here for weapon and item descriptions.
- Scenario Walk-throughs: This section provides complete solutions for all five Resident Evil Outbreak scenarios.
- Event Checklists: Look here for complete event checklists for each scenario.
- Collection: This section compiles all collection items, description, and cost.
Table of Contents
General StrategiesCharacters
Weapons and Items
Walk-Through
Event Checklists
Collection
Chapter 1 - General Strategies
This chapter offers general strategies and online tips for Resident Evil Outbreak.
- Fighting isn’t always the answer. In fact, most of the time it’s not the answer! Conserving ammunition is extremely vital to long term survival. Ammunition is scarce, particularly for the better weapons (such as the shotgun or grenade launcher). Don’t shoot every zombie you encounter. Zombies aren’t quick and it’s often easy to avoid them. Utilize your character’s special abilities to aid in avoiding combat. Knock a zombie back with Kevin’s kick or elude a zombie with Yoko’s escape maneuver. Save ammunition as a last resort.
- Non-player characters join you in the single-player game. These non-player characters can stick with you or even go around alone and perform their own tasks. They will even solve puzzles and gather important scenario items on their own. This can become an issue should the NPC perish at the hand of a zombie or other enemy. Instead of joining you at a location to hand over the important item (or to use it), the NPC’s rotting corpse may be slumped in a corner and hold the only means of continuing on. If you can’t find an NPC or an important item that NPC might hold, check the map for the red "X" that denotes the location of a dead party member. Go there and search the corpse’s inventory for the item.
- In online mode, party members can work together by trading valuable items (giving an injured teammate a health item or handing over an extra weapon to a defenseless friend). Know your character’s strengths and use them to aid your online partners. Yoko’s extra inventory slots can hold extra weapons or ammunition to aid in combat situations or more health items to help the wounded; Kevin and Mark can share weaponry early because both come equipped with their own handgun; Cindy starts with and can hold extra health items; and David can create his own weapons and share them with others by using his toolbox.
- Online party members can split up and solve scenarios faster by performing different tasks at the same time--such as getting the silver and gold keys on Hellfire or the P-base and V-Poison ingredients on Decisions, Decisions. Splitting up is riskier. Fewer players means combat situations could be tougher. Plus you won’t have a friend nearby for aid with the presentation of a health item. If you have split up and perish, return as a zombie and scare the jeebies out of your fellow online players!
- You can help your online teammates with various actions. For instance, pulling a teammate up from a ledge or carrying a wounded friend through a hall. Completing scenarios successfully and quickly is about teamwork. Work together to defeat enemy creatures and share your ammo and health items to benefit the team.
Chapter 2 - Characters
This chapter provides vital information on the eight playable characters in Resident Evil Outbreak.
Kevin Ryman
| Occupation | Police Officer | |
| Age | 31 | |
| Height | 6’0" | |
| Weight | 197 lbs. | |
| Description | He has a high-quality handgun at game start. | |
| Personal Item | Special .45 Automatic | |
| Special Actions | Kick (Circle + R1), Take Pot Shots (Hold R1, X) |
Kevin is an excellent all-around character. He starts with a sturdy handgun (with special ammunition scattered around the scenarios) and possesses a robust kick that can push back zombies so he can make a quick escape instead of using valuable ammunition. The "Pot Shots" move enhances Kevin’s aim and damage when using his .45 handgun.
Mark Wilkins
| Occupation | Security Guard | |
| Age | 52 | |
| Height | 6’2" | |
| Weight | 222 lbs. | |
| Description | He is strong with melee weapons. | |
| Personal Item | Handgun | |
| Special Actions | Guard (Hold R1, press Circle repeatedly), Full Swing (Hold R1, X) |
Mark Wilkins is a burly security guard and, like Kevin, begins with his own handgun, which frees up other weapons for your NPC partners. Utilize Mark’s guard move to protect yourself against most enemy damage (though not virus infection). The full swing maneuver is used with melee weapons. Though he starts with a handgun, Mark is strong with melee weapons with his full swing maneuver.
Jim Chapman
| Occupation | Subway Staff | |
| Age | 24 | |
| Height | 5’9" | |
| Weight | 55 lbs. | |
| Description | He will rarely be attacked by enemies. | |
| Personal Item | Coin | |
| Special Actions | Play Dead (Hold R1, press and hold Circle), Item Search |
Jim lacks the weapon skill of Kevin the cop and Mark the security guard but he’s effective at playing dead! Jim Chapman’s special move is playing dead. He drops down onto the ground and nearby enemies ignore his presence. Note that it does increase your virus meter. Use it to skip past tougher enemies and avoid combat.
George Hamilton
| Occupation | Doctor | |
| Age | 39 | |
| Height | 5’10" | |
| Weight | 175 lbs. | |
| Description | He can create many types of medicines. | |
| Personal Item | Medical Set | |
| Special Actions | Tackle (Circle + R1) |
George comes equipped with a medical set, which converts herbs into various medicines and anti-viruses. If George is an NPC or part of your group online, hand over herbs to him to create antidotes, recovery medicines, and anti-viruses. Utilize the tackle move to push back enemies and avoid further combat.
David King
| Occupation | Plumber | |
| Age | Unknown | |
| Height | 6’0" | |
| Weight | 203 lbs. | |
| Description | He can create new weapons using tools. | |
| Personal Item | Toolbox | |
| Special Actions | Lug Wrench Throw (Circle + R1), Continuous Knife Attack (Hold R1, repeatedly press X) |
A plumber by trade, David King carries a toolbox to fix and create new weaponry. For instance, David can combine a lighter and the pesticide to create a flame weapon. You may also find broken weapons in some scenarios (like the broken shotgun in Below Freezing Point) and David can fix them. David’s special actions include the lug wrench throw (which tosses one of the lug wrenches from his toolbox) and the close-range knife attack.
Alyssa Ashcroft
| Occupation | Reporter | |
| Age | 28 | |
| Height | 5’9" | |
| Weight | 139 lbs. | |
| Description | She is a master of unlocking things. | |
| Personal Item | Lock Picks | |
| Special Actions | Back Step (Circle + R1), Take Pot Shots (Hold R1, X) |
Alyssa is the master of unlocking things. You’ll find locked cabinets, lockers, and doors within each scenario. Utilize Alyssa’s lock pick set to open the locked areas and recover the items inside. The back step helps Alyssa dodge nearby enemies and make an escape to conserve ammunition. She also features the pot shot ability, much like Kevin.
Yoko Suzuki
| Occupation | Student | |
| Age | 20 | |
| Height | 5’3" | |
| Weight | 127 lbs. | |
| Description | She can hold more items at one time. | |
| Personal Item | Knapsack | |
| Special Actions | Escape (Hold R1, press and hold Circle) |
Yoko’s claim to fame is her large knapsack: it holds four more items in addition to her normal four inventory slots. Thus she’s a great partner in online games. Your group can hoard more health items, more ammunition, and more vital items for the scenario. Perform Yoko’s escape maneuver to avoid enemies.
Cindy Lennox
| Occupation | Waitress | |
| Age | 24 | |
| Height | 5’9" | |
| Weight | 142 lbs. | |
| Description | She can heal her friends. | |
| Personal Item | Herb Case | |
| Special Actions | Duck (Circle + R1) |
Cindy, the waitress at J’s bar, carries an herb case that contains and can hold additional herbs. Like Yoko, Cindy is a great support party member. She can use her herbs on other party members. Use Cindy’s duck move to elude an attack and make a quick escape without wasting ammo or risking damage.
Chapter 3 - Weapons and Items
This section offers tips on using various types of weaponry in Resident Evil Outbreak. You’ll also find a list of vital items throughout the scenarios.
Melee Weapons
The benefit of melee weapons is you don’t need ammunition to use them. But the downside is you have to move very close to the enemy in order to inflict damage. The closer you are to the enemy, the greater the risk of suffering damage and increased virus infection.
Some melee weapons also suffer damage and become less potent over time. For instance, bash zombies repeatedly with the iron pipe and it begins to bend. The bent version is less effective than its straight counterpart. Melee weapons found throughout the scenarios include the iron pipe, a crutch, a butcher knife, a stick, a scrub brush, and David’s creations.
If you must kill an enemy, use melee weapons in hit and run fashion. Inflict damage then back off and avoid the counter attack. Repeat as necessary. Don’t neglect your character’s own melee attacks, particularly the special abilities of Kevin and George. These can repel an attacker and allow you to escape or counter with another weapon.
Projectile Weapons
The benefit of projectile weapons is their longer range. You can remain at a relatively safe distance and use the projectile weapon to inflict damage on the enemy. This can keep you out of the enemy’s attack range and prevent harmful damage or viral infection. But the downside is that the projectile weapons require ammunition, which is extremely scarce throughout the scenarios.
Projectile weapons include Kevin and Mark’s handguns, the handgun SG, the burst handgun (found in night reception in The Hive), the magnum revolver (found in the open window in Outbreak), the sub machinegun (found on the roof in The Hive), the assault rifle (found in the subway car in Decisions, Decisions), the shotgun, the grenade launcher, and the rocket launcher (found in the front square at the end of Decisions, Decisions).
Conserve ammunition whenever possible by simply avoiding combat. Since ammunition is so scarce, it’s much more valuable in tougher situations, such as boss battles or against faster, tougher foes. Zombies are easier to avoid. Utilize your character’s special abilities to avoid contact or being surrounded by zombies. Be accurate with your shots and don’t use the shotgun at longer range. It’s a close-range, powerful weapon. It has the ability to down multiple enemies in a single blast. For instance, wait until several zombies approach your position and pulverize them all with a close-range shotgun blast.
Health Items
The following is a list of health items and their function in Resident Evil Outbreak.
- Green Herbs: Restore health.
- Blue Herbs: Cure poison.
- Red Herbs: Mix to enhance herb.
- Green Herb and Blue Herb Mix: Restore health and cure poison.
- First Aid Spray: Stops bleeding and restore health.
- Antidote: Cure poison.
- Anti-Virus: Temporarily stops viral infection.
- Recovery Medicine: Restores health.
- Hemostat: Stops bleeding.
Vital Items
The following chart reveals the location and use of vital items found in each scenario. This chart assumes normal difficulty level. Locations may change depending on other difficulty levels.
| SCENARIO | ITEM | LOCATION | USE |
| Outbreak | Staff Room Key | J’s Bar | Opens staff room door. |
| Outbreak | Key with Blue Tag | Staff Room | Opens door into staircase leading to liquor room. |
| Outbreak | Forklift Key | Wine Room | Activates the forklift in the liquor room. |
| Outbreak | Lighter | Drawing Room or next to officer’s corpse. | Ignites the gas from the tanker truck. |
| Outbreak | Detonator Handle and Detonator Main Unit | Amongst the corpses at the end of Outbreak | Combines to form the detonator. |
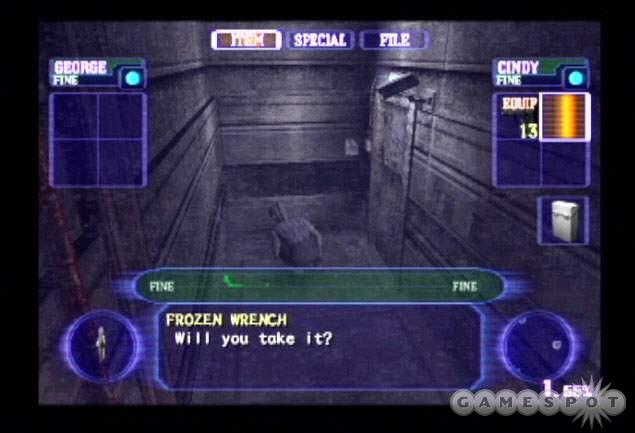
| Below Freezing Point | Frozen Wrench | B6F south passage | Once thawed, used to open the panel in the B6F security center. |
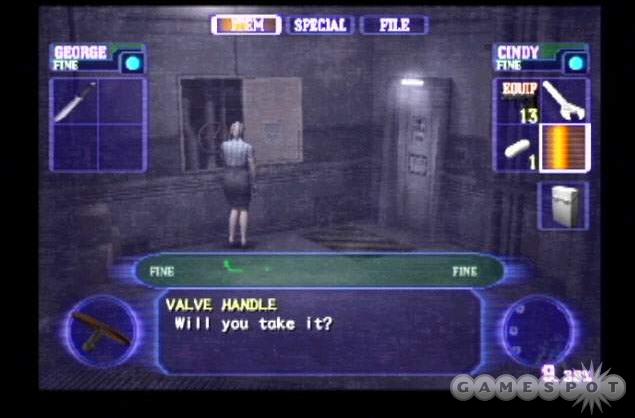
| Below Freezing Point | Valve Handle | B6F security center. | Use to open the door in the security center and raise the ladder in the Duct. |
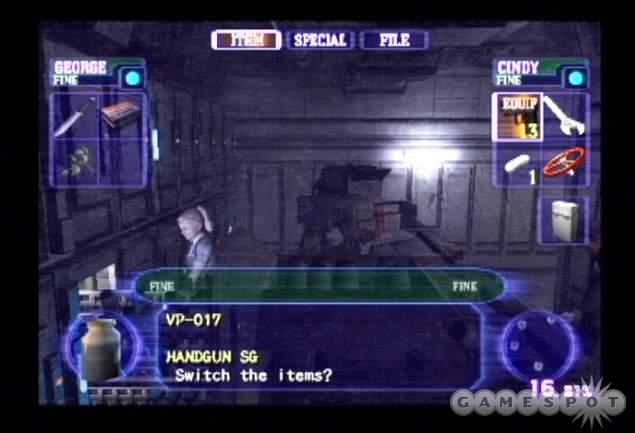
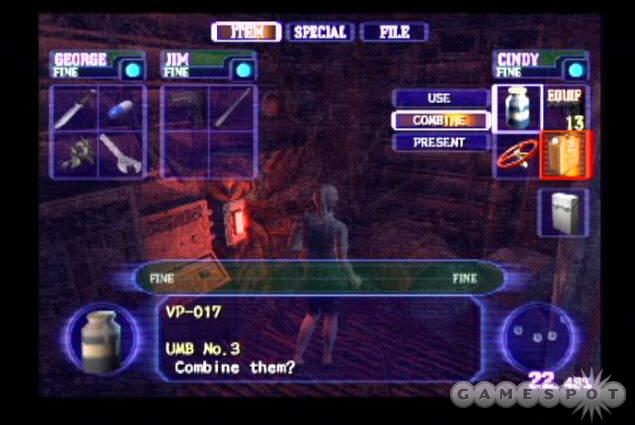
| Below Freezing Point | VP-017 | B7F chemical storage | Combine with the UMB No. 3 to create the V-Jolt. |
| Below Freezing Point | UMB No. 3 | B7F chemical disposal room | Combine with the VP-017 to create the V-Jolt. |
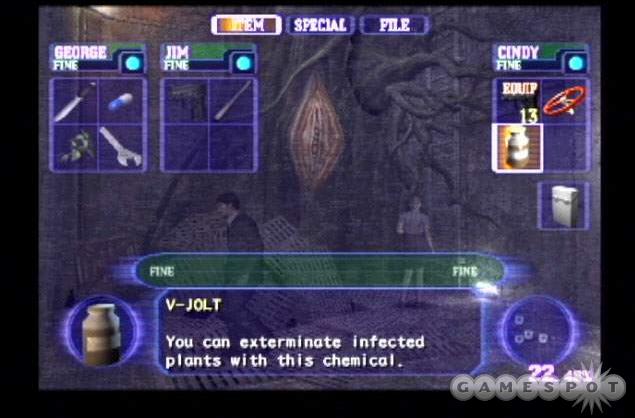
| Below Freezing Point | V-Jolt | Inventory combination of VP-017 and UMB No. 3 | Use on the infected plant in the Duct. |
| Below Freezing Point | Blowtorch | 4F culture room | Used to thaw the frozen corpse in the B4F low temperature laboratory. |
| Below Freezing Point | Turn Table Key | B4F turn table | Activates the train. |
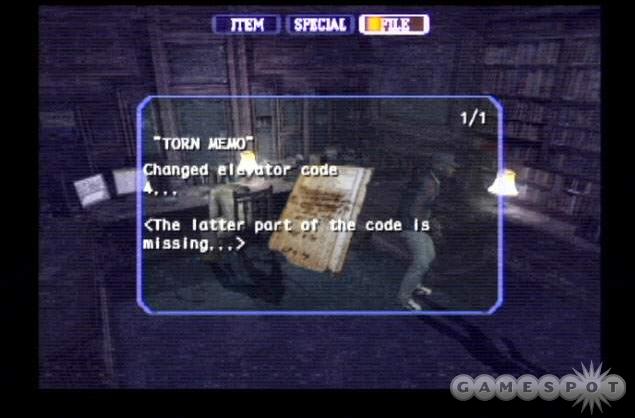
| Below Freezing Point | Lab Card Key | B4F turn table | Can be used to unlock the compute room and east area passage instead of using the passcodes. |
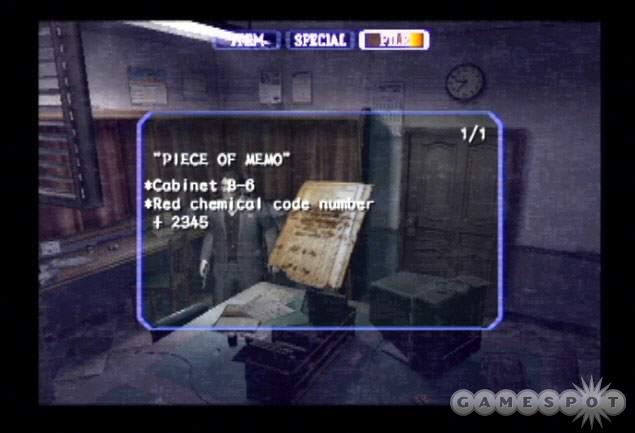
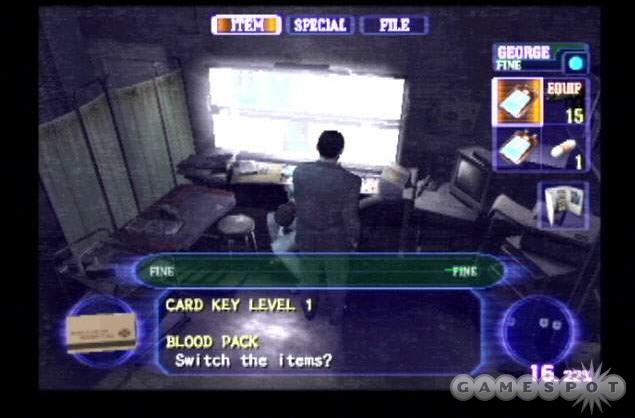
| The Hive | Blood Packs | Several rooms including the nurses’ center and laboratory. | Used to distract the leeches and Leech Man, particularly in the fixed temperature laboratory. |
| The Hive | Card Key Level 1 | Examination Room | Opens door into B1F south passage. |
| The Hive | Card Key Level 2 | Fixed Temperature Laboratory from Leech Man corpse. | Unlocks the door to the underpass entrance. |
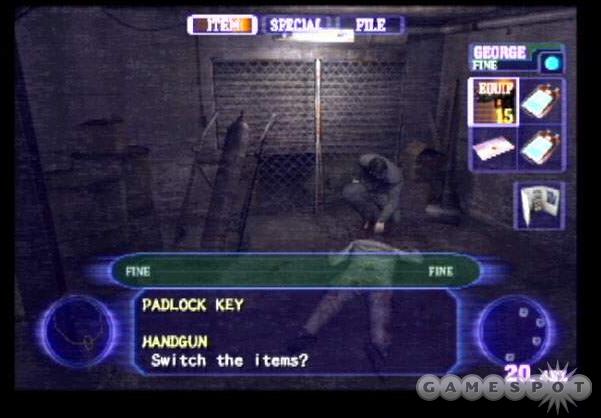
| The Hive | Padlock Key | B1F south passage. | Unlock the boat. |
| Hellfire | Security Room Key Card | Boiler Room | Unlocks the security office. |
| Hellfire | Silver Key | In room 101’s safe. | Used to unlock doors with the silver locks. |
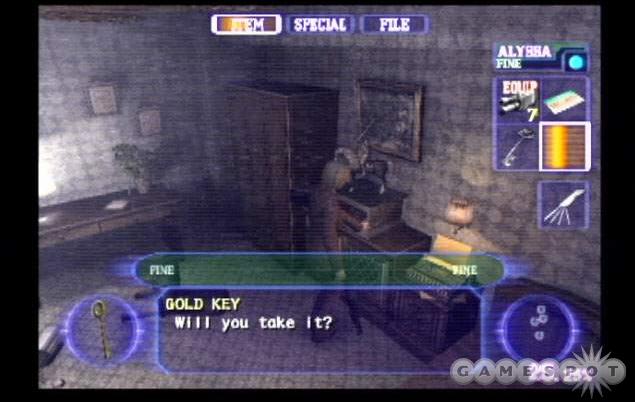
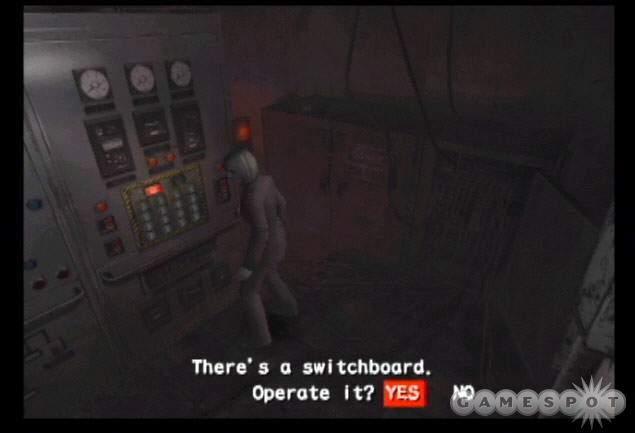
| Hellfire | Gold Key | In the horse statue in room 204. Opened after solving the Europe map puzzle. | Used to open the door into the power supply room. |
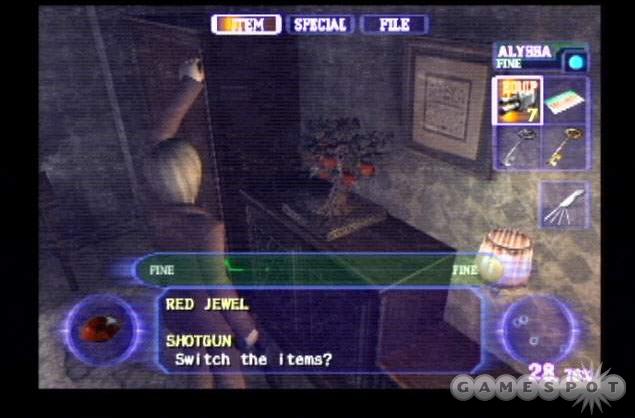
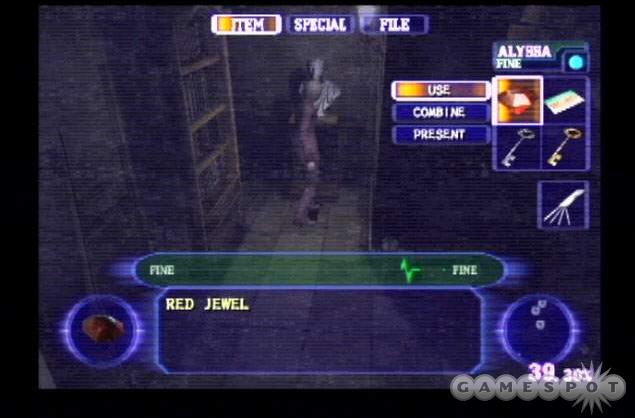
| Hellfire | Red Jewel | Plant in room 306. | Inserted into bust in security office to open hidden passage. |
| Decisions, Decisions | Red Jewel | Inside the clock in the General Manager’s Office. | Inserted into the moose head in the entrance hall. |
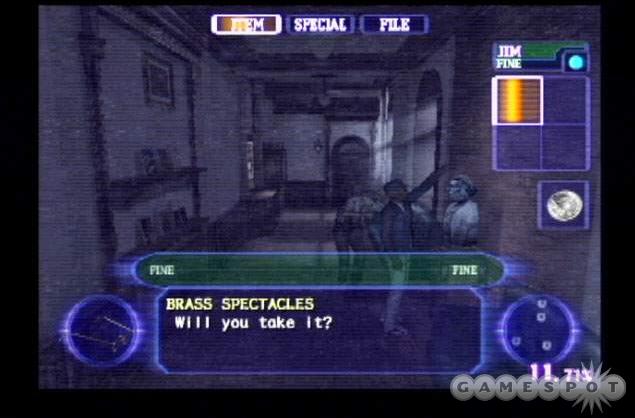
| Decisions, Decisions | Brass Spectacles | aiting Room | Placed on the bust in the 2F passage to open the testing passage A route. |
| Decisions, Decisions | Blue Jewel | Art Gallery (pull cord in Presidents’ Room first) | Inserted into the moose head in the Entrance Hall. |
| Decisions, Decisions | Card Key | Back Square | Opens double door back into 1F passage B. |
| Decisions, Decisions | Key with Red Tag | Water Purifying Facility | Opens locked door in the water works management office into the water tank. |
| Decisions, Decisions | Sealed Reagent Case | Water Tank | Holds the P-base. |
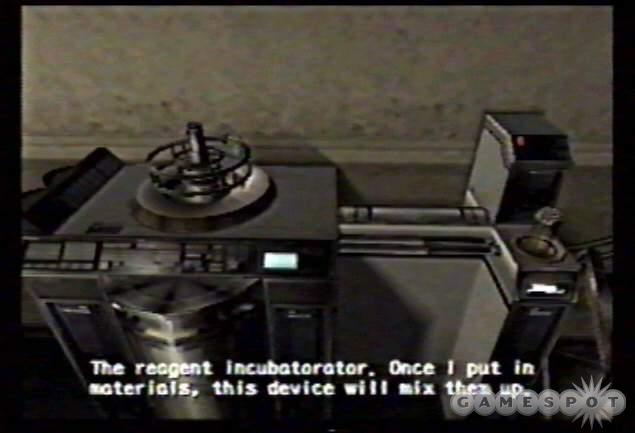
| Decisions, Decisions | P-base | Water Works Management Office | Held in the sealed reagent case and inserted into the reagent incubator in the 3F laboratory. |
| Decisions, Decisions | V-Poison | Emission Tower B1 | Inserted into the reagent incubator in the 3F laboratory. |
| Decisions, Decisions | T-Blood | IF Passage B | Recovered from injured Thanatos R.v |
| Decisions, Decisions | Daylight | Laboratory (from Reagent Incubator after all three items inserted and incubator reactivated) | Used to cure self and the world of the virus. Can also be shot at Thanatos R in the second battle using the shooter. |
Chapter 4 - Walk-through
This section provides complete scenario walk-throughs for Resident Evil Outbreak. The walk-throughs reveal each required path through a level even though some paths may be completed by NPC characters that have joined you in the scenario. For instance, in the Hellfire scenario, while you hunt for the silver key, an NPC may complete the tasks required to gather the gold key. If you follow the walk-throughs in this section and can’t locate an important item, check the NPCs’ inventory. If you can’t find your NPC, check the map for a red "X" denoting the death and location of an NPC. Move to their body and search them for the item. Note that these scenario walk-throughs are for the normal difficulty mode. Items and puzzles can variety depending on difficulty level.
Outbreak
Briefing: It was a typical night at J’s bar. Some uninvited guests crashed the party. Our race for survival was just beginning.
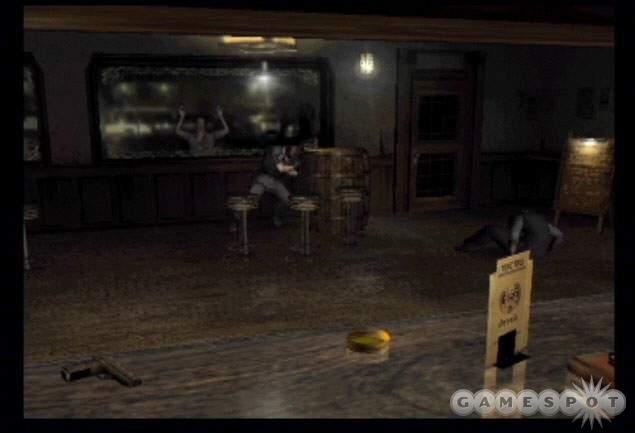
You begin inside J’s bar just before the zombies attack. All characters but Yoko begin at the bar (Yoko starts in the women’s bathroom). Grab the handgun off of the bar. If your character starts with a handgun, give it to one of the NPCs. Move toward the door and push the two barrels toward the right side in front of the door. This somewhat delays the zombies' entrance into the bar.
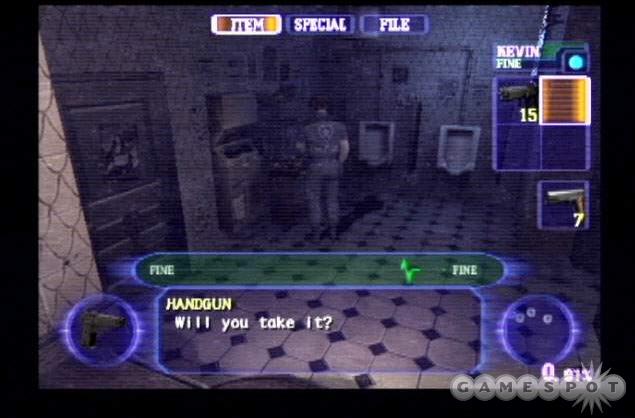
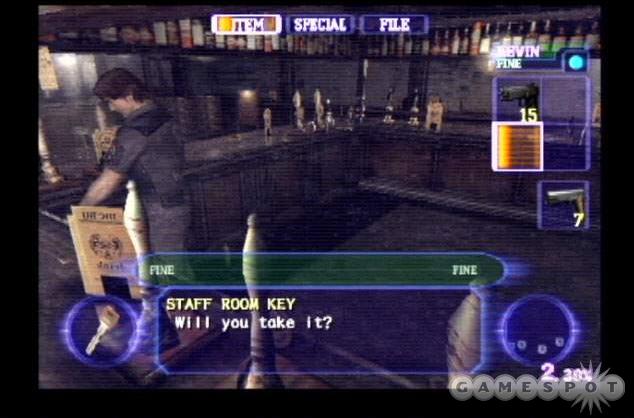
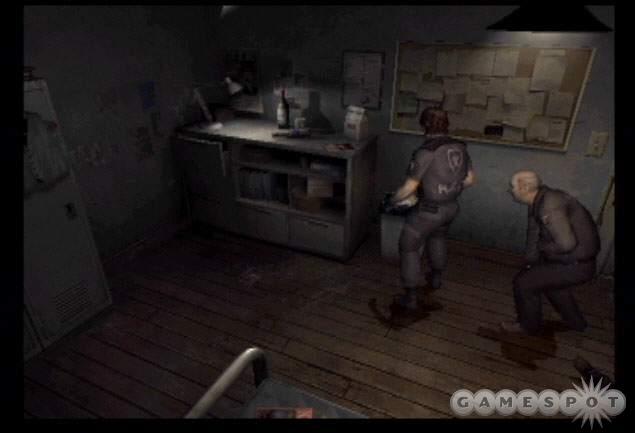
The most important item in the bar is found just to the right of most characters’ start position--it’s the staff room key. Pick up the key. Before moving onward, take a moment to explore the men’s and women’s bathrooms for additional items, including a handgun and green herb in the men’s bathroom. Once you’ve finished exploring, open the staff room door to the left of the bathrooms and enter the stairs between 1F and 2F. Don’t forget to help Bob, the security guard, if you want to meet several requirements on the event checklist. You’ll have to escort him around these rooms to keep him safe.
Ascend the staircase (grabbing the green herb after the first flight, if it’s still there) and enter the staff room at the top. Cross the staff room around toward the right side and open the door ahead into the break room (ignore the hall on the left for the moment).
Inside the break room, check the garbage can for a blueprint of J’s bar and find handgun ammunition on the table. Return to the staff room. Turn down the hall on the right and enter the first door on your left into the locker room. Search the lockers for a variety of weaponry, ammunition, herbs, and a file. One locker can only be opened if you’re playing as Cindy. Exit the locker room and continue into the staff room area.
Face the desk on the left and pick up the nail gun. Return to the hallway entrance and spot the boards along the right wall. Move against the boards and use the nail gun to automatically barricade the hallway entrance. Return to the staff room and search the coffee table for a newspaper and the key with blue tag.
Return to the hallway and face the locked door on the left. Use the key with blue tag. Ascend the staircase and enter the liquor room at the top. Move around the left corner and search the wall of bottles for the alcohol bottle. Place it in your inventory and return down the stairs into the staff room.
Cross the staff room to the back corner and enter the owner’s room. Search the balcony for several herbs then approach the desk on the left side of the room. Face the painting--with the bottle-shaped hole--on the far wall. Use the alcohol bottle on the painting. This unlocks the desk to your left. Open and search the desk for a shotgun as well as a file.

Return into the staff room. You can search down the hall on the left and enter the drawing room. Beware of the crow that might enter the room. You can find a lighter on the table (for reading the graffiti as part of the event checklist and later for igniting the gas, though you’ll find another lighter later) and some ammunition. Alyssa can unlock the armoire on the other side of the room.
Move back up the stairs into the liquor room. Open the door on the right into the wine room. Cross the room and find the forklift key on the table. You can also save your position and find shotgun rounds on the left barrel. Exit and return into the liquor room.
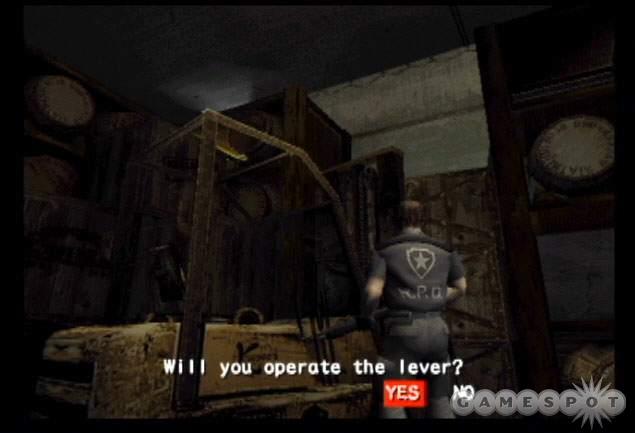
Cross to the back end of the room and find the forklift. You just recovered the forklift key so it’s time to put it to good use. Operating the forklift raises the crates between the two shelves. With the crates raised, you can now cross the top of the shelves to find the room’s ventilation shaft exit. Note that if you are helping Bob, leave him here (kill off any zombies first) while you move through the ventilation shaft. You’ll be back for him in a moment. Climb the ladder onto the first shelf and cross the crates and the second shelf to the exit shaft. You’ll enter the 3F to rooftop stairway.
If you’re helping Bob, descend the staircase and open the door back into the liquor room. Help Bob through and up the stairs. At the top, search the desk for the storage room key. Exit through the door and onto the rooftop.
Avoid the crows and run to the opposite side of the rooftop. Use the storage room key on the door to the left and enter the storage room. It’s not mandatory but does contain some ammunition on the top shelf (use the crates). Return to the rooftop. Note that if you successfully led Bob, his journey ends on the rooftop.
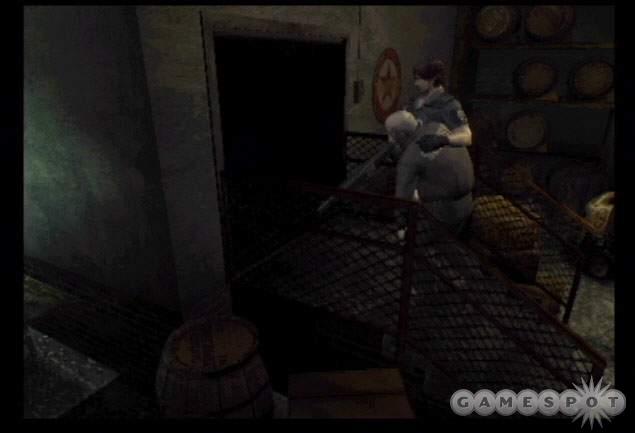
Bust the section of fence across from the storage room. Use a weapon or a melee attack. Climb onto the pathway and move to the left. You’ll eventually reach a gap. Jump to the adjacent rooftop. Quickly pull yourself onto the adjacent roof (the crows can knock you off so move fast or kill the crows beforehand). Go left and enter the top floor of the apartment. Cross the room to the elevator on the right and use it. Board the elevator and enter 1F of the apartment.
Grab the herb then reach the intersection. Beware of the zombies on either side. Scamper away to the left and exit the door. You’ll reach in front of J’s bar. Descend the staircase to automatically speak with the officer.
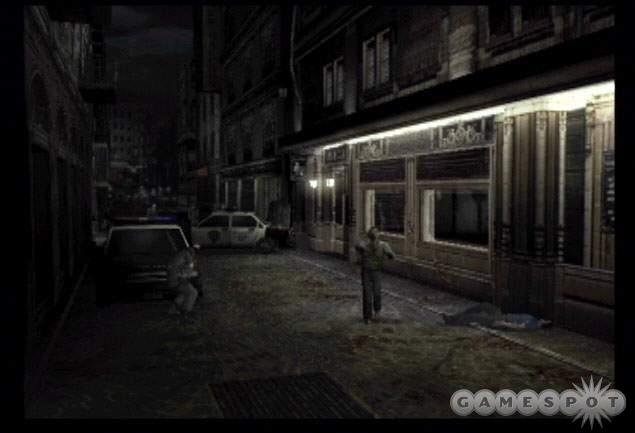
Move to the opposite side of the nearby police car and find the vicinity map. Proceed down the street away from the officer and find the police car on the left curb. Push it forward until it stops. Return to the officer and find a second police car along the street. Push it forward until it stops. Appear in the next area automatically.
Find some first aid spray on the left side. Quickly move to the double doors on the opposite side of the area and assist the officer in breaking the doorway with weaponry or other attacks. The police officer meets an untimely fate and drops some key items. Grab the lighter (which you may already have) and his shotgun if you need another weapon. With lighter in hand, move to the right toward the tanker truck.
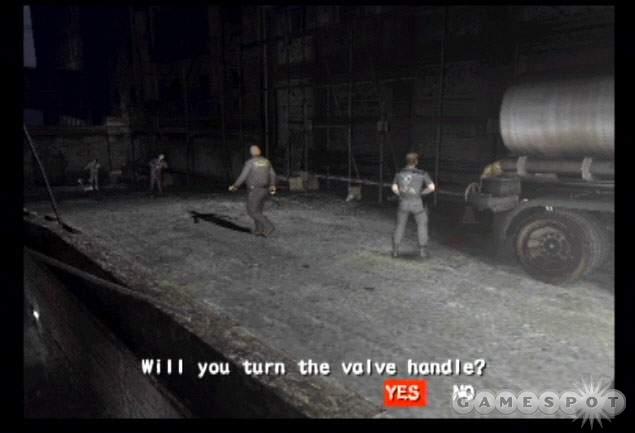
Lure the nearby zombie away so you can safely turn the valve, which releases the gas. Once it’s covering the ground, move to the edge of the flammable liquid and use the lighter (ensure your allies aren’t standing in the gas). The explosion sends you to the slope along the canal.
Move left to the edge and drop down. Cross the canal and enter the tunnel on the left side. Drop out and move toward the top of the screen. Continue to the right (grabbing the herb along the way) and ascend the ladder at the end to reach in front of the Apple Inn.
Exit the sewer and head to the right and find the police officer. When the officer stops moving, speak with him and become automatically transported to the next area. Once there, enter the police van and save your game if you wish. Collect the shotgun, ammo, and health items. Search the exterior for another herb. Move up the staircase across from the officer.

Find an herb in an alcove on the right side and search the open window for the magnum revolver. Ascend the staircase to the footbridge. Cross the bridge and descend the staircase on the right side and reach Main Street. Walk forward and speak with the officer. At this point you can complete the level by detonating the explosives or returning to the previous officer. You must do both methods to meet event checklist requirements.
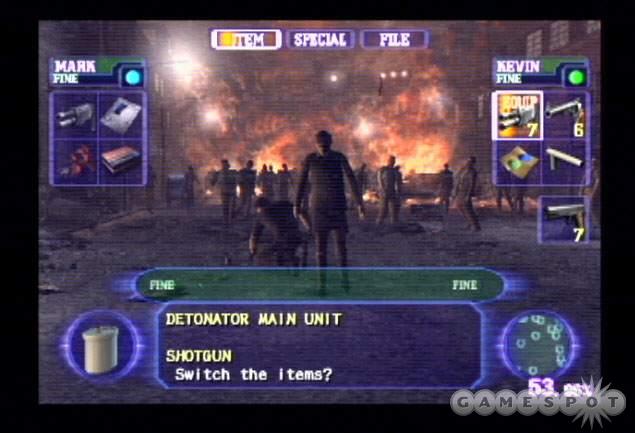
To set off the explosives, continue across from the officer to find a group of zombies around the policemen corpses and detonator pieces. Move to the right side of the street and find the detonator handle. Cross to the left side of the street and find the detonator main unit. Combine the detonator handle and the detonator main unit to form the detonator. Move to the policeman corpse in the street’s center and use the detonator.
Below Freezing Point
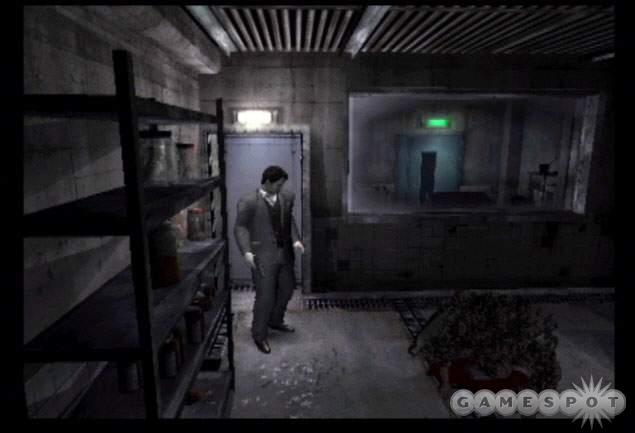
Briefing: We escaped the zombies and found our way into a frozen underground facility. What truths lie beyond the cries of pain in the distance?
You begin in the tunnel. Find an herb in an alcove on the left side of the screen. Wait until the cutscene then pick up an iron pipe on the left side. Move through the open door onto the platform. Go up the ledge on the bottom portion of the screen. Walk forward until the gunshot triggers the cut scene.
Follow the narrow corridor around the left corner to the elevator. Ascend the staircase until you reach the ventilation shaft on the left side of the screen. Grab hold and pull yourself inside. Crawl through and into the next section.
At this point the level splits depending on which character you picked. Kevin and Cindy enter at B6F south passage; George and David enter at B6F east passage; Alyssa and Jim enter at B7F south passage; and Mark and Yoko enter at B7F east passage. Both B6F entrances lead essentially to the same location and goals as do the B7F entrances just in different order.
Since characters can start on entirely different floors, the order of tasks below will differ between the characters that start on B6F (Kevin, Cindy, George, and David) and B7F (Alyssa, Jim, Mark, and Yoko). Characters starting on B6F will obtain the valve handle first and use it to get to B7F to collect the chemicals. Characters starting on B7F will obtain the chemicals first, use the chemicals to kill the infected plant so they can reach B6F and obtain the valve handle.
This first section describes in order how to complete the level using Kevin, Cindy, George, and David. Skip down to the BF7 laboratory to begin the walk-through as Alyssa, Jim, Mark, or Yoko.
Enter the B6F south or east passage. Kevin or Cindy should be able to find a handgun and the frozen wrench just ahead and to the right of their start position. Beware of the zombie then turn down the left hall and open the door at the end. Enter the B6F security center. Check the room for an herb and first aid. Check the map on the left side. Exit through the opposite door into the B6F east passage. Search the lobby for handgun rounds and a knife. Move through the opposite door into the B6F break room.
George and David begin in the east passage. Search the lobby for handgun rounds and a knife. Move through the hall into the security center. Grab the items and check the map inside then continue into the B6F south passage to recover the handgun and frozen wrench. Return to the east passage and into the B6F break room.
Search the break room for first aid (carry it to the duct later if possible), an herb, and an iron pipe and check the lockers for anti-virus. Alyssa can unlock the far right locker with a lockpick. Move into the alcove on the right side of the room to find a sink filled with hot water. Move against the sink and use the frozen wrench. The warm water melts the ice and turns the frozen wrench into just the wrench.
Return through the east passage and into the B6F security center. Watch out for any zombies along the way. Cross the room to the maintenance panel on the left side. Use the wrench to loosen the bolts on the panel and pick up the valve handle inside. Move in front of the door in the security room’s center. Use the valve handle on the small hole to the door’s right. Turn the handle to open the door. Search the room for ammo then descend the ladder into the B7F laboratory.
This is the floor Alyssa, Jim, Mark, and Yoko begin on. Make your way through the B7F hallway into the B7F laboratory to begin your walk-through at this point. Once you have completed these tasks and killed the infected plant, enter the B6F level and complete the walk-through at the beginning of this section to obtain the valve handle.
Search the lab for a variety of items: a file on the cabinet ahead of you, some rounds for Kevin’s weapon, a file near the computer (note the passcode), an herb, and a chemical bottle, which can be used as a thrown weapon. Move left from this room’s entrance to find the exit door in the corner. Move into the B7F east passage. Follow the passage to the door at the end and enter the B7F chemical storage.
Beware of the zombies hanging out in here. Search the room for some items (handgun, chemical bottle, herb) then move to the computer in the back right corner. Use the computer and enter the passcode retrieved from the file in the laboratory. The code possibilities are 0634, 4509, and 9741. This moves the storage units on the other side of the room. Walk against the moved storage unit and pick up the VP-017.
Return into the B7F east passage and return to the B7F laboratory. Move through the first door on your left (watch out for a possible zombie intruder) and into the B7F south passage. Follow the hallway to the intersection and take the turn. Open the door and enter the B7F chemical disposal room.
Cross the chemical disposal room and approach the door to the left of the large window. Note the zombie inside: he comes alive when you enter the room. Inside the room, grab the UMB No. 3 and mix it with the VP-017 to create the V-Jolt, used to eradicate infected plants. Return to the B7F south passage and turn left at the intersection. Open the door into the Duct.
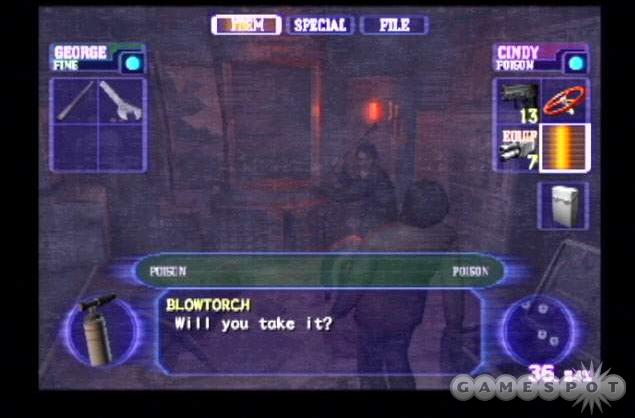
Examine the wounded man in the corner. Use first aid spray on him and be rewarded with a shotgun. Cross the area and reach the infected plant. Stand against the plant and use the V-Jolt to eradicate the obstruction. Climb the ladder to the first catwalk. This catwalk includes a typewriter for saving your game.
Use the valve handle on the hole to the right of the ladder. This raises the ladder to the upper catwalks. The two paths that were split at the scenario’s start (Kevin, Cindy, George and David on B6F and Alyssa, Jim, Mark, and Yoko on B7F) meet at this point.
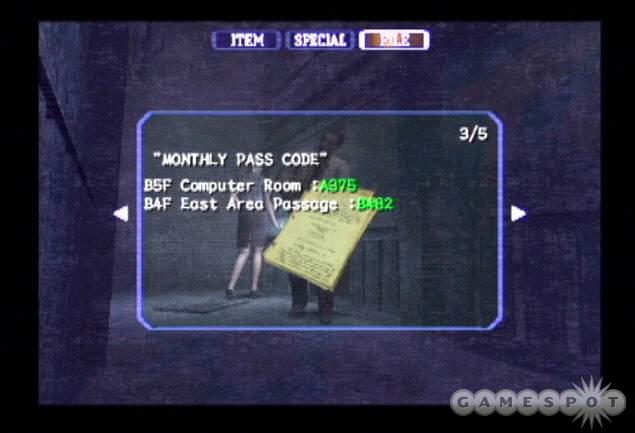
Enter the door on this second level catwalk and find yourself in the B5F area C passage. Round the corner and beware of the crawling zombie. Pick up the file next to the zombie to recover two passcodes: one for the B5F computer room and another for the B4F east area passage.
Return to the duct and descend the ladder to the first level catwalk. Open the door and enter the B6F south passage. Follow the hall back into the B6F security center. Approach the center of the security console and enter the two passcodes revealed on the memo. The code combination possibilities are C582 and A194, A375 and B482, and J126 and D580.
Return to the B6F south passage and the Duct. Ascend the ladder to the second catwalk. Open the door into the B5F area C passage. Enter the small crawlspace into the B5F emergency passage. Traverse the path; grab the memo inside the emergency passage to learn guest access on the computer terminal. Exit the emergency passage through the other side and into the B5F area B passage.
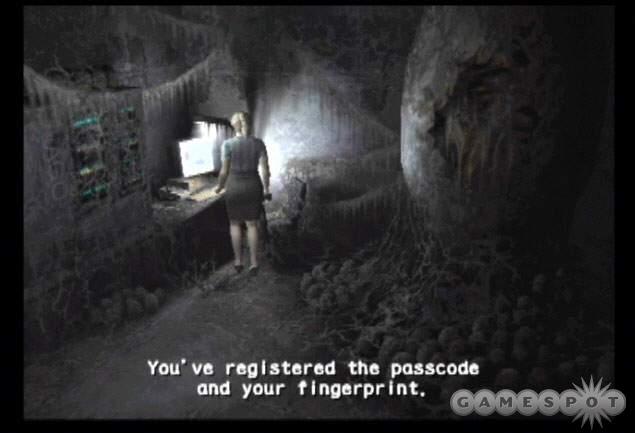
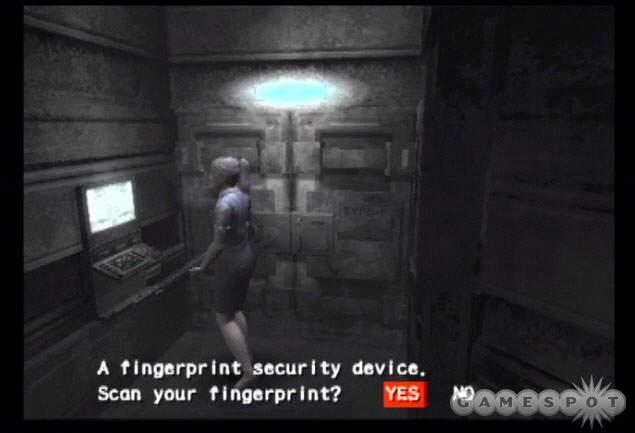
Search the room for an herb (if you’re Yoko, talk with the man). Cross the room to the big bay door and use the console to its right. Avoid the larvae in the next room. Open the next door into the B5F computer room (which you unlocked from the security room). Investigate the compute room for some ammo and health items. Check out the computer in the corner. Use it to log on with guest access and imprint your fingerprint into the system. If the computer doesn’t work, return to the B5F emergency passage and read the memo there.
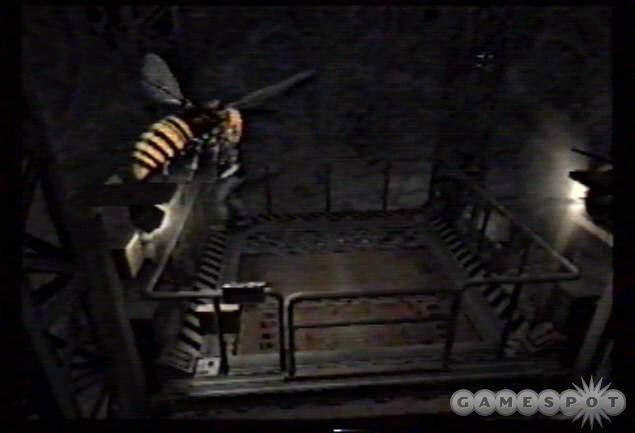
Return through area B, the emergency passage, area C, and back into the Duct. Climb the ladder to the third catwalk. Open the door into the B4F west area passage. Enter the door at the intersection into the main shaft. At this point, a gigantic mutant insect snatches your character and places you inside a cocoon back in the B5F computer room.
Wiggle your way out of the cocoon and retrace your steps back to the third catwalk and the main shaft. Avoid the giant moth and enter the center intersection. The doorways are color-coded. You arrived from the red one. Enter the blue one; this passage was previously unlocked so enter the B4F east area passage.
Turn right at the intersection and move past the frozen enemy. Use the console on the left. It requires a fingerprint, which you have previously entered into the system. Enter the open door into the B4F culture room. Search the room for first aid, ammo, chemical bottles, and a file.
The most important item is the blowtorch resting on the ground near the zombie. With blowtorch in hand, exit to the B4F east area passage. Follow the hall past the intersection into the B4F low temperature laboratory.
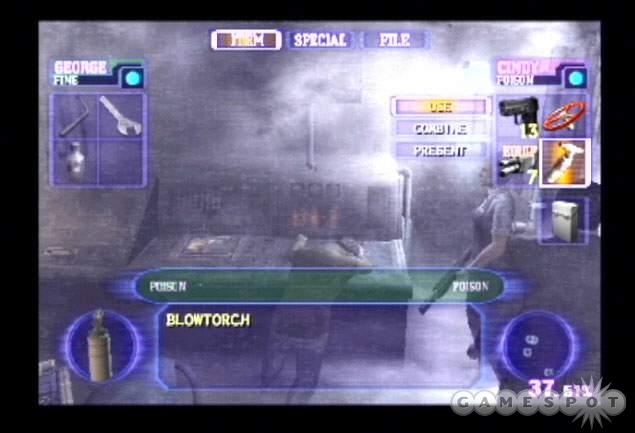
Search the misty ground for first aid, a file, and a broken shotgun (which if you’re David, you can fix). There’s also a typewriter for saving your position. Approach the corpse on the console. You can’t operate the lever with the corpse frozen to the console. Use the blowtorch to melt the frozen corpse. He automatically pulls the lever.
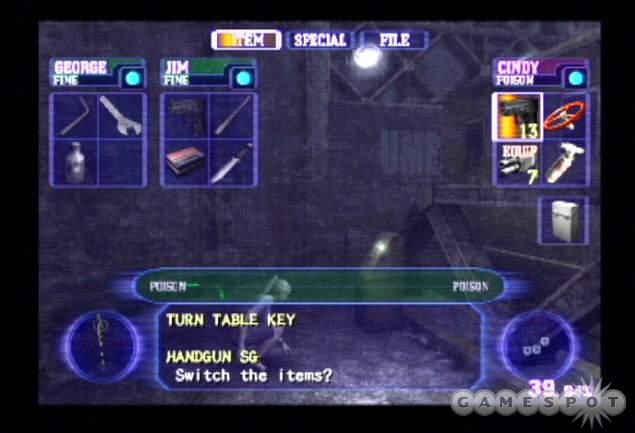
Return to the main shaft. Beware of the now-unfrozen enemies. Follow the catwalk marked with the white light and enter the B4F turn table. Avoid the zombies and approach the vehicle. Go to its left side and pick up the turn table key near the console. Use the key on the console. A countdown begins. All party members should reach the train. Hop on the back of the train to avoid the enemies in the area.
Ride the vehicle to the marshaling yard. Move forward to trigger the cut scene. Now you must battle the Mutated G. Lure the creature onto the tracks. Move around to the opposite side of the train and use the console when the Mutated G is standing on the tracks. Perform this action twice to slay the beast. You can also utilize your current weapon and ammunition to inflict damage on the creature.
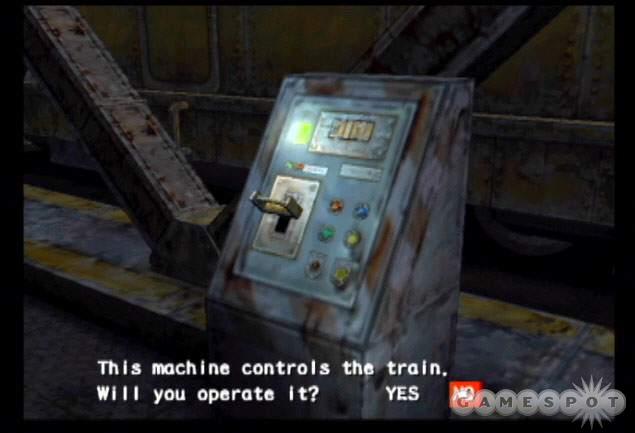
Level Note: It’s possible to unlock the B5F computer room and B4F east area passage using a key card instead of the passcodes entered into the security room terminal. If you want to use the key card (which is also on the event checklist) instead of the passcode, move through the main shaft on the upper catwalk. Enter the B4F turn table and find the lab card key on the left side of the train. This card key opens the computer room and east area passage.
The Hive
Briefing: A hospital transformed into some kind of hive full of squirming "things." We pushed on and pushed the repulsive image from our mines.
You begin in a hospital room. Explore the room (push the call button if you wish) then move toward the exit to trigger the cut scene. Exit the room into the 3F passage. Follow the hallway around to the left into the far hallway. Open the door on the left into room 302. Search the room for a couple melee weapons (stick and crutch) as well as a file on the bed. Next open the locker to find a handgun. This triggers the arrival of the Leech Man.
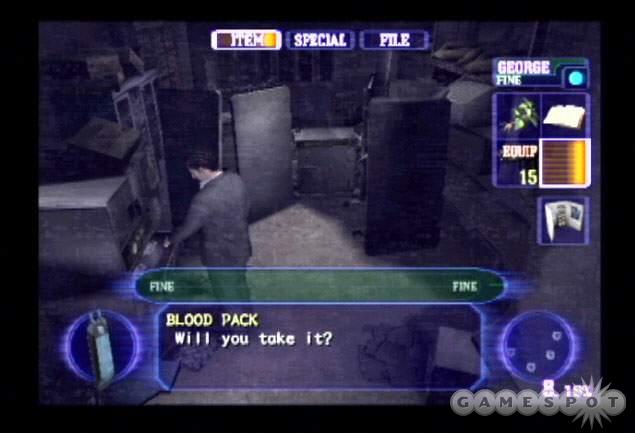
The Leech Man will follow you around the hospital. If you take too long in a certain area, the Leech Man drops from a vent shaft to cause problems. Don’t bother wasting ammunition on the Leech Man. You can’t kill him until later in the scenario. You can temporarily distract the Leech Man (and the smaller leeches) with blood packs. You’ll find them throughout the hospital. Place the blood pack on the ground to occupy the leeches and their Leech Man master while you explore the room or make an escape.
After the Leech Man drops into the room, escape back to the 3F passage. Return to the opposite end of the hall and enter the nurses’ center on the left. Find a map on the left side and a file on the right side of the room. Approach the back end of the room to trigger a cut scene. If a cut scene isn’t shown here then you didn’t get the handgun from room 302 to trigger the Leech Man’s arrival.
Climb over the obstruction and search the alcove for first aid and blood packs in the cooler on the right side. Fill your inventory with as many packs as possible. Avoid the zombie as you leave the room. Call the elevator opposite of the nurses’ center and proceed to floor 2F. Exit the lift into the 2F passage.
Search the lobby for items then cross to the opposite side of the hall to find the door leading into room 202. Comb the room for a variety of items including an herb, file, ammunition, and melee weapons. You can even press that nurse’s call button again if you wish! Return to the 2F passage and enter the nurses’ station opposite the elevator.
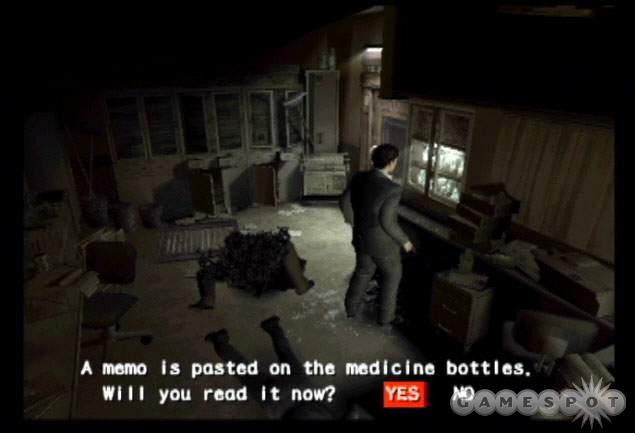
Examine the medicine cabinet on the right side of the room. When you do, a couple leeches pop out. Eliminate the leeches with a weapon or place a blood pack on the ground to distract them. Examine the medicine cabinet again to read the memo. Find the cooler in the room and open it to find more blood packs. Exit to the 2F passage and find the staircase. Descend to the 1F passage.
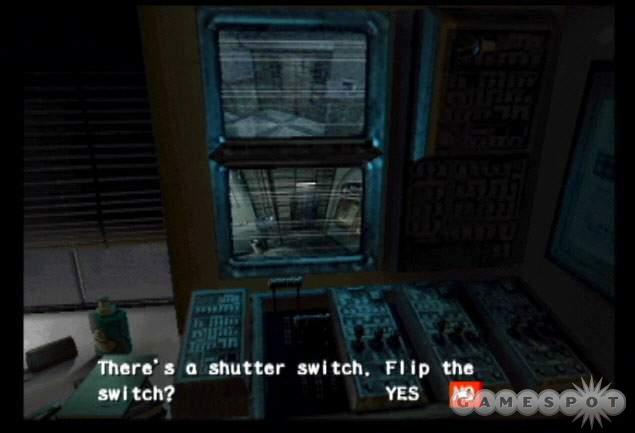
The large shutter ahead of you is closed and can be opened. Open the door to the shutter’s left into night reception. Search the back of the room for the burst handgun then move to the control panel and use it to open the shutter. Return to the 1F passage. Use the panel next to the shutter to open the passage. Enter the hall.
Search the hall for an herb. Cross to the opposite side and use the switch to open another shutter. Enter the door on the left to move into the office. Check the table for a memo containing a code number. Check the cabinets for medicine and beware of the leech hopping around the room. Move through the opposite door into the doctors’ station. Search the room for an herb, anti-virus, and ammunition as well as files containing important code numbers. Note the birthday of September 30th is actually an optional code.
Return to the hall and move through the other door into the central waiting room. From here enter the door into the examination room. Inside the examination room and search the slumped over corpse at the desk to find the card key level 1. A thorough search also reveals some health items. Move through the opposite door into the treatment room. Gather the health items and save your game at the typewriter if necessary.
Return to the examination room and enter the other door into the locker room. Search the lockers for items but beware of zombies. The far left locker is locked and can be opened if you’re playing as Alyssa. Return to the 1F passage. Use the elevator and descend to floor B1F.
Exit the elevator, snag the herb nearby, and enter the opposite door into the reposing room. Search the room for some items and a typewriter to save your game. Return to the B1F passage. Move down the hall and enter the first door on the left: it’s the elevator control room. Comb the room for files and items. Approach the console: it’s covered with leeches! Shoot the leeches or use a blood pack to distract them.
You need to enter a passcode into the console to unlock a new floor for the elevator. Check your files to find the code. One file, the chemical code message, reveals the following: C-4041, E-1160, T-7221, K-1210, I-2005. A second file, reveals a number with a plus sign. To get the code, add the number with the plus sign to the C, E, T, K, and I numbers. The possible codes are 8211, 5315, and 3555. Also, enter the code 0930 (the birthday date from the doctors’ station) to gain access to the rooftop.
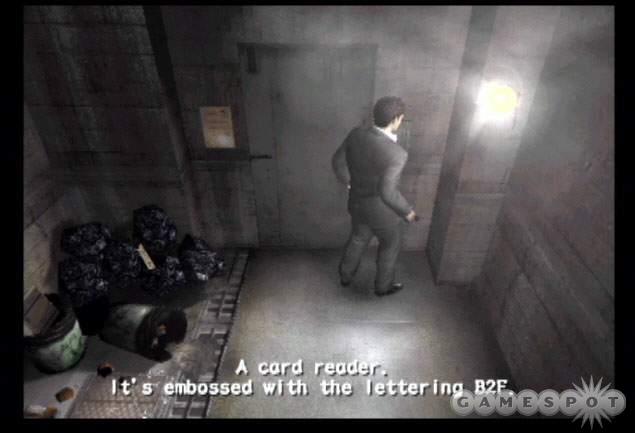
Exit the control room and go left. Approach the door at the end of the hall (avoid the nearby zombie) and use the card key level 1 on the card reader. Open the door into the B1F south passage. Cross the hallway (snagging the herb near the entrance and the iron pipe at the intersection) and beware of the zombie at the intersection. Follow the hall into the waste liquid disposal room.
Search the left side for an herb but beware of the curious leech. Descend the stairs and avoid another leech lurking in the shallow water. Cross to the water to the far alcove and grab the padlock key near the corpse. Watch out; it’s a zombie! Exit the room and return to the elevator in the B1F passage.
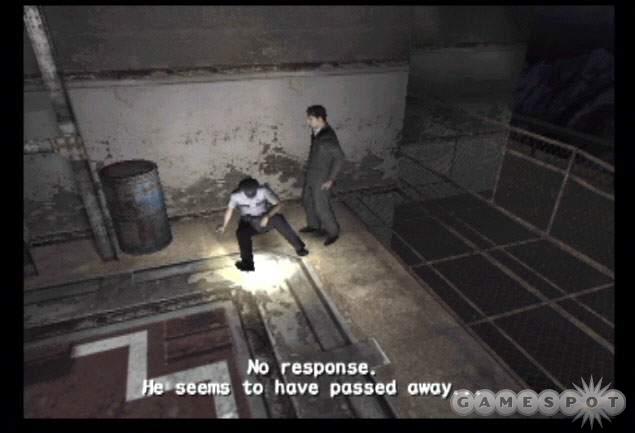
If you unlocked the elevator’s ability to reach the rooftop, make the side trip now. The rooftop contains ammunition, some pesky crows, and a wounded police officer. Speak with the officer. You may be able to recover the sub machinegun from him. Return to the elevator and descend to B2F and into the B2F passage.
Open the door on the right into the laboratory. Search the lab for more blood packs (you’ll need one soon so save it) and a couple files. Exit through the opposite door into the fixed temperature laboratory. Ignore the console and enter the door into the small room. Place a blood pack in the middle of the room. Wait until the Leech Man enters the lab then lure him toward the blood pack.
While the blood pack occupies the Leech Man, return to the console and switch the temperature to "High". After the cut scene, switch the temperature to "Stop" and check around the console for some health items. Reenter the room containing the former Leech Man. Search around the corpse for the card key level 2.
Exit the labs and return to the B2F passage. Move down the hallway and use the card key level 2 on the card reader at the end of the hall. Open the door into the underpass entrance. Check this storage area for ammo and health items. Approach the padlock next to the boat. Use the padlock key on the padlock to free the boat. Use the boat.
You must now battle the gigantic leech. Utilize any weaponry in your inventory while keeping your distance. The leech can submerge its front end and attack your character’s torso from long-range. You can also lure the leech down the canal back toward the boat. Shoot the valve wheels on the ceiling with the gigantic leech moves underneath to inflict damage. You can also use black tank on the bridge section and even the gas tank near the boat’s original position to defeat the creature. Don’t stand close to the explosions. Once he falls to your attacks, run down the canal past the leech’s start position to complete the level.
Hellfire
Briefing: While avoiding blasts of flame, we proceeded through the smoke-encased hotel. We now knew the true meaning of "Hell."

Walk forward and check out the map engraving. Turn around and enter the door to move inside the boiler room. Check near the fireman’s body to examine the radio. You’ll also find the fireman’s id tags here. A second fireman lies at the top of the ladder with similar id tags. Finish the mission with both id tags to meet an event checklist requirement. Climb the ladder and move past the second fireman. Open the door into the area marked Apple Inn square.

Avoid the zombies in this hallway. Search the right side for a handgun then move around to the left side and enter the door. You’re now in the northwest passage 3. Turn left and approach the open window. Check room 301 on the left for an herb. Exit through the open window.
You must traverse the narrow ledge going to the left. Pestering crows hover around the area and can knock you off the ledge. Pull up quickly before a crow attacks again. Avoid getting blasted by the fire out of the windows around the other side (the blast can kill a crow if you’re fortunate). Upon reaching the fire escape, descend the ladder and enter the door into the northwest passage 2.
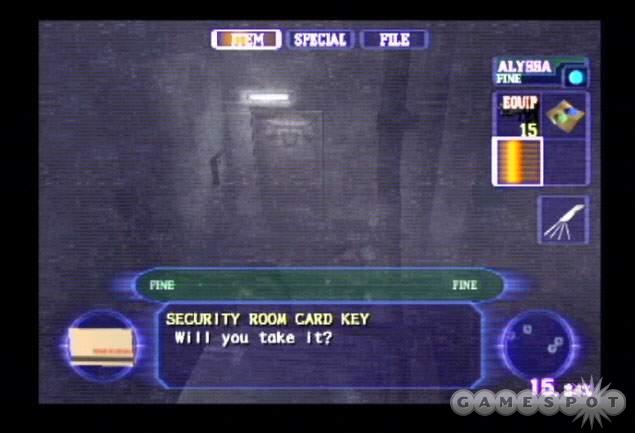
Turn right and open the first door on the left into the store room, which contains various items such as ammo, files, and health items. Return to the passage and enter the next door on the left into the corridor. Follow the corridor to the boiler management office. Continue into the next room, the boiler room, and find the security room card key on the ground. Return to the northwest passage 2.
Move to the end of the hall and enter room 201. Avoid the zombie inside and search the area for anti-virus and an herb. Return to the passage and make your way back to the first door to the left of the entrance. Use the security room card key to unlock the door. Enter the security room. Search it for files and health items. There’s also a typewriter to save your game.
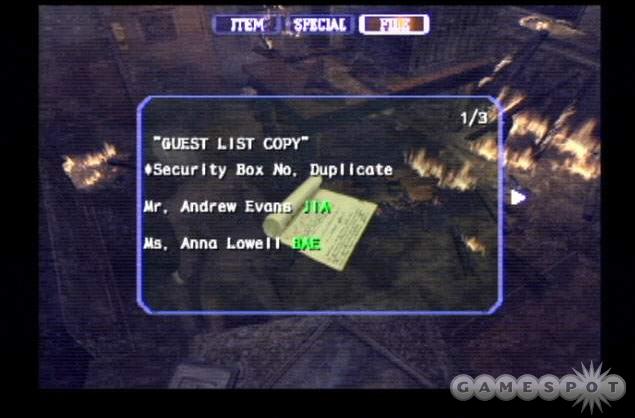
Return to the northwest passage 2 and follow the hall to the end door on the right. It’s the owner’s room. There’s a typewriter here if you need it. Push the wooden crate through the hole in the floor. Once it falls, drop down into the room below. Search the room for an important file, the guest registry. Note the guest names and the corresponding three digit code. Exit the door into northwest passage 1.
Search the bench for a shotgun but beware of the monster on the ceiling above you. He’s hard to see just don’t linger in the hall for very long. Open the door to its right into room 101. Search the room for health items then grab the file on the bed. It reveals who is staying in this room. Match the name with the guest registry file in your inventory. Approach the safe on the back wall and enter the corresponding code. Open the safe and collect the silver key.
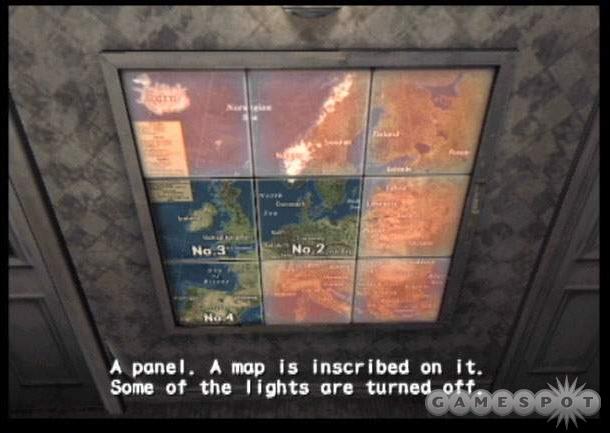
Exit room 101 into the northwest passage 1 and find the first door on your right. It’s locked and requires the silver key. Use the silver key to unlock the door and enter the corridor. Search the right alcove for a handgun then move through the fiery hall to the left side. Enter the second door on the left into room 102. Search the room for a file and check out the painting of Finland. This painting, and others like it in rooms 103, 104, and 202 are part of the Europe map puzzle. Leave the painting alone until you enter room 204.
Search the remaining rooms in the hall (103 and 104) for various items, ammo, files, etc. Break down locked doors or, if you’re Alyssa, use a lockpick. Move down the corridor to its end to find the stairs leading to the second story. Open the first door on the right into room 204.
Check out the four panels on the wall. These are part of the Europe map puzzle. Your goal is to light all four panels. If any panels are not lit, you must return to room 102, 103, 104, or 202 (down the hall from your current location) and use the switch on the painting. Each panel corresponds to a particular painting. Panel 1 corresponds to room 102; panel 2 corresponds to room 103; panel 3 is matched with room 104; and panel 4 is matched with room 202.
With all panels lit, move to the opposite side of the room and use the horse statue to open and recover the gold key. Search the rest of the room for a file, health items, and ammo.
Return to the lounge stairs and take the stairs to the third floor. Open the door into the area marked Apple Inn square. Beware of the zombies and enter the door on the left into the room marked 30X. Search the room for ammo then find the hole on the right wall. Crawl through the hole into the adjacent room. Find the grenade launcher inside. Exit the room into the Apple Inn square.
Enter the door on the right into room 306. Grab the red jewel from the plant on the cabinet. Exit room 306 and descend the staircases. Return through northwest passage 2 and into the owner’s room. Drop down the hole in the owner’s room and enter northwest passage 1. Find the locked door requiring the gold key. Use the gold key to enter the power supply room.
Use the control panel inside the power supply room. The goal is to turn all of the console lights on. Hitting a button causes all buttons that surround the one you touched to light up. With all buttons lit, the power is restored. Exit the power supply room back into the northwest passage 1.
Enter the owner’s room and climb the table and pull yourself up to the upper section. Exit into the northwest passage 2. Head left and follow the hall to the security office on the right side. Move left around the far side of the table. Push the bookcase toward the statue to reveal the hidden passage. Use the red jewel on the statue to open the passage. Enter the Apple Inn front lobby.
Search the upper catwalks for items then use the box to the left of the ladder. Lower the ladder and descend into the room. Search the lower section for items before attempting to exit through the left hall. This triggers the scenario’s boss encounter with the Regis Licker. Additional lickers enter the lobby and attack from ground level. To get rid of the ground lickers, ring the bell on the front desk. You could also shoot them but it’s better to use your ammunition on the boss creature.
When battling the Regis Licker, attempt to remain out of range of its tongue attack. Watch the Regis Licker and when it begins to shake, retreat quickly and out of range to avoid taking damage from the attack. Defeat the creature and leave the inn to complete the mission.
Decisions, Decisions
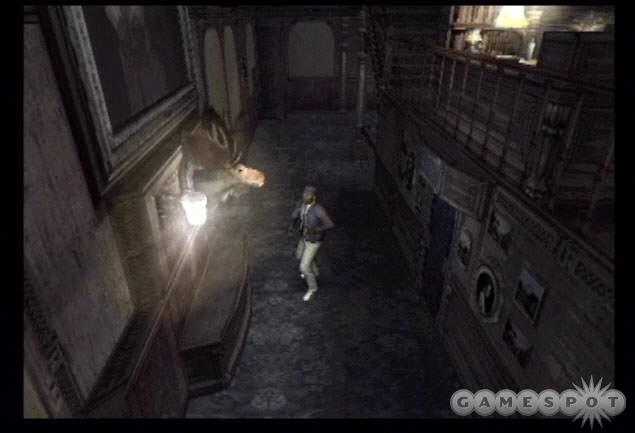
Briefing: Destruction. Darkness. We quickly raced forward knowing all too well that each decision we made held newfound hope or endless despair.
You begin in the entrance hall. Head left into the bottom left corner to find the 1F passage elevator. You’ll use this eventually to visit other floors. Check the area for several items, including map, herb, typewriter for saving the game, iron pipe, and a lighter. Return to the entrance hall and cross to the other side. Enter the center door into the student affairs office.
Beware of the zombie in the room and grab a file off of the desk. Search the back left side of the room for a book containing information on the moose in the entrance hall. Exit through the rear door into the general manager’s room. Find a memo on the left desk with unusual number patterns. It’s actually part of a puzzle in the same room. The number patterns form four larger numbers. For instance, in normal mode notice how the first page has the number four down the center. It basically forms the number "1" in the pattern. Check the other pages for similar patterns.
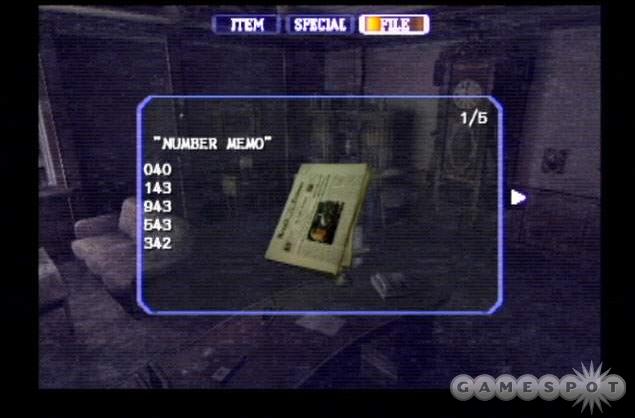
Find the painting in the front left corner of the room. Use the painting to reveal a switch. Push the switch to activate the clock on the back wall of the room. Grab the nearby herb then approach the clock. You must set the clock to the four digit time revealed in the "number memo" in your inventory. The time setting differs for each difficulty level. On easy, set the clock to 3:25; on normal, set the clock to 10:05; on hard, set the clock to 7:40; and on very hard, set the clock to 2:50. Grab the red jewel from the clock.
Return through the student affairs office to the entrance hall. Move along the right side of the entrance hall to find the moose head on the wall. Use the red jewel on the moose head to place the jewel in the moose’s eye. Return to the other side of the entrance hall (where the student affairs entrance is) and enter the door in the right corner. You’ll enter the waiting room.
Move through the hall and avoid the zombie. Search the bust on the right side to grab the brass spectacles. Enter the far door into 1F passage A. Continue through this hallway. Note that you can push the dressers along the side walls and reveal hidden items (such as ammo or health items). Traverse the hall around a couple corners to the back door. Enter 1F passage B.
Check the debris on the left side near the door to find a part of a torn menu with a three digit number. Continue through the hall and take note of the switch on the right wall. You don’t need to use it now but it comes into play later in the scenario. Grab the blue herbs or leave them there for later. Enter the door on the right back into the entrance hall.
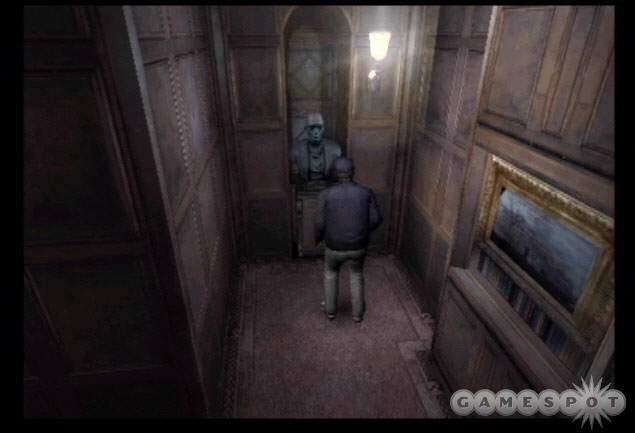
Climb the staircase inside the entrance hall and search the upper floor for items. Enter the door into the 2F passage. Once again you can push the dressers to reveal items. Avoid the zombie presence here and move to the very back of this passage to find another bust. Place the brass spectacles on the bust to reveal a hidden door to the bust’s left side.
Return down the hall to the two doors on either side. Enter the door on the right into the drawing room. Search the room for herbs, a weapon, and anti-virus. Find the next door and enter the Presidents’ room. Search the room for ammo (if your character fits under the couch) and other items before moving to the fireplace. Pull one of the cords within the fireplace. Hopefully a random zombie appears, which completes the "pulled string, zombies came out" segment of the event checklist.
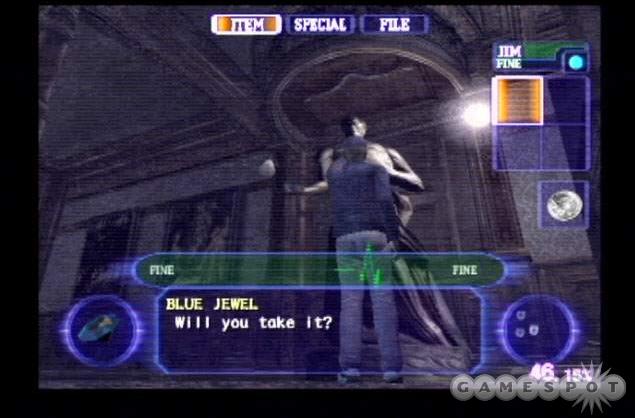
Return to the 2F passage and enter the door across the hall into the art gallery. Cross the room to the statue and grab the blue jewel. Comb the room; if you’ve selected Cindy as your character, play the piano as part of the event checklist. Return to the 2F passage. Enter the secret door opened by the brass spectacles. It’s testing passage A, a shortcut downstairs. Cross the catwalk and descend the ladder. Search the bottom route for some ammo before exiting through the left door into the 1F passage B. Move through this passage back to the entrance hall.
Go to the far side of the entrance hall to the moose head on the wall. Insert the blue jewel into the moose’s eye to open a secret passage behind your position. Enter the passage into the study room. Descend the staircase until the cut scene interrupts the action.
Search the right side of the desk for the second piece of the torn memo. Look at the left side of the desk for a couple notes pertaining to ingredients. Search the rest of the room for anti-virus and other health items before ascend the stairs back into the entrance hall.
Return to the 1F passage elevator and operate the console. The code to activate the elevator is on the two pieces of the torn memo. Possible code variants include 4161, 4284, 4032, and 4927. Enter the appropriate activation code into the console then cross the room to the elevator. Proceed to floor B2F and reach the B2F passage elevator.

Search this storage area for various items, such as the first aid spray on the top of the shelf (use the crates to reach it). You’ll even find poor George slumped against the wall--unless you’re playing as George. Find the door and exit to the pier. Cross the pier going left quickly to avoid becoming shark food. Grab the first aid spray if you wish but be quick. Ascend the stairs on the far side. Find a couple herbs near the next door that leads into the back square.
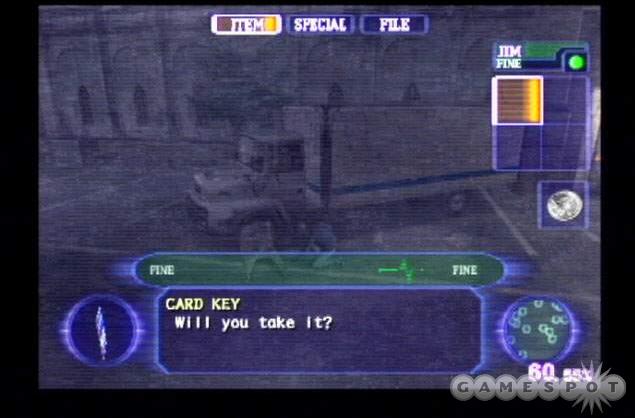
Watch the cut scene then move forward and find the blue herb. Move along the right side of the area to find the corpse near the truck. Grab the card key off of the corpse. It unlocks the double door to the right of the truck, which you can do so now but don’t move inside yet. Continue across the courtyard and pick up the memo next to the other corpse. Go to the back wall on the right side and check out the map. Now move to the left side and descend the ladder through the man hole.
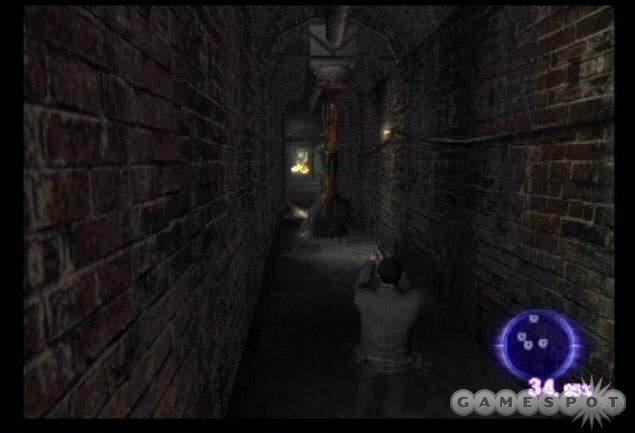
You’ll enter the water purifying facility. Walk onto the crates and jump up to grab the overhead bar. Shimmy to the right until you’re over the platform. Drop down. Check the platform for ammunition before moving to the left side and finding another overhead bar. Jump straight up and grab hold. Shimmy to the left and drop down on the adjacent walkway. Search the top of the crate for some ammo for Kevin’s weapon and down the catwalk to the far left to find standard handgun rounds.
Move along the catwalk to the far right until the cut scene interrupts the action. Now you have a new beast to deal with. Search the ground to the right of the container to find the key with a red tag. Return to the left and avoid or kill the beast. Check the restroom (the left door) to find a grenade launcher. Exit and open the door on the right into the underground tunnel. Cross the catwalk and open the door into passage B.
Walk through the passage and search the alcove on the right for handgun rounds. Continue to the far door into passage A. Avoid the zombie and grab the herb. Enter the door on the left to search the shed for the grenade launcher, which uses the burst rounds. Exit and continue past the shelving and into the next door. Open the door at the end of the passage on the right. It leads to the water works management office.
There’s a reagent case on the table. If you’ve been reading files you’d know this could be important. Unfortunately it’s not sealed so it’s worthless. Discard it. Check the table for ammo and a file. There’s also a typewriter in the room to save your game and an herb in the corner. The container holding the "P-base" is here but you’ll need to find a sealed reagent case to obtain the item.
Cross the room to the locked door. Use the key with a red tag to unlock the door. Enter the water tank. Grab the nearby herb then cross toward the bottom of the screen. Avoid or kill the beasts and go up toward the console. Use the console to release the water tank lock. Pick up some ammo on the right side.
Retrace your steps through passage A and B into the water purifying facility. Return over the overhead bars to the room’s start location. After the second bar, go left through the opening in the fence. Open the door on the right into the quality assurance testing room. Search the room for an herb and anti-virus then enter the far door into the underground tunnel. Avoid the beast and enter the water tank across the catwalk.
Move along the narrow ledge and climb the short ladder. Enter the door. Search the small room for the sealed reagent case. Exit the water tank. Instead of returning to the purifying facility, go to the left. Drop down and you’re back to where you unlocked the water tank. Climb out of the water to avoid the beasts. Return to the water works management office.

Use the sealed reagent case on the P-base to obtain the item. Retrace your steps through passage A and take the intersection to the right into the east waterway. Avoid the zombie and descend the ladder into the shallow water. Avoid another creature and proceed through the gate into the west waterway. Follow it to a ladder. Climb up to the B2F passage elevator. Go left to the lift and hit the 3F button. Enter the 3F passage elevator.
Search the desks to the far left for ammo. Enter the door on the right into the experiment preparation room. Check the front desk near the computer for anti-virus and the desk in the back of the room for medicine. Exit through the door into the laboratory. Move to the back of the room and use the sealed P-base on the reagent incubator. Return to the lift and descend to the B4F. Enter the B4F corridor.
Move right to the intersection. Grab the antidote off of the ground. Move forward and find additional items as well as check the map on the wall before entering the door on the left into the access waterway. Move toward the stairs and encounter the first of several giant spiders. Blow it apart with the grenade launcher or just avoid the creature. Go down the hall and drop down into the sewer.
Avoid the next spider as you move forward. Beware of another in an alcove on the left. Climb up and move into the next area marked the old subway tracks. Check the platform on the left for a blue herb (which cures poison from the spiders if necessary). Run down the tracks to the right until you enter the old subway tunnel.
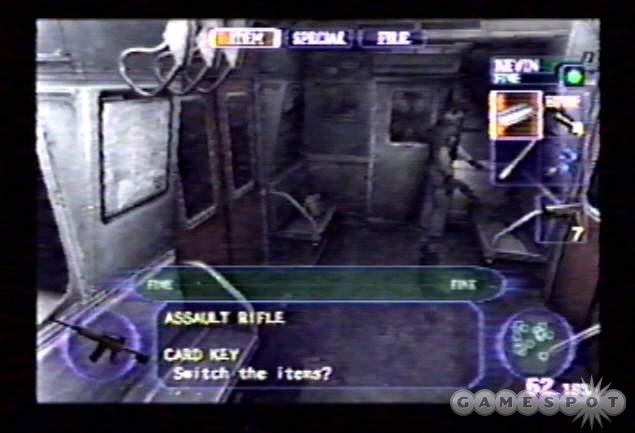
Enter the subway car on the left. You’ll enter the south car. Search the car (while avoiding the zombie inside) for first aid and the assault rifle on the seat in the upper left corner. Enter the door into the north car. Avoid the zombies while picking up the assault rifle ammo on the seat to the right. Exit the car into the old subway tunnel.
Avoid the wasps overhead and run to the blue door on the right side of the screen. Enter the T-shaped passage. Grab the first aid out of the container on the right. Check the underground management office. Grab the anti-virus and check out the map to the right of the typewriter (which can be used to save your game). You’ll also find some ammo on the table. Exit and check the control room across the hall for additional items. Exit and cross the hallway to the end. Crawl through the hole at the bottom of the wall into the emission tower inside wall.
Grab the herb. Wasps fly overhead and will knock you off the ledge. Take time to shoot them if you have the ammo. Just face a particular direction and wait for the wasp to attack above you. Shoot until it dies. Move across the ledge toward the right side. Reach the next platform and pick up the blue herb. Crawl through the hole into the storeroom.
Avoid the zombie inside. Cross the room and push the cabinet (to the door’s right) to the right to expose a hole. Crawl through the hole into the spare power supply room. Use the console. It’s another light switch puzzle. When you hit a button, that button and the adjacent diagonal button will be lit up. Solve the puzzle to restore power to the emission tower.
Exit the door into the T-shaped passage. Turn left at the intersection and climb the ladder into the emission tower access passage. Go left at the intersection and find some pesticide spray in the container (handy if you’re David). Proceed to the right and find a handgun in the back corner. Open the door on the left wall into the emission tower lower part.
Beware of the wasps and run onto the lift. Use the lift to enter the emission tower elevator. More wasps buzz overhead. Get into the back left or right corner of the lift and aim upward. When a wasp moves overhead to attack, shoot it. Try to conserve ammunition with accurate shots. Reach the top of the lift into the emission tower B1.
Move around the catwalk and find the V-Poison on the back wall (within the wasp construction). Return to the staircase and ascend. Search the upper catwalk for a blue herb then enter the door into the emission tower station. Grab the anti-virus off of the table. Check the room for first aid and antidote. Exit through the back door into the back square. Enter the double door on the left side of the screen (unlocked with the card key earlier) and return to the 1F passage B.
Maneuver through the passage and open the first door on the right. You’re back in the entrance hall--and so is Thanatos R, the creature from earlier. Avoid him and return inside the 1F passage elevator. Use the lift to 3F into the 3F passage elevator. Move through the experimental preparation room and into the laboratory. Use the V-Poison on the reagent incubator. Two items down, one item to go.
Retrace your steps back into the entrance hall. You must retrieve the last item from Thanatos R. Lure him into 1F passage B. Remember the switch that activated the electricity-filled wires? You must lure Thanatos R under those wires. Move through the waiting room then 1F passage A and into 1F passage B. Remain near the switch until Thanatos R arrives. Shock him when he’s underneath the wires by pressing the button. Pick up the T-Blood.
Return to the entrance hall and the 1F elevator passage. Use the elevator to 3F and the 3F elevator passage. Move through the experimental preparation room and the laboratory. Use the T-Blood on the reagent incubator.
Exit through the opposite door into the machine storage room. Search the first lab room for various items, including first aid and a grenade launcher. Move through the plastic drapery into the second hall. At this point you have a few decisions to make. You can save the world and yourself by operating the computer console and use it to reactivate the reagent incubator. It makes "Daylight" which counteracts the virus. Use the left computer to reactivate the reagent incubator. You can also pick up a handgun near the doctor’s body.
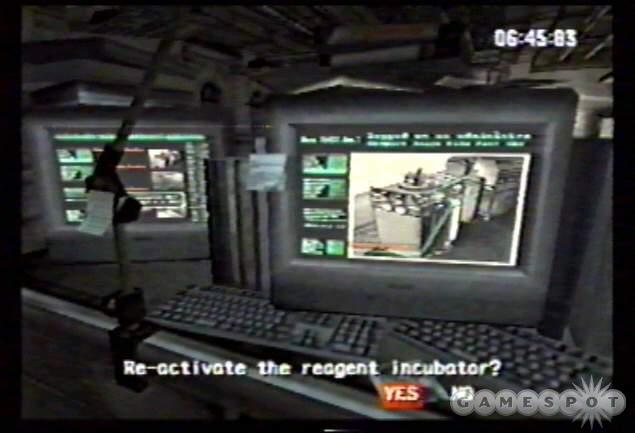
Use the computer on the right to release all locks on the University premises. Even if you don’t want to use the reagent incubator to save the world, you still need to use the lock release. If you want to use the reagent incubator, return through the machine storage room and into the laboratory. Move to the incubator and wait for it to eject vials of "Daylight" and grab one to use on yourself and at least one other to end the game with (to save the world!). You can also grab a third if you want to use a vial on Thanatos R to make the end battle a bit easier. The incubator takes time to create each vial but you should have plenty of time on the countdown.
Return to the second hall and enter the door on the left side of the room. It’s testing passage B. Cross the catwalk and descend the ladder. Go through the door into the Presidents’ room. Continue through the drawing room and into the 2F passage. Use testing passage A, which you opened earlier. Avoid Thanatos R and go left into the testing passage. Descend the ladder and exit into 1F passage B.
Avoid Thanatos R and move down the hall to the double doors in the back corner. Exit into the back square. Proceed toward the exit door. It’s in the back right corner near the map. Wait for the countdown to conclude. After the cut scene, avoid the wasps and proceed again to that exit door. Open it into the unloading passage.
Proceed through the passage. Check the scaffolding on the left (and subsequently the top of the truck) for first aid and ammo. Descend to ground level and climb across the truck. Check the hole for more first aid. Continue forward until the cut scene interrupts the action. It’s time to battle Thanatos R.
Stay away from Thanatos R; don’t get close or you’ll suffer at the hands of his melee superiority. Instead, use weapon fire to break the red cabinet on the right wall (near the scaffolding). It contains the rocket launcher. Keep away from Thanatos R and wait for him to jump. Watch the ground for Thanatos’ shadow and move away. He’s vulnerable after landing. Blast him with a rocket. You automatically move to the canal and then the front square upon defeating Thanatos R the first time.
That’s right…the first time. He’s back. You have a couple options here, particularly if you brought an extra vial of "Daylight" with you. Approach the tank and search to its left for the augule shooter. Load it with daylight and blast Thanatos R. There’s also ammo scattered around the area as well as health and herbs to aid you in the battle.
Chapter 5 - Event Checklist
Each scenario has its own event checklist. How many events you complete is displayed as a percentage at the completion of the scenario. Many events require several play-throughs to complete. For example, unlocking the cabinet in Outbreak requires you to play as Alyssa but seeing the "Will Becomes a Zombie" movie requires you to play as Mark. This section reveals all scenario events.
Outbreak
- Built barricade out of barrels.
- Used the staff room key.
- Used the key with blue tag.
- Solved painting puzzle.
- Unlocked cabinet (Alyssa).
- Moved cargo with the forklift.
- Destroyed the liquor room shutter.
- Destroyed the wire fence on rooftop.
- Read all graffiti with lighter.
- Built patrol car barricade.
- Opened gasoline tanker valve.
- Used lighter to ignite gas.
- Activated detonator.
- Killed zombies and survived.
- Escaped zombies and survived.
- Collected every map.
- Died in gas tanker explosion.
- Obtained "newspaper."
- Obtained "Jack's memo."
- Obtained "Staffer's diary."
- Obtained "Raccoon Today."
- Screams in Owner's Room.
- Screams in front of J's Bar.
- Saw crow fly into Drawing Room.
- Saw bottle break in Wine Room.
- Saw bottle break in Liquor Room.
- Watched "Will Becomes a Zombie."
- Watched "Bob Gets Worse."
- Watched "Bob's Suicide."
- Watched "Bob Becomes A Zombie."
- Watched "Block Staff Door."
Below Freezing Point
- Unlocked locker with lockpick.
- Thawed frozen wrench.
- Used wrench to open panel.
- Used valve handle to open door.
- Watched "Used V-JOLT in B7F."
- Watched "Used V-JOLT in B6F."
- Watched "Monica Runs Off."
- Watched "Giant Moth Attacks."
- Watched "Comp. Room Desertion."
- Unlocked comp. room w/ card key.
- Unlocked shutter with card key.
- Watched "Used Blowtorch."
- Used key to activate turn table.
- Watched "Missed Turntable."
- Watched "Turn Table Goes Up."
- Moved locomotive.
- Watched "Defeated Mutated G."
- Received item from researcher 1.
- Got item from staffer 2 (Yoko).
- Obtained map.
- Obtained "Top-Secret Memo."
- Obtained "Researcher's Will."
- Obtained "Staff Memo."
- Obtained "Interoffice Memo."
- Obtained "Laboratory Memo."
- Obtained "Monthly Passcode."
- Obtained "Custodian's Diary."
The Hive
- Used blood pack.
- Used nurse call button.
- Turned on power to shutter.
- Opened 1F shutter.
- Opened waiting room shutter.
- Had the elevator get to B2F.
- Elevator reached the roof.
- Bled at the nurse station.
- Unlocked door with B1F card key.
- Unlocked door with B2F card key.
- Defeated Leech Man.
- Got item from policeman on roof.
- Used chain key.
- Obtained map.
- Obtained "Male Nurse's Diary."
- Obtained "Repair Work Memo."
- Obtained "Setting Manual."
- Obtained "Piece of Memo."
- Got "Chemical Code Message."
- Obtained "Researcher's Diary."
- Got "Investigation Request."
- Obtained "Card Memo."
- Obtained "Security Guard Guide."
Hellfire
- Unlocked safe in Room 101.
- Provided emergency power.
- Solved Europe map puzzle.
- Dropped crate in owner's room.
- Destroyed 304/305 wall.
- Cleared with Len's tag.
- Cleared with Charlie's tag.
- Cleared w/ Len and Charlie tags.
- Obtained Apple Inn map.
- Obtained "Guest Memo 1."
- Obtained "Guest Memo 2."
- Obtained "Guest Memo 3."
- Got "Janitor's Repair Memo."
- Got "Janitor's Daily Report."
- Obtained "Guard's Notebook."
- Obtained "Emergency Manual."
- Obtained "Guest List Copy."
- Got "Hotel Charge Breakdown."
- Defeated Regis Licker.
- Opened secret security rm. door.
- Used motorized ladder.
- Used card key to unlock door.
- Used passcode to unlock door.
- Used gold relief key.
- Used silver relief key.
- Rang front lobby bell.
- Opened locker with lockpick.
- Watched "Call over Radio."
- Watched "Regis Licker Appears."
Decisions, Decisions
- Set red jewel in stuffed moose.
- Set blue jewel in stuffed moose.
- Solved Cuckoo Clock Puzzle.
- Played Piano on 2F (Cindy).
- Pulled string, moved statue arm.
- Pulled string, zombies came out.
- Used V-Poison in incubator.
- Used P-Base in incubator.
- Used T-Blood in incubator.
- Used Daylight on yourself.
- Killed Thanatos R with Daylight.
- Defeated Thanatos R.
- Routed power to emission tower.
- Unlocked door with red tag key.
- Unlocked water tank area door.
- Electrocuted Thanatos.
- Thanatos came in through window.
- Collected every map.
- Used glasses on 2nd statue.
- Used card key.
- Input elevator code.
- Unlocked university doors.
- Restarted Incubator.
- Obtained "Geneology Facts."
- Obtained "Blood-Stained Memo."
- Got "Reagant Generation Memo."
- Obtained "Section of a Diary."
- Obtained "Cable Repair Request."
- Obtained "Torn Memo."
- Obtained "Part of Torn Memo."
- Obtained "Orders."
- Obtained "Peter's Diary."
- Obtained "Number Memo."
- Watched "Peter Discovered."
- Watched "Hunter Gamma Appears."
- Watched "UBCS vs Thanatos."
- Watched "Greg and Yoko."
- Watched "ED: Chopper Zombie."
- Watched "ED: George and Cindy."
- Watched "ED: Mark and David."
- Watched "ED: Kevin and Jim."
- Watched "ED: Alyssa and Yoko."
- Watched "ED: Regretful Ending."
- Watched "ED: Remain Hopeful."
Chapter 6 - Collection
This section reveals collection items and their cost.
Gallery
| NUMBER | ITEM | COST |
| 001 | Kevin - CG Picture of Character | 500 |
| 002 | Kevin - Character Collage | 500 |
| 003 | Kevin - CG Picture of Character | 1000 |
| 004 | Mark - CG Picture of Character | 500 |
| 005 | Mark - Character Collage | 500 |
| 006 | Mark - CG Picture of Character | 1000 |
| 007 | Jim - CG Picture of Character | 500 |
| 008 | Jim - Character Collage | 500 |
| 009 | Jim - CG Picture of Character | 1000 |
| 010 | George - CG Picture of Character | 500 |
| 011 | George - Character Collage | 500 |
| 012 | George - CG Picture of Character | 1000 |
| 013 | David - CG Picture of Character | 500 |
| 014 | David - Character Collage | 500 |
| 015 | David - CG Picture of Character | 1000 |
| 016 | Alyssa - CG Picture of Character | 500 |
| 017 | Alyssa - Character Collage | 500 |
| 018 | Alyssa - CG Picture of Character | 1000 |
| 019 | Yoko - CG Picture of Character | 500 |
| 020 | Yoko - Character Collage | 500 |
| 021 | Yoko - CG Picture of Character | 1000 |
| 022 | Cindy - CG Picture of Character | 500 |
| 023 | Cindy - Character Collage | 500 |
| 024 | Cindy - CG Picture of Character | 1000 |
| 025 | All Characters - CG Picture of Character | 1000 |
| 026 | All Characters - Alternate Character Design | 2000 |
| 027 | All Characters - Alternate Character Design | 2000 |
| 028 | CG Picture of Creature | 500 |
| 029 | CG Picture of Creature | 500 |
| 030 | CG Picture of Creature | 500 |
| 031 | CG Picture of Creature | 500 |
| 032 | CG Picture of Creature | 500 |
| 033 | CG Picture of Creature | 500 |
| 034 | CG Picture of Creature | 500 |
| 035 | CG Picture of Creature | 500 |
| 036 | CG Picture of Creature | 500 |
| 037 | CG Picture of Creature | 500 |
| 038 | Alternate Character Design | 2000 |
| 039 | Alternate Character Design | 2000 |
| 040 | Alternate Character Design | 2000 |
| 041 | Alternate Character Design | 2000 |
| 042 | Alternate Character Design | 2000 |
| 043 | "Outbreak" Background Image | 1500 |
| 044 | "Outbreak" Background Image | 1500 |
| 045 | "Outbreak" Background Image | 1500 |
| 046 | "Outbreak" Background Image | 1500 |
| 047 | "Below Freezing Point" Background Image | 1500 |
| 048 | "Below Freezing Point" Background Image | 1500 |
| 049 | "Below Freezing Point" Background Image | 1500 |
| 050 | "Below Freezing Point" Background Image | 1500 |
| 051 | "The Hive" Background Image | 1500 |
| 052 | "The Hive" Background Image | 1500 |
| 053 | "The Hive" Background Image | 1500 |
| 054 | "The Hive" Background Image | 1500 |
| 055 | "Hellfire" Background Image | 1500 |
| 056 | "Hellfire" Background Image | 1500 |
| 057 | "Hellfire" Background Image | 1500 |
| 058 | "Hellfire" Background Image | 1500 |
| 059 | "Decisions, Decisions" Background Image | 1500 |
| 060 | "Decisions, Decisions" Background Image | 1500 |
| 061 | "Decisions, Decisions" Background Image | 1500 |
| 062 | "Decisions, Decisions" Background Image | 1500 |
Costume
| NUMBER | ITEM | COST |
| 001 | Kevin: New Costume - Six Shooter | 10000 |
| 002 | Mark: New Costume - Casual Wear | 10000 |
| 003 | Jim: New Costume - Slam Dunk | 10000 |
| 004 | George: New Costume - Outdoor Expert | 10000 |
| 005 | David: New Costume - Club Scene | 10000 |
| 006 | Alyssa: New Costume - Street Scene | 10000 |
| 007 | Yoko: New Costume - Spring Fashion | 10000 |
| 008 | Cindy: New Costume - On Vacation | 10000 |
| 009 | Alyssa: New Costume - Midnight Caller | 30000 |
| 010 | Yoko: New Costume - Gym Class | 30000 |
| 011 | Cindy: New Costume - Funny Bunny | 30000 |
| 012 | NPC in "Outbreak" - Bob, Mark’s friend | 4000 |
| 013 | NPC in "Outbreak" - Will, J’s Bar waiter | 3000 |
| 014 | NPC in "Outbreak" - Raymond, Arthur, Aaron, Dorian | 5000 |
| 015 | NPC in "Outbreak" - Elliott, Eric, Harry | 5000 |
| 016 | NPC in "Outbreak" - Yoko, J’s Bar disguised | 8000 |
| 017 | NPC in "Below Freezing Point" - Monica, Umbrella researcher | 5000 |
| 018 | NPC in "Below Freezing Point" - Scholar 1 and 2, Umbrella researcher | 3000 |
| 019 | NPC in "The Hive" - Hursh, Raccoon Hospital Doctor | 4000 |
| 020 | NPC in "The Hive" - Doctor 1, 2, and 3, Raccoon Hospital | 6000 |
| 021 | NPC in "The Hive" - Nurse 1 and 2, Raccoon Hospital | 5000 |
| 022 | NPC in "Hellfire" - Danny and Danny: B, fire fighter | 5000 |
| 023 | NPC in "Hellfire" - Gill and Gill: B, fire fighter | 5000 |
| 024 | NPC in "Hellfire" - Fireman, fire fighter | 3500 |
| 025 | NPC in "Decisions, Decisions" - Peter, George’s friend | 3000 |
| 026 | NPC in "Decisions, Decisions" - Greg, ex-Umbrella researcher | 10000 |
| 027 | NPC in "Decisions, Decisions" - Frank, Raccoon University Professor | 3000 |
| 028 | NPC in "Decisions, Decisions" - UBCS 1 and 2, UBCS member | 8000 |
| 029 | NPC in "Decisions, Decisions" - U.S.S. 1, U.S.S. special forces | 5000 |
| 030 | NPC in "Decisions, Decisions" - Man 1, 2 , 3, 4, and 5 | 10000 |
| 031 | Mr. Red, Mr. Blue, Mr. Green, Mr. Gold, Mr. Black | 100000 |
Movie
| NUMBER | ITEM | COST |
| 001 | Resident Evil Outbreak Opening Movie | 500 |
| 002 | "Outbreak" - Kevin Opening and Ending Movie | 500 |
| 003 | "Outbreak" - Mark Opening and Ending Movie | 500 |
| 004 | "Outbreak" - Jim Opening and Ending Movie | 500 |
| 005 | "Outbreak" - George Opening and Ending Movie | 500 |
| 006 | "Outbreak" - David Opening and Ending Movie | 500 |
| 007 | "Outbreak" - Alyssa Opening and Ending Movie | 500 |
| 008 | "Outbreak" - Yoko Opening and Ending Movie | 500 |
| 009 | "Outbreak" - Cindy Opening and Ending Movie | 500 |
| 010 | "Outbreak" - Scene 01 Movie | 500 |
| 011 | "Outbreak" - Scene 02 Movie | 500 |
| 012 | "Below Freezing Point" - Opening Movie | 500 |
| 013 | "Below Freezing Point" - Scene 01 Movie | 500 |
| 014 | "Below Freezing Point" - Scene 02 Movie | 500 |
| 015 | "Below Freezing Point" - Scene 03 Movie | 500 |
| 016 | "Below Freezing Point" - Scene 04 Movie | 500 |
| 017 | "Below Freezing Point" - Kevin Ending Movie | 500 |
| 018 | "Below Freezing Point" - Mark Ending Movie | 500 |
| 019 | "Below Freezing Point" - Jim Ending Movie | 500 |
| 020 | "Below Freezing Point" - George Ending Movie | 500 |
| 021 | "Below Freezing Point" - David Ending Movie | 500 |
| 022 | "Below Freezing Point" - Alyssa Ending Movie | 500 |
| 023 | "Below Freezing Point" - Yoko Ending Movie | 500 |
| 024 | "Below Freezing Point" - Cindy Ending Movie | 500 |
| 025 | "The Hive" - Opening Movie | 500 |
| 026 | "The Hive" - Scene 01 Movie | 500 |
| 027 | "The Hive" - Scene 02 Movie | 500 |
| 028 | "The Hive" - Scene 03 Movie | 500 |
| 029 | "The Hive" - Kevin Ending Movie | 500 |
| 030 | "The Hive" - Mark Ending Movie | 500 |
| 031 | "The Hive" - Jim Ending Movie | 500 |
| 032 | "The Hive" - George Ending Movie | 500 |
| 033 | "The Hive" - David Ending Movie | 500 |
| 034 | "The Hive" - Alyssa Ending Movie | 500 |
| 035 | "The Hive" - Yoko Ending Movie | 500 |
| 036 | "The Hive" - Cindy Ending Movie | 500 |
| 037 | "Hellfire" - Scene 01 Movie | 500 |
| 038 | "Hellfire" - Scene 02 Movie | 500 |
| 039 | "Hellfire" - Scene 03 Movie | 500 |
| 040 | "Hellfire" - Kevin Ending Movie | 500 |
| 041 | "Hellfire" - Mark Ending Movie | 500 |
| 042 | "Hellfire" - Jim Ending Movie | 500 |
| 043 | "Hellfire" - George Ending Movie | 500 |
| 044 | "Hellfire" - David Ending Movie | 500 |
| 045 | "Hellfire" - Alyssa Ending Movie | 500 |
| 046 | "Hellfire" - Yoko Ending Movie | 500 |
| 047 | "Hellfire" - Cindy Ending Movie | 500 |
| 048 | "Decisions, Decisions" - Scene 01 Movie | 500 |
| 049 | "Decisions, Decisions" - Scene 02 Movie | 500 |
| 050 | "Decisions, Decisions" - Scene 03 Movie | 500 |
| 051 | "Decisions, Decisions" - Kevin Ending Movie | 500 |
| 052 | "Decisions, Decisions" - Mark Ending Movie | 500 |
| 053 | "Decisions, Decisions" - Jim Ending Movie | 500 |
| 054 | "Decisions, Decisions" - George Ending Movie | 500 |
| 055 | "Decisions, Decisions" - David Ending Movie | 500 |
| 056 | "Decisions, Decisions" - Alyssa Ending Movie | 500 |
| 057 | "Decisions, Decisions" - Yoko Ending Movie | 500 |
| 058 | "Decisions, Decisions" - Cindy Ending Movie | 500 |
| 059 | Epilogue Movie | 500 |
Sound
| NUMBER | ITEM | COST |
| 001 | "Outbreak" Background Music | 1000 |
| 002 | "Below Freezing Point" Background Music | 1000 |
| 003 | "The Hive" Background Music | 1000 |
| 004 | "Hellfire" Background Music | 1000 |
| 005 | "Decisions, Decisions" Background Music | 1000 |
| 006 | Battle Background Music | 2000 |
| 007 | Miscellaneous Background Music | 2000 |
| 008 | Kevin Voice | 2000 |
| 009 | Mark Voice | 2000 |
| 010 | Jim Voice | 2000 |
| 011 | George Voice | 2000 |
| 012 | David Voice | 2000 |
| 013 | Alyssa Voice | 2000 |
| 014 | Yoko Voice | 2000 |
| 015 | Cindy Voice | 2000 |
| 016 | Miscellaneous Voice | 2000 |
Extra
| NUMBER | ITEM | COST |
| 001 | "Hard Mode" is now available for all scenarios. | 2000 |
| 002 | "Very Hard Mode" is now available for all scenarios. | 3000 |
| 003 | "Lone Wolf Mode" is now available for all scenarios. | 10000 |
| 004 | "Infinity Mode" is now available for all scenarios. | 50000 |
Got a news tip or want to contact us directly? Email news@gamespot.com
Join the conversation