Gears of War 2 Walkthrough
Gears of War 2 may be tough, but we're tougher. Check out our Gears of War 2 Walkthrough for the best battle tactics and where to find all those hidden collectibles.
Marcus and the gang are back and their world is worse off than ever. With the Locust army growing stronger by the day, it's up to you and the CoGs to put them back in their place…deep underground. Of course, it won't be easy, but with our survival guide at our side, it's about the best chance you've got at defeating those subterranean scum.
Here's what you'll find in GameSpot's Gears of War 2 Guide:
- Boot Camp: Get up to speed with the fundamentals of war.
- Walkthrough: We'll hold your hand through every enemy encounter, including showing where to take cover and how to find those pesky collectibles.
- Achievements: Not sure how to unlock some achievements? This is for you!
Boot Camp
If you're a Gears of War virgin, you'll quickly find your typical run 'n' gun tactics have no place here…unless you like being turned into hamburger meat. However, if you're a Gears of War veteran, then the same skills apply here.
Take Cover
Unlike most shooters, your enemies are quite the expert marksmen and will use every opportunity they have to fill you full of holes. In order to hold your own against these guys, taking cover during every battle is a must!
Thankfully, Gears makes taking cover easy—it's using it effectively that's the challenge. First and foremost, running to a place of cover leaves you vulnerable, so it's often best to find the nearest cover point and attack from there. For example, taking cover on either side of the doorway leading into most rooms is often an excellent cover point. While you may be a short ways from the battle, it will almost ensure that you're safe from harm's way.
Now, taking cover by itself isn't enough to win you the battle—no, you'll have to learn how to use it effectively. In short, if you're not shooting, you shouldn't be standing—keep your head out of the line of fire unless you need to take a shot. And even then, fire in short, controlled bursts then immediately duck back out of sight.
Battle Tips
While taking cover is the most important aspect of battling, there are a few others things you can do to turn the tide in your favor. First up: Locust holes. These openings in the ground are where the locusts emerge from. While they'll automatically close after enough time has expired, you can close them early by tossing a grenade inside, thereby preventing more enemies from spawning. Second: Flanking. If you're having trouble targetting a shielded foe, try finding a cover point to the side and shooting them from there. Also, if an enemy gets into your face, don't forget your primary weapon doubles as a chainsaw!
Reloading
Gears of War features something known as the "Active Reload." This is pretty much a timing based mini-game that determines how quickly you can get back into the action. Tapping the reloading button once causes a white bar to move horizontally along your ammo counter—tap it again in the 'white' zone for a well-timed reload. However, if you tap it outside this zone, your gun will jam, costing you several seconds. But with a perfect reload—tapping the reload when the moving bar overlaps the stationary one—you'll reload almost instantly and your bullets will deal more damage for a short period of time!
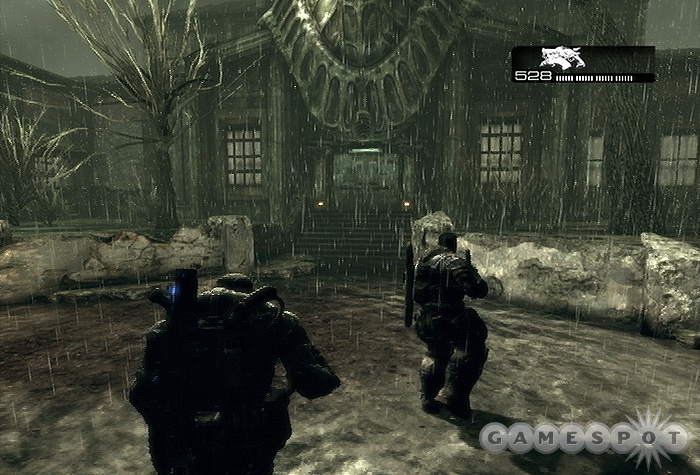
Tip of the Spear - Welcome to Delta
Take Carmine on his First Patrol
Welcome to training. While the lesson itself is pretty straight-forward, there are some things to make note of along the way. Start off by working your way up the street to the fence, where you'll find The Eagle Newspaper in the middle of the street.
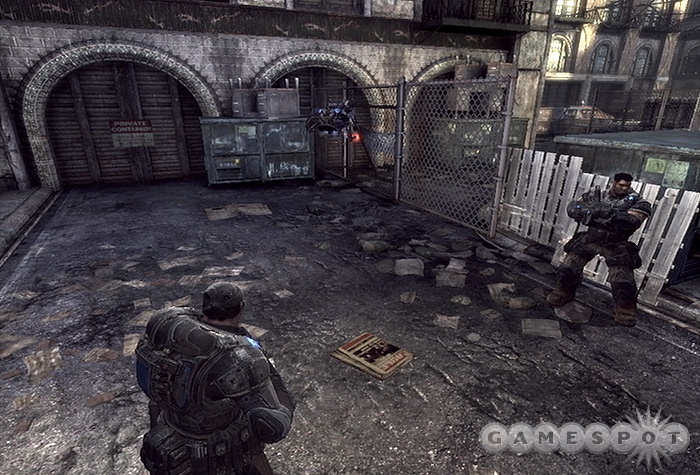
Take Cover
At the end of the street, take cover against any wall or object (by tapping "A" when near an object) to complete the objective. Now continue through the opening in the fence that Jack created and continue up to a truck.
Shoot Bottles
You'll spot some bottles on the van, just past the truck. Follow the directions on-screen to shoot them, then continue onward!
Kick Open the Gate
You'll soon reach a closed gate—kick it open by hitting the Action button.
Pick up the Grenades
Collect a few grenades from the basketball court by walking over to them and pressing the "Action" button.
Use a Grenade to Kill the Wretch
After grabbing the grenades, the camera will zoom to an enemy in the parking garage. Job a grenade up there to take him down.
Revive Your Squadmate
After killing the wretch, your teammates will be knocked to the ground by an explosion. Revive them by pressing the Action button when near them to get them back on their feet and at your side. Look for another grenade nearby before continuing on.
Search the Parking Structure
As you enter the parking garage, use your chainsaw to tear through the wooden barricade and continue onward. After turning the corner at the top of the ramp, look for some ammo in the corner, then proceed to the ladder that leads down to the street.
Return to the Hospital
Follow the road up to the hospital to complete training and begin the level proper.
Tip of the Spear - Desperation
Follow Tai
If you chose to skip training, this is where you'll start: a hospital foyer. Proceed through the automatic door on the right. After meeting up with Tai, follow him up the staircase and through another door.
Ambush the Invading Locust
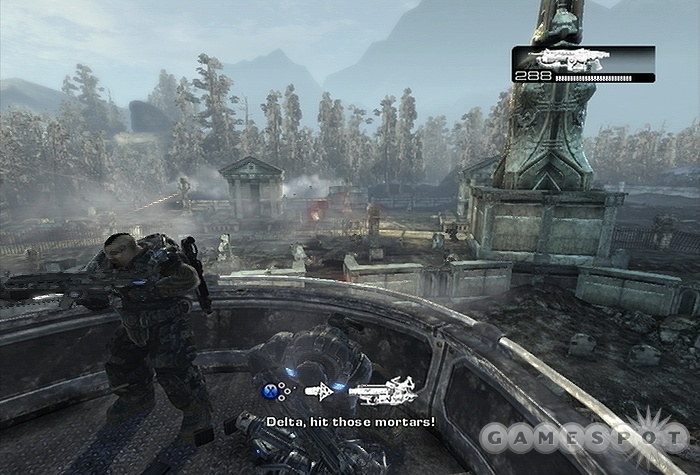
Tai will lead you to a hall overlooking the hospital courtyard. Quickly take cover behind any of the windows (though the unoccupied one around the corner is best) and wait for some enemies to barge in below. Stay calm and wait until they surround the explosive canisters in the center—as soon as your teammate yells to shoot the canisters, do just that to wipe them all out.
Clear the Hospital of the Remaining Locust
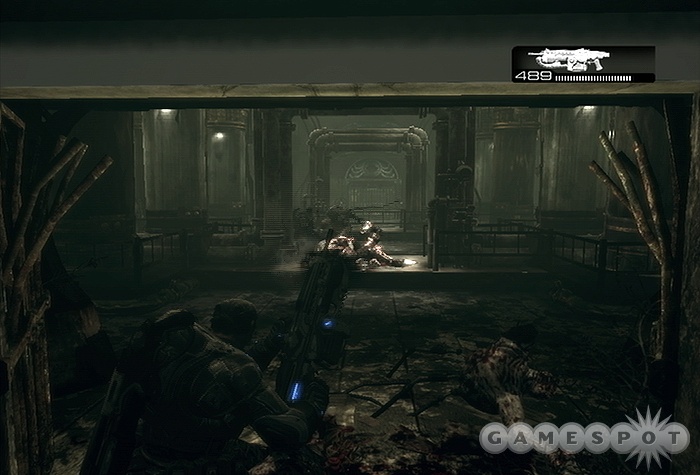
Afterward, follow Tai through the door that opens and collect the ammo along the way. When you reach the walkway that surrounds a room below, take cover behind a pillar and open fire on the foes below—you should be able to kill a few of them before they escape into the next room. Continue left around the walkway and use the desks and cabinets for cover around the corner as you tackle more enemies.
Proceed through the door just ahead and immediately take cover behind the desk. Wait here, as the enemies that barge in will be blown away by your support team. Afterward, take cover to either of side of the door around the corner and target the enemies in the next room. Once they're down, head inside the sub-room on the right to find some grenades. You may also want to take cover by the window to target the enemies through the door ahead, allowing you to climb down the staircase within.
After exiting the staircase, take cover by the door on the right and blast the Locust within. After regrouping with your squad, follow them through the right door, grab the ammo, then head outside. Take cover behind the closest pillar, which provides a great vantage point to clear the courtyard. Quickly run across the courtyard and up the walkway on the opposite side—ignore the "Y" prompt to check out the incoming Reaver, just focus on getting to the other side and hiding behind a pillar. Once there, chill out and let your teammates tackle the Reaver. Now that the courtyard is completely devoid of the Locusts, you may want to scavenge the ammo from the fallen enemies and grab the box of ammo on the right side of the current walkway, before going through the door leading back into the hospital.
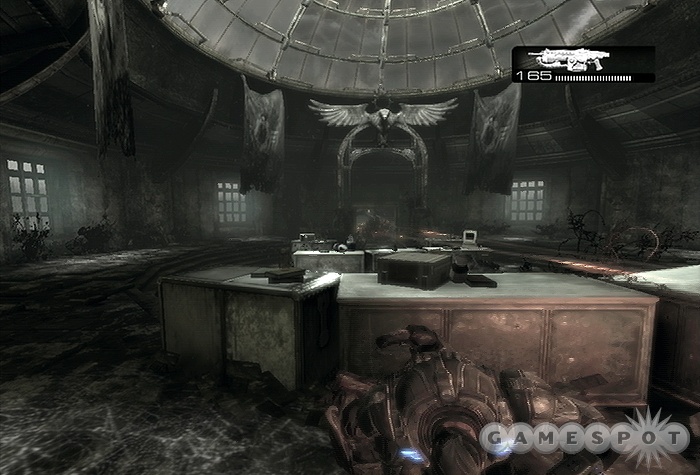
Follow the hall (grab the ammo box just around the corner, and check the nearby room for some grenades) and take cover behind the counter-top on the left to battle some more bad guys. Subsequently, go through the open door on the right and follow either route—both lead to the dining room (the right one leads to more direct cover, however, you'll find a Cog Letterhead along the left route—look for it in a small office on the left side of the hall, opposite the first entryway into the dining room). Duck behind the end of one of the serving tables to shoot the enemies toward the back of the room. When clear, push forward until a ship crashes through the roof—the moment it does, hightail it to a pillar on either side for cover, then get ready for enemies to emerge both on the ground floor, as well as the walkway above. Afterward, look for an ammo box on the left side of the room, and grenades on the right. Now climb either staircase to the walkway above and continue down the hall (another ammo box can also be found at the top of the left staircase).
Upon entering the next room, grab a pair of grenades from the left, and some ammo, as well as a Cog Proclamation on the far right. Continue down either staircase (look for more ammo on the ground floor, between the two) to the counter in the center. As you approach, the power will go out again, which can only mean one thing: Locusts are coming—first from a hole by the left staircase, then from a door on the opposite side. Typically, you would battle them from the behind the counter, but there's a much better way. As soon as the lights go out, hightail back up the staircase and battle the enemies from here. They will drastically cut down on your vulnerability, while giving you a fantastic vantage point. Once the power is restored, check out the room that the Locusts merged from for some ammo, then proceed through the only other door (opposite the stairs) to meet up with the rookie.
Clear the Streets of the Locust Attack Force
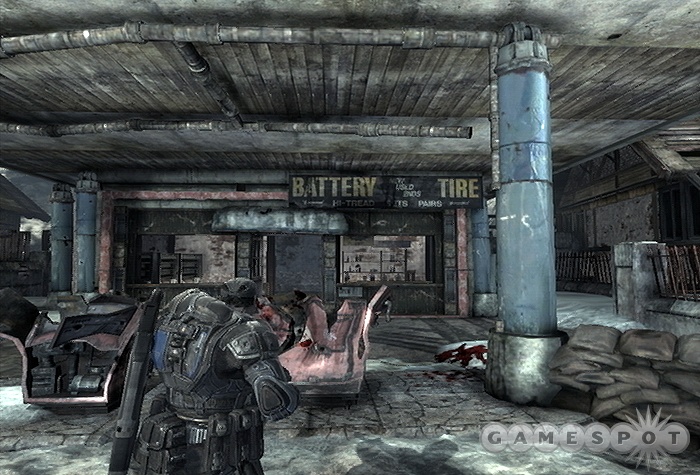
The streets ahead are heavily fortified by the enemy, so don't even think about venturing out there! Instead, take cover behind the sandbags right in front of you and attack them from here. Oh, and don't bother battling the Reaver when he appears, as he's only making a quick pit-stop. With the streets mostly clear, head on down and take cover until your air support shows up, which will help push the enemies back. Now run across the street and hop over the counter into the store (there's also an ammo box on the right).
Inside the store, hop behind the counter on the left and use it for cover so you can safely shoot the enemies left on the street, through the door. Once you've turned them into hamburger, grab an ammo box from the left corner and head outside. Use the vehicles for cover as you continue to clear the street of their ugly presence.
Tip of the Spear - Rolling Thunder
Escort the Assault Derricks to Landown
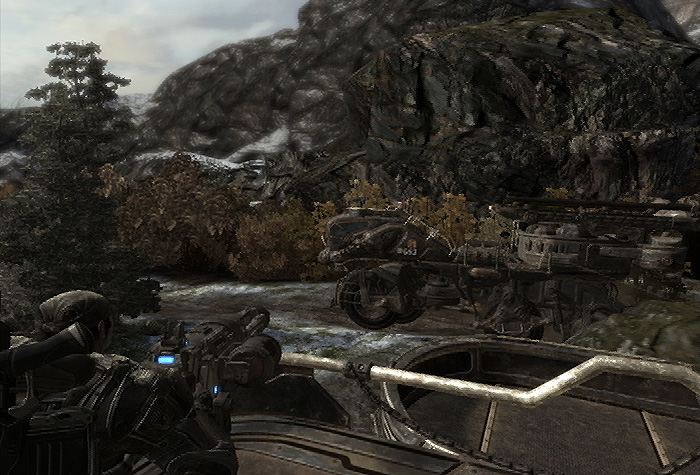
Now this is what we're talking about, heavy artillery baby! While you may not be able to drive her, it's up to you to defend her. Grab hold of the turret at the top of the ramp and learn to love it, as this should be your primary weapon for the duration of this mission. Although it has unlimited ammo, be easy on the trigger, as it will overheat if used too much, killing precious time while it cools down.
Shoot Down the Nemacyst Mortars
A little ways into your trip, you'll come under fire by incoming projectiles. If too many collide with your ride, it's game over. As such, you need to shoot them before they hit by leading your shots—that is, follow the smoke trail and shoot where they will be in a second or two (your shots are too slow to try and fire at them directly). There's nothing you can do about the first few, but you need to get on the defensive shortly after the helicopter goes down. Just be careful that you don't hold down the trigger for too long, otherwise the gun will have to cool off, which may not give you enough time to target the incoming rocks.
Kill All Incoming Reavers
If it's not flying rocks, it's flying Reavers. Now despite what the objective says, you only have to kill one: The one that tries to ram your ride off the road, from the left. Use your turret and target the two riders on the Reaver's back, then focus your attention on the Reaver himself. You have to move fast, otherwise he'll knock you off the cliff.
Defend Dizzy While He Repairs the Assault Derrick
Oh great, what now? It seems Derrick wasn't built to slide-down hillsides at high speed, so you're going to have to defend Dizzy while he repairs the vehicle. First, grab the ammo boxes and grenades to your left, near Derrick's front wheel. Now immediately seek cover behind the closest fallen pillar (ideally, to the far left of it), as the enemies are going to climb out of their emergence holes ahead. If you're handy with your grenades, try chucking them into the emergence holes (near the middle of the back area) to close it up, then a second to the right. If not, just hang here and shoot the enemies from behind you're cover. Once they're down, more will flank you from a ledge on the right—reposition yourself behind the left side of the pillar for cover, but get ready to move back again when more enemies appear in their original location.
Climb Back On Board the Assault Derrick
Get ready to bolt back to your ride as soon as Dizzy reports the rig as fixed.
Tip of the Spear - The Big Push
Defend Your Assault Derrick
Resume your position on the turret, but don't worry about the flood of enemies about to appear. However, a fellow Assault Derrick has been overtaken by the enemy, and will soon begin attacking from the right. Shoot the enemies onboard with the turret, but you may have to disengage briefly to kill a foe or two who'll hop onto your ride, shortly after the two vehicles take differing paths. Soon thereafter, the opposing vehicle will begin to ram yours, which will smash its windshield —- you must quickly kill the driver before reaching the bridge, otherwise you're going off the cliff.
Protect the Assault Derrick From Brumaks
So you won the great battle over the bridge, but it's not over yet, as you're going to have to defend yourself from several Brumaks—well, at least it seems that way, you really only need to attack one. That's right, one. In fact, you can set the controller down on the ground until the very end of this segment (just after the Corpser drags an ally Derrick underground) when the final Brumak fires rockets at your vehicle. As soon as he comes into view, target the gun on his back and don't let off until he's down for the count.
Tip of the Spear - Roadblocks
Escort the Assault Derrick to the Deployment Zone
Yup, you're back on foot, just like old-times. Grab the ammo box to the right of the car, then enter the building on the left by kicking open the door.
Eliminate All Tickers so the Assault Derrick can Continue
As you enter the house, climb the stairs behind the bar to find a loft containing ammo, grenades, and the Jacinto Sentinel Newspaper. Now head back downstairs and continue deeper into the house. After the cutscene showing the Tickers scamper by, keep back from the exit and shoot the Tickers as they run up (there's some ammo in the corner to your right). Once it sounds like things have died down, step out a few feet into the snow, then quickly backtrack into the house, as two more will appear. Once they're down, it's safe to proceed outside.
Check the deck to the left for anther ammo box, then continue through the busted fence ahead, around the back, then through an alley. Chainsaw the gate, grab the ammo box, then stay behind the sandbags so you can target more tickers that appear.
Before turning up the street, check the dead-end on the right for some grenades, and a Memorial Inscription embedded in the wall.
Take Cover from the Incoming Nemacyst Attack
Several balloon-shaped creatures will appear in the air overhead. Target them quickly, then run up the hill and duck behind the concrete wall on the right—you want to get there before gunner appears on top of the gas station. Once he does, lob a grenade onto the rooftop to take him down easily. Now there's one more gunner to the left, but don't bother with him, as Derrick will roll in shortly and smoosh him like a bug.
With the area clear, explore the gas station to find some goods, including a box of ammo and a Truck Driver's Note on the floor of the back room. Now hop the barrier on the right side of the gas station , collect an ammo box, then continue down the street and into a tunnel.
Clear the Tunnel
If this dark tunnel reminds you of the Subway scene in Cloverfield, you're not alone. Essentially, the tunnel is riddled with tickers, so it's best to move slow for a couple of reasons: It allows the large flashlight behind you to keep up, but more importantly, it should give you plenty of breathing space to shoot the scampering critters. However, even with the light, if can be difficult to see them—look for their dust trail and lead your shots to take them down. Oh, and make sure to grab the ammo box and grenades just past the first car on the left. Climb the staircase at the end of the first section, get ready to tackle a few more that charge your way from a hole ahead, then exit back into the tunnel via the other exit. Check for more ammo on the right of the first car, then use the same tactics as before to make it through the tunnel.
As you approach the exit, a Reaver will fly in. Take cover behind the car, then work on taking it down. Once it's dead, you may finally exit the tunnel.
Clear the Buildings of All Locust Activity
As you exit the tunnel, the town will fall victim to another mortar attack, and you'll then be given a choice: Go through the Hotel, or stick to the rooftops. The choice is yours, and we offer a walkthrough for each below.
-Hotel Path
Proceed upstairs and take cover to either side of the door and shoot the enemies out on the rooftop. Now grab an ammo box to the right, then continue onto the roof, where you'll find another ammo box on the right. Continue along the rooftop and wait for Dom to blow a hole through which you can continue. Enter the hall on the left, grab the ammo box at the dead-end, then kick down the door on the other side. Immediately take cover to either side to kill the foes inside. Take cover by the windows on the right and pummel the foes on the other side with bullets to the face—they're one great weakness. Once clear, proceed outside and grab an ammo box on the left, as well as a Mortar.
-Rooftop Path
Climb the staircase and turn right at the top for an ammo box. Now continue in the other direction, and take cover behind a low concrete wall around the corner, enabling you to shoot the enemies beyond. Afterward, climb the ladder around the next corner, kill the baddie manning the mortar, then collect the ammo in the corner. Now Dom will request a small favor: create an entrance for him. Grab the nearby mortar, then set it down by holding the Left-Trigger and face it toward the building across the way (Hold "Y" if you're not sure which one). Now fire the Mortar at the maximum distance (just keep holding the fire button) to blow a hole in the building—easy, right?! Now drop the mortar and climb back down the ladder and open the door on the right, once Jack has unlocked it. Inside, use the windows on the left to kill the foes on the roof, then continue outside.
Defend the Assault Derrick From the Brumak
Regardless of which route you took, you'll emerge on a rooftop containing a mortar. Grab it, as a Brumak is coming your way from the tunnel! Ready your mortar (by setting it down with the "Left Trigger") and launch several mortars at him to take him down. Make sure to adjust your distance appropriately if they're not connecting.
Tip of the Spear - Digging In
Protect the Assault Derricks While they Deploy the Grindlifts
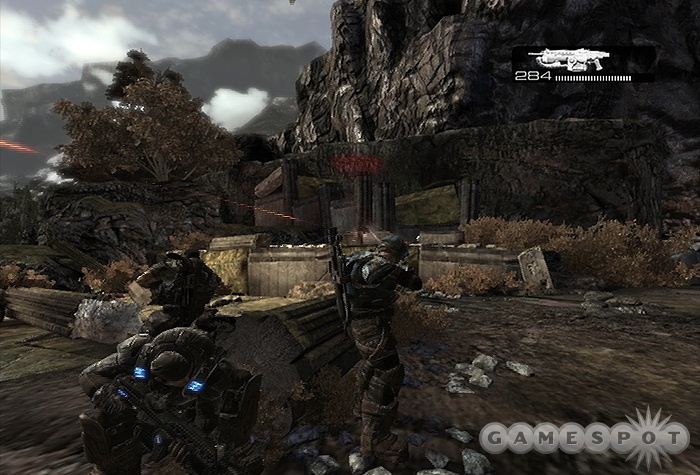
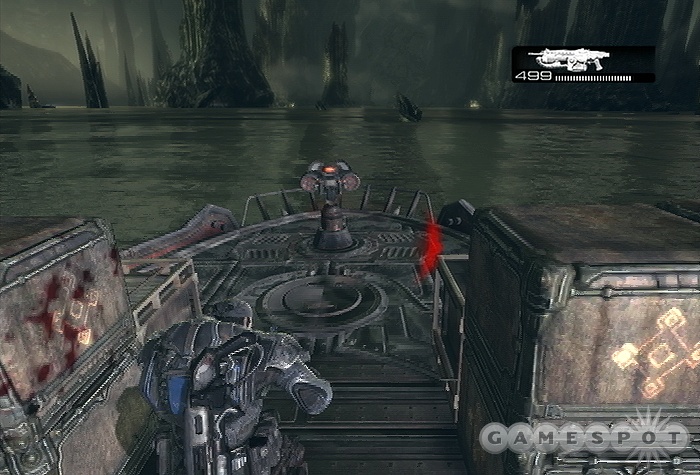
Alright, you have one final stand to make before the next level. We strongly suggest keeping off the turret (as it makes you a large target), and instead take cover by the railing on the lower deck and shoot the enemies in the field below. After a minute or two, a mortar crew will appear on the right side (as marked by an objective)—take them down as soon as they appear! If they fire off a mortar, quickly move to the opposite side of the vehicle in hopes of avoiding the resulting hail of destruction. If you need a better vantage point, try climbing the ramp with the turret, though you're also more vulnerable—we suggest heading back down when the Boomers show up. Also, be prepared for an enemy or two to climb on board—the chainsaw was made for this. If you need additional ammo at any point, you can find more on either side of the ramp, one of which re-spawns continually (so don't worry about running out).
Destroy the Reavers
A pair of Reavers will eventually show up. The fastest method to take them down is to use the Mortars and fire them at maximum distance, otherwise your guns work too, though it can take a while.
Denizens - Scattered
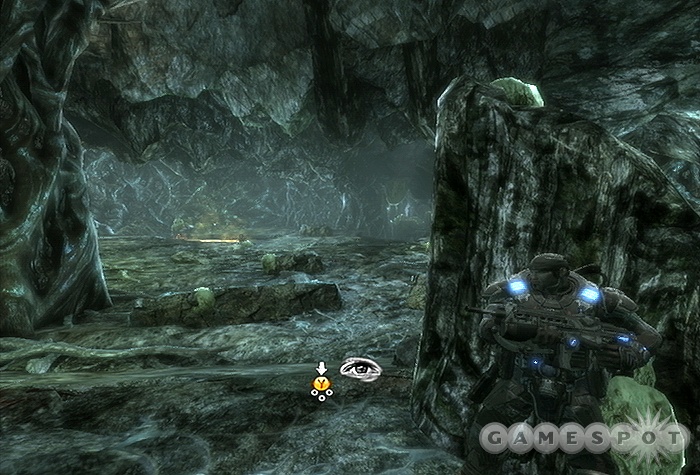
Regroup with Carmine
Deep underneath the Earth's surface lies a sprawling complex of tunnel. This first section has several routes that can be a bit confusing, but that's why we're here, right? Start off by going down the ramp ahead. It will drop you off in a small area where you'll spot several other soldiers who have landed. Now there are three paths leading from here: Take the far left one, leading uphill (the other two return you to where you were).
Use your chainsaw to cut through the ivy barricading the path then immediately take cover behind the low wall and kill the enemies within. Now head to the back of the room and look for some ammo and grenades near the Grindlift.
Defeat the Locust so Jack can Repair the Grindlift
While Jack fixes up the Grindlift, you'll have to hold off the invading Locusts who emerge from two holes: One far head, toward the left, and the other on the right. We found the best place to take cover is the far left pillar of the short-wall ahead. This vantage point allows you to see most of the field, while providing a lot of cover. While there's a ton of Drones, you need to concern yourself more with the 7 or so Tickers that start to show up after about a minute - usually from the left hole first, then the right. It's crucial you kill them ASAP, though if they get close, back away immediately and shoot. We also don't suggest trying to use close the two emergence holes with grenades, as the slits are far too hard to target from this distance. Once everyone's dead, activate the Grindlift and follow it through the hole it digs.
Help Omega Squad Defeat the Locust Attack
You'll emerge in a large cavern, where a fierce war below is about to take place. Typically, you would follow your teammates down to the ground floor and battle them there, but there's a better method. Stay here and look over the ledge—this provides a fantastic vantage point allowing you to kill even those behind cover. It also protects you from those annoying Tickers who appears every now and then. And if you come under heavy fire, simply back away from the ledge so they can no longer see you—there's nothing they can do! Now there's quite a few enemies, so try to be conservative with your shots (plus your allies below should provide a lot of support) otherwise you may find yourself low on ammo—more can be found by a grindlift near your squad. Once clear, proceed down the ramp, grab some grenades by a Grindlift on the left, then rejoin your squad below.
Find the Source of Seismic Activity
Beyond the sandbags awaits a dark, damp cavern. Shortly after your teammate comments on the glowing plants, you'll be ambushed by several Wretches—obliterate them with the chainsaw. Do the same for the ivy blocking the path.
Denizens - Indigenous Creatures
Shoot the Glowing Fruit to Lure the Rockworm
What the? A worm made of rock? There's no need to fear these guys (so long as you stay away from their face) as they're mostly harmless. In fact, their rock-solid body can be used as a mobile cover-point. Oh, and you can actually lure the rockworm by shooting the glowing fruit (which the worm loves!) along the ceiling, causing him to move to it. Try this out on the one just ahead to complete this objective.
Just beyond the land bridge, keep an eye out for a vine-covered area on the left. Chainsaw through it to find an ammo box and Gear's Journal. Up ahead is a branching path—but first grab the ammo and grenades by the Grindlift. Now make your choice, left path or right path.
Eliminate the Locust Checkpoint
Both paths eventually lead to the same area, the only difference is where you actually do the battle from. The higher route is more secluded, which can make it difficult to target the enemies either with grenades or standard weapons. The lower route, however, is closer and actually a bit easier. In either case, take cover behind the first wall you find once the enemies come into view and fight from there. When done, grab the ammo on either side of the checkpoint, then climb the ladder.
Watch out for a ticker or two, go left first for some ammo and grenades, then follow your squad up the tunnel. Take cover behind the rockworm that appears to battle the Locusts beyond. Push forward through the tunnel, taking cover when necessary to kill the Drones.
Break through Locust Defenses
You will soon come across a land-bridge just past a Grindlift. Look for a sniper rifle nearby, then take cover behind the nearby sandbags and target the drones on the ledge ahead (to the right of the bridge). If you run low on ammo, it may be time to get a bit closer. As you close in, a rockworm will emerge from a hole in the right wall and crawl along the edge, providing shelter from the enemies on the platform across the gulf. However, the rockworm will keep on moving at a steady pace, so keep up and try to take down the enemies quickly. Afterward, you'll reach another split path—both lead to the same area, but on opposite sides (we have found that the left route provides better coverage for the upcoming battle). Along the way, you'll encounter a sniper rifle on a ledge overlooking 7 enemies wandering by below—shoot as many of them as you can before they escape, so you'll have less to face later on.
Regardless of the route, you'll wind up in a battle at the top. If you took the left path, it's best to take cover behind the pillar, right of the sandbags. This position is well protected, and allows you a chance to easily take down one of the two gunners. Once the gunner's down, feel free to move alongside the sandbags to targets the remaining enemies. But what if you took the right path? We found it's best to duck behind the box, just left of the ladder. Now wait for your teammate to distract the gunner, then target him. Once the main enemies have been cleared, a Reaver will drop in. Take cover as far away as you reasonably can, then target the soldiers on its back using whatever you have available.
You're not done yet, as some enemies—including two boomers—are about to burst through the large doors. Take control of the turret closest to the door (remember to use first-person view!) and aim for the Boomers first, then whatever's left. Afterward, explore the area to find some grenades by a box, and some ammo and a Kantus Scroll along the ledge, right of the door. Continue through the door when you're done.
Assist Alpha Squad
Descend the spiraling walkway until you receive a message from Alpha Squad who's under attack. Continue up to the sandbags for cover and take down the immediate foes, then grab hold of the turret to blast the enemies below.
Denizens - Disturbing Revelations
Search Deeper in the Cave Network for the Massive Creature
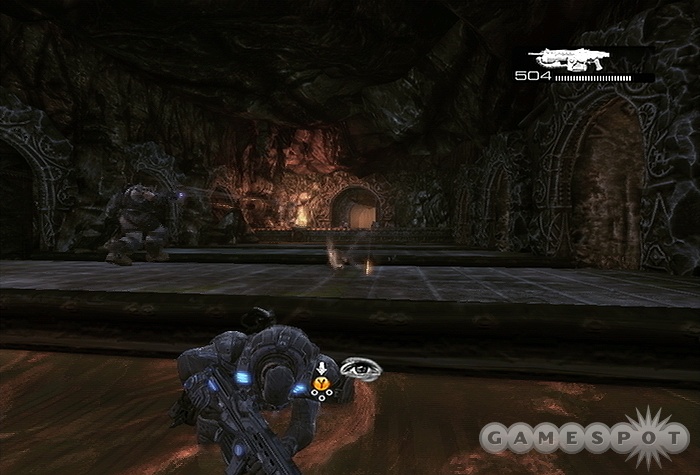
After spying the large creature, grab the ammo near the turret then continue onward. When you reach the fortress at the top of the stairs, you'll have to battle several enemies who'll flood from inside. We found the best place for cover is near the tail end of the rockworm that emerges from the right wall. While it seems like it doesn't provide much cover, it's surprisingly effective and provides a good vantage point, particularly for a couple of tickers that will emerge. When everyone's down, proceed inside the fortress.
Inside, look for some ammo and a Locust Emblem in the right corner, then continue onward until you come across another split-path. The right one is much easier, but less action-packed.
-Left Path
Grab the ammo box from the get-go and continue on into the room ahead. You'll now be tasked with shooting three glowing fruits to lure the rockworm across the floor below, providing your teammates with cover. The first two can be shot from the windows on the right, and the final one from the window in the corner, near the switch. As you as you knock down the third, quickly retreat to the doorway you just came from to prepare for a horde of enemies about to flood in—you can safely shoot most of them from here, but chainsaw those who dare to get close. Once clear, activate the switch in the corner and exit through the door that opens.
Immediately take cover behind the sandbags, as a gunner ahead will otherwise tear you to shreds. Sit tight, as your squadmates will take him down. Proceed down the nearby ramp and take cover at the wall—if you have the sniper, use it on the enemies below (and keep an eye out for a couple of tickers). If not, dash to the wall ahead (after the turret pauses to cool down), then finally to the rockworm that emerges from the wall. If you wait patiently, your teammates should take care of the guy manning the turret, allowing you to target the enemies beyond without issue.
-Right Path
Grab the ammo box then take cover behind the rockworm in the next room and follow it as it (slowly) crosses the room. Don't bother trying to get the enemies yet. Once it comes to a stop around the corner, you'll now be able to target the gunners inside the building. Head inside when clear and pull the switch to open the door. Be careful: As soon as you climb the ladder to the top, there'll be an enemy waiting. Continue down the ramp in the corner—ignoring the enemies in the field below—and chainsaw the gunner when you reach him. Now use his turret to clear everyone else from the room.
Denizens - Sinking Feeling
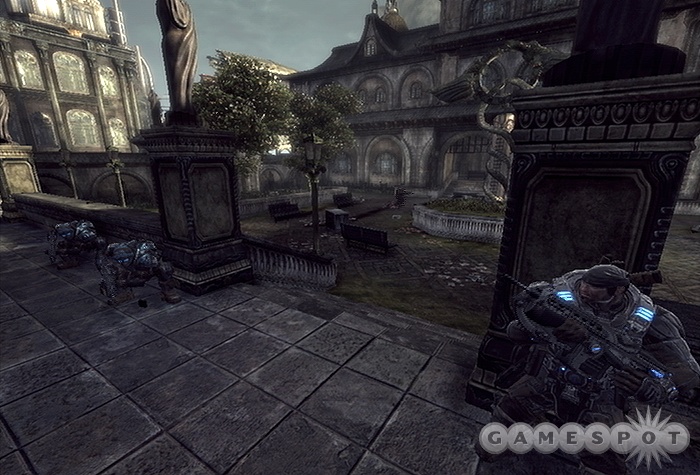
Infiltrate the King Raven Crash Site
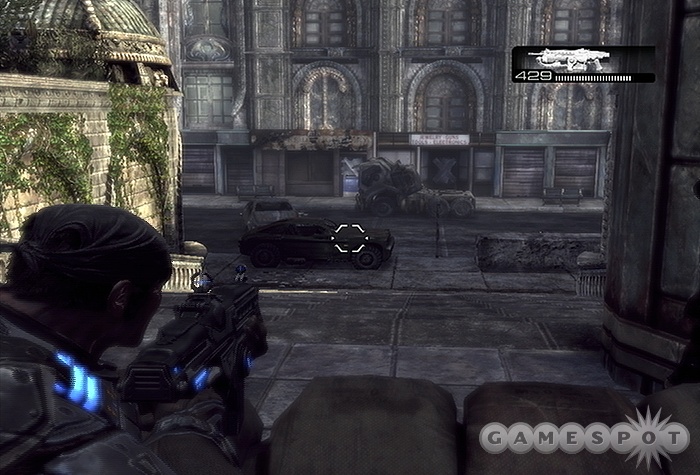
After you witness the building fall in the distance, grab the ammo from the left platform and push forward. Look for some grenades by an overturned car on the left, then take cover behind the jeep. Focus on taking down the Mount roaming around (before targeting the Drones), as his unpredictability can make him difficult to target—aim for the rider first. Move up to the van and prepare for another mount to enter the scene—be careful, as he may pop over a wall to the right, potentially catching you off guard. Continue to hang out here, as it provides good coverage for the remaining enemies. Once clear, grab some ammo from the wreckage to the right, then look for some more around the corner.
Continue forward (ignoring the side-street to the right) until a Reaver appears—immediately turn around and backtrack to the van for safety and blast it from here (remember to aim for the rider). When you get a chance, check out a small area on the right side (opposite the large hole) to find some ammo, as well as the Ilima City Help-Wanted Ad. Now continue forward again, but seek cover behind the car (just after the large hole) and blast the enemies to the right. Now grab an ammo box on the left, then proceed down a debris-covered path on the right.
Grab the ammo box from an alcove on the left, then venture into the next area. A bridge will pop-out from a large tunnel ahead—seek cover on the thin side of the closest fallen pillar (why the thin side—you'll see!) and open fire on the enemies descending said bridge. In a few moments, a Reaver will swoop in and land on the right, but if you took cover where we suggested you should be well protected. Remember, aim for the rider first, then the Reaver itself. Afterward, proceed up to the wall ahead and kill he remaining foes. Once clear, head left to find some grenades and ammo, then drop to the level below (where you'll find more ammo on the left), then enter the destroyed building.
As you pass through the first building, check for some grenades on the left before entering the 2nd. Be warned: As soon as you enter the main room of the second building, you'll be ambushed from above on multiple sides. Immediately seek cover in a room dead-ahead (where you'll find an ammo box) and hold off the enemies from here. Eventually, the "Cole Train" will roll in and save your ass from being handed to you—how sweet.
Search for Baird and Sigma Squad
Grab the Cog Tag from a corpse in the corner, then grab some ammo on the other side of the divider before heading through the door. Follow the street up to the archway leading into the graveyard. Now here's the thing: the moment you step foot into the graveyard, a reaver will land nearby. As such, we immediately suggest seeking cover on either side of the archway and blasting the reaver from here—if he gets too close for comfort, back down the street to give yourself plenty of space. Once he's dead, move up to a grave and kill the drones and tickers that spawn.
Cross the bridge and look for two boxes of ammo, one to the right, the other on the other side of the short wall.
Denizens - Captivity
You'll soon come across a several captivity stations—grab the ammo in the corner and carry on to the next group to free a team member.
Search Area for Other Captives
As you enter the next next area, look for Stranded's Journal to the right (behind a box), then collect some ammo further up in the room (near the cage). Up ahead is a Locust captive ship—take cover behind the last over-turned prison-unit and shoot the Boomer and co that emerge from the ship. Before boarding the ship, grab the ammo just beyond the ream, then climb aboard.
Find a Way to get the Barge Moving
Get ready to take cover behind any one of the boxes, as an enemy is about to ride a lift on the right down to your level. Once he's down, catch a ride on that very lift up a level (you may want to grab the gatling gun that he drops). On the second floor, head across the deck and climb the ramp…backwards. This way, you'll be facing two drones on the top deck, and if you need cover, you can quickly retreat back down. Once they're down, a Reaver will make a quick pass—don't bother with him. Now pull the switch on the backside of the machinery in the middle to get the Barge started. Once it gets going, seek cover on the other side of the switch, as a few more Reavers will appear—again, don't bother with them. However, as soon as they take off, move back to the other side and seek cover by the switch, for the upcoming battle.
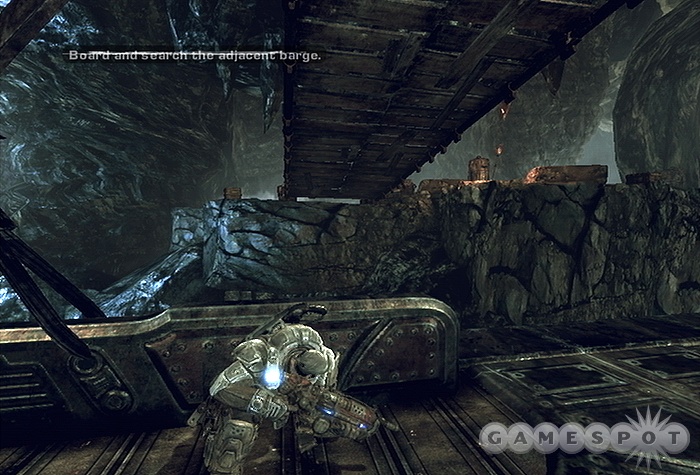
Board and Search the Adjacent Barge
Your barge will soon collide with another. If you haven't already, take cover by the switch you recently pulled to target the enemies on the other barge. Cross on over to it, then proceed down the ramp and pull the switch on the center column to open the jail cells, freeing Tai…or what's left of him.
Afterward, you'll wind up the lower deck. Immediately seek cover either behind the railing and shoot the enemies up on the cliff. Cross over the lowered bridge and follow the path. Peek over the right cliff-edge to get head-start on blasting the enemies. Once they move out of sight, proceed onward to the second stone slab for cover as you kill the Locust downhill. Continue along the path—at the U-Turn, use the corner for cover so you can target the Kantus and Tickers beyond.
Take cover behind the wall just beyond the overturned car, and shoot the enemies ahead. Afterward, push forward to the lowest wall (by the collapsed building on the right) to target more foes in the field. Subsequently, move up to the corner of the building ahead, on the right. This will trigger a Reaver to swoop in—shoot him as much as he can from here, but retreat up the hill, back to the overturned car for cover when he starts to get close.
Afterward, look for an ammo box inside the nearby building (enter via the side around the hole in the ground), then proceed down the main street (look for an ammo box halfway on the right) and use the right barricade for cover to take down the drones ahead. Go through the burning gas station and seek cover behind the car to tackle two more foes.
Go around the large building, to the right, and grab some grenades by the truck. Continue to the back to find an entrance and work your way to the roof. Once there, look for an ammo box, then immediately seek cover (we found the doorway in the back, to your left, is a great place) as you're about to be ambushed from several directions. Just hold off the enemies until the countdown expires to be picked up via helicopter…
Denizens - Intestinal Fortitude
Find the Riftworm Heart
From the get-go, grab the Car Gold Magazine along the left wall, then follow the path.
Avoid the Digestive Teeth
You'll soon come across several large teeth that will crush you if you don't get out of the way in time. For the first two teeth, simply run across (one at a time) as soon as the tooth begins to rise. The third is a bit trickers, since it's so long. Venture up as far as you can to its left, then turn 45 degrees so you're facing you destination, then just run like the dickens when the tooth rises. This next section is a long string of teeth that chomp down just far enough to crush you if you stand. As such, you have to run the entire way—just look far ahead and avoid hitting the walls. Alright, you're almost done! You can walk past the first horizontal tooth-set, then run across the next two (one at a time) when they rise, then dart through the final one.
When you reach the downward slope, several intentional parasites will run your way, but they're no match for your machine gun. Onward, you'll trigger a cutscene.
Outrun the Wall of Debris
You've seen Indiana Jones, right—with the boulder? Same deal here—keep running to avoid being squashed (follow your teammates if you don't know where to go). But make sure you avoid touching the villus (the plant looking patches), as they're poisonous and can kill you. A short ways in, you can grab a Cog Tag along the left wall, just before a small alcove. When you reach the dead-end sphincter, shoot it relentlessly until it opens.
Just beyond the first sphincter are several parasites—shoot them quickly before continuing. Follow your squad to a flesh wall you need to chainsaw through. Run down the path to another sphincter door and shoot it open.
Run through the crap-creek and shoot the teetering vehicle until it drops, creating a bridge. Now run like hell along the path (ignoring the enemies) and chainsaw through one more thin membrane to complete this section.
Avoid Jets and Pools of Acid
As the objective states, you'll have to work through the stomach, while avoiding being sprayed or stepping into pools of acid. Unfortunately, there are jets all over the place just spraying the stuff. But you can temporarily disable them by shooting the green bulb on the end. So you start at a fork in the road; the right leads to ammo, but the left is the only one that can get you out of here. It's pretty basic from here: shoot the jets to stop them spraying and continue forward.
Pass Through the Intestines Quickly to Avoid Suffocation
There's no time to dilly-dally at the intestines, as the gasses that are present will suffocate you if you wait around long enough. Run through the main tunnel, skipping all of the side routes. Go through the large opening and turn left, then make another left and hug the right wall—follow the red-lit ground straight to a fleshy wall you can chainsaw through to escape.
Cut Two Arteries to Destroy the Riftworm Heart
After chain-sawing through the fleshy wall, you'll find the heart. Chainsaw through the artery on either side, then escape up the path that opens. Shoot the parasites as you go, and cut through another flesh wall to reach the second heart.
Cut Three Arteries to Destroy the Riftworm Heart
Another heart and three more arteries you need to chop—the path on the left leads to all three. When done, continue up the path along the wall and saw through another membrane to find the third heart.
Cut Four Arteries to Destroy the Riftworm Heart
As you explore the room, parasites will often emerge from the ground—just back up and shoot. Now you'll find the four arteries in groups of two (one behind the other) on either side of the heart. Cut all dour to complete the level.
Gathering Storm - Dirty Little Secret
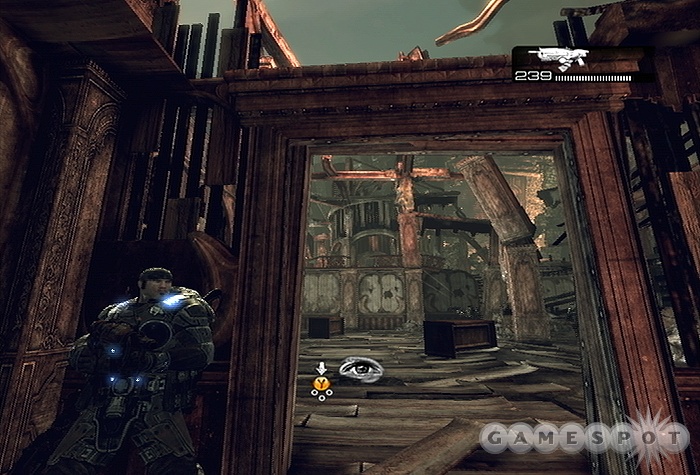
Explore the Abandoned Facility
There's nothing of importance to find out here, so head left around the building and up the long walkway to the door to enter the facility. Inside, proceed down the hallway on the right. Enter the rooms on the left to find several weapons, then approach the rear door when you're ready.
Restore Power to the Warehouse
Hopefully you're not afraid of the dark—luckily, your favorite bot, Jack, will provide some light. Anyway, work your way through the facility until you come across the flamethrower in the center of the room, just before the power room (don't worry, it's hard to miss). Continue into the next room and flip the switch to restore power.
Return to the Centaur for the Explosive Charge
With the power restored, it's time to work your way back to the rest of you squad, by the Centaur…if only it were that easy. Shortly into your trip, you'll find the door you originally came through is now closed, but there's another you can open on the other side via the panel, leading into a warehouse. After stepping more than a few feet in, ton of wretches will attack. They're weak though, so don't waste your ammo. Just put your back to the wall and chainsaw or melee them to death. Once done, you can find a flamethrower in the far corner downstairs and additional ammo plus a shotgun upstairs. Finally, ammo boxes can be found in the adjacent room, by the garage door. When ready, turn the wheel by the door to open an exit outside and meet up with your squad.
Carry the Explosive Charge to the Secure Door
Great, they have the explosives ready! Now you and Dom will have to work together to deliver it to the door. Carry it to the lift ahead and wait for Jack to raise you into the warehouse. But guess what? More wretches! Thankfully, they're still complete push-overs, so just bash them like before. Continue into the room ahead and turn right down the hall, leading to the security door. After a few more wretches, you'll be able to blow a hole through the door.

Gathering Storm - Origins
Don't be scared—go through the door you just created! When you reach the next monitor bank, where Niles introduces himself, duck into the room on the right to find a pistol and an Interoffice Memo. Climb the stairs in the next room and grab the ammo box near the window. Head back down and venture through the door on the left that Jack opens.
Search for the Data on the Locust Stronghold
Look for a shotgun in the small room dead-ahead, then continue down the staircase. Bust through the door on the right and activate the security system by the window looking into a room full of wretches. Violence! With the wretches down, it's now safe for you to go through that room (via the door on the other end of the hall), just make sure to deactivate the security system first!
Duck into the sub-room on the left if you want a rifle, otherwise continue through the corridor. You'll reach another junction—head left and quickly duck into the side-room for some grenades and a switch that deactivates security, then go right down the other side of the hall.
Enter the first door on the right and bust through a second to find a Memo on the floor, by the third door. Return to the hall and keep going right. Duck into the next room for some ammo and continue on. Up ahead is another security turret—duck behind the cabinet in front of it and wait for its flashlight to pass over to the right. Immediatly run up the next cabinet and wait for its light to pass over to the left—as soon as it does, roll into the room on the right.
Don't bother with the security panel on the left—continue through either door ahead and get ready to melee some more wretches. Afterward, you'll find the other half of this room contains two more turrets, this time equipped with flame-throwers. To get across, position yourself on the right side of the room then just blow past of them quickly—that's it! You can now deactivate them via the panel, otherwise continue into the hall ahead.
Head right to the corner—there more turrets await on the other side. Wait for the one sweeping horizontally to face the left wall, then bus through the door across the hall to enter the shower room. Exit through the other door and deactivate the security via a panel on the left, allowing Dom to rejoin you. Now continue through the hall and bust through a door that leads back outside.
Crack open a couple more wretch skulls then venture down into the courtyard and up the right staircase—be ready for that door to burst open as you approach as more wretches are going to attack. Go inside and down the hall. Another security turret is around the corner—wait for it to scan right, then enter the room on the left for some ammo and a switch to deactivate it. Now enter the room across the hall into the kitchen and get ready to kill more wretches.
Sneak past both turrets here and escape back into the hall. Deactivate the security via the panel on the left then continue down the hall to the right. You'll eventually reach a room with two more turrets; stick to the perimeter, but don't deactivate security via the panel yet, as it'll help take down a horde of wretches about to flood in. Melee the remainders, then deactivate the security. Check out the adjacent side-room for some ammo and a New Hope Medical File.
Proceed into the room ahead (with more security—go figure) and proceed past them into the hall on the right. Now check the passage behind the turrets for an ammo box, then continue into the corridor leading to a stairwell. Shortly after you run into another message of Niles, get your melee arm ready for more wretches about to storm your way. Now run straight down the hall, past all of the security turrets, then proceed past the gate that Jack unlocks.
After climbing down the stairs, you'll have to choose between one of two routes: Turret Controls or Laser Bait. Both are incredibly easy, with perhaps a slight nod going to the Turret route, since it's impossible to die. If you do choose the turret route, simply deactivate the security turrets one at a time so Dom can quite. Likewise, if you choose the laser bait route, simply cross past the security as Dom deactivates 'em—easy! In either case, activate the panel at the end to continue into the next room.
Venture around the stasis chambers in the center and continue through the hall and up a staircase into a computer room. After Jack begins to hack the database, pull the lever in the room's center.
Gathering Storm - Rude Awakenings
Return to the Centaur
Uh-oh, you've awakened something and it doesn't sound good. Go through the open door and into the stasis chamber. A short ways in, something called a "Sires" will burst from the chamber. Because of how close he is, simply melee or chainsaw him to death (or use the flamethrower if you have it, which is particularly effective). Around a few more corners, two more will pop out—treat them the same way. Finally, one more pair will burst through the gate as you try to exit (there's some ammo to the right, as well).
This next room is a bit trickier, because they attack a bit more frequently and unexpectedly. Stick to the perimeter of the room and move very slowly, as your proximity to the tubes seems to dictate when the enemies pop-out. Work your way to the door in the back (where you'll also find additional ammo and a flamethrower, to the left).
Hang by the entrance leading into the next room, as it'll force the enemies to come at you head-on, giving you plenty of time to take them down. Chill here for a while, as there's a lot of them. Once things have quieted down, go through the room toward the backdoor (but be ready in case another Sires or two pops out). Also, you may want to explore the room's left side for an ammo box. Once you're ready, turn the wheel by the exit to escape.
Proceed down the short staircase and turn up the corridor to flip the switch at the end, which will power Niles off for once and all. Now proceed through the open door and up the staircase. So here's the deal: Shortly after you enter the next room, several Locusts equipped with flamethrowers will run in. But there's a super easy way to beat them! As soon as you enter, dart into the security room on the right and activate the panel to reengage the turrets—these should heavily damage, if not kill your opponents (there's some ammo you can grab here too). Now take cover by the box just outside the room to target the remaining enemies. Just don't forget to deactivate the security before exiting the room!
As you enter the next room, more Locust will appear. Take cover to either side of the hole and shoot them through it. Once clear, proceed through the door closest to the hole and take cover at the corner to shoot the enemies across the hall—move up to the low wall ahead if you're having trouble targeting them. Once clear, enter the room at the end of the hall to deactivate the turret, then jump over the low wall and continue down the hall to the left.
Look for an ammo box in a small room on the left, then take cover at the next corner to shoot a couple of enemies beyond. After passing through a set of doors, use the next corner for cover, as more enemies await just around it. Afterward, look for some grenades in the nearby room and continue onward to the next room.
Avoid the Razorhail
As you enter the next room, a boomer and several other locusts will pop in from the opposite side. Seek cover behind the desk ahead and just wait—that's right, don't even bother shooting them. Eventually, the glass ceiling will collapse, exposing them to razorhail (more like razorhell, am I right?) which should take them out. Make sure you avoid stepping into the center of the room, as it will kill you too. Now exit through the far door.
So here's the deal: You want to work your way to the train car on the left which will provide shelter from the razorhail, but how do you get there? Simple—as long as you run, you can sustain the hail for very short durations. But before we worry about that train, run into the shack on the right to find a Doctor's Journal. Now dart to the shack on the other side, grab the ammo, then take cover on either side of the door to kill the enemy inside YOUR train car—what a jerk! ONce it's clear, dash over to the train car and hop in.
Pull the break-release on the left to get this baby rolling, then take residence by the windows and kill the locusts that appear. Get off the train when it comes to a stop and seek cover behind the concrete barriers ahead to kill more fools that emerge. Now go down the ramp on the right, hop through the traincar, and follow the path to a door you should take cover to on either side, as there's a sniper up ahead. When it's clear, head inside and open the door on the left, then take cover behind the concrete barrier as you blast the enemies on the platform ahead.
Once it's clear, venture back into the previous room, hop the nearby barrier and open another door. Now head outside, jump the barrier on the right, and open a third door. Go through, follow the walkway to another opening, then dart through the hail to the overhang across the way. Skip the triancar for now and dart through the razorhail again to find some ammo inside the building. Now hop into the traincar, relese the brake, and take cover by the nearby window. This time you'll face enemies on both sides—of most importance is a Boomer on the right side (that is, if you're facing the lever), and then a large creature out the other window. Keep your head down as much as you can.
When the train stops, make sure it's clear, then get off and climb the ladder on the left. Continue through the walkway, and quickly run cross the razorhail portion to the building beyond. Take cover at the cincrete pillar and kill the enemies beyond. Once clear, dart across to the next building, and do the same (take cover by concrete barrier and shoot).
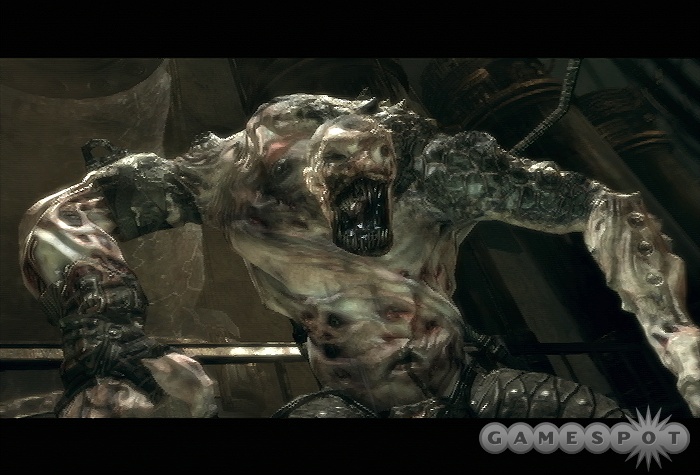
Defeat the Mauler Boomers
You'll soon have to tackle some Mauler Boomers. As soon as they appear, retreat to the the previous building to give you enough room (and time) to shoot them dead. Once they're down, you can actually grab their shields and use them for cover—sweet! With the Boomers down, the razorhail will cease, and it'll be time to return to the Cenataur. Continue across the field and prepare to tackle a few drones. If you have the Boomer's shield, there's no need to worry about cover—you have it already! If not, use the concrete barriers for cover, like before.
Defend Baird While he Repirs the Cenataur
Once you reach the Cenataur, two Ravers will fly in. Now there really isn't an optimal place for cover from these guys, but because the field is so huge, simply back away from them and shoot. You can also try hanging around inside the sheltered area; while they'll still come after you, they seem to get hung up on the barriers. Once both are down, return to the Cenataur to complete the level.
Gathering Storm - Ascension
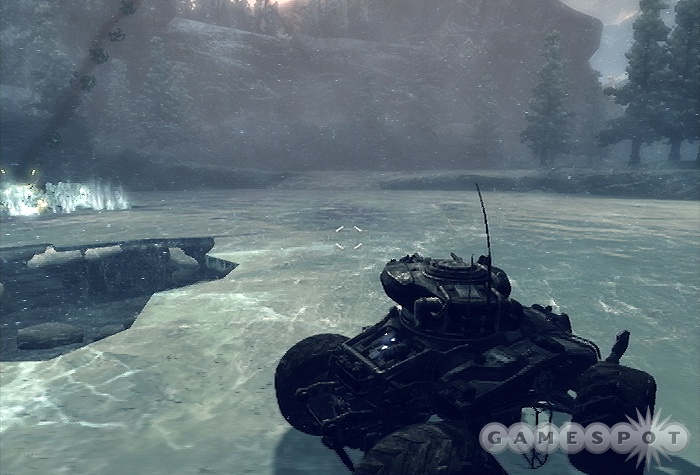
Find the Road to Mount Kadar
Pretty sweet ride, huh? So if you've ever played any of the Halos before, the controls should be pretty familiar. Essentially, your vehicle goes wherever you're you point the camera—the left stick controls speed while the right stick moves the camera (which your turret also follows). You can fire your turret with the right-trigger, and "A" activates a speed boost. Up to speed? Good—let's roll!
Right off the bat, you'll come across a fork in the road. For now, let's focus on the left path.
-Left Path
Follow the road up to the barricade, but leave it intact (it's good protection). Peek around the right support beam and target a gunner to the right, then focus on the drones (be prepared for a few to run around the barricade and attack from behind). Prepare for a Reaver to roll in a few moments later. Once clear, continue onward and over a ramp and down to a base on the left. As soon as it comes into view, back up a short distance so you're out of range of a gunner on the roof, allowing you to safley target the drones heading your way. Once they're down, take down the gunner and drive through the base.
Up ahead are more drones and a Reaver. Once you see them, backup a few meters for protection and blast the drones as they come around the corner, which will then allow you to easily target the Reaver. Prepare for a gunner on the right, just before the next barricade. Now there's a pretty big jump coming up, and you're going to have to lay on the turbo in order to clear it!
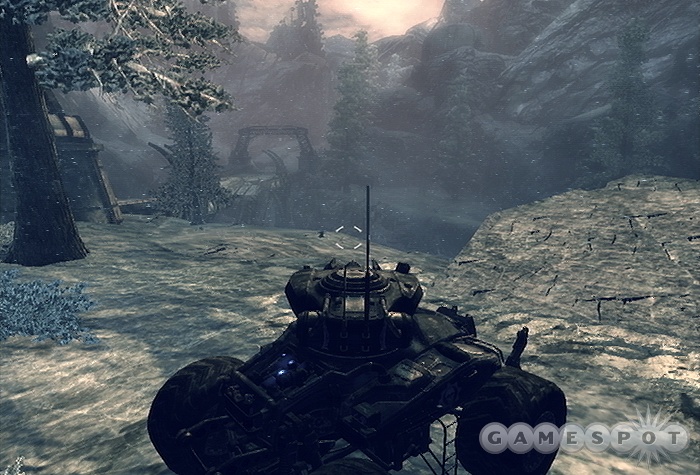
Cross the Frozen Lakes
After the jump, you'll have to cross several frozen lakes, which will soon come under bombardment from mortars that create giant holes you'll have to avoid. Luckily, it's pretty damn easy. Simply take it slow and veer around the holes as they appear. Once on the other side, head right and prepare to tackle a pair of reavers, before crossing another lake. This second lake is a bit tricker, so again, take it slow, but prepare to tackle a couple more reavers who touch down on the other side. Once across the lake, prepare for a few enemies to emerge from the trees on the right, as well as some Reavers from down the street to the left.
Continue up Mount Kadar
Once clear, you'll have to choose between two paths again. The road ahead or the one to the left (where the Reavers came from).
-Left Path
You'll soon come across another base, where a horde of drones will flood from—they shouldn't pose much trouble. But prepare to tackle a few Reavers a bit further up the road. As you turn a corner, Dom will point out some Seeders high up on a ridge dead-ahead. Don't even try to shoot them from the street, as you're a huge target. Instead, back up a ways and attack from behind the cover of the trees on the right—although it may be difficult to actually see the Seeders, you can find them quickly by zooming in (left trigger) and surveying the area until your cursor turns red, indicating you're aiming right at them! Afterward, push forward along the street until you reach a bridge…
Find Another Way Across the Chasm
…or what's left of it. Looks like you're going to have to find another way across. Head into the snowy bank on the right to find a rocky ramp—yeah, you know what to do. Boost up it to shoot across the chasm.
Ascend Mount Kadar
Continue your trek up the mountain, but prepare for two Reavers to drop in ahead. A third will make an aerial pass soon after, but don't worry about him. Instead, get ready for a fourth on cliff-ledge to the right.
Destroy the Locust Outpost
As soon as the Outpost comes into view (in the canyon below), tackle a Reaver to the right, then focus your efforts toward the enemies running around the base—you should be able to kill several before they start heading your way. Soon after, you'll come under fire from a couple of gunners in in the windows of a left building—target them quickly, then focus your shots onto the nearby tower (that's right, the tower itself), where a couple of rocket-launchers reside. It'll collapse after a few shots, taking the enemies inside down with it. Once the area's clear, head on down and continue into the cave.
Search the Cave Network for the Locust Stronghold
After Marcus turns the headlights on, a corpser will appear…but won't do much of anything. In fact, you have quite a ways to go before anything of importance happens, so enjoy the ride. Oh, and don't be afraid of driving off the ledges when there's seemingly no where else to go.
After the third drop-off, your vehicle will begin to have some electrical problems at a very bad time, as three corpsers are about to surround you. As soon as power is restored, immediately target the three corpsers, starting with the one on the far right and working your way left (since they open up and become vulnerable in that order)—a shot each should do the trick. Oh, and try to do it quickly, otherwise it's Game Over.
Kill the Brumaks
After the next drop-off, you'll have to tackle three Brumaks! THREE! Hug the left wall and drive forward—look for the first coming your way from the right. If you're quick, you should be able to kill him before the other two close in. The remaining two will come from the center and to the left. Your best bet is to focus on one at a time, while backing up to avoid their fire.
Gathering Storm - Displacement
Find a Route to Nexus
After descending the long ramp, you'll come across an archer on the bridge. Duck into the tunnel to the right and take cover by the exit for a good vantage point to take him down—just make sure not to get hit by the arrow.
With the archer down, look for some grenades behind a pillar to the left, then take the lower path to find some ammo. As you enter the destroyed ruins ahead, take cover behind the first wall on the left. A gunboat will soon circle the water to your left, but don't worry about it yet. Instead, focus on the enemies that flood in ahead. Push forward slowly whenever the coast is clear and prepare for a few wretches.
Climb the destroyed structure in the center, then take cover behind one of the low walls on the far side overlooking the other half of the field. This should keep you at a relatively safe distance from the battle, while providing a great vantage point. Just be prepared for a few Tickers to come screamin' your way.
Disable the Gunboat
As you're shooting the enemies, the gunboat will come to a stop in the waters ahead. Target the yellow explosive cannisters on either side of the boat to destroy it. With the area cleared, head up the stairs to the right for some grenades and Stranded's Journal (in front of an alter), then head the opposite way to find ammo along the waterfront.
Get to the Boat at the End of the Pier
Cross over the gunboat's carcass to reach the other side, where you'll battle a boat-load of enemies (get it—they came from a boat? Never mind). Immediately seek cover behind the wall to the right, inside the archway. Stay here at least until the Gunboat to your left takes off (after about 30 seconds or so). Once the gunboat's gone, feel free to move up to the pillar ahead for a better vantage point to tackle the enemies beyond. Once clear, grab the boxof ammo ahead, then push forward to the next section.
Just as you pass the waterfall, a mount will emerge from the structure ahead. Take cover behind the closest wall, then open fire—you should be able to kill it before it gets close. Grab another ammo box ahead then seek cover behind the nearby pillar to tackle the enemies in the structure ahead. When done, head on through to reach the pier.
After stepping foot onto the pier, take cover behind either a pillar or low wall a short ways in and prepare to tackle more enemies dropped off by a gunboat. There are quite a few places for cover, so move forward if you must for a better vantage point. Once you've cleared the pier, continue onward to the boat!
Defend the Raft
Aw crap. You're now stuck adrift on a makeshift raft while a gunboat attacks—swell! Because the gunship roams around, you're going to have to switch cover positions a few times to ensure you keep something between you and them. However, because this sequence lasts a set amount of time, there's no need to even bother shooting the enemies, so save your ammo. Just make sure to stay behind cover at all times, especially when the second gunship shows up—don't bother shooting it either. After a few moments, both ships will take off, leaving you to be…for the time being.
Board the Enemy Gunboat
After you see the giant creature swim by, get ready for another gunboat to crash right into you. Take down the lone enemy fast, then hop aboard before your raft sinks!
Defend the Gunboat
Your troubles aren't over yet…but they might as well be, because there's an incredibly easy way to beat this section. Simply take cover between the two stacks of boxes near the turret and chill here. Although numerous gunboats will swarm in and attack, none will be able to touch you in this location (though to be extra safe, put your back to the box stack closest to the gunship)! And even better, since this sequence also lasts a set amount of time, there's no point in even shooting them. So hang tight and ride it out.
Gathering Storm - Brackish Waters
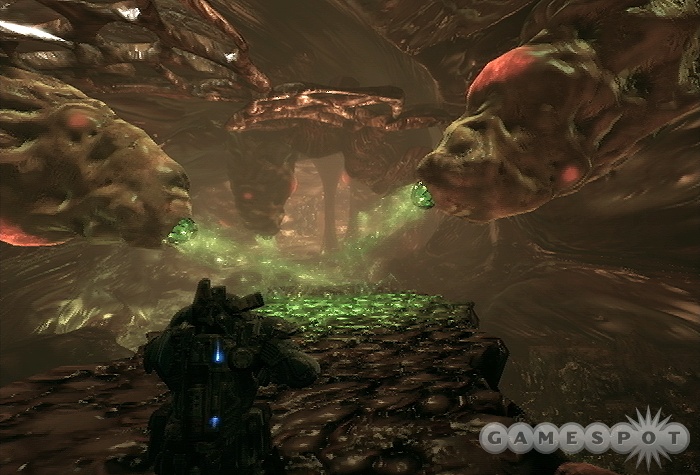
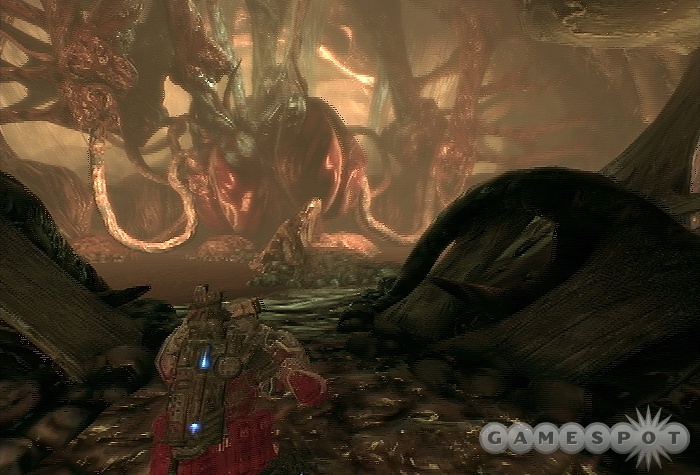
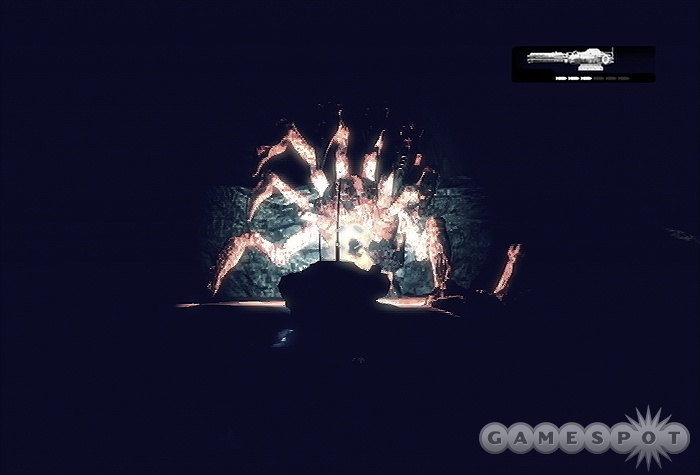
Defeat the Monster
First a giant worm, and now a giant fish? What's next, Godzilla? There's several steps to this fight, but ultimately you're going to have to take him down from the inside. Anyway, during the first part of the battle, the monster's tentacles will grasp onto the ship and attempt to drag it down—make sure to avoid them as they latch on (standing to either extreme of the ship should do the trick), then quickly run up and chainsaw them loose.
Once you've dislodged three tentacles, stand back from the flat side of the boat, as the fish is about to chomp down! Shoot him in the left eye when it opens to knock him loose. Do this once more to cause his mouth to open—quickly run inside! Now you'll spot six tentacles ahead, and you're going to have to shoot three to get to the next step. However, only one tentacle is vulnerable at a time: the blue one that's wiggling around. After shooting it, another tentacle will become active—shoot it too. After shooting three tentacles, the weird thing in the back of the fish's throat will begin convulsing—toss a grenade inside it to finally deal this fish some damage!
Repeat this process two more times to do him in for good. Oh, and if you run low on grenades, more can be found scattered around the boat.
Hive - Priorities
Find the Highway to Nexus
Ahh, dry land; it's about time! Simply follow the path through the temple to find the highway and complete this objective.
Help Dom with the Labor Camp
Follow Dom to the lift and ride it up a floor. Follow the path to a second lift and ride it back down to find a room filled with water. Interact with the wheel on the left to stop the waterflow, then jump over the barrier. Unfortantley, a swarm of enemies are about to storm in from the other side, one of whom will attempt to reopen the floodgates by turning a wheel on the left. Aim for him first! If you don't, you can say sayonara. Once he's down, take cover behind one of the barriers and take your time picking off the rest (don't worry, they won't go for the wheel!). Once clear, continue across to a lift, which will take you deeper underground.
After stepping off the lift, look for a sniper and some ammo just ahead, then head downstairs. As you enter the field, several wretches will flood in, as well as a single Mauler Boomer from the right. Since he's slow, focus on the wretches first. You may want to consider backing up the stairwell you just came down to give you even more time to target the Boomer. Aim for his limbs if he's shielding himself, or toss a grenade to take care of him quickly. Once clear, you may want to consider grabbing his shield for the next section, then look for some ammo and grenades on the left side of the field and head for the bridge.
As you step foot onto the bridge, numerous enemies will appear on the other side, including a couple of gunners: one dead-ahead, the other on the left. If you didn't grab the shield from the Boomer, seek cover behind the first barrier and aim from here. Use grenades or the sniper rifle to take care of the turrets, or if you have the shield, get up close and personal (assuming everyone else is dead). Afterward, climb the stairs on the right for some ammo, then the ones on the left to find a Locust Terminal lying on the ground. Now interact with the nearby yellow terminal to search for Maria in the database.
Check the Terminals for the Matching Locust Symbol
This next section is pretty straight-forward. Just follow Dom, taking cover when he does to avoid the patrols, and check the terminals along the way. When you reach the second terminal, check the left corner to find a Prisoner's Journal. After the first four terminals turn out to be duds, you'll finally find what you're looking for at the 5th one.
Defend Jack While He Scans the Containers
Unfortunately, the enemies will be alerted to your presence after interacting with the 5th terminal and will attack in multiple waves—great. The first wave attacks from the far end (opposite the terminal) and includes a Mount as well as some wretches. We strongly suggest running left (where you came from originally) and taking cover behind the first barrier. This will keep you a little ways from the battle, giving you plenty of time to take down the mount—ignore the wretches until after the mount is defeated. As soon as he's down, run back to the terminal and take cover by the nearest wall (this will serve as your cover position for the remainder of the battle), as the next wave is going to attack from the left (behind where you just were, hence why you needed to get out of there!). The second wave includes another mount, so focus on him. Prepare for a third wave to attack from the other direction (where the first wave came from), this one including a Boomer—focus your efforts on him. Finally, the final wave will attack from the left again and includes multiple archers. Take your time with these guys, and attack only when you can't see the glow of their arrows.
Hive - Hornet's Nest
Find Your Way to the Palace
Grab some ammo from the far corner then proceed down the staircase. Turn right and follow the path to find a Locust Jailer Document on the ground. The path will soon lead you to a door you can bust through. After the cutscene, take cover behind the railing and shoot what enemies you can from here, but be careful of a sneaky archer in the tower far ahead. Once you've dropped a few foes, run down the stairs and take cover in by the wall, next to the ammo box. Move along this wall to target, or take cover, from the enemies on the walkway above. Also, be sure to take down that archer in the tower. Once clear, grab the ammo from the half-circle, then climb the stairs leading into the tower and activate the switch there.
However, as soon as you flip that switch, several enemies will attack, including a few with flamethrower. Immediately exit the switch room and take cover on the walkway, to the left. From this position, you have a clear view of the court below, as well as the stairwell, so you can keep tabs on any enemies coming your way. Once they're dead, return to the courtyard and continue down a hallway behind the tower.
Grab the ammo along the way, then take cover behind the first low-wall to tackle the enemies ahead, including a mount! Push forward to the wall just ahead to tackle a few more enemies. Get ready for another enemy to appear just before you enter the building ahead. When inside, head down the spiral staircase for a couple of grenades, then exit out the other side. Quickly take cover behind the barricade and flip the switch to cause more cover points to rise. We suggest taking cover in the front row and shooting the enemies beyond. But get ready to focus your efforts on an enemy on a ledge to the right who'll lower your cover if left unchecked.
A Reaver will soon join the fray—as soon as you see him, run back into the building you just came from and attack him from here. Since he can't fit through the door, he'll just hang around awkwardly outside, making him an easy target. Once he's down, return to your place of cover outside, then down any remaining enemies. As you get closer to the large door, two boomers will appear. Take cover anywhere and target them whenever you get a chance. Once clear, head inside the palace.
Find a Suitable Place for Jack to Call for Reinforcements
Inside the Palace, check a short hall on the right for some grenades, then take cover by the room's exit to target the enemies outside. Once the inital batch of foes are down, work your way from trench to trench, targeting the enemies beyond. With the room cleared, climb the staircase in the back.
After climbing the stairs, check out the room at the very end of this hall for some ammo and grenades, then proceed back to the door you just skipped past. Step a few feet into the next room to trigger the enemies, then step back into the hall and take cover on either side of the door to target the enemies on the walkway above. Oh, and be ready for a couple of boomers to come walking your way—the shotgun (if you have it) will make short work of them. Once clear, follow the walkway back outside.
Protect Jack While he is Transmitting Your Position
Back outside, flip the switch ahead to raise some cover points, then dart up the stairs and take cover behind the closest one to shoot the enemies beyond. Once clear, Jack will begin to call for reinforcements, but you'll be ambushed by more enemies. Immediately flip the nearby switch to raise more cover and take cover by the wall ahead. Once you've cleared out the immediate enemies, two Reavers will pay you a visit, one after another. We found the best way to tackle them was to backtrack to the door you came through and shoot them through it for an easy victory. Once both are down, a gate will open back in the courtyard, revealing an enemy armed with a mortar. Keep an eye on the sky to avoid it landing on you, then take him down. Now flip the switch nearby and watch as your COG friends join the battle.
Clear Surrounding Area for COG Reinforcements
As soon as you flip the aforementioned switch, the wall to your left will drop revealing more enemies, including mortar launching baddie. We'll be honest, this next sequence can be incredibly difficult and may take you numerous tries. If you have a long-range weapon, seek cover behind a pillar against the left wall, as it's outside the mortar's range. If not, you're going to have to pray you don't get hit by one as you mow the enemies down from behind cover (make sure to flip that switch to raise the cover points)—anytime you see a mortar launched, move to a cover point on the opposite side to avoid the resulting storm of fire. Try tossing a grenade at the mortar's location, you may just get lucky.
Once you've cleared that first area, a second wall will drop to the left, revealing more enemies and another damn mortar! Raise more cover points by triggering the switch in the corner, then work your way up to a second switch (which you should also activate to raise more) right in front of a barrier. If you have more grenades, now's the time to toss to hopefully take out that second Mortar. Once clear, a third wall will drop revealing Tickers and Boomers. It's best to run back to the first area and peek around the angled wall to target the Boomers. With the area cleared, proceed up the staircase in the back to a door, but make sure to grab the ammo and grenades from just in front of it.
Hive - No Turning Back
Protect Cable Cars from Reavers
As you ride the cable car across the chasm, you're going to have to shoot down several Reavers. Take cover behind the left railing (assuming the front is the direction the cable car's going) and shoot them down as they fly into view—it's not too hard. Soon after, a second cable car will approach along the left; kill the enemies on board from your cover point.
Board the Other Cable Car Before Yours Falls
When the second car aligns itself with yours, quickly hop aboard before yours falls away, then activate the switch in the corner to get it started. Now take cover along the right side and shoot down a couple more Reavers that attack.
Find a Way into the Queen's Palace
After disembarking from the Cable Car, head through the large doorway and look for some ammo behind the stairwell before climbing it. At the top, look for a Locust Calendar on a podium to the left. Continue down a staircase and head left to find some ammo and grenades. Take cover behind this railing and shoot the enemies across the way. Once done, head over there and look for some ammo just behind the barriers, then continue along the path to find a switch. Flip it to be given the choice of two paths: Stairwell or Life with Troika Turret.
-Stairwell
Climb down the stairs and take cover at the first barricade at the base to shoot the enemies beyond. Once clear, continue on and head right to find the first of two Lift Control switches. Activate it, then prepare for a couple tickers to come at you from the stairs, which you should then descend. Take cover at the base and shoot any remaining enemies below, then head toward the lift and turn right to find the second Lift Control switch. Once activated, continue down another staircase and take cover at the base again to shoot the few enemies below. Once clear, the nearby doors will open, allowing you to regroup with your squad.
Continue down the staircase and into the next room, where another battle awaits. Head down the stairs on the left and take cover behind the railing—the boomers below will have a hard time targeting you here. Once you've cleared the room, activate the nearby switch then cross the bridge on the other side of the room. There, you'll find a room containing ammo, the Locust Defense Plans, as well as another switch. Activate it to cause a stairwell to emerge right by the bridge—take it down to watch a cutscene.
After the cinema, immediately take cover behind the barrier by the stairs and kill the two grinders beyond. Once they're down, get ready for an enemy to pop out of a door along the left wall. After killing him, head on through and down the stairs. Take cover by the railing overlooking a battle below and kill them from here. Head on down to tackle the last remaining foes in the next room, then continue through the door into the next room.
As you enter the next area, a lift will rise bringing several enemies with it. Dash back to the previous room and take cover by the doorway and shoot the enemies through it. Once clear, you'll automatically board the lift in a cutscene.
Hive - The Best Laid Plans
Enter the Palace
Once off the lift, climb the stairs ahead and check for some ammo to the left. Now as you try and enter the palace, you'll find yourself surrounded by enemies in the windows, who'll raise and lower your cover on a whim. Don't even bother with them--instead, quickly retreat down the first flight of stairs and follow a walkway around the building to trigger a checkpoint and the next objective. It's almost too easy.
Find an Alternate Entrance into the Palace
As you work your way around the palace, look for some ammo on the lower walkway. You'll soon come across some enemies--take cover by the right wall. A few more will emerge from a lift on the left--seek cover behind any of the walls, though the further away you are, the better. Once clear, skip past the lift briefly to find some ammo and weapons beyond, then ride it down
Make Your Way Toward the Bottom of the Palace
Flip the switch at the end of the hall lined with cells to be offered two paths: an Upper one, or the Lower one. The upper path is defintley easier, but the lower one gives you a chance to grab a Boomer Shield, which can always be handy.
-Upper Path
Climb the stairs to the window and shoot the enemies bothering your friends below. Thankfully, most of them won't pay any attention to you, though you can always retreat into the hall if you need a breather.
-Lower Path
Seek cover by the first group of pillars and blast the enemies from here, though you may have to move up a bit to cause a Mount to appear.
After regrouping with your squad, you'll come across two paths: One leading down, the other up. Head up the stairs first to find some ammo and a Trinity of Worms Artifact at the end, then take the other route down a spiraling staircase. Look for a couple of ammo boxes on the platform to the left, then continue downward. You'll soon face heavy resistance as you continue down the stairs, including archers and tickers. Take it slow and use the columns on the left side for maximum cover.
When you reach the room at the base, stay inside the doorway for protection, as well as a great vantage point.
Hive - Royal Inquisition
Make Your Way Toward the Bottom of the Palace
Grab the ammo and grenades, then continue up the stairs to a large balcony. Look for Locust Tablets along the left wall, then interact with the switch along the railing to choose between two paths: Left Hall or Right Hall. Not that is matter, since both are pretty much identical. Regardless of which route you choose, proceed slowly, taking cover early and often--only proceed when it's safe and keep your distance from the enemies. Also, we strongly advice grabbing the Boomer's shield after he drops it, as it can be a huge help. Watch out for a few archers in the final section, then ride the lift in the back down a floor.
Search the Bottom Level of the Palace and Locate the Queen
Finally, you're on the bottom level. Now as soon as you enter the room ahead, numerous enemies will flood in. Take cover by the entryway (where you got off the lift) for a safe place to take 'em down. As you proceed through the room, you'll face two more large-scale battle. For the first, take cover behind the first low wall. For the second, seek shelter behind the pillar on the left side of the room. Once you've wrapped things up, collect the ammo from the fallen enemies (since you're likely low) then continue onward.
It's a trap! Now you're stuck on this platform, battling wave after wave of enemies that spawn from the sides. However, there's a wheel on the central column that can raise this platform back to the level above. In fact, if you start turning that wheel right at the start, you should have enough time to escape without having to battle the enemies--score!
Gain Access to the Throne Room
Before continuing, grab as much ammo as you need from the two ammo boxes that constantly respawn. When you're ready, climb the stairs and continue through the door, leading to a battle with Skorge.
Defeat Skorge
Essentially, all you have to do is avoid Skorge's attacks, then wait for him to engage you in a chainsaw duel--beat him 3 times to send him running home to mommy. Although there's no need to shoot Skorge, you will have to take evasive action throughout the battle.
From the get-go, he'll engage you in the first of three chainsaw duels--hammer away on the melee button to beat him. Now take cover behind the walls to the right while he runs around on the far ledge. From this point, it's a simple matter of avoiding his attacks. Shoot the tickers that appear, then roll to an adjacent wall when he tosses a smoke grenade. Soon after, he'll begin to drop rocks from the ceiling--you can tell where they'll land by the falling rubble. Roll out of the way. He'll soon try to chainsaw a pillar and knock it onto you--simply roll away just before it hits. Oh, and whenever the cover is lowered, simply stand on the switch in the center to re-raise it. After you've evaded enough of his attacks, he'll run in for more chainsaw duels--beat these to take him down.
Pursue the Locust Queen
With Skorge having ran away, climb the staircase on either side of the queen's thrown to regroup with your squad outside.
Cross the Bridge to get to the Reaver Pens
After regrouping, simply run across the bridge at full-speed to avoid the attack Reaver.
Aftermath - Escape
Escape from Nexus
Who would have ever thought you'd have the chance to ride a Reaver? So the controls are pretty basic: Right Trigger shoots, Left Zooms, Right Bumper cools down your gun, and X turns you 180 degrees (you'll also use a different weapon when facing the rear). Although your flight path is preset, you can move the Reaver around the screen with the control stick--this is how you evade rockets. For this first portion, simply face forward and shoot whatever comes your way.
Defend Your Fellow Gears
After landing, help out the fellow Gears by shooting the roaming enemies. Once clear, prepare for a Brumak to bust through the wall on the left--lay into him quickly.
Fight off the Hydra while Cole look for an Exit
When fighting the Hydra, make sure you're facing behind you at all times. Now there's not a whole lot to this battle: Move around to avoid the inbound rockets, target the turret on top of the Hydra whenever it's activated, and shoot the Hydra in the mouth whenever it gets close. Rinse and repeat.
Ride the Reavers into Jacinto
There's not a whole lot to say, or do, during this segment. Just face backwards the entire way and open fire on the attack reavers. We found moving around spastically to help avoid the incoming fire.
Take Down the Hydra
It's that darn Hydra again. The basics remain the same: Avoid the rockets. However, he's got a few new tricks up his sleeve. First and foremost, he'll sometimes fly around the front and attempt to ram into you--fire a rocket into his ugly face to stop him in his tracks. His second trick is that he'll sometimes grab you from behind--simply shoot the offending arm to be freed. And that's pretty much it--he'll perish after the 3rd rocket to the face.
Aftermath - Desperate Stand
Take Position on the Outer Perimeter
From the outset, a Reaver will begin attacking--thankfully, your fellow Gears will make short work of him. Look for some ammo just down the stairs to the right, then follow your squad up a staircase and around the corner (look for some more ammo just at the top of the stairs).
Clear the Landing Platform of Enemy Forces
Simply take cover behind the railing and shoot the enemies on the landing platform below--it's really quite easy.
Move to the West Gates and Support the Other Gears
Follow the walkway, but make a detour down the next staircase to find some ammo as well as a CoG Recon Report. Continue onward and take cover near the concrete barriers to battle a few more foes beyond.
Defend the Street Entrance to Courtyard
As you enter into the parking garage, check an alcove on the left for ammo, grenades, as well as a mobile turret--use it along the railing to massacre the enemy forces below. There's a lot of them, but as long as you take cover whenever you take heavy damage, it shouldn't be a problem.
Move to the North Gates and Defend the other Gears
With the courtyard cleared, head across the bridge then up the stairs to find a balcony with two turrets.
Defend the Comm-Sat Array by Destroying 3 Reavers
Grab hold of either turret and lay waste to the 3 Reavers flying around. They shouldn't post much of a threat, but remember to use first-person view for better accuracy. With all 3 destroyed, continue down the staircase, grab the ammo, then continue through the gate the Sargent opens.
Defend the North Gates
Okay, so there's a ton of enemies below, but you've have quite a few weapons at your disposal--look for a turret or a mortar on the walkway (we suggest the former). Now take it to the lower deck and blast the enemies from here. Once you've cleared 'em out, two Brumaks will roll on in. Seek cover behind a pillar to avoid their fire and shoot them whenever you get a chance. Even though it may appear your ordinary guns would be ineffective, they will get the job done just fine, so there's no need to rely on the pesky mortar. Once they're down, grab the ammo scattered about and check for a Cog Tag down the furthest staircase, near the railing.
Aftermath - Free Parking
Clear the Archives Building of Enemies
Take cover behind the large steel barricade just in front of you and make this your operations base as you target the enemies to the left, right, and some snipers on the balcony above. If you have the sniper rifle, now's a good time to make use of it. Also, instead of peeking around the corner, sometimes it's best to back a foot or two away from the wall and target the enemies without using the cover system--this will give you a greater vantage point while keeping you out of view of the snipers. Once most of the enemies are down, two flamethrowing-equipped baddies will start heading your way: One from the left, the other from the right. They're slow, but you should try to kill them quickly to ensure they don't get close.
Once the area's cleared, you have the choice of entering the Archive via an entryway on the left and right. The right route is quite a bit easier, both due to the room's layout, but also since Dom will be at your side.
-Left Route
Be careful as you enter the first room, as it contains both a flamethrower and a sniper. Keep back in either corner and try to take them down from here; retreat outside if you need to regain health. After killing both, push forward to a box just before the next room and use it for cover--move up to the box ahead to target the enemies that descend the stairs on the right. And watch out for tickers! Once clear, head through the door.
-Right Route
Be careful as you enter the first room, as it contains both a flamethrower and a sniper. Climb the stairs afterward and take cover by the railing to target the enemies in the room below, but be ready for a couple of tickers to find their way up to you. Once clear, head down the stairs and through the door.
Secure the Courtyard
Back outside, grab some ammo from the left, then take cover behind the railing on the extended section of the balcony and target the foes from here. You may have to head into the courtyard to trigger some more foes, then quickly retreat back to your point of cover. Prepare for a few Mauler Boomers and Blood Mounts to come your way. When finished, enter the hall on the far side and turn the wheels to raise the gate and continue.
Proceed Down Cooper Street
Run down the stairs and take cover at the first concrete barrier. Once clear, check for some grenades up another staircase to the left, and some ammo near a barrier. As you pass through a fence, look for a Jacinto Sentinel Newspaper behind a barrier to the right. Soon after, you'll be given the choice of two paths: Streets or Garage. The latter is, by far, the easier of the two.
-Streets
Take cover behind the first concret barrier, then shoot a large gas cannister alongside the left building to kill all the enemies inside. Run there and take cover by the windows to tackle the enemies further up the street. Afterward, step a foot or two outside to trigger a Reaver, than dash back inside. Chill here until the Reaver takes off of his own accord. Now you may want to start working your way up the street, car to car, until you reach another concrete barrier. Take cover and then target another gas cannister by the parking garage to kill most of the enemies ahead.
-Garage
Look for some ammo upstairs, then prepare to take cover behind the first concrete barrier as you enter the garage proper. Take down the enemies on the other side of the chain link fence, then hop the barrier on the left and push the car if you want to give your partner some cover below. Now work your way to the back and climb down the ramp to regroup with Dom.
After regrouping, take cover and prepare for some enemies to jump a barricade on the left, then get ready for a Grinder ahead. Take cover at the car just before the corner to target a few more drones, then stay here as you battle a Reaver--so long as you don't move, he won't be able to get at you. Afterward, take cover by the nearby concrete barrier to target the remaining stragglers, then push forward up the street. After passing through a destroyed building, check inside a small room on the left for a CoG Tag.
Aftermath - Tenuous Footing
Use the Cranes to Cross the Chasm
Hop into the sinkhole, grab the ammo along the ledge, then hop into the crane downhill. Controlling the crane is easy, as the left stick is all you'll need. Use the crane to pick up Dom by lowering the platform and moving it left. Once he's aboard, carry him as far right as it'll go, then lower him into the ground. Now it's your turn to cross--take cover by the crane and wait for Dom to work his magic. Once the tower drops, forming a bridge, run over to the other side.
Make it to the Bottom of the Sinkhole
After crossing over to Dom, take cover by the railing to blast the enemies below. Once clear, head down the ramp and take cover by the low wall to blast a few more enemies that appear. When you finally drop to the lower level, get ready to tackle a Mauler Boomer that appears from the far side, though you should have more than enough time to kill him before he can get close. Soon after, a Reaver will drop in--it's best to tackle him from the cover point up the ramp, since he can't reach you here.
Continue down a ramp, but prepare for a couple of tickers, a flamethrower, and another enemy as you work your way up the path around the corner. Prepare for a couple more tickers as you pass through the house. Now take cover by the railing to shoot the enemies on the nearby building before crossing over. Once you do, seek cover behind the first low wall and prepare to tackle the enemies climbing up to your location. After taking down enough, the roof you're on will collapse, dropping you closer to the bottom of the sinkhole.
After dropping, seek out the nearby ammo, then prepare to kill an incoming flamthrower--stay away from the windows to protect yourself. But after killing him, feel free to use the windows for cover as you open fire on the remaining enemies outside. Once clear, jump through the window and dash down a staircase and use the railing for cover to target the enemies below.
Once clear, head on down and use your chainsaw to rip through the two cables holding the tower. This will cause it to drop, creating a bridge to where you need to go. But as you try and cross, it'll collapse, conveniently bringing you close to your objective.
Find a Way Into the Cavern
After dropping, run down the ramp and quickly seek cover behind the low wall on the left to tackle the enemies beyond. Afterward, head into the building ahead and prepare to ride it down the hillside to a checkpoint.
Escape the Burning Building
Head through the burning building and hop aboard the elevator at the end.
Kill the Brumak Pilot
After exiting the lift, you'll come face to face with a Brumak. Dart down the hall and hop through the window--you'll spot the Brumak's driver running about as you reach the next window--kill him.
Aftermath - Closure
Find a Way to Collapse Jacinto
Oh hell yeah, how awesome is this? Your very own Brumak! So controlling him is pretty much identical to Marcus, except now you can unleash missiles with "X" and cool down your guns by hitting reload.
Alright, so you've made it this far in Gears, so we don't think you'll be needing much help here. Just shoot the enemies as you see them, then bust through the door at the end. Target the searchlights and turrets beyond the door first, then focus on everything else second.
Defeat the Corpser
When you come across the corpser, simply hammer on the "melee" button to take him down. Afterward, return to your shooting everything that moves philosophy until the next objective.
Destroy the Torture Barge
Take down the barge by firing everything you've got at it.
Destroy the 3 Columns to Make an Opening for the Choppers
There are three support columns you're going to have to destroy. You can target the first two from here, but you're going to have to walk a bit in order to reach the third.
Kill the Imulsion-Infected Brumak
Oh wow, it does not get easier than this. Simply fire the Hammer of Dawn on the Brumak three times to win. That's it, seriously. It takes like 15 seconds. Why are you still reading this? You should be quite done by now. Twice over, even.
Xbox 360 Achievements
| Achievement Name | How To Earn | Point Reward |
|---|---|---|
| Green as Grass | Train the rook (any difficulty) | 10 |
| It's a Trap! | Story progression in Act 1, Chapter 2 | 10 |
| Escort Service | Story progression in Act 1, Chapter 4 | 10 |
| Girl About Town | Story progression in Act 1, Chapter 6 | 10 |
| That Sinking Feeling | Story progression in Act 2, Chapter 4 | 10 |
| Freebaird | Story progression in Act 2, Chapter 5 | 10 |
| Heartbroken | Story progression in Act 2, Chapter 6 | 10 |
| Longitude and Attitude | Story progression in Act 3, Chapter 3 | 10 |
| Tanks for the Memories | Story progression in Act 3, Chapter 4 | 10 |
| Water Sports | Story progression in Act 3, Chapter 6 | 10 |
| There's a Time for Us | Story progression in Act 4, Chapter 2 | 10 |
| Better Wrapped in Beacon | Story progression in Act 4, Chapter 3 | 10 |
| Have Fun Storming the Castle | Story progression in Act 4, Chapter 6 | 10 |
| And the Horse You Rode in On | Story progression in Act 5, Chapter 1 | 10 |
| You Are the Support, Son | Story progression in Act 5, Chapter 2 | 10 |
| Brumak Rodeo | Story progression in Act 5, Chapter 4 | 10 |
| Does This Look Infected to You? | Story progression in Act 5, Chapter 5 | 10 |
| Tourist of Duty | Complete all campaign acts on Casual Difficulty | 25 |
| Guerilla Tactician | Complete all campaign acts on Normal Difficulty | 50 |
| Artist of War | Complete all campaign acts on Hardcore Difficulty | 75 |
| Suicide Missionary | Complete all campaign acts on Insane Difficulty | 150 |
| Collector | Recover 5 collectibles (any difficulty) | 5 |
| Pack Rat | Recover 20 collectibles (any difficulty) | 10 |
| Completionist | Recover all 41 collectibles (any difficulty) | 30 |
| One-Night Stand | Complete 1 chapter in co-op on any difficulty (Marcus or Dom) | 10 |
| Open Relationship | Complete 10 chapters in co-op on any difficulty (Marcus or Dom) | 30 |
| Friends with Benefits | Complete all acts in co-op on any difficulty (Marcus or Dom) | 50 |
| Once More, With Feeling | Perform 30 perfect active reloads (any mode) | 10 |
| Takes a Licking | Melee 30 Tickers (any mode) | 30 |
| Organ Grinder | Kill 30 enemies with a cover mounted Mulcher (any mode) | 10 |
| Shock and Awe | Kill 30 enemies with the heavy Mortar (any mode) | 10 |
| Said the Spider to the Fly | Kill 10 enemies with a planted grenade (any mode) | 10 |
| Crowd Control | Melee 10 enemies down with the Boomshield equipped (any mode) | 10 |
| Smells Like Victory | Kill 30 enemies with the Scorcher Flamethrower (any mode) | 10 |
| Variety is the Spice of Death | Kill an enemy with every weapon in the game (any mode) | 30 |
| Seriously 2.0 | Kill 100,000 enemies (any mode) | 50 |
| Standing Here, Beside Myself | Win 3 matches of Wingman (public) | 10 |
| Beat the Meatflag | Capture 10 meatflags in Submission (public) | 10 |
| It's Good to be the King | Win 10 rounds of Guardian as the leader (public) | 10 |
| You Go Ahead, I'll Be Fine | Win three matches of King of the Hill (public) | 10 |
| Back to Basic | Successfully complete the 5 lessons of multiplayer Training Grounds | 10 |
| Party Like It's 1999 | Play 1999 rounds of multiplayer (any mode) | 30 |
| Around the World, Again | Win a multiplayer match on each map (any mode) | 30 |
| Dirty, Dirty Horde | Survive the first 10 waves of Horde (any difficulty, any map) | 20 |
| Hoard the Horde | Survive all 50 waves of Horde (any difficulty, any map) | 30 |
| Crossed Swords | Win 10 chainsaw duels (any mode) | 10 |
| A Parting Gift | Kill 10 enemies with a grenade while down but not out (any mode) | 20 |
| Pound of Flesh | Use a meatshield to save your life 10 times (any mode) | 10 |
| Photojournalist | Submit a spectator photo | 10 |
| Kick 'Em When They're Down | Perform all 11 unique executions on a downed enemy | 10 |
Got a news tip or want to contact us directly? Email news@gamespot.com
Join the conversation