Jedi: Fallen Order Stim Locations Guide - How To Find Every Canister Upgrade

GameSpot may receive revenue from affiliate and advertising partnerships for sharing this content and from purchases through links.
Star Wars Jedi: Fallen Order's combat can get pretty tough. If you're not careful, the various enemies--both the Empire's soldiers and indigenous creatures--will wipe the floor with you, which can set back your progress quite a bit, thanks to the game's Dark Souls-inspired mechanics. If you're willing to do some extra exploring, you can get an edge to increase your chances of survival by finding more Stim canisters for BD-1.
You'll nab two Stim canisters just by working through the beginnings of Jedi: Fallen Order's story, which is enough to help you in the early areas. But once the difficulty begins to ramp up, you'll be wanting more. Below we outline the locations of each Stim canister as well as include screenshots detailing where they are on the map.
For more Star Wars Jedi: Fallen order guides, check out our beginner's guide and our feature on the best skills to unlock first. We also have guides detailing how to find the Scomp Link and one of the most useful weapons earlier.
You can also read our Star Wars Jedi: Fallen Order review, where editor Phil Hornshaw gave the game an 8/10 and said, "But Fallen Order becomes perhaps the strongest conception of what playing as a Jedi Knight ought to really be like. It's true that Fallen Order borrows liberally from other action games, but those elements work together with Respawn's combat and environment design, and a story that finds humanity in the Force and in its characters, to hone in on what makes the world of Star Wars worthy of revisiting again and again. Even with some rough edges, Fallen Order represents one the most compelling game additions to the Star Wars franchise in years."
Where To Find Every Stim (Video)
Locating each of BD's Stim canister upgrades can be difficult, even when you have written descriptions. For a live look at where you need to go and what you need to do to find all 10 Stims, check out the video above.
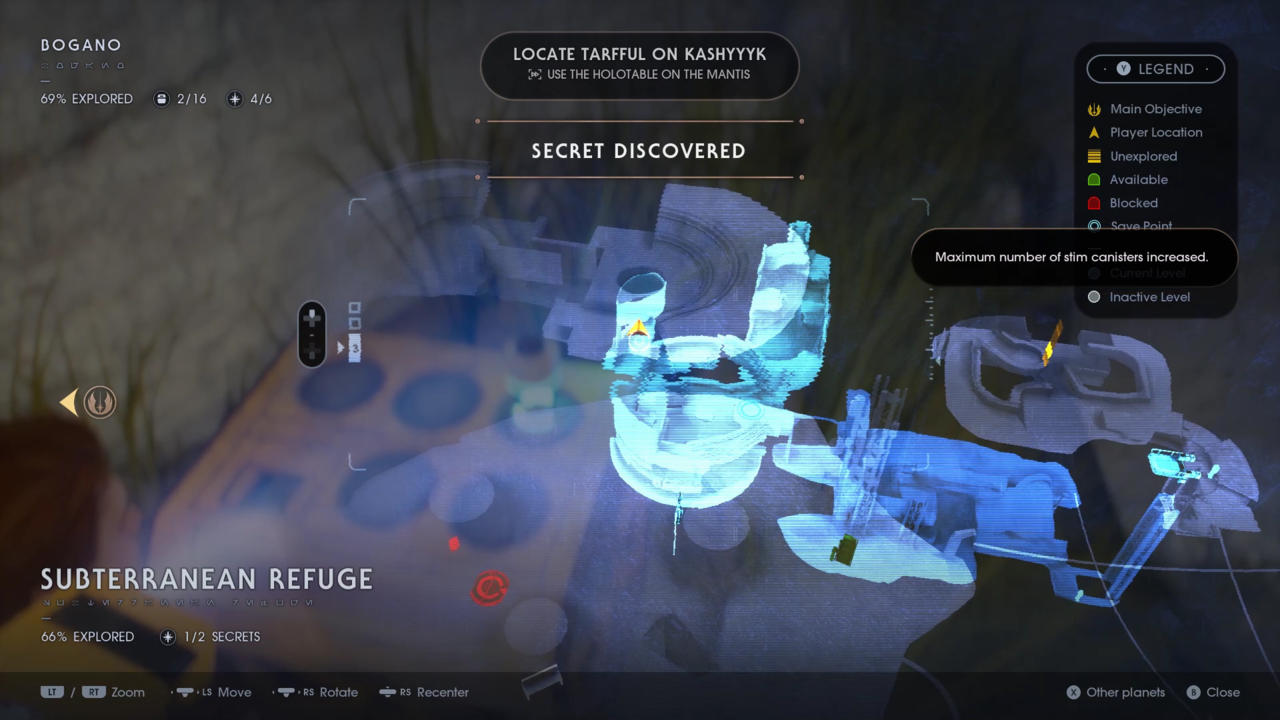
Stim Canister 3: Subterranean Refuge (Bogano)
You can find a Stim Canister hidden in the Subterranean Refuge on Bogano, but you won't be able to reach it from the bottom of the area. Instead, you'll have to approach from the top via a hole at Binog Mesa. But to reach the hole leading to this Stim Capsule, you'll first need to acquire the wall run ability. Once you've got this handy Jedi maneuver, get to the end of Binog Mesa and drop down the hole to earn yourself a new Stim canister.
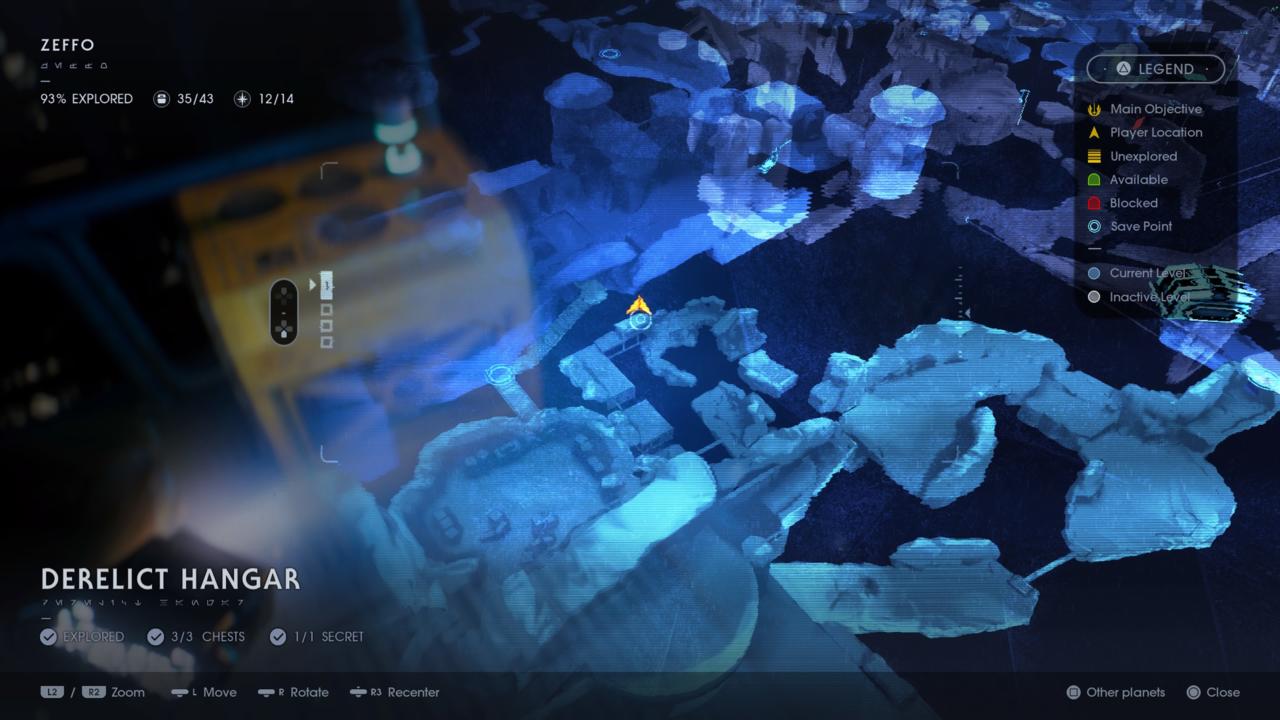
Stim Canister 4: Derelict Hangar (Zeffo)
The next Stim canister you can get is on Zeffo. You'll find it in the Derelict Hangar, a room found rather early in your exploration of the planet. Keep moving past the hangar itself to the right of the opening. You'll soon see a pair of Skaggs (the big rats) fighting over the body of a stormtrooper. From here, look left for a pathway that requires you to jump across a couple of platforms. On the far side, enter the dark cave, which will take you back into a darkened area of the hangar. Keep moving through carefully until you get up on an elevated catwalk, where the Stim Crate waits.
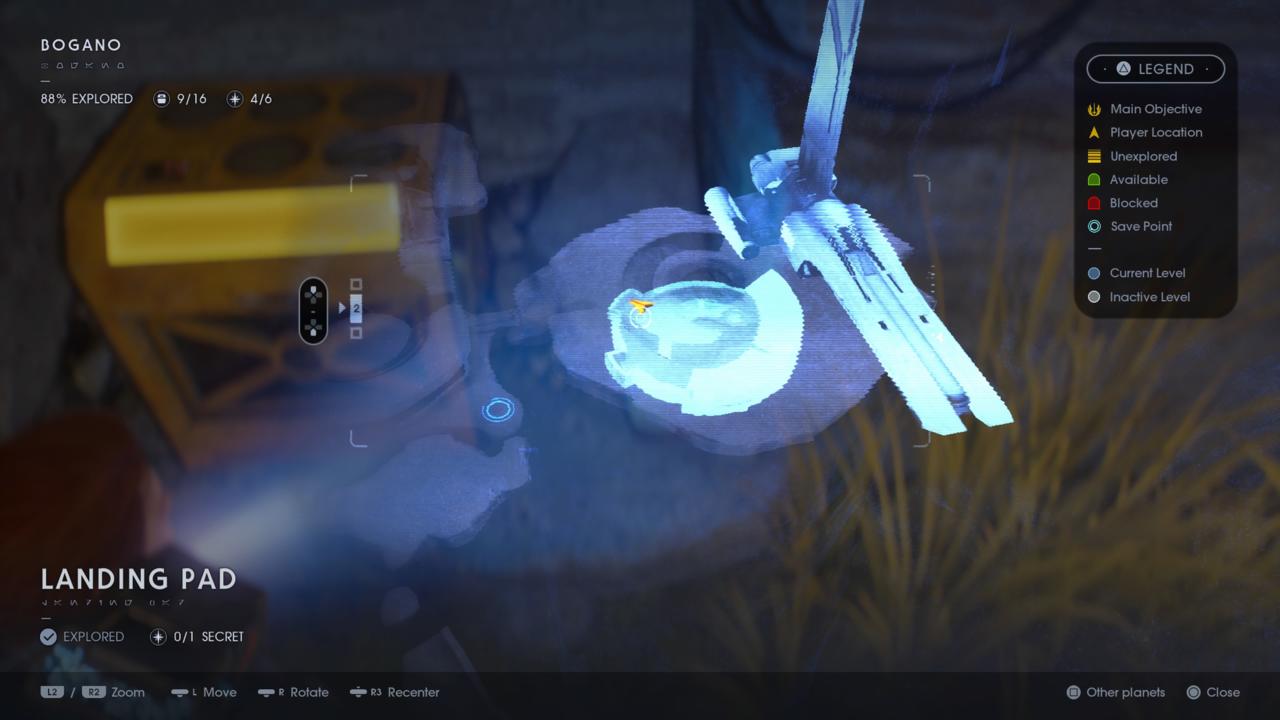
Stim Canister 5: Landing Pad (Bogano)
To get this Stim canister, you need the Force Push ability. Head to Bogano, and when you get out of your ship, head right, and you'll reach a pathway leading underground. At the bottom, you'll find a room with a caged wall. On the other side are a sphere and a Stim canister box. To get the health upgrade, use your Force powers from behind the cage to push the sphere into an indentation on the floor. It takes a little finesse--you'll need to get the ball up the ramp, then slow it, reposition yourself, and hit it so that it rolls along the curved floor to the indentation. Once you succeed, the cage will open up, and you'll find inside the room a new Stim canister.
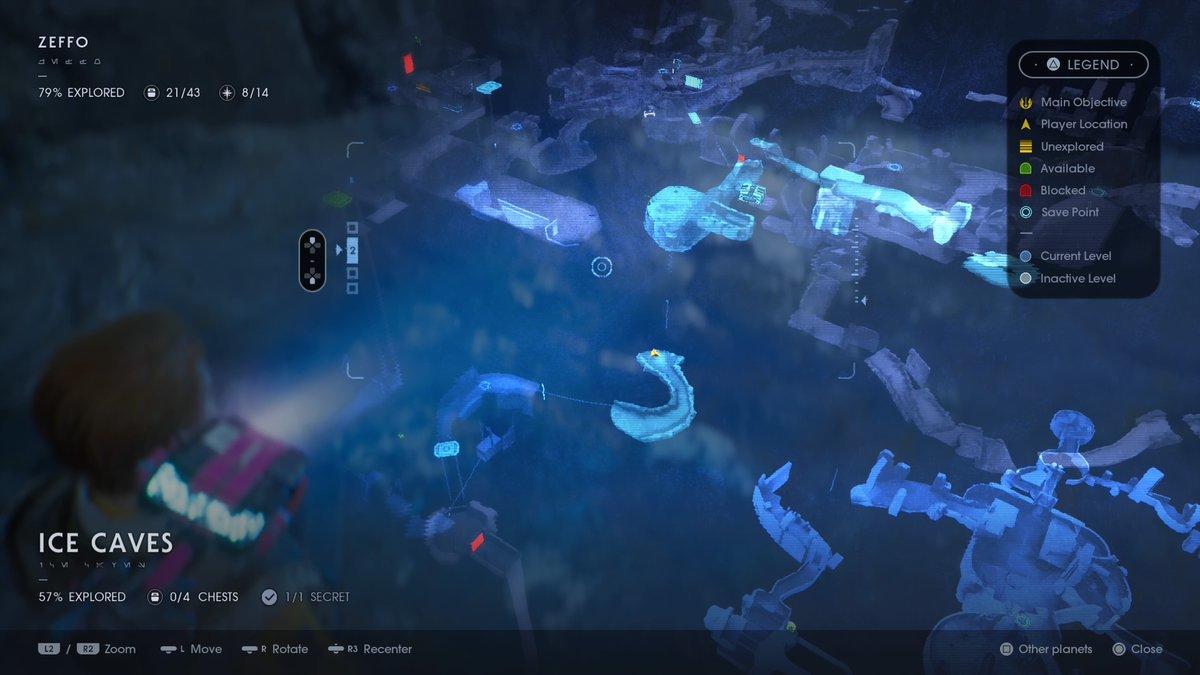
Stim Canister 6: Ice Caves (Zeffo)
Zeffo's Ice Caves are an optional location you can reach from a number of different places, including the Crash Site and Imperial Dig Site. Especially if you're still early in the game, The Dig Site path is actually the best way to get there, because the path will take you right past the Stim crate. From the Dig Site, look for an elevator you can take down, leading to path that requires you to wall-run, carrying you into a tunnel away from the Dig Site. Keep moving and eventually things will start to freeze up, and you'll basically run straight into the Stim crate.
If you have Force Pull and Jedi Flip (Fallen Order's version of double-jump), you can get this crate from the main room of Ice Caves--that's the cavern you reach when you slide down one of those icy slides. This is the easier approach if you have the right Force powers, because it's very easy to find the way. Look for the big blue Jotaz who crashes through the wall as you venture through the main cavern. With the wall it broke down on your left, pass the creature and look for a tunnel on the left with two vines hanging from it. With a running double-jump, you can pull the first vine to cross the gap and reach the canister chest. From the Dig Site side, look for the elevator that takes you down to reach the tomb where you fought the Second Sister. The pathway is below you and left of the elevator, but you'll need to swing across on a rope to get to it.
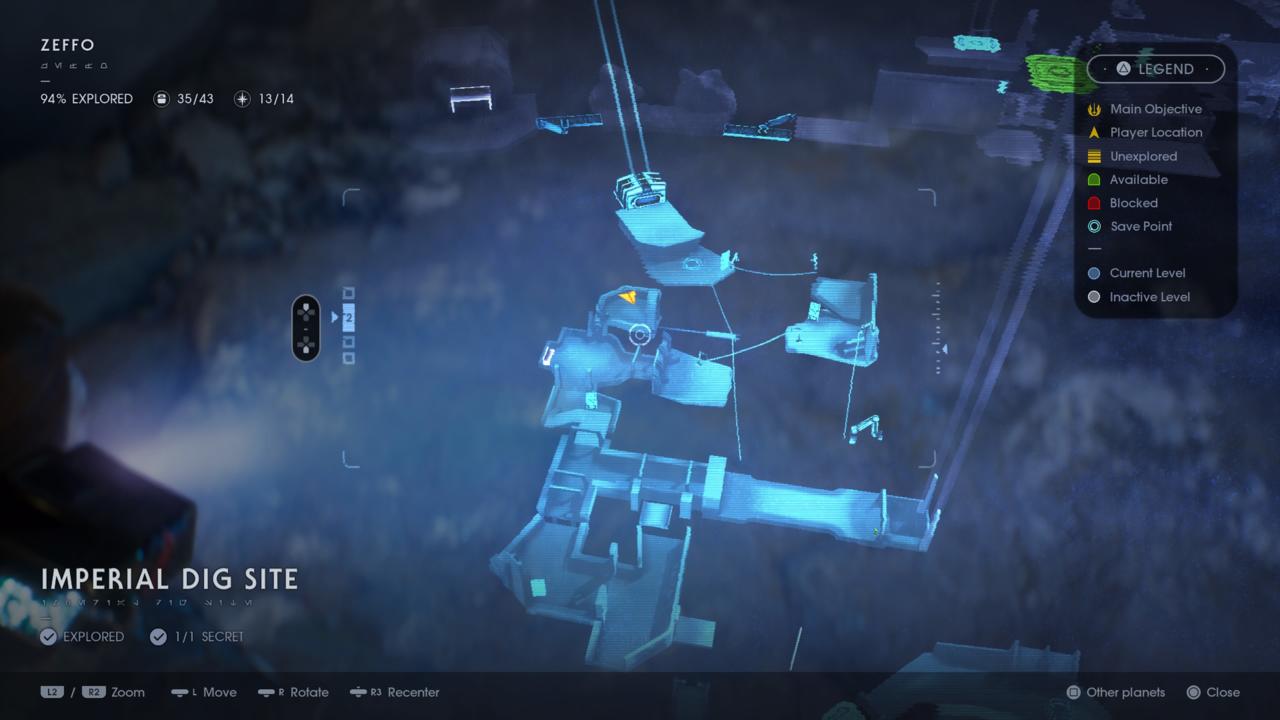
Stim Canister 7: Imperial Dig Site (Zeffo)
This one's a bit tricky to reach, and you'll need Force Push to access it. As you work through the Imperial Dig Site, you'll find zip lines all over the area that let you reach various different locations. As you pass through the main big room of the Dig Site, you'll find a bridge where you'll fight a bunch of stormtroopers and probe droids. From here, look to one side of the bridge to find a steep zip line shooting up toward a metal beam. You need to ride that line and catch the beam near its top, but the zip line won't take you there automatically--instead, it'll shoot you right over the top of it.
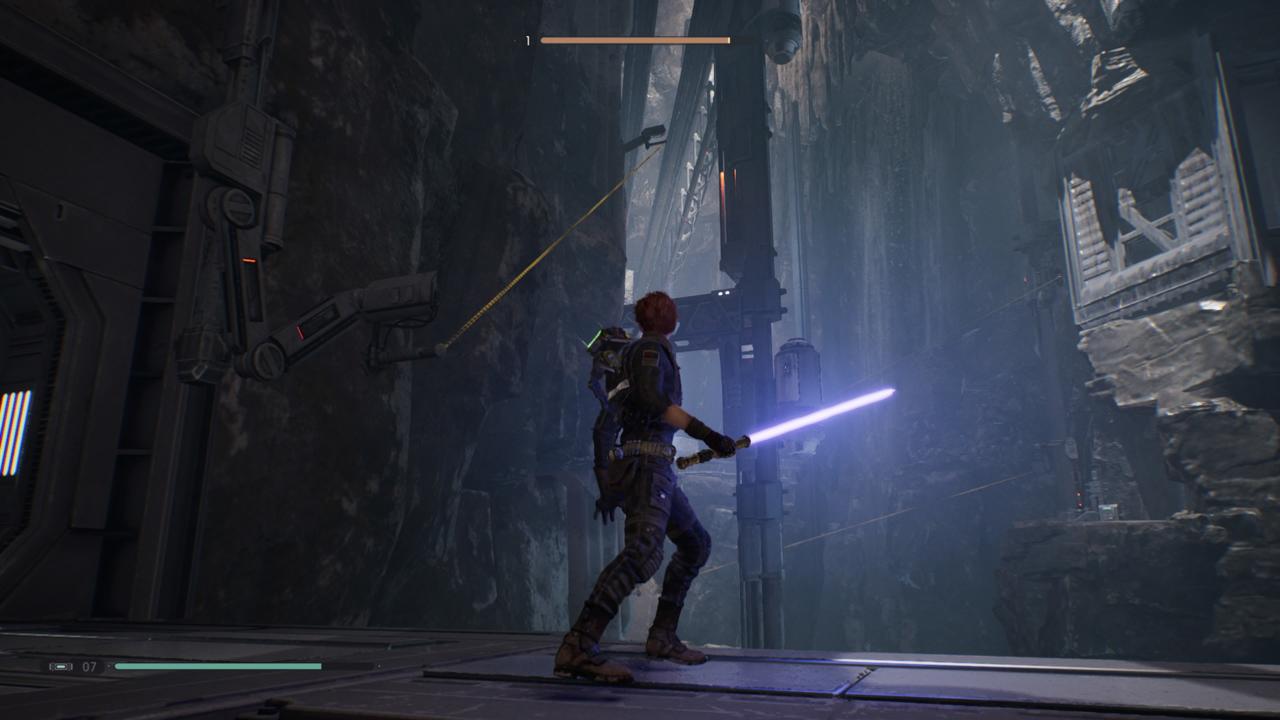
Stim Canister 7: Imperial Dig Site Zip Line
To catch the beam, you'll need to hit the Dodge button just ahead of hitting the end of the zip line. If you time it right, you'll land on the beam. Follow it toward the nearby wall and you'll see a place where you can blast a hole with Force Push. The Stim Crate is waiting inside.
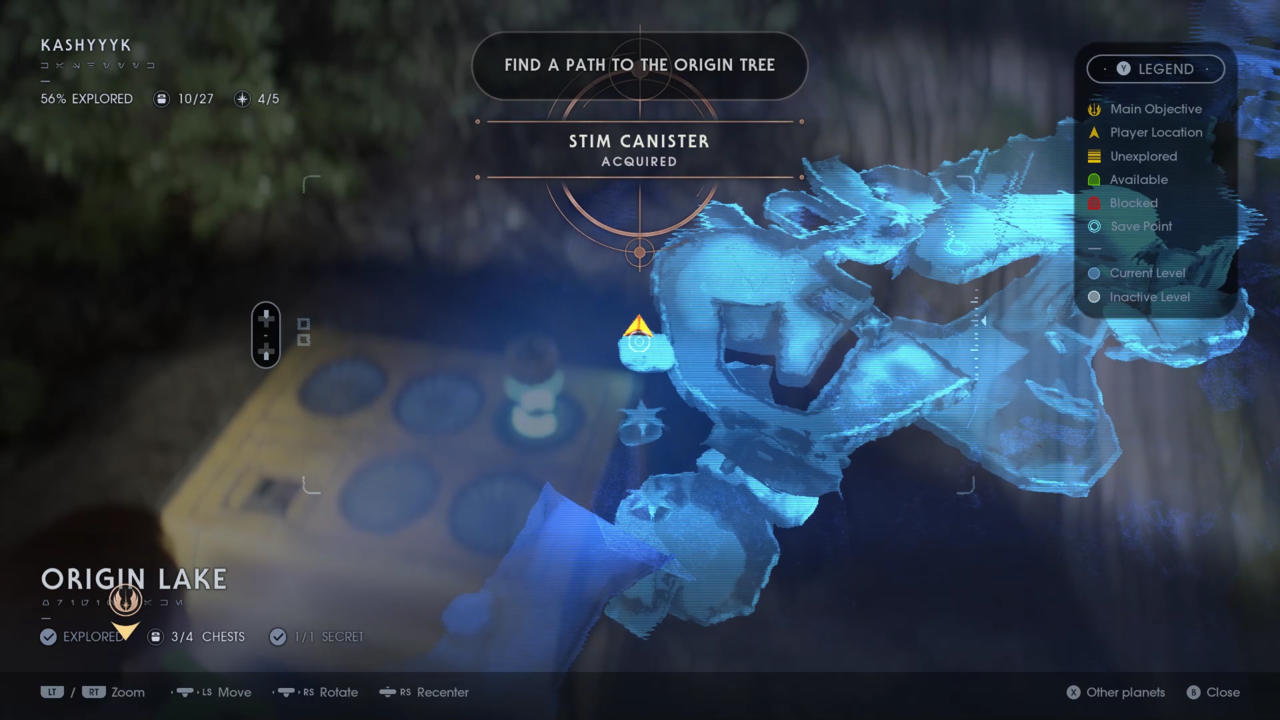
Stim Canister 8: Shadowlands (Kashyyyk)
On your second visit to Kashyyyk, you’ll eventually work your way to a rendezvous with the wookiee leader Tarfful. After swimming through the wreckage of an LA-AT gunship you’ll reach a dock with a bouncy Lung Flower and vines to climb. Turn around, facing back the way you came, and look up. You’ll see a series of two other Lung Flowers. Use them to bounce yourself continually up to the top of the tree, being careful about landing on each one. Bounce your way up to the top and your reward is a Stim crate.
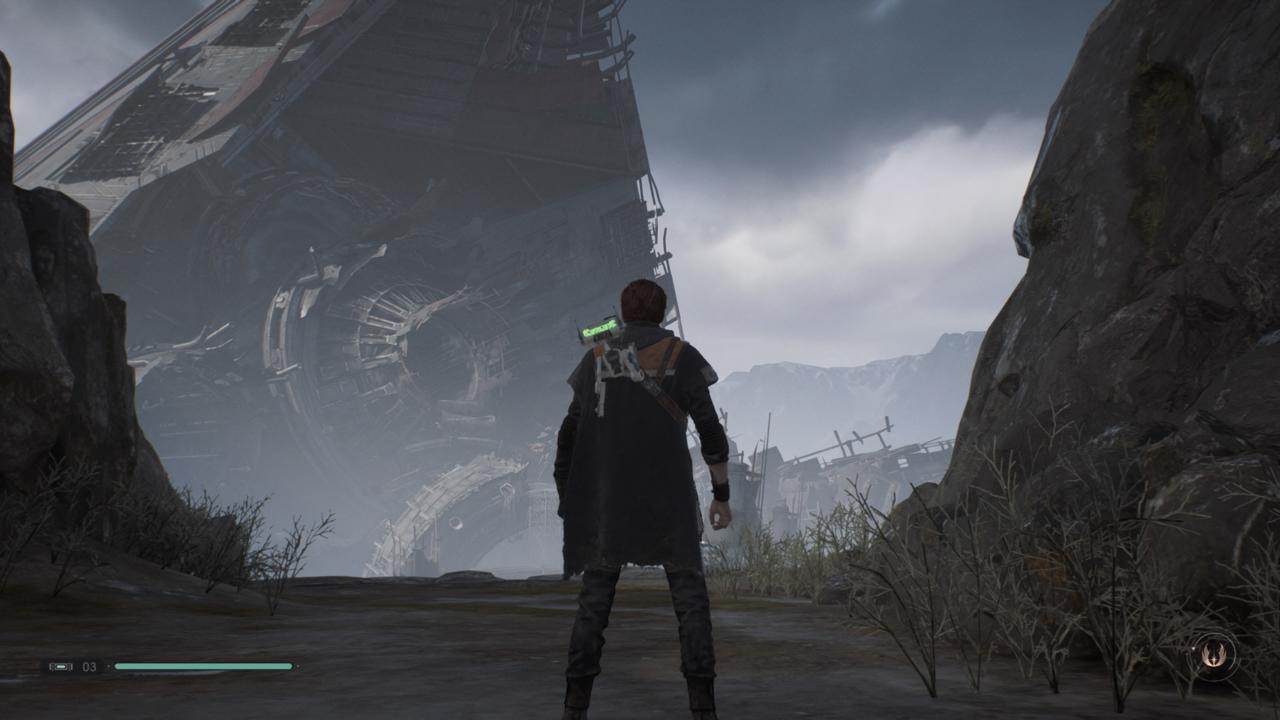
Stim Canister 9: Venator Wreckage (Zeffo)
The wreck of the Venator on Zeffo is actually a huge optional area full of Purge Troopers, story tidbits, and other secrets. You can access it from the Crash Site area but only once you have Jedi Flip (double jump). Climb up on the big semicircular rings near the ship's hulking wreckage, where you'll find Imperial probe droids waiting to blast you. Keep moving forward and double jump onto the ledge that lets you into the big round opening into the ship. You'll slide down an ice ramp from there to reach the area marked Venator Wreckage. From here, you have to work your way through the entire area to reach the stim canister at the top of the ship. The pathway is pretty straightforward, if a little meandering, so keep an eye out for ropes you can drop to create shortcuts back to the bottom. Keep climbing to the top and you'll eventually exit the ship high above the rest of the map. Turn left and follow the path down to the round opening that leads to the crash site. On your way there, you'll pass the yellow stim chest, a reward for your hard work.
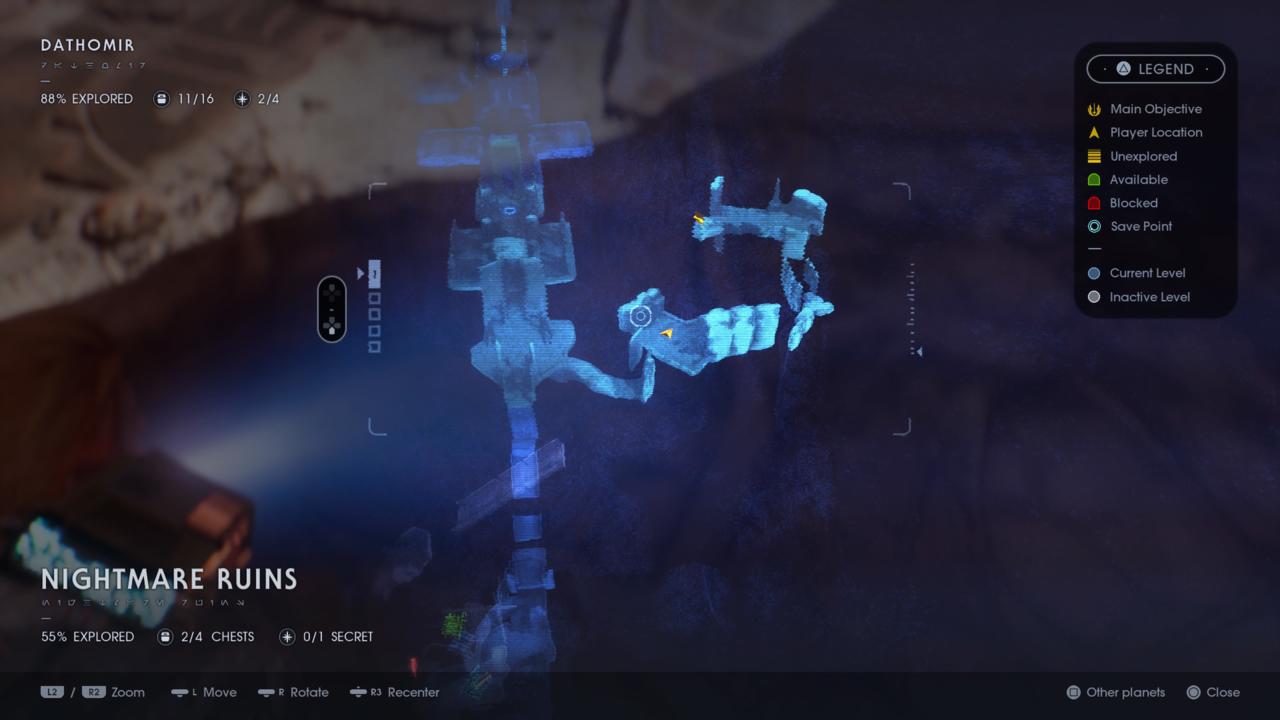
Stim Canister 10: Nightmare Ruins (Dathomir)
You'll head to the Nightmare Ruins on more than one occasion as you work through the story on Dathomir, and you might even pass this Stim canister without even knowing it's there. To get to it, you'll need to brave a couple of tough fights located just outside the temple at the end of the area. After you cross the gapped walkway where you meet the Stranger (you'll need Jedi Flip in order to make it all the way across), turn right just before entering the temple. You'll see a pathway there that requires you to wall run to progress. At the end of it is your first tough battle: the Nydak Alpha, one of Jedi: Fallen Order's Legendary Beasts. This is basically an optional mini-boss that will put you through your fighting paces, so if you can't beat it, come back when you're stronger.
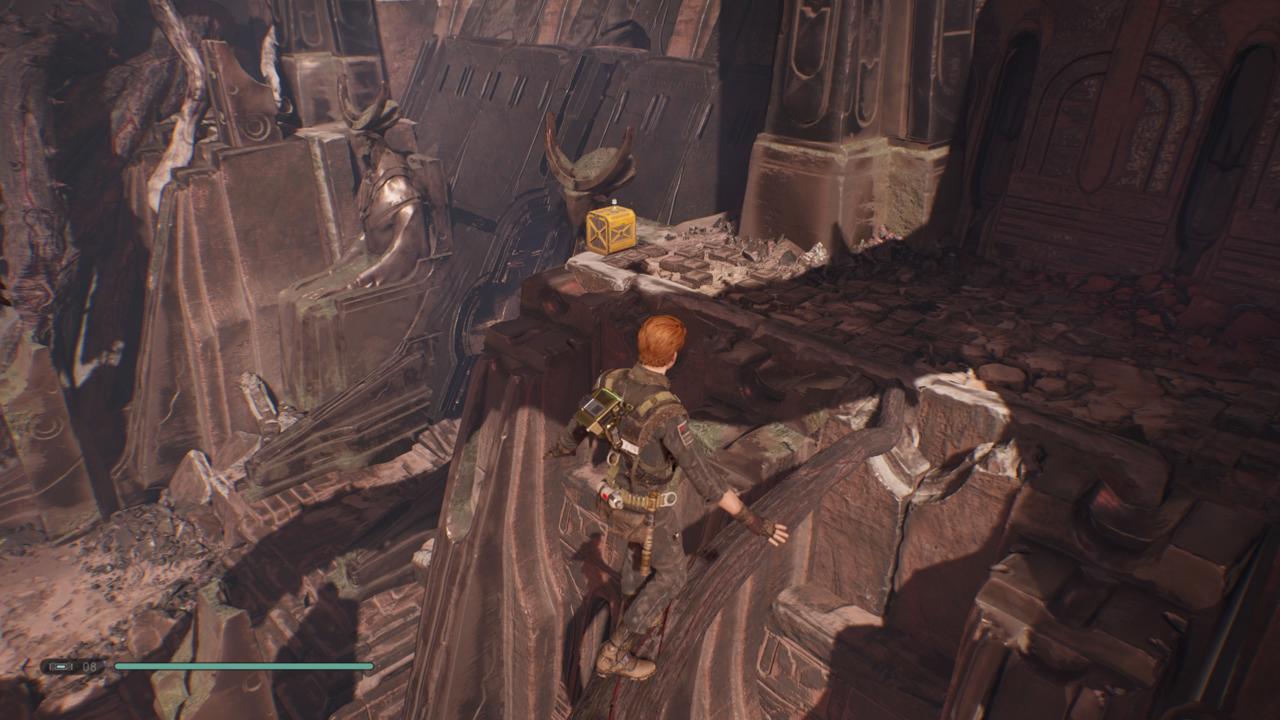
Stim Canister 10: Nightmare Ruins Path
After taking down the Nydak, head to the back of the arena and look for a sloping pathway. Follow it until you hit three Night Brother archers. Take them down at a distance by reflecting their blaster bolts, then walk forward--you'll trigger an attack by some undead Night Witches. Clear them out and climb onto the platform where one of the Night Brothers attacked you to find the path forward. You'll open some chests along the way before finally climbing up onto the Nightmare Ruins. Follow a nearby tree branch that makes a path along the edge of the stone walls and you'll finally find yourself right above the doorway to the temple, with a Stim chest waiting.