Soldier of Fortune II: Double Helix Walkthrough
John Mullins has a dirty job to do, but you'll see him through it in GameSpot's Soldier of Fortune II guide. Also features cheats and multiplayer strategies.
Design by Collin Oguro
Soldier of Fortune II may lose the fictional Hawk, but it doesn't misplace the carnage. It's a straightforward shooter with dozens of weapons, gobs of gore, and the occasional need to sneak around people instead of shooting them in the face.
You'll take on the persona of John Mullins, elite mercenary and employee of the Shop, a secret agency based in Texas. In this guise you will travel to the far reaches of the world, from the humid jungles of Colombia to the barren tundra of Kamchatka. You'll face overwhelming odds and well-armed opponents, and you'll even have to find the occasional keycard.
But whether you're stuck in a particularly deadly choke point or you just can't figure out where to go next, this guide will answer any and all of your questions.
Inside you'll find:
- General strategies for weapons, combat, stealth, and much more
- Detailed level walk-throughs for every location and puzzle in the game
- A few multiplayer tips for when you want to share your marksmanship with the world
- Cheat codes for when the going gets too tough and you just want to get going
Table of Contents
General StrategiesLevel Walk-Throughs
Colombia
Vergara's Mansion
Seaward Star
Hong Kong
Prison
The Armory
New York
Kamchatka
Switzerland
The Shop
Cheat Codes
General Strategies
What follows are a few simple strategies to use throughout the single-player game. Some will be obvious to veteran first-person shooter fans, but others are very specific to Soldier of Fortune II.
Mastering the Controls
Soldier of Fortune II has far more controls than your average first-person shooter. It's important that you familiarize yourself with them.
You have your typical movement keys such as walking, running, and jumping. You have your typical weapon keys like primary fire mode and secondary fire mode. But there's also much more. You can lean and lie flat. Weapons have more functions, and there are several keys mapped to activating features such as laser sights, sniper zoom, and tactical lights.
Make sure you are comfortable with the mapped keys so that you can easily remember where things are in the heat of battle. And if you aren't comfortable, remap the keys so that they make sense to you.
Managing Your Saved Games
Like its predecessor, Soldier of Fortune II allows you only a limited number of saved games per level. You can, however, change the number of saved games available if you create a new game with a custom difficulty level. You can also choose "unlimited" saves at this point, and it is highly recommended that you do so.
If you choose to go with the limited saved games, though, try to save sparingly. The levels can be quite long, and there are very few points where you'll get a breather. Opposition is almost constant, so make absolutely sure that you've cleared an area before saving. Nothing is worse than wasting one of your saves right as an unseen enemy throws an F1 grenade at your feet.
Exploring Your Surroundings
The levels in the single-player game are very straightforward and linear. In most cases, there is only one available path to take. Occasionally, though, items will be hidden. It is important to search behind crates and other objects to find ammo, armor, and health. It is very rare, however, that items will be hidden inside crates. If you must search boxes and the like, use your knife instead of a firearm. It's quieter, and you'll save ammunition.
Stealth vs. Blazing Guns
There are a few levels where stealth can be used effectively. It is almost never necessary, though, and it is often harder to keep quiet than to just shoot everyone who hears you. It's your choice, but Soldier of Fortune II doesn't reward stealth any more than it rewards walking around with guns blazing. (The one exception to this rule is the Prague train station level, where stealth is required. This level is covered in the level walk-throughs section of this guide.)
Here are some general stealth tips, if you decide to take that route when presented:
- The knife is not a good one-hit weapon, unless it is thrown using the alternate fire mode.
- You can knock guards unconscious with the butt of your pistol or shotgun. Make sure you stab them once they are down, though, because they don't stay unconscious for long.
- Carrying bodies is possible but not necessary. They will just vanish if you kill them, so it's not a necessary precaution.
- Never run if you are trying to remain undetected. Crouching is best, but walking will suffice. Crawling while prone is the quietest method of travel, but it leaves you vulnerable.
- Watch the alarm above your health meter, when it is visible. If it starts flashing, you've been spotted.
Managing Your Equipment
In most cases, the recommended inventory is fine. If you like a particular weapon, go ahead and add it, but it's usually a bad idea to replace the sniper rifle or the OICW if they are available. When faced with sniper fire, having your own means of long-range fire is the best defense.
If you get stuck with a weapon you don't like, you shouldn't have too much trouble replacing it during the mission. Enemies have a pretty varied arsenal, and eventually one of them will drop something you'd like better than something you already have. If your weapons load is maxed out, simply equip the weapon you'd like to drop and hit "T." Then pick up the new weapon.
Also learn to use the alternate fire mode for different weapons, and learn to use the special weapons keys. As mentioned in the controls section, Soldier of Fortune II has more controls than your average FPS, and you won't be taking full advantage of your equipment if you don't learn them.
Firearms
There are many types of weapons--assault rifles, machine guns, shotguns, and pistols--and each type has several different varieties. In addition, you have a grenade launcher, a sniper rifle, and a secret rocket-propelled grenade launcher (which is only available if you activate the "all weapons" cheat). Each different weapon of a type has its own strengths and weaknesses, particularly if you have "weapon inaccuracy" enabled. Learn which ones you like and stick with them when you can, both in single-player and multiplayer.
Grenades
Grenades have different uses, so make sure you're using the right one for the job. Stun and smoke grenades have very specific uses and should definitely not be employed when destruction is your goal.
The OICW
The superweapon in Soldier of Fortune II is only partially super. It works well as a sniper rifle and as an assault rifle, and it has a handy night-vision mode and a targeting function that gives you an outline of enemies who aren't even visible to the naked eye. But it's a terrible grenade launcher. In order to use it as such, you must operate a menu, and it's downright impossible to do so when fighting. If you choose to use the OICW (and it definitely has its strengths), make sure you practice with the menu or just ignore its launching capabilities altogether.
Accessories
As for miscellaneous equipment, just take what you like best, though night-vision goggles are generally more useful than binoculars or thermal goggles.
Lean, Lean, Lean
It is impossible to overstate the importance of cover. Crouching behind objects is good, but leaning around corners is better. If you can get most of your body behind a wall, you will be pretty much invincible. Leaning around corners is especially important in the later levels, where you will be facing dozens of enemies at a time.
To lean properly, make sure your entire body is behind the wall when you are upright. Then press "E" to lean right or "Q" to lean left. Once you are in position, you will be mostly immune to enemy gunfire from the front, but beware of enemies trying to sneak up on your side. And if you hear the telltale clanging of a grenade, be sure to move back to safety. Enemies will usually follow you, and you don't want to fall for their attempts to flush you out.

Headshots
Always try to shoot enemies in the head and the neck. Headshots are vital, because they are almost always instantly fatal. Hitting the enemy's head will not only conserve ammunition, but will make large firefights much more manageable. Trying to take down five or six enemies who are decked out in body armor can be bad for both your ammo reserves and your health, but a few well-placed headshots (or neckshots, if they're wearing head armor) will drop them easily.
Level Walk-Throughs
The rate at which you encounter enemies will differ depending on the difficulty setting and how much noise you make as you move around. Likewise, items are somewhat random (in terms of enemy drops) and are usually easy to find providing you are looking on shelves and near crates. Because of these factors, these level walk-throughs won't include blow-by-blow descriptions. Instead, they will focus primarily on possible problem areas, potential choke points, puzzle solutions, and completing objectives.
Prague
Recommended Inventory:
- Combat Knife
- M1911A1
- Binoculars
You must find a way into the hotel where Dr. Ivanovich is being imprisoned, then escort him safely out of the country. Regardless of what the briefing says, this mission does not require (or even allow) you to keep a low profile--at least not until the very end.
Prague: Street
Objective: Enter the Hotel
You begin on a well-guarded street. There are enemies everywhere, but also plenty of places to take cover. It's a good level to practice your leaning and headshots.
Follow the alley around. Before the first street, lean out and take some shots at the huge tank. It will explode and clear out most of the nearby enemies. Then take cover, because a few more will be headed your way.
Follow the road around to the area with the huge storage crates. Once the coast is clear, follow the far wall to the door. Watch for the guard above, who will lob grenades down from the roof. Pick the lock on the door, then proceed up the stairs.
Go out the window and jump from the railing to the ledge. Follow the ledge to the guard tower. A guard will emerge from one of the higher crates. Kill him now, or he'll make the next part more difficult.

Drop down on the right side of the ledge, then go through the doors. There is a mounted gun ahead. Use the truck as cover, then take out the guard manning the gun. There is some health and armor near the gun, but using the gun will cause a few enemies to spawn.
Instead, hide in the alleyway directly across from the gun. Take out the guards, then make your way to the crate to the truck near the fence. Get to the crate leading into the area behind the hotel. A truck will arrive, and several guards will use it as cover. Once they are dealt with, climb the fire escape and jump to the ledge on the outside of the hotel. Follow it around to the fire escape, then into the hotel. Follow the hallway to the trap door, then drop down.
Prague: Hotel Prague
Objective: Find Dr. Ivanovich
Note that you'll now have access to dual M1911A1s. The nearby closet has some supplies. Stock up, then head into the hallway. Make your way to the captain's office, and kill him for his shotgun. Then continue downstairs.
At the bottom of the stairs, a few guards will emerge from a locked door near the dining room. If you have any grenades, lob one in to clear out the room. Continue through the downstairs rooms until you find the stairs to the next wing. Make sure to search for equipment in the pantries along the way.
The second wing is primarily one firefight after another along a pretty linear path. Make your way through the kitchen, upstairs, and to the guestrooms. You will come to four locked doors. You can pick two of the locks: The middle one leads to some supplies, the far right to the doctor. Talk to him, then follow his lead.
Clear out any enemies along the way, then follow the doctor into the garbage shoot.
Prague: Outside Hotel
Objective: Extract Dr. Ivanovich
Jump on the truck and grab the mounted gun. Enemies will be coming in droves. You'll want to make sure that you keep the truck in relatively good condition until you get to the countryside--you've got a long trip ahead.
In general, you'll want to shoot everyone as quickly as possible. There are plenty of barrels to shoot, but wait until there are enemies nearby so the explosions will do some good. Once the truck is moving, keep swinging the turret to make sure you shoot everyone you can.
When the truck stops. Turn and destroy the barrels by the closed gate; the ensuing explosion will open it. Then keep firing at the guards until you're on the road.
Prague: Countryside
Objective: Extract Dr. Ivanovich
The countryside is a little more difficult. Trucks with gunmen will follow you and try to cut you off. You'll need to be fast if you want the doctor to make it to the train station safely.
When the helicopter arrives, just fire at it with everything you've got. The bumpy road makes it difficult to aim, but you should be able to take it down relatively quickly. A few more trucks will come up on the side, then you'll hit a closed gate.
Shoot everything near the gate. The tanks will take out the guards, and the parked truck, when it explodes, will open the gate. A few more trucks will pull up as the doctor pulls through. Take out the rest of the opposition. You're almost there.
Prague: Train Station
Objective: Extract Dr. Ivanovich
This is the only level in the game where stealth is required. You'll want to knock out guards (hit the Alt key with your pistol equipped) then knife them while they are unconscious. Don't fire a single shot, or the mission will end.

Follow the doctor to the restroom. Talk to your contact, then walk back to the ticket window. Give the conductor your papers, then enter the station.
A guard is posted just outside the first door. Knock him out and kill him. Pick the restroom door lock, and the doctor will get on the train. Talk to him, then leave the train.
Go through the green double doors at the far end of the station. Kill the patrolling guard, then head up the stairs. Follow the hallway to the left, destroy the cardboard boxes with your knife, then go through the hole in the wall. Drop down quietly behind the tank. Wait until the guards are done talking, then take them both out.

Go through the double doors. Knock out the guard on the lower floor, then quickly get the other as he climbs the stairs. Kill them both, then climb the stairs and jump to the duct that runs along the wall. Go through the only open door, deal with the guard, then jump through the open window onto the ledge. Follow it around, then drop down near the control station.
Go up the stairs, get rid of the guard, then throw the switch to release the brakes.
Colombia
Recommended Inventory:
- Combat Knife
- US Socom with Laser Sight
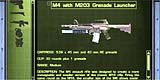
- M4 with M203 Grenade Launcher
- M60 Machine Gun
- M67 Fragmentation Grenade
Your goal in Colombia is to find evidence of the virus and who might be responsible. This mission is made up of several short areas.
Be warned: Colombia is basically one big choke point crawling with rebels. The path through the jungle is almost completely linear, so just follow the obvious trail and be cautious about well-camouflaged rebels hiding around every bend.
Colombia: Marine Base Camp
Objectives:
Meet with Sgt. Jack Anderson
Escape the camp and start your mission
Walk up to the Marines and listen as the sergeant explains the situation. Once all hell breaks loose, help the Marines deal with the snipers, and walk over to the trail, jump over the jeep, and hit the road.
Take out the rebels at the bend, then proceed to the ruins.
Colombia: Temple Ruins
Objective: Get to forward camp
You will encounter several groups of rebels as you make your way through the jungle. The first is hiding out in a group of ruined buildings. At this point, the path takes a U-shaped bend, so turn around and follow it once you're ready.
The next camp features a manned gun. Stay low and covered until you can get a clean shot at the rebel manning the gun. Follow the path along the hill. A small path leads up the bunker with the manned gun, which contains some supplies.
Continue along the main path until you reach the temple. The path continues to the right from here, so continue on to forward camp once the coast is clear.
Colombia: Forward Camp
Objectives:
Eliminate the rebel helicopter
Open the gate
This is a fairly tough section, with a large, well-hidden opposing force. Start shooting as soon as you see them, and try to stay hidden. Move only when you know it is safe.
After the helicopter makes its first pass, start moving toward the cave. Beware of the sniper perched atop the cave and of the trip wire hidden in the grass. You can go around the trip wire or just use the Shop tools (press Space when the icon appears) to cut it.
Once you're through the cave, you have a few more rebel camps to deal with. You'll come to two camps separated by a bridge. There are snipers across the bridge, so use the bunkers for cover. Across the bridge, you can pick up an MSG90A1 sniper rifle, which will come in very handy once you meet Bravo Team.
When you've passed the final camp, you'll see a closed gate next to a locked shed and a small stone guardhouse. Enter the house and climb the ladder. Use the control box to fire the SAM. This will destroy the helicopter.
The SAM blast will also destroy the shed, revealing the gate controls. Open the gate and move through.
Colombia: The Bridge
Objectives:
Meet with Bravo Team
Destroy the bridge
You'll face a small amount of opposition right at the beginning of this area. Continue down the path to meet up with Bravo Team. Shoot the sniper on the opposite side of the river, then wait for your orders.
They'll call in an air strike, then proceed across the river.
It's important that you follow behind the members of Bravo Team. They're slow, but they'll start yelling (and, eventually, shooting) at you if you get too far ahead. You'll fight a handful of rebels, then proceed to the rebel encampment.
Colombia: Rebel Encampment
Objectives:
Explore the camp for evidence
Rescue Alpha Team survivors
As at the bridge, you should stick with Bravo Team here. Stay behind them, and shoot any rebel stragglers.
You'll be ordered to clear out a few buildings. Do so when you're told, and then Bravo Team will continue its sweep of the camp. Check the board behind the desk in the first building for a clue about the virus.
Once all the buildings are clear, you'll be asked to free the prisoner. Walk up to the cage and use the Shop tools to open it. Then walk over to the gate and plant some explosives. In both cases, you just need to press Space when the appropriate icon appears.
Take cover. After the explosives have detonated, go through the gate.
Colombia: River Landing Zone
Objective: Escort POW to landing zone
Stick with the Bravo Team leader so you can help with the overwhelming opposition. Follow the river to a ruined temple, where you'll face a fair number of rebels. There are supplies around here, so grab them if you need them.
Continue following Bravo Team up the path to the landing zone. Once you see the choppers, jump in and grab the mounted gun. Shoot the rebels as they come pouring out of the jungle.
Colombia: Helicopter Extraction
Objective: Eliminate opposition along the riverbank
The briefing will tell you not to be a hero. Don't listen. You'll need to eliminate almost every enemy you see, and the chopper will circle each camp several times. As with the later Prague levels, don't shoot the barrels unless there are enemies nearby.
The second camp you approach will have a mounted gun. To get rid of it quickly, aim for the barrels near the wall just behind it. That will take out the entire building, gun and guard included.
The next tower has some strategically placed barrels as well. Shoot those, and it will go down immediately. When you come to the bridge, shoot the truck to get rid of all the guards on the right side, then the guard on the left. Finally, shoot the guard manning the M60 near the bridge.
Next up are the SAMs. Shoot them out of the sky as they approach the chopper. The boat, which will arrive next, is easily disposed of. Just shoot it until it explodes, and don't worry about getting the occupants individually.
Vergara's Mansion
Recommended Inventory:
- Combat Knife
- US Socom with Silencer
- M590 Combat Shotgun
- M4 with Grenade Launcher
- M67 Fragmentation Grenade
- Night-Vision Goggles
You must make your way through Vergara's heavily guarded mansion and find out what he knows about the virus. The first two levels of this mission can be finished with minimal resistance if you choose to be stealthy about it.
Vergara's Mansion: Grounds
Objective: Enter the mansion
It is possible to get into Vergara's mansion without being detected. Immediately turn to your left and follow the bushes around the house. Shoot the camera with the silenced Socom, and do the same to the patrolling guard. You'll need a good headshot, or the alarm will sound.
Sneak around the buildings, past the pool. The garage and the dog pen have supplies, if you want to stock up. Shoot out the camera over the pool. A guard will leave the garage and walk around the house. When he is out of sight, shoot the guard on the balcony, then hurry over into the pool area. Climb up the trellis and then jump the rail onto the roof. Open the grate, then enter the house.
Vergara's Mansion: Main House
Objective: Find Vergara's study
It is harder to sneak once you're in the mansion, but it is possible.
You'll enter the house in an attic. Walk around until you see a hole in the floor. Drop down into a closet. Go through the door into a small gymnasium, and then sneak toward the hallway. Wait for the maid to walk down the hall, then shoot the guard. Grab his body and hide it in the gym, out of sight. Wait for the maid to pass again, and then sneak down the hall, take the first left, and shoot the guard. Go down the stairs and out the door to the left.
Take your first right and enter the study. Pick the lock on the safe. At this point, your cover is blown, so arm your M590 and get ready. Shoot the guards, and go into the rec room.
A pair of double doors will open--go through the single door to the left of these once the guards have been killed. Go down the stairs into the wine cellar.
Vergara's Mansion: Wine Cellar
Objective: Get to the bunker
When you enter the wine cellar, a guard will shut the double doors ahead of you. Pick the lock on these doors, then kill the guards beyond.
Follow the hallway ahead into the bowling alley. There are supplies in the room behind the bar if you're in need. When you're ready, go through the first door on your right as you enter the alley.
Follow the hallway around, past the pool, and into the first open door. Climb the steps, then crouch and enter the ventilation shaft. As you crawl through the shaft, be careful not to step on the first grate you see. This will drop you down into the bowling alley again.
Instead, keep crawling until you reach the second grate. Listen to the conversation, then shoot Vergara's men from your vantage point. Throw a grenade down if you're so inclined. Drop down into the office, then proceed down the stairs. You'll come to a target range and a nearby vault. Pick the lock on the vault door and restock your health, armor, and ammo inside.
Continue down to the wine cellar proper. Make your way through the maze of boxes and kegs until you come to what appears to be a dead end. There's a large pile of boxes near a wine rack--the pile is on the far right wall as you enter this room. Destroy the boxes to reveal a switch. Flip the switch and go through the secret passage.
Kill the remaining guards and then go down the spiral stairs into the bunker.
Vergara's Mansion: Bunker
Objectives:
Kill Vergara's bodyguard, Sanchez
Find Vergara
You'll encounter a great deal of resistance in the bunker.
Follow Sanchez as he retreats. When you reach the bunker door, everything will go haywire. You must make your way through the maze of tunnels and rooms until you corner Sanchez. The path is straightforward: Follow the trail of guards and items until you pass a locked door with a red card reader. Just beyond that door is Sanchez.
Sanchez will kill you if you try to shoot him directly. Quickly take cover behind the first stone pillar in the room. He'll destroy the shelf next to you, or you can do so yourself. Now run to the pillar directly ahead and to the left, then run to the pillar directly to your right. Lean out from the beam and aim at the circuit box behind Sanchez.
To kill Sanchez, you need to shoot the circuit box twice--once to open it and once to short it. After he's electrocuted, grab the red keycard and head back into the hallway and through the locked door.
Seaward Star
Recommended Inventory:
- Combat Knife
- US Socom with Silencer
- M3A1 "Grease Gun"
- M590 Combat Shotgun
- AN-M14 Incendiary Grenade
- Night-Vision Goggles
Your goal is to get to the cargo hold of the ship and destroy the virus. The first level can be completed, for the most part, without alerting anyone to your presence. Once you make it to the interior of the ship, however, it's back to killing-is-my-business as usual. And, as the man said, business is good.
Seaward Star: Main Deck
Objective: Gain entry to the cargo hold
Listen to the guards' conversation for an important clue, then wait until they finish talking and one walks away. Aim your silenced Socom through the crates and shoot the remaining guard in the head. Go up the first flight of steps and through the door. The second flight leads up to a locked door, and you will need a security keycard to get through.
Follow the hallway through the laundry room and outside. Kill any guards you encounter with the silenced Socom. When you can see the stacks of cargo on the deck, peer around the corner and shoot the crewmember through the window. Now go down the stairs, and then down the second flight behind you. Turn the corner and go through the door into the bunk rooms.
Turn left at the first hallway. The first locked door goes to the guard captain's chambers. Kill him in his sleep and grab the key. Now go all the way back to where you boarded and unlock the security door.
Kill the guards, then pick the lock on the door to the communications room. Find the switch to open the cargo hold. It's stuck. Head out through the nearby door and down to the deck.
Sneak around the crates until you find a switch at the far end of the ship. Flip the switch to clear the cargo hatch doors. At this point, you either need to hide or give up the pretense of stealth. It's easier to do the latter. Get back to the communications room and throw the switch. Return to the deck and drop down into the ship's interior.
Seaward Star: Interior
Objective: Scuttle the ship
First, you need to get to the main cargo area. It's a fairly linear path at first. Follow the walkways and kill any guards you encounter.
You'll come to a locked door next to some stacks of cargo. Jump over the rail and drop down between the two walkways and crawl into the next hold. There are some guards on the walkway above--kill them as you see them. You can shoot through the walkways, so it shouldn't be too hard to take the guards out from below.
Move around the cargo to the left and find the forklift. Operate the forklift (press Space) and then jump up the crates to the walkway above. Go through the control room and through the two large engine rooms. You'll find a ladder to climb down into the ship's lower hold.
Take your first right and turn the crank to shut off the fire blocking the hallways. Crawl under the pipes. At the next turn, crawl under the steam. After the next turn, you'll be in the cargo hold that contains the virus.
After a brief conversation with Taylor, a stack of crates will be moved. Follow the path through the cargo to a ladder, then climb down. Go through the first door you encounter and climb down the ladder.
To scuttle the ship, you'll need to set five explosives. Set the first here by walking up the important-looking thing and pressing Space. Climb back up, and some guards will emerge through a previously locked door. Go through the door and turn right. Climb down the ladder, crawl under the steam, and set the second explosive.
Climb back up and continue through the next door. Follow the hallways. The third ladder is somewhat hidden behind a door, just after a control room. Turn right to see it. Climb down and set the third explosive. Get back up and continue down the hallway, and the fourth ladder will be in plain sight. After setting the fourth explosive, climb back up and continue through the hold until you find a locked door next to a ladder leading up.
Climb up into a new area of the main virus cargo area. Follow the crates around, picking up supplies and killing guards. There is only one door out of here. Go through it, and climb down. A guard will come through a door--kill him, and go through the door. The hallway ahead leads to the fifth place to set an explosive and the end of the mission.
Hong Kong
Recommended Inventory:
- Combat Knife
- MicroUzi
- MSG90A1 Sniper Rifle
- MM1 Grenade Launcher
- M15 Smoke Grenade
- Binoculars
Hong Kong is a difficult, long mission. You'll face a great deal of resistance, regardless of what you're told in the briefing. You'll need to find your way through the heavily guarded streets to a more heavily guarded warehouse. And though it is relatively straightforward, there are a few points where it is somewhat unclear how to proceed.
Hong Kong: Lower Docks
Objective: Get to the upper docks
You begin on the junk. Get up to the top level, and get off the boat. You'll encounter a fair enemy presence right from the get-go. Luckily, you start this level with the MM1 grenade launcher. You can't carry much ammo for it, but it will come in handy.
Proceed through the gate and up the road. Turn right at the intersection--the road that leads left and up goes to a dead end. Make your way through the huge stacks of cargo and down the alley.
Another heavily guarded area awaits. Once you're through, you'll see a boarded-up window at the end. Destroy the boards and jump through. Make your way through the building to the double doors that lead to the upper docks.
Hong Kong: Upper Docks
Objective: Find the warehouse district
Fight your way through the building and then through the window to the street. This area is swarming with guards. There is a huge tank in the open area that you can shoot, which causes a huge explosion that will help kill some of the opposing force.
Head to the open area and then through the cargo crates to the right. Near the wall is a forklift. As on the Seaward Star, you need to operate the forklift to make a makeshift staircase. Jump up the crates and over the wall.
Hong Kong: Streets
Objective: Get to the market
There are civilians around. Be careful not to kill any. Grab the nearby armor and health, if you need it, then make your way to the intersection. Wait for the civilians to get a fair distance away, then break out the MM1 grenade launcher. Fire some rounds at the truck and the surrounding guards, then carefully move down the street.
There are snipers around the next bend. Lure the street-level thugs toward you and kill them, then take out the snipers on the balconies. Go down the street and through the door into the alley.
Turn left. Kill the guard and climb up into the window--you may need to remove the boards first. Go through the building until you reach the top floor. There are supplies all over this building, and even more in the next, which can be accessed via the balconies on the second and third floors.
Once you are on the third floor, go out onto the balcony. Take out the snipers, then jump onto the long, blue sign below. Use this to jump to the next building. Fight your way to the next door, then go out. Again, run along the sign and jump to the next building.
Climb down the ladder to the street, then run to the alley ahead. Turn right and jump up the trash heap and over the wall.
Hong Kong: Market
Objective: Find the warehouse
Find a good cover spot in the alley, and clear out the oncoming horde of enemies. The marketplace ahead has more, including a sniper on a balcony. Once the market is clear, turn right and head down the road. The street ahead has even more enemies, including several snipers.
Go through the gateway next to the truck. This is the warehouse for which you've been looking. There are two doors--one in the back and one just to the right of the gate. Whichever door you choose, go into the warehouse, kill the enemies on the first floor, then head up the stairs.
Flip the switch near the windows on the second floor--it will open the gate below. Through this gate lies the elevator down to the heart of the warehouse.
Hong Kong: Warehouse
Objectives:
Find Deviant1
Get information on the Remus virus
Kill the guard in the hallway, then grab any supplies you can find. The hallway goes to the left and the right. Go to the left, but don't shoot the tanks in the room ahead. If you do, you won't be able to get into the next room, which contains a fair amount of supplies.
Go back and follow the hallway the other way. Open the metal door by using the switch on the wall. After clearing out this small warehouse, check the door to the left for some health. Then continue down the hall to the main warehouse area.
Stake yourself out in the entrance to the storage room and kill everyone in sight. Run up the ramp to the catwalk, killing the guard after he drops the barrels. Follow the catwalk around to the middle door. Go through it and into the next large storage room.
As in the previous room, use the leaning method to clear it out. Follow the walkway to the door, then go through it. Listen to the guards speak, then kill them both when the cutscene ends. Walk up to the PC and use it. Then fall to the ground unconscious. They should have hired more guys like these two to guard this place.
Prison
Recommended Inventory:
- No starting inventory
Objectives: Find the Remus disk and escape
The prison is a short, somewhat easy level. You'll start out with nothing. Listen to the yammering of your jailers, then wait for Huang Zhenmeng to free you. Grab the MicroUzi from the dead guard, then grab your tools from the table near the desk.
Pick the lock on the green door while Huang keeps the guards at bay. Pick the lock on the storage cabinet to get an AK74 and some ammo. Then go through the door into the hall.
The next few firefights will be tough. Huang will help some, but try to kill as many guards as you can through windows so they won't have time to lob grenades into the tight space. Kill everyone, grab all the supplies you find, and move on to the next area. You'll need to pick the lock on the barred door to continue.
The next area is slightly easier. Take out the guards from the safety of the doorway. Grab any weapons and move out into the courtyard.

Once outside, you'll need to kill the torturer and Deviant1. They're both tougher than most opponents you've faced, so keep to the cover of the crates in the yard. Once the torturer is down, move closer to Deviant1 and take her out from below, or wait until she's out of sight, pick the lock on the tower door, and run up to kill her at close range.
After she's dead, grab the disk and head back to New York.
The Armory
Recommended Inventory:
- No starting inventory
Objectives: Rescue Sam from the burning building
What starts as a normal briefing mission gets complicated immediately. Head into the burning armory and to the left. Run up to the door, then jump down into the elevator shaft. Quickly jump off the elevator onto the floor above. Climb up the beam to the second floor. Grab the pistol, then talk to Sam.
You'll need to carry him out, but don't pick him up yet. Instead, climb through the small window nearby and drop down. Turn the valve to remove the steam, then head back up and grab Sam.
Carry him out through the doorway that was previously blocked by the steam. Jump up and go through the window, then walk down the alley and out the fence. When you get him to the ambulance, the mission will end.
New York
Recommended Inventory:
- No starting inventory
If you think you're just going to waltz in and discover the identity of the mole, think again. This mission gets tough quickly, and you've got nothing but your mustache to start with.
New York: Hospital Main Level
Objectives:
Find Sam's room
Get to patient services
Walk to the nurse's station and ask about Sam. She'll tell you what she knows, then buzz you through the door. Get in the elevator and head up to the second floor.
Walk to Sam's room. As soon as you enter, your objectives will change for obvious reasons. Grab the pistol from the dead guard and kill the soldier. Grab his M4 and head back into the hall.
You can pick the lock on the door across the hall for health and armor. Proceed cautiously down the hall, there are several soldiers ahead. The doors will fly open ahead. Kill the soldier and jump through the broken window. Move down the hall.
Use the wall for cover and clear out the next room. Climb up the scaffold to the balcony, then jump across the light fixtures. As you do this, some soldiers will emerge from the elevator. Kill them, then use the light fixtures to reach the balcony near the elevator. Get in the elevator to end the level.
New York: Patient Services
Objective: Get to the roof
This level is really, really tough. You'll be facing your strongest opponents yet, and hordes of them. Pick up spare ammo at every opportunity, because you'll use most of it.

You'll be greeted by a security guard. Don't get too attached. He'll open a door for you, then immediately be gunned down. Proceed cautiously, and peek around corners. Use the oxygen tanks strategically, firing at them when soldiers pass by.
Once you're through the first hallway, a pair of soldiers will repel into the area from outside. Shoot them before they can enter. Continue through the hospital, using cover and shooting everyone. Lob grenades and use the launcher on the M4. There are no civilians, so you don't have to worry about unwanted casualties, and most soldiers will be grouped so you can get a few with a single grenade.
Get to the first staircase and climb up. More soldiers await. Jump the hole in the floor and continue through the opposite door. Again, use cover and go for headshots with each and every bullet fired. Once this area is cleared out, you'll come to an open window. Climb out and carefully maneuver around the ledge to the next open window. Kill the soldiers inside and climb in.
More fighting, and lots of it. Proceed to the next flight of stairs. You can climb up or use the nearby elevator. Either way, you've still got a ways to go. Once you reach the final staircase, it's time to head up to the roof.
New York: Hospital Roof
Objective: Destroy the helicopter
Run across the roof as quickly as you can and get to the small building. Grab the supplies, then take cover behind the crate. Shoot the power rods next to the closed gate that leads to the next area to knock them down, then shoot the guards as they approach.
Go through the newly opened gate and kill any remaining guards. If you want an M60 (and you probably do), shoot the generator to open a third area of the roof.
Once you've cleaned the roof of human opponents, turn your attention to the helicopter. You need to shoot the engines. A good method is to take cover in a corner, take a few shots, then run under the helicopter so it has to turn around. Keep firing at the engines until you see them trailing sparks.
At this point, you'll see a red light on the side of each engine. Shoot both of these, and the engines will explode, sending the helicopter down.
Kamchatka
Recommended Inventory:
- Combat Knife
- US Socom with Laser Sight
- OICW
- USAS-12 Shotgun
- M84 Stun Grenade
- Thermal-Vision Goggles
The good news: You get the OICW for this mission. It's a good combination of sniper rifle and assault rifle. It's deadly accurate and has a great targeting feature that makes long-range combat much, much easier. It also has built-in night-vision goggles.
The bad news: You get the OICW for this mission. Its strengths are almost outweighed by the fact that it is also a terrible grenade launcher. Having to use its ridiculous menu to fire a grenade is more trouble than it's worth.
And that's not all for the bad news. Kamchatka is a huge mission, made up of many levels. It's long, difficult, and full of puzzles. Luckily, the good features of the OICW will make it a bit easier.
Kamchatka: Perimeter
Objective: Find the main road
Don't worry about being stealthy; you'll just have to kill everyone anyway. Head in the direction you're facing after landing. Kill the guards on the way to the bridge, then take cover and kill everyone on the bridge.
Go through the hole in the fence and down into the ravine. Clear out the guards, and search the bunker for supplies. Continue to the next fence. Find the small gap and use your tools to cut it open. Proceed cautiously and take out the guards.

Move around to the back of the two-story building. Jump to the ledge, then go through the window. Flip the switch to open the gate. Snipe any guards you can from here, then climb down and clear off the road. Be aware that more guards will have appeared close by.
Proceed down the road and into the tunnel. Use the security lock (and don't question why your handprint works), then head out onto the main road.
Kamchatka: Main Road
Objective: Find a way into the train depot
Use cover and kill the guards, one group at a time. Be aware of a sniper on the hill to your right as you proceed up the road.
Once you round the bend, fight your way to the switch in the middle of the elevated platform. Using the switch will open a pipe just below. Drop down into the ditch and crawl into the pipe.
You'll face a bit of opposition in the underground area. Once it is clear, proceed to the next pipe just ahead.
Kamchatka: Train Depot
Objectives:
Make your way back to the main road
Find an entrance to the train yard
Find an alternate entrance to the base
The pipe will deposit you on a snowy hill. Use the targeting feature of the OICW to take out the nearly invisible guards ahead. Get to the bridge, then find the ladder on one of the pillars. Climb up, and go through the door on the bridge.
Turn left and climb up the ladder. You'll emerge near a vehicular bridge that is heavily guarded. Fight your way to the opposite side.
After you're safely across, turn right and follow the narrow ridge until you find a hole in the fence. There are a few guards in this area, and you might want to kill them before proceeding. Jump through the hole and turn left. Follow the wall to a hole, which will lead you to the train yard.
Find cover and clear out the guards in the train yard. Search the nearby buildings for supplies, and then make your way to the yellow engine car at the far end of the tracks. Enter the car and release the brakes.
The chain reaction will push each car down the tracks. Go back to the opposite end and jump in the open train car. Climb the crates to the open hatch, then jump onto the roof of the car. Jump from the train onto the nearby ledge, and then crawl into the duct that leads into the base.
Kamchatka: Train Bridge
Objective: Make your way into the base
Wait for the guards to finish talking, then drop down and shoot them both. Proceed down the hallway and take cover near the door. Clear out the oncoming guards, and then follow the tracks down to the doorway.
Cross the bridge, engaging the enemy. Once the area is clear, climb into the guard tower next to the main building. Jump from the window onto the roof, and then drop into the open hatch. As you make your way down the duct, take note of the fan on the floor to your right.
Drop down at the end of the duct, then kill everyone in the room ahead. Open the gate and move to the gated area. Inside is a switch that turns off the fans. Go through the double doors that lead outside. Once again get to the roof and into the hatch.
Now that the fan has stopped, you can drop down into the lower duct. Proceed to the next area.
Kamchatka: Checkpoint
Objective: Disable the security grid
Grab the supplies in this first room, then head out the door. The next area is full of guards. Kill them before proceeding. Go through the double doors and into the security grid control room. When your path is cleared, go down and disable the grid.
To disable the grid, you must throw the two switches mounted on the walls and then the main switch in the center. Stay in the control room until the fireworks are over, then move back to the main area. Be cautious of the guards who appear after the grid is disabled.
The cave-in has created a makeshift ramp. Climb up and then jump to the roof of the central building. Jump from the roof to the ventilation duct, and then climb in the open duct ahead. Drop down into the next room. Don't fire on the people in this room--they are scientists.
Follow the hallway to the next room. You'll need to get the train moving, but first you'll need to lighten its load. Look between the engine car and the car behind it. Remove the pin in the coupling, then jump into the engine car and fire it up.
Kamchatka: Cave Complex
Objective: Proceed to the lower levels
Follow the hallways until you reach an enormous cavernous area. Clear out the guards here, and be especially aware of the manned M60 on the upper level. Proceed to the double doors at the far end of the cavern.
Go up the two flights of stairs and onto the upper level of the previous room. A new wave of soldiers will appear, and they will lob grenades at you from below. Use the M60 to get rid of them, or just dodge them altogether and get in the elevator. Activate the elevator to descend.
Fight your way through the hallways of the lower level to the main generator.
Kamchatka: Main Generator
Objective: Disable the power grid
Before you finally reach the main generator, you'll come to a large stairway. The bad news is that this is one of the deadliest choke points in the game. Elite soldiers with excellent aim guard the stairs. It's hard to get a good shot at them, because the beams are difficult to shoot through. (The worst news is that it's even more deadly on the way back up.) It's best just to run down, guns ablazin'.
When you reach the bottom of the stairs, climb down the ladder into the generator room. There's a ladder up to a walkway to the right. Climb it, then follow the walkway all the way around, though the control room, to the center switch. Flip that switch, then return to the main control room. Flip that switch and the power will be shut down.
Kamchatka: Main Generator
Objective: Return to the upper levels
Now it's dark. Use the night-vision goggles and the targeting of the OICW if you're having trouble seeing. Make your way back up the ladder to the main stairway. Get ready to fight more elite guards, who will be descending on you.
Get to the stairs and climb up. Fight your way back to the lab areas. Most of the doors have been sealed with the power outage, but you'll see some scientists breaking a window with a chair. Once the window is out, jump though and find the open hatch. Drop down and crawl through the duct.
Fight the guards in the next room, then go through the double doors. In the next lab, wait for security windows to open, then kill the visible soldiers. Go through the door and then take an immediate right. This will take you back to the cave complex.
Kamchatka: Cave Complex
Objective: Gain entrance to the research facility
Pick the lock on the door, then follow the hallways to a ladder. Climb up, and fight your way through the white brick corridor.
You'll find a locked door here that leads to the research facility. You can't open it yet. Back up and find the nearby elevator. Flip the switch to open the roof hatch, then climb the ladder to the top of the elevator. Climb the elevator cables to the very top. Make sure you have a safe place to land, then drop off the cable.
Either grab the M60 or get to the double doors. Make your way back down the stairs and into the main floor of the cavern. Note that some previously sealed doors in the computer room are now slightly ajar, and you can find some supplies behind them.
Once you are on the ground floor of the cavern, turn right and head over to the conveyor controls. Flip the switch to drop the cargo into the ravine below. Now go all the way back up to the elevator and climb down the cable.
Return to the locked door you encountered before climbing the elevator shaft. You'll need to jump a large gap, but the door will be gone. Proceed to the research facility.
Kamchatka: Research Facility
Objective: Get to the labs
At the bottom of the steps is a locked door. Pick the lock for some supplies. Follow the hallway until you come to an intersection. Head left. Follow the hallways until you come to a scientist trying to open a door. Pick the lock, head through, and go up the stairs.
Fight your way to the end of the hall. It appears to be a dead end. Throw a grenade to shatter the windows, then drop down into the room below.
Jump through the open window of the central room. Turn the valve to flood the room, which will in turn open the doors just outside. Head through the doors, jump over the debris, and prepare for a big fight in the room beyond. Once the path is safe, move forward into the main labs.
Kamchatka: Labs 1, 2, 3
Objectives:
Find explosive charges
Destroy Bio Lab One
Destroy Bio Lab Two
Destroy Bio Lab Three
Get to Bio Lab Four
The power is back on. Go through the door into the first lab. Try to set a charge on the shiny, expensive-looking thing. Head out and to the left.
You'll find a door to a small area with trucks and military supplies. On the platform in the center is a switch that controls the cargo. Flip it twice to bring both pallets to the platform. The second has some charges on it. Return to the lab and set the first charge.
When it explodes, it will leave a huge hole in the wall behind it. Go through it and into lab two. Be very careful of the hallway just before the lab--it is a significant choke point.
Climb down to lab two. Set the charge and take cover. After it explodes, a small wave of soldiers will appear on the walkway above. Get back up to the hallway, and look through the now-destroyed windows. You'll see a closed duct on the opposite wall. Shoot it open, then make your way along the ledge toward it. Crawl through the duct and into the hallway. Shoot the next duct and crawl through it.
When you get to lab three, jump over the console and flip the switch to open the access door. Go in and set the charge. After the third lab is destroyed, some soldiers will open the door to lab four. Kill them and proceed.
Kamchatka: Lab 4
Objectives:
Destroy Bio Lab Four
Find and Extract Dr. Sestrogon
In the final lab, you must first unlock two security doors leading in. Once you can see the lab equipment, head down and flip the two switches on either side. Then head into the main control room and flip the switch to raise the cover.
Set the charge, then take cover. Once the final lab is destroyed, head up the stairs. The shield that previously covered the equipment will be going haywire, raising and lowering. Jump on it, and ride it to the ceiling near the vents above. Crawl along next to the vents until you hear someone yelling at Dr. Sestrogon. When you reach the end of the area, you'll fall through into the room below.
Kill the guards and talk to the doctor. Follow him out of the lab.
Go down the steps and pick the lock on the door below. Flip the switch to call the metal cage. Get into the cage, and flip the switch when you are ready. Once you're in the tunnel, shoot the guards below, then turn toward the door of the cage. Shoot the guards ahead, then wait until the cage stops. Exit and watch your debriefing.
Switzerland
Recommended Inventory:
- Combat Knife
- US Socom with Laser Sight
- OICW
- M590 Shotgun
- M84 Stun Grenade
- Thermal-Vision Goggles
Most of this mission will take place in an airport, and the first half plays a bit like VirtuaCop. You'll be able to move around, but the presence of hostages means you need to be extra careful with your gunfire.
If you haven't learned to use cover effectively, now is the time. You'll literally be taking on an army, and the body count will hit the triple digits in this mission. You can clear out most areas with nary a dent in your armor, however, if you find a good place to stand while you draw out the enemy.
A good strategy, if you don't mind taking advantage of the "artificial" in artificial intelligence, is to find good cover, run out to trigger enemies, then run back and pick them off. It's a cheap move, but it works.
Switzerland: Security Station
Objectives:
Meet with Captain Jenzer
Get to the terminal
After meeting with Jenzer, go through the double doors and out into the airport. Jenzer will give you some audio clues about oncoming enemies, but they aren't very helpful.
Go up the escalator and kill the soldiers. Head left and clean out the bathrooms, then continue through the airport. Some hostages will come around the next turn. You must not let them die, and you certainly shouldn't shoot them yourself.
Keep finding cover and clearing oncoming soldiers as you make your way to the next escalators. Go up these, and then down the next set of escalators.
You'll come to a moving walkway. Watch the door at the end as you approach--a soldier will kick it open and start firing. Turn the bend and get behind the luggage cart. Lean and pick off the enemies as they approach. Move forward and take cover at the wall near the ticketing counters. Kill the soldiers as they come down the escalators.
When you're ready to move forward, be wary of the sniper above you. Get him, and then head up the escalators and into the terminal.
Switzerland: Terminal
Objective: Get to the employee section of the airport
Immediately take cover behind the phone booth. Two soldiers will descend on the escalators ahead. Kill them, then proceed up.
Clear out the baggage area, then move down the hall. The end of this hall is a particularly good cover point. Once the next hall is clear, proceed. There are two paths down to the baggage claim--a pair of escalators and a walkway. Use the walkway, as it will keep you covered until you're at the bottom.
Move through the baggage claim area and continue around to the gates. Pause and clear the area before going beyond the metal detector. Try to avoid going directly through the metal detector if you can.
Proceed to the gate area and clean out the bathrooms. There are numerous soldiers ahead, and you don't want anyone flanking you. In the next gate area, go through the open door with the exit sign to enter the baggage handling area.
Switzerland: Hangar
Objective: Locate and board the Prometheus jet
Make your way down to the bottom floor of the baggage area. Jump on the horizontal conveyor at the back of the room, and duck as you pass through the tunnels. When you reach the end, try to kill as many soldiers as you can before dropping down into the next area.
Head up the steps and pick the lock. Head left down the hallway and clear out the next room. Climb the ladder, then shoot the fuel tank near the grate. Drop through the grate onto the walkway below. More guards will appear--kill them quickly. Pick the lock on the gate ahead, then crawl forward.
At the end of this passage is a large grate. Be very careful here. The room below is full of soldiers, and they can see you. Shoot the boxes to clear the grate, then bounce some grenades into the hole if you can. Use the OICW to target soldiers before you drop down. Do anything you can to clear out most of that room before you drop down. When you're ready, lower yourself through the opening.
You'll soon emerge outside. Move through the heavily guarded storage bins until you reach the hangar. Kill the soldiers guarding the jet, then climb up the stairs to the wing. Move across the wing, and then across the small ledge leading to the door. Pick the lock and enter the jet.
Switzerland: Airplane
Objectives:
Find Nachrade
Radio the Shop
Disable the navigational controls
Escape the plane
Climb up the ladder and arm your weapon of choice. Move up the steps ahead and turn around. Head through the fuselage of the plane. Near the restrooms, you'll find a red keycard on a table. Grab it and head back the other way.
At the opposite end of the plane, you'll find the security card reader. Use the red key and head up the stairs.
After the confrontation, enter the cockpit. Use the radio to call the Shop. Head back down to the lower level, then proceed past the stairs. You'll see a red light coming from a room blocked by a row of sensors and controls. You can squeeze through a small gap on the right side of these and then find the navigation controls. Use them, then head back to the cargo loading dock, which is now opening. Grab the parachute from the wall next to the jeep, and then exit the plane.
The Shop
Recommended Inventory:
- Combat Knife
- US Socom with Laser Sight
- OICW
- MM1 Grenade Launcher
- M84 Stun Grenade
- Night-Vision Goggles
This is it. The last mission, and the final few levels. You'll find out who the mole is and maybe put an end to this whole Prometheus threat. Choose your weapons and get started.
The Shop: Main Level
Objective: Make your way to level two
Kill the soldier guarding the security doors, then go through. Fight your way through the scanner and to the next set of security doors. The next hallway is heavily guarded, and the doors make cover next to impossible. Be prepared to shoot quickly and take some lead.
Once it's clear, search the rooms if you want equipment or if you want to clear out all the soldiers. If you just want to move along, head right and down the next hallway. Jump onto the furniture and into the duct. Lie prone and crawl through the duct. You can't stand up in the next area, so you'll just have to keep crawling over the battle below. Enter the next duct and crawl all the way to the end.
Drop down and turn right. The elevator to level two is right here. Enter and use it.
The Shop: Level Two
Objective: Make your way to the laboratory
This level has a fair number of soldiers and some supplies scattered around. The direct path, though, is a fairly short route.
Start to move down the hallway straight ahead. There will be an explosion, at which point you'll need to jump over the furniture to continue safely. Turn left at the end of the hall, then turn right.
Go to the end of the hall and enter the elevator.
The Shop: Laboratory
Objectives:
Find the mole
Find Dr. Sestrogon
Make your way to the roof
Head down the hall and turn right. Go through the security doors. The security doors ahead lead to some supplies. If you need them, grab them. Otherwise, open the double doors on the left.
Crouch and take cover. Lean in and kill all the soldiers. Move through the room and to the next set of double doors. Go through these and then through the security door on the left. Follow the hallway and turn left. Go through the first door on your left. Go straight through the room and exit through the door ahead.
Go through the security doors. Kill all of the soldiers, then proceed around to the window at the end. You'll find Sestrogon and the mole here. After the short scene, go through the security doors behind you, and head left down the hallway. Turn left at the end and enter the elevator to the roof.
The Shop: Roof
Objective: Destroy the helicopter
Another boss fight, another helicopter. Immediately exit the elevator, turn left, and jump over the railing. Climb the first ladder, and head to the second door on your left. Open the lock before you start attacking--the room is full of supplies, and it's best to open it sooner than later.
Stay in this area of the roof. You can avoid the soldiers entirely over here. Arm your OICW and get to work on those helicopter engines. Just as in New York, you'll want to concentrate your fire on the engines. When the helicopter is unloading men, you pretty much have free rein to fire at the engines with no retaliation, so take advantage of the opportunity.
Once the red lights are showing, a direct hit will blow up the engines. Unfortunately, it won't be enough. Fortunately, it will blow out the glass shielding the pilot. Zoom your scope on the pilot--one clean headshot will be enough to take the helicopter, and the mole, down for good.
Multiplayer Tips
Becoming good at multiplayer Soldier of Fortune II is dependent on a variety of factors. If you've played other, similar FPS games multiplayer (such as Counter-Strike or Return to Castle Wolfenstein), then you have a decent head start.
First and foremost is practicing until you know which weapons work best for you. Other factors, such as your mouse and your connection, can't be taught or learned (but they can be bought). There are some ways to improve your game, though, and below are a few very general strategies to help you on the road to dominance.
Know Your Maps
It seems obvious, but it's one of the most important factors of good multiplaying. If you really want to get good, start a few servers on your own and check out the maps without other players. Learn where the choke points are located, where good sniping locations are, and, if you play infiltration games, where the briefcase and the extraction points are. Whether you're defending or nabbing, these latter locations are both vital to know.
Know Your Weapons
Certain weapons and equipment are great on some maps but not so great on others. Once you learn the maps and environmental conditions, you'll know what equipment you'll want to use and when. The preset outfitting selections are good, and you can choose any available weapon or accessory with the custom outfit option.
If you find you don't like what you've chosen, you can change your inventory while you're a ghost, or you can do it during the brief countdown before a new game begins. This is especially important right after your server has changed maps and you want new equipment for the new location.
Ghost Spy
If someone on your server seems particularly good, watch them play while you're a spectator or a ghost. Note what equipment their using and what routes they take through the map. It's a good way to learn from an experienced player.
You can also use this technique to spy on the opposition, if the server allows you to watch the opposing team. Certain players will have consistent patterns, so you can preempt them once you're back in the game.
Infiltration Tips
Infiltration is the best multiplayer mode in Soldier of Fortune II and one of the most popular. Because of this, it warrants a bit of special attention.
If you're on the defending team, there's no need to split up and go hunt down the enemy. Never leave the briefcase unattended. Good teamwork allows some people to commando off and hunt down the blue team, but a good red team will work together to defend the case. The red team has an advantage: The blue team must come to you, and you know exactly what they want and where it is.
Members of the blue team, on the other hand, can take whatever route they want. Still, teamwork is important. It's a good idea to work together to get the briefcase to the extraction point. If someone grabs it and gets killed, someone should be there to pick it up immediately. Incendiary grenades are a must, and if you grab the briefcase, throw some down to create a fiery path in your wake.
Cheat Codes
To activate the cheat menu, you will need to edit a file. To do this, open the MYCONFIG.CFG file (located in the \base\ folder in your Soldier of Fortune II directory) with a text editor. It is a very good idea to back up the file before monkeying with it. Add the following text to the file: seta sv_cheats "1". Then save the file and restart Soldier of Fortune II.
During the game, simultaneously press Shift and the tilde key (~) to open the console. Type setrandom sv_cheats 1 and then press Enter to enable cheats. Open the console and type the desired command to activate the cheat. Note: You must enable the cheats every time you switch levels.
Codes:
| Command | Effect |
| god | Toggle god mode |
| give all | All weapons and ammo |
| give "item name" | Spawn indicated item |
| give ammo | Full ammunition for held weapons |
| give armor | Set armor to full |
| give health | Full health |
| noclip | Toggles no-clipping mode |
| notarget | Disable enemy AI |
| g_gravity 0-800 | Change gravity (800 is default, 0 for flight) |
| g_speed "number" | Change movement rate (320 is default, lower is slower) |
| cmdlist | List console commands |
| kill | Suicide |
| quit | Exit game |
| mapname | Display current map name |
| dir maps | List map directory |
| map "level name" | Advance to indicated map |
| raven 1 | Level-select icon at main menu |
| name "text" | Change player's name |
| toggle r_fullscreen | Toggle windowed and full screen, restarts game |
| serverinfo | Show current server settings |
| reconnect | Reconnect to last server |
Got a news tip or want to contact us directly? Email news@gamespot.com
Join the conversation