Xenosaga Episode I: Der Wille zur Macht Walkthrough
This comprehensive guide includes lists of unique attacks, status effects, skills, and items, as well as a full databank with stats on all the enemies in the game, a step-by-step walkthrough, card listings and tips for the mini-games, and more.
Design by James Cheung
Xenosaga Episode I: Der Wille Zur Macht is an epic role-playing game that follows the adventures of a young woman, Shion Uzuki, and her companions as they battle mysterious beings known as the Gnosis. This GameSpot Complete Game Guide gives players everything they need to know to complete Xenosaga Episode I.
The guide includes:
- Gameplay basics and lists of each character's unique attacks
- Lists of status effects, skills, and items
- a full databank with stats on all the enemies in the game
- a detailed, step-by-step walk-through
- Card listings and tips for the mini-games
Table of Contents
Chapter 1: Game BasicsChapter 2: Battle Basics
Chapter 3: Attacks and Tech Attacks
Chapter 4: Status Effects
Chapter 5: Character Profiles
Chapter 6: Emails
Chapter 7: Segment Addresses
Chapter 8: Ether
Chapter 9: Skills
Chapter 10: Items and Equipment
Chapter 11: Basic AGWS Strategies
Chapter 12: AGWS Listing
Chapter 13: AGWS Equipment
Chapter 14: Enemy Databank
Chapter 15: Walk-Through
Woglinde
Pleroma
Elsa
U-TIC Battleship
Dock Colony
Cathedral Ship
Durandal
Kukai Foundation
Miltia
Kukai Foundation Revisited
Song of Nephilim
Proto Merkabah
Chapter 1: Game Basics
Movement
Walk around with the left analog stick, unless you are old-school and you like the directional pad. Using the analog stick affords you more options, though. Pushing the stick further and further in one direction makes your character walk faster, then jog, then run. Holding the R2 button will put you in walk-only mode, which is useful for sneaking around enemies. Coming into contact with an enemy will put you into a battle.
The circle button
Hit circle to open doors, talk to people, open boxes, take items, hit big red switches, read maps, activate cranes, or do pretty much anything else that involves interaction with the environment around your character.
Save points
The big rotating yellow things are save points, and you can save your game at them by hitting O. You may also recover your characters' stats at one by using a Bio Sphere. If the save point has a blue plate attached to the top of it, then it has few additional features: you can play Xenocard, play AGWS battling, visit the casino, or use the E.V.S.
Shopping
The big rotating silver things are shops. You can buy or sell items and equipment there.
Blowing stuff up
You can use the U.M.N. to blow stuff up. If your character passes by an object that can be blown up, a blue indicator will appear and a sound will play. Hit square to blow that object up. You may open up new areas, discover items, or encounter enemies when blowing stuff up. Some stuff, when blown up, will release some kind of temporary ill effect for your enemies on the field (lightning, fire, etc.). If you can lure an enemy into one of these, then the effect will be displayed. If you then fight the enemy, it will be at an appropriate disadvantage.
Radar
In the lower right corner, there is a blue radar screen. Your character's location and facing are indicated by a red triangle. Enemies are indicated by yellow triangles. Non-hostile characters are indicated by green triangles.
Chapter 2: Battle Basics
Attacking
Basically, you have two kinds of attacks: short range and long range. When it is your character's turn in battle, you can choose a target and then hit triangle to execute a long range attack, or square to execute a short range attack. You can keep attacking as long as you have AP (Action Points), which is indicated in the blue meter near your character's portrait. You may stop attacking by hitting X. Each turn you get 4 AP (Unless you're under the influence of certain items or effects). If you do not use all of your AP in one turn, it will carry over to the next turn. Regular attacks take 2 AP each. Sometimes you may score a critical hit, which does more damage than usual. In a typical turn, you might hit triangle and then square, thus doing two attacks and using all of your 4 AP for that turn. KOS-MOS and Ziggy both have special weapons that can be used by hitting circle when you have 6 AP.
Tech Attacks
If you have enough AP, you can execute a tech attack by doing a regular attack and then hitting O. Check out your tech attack menu to view and edit which attack combinations are associated with which tech attacks. As an example, on one turn you might hit triangle to do a regular, long-range attack, then hit X to stop attacking and let your AP carry over. On the next turn, you might hit square, square, circle, using all
of your 6 AP to unleash a LW Speed Tech attack. If you upgrade a Tech attack to high speed, then it can be used on a turn in which you only have 4 AP, because it can be set to be used after only one regular attack.
Menu
Instead of attacking on your turn, you can hit X to call up the menu. Hit X again to return to the attacks. The battle menu contains the following options:
ETHER
These are your character's "spells". Choose an Ether, then choose a target, if required. This uses 4 AP.
ITEM
This lets you use an item. Choose an item, then choose a target. This uses 3 AP. You can also choose a "W" item with triangle in order to use it on all characters, using up 6 AP and two of the item.
MOVE
You can move to another location on the battlefield. This affects your attack and defense. Characters in the back row will not be able to use, or be hit by, physical attacks. This costs 2 AP.
AGWS
Use this to board your AGWS. You will be prompted for a location where you would like to deploy.
GUARD
This makes your character guard until her next turn. It costs 2 AP.
Boost
The Boost gauge is the red gauge near a character's AP gauge. It fills up as you attack, and once full, it increments the number next to it and empties again. Boost allows you to slip a character's turn into the round pre-emptively. When a character has at least one boost gauge filled, and is not already present in the turn queue at the bottom right, you can hold down R2 and a Boost icon will show up. Eligible characters will show up around it, and you then hit the appropriate button(square is left, triangle is up, circle is right). That character's icon will then be inserted into the queue immediately after the current turn.
Counter-Boost
Some enemies have the ability to counter-boost. This means that they have a chance to automatically boost when attacked. The enemy's portrait will appear in a pink boost circle rather than a yellow one, and whether the enemy is already in the turn queue does not affect this ability. This means that one enemy can go twice in a row. The nice thing is that your characters can gain this ability as well. The items Samurai Heart and Revenge Power are both counter-boost items, and the corresponding skills can be drawn from them. Neat!
G.T.W.
At the bottom right of the screen is a blue field called the G.T.W., or Group Turn Window. It shows a diagram of the battlefield, including all allies and enemies. The currently targeted ally or enemy will be indicated by a line, and by having its portrait slightly offset in the queue. Enemies are indicated as type B (biological), M (mechanical), or G (Gnosis). If you are able to see enemies' hit points, they will be displayed here as well. The queue of portraits in the middle indicates in what order characters will act during this round of battle. At the beginning of a round, icons are put into the queue according to one's speed attribute. As turns are taken, the icons file out the left side of the queue. Keep an eye on who will be taking the next turn, as you might be able to kill a monster right before it attacks, or you might find reassurance in knowing that your healing character will have the next turn. Also keep in mind that the queue can be altered by the use of Boosts, by both you and your enemies.
Event Slot
Next to the G.T.W. is a little slot machine-like window that rolls over each turn. It has four possible settings, each of which affects in a different way the combat that takes place during that turn. The little orange burst increases the effectiveness of critical hits. The gold ring increases the rate at which your Boost gauge fills. The coin-like item gives you extra tech, ether, and skill points with each kill made on that turn. The amount of points received varies, with a high chance of getting double points, sometimes quadruple points, and rarely ten times normal point values. The blank one does nothing.
Chapter 3: Attacks and Tech Attacks
This section lists normal attacks and tech attacks for each of the playable characters in Xenosaga.
Shion
Normal Attacks
square: Knuckle
triangle: Firecracker (far)
square, square: Break Kick
square, triangle: Stun Shock (lightning)
triangle, square: Spin Kick
triangle, triangle: Cherry Bomb (far, fire)
Tech attacks
Lightning Blast (lightning attack, targets one enemy)
Spell Ray (ether attack, targets one enemy)
Shock Blade (targets one enemy, changing cartridges imparts different status effects - see below)
Thermal Blast (an intense fire attack, targets one enemy)
Ether Amp (a single targeted Bio or Gnosis enemy will now take double damage from ether attacks)
Gravity Well (slows Bio and Gnosis enemies, targets one enemy)
Lunar Blade (slashing/beam damage on one enemy)
Rain Blade (a rain of beams on all enemies)
Shock Blade cartridge types
BXS001V - imparts slow on mechanical enemies
BXS002V - imparts power loss on mechanical enemies
BXS003V - imparts armor failure on mechanical enemies
BXS004V - reduces physical attack of biological and gnosis enemies
BXS005V - reduces physical defense of biological and gnosis enemies
KOS-MOS
Normal Attacks
square: Punch
triangle: Blaster (far, beam)
square, square: S-Sault
square, triangle: Sword
triangle, square: Needle
triangle, triangle: Blaster (far, beam)
Sub-Weapons
F-MSHOT (limited to 12 shots per battle, requires 0 EP)
F-GSHOT (limited to 2 shots per battle, requires 0 EP)
F-BSHOT (limited to 8 shots per battle; requires 2 EP)
F-RSHOT (limited to 8 shots per battle requires 0 EP)
F-SCYTHE (limited to 1 shot per battle; requires 8 EP)
Tech attacks
R- BLADE (physical attack, targets one enemy)
R- CANNON (ether attack, targets one enemy)
R- DRILL (physical attack, targets one enemy)
X- BUSTER (ether attack, targets all enemies)
S- CHAIN (causes a random status effect on enemies, targets one enemy)
R- HAMMER (physical attack, targets one enemy)
R- DRAGON (physical attack, targets one enemy)
Ziggurat8 (Ziggy)
Normal Attacks
square: High Kick
triangle: Laser Blade (far)
square, square: Jack Knife
square, triangle: Ignition (fire)
triangle, square: Jack Blade
triangle, triangle: Laser Swing (far)
Sub-Weapons
BMP55SX (limited to 2 shots per battle, requires 4 EP, attacks all enemies)
MSP89SX (limited to 2 shots per battle, requires 0 EP, attacks all enemies)
Tech attacks
Cyber Kick (physical and fire attack, targets one enemy)
Lightning Fist (ether and lightning attack, targets one enemy)
Meteor Shot (ether and fire attack, targets all enemies)
Cyclone (physical attack, targets one enemy)
Cross Lancer (physical attack, targets one enemy)
Executioner (ether and lightning attack, targets all enemies)
Hell Fire (physical and fire attack, targets one enemy)
M.O.M.O.
Normal Attacks
square: Stardust
triangle: Melody Ray (far)
square, square: Dream Whirl
square, triangle: Ignition (fire)
triangle, square: Cosmic Flip
triangle, triangle: Flower Storm (far)
Tech attacks
Star Strike (physical attack, targets one enemy)
Floral Tempest (ether attack, targets one enemy)
Meteor Storm (ether attack, targets one enemy)
Star Cannon (physical attack, targets all enemies)
Angel Arrow (ether attack, targets all enemies)
Magic Caster (no attack; chance to steal rare item, can only perform after transformation)
MOMO's Kiss (ether attack; can only perform after transformation, targets one enemy)
Dark Scepter (physical attack; Gnosis will be turned into an item, targets one enemy)
chaos
Normal Attacks
square: Tornado Slash
triangle: Arrow (far)
square, square: Seraphim Rush
square, triangle: Electro Upper
triangle, square: Star Thrust
triangle, triangle: Angel Shot (far)
Angel Wings (physical attack, targets one enemy)
Lunar Seal (ether attack, targets one enemy)
Heaven's Wrath (physical and lightning attack, targets one enemy)
Angel Blow (ether attack, targets all enemies)
Chained Blast (ether attack; cause machine-type's pilot to faint)
Arctic Blast (ether and ice attack, targets all enemies)
Demon Banisher (Gnosis may leave battle, targets one enemy)
Divine Spear (physical attack, targets one enemy, only available when one ally is knocked out)
Jr.
Normal Attacks
square: Cross Shot (far)
triangle: Southpaw (far)
square, square: Trick Shot (far)
square, triangle: Coin Snap (far)
triangle, square: Hip Shot (far)
triangle, triangle: Cross Fire (far)
Tech attacks
Prelude to Battle (physical attack, targets one enemy)
Moonlit Serenade (ether attack, targets one enemy)
Storm Waltz (physical attack, targets all enemies)
Last Symphony (physical attack, targets one enemies)
Mystique Nocturne (ether attack, targets all enemies)
Angelic Requiem (physical attack, targets all enemies)
Soul Rhapsody (ether attack, absorbs Gnosis, targets one enemy)
Chapter 4: Status Effects
While a character or enemy is experiencing a status effect, a cloud will appear
above their head. In the case of characters, an icon will also appear in their
status window at the top of the screen.
Negative Status Name / The Effect
Unconscious / Unable to perform any action
Stop / Unable to perform any action
Sleep / Unable to perform any action
Confusion / A confused person might attack friends
Poison / Every turn 20% of max HP will be reduced
Ether Bomb / Ether damage will be doubled
Reverse / Recovery and Damage are reversed (instead of damage hurting you it heals you)
HP Half / HP recovery amounts will be halved
Admonish / receive the damage of one's own attack
EP Half / EP recovery amounts will be halved
EP Over / All Ether costs twice the normal amount
Slow / next turn comes 50% slower
Accuracy Down / accuracy down 50%
Evasion Down / evasion down by 50%
Physical Strength Down / Physical Strength Down 25%
Physical Defense Down / Physical Defense Down 25%
AP Half / Each turn the AP received will be half normal amount
Ether Power Down / Ether Power Down 25%
Lost / Ether can't be used
Boost Seal / Boost can't be used
Taking damage will cause recovery
Taking damage gives a 15% chance of recovery
Chapter 5: Character Profiles
Shion Uzuki
Sex: Female
Height: 163cm
Weight: 48kg
Age: 22
Bio: Shion is the head engineer of the "KOS-MOS" project inside Vector, the number one development agency. In the beginning of the story, Shion is dispatched to outer space by Vector, to be in charge of the investigation of a planet which has disappeared, and to test the KOS-MOS project. The project is being conducted jointly by the government and the private sector. From early on, since her birth, there has been a long history of many wars around and in her hometown. Both of her parents are dead, and also two years ago she lost her first love in an accident. It has been a very tough experience for her. However, she hasn't been troubled by it very much and she has never revealed her hurt feelings to anyone else. She does everything with a positive attitude, and this tends to be taken just as simple optimism. But it is her positive attitude is really the strongest resistance to all the experiences she's had in the past. It's also the proof that she is not restrained by the ghosts of her past, and the reason for her sheer will to live for today first and then worry about tomorrow. Shion is a woman with "strong and mighty" personality, who tends to push her coworkers to move ahead aggressively. Although this quality is also kind of an attraction, she denies it about herself. However, as being the KOS-MOS project's head engineer, she is thought of as just a Muse. The fact is that she is a pretty woman. Because of this many of her male coworkers take a fancy to her.
KOS-MOS
Sex: Female
Height: 167 cm
Weight: 92kg
Age: Appearance of approximately 18 years.
Bio: Key girl throughout the Xenosaga series. A female-type battle android developed by the galactic conglomerate "Vector". Created without the artificial-human Realien technique, she is a unique being composed entirely of mechanical parts. Created as a battle system for use against the Gnosis by the pilgrimage fleet, "KOS-MOS" is a general project title rather than a name. She is devoted to the three priorities of logic, the establishment, and duty, and to guarding her creator Shion unconditionally. In order to facilitate communication with others, she implements a "personality imitation OS". Her name means "order".
Ziggy
Sex: Male
Height: 191cm
Age: 98 years have passed since he donated his body to science. (Appears to be 30 years old) A battle cyborg charged with the task of escorting 100-Type Observational Realien "M.O.M.O.". In the year 4667 T.C., at the age of 30, after donating his body to science, he was deployed to the contact subcommittee for use as a battle cyborg. While alive, his last rank held was "Commander, Federation Police 1875th Special Operations Force Headquarters Detachment". Ziggy becomes commissioned by the federal subcommittee to personally rescue M.O.M.O.
MOMO
Sex: Female
Height: 141cm
Weight: 36kg
Age: Appearance of about 12 years.
Bio: The only way to capture a Gnosis is to use a "special observer". To capture the Gnosis, an observation-type Realien prototype was developed. Joachim Mizrahi and Juli Mizrahi created the UTIC, a mechanics organization. Through this they created M.O.M.O. (Multiple Observative Mimetic Organicus), which is modeled after the appearance of Sakura Mizrahi, their deceased daughter. By accumulating good deeds, she hopes to fulfill her dream of meeting her father Joachim in heaven.
chaos
Sex: Male
Height: 169 cm
Weight: 53kg
Age: Appearance of approximately 18 years.
Bio: A key person throughout the Xenosaga Series. Chaos is slender, and always wears a gloomy expression. He seems to have some kind of quality that sees through everything. His philosophical style of speech is hard for others to understand. He has the appearance of a 16 year old, but his age is unknown. His
amber colored eyes and silver hair make him very special. Choas never talks about his past in detail. So no one knows his background, including himself because of some memory blackouts. This is why everything about him is wrapped with mystery.
Jr.
Sex: Male
Height: 140cm
Weight: 38kg
Age: Looks about 12 years old
Jr. represents the board of directors for the Kukai Foundation. The Kukai Foundation is a financial group rooted within the independent state of Miltia, a member of the Galaxy Federation. Jr. appears to be 12 years old. However no one knows his real age. Despite his child-like appearance, inside he is just the opposite. He's filled with very extensive knowledge. But sometimes he asks very child-like questions, at the same time making remarks about the true nature of things. Collecting old books and rare guns (from our period) is Jr.'s hobby.
Chapter 6: Emails
Throughout the course of the game, Shion will receive a number of emails on her U.M.N. Some of these emails can be replied to, and if you reply correctly, you can procure some nice items and a good amount of cash. Here is a quick list of all emails that can get you something.
The email list follows this pattern:
Subject
(Location and time received in game)
Effect of this email
-O- Right reply
-X- Wrong reply
EVS MAILS
Database Service Start
(Woglinde, on the way to the bridge)
Allows you to use the U.M.N. Database.
EVS Plugin
(Elsa Kitchen, on the way to bring curry to Andrew)
Allows you to use the EVS. Starting maps are KOS-MOS Simulator, Woglinde, and Asteroid Pleroma.
(1) / New Map Supplement (1)
(Dock Colony, spending the night)
Adds the U-TIC headquarters map to your EVS.
(2) / New Map Supplement (2)
(Durandal, looking for MOMO)
Adds the Gnosis Mothership map to your EVS.
(3) / New Map Supplement (3)
(Shion's Room on Durandal, going to see Allen)
Adds the Encephalon map to your EVS.
(4) / New Map Supplement (4)
(Durandal Bridge, going to ride the Elsa to Proto Merkabah)
Adds the Song of Nephilim map to your EVS.
KOS-MOS Tech attack Mails
(1) / Tech attack Use Approval (1)
(Elsa, going to look for Ziggy)
Gives KOS-MOS tech attack "R-DRILL"
(2) / Tech attack Use Approval (2)
(Durandal Residence Area, going to see Allen)
Gives KOS-MOS tech attack "X-BUSTER" and weapon "F-RSHOT"
(3) / Tech attack Use Approval (3)
(Durandal, getting on Elsa to enter Song of Nephilim)
Gives KOS-MOS tech attack "S-CHAIN" and "R-HAMMER"
(4) / Tech attack Use Approval (4)
(Durandal, getting on Elsa to enter Neo Merkabah)
Gives KOS-MOS tech attack "R-DRAGON"
KOS-MOS Weapon Mails
Secret Mail
(Woglinde, on the way to the bridge)
Reply before the story event on the Bridge.
-O- I read the Secret Mail
-X- Tsk Tsk!
I'm sending Sprinkle
(Woglinde, after the story event on the Bridge)
Gives Sprinkle.
New Weapon Complete!
(Durandal, getting on Elsa to enter Song of Nephilim)
Gives KOS-MOS weapon "F-SCYTHE".
Investment Mails
For the IT and Construction investments, you need to talk to the worker on the Woglinde near the Zohar to get these emails. For the others, it's the worker or the old guy downstairs at the Dock Colony. Give them your address and then you'll start getting emails about investing. In order to get F-BSHOT, you should
invest in Vector for Medical Supplies, and then Venture Link for Industry. If you miss one of them but get the other, then you can then invest in Vector for IT and Alchemia for Construction to get it later
Investment Firm Guide - Medical Supplies
(Woglinde, after the story event on the Bridge)
Reply before leaving the Woglinde.
-X- Invest in Hasegawa
-O- Invest in Vector
-X- Invest in Dawson
Results from investing in Hasegawa
(Elsa elevator, bringing curry to Andrew)
Gives 5x med kit S and 10% discount on healing items
Results from investing in Vector
(Elsa elevator, bringing curry to Andrew)
Gives 5x ether pack S and 10% discount on healing items; required to get KOS-
MOS's F-BSHOT weapon
Results from investing in Dawson
(Elsa elevator, bringing curry to Andrew)
Gives 5x revives and 10% discount on healing items
Investment Firm Guide - Industry
(Elsa, before the save point, going to check on the hatch)
Reply before the Elsa performs gate jump.
-O- Invest in Venture Link
-X- Invest in Tesla Instruments
-X- Invest in Chemical Union Distribution Center
Results from Venture Link
(Elsa B2, with Ziggy and MOMO)
Gives 4000G and 10% discount on AGWS weapons; required to get KOS-MOS's F-
BSHOT weapon
Results from Tesla Instruments
(Elsa B2, with Ziggy and MOMO)
Gives 6000G
Results from Chemical Union Distribution Center
(Elsa B2, with Ziggy and MOMO)
Gives 2x Speed Star
Investment Firm Guide - IT
(Elsa B3 Catapult, with Ziggy and MOMO)
Reply before Andrew freaks out.
-X- Invest in Advanced Cluster Machines
-X- Invest in Mercedes Technologies
-O- Invest in Vector Com
Results from Advanced Cluster Machines
(Durandal, looking for MOMO)
Gives 4000G and 10% discount on AGWS weapons
Results from Mercedes
(Durandal, looking for MOMO)
Gives 8000G
Results from Vector
(Durandal, looking for MOMO)
Gives Code Key Plugin and 10% discount on AGWS Accessories; required to get
KOS-MOS's F-BSHOT weapon
Investment Firm Guide - Construction
(Durandal, looking for MOMO)
Reply before finding MOMO in the Park.
-O- Invest in Alchemia
-X- Invest in Hamilton
-X- Invest in Shijima
Results from Alchemia
(Durandal, back at your room after finding MOMO)
Gives 24000G; required to get KOS-MOS's F-BSHOT weapon
Results from Hamilton
(Durandal, back at your room after finding MOMO)
Gives 48000G
Results from Shijima
(Durandal, back at your room after finding MOMO)
Gives 72000G
F-BSHOT Supply
(Elsa B1, staying at the Dock Colony OR Durandal, going from Residential
Area to Dock Area)
Gives KOS-MOS' F-BSHOT weapon.
This email will come only if you have either:
*invested in Vector for Medical Supplies and VL for Industry
OR
*invested in either of the above two, plus Vector for IT and Alchemia for
Construction
Chapter 7: Segment Addresses
There are eighteen red doors scattered throughout the game. Some of the best items in the game are in these doors, so try to get them all. Early in the game you'll get a Segment F item that lets you keep track of the doors and keys you've found so far.
Segment Addresses (Red Doors)
1: At the Foundation, on the roof of the inn to the right (accessible after Gnosis attack). Contains "Robot Head Part"
2: At the Dry dock colony, the basement of the "Talk to me" AGWS store. Contains "Robot Body Part"
3: At the Foundation, in the laundry store on the 1st floor the area surrounded by clothes (accessible after attack). Contains "Robot Right Leg Part".
4: At U-TIC headquarters, the wall of the passage on the 2nd floor and the 2nd map between the saintly hall on the stairway. Contains "Thief's Ring"
5: At the Encephalon Area, in the park, before the statues area. Contains "Double Buster"
6: In Heaven's Vehicle, in the astronomical observation room. Contains "Trauma plate"
7: On the Woglinde, beside the sergeant who gave you the key. "Robot Right Arm Part"
8: In the Elsa, the passage of B2F. Contains "Robot Left Leg Part"
9: In the Gnosis Mothership, at the research building 3rd floor. Contains "Robot Left Arm"
10: At the KOS-MOS simulation site, in the 1st floor of a deserted house. Contains two booster packs
11: In the U-TIC Battleship, the room of the soldier. Contains "Ice Coat"
12: At the Song of Nephilim, the 3rd floor of the 2nd tower. Contains "W Hammer Rod"
13: In the Gnosis Hive, at the first floor of the warehouse inside the department store. Contains "Samurai Heart"
14: In the Elsa, at the catapult deck. Contains "Speed Shoes"
15: At the Encephalon Area, near the subway ticket window. Contains "Angel Ring"
16: On the Woglinde, the passage before Andrew's office and lab. Contains "Stim DX"
17: In Proto Merkabah, at the research building 43rd floor. Contains "BLOOD9"
18: On the Woglinde, the passage near Shion's room. Contains "Lightning Coat"
Decoders (Keys)
1. First talk to the little boy at the Dock Colony shop "Talk to Me!!". At the Foundation, in the first floor of the warehouse, destroy the crates and ask the pink thing for some hints (make sure you talk to the pink thing about every hint that it gives). Then it can be found on the Durandal inside the park to your first right (the very first little section that breaks off from the main park area (still inside the park)). The key will be sparkling on the southern bit of the walkway to that small area. Make sure you talk to the pink thing about every hint that it gives.
2. At the Song of Nephilim, the 2nd tower, destroying one of the boxes the enemy that comes out carries it.
3. At the Encephalon Area, the bunny's house. Use carrot juice on the log to trick him and beat him back to his house.
4. At U-TIC headquarters, destroy the AGWS that you had avoided using the crane earlier.
5. At the Durandal, in the Waiting area in the locked room. Get the key from one of the closets in the Residential area.
6. In Heaven's Vehicle, defeat the boss on the satellite dish.
7. On the Woglinde, the master sergeant gives it to you to remember him by.
8. At the Foundation, in the bar is a woman who dumped her engagement ring and her boyfriend. After getting the fishing rod from the upstairs of the laundry mat go fishing until you find the ring. Than give the ring to the woman in the bar. She will give you the key for her ring.
9. In the Gnosis Hive, in the department store a Gnosis protects the box that contains the key.
10. In the Elsa, use the slide deck key to move the sliding deck. The slide deck key is in the 2nd cabin on a seat in the center of the room on the main floor (note: you can't see the key on the seat), yes the rooms between the bridge and the restaurant.
11. At U-TIC headquarters, the passage to right side or the central image which the soldier goes around.
12. At the Encephalon Area, a treasure box in the sewer.
13. At the Foundation, the bakery roof get there from the left side of the Inn's roof.
14. At the Song of Nephilim, 1st tower, 5th floor.
15. In the Gnosis Mothership, department stores 2nd floor protected by a flower gnosis.
16. In the U-TIC Battleship, using the guards key to enter his room. It's in his room.
17. At the Song of Nephelim, the 3rd tower center, go above the closed room on the left side and fall thru the hole.
18. On the Woglinde, Break the glass to Andrews office, which is a small lab or operating room.
Chapter 8: Ether
Ether are the spell-like abilities of your characters. Ethers marked with a * cannot be transferred from character to character
Shion
Medica (02 Ep , heals a small amount of hp, targets one ally or enemy)
Analyze (02 Ep, find out the current hp of an enemy)
Goodbye (01 Ep, leave normal battles, doesn't work for special events or bosses)
Medica All (08 Ep, heals a medium amount of hp, targets all allies)
Refresh (02 Ep, cures all status ailments, targets one ally)
Boost One (04 Ep, puts the boost gauge up 1 level, targets one ally)
Jamming (04 Ep, mechanical enemy's dexterity goes down for 5 turns, targets one M-enemy)
Medica Rest (08 Ep, heals a large amount of hp, targets one enemy or ally)
Revert (12 Ep, wake up a ko'd friend with a medium amount of hp, targets one ally)
Safety Level (12 Ep, if you die, reset to hp of one)
Quick (06 Ep, speed up character 25% for 5 turns, targets one ally)
*Queen Kiss (08 Ep, steal an item and a slight chance of an instant death, targets one enemy)
*Seraphim Bird (12 Ep, hurts all enemies, can only be used once per battle)
*Thrones Blade (08 Ep, hurts enemies, can only be used once per battle)
*Dominion Tank (10 Ep, ultra offensive strike, can only be used once per battle, targets all enemies)
*Erde Kaiser (30 Ep, the ultimate attack, can only be used once per battle, targets all enemies)
To get Shion's last 4 Ethers:
You have to find all the robot parts (all are found in the red doors), and give them to Hakase at Kukai Foundation's AGWS Garage. He is in the basement to the far left. In your journey to create Erde Kaiser you will also get 3 other ethers, they are Thrones Blade, Seraphim Bird, and Dominion Tank. Now once you have all the parts, Hakase will try to create Erde Kaiser and there will be a small accident. Now go to the Bar and find Scott. Finally they will make Erde Kaiser together.
KOS-MOS
Mode A7 (02 Ep, lowers physical attack and raises defense for 5 turns, targets self)
Dex Down (04 Ep, lowers dexterity of Bio and Gnosis by a medium amount, targets one enemy)
Force Down (04 Ep, lowers physical attack of Bio and Gnosis, targets one enemy)
Spell Down (04 Ep, lowers ether attacks of Bio and Gnosis, targets one enemy)
Gate (08 Ep, takes 1/4 of Hp but a slight chance of death against Bio and Gnosis, targets one enemy)
Ether Limit (16 Ep, ether damage and cost 2x, targets self)
*Satellite (16 Ep, Beam attack, limit once per battle, targets all enemies)
Dex Spell Ra (12Ep, Ice/ether attack, targets all enemies)
Dex Spell Fa (12Ep, Fire/ether attack, targets all enemies)
Dex Spell La (12Ep, lightning/ether attack, targets all enemies)
Ziggy
(all of Ziggy's ethers except Red Mark target himself)
My Guard (02 Ep, physical defense up and attack down for 5 turns)
* Body Guard (02 Ep, with MOMO in the back row, defense and strength go up)
Recharge (04 Ep, Hp up a medium amount)
Ether Shift A (04 Ep, ether defense up and attack down for 5 turns)
Ether Shift B (04 Ep, ether attack up and defense down for 5 turns)
Charge X (04 Ep, some Hp and Ep restored, limit once per battle)
Red Mark (04 Ep, 80% chance of critical hits on Machines, targets one enemy, limit once per battle)
Speed Boost (10 Ep, speed up 50% for 5 turns)
M.O.M.O.
Life Shot (02 Ep, Heals for about 120 at start, targets one enemy or ally)
Miracle Star (04 Ep, ether attack, targets one enemy)
Sheep Beam (04 Ep, machine pilots fall asleep, targets one enemy)
Prayer (06 Ep, get an item from heaven, targets self)
Refine (06 Ep, revive a ko'd character with low hp, targets one ally)
Junk Beam (06 Ep, a 50% chance machines will lose a turn, for next 5 turns, targets one enemy)
*Star Wind (10 Ep, strength up, can only use once per battle, targets self, used to transform)
*Star Veil (04 Ep, all ether effects down 25% for 5 turns, targets all allies, can only be used during Star Wind transformation)
*Star Action (06 Ep, Fills a characters AP points, targets one ally, can only be used during Star Wind transformation, )
*Starlight (10 Ep, strength up, can only use once per battle, used to transform)
*Star Bell (04 Ep, ether attack, targets one enemy, can only be used during Starlight transformation)
*Star Bunny (08 Ep, ether attack, targets all enemies, can only be used during Starlight transformation)
To get MOMO's two transformation Ethers and extra Tech attacks, you need to use MOMO as the lead character and inspect the glittering bookcase in the Gnosis hive (up the stairs, in the area with the falling bridge). Doing this you will get the Ether "Star Wind" and the Tech attack "Magic Caster". Also use MOMO as the lead character and inspect the glittering "wall" in the Song of Nephilim, the second tower 6th floor. Doing this you will get the Ether "Star Light" and the Tech attack "Lovely Ray". Again use MOMO as the lead character and enter the upstairs open window of Kukai Foundation bar and defeat Mintia, (get there by going upstairs at the hotel, outside and across the canopy). Doing this you will get the Tech attack "Dark Scepter"
chaos
Protective Armor (04 Ep, Ether attacks are 25% down for 5 turns, targets one enemy)
Healing Dew (06 Ep, everyone recovers a small amount of Hp, targets all allies)
Ice Wings (04 Ep, ice/ether attack, targets one enemy)
Purifying Storm (06 Ep, clears all status affects, targets all allies)
Fire Wings (04 Ep, fire/ether attack, targets one enemy)
Lighting Wings (04 Ep, lightning/ether attack, targets one enemy)
*Best Ally (50 Ep, completely revives and restores full health ko'd characters, can only be used once per battle, targets all allies)
Supreme Judgement (8 Ep, the amount an enemy can heal itself will now be halved, targets one enemy)
Cataclysm (12 Ep, all enemies lose a turn)
Light and Wings (12 Ep, attacks and clears all status affects, targets all enemies)
Jr.
Psycho Arm (04 Ep, physical attack up, targets self)
Ether Flare (04 Ep, ether effect up 25%, targets one enemy or ally)
*Dandyism (08 Ep, if a girl is in the back row and Jr. is in front, when KO'd you'll be auto revived, targets self)
Psycho Pocket (04 Ep, steal an item, targets one enemy)
Chain (04 Ep, Bio and Gnosis evasion down, targets one enemy)
Misty (10 Ep, block bio and gnosis spells, targets one enemy)
Coin Lock (08 Ep, immune to all status ailments for 5 turns, targets one ally)
Speed Machine (06 Ep, speed up 25% for 5 turns, targets one ally)
*Magnum Joe (summons Great Joe, targets one enemy)
*Buster Joe (summons Great Joe, targets all enemies)
To get Jr.'s last 2 Ethers:
Use Jr. as your lead character, destroy one of the closet doors and defeat Great Joe, (in the Residence Area of the Durandal, the bedroom with the shiny silver spinning thing that sells basic items). Doing this you will get the summon "Magnum Joe", after that you can buy the next summon "Buster Joe".
Chapter 9: Skills
Skills can be extracted from certain items in the game. The items in the game with an extractable skill effect are listed here. Note that Hats and Armors and Accessories with the same skill worn at the same time the effects will be cumulative. For example a hat that has E. Pt's up 25% worn also with an accessory that has E. Pt's up 25% will equal E. Pt's up 50%.
Also note there are other hats, armors, and accessories that just don't have a skill these are not listed here.
HATS
Skill Name / Item / Necessary Skill Level / Necessary Skill Points / Effects and remarks
Sleep Guard / Night Walker / Lv2 / 200 / Sleep prevention
Lost Guard / Magical Hat / Lv2 / 220 / "Lost" prevention
Ether P+25 / Star Hat / Lv5 / 1000 /E.Pt up 25%
ARMOR
Skill Name / Item / Necessary Skill Level / Necessary Skill Points / Effects and remarks
PDEF+4 / Neo Armor A / Lv3 / 300 / Physical defense +4
EDEF+4 / Neo Armor B / Lv3 / 300 / Ether defense +4
All Guard / Shield armor / Lv4 / 500 / protection from all status effects
Lonely EDUP / Spirit / Lv3 / 300 / Each time a person is KO'd, ether defense rises
Lonely PDUP / Soul / Lv3 / 300 / Each time a person is KO'd, physical defense rises
Tech P+25 / Swimsuit / Lv5 / 1000 / Tech Points earned up 25%
The swimsuit is a very nice item, and there are three total in the game. One is behind the counter at Our Treasure in the Kukai Foundation while you are saving the 13 people, one is procured by beating Great Joe, and one is won in the drill game. Collect all three!
ACCESSORIES
| Skill Name | Item | Necessary Skill Level | Necessary Skill Points | Effects and remarks |
| Fire-20 | Flame Coat | Lv3 | 300 | Fire damage reduced by 20% |
| Lightning-20 | Lightning Coat | Lv3 | 300 | Lightning damage reduced by 20% |
| Ice-20 | Ice Coat | Lv3 | 300 | Ice attributed damage reduced by 20% |
| Beam-20 | Beam Coat | Lv3 | 300 | Beam damage reduced by 20% |
| Sword-20 | Sword Coat | Lv3 | 300 | Pierce and Slashing damage reduced by 20% |
| CRTC Guard | Trauma Plate | Lv4 | 500 | Enemies are prevented from getting Critical hits against you |
| A-Poison Guard | Venom Block | Lv3 | 300 | Attack poison prevention (note: this is different from just poison prevention) |
| Bind Guard | Wooden Idol | Lv3 | 320 | Bind prevention |
| EP Double Guard | Rune Crystal | Lv3 | 300 | EP overconsumption prevention |
| DEX Guard | Sniper Goggles | Lv1 | 40 | Prevention of Dexterity down |
| PATK Guard | Power Brace | Lv1 | 30 | Prevention of physical attack power down |
| PDEF Guard | Guard Pendant | Lv1 | 60 | Prevention of physical defense power down |
| EATK Guard | Spirit Pendant | Lv1 | 60 | Prevention of ether attack down |
| EP Guard | Chakra Shield | Lv3 | 300 | You defend the EP damage |
| Slow Guard | Clock Shield | Lv1 | 100 | Slow prevention |
| Poison Guard | Snake Hunter | Lv1 | 60 | Poison prevention |
| KO Guard | Defibrillator Vest | Lv3 | 300 | Prevention of instantaneous death |
| Special Guard | Soldier's Honor | Lv3 | 240 | Prevention of Tech Attack block |
| Confusion Guard | Blade Soul | Lv3 | 300 | Prevention of confusion |
| Stop Guard | Field ring | Lv3 | 300 | Prevention of stop |
| PATK+2 | Red ring | Lv2 | 150 | Power +2 |
| PDEF+2 | Green ring | Lv2 | 150 | Physical strength +2 |
| DEX+2 | Blue ring | Lv1 | 50 | Dexterity +2 |
| EVA+2 | Cobalt ring | Lv1 | 50 | Evasion +2 |
| AGL+1 | White ring | Lv4 | 500 | Agility +1 |
| EATK+2 | Purple ring | Lv2 | 180 | Ether attack power +2 |
| EDFE+2 | Orange ring | Lv2 | 180 | Ether defense +2 |
| CRTC+5 | Hunter Goggle | Lv3 | 300 | Critical hit ratio +5% |
| Rare+10 | Thief Ring | Lv2 | 200 | +10% chance of getting a rare item |
| Counter+10 | Samurai heart | Lv3 | 300 | Counter ratio +10% |
| Damage-10 | Cross | Lv3 | 300 | Damage -10% |
| HPMAX+15 | Yamato Belt | Lv3 | 300 | HP MAX+15% |
| EPMAX+15 | Silver Crown | Lv3 | 300 | EPMAX +15% |
| AP+1 | Commander's Crest | Lv4 | 300 | Every turn AP+1 |
| Speed+25 | Speed Shoes | Lv4 | 500 | Speed +25% |
| Skill Pt+25 | Craft Apron | Lv5 | 1000 | S.Pt + 25% |
| EP Half | Angel ring | Lv5 | 1000 | EP consumption half |
| ST Double | Gemini Clocks | Lv4 | 500 | Status effect time doubled |
| ExperienceP+25 | Master's Pendant | Lv5 | 1000 | Experience value + 25% |
| Ether Power D | Blue topaz | Lv3 | 300 | ether defense effect |
| Ether power U | Red topaz | Lv3 | 300 | anti defense effect |
| Damage UD | Golden | Lv3 | 300 | It increases and decreases the damage which is received according to current HP |
| HP Strong | Bravesoul | Lv4 | 500 | STR goes up when HP goes down |
| Tech attack AC | Battle Mask | Lv3 | 300 | Tech attacks critical hits up |
| Recovery Double | Life stone | Lv4 | 500 | All hp recovery doubled |
| W Special | Double Buster | Lv4 | 500 | square circle circle or triangle circle circle - double Tech attack attack is possible |
| Search Eye | Scope | Lv1 | 60 | It indicates the HP information of the enemy |
| CB on | Revenge Power | Lv3 | 300 | When being attacked, auto boost, Note: The skill "counter +10%"' is needed |
| Battle BC+1 | Boost Pack | Lv4 | 500 | Start fights with boost +1 |
Chapter 10: Items and Equipment
This section lists consumable items, their effects, and also some of the wearable equipment, their sale value, and where to find them. For the rare items, you'll want to use MOMO's Magic Caster tech attack to get them from the enemies. She needs to be in transformed mode to use this tech attack; set it to high speed so that you won't have to waste a turn building up AP.
W = If you select this item with Triangle when your AP is at 6, it will be used
on the whole party.
Consumable ITEMS
| NAME | TARGET | EFFECT |
| Med kit | Enemy or Single Ally; W | Small HP recovery (50hp) |
| Med kit S | Enemy or Single Ally; W | Medium HP recovery (150hp) |
| Med kit DX | Enemy or Single Ally; W | Large HP recovery (300hp) |
| Ether pack | Single Ally; W | Small EP recovery (10ep) |
| Ether pack S | Single Ally; W | Medium Ep recovery (20ep) |
| Ether pack DX | Single Ally; W | Large Ep recovery (50ep) |
| Rejuvenator | Single Ally; W | HP and EP full recovery |
| Revive | Single Ally; W | Revives fallen ally and gives life (25%hp?) |
| Revive DX | Single Ally; W | Revives fallen ally to max hp |
| Cure-All | Single Ally; W | Clears all status changes |
| Antidote | Single Ally; W | Clears all physical disorders |
| Neuro stim | Single Ally; W | Clears all mental disorders |
| Booster pack | Single Ally | Boost meter + 1 |
| Escape pack | Ally Side | Run from battle |
| Stim | Single Ally; W | Physical attack power up 25% |
| Hemlock | Single Ally | Reduces HP to 1hp (useful with Brave Heart item and Safety Level ether) |
| Speed stim | Single Ally; W | Action speed up 25% |
| Defense shield | Single Ally; W | Physical Defense up |
| Veil | Enemy or Single Ally; W | Ether effectiveness down 25% |
| Bio sphere | All Ally; Save Point only | HP and EP full recovery |
| Frame Repair A | Single AGWS | Restores HP, 25% of max |
| Frame Repair Z | Single AGWS | Restores HP, 50% of max |
| Tech upgrade A | Single Ally | Tech Points + 10 |
| Tech upgrade S | Single Ally | Tech Points + 50 |
| Tech upgrade Z | Single Ally | Tech Points + 100 |
| Ether upgrade A | Single Ally | Ether Points + 10 |
| Ether upgrade S | Single Ally | Ether Points + 50 |
| Ether upgrade Z | Single Ally | Ether Points + 100 |
| Skill upgrade A | Single Ally | Skill Points + 10 |
| Skill upgrade S | Single Ally | Skill Points + 50 |
| Skill upgrade Z | Single Ally | Skill Points + 100 |
| Unicorn's Horn | Sellable Item | Sell for money (500 G) |
| Colbalt Knife | Sellable Item | Sell for money (200 G) |
| Garnet | Sellable Item | Sell for money (500 G) |
| Scrap Iron | Sellable Item | Sell for money (100 G) |
| Junk Circuit A | Sellable Item | Sell for money (400 G) |
| Junk Circuit B | Sellable Item | Sell for money (800 G) |
| Sapphire | Sellable Item | Sell for money (500 G) |
| Ruby | Sellable Item | Sell for money (1000 G) |
| Emerald | Sellable Item | Sell for money (1500 G) |
| Diamond | Sellable Item | Sell for money (2000 G) |
ACCESSORIES
| NAME | SELL PRICE | DEF UP | LEARNABLE SKILL | SKILL LEVEL | SKILL POINTS | LOCATION |
| Protector | 80 | 2 | na | na | na | shops |
| Sniper Goggles | 200 | 0 | DEX guard | 1 | 40 | shops |
| Power Brace | 300 | 0 | PATK guard | 1 | 30 | shops |
| Guard Pendant | 300 | 0 | PDEF guard | 1 | 30 | shops |
| Spirit Pendant | 400 | 0 | EATK guard | 1 | 60 | shops |
| Clock Shield | 600 | 0 | Slow guard | 1 | 100 | Gnosis Mothership dept. store |
| Snake Hunter | 500 | 0 | Poison guard | 1 | 60 | shops |
| Blue ring | 200 | 0 | DEX+2 | 1 | 50 | shops |
| Cobalt ring | 200 | 0 | EVA+2 | 1 | 50 | shops |
| Scope | 400 | 0 | Search Eye | 1 | 60 | shops |
| Red ring | 600 | 0 | PATK+2 | 2 | 150 | shops |
| Green ring | 400 | 0 | PDEF+2 | 2 | 150 | shops |
| Orange ring | 300 | 0 | EDEF+2 | 2 | 180 | shops |
| Fire Coat | 1000 | 2 | Fire -20% | 3 | 300 | Gnosis Mothership, top of first slope |
| Lightning Coat | 1000 | 2 | Lightning-20% | 3 | 300 | Segment Address 18 |
| Ice Coat | 1000 | 2 | Ice -20% | 3 | 300 | Segment Address 11 |
| Beam Coat | 1200 | 2 | Beam -20% | 3 | 300 | Elsa 2nd time AGWS hangar |
| Sword Coat | 1400 | 2 | Sword -20% | 3 | 300 | Encephalon battlefield |
| Venom Block | 1200 | 0 | Poison guard | 3 | 300 | Encephalon subway line |
| Wooden Idol | 0 | 0 | Bind (admonish)guard | 3 | 320 | Kukai Area 26 |
| Rune Crystal | 0 | 0 | EP double guard | 3 | 300 | Kukai Foundation |
| Defibrillator Vest | 0 | 0 | instant death guard | 3 | 300 | Song of Nephilim 2nd tower |
| Solider's Honor | 0 | 0 | Tech attack guard | 3 | 240 | Song of Nephilim 2nd tower |
| Samurai Heart | 0 | 0 | Counter +10% (during counter bg raises by half) | 3 | 300 | Segment Address 13 |
| Blue Topaz | 1200 | 0 | Ether Down | 3 | 300 | Encephalon Forest |
| Red Topaz | 1200 | 0 | Ether Up | 3 | 300 | Encephalon subway platform |
| Blade Soul | 1600 | 0 | confusion guard | 3 | 300 | Encephalon outdoors |
| Field Ring | 0 | 0 | Sleep guard | 3 | 300 | Song of Nephilim 3rd tower |
| Trauma Plate | 0 | 0 | CRTC guard | 4 | 500 | Segment Address 6 |
| White Ring | 1800 | 0 | AGL+1 | 4 | 500 | Ziggy |
| Commander's Crest | 3000 | 0 | AP+1 | 4 | 300 | Gargoyle's rare item |
| Speed Shoes | 0 | 0 | Speed up 25% | 4 | 500 | Segment Address 14 |
| Gemini Clocks | 0 | 0 | ,r,s double | 4 | 500 | Doppeluugel's rare item |
| Boost Pack | 0 | 0 | Boost Gauge +1 | 4 | 500 | Rianon Se's normal item |
| Master's Pendant | 0 | 0 | Experence +25% | 5 | 1000 | Einrugal's rare item |
| Bravesoul | 0 | 0 | HP Stronger | 4 | 500 | Casino |
| Revenge Power | 0 | 0 | CB on | 3 | 300 | Tiamat's rare item |
| Silver Crown | 0 | 0 | EPMAX + 15 | 3 | 300 | Gargoyle's normal item |
| Craft Apron | 2 | 0 | Skill Pt +25% | - | - | Mintia's rare item |
| Double Buster | 0 | 0 | W Tech attack | 4 | 500 | Segment Address 5 |
Chapter 11: Basic AGWS Strategies
General Tips
-Level up! While AGWS have their own set of stats, their ether power, ether defense, hit rate and evade rate are equal to their pilot. So, don't ignore your character's stats. (The VX series AGWS also have a anti-ether armor coat which gives an extra 4 or 8 EARM.)
-Upgrade! If you have the cash (which is no problem if you're good at poker), it goes without saying that you should keep all your AGWS's as updated as possible. Revisit the Dock Colony and Foundation parts shops as much as possible, since they get new wares after story events. However, if you know you won't be using a certain AGWS for a while (or ever...) you can forgo upgrades and save some money.
-Mini-maximize! The attack power of all non-ether weapons is related to the AGWS's DPOW. So, equipping a pair of axes will increase the damage done by your missile launcher too. Ether weapons depend entirely on the pilot. So, it's best to equip either all physical attack weapons or all ether weapons to minimize efficiency and maximize power.
-Metagame! Think about what enemies you'll be facing and equip your mechs accordingly. Fighting large groups of annoying soldiers? Put on some missile launchers. Up against a boss with strong defense? Try beam rifles.
-W-ACT! Having two weapons with the W-Act ability is often your best bet. Because a double attack combines the damage of the two weapons before figuring the enemy's defense, you'll end up doing more damage than with two regular attacks (especially if you get a critical hit). Plus, double attacks use only one ammo point and no EP.
-Speed! One of the biggest weaknesses of AGWS is their speed is lower than most characters. Speed boosting accessories should be a major priority, as well as keeping the weight down by going easy on the heavy weapons. AGWS also can't boost either, unless you equip the B-MAX gear, and even then your AGWS boost gauge still won't increase when attacking.
-Heal! Repair at shops when you get the chance (including after every frame upgrade); it's only 100G. Repair kits are available later in the game if you know the right shops, but be sure to get a Guard Recover for each AWGS you use. These repair 10% of your mech's max HP every time you Guard. Guarding then
becomes a viable strategy, since you're healing, taking less damage, and saving up AP for a double attack the next round!
Battles where AGWS are particularly useful
-Straight physical attackers. If you're keeping your AGWS upgraded, their defense will be much higher than your characters. Feel free to laugh as the soldiers or cobolts plink your mechs for 0 damage.
-Status attackers. If you're up against enemies who use poison or some other nasty affliction every round and you don't have protection, get in your AGWS first turn. You'll be immune to almost all normal status effects. There are a few statuses that can affect your AGWS, but hardly any enemies actually use them.
-Boss inside the Giant Gnosis. Once you take care of his two little buddies, the Gargoyle powers up and launches some nasty attacks, and at this point your characters probably aren't strong enough to survive very long. Hop in your AGWS, and assuming you've upgraded them, the fight is a cinch.
-The church boss in Encephalon. Tiamat is the trickiest fight in the game, bar none. You're stuck with three characters who can use AGWS, so you might as well take advantage of that. First, equip their AGWS with a Guard Recover and a Guard Cleaner, and have everyone board their bots as soon as the battle begins. Have Chaos do most of the attacking at first because he won't be counterattacked. Finally, just kill him with both Shion and Jr.; it still counts if they're in their AGWS.
-The boss in Nephilim's Song. Shimeon has very high attack and defense power, so you'll probably want to use your AGWS at some point. It doesn't do any status attacks, but it has a very nasty beam weapon you may be familiar with, so equip accordingly.
Chapter 12: AGWS Listing
VX SERIES
VX-4000
Height: 4.12m
Weight: 2.63t
Transfer Generator: 19.7
DSSS rating: 4.8ms
Description: Buy at the Dock Colony for 50000G (available as soon as you get to explore the Kukai Foundation). It cannot equip heavy weapons like rifles, but has 7 AGL and good ether defense.
Equipment: Starts with a pair of ER-VX electron shooters which only it can use. They're useful against mechanical enemies, so you may opt to keep them. Also comes with a ECM (electronic countermeasures) pod ECM1-VX, which is useful for inflicting status effects on machines.
Optimal equipment: Your options are a bit limited. After Nephilim's Song appears,
you'll be able to buy an ECM pod which affects all enemies (ECM2-VX) and the
DEF-VX Ether Shield. Equipping either one deprives you of a potential weapon, so
choose wisely.
VX-7000
Height: 4.98m
Weight: 3.24t
Transfer Generator: 24.4
DSSS rating: 4.3ms
Description: Jr.'s AGWS. One of Vector's military mechs, customized with a Logical Drive. Usually has the most HP of the 3 default AGWS.
Equipment: Starts with a pair of HG45VX handguns. They have plenty of ammo and allow a W-Act every 3rd round. Obviously, get the upgraded HG75VX handguns at the Foundation shop when you first arrive.
Optimal equipment: The spread lancer (LW-VX2) is exclusive to this AGWS and its strongest weapon, but it has disadvantages as well. If your pilot has weak ether you're better off with something else. A pair of grenade launchers (GRD20AG) has the same AGL penalty and might suit your fancy.
VX-9000
Height: 4.95m
Weight: 3.01t
Transmit Generator: 21.0
DSSS rating: 4.0ms
Description: Used by a solider from the Durandal (NPC). Accompanies Mary and Jr. on their raid of an enemy battleship.
Equipment: Has a pair of SWD32VX swords. Equipment cannot be changed.
VX-10000
Height: 4.95m
Weight: 3.11t
Transmit Generator: 22.5
DSSS rating: 3.8ms
Description: Shion's AGWS. Supposedly built as a multi-purpose mech for the common market. Slightly lower HP than the other default AGWS, and average in its abilities.
Equipment: Starts with a SWD21AG and an SMG99AG. I recommend selling the machine gun and getting a second sword, but as long as you equip them in pairs, any weapon should do fine. If your driver has high ether power, I recommend a pair of beam arms later.
Optimal equipment: Personally I prefer a pair of beam swords, but since this mech doesn't have an "ultimate weapon" to work with it's up to you. Be sure to add a chaff launcher (CB85VX) as well.
VX-20000
Height: 5.22m
Weight: 4.25t
Transmit Generator: 27.1
DSSS rating: 5.2ms
Description: Mary's AGWS (NPC). Big and mean. Has 1200HP and high defense.
Equipment: A pair of LG24VX beam rifles. Equipment cannot be changed.
AG series
AG-01
Height: 4.40m
Weight: 3.80t
Transmit Generator: 18.63
DSSS rating: 6.8ms
Desciption: Simple all-purpose mech. Used by soldiers on the Woglinde. Non-playable (which is good, since they get trashed so easily).
AG-02
Height: 4.48m
Weight: 3.97t
Transmit Generator: 20.11
DSSS rating: 6.8ms
Description: Chaos's AGWS. Variant of the AG-01. Also used by Virgil. Well-rounded and seems best suited for rifles and beam weapons.
Equipment: Starts with a pair of LG10AG rifles. These are OK, but if you have the cash, upgrade to a pair of SMG32VX. Be sure to get a pair of LG24VX rifles when you can; they're good weapons and you'll never see them later.
Optimal equipment: This is the only AGWS that can use the SHB67AG shield rifle, so you might want to try it. It's not that powerful, but it seems to add significantly to defense when guarding. I also recommend a BL24AG beam launcher or LG100VX long beam rifle. After Nephilim's Song appears, you'll be able to buy the ultimate fan-service weapon: AIRD-AG2 Aerods. They're powerful, but limit your AGWS in speed and other equipment.
AG-04
Height: 4.20m
Weight: 3.56t
Transmit Generator: 16.0
DSSS rating: 6.8ms
Description: Buy at the Dock Colony for 80000G (available as soon as Nephilim's Song appears). Though it looks a bit odd, it has very high HP and attack power as well as 7 AGL.
Equipment: Starts with "hands" (it punches enemies). Obviously you want to upgrade to those gyrosaucers (WCT02AG4) ASAP. It can only use a few different weapons though.
Optimal Equipment: You don't have much selection here, so get the pair of drill claws (DLCOAG4). You also might want to throw on a missile pod (SMP53AG) since this bot can take the AGL hit easily and needs the versatility.
AG-05
Height: 4.80m
Weight: 5.69t
Transmit Generator: 22.8
DSSS rating: 6.8ms
Description: Buy at the Dock Colony for a whopping 300000G (available when Proto Merkabah appears). Huge and evil, with 6000HP and the best offense and defense, but has only 5 AGL.
Optimal equipment: There are a ton of weapons exclusive to this monster, but it can only equip 1 weapon in most of these cases.
-A pair of vulcan cannons (HGG-AG5). They do around 700-900 damage on a normal hit against the final boss, and can W-Act. Highly recommended.
-A warhammer (HMP-AG5). It adds a lot to your power and does even more damage than the vulcans. Good for long battles, but lacks versatility.
-An artillery cannon (LC-AG5). Probably the most powerful AGWS weapon available. Expect a few thousand damage per hit. However, it only has a couple of shots per battle, gives -1 AGL, and needs 6AP to use.
-A massive beam cannon (BBC-AG5). If your driver has very high Ether and EP, it is potentially even stronger than the artillery cannon. Also takes 6AP to use and a -1 AGL penalty, and eats up EP like other beam weapons.
-Missile launchers. The arm-mounted ones (HMP-AG5) have 2 shots each, and no W-act. The back-mounted pod (BMP-AG5) has only 1 shot but that one shot will likely kill any normal enemy group you're fighting. For both power and versatility, your best bet is to equip the BMP and either a HMP or a HGG.
AGWS stats after final upgrade
(completely unequipped and driverless)
| Name | FHP | DPOW | PARM | EARM | AGL |
| VX-10000 | 2320 | 70 | 104 | 4 | 6 |
| VX-7000 | 2700 | 76 | 110 | 4 | 6 |
| VX-4000 | 2100 | 68 | 98 | 8 | 7 |
| AG-02 | 2400 | 73 | 106 | 0 | 6 |
| AG-04 | 2920 | 84 | 109 | 0 | 7 |
| AG-05 | 6000 | 130 | 120 | 0 | 5 |
Chapter 13: AGWS Equipment
Type abbreviations: SE = single enemy, AE = all enemies, AA = all allies. M = melee, P = projectile (can hit flying enemies), F = flying (can hit enemies in the back row)
User abbreviations: V10 = VX-10000, V7 = VX-7000, V4 = VX-4000, A2 = AG-02, A4 = AG-04, A5 = AG-05
POW shows how much strength the equipment adds to drive power, or in the case of beam weapons, shows their ether attack modifier. Note that increasing the AGWS's power increases the damage of all non-beam weapons equipped. Location tells where the weapon can be equipped. If there is a number after it, it refers to how much space the weapon takes up.
Name Type POWWAGL APEPAmmoLocation
Description Rating User
HAND SE/M/strike 0 0 3 - - arm
Hand for punching enemies. Lame. 1A4
AXE11AG SE/M/cut/WACT 20 0 4 - - arm
Axe. Not a bad mid-game weapon, High POW bonus 3A2 A5 V4 V7 V10
SWD21AG SE/M/cut/WACT 9 0 3 - - arm
Sword. Decent at the beginning if paired up. 2A2 A5 V4 V7 V10
SWD34VX SE/M/cut/WACT 10 0 3 - - arm
Sword. Only 1 point stronger than the 21AG. 2A2 A5 V4 V7 V10
HG-45VX SE/P/pierce/WACT12 0 3 - 20 arm
Handgun. Fairly strong, low AP, plenty of ammo. 3A2 A5 V4 V7 V10
HG-75VX SE/P/pierce/WACT25 0 3 - 20 arm
Handgun. Like HG45 but stronger. Excellent midgame. 4 A2 A5 V4 V7 V10
HMR55AG SE/M/strike/WACT40 1 4 - - arm
Hammer. Not worth the WAGL penalty. 2A2 A5 V4 V7 V10
BSW13AG SE/M/cut/beam/WACT 50 0 4 - - arm
Beam sword. One of the best weapons available. 5A2 A5 V7 V10
WCT02AG4 SE/M/pierce/WACT40 0 4 - - arm
Gyrosaucer. Decent attack power. 3A4
DLC02AG4 SE/M/pierce/WACT54 0 4 - - arm
Drill claws. The best weapon for the AG-04. 4A4
ER-VXSE/M/cut/WACT 0 0 4 - - arm
Electron shooters. Cause electrical damage? 4V4
SMG99AG SE/P/pierce/WACT6 0 4 - 16 arm
Sub machine gun. Not very powerful. 1A2 A5 V4 V7 V10
SMG32VX SE/P/pierce/WACT 16 0 4 - 16 arm
Sub machine gun. Decent weapon for midgame. 3A2 A5 V4 V7 V10
LG10AG SE/P/pierce/WACT 12 0 4 - 12 arm
Rifle. Better off with something else. 2A2 A5 V7 V10
LG24VX SE/P/beam 120% 0 4 - 12 arm
Beam rifle. Takes no EP and has decent ammo. 4A2 A5 V7 V10
LG100VX SE/P/beam 300% 1 4 4 4 arm (2)
Long beam rifle. Powerful, but not enough ammo. 3A2 A5 V7 V10
BA15VX SE/P/beam/WACT 185% 0 4 3 6 arm
Beam arm. One of only ether weapons with W-ACT. 4A5 V7 V10
LM11VX SE/M/cut/WACT 46 0 4 - - arm
Lance arm. not bad until you get beam swords.3A2 A5 V7 V10
PB55AG SE/M/pierce30 1 4 - - arm
Pile banger. Not worth it. 1A2 A5 V7 V10
FLM64AG SE/P/fire/WACT 150% 1 4 2 8 arm
Flame thrower. Great against certain enemies.4A2 A5 V7 V10
GRD20AG SE/P/strk/fir/WACT 40 1 4 - arm
Grenade launcher. One of best projectile weaps. 4A2 A5 V7 V10
GLG76AG SE/P/pierce/WACT 30 1 4 - arm
Gatling gun. Heavy but fairly powerful. 3A2 A5 V7 V10
HMP33AG AE/F/strike16 1 4 - arm
Missile pod. Decent against large groups.3A2 A5 V7 V10
SMP53AG AE/P/pierce10 1 4 - 1 Rshoulder
Missile pod. Decent against large groups.3A2 A4 A5 V7 V10
BL24AG SE/P/beam 200% 0 4 2 8 Rshoulder+arm
Beam launcher. Excellent beam weap for midgame. 4A2 V7 V10
BMP45VX AE/F/beam 130% 1 6 4 2 Rshoulder
Beam pod. Decent if your ether power is high.3A2 A4 A5 V7 V10
SHB45VX SE/F/beam/defense 130% 0 4 4 8 Lshoulder+arm
Shield beam rifle. Really unique and useful. 4A2
AIRD-AG2 AE/F/beam 250% 2 6 6 2 back (2)
Aerods. Nasty if you don't mind WAGL penalty.4A2
LW-VX2 AE/F/beam 300% 2 6 8 2 back (2)
Spread lance. Very similar to the Aerods.4V7
ECM1-VX SE/P/status00 4 - 2 Rshoulder
ECM pod. Inflicts status on an enemy.4V4
ECM2-VX AE/F/status01 6 - 2 back (2)
ECM pod. Status on all but takes up space. 3V4
DEF-VX AA/ethershield 02 6 2 back (2)
Defenser. All characters in Hyperveil status.4V4
CB85VX AE/P/status00 4 - Rshoulder
Chaff pod. Status on mechanical enemies. 4A2 A4 A5 V7 V10
HMR-AG5 SE/M/strike160 0 4 - - arm (3)
Warhammer. Great attack power. 4A5
HGG-AG5 SE/P/pierce/WACT 60 0 4 - 8 arm (1.5)
Heavy gatling gun. High attack power; WACT. 5A5
HMP-AG5 AE/F/strike40 0 4 - 2 arm (1.5)
Missile pod. Fairly strong but short on ammo.4A5
BMP-AG5 AE/F/strike80 1 6 - 1 back (2)
Missile pod. Just one shot but that's enough.4A5
LC-AG5 SE/P/pierce350 1 6 - 3 back (3)
Insane attack power but limited by AP and ammo. 3A5
BBC-AG5 SE/P/beam 600% 1 6 8 3 back (3)
Insane, but limited by AP, ammo, and EP. 3A5
AGWS Accessories
Name / Effect
Fast drive circut 25 / Increases movement speed by 25%
Fast drive circut 50 / Increases movement speed by 50%
B-MAX circut / Enables Boost
Armor defense unit / Prevents "armor loss"
Engine shield / Prevents "stall"
Gear shield / Prevents "slow"
M-chip guard / Prevents "ponk"
AP shield / Prevents "AP down"
W-circut protective gear / Prevents "attack block"
Cockpit guard / Prevents pilot "sleep" and "confusion"
Guard cleaner / Removes status effects when guarding
Guard recover / Recovers HP while guarding (10% of HP max)
Tune circuit / AGL +1
Auxilliary armor A / Physical defense +2
Auxilliary armor B / Physical defense +4
EF enhancer circut A / Ether defense +2
EF enhancer circut B / Ether defense +4
Fireproof armor plate / Fire damage -25%
Coldproof armor plate / Cold damage -25%
Elecproof armor plate / Electric damage -25%
Beamproof armor plate / Beam damage -25%
Chapter 14: Enemy Databank
This chapter contains statistics for all enemies in Xenosaga Episode I, including boss characters. Here you'll find out how many experience and bonus points are awarded for defeating specific enemies, what items enemies will drop, as well as which attacks to use and which not to use against certain monsters. Enemies are listed in roughly the order they appear in the game.
Key
* - denotes Boss
HP - Hit Points, the enemy's life
STR - Strength, the enemy's overall physical attack power
VIT - Vitality, the enemy's resistance to physical attacks
EATK - Ether Attack, the enemy's ether attack power
EDEF - Ether Defense, the enemy's resistance to ether attacks
DEX - Dexterity, the enemy's ability to successfully attack
EVA - Evasion, the enemy's ability to successfully evade attacks
AGL - Agility, the enemy's speed and amount of turns during battle
Weakness - Types of attacks the enemy is especially vulnerable to
Resists - Types of attacks the enemy has partial immunity to
Location - Area where the enemy can be found
EXP - Experience Points, the amount given after the enemy's defeat
Money - G's, the amount given after the enemy's defeat
T.PT - Tech Points, the amount given after the enemy's defeat
E.PT - Ether Points, the amount given after the enemy's defeat
S.PT - Skill Points, the amount given after the enemy's defeat
Normal - Item commonly dropped by the enemy
Rare Item - Item rarely dropped by the enemy
Group - Other enemies that the enemy may be grouped with
Drone M - Biological
| HP | STR | VIT | EATK | EDEF | DEX | EVA | AGL | WEAKNESS | RESISTS | LOCATION |
| 50 | 13 | 2 | 2 | 3 | 10 | 6 | 6 | Fire | - | Simulator |
| EXP | MONEY | T.PT | E.PT | S.PT | NORMAL | RARE ITEM | GROUP | |||
| 7 | 10 | 2 | 2 | 2 | - | Med kit | Drone F/AttackDrone | |||
Drone F - Biological
| HP | STR | VIT | EATK | EDEF | DEX | EVA | AGL | WEAKNESS | RESISTS | LOCATION |
| 68 | 13 | 2 | 2 | 3 | 10 | 6 | 4 | Fire | - | Simulator |
| EXP | MONEY | T.PT | E.PT | S.PT | NORMAL | RARE ITEM | GROUP | |||
| 8 | 10 | 2 | 2 | 2 | - | Med kit | Drone M/AttackDrone | |||
Attack Drone - Mechanical
| HP | STR | VIT | EATK | EDEF | DEX | EVA | AGL | WEAKNESS | RESISTS | LOCATION |
| 80 | 14 | 4 | 9 | 1 | 4 | 2 | 5 | Lightning | - | Simulator |
| EXP | MONEY | T.PT | E.PT | S.PT | NORMAL | RARE ITEM | GROUP | |||
| 13 | 0 | 4 | 2 | 4 | - | - | Drone M/Drone F | |||
Drone SPX - Mechanical
| HP | STR | VIT | EATK | EDEF | DEX | EVA | AGL | WEAKNESS | RESISTS | LOCATION |
| 280 | 20 | 9 | 12 | 5 | 10 | 8 | 5 | Lightning | - | Simulator |
| EXP | MONEY | T.PT | E.PT | S.PT | NORMAL | RARE ITEM | GROUP | |||
| 40 | 0 | 18 | 0 | 16 | Med kit S | - | - | |||
Drone G1 - Gnosis
| HP | STR | VIT | EATK | EDEF | DEX | EVA | AGL | WEAKNESS | RESISTS | LOCATION |
| 82 | 4 | 6 | 12 | 11 | 22 | 8 | 7 | Slash | - | Simulator |
| EXP | MONEY | T.PT | E.PT | S.PT | NORMAL | RARE ITEM | GROUP | |||
| 10 | 0 | 2 | 2 | 0 | - | Ether pack | - | |||
Drone G2 - Gnosis
| HP | STR | VIT | EATK | EDEF | DEX | EVA | AGL | WEAKNESS | RESISTS | LOCATION |
| 60 | 4 | 5 | 12 | 5 | 24 | 12 | 8 | Beam | - | Simulator |
| EXP | MONEY | T.PT | E.PT | S.PT | NORMAL | RARE ITEM | GROUP | |||
| 8 | 0 | 2 | 4 | 0 | - | Ether pack | Drone G3 | |||
Drone G3 - Gnosis
| HP | STR | VIT | EATK | EDEF | DEX | EVA | AGL | WEAKNESS | RESISTS | LOCATION |
| 130 | 18 | 8 | 8 | 2 | 8 | 4 | 5 | - | - | Simulator |
| EXP | MONEY | T.PT | E.PT | S.PT | NORMAL | RARE ITEM | GROUP | |||
| 20 | 0 | 4 | 0 | 0 | - | Med kit | Drone G2 | |||
*Drone GX - Gnosis
| HP | STR | VIT | EATK | EDEF | DEX | EVA | AGL | WEAKNESS | RESISTS | LOCATION |
| 420 | 19 | 6 | 16 | 13 | 10 | 12 | 6 | Slash | - | Simulator |
| EXP | MONEY | T.PT | E.PT | S.PT | NORMAL | RARE ITEM | GROUP | |||
| 100 | 0 | 24 | 12 | 8 | Ether pack S | - | - | |||
Goblin - Gnosis
| HP | STR | VIT | EATK | EDEF | DEX | EVA | AGL | WEAKNESS | RESISTS | LOCATION |
| 180 | 22 | 10 | 6 | 6 | 4 | 4 | 5 | Air | - | Woglinde |
| EXP | MONEY | T.PT | E.PT | S.PT | NORMAL | RARE ITEM | GROUP | |||
| 40 | 0 | 6 | 0 | 0 | Escape pack | - | Manticore | |||
Gremlin - Gnosis
| HP | STR | VIT | EATK | EDEF | DEX | EVA | AGL | WEAKNESS | RESISTS | LOCATION |
| 100 | 6 | 4 | 16 | 11 | 24 | 12 | 6 | Puncture | 50% Ice | Woglinde |
| EXP | MONEY | T.PT | E.PT | S.PT | NORMAL | RARE ITEM | GROUP | |||
| 50 | 0 | 3 | 3 | 3 | Revive | Med kit S | - | |||
Golem - Gnosis
| HP | STR | VIT | EATK | EDEF | DEX | EVA | AGL | WEAKNESS | RESISTS | LOCATION |
| 240 | 23 | 8 | 18 | 12 | 26 | 20 | 8 | Slash | - | Woglinde |
| EXP | MONEY | T.PT | E.PT | S.PT | NORMAL | RARE ITEM | GROUP | |||
| 110 | 0 | 8 | 8 | 4 | Ether pack S | - | - | |||
Manticore - Gnosis
| HP | STR | VIT | EATK | EDEF | DEX | EVA | AGL | WEAKNESS | RESISTS | LOCATION |
| 90 | 19 | 4 | 18 | 9 | 20 | 10 | 6 | Slash | - | Woglinde |
| EXP | MONEY | T.PT | E.PT | S.PT | NORMAL | RARE ITEM | GROUP | |||
| 30 | 0 | 3 | 4 | 0 | - | Ether Upgrade A | Goblin | |||
*Cyclops - Gnosis
| HP | STR | VIT | EATK | EDEF | DEX | EVA | AGL | WEAKNESS | RESISTS | LOCATION |
| 560 | 20 | 11 | 21 | 12 | 20 | 8 | 6 | Lightning | - | Woglinde |
| EXP | MONEY | T.PT | E.PT | S.PT | NORMAL | RARE ITEM | GROUP | |||
| 560 | 800 | 30 | 16 | 24 | SMG99AG | - | - | |||
*Minotaur - Gnosis
| HP | STR | VIT | EATK | EDEF | DEX | EVA | AGL | WEAKNESS | RESISTS | LOCATION |
| 920 | 20 | 12 | 20 | 15 | 26 | 8 | 6 | Beam | - | Woglinde |
| EXP | MONEY | T.PT | E.PT | S.PT | NORMAL | RARE ITEM | GROUP | |||
| 720 | 0 | 42 | 30 | 12 | Skill upgrade S | Skill Upgrade Z | Sky Fish | |||
*Sky Fish - Gnosis
| HP | STR | VIT | EATK | EDEF | DEX | EVA | AGL | WEAKNESS | RESISTS | LOCATION |
| 240 | 25 | 11 | 18 | 11 | 18 | 18 | 7 | Puncture | - | Woglinde |
| EXP | MONEY | T.PT | E.PT | S.PT | NORMAL | RARE ITEM | GROUP | |||
| 150 | 0 | 3 | 6 | 2 | Escape pack | - | Minotaur | |||
U-TIC Soldier A - Biological
| HP | STR | VIT | EATK | EDEF | DEX | EVA | AGL | WEAKNESS | RESISTS | LOCATION |
| 90 | 24 | 12 | 20 | 8 | 20 | 10 | 7 | Fire | - | Pleroma/U-TIC ship |
| EXP | MONEY | T.PT | E.PT | S.PT | NORMAL | RARE ITEM | GROUP | |||
| 30 | 40 | 2 | 2 | 2 | Med kit | Med kit S | U-Tic Soldier B & D | |||
U-TIC Soldier B - Biological
| HP | STR | VIT | EATK | EDEF | DEX | EVA | AGL | WEAKNESS | RESISTS | LOCATION |
| 120 | 23 | 12 | 20 | 8 | 20 | 10 | 4 | Fire | - | Pleroma |
| EXP | MONEY | T.PT | E.PT | S.PT | NORMAL | RARE ITEM | GROUP | |||
| 40 | 80 | 2 | 2 | 2 | Med kit | Med kit S | U-TIC Soldier A/Cyber Crab | |||
Ishu Hariot - Biological
| HP | STR | VIT | EATK | EDEF | DEX | EVA | AGL | WEAKNESS | RESISTS | LOCATION |
| 100 | 30 | 11 | 12 | 12 | 20 | 12 | 8 | Fire | - | Pleroma |
| EXP | MONEY | T.PT | E.PT | S.PT | NORMAL | RARE ITEM | GROUP | |||
| 10 | 0 | 1 | 1 | 1 | Med kit | Med kit S | - | |||
Cyber Crab - Mechanical
| HP | STR | VIT | EATK | EDEF | DEX | EVA | AGL | WEAKNESS | RESISTS | LOCATION |
| 160 | 25 | 15 | 22 | 6 | 12 | 4 | 6 | Lightning | - | Pleroma |
| EXP | MONEY | T.PT | E.PT | S.PT | NORMAL | RARE ITEM | GROUP | |||
| 50 | 0 | 4 | 0 | 4 | Scrap Iron | - | U-TIC Soldier B | |||
*Mercurio-A - Mechanical
| HP | STR | VIT | EATK | EDEF | DEX | EVA | AGL | WEAKNESS | RESISTS | LOCATION |
| 540 | 45 | 24 | 10 | 17 | 10 | 4 | 6 | - | - | Pleroma |
| EXP | MONEY | T.PT | E.PT | S.PT | NORMAL | RARE ITEM | GROUP | |||
| 150 | 200 | 10 | 4 | 6 | Med kit S | - | Mercurio B/Zolfo A | |||
*Mercurio B - Mechanical
| HP | STR | VIT | EATK | EDEF | DEX | EVA | AGL | WEAKNESS | RESISTS | LOCATION |
| 640 | 40 | 18 | 10 | 4 | 16 | 8 | 6 | - | - | Pleroma |
| EXP | MONEY | T.PT | E.PT | S.PT | NORMAL | RARE ITEM | GROUP | |||
| 150 | 200 | 8 | 10 | 6 | - | - | Mercurio A/Zolfo A | |||
*Zolfo A - Mechanical
| HP | STR | VIT | EATK | EDEF | DEX | EVA | AGL | WEAKNESS | RESISTS | LOCATION |
| 820 | 42 | 19 | 10 | 6 | 20 | 10 | 6 | - | - | Pleroma |
| EXP | MONEY | T.PT | E.PT | S.PT | NORMAL | RARE ITEM | GROUP | |||
| 200 | 200 | 22 | 50 | 16 | - | - | Mercurio A/Mercurio B | |||
Gardis M1 - Mechanical
| HP | STR | VIT | EATK | EDEF | DEX | EVA | AGL | WEAKNESS | RESISTS | LOCATION |
| 450 | 12 | 18 | 20 | 5 | 28 | 14 | 6 | Lightning | - | Pleroma/U-TIC ship |
| EXP | MONEY | T.PT | E.PT | S.PT | NORMAL | RARE ITEM | GROUP | |||
| 350 | 0 | 10 | 0 | 8 | Med kit S | - | - | |||
Gardis F10 - Mechanical
| HP | STR | VIT | EATK | EDEF | DEX | EVA | AGL | WEAKNESS | RESISTS | LOCATION |
| 60 | 4 | 12 | 19 | 6 | 24 | 15 | 6 | Lightning | - | Pleroma |
| EXP | MONEY | T.PT | E.PT | S.PT | NORMAL | RARE ITEM | GROUP | |||
| 5 | 0 | 1 | 0 | 1 | - | - | - | |||
*Margulis - Biological
| HP | STR | VIT | EATK | EDEF | DEX | EVA | AGL | WEAKNESS | RESISTS | LOCATION |
| 820 | 40 | 27 | 30 | 20 | 16 | 18 | 11 | Changes | - | Pleroma |
| EXP | MONEY | T.PT | E.PT | S.PT | NORMAL | RARE ITEM | GROUP | |||
| 2400 | 3000 | 58 | 60 | 26 | Purple ring | Red ring | - | |||
DOMO-A - Mechanical
| HP | STR | VIT | EATK | EDEF | DEX | EVA | AGL | WEAKNESS | RESISTS | LOCATION |
| 150 | 5 | 15 | 24 | 8 | 20 | 20 | 7 | Lightning | - | Elsa |
| EXP | MONEY | T.PT | E.PT | S.PT | NORMAL | RARE ITEM | GROUP | |||
| 80 | 0 | 8 | 2 | 4 | Scrap iron | - | DOMO-B | |||
DOMO B - Mechanical
| HP | STR | VIT | EATK | EDEF | DEX | EVA | AGL | WEAKNESS | RESISTS | LOCATION |
| 150 | 5 | 12 | 28 | 10 | 30 | 20 | 7 | Lightning | - | Elsa |
| EXP | MONEY | T.PT | E.PT | S.PT | NORMAL | RARE ITEM | GROUP | |||
| 90 | 0 | 8 | 2 | 4 | Scrap iron | - | DOMO-A | |||
DOMO Carrier - Mechanical
| HP | STR | VIT | EATK | EDEF | DEX | EVA | AGL | WEAKNESS | RESISTS | LOCATION |
| 1800 | 44 | 27 | 30 | 18 | 15 | 6 | 8 | Lightning | - | Elsa |
| EXP | MONEY | T.PT | E.PT | S.PT | NORMAL | RARE ITEM | GROUP | |||
| 4500 | 0 | 80 | 20 | 40 | Beamproof Armor | - | - | |||
U-TIC Soldier D - Biological
| HP | STR | VIT | EATK | EDEF | DEX | EVA | AGL | WEAKNESS | RESISTS | LOCATION |
| 120 | 38 | 10 | 6 | 10 | 10 | 12 | 5 | Fire | - | U-TIC ship |
| EXP | MONEY | T.PT | E.PT | S.PT | NORMAL | RARE ITEM | GROUP | |||
| 50 | 100 | 6 | 2 | 6 | - | Med kit S | U-TIC Soldier A | |||
Zolfo B - Mechanical
| HP | STR | VIT | EATK | EDEF | DEX | EVA | AGL | WEAKNESS | RESISTS | LOCATION |
| 800 | 46 | 24 | 10 | 14 | 30 | 15 | 8 | - | - | U-TIC ship |
| EXP | MONEY | T.PT | E.PT | S.PT | NORMAL | RARE ITEM | GROUP | |||
| 200 | 0 | 18 | 4 | 12 | Frame Repair A | Frame Repair Z | - | |||
*Ambix - Mechanical
| HP | STR | VIT | EATK | EDEF | DEX | EVA | AGL | WEAKNESS | RESISTS | LOCATION |
| 1200 | 42 | 28 | 40 | 8 | 20 | 8 | 8 | - | - | U-TIC ship |
| EXP | MONEY | T.PT | E.PT | S.PT | NORMAL | RARE ITEM | GROUP | |||
| 1800 | 0 | 62 | 16 | 50 | Frame Repair Z | B-MAX Circuit | - | |||
Cerberus - Gnosis
| HP | STR | VIT | EATK | EDEF | DEX | EVA | AGL | WEAKNESS | RESISTS | LOCATION |
| 500 | 48 | 18 | 30 | 14 | 24 | 20 | 6 | Lightning, Beam | 50% Fire, Lightning | Cathedral |
| EXP | MONEY | T.PT | E.PT | S.PT | NORMAL | RARE ITEM | GROUP | |||
| 320 | 0 | 8 | 8 | 2 | Med kit S | - | Fairy/Ogre/Unicorn | |||
Fairy - Gnosis
| HP | STR | VIT | EATK | EDEF | DEX | EVA | AGL | WEAKNESS | RESISTS | LOCATION |
| 180 | 8 | 6 | 30 | 22 | 30 | 30 | 7 | Lightning | - | Pleroma |
| EXP | MONEY | T.PT | E.PT | S.PT | NORMAL | RARE ITEM | GROUP | |||
| 100 | 0 | 3 | 4 | 2 | Ether pack | Ether pack S | Cerberus/Ogre | |||
Ogre - Gnosis
| HP | STR | VIT | EATK | EDEF | DEX | EVA | AGL | WEAKNESS | RESISTS | LOCATION |
| 800 | 75 | 22 | 6 | 10 | 18 | 6 | 5 | Air | - | Cathedral |
| EXP | MONEY | T.PT | E.PT | S.PT | NORMAL | RARE ITEM | GROUP | |||
| 380 | 0 | 12 | 0 | 0 | Antidote | Skill Upgrade A | Cerberus/Fairy/Unicorn | |||
Hydra - Gnosis
| HP | STR | VIT | EATK | EDEF | DEX | EVA | AGL | WEAKNESS | RESISTS | LOCATION |
| 380 | 46 | 24 | 32 | 14 | 30 | 20 | 6 | Fire | - | Cathedral |
| EXP | MONEY | T.PT | E.PT | S.PT | NORMAL | RARE ITEM | GROUP | |||
| 200 | 0 | 5 | 6 | 2 | - | Cure-All | - | |||
Unicorn - Gnosis
| HP | STR | VIT | EATK | EDEF | DEX | EVA | AGL | WEAKNESS | RESISTS | LOCATION |
| 1200 | 64 | 18 | 40 | 30 | 30 | 24 | 6 | Puncture | 50%beam, lightning | Gnosis |
| EXP | MONEY | T.PT | E.PT | S.PT | NORMAL | RARE ITEM | GROUP | |||
| 600 | 0 | 16 | 16 | 4 | Unicorn's Horn | - | Cerberus/Ogre | |||
Lizard Man - Gnosis
| HP | STR | VIT | EATK | EDEF | DEX | EVA | AGL | WEAKNESS | RESISTS | LOCATION |
| 420 | 50 | 18 | 8 | 8 | 22 | 4 | 7 | Ice/Slash | - | Cathedral |
| EXP | MONEY | T.PT | E.PT | S.PT | NORMAL | RARE ITEM | GROUP | |||
| 260 | 0 | 10 | 3 | 2 | - | Hemlock | - | |||
Svarozic - Gnosis
| HP | STR | VIT | EATK | EDEF | DEX | EVA | AGL | WEAKNESS | RESISTS | LOCATION |
| 1500 | 60 | 20 | 34 | 25 | 20 | 20 | 11 | Ice/Slash | 50% Fire | Cathedral |
| EXP | MONEY | T.PT | E.PT | S.PT | NORMAL | RARE ITEM | GROUP | |||
| 800 | 0 | 30 | 16 | 6 | Tech upgrade S | Tech upgrade Z | - | |||
Perun - Gnosis
| HP | STR | VIT | EATK | EDEF | DEX | EVA | AGL | WEAKNESS | RESISTS | LOCATION |
| 1500 | 60 | 20 | 34 | 25 | 20 | 20 | 11 | Air/Slash | 50%Beam, Lightning | Cathedral |
| EXP | MONEY | T.PT | E.PT | S.PT | NORMAL | RARE ITEM | GROUP | |||
| 800 | 0 | 12 | 10 | 24 | Ether upgrade S | Ether upgrade Z | - | |||
Stribog - Gnosis
| HP | STR | VIT | EATK | EDEF | DEX | EVA | AGL | WEAKNESS | RESISTS | LOCATION |
| 1500 | 60 | 20 | 34 | 25 | 20 | 20 | 11 | Fire/Slash | 50% Ice | Cathedral |
| EXP | MONEY | T.PT | E.PT | S.PT | NORMAL | RARE ITEM | GROUP | |||
| 800 | 0 | 16 | 30 | 6 | Skill upgrade S | Skill upgrade Z | - | |||
*Gargoyle - Gnosis
| HP | STR | VIT | EATK | EDEF | DEX | EVA | AGL | WEAKNESS | RESISTS | LOCATION |
| 3600 | 60 | 15 | 40 | 15 | 23 | 30 | 5 | Ice/Slash | - | Cathedral |
| EXP | MONEY | T.PT | E.PT | S.PT | NORMAL | RARE ITEM | GROUP | |||
| 7400 | 0 | 140 | 120 | 60 | Silver Crown | Commander's Crest | Oudgogue | |||
*Oudgogue - Gnosis
| HP | STR | VIT | EATK | EDEF | DEX | EVA | AGL | WEAKNESS | RESISTS | LOCATION |
| 1000 | 5 | 10 | 40 | 26 | 40 | 30 | 8 | Slash | - | Cathedral |
| EXP | MONEY | T.PT | E.PT | S.PT | NORMAL | RARE ITEM | GROUP | |||
| 800 | 0 | 50 | 50 | 10 | Frame Repair A | Frame Repair Z | Gargoyle | |||
Federation Soldier A - Biological
| HP | STR | VIT | EATK | EDEF | DEX | EVA | AGL | WEAKNESS | RESISTS | LOCATION |
| 320 | 56 | 14 | 28 | 25 | 60 | 8 | 8 | Fire/Slash | - | Durandal |
| EXP | MONEY | T.PT | E.PT | S.PT | NORMAL | RARE ITEM | GROUP | |||
| 180 | 200 | 6 | 6 | 6 | Escape pack | - | Federation Soldier B /Gertzog FE | |||
Federation Soldier B - Biological
| HP | STR | VIT | EATK | EDEF | DEX | EVA | AGL | WEAKNESS | RESISTS | LOCATION |
| 360 | 54 | 14 | 28 | 25 | 60 | 8 | 8 | Fire/Slash | - | Durandal |
| EXP | MONEY | T.PT | E.PT | S.PT | NORMAL | RARE ITEM | GROUP | |||
| 250 | 300 | 10 | 6 | 8 | Escape pack | - | Federation Soldier B /Gertzog FE | |||
Gertzog FE - Mechanical
| HP | STR | VIT | EATK | EDEF | DEX | EVA | AGL | WEAKNESS | RESISTS | LOCATION |
| 580 | 60 | 40 | 20 | 18 | 30 | 8 | 6 | Air | - | Durandal |
| EXP | MONEY | T.PT | E.PT | S.PT | NORMAL | RARE ITEM | GROUP | |||
| 360 | 400 | 18 | 4 | 16 | Med kit DX | - | Federation Soldier A/B | |||
Dirlewanger - Biological
| HP | STR | VIT | EATK | EDEF | DEX | EVA | AGL | WEAKNESS | RESISTS | LOCATION |
| 380 | 56 | 15 | 37 | 26 | 30 | 10 | 7 | Fire | - | Encephalon |
| EXP | MONEY | T.PT | E.PT | S.PT | NORMAL | RARE ITEM | GROUP | |||
| 220 | 400 | 12 | 6 | 10 | Med kit S | Ether pack S | Kubel | |||
Kubel - Mechanical
| HP | STR | VIT | EATK | EDEF | DEX | EVA | AGL | WEAKNESS | RESISTS | LOCATION |
| 800 | 58 | 26 | 20 | 10 | 24 | 8 | 4 | Lightning | - | Encephalon |
| EXP | MONEY | T.PT | E.PT | S.PT | NORMAL | RARE ITEM | GROUP | |||
| 420 | 0 | 18 | 6 | 20 | Junk circuit A | - | Dirlewanger | |||
Bugbear - Gnosis
| HP | STR | VIT | EATK | EDEF | DEX | EVA | AGL | WEAKNESS | RESISTS | LOCATION |
| 980 | 75 | 28 | 40 | 12 | 20 | 10 | 6 | Air | - | Encephalon / Kukai |
| EXP | MONEY | T.PT | E.PT | S.PT | NORMAL | RARE ITEM | GROUP | |||
| 480 | 0 | 24 | 2 | 6 | Med kit S | Tech upgrade A | Kobold/Basilisk | |||
Kobold - Gnosis
| HP | STR | VIT | EATK | EDEF | DEX | EVA | AGL | WEAKNESS | RESISTS | LOCATION |
| 280 | 57 | 12 | 10 | 24 | 36 | 50 | 7 | Lightning/ Slash | - | Encephalon / Kukai |
| EXP | MONEY | T.PT | E.PT | S.PT | NORMAL | RARE ITEM | GROUP | |||
| 260 | 0 | 12 | 4 | 10 | Kobold's Knife | - | Bugbear/Basilisk | |||
Troll - Gnosis
| HP | STR | VIT | EATK | EDEF | DEX | EVA | AGL | WEAKNESS | RESISTS | LOCATION |
| 1200 | 90 | 30 | 10 | 12 | 10 | 2 | 6 | Air | - | Encephalon / Kukai |
| EXP | MONEY | T.PT | E.PT | S.PT | NORMAL | RARE ITEM | GROUP | |||
| 560 | 0 | 30 | 2 | 6 | Med kit S | Med kit DX | - | |||
Larva Doll - Gnosis
| HP | STR | VIT | EATK | EDEF | DEX | EVA | AGL | WEAKNESS | RESISTS | LOCATION |
| 300 | 20 | 12 | 36 | 28 | 40 | 20 | 7 | - | - | Encephalon / Kukai |
| EXP | MONEY | T.PT | E.PT | S.PT | NORMAL | RARE ITEM | GROUP | |||
| 380 | 0 | 16 | 20 | 8 | Neuro stim | Cure-All | - | |||
Gremlin - Gnosis
| HP | STR | VIT | EATK | EDEF | DEX | EVA | AGL | WEAKNESS | RESISTS | LOCATION |
| 420 | 20 | 14 | 40 | 4 | 40 | 20 | 7 | Puncture | 50% Ice | Encephalon |
| EXP | MONEY | T.PT | E.PT | S.PT | NORMAL | RARE ITEM | GROUP | |||
| 320 | 0 | 10 | 6 | 2 | Revive | Med kit S | Sky fish | |||
Sky Fish - Gnosis
| HP | STR | VIT | EATK | EDEF | DEX | EVA | AGL | WEAKNESS | RESISTS | LOCATION |
| 560 | 48 | 12 | 38 | 20 | 40 | 20 | 6 | Puncture | - | Encephalon |
| EXP | MONEY | T.PT | E.PT | S.PT | NORMAL | RARE ITEM | GROUP | |||
| 380 | 0 | 13 | 10 | 4 | Escape pack | - | - | |||
Gertzog UT - Mechanical
| HP | STR | VIT | EATK | EDEF | DEX | EVA | AGL | WEAKNESS | RESISTS | LOCATION |
| 640 | 65 | 26 | 20 | 12 | 30 | 12 | 6 | Air | - | Encephalon |
| EXP | MONEY | T.PT | E.PT | S.PT | NORMAL | RARE ITEM | GROUP | |||
| 380 | 600 | 22 | 6 | 20 | Med kit S | Med kit DX | - | |||
Basilisk - Gnosis
| HP | STR | VIT | EATK | EDEF | DEX | EVA | AGL | WEAKNESS | RESISTS | LOCATION |
| 480 | 30 | 10 | 38 | 22 | 30 | 10 | 7 | Slash | - | Encephalon |
| EXP | MONEY | T.PT | E.PT | S.PT | NORMAL | RARE ITEM | GROUP | |||
| 300 | 0 | 14 | 10 | 4 | Ether pack S | Ether upgrade A | Bugbear/Kobold | |||
*Tiamat - Gnosis
| HP | STR | VIT | EATK | EDEF | DEX | EVA | AGL | WEAKNESS | RESISTS | LOCATION |
| 6400 | 100 | 20 | 50 | 24 | 32 | 40 | 10 | Beam / Puncture | - | Encephalon |
| EXP | MONEY | T.PT | E.PT | S.PT | NORMAL | RARE ITEM | GROUP | |||
| 15600 | 0 | 180 | 160 | 120 | B-MAX Circuit | Revenge Power | - | |||
Gel Fish - Gnosis
| HP | STR | VIT | EATK | EDEF | DEX | EVA | AGL | WEAKNESS | RESISTS | LOCATION |
| 800 | 58 | 26 | 20 | 10 | 24 | 8 | 4 | Lightning | - | Encephalon |
| EXP | MONEY | T.PT | E.PT | S.PT | NORMAL | RARE ITEM | GROUP | |||
| 420 | 0 | 18 | 6 | 20 | Junk circuit A | - | Dirlewanger | |||
Wyrm - Gnosis
| HP | STR | VIT | EATK | EDEF | DEX | EVA | AGL | WEAKNESS | RESISTS | LOCATION |
| 1000 | 20 | 15 | 70 | 32 | 40 | 20 | 8 | Puncture | 50% Ice, Lightning | Kukai Foundation |
| EXP | MONEY | T.PT | E.PT | S.PT | NORMAL | RARE ITEM | GROUP | |||
| 900 | 0 | 25 | 14 | 6 | Cure-All | Ether Pack DX | - | |||
Larva Face - Gnosis
| HP | STR | VIT | EATK | EDEF | DEX | EVA | AGL | WEAKNESS | RESISTS | LOCATION |
| 300 | 20 | 12 | 40 | 28 | 40 | 20 | 7 | - | - | Kukai Foundation |
| EXP | MONEY | T.PT | E.PT | S.PT | NORMAL | RARE ITEM | GROUP | |||
| 500 | 0 | 16 | 20 | 8 | Neuro stim | Cure All | - | |||
*Gigas - Gnosis
| HP | STR | VIT | EATK | EDEF | DEX | EVA | AGL | WEAKNESS | RESISTS | LOCATION |
| 2800 | 100 | 40 | 55 | 34 | 40 | 30 | 9 | Air / Slash | - | Kukai Foundation |
| EXP | MONEY | T.PT | E.PT | S.PT | NORMAL | RARE ITEM | GROUP | |||
| 7800 | 0 | 120 | 100 | 60 | Spirit | Soul | - | |||
Vive - Biological
| HP | STR | VIT | EATK | EDEF | DEX | EVA | AGL | WEAKNESS | RESISTS | LOCATION |
| 1000 | 40 | 12 | 58 | 32 | 40 | 20 | 9 | Beam / Air | 50% Fire | Song of Nephilim |
| EXP | MONEY | T.PT | E.PT | S.PT | NORMAL | RARE ITEM | GROUP | |||
| 780 | 0 | 12 | 4 | 12 | Med kit DX | Veil | Shot Crab / Calx / Capto Mortum | |||
Shot Crab - Mechanical
| HP | STR | VIT | EATK | EDEF | DEX | EVA | AGL | WEAKNESS | RESISTS | LOCATION |
| 1420 | 75 | 36 | 70 | 16 | 40 | 12 | 6 | Lightning | - | Song of Nephilim |
| EXP | MONEY | T.PT | E.PT | S.PT | NORMAL | RARE ITEM | GROUP | |||
| 900 | 5 | 14 | 0 | 16 | - | - | Vive / Capto Mortum / Calx | |||
Capto Mortum - Mechanical
| HP | STR | VIT | EATK | EDEF | DEX | EVA | AGL | WEAKNESS | RESISTS | LOCATION |
| 1600 | 95 | 38 | 70 | 16 | 50 | 30 | 9 | Beam | - | Song of Nephilim |
| EXP | MONEY | T.PT | E.PT | S.PT | NORMAL | RARE ITEM | GROUP | |||
| 1040 | 0 | 16 | 0 | 20 | Scrap iron | - | Vive / Shot Crab / Calx | |||
Calx - Biological
| HP | STR | VIT | EATK | EDEF | DEX | EVA | AGL | WEAKNESS | RESISTS | LOCATION |
| 1100 | 40 | 12 | 62 | 32 | 40 | 20 | 7 | Beam / Air | 50% Fire | Song of Nephilim |
| EXP | MONEY | T.PT | E.PT | S.PT | NORMAL | RARE ITEM | GROUP | |||
| 880 | 0 | 16 | 4 | 16 | Med kit DX | Veil | Vive / Shot Crab / Capto Mortum | |||
Byproduct 103 - Gnosis
| HP | STR | VIT | EATK | EDEF | DEX | EVA | AGL | WEAKNESS | RESISTS | LOCATION |
| 2600 | 20 | 20 | 60 | 38 | 40 | 30 | 7 | Fire | 50% Ice | Song of Nephilim |
| EXP | MONEY | T.PT | E.PT | S.PT | NORMAL | RARE ITEM | GROUP | |||
| 1360 | 0 | 42 | 24 | 8 | Garnet | Ether upgrade A | Byproduct 145 & 172 | |||
Byproduct 145 - Gnosis
| HP | STR | VIT | EATK | EDEF | DEX | EVA | AGL | WEAKNESS | RESISTS | LOCATION |
| 1600 | 90 | 30 | 20 | 16 | 50 | 30 | 9 | Ice | - | Song of Nephilim |
| EXP | MONEY | T.PT | E.PT | S.PT | NORMAL | RARE ITEM | GROUP | |||
| 1140 | 0 | 30 | 10 | 4 | Med kit DX | Skill upgrade A | Byproduct 103 & 172 | |||
Byproduct 173 - Gnosis
| HP | STR | VIT | EATK | EDEF | DEX | EVA | AGL | WEAKNESS | RESISTS | LOCATION |
| 1800 | 100 | 32 | 20 | 16 | 30 | 30 | 8 | Lightning | - | Song of Nephilim |
| EXP | MONEY | T.PT | E.PT | S.PT | NORMAL | RARE ITEM | GROUP | |||
| 1280 | 0 | 34 | 10 | 4 | Booster pack | TP Drive A | Byproduct 103 & 145 | |||
Athra 26 Series - Gnosis
| HP | STR | VIT | EATK | EDEF | DEX | EVA | AGL | WEAKNESS | RESISTS | LOCATION |
| 3000 | 90 | 15 | 90 | 26 | 50 | 45 | 11 | - | - | Song of Nephilim |
| EXP | MONEY | T.PT | E.PT | S.PT | NORMAL | RARE ITEM | GROUP | |||
| 2400 | 0 | 120 | 24 | 100 | Revive DX | - | - | |||
*Rianon Se - Gnosis
| HP | STR | VIT | EATK | EDEF | DEX | EVA | AGL | WEAKNESS | RESISTS | LOCATION |
| 5600 | 100 | 20 | 65 | 40 | 45 | 50 | 11 | Fire | 100% Ice | Song of Nephilim |
| EXP | MONEY | T.PT | E.PT | S.PT | NORMAL | RARE ITEM | GROUP | |||
| 20000 | 0 | 160 | 160 | 40 | Boost pack | Ether Pack DX | - | |||
*Simeon - Mechanical
| HP | STR | VIT | EATK | EDEF | DEX | EVA | AGL | WEAKNESS | RESISTS | LOCATION |
| 8400 | 120 | 100 | 100 | 30 | 42 | 36 | 9 | - | 50% Fire, Ice,Beam, Lightning | Song of Nephilim |
| EXP | MONEY | T.PT | E.PT | S.PT | NORMAL | RARE ITEM | GROUP | |||
| 32000 | 0 | 220 | 200 | 180 | B-Max Circuit | Fast Drive Circuit 25 | - | |||
*Ein Rugel - Gnosis
| HP | STR | VIT | EATK | EDEF | DEX | EVA | AGL | WEAKNESS | RESISTS | LOCATION |
| 3600 | 90 | 35 | 60 | 20 | 45 | 47 | 8 | - | 75% Ice, Lightning | Song of Nephilim |
| EXP | MONEY | T.PT | E.PT | S.PT | NORMAL | RARE ITEM | GROUP | |||
| 24000 | 0 | 180 | 160 | 80 | - | Master's pendant | - | |||
*Doppelwogel - Gnosis
| HP | STR | VIT | EATK | EDEF | DEX | EVA | AGL | WEAKNESS | RESISTS | LOCATION |
| 4400 | 110 | 30 | 70 | 40 | 40 | 60 | 12 | - | 75%Beam, Lightning | Song of Nephilim |
| EXP | MONEY | T.PT | E.PT | S.PT | NORMAL | RARE ITEM | GROUP | |||
| 24000 | 0 | 180 | 160 | 80 | Samurai Heart | Gemini Clocks | - | |||
Work Droid - Mechanical
| HP | STR | VIT | EATK | EDEF | DEX | EVA | AGL | WEAKNESS | RESISTS | LOCATION |
| 2400 | 100 | 34 | 52 | 12 | 20 | 10 | 6 | Beam | - | Proto Merkabah |
| EXP | MONEY | T.PT | E.PT | S.PT | NORMAL | RARE ITEM | GROUP | |||
| 1800 | 0 | 18 | 0 | 24 | Junk Circuit B | Frame Repair A | - | |||
Delphyne - Gnosis
| HP | STR | VIT | EATK | EDEF | DEX | EVA | AGL | WEAKNESS | RESISTS | LOCATION |
| 2000 | 95 | 30 | 30 | 8 | 42 | 20 | 7 | Ice | - | Proto Merkabah |
| EXP | MONEY | T.PT | E.PT | S.PT | NORMAL | RARE ITEM | GROUP | |||
| 2400 | 0 | 24 | 10 | 6 | Hemlock | Med kit DX | Demon | |||
Demon - Gnosis
| HP | STR | VIT | EATK | EDEF | DEX | EVA | AGL | WEAKNESS | RESISTS | LOCATION |
| 2300 | 115 | 10 | 80 | 36 | 46 | 44 | 8 | - | 75% Ice, Fire, Lightning | Proto Merkabah |
| EXP | MONEY | T.PT | E.PT | S.PT | NORMAL | RARE ITEM | GROUP | |||
| 3200 | 0 | 16 | 28 | 12 | Med kit DX | Ether pack DX | Delphyne | |||
Xanthosis - Mechanical
| HP | STR | VIT | EATK | EDEF | DEX | EVA | AGL | WEAKNESS | RESISTS | LOCATION |
| 4000 | 150 | 40 | 20 | 12 | 30 | 12 | 6 | Lightning | - | Proto Merkabah |
| EXP | MONEY | T.PT | E.PT | S.PT | NORMAL | RARE ITEM | GROUP | |||
| 4800 | 0 | 40 | 0 | 28 | Frame Repair A | Frame Repair Z | Iosis | |||
Iosis - Mechanical
| HP | STR | VIT | EATK | EDEF | DEX | EVA | AGL | WEAKNESS | RESISTS | LOCATION |
| 4800 | 120 | 36 | 70 | 12 | 40 | 12 | 6 | Beam | - | Proto Merkabah |
| EXP | MONEY | T.PT | E.PT | S.PT | NORMAL | RARE ITEM | GROUP | |||
| 5400 | 0 | 50 | 0 | 36 | Frame Repair A | Frame Repair Z | Xanthosis | |||
Armaros - Gnosis
| HP | STR | VIT | EATK | EDEF | DEX | EVA | AGL | WEAKNESS | RESISTS | LOCATION |
| 3000 | 130 | 40 | 40 | 20 | 52 | 40 | 8 | - | 50% Air | Proto Merkabah |
| EXP | MONEY | T.PT | E.PT | S.PT | NORMAL | RARE ITEM | GROUP | |||
| 4000 | 0 | 34 | 16 | 10 | Med kit DX | Skill upgrade S | Baraqijal/Azazel | |||
Baraqijal - Gnosis
| HP | STR | VIT | EATK | EDEF | DEX | EVA | AGL | WEAKNESS | RESISTS | LOCATION |
| 2400 | 20 | 15 | 65 | 35 | 50 | 30 | 9 | - | 50% Ice, Beam | Proto Merkabah |
| EXP | MONEY | T.PT | E.PT | S.PT | NORMAL | RARE ITEM | GROUP | |||
| 4600 | 0 | 24 | 24 | 10 | Ether pack DX | Ether upgrade S | Armaros/Azazel | |||
*Azazel - Gnosis
| HP | STR | VIT | EATK | EDEF | DEX | EVA | AGL | WEAKNESS | RESISTS | LOCATION |
| 4600 | 30 | 20 | 100 | 40 | 54 | 24 | 7 | - | 50% Fire, Lightning | Proto Merkabah |
| EXP | MONEY | T.PT | E.PT | S.PT | NORMAL | RARE ITEM | GROUP | |||
| 6200 | 0 | 36 | 36 | 16 | Ether pack DX | Tech upgrade S | Armaros/Baraqijal | |||
*Proto Dora - Mechanical
| HP | STR | VIT | EATK | EDEF | DEX | EVA | AGL | WEAKNESS | RESISTS | LOCATION |
| 12000 | 165 | 100 | 170 | 20 | 50 | 10 | 6 | Beam | - | Proto Merkabah |
| EXP | MONEY | T.PT | E.PT | S.PT | NORMAL | RARE ITEM | GROUP | |||
| 32000 | 0 | 240 | 0 | 200 | Frame Repair Z | Fast Drive Circuit 50 | Schutz | |||
*Schutz - Mechanical
| HP | STR | VIT | EATK | EDEF | DEX | EVA | AGL | WEAKNESS | RESISTS | LOCATION |
| 3800 | 45 | 30 | 58 | 16 | 60 | 40 | 8 | Lightning | - | Proto Merkabah |
| EXP | MONEY | T.PT | E.PT | S.PT | NORMAL | RARE ITEM | GROUP | |||
| 5000 | 0 | 100 | 0 | 60 | Frame Repair A | Fast Drive Circuit 25 | Proto Dora | |||
*Albedo - Biological
| HP | STR | VIT | EATK | EDEF | DEX | EVA | AGL | WEAKNESS | RESISTS | LOCATION |
| 7400 | 115 | 30 | 90 | 40 | 60 | 50 | 12 | - | 75%Fire, Ice,Beam, Lightning | Proto Merkabah |
| EXP | MONEY | T.PT | E.PT | S.PT | NORMAL | RARE ITEM | GROUP | |||
| 54000 | 0 | 250 | 220 | 250 | Revive DX | Med kit DX | - | |||
*Sophie Peithos - Gnosis
| HP | STR | VIT | EATK | EDEF | DEX | EVA | AGL | WEAKNESS | RESISTS | LOCATION |
| 16000 | 150 | 42 | 220 | 42 | 60 | 20 | 6 | - | - | Proto Merkabah |
| EXP | MONEY | T.PT | E.PT | S.PT | NORMAL | RARE ITEM | GROUP | |||
| 88000 | 0 | 250 | 250 | 250 | - | - | - | |||
*Jaldabaoth - Gnosis
| HP | STR | VIT | EATK | EDEF | DEX | EVA | AGL | WEAKNESS | RESISTS | LOCATION |
| 1200 | 120 | 30 | 120 | 1 | 60 | 50 | 9 | - | - | Proto Merkabah |
| EXP | MONEY | T.PT | E.PT | S.PT | NORMAL | RARE ITEM | GROUP | |||
| 2400 | 0 | 150 | 80 | 20 | Revive | Revive DX | - | |||
*Ratatosk - Gnosis
| HP | STR | VIT | EATK | EDEF | DEX | EVA | AGL | WEAKNESS | RESISTS | LOCATION |
| 1800 | 80 | 40 | 80 | 20 | 60 | 20 | 7 | - | 100%Beam, Lightning | Proto Merkabah |
| EXP | MONEY | T.PT | E.PT | S.PT | NORMAL | RARE ITEM | GROUP | |||
| 3800 | 0 | 180 | 120 | 20 | Revive | Revive DX | - | |||
Ace Pilot - Biological
| HP | STR | VIT | EATK | EDEF | DEX | EVA | AGL | WEAKNESS | RESISTS | LOCATION |
| 360 | 50 | 15 | 30 | 20 | 30 | 20 | 8 | - | - | U-TIC ship |
| EXP | MONEY | T.PT | E.PT | S.PT | NORMAL | RARE ITEM | GROUP | |||
| 30 | 500 | 10 | 4 | 16 | Skill upgrade A | Ether upgrade A | - | |||
Meld Gareth - Mechanical
| HP | STR | VIT | EATK | EDEF | DEX | EVA | AGL | WEAKNESS | RESISTS | LOCATION |
| 5500 | 110 | 80 | 50 | 10 | 30 | 10 | 6 | - | - | U-TIC ship |
| EXP | MONEY | T.PT | E.PT | S.PT | NORMAL | RARE ITEM | GROUP | |||
| 4000 | 1000 | 60 | 20 | 60 | Frame Repair Z | B-Max Circuit | - | |||
Din Gareth - Mechanical
| HP | STR | VIT | EATK | EDEF | DEX | EVA | AGL | WEAKNESS | RESISTS | LOCATION |
| 8500 | 150 | 80 | 50 | 30 | 50 | 10 | 6 | - | - | U-TIC ship |
| EXP | MONEY | T.PT | E.PT | S.PT | NORMAL | RARE ITEM | GROUP | |||
| 8000 | 1000 | 80 | 20 | 80 | Frame Repair Z | Fast Drive Circuit | - | |||
Mintia - Gnosis
| HP | STR | VIT | EATK | EDEF | DEX | EVA | AGL | WEAKNESS | RESISTS | LOCATION |
| 7777 | 20 | 20 | 80 | 32 | 80 | 50 | 18 | - | 50%Fire, Ice,Beam, Lightning | Kukai Foundation |
| EXP | MONEY | T.PT | E.PT | S.PT | NORMAL | RARE ITEM | GROUP | |||
| 22000 | 12000 | 160 | 240 | 200 | Penguin Rod | Craft Apron | - | |||
*Great Joe - Gnosis
| HP | STR | VIT | EATK | EDEF | DEX | EVA | AGL | WEAKNESS | RESISTS | LOCATION |
| 9999 | 100 | 30 | 68 | 20 | 40 | 40 | 11 | - | 50%Beam, Lightning | Durandal |
| EXP | MONEY | T.PT | E.PT | S.PT | NORMAL | RARE ITEM | GROUP | |||
| 18000 | 200 | 200 | 180 | 200 | Swimsuit | - | - | |||
Chapter 15: Walk-Through
Welcome to the walk-through portion of the GameSpot Complete Guide to Xenosaga: Episode I. In each section, we'll include a list of enemies in the beginning of every chapter so you can cross-reference them to the Enemy Databank. Hopefully that will allow you to determine which areas have enemies that aren't too difficult for your characters, or if a certain area is a good place for leveling up.
Encephalon
Enemies:
Attack Drone
Drone F
Drone G1
Drone G2
Drone G3
Drone M

As Shion Uzuki, you enter into a virtual battlefield with KOS-MOS. This is the game's way of getting you familiar with the battle system. You don't have to take part in any of the battles, but it is recommended if you are new to the game. Talk to KOS-MOS to choose which tutorial you'd like to receive. After choosing a type, approach the yellow guard to start the battle. Just remember that since these are easy tutorial battles, you'll only get one experience point per enemy, and one tech point, one ether point, and one skill point no matter what you do. Don't bother trying to level up here.
Normal Attacks
This tutorial teaches you about the group turn window (GTW), the two main attacks, the different types of enemies you'll face (biological, mechanical, and Gnosis), how each attack consumes 2 action points (AP), and that you go into a turn with 4 AP. This tutorial will place you into a battle with two Drone M's.
After the first tutorial, Allen will explain the body-flashing phenomena. After a battle, the lead character flashes. While flashing, you will not engage in a new battle even if you are touching an enemy.
Tech Attacks
This tutorial teaches you that 6 AP is needed to perform a tech attack. You can attack for one turn and then hit X to carry over the unused AP into your next turn. You can also guard to save more AP. Once you have 6 AP, they tell you how to perform a tech attack. The ones available for Shion are Lightning Blast (square, square, circle) and Spell Ray (triangle, triangle, circle) The ones available for KOS-MOS are R - BLADE (square, square, circle), R - CANNON (triangle, triangle, circle), and F - GSHOT or F - MSHOT (circle). The F - GSHOT and F - MSHOT use her subweapon, and they can only be used a certain number of times per battle. To use it, you need ammo, EP, and AP. Her F - GSHOT uses 1 ammo, 0 EP, and 6 AP. Later on, you will be able to reassign the tech attacks to different button combinations. This tutorial will place you into battle with two Drone M's.
Submenus
This tutorial teaches you how to access the submenu in battle. You have the choice of Ether (consumes 4 AP and uses EP based on what ether you'll use), Item (consumes 3 AP, though if the item has a "W" next to it, it can be used as a W-Item, which uses 6 AP and two items and affects the whole party instead of a single target), Move (consumes 2 AP and allows your character to move to a different location on the battlefield, which affects how much damage you inflict and sustain), AGWS (consumes 4 AP and allows characters who have AGWS units to get into them), and Guard (consumes 2 AP and reduces the amount of damage that character sustains). You also learn that there is no "escape" command. The only way to leave battles are to win, lose, use a few escape packs, or use Shion's "goodbye" skill. This tutorial will place you into battle with three Drone F's.
After you attack once, you'll learn about the boost gauge. After each successful normal or tech attack, the boost gauge will rise. When it fills, it'll go up by one and start over. The battle gives you a boost gauge of 2 automatically. A character not in the GTW can be boosted to take the next action if his or her boost gauge is at least at 1. You hit the R2 button along with the square, triangle, or circle button to choose which character. Square would be the first character, triangle the second, and circle the third.
After using (or not using) Boost and killing an enemy, you'll learn about the event slot. It's the small rectangle to the left of the GTW. There are four possible things that it can be filled with: nothing; critical hit rate up, which allows for a greater chance of inflicting (or sustaining, if an enemy has that slot) a critical hit; boost gauge rate up, which allows faster filling of the boost gauge; and special points up, which gives you two times, four times, or even 10 times the amount of tech, ether, and skill points for killing that enemy. Those points go toward improving tech attacks and character stats (tech points), learning new ether spells or transferring spells to other characters (ether points), and drawing out new skills from equipment (skill points).
Switch to Real Combat
This is the last tutorial battle. The enemies will attack your character in this battle. You fight one Drone F, one Attack Drone, and one Drone M. Since the Drone F can attack the whole party at once, you should kill it first.
After that battle is done, you're switched into the real battle simulator. Allen will briefly explain destructible objects. If you get close enough to one, you can use the square button to use your vaporizer plug-in to destroy it. By doing so, you can acquire items, unleash enemies, get rid of obstacles, or have status effects affect nearby enemies.

Go down the slope that's to the right of the enemy walking around. You can destroy the truck in the way to reveal stairs. Use them and follow the path until you reach the door. Destroy the door and go inside. By doing so, you'll acquire a med kit. Get out of the building, head down the stairs, ascend the second set of stairs on the left, and then lure the enemy near you. Run down the stairs and destroy the yellow canister. If the enemy is close enough, it'll get shocked. On the field, its movements will be slowed down, so if you want to avoid it, now is a great time. However, using canisters like that will not only affect enemies in the field, but it will also affect them in battle mode. If you go into battle while the enemy is still shocked, your party will have a greater chance of landing a critical hit. Kill the enemies by using boosting for more turns. Now head back to where you started from and go to the left of the screen. Ascend the ladder, walk to the window, destroy the red canister, and then destroy the door. On the field, enemies will be stopped entirely while on fire. In battle, your party members start with a boost gauge of 1. Kill the enemies (always Drone F's first, remember) and collect the two med kit S's from the chest. Descend the ladder and move toward the large building at end of the area. Avoid or fight the enemy, then go inside the building.
Run forward and confront the enemy in front of the gate if you want to gain more points and items. Otherwise, avoid it and ascend the stairs to the right. There's another enemy, one that will react to your footsteps. If you walk behind it, it won't notice you, so you can use the red canister to your advantage. Destroy that and win the fight, then continue down the catwalk that the red canister was near, destroying the crate that's in your way. This will take you outside the building. Go to the end of the path and destroy the crate to get a revive. Head back inside and destroy the crate blocking your path. Lure the enemy to the red canister again, destroy it, and fight. Then go to the left and use circle to open the door. Follow the catwalk around the bend, but don't go any further if you don't want to fight the upcoming boss battle.
Go back and get some more experience points, since enemies respawn. Once you think you're ready, get closer to the stairs to initiate battle with Drone SPX.
Boss Fight 01 : Drone SPX : 280 HP
You're able to call Shion's AGWS, VX-10000, in this battle. In fact, you have no choice, as it automatically happens. Use KOS-MOS' BLASTER once and then cancel to save up AP. The enemy will go again, then it'll be KOS-MOS' turn again. Use her R - CANNON tech attack. Then it will be Shion's turn. You'll get a short tutorial on AGWS fighting. Since KOS-MOS should have inflicted a decent amount of damage upon the Drone SPX, use VX-10000's SWD21AG to finish it.

After the fight, the guys at the lab will upgrade the enemies into ones that simulate the Gnosis. These will respond to sound like the Drone F and Drone M enemies walking around did before. Now you can save your game if you want. Go to the Unus Mundus Network (UMN) save point and hit circle to bring up
the save screen. After that, come toward the screen and descend the stairs. Don't go in the door yet, though. Descend the ladder to your left and exit the room at the bottom of the screen. This leads you into another room. Head down and to the right a little to destroy some crates. Doing so will get you an ether pack and two med kit S's. Continue toward the rear of this side area and destroy the junk to reveal a red door. These are special doors that need special keys to unlock them. This is segment address no. 10. Go back toward
the entrance of the room and on the left will be a crate you can destroy. If you destroy it, it'll unleash a group of two or three Drone G1s. Use physical attacks on them for more damage. These enemies hit harder, so make sure to use Shion's Medica ether to heal up after the battle. Leave the room, go back to the ladder, ascend it, and then go into the door on the right. Grab the mission key that's on the desk, then head to the right and destroy the cabinet blocking the door. The enemy you see floating around (Drone G2), can be harmed only by ether attacks. So fight it or walk around the enemy and down the stairs. Go to the grate to the left of the stairs and use the mission key on it to get access to the next room. Don't bother going any further in the room if you don't think you're ready for another boss fight. Level up outside of the building where you started, since you can fight Drone G3s there. They give 20 experience points each. It may not be much, but it's more than any other enemy around. Once you feel ready, go to the save point to save, then go back to the room you used the mission key for and fight the boss.
Boss Fight 02 : Drone GX : 420 HP
Have Shion get into her AGWS and use KOS-MOS' BLASTER once to build up AP. Now have Shion use the SG21AG once to build up her AP. Now have KOS-MOS use her R - CANNON tech attack to finish off the boss.
Woglinde
Enemies:
Drone SPX
Goblin
Golem
Gremlin
Manticore
You start off in the KOS-MOS lab. Shion has been summoned to the bridge to talk to the captain. No matter how quickly you get there, you'll always be 10 minutes late, so take the time to check out the Woglinde. Also, the vaporizer plug-in that you used in the simulator hasn't been made yet, so you can't destroy crates or anything. You will get it soon enough, though, so don't worry. Head toward the screen to find a save point and save your game. Go to the right of the red chair that Shion was in and talk to the mechanic there. Doing this puts you back into the simulator. All you really want to do is to go back to the room you fought the Drone GX in to get the crate you weren't able to get before. Just walk around the enemies to get to the room, destroy the crate, and obtain the battle passport. To the right of that is another exit, so leave the simulator. Go up the ramp near the save point, go to the right, and follow the path to a door. When you go to open it, a cutscene will begin.

Follow the corridor to the right and you'll see a map on a wall. Use this if you want to know the general layout of the Woglinde. Head toward the screen from the map and you'll get an e-mail. After reading it,
you'll get a small tutorial about the UMN. You'll also be able to read e-mails detailing how to equip characters and AGWSs, along with general tips for battles and using tech, ether, and skill points. With that out of the way, continue going down and go through the doors. There'll be another cutscene. With control of Shion again, head to the door on the right of the small room to initiate a round of cutscenes. Once you regain control of Shion again, go to the right and talk to the mechanic near the doorway. Give him your e-mail to get some good stuff later on. Go through the doorway, then up through the door to get to D-01. Go up a little bit to initiate two cutscenes.
After those are done, continue moving up D-01. Near the T intersection, Shion will state that she should bring the Realian service data with her. She recalls it being in her room, so keep going straight. Her room will be the third on the right. The first room has a control for the partition doors. Remember that room. After that is segment address no. 18. Beyond that is Shion's room. The Realian service data is on her desk at the top of the room. Grab that and save. You can rest in her bed to restore your HP and EP, so that's nice. Just before you leave the room, Miyuki will e-mail you concerning the creation of the MWS weapon Shion used in the Encephalon simulation. Leave Shion's room and head back toward the T intersection, since the path further up is blocked off. Go through the doors at the end of the left part of the T intersection to go into the Realian lab.
Once in the Realian lab, you have to fix a problem in the main computer system, and then you have to check out all the Realians lying in the medical beds. So go around the room and talk to them all, then head toward Lieutenant Caspase at the main computer to trigger a cutscene where you meet Lieutenant Virgil.
Afterward, head toward the door at the top of the screen and you'll get another cutscene. Once that is done, you'll be in D-02, so turn around and go toward the back of the Realian lab, where you'll get another e-mail. This is an e-mail you can reply to. So, give your reply, stating you'll aid in catching the hacker. Then go back to D-02. Follow the corridor and you'll come to a section that's covered in trash. Talk to the man on the left, Mr. Driller, to start up a minigame.
The square button controls the movement of the drill crane. Hold it down to move the drill crane up first. Let go at the desired location. Press and hold the square button again to move the drill crane to the right. Let go at the desired location. Once you stop the horizontal motion of the drill crane, the drill will fall and destroy whatever is under it. Use the R2 button to get the overhead view for the best chance of hitting all the debris. If you hit all the trash on your first time, you get a med kit S. If it takes you more than one try for each piece of trash, then you get a med kit. Mr. Driller also gives you the drill passport.
With the path clear, move up toward the doors at the end and you'll get another e-mail. This time it's from the Omega Byte Store. You now have the database plug-in. It provides explanations of the terminology used in the game, along with information you gather on Gnosis enemies by using Shion's analyze spell.
Go through the doors at the top of the drill crane section of D-02 to reach D-03. The first door on the left has a save point in it. The second room on the left can't be accessed yet, so don't worry about it. Continue forward through the doorway and take a left into the lounge opposite the map on the wall to get another e-mail. This one's from Miyuki about developing a weapon for KOS-MOS that attacks the whole enemy party at the same time. Reply favorably to the e-mail and continue going down D-03.
This area is D-04, and it's where you meet up with Sergeant Swaine. Talk to him and he'll give you the segment file, which keeps tracks of what doors and keys you have. Next to him is segment address no. 7. Now head to the right and, if you gave your e-mail to the mechanic in the Zohar room, you'll get another e-mail. It's a spam e-mail from Namco about a video game. Exciting, isn't it? It's not the special thing the mechanic was talking about, though.
Head left past Sergeant Swaine, go up through the corridor, and talk to the two men on the left side of the room to start a game of tag. Just run toward the block in the center of the room, go to the left and go around it, and run back to the starting point and reach the med kit on the ground before they can tag you. Do it another two times to get an additional two med kits if you want.
Go to the left of the room and then up through the doors and you'll be in the AGWS hangar. If you talk to the mechanic near the back of the room by the VX-10000, you can have a battle against the Drone SPX. This is by far the best place to get tech points and skill points. The Drone SPX still has only 280 HP, and it will inflict at max around 10 damage to your AGWS. You can time the event slot to be on the special points up every time when you kill the Drone SPX. So, on two times you'll get the standard 40 experience points, 36 tech points, and 32 skill points. On four times you'll get the standard 40 experience points, 72 tech points, and 64 skill points. On 10 times, you'll get the standard 40 experience points, 180 tech points, and 160 skill points. Additionally, you get a med kit S for every time you beat it. However, you can't heal your AGWS yet, so just fight the Drone SPX bare-handed. Don't worry about healing, because after the battle, you'll have full HP, since it's a simulation. Another thing--this simulation is only available at the current time, so feel free to take this opportunity to gather points and med kits. On the right side of the actual hangar is a mechanic who will buy and sell items. On the left are some more mechanics.
After leveling up some, head over past Sergeant Swaine to reach D-05. Use the elevator at the top part of the room to get to the bridge. Once at the bridge, go up the ramp and talk to Captain Moriyama, who's sitting in his chair. This will start a cutscene. Once that's done, head toward the screen and you'll get an e-mail from Miyuki again. It's about the sprinkle plug-in. Get out of the e-mail and to the main mail box, then select the e-mail and download the attachment. Once that's done, you'll have the sprinkle plug-in. Get back on the elevator and go down. You'll get a notice to pick up a package at the AGWS hangar, so head back over there. Once there, go to the left side and talk to the mechanic behind the desk to receive the MWS.
Exit the AGWS hangar and ignore Shion's little comment about being tired. Go all the way to the right until you reach a door, open it, and go into a different part of D-05. Go right, then down, and you'll see segment address no. 16. Go right, and if you want something funny to occur, go into the room across from the segment address to interrupt some really friendly people while they "work," as the guy says. Leave the room and continue going right, then head down. On the right-hand side, there's a computer that controls the holograms one of the guys is looking at. Make sure you turn it off, as you'll need to turn it on in a bit.
Continue a little further down and then go behind one of the plants to get another e-mail. This is what the mechanic in the Zohar hanger was talking about. If you have 500G on you, which you should, you should invest the money into one of the three companies. If you want another spam e-mail, go back to the KOS-MOS lab and go to the left side of the room. It's to alert you of a new tennis game. Wow.

Head back to Shion's room to trigger a couple of cutscenes, then take a catnap. A series of cutscenes occur and wake Shion up. Now you're back in control, but the Woglinde has been infested with Gnosis. So run up to start a battle with the first Gnosis you see. Shion notices that she can't hurt them because they aren't in the same world or dimension as the Woglinde and its crew. Avoid getting into a battle, as the Gnosis, somehow, can still hurt you.
Now you have to go to the KOS-MOS lab to wake her up. She is a weapon built for fighting the Gnosis, after all. So walk up a little and then head right toward the partition door Shion notices. You have to make it to the switch on the right side of the door to avoid the Gnosis in the room. With that done, head up the hallway with the plants. Don't expect to get far, though. Lure the Gnosis toward the middle area and go behind the computer to activate the holograms you deactivated on your first trip through this hallway. Once it's distracted, continue going up the hallway and turn left. Talk to the woman in the corner near the segment address if you want. Go up a little to get the attention of the Gnosis blocking the path. Run into the room where the lovebirds were and watch the Gnosis walk by. Save if you want, then head out to initiate a cutscene in which someone wakes up.
Go through the doors the Gnosis was blocking to see another Gnosis storming about in D-04. This one's easy to get rid of. Go left and climb the ladder until the Gnosis sees you, then use the green button on the console to open the doors to the airlock. With the Gnosis disposed of, climb back down the same ladder and go down. The path will be blocked, so talk to the guy on the left, who will give you a clue as to how to clear it. Now head up and to the left. The entrance to the AGWS hangar is a mess, and there are two Gnosis guarding a treasure chest. Go around the debris and stand by the small crate. The closest Gnosis will hopefully charge into the box, destroying it. Now run back around and stand behind the yellow electromagnetic net. The Gnosis will become trapped in it. Stand by the other yellow electromagnetic net and the second Gnosis will get trapped in there also.
Collect what was in the crate, 200G, then get the two veils in the treasure chest. Now go into the AGWS hangar and talk to the mechanic who sold you items. You now have the vaporizer plug-in. So head to the rear of the AGWS hangar. Destroy the first box on the left-hand side to get two frame repair A's. Destroy the remaining box to receive an escape pack. Now head to the back of the hangar and destroy the panel on the wall to receive two frame repair Z's. Head out of the AGWS hangar, go right toward the airlock, and destroy the large crate blocking the ladder. Ascend the ladder and destroy the crates to receive a revive DX and 200G. Descend the ladder and head down to the large wreckage blocking the path. Destroy it and two Gnosis will phase in through the walls (which makes you wonder how a partition door or going into
another room will protect you from them). Use the same method to avoid them as you did with the two guys you played tag with. Once you reach the room, the Gnosis will stop chasing you. You'll encounter Sergeant Swaine again. Talk to him and he'll give you decoder 7, which can be used on the segment address door he was next to earlier. In the room you'll find robot part right arm. Exit the room and go to the left and destroy the centerpiece of the room to reveal a bio sphere. Destroy the plant in the upper left-hand corner of the room to reveal an ether pack. Head down through the doors to start a sequence of cutscenes.
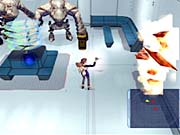
Once everything has occurred, check the guy on the floor to obtain a crewman's key, which will unlock the door above the room with the save point. Inside the room is a chest that contains a SMP53AG. Grab it, then go back into the corridor and down into the room where the save point is to save your game.
This would be a good place to use the tech points you got from the simulation battle. Upgrade Shion's stats and remove the waiting time from both her lightning blast and spell ray. Also, increase their speed so you can use them in one turn. You should also increase their tech levels two or three times if you can.
Once that's done, leave the room. Keep running down the corridor and go through the doors to start another series of cutscenes. Once the cutscenes end, a boss fight begins.
Boss Fight 03 : Cyclops : 560 HP
This boss counterattacks ether attacks, so only use physical attacks against it. Have Shion use her Lightning Blast tech attack. KOS-MOS should use Punch, then S-Sault. Virgil should use Rush twice. Don't forget to try to have the special points up event slot on for the final hit. For winning, you'll get 800G and a SMG99AG.
Another cutscene will occur now. Since KOS-MOS used the Hilbert effect, the Gnosis can be harmed, so it's time to rock their world. Also, Allen gives Shion the prototype AGWS capsule that allows her to summon the VX-10000 into battle.
Shoot the yellow canister next to the Gnosis to make the battle easier. Once you are finished, destroy the plant and panel on the wall to reveal an ether pack and a med kit, respectively. Head to the right and you'll have a short scene where Shion looks at the control room above the Gnosis. So head over there and hit the button to unseal the partition doors. Now go up and into Shion's room to save, then leave and fight the Gnosis at the top of the room if you want to. You can destroy the yellow canister to make it easier. Destroy the centerpiece to reveal a bio sphere.

If you want to gain some more experience, you can go around the whole Woglinde again and fight till your heart's content. If you don't want to, you can just skip the next paragraph and pick up the walk-through from there.
Go up through the doors behind the fiery wreckage and fight the two Gnosis in the room. You can use the yellow canister to make the battle easier. Destroy the centerpiece to reveal two revives. Go right into the corridor where the plants and hologram are. Fight the Gnosis that is there, then go behind the computer controls and destroy the panel there to reveal a med kit S. Also destroy the plant at the top of the control area to reveal an ether pack S. Go up again to fight another Gnosis. Go into the room where the lovebirds
were and save your game. Now destroy the glass to fight the Gnosis behind it. Once you win the battle, you can claim the treasure chest there, which contains a decoder 18. Now you can go back to the corridor with Shion's room and open segment address no. 18. Of course, that means you have to fight more Gnosis. Inside of segment address no. 18 you will find a coat - lightning.
Head on down past Shion's room and past the three Gnosis eating an AGWS. If you want to fight them, destroy the red canister to make the battle easier. Keep going down, then go between the barrels on
the raised platform. Lure the other Gnosis close by and destroy the red canister to make the battle easier if you want to fight. Destroy the panels on the walls past the Gnosis to reveal a revive on the right and two revives on the left.
Equip the SMP53AG onto Shion's VX-10000's right shoulder to increase the power of the AGWS for the upcoming boss fight. If you want to, you can replace the SWD21AG on the left hand of the VX-10000 with the second SMG99AG you got from the Cyclops boss. Doing so will allow you to use the W-ACT command in battle if the VX-10000 has 6 AP to use.
Go through the doors when you're ready to start a cutscene. Once that is done, another boss fight begins.
Boss Fight 04 : Minotaur w/ Sky Fish x2 : 920 / 240 HP
Have Shion eliminate the Sky Fish with her Spell Ray tech attack, since you should be able to do that each turn now. On KOS-MOS' turn, have her use her ether spell Mode A7 to increase her power. Have Shion use her Spell Ray on the second Sky Fish. Have KOS-MOS use BLASTER once on the Minotaur to build up her AP, that way on her next turn she can use R - CANNON. Repeat that process for KOS-MOS for the rest of the battle, unless her HP are getting low, in which case use an item to heal her. Use Shion's next turn to call her AGWS. When her turn comes up when she's in her AGWS, use Guard to save AP. By this time, when Shion's turn is up again, she can use W-ACT to kill the Minotaur. Just remember to kill it with the special points up event slot.
After the boss fight, and another series of cutscenes, you will be asked if you want to save. Save if you want to.
Pleroma
Enemies:
Cyber Crab
Gardis F10
Mercurio A
U-TIC Soldier A
U-TIC Soldier B
U-TIC Soldier X
More cutscenes start off this section of the game. Once they're all done, you're asked if you want to save. More cutscenes will occur, then you will be in control of Ziggurat 8.
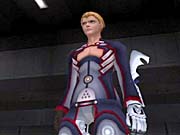
You have a stealth suit activated when you arrive, so you don't have to worry about being caught in a battle. Run up from where you start, making sure to go right and destroy two crates and a drum. Inside the first crate is a scope, there's nothing in the second crate, and there are two ether upgrade S's in the drum. I suggest using those right away. This is a stealth mission, after all, so you should be avoiding the enemies at all costs. However, in doing so, you will not receive experience points, gold, or tech, ether, and skill points. With the 100 ether points you have, evolve My Guard into both Bodyguard and Recharge. Get out of the alcove and head up toward the AGWS units, then hang a right to the entrance of the building. This initiates a cutscene. Now that your stealth suit has malfunctioned, you'll have to be really sneaky to survive. The R2 button should be held down constantly for a while.
Walk to the right, then up, and then ascend the stairs. This will give you a better view of the enemy movement patterns. Walk back down the stairs and wait until the closest soldier is walking away from you. Follow him to the end of the obstacle, then without stopping, angle yourself down and keep walking. You'll end up being really close to a soldier coming up behind you, so position yourself behind the wall of the second obstacle until the soldier passes, then walk behind him and get off the floor that makes noise.

In the second room, you can destroy two wall panels. Neither one will give you anything, but the second reveals a doorway. Go through and you'll be on a staircase behind a wall in the first room. Ascend the stairs and you'll see a treasure chest. Open it to obtain a snake hunter. Behind that is another wall panel you can destroy. Doing this will reveal segment address no. 4. Descend the stairs again. To the south of the room is another wall panel you can destroy--this one has two revives in it. Be careful when destroying things in this area, because if the soldiers are close by, they'll be alerted to your presence. Now hide behind the wall and watch the soldiers move. Go down, then follow the soldier guard up into the middle, to the right, and down. Let him finish his patrol and keep going down, while going to the right. This will put you behind another wall. Now wait until the nearest soldier walks away from you and then sneak out and across the rest of the room to the wall on the other side.
In the next room, walk across the catwalk into the room with an AGWS inside. Go to the left and down slightly to the crane controls. Hit the glowing red button to activate it. By doing so, you'll draw the attention of the AGWS over to where the noise came from. It'll sit there for a while, mesmerized by the crane, giving you time to run to the right, descend the ladder, and go to the door on the right. You'll be treated to a cutscene again, but it will lead to a battle. Defeat the two U-TIC Soldier A's to initiate another cutscene. Now, you need to find the key to open the Realian's cell door. Head to the left and down the ramp into a different part of the previous room.
Follow the Cyber Crab walking around, but ignore the treasure chest the crane exposed--you'll come back for it. At the lower right part of the room is a door. Go through it and you'll go into a hallway. Go through the doorway on the left side to find six destructible crates. It looks like this:
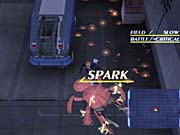
[A][B][C]
[D][E][F]
C and F are the closest to the door.
In C you'll find an ether pack S.
In F you'll find a bio sphere.
In B you'll find 100G.
In E you'll find a med kit S.
In A you'll find a revive.
Don't bother with D unless you want a battle. If you do, step away from it before destroying it. Once the Cyber Crab comes after you, run into the hallway and destroy the yellow canister to shock it. After leaving the room or beating the enemies, go to the right side of the hallway and Ziggurat 8 will notice a monitoring room. Go down a little bit and enter the room. You'll be shown a weird-looking robot in the right side of the room. Heal up if need be, then go and make contact with the robot to start a boss fight.
Boss Fight 05 : Gardis M1 w/ Gardis F10 x? : 450 HP / 60 HP
Start this off by using High Kick once to gain some AP. The Gardis M1 will Counter-Boost and summon two Gardis F10s for aid. Now use Laser Blade once on each of the Gardis F10s to eliminate them both. You want to do this just for the experience points, since the Gardis M1 will constantly spawn more Gardis F10s. Now use Ziggurat 8's Lightning Fist on the Gardis M1. This will do a good amount of damage and cause the boss to counterattack with the Mental Incapacitator S attack, which will lower Ziggurat 8's ether attack. Disregard that and use Laser Blade once on a Gardis F10 for a possible one-hit kill to get you more experience points and build up AP. The next Lightning Fist should kill the boss, so make sure you do it on the special points up event slot like always.
Now you can go to the little hallway the boss was guarding and go up to open the treasure chest. Inside you'll find the master key. Sneak past the Cyber Crab if you destroyed crate D, and go through the doors into the other room. Follow the Cyber Crab around the rocks once again and ascend the stairs into the room the Realian is being kept in. Open the cell on the left and destroy the crate inside to obtain speed stim. Open the next cell to reveal a save point. Lastly, open the Realian's cell to initiate a cutscene. After that's done, go into the menu, go to Battle Formation, and place MOMO directly behind Ziggurat 8. This will not only stop Ziggurat 8 from being pushed back into the back row by certain attacks, but it will also allow him to use the Bodyguard ether spell to increase his defense and attack power. Now go to the cell with the save point and save your game.
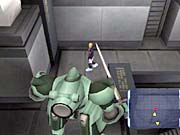
Go down the ramp again and follow the soldier to allow access to the treasure chest. Inside are two veils. If the soldier attacks you, it won't be as hard as it would have been with just Ziggurat 8 alone. Once you get the treasure chest, head back into the cell room and exit through the main doorway.
This next boss fight isn't necessary, but it gives you good stuff if you do it. If you don't want to bother, skip the next paragraph. Once out of the cell room, run all the way to the left to cause the AGWS to attack you. This isn't a boss fight, but it feels like one, so I'll classify it as one.
Boss Fight 06 : Mercurio A : 640 HP
This is going to be a long, long battle. Have MOMO cast Sheep Beam on the AGWS to put the pilot to sleep, then have Ziggurat 8 cast Body Guard on himself. Have both MOMO and Ziggurat 8 defend on their next turns. On MOMO's third turn, have her defend again, and have Ziggurat 8 use his Lightning Fist tech attack on the AGWS. Once he does that, he should be able to Boost. Accept the damage when it's the AGWS's turn. Use Ziggurat 8's boost whenever needed. Have MOMO put the AGWS pilot to sleep again, then have Ziggurat 8 heal and build up AP. Once a decent amount of HP has been lost, the AGWS will use Absolute Defense. It will Counter-Boost if attacked, so use Sheep Beam on the pilot and build up AP once again. Unleash Lightning Fist, then boost to guard, because the AGWS will attack when awoken. Use med kits and ether packs as needed. Repeat the process until the Mercurio A falls, hopefully during the special points up event slot. For beating the Mercurio A, you acquire a med kit S, along with decoder 4, which can be used on the segment address you found in this area.
Don't bother trying to leave the way you came, as the catwalk is guarded by a group of enemies. So head back to the hallway where the monitoring room is. Go into the monitoring room and go to the console at the top of the room. Use the button to unlock a door at the bottom left corner of the hallway. Go through the door and descend the ladder you find to start a few more cutscenes.

In this lower corridor, you need to avoid the brown sludge-like areas, as they'll slow you down. Since you have enemies pursuing you, you should try to be as fast as you can be. Go to the left, go up and around the block you see, then take the leftmost path to avoid running into a dead end. Take the small bridge across the water and continue going forward, then cross over another small bridge. Move to the left again until you see another small bridge. Cross it, then head to the right and destroy the container to obtain a med kit. Turn around and head up into the doorway. This will lead into another hallway, then into the area underneath the catwalk from earlier. There aren't any enemies here, so don't worry about that. Go up and get the ether upgrade Z from the treasure chest, then destroy the podiums to the left and the right to get two ether packs and an ether pack S, respectively.
Now leave this area and head back into the main corridor. Cross the small bridge again and head to the left. Destroy the uppermost canister you see to obtain a revive. Keep heading to the left until you see pipes. Use R2 to walk along the pipes so you don't fall down, because if you do, you'll have to trudge through
the brown stuff to make it to the ladder on the other side. Once across the pipes, continue moving left, staying close to the lower wall until a section of the wall juts out a little. Go around that and then up and right into the small alcove near the end of the ceiling grating. Destroy the canister there to obtain an ether pack S. Get out of the alcove and continue to the left. Avoid the brown sludge and heal if you need to, then ascend the ladder. This will initiate a cutscene and a boss fight.
Boss Fight 07 : Zolfo A w/ Mercurio B x2 : 820 HP / 640 HP
There's a simple and funny way to win this battle. Have Ziggy cast Bodyguard on himself, and have MOMO cast Sheep Beam on both the Mercurio B pilots. Have Ziggy use Lightning Fist on the Zolfo A, then guard to rebuild AP. The Zolfo A pilot will shoot one of the Mercurio B pilots, waking him up and causing around 125 damage at the same time. Have MOMO cast Sheep Beam on the woken-up pilot. Heal and replenish EP as needed. Just be careful. If you attack the Zolfo A while it's guarding, it'll counterattack with Grenade Launcher P. So just guard or heal if he guards himself. You should make sure you don't accidentally kill the Zolfo A before it can kill off the two Mercurio B's. Make sure to kill the Zolfo A while the event slot is on special points up.

After the battle, destroy the small forklift behind you and to the left to receive two bio spheres. Move up to destroy two crates on the right. The first one is empty, but in the second one you'll find eight med kit S's. Now go to the upper right-hand corner of the room and go through the door. Use a bio sphere at the save point in the left part of this room, then save. Once you're all set, go through the door at the top of the room to return to the first room you were in. Head to the left to leave the building. Time for another cutscene and another boss fight.
Boss Fight 08 : Margulis : 820 HP
Have MOMO do nothing but defend, heal, and replenish EP this whole battle. Have Ziggy cast Bodyguard on himself, and then Guard to build up AP. When Ziggy's at 6 AP, use Cyber Kick to attack. Margulis is fast and strong, so don't focus entirely on attacking him. After a few turns, Margulis will start casting spells on himself. One will absorb lightning (Spirit Rain : Lightning Phoenix), so don't use Lightning Fist, and
the other will absorb fire (Spirit Rain : Fire Dragon), so don't use Cyber Kick--just heal. With MOMO behind Ziggy, Margulis' Rune Blade attack will do nothing except damage Ziggy. When Ziggy's Bodyguard wears out, be sure to activate it again, as the strength and defense increases are invaluable in this battle. After a decent amount of damage has been done to Margulis, he'll start using Hell's Crest, an attack that inflicts damage upon both Ziggy and MOMO. When that happens, have MOMO W-ITEM a med kit S. Hopefully the battle will end with the special points up event slot. If not, don't worry too much about it, since I'm sure you wouldn't want to go through this battle again.
After the battle is over, you get treated to another series of cutscenes.
Elsa
Enemies:
DOMO-A
DOMO-B
Back on the Elsa, Shion is going to bring food to Commander Cherenkov. Leave the kitchen area and you'll receive an e-mail about the environmental simulator (EVS) plug-in. It lets you revisit old areas of the game. Head south of the kitchen into the restaurant, then talk to the robot behind the counter to receive the card passport. Now head up through the doors and into the passenger cabin area. Go along the right side of the cabins to receive another e-mail. If you invested in a company by giving them 500G after giving your e-mail to the mechanic in the Zohar room of the Woglinde, you'll receive some good stuff. No matter who you picked to invest in, you'll get 10 percent off all items in shops. Additionally, if you invested in Hasegawa Biochemical, you will also receive five med kit S's. If you invested in Vector-Tenan Pharmaceuticals, you'll also receive five ether pack S's. And if you invested in Dawson Pharmaceuticals, you'll also receive five revives. Make sure to download the attachment to get the items. Now enter the bottommost of the passenger cabins and examine the red couch on the inside to find the disarm key. Exit the passenger cabin and head north to the four-way intersection. Take a right and save. You'll notice another UMN panel next to the save point. This is a UMN shop panel. This shop is the first that has the 10 percent off on all items since you contributed 500G in that e-mail. Now head back to the passenger cabin area and descend to B1 via the elevator on the left-hand wall to initiate a string of cutscenes.
Once at B1, move up and destroy the panel on the wall to your left to reveal an ether pack. Now go right and pass the sealed cargo door to receive an e-mail from Vector NSS dealing with the hacker. Now move up through the door and destroy the large crate ahead of you to obtain a med kit. To the right are four small crates.
[A][B]
[C][D]
Destroy A and C since they're the closest. Inside of C you'll find two ether upgrade S's, and inside of B you'll find a med kit. Ignore the ladder and head back the way you came. Keep going down until you go through a series of partition doors. Once clear of those, destroy the topmost wall panel on the left to reveal a doorway. Go through there to find three crates. Destroying the large crate will get you an ether upgrade A, while destroying the topmost small crate will get you 50G. Head out of this small area and continue going to the right, ignoring the small crate, as there's nothing in it. Now head down and descend the stairs to find some more crates. Destroy the large one to receive 150G and the small one on the left to get 200G. Continue going left and go through the door to enter a room with a save point and chaos. Exit through the door at the top of the room to enter the slide deck. Destroy the topmost wall panel on the left to reveal segment address no. 8, then go right and examine the panel with the green light on it. You'll use the disarm key you got in the lower passenger cabin. Examine the panel again to move the slide deck. Now go up and to the right to destroy a crate that is hiding another 200G. Go all the way left and descend the stairs to access another room. In here you'll find four crates. Destroy the large one at the top to obtain a spirit pendant.
[A][B]
[C][D]
Destroy B and D since they're closer to you. Inside of D you'll find 50G. Destroy C to find a bio sphere, and destroy A to reveal a treasure chest that contains decoder 10. Leave this room and ascend the stairs, then go up and off the slide deck. Take a left and go up a little bit to find more crates. In the lowermost small crate you'll find five ether upgrade A's. In the other small crate you'll find a med kit. Destroying the lowermost large crate will get you a bio sphere, and destroying the other is pointless, since there's nothing in it. So go back down and head right, then up. The door you see at the end of the hallway connects to the ladder on the floor above, so don't bother with it. Instead, follow the path to the left until you reach a door.
Go through it, then descend the stairs and head left into the catapult area of the Else. Talk to Hammer if you want, otherwise destroy the first panel on the left to reveal segment address no. 14. Destroy the next panel to receive a fiber suit. The last panel hides 150G from you, so grab that also. Head on over to the right side of the area and destroy those panels now. You'll get nothing from the one at the top, 100G from the one in the middle, and an ether upgrade S from the one at the bottom. Now head out of the room, ascend the stairs, and go through the door. Follow the path to the right, then head down, crossing back over the slide deck, and exit to the door on the bottom left to return to the room with the save point. Go down and exit through the door at the bottom left of this room to reach the AGWS hangar.
Go down and stand on the lift platform, then descend. To your left is a robot that will sell AGWS parts and items, as well as heal up the AGWS you have. It is recommended that you upgrade Shion's VX-10000, as it'll greatly help you for the boss at the end of this Layer. You should also invest in two SMG32VX's for the VX-10000. Having two will allow you to use the W-ACT command in battle. If you do spend money, make sure you keep at least 1,000G on you. Once you're done shopping, head to the left and down a little to destroy the topmost crate to receive five ether upgrade A's. Destroy the other crates and go all the way down, then head right until you're in the middle of the room. Now head down and go through the door. Go left and then down, descending the metal grating. Then take a right and head down some more until you reach a treasure chest. Open it to receive a coat - beam. Now head back to the AGWS hangar, use the lift to the left of the robot, and enter the door in front of you. This will bring you to KOS-MOS' room and initiate a series of cutscenes.
Leave KOS-MOS' room and you'll be called by Captain Matthews to report to the bridge. So head on up there. But first, you may want to get two more e-mails and do some other stuff. In the AGWS hangar, go down a little ways and you'll see Tony pacing about. Talk to him and he'll explain that he can't find something. Offer to help him, and you'll be asked to find the hazardous area map. Ascend on the lift on the right side of the robot and exit the hangar. Head through the door at the top of the room with the save point and cross the slide deck. Go to the right and enter the door at the top of the hallway. Ascend the ladder and exit the room. Head to the left, then down a little, and ride the elevator up to the passenger cabin area. Enter the lower cabin and go to the top of the table to receive another e-mail. It might take a while to find the spot, but you'll get it. Now head out of the cabin and down into the restaurant. Head into the middle of the restaurant and you'll receive another e-mail. Leave the restaurant, head up past the passenger cabins, take a right at the intersection, and save your game. The save point now has an EVS plate on it. If you want to, you can go back to past areas. I would say you should go back to the KOS-MOS simulator and do Pleroma. If you don't want to bother, then skip the next two paragraphs.
Use the EVS to go to the KOS-MOS simulator. Remember where segment address no. 10 is? Enter the large building at the top of the screen, then go right and ascend the stairs. Head to the left and go through the door to enter the destroyed room. Go to the left and go through the other door to reach another room. Now descend the ladder you see on your left and head down through the opening. Take a right and destroy all the crates in your way. Now you'll have access to segment address no. 10. Inside you'll find a treasure chest that contains two booster packs. Leave the area, head back to the beginning of the level, and exit the simulator.
Now reenter Pleroma. Battles shouldn't be hard with Shion, since she had so many tech points from the AGWS simulator on the Woglinde. Make sure you extract and set the skill Poison Guard, as some guards use an attack that can cause poison. Just fight your way to the second room that Ziggy had to sneak around in. There was a statue in the middle of the room. Destroy the statue to reveal a treasure chest. Inside you'll find decoder 11. Destroy the topmost panel on the left side of the second room again to reveal a doorway. Go through there and ascend the stairs. When you beat the Mercurio A with Ziggy and MOMO, it dropped decoder 4. Well, segment address no. 4 is up there. So open it and receive a thief ring. Now, if you want to, go through the whole area again and get some experience, tech, ether, and skill points and some gold. Otherwise, head back to the start and exit back to the Elsa.
Leave the save area and go up into the bridge to initiate another cutscene. Afterward, talk to Captain Matthews to get the hazardous area map. Exit the bridge and head right to the save point, and you'll receive another e-mail. This time you'll be asked to give 1,000G to one of three companies. You can invest in Venture Link, Tesla Instruments, or Chemical Union Distribution Center. I would put the 1,000G into Venture. Now head on down to the AGWS hangar and talk to Tony again. For finding the map for him, he'll give you a med kit DX. Not too shabby. Now use the AGWS hangar using the right-hand lift, then exit through the door at the top of the room with the save point. Head across the slide deck and take a right, then hang a left and follow the path to a door. Descend the stairs and go all the way up to the back of the catapult area and examine the panel. After checking the panel, head down the catapult area toward the exit. After passing the destructible panels on the walls, you'll receive another e-mail. The hacker logged on, but logged off before you could get a specific location. Your AI Extraordinaire bunny friend will send you an e-mail of the three possible locations of the hacker: Asteroid Lutz, power generating satellite LS13, or a cargo ship on Asteroid Lutz. Reply to the e-mail and state which one you would look into. I said the cargo ship because it's mobile, so it seemed like the obvious one. Once that's done, head back to the bridge to start a series of cutscenes.
Leave the bridge and save your game. Once the game is saved, head on down to B1 via the elevator in the passenger cabin area. Destroy the panel on the wall to your left to obtain an ether pack. Head to the right to start a short cutscene. Now that the partition doors are closed, head up through the door and into the next room. Destroy the large crate to obtain another ether pack. Head to the right to destroy a group of four small crates.
[A][B]
[C][D]
A and C have nothing, but B has an escape pack and D has a bio sphere. Once you get those items, head down the ladder to switch control over to Ziggy and MOMO.
Head down and fight the first DOMO-A you see. When the battle's over, destroy the first panel on the left wall to reveal an antidote. Destroying the second panel on the left will give you an ether upgrade S. Destroying the second panel on the right wall will give you five skill upgrade S's. Destroy the yellow canister to make the second battle easier. Destroying the third panel on the left reveals segment address no. 14 again, while the third panel on the right reveals an ether upgrade A. Now head down and get into a third battle. Once that's done, head to the bottom of the room and initiate a fourth battle. This battle will be harder than the rest since, you have to fight four DOMO-As at the same time. Place MOMO behind Ziggy and have him use Bodyguard, then use his BMP55SX to injure two of the enemies at the same time. Have MOMO heal as needed. Destroying the large crate on the left will get you an ether upgrade S, and destroying the one on the right will get you an antidote, although they're both hidden from view. Now exit through to door to the right and ascend the stairs and exit that door. Now follow the path until a short cutscene occurs.
Head down toward the slide deck, but instead of going down across it, continue to the left. You can destroy the yellow canister to get a jump on the enemy in the area. Once the enemy is out of the way, you can destroy some crates again. Destroying the first small crate will get you a skill upgrade S, and destroying the second will get you a frame repair A. Destroying the first large crate will get you nothing, while destroying the second large crate will get you an antidote. Now head over to the slide deck and go to the right of the four-way intersection to destroy a crate. Inside you'll find a bio sphere. Cross the intersection and head down the stairs into another room. Destroying the large crate will give you an antidote.
[A][B]
[C][D]
Crate B has an ether pack inside, crate D has a frame repair A inside, crate C has a med kit S inside, and crate A has an empty treasure chest since you already got the decoder 10 from it. Head back to the right and exit this room. Head to the right and then down and off the slide deck. You can avoid the enemies if you want to, or you can fight them. Either way, head to the left, then down and through the door. This will bring you into the save point room. Head through the door on the right into the room where you saw the enemies in the cutscene a while back. Since the electromagnetic floor is turned on, the enemies can't move, so fighting them is entirely up to you. Your movements are hindered as well, but it doesn't really affect anything. Head right and destroy the first small crate to receive an escape pack. The second small crate has nothing in it, but the large crate has two skill upgrade A's. Head up the stairs and destroy the crate that's ahead of you since now there's a med kit S in there. Now head to the left and avoid or fight the enemies. Destroy the topmost panel on the wall to get an ether pack. Go through the now-exposed doorway again and down that hallway to the room with more crates. Destroy the large crate to get an ether upgrade S. There's nothing in the middle crate again, but there's an escape pack in the crate at the top.
Now leave this area, head back to the save point, and save your game. Once you've saved your game, head down into the AGWS hangar. Avoid fighting the enemies in the hangar by zigzagging between them. So walk left from the lift and then straight down as far away from the enemy as you can. Once you're past the enemy on the left, cross over to the other side and head down as far away from that enemy as you can. Once you're past that one, cross to the other side and walk by the last enemy while staying as far away from it as you can. Once free, you should set your party to be Shion, chaos, and someone else. Choose Ziggy since he has a lightning-based tech attack. So head on down and go through the doors. A short cutscene will occur, showing you the boss. Head to the left, then down the ramp, and then to the right to make contact with the boss.
Boss Fight 09 : DOMO Carrier : 1,800 HP
On the DOMO Carrier's first turn, it'll analyze the event slot. If critical hit rate up is copied, load up your last save, because the Tremor P attack will do a lot more damage than normal, and since you can't heal AGWS in battle, you won't win. Also, if it copies boost gauge rate up, it will get its turn a lot faster than normal, so load up your last save if that happens too. You'll be hoping for a blank event slot or for the special points up slot, since neither help the DOMO Carrier in any way. With that being said, use Shion and chaos' first turns to get into their AGWSs and use Ziggy's first turn to cast My Guard on himself. On everyone's next turn, have them all Guard. When chaos or Shion have their next turns, use W-ACT on the boss to inflict a good amount of damage. Have Ziggy use his Lightning Fist tech attack if his HP is higher than 300. Repeat the process of guarding and then using W-ACT and Lighting Fist, while having Ziggy heal as needed. If you let the DOMO Carrier live for too long with less than half its HP, it'll start to heal for 600 HP a turn. Don't worry about trying to kill it with the special points up event slot. You'll get one anti-beam armor for winning the fight.
Afterwards, you'll be treated to some cutscenes. Now you have to show Ziggy and MOMO around the Elsa. Great.

Start off by showing Ziggy and MOMO the kitchen to start a short scene. Next, show them both of the passenger cabins. In the lower cabin, after the short scene, Shion will say how she's a little tired. Well, sleep is for the weak, so choose "No, I have to show them around properly" to continue the tour. Exit this cabin and go into the next for another short scene. Now leave that cabin and head over to the bridge for another short scene. Leave and use the elevator to get to B1, then head around to the partition doors (which are open now, and so are the enemies, if you didn't fight them) and take a right, descend the stairs, and head left into the room with a save point for another short cutscene.
Head up toward the door and you'll get an e-mail. It's the dividend from your 1,000G investment. If you invested in Venture Link, you receive 4,000G and 10 percent off AGWS weapons. If you invested in Tesla Instruments, you receive 6,000G. And if you invested in the Chemical Union Distribution Center, you'll receive two speed stims. Now head into the AGWS hangar for another scene, then to KOS-MOS' room for another cutscene, and then to the area where you fought the DOMO Carrier for yet another cutscene. After all that, head back to the room with the save point, then go through the door at the top and cross the slide deck. Now go right, follow the path to the left, and go through the door. Descend the stairs for another cutscene. Now head all the way to the back of the room toward the panel you examined earlier to receive another e-mail. It's another investment e-mail. This time you're asked to invest 2,000G in a company. You can invest in Advanced Cluster Machines, Mercedes Technologies, or Vector Com. Invest in Vector Com.
With all that out of the way, get out of the catapult area, follow the path to the door at the end of the hallway, and then ascend the ladder to B1. Exit the room and take a left, then go up the elevator to the passenger cabin areas. Head into the lower cabin and rest up. In doing so, you'll be prompted to save. After you do so, you'll be treated to some cutscenes that bring us to the next part of the game.
U-TIC Battleship
Enemies:
Cyber Crab
DOMO A
DOMO B
Gardis F10
Gardis M1
U-TIC Soldier A
U-TIC Soldier B
Zolfo B
You start off in a battle in your AGWS, so the battle will be a breeze. Afterward, you'll see another few cutscenes, and then you can control Jr. Head down to the save point and save your game. Now head up and into the large doorway to the right. Go down the ramp and head toward the screen into another hallway. Follow this until you see a doorway on your right, then go through there and into another hallway. Destroy the first grouping of canisters you see against the wall to obtain an antidote. Destroying the one next in line will give you a med kit S. Head down to the opposing wall and destroy that grouping of canisters to reveal two ether upgrade A's. Head up and destroy the last remaining grouping of canisters to reveal two tech upgrade A's. If you continue to the right, you'll come across some laser beams. To deactivate them, head up the short corridor and then into the small alcove on the right. Destroy the generator there to turn off the lasers. With the lower lasers out of the way, continue to the right. Heading up and destroying the panel on the wall will cause a group of U-TIC Soldiers to attack you. Destroying the panel to the south will give you two skill upgrade A's. Head up toward the locked door and take a left into another small alcove. Destroy this generator to deactivate the laser at the top of the room. Head around to the top of the room, past the newly deactivated lasers, and examine the control panel at the top right of the room. By doing so, you'll open a few doors to the south. Head down, going through the open doors, until the camera changes and Jr. is ambushed by a pair of U-TIC Soldiers. After defeating both of them, continue going down the hallway, then head to the left and into the first door you see. Destroying the crate will give you two frame repair A's. Head out of the room and go left and up, then go through the door on the right. Examine the computer panel at the right to unseal door number 4.
Leave the room and head into the hallway you just unlocked. Ignore the first door you see, as you can't do anything in there without a keycard. Head down and destroy the first wall panel you see--this will give you a cure-all. You'll obtain a bio sphere by destroying the second. There's a save point in the room below the panels, so go ahead and save your game if you want. Head back past the wall panels and take a right into the hallway. Destroying the first plants along the wall will give you two skill upgrade A's and two tech upgrade A's. Move further down the hallway until you see doors with blinking lights next to them. If you try to open the doors without destroying the generators located close to them, you'll set off an alarm, causing you to be ambushed by two U-TIC Soldiers and a Gardis M1. Since Mary can almost kill the Gardis M1 with a single W-ACT, the battle should be a breeze, so attempt to open both doors to get some experience points and gold. You can fight as many times as you want. When you're done fighting, follow the hallway to the right, head down and destroy the generator for the second room, and then enter. You'll be attacked by a lone U-TIC Soldier. When you bring his HP to 0, he'll Counter-Boost and enter his AGWS, a Zolfo B. Just W-ACT to defeat it. You'll get a frame repair Z for winning. Now destroy the portion of wall in the upper right-hand corner of the room to reveal two skill upgrade A's and segment address no. 11. Since you have decoder 11, open the door and claim the coat - ice waiting for you. Head out of the room and back into the hallway, past the locked door on the right. Destroy the wall panel you see to obtain five ether upgrade A's. Now go left to trigger an ambush. You can avoid the second battle if you want to. Either way, head to the left and go through the door.

Head to the left and open the door you see. Inside the room, examine the computer panel to unseal door number 5. Now exit the room and head up into the next room on the left to save your game. Now head down until you come upon a large AGWS hangar. To the right of you will be a cabinet you can destroy to obtain a cure-all. Now head all the way left and descend the staircase. In between the AGWS units will be catwalks with crates at the end of them.
There is a frame repair A at the end of the first catwalk. There is nothing in the crate at the end of the second catwalk. There are two skill upgrade A's in the crate at the end of the third catwalk. There is an ether upgrade S in the crate at the end of the fourth catwalk. The treasure chest near the fourth catwalk has a tech upgrade Z. The crate at the end of the fifth catwalk set off an explosion, calling U-TIC soldiers to investigate.
You can avoid the battle by running to the end of the fourth catwalk and then walking behind the enemy there and hiding in the second catwalk while he passes again. Whatever you do, go to the left and ascend the stairs, then go right and down the path. You'll alert two guards and get into a battle. You don't have to fight the second guard, thanks to the flashing phenomena. Whatever your choice, head into the first room on the right. Destroy the crate at the right to reveal a treasure chest with an U-TIC card in it. Leave the room and cross the hallway, then head into the room down on the left. On the desk at the top of the room, you'll find card no. 3. Exit the room and head north through the hallway. Cyber Crabs now patrol where the U-TIC Soldiers used to, but they're easy to avoid. Just walk behind the one outside of the doorway, then walk to the right, then up to the other hallway, and enter the door on your right.
Walk to the right down this hallway and wait until the Cyber Crab starts walking in the same direction as you. Mirror it and you'll get by without being detected. Head up and use the U-TIC card on the lock next to the door you see. Enter the room and open the treasure chest inside to obtain decoder 16. Exit the room and hopefully the Cyber Crab will be heading up. If not, reenter the room and exit, unless you want to fight. Follow the Cyber Crab up the hallway and around the corner, then enter the door on the far left. Exit until the Cyber Crab is past you, then continue to the left. Head across the hallway and up into the first room you saw in this area. Use card no. 3 on the green glowing panel, then go to the right and operate the computer panel to unseal door number 3. Exit the room and head down into the room with the save. Use frame repairs on Jr.'s AGWS if you used it and save your game. Now exit the room, head up through the opened doorway and through the hallway, and open the door at the top to proceed. Now you're on the bridge. Head up and to the back of the center terminal and examine it to start a boss fight.
Boss Fight 10 : Ambix : 1,200 HP
Go into the battle with Mary and the soldier at low HP, have them deal damage to the Ambix while Jr. gets in his AGWS and guards. Your goal is to have the Ambix focus his attacks on both Mary and the soldier. If they die, it's OK--since you can't use them in the game again, you don't need to level them up. Once both are dead, have Jr. repeat the W-ACT/Guard routine. The Ambix will fall hopefully on the special points up event slot. If that happens, Jr. will get 1,800 experience points and a minimum of 124 tech points, 32 ether points, and 100 skill points.
After the battle, there will be some cutscenes to bring us to the next part of the game.
Dock Colony
When you are in control of Shion, head down to exit the bridge. Before you can exit, you'll receive an e-mail. It's an e-mail from the Vector First R&D Division, allowing the removal of a seal on KOS-MOS' battle technique program, thus allowing her to use the tech attack R - DRILL. When you have KOS-MOS in your party next, be sure to plug R - DRILL into a slot. Exit the bridge and save your game. Since you acquired decoder 16 in the U-TIC Battleship, use the EVS plate at the save point to board a simulated Woglinde. If you don't want to do this right now, then skip the next paragraph.
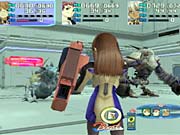
You start on the Woglinde in D-01 right behind a Gnosis. Just run up to it and fight it. Although you only have Shion and chaos in your party, all the battles will be easy. Continue up the hallways and you'll pass another Gnosis. Then another will run at you. Go ahead and fight--it's not like extra experience points ever hurt anyone. Once you're done with the battle, continue heading up, going past a group of Gnosis eating an AGWS. You'll enter a room with two Gnosis in it. Fight both, or destroy the yellow canister to avoid one of them. After the battle or battles, go through the door to enter D-05. Head to the right to go into the hallway with all the plants and the holographic projector. Three Gnosis are in this hallway, so blow through them and follow the hallway to the left. On the left wall you'll find segment address no. 16. Examine it to use decoder 16 and enter it to obtain a stim DX. Leave the room and head back to the right, then head down the hallway, killing the Gnosis you encounter. Go left and through the open partition doors, then down and through the door. In D-01 again, head down to encounter two Gnosis. Once you're finished with them, continue down, past the group at the AGWS. Go down further, past more Gnosis, to find the exit.
From the save point, head left and then down into the passenger cabin area. Descend the elevator on the left to go to B1. After exiting the elevator, head up and to the right. Now follow the corridor down and through the grouping of partition doors. Go right and then descend the stairs. Head to the left and go through the door. You'll see Ziggy working on his bed thing. Talk to him and he'll join your party. Now head back through the door to your right and go to the elevator to the passenger cabin area. Head up and to the right to save your game if you want. Otherwise, head to the left to leave the Elsa and initiate a short cutscene.
Head left off the dock and go left. speak to the woman outside of the dock clinic and then go inside. Head through the door in the lower left and talk to the nurse standing to the left of the chairs to refill your HP and EP. Head back to the right and through the door, then leave the clinic and go down into the shop. Descend the stairs you see and head to the left, then head down a little and descend the second set of stairs. Go all the way to the left to find a series of destructible objects. Destroy them all and follow the path it opens up in order to find segment address no. 2. If you want to get a message that's kind of weird in a disturbing way, then talk to the guy in purple behind the counter. Head up the stairs when you're done. Go up and talk to the person behind the counter and buy some things. You should buy the navy gloves for chaos, the metal rod for MOMO, the MSP89SX and VOLG20 for Ziggy, the D unit 03 for KOS-MOS, a guard pendant or two, and an armor protect unit or two. Also, you should buy the VX01-F03 frame and VX01-G03 generator for Shion's VX-10000 and the AG02-F03 frame and AG02-G03 generator for chaos' AG-02. Since you'll probably be strapped for cash, exit the shop and head south and to the right up a ramp to reach a save point with an EVS plate. Head to Pleroma and battle the soldiers there to get gold. Also, sell whatever scrap iron you have for more gold. Once you're all set with that, leave and head south down the ramp for a cutscene. Now head back into the dock clinic and walk between the two rows of chairs to receive another e-mail. With that done, leave and head back down the ramp. At the end of the path, head left to watch some cutscenes.
Once you're in control of Shion again, head to the save point and go a little above it to receive another e-mail. This one is to inform you that the U-TIC battleship is now available from the EVS. Next, head back toward the elevator to receive another e-mail, but only if you invested in Venture Link and Vector previously. Vector sends you the F - BSHOT subweapon for KOS-MOS. Use the elevator and head up past the passenger cabin area of the Elsa, then head up to the bridge and talk to Captain Matthews to depart and initiate some cutscenes.
Cathedral Ship
Enemies:
Cerberus
Fairy
Hydra
Lizardman
Ogre
Unicorn
Once you're in control of Shion, head to the left and save your game. Head north from the save and destroy the three objects in your way. The small one of the left gives you an antidote, the small one on the right gives you nothing, and the large one gives you a nightwalker. Continue north to fight the first of the second-generation Gnosis. Head up, then to the left and follow this path. Destroy the object on the right to obtain a bio sphere. Head back down and to the right to encounter another Gnosis, then continue into the next area. Fight the Gnosis you see, then head up and around the bend to initiate a couple of cutscenes. Once they're done, head to the left and destroy the crate in the back to receive a neuro stim. Head back down and to the right to encounter two Gnosis. Destroy the yellow canister for easy battles. Further to the right are some more Gnosis and a red canister. After the battles, head up and around the bend until you're behind the sign. Destroy one section of the sign to access the treasure chest that contains a coat - fire. Now head back down, then head to the right and into the next area.
Head right, toward the building, and break down the door to enter. Ascend the ladder and continue to the right until you meet up with a Gnosis. Destroy the object to the south to obtain a revive and the object to the north to obtain a cure-all. To the left of the cure-all is a destructible wall that hides a treasure chest containing a revive DX. Go left and descend the ladder, then go gown and around the bend to the right to encounter a Gnosis. When the battle's over, follow the path to the end and destroy the crates that are blocking the elevator. Head left and up, going past the building and around the bend to encounter another Gnosis. Follow the path across a bridge, then use the elevator on the left. From this point, continue down to battle another Gnosis and enter another area.

Follow the path around the bend to encounter a Gnosis. Now, place MOMO in your party, if she wasn't already there, and make her the character onscreen. Ascend the stairs and examine the object that glimmers to learn the Magic Caster tech attack and the Star Wind ether. Switch back to your normal party and set Shion as the onscreen character. Destroy the object on the far right to cause the bridge to collapse. Head back to the left, then descend the stairs. If you don't wish to participate in this battle, then skip the rest of this paragraph and the next paragraph. Make your party Shion, KOS-MOS, and chaos, making sure to give KOS-MOS the coat - fire you got earlier. With KOS-MOS fully healed, run across the bridge and encounter the Gnosis on the other side. Beating it will allow you access to the tuned circuit inside the treasure chest it guards.
Boss Fight 12 : Svarozic : 1,500 HP
Have Shion and chaos board their AGWS units and have KOS-MOS use Mode 07 on herself. Next, have all three party members Guard to get 6 AP. When the AGWS units get their turns, W-ACT Svarozic, and when KOS-MOS gets her turn, use her R - BLADE tech attack. The battle should be over by the time all three characters use all 6 AP.
Continue to the left and down the small ramp to encounter another Gnosis, then destroy the crate to the right to clear the path. Move to the left, around the bend, and ascend the two sets of stairs. Encounter the Gnosis on the path, then keep moving. Destroy the lowermost object to receive an ether pack S and destroy the one to the right of that to obtain a med kit S. Continue to the right to access another area.
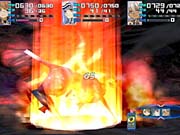
Follow the path to the right to encounter two Gnosis. After dealing with them, continue down, then around the bend to fight another. Now head north and use a bio sphere and save your game. Use the shop plate if you want to, otherwise, head up into the building. Follow the path around the floating crystals and destroy the two objects in your way. The first gives you a frame repair A and the second gives you two skill upgrade A's. A Gnosis is blocking the stairway to the right. Time for another boss fight.
Boss Fight 13 : Perun : 1,500 HP
Have Shion and chaos get into their AGWS units and have KOS-MOS defend to gain 6 AP. Have each AGWS W-ACT and have KOS-MOS use her R - BLADE. Have KOS-MOS use a med kit S if her HP runs low, as Perun hits hard and frequently. Perun should fall within four or five attacks.
Ascend the stairs, enter the shop on the right, and defeat the Gnosis you see inside to obtain decoder 15. Head for the back of the room. On the desk at the right, you'll find a flower seed. Leave the store and head to the left and through the door you see. Head up and fight the Gnosis to your left, then follow the hallway and exit through the door to the south. Go down and step on the blue glowing elevator to descend to the lower level, then head left and up into the door.
Heal everyone up if they need to be healed, and continue up and let the destruction begin.
[A][B][C][D][E][F][G]
[H] [I] [J]
[K] [L] [M]
[N] [O] [P]
[Q][R][S][T][U][V][W]
[X] [Y][Z][1][2]
X contains a bio sphere.
Y contains a skill upgrade A.
Z contains nothing.
1 contains two tech upgrade A's.
2 contains nothing.
W contains a cure-all.
V contains nothing, but destroying it drops a yellow canister into place.
Destroy the yellow canister and encounter the Gnosis. With that Gnosis out of the way:
P contains nothing.
M contains nothing.
J contains nothing.
G contains two ether upgrade A's.
F contains nothing, but destroying it drops another crate into place.
The second F contains nothing, but destroying it reveals segment address no. 13.
E contains nothing, but destroying it drops another crate into place.
The second E contains an ether pack S.
U contains five skill upgrade A's.
T contains nothing.
I contains a yellow canister.
L contains 100G.
At this point, you should use the yellow canister and encounter the Gnosis. Once you're done, it's time to finish clearing the room.
D contains nothing.
C contains 200G.
B contains a cure-all.
A contains nothing, but destroying it drops another crate into place.
The second A contains a treasure chest with a med kit MAX inside.
H contains two skill upgrade A's.
K contains nothing.
N contains nothing.
Q contains nothing.
R contains 500G.
S contains nothing.
O contains a med kit DX.
After you've collected everything, exit the room using the door at the bottom, then head right and use the elevator to return to the main level. Take a left out of the elevator and head down and through the door to reach another area. Go right after entering the new area and then go down until you encounter a Gnosis. Defeat the Gnosis and destroy the crate to obtain a revive. Now head left to encounter another Gnosis and a crate with a clock shield inside. Going further left, you'll see an area that has a Gnosis guarding a treasure chest that contains decoder 9. This is another optional boss battle. So, if you don't want to participate, skip it.
Boss Fight 14 : Stribog : 1,500 HP
Have Shion and chaos enter their AGWS units with their first turns, and have KOS-MOS guard to build her AP. When Shion and chaos have their turns again, guard to build their AP. KOS-MOS should use a tech attack, then have Shion and chaos use W-ACT. This should kill Stribog. If not, simply repeat the process.
Continuing north on the main path, you'll come to a T intersection. Head left to encounter a Gnosis guarding a destructible door. Behind the door is a treasure chest that contains a rejuvenator. Now head to the right to encounter another Gnosis and a grouping of rocks.
[A] [B]
[C] [D]
[E]
A, D, and E have nothing.
C contains 500G.
B contains a cure-all.
Now head north to initiate a couple of cutscenes. When they are done, head into the doors. Head north to encounter a new type of Gnosis. After dealing with one Gnosis, go to the left path and fight the other one you see. At the end of the left path, you can destroy a fallen object to receive two frame repair A's and to fight another Gnosis. Destroy the statue behind the Gnosis to reveal a treasure chest that contains an ether pack MAX. Head back down and around to the right path. The first plant holder you destroy contains nothing, the second contains a revive, and the third contains nothing. Now head to the right and destroy the yellow canister. Encounter the last Gnosis in this area, then head north through the door.

Go to the left and up a little to find a save point. After saving and using a bio sphere, head up and to the right and destroy the locking mechanisms on either side of the elevator. Now head to the left and enter the door you see. Head up, destroy the yellow canister, and fight the Gnosis it shocked. Destroy the plant holder above you to receive a frame repair Z. To the right and down, between the aisles of cubicles, you can encounter another Gnosis. Head to the end of the aisle and go to the right, which brings you on the other side of the cubicles. Enter the closest cubicle to you and examine the bottom wall to obtain a magical hat.
Go to the next cubicle to encounter another Gnosis. Now head up, leave the aisle, and go to the right, then head down, ascend the stairs, and go through the door to the next floor. Go left and destroy the lock mechanism, then press the glowing red button on the wall to lower the ladder on the other side. Head back out through the door on the right, go around to the other stairway, and go through that door. Avoid the Gnosis along the way or fight them again for more experience points. Now head to the right and destroy the lock mechanism, then climb the ladder. Head to the right and destroy the last two lock mechanisms, then continue to the right and destroy the blue wall panel to reveal a door. Enter the door and follow the short path to find segment address no. 9. Now, if you fought the Stribog outside, then you can decode this segment address to obtain robot part left arm. After doing that, or not doing that, head back left, descend the ladder, and exit through the door on the left. Descend the stairs, fight the Gnosis in the room if you like, and exit through the door at the bottom of the room. Use the save point, then head to the now active elevator and descend to the lower level.
There are three Gnosis in this area, and they constantly move clockwise. Slip in behind one and follow them while walking. Continue until you get to the destructible objects on the left. Destroy them, go down the hallway, and then destroy the object to reveal a veil.

There should be a gap between the third and first Gnosis, so wait until the third one passes you, then run down and go down the hallway you passed before. Now you should prepare for a boss fight. Have Shion learn Medica All if she already hasn't. Use tech points to make your strongest techs be available with 4 AP, and level those tech attacks up also. You should also use frame repairs on the VX-10000 and AG-02 so they're at full FHP. When ready, descend the elevator in the center. Once it's stopped, go down the hallway and examine the control panel on the right to unseal the massive door. Go through it to initiate a cutscene and boss fight.
Boss Fight 15 : Gargoyle w/ Oudogogue x2 : 3,600 HP / 1,000 HP
The battle starts with one of the enemies using Hell's Flash on the whole party. When Shion has her first turn, have her use Medica All. KOS-MOS and chaos should focus on using R - BLADE and Heaven's Wrath on one Oudogogue each turn until it falls. Since all three of the Gnosis can use Hell's Flash, you'll need Shion always using Medica All on her turn, at least until both Oudogogues are taken care of. After each of the Oudogogues die, the Gargoyle powers up. Have chaos board his AGWS and have Shion cast Medica on KOS-MOS as her last turn outside of her AGWS. KOS-MOS should continue to use R - BLADE, and she should heal using a med kit S if her HP goes below 300. Once chaos is in his AGWS, have him guard. On Shion's next turn, have her get into her AGWS, then select Guard when her next turn comes up. When chaos gets his next turn, use W-ACT on the Gargoyle, then Guard on his next turn. Continue using that pattern until you kill the Gargoyle. Hopefully you can kill it on a special points up event slot to make the battle's end even sweeter.
After the battle, you're treated to a long series of cutscenes, and then you're asked to save. Then you'll sit through a few more cutscenes that will bring you to the next part of the game.
Durandal
Once you're in control of Shion, head left and up the stairs to talk to Allen. Continue to the left toward the door and you'll receive an e-mail telling you that Cathedral Ship is now available from the EVS. Now head through the doors and continue moving left through a doorway and into another area. Once you're at the top of the ramp, you'll get another e-mail. This time it's the dividend from your investment on the Elsa. If you invested in Vector Com, you receive a code disarm key plug-in (be sure to download it) and 10 percent off AGWS accessories. If you invested in Advanced Cluster Machines, you receive 4,000G and 10 percent off AGWS accessories. If you invested in Mercedes Technologies, you receive 8,000G. After getting the goods, head left and examine the train map if you want to. You're currently in the isolation area of the Durandal. Turn towards the train and examine it to be prompted on where to be taken. Head to the residential area.
Once off the train, go left and through the doorway into the next area. All the way to the left will be a door. Go inside and to the left, toward the first bed. This will allow you to replenish your HP and EP. Now exit the room and head right, then around the corner and up. On the right wall is a bench you can destroy to obtain a booster pack. Destroy the blue wall panel next to it to obtain another booster pack. Continue up and take a right at the T intersection, then head through the door and into the game room. Up to the left of the door will be a save point with an EVS plate. Head to the right and up some stairs. You'll find a treasure chest behind the table that contains the casino passport.
Go left and down to exit the room, then head to the left and through the door. If you continue to go left and through the door you see, you'll be in another bedroom. Destroy the two closest doors here in obtain a med kit S and two ether upgrade A's. Exit the room and head right, then head around the corner and up. Destroy the first blue wall panel you see on your left to obtain a med kit DX. At another T intersection, go left until you see a sitting area. Destroy the aquarium on the left to obtain two ether upgrade A's. Destroy the panel at the top of the room to obtain an ether pack S. Leave the sitting area and head to the right, then head through the door. To the north of the door will be a shop point. Shop around if you want, otherwise go left and destroy the left closet door to obtain another med kit DX. Now leave the room and go left and down, exiting through the door on the right. Then go right and down and hop on the train through the doorway at the bottom right. Make sure you have 6,000G before moving on. If you don't, use the casino passport and play poker to make some money. Now head to the hangar area.
Head to the right and through the large doors to receive another investment e-mail. You can invest in Shijima Steel Manufacturing, Hamilton Heavy Industries, or Alkimia Industries, but you're asked to invest 6,000G this time. Invest in Shijima. Head back through the large door on your left and hop on the train to the park area.
Head right, then step on the left side of the escalator-type thing to the north to ascend to the second floor. Then head into the doorway you see. This will initiate a cutscene. Once that's done, head down and to the right and you'll receive the dividend from the latest investment. That was quick. For those of you who invested in Alkimia Industries, you receive 24,000G. Those who invested in Hamilton Heavy Industries receive 48,000G. Those who invested in Shijima Steel Manufacturing receive 72,000G! Now head through the doorway to the south and descend the escalator-type thing again, then head to the left to receive another e-mail. This time it's about the hacker. Once you're done reading it, download the attached code disarm key support plug-in and board the train to go back to the residential area.
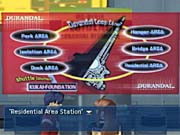
Head to the left, and before you reach the ramp, you'll get yet another e-mail. This one is an advertisement for Ace Combat 04. Head up the ramp and through the door, then around the corner and into the hallway on the left. Go into the door and head left into the bedroom to take a nap to initiate some cutscenes. Once all of them are done, head back to the train and go to the dock area.
Head right and go up the escalator-type thing on the right, then talk to Jr. Now head to the right and up the stairs into the shuttle. Agree to be taken to the Kukai Foundation to go to the next section of the game and initiate a cutscene.
Kukai Foundation
Enemies:
Federation Soldier A
Federation Soldier B
Gertzog FE
Once you're in control of Shion, head south and you'll receive another e-mail. Reply accordingly, based on the clues you were given. Once you're done with that, go to the left, then head up until Ziggy shows up. After the short cutscene, continue up until you're brought to a map of the area (like the one of Nortune in Xenogears). Head south on this map and enter the AGWS Parts Shop and Foundation Robot Academy. Once you enter, head to the left if you want to shop around. Further to the left and down some stairs you'll meet up with the professor. Head back up the stairs or, if you didn't go down them, head to the right and you'll find a game, Destroy Runner.
Question 1 : What is the name of the parts shop on the Dock Colony?
Answer 1 : Talk to Me.
Question 2 : What's the name of the eccentric professor at the Foundation Dock Colony?
Answer 2 : Professor.
Question 3 : What kind of clothing is hanging second from the left on the wall at the cleaners?
Answer 3 : Smelly looking purple T-shirt.
Question 4 : Who's all fired up about the drill?
Answer 4 : Holgar.
Question 5 : What's the name of the girl that can't speak at the Dock Clinic, the medical clinic at the Dock Colony?
Answer 5 : Luty.
For answering all the questions correctly, you receive a PM card C. Head out of this area and back to the Kukai Foundation map. Head to the center of the map to enter City Sector 26 and 27. Once you enter this area, head to the left and up into the second entrance you see. Inside will be a save point and an EVS plate. Save your game if you want or revisit some old areas. Once you're done, head outside and head all the way to the left to visit the next area. Head up the stairs and to the left and into the area marked East 6. Inside, destroy the car to obtain an escape pack and the first crate you see in the back to receive a tech upgrade A. Destroy the other crate behind it to reveal the pink bug. Next, head up the stairs to the left and through the door and through the hallway. In this room, head down the stairs and destroy the first cabinet you see to obtain two ether upgrade S's. Behind the second is 1,200G. Behind the third is segment address no. 03.
Head south and to the right and climb the small stepladder you see. Examine the dryer in front of you to obtain PM card B. Now head up the stairs next to you and examine the suit hanging up to obtain the fish detector. Head down and exit the building, then head down both sets of stairs and all the way right into the previous section. If you want to continue the story, skip the rest of this paragraph. Continue to the right and exit this area to appear on the Kukai Foundation map. Select the Launch Pad and take the shuttle to the Durandal. Exit the shuttle to the left and go down the escalator-type things, then head down and to the right. Talk to Captain Matthews outside of the Elsa to revisit the Dock Colony, which has an updated shop listing. The VX-4000 is available if you have 50,000G to spare.

Once you're done everything you want to do, head back to the Elsa and talk to Captain Matthews outside to be brought back to the Kukai Foundation. Head up and take the shuttle back to the Kukai Foundation. Now head to City Sector 26 and 27 and enter it, then go to the left to continue.
Enter the Our Treasure and talk to the little girl in front of the counter to spend the night and have your party's HP and EP restored. Now head to the right and leave the area. Once back on the Kukai Foundation map, go to the Launch Pad on the right. Descend the stairs and continue right, going onto the shuttle bound for the Durandal. Exit the shuttle and head left through the gate, then down the escalator-type things. Head down and to the right to board the Elsa. Head to the right and then down a little bit to meet up with Allen and initiate a series of cutscenes.
Once the cutscenes are done, you control chaos, attacking a group of Federation Soldiers. Kill them and you'll be in control of Shion again. Head to the right, then head up to the T intersection and into the room on the right. In here you'll find a treasure chest with equip item inside. Once you've gotten that, exit the room, head back down, and go through the door on the right. Continue right and fight the Soldier you see, then head down to encounter another Soldier. Continue down, then head left to encounter a Gertzog FE. Enter the door to the left and rest up in the beds if you need to, or just destroy the closet on the left to reveal a treasure chest that contains an armory key. Head out of the room and go right down the hallway, then around the bend to encounter a pair of Federation Soldiers. Once you defeat them, head through the doorway. Descend the ramp and fight the soldiers that stand in your way to the train, then head to the hangar area.
Head to the right and fight the Gertzog FE standing outside of a door. When it's defeated, examine the door to unlock it with the armory key. Enter it and destroy the large crate at the lower right to find a treasure chest that contains decoder 5 inside. The small crate at the lower left contains nothing, the large crate at the upper right contains a frame repair Z, and the large crate at the upper right contains MS5540. Now exit this room and head to the left and board the train. This time, go to the Dock area.

Go south and fight the Gertzog FE you see. With it out of the way, continue down and descend the stairs, then go right and down the ladder. Follow the catwalk until it brings you to another ladder. Climb this one, head to the right, and you'll be able to jump on to the top of the Elsa. Shion will find an opening for the group to enter. Now head to the right and enter the door to the north. Then go inside and descend the ladder to reach B2F. Exit the room and head south, crossing over the slide deck. Go to the left and use decoder 8 on the segment address you see to obtain the robot part left leg. Once you have that, head south into the room with the save point and continue down through the other door. Use the lift to go down, then head to the left and go up the other lift and into KOS-MOS' lab to initiate some cutscenes and bring
you into the next area.
Miltia
Enemies:
Basilisk
Bugbear
Dirlewanger
Gertzog UT
Gremlin
Kobold
Larva Doll
Sky Fish
Troll
Once you control Jr., turn around and save your game. In this area, you have to be careful not to be spotted by the searchlights, or else you'll have to probably fight a battle. Of course, you may want to--it's up to you. From the save point, head southeast and you'll find a treasure chest that contains a coat - sword inside. Now head up and to the right until the camera changes its view. Continue up and destroy the crate in the center of the screen, backing away if the searchlight is drawn there. Once it's safe, you'll obtain a ruby helmet. Destroying the canister on the left will give you five bio spheres, and destroying the one on the right will give you five med kit DXs. Now head south, following the centerlines to initiate some more cutscenes.
Now you'll be in control of Shion. Head to the left and destroy the column to obtain a defense shield. Head back to the right and then up into the building and use the save point to the right. Now head up and destroy the seal with the ball on its nose to obtain five ether pack S's. Destroy the penguin across from that to obtain a blade soul. Destroy the teddy bear to the right to obtain three bio spheres. Across from the teddy bear and to the right of the pink thing, destroy the snowman to obtain a rejuvenator. Continue right and you'll cause a Gnosis posing as a statue to attack you. Make short work of it, then destroy the golden statue to the right of it to acquire five revives. Head south and take a left, then descend the rightmost stairway and navigate through the rubble to exit to the south. Now head to the left to encounter a Gnosis.
Turn the corner and head to the right, then head down through the hole in the wall to fight more Gnosis. Head to the left, then down through the hole in the wall and fight the next Gnosis you see. Now go to the right and head down through another hole in the wall. Continue down until you're attacked by a Gnosis. Once you're finished with the battle, continue down and open the treasure chest to receive PM card E. Now head back up and to the left until you see a person. Talk to the person to initiate another battle. These types of Gnosis, Larva Dolls, are like zombies, so curative items and ether spells are the way to defeat them. Destroy the large crate to your right and jump into this manhole, then head north and up the stairs to your left to return to where you started. Examine the pedestal with the glowing red button to unlock the door for this area, then head to the left and descend the stairs you see. Go left and under the bridge, then fight the Gnosis. Once done, destroy the wall panel that you see to discover segment address no. 5. Decode it and head inside to obtain the double buster.
Once outside, fight the Gnosis again, then ascend the stairs and press the button at the top level to unlock this door. Exit through the door to your right, head across to the other door and enter it, then destroy the sign and open the treasure chest it reveals to obtain a guard cleaner. Head back the way you came, down the stairs, under the bridge, up the other stairs, to the right, and down those stairs. Head down and then ascend the ladder to go outside once more. Now head south and enter the other manhole you see on your right.
In the sewers, head down across the bridge and destroy the junk to your left to reveal five ether pack S's. Cross the bridge once more and follow the path around to the right until you encounter a Gnosis. To the right of the Gnosis, you'll see a glowing switch. Press it and continue south and across the bridge to fight another Gnosis. With the Gnosis out of the way, head to the right, then north, across the bridge, to fight some more Larva Dolls. When the fight is over, continue north, then descend the stairs on the left and trudge north through the water. You'll be then be in control of Jr.
From where you start, go to the left and enter the building. In the back, you can destroy an object to obtain another rejuvenator. Go back outside and head down to encounter three AGWS units on patrol. When they're all disposed of, or avoided, head to the right and descend the stairs to enter the subway. Head to
the left and descend the uppermost stairway, then navigate through the rubble. Don't bother getting tokens to ride the train--just head on through the gates and use the save point to the south to replenish HP and EP if needed or to save the game.
Head north from the save and head through the subway gate to the north of the one you came from to access the other side of some rubble. Go right, then left, ignoring the door you see to destroy the debris on the left to obtain two bio spheres. Now head to the left a bit more until you can destroy the large window. Do so, then head right and enter the door. Once inside, go to the left until the camera changes and you can see into the booth. In here you'll find segment address no. 15. Use decoder 15 to access the angel ring inside. You should equip the ring on MOMO since it cuts EP usage by half, which come in handy.
Now exit the building and head down and to the left, through the gate again. Head north and descend the stairs to your left. Destroy the bench to the left of the first sign to obtain a veil, then continue left to encounter another AGWS. Descend the stairs to the south, then head to the left to fight another AGWS. Destroy the crate to the right to obtain five neuro stims. Head back to the left and go up the stairs. Go back to the right to ascend the stairs you came down before, then head to the south and descend the other set of stairs you see on your right. Destroying the bench to the left will unleash a pack of Kobolds on your party. Fight them if you like. Continue to the left and destroy the debris in front of the stairs to obtain two frame repair A's. Descend the stairs and head up the ramp to your left. Follow it and a Larva Doll will attack you. Follow the path laid down before you and destroy the soda machine it brings you to. Open the treasure chest it was hiding to obtain a red topaz. Head back across the makeshift ramps and head right to fight the AGWS. Once it's out of the way, continue right into the next area.
Continue moving to the right, navigating around the rubble on the ground until you encounter a Gnosis. Continue to the right and go up the ramp you see into the train cabin. Head to the right and exit the train via the south ramp. Fight the Gnosis waiting at the end of the train, then head up and to the left. Ascend the ladder you see and go left until you fight a Larva Doll. Head all the way to the end and destroy the debris to allow access to a chest you couldn't get to earlier. Go right and descend the ladder once again, then backtrack through the train. Exit the train and head to the left, then head up and run up the rubble to open the treasure chest to obtain a venom block. Head south and to the right, going back into the train to destroy the door to the left to obtain an ether pack S. Follow the path outside over the wrecked train and descend the ramp by the Gnosis. Fight the Gnosis, then head north, go down the stairs, and head to the right to enter the next area.
Head to the right and fight the Gnosis blocking your path. Once it's been dealt with, head around the debris in your way. You can fight the Gnosis you see above you or avoid it. Continue to the right, under the bridge. Another Gnosis will be here. Defeat it, then destroy the wall panel to obtain four frame repair A's. Head to the right, then ascend the stairs you see. If you pressed the switch as Shion, you'll be able to go through this door. Ascend the ladder and go through the door to open the treasure chest to obtain decoder 12. Turn around and climb down the ladder, then go back into the water. Head east under another bridge, then climb the long ladder you see to initiate a cutscene.

You're back in control of Shion now. Use the save point in front of you if you want. Go to the right and you'll encounter a new type of Gnosis. Dispose of them and destroy the rock to the south to allow access to a secret path. Head down, then to the right and you'll be in a small camp ground with a treasure chest. Open it to obtain PM card D. Head back the way you came, then go to the right and fight another Gnosis. Continue into the next area. You'll see a bunny across the way, but it'll run away when it spots you. Follow the path around until you encounter a couple of Gnosis. While following the path, you'll head over a tree acting as a bridge. Follow the bend to fight another Gnosis. Head to the left until you encounter yet another Gnosis. Continue along and destroy the tree at the far left, then destroy a portion of the rock wall. Enter the hole and head to the right until you can blow open the other side. Do so and you'll be in the open water.
Head to the right, around the bend, and go left until you're able to destroy another area of wall. Head to the large pillar in the middle of the water and destroy that to allow access to a treasure chest that contains a blue topaz. However, a Gnosis will also attack you if you attempt to get it. So teach that Gnosis a lesson, then collect the treasure. Once you've gotten the blue topaz, head back through the holes and head to the right, taking the low road into the next area.

From here, go to the right and fight the Gnosis you see, then head to the south and blow up the tree trunk to obtain an ether pack S. Head back north and cross the bridge to the right for another short scene with the bunny. Go north and fight or avoid the Gnosis you see. Now head to the left and around the bend to encounter another Gnosis. Now destroy the pulley you see in front of you to lower the bridge. Go across it and behind the waterfall, then head into the hole in the side of the rocks. Now you'll be in the previous area. Run to the left, across the bridge, and destroy the carrots where the bunny was before. You'll reveal four S. carrot juices.
Now head back to the right, across the bridge, and go a little south. Head up toward the large tree in the middle. Hollow out the center of it to obtain two frame repair Z's. Now head down and around, going through the hole you came from. Run back behind the waterfall and across the bridge, then head to the east and under the bridge. Head to the table and you'll be prompted to place a S. carrot juice on the table. Do so, and you'll start a cutscene.
After the cutscene, hide behind the tree and wait for the bunny to circle the table three times. On the third time around, start running toward the table when the bunny is on the opposite side. Continue to run toward its house and it shouldn't even spot you. Once inside, it'll allow you access to a treasure chest inside. Open it to acquire decoder 3. Now head back under the bridge and go up to encounter the Gnosis hopping around. Continue up, then to the right, behind the bunny's house to go to the next area and initiate a
cutscene. If you want to obtain PM card A, go through the purple portal and head all the way back to where Shion started from. Have Jr. as the main character and enter the dome to the south in order to get it.

Otherwise, head to the right, over the bridge, and south along the church's side. Enter the church to initiate another cutscene. Once inside, talk to the woman by the door at the back of the church to restore your party's HP and EP, then head down and save. Now head through the door in the back to initiate a cutscene and a boss fight.
Boss Fight 17 : Tiamat : 6,400 HP
Tiamat starts the battle by attacking one of your party members. You should have three people who have AGWS units. On everyone's first turn, load them into their AGWS units, then select Guard on their next turn. Everyone should use W-ACT on their next turn. Tiamat's attacks shouldn't be too devastating, so don't worry about them too much. Plus, the battle will be over before the AGWS units' FHP reach 0. When Tiamat has around 500 HP left, have Shion get out of her AGWS and use her most powerful tech attack on her next turn. He'll heal himself for 1,500 HP, so place Shion back in her AGWS. Wear Tiamat down by 1,000 HP, then remove Jr. from his AGWS. Use his most powerful tech attack on Tiamat to kill it for good. Hopefully it'll be on a special points up event slot.
Once you've finished Tiamat off, a long series of cutscenes will occur to bring you into the next area.
Kukai Foundation Revisited
Enemies:
Basilisk
Bugbear
Gel Fish
Kobold
Larva Doll
Larva Face
Troll
Wyrm
When you're in control of Shion, head to the left and you'll receive an e-mail. You can now access the simulation of Miltia via the EVS. Head out the door to the south, then to the right, and then down around the bend and you'll receive another e-mail. You now have KOS-MOS' tech attack X - BUSTER and her subweapon F - RSHOT. Head through the doorway on the right and descend the ramp to receive yet another e-mail. This is from the hacker. If you guessed that the hacker was in the Durandal, then it's a good e-mail. Kind of.
Board the train and head for the dock area. Once you arrive, head to the right, then down and into the Elsa. Continue right, then head up to the bridge. Talk to Captain Matthews and he'll bring you to the Dock Colony. You can now finish the Luty side quest or buy the VX-4000 if you didn't last time. If you still don't have enough money, play poker for a while. Once you're done here, head back to the Elsa and talk to Captain Matthews again to go back to the Durandal. Go to the left and up, ascending the escalator-type things. Then go to the right to board the shuttle bound for the Kukai Foundation. Once you arrive, head left, then ascend the stairs to bring you to the map. Enter City Sector 26 and 27 and run all the way to the left, ascending the last set of stairs on the second screen and then entering the building. Run all the way to the end and open segment address no. 3 to obtain robot part right leg.
Now exit the building through the door at the bottom and descend the stairs. Head right and leave this screen. Head to the right in this screen and head up to the Iron Man bar, but don't enter. Examine the crank to the left of the entrance to lower the awning above the door. Now you can exit this area by continuing to the right. Once on the map again, head south and into the AGWS Parts Shop and Foundation Robot Academy. Enter the shop on the left to buy some more weapons. You should buy a few sets of GLG76AG for the three main AGWS units and equip each with two of them. Once you're done with that, head down and to the left, descending the stairs to the Foundation Robot Academy. Since you have two more robot parts, you'll walk out with a new ether summon, Dominion Tank. Now leave this building, head back to City Sector 26 and 27, enter the Iron Man bar, and talk to Allen, who is posing on the right, to initiate some cutscenes.
Once you're back in control of Shion, you'll be on the Durandal's bridge, so step onto the elevator platform and descend to the main level. Head to the right, enter the train, and depart for the Dock area. Exit the train and head to the right, then head up the escalator-type things and board the shuttle to the right. Once you arrive at the Kukai Foundation again, head to the left and ascend the stairway to access the map. Go to City Sector 26 and 27. Once you're inside, you'll find the mayor is waiting in the streets. He'll sell you items and also tell you how many people need to be rescued. So right now, you have 13 people to rescue.

Head to the left and encounter the Gnosis in the street. Head up and into the Iron Man bar and talk to the guy posing with the cardboard cutouts. Twelve more people to go. Head back outside and fight the Gnosis again, then head to the left and destroy the purple canister for an edge in the battle with the flying Gnosis you see. Now head up into the Our Treasure hotel. Talk to the man on the floor, then head to the right and go up a little bit. Now go to the left, behind the counter, and open the chest to the left to obtain a swimsuit. Now head back to the right and ascend the stairs. Go to the right and around the boxes in the room, then destroy the shelf you see to obtain some battle gear. Continue to the right and press the glowing red switch in the back of the next room to move the cargo elevator. Head back to the left and destroy the shelf again, then head up the ladder and examine the blue painting to the left to find out the Inn Keeper's daughter was born on the 28th of October. You'll need to know this.
Head to the right and destroy the blue crate to obtain a tech upgrade S. Descend the ladder, head to the left, and go down the stairs. Go all the way to the left to fight a Gnosis blocking a door. Once it's out of the way, enter in the PIN to unlock the door. If you can't figure it out, think about it. The safe belongs to the Inn Keeper. He mentioned something about a picture. Once you unlock it, you rescue the angel that was inside. Eleven people to go.
Head back up the stairs to the right, then ascend the ladder to the right and exit through the door to the southwest to gain access to the roof. Run to the right and keep running as you slide down. You should land on a small ledge. Destroy the panel to reveal segment address no. 1. You should be able to decode it, so head inside and obtain the robot part head. Slide off the roof and onto the catwalk, destroy the junk to the right to obtain an ether upgrade S, then continue to the left and enter the door. Go through the door at the top left, go to the right and up the ladder, then head to the roof again. Now run to the left and head for the little overhang you see to be dumped into, well, the dumpster area. Destroy both dumpsters to find 1,000G in the left one and a person in the right. Talk to him to save him. Ten more left.
Head down, open the gate, and fight the Gnosis outside, then head to the right and reenter Our Treasure. Go back to the roof and run to the left again, this time going behind the roof. Follow this path to the left until you see a treasure chest. Inside you'll find decoder 13. Head to the right and back to the roof. Fall off onto the catwalk. Go all the way to the right and destroy the junk, then fall off onto the road. Now head to the left into the next area. Head to the left and fight the Gnosis that's at the statue. When you're finished with the Gnosis, destroy the statue and talk to the person who was on top of it. Nine more to go.
Continue to the left to fight another Gnosis, then another. Now head up the stairs and enter the building through the door on the left. Head up and destroy the red canister to get a drop on the Larva Dolls affected by it. As you head toward the window, you'll see a person cornered by another Larva Doll. Right now, though, head toward the stairs, then down and through the door to talk to the woman in here to rescue her. Eight to go.
Destroy the cabinet to the right to obtain two ether upgrade S's, then ascend the ladder you see. Follow the path and you'll see a kitty staring down a Larva Doll. Continue to the right for now and fight the Larva Doll that you encounter. Now destroy the wooden panel to the right to free a boy trapped inside. Seven more.
Follow the path back to the ladder and climb down, then exit the room, head up the stairs, and exit through the door to the south. Go to the right and down, entering the doorway on the side of the building. Go south and destroy the bookshelf to obtain a skill upgrade S, then exit through the door on the left. Head around the catwalk and enter in the other door you see. Follow the corridor and fight the Gnosis blocking your way, then continue along until you go through a doorway and fight another Gnosis in the room. Destroy the yellow canister to the south if you want to. Destroy the cabinet to the left to access a small hole in which you can see the baker being cornered by a Gnosis. So head out the door and to the left, down the ramp. Press the switch on the far left to raise the ramp into a bridge. Go right and ascend the ladder, then cross the bridge and enter the new room to save the baker. Talk to him to rescue him. Six left.
Destroy the leftmost bread rack to become 1,000G richer. Now head through the door and follow the path to the right, then head down the stairs to get into East 6. Destroy the car to obtain a rune crystal, then fight the Gnosis. Talk to Johnny to find out he won't leave his loved one. So destroy the crate behind him to free his girlfriend trapped inside. Talk to her and they'll both leave. Four more to go. Exit East 6 and head up the stairs and into the doorway you see. Once inside, talk to king to save him. Three more.
Continue to the left around the catwalk to fight a Larva Doll. Go to the panel on the wall it was guarding and activate the switch. Head back around the catwalks and enter the new room. Head up the stairs and through the door to enter the hallway the kitty and Larva Doll are in. Fight the Larva Doll, then talk to the kitty to save it. Two left.
Head to the right and back into East 6. Go back on the catwalk and exit through the door to the left of the Larva Doll. Follow this hallway to the left and then head down the stairs to save the girl from the Larva Doll. Just one left. Destroy the cabinet next to the segment address to obtain a cure-all, then head back up the stairs, through the hallway, and down the catwalk of East 6 and exit. Head to the left and follow the path, then enter the room where you saved the baker. Fight the Gnosis and destroy the bread racks to access the ramp he told you about earlier. Now that you're on the street again, head back to the Iron Man bar. Go to the area the cargo elevator was previously blocking access to and destroy all the crates to obtain a tech upgrade S and rescue the last person.
With that accomplished, head to the right behind the counter and fight the Gnosis there, then head all the way to the right to obtain a wooden idol. Exit the Iron Man bar, head to the Our Treasure, and save your game. Heal if needed. Once that's done, attempt to exit the area to cause the boss to appear. Run into it to start the fight.
Boss Fight 19 : Gigas x2 : 2,800 HP
After the first attack, Gigas will split into two. Use tech attacks on one Gigas until it falls. Equip the person with the strongest tech attack with the Double Buster. If you've been upgrading Shion's Spell Ray tech attack and you give her the Double Buster, she can do a lot of damage by casting Spell Ray twice. If a character's HP gets below 300, have him or her get into an AGWS and then Guard to build AP, then use W-ACT. Try to eliminate both of the Gigas before they can use the Deathbringer attack on you, because it will kill a character. Revive any fallen characters and try to finish the battle on a special points up event slot.
Once you're finished with the boss, exit the area to the right, then head down to the AGWS Parts Shop and Foundation Robot Academy and bring the professor the robot part head you found to get a new ether summon, Seraphim Bird. Now head to the Launch Pad to initiate a cutscene. Once you arrive at the Durandal, turn around and leave for the Foundation again. Head to the left to start a short cutscene, then head back to the Durandal. Once there, head to the train and take it to the Residential area. Head to the left, up the ramp, to initiate a series of cutscenes.
Once you're in control of Shion again, descend the Durandal's elevator. Once you step off it, you'll receive an e-mail. It's an e-mail from Vector that allows KOS-MOS to use two more tech attacks: S - CHAIN and R - HAMMER. If you head to the right toward the train, another e-mail arrives. This time it's from Miyuki, if you replied correctly to her e-mail way back when in the Woglinde. She'll send you the F - SCYTHE subweapon, so download it and equip it. Now head to the Dock area via the train. Head down and to the right to enter the Elsa. Go to the bridge, talk to Captain Matthews, and head to the Dock Colony. Head to the left, enter the Talk to Me shop, and buy whatever upgrades you can afford. One you're done shopping and equipping, head back to the Elsa, and Captain Matthews will take you to the Durandal again. Once docked, turn around and head back into the Elsa to save, then go back to the bridge and talk to Captain Matthews again. This time, choose the other option and a cutscene will occur to bring us to the next part of the game.
Song of Nephilim
Enemies:
Byproduct 103
Byproduct 145
Byproduct 172
Calx
Capto Mortum
Shot Crab
Vive
Once the Elsa is docked, head to the left to initiate a cutscene. Once it's over, continue to the left and a short panning sequence will occur. When that's done, head up into the first tower. Destroy the small crate to your left and the two crates on the right side to activate the elevator. Examine the control panel to ascend to the third floor. Head up and to the left to encounter a Shot Crab. Now follow the path and enter the doorway on the left wall to head outside. Go up and press the button at the end of the path, then head back inside. Head down along the wall to avoid the battle, then destroy the crate to obtain a med kit DX. Follow the path back around and fight another Shot Crab, then continue to the end and enter the doorway to return to the elevator.

Now you want to head to the fifth floor, so destroy all the crates you see except the tall stack in the upper right, a single one in the upper left, and the crates on the lower left. Head up and to the left to fight another Shot Crab. Continue on the path while staying close to the left wall until you find a crate. Destroy it, then open the treasure chest to obtain decoder 14. Now follow the path back to the end, hugging the left wall, and return to the elevator.
Next, you want to get to the sixth floor, so destroy all the crates except for the double stack in the upper right and the single crate on top of the large crate on the right. Head up and follow the path to the left to find a crate. Destroy it to obtain neo armor A. Then head back up the path and into the second door to your left. This will bring you outside of Tower 1. Follow the path and enter Tower 2.
Head to the left, then head down and save your game. Set MOMO as the character onscreen, leave the save point, and head to the right. Head past the entrance you came from and into the first door you see. Examine the wall panel and you'll obtain her tech attack, MOMO's Kiss, and her ether, Starlight. Now put your party back to the original formation and exit this room. Head left and enter the next room. Cross the bridge and go to the right, where you'll fight some Capto Mortum. Once they're disposed of, continue right and destroy the red barrel to obtain the cross. Now exit this area and go to the left, entering the next door you see. Fight the Calx that block your way, then descend the ladder and head right, fighting the Shot Crab you see. When it's out of the way, ascend the ladder and destroy the red barrel to the left to obtain soldier's honor.
Climb back down the ladder, go to the right, and descend the other ladder. Now head all the way to the left, fighting the Calx that you encounter. At the end of the path, ascend the ladder and cross the bridge. To the left will be several crates. Destroy the first one to receive nothing. Destroy the second to receive a defibrillator vest. Destroy the third crate to receive neo armor B. Now heal everyone up and destroy the fourth crate to start a fight. Although this isn't really a boss fight, this enemy can be tricky, so I'll classify it as one.
Boss Fight 20 : Athra 26 Series : 3,000 HP
Start off by having Shion use her Spell Ray on her first turn, since it'll be the only time it'll hurt the enemy. Once it's been hurt by certain attacks, it'll become immune to them. Have KOS-MOS guard, and have whoever else is in your party execute a tech attack. On Shion's next turn, have her get into her AGWS, do the same with the third party member, as long as the AGWS units have engine shields. On KOS-MOS' next turn, have her unleash two different tech attacks by having her equipped with the Double Buster. Afterwards, use her for physical attacks and R - BLADE. Have each AGWS guard and then use W-ACT on the enemy until it falls. You'll receive decoder 2 for beating it.
Now destroy the last crate to reveal segment address no. 12. Decode it and enter to receive the W hammer rod. Now head back, destroying the crates once again to clear your path and leave this little area. Save your game if you like. Then return to where you were and descend the ladder to the other floor. Fight the Calx that is waiting for you, then head to the right and descend the other ladder. From here, head right and into the middle door. Once inside, press the switch to bring the floor down to this level, then exit from the way you came. Now head to the left, fighting the Calx along the way. Go through the door and destroy the canister. Head back out, fight the Calx again, and go to the other end of the path, fighting another Calx along the way. Enter this door and destroy this canister. Doing so will lower the wall blocking you, as well as make a boss appear. Heal up, make sure at least two people know Medica All, and walk to the boss to start the fight.
Boss Fight 21 : Rianon Se : 5,600 HP

Whatever you do, don't get into your AGWS units. Rianon Se will disable your party's ability to boost when allowed to, but don't worry about this too much. Just attack it with Spell Ray, X - BUSTER, and one of the long-range tech attacks of your third character. Rianon Se will sometimes drain HP from one of your characters, but it'll drain a lot more from an AGWS, so again, don't use one. Heal up when needed, make sure KOS-MOS is equipped with the Double Buster, then unleash double X - BUSTERs over and over again. Rianon Se won't stand a chance against you as long as you're healing when needed and don't get into your AGWS units.
After the battle, head down to the area beyond the wall that was lowered and you'll be outside of Tower 2. Press the button to the right to make a bridge appear between Tower 2 and Tower 3. Now head back inside. Enter the middle door to raise the flooring again, then ascend all the ladders and make your way back to the save point to save your game. Once you're done, follow the path opposite of the save point to head outside and cross the bridge into Tower 3.
Once inside, head to the left and follow the path, destroying the purple canister to make the battle against the enemy easier. Head down the ladder and to the left, destroy three blocks to lower the bridge, and then head across it. Destroy the canister to the north to receive a field ring. Head back across the bridge and down the ladder, destroying the purple canister to aid in the fight. Now head to the left and destroy the rest of the blocks to lower the bridge again and cross over. Now ascend the ladder to the second floor and destroy three blocks to lower the bridge and cross it, destroying the purple canister you see to help you in the battle. Ascend the ladder as high as you can go, then fight the Byproduct you see. Follow the path, ignoring the junk in the lower-left corner. Instead, fight the Byproduct, then destroy the canister to the north to receive a skill upgrade S.
Now head back and destroy the junk you see to find a hole. Jump into it and obtain an ether pack DX. Head to the north and blow out the door to obtain a med kit. Head inside and destroy the obstacle blocking the ladder, then go around to open the treasure chest, which contains decoder 17. Now descend the ladder to the lowest floor and destroy the rest of the blocks to move the bridge down. Cross it and destroy the purple canister to make the fight against the Byproduct easier. Go north and destroy the canister you see to obtain an ether pack DX. Now go back over the bridge and head down the stairs to go outside, then head back inside to reset the bridges and blocks. Ascend the ladder to the next floor, destroy three blocks to lower the bridge, and then cross it, descend the ladder, and head through the door to the left.
Ignore the columns for now and continue left into another area. Listen and watch the lights, then head to the right and destroy sections of the pillars so the sounds match the ones in the smaller room (destroy four red sections, three blue sections, and one green section). This will allow access to the outside and to the last button. Follow the path to the right until you see the button, then press it to activate the third bridge. Head into the door to your left and ascend the elevator to the main floor, then exit to the north and cross that bridge into Tower 2. Heal and save your game. Head to the right and exit through the door to the south, then cross the bridge to enter Tower 1. Head south and enter the door to the left to access the bridge to Tower 3. Make sure your party has people that can get into AGWS units, then descend the elevator with three lights and enter the door to the north to initiate a few cutscenes and a boss fight.
Boss Fight 22 : Simeon : 8,400 HP
On the first round, have everyone get into their AGWS units. On their second round, have them all guard. On the third round, use W-ACT. Simeon will use an attack that puts Slow on one of your AGWS units and then damages it, but if you have the Guard Cleaner and Guard Recovery accessories on all your AGWS units, this shouldn't be a problem. Continue attacking in this fashion until the battle's over. Hopefully you'll finish Simeon on the special points up event slot.
Once the battle's over, exit this area and ascend the elevator and go back to Tower 1 and board the Elsa. Head to the AGWS hangar in the basement and heal the AGWS units up, then buy Cockpit Guards and Engine Guards if needed. Now head back to Tower 2 and save your game, then head to the bridge between Towers 1 and 3, descend it, and enter the door. Talk to the creature to the north to start a series of boss fights.
Boss Fight 23 : Ein Rugel : 3,600 HP
Have Jr. or Shion use an ether spell to steal from Ein Rugel. If it's successful, you'll obtain the Master's Pendant, which will be helpful if you want to level up. Put everyone else into their AGWS units and have them guard until the item is stolen, then have Jr. or Shion get into his or her AGWS and guard. Hopefully you'll have gotten Cockpit Guards, because Ein Rugel will attempt to put your characters to sleep. Use W-ACT until the boss transforms into his second form.
Boss Fight 24 : Doppelwogel : 4,400 HP
Since you're already in your AGWS units, guard until you can use W-ACT, then use it. Doppelwogel will attempt to use Confuse on your characters, but with the Cockpit Guard enabled, it's ineffective. Since Doppelwogel is an airborne enemy, you have to use long-range attacks, so hopefully your AGWS are properly equipped. One attack you need to watch out for is Eternal Storm, since it hits all your characters and inflicts a good amount of damage. Continue to Guard/W-ACT until the boss falls, hopefully on a special points up event slot.
After the battle a cutscene will occur, then you can talk to everyone if you want to, or exit using the door. This will initiate some more cutscenes, and then you'll be back in control of Shion. Head south and descend the Durandal's elevator. Once you step out of it, you'll get an e-mail. This one will unlock the final tech attack for KOS-MOS, R - DRAGON. Head to the right and you'll receive another e-mail if you got the last e-mail from the hacker. This will make you a lot richer than you previously were--200,000G richer, to be exact.

Continue toward the train and you'll get another e-mail, this time to tell you that Song of the Nephilim is available via the EVS now. So get to the train and head for the Dock area. Head up and into the shuttle to the right to go to the Kukai Foundation. Exit the shuttle, head to the left, and ascend the stairs to get to the map. Enter City Sector 26 and 27. Go to the Iron Man bar and destroy the leftmost series of crates to obtain a tech upgrade S. Leave the bar and head to the left, then enter the area with the dumpsters and destroy the one behind the man standing there to obtain a skill upgrade A.
Leave the dumpster area and head left into the next screen. Continue left, ascend the stairs at the end of the road, and enter the door on the left. Once inside the cleaners, head up, then make a U-turn in the second room, and head down into the room where the garments are kept. Destroy the cabinet near the ladder to obtain a skill upgrade S. Now head out of the cleaners the way you came in. Head to the right, ascend the stairs, and follow the path to the back of the bakery. This is where you'll receive your last e-mail, an ad for Soul Calibur II. Now turn around, descend both sets of stairs, head all the way to the right, and return to the Kukai Foundation map.
Head to the Launch Pad and take the shuttle on the right back to the Durandal. Now exit the shuttle, go left, then down and to the right to board the Elsa. Then go into the bridge and talk to Captain Matthews. Go to the Dock Colony again. Head to the left and enter the Talk to Me shop. Go downstairs and destroy the junk you see to the left. Then follow the path and decode segment address no. 2 to obtain robot part body. Now head upstairs and shop. Once you're ready, head back to the Elsa and talk to Captain Matthews to be brought back to the Durandal. Turn around, head back into the Elsa, head to the bridge, and talk to Captain Matthews to initiate a cutscene and bring us into the last part of the game.
Proto Merkabah
Enemies:
Armaros
Azazel
Baraqijal
Delphyne
Demon
Iosys
Work Drone
Xanthosis
Exit the bridge of the Elsa and take a right to save your game if you want. Otherwise, head to the left and out of the air lock. Head down the stairs you see on your left and then head up, passing by all the ships that are docked. Follow the path and fight the Work Drone you see. Destroy the large canister against the wall to reveal a treasure chest. Open it to receive a defibrillator vest. Head back around the path and up the stairs again, then head down and to the left. Head up and fight the Work Drones you see. Continue north and destroy the red canister you see to aid in the battle with another Work Drone. Then head up the stairs to bring you to the next area. Go north, then take a right along the conveyor belt and destroy the bottom southern crate to receive two ether pack DXs and the northern small crate for two frame repair A's. Stand as far away from the large yellow crate as you can be, then destroy it to release a Gnosis. Once you've freed it, destroy the yellow canister to get an edge in the battle.
Once you're done with the battle, head down the ladder to the lower floor. Avoid or fight the Work Drones, according to your preference. Head south and destroy the yellow crate on the right to obtain two frame repair Z's and the one next to it for two bio spheres. Head to the left and fight the Work Drone, then continue and destroy the northern yellow crate to obtain two med kit DXs. Now head up and pass under the bridge. Head to the left and press the button on the control panel you see to raise a bridge. This, however, locks you into this area, so head south and press the button on the other control panel to lower this bridge to give yourself a way out. Now head to the right, then go north and fight or avoid the two Work Drones patrolling this area. Destroy the upper left-hand corner crate to receive a pair of ether pack DXs and ignore the rest, since they give you nothing. Now head up and press another button on this control panel to raise this bridge. Since the other bridge is already up, move a little to the left, enter the path, and ride the conveyor belt to the main floor. Go left along this conveyor belt, follow the path up and around to the right, and enter the elevator at the end.
You arrive at Floor 40. Follow the path, head up the stairs, and pass Floor 41. Destroy the red canister to help in the battle against the Gnosis at the foot of the stairs to Floor 42. Continue up the stairs, fighting or avoiding the Gnosis you see, until you reach Floor 43. Head through the door on the left and enter the new room. In here, enter the door to the north and then go to the right and destroy the large red crate to reveal a treasure chest that contains a pair of frame repair Z's. Exit this room, go to the left, and enter the control room to heal if needed and save your game. Exit this room and head to the right, going back into the stairwell. Ascend the stairs to Floor 44 and enter the door on the left.

Walk through the hallway, staying by the corner until the Gnosis turns away, then walk and stand by the canisters you see. As the Gnosis walks by again, it'll spot you and rush you. However, if you're positioned correctly, it can't attack you and it'll eventually leave you alone. When this happens, walk to the left until you can destroy the glass door you see. Do so to obtain a rejuvenator. This will alert the surrounding Gnosis of your presence, but that's OK. Run into the room whose door you just you blew open, and in the back you'll find a treasure chest containing the dragon rod. Leave this small room and head to the right, destroying the red canister you see to stop the Gnosis in its tracks. Head around it and follow the path until you can exit through the door on the left.
Descend the stairs and enter the door on the right. Head into the first door you see in this area and head to the back, destroying the wall panel to reveal segment address no. 17. Decode this segment address to obtain the BLOOD9 for Jr. Exit this room, then head left back into the stairwell. Descend the stairs and destroy the purple container to make the fight with the Gnosis easier. Continue down the stairs, ignoring Floor 42, and then destroy another purple container and fight another Gnosis. Once on Floor 41, head into the door on the right and fight the Gnosis in this room. Now head into the door, go to the right, and exit through the other door. On the right, you'll find a treasure chest that contains an M guard chip. Now head back to the left, into the stairwell, and up and into the room on Floor 42. Defeat the Gnosis you see here with or without the help of the red canister, then go all the way to the right and flip the switch to lower a door in the room on Floor 44. Head back to the left and fight the Gnosis again, then head up the stairs to Floor 44. Enter the room and head to the right to fight the Gnosis you see, then go down the hallway that's now unlocked and head through the door.
Head to the left and fight the large Xanthosis in the hallway. Once it's been dealt with, destroy the two wall panels to reveal a hallway. Head down it and destroy the canisters you see. In the last one in the corner you'll find a treasure chest that contains a chakra shield. Once you obtain that, head back to the left to fight an Iosys. Once you're done with it, heal up and head to the left some more, then down the catwalk. Agree to jump down into the satellite dish to initiate a boss fight.
Boss Fight 26 : Proto Dora w/ Schutz x2 : 12,000 HP / 3,800 HP
Use the strongest tech attacks you have against the two Schutz to get them out of the picture as soon as possible. Heal if you need to, and pummel away at Proto Dora. However, make sure one character is constantly guarding. Proto Dora will use a Beam Shield that will negate beam attacks, but over time it'll lower as it's attacked. Once it mentions an energy recharge, have a character with 6 AP use a veil on the whole party. On Proto Dora's next turn, it'll unleash its Sonic Buster attack, but with veil in place the damage will be cut by 25 percent. Now heal everyone up and continue the attack. After a while, Proto Dora will call in Relief Goods to heal itself for a few thousand HP. Keep using tech attacks and healing, using another veil for the whole party if the energy recharge message comes up again. Continue this method until the Proto Dora falls. Of course, you could have Shion use Erde Kaiser from the start to knock off a nice 9,999 HP.
You'll receive decoder 6 for winning the battle. Now heal up, head to the left of the satellite dish, and climb the ladder. Head to the left and fight the Iosys patrolling the area, then head into the door. Go north in this passage and through the door at the other end to be brought to another room. Head right and fight the Gnosis you see, then head up and destroy the junk blocking the ladder. Descend to the lower level and head around to the left side to destroy that wall panel to reveal segment address no. 6. Decode it to obtain the trauma plate. Now head back to the ladder and climb up, then fight the Gnosis you see. Enter the door at the top of the room and head right through another door. Follow the hallway to the right and clear the room of the Gnosis. If you want to see an extra cutscene, head into the door at the north of the room, otherwise continue to the right and descend the stairs to the left to use the elevator.

Use the save point on the left to heal and save your game. Head to the left and examine the glowing white button to activate the elevator. While riding the elevator down, four Gnosis will appear. Once you've reached the bottom, head back up the elevator and go back to the save point to save your game so you won't have to deal with those enemies again. Once you're done, go down the elevator and to the right, then head through the door and fight the enemies in this hallway. When they're all gone, heal up and prepare for the last boss fights of the game. Equip Shion with the angel ring, then head up the stairs and into the new area. When you're walking on the bridge you'll initiate a cutscene that will lead into a boss fight.
Boss Fight 27 : Albedo : 7,400 HP
Quick solution to this battle: Erde Kaiser. Don't bother using any other tactic, since you don't want to weaken your characters at all.
After the battle, you'll be treated to another cutscene, then the last boss fight.
Boss Fight 28 : Sophie Peithos : 16,000 HP
w/ Jaldabaoth x2 : 1,200 HP
w/ Ratatosk : 1,800 HP
Use Erde Kaiser ASAP to knock 9,999 HP off this boss. It'll then summon a Jaldabaoth into battle. Eliminate the Jaldabaoth and attack Sophie Peithos until it summons another Jaldabaoth. Kill that one and attack the boss. Heal if needed. After a while, Sophie Peithos will summon Ratatosk, so deal with that, then heal and attack the main boss again. After you inflict enough damage, Sophie Peithos will start using harder attacks, so transfer into AGWS and guard, then use W-ACT to finish the boss.
Once you've won, you'll be treated to some cutscenes and be prompted to save. So, save your game. Now you'll be taken to the title screen.
Congratulations, you've beaten Xenosaga Episode I: Der Wille Zur Macht.
Chapter 16: MiniGames
Xenocard
In order to play Xenocard, you'll need some cards and the Card Passport. The Passport can be procured by talking to the BartendRobo working in the Restaurant on the Elsa. Activate the Xenocard minigame by using the Passport (in your key items list) while standing at a blue-plate-enabled save point.
There are 3 card types: Battle Cards, Event Cards, and Situation Cards
Battle Cards come in these different types:
Human Cards
ReAlien Cards
Mech Cards
Gnosis Cards
Weapon Cards
OTHER TERMS
Battle Field
Standby Area
Situation Area
Cards In Hand
Next Card In Deck
Discarded Cards
Discard Area
PHASES
Draw - Take a card from the deck.
Move - Move a card.
Event - Use a cards effect.
Set - Set a cards place.
Block - Block the opponent from using a card.
Battle - Begin battle.
Adjust - Change the cards in hand.
OVERVIEW
Take a minute and flop thru the tutorial quickly as there are some things that are useful to understand.
There are 3 types of cards: Battle cards are red. Event cards are yellow. Situation cards are blue.
The table has 4 major sections. The Battle field is where the action takes place. The Standby area is where you place your cards before they can go to the battle area; this is to your left. The Situation area, where Situation cards are played, is to your right. The final area is the bottom area, which shows the cards in your hand, how many cards are in your deck, and finally your discarded cards.
You win the game by making your opponent run out of cards; likewise if you run out of cards you will lose. Try not to use too many cards; at the same time don't lose them in battles.
Circle selects, X cancels, while in a phase when you are finished with the phase hit Square and then circle to confirm. For example if you are finished moving all your cards simply hit the Square button and then Circle. Triangle will give you the basic info of the selected card.
You begin the game going through a routine of phases; you go through this routine every turn.
You will start with Draw. Draw will give you cards, as far as I can tell you receive cards every turn to replace the cards you either moved out of your hand or that you used. So it is possible to end up with a bunch of cards!
Next is Move. You can move cards from the Standby area to the Battle field, and you can rotate your cards around the Battle field too.
Event, this allows you to use Event cards. Event cards have different effects for every card. The curry card heals other cards HP, other cards damage the opponent's cards on the battle field and yet other cards have different effects.
Set, this is where you take cards from your hand and put them to the Standby Area. This is when you can enhance your cards on the battle field by using your Weapon Cards. Also you can only deploy situation cards into the situation area.
Block, you do this on you opponents turn. What you can do during the block phase is deploy your own event card, that's all. Please note: you can block your opponents use of an event card as long as you have the 2 event cards that let you counter.
Battle, now the cards hack it out. If the opponent has cards in the battlefield, your cards will attack them. If not your cards will attack the opponents deck if they are in range.
Adjust, this is when you have too many cards in your hand, you will have to discard.
Each card has a "cost", which is the number of cards that has to be "spent" from the deck. For an example, let's take a look at the KOS-MOS card level 1. This card has a card type of "mech", an HP of 6, attack of 3, attack type of "shooting", field requirement of 1 human + 1 any, and a cost of 5.
She's a very useful unit but with a requirement of 5 cards, rather costly. However, her special ability is "If Shion is present in your own battlefield, she can be moved into battle for free" and "She cannot equip any weapons."
Now for the explanation:
Card type signifies what kind of card the card is considered to be on the battlefield (important because this determines what kind of cards can be played). There are four different card types and they are: Human, Realien, Mech, and Gnosis.
HP is just that. Every time a character is attacked by an enemy unit, they lose HP. When HP hits 0, they "die" and are sent to the discard pile.
Attack is just that as well. That's the amount of damage the card does to opposing enemy units or the enemy deck.
There are five different kinds of attack types. They are hand-to-hand, shooting, hit-all, penetrate, and artillery. Hand-to-hand cards can only attack cards that are in contact with it, so they can only attack enemy cards that are in the front row like themselves. Shooting lets the card attack from any row against any enemy cards in front of it, including the base deck. Hit-all attacks hits all enemy cards on the battlefield, but doesn't do damage to the base deck. Hit-All attacks also go last. Penetrate attacks work just like Shooting, except when the attack points weren't fully spent on a single enemy card, it passes on to the next. (for example an AG-05 with 7 AP hits a card with 3HP, the attack will kill that card and the left over 4AP will hit the next card behind it). Artillery is a bit different, its attacks only damages the base deck, bypassing any enemy card that might have normally been blocking the way.
Field requirement is the kind of cards that must be present on the battlefield before this card can be moved to the standby area. In the case of KOS-MOS, there must be at least one human card and another unit out there on the standby/battlefield area. If the requirement is not met, the card cannot be played and obviously, the stronger the unit higher the requirement.
Cost is the number of cards that are "spent" when the card is played. For example, the KOS-MOS card has a cost of 5, which means that you have to move five cards from the base deck to the discard pile (the discard pile on the left, the pile that can be re-used). With only 40 cards total, that's pretty expensive.
Most cards have a cost of at least one (except Realiens and really weak human cards).
If you can't use a particular card, it's either because of the cost (too expensive - not enough cards left in the deck) or the field requirement is not met (this probably occurs more often). For an example, make sure you don't have any event cards or character cards that require a "Gnosis" if you don't have any Gnosis cards in the deck.
You can only deploy (set) one battle card per turn, weapons and Gnosis included. The one exception to this is Realiens, you can deploy as many as you can/allowed (some of them will only allow one to be out at a given time, like the Govt. use realiens).
CARD LIST
Get ready, here it is.
H=Hand to hand combat has a range of 1,can only attack cards it contacts
S=Shooting has a range of 1&2&Deck, can attack cards in contact and one card
behind the contact card
B=Ballistic has has a range of 2&3&Deck,
A=All ranges
| No | Card name | Attributes | HP | ATK | Condition$Cost | Availability | Remark |
| 1 | Shion Lv1 | Human,S | HP4 | ATK1 | na $1 | Rare | When you destroy an enemy card, you can search thru your own deck, and from among those you can add Shion Lv10 to the cards in your hand. After that the deck will be reshuffled. |
| 2 | Swimsuit Shion | Human,H | HP4 | ATK3 | 1 Human $1 | Promo | No special ability. |
| 3 | Ziggy Lv1 | Human,H | HP5 | ATK2 | 1 Human $1 | Rare | When it attacks whatever it hits will have the "down" effect. This card cannot equip a weapon. |
| 4 | Momo Lv1 | Realien,S | HP4 | ATK1 | 1 Human $1 | Rare | When attacking a Gnosis the attack of this card goes up by 1. |
| 5 | KOS-MOS Lv1 | Mech,S | HP6 | ATK3 | 1Human+1 any $5 | Rare | When Shion is on the battle field, there is no cost to set KOS-MOS. This card cannot equip a weapon. |
| 6 | Jr. Lv1 | Human,S | HP4 | ATK1 | 1 Human $1 | Rare | It attacks during both battle phases (yours and your oponents). Jr. will lose this ability when a weapon is equipped. |
| 7 | Chaos Lv1 | Mysterious(the bunny),S | HP4 | ATK1 | 1 Human $1 | Rare | Every turn on your adjust phase, this card recovers 2 HP. |
| 8 | Shion LV10 | Human,S | HP6 | ATK3 | 3 Humans $1 | Rare | If Shion Lv.1 is present on your battle field, you can replace it with this card even if the field requirements are not met. Any damage done by Realien cards are decreased by one. |
| 9 | Swimsuit Momo | Realien,H | HP4 | ATK3 | 1 Human $1 | Promo | +1 ATK when fighting against Gnosis. |
| 10 | Ziggy Lv10 | Human,H | HP7 | ATK2 | 2 Humans $1 | Rare | If Ziggy Lv.1 is present on your battle field, you can replace it with this card even if the field requirements are not met. When it attacks whatever it hits will have the "down" effect. This card cannot equip a weapon. |
| 11 | Momo Lv10 | Realien,S | HP6 | ATK3 | 2 Humans $1 | Rare | If Momo Lv.1 is present on your battle field, you can replace it with this card if the field requirements are met. If this card is present on the battle field, both friendly and enemy Gnosis will not be able to move around on the battle field. When attacking a Gnosis the attack of this card goes up by 1. |
| 12 | KOS-MOS Lv10 | Mech,A | HP8 | ATK2 | 2 Humans+2 any $10 | Promo | If KOS-MOS Lv.1 is present on your battle field, you can replace it with this card if the field requirement is met. Can only equip weapons designed for KOS-MOS. Attacks once every two turns. |
| # | Card name | Attributes | HP | ATK | Condition$Cost | Availability | Remark |
| 13 | Jr. Lv10 | Human,S | HP6 | ATK2 | 2 Humans &1 | Rare | If Jr. Lv.1 is present on your battle field, you can replace it with this card if the field requirements are met. It attacks during both battle phases (yours and your oponents). Jr. will lose this ability when a weapon is equipped. |
| 14 | Chaos Lv10 | Mysterious(the bunny),S | HP6 | ATK3 | 2 Humans $1 | Promo | If Chaos Lv.1 is present on your battle field, you can replace it with this card if the field requirement is met. Every turn on your adjust phase, this card recovers 3 HP. |
| 15 | Albedo | Human,S | HP5 | ATK2 | 1 Human+1 any $1 | Rare | If this is the only card on your battle field, the number of cards in the discard (non-reusable pile) is added to the ATK. When this happens, the cards in the dicard pile are permanently removed from the game. This card cannot equip any weapons. |
| 16 | Hammer | Human,S | HP3 | ATK1 | na $1 | Uncom | During the battle phase, Hammer's ranged attack is increased by 1 for every Machine card that is in your battle field. This ability is not subject to the effect of event cards. |
| 17 | Civilian Child | Human,H | HP3 | ATK1 | na $0 | Com | There is no special effect. |
| 18 | Civilian Female | Human,H | HP3 | ATK1 | na $0 | Com | There is no special effect. |
| 19 | Civilian Male | Human,H | HP3 | ATK1 | na $0 | Com | There is no special effect. |
| 20 | Civilian Boy | Human,H | HP3 | ATK1 | na $0 | Com | There is no special effect. |
| 21 | Soldier | Human,S | HP3 | ATK1 | na $1 | Com | There is no special effect. |
| 22 | Security Guard | Human,S | HP3 | ATK1 | na $1 | Com | There is no special effect. |
| 23 | U-TIC Soldier | Human,S | HP3 | ATK2 | na $1 | Uncom | When this card is destroyed in combat, the owner of this cards pays the cost of one card. |
| 24 | Realien Male,H | Realien | HP2 | ATK1 | na $0 | Com | There is no restriction as to how many of these can be set during one turn. If you use (set) this card, draw one card from the deck in your adjust phase. |
| 25 | Realien Female,H | Realien | HP2 | ATK1 | na $0 | Com | There is no restriction as to how many of these can be set during one turn. If you use (set) this card, draw one card from the deck in your adjust phase. |
| 26 | Government Realien | Realien,H | HP2 | ATK2 | na $0 | Com | There is no restriction as to how many of these can be set during one turn. |
| 27 | Type 100 Realien | Realien,H | HP2 | ATK2 | na $0 | Uncom | There is no restriction as to how many of these can be set during one turn. When attacking a Gnosis card add one to the ATK. |
| 28 | Combat Realien M | Realien,S | HP2 | ATK1 | na $0 | Uncom | There is no restriction as to how many of these can be set during one turn. |
| 29 | Combat Realien F | Realien,S | HP2 | ATK1 | na $0 | Uncom | There is no restriction as to how many of these can be set during one turn. |
| 30 | Bunnie | Mysterious(the bunny),H | HP5 | ATK2 | 2 any $1 | Promo | When the "E" mark is off (the E mark is on shows on the standby area), all the cards at the standyby area are discarded. |
| 31 | AG04 | Mech,H | HP6 | ATK2 | 1 Human $2 | Promo | When it attacks whatever it hits will have the "down" effect. |
| 32 | AG02-M | Mech,S | HP7 | ATK2 | 1 Human+1 any $2 | Uncom | Only one card can be in the standby area or the battle field at once. When it attacks whatever it hits will have the "down" effect. |
| 33 | Simeon | Mech,A | HP9 | ATK3 | 2 Humans+1 Mech+1 any $4 | Rare | Only one card can be in the standby area or the battle field at once. This card attacks once every 2 turns. Every turn, inflicts 1 damage to all enemy cards in the battle field and Standby area. |
| # | Card name | Attributes | HP | ATK | Condition$Cost | Availability | Remark |
| 34 | AG01 | Mech,S | HP4 | ATK2 | 1 Human $2 | Uncom | There is no special effect. |
| 35 | Proto dora | Mech,S | HP8 | ATK10 | 1 Human+1 any $3 | Promo | Only one card can be in the standby area or the battle field at once. It attacks during both battle phases (yours and your oponents). It has the penetration ability. |
| 36 | AG05 | Mech,S | HP8 | ATK7 | 1 Human+2 Mech+1 any $4 | Promo | Only one card can be in the standby area or the battle field at once. It attacks during both battle phases (yours and your oponents). It has the penetration ability. |
| 37 | Drone | Mech,H | HP9 | ATK2 | 1 Human$2 | Com | There is no special effect. |
| 38 | VX-7000 | Mech,S | HP6 | ATK3 | 1 Human+1 any $4 | Uncom | Only one card can be in the standby area or the battle field at once. It has the penetration ability. When Jr. is on the battle field there is not cost to set this card. |
| 39 | VX-9000 | Mech,S | HP6 | ATK3 | 2 Humans $3 | Uncom | Only one card can be in the standby area or the battle field at once. When this card is destroyed in the battle field it also takes out one of cards in the opponents standby area. |
| 40 | VX-10000 | Mech,S | HP6 | ATK3 | 1 Human+1 any $3 | Uncom | Only one card can be in the standby area or the battle field at once. It has the penetration ability. When Shion is on the battle field there is not cost to set this card. |
| 41 | VX-4000 | Mech,A | HP5 | ATK1 | 2 Humans $3 | Rare | Only one card can be in the standby area or the battle field at once. |
| 42 | VX-20000 | Mech,B | HP5 | ATK5 | 2 Humans+1 Any $3 | Uncom | Only one card can be in the standby area or the battle field at once. This card attacks once every two turns. |
| 43 | Saber | Weapon | - | ATK7 | 1 Mech $0 | Com | You can only use one of these cards per turn. Can only be equipped on Mechanical cards. When attacking Gnosis ATK is +3. |
| 44 | Cannon | Weapon | - | ATK8 | 2 Mech $1 | Com | You can only use one of these cards per turn. Can only be equipped on Mechanical cards. Adds "penetration ability", once every 2 turns. Can only be equipped on Mechanical cards. |
| 45 | Shield | Weapon | - | ATK0 | 1Mech $2 | Rare | You can only use one of these cards per turn. Can only be equipped on Mechanical cards. The card which is equipped with this will receive -1 damage. |
| 46 | Airds | Weapon | - | ATK5 | 1Mech $1 | Rare | You can only use one of these cards per turn. Can only be equipped on Mechanical cards. Damage is given to the enemy deck directly now, will be used once for every 2 turns. |
| 47 | Beam | Weapon | - | ATK4 | 1 Human+1 any $1 | Uncom | You can only use one of these cards per turn, one time use only. Can only be equipped on Mechanical cards. |
| 48 | Battle suit | Weapon | - | ATK0 | 2 Humans $1 | Com | You can only use one of these cards per turn. Can only be equipped on Human cards. Once equipped damage received is -1. |
| 49 | Missile Pod | Weapon | - | ATK2 | 2 Humans $1 | Com | One turn use only. Can only be equipped on Human and Realien cards. |
| 50 | Handgun | Weapon | - | ATK1 | 1 Human $0 | Com | One turn use only. Can only be equipped on Human and Realien cards. |
| 51 | Rifle | Weapon | - | ATK2 | 1 Human $1 | Com | One turn use only. Can only be equipped on Human&Realien cards. |
| 52 | Rocket | Weapon | - | ATK3 | 1 Human+1 any $3 | Com | One turn use only. Can only be equipped on Human&Realien cards. |
| 53 | 3rd Type Armament | Weapon | - | ATK10 | 1 Human+1 any $1 | Promo | Unless KOS-MOS and Shion stay on the battlefield, it is not possible to use. Only used once every 2 battles. Only Lvl 10 KOS-MOS can equip this. |
| 54 | Glasses | Weapon | - | ATK0 | 2 Humans $2 | Com | This will cause the card to attack a different target. This is a one time use card which can only be equipped on Human and Realien cards. |
| 55 | Virgil | Human,S | HP4 | ATK2 | 1 Human + 1 Any $1 | Uncom | If this card is present on your battle field, discard all Realiens in your battle field at the end of enemy adjust phase and this does 4 damage to the enemy deck for every Realien that was discarded. |
| 56 | Margulis | Human,H | HP4 | ATK4 | 2 Humans $1 | Uncom | When the E mark disappears from this card, destroy any one situation card. |
| 57 | Matthews | Human,H | HP4 | ATK3 | 1 Huaman $1 | Uncom | If this card is present on the field, pay 1 card before the draw phase. If it is present on the battle field, pay another additional card (effects both friend and foe). |
| # | Card name | Attributes | HP | ATK | Condition$Cost | Availability | Remark |
| 58 | Gaignun | Human,H | HP5 | ATK4 | 1 Human+1 Any $1 | Uncom | When the E mark disappears from this card, all Realien cards out on the battlefield return to your hand (effects both friend and foe). |
| 59 | Testament | Mysterious(the bunny),H | HP6 | ATK5 | 1 Human+1 Gnosis $2 | Promo | When the E mark disappears from this card, may cause the "down" effect on one enemy card on their battle field. |
| 60 | Wilhelm | Human,S | HP3 | ATK1 | 3 Humans $1 | Rare | If this card is destroyed in normal combat, it kills the card that destroyed it as well. At the same time, it causes 4 damage to the enemy deck. |
| 61 | Cherenkov | Human,S | HP3 | ATK2 | 1 Human $1 | Uncom | When this card is destroyed, look at the top card of the discard (non-reusable) pile. If the top card is a Human, Realien, or Mech swap this card with that card in your adjust phase. The new card will have an HP of 1. |
| 62 | Tony | - | HP3 | ATK2 | 1 Human $2 | Com | When the E mark disappears from this card, may cause the "down" effect on one enemy card in their standby area. |
| 63 | Allen | Human,S | HP3 | ATK1 | 1 Human + 2 Any $2 | Com | When the E mark disappears from this card, you can move one card from the battle area to the standby area. This cannot be done if there is no room in the standby area. |
| 64 | Juli Mizrahi | Human,S | HP2 | ATK1 | 1 Human $0 | Com | If this card is present on your battle field, you may discard it during the event or the block phase. This will cause all of your human cards to get an ATK bonus of 1 (during that turn only). |
| 65 | Pellegri | Human,H | HP4 | ATK1 | 1 Mech+1 Human $0 | Rare | If this card is present on your battle field, you may discard it during the event or the block phase. This will cause all of your Mech cards to get an ATK bonus of 1 (during that turn only). |
| 66 | Zohar Emulator | Mech,H | HP10 | ATK0 | 1 Human $1 | Rare | Only one of the card can be in the standby area or the battle field at once. This card cannot equip any weapons. If this card is present on your battle field, you may discard it during the event or the block phase. This will cause all of your Gnosis cards to get an ATK bonus of 2 (during that turn only). |
| 67 | Kobold | Gnosis,S | HP5 | ATK1 | 1 Human $0 | Uncom | 1 human card on the battle field has to be canceled for this card to be moved to the battle field. Only one of the card can be in the standby area or the battle field at once. |
| 68 | Goblin | Gnosis,H | HP5 | ATK2 | 1 Human $0 | Com | 1 human card on the battle field has to be canceled for this card to be moved to the battle field. Only one of the card can be in the standby area or the battle field at once. Whatever it attacks will receive the "down" effect. |
| 69 | Ogre | Gnosis,S | HP7 | ATK3 | 1 Human+2 any $0 | Com | 1 human card on the battle field has to be canceled for this card to be moved to the battle field. |
| 70 | Gremlin | Gnosis.S | HP1 | ATK2 | 1 Human+1 Mech $0 | Com | 1 human card on the battle field has to be canceled for this card to be moved to the battle field. |
| 71 | Lizard man | Gnosis,B | HP5 | ATK2 | 1 Human+1 Mech $0 | Com | 1 human card on the battle field has to be canceled for this card to be moved to the battle field. |
| 72 | Hydra | Gnosis,B | HP6 | ATK4 | 2 Human+1 Mech $0 | Com | 2 human cards on the battle field have to be canceled for this card to be moved to the battle field. Only one of the card can be in the standby area or the battle field at once. |
| 73 | Cerberus | Gnosis,S | HP10 | ATK4 | 2 Human $0 | Com | 2 human cards on the battle field have to be canceled for this card to be moved to the battle field. Whatever it attacks will receive the "down" effect. |
| 74 | Fairy | Gnosis,A | HP3 | ATK1 | 2 Human $0 | - | 1 human card on the battle field has to be canceled for this card to be moved to the battle field. |
| 75 | Minotaur | Gnosis,S | HP10 | ATK4 | 2 Human+1 any $0 | Rare | 1 human card on the battle field has to be canceled for this card to be moved to the battle field. |
| 76 | Golem | Gnosis, S | HP5 | ATK3 | 1 Human+1 any $0 | Uncom | 1 human card on the battle field has to be canceled for this card to be moved to the battle field. Only one of the card can be in the standby area or the battle field at once. |
| 77 | Gargoyle | Gnosis,S | HP10 | ATK5 | 1 Gnosis+2 Human $0 | Rare | 2 human cards on the battle field have to be canceled for this card to be moved to the battle field. Only one of the card can be in the standby area or the battle field at once. When this card attacks every card in the battle field receives 1 damage. |
| 78 | Unicorn | Gnosis,S | HP7 | ATK2 | 2 Gnosis+1 Human $0 | Rare | 1 human card on the battle field has to be canceled for this card to be moved to the battle field. When this card is on the battle field it recovers 3 HP during the adjust phase. |
| 79 | Sanctuary Ship | Gnosis,S | HP8 | ATK2 | 1 Gnosis+1 any | Rare | When this card is moved to the battle field, all cards on the battle field will be canceled. When on the draw phase while this card is on the battle field, it will pill 2 cards from the discard pile. |
| 80 | Kirschwasser | Realien,S | HP3 | ATK1 | 2 Any $1 | Rare | If this card is present on the battlefield with either Momo or Albedo, it increases their ATK by 1 during the battle phase. |
| 81 | Durandal | Mech,S | HP8 | ATK3 | 1 Human+1 Mech+1 Any $3 | Rare | Only one card can be in the standby area or the battle field at once. This card cannot equip any weapons. |
| 82 | Joachim Mizrahi | Human,H | Hp3 | ATK0 | 1 Human $1 | Rare | If this card is present on the battlefield with Momo, Momo's HP never falls below one. |
Event Cards
| # | Card name | Condition$Cost | Availability | Remark |
| 83 | Miyuki's Email | 1 Human+1 any $1 | Rare | Cancels an opponents event card. |
| 84 | Cure-All | 1 Human $0 | Com | Revives a Human card that has been destroyed to normal condition. |
| 85 | Curry | 1 any $0 | Com | Recovers the HP of any 1 card except for Gnosis cards. |
| 86 | Bio sphere | 2 any $1 | Com | Recovers 3 HP of all cards on the battle field except for Gnosis cards. |
| 87 | Supply ship | 2 Mech $0 | Uncom | Recovers 5 cards to the deck from the discard pile. However you can only recover cards that have been discarded, so if there is only 3 cards in the discard pile that is all you will get back. |
| 88 | Supply fleet | 2 Human $0 | Rare | It will recover the same amount of cards in the battle field and stanyby area from the discard pile, this can't exceed the total amount of cards in the discard pile. |
| 89 | Retreat | 2 Human $1 | Com | Moves one of the enemies cards from his battle field to his standby area, only if there is space in his standby area. |
| 90 | Woglinde | 1 Mech $1 | Uncom | Moves one of the enemies cards from his battle field to his standby area, only if there is space in his standby area. |
| 91 | Surprise Attack | 1 Gnosis $0 | Com | Damage of 2 is given to one card in the enemies battle field. |
| 92 | Federation cruiser | 1 Mech $0 | Com | Damage of 2 is given to one card in the enemies battle field. |
| 93 | Invitation | 1 Human+1 any | Uncom | The total amount of ATK of all cards on the battle field is recovered from the discard pile. This can't exceed the total amount of cards in the discard pile. |
| 94 | Mary and Shelly | 2 any $0 | Rare | Adds 2 cards from the deck to the cards in your hand. |
| 95 | U.M.N. Invasion | 1 Gnosis $0 | Rare | Adds 2 cards from the discard pile to the cards in your hand. |
| 96 | Investigation | 2 any $0 | Com | You can see the next 5 cards in the deck, there is a chance this will cause a reshuffle. |
| 97 | Landing operation | 1 Mech $0 | Com | Destroys one situation card. |
| 98 | Premonition | 2 Gnosis $3 | Uncom | The card which has the E mark is destroyed. |
| 99 | Dragon's skull | 2 Mech $1 | Uncom | It destroys 1 Gnosis card. |
| 100 | Expulsion order | 2 Humans $3 | Rare | The enemy Human card that has the E mark is destroyed. |
| 101 | Impregnable Guard | 1 Mech+1 any $0 | Uncom | Makes the deck invincible for 1 turn. |
| 102 | Article 4-13 | 1 Human+1 Mech+2 any $2 | Rare | The total amount of HP&ATK on your battle field will be given in damage to the enemies deck on the enemies adjustment phase, this is only for one turn. |
| 103 | Phase Cannon | 1 Human+2 Mech+ 1 Gnosis $4 | Promo | This will destroy all Gnosis on both sides of the battle field. |
| 104 | Notice | 2 any $0 | Com | It removes the weapon from a card that has been equipped with a weapon. |
| 105 | Resolution | 1 Human+1 any $1 | Com | It removes all the weapons from all cards both battlefields (yours and opponents) |
| 106 | Recycler | 1 Human+1 any $0 | Com | Takes one Mech card from the destroyed card pile and returns it your hand. |
| 107 | ReviveDX | 1 any $1 | Com | Returns 2 Human cards from the destroyed card pile. |
| 108 | Stim DX | 2 Human +1 any $3 | Rare | One card gets plus ATK2 and ballistic and penetration abilities. |
| 109 | Simulation | 1 Human+1 any $3 | Com | The first card from the destroyed pile is returned to the standby area. |
| 110 | War casualty | 2 Human $0 | Uncom | Returns all cards on the battle field to the deck, which can only be a total of 4. |
| 111 | X-Buster | 1 Mech $0 | Rare | All cards in enemies battle field receive 1 damage. |
| 112 | Charge | 1 Mech $0 | Com | It causes the "down" effect on one card. |
| 113 | Precise shooting | 1 Mech $0 | Com | Causes damage of 1 to one card. |
| 114 | Invoke | 1 Human+2 Mech $3 | Promo | It destroys all situation cards in situation area. |
| 115 | Confusion | 1 Gnosis $0 | Com | Front and back rows of the enemies battlefield are reversed. |
| 116 | Militia Conflict | 2 Mechs $0 | Rare | It causes the "down" effect on one card. |
| 117 | Song | 1 Gnosis+1 any $0 | Com | This card cancels an enemies event card. |
| 118 | Start Up | 1 Mech $0 | Uncom | Returns a card that has the effect of "down" to normal. |
| 119 | Destiny | 3 Humans $1 | Promo | 1 Human on the battle field is replaced with 1 human in the destroyed card pile. If they were equipped with a weapon our other ability it will be lost in the process. |
| 120 | Breakthrough | 2 Mech $0 | Uncom | Does 2 damage to 1 of any cards in the standby area. |
Situation Cards
| # | Card name | Condition$Cost | Availability | Remark |
| 121 | Hilbert effect | 1 Mech+1 any $0 | Com | For 2 turns all Gnosis be -1 Atk and unable to move. |
| 122 | Analyze | 1 Mech $0 | Com | Both players will see each others hand. |
| 123 | Tune-up | 2 Mechs $0 | Com | Damage down to Mech cards will be -1 for 3 turns. |
| 124 | Stim | 2 Humans $0 | Com | One Human card in the battle field receives +1 ATK for 3 turns. |
| 125 | Good luck | 2 Humans $0 | Com | One Human card in the battle field evades all attacks for 3 turns. |
| 126 | Armistice | 2 Humans $2 | Uncom | For 1 turn no battle will take place for both players. |
| 127 | Human sacrifice | 1 Human+1 Mech | Com | Whenever a set of cards is destroyed in battle, the cost amount of the main card is recovered to the deck from the discard pile. |
| 128 | Kukai Foundation | 1 Human+1 Mech+1 any | Rare | Gnosis cards in the battle area recover 1 HP. |
| 129 | Dammerung | 3 Human+1 any $0 | Promo | Every turn the deck recovers 1 card until there are no more cards in the discard pile. |
| 130 | Supply order | 1 Human+1 any $0 | Uncom | If any Realien is destroyed (yours or opponents) than 1 card recovered to the deck from the discard pile. |
| 131 | Gnosis phenomenon | 1 Gnosis $0 | Com | When a Gnosis is destroyed, it is returned to the deck and not placed in the destroyed pile. |
| 132 | Gnosify | 1 Gnosis $0 | Uncom | In an event phase or block phase, 2 cards are destroyed from your hand and 1 is pulled from the discard pile. |
| 133 | Collective | na $0 | Rare | Before you draw a card, you can look into the deck and reset the order. This can be done as long as a Gnosis is in the deck, or else this will only last for 3 turns. |
| 134 | Transfiguration | 2 Gnosis $1 | Com | In the event phase or block phase 1 Gnosis will return to deck and you will be able to see the deck. After this the deck will be reshuffled. |
| 135 | Mysterious Girl | 2 any $2 | Uncom | All Gnosis (your and opponents) will have ATK+1, however this effect only lasts one turn. |
| 136 | Territory shift | 2 Gnosis $1 | Com | When a Gnosis attacks it gives damage to the deck directly. The player that receives the attack also has to discard 1 card. |
| 137 | Pilgrimage fleet | 1 Gnosis+1 any $0 | Com | During adjust phase Gnosis in standby area and the battle field recover 1 HP. |
| 138 | Imaginary Space | 2 Gnosis+1 any $1 | Com | At the time of your draw, you draw from the discard pile and when discarding you discard to the deck. When you fail to discard during a turn this effect is canceled. |
| 139 | Rat in a trap | 3 any $1 | Com | You will get 2 move phases and 2 draw phases for one turn. |
| 140 | So weak | 1 Human+2 any $2 | Promo | During an event or block it does 3 damage to one card on the battle field. |
| 141 | Waste money | 1 Human+1 any $0 | Com | Cause both you and opponent to draw 1 extra card. |
| 142 | Phenomenon change | 2 any $1 | Promo | During an event or block it does destroys an enemy situation card. |
| 143 | Rhine Maidens | 2 Mech $2 | Promo | During an event or block it does 4 damage to the deck. |
| 144 | Foreign Weapon | 2 Human+1 any+1 Mech $3 | Promo | During an event or block all cards on the battle field receive 2 damage (your and opponents). |
| 144 | Unknown Armament | 1 mech 2 human | - | When discarded during block or event, all cards on field take 2 damage |
| 145 | Zohar | 2 any $0 | Promo | All cards attack plus 1 (yours and opponents). |
| 146 | D.S.S.S. | 1 Mech $0 | Com | A gnosis will be destroyed after 3 turns. |
| 147 | Compulsory sortie | 2 Mech $0 | Com | deploy all battle cards that are possible to deploy. after one turn, card is discarded |
| 148 | Override Code | 2 Humans $0 | Com | Deploy all raelian cards that are possible to deploy. after one turn, card is discarded |
AGWS Battling
In order to play AGWS battling,, you'll need the Battle Passport. The Passport can be procured by returning to the VR simulation that was the game's first dungeon and finding the chest located where the boss originally was. Activate the Battling minigame by using the Passport (in your key items list) while standing at a blue-plate-enabled save point.
Casino
In order to visit the Casino, you'll need the Casino Passport. The Passport can be procured by looking in the chest upstairs in the game room of the Durandal. The game room has a big sign outside of it that says "CARD GAME" with an arrow. Activate the Casino minigame by using the Passport (in your key items list) while standing at a blue-plate-enabled save point.
EXCHANGE
Purchase Coins
Here you can trade in your money (G) for Casino Coins. Choose how many coins you would like and hit O to buy them.
Claim Prizes
This is where you can claim prizes. Choose the prize you'd like and trade in the appropriate number of coins for it.
Earned Materials
This is the viewer for your art prizes. Select a picture, then hit T to view it. The left analog stick scrolls, and X stops viewing.
PRIZES
| NAME | DESCRIPTION | COST (in Coins) | SELL VALUE | G:Coin ratio |
| Recovery Set | Med kit, Ether pack, Revive, Cure-All | 100 | 110 | 1.1 |
| Escape and Rest Set | Escape pack, Bio Sphere | 150 | 70 | .466 |
| Gold Dice | See items section | 10000 | ||
| Bravesoul | STR up when HP low | 15000 | ||
| Revive DX | Restore KO'd chaaracter to full HP | 18000 | ||
| War God's Token | Weapon attack power 50% up | 12000 | ||
| Starter Set (Xenocard) | 400 | 200 | .5 | |
| Card Pack release 1 | 100 | 50 | .5 | |
| Card Pack release 2 | 100 | 50 | .5 |
SLOT
Choose a Level for how fast you would like to go broke. Up/down selects the spots where you can bet, and left/right increments your bet. Hit O to spin, then hit it again to stop each wheel. Once all wheels have stopped you will find out either that you didn't win, or, if you're lucky, that you won back a tiny fraction of the amount you've already wasted. Enjoy!
POKER
This is where the real coinage is. Select a Level for how fast you would like to see the coins roll in:
Level 1: 5-coin bets
Level 2: 10-coin bets
Level 3: 30-coin bets
Level 4: 100-coin bets
You will be dealt a hand. Choose which cards you would like to hold, then select "CHANGE". You can trade in as many cards as you like. If you've got a winning hand, the multiplier will light up and you will be asked if you'd like to play a double-up game. If you choose to play, you'll be dealt cards one at a time. You have to guess whether the next card will be higher or lower than the current one. Each correct guess doubles your winnings for the hand, up to 4 times. You may stop at any time and keep that hand's winnings.
HOW TO MAKE MORE MONEY THAN YOU KNOW WHAT TO DO WITH
1. Play Level 4 poker. If you know anything about the game, you should be able to get at least a 1x prize most of the time.
2. Always double up when you win, and then guess with the odds. Stop on 6-9s and take your winnings.
3. Once you have 10000 Coins (with enough left over to play again), buy 99 Recovery Sets.
4. Get out of the Casino and run to the nearest shop. Sell off the components of the Recovery Sets. You'll make almost 11,000 G.
5. Repeat 1-4; enjoy being able to afford every AGWS upgrade, every character item, and 99 of every regular item.
Got a news tip or want to contact us directly? Email news@gamespot.com
Join the conversation