The Best Mission In Marvel's Avengers Beta's Is A Secret
Finding the biggest, most involved War Zone mission in the Marvel's Avengers beta requires you to go off the beaten path--here's how to find it.
The beta for Marvel's Avengers is now available for PS4 players who preordered it, and it's pretty expansive--it covers an early portion of the game's single-player story, includes a bunch of multiplayer missions, and gives you the chance to take on the roles of four different Avengers. But it also has some secrets mixed in, including a hard-to-find hidden mission that represents the best take on Avengers' multiplayer so far.
The hidden mission is a War Zone set in the Snowy Tundra area of Siberia, which you'll visit during the story portion of the beta when you play as Kamala Khan and the Incredible Hulk. In that mission, your job is to find a secret SHIELD bunker that's been hidden away from the enemy forces of AIM. After you finish that mission, Snowy Tundra is no longer accessible from your War Table map where you select missions. But you can return to the location for a new War Zone, provided you find a hidden SHIELD cache in another mission.
When you return to the Snowy Tundra, you'll go after a secret SHIELD vault that's full of high-powered gear and resources. The difference is, this SHIELD vault is enormous, and requires you to solve a puzzle to open it while defending the location from enemies. The Snowy Tundra area is also one of the biggest in the game, according to Crystal Dynamics, so exploring it is pretty fun on its own.
Here's how to find the Snowy Tundra Vault mission and how to open the vault when you get there.
Face Some Stark Realities
The location of the Snowy Tundra Vault is actually found in a hidden location in the Stark Realities mission, which you'll find in the Pacific Northwest region. You're looking for a SHIELD cache buried underground, but you won't find it by normal means. Usually, you can hit up on the D-Pad to see points of interest around the map, but the cache isn't marked with a question mark like other locations. Instead, you'll have to use the same beeping Signal Locator you used in the Snowy Tundra mission in order to find it.

You'll have to be in the right section of the Stark Realities map in order for the Signal Locator to activate. To find it, when you spawn in, face toward the objective marker ahead and head to the left. You'll quickly hit the rock wall surrounding the area, but keep following it to the left, away from the objective marker for the mission. Eventually, you'll find a cliff off to your left and the Signal Locator should start beeping. Keep following the locator as the distance numbers descend until you find the cache and open it.

Head down into the cache and look for the marked treasure chest inside. That should give you the Vault location--it'll pop up on your screen on the right in the same place where you're notified about picking up gear. Once you have it, you can head back to the Quinjet--you don't need to finish Stark Realities to access the new mission.
Head To The Snowy Tundra Region
At the War Table, you'll now have a new location marked on the top right section of the map. Look for a "plus" marker to access the Snowy Tundra section. When you pull it up, you'll get the mission for the Snowy Tundra Vault.

You'll return to a version of the map from the single-player mission earlier in the beta. There are a bunch of points of interest spread throughout the map for you to track down, and a lot of gear to find. But to complete the mission, you want to use the Signal Locator to find the SHIELD vault. It's not hard to come by, but don't head there until you're finished with everyone else in the mission, because completing the vault will kick you back to the Quinjet.
How To Complete The Vault
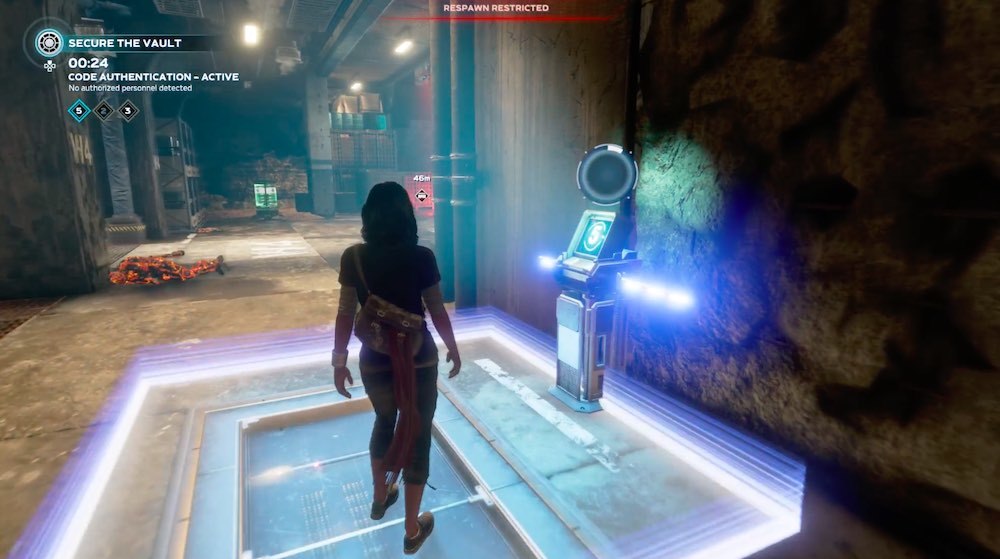
Inside the vault, you'll need to fight several waves of enemies while also capturing a bunch of locations in sequence, in order to bypass the security protocols and open the big vault door. To do that, first approach the vault and interact with the console. Note also that there are five computer consoles scattered around the vault room--1 and 3 on the right side and 2 and 4 on the left side. The No. 5 computer console is also on the left side if you're facing the vault door, but it's outside of the room with the other consoles, and instead behind a small wall next to the door.

Once you start the security bypass, the PA system will give you numbers, indicating which consoles you need to interact with in sequence. All you need to do is find the terminal with the number and stand in front of it for a few seconds to activate it, but you're racing a timer: you only have 45 seconds to reach each console. The good news is, you can reset that timer anytime by walking back in front of the vault door.
As you work to activate each console for the sequence, you'll get attacked by waves of AIM enemies. You should be able to handle these guys and mostly ignore them as you run to the consoles, but be aware of the orange flaming robots, who will run up to you and explode. They also explode if you beat them down, so just keep clear of them altogether.
After you activate the sequence consoles, return to the vault door and hold down that location by fighting off all the enemies. Once they're all dead, you'll start the process again but with more consoles to visit. There are three locks on the vault and each one you complete acts as a checkpoint, so don't worry too much if you're about to fail an unlock sequence--you can just start it over again.
Note also that you'll have to contend with the occasional AIM hacker. This is an enemy that will run to one of the consoles and start interacting with it, and if it is left there for too long, the enemy will reset your unlock sequence. Before you can do anything else, you need to run this enemy down and kill it. Fortunately, the hacker's location is marked on your screen with a red icon to show you exactly where to go.
Complete the unlock sequence twice more to open the vault. It'll take a while, especially because the fights are long and the console sequence gets larger with every lock. But once you've cleared the place a third time, you'll get inside the SHIELD vault and gain access to its goodies. Press the big red button to end the mission when you're done, but note that you'll be sent back to the Quinjet when you do.
Returning To Snowy Tundra
After you finish the Snowy Tundra Vault, you'll lose access to the Snowy Tundra location on your War Table--this mission isn't repeatable like the others is. However, you can access it again in the same way you unlocked it the first time. Just head back to Stark Realities and find your way to the buried SHIELD cache again. You can go back inside and find the same chest you did the first time, which should give you the vault's coordinates again--and bring back the Snowy Tundra Vault mission to your War Table.
We spent quite a bit of time with the Marvel's Avengers beta--check out our beta impressions and our guide on how all the progression systems in the beta work.
Got a news tip or want to contact us directly? Email news@gamespot.com
Join the conversation