Prince Of Persia: The Lost Crown - Clock Puzzle In The Upper City Guide
You'll be tossing a bunch of crystals just to fix a clock in Prince of Persia: The Lost Crown.
The Upper City Clock Puzzle in Prince of Persia: The Lost Crown can be somewhat tricky. That's because certain objects are hard to reach, and you need them to repair a mechanism. Our guide discusses just what you need to do to complete this portion of the campaign.
How to solve the Upper City Clock Puzzle in Prince of Persia: The Lost Crown
To solve the clock puzzle, you need the Chakram - Shadow of the Simurgh upgrade. Here's a quick summary:
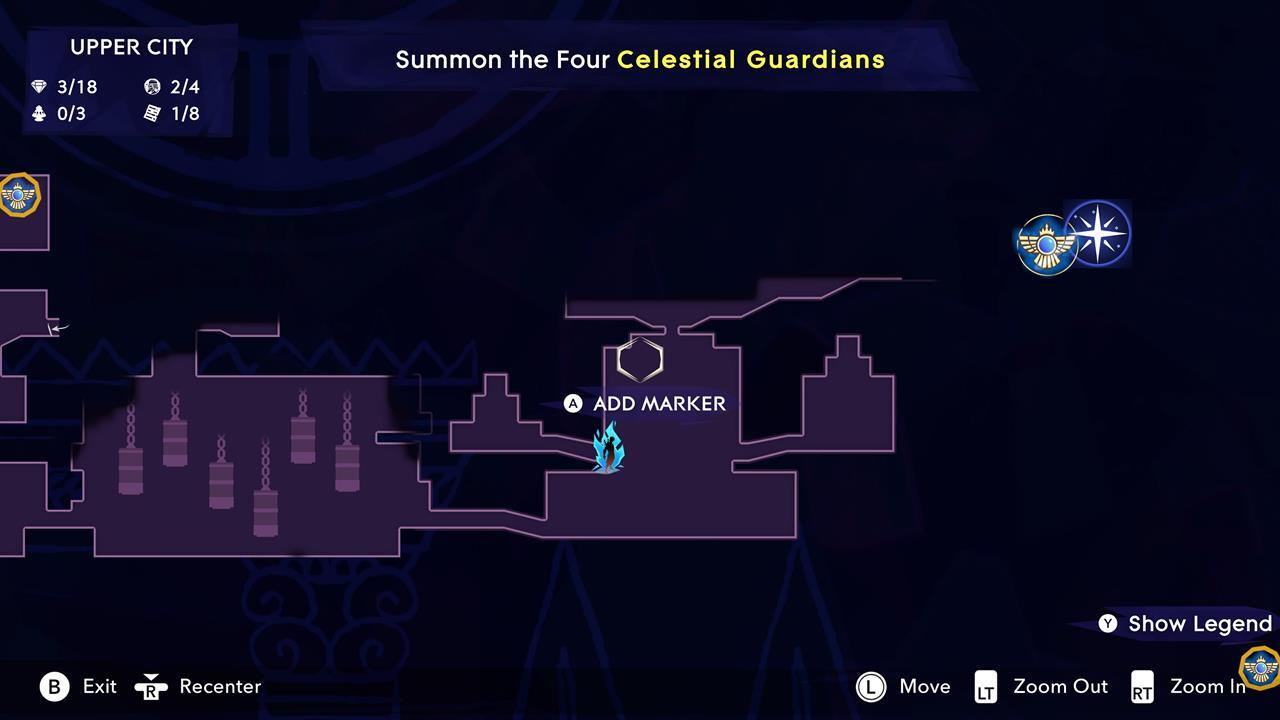
- This whole endeavor is part of The Celestial Guardians mission, which is where you have to activate four constellations all over Mount Qaf.
- The Clock Puzzle itself is in the top-right portion of the Upper City (as seen in the map image below).
- While it's okay to think these tasks can be done in any order, the Upper City Clock Puzzle becomes significantly easier if you first obtain the Chakram - Shadow of the Simurgh upgrade. With it, you'll gain the ability to teleport to where your Chakram is thrown.
- The upgrade is found in the constellation in the top-left portion of the Upper City. You have to defeat a boss there, and we don't want to spoil all the details here.
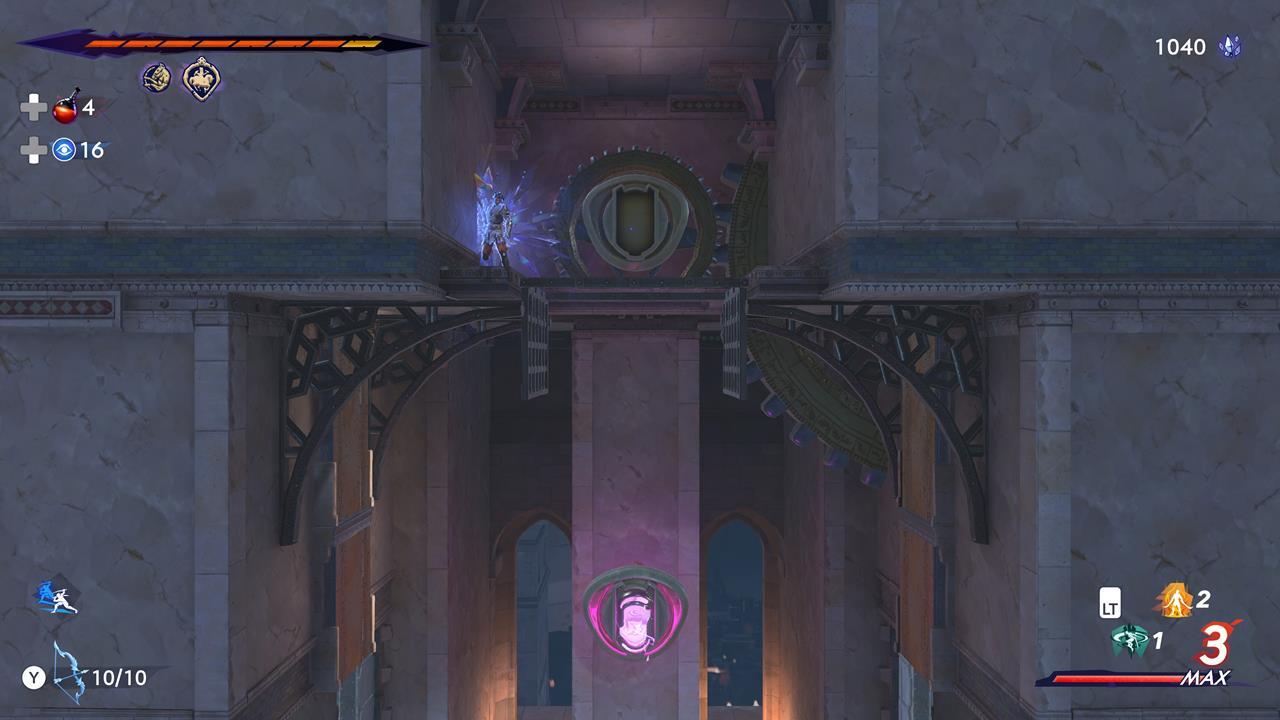
Puzzle room #1 (bottom chamber)
- Enter the room at the bottom of the main chamber and throw your Chakram to the ledge that has a crystal.
- Teleport to it, then use Dimensional Claw to grab the crystal.
- Place the crystal inside the receptacle to form a ledge.
- While standing on the ledge, throw your Chakram to the very top and teleport to it. You should be able to create a Shadow of the Simurgh copy in this small nook.
- Reclaim the crystal and teleport back to the top nook. Note that the hatch will close once you do this. However, you can attempt to toss the crystal using Dimensional Claw just as you're falling down.

Puzzle room #2 (left chamber)
- Hop on the walls and activate Shadow of the Simurgh when you're close enough to the empty crystal receptacle.
- Use Dimensional Claw to grab the crystal down below, then teleport to your shadow copy and plop it inside the receptacle.
- Toss your Chakram all the way up and teleport to it, then create another Shadow of the Simurgh copy.
- Grab the crystal as you fall down, then teleport back to the top so you can slot it into the topmost receptacle.
Puzzle room #3 (right chamber)
- Grab the crystal using Dimensional Claw and place it inside the first receptacle.
- Jump to the right (toward the indented wall) and create a Shadow of the Simurgh copy.
- Retake the crystal, then teleport to your copy. Quickly air dash to the left so you're above the higher ledge. Create another shadow copy once you're above it.
- Place the crystal back inside the receptacle, then teleport to the ledge.
- Toss your Chakram all the way to the top then make a Shadow of the Simurgh copy there.
- Reacquire the crystal and teleport to your copy at the top of the room so you can place it inside the receptacle.

How to fix the clock hands
Now that you're done with each room in the Prince of Persia: The Lost Crown Clock Puzzle, it's time to fix the device itself. Go ahead and make your way to the main chamber. You'll notice the following:
- There are three plates on the ledge that correspond to the three symbols/colors: blue, red, and yellow.
- Stepping on a plate causes the ring with that symbol to stop moving, but the others will continue to rotate.
- The goal is to step on one plate first when the symbol is glowing. For instance, you can stay on the blue plate first to make that ring stop. Then, when you see that another symbol (i.e. red) is about to glow, that's when you step on that plate.
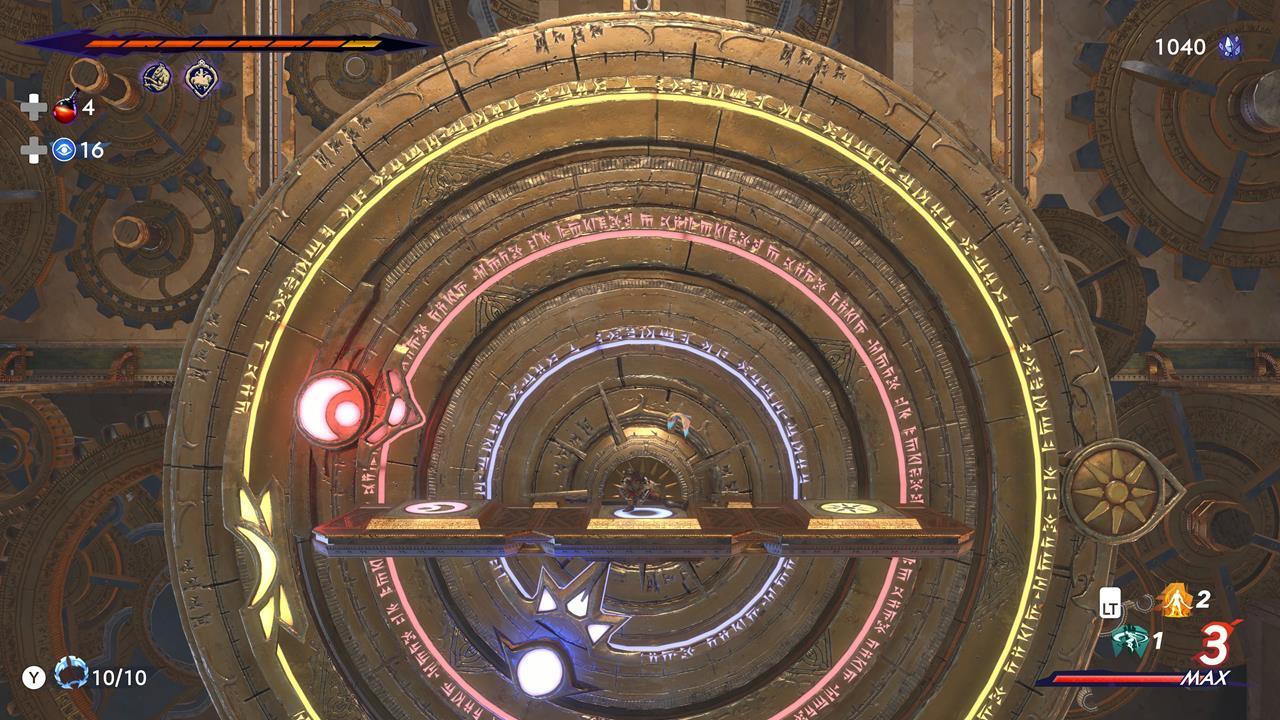
Once you make all three symbols glow at the same time, the mechanism will fully activate. This is how you solve the Upper City Clock Puzzle in Prince of Persia: The Lost Crown. Past this point, you'll have access to the Simurgh Gate, and the last few chapters of the campaign. Moreover, you'll spot a chest at the top, and it contains an Amulet Holder. You can refer to our amulet slot upgrades guide to learn about the locations of these items.
Prince of Persia: The Lost Crown takes you on a mystifying adventure all over Mount Qaf. We discuss various mechanics further in our guides hub.
Got a news tip or want to contact us directly? Email news@gamespot.com
Join the conversation