Portal 2 Hands-On Preview
We make our way through a slimier version of Aperture Science in a two-hour hands-on demo of Portal 2's single-player campaign. WARNING: This preview may contain spoilers.
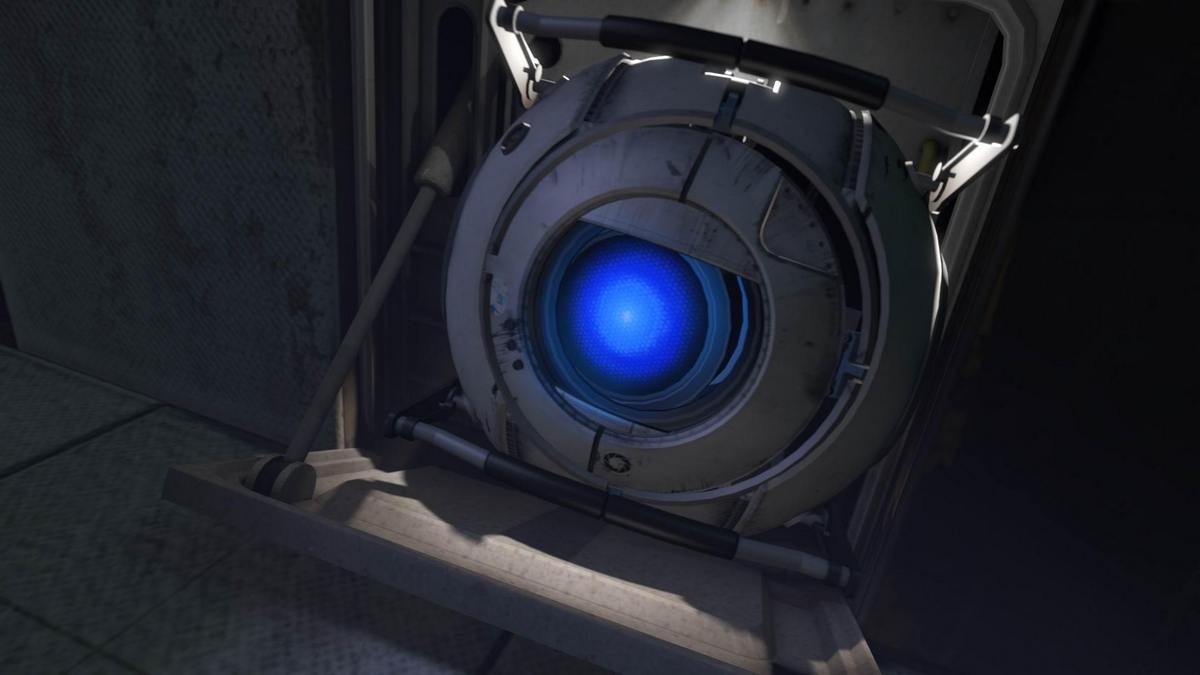
"Say apple," Wheatley commands, surveying you with his twitchy blue eye. You go to speak, but end up jumping on the spot instead. "I don't want to alarm you," he starts, trying to keep his voice steady, "but you probably have brain damage. Not to worry, though. We'll probably be okay. I mean, you know, as long as nothing else goes wrong."
Plenty of things went wrong during our two-hour hands-on demo of Portal 2's single-player campaign at Valve's headquarters near Seattle. We made our way through the opening chapters of the game, before skipping ahead to a new section in the latter-part of the campaign.
Fallout 4 Next Gen Update Comparison Stellar Blade - Hard Mode No Damage Abaddon Boss Gameplay Stellar Blade - (Almost) All Outfits Granblue Fantasy: Relink - New Content Trailer Modern Warfare III - New Season 3 Reloaded Modern Warfare Zombies Update River City Girls 2 - New Playable Characters DLC Reveal!! Stellar Blade - Hard Mode No Damage Gigas Boss Gameplay That Time I Got Reincarnated as a Slime ISEKAI Chronicles – Official Announcement Trailer MEGATON MUSASHI W: WIRED – Official OP “MUSASHI English Ver.” Trailer Gothic 1 Remake | Official Collector's Edition Trailer SaGa Emerald Beyond – Official Launch Trailer Paper Mario: The Thousand-Year Door – Official Switch Overview Trailer
Please enter your date of birth to view this video
By clicking 'enter', you agree to GameSpot's
Terms of Use and Privacy Policy
Portal 2's beginning is familiar enough: Chell, alone in a room. It's not the cold, sterile environment we've seen before; this new room is a vast improvement--carpeted floors, a wardrobe, a desk, potted plants, and even art. But something just doesn't feel right. The new AI caretaker is male, for one. His baritone voice breaks out over the loudspeakers, instructing you to move around and get used to your surroundings. If you're feeling up to it, he chirps, you can do some basic mental stimulation exercises by staring intently at the framed painting that hangs above your bed. Or, if that doesn't do it for you, he can always provide some classical music. You're just beginning to think about requesting Bach's Organ Concerto in G when you lose consciousness; you come to in the same room, although you barely recognize it now: vines creep along the walls, the carpet is a mushy brown color, and the desk and wardrobe have fallen into disuse and decay. And suddenly, there's Wheatley (brilliantly voiced by Stephen Merchant)--the neurotic caretaker of Aperture's 10,000 test subjects--telling you that the whole place is collapsing and you have to escape, now.
After navigating a maze of collapsed walls thickly coated in overgrown vines and narrow passageways filled with debris, you come across the portal gun--as you knew you would--lying unceremoniously in a pile of rubbish. According to Wheatley, the only way you can escape Aperture is by going through the test chambers. Again. Judging by his crazed ramblings, he still doesn't know you're The One [i.e. The One Who Killed GlaDOS]; he thinks you're a misguided test subject with an embarrassingly low IQ. ("People with brain damage are the real heroes," he says soothingly as you shoot a portal into the wrong wall.)
The first few chambers are a cakewalk. You know the drill: pick up the cube, drop it on the big red button, open the door, and move on. The chambers are a bit rundown, but still functional. There's even some jazz music in the third or fourth chamber, to help distract you from all the shrubbery currently growing on Aperture's once-pristine walls. For a brief, existential moment, you catch a glimpse of yourself as you pass through a portal. You're the same long-limbed, ponytailed Chell, the young woman who once walked these halls in search of something moist and delicious. But you are not a test subject now--you're an escapee. At least, that's what you think. The difficulty level of these early chambers increases significantly with each one; by chamber five you're already using momentum and gravity to propel yourself into portals and working with two or three cubes at varying heights and platforms.
Around the seventh chamber, Wheatley decides it's time he properly introduced himself. He's funny, eccentric, and melodramatic all at once--a ball of nerves one minute and a sarcastic fool the next. It's an instantly endearing routine, particularly when he begins to clumsily disengage himself from his "management" (the guardrail that keeps him in place) while pleading with you to turn around because he simply just can't do it if you're watching. He'd be blushing all over if he weren't made of steel.
In the next section of the game, Wheatley takes you behind the scenes of Aperture, through a series of conveyor belts, narrow staircases, and water pipes. He says this is a shortcut, but you know better. Before long you've hit a dead end, and through his erratic apologies he coyly admits that in order to escape now, there's a slight chance (read: 100 percent guarantee) that you will have to pass through GlaDOS' chamber, in which case there's another slight chance (read: 100 percent guarantee) that she will kill you if she happens to still be alive.
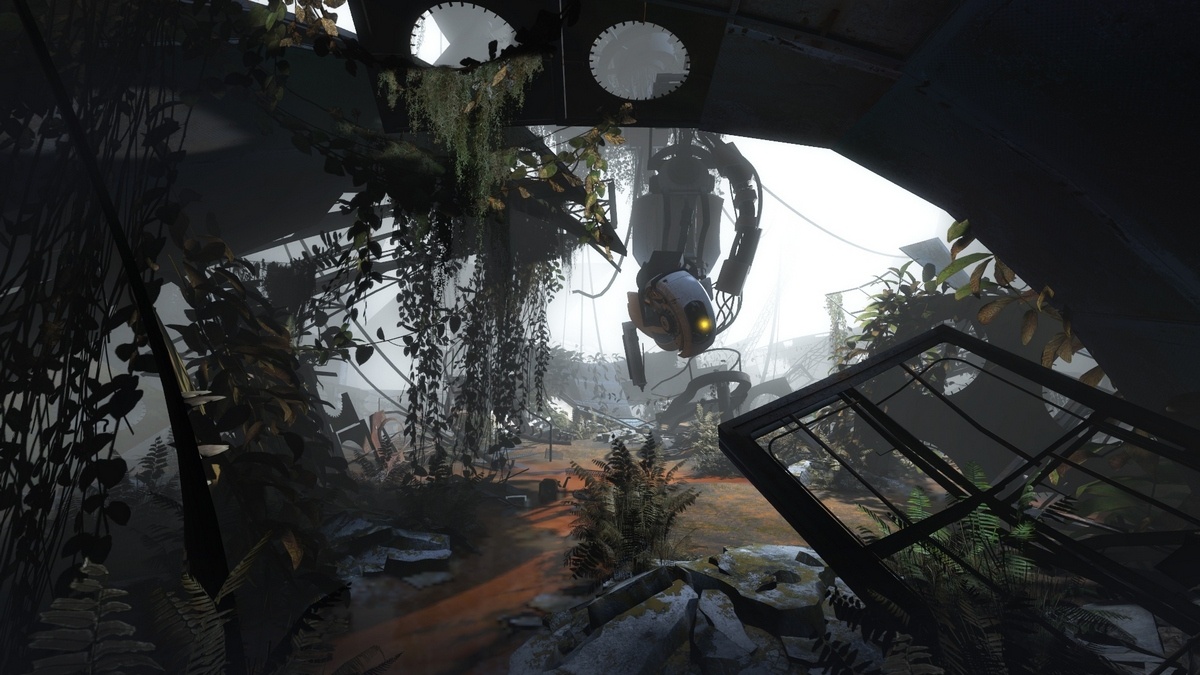
Wheatley is right. With a soothing piano concerto egging you on in the background, you and Wheatley venture aboveground through the broken remains of GlaDOS' shell, scattered in the overgrown garden of the Aperture compound. It's really quite a mess, and of course you've seen it all before--having caused it--so you'd really like to leave now, but you can't, because you suddenly spot Wheatley, who is yapping away nervously at a nearby terminal, trying to find an escape pod, and by the time you realize what he's doing, it's too late to stop him. GlaDOS is awake, reassembling herself with incredible ease, and before Wheatley can elaborate on his "Plan B" (which seems to involve staying still and not making eye contact), GlaDOS spots you.
"Oh," she says, in her deadpan way. "It's you." Wheatley hardly even has time to stop his nervous chattering and ask why GlaDOS seems to know you before she scoops you up and says something about you really loving "The Test" if you went to all the trouble to wake her up. She drops you inside the incinerator room, and, with rather caustic impoliteness, demands that you relive the moment in which you so cruelly killed her. "But that's all in the past," she says after a while. "You and me, we have 60 years to put all this behind us." Sixty years? Did you hear right? So that's how GlaDOS plans to exact her revenge: by making you take The Test over and over for the rest of your life. No longer bothering to mask the viciousness in her voice, she gives you the dual portal gun and pushes you into the next chamber.
Chapter 2 begins, unsurprisingly, in a chamber that looks as difficult as it does deadly. GlaDOS, now back in control, has mastered her anger. Instead, she resorts to sarcastic references about her death and occasionally points out what a true monster you really are. The next few chambers involve a few of the new, trickier gameplay elements such as the lasers and the faith plates. The former have to be targeted towards a specific pad in the wall, which, once hit, will make something happen (that is, a cube will drop, a platform will be raised, and so on). It's almost always a matter of positioning portals in such a way as to reflect the lasers in the direction you want them to go. The latter, once stepped upon, propel you forward with great height and distance. You must use this time in the air to navigate your environment and position portals in the right spots in order to coordinate landing right through them. Since there's no sign of Wheatley, you're on your own for most of this part, interrupted only by GlaDOS' occasional insults ("smelly garbage" seems to be one of her favourites).
The first part of our hands-on demo ends here. The second part begins quite a long way into the game. From the very first moment, it's clear this isn't Aperture Science. You're in a huge, run-down warehouse space with bulging pipes and rusty stairwells abandoned long ago. There is no GlaDOS, or Wheatley. There are no signs showing you where to go, no door on the other side to cross to. You're completely on your own.
You enter a room and see posters and relics from a bygone era: ham radios, art-deco furniture, and faded posters. You see an Aperture Science logo, but this does not look like Aperture Science. You hear a male voice reminding soldiers not to leave their guns lying around. You gather that this too was some sort of testing facility. Your portal gun still works though, so you move through the empty rooms and rusted stairwells and eventually find some pipes, a level, and something called repulsion gel. Suddenly, the test chambers are back. They're not the white, scientific test chambers of Aperture Science; these walls are made of corrugated iron, and there are leaking roofs, exposed frameworks, and a general sense of misery. There are only two chambers to pass before the demo ends: both involve the mysterious repulsion gel, which lets you bounce very, very high, both vertically and horizontally.
The puzzles are tricky to solve--you now have to contend with multiple rooms, platforms, and a general lack of portal-friendly wall space. But just as you begin to feel you might know where this is all going, and what link this ramshackle place has to Aperture, and, more importantly, your escape, the screen goes black.
We're looking forward to seeing more of Portal 2 ahead of its release in April this year.
Got a news tip or want to contact us directly? Email news@gamespot.com
Join the conversation