Neverwinter Nights: Shadows of Undrentide Walkthrough
This guide will lead you from Master Drogan's humble farm all the way to a magical floating city in the sky, and show you everything to do in between.
Design by Katie Bush
While not quite as big as Neverwinter Nights, Shadows of Undrentide is still a huge mass of land covered with quests and critters. It's also really difficult at times. But don't fear. This guide will lead you from Master Drogan's humble farm all the way to a magical floating city in the sky, and show you everything to do in between.
Inside you'll find:
- General strategies for successful adventuring.
- Complete solutions for every quest.
- Detailed walk-throughs for every dungeon, cave, and tomb in the game.
- Maps for almost every location you'll visit.
Table of Contents
General TipsChapter One Walk-through
Hilltop West
Hilltop East
Hilltop Foothills
The Elven Crypt
The Nether Mountains and Kobold Cave
High Forest
The Gnoll Cave
The Underground Ruins
Blumberg
Oasis of the Green Palm
The Tomb of Kel-Garas
The Tomb of Kel-Garas: Inner Catacombs
Ao Encampment
Excavated Ruins
The Formian Hive
North, East, and West Fragments
The Great Library and the Temple
The Crypt Tower
The Arcanist's Tower
The Temple of the Winds
Unique Items
Prestige Classes
General Tips
What Is All This Nonsense?
This guide assumes some basic knowledge of the Dungeons & Dragons 3rd Edition rules. Some of the terminology used may seem foreign to someone who hasn't spent many late nights rolling 20-sided dice and eating slice after slice of stale pizza. So here's a very, very basic tutorial regarding some of the terms used in this guide.
Dungeons & Dragons uses dice. Neverwinter Nights: Shadows of Undrentide uses simulated dice. The common notation for dice in D&D is XdY, where X is the number of dice, and Y is the type of die rolled. So, if a dagger does 1d4 cold damage, Shadows of Undrentide simulates rolling one four-sided die.
Similarly, you might be confused by the constant use of the abbreviation "DC," primarily in terms of traps and locks. DC stands for "difficulty class." When you roll the dice and attempt to disarm a trap, for instance, the DC is the number you must roll (in addition to any modifiers) to disable the trap.
You don't actually need to know the rules of D&D to enjoy the game. BioWare have been kind enough to put all that in the background. But it can't hurt to familiarize yourself with them at some basic level, especially when creating a character.
Necessary and Suggested skills
Speaking of creating a character, there are certain skills that you should probably consider more than others. While each class has some good skills to choose, there are a few that are key for everyone.
Persuade
You'll do a lot of talking in Shadows of Undrentide. Talking will occasionally help you avoid fighting, and it will sometimes be the only way to solve a quest. The persuade skill helps immensely with this. It can be prohibitively expensive if it isn't one of your class skills, though, so as an alternate you can boost your charisma with potions of eagle's splendor for those times when a silver tongue is more important than a bloody blade.
Open Lock/Disable Trap
Traps and locks. They are everywhere, and they need to be dealt with. Rogues get enough skill points that they can become masters of the art of jimmying and disabling fairly quickly. But what about the poor fighter? What about the mage? If you don't want to pour all your points into rogue skills, just take one with you: Dorna Trapspringer will be the henchman you want. Mages can also just cast direct damage spells--a well-placed fireball will demolish a chest or a weak door, lock, trap, and all.
Animal Empathy
While it is nowhere near as important as the previous two, animal empathy will allow you to engage in some otherwise unavailable tasks in the first chapter of Shadows of Undrentide.
Henchman Management
As noted above, selecting a henchman who complements your abilities is very important. In the first chapter, your only choices are Xanos and Dorna. Beginning with the interlude, you'll also be able to select Deekin the kobold bard. Dorna is a good choice for almost anyone--she has healing skills and is a good rogue. But Xanos is a good choice for tanks who want a little magic to back them up.
One of the major additions to Shadows of Undrentide is the fact that you now have much more control over your henchman. Primarily, you can choose what equipment they will use. This is incredibly handy, often allowing you to make your henchman just as powerful as yourself, rather than just a secondary support unit. Make sure you remember to constantly give potions and equipment to your henchman. Unfortunately, the henchmen aren't very smart about managing their enhancement potions, so dole them out carefully. There's no reason for them to waste perfectly good potions to fight a single kobold (and, rest assured, they will).
Difficulty
One of the other significant differences between Neverwinter Nights and Shadows of Undrentide is the difficulty. There are some fights that are just ridiculously hard, and you'll no doubt wonder if you missed some huge section of the game, and as a result a few levels, when you face some of the challenges in store. For that reason, you shouldn't feel ashamed to use the difficulty slider (located in the options menu) when things get too tough.
When you find yourself in over your head, though, there is one fighting technique that always works. When facing multiple strong enemies, try to lure them one by one into a hallway and then shut the door behind them. You can weed them and balance the playing field a little. And you'll feel better for not having to set the game to "easy."
The Tab Key
Tired of running the mouse over every single barrel and crate to see if you can even open it? Don't forget to use the Tab key often. It will highlight everything onscreen you can interact with, allowing you to quickly scan a room and see where the treasures might be hidden.
Walk-Through
Important note about this walk-though: When compass directions are given, they refer to the map provided, with north being the top. These may be different within the game itself.
Chapter One
Drogan's Farm
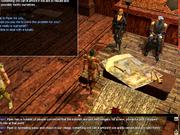
Drogan, your mentor, is being attacked. Your fellow students are rushing to his aid, and you should follow suit. Before doing so, however, you may want to grab the items from the footlocker near your bed. Most importantly, get Mystra's hand. Head down the stairs.
Help the others kill the kobolds that have invaded. Once the room is safe, speak with Ayala. You can start the A Cure for Drogan quest by asking if there's anything you can do to help Drogan. After the conversation is finished, choose your henchman. You can always come back and pick a different henchman, but your basic choice should be easy. If you don't have, and aren't planning to acquire, thieving skills, you absolutely want the rogue/cleric Dorna Trapspringer. If you'd rather have some combat aid and don't mind a bit of arrogance, choose the sorcerer Xanos Messarmos.
A note on henchmen: Henchmen work a bit differently in Shadows of Undrentide than they did in the original Neverwinter Nights. Primarily, you now have control over their equipment. As you find items that might make your henchman more powerful, speak with them and choose "I want to change your tactics." Then choose "I want to adjust your equipment." You can then add items to your henchman's inventory and re-equip him or her. Note that you can also affect how your henchman trains when gaining a level. Speak to your henchman and choose "I want to discuss your training." You can then set some simply guidelines for how he or she will advance.
Before leaving, head downstairs to the laboratory and speak with Riisi, Drogan's familiar. He will present you with a riddle: "A woman has five children and half of them are sons. Is this possible?" The answer is "Yes." Riisi will tell you about the kobolds and how they gained entrance to the laboratory. Note that during the conversation, you can try to persuade Riisi to tell you how to get past the barrier, but even if you make a successful persuade check, he won't tell you. You can, however, persuade Riisi to give you some items. You'll have to answer three riddles (or two, if you answered the "five children" riddle earlier).
Riisi's first riddle is: "How many nines you use to count to one hundred?" The answer is "20." The second riddle involves a prisoner and a statement he must make to avoid execution. The answer is "I will be hanged." The final riddle involves wizards and fruit trees. The answer is "six." Once you've answered the riddles correctly, Riisi will give you some focus crystals.

There's one more thing to do before leaving the farm. Head upstairs to the apprentice quarters. If you haven't retrieved Mystra's hand from your footlocker, do it now. Head into Drogan's workshop, located through the door at the east end of the hall. You can't open the glowing chest, ever. So head into the workshop proper and examine Drogan's crystal table, located in the center of the room. This will teach you how to make focus crystals, and you can do so if you have the proper ingredients. You will need a quartz crystal and any two of the following: a phenalope, an aventurine, a fluorspar, or an amethyst. Put the materials in the grinder to make a focus crystal.
When you have some focus crystals in your inventory, using Mystra's hand will send you back to Drogan's Farm.
Quest: The Missing Artifacts
This is the primary quest for Chapter One. It requires you to find the mummified hand, the tower statue, the dragon's tooth, and the mask, each listed as a quest itself.
Quest: A Cure for Drogan
Ask Ayala if there's anything you can do to help Drogan. She will tell you to get a tressym tongue, some charcoal, and some helmthorn berries from the herbalist in Hilltop. When you do visit the herbalist, he'll have two of the required herbs. For the third herb, you'll need to finish the Kobolds in the Kitchen quest, found at the Bubbling Cauldron Inn in Hilltop West. Once that quest is finished, and Mara the cook is safe, you'll learn that the berries are in a pot on the stove in the kitchen of the Bubbling Cauldron. Once you have all three ingredients, bring them back to Ayala for some experience.
Hilltop West
A. Drogan's Farm
B. Drogan's Barn
C. Toman Bross' House/Szaren's Shop
D. Chicken Coop
E. The Smith
F. Herbalist
G. Community Hall
H. The Bubbling Cauldron
I. Piper's Congregation
J. To Hilltop East
As you leave Drogan's farm, you'll see a barn nearby, as well as some tracks leading into it. Characters with tracking skills (druids, rangers, and barbarians) and characters with high intelligence will determine that they are kobold tracks. Head into the barn and kill the two kobolds inside.
If you have the animal empathy skill, speak with any of the dogs running around the area. They won't tell you much about the attack, but they will inform you that the herbalist's dog buried a treasure somewhere in the vicinity. Likewise, druids and rangers can speak with the chickens in the coop and learn that there's a gem in the nearby water trough.
The Smith
For now, there isn't much to do at the smith, unless you just want to buy supplies. Fiona, the smith, is just a merchant, and a merchant with a terrible sense of humor at that.
However, later in the chapter you can return to Fiona for different, alternate outcomes for two quests. Rescue Glendir and Horns of the Shadow Hart can both yield minor loot if you return to Fiona and speak with her before solving them. See the appropriate areas for those quests (gnoll caves and Hilltop Foothills, respectively) for details. Fiona is also involved in one of the solutions to An Excess of Prophet, found at the community hall.
The Herbalist
Farghan the herbalist can give you two of the necessary herbs for the A Cure for Drogan quest, and he will tell you that Mara at the Bubbling Cauldron bought the rest of his helmthorn berries.
Druids and rangers can speak with Farghan's dog, Bethsheva. She knows very little about the kobold attacks, but if you've spoken with any of the stray dogs you can ask her about her treasure. A successful persuasion skill check will cause Bethsheva to reveal the location, which is a woodpile behind the smith. Search the woodpile after leaving the herbalist's house and you will find the Ring of the Wolf, a fairly powerful magic ring for low-level characters, which provides +2 to your animal empathy skill and can summon a wolf.
Community Hall
There are only a few things to do in the community hall. You can talk to Gilford, the exhausted priest of Ilmater. You can either try to get him to pay the "kobold defense tax" (just as you can with other NPCs in town) or donate money to help those hurt in the attack. The latter option will adjust your alignment toward good.
Talk to Haniah, standing near the inebriated mayor. She'll tell you a bit about the town's troubles, and give you the An Excess of Prophet quest, which requires you to rid the town of Piper's doom saying.
Quest: An Excess of Prophet
Exit the community hall and head east. Piper is standing near the hall, speaking to a large group of followers. There are several ways to deal with him. You can just kill him outright. Characters with decent persuasion skill can convince him to leave for Silverymoon or Neverwinter, but you will need to pay him one or 10 gold pieces (depending, again, on a persuasion check) to leave. Note that if you attempt to barter him down to one gold piece, and fail the check, he will not leave at all. If you choose Waterdeep as the suggested relocation city, you will not need to pay him at all.
You can also get him to leave by asking him if he had anything to do with Hol's death. After he admits to having defiled the corpse, his followers will become disgusted and leave.
Finally, you can get Piper to stop his doom saying by retrieving his sword from Fiona. Follow the conversation thread that begins "There is need for you in the village, but you go about it all wrong," and he will ask you to retrieve his sword. Go to the smith and speak with Fiona, who will give you the sword. Return to Piper and give him the sword, and he will leave to join the guards.
The Bubbling Cauldron
When you enter the tavern, the locals have trapped a group of kobolds in the kitchen. Unfortunately, the kobolds have taken the cook, Mara, hostage. Talk to Lodar the tavernmaster to start the Kobolds in the Kitchen quest. Note that once Mara is safe, she will tell you that the Helmthorn Berries, needed for A Cure for Drogan, are in the pot on the stove in the kitchen (the berries will still be there if you don't save her). Once the kitchen is clear, remember to grab them.
Quest: Kobolds in the Kitchen
Again, there are several ways to solve this. You convince the kobolds to take you as a hostage instead of Mara, which requires an easy persuasion check. You can then let them go, convince them to leave, and ambush them, or just attack them yourself in the kitchen. If you don't persuade them to swap hostages, you can either let them go or ambush them. Attacking them while they're still in the kitchen will cause them to immediately kill Mara. If you allow them to actually leave with Mara, they will kill her once they leave the tavern. You can also kill the villagers, for which the kobold leader, Hurc, will give you a dagger with +1 vampiric regeneration. Note that if you allow Hurc to leave the tavern, he will help you later.
Toman Bross' House
You can break into Toman's house, but he doesn't have much to say. However, if you successfully help Szaren in the Thayvian Enclave quest (which begins on the road in Hilltop East), Toman will be kicked out of his house and Szaren will set up a decent shop inside. The benefit of this shop, other than its low-level magic items, is that Szaren will give you a much better deal than Fiona.
Hilltop East
A. To Hilltop West
B. Halfling Caravan
C. The Fortune-Teller's Caravan
D. Old Farm
E. Szaren
F. Blake House
G. To Hilltop Foothills
The eastern section of Hilltop is a huge swath of land occupied by exactly two houses--and one of them is abandoned. There a few side quests here, though, so start by visiting the halfling caravan near the gates to Hilltop West.
The Halfling Caravan
Speak to Katriana, who will tell you that the caravan's fortune-teller, Daschnaya, has had her cards stolen by kobolds. Ask Torias, "Does this caravan sell anything?" He will show you his black-market goods, which include some decent low-level magic items.
Quest: Not Playing With a Full Deck
Katriana will tell you to speak with Torias about the kobolds. Do so. He will inform you that they fled to the north. There's an abandoned farm through a small gate to the north. Go there, and enter the farmhouse. You'll see some tracks heading down to the cellar. In the cellar, you'll find a group of kobolds. The kobold hiding behind the broken table directly opposite the stairs has the cards. Kill the kobolds, grab the cards, and return to Katriana. She will give you a key to the fortune-teller's caravan. Enter the caravan and return the cards to Daschnaya. You can receive some gold or a free reading as your reward.

Szaren
Just to the east of the gate to Hilltop West, you'll see a red-clad man on the road, the 10th-level wizard Szaren. Speak to him to learn about the red wizards of Thay, and to possibly help him set up an enclave in Hilltop.
Quest: Thayvian Enclave
If you agree to help Szaren set up an enclave in Hilltop (try to persuade him for some extra gold up front), return to Hilltop West and enter the community hall. Speak with Haniah. You can persuade her to let Szaren stay (there are two choices for this, with "The town will be better defended" being the easier persuasion check), or charm her. You can also threaten to kill the mayor if she does not comply, and then actually kill the mayor if your intimidation doesn't work. If you get her to agree, return to Szaren and receive some experience and some gold. He will then set up shop in Toman Bross' house. Note that you can also agree to make him leave. Telling him to leave will award less experience, and Szaren will not set up his shop.
Blake House
As you approach this house, Nora Blake will run up and ask you to save her family.
Quest: Rescue My Family
Enter the Blake home and kill the kobold waiting in ambush. If you do it quickly, Adam Blake will survive. Head upstairs and speak to the kobold footpad in the nursery. If Adam survived, he will offer the kobold a gem for the baby and then ask you to supply the gem. Give him a cheap gem or snatch the baby when prompted. Bards can also play a song to distract the kobold. Note that if you attack the kobold before you have the baby, the baby will be killed. Return the baby to Adam or, if Adam is dead, take it outside to Nora. Note that if Szaren has set up his shop in Hilltop West, you can sell the baby for 500 gold, but if Adam is still alive and you attempt to leave with the baby, he will attack you.
Hilltop Foothills
A. To Hilltop East
B. Ferran Valiantheart
C. Elven Crypt
D. Wounded Bear
E. Hurst Farm
F. Rumgut's Cave
G. To the Nether Mountains
H. To Blumberg
I. To the High Forest
Now the primary quest starts in earnest. Notice the remnants of a large battle--gnoll and kobold corpses abound.
The Wounded Bear
Through a passageway near Ferran, you'll come across a brown bear. If you have animal empathy, you can examine the bear and learn that it is wounded. Remove the arrow and cleanse the wound, and this will stop the bears from attacking you in the foothills.
Hurst Farm
Nathan Hurst will tell you that his daughter, Becka, has been kidnapped by Rumgut, a hill giant who lives to the west.

Quest: Rumgut Needs a Wife
Rumgut is a level-12 giant--you probably won't be able to fight him at this point. There are a few ways to save Becka, though. First, you can persuade Rumgut that Becka will never get any bigger. Secondly, you can challenge Rumgut to a drinking contest. If you have a high constitution, you can actually drink the alcohol. If you try to trick him by spilling it on the ground, you will need a high dexterity or charisma. If you win the contest, Rumgut will fall asleep--allowing you to grab the key to Becka's cage (and also his gloves of +3 concentration). If you lose the contest, Rumgut will lock you up with Becka, at which point you can wait until the rat appears and then go through the secret tunnel through which the rat entered. Return to Nathan, and he will give you an amulet of natural armor +1.
Ferran Valiantheart
To clarify the situation, speak with Ferran Valiantheart, an arcane archer camped out near the first hill you'll ascend. Ferran will tell you about the Elven Crypt to the south (if you're elven, or have a good persuade skill, he'll tell you some of the history surrounding the crypt) and about the gnolls that ambushed the kobolds as they fled from Hilltop. Ferran will also tell you about the shadow hart, and how he needs its horns to make medicine for his ailing wife.

Quest: Horns of the Shadow Hart
The shadow hart can appear in several different locations in the foothills. After you begin spotting its tracks, it will eventually appear. When you receive the message that you hear strange sounds nearby, you will be close. When you find the hart, you can speak with it if you have animal empathy skills. If you tell it to leave, your alignment will shift to good. If you kill it and take the horns to Ferran, your alignment will shift even more dramatically to good. Beware that when you attack it, it will attempt to teleport away--it's best just to try and kill it quickly so you don't have to run after it. If you take the horns to Ferran, you can convince him to give you his longbow, which provides +2 for spot skill and +1 for your attack rating. Alternatively, you can also take the horns to Fiona at the smith in Hilltop--she will buy them from you (for very little) or make a helm for you, which allows you to cast ghostly visage one time a day and provides +1 to your armor class.
Quest: Fled Into the Crypt
Once Ferran has told you about the crypt, this quest will begin. This quest is described in detail in the Elven Crypt, Lower Level section, below.
The Elven Crypt, Upper Level
Read the marker at the entrance--it's a warning. Looting the graves in the crypt will cause you to be attacked by the undead and will shift your alignment to evil. If you are an elf or a half-elf, or if you have a decent lore skill, you can read the scribed pillar in the center of the second room, which will tell you the history of the crypt. The room to the east cannot be entered yet (see The Elven Test section, below, for details), so proceed down the stairs to the lower level.
The Elven Crypt, Lower Level
A. Nimaldor's Tomb
B. Spider-Infested Tomb
C. The Elven Warrior's Spirit
D. Kobold Archer Ambush
E. Kobold Hideout
F. Secret Door
G. Trap Mechanism
Kill the kobolds in the hallway, then head into the first passage to the west. Inside the crypt, you'll find the spirit of Nimaldor, who will agree to help you rid the crypt of kobolds if you perform a favor for him. This begins the Spider Infestation quest. You can also choose to kill Nimaldor, and if you attempt to open his sarcophagus he will attack you (Nimaldor is a level-five undead). Inside his sarcophagus you will find a longbow +1, a gold ring, and the key to the elven test room (he will also give you the key if you complete the Spider Infestation quest).
Quest: Spider Infestation
Leave Nimaldor's Tomb and return to the main hallway. The next westward passage leads to a crypt full of spiders. Kill them all, and destroy the egg sacs. Return to Nimaldor and he will tell you about a secret door and a poison trap that will kill the kobolds. Nimaldor will also give you the key to open the eastern passage on the upper level, which begins the Elven Test quest.
Quest: The Elven Test
The blue line marks the safe path to the center. The red line marks the safe path back.
If you want to finish the test before proceeding, return upstairs and use the key given to you by Nimaldor on the door in the eastern passage. Look at the lights shining on the tiles. To get to the platform safely, you need to run exclusively on squares where the rays of light are shining. Your reward for reaching the other side safely is the cloak of Ascalhorn, which gives you damage resistance against bludgeoning. Before grabbing the cloak, however, note the squares without lights. That is the safe path back. (You can put the cloak back and the lights will return if you need to see the path again). Once you have the cloak, return to the lower level.
Quest: The Lost Sword
Continue down the passageway. You'll be fighting undead along the way. In the western passage at the far end, you will find three tombs. The easternmost of these contains the spirit of an elven warrior who will ask you to find his stolen sword. The sword is located in a room in the eastern passage of the crypt, on some skeletal remains. Note that a spike trap is situated just below the remains. Return the sword to the spirit, and you'll be rewarded with your choice of a single item from his meager chest.
Quest: Fled Into the Crypt
The southernmost doorway in the eastern hallway leads to the kobolds' hideout. Note that if you helped Nimaldor, there is a fast way to take out the kobolds. Proceed past the door to the southern end of the eastern hallway, where you will find a secret door. Go through the door and flip the lever to activate the poison trap, then grab one of the elven trap protective helmets from the nearby chest (the weapons racks contain a +1 longbow and a scroll of ghostly visage). Return to the kobold hideout. You can easily talk your way through the door. Put away your weapon before entering or they will attack you.

Once inside, you have several choices. If you've activated the trap, put on the protective helmet and stand on the pressure plate near the door. Doing this immediately, however, will cause you to miss some important information. Before attacking the kobolds, talk to their leader, Urko. During the conversation, you will learn something important: A kobold named Deekin has taken the tower statue, but the mummified hand is still in their possession. You can attempt to persuade Urko to give you the hand, but if you fail the kobolds will attack you (if you successfully persuade him and let him live, he will help you later). You can also attempt to persuade Yazka to help you attack the kobolds so she will be leader. Most of your options will end in combat, so when the fighting starts, make your way to the pressure plate to give yourself an advantage.
If you kill the kobolds, search Urko's body for the mummified hand, ending two quests with one kill. Once you have the hand, use its special power--it will point you to the next artifact. Once you have the hand, leave the Elven Crypt.
Deekin
Return to the foothills and then make your way north to the Nether Mountains. Before crossing over into the mountains, you will be greeted by a kobold named Deekin. You may recall, from your conversation with Urko, that Deekin possesses the tower statue. He will tell you that if you can free him from his servitude, he will give you the statue.
The Nether Mountains
A. To Hilltop Foothills
B. Orc Cave
C. Kobold Cave
There isn't much to do here, other than head straight for the kobold cave. Along the way, you can stop in the orc cave to kill some orcs (including a level-one humanoid/level-four ranger orc chieftain) for loot and experience. Once you've cleaned out the orc caves, head into the kobold cave.
Kobold Cave
A. To Nether Mountains
B. Trapped Hallway
C. Trapped Chest
D. Door Puzzle
E. Kobold Commoners
F. Wolf Pen
G. Prison
H. Chief's Cavern
I. To Dragon Cave
The first section of the kobold caves is fairly straightforward. Just hack your way through, but beware--there are numerous traps in the winding hallway. You'll eventually come to a large cavern with four smaller caverns at the corners. In the center of this cavern is a chest. Don't bother opening it unless you want some minor experience. The chest is empty, and the doors will close, trapping you inside. You can pick the door locks and kill the kobolds that ambush you easily.
The Door Puzzle
You'll notice a large locked door at the northern end of the cavern. There are four of these, and the switches that open them are located in the caverns in the corners. Note that flipping a switch out of order will close all the doors. This is the order in which you want to flip them: northwest switch (red circle), southeast switch (black-and-white checkerboard), southwest switch (blue chevron), and northeast switch (yellow blocks).
The Prison
Once the door is open, proceed into the kobold common area. Along the way, you will be beset by wolves. Kill the wolves and then proceed into the prison. Kill the warden and take his key. Head into the southernmost cell and speak with Master Jumper Klumph. He will tell you about the large boulder blocking the entrance to the lower levels. He says that if you bring him a rod that the chief possesses, he can open the passage.
Quest: Blocked Passage
Head to Chief's Cavern. If you've let Hurc or Urko survive, Chief Arzig will speak with you. (However, he will not speak with you if you've only saved Nafeeli from the gnoll caves). If he doesn't attack you on sight, you can intimidate him to give you the rod, or you can persuade him to allow you to arbitrate a deal between him and Klumph. Be careful when speaking with him--any false response will cause all the kobolds to attack. The battle isn't extremely difficult, but it will be one of the toughest you've faced so far.

If the chief agrees to the arbitration, bring Klumph to Chief's Cavern. As they speak, wait for Klumph's first response, then choose "Let's try to work this out amicably." Next, choose "Klumph, have some respect for your chief." Choose "one month" as the frequency of Arzig's visits to the master, then ask Klumph if there is anything he wants. They will settle on a deal, and ask you to meet them at the big rock. Head into the southwest cavern and watch the surreal door mechanism in action. Once the boulder is moved, head down to the dragon cave.
Dragon Cave
Immediately upon entering the cave, you will be attacked by "The Freezer," Klonk--probably the toughest foe you've fought yet (unless you attacked Rumgut, that is). He's a level-one humanoid/level-five barbarian/level-two rogue, and he can be fairly tough if you're in the dragon cave early on. Luckily, there's an easy way to kill not only Klonk, but also the numerous hostile kobolds and ice hounds in the cave.

Just walk over to the ox pen, open the gate, and stand back. The stampede will kill everything in sight. Once the cavern is clear, head to the north cave, where Tymofarrar awaits.
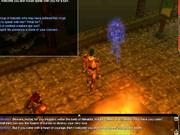
Tymofarrar
Your conversation with Tymofarrar will be lengthy and involved. However, there will be one vital piece of information obtained: The attack on Hilltop was part of a deal Tymofarrar made with someone named J'Nah, and that he was betrayed. Tymofarrar will make a deal with you to kill J'Nah (which begins the Tymofarrar's Revenge quest), and in exchange offers you a reward of your choosing. If you ask him how you can trust him, he will give you his oath, and this will come in handy later. Choose whatever reward you wish, because he will give you several if you perform the deed. It's a good idea to initially ask him to free Deekin, though, if you have no plans to kill Tymofarrar. Otherwise, you will have to buy the kobold's freedom. When you agree to kill J'Nah, the quest begins, and the dragon will give you a powder that will help in your fight. Once the deal is done, Tymofarrar will show you a shortcut out of the caves. Leave, and head to the High Forest.
Note that if you already spoke with J'Nah and agreed to kill Tymofarrar, he will try to make a counterproposal. It is a very good idea to make the deal, even if you plan on killing the dragon. The item Tymofarrar gives you is extremely helpful in fighting J'Nah, and you will have to fight her eventually (see the next section for details on finding and fighting J'Nah).

If J'Nah is dead, return to Tymofarrar and tell him the news. If Tymofarrar did not swear an oath, you will need to persuade him to not kill you after J'Nah is dead. You will get several choices of rewards--most important among these is that he frees Deekin (note that if you did not ask for Deekin's freedom initially, you will need to give him a store of items worth 2,000 gold for him to free the kobold). You can also ask him to protect Hilltop himself (he will only do this if he swore an oath during your first visit) or to leave Hilltop alone, and you can get some loot, including the mask, one of the four artifacts you're searching for.
Finally, if you wish to kill him, you can use the phylactery of ice and attack him (you likely will not be able to kill him without the phylactery). Even in the frost-giant form the battle is fairly tough, but it is winnable. Once the dragon is dead, grab his head and the mask, and loot his treasure. Now return to J'Nah, or go find Deekin, if J'Nah is already dead.
High Forest
A. To Hilltop Foothills
B. Bandit Camp
C. Bandit Cave
D. Hermit's House
E. Tomb
F. Wyrmling Cave
G. Gnoll Cave
In the center of the forest, you'll come upon a small group of bandits, who will be talking about taking something back to the cave. Kill them, then head to the cave they were speaking of, noted on the map.
The Bandit Cave

There are a handful of fairly tough bandits in here, as well as plenty of traps. Kill everyone, then search the chests in the northeast corner. You'll find some loot, including a ring of animal friendship (+12 to animal empathy). More interestingly, though, you'll find Garg's book and a silver key. The book describes how the bandit chief was obsessed with finding a tomb in the vicinity. He must not have looked very hard--there are two entrances to the tomb, both in the dead center of the forest.
The Hermit's House
The hermit is a strange man who talks in circles. You can buy items from him, as well as sell him some exotic items. He also has a box that can recharge magic items.

The Tomb
The northern entrance is guarded by bugbears, the southern by a group of wild animals, all fighting among themselves. Use the key to open the door to the tomb, then get ready for your toughest fight yet. The main opponent is a mummy--a level-six undead with an aura of fear. In addition, there are numerous skeleton warriors guarding him. Throw everything you have at the undead guardians. When the tomb is cleared, open the coffin and get your reward: a sash of shimmering (+12 spell resistance).
The Wyrmling Cave
This cavern is filled with wyrmling white dragons and wyrmling red dragons. Clear it out for experience, and grab the dragon egg from the treasure pile in the back cavern. You can sell it to various merchants, including the hermit and Szaren.
Deekin
If you are visiting the High Forest before the Nether Mountains, you will be greeted by the kobold Deekin before crossing over into the mountains,. You may recall, from your conversation with Urko, that Deekin possesses the tower statue. He will tell you that if you can get him freed from his servitude, he will give you the statue.
The Gnoll Cave
A. To the High Forest
B. Kobold Cells
C. Slave Pen
D. Glendir
E. Beastmaster
F. Chief's Cavern
G. Chief's Treasure Room
H. To Underground Ruins
Fight your way through the caves to the four cells in the western area. The northeastern cell contains several captured kobolds.
Quest: The Kobold Prisoners
The warden is not too tough, and you'll need to kill him for his key. Open the cells and talk to Nafeeli. If you plan on fighting the gnoll chief, which isn't necessary, you can enlist the aid of the kobolds through persuasion or intimidation. Otherwise, you can just let them go or kill them. Continue fighting through the caves to the slave pen.

Quest: The Gnoll Slaves
This quest is over almost as soon as it begins. Kill the gnolls guarding the slave pen and then open the gate. Talk to any of the slaves--you will learn they were captured from Blumberg. If you decide to free the slaves, you must clear a path to the exit for them. You also choose where they go: Silverymoon or Hilltop. Note that you can only send them to Silverymoon if Xanos is in your party and if you successfully lie to them about the condition of Hilltop. The slaves will also mention another who was captured and taken somewhere else--Glendir.

Quest: Rescue Glendir
Glendir is a half-orc imprisoned in a single cell in the eastern section of the caves. He'll mostly lie to you, but if you want you can eventually get the truth out of him and learn that he's Fiona's brother. You can also get a promissory note from him. Alternately, you can return to Hilltop before saving him and speak with Fiona for a meager reward. But the 200 gold she'll pay you may not be worth the trip. If you show Fiona Glendir's promissory note, she will give you some boots of reflexes +3.
The Beastmaster
The beastmaster isn't too tough--he's only level three. In his pen, however, he has three angry black bears. Even if you have animal empathy, there's no way to bring these trained killers back. But if you do speak with them, you'll learn that they want to be put out of their misery. Do so, and your alignment will shift toward good.

The Chief's Cavern
The gnoll chief, Gishnak, is slightly more reasonable than the kobold chief. But, again, you must watch your responses or the whole room will attack you. If you hurt the chief badly, he will surrender, at which point you can act as chieftain. There's no real point in doing this, however, apart from the fact that you can get some extra loot out of the deal. You want to make a deal with Gishnak and convince him that you intend to kill J'Nah--he will offer the services of his gnoll soldiers when the time comes, but in exchange you must kill no more gnolls and not steal anything from them.
This last demand won't be enforced. After talking to Gishnak, head into his treasure room and loot it dry. Then head down into the underground ruins.
The Underground Ruins
A. Rope to Gnoll Cave
B. Magical Pool
C. Elemental Pedestal
D. Water Elemental
E. Fire Elemental
F. Earth Elemental
G. Air Elemental
At the bottom of the rope, you will find yourself in a strange room--there are four pedestals, a magic pool, a level, and some goblin bones. Search the bones for a note that will give you a clue to navigating the treacherous hallways.
The pool is of no use to you yet, so pull the lever. Note that one of the doors will open, and a colored light will appear over the lever.
The Hallways
This light represents which path is now safe. For instance, if the light is blue, you can walk down the water hallways without being harmed.
Go through the appropriately colored door. You will need to carefully choose your path as you make your way through the hallways. Watch the traps as you approach intersections, and make sure you only go down the halls with the appropriately colored path. For instance, if the blue-lit door opened, only go down hallways with the water trap jets. They won't hurt you.
The Elemental Pedestals
Each hallway has an elemental pedestal. Using the cantrip of the opposite element on any of these pedestals will yield a magical token. Note, however, that you can only do this once, and as soon as you receive one token the other pedestals will become inactive. Here are the pedestals and the cantrip to cast:
Waters of Wisdom: Flare
Fires of Knowledge: Ray of Frost
Column of Air: Acid Splash
Shower of Earth: Electric Jolt
The Elementals
The elemental battles are tough. Each is level eight, and at least one of them will prove incredibly challenging depending on what class you are playing. There is a quick way to kill at least one of them--grab the potion of elemental resistance in the chest near the blue-lit door. Take the potion while fighting an element, and have it chase you into a hallway that is not currently safe. They'll be killed by the trap pretty quickly. Make sure you rest up (and teleport back to Hilltop for supplies if needed) between battles.
Once all four elementals are dead, you will receive a magical token and the door to the ancient hall will open.
The Magical Pool
Before heading into J'Nah's lair, examine the magical pool in the main area. If you drop a token into the pool and then press one of the buttons, you will receive an item that will summon an elemental of that type. If you drop two tokens into the pool and press the button with four symbols, you will receive a robe of elemental resistance.
J'Nah
J'Nah is a strange-looking elf. You might not want to know too much about her background at this point. If J'Nah reveals her origins, she will immediately attack you. Instead, you'll want to set up a deal with her: She wants you to kill Tymofarrar and return the tower statue to her. This begins the J'Nah's Request quest. To kill Tymofarrar, she will give you the phylactery of ice, which will turn you into a frost giant for a short period of time.
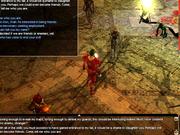
Note that there is no way to avoid fighting J'Nah. Even if you kill Tymofarrar, she will attack you. Eventually, you will have to kill her. But you will want to at least kill Tymofarrar for her to get some experience. Conversely, you can kill her and receive experience from Tymofarrar. But why not just kill them both? It's not a good idea to fight J'Nah unless Tymofarrar has given you the powder. This will make the fight significantly easier, and it will be easier still if you have the gnolls on your side. J'Nah is a 12th-level sorcerer, and Quemozeng, her quasit associate, is a third-level outsider. The hellhound in the room is fourth level, and her guards are third-level fighters. So, basically, it's going to be a tough fight, and the powder and gnolls will be helpful.
Once she is dead, grab the dragon's tooth, loot the hall, and leave the gnoll caves.
At this point, you can head to Blumberg (which is totally unnecessary) or return to Hilltop.
Blumberg
A. To Hilltop Foothills
B. Dying Man
C. Deekin's Shop
As you enter Blumberg, a dying man will approach you and say that the town has been overrun by gnolls. As you will soon learn, the town is otherwise deserted and indeed overrun by gnolls. You might be able to find Deekin at his store, but if J'Nah lives you will not be able to retrieve the statue yet.
Basically, kill all the gnolls in the area for experience, then leave. There is very little to see here.
Chapter One Conclusion
If J'Nah is dead, and Tymofarrar is either dead or has agreed to release Deekin from his servitude, Deekin will find you. He will appear near the exit leading from the Hilltop Foothills to Hilltop East, and if you have his doll or Tymofarrar's head, he will give you the tower statue.
With the artifacts in hand, return to Drogan's farm. Master Drogan will be revived, and you can proceed to the interlude. Stock up on any items you need before proceeding (you will have to keep the tower statue, but you can sell the other three artifacts if you want--you will lose them at the chapter's end).
Interlude
Caravan Camp
You have set off with Katriana's caravan, which is en route to an encampment where a friend of Drogan's, Garrick Halassar, was last seen. Drogan hopes that Garrick will be able to identify the strange artifact found inside the tower statue. Thus begins the Identifying the Crystal quest.
At the beginning of the interlude, the caravan is attacked by stingers. Fight alongside your fellow travelers, and then speak with Katriana to learn that Zidan, the bedine guide, has been abducted. Note that you can now choose a new henchman: Deekin the kobold, who is a bard/healer.
Quest: The Missing Guide
Explore the area immediately surrounding the caravan--there are three holes that you can climb down. Climbing down will require a dexterity check, and if you fail you will fall and sustain some damage. You will find yourself in a cavern with four tunnels extending in the cardinal directions. Three of these lead back to the surface. The fourth leads into the stinger caves.
The Stinger Caves
A. To SurfaceB. Manticore Arena
C. Treasure Room
D. To Stinger Temple
The caves are basically a straightforward hack-and-slash fest. As you enter, four stingers will appear from underground and attack. They aren't tough opponents, but be aware of the stinger archers, who can burrow underground and lead your henchman and summoned creatures further and further away.
The Manticore Arena
The center area of the caves is actually a huge trap. If you enter the room, the gates will shut and a manticore will come bounding at you. Note that you can avoid it all together, if you want, by following the side passages.

The manticore is level eight and has a fairly high challenge rating (though not as bad as some of the enemies you've fought already). It can also shoot spikes. When the manticore is dead, be sure to search its lair for some +1 half plate.
The Treasure Room
In the center of this room are two acid traps, each with a DC of 36. Also in the center of the room are two chests and two weapons racks, each with low-level treasure. The good stuff is at the back of the room. Both of the chests are trapped (with DCs of 35), but opening them will yield a wand of lightning, an amulet of health, boots of elvenkind (which offer +2 to dexterity and +10 to the move silently skill), and the aurumvorax armor (light armor that gives you a +2 AC bonus and damage resistance against piercing and slashing weapons).

The Stinger Temple
In the temple you will face a handful of stingers, including the stinger high priest, a fourth-level humanoid/sixth-level cleric who can cast negative energy ray. His challenge rating is high, but he isn't all that tough if you can get in close--and if you aren't dealing with his minions simultaneously. Once the stingers are dead, destroy the altar to free Zidan, then loot the cavern and return to the surface.
Oasis of the Green Palm
A. Caravan
B. Bedine Camp
C. Catacomb of Al-Rashid
D. House of the Morninglord
E. To the Tomb of Kel-Garas
The caravan is low on water and cannot proceed. It's up to you to fetch water from the bedine, who have had an altercation with the caravan in the past. This begins the Oasis of the Green Palm quest, which will be much more complicated than simply fetching a pail of water. Proceed through the desert to the bedine camp.
The Bedine
The bedine are having a problem. Namely, a good majority have been turned into undeadine. Kill the zombies and speak with Ali Ibn-Musud. Ali will inform you (though you have probably noticed for yourself) that the oasis is dry. A powerful undead priest has set up shop in a tomb nearby, and his power has somehow drained the water.
Quest: The Rod of Blight
Ali informs you that to break the curse of the priest, you must retrieve the rod of blight from him and then place it on the altar to Lathander in the House of the Morninglord. He will also tell you the history of his people, and that a helpful artifact can be found in the catacomb of Al Rashid.
The Catacomb of Al Rashid
It isn't much of a catacomb--in fact, it's more of a "room." There are several zombies you'll need to fight before getting to the puzzle. Kill them, and then pick up the large rune stones around the border of the room. You need to place them on the pressure plates to form an "X" shape. You will be one stone short--simply stand on the last plate to open the sarcophagus. Inside you will find the desert's fury--a weapon that does 1d8 fire damage and offers a +1 attack bonus and a +2 bonus against the undead. The type of weapon it is will change depending on your character class--it will appear as a kama, a staff, a morning star, or a scimitar. Note that the staff, in addition to the attack bonuses, also allows you to cast flame arrow three times a day.
The House of the Morninglord
You don't have to go in here yet, but it's a good idea to clear out the zombies before you come back. Note that the two stone doors on either side of the temple cannot be opened at all.
With the desert's fury in hand, it's time to head into the Tomb of Kel-Garas.
The Tomb of Kel-Garas
A. To the Oasis of the Green Palm
B. Secret Doors
C. Priest Burial Room
D. Zombie Lord
E. Minotaur Trap
F. Rubble
G. Undead Monk
H. Secret Door
I. Fireball Trap
J. Tangle-Trap Room
K. Skeleton Blackguard
L. To the Inner Catacombs
The walkway leading out of the front room is a tough undead--you have skeletal archers on either side of the chamber attacking you as you cross. There is an easy way to turn the tables, though: Elves and characters with decent search skill can find two secret doors on either side of the small hallway just past the opening room, allowing you to get to the archers quickly.

Priest Burial Room
The priest burial room contains four coffins, each with some decent treasure. However, you'll need to fight several mummies to get to it. Inside the coffins you will find, among other less significant items, a monk's belt (a monk-only item that adds the improved critical feat and weapon specialization to unarmed strikes and allows you to cast haste once a day), gloves of the long death +3 (a monk-only item that adds three points to your attack bonus, as well as two points of cold damage), and a helmet of discharge (which adds 25 points to your electrical resistance).
The Zombie Lord
In the chamber on the opposite side of the room, you'll fight a zombie lord, a seventh-level undead fighter. He shouldn't be too tough to beat. Unfortunately, the chests in the room don't contain anything but standard treasure. Once he's dead, though, loot his corpse for a lens of detection, which will allow you cast the find traps spell three times a day.
The Minotaur Trap
There's no way to avoid this room, unfortunately. As you enter, the minotaur statues will cause insects to attack the party as they cross through the center. Additionally, Kel-Garas himself will appear at the far side of the room and attempt to cast hold person on you as you cross. When you reach him and attack, though, he will disappear. Your biggest problem will be getting your henchman to cross safely, without stopping to attack the indestructible statues--if your henchman keeps dying in the room, change the attack settings so that he or she doesn't attack..
The Undead Monk
In the hallway opposite the minotaur room, you'll see a pile of rubble. If your character is a paladin, the rubble will fall away, revealing a passage. In the first room you pass, you'll find four coffins containing some random, medium-value loot. Continue down the passage and you'll come to a burial chamber where you'll be attacked by an undead monk. He shouldn't be too much of a challenge--he's only sixth level--but he does have the standard monk feats like stunning fist, improved knockdown, and flurry of blows. Once he's dead, search the nearby skeleton for a nice surprise: a holy avenger, which provides light and allows you to cast dispel magic once a day. Paladins rejoice.
The Fireball Trap
The fireballs shooting down the hallway, which are possibly the most annoying aspect of the game, can't be disabled. Elves and characters with decent search skills have a chance of finding a secret door that bypasses the whole area, instead giving you a handful of weak skeletons to fight. If the secret door isn't found, though, you'll have to traverse the hallway.
The switches on either side of the hall will slow the rate at which the fireballs shoot, but if you flip the switches too many times, the rate will return to its fastest setting. Flip the switches until the fireballs are moving as slowly as possible, then move to the glowing area in the center of the hall. Again, you must flip the switches to proceed. When you reach the other side, the trap will cease firing.
The Tangle-Trap Room
This room is full of traps and undead. And once you step in, Kel-Garas will appear again. Unfortunately, he will disappear before you can kill him. Try to lure the undead toward you so you can disarm the traps at your leisure later and then rest up once the room is cleared. The next fight may be the most difficult yet.

The Skeleton Blackguard
Rest up, and make sure you learn the most powerful offensive and defensive spells you have. If you have items that will help you against the undead, all the better. Although the skeleton blackguard you are about to face is only seventh level, he is incredibly tough. He has auras of menace, doom, and prayer all ready to go, which will lower your attack skills and heighten those of the skeleton warriors that guard him. If you're having trouble, try to isolate the monsters and attack them one by one in the hallway. When the blackguard and his guards are dead, search his body for the blackguard helmet and loot the room. Rest up, and be wary of the traps blocking the stairs to the inner catacombs.
The Tomb of Kel-Garas: Inner Catacombs
A. Entrance
B. Statue of Jergal
C. Archer Statues
D. Secret Door
E. Kel-Garas
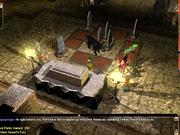
As you enter the inner catacombs, you will see a large statue of Jergal. Examining the statue will reveal two large rubies for eyes. If you take the rubies, the statue will come to life and attack. It is a 10th-level construct with a 25 strength rating and a moderate challenge rating.
The hallways leading to Kel-Garas are lined with statues of archers that will attack you as you pass. Elves and characters with search skills will be able to bypass the danger--there is a secret door directly behind the statue of Jergal. Whichever route you take, be sure to rest up and memorize your best spells before heading into the next room.

Kel-Garas waits near his tomb. This will be a tough fight. He's a 12th-level cleric/battle priest, and he can (and will) cast blade barrier, greater dispelling, and circle of doom, among other nasty spells. Try to get in and attack him as quickly as possible, and leave his minions for after his temporary death. Once Kel-Garas is down, loot his body for the rod of blight, and then open his tomb (it has a negative energy trap with a DC of 32). Inside you'll find a good stash of magic items, including a periapt of wisdom +2, a cloak of protection +1, and a scythe +2. The chests on either side of the tomb contain some gold, gems, and jewelry. Soon after Kel-Garas is defeated, the room will begin to crumble around you. Head for the exit, which will automatically return you to the oasis.
The House of the Morninglord, Revisited

You must take the rod of blight to the altar for Lathander located in the House of the Morninglord. As you approach the altar, Kel-Garas will appear. Paladins, druids, and good clerics will be attacked on sight. Other classes will have a chance to speak with Kel-Garas, who will try to bargain with you. His offer: Kill Ali instead, with a dagger he will provide, and he will give you a powerful item. The choice is yours--either you must fight Kel-Garas again, or attack Ali, a ninth-level ranger. If you attack Kel-Garas, you can quickly defeat him by placing the rod of blight into the altar. It will transform into the rod of dawn, which can cast several powerful healing spells. If you kill Ali instead, place the dagger in the altar, and it will be transformed Jergal's claw, a +2 short sword that can cause blindness on successful strikes.
Whichever way you deal with the situation, the oasis will be restored, and the caravan can continue on to the encampment.
Ao Encampment
A. Caravan
B. Musharak
C. Jasmeena
D. Temple of Ao
E. To the Valley of Winds
Before leaving the encampment, talk to Torias. He will request a bottle of Ao wine from you. This is one of several quests related to the wine. Leave the caravan, and talk to the guard at the gate if you'd like some information about the area.
Musharak
The hobgoblin merchant has some decent items for sale, but he will offer to find you something really special for a small deposit of 100 gold. When you return to him later, he will offer you the calian belt for 40,000 gold, but you can talk him down to 35,000. The belt is worth buying if you can afford it--it offers +1 damage resistance and allows you to cast haste once a day.
Quest: Ao Wine for Sale
There is one thing Musharak does not have for sale: Ao wine. He will ask for your help in changing this situation. There are several ways to do this. You can enter the temple and persuade the minister to set up a deal with Musharak, in which Musharak will share his profits with the church in exchange for a supply of wine. Musharak will agree to this deal. The minister can also be convinced to give wine to Musharak if the hobgoblin converts to the Ao religion. In order to prove his conversion, Musharak will give you his idol. Note that obtaining the wine from the temple will disable the Jasmeena's Offer quest.
Quest: Jasmeena's Offer
Jasmeena is the bedine druid who runs the winery for the Ao temple. She will also provide you with a supply of wine for Musharak. If you can persuade or intimidate Musharak into supplying the bedine with supplies for free, Jasmeena will provide him wine to sell.
Quest: Torias's Request
Once you have supplied Musharak with a supply of wine, you can buy a bottle from him. He will ask for 200 gold, but you can talk him down to 150. Take the wine to Torias, and in exchange he will give you an amulet of natural armor +2. Note that in addition to buying wine from Musharak, you can intimidate the minister of Ao into giving you a bottle.
The Temple of Ao
Inside the temple, you will find Garrick. He is badly hurt and needs healing, but Valana, the nurse, has no magic. Heal Garrick and then speak with him. Garrick will tell you about the nearby excavation and the true nature of the crystal found in the tower statue. Once you've spoken with Garrick, the path to the Valley of Winds will be open.
Next, speak with Valana. You can convince her to go to the bedine people as a priest of Lathander, and clerics and paladins can attempt to convert her to their religion.
Finally, speak with the minister. You can negotiate with him to supply wine to Musharak, as detailed above. You can also ask him to give you the Ao test of wisdom. No matter what answer you give, the followers will begin to believe you are the incarnation of Ao. They will offer you gifts, no matter how you treat them. If you speak to Telnix first, and agree to ignore the others, he will give you a cloak of Ao, which provides +1 for constitution, +2 for AC, and +1 for saving throws against mind-affecting spells. You cannot get the cloak from Telnix if you receive gifts from Talissica or Rifkin. If you cast a spell for Talissica, she will give you a ring of protection +3. If you heal Rifkin, he will give you an amulet of natural armor +3.
When you're finished in the temple, head into the Valley of Winds.
The Valley of Winds
For such a huge area, it is almost entirely empty. There's a chest with a tower shield +1 and some various other loot, but other than that, the place is deserted. Don't bother exploring too thoroughly--just head down into the ruins.
Excavated Ruins
A. To the Valley of Winds
B. The Spell Orb
C. Secret Door
D. Minogons/Formian Hive Entrance
E. Strange Machine
F. Sphinx Statue
G. To Formian Hive
H. Portal Room
I. Shield Guardian
The ruins are a dangerous place. They're filled with falling rubble and slaads, and you'll need to make your way through the dilapidated environments to the portal in the dead center. There a few places of note along the way.
The Spell Orb
If you can decipher the writing, you will learn that you need to cast spells on the orb. Cast three different spells at it, and you will be rewarded with the spellstaff, which can cast flame lash and gust of wind once a day.
Minogons
The sarcophagi in this room are guarded by two eighth-level minogons armed with powerful netherese axes. They'll pose a decent challenge, as they have the ability to stun you. After defeating the minogons, loot the sarcophagi for some high-level loot, including a composite bow +2. Note that this area is accessible from the queen's chamber of the formian hive.
The Shield Guardian
The shield guardian will assume you are a fellow guardian after you assist it in killing the slaad. Behind the guardian is his master's skeleton, but if you attempt to loot it he will attack. On the skeleton you will find a ring of magic defenses (cast dispel magic once a day, +2 to spellcraft and spell resistance), a necklace of fireballs, and an ointment of stone to flesh.
The Sphinx Statue
As you enter this area, you will be attacked by basilisks. They are level six, and they can petrify you with their gaze. When you find the sphinx statue, use a stone to flesh spell and it will be restored. (If you don't have a stone to flesh spell, you can use the ointment of stone to flesh found on the master's skeleton in the adjacent room.) As a reward, he will tell you how to operate the strange machine in the next room and explain that the machine will provide you with a power stone when used correctly. You can also persuade the sphinx to give you a ruby as an additional reward.
The Strange Machine
Read the pillars for clues about what you need to do to operate the strange machine. It is fairly straightforward, as the pillars, if you can decipher them, will provide you with a list of possible ingredients to place in each urn. Depending on which ingredients you place in the urns, the effects of the stone will be different. Here is a list of what powers the ingredients will add to the stone:
Right Urn (Defensive)
1 Ruby = Magic Resistance
3 Rubies = Greater Magic Resistance
1 Dragon's Blood = Damage Reduction
1 Fairy Dust = Invisibility
6 Belladonna = Haste
6 Slaad Tongue = Elemental Resistance
Left Urn (Offensive)
1 Ruby = Fire Attack
3 Rubies = Greater Fire Attack
1 Dragon's Blood = Knocks Opponents Back
1 Fairy Dust = Stuns Opponents
4 Belladonna = Slows Opponents
10 Slaad Tongue = Causes Pain to Opponents
The resultant stone will have 20 charges of whatever combination you created. When used, the stone activates both powers at once. After creating the stone, the urns and the machine will be destroyed
The Formian Hive Entrance
In the antechamber to the portal room, you will see some strange creatures fighting slaads. Kill everything, and then head down the hole into the hive.
The Formian Hive
A. Entrance From Portal Room Antechamber
B. Entrance From Minogon Room
C. Formian Queen
Note that if you enter the hive through the minogon room, you will avoid a great deal of fighting and be taken straight to the queen.
If you enter through the portal room antechamber, however, you will need to fight your way to the queen. Along the way, she will send you telepathic messages. Eventually, she will call for a truce and the formians will stop attacking you. When you reach the queen, she will make a deal with you. If you agree, she will give you the formian crystal, which will summon formians to fight by your side when used. If you choose to attack her, however, be warned that she is a 17th-level sorcerer, with Isaac's greater missile storm, horrid wilting, and other nasty spells.

Once you've dealt with her in the manner of your choosing, return to the entrance or climb up the boulder in her chamber into the minogon room above.
The Portal
When you enter the portal room, you will face several slaads, including an 11th-level gray slaad that will pose a serious challenge. If you have the formian crystal, you are advised to use it. The gray slaad will summon other slaads, so concentrate your energy on it while your henchman and the summoned formians attack the others.
Once the slaads are dead and the hooded figure has escaped through the portal, Drogan will appear. As he's casting his spell, you must solve the pillar puzzle. Look into the birdbath, and you will see a pillar with an object on the floor nearby. Find that pillar and press the button. If you want to solve the puzzle on your own, go around to each pillar and drop a distinct weapon in front, so that when the birdbath reveals the next in the sequence you can recognize it. Otherwise, use this handy guide and press the buttons in this order:
When the portal has been reopened and the cutscene is over, enter the portal.

Netherese Ruin
As you make your way through the ruins, you will pass numerous statues. Note that if you use a stone to flesh spell on any of these, they will come to life and attack you. You will definitely be attacked by groups of asabi, and you'll need to fight your way to the large stone structure at the opposite end of the ruin.
Standing atop the structure is the hooded figure. Speak to her. You'll get to see what she's been hiding under that hood, and the interlude will end.
Chapter Two
Undrentide: Asabi Camp
A. Ashtara
B. To East Fragment
C. To North Fragment
D. To West Fragment
E. Shield Guardians
F. To Temple of the Winds
You begin Chapter Two in the asabi camp, after being petrified and enslaved. Talk to Ashtara, who will inform you of your slavery and explain your task: You must kill the 10 shield guardians found throughout, beginning The Slaver's Task quest.

Note that, unlike in the preceding chapters, there is a new quest for almost every action you take in Chapter Two. Many of these begin and end simultaneously. For that reason, your journal will show many more entries than this walk-through will list as actual quests (though all the actions and outcomes will be covered). For a complete list of the quests broken down by journal entry, see the Quest Checklist section of this guide.
There are three shield guardians in the area. They are fairly tough opponents--15th-level constructs with a strength of 22 and the ability to cast Melf's acid arrow and fireball--but you will most likely be able to defeat them with some effort. Luckily, you don't have to. Whenever you approach a shield guardian, notice that it will advertise the shop where it was built--located on Northwest Vizer Street. Head to the north fragment.
Undrentide: North Fragment
A. To the Asabi Camp
B. To East Fragment
C. Golem Emporium
D. The Crypt Tower
E. Shield Guardian
F. To West Fragment (O4)

The door leading to the golem emporium is locked, with a DC of 18. Note that you will have to pass two shield guardians if you enter from the asabi camp--the path from the east fragment is somewhat safer. Once you are in the emporium, speak with the stone butler. He's a 10th-level construct, for those who aren't in the mood to talk. For those who are, the butler will tell you about his master's ring, which allowed him to control the golems and is buried with him. The door to the master's tomb is in the northeast corner of the room, and inside his sarcophagus (locked with a DC of 18), you will find the golem maker's ring. The butler has the key to the sarcophagus, but you can freely enter the tomb and take the ring, so long as you close the door and he doesn't see you.
Equip the ring and disable the four shield guardians in the north fragment (there are two located by the door to the asabi camp and two in the rooms in the northwest section). To disable the guardians, equip the ring and use its special power. Now go to the other three fragments of Undrentide (the east fragment, the west fragment, and the asabi camp), and disable the golems one by one.
Undrentide: East Fragment
A. To the Asabi Camp
B. Shield Guardian
C. The Great Library
D. To North Fragment
There is only one shield guardian in the east fragment, residing in the library in the southern section.
Undrentide: West Fragment
A. To Asabi Camp
B. The Arcanist's Tower
C. Shield Guardian
D. To the North Fragment
Two shield guardians reside in the west fragment, in the houses in the southern section of the street.
When all the shield guardians are dead or disabled, return to Ashtara. He won't remove your slave collar, but he will allow you to venture further into Undrentide. If you've ventured into the Temple of the Winds, you have seen the ark of the three winds and its three round, empty depressions. Your next goal is to return the ark to working order.
The Great Library
A. To the East Fragment
B. The Tomes
The library is located in the east fragment. As you approach it, your journal will update and you will receive some experience for your discovery.
Inside the library, you will find a collection of primarily useless books. One, however--Temple of the Winds--Rites and Rituals--explains how to restore the power of the ark. You must collect three winds and place them in the depressions. The book also reveals the locations of these winds.
Fight your way through the dust mephits and dust elementals to the last room of the library. Inside, you will be attacked by more mephits and elementals. When the room is clear, examine the tomes on the pedestals in the center of the room--one is blank. The other, however, contains a story titled "The Beggar's Love."
The Beggar's Love
You will be transported to a wood. Nearby, you will see William. Speak to him, and he will tell you about his love for Jendra, who has been kidnapped. Continue through the wood and search the bones beneath the tree. There you'll find the greenleaf armor, which grants +5 to AC and +5 to the hide skill. Now enter the temple.
The Temple
After entering the temple, you will be attacked by two unholy priestesses. Kill them and then rest up. Though no single creature in the next room is much of a challenge, together they are fairly devastating. The grand matron is the most challenging, as she is a 10th-level cleric/second-level monk. The devil, though visually intimidating, is only level eight. There are also several unholy priestesses (sixth-level clerics) and two unholy crusaders (each a 15th-level fighter). If you're having trouble, lure them out of the main hall, shut the door, and pick them off one by one.
Make sure you search the grand matron's corpse for a pen (which will become very important) and some other decent loot. Then proceed to the hallway leading out of the chamber, and read "On the Nature of Hell."
Hell
You will see Karsus being attacked by succubae. Help him defend himself, and then speak with him. Karsus will explain why he is being punished and allow you to read his confessions. He will also give you an inkwell. You can kill Karsus, if you choose--he's a 15th-level wizard--but you'd be wise to let him live. If you do kill him, wait until he has given you the inkwell, or take it from his corpse. Read the confessions of Karsus to return to the great library.
The Great Library, Revisited
With the pen and the inkwell in hand, you can now write a story in the empty book. However, before doing so, examine "The Beggar's Love" again. There is a new option: "Rewrite the ending." Choose this, and you will return to the wood. Enter the temple and speak with William, who will agree to help you catch the wise wind. Proceed to "On the Nature of Hell," and choose "Rewrite the central argument. You will return to hell, only to find that Karsus has been redeemed. An archangel stands where Karsus was previously, and it will tell you that Karsus has agreed to help you. Read "The Confessions of Karsus" to return to the library.
The Wise Wind
Now, go to the empty tome and choose "Write a story to catch the wise wind." You will be given a selection of opening lines. Characters with normal intelligence or high wisdom will be given an extra option: "Where treasure lay..." Otherwise, your choice of opening lines has no effect other than the setting of your battle against the wise wind.
With Karsus and William, defeating the wise wind is not very difficult. It can be difficult alone--it's a 21st-level cleric, and it will heal itself and teleport away as you fight it. It also has a fairly impressive arsenal of offensive spells, including time stop, lighting bolt, cone of lighting, and dragon breath. When the wise wind is defeated, grab it. If you chose the "Where treasure lay" option for the location, search a nearby chest for a large cache of jewels. With the wise wind in hand, return to the library.
The Crypt Tower
The crypt is located off the north fragment. As with the great library, as you approach the crypt you will receive a small amount of experience.
The Crypt Tower, First Floor
The first floor of the tomb is one huge room, filled with dread sarcophagi. More importantly, the entire floor is trapped, so you must proceed very carefully. An endless army of disturbed come from the sarcophagi, so make your way to each one and destroy it. Even better, used ranged weapons or spells to avoid the trapped floor. Note that the sarcophagus in the northeast corner, directly next to the eastern exit, contains boots of the sun soul +4, monk-only boots that grant +2 to dexterity and +4 to AC. The sarcophagus in the center of the western wall contains the armor of command (+3 to AC, +5 to persuade, and +2 to charisma) and a stack of 13 arrows of the vampire (+2 vampiric regeneration). When you can safely continue, head up the stairs.

The Crypt Tower, Second Floor
The second floor is much easier. Though it is filled with burning men, they will not attack you. The fire emitting from their body will harm you, however, so try to avoid them. Make your way to the lever in the center of the room and use it. Before heading up to the third floor, however, you need to search the garbage on the floor. Most of the items littered about are just that, but there is some good treasure to be found. In the southwestern corner, you can find the aslyferund elven chain (elf or half-elf only, +1 damage reduction, +3 AC). Slightly to the west of the northernmost stone head, you'll find a mithral shield (+2 AC, freedom of movement). Slightly to the northwest of this same head, there is a pixie lance (a +2 dagger that casts sleep on a successful strike). And to the east of the floor lever you'll find a shadow robe (casts camouflage and displacement, each once per day). Now head upstairs.
The Crypt Tower, Third Floor
A. To Crypt Tower, Second Floor
B. The Maze
C. Skeleton Chieftain
D. Throne Room
E. To the Hall of the Dead Wind
This maze may seem confusing at first, but it actually isn't a maze in the traditional sense. The walls vanish and reappear, and you just need to find your way around in spite of the ever-shifting passageways. The side rooms all contain random treasure, but be warned that opening a coffin or sarcophagus will often cause a monster to appear.
In a small graveyard in the southeastern corner, you will meet a skeleton chieftain who will speak with you. He will attempt to tell you his story, but he cannot remember very much. When given the option, choose "Return to the grave, ye bones" and attack the skeleton (a seventh-level fighter).
In the northeast corner, you'll find a room with three pairs of thrones. Each pair is associated with a particular alignment. The thrones on the south wall are neutral, the thrones in the northeast corner are good, and the thrones on the western wall are evil. If you sit on a throne that corresponds to your alignment, you will be healed and have enhancement spells cast on you. If you sit in a chair that does not correspond to your alignment, you will be severely wounded.
Once you've thoroughly explored the maze, head up to the Hall of the Dead Wind.
The Hall of the Dead Wind
The dead wind is nowhere near as tough as the wise wind. It is only a seventh-level elemental, but unfortunately it is protected by a field that makes it temporarily invulnerable. While the protective circle is active, the dead wind cannot be harmed. Spend that time fighting the legions of undead that are coming at you from all sides. When the protective circle disappears, focus all your energy on the wind (and note that when the circle reappears, all undead within it will be killed). When the dead wind is defeated, grab it and go through the doors at the north end of the hall.
The Arcanist's Tower
Located in the western fragment of Undrentide, the arcanist's tower is the location of the third and final wind, the dark wind.
Arcanist's Tower, First Floor

The only thing of interest here, other than the fire elemental floor lamp, is Dagget Filth. Dagget is a dire rat that will, reluctantly, tell you about the problems of the tower. Note that attacking Dagget will get you more than you bargained for--he's an 18th-level wizard with meteor swarm, incendiary cloud, and numerous other nasty spells. According to Dagget, the shadovar--the residents of the shadow plane--have been disassembling the tower piece by piece. After talking to Dagget, climb the stairs to the second floor.
Arcanist's Tower, Second Floor
As Dagget warned you, the second floor is in pieces. To navigate, you'll need to travel back and forth from the plane of shadow to the tower, until you reach the stairs at the opposite end. To enter the plane of shadow, you will need shadow gems. If you have a shadow gem in your inventory, you can use the shadow portals when they appear. To obtain shadow gems, kill the shadovar as they appear.
Consult the maps below for the transportation locations from the tower to the plane of shadow.
The arcanist's tower.
The plane of shadow.
When in the plane of shadow, be sure to check the chests and racks. You can find shadovar armor (+1 AC bonus, +1 AC vs. good) in the armor rack in the north and southeast passageway. In a weapon rack in that same southeastern passageway, you'll find a shadow sword, a +2 two-bladed sword that does 1d8 damage and adds 1d4 acid damage.
Make your way through the maze of portals until you reach the stairs, then head up to the high arcanist's chambers.
The Arcanist's Tower, High Arcanist's Chambers
By the time you make it to the top floor, it will be too late. The lich has absorbed the power of the dark wind and vanished through a portal--which unfortunately vanished behind him.
The high arcanist's room contains a chest that's locked with a DC of 25. Open it, or destroy it, to find a portable door. Use the door's special power to create a door to the plane of shadow.
Plane of Shadow
The shadow lich is a third-level undead/14th-level wizard. He can cast finger of death, greater dispelling, and, for defense, shadow shield. He also has numerous shadovar minions around him. Try to lure his minions away before rushing in on the Lich himself--they can be dispatched more easily if you can lead them around the large pillar in the center of the room.
When the lich is dead, search his body for the dark wind. Also search the chests and nearby racks for some random, medium, and high-level treasure. When the lich is dead, the shadow servant will appear and inform you that you are the new lord of the estate. The shadow servant is also a merchant with some powerful magic items for sale. Buy what you need before returning to your home plane.
The Temple of the Winds
Before entering the Temple of the Winds, return to Ashtara at the asabi camp and stock up on potions. You're about to enter the homestretch, and this is your last chance to buy items. It's a particularly good idea to stock up on cure critical wounds potions and any potions that enhance your primary statistics. Once you feel well equipped, enter the Temple of the Winds.
Examine the ark of the winds. Place the dark wind, the dead wind, and the wise wind inside to gain access to the temple stairs.
The Temple of the Winds, First Floor
A. Entrance
B. Battle Horror
C. Helmed Horror
D. To Second Floor
While treacherous, the first floor of the temple is fairly straightforward. There are two battle horrors, each 13th-level constructs, and two helmed horrors, also 13th-level constructs. Accompanying each of them are four sixth-level medusa handmaidens. Once all the foes are dead, make your way around the thin platform, disarming the numerous traps and opening the chests (all trapped with DCs of 26). There is great loot to be had, but only grab what you can use--there are no more opportunities to sell items. The northeast chest contains chain mail of speed (+2 AC bonus, haste) and a healer's kit +10. The southeast chest contains kumakawa armor (+3 AC, improved evasion). Inside the northwest chest, you'll find red dragon armor (+5 AC, 20 fire resistance, and 80-percent base item weight reduction). Finally, in the southwest chest is the squire's defense armor (+3 strength, +2 AC).
The Temple of the Winds, Second Floor
A. From First Floor
B. Bloodied Altar
C. Tentacle Beast
D. North Lever
E. East Lever
F. South Lever
G. West Lever
On the second floor of the temple, your goal is to flip each of the levers in order to unlock the doors to the chamber of the mythallar. There is a great deal of opposition--almost every area is crawling with monsters.
The biggest monster, though, is the tentacle beast that appears as you attempt to cross the center platform. He shoots waves of fire that will do significant damage. However, there is a way to temporarily distract the beast. In each section, there are two bloodied altars. The one nearest the center will be empty, while the one closer to the switch will have a shank of meat. Place the shank of meat on the empty altar, and the beast will be lured to it for a brief moment, allowing you to cross the central area in safety. Note that the southwest altar also contains a harp of charming (a bard-only item that can cast charm monster, charm person or animal, and mass charm). The northeastern altar also contains a scarab of protection +5.

Once all the levers are activated, the doors to the chamber will open.
The Chamber of the Mythallar
This is it--the final fight. Drink your potions, prepare your spells. As soon as Heurodis sees you, she will approach and begin talking. When the conversation is over, she will attack. Allow your henchman and other associates to distract her. As you've probably noticed, she cannot be harmed. Yet.

You need to destroy the mythallar. They are all trapped (DC 26), but you don't really have much time. It's easier just to take the damage and guzzle potions as you make your way around the circle. If you can use ranged weapons or spells to destroy the Mmythallar, all the better. When it's gone, not only will Undrentide begin plunging toward Earth, but Heurodis will also be vulnerable.
Heurodis is a sixth-level humanoid/18th-level wizard. Among her spells are incendiary cloud, summon creature VII, and delayed fireball. She also had an aura of fear. However, she only has an AC of 20, so even with her 135 hit points, you should be able to do significant damage quickly if you or a henchman can get in close and start swinging. After the mythallar are gone, Heurodis should go down quickly. Congratulations! Enjoy the end cinematic.
Quest Checklist
What follows is a list, broken down by chapter, of the quests available and where to find them. Where appropriate, the quest is linked to its section in the walk-through. Cases that continue throughout the chapter are not linked.
Chapter One
Blocked Passage
Received From: Chief Azrig, Master Jumper, or Automatic
Location: Nether Mountains, Kobold Caves
Status: Required
Experience: 200
A Cure for Drogan
Received From: Ayala
Location: Hilltop West, Drogan's Farm
Status: Optional
Experience: 500
The Dragon's Tooth
Received From: Ayala
Location: Hilltop West, Drogan's Farm
Status: Required (Main Plot Quest)
Experience: N/A
The Elven Test
Received From: Automatic
Location: Hilltop Foothills, Elven Crypt
Status: Required (Main Plot Quest)
Experience: 50
An Excess of Prophet
Received From: Haniah
Location: Hilltop West, Community Hall
Status: Optional
Experience: 100
Fled Into the Crypt
Received From: Automatic
Location: Hilltop Foothills
Status: Required
Experience: 200
The Gnoll Slaves
Received From: Automatic
Location: High Forest, Gnoll Caves
Status: Optional
Experience: 200
Horns of the Shadow Hart
Received From: Ferran Valiantheart
Location: Hilltop Foothills
Status: Optional
Experience: 0
J'Nah's Request
Received From: J'Nah
Location: High Forest, Ancient Hall
Status: Optional
Experience: 0
The Kobold Prisoners
Received From: Automatic
Location: High Forest, Gnoll Caves
Status: Optional
Experience: 200
Kobolds in the Kitchen
Received From: Automatic
Location: Hilltop West, Bubbling Cauldron
Status: Optional
Experience: 100
The Lost Sword
Received From: Elven Warrior Spirit
Location: Hilltop Foothills, Elven Crypt
Status: Optional
Experience: 50
The Mask
Received From: Ayala
Location: Hilltop West, Drogan's Farm
Status: Required (Main Plot Quest)
Experience: N/A
The Missing Artifacts
Received From: Ayala
Location: Hilltop West, Drogan's Farm
Status: Required (Main Plot Quest)
Experience: 1,000
The Mummified Hand
Received From: Ayala
Location: Hilltop West, Drogan's Farm
Status: Required (Main Plot Quest)
Experience: N/A
Not Playing With a Full Deck
Received From: Katriana
Location: Hilltop East
Status: Optional
Experience: 100
Rescue Glendir
Received From: Slaves or Automatic
Location: High Forest, Gnoll Cave
Status: Optional
Experience: 100
Rescue My Family
Received From: Nora Blake
Location: Hilltop East
Status: Optional
Experience: 100
Rumgut Needs a Wife
Received From: Nathan Hurst
Location: Hilltop Foothills
Status: Optional
Experience: 250
Spider Infestation
Received From: Spirit of Nimaldor
Location: Hilltop Foothills, Elven Crypt
Status: Optional
Experience: 100
Thayvian Enclave
Received From: Szaren
Location: Hilltop East
Status: Optional
Experience: 100
The Tower Statue
Received From: Ayala
Location: Hilltop West, Drogan's Farm
Status: Required (Main Plot Quest)
Experience: N/A
Tymofarrar's Revenge
Received From: Tymofarrar
Location: Nether Mountains, Dragon Cave
Status: Optional
Experience: 0
Interlude
Ao's Wine for Sale
Received From: Musharak
Location: Ao Encampment
Status: Optional
Experience: 0
Identifying the Crystal
Received From: Drogan
Location: Automatic
Status: Required (Main Plot Quest)
Experience: N/A
Jasmeena's Offer
Received From: Jasmeena
Location: Ao Encampment
Status: Optional
Experience: 0
The Missing Guide
Received From: Katriana
Location: Night Camp, Caravan
Status: Required
Experience: 1,000
Oasis of the Green Palm
Received From: Katriana
Location: Oasis of the Green Palm, Caravan
Status: Required
Experience: 1,000
The Rod of Blight
Received From: Ali
Location: Oasis of the Green Palm, Bedine Camp
Status: Required
Experience: 1,000
The Valley of Winds
Received From: Garrick
Location: Ao Encampment, Temple
Status: Required
Experience: 1,000
Torias's Request
Received From: Torias
Location: Ao Encampment, Caravan
Experience: 0
Chapter Two
The quest structure is very different in Chapter Two. For that reason, not all the journal entries listed here are covered individually in the walk-through. Note that the number of experience points listed for these quests is for completing every related entry.
Arcanist's Tower
- A Maze of Shadows
- A Portable Door
- A Shadow Estate
- Discovery
- Shadow Portals
- The Shadovar
- The Shadow Lich
Received From: Automatic
Location: Undrentide, North Fragment
Experience: 5,000
Status: Required
Ashtara
- Golem Destroyed
- Golem Disabled
- The Golem Emporium
- The Golem-Maker's Ring
- The Slaver's Task
- The Stone Butler's Love
Received From: Ashtara
Location: Asabi Camp
Experience: 5,000*
Status: Required
*More experience is awarded for disabling the golems than destroying them.
Crypt Tower
- A Maze of Bones
- Atop the Tower
- The Burning Men
- Discovery
- Disturbing the Dead
Received From: Automatic
Location: Undrentide, North Fragment
Experience: 5,000
Status: Required
Heurodis
- Farewell to the Mythal
- The Chamber of Mythal
- The Lost City of Undrentide
- The Mythallar
Received From: Automatic
Location: Temple of the Winds
Experience: 5,000
Status: Required
Library
- The Catching of the Wind
- Dark Rituals
- Discovery
- Karsus' Promise
- Poor William
- A Romance Novel
- A Romance Rewritten
- Sins Against Netheril
- Sir William's Promise
- A Treatise on Forgiveness
- A Treatise on Hell
Received From: Automatic
Location: Undrentide, East Fragment
Experience: 5,000
Status: Required
Temple of the Winds
- Discovery
- An Empty Ark
Location: Undrentide, Asabi Camp
Experience: 0
Status: Required
Three Winds
- An Ancient Ritual
- The Dark
- The Dead
- The Wise
Received From: Automatic
Location: Temple of the Winds
Experience: 0
Status: Required
Unique Items
The following charts list many of the unique items that are new to Shadows of Undrentide, their special properties, and where they can be found.
Armor
| Name | Properties | Location | Notes |
| Blackguard Armor | +1 AC bonus, Divine Favor (3x/day), heavy armor, evil or neutral only | Tomb of Kel-Garas | Worn by Skeleton Blackguard |
| Chain of Stealth | +6 to Hide, +6 to Move Silently | Hilltop East, Torias's shop | For sale |
| Shadovar Armor (scale mail equivalent) | +1 AC, +1 AC vs. good | Plane of Shadow | Found in an armor rack |
| Shadovar Robes | +1 AC, +1 AC vs. good | Plane of Shadow | Equipped by various Shadow Plane enemies |
| Shadow Robe | Camouflage (1x/day), Displacement (1x/day) | Undrentide, Crypt Tower | On the ground of second floor |
| Robe of Light | Light source | Great Library, "The Beggar's Love" | On Jendra's corpse |
Helms
| Name | Properties | Location | Notes |
| Blackguard Helmet | +3 to saving throws vs. mind-affecting spells, +3 to saving throws vs. sonic damage | Tomb of Kel-Garas | Worn by Skeleton Blackguard |
| Elven Trap Protective Helmet | Protects user from the poison trap in the Elven Crypt | Elven Crypt, secret room | The Spirit of Nimaldor will explain the purpose of these helms |
| Helmet of Discharge | Damage resistance: Electrical 25/- | Tomb of Kel-Garas, Priest Burial Room | In sarcophagus |
| The Mask | Invisibility (3x/day), Ultravision (3x/day), Immunity to Fear | Nether Mountains. Given by (or taken from) Tymofarrar | This is one of the four missing artifacts |
| Shadow Helm | AC +1, Ghostly Visage (1x/day) | Hilltop West, The Smith | Give the Shadow Hart Horns to Fiona the smith |
Melee Weapons
| Name | Properties | Location | Notes |
| Frost Bringer (greataxe) | 1 cold damage, massive criticals (1 damage) | Hilltop Foothills, Nathan Hurst's Farm. | Dropped by the farmhand if you fight him |
| Hurc's Dagger | +1 vampiric regeneration | Hilltop West, Bubbling Cauldron | Dropped (or presented) by leader of kobold gang |
| Dragon Tooth Dagger | -1 attack and damage, 1d8 damage vs. undead, +2 saving throws vs. negative energy | Deekin's dagger | One of Deekin's possessions |
| Blade of Chult (great sword) | +1 enhancement, poison: 1d2 constitution damage | Fiona's shop | For sale |
| Crusader's Blade (longsword) | +1 attack, 1 fire damage, good alignment only | Hilltop East | Equpped by guard near foothills gate |
| Holy Avenger (longsword) | Dispel Magic (1x/day), special propertie, light source | Tomb of Kel-Garas, Undead Monk chamber | Only paladins will be able to access the chamber |
| Piper's Sword (longsword) | -1 attack, -2 damage | Hilltop West, The Smith | Given by Fiona if Piper has asked for his sword |
| Klonk's Ice Blade (shortsword) | 1 cold damage | Dragon Caves | Equipped by Klonk the Freezer |
| Jergal's Claw (shortsword) | +2 enhancement, chance of Blindness on hit, evil only | House of the Morninglord | Reward for killing Ali at Kel-Garas' request |
| Ali's Scimitar | +1 enhancement | Oasis of the Green Palm | Equipped by Ali |
| Desert's Fury (scimitar) | 1d8 fire damage vs. undead, +1 enhancement, +2 enhancement vs. undead | Catacomb of Al-Rashid | Found in sarcaphogus after solving rune stone puzzle (1 of 4 possible) |
| Shadow Sword (double-bladed sword) | 1d4 acid damage, +2 enhancement, keen | Plane of Shadow | Found in a weapon rack |
| Baton of the Holy (club) | +1 attack, bonus level 1 spell, light source (Cleric only) | Hilltop West, Community Hall, Gilford's shop | For sale |
| Ice Grinder (hammer) | +1 damage bonus, +1 sonic damage | Hilltop Foothills, Elven Crypt | Dropped by Urko the Kobold leader |
| Desert's Fury (morning star) | 1d8 fire damage vs. undead, +1 enhancement, +2 enhancement vs. undead | Catacomb of Al-Rashid | Found in sarcaphogus after solving rune stone puzzle (1 of 4 possible) |
| Katana of the North | +1 attack, Endure Elements (2x/day), massive criticals (4x), +1 Animal Empathy skill | High Forest, Bandit Caves | Dropped by the bandit chief |
| Desert's Fury (kama) | 1d8 fire damage vs. undead, +1 enhancement, +2 enhancement vs. undead | Catacomb of Al-Rashid | Found in sarcaphogus after solving rune stone puzzle (1 of 4 possible) |
| Talona's Strike (polearm) | 1d6 acid damage, +1 enhancement | Stinger Caves | Found on body of stinger warrior near temple stairs |
Rods and Staves
| Name | Properties | Location | Notes |
| Rod of Dawn | Cure Critical Wounds (2 charges), Divine Power (3 charges), Flame Strike (3 charges), good or neutral clerics only | House of the Morninglord | Awarded after destroying Rod of Blight |
| Desert's Fury (staff) | 1d8 fire damage vs. undead, +1 enhancement, +2 enhancement vs. undead, Flame Arrow (3x/day), sorcerer and wizard only | Oasis of the Green Palm, Catacomb of Al-Rashid | Found in sarcaphogus after solving rune stone puzzle (1 of 4 possible), |
| Spellstaff | Flame Lash (1x/day), Gust of Wind (1x/day), special power, all base classes but monk and fighter | Valley of Winds, Excavated Ruins | Awarded after solving Spell Orb puzzle |
Bows
| Name | Properties | Location | Notes |
| Eliak's Vengeance | +1 attack, massive criticals (3 damage), Ranger only | Nether Mountains, Orc Caves | Equipped by Orc Chieftain |
| Shadovar Longbow | +1 attack bonus, unlimited ammunition | Arcanist's Tower | Equipped by Shadovar Archers |
Clothing
| Name | Properties | Location | Notes |
| Cloak of Ao | +1 constitution, +2 AC bonus, +1 saving throws vs. mind-affecting spells | Ao Temple | Given by Telnix if he thinks your are Ao incarnate |
| Cloak of Ascalhorn | Damage Resistance: Bludgeoning 5/- | Hilltop Foothills, Elven Crypt | Reward for passing the Elven Test |
| Calian Belt | Haste (5x/day), damage reduction +1 (soak 5 damage) | Ao Encampment | Available from Musharak if you ask him to "scrounge" for you |
| Fist of the North (gauntlet) | +1 cold damage, damage resistance: cold 5/- | Hilltop West, The Smith | Equipped on Fiona |
Jewelry
| Name | Properties | Location | Notes |
| Dragon Tooth Amulet | +4 strength, reprilian only | Various | One of Deekin's possessions |
| Ventrue's Lucky Charms (amulet) | +1 to all saving throws, +3 Lore | High Forest, Hermit's shop | For sale |
| Kilrav's Ring | +1 Appraise, +1 Craft Trap, +1 Disable Trap, +1 Hide, +1 Lore, +1 Move Silently, +1 Open Lock, +1 Pick Pocket, +1 Search, +1 Set Trap, +1 Use Magic Device | Hilltop Foothills, Elven Crypt | Located on bones in northwest corner of lower level |
| Mystra's Hand (ring) | Teleports user to Drogan's Farm (if they have a focus crystal) | Hilltop West, Drogan's Farm | Inside your footlocker |
| Ring of the Wolf | +2 Animal Empathy, Summon Wolf (1x/day) | Hilltop West | Found in the pile of wood behind The Smith. You must speak to herbalist's dog first (Ranger/ druid only) |
Instruments
| Name | Properties | Location | Notes |
| Beastmaster's Horn | Makes the bears in the gnoll cave friendly | High Forest, Gnoll Caves | Found on Beastmaster |
| Chime of Opening | Knock (1 charge) | High Forest, Hermit's shop | For sale |
| Quality Lute | Improves Perform skill (1x/day) | Drogan's Farm | Your footlocker (Bard only) |
Miscellany
| Name | Properties | Location | Notes |
| Bowl of Water | Summon Water Elemental (single use) | Gnoll Caves, Underground Ruins | Created in Magic Pool |
| Brazier of Fire | Summon Fire Elemental (single use) | Gnoll Caves, Underground Ruins | Created in Magic Pool |
| Censer of Air | Summon Air Elemental (single use) | Gnoll Caves, Underground Ruins | Created in Magic Pool |
| Censer of Readiness | Increases Tumble skill (1x/day) | Hilltop West, Drogan's Farm | Inside your footlocker (Monk only) |
| Crystal of Concentration | Increases Concentration skill (1x/day) | Hilltop West, Drogan's Farm | Inside your footlocker (Wizard only) |
| Flask of Powder | Significantly weakens J'Nah | Nether Mountains, Dragon Cave | Given by Tymofarrar |
| Focus Crystals | Teleports user to Drogan's Farm (in conjuction with Mystra's Hand) | Hilltop West, Drogan's Farm | Can be made in Drogan's laboratory |
| Formian Crystal | Summons formians to fight with you | Formian Hive | Given by Formian Queen if you agree to her deal |
| Gift of the Dryad | Increases Spot skill (1x/day) | Hilltop West, Drogan's Farm | Inside your footlocker (Ranger only) |
| Heart of Neely | Cure Moderate Wounds (3x/day) | Community Hall, Gilford's shop | For sale |
| Holy Symbol | Increases Healing skill (1x/day) | Hilltop West, Drogan's Farm | Inside your footlocker (Cleric only) |
| Horn of Listening | Increases Listen skill (1x/day) | Hilltop West, Drogan's Farm | Inside your footlocker (Rogue only) |
| Idol of the Bear | Increases Taunt skill (1x/day) | Hilltop West, Drogan's Farm | Inside your footlocker (Barbarian only) |
| Instrument of the Inquisition | Increases Persuasion skill (1x/day) | Hilltop West, Drogan's Farm | Inside your footlocker (Paladin only) |
| Lens of Detection | Find Traps (3x/day) | Tomb of Kel-Garas | On corpse of Zombie Warrior in southern chamber of upper level |
| The Mummified Hand | Shows direction to next artifact | Hilltop Foothills, Elven Crypt | Given by (or taken from) Urko |
| Phylactery of Ice | Transforms player into a Frost Giant | Gnoll Caves, Ancient Hall | Given by J'Nah |
| The Poetry of Dagget Filth (book) | Tasha's Hideous Laughter (single use) | Various | Found on various bookshelves in chapter two |
| Power Stone | Casts offensive and defensive spells simulataneously | Valley of Winds, Excavated Ruins | Awarded after solving the strange machine puzzle. Its effects are dependent on the ingredients used to create it |
| Rod of the Magi | Increases Spellcraft skill (1x/day) | Hilltop West, Drogan's Farm | Inside your footlocker (Sorcerer only) |
| Scale of Discipline | Increases Discipline skill (1x/day) | Hilltop West, Drogan's Farm | Inside your footlocker (Fighter only) |
| Scented Fetish | Increases Animal Empathy skill (1x/day) | Hilltop West, Drogan's Farm | Inside your footlocker (Druid only) |
| Stone of Earth | Summon Earth Elemental (single use) | Gnoll Caves, Underground Ruins | Created in Magic Pool |
| Tome of Worldly Knowledge (book) | Indentify (2 charges) | Various | Random bookshelves, chapter one |
Prestige Classes
The prestige classes are interesting hybrids--by choosing very specific feats and very specific skills, you character can unlock access to a variety of unique abilities. Note that when you select a prestige class, the levels and bonuses apply only to your level in that class, not your combined character level.
Arcane Archer
Prerequisites:
Race: Elf or Half-Elf
Base Attack Bonus: +6
Feats: Weapon Focus Longbow or Weapon Focus Shortbow; Point-Blank Shot
Other Prerequisites: Character must have the ability to cast first-level arcane spells.
The arcane is a powerful hybrid of ranged warrior and spellcaster. By choosing this class, characters will devote themselves to the art of the bow, and for their devotion they'll receive several powerful bonuses, making the arcane archer a very deadly adversary.
The path of the arcane archer is fairly restrictive. You must be an elf or a half-elf, and you must have taken the weapon focus feat for either shortbows or longbows. More importantly, you must be able to cast arcane spells. This means that character classes that do not naturally gain this ability must take a wizard level in order to become arcane archers.
The maximum level for the arcane archer prestige class is 10.
Abilities:
Hit Dice: d8
Proficiencies: All Simple and Martial Weapons, Light and Medium Armor, Shields
Skill Points: 4 (Plus Intelligence Modifier Bonus)
Enchant Arrow: This is a natural bonus to bow skills added to the arcane archer's attack and damage rolls. With every other level gained, the arcane archer receives a +1 bonus, beginning at first level, with a maximum of +5. Note that this bonus applies only to non-magical arrows.
Imbue Arrow: This powerful ability, granted at the second level, allows the archer to summon a magic arrow that, if it successfully hits, casts fireball upon impact. This ability can be used three times a day.
Seeker Arrow: Granted at the fourth level, this ability allows the arcane archer to summon and fire a single magic arrow that will not miss once a day. At the sixth level, the arcane archer is given two seeker arrows a day.
Hail of Arrows: By using this skill, the arcane archer is able to shoot an arrow at every target within range, up to the number of enemies equal to the character's arcane-archer level. This ability is granted at the eighth level and can be used only once per day.
Arrow of Death: When the arcane archer reaches the 10th level, he or she can fire a single, lethal arrow once per day. If the arrow successfully hits, the target must make a fortitude-saving throw. If the saving throw fails, the target is killed instantly.
Assassin
Prerequisites:
Alignment: Evil
Skills: Move Silently (8 ranks), Hide (8 ranks)
The assassin is the deadly cousin to the rogue. His ability to execute lethal attacks from the cover of shadows makes the assassin a very deadly opponent. At higher levels, the assassin is granted spells that make him or her even more deadly.
The prerequisites for becoming an assassin are fairly simply: You must be somewhat adept at the move silently skill, as well as the hide skill. Your character must also be evil, for obvious reasons.
The maximum level for the assassin prestige class is 10.
Abilities:
Hit Dice: d6
Proficiencies: Simple Weapons, Light Armor
Skill Points: 4 (Plus Intelligence Modifier Bonus)
Death Attack: With every other level, starting at the first level, this special sneak attack becomes more deadly. The extra damage is applied to attacks successfully executed while the assassin is hidden or invisible. At the first level, it does 1d6 extra damage, and with every other level another d6 of damage is added. Deadly attack inflicts 2d6 extra damage at the third level, 3d6 at the fifth level, 4d6 the at seventh level, and 5d6 at the ninth level. Note that this damage is not multiplied for critical hits.
Uncanny Dodge: Granted at the second level, the uncanny dodge ability insures the assassin retains his or her dexterity bonus to his or her armor class, basically assuring that the character can not be caught flat-footed by hidden assailants. Additionally, at the fifth level, it gives the assassin a +1 to reflex saving throws against traps, and at the 10th level, it increases that bonus to +2.
Ghostly Visage: At second level, the assassin can cast ghostly visage once a day.
Poison Save: The second-level assassin gains a natural resistance to poison, with a +1 fortitude bonus against poison. This resistance increases as the assassin becomes more powerful. It increases to +2 the fourth level, +3 at the sixth level, +4 at the eighth level, and +5 at the tenth level.
Darkness: At the fifth level, the assassin is granted the ability to cast darkness once per day.
Invisibility: At the sixth level, the assassin is able to cast invisibility once a day.
Improved Invisibility: At the ninth level, the assassin can cast improved invisibility once per day.
Blackguard
Prerequisites:
Alignment: Evil
Skills: Hide (5 ranks)
Feats: Cleave
Becoming a blackguard isn't difficult, though you will need to waste a fair amount of skill points boosting your hide skill if you are a fighter before selecting the prestige class. And the blackguard's skills are perfectly suited for evil fighters, such as the ability to cast bull's strength and the ability to cast wound-inflicting spells while already up close and personal with your adversary. Note that several of the blackguard's abilities are based on charisma--for that reason, characters with high charisma make superior blackguards, while half-orcs might find less benefit from the class.
The maximum level for the blackguard prestige class is 10.
Abilities:
Hit Dice: d10
Proficiencies: All Simple and Martial weapons, All Armor, Shields
Skill Points: 2 (Plus Intelligence Modifier Bonus)
Smite Good: At the second level, the blackguard's charisma modifier is added to his or her attack roll when fighting opponents of good alignment.
Dark Blessing: Also related to his or her charisma, and also granted at the second level, this bonus ability adds the blackguard's charisma modifier to all saving throws.
Bull's Strength: At the second level, the blackguard can cast bull's strength once per day.
Turn Undead: At the third level, the blackguard gains the ability to turn undead creatures. It functions exactly like the cleric ability of the same name. Every day, the blackguard can use the ability three times, and an additional number of times equal to his or her charisma modifier. The number of undead turned is determined by the blackguard's level and charisma modifier. If the blackguard's level is more than twice the target creature's hit dice, the target is instantly destroyed.
Create Undead: At the third level, the blackguard can summon a ghast. At the seventh level, he or she can summon a doom knight. This ability can be used only once per day.
Sneak Attack: If the blackguard successfully strikes a target while hidden or invisible, extra damage is applied. At the fourth level, the extra damage is 1d6. At the seventh level, it is increased to 2d6, and at ninth level, it is increased to 3d6. Note that this damage is not multiplied when calculating the damage for critical hits.
Summon Fiend: At the fifth level, the blackguard can summon a succubus. At the ninth level, he can summon a vrock.
Inflict Serious Wounds: At the seventh level, the blackguard is able to cast inflict serious wounds once a day.
Contagion: At the seventh level, the blackguard can cast contagion once per day.
Inflict Critical Wounds: At the eighth level, the blackguard is granted the ability to cast inflict critical wounds once per day.
Harper Scout
Prerequisites:
Skills: Search (4 ranks), Persuade (8 ranks), Lore (6 ranks), Discipline (4 ranks)
Feats: Alertness, Iron Will
Alignment: Any Non-Evil
Like Drogan and Ayala, you too can be a harper. So long as you aren't evil, that is. Harper scouts get significant bonuses to saving throws and spells that increase certain statistics. Of the prestige classes available in Shadows of Undrentide, harper scouts are definitely the most role-play-oriented, in that they don't get significant combat bonuses. Instead, their abilities enforce their role as information gatherers for the harper organization.
The maximum level for the harper scout prestige class is five.
Abilities:
Hit Dice: d6
Proficiencies: Simple Weapons, Light Armor
Skill Points: 4 (Plus Intelligence Modifier Bonus)
Harper Knowledge: Identical to the bardic knowledge feat, and granted to harper scouts at the first level, this bonus adds your class level to any lore checks.
Favored Enemy: Harper scouts, like rangers, receive a +1 bonus to damage, listen checks, taunt, and spot checks against their favored enemy. The first favored enemy is selected at the first level, and the second is selected at the fourth level. Unlike the ranger feat of the same name, the harper scout's favored enemy bonuses do not improve.
Deneir's Eyes: This +2 bonus to reflex saves against traps is granted to harper scouts at level two.
Sleep: At the second level, the harper scout can cast sleep once per day.
Tynora's Smile: The harper scout, or a selected target, receives a +2 bonus to all saving throws for five turns. This ability is granted at the third level, and it can be used once a day.
Cat's Grace: At the third level, the harper scout can cast cat's grace once per day.
Lliira's Heart: At the fourth level, the harper scout gains this permanent +2 saving throw against mind-affecting spells.
Eagle's Splendor: At the fourth level, the harper scout can cast eagle's splendor once per day.
Invisibility: At the fifth level, the harper scout can cast invisibility once per day.
Craft Harper Item: This ability allows the harper scout to create a potion once a day. It is available once the harper scout reaches level five.
Shadowdancer
Prerequisites:
Skills: Move Silently (8 ranks), Hide (10 ranks), Tumble (5 ranks)
Feats: Dodge, Mobility
The shadowdancer is somewhat like a superpowered rogue. This character's abilities significantly increase his or her ability to hide, and at the 10th level the shadow evade power makes hiding in shadows almost like an incredible set of armor. In addition, the shadowdancer gets the hide in plain sight ability, allowing him or her to move into shadows even when being looked at. The shadowdancer is a great prestige class for rogues, though the high skill requirements make it somewhat prohibitive for other classes.
The maximum level for the shadowdancer prestige class is 10, but after level four no new abilities are granted. Note that shadow evade and summon shadow, however, will continue to improve.
Abilities:
Hit Dice: d8
Proficiencies: Simple Weapons, Light Armor
Skill Points: 6 (Plus Intelligence Modifier Bonus)
Hide in Plain Sight: The shadowdancer is able to use the hide skill even when being observed. This will not work, however, when engaged in combat. The shadowdancer receives this ability at the first level.
Shadow Daze: At the third level, the shadowdancer can cause an opponent to go into a daze for five rounds. This skill can be used once per day.
Summon Shadow: The shadowdancer can summon a shadow once per day. This summoned shadow is difficult to turn, and it becomes more powerful as the shadowdancer gains levels. This ability is granted at the third level.
Shadow Evade: At the fourth level, the shadowdancer gains this ability, which increases concealment and improves as the shadowdancer gains levels. This ability can be used three times per day, and it lasts for five rounds. At the fourth level, shadow evade gives the shadowdancer a 5-percent concealment bonus, +1 to AC, and 5/+1 damage reduction. At level six, the effect increases to a 10-percent concealment bonus, +2 to AC, and 5/+2 damage reduction. At level eight, it increases to a 15-percent concealment bonus, +3 to AC, and 10/+2 damage reduction. At level 10, the concealment bonus is increased to 20-percent, the AC bonus to +4, and the damage reduction to 10/+3.
Got a news tip or want to contact us directly? Email news@gamespot.com
Join the conversation