How To Complete Mauer Der Toten Main Easter Egg In CoD: Black Ops Cold War's Zombies
Our guide gives you all the steps to complete the main storyline quest for Mauer der Toten.
Call of Duty's Season 4 Reloaded update for Black Ops Cold War's Zombies adds the new round-based map Mauer der Toten, and you can complete a main storyline quest to continue following Cold War's ongoing Dark Aether narrative. Here's our full guide to completing the Mauer der Toten main Easter egg quest.
Like most main quests in Zombies, Mauer der Toten will require you to power up the map, and open up most of the doors before really getting started with actual storyline quest steps.
Step 1: Turn On Power and PAP
Your first priority when spawning into the map is getting the power on. You'll need power for accessing new areas of Mauer der Toten and using perk machines. Afterwards you'll be able to reach the Pack-A-Punch. Here's our full guide for turning on the power and activating Mauer der Toten's Pack-A-Punch.
Step 2: Activate Klaus
You'll also need the help of Mauer der Toten's robot ally named Klaus. Klaus can defend areas to protect you or access areas you can't on your own, but first you'll need to activate him. Here's how you activate Klaus.
Step 3: Obtain A Wonder Weapon
Next you'll need to get your hands on Mauer der Toten's CRBR-S Wonder Weapon. This new Wonder Weapon starts off as an energy-based pistol with an orbiting repeater, but it also has three additional variant upgrades. Here's how you obtain and upgrade the CRBR-S Wonder Weapon.
Step 4: Upgrade Klaus
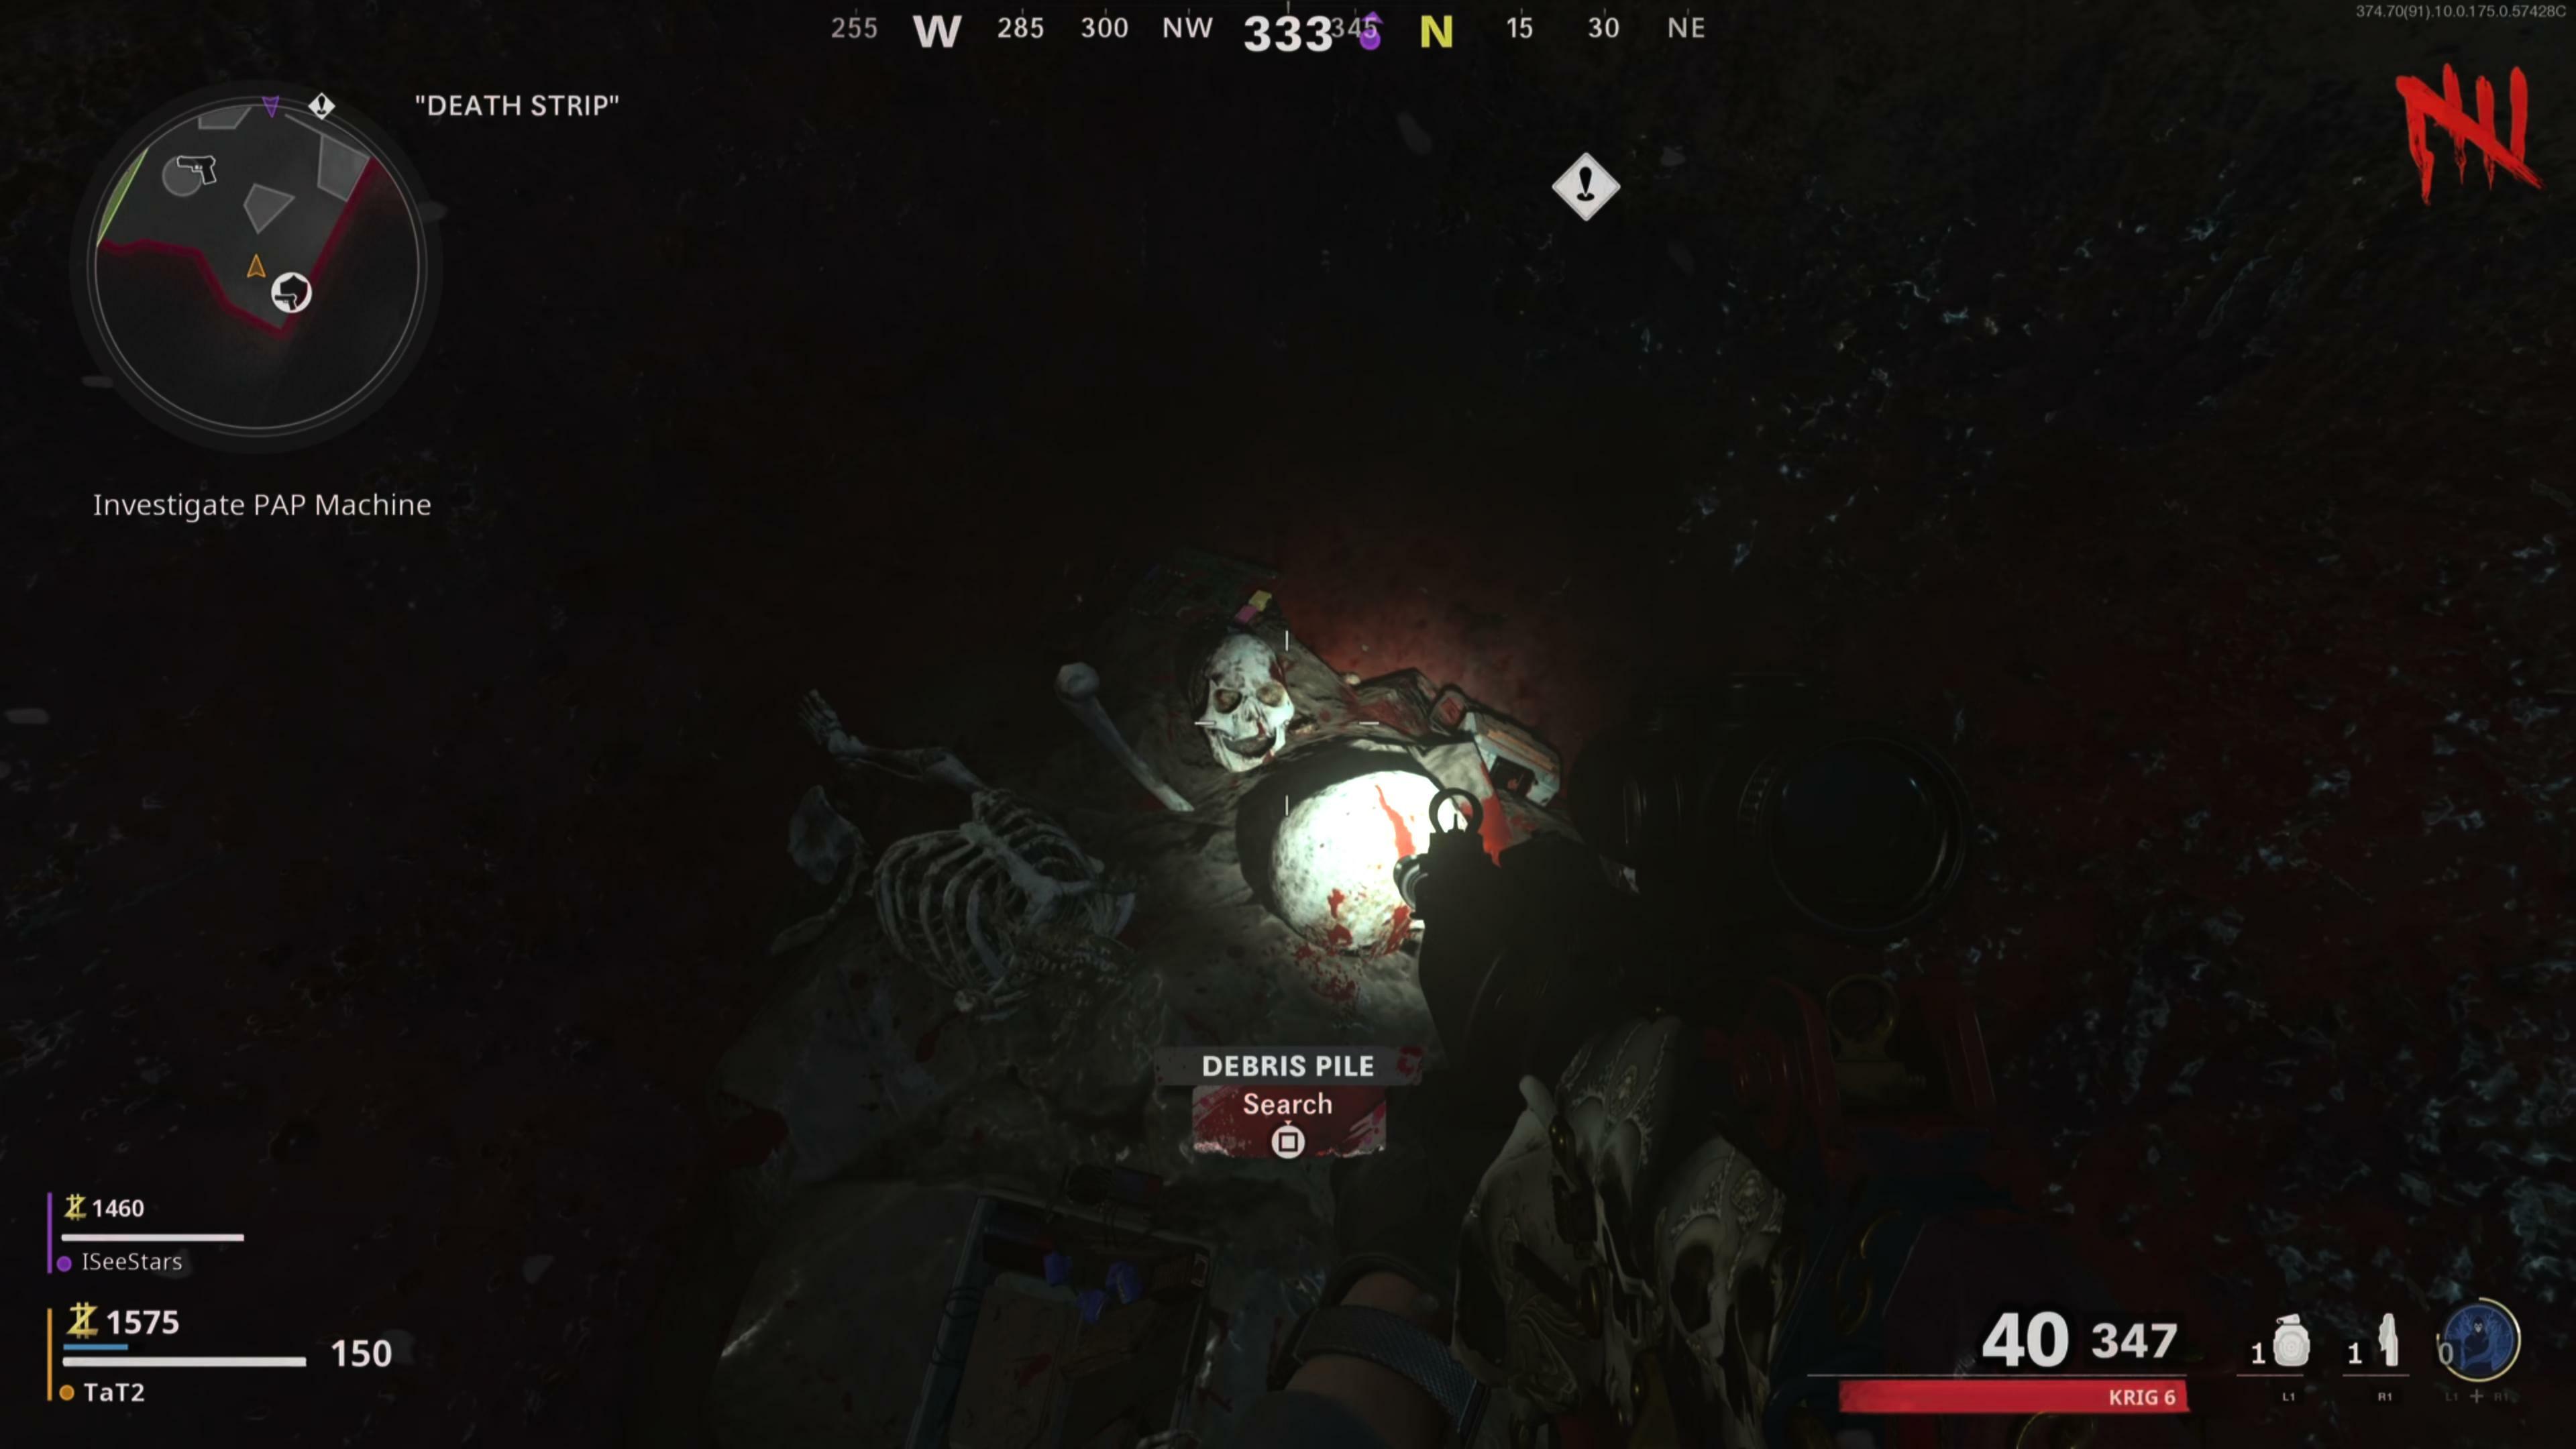
To upgrade Klaus, you need to collect three parts: the Microwave Dish and two Cosmetic Disks.
For the Microwave Dish you'll need to search the debris piles that can be found in the kill zones on both sides of the Pack-A-Punch machine. There are several debris piles, so just keep searching them until one spawns the Microwave Dish.
The two Cosmetic Disks you need are located in special boxes around the map. Use your blacklight on each to see a small Klaus Icon. Order Klaus near the box to make him smash it open. There are six box locations, but only two boxes in your match will have the Klaus icon that appears under the blacklight.

Here are the possible locations:
- Hotel Lounge: On the inner corner of the room
- 5th Floor Apartments: Between the door and bookshelf
- Blasted Suite: Near the workbench
- West Berlin Street: Under the Cafe sign
- Maintenance Tunnel: Outside the tunnel that leads to the Safe House
- Ghost Station: On the smaller train loading platform opposite Mule Kick
Take the collected items to the Garment Factory and interact with the Upgrade Station. Klaus will then need to get some zombie kills here. Once Klaus scores enough kills, the Upgrade Station's display will turn from red to green. Now you can use the remote to direct Klaus into the Upgrade Station. You'll need to defend it for about a minute. To fully upgrade Klaus, you need to use each item, then complete the defend step each time. So, you'll do this three times to finish the complete upgrade. Once successful, Klaus will hop out of the machine with a new punk rock look.
Step 5: Build The Headgear
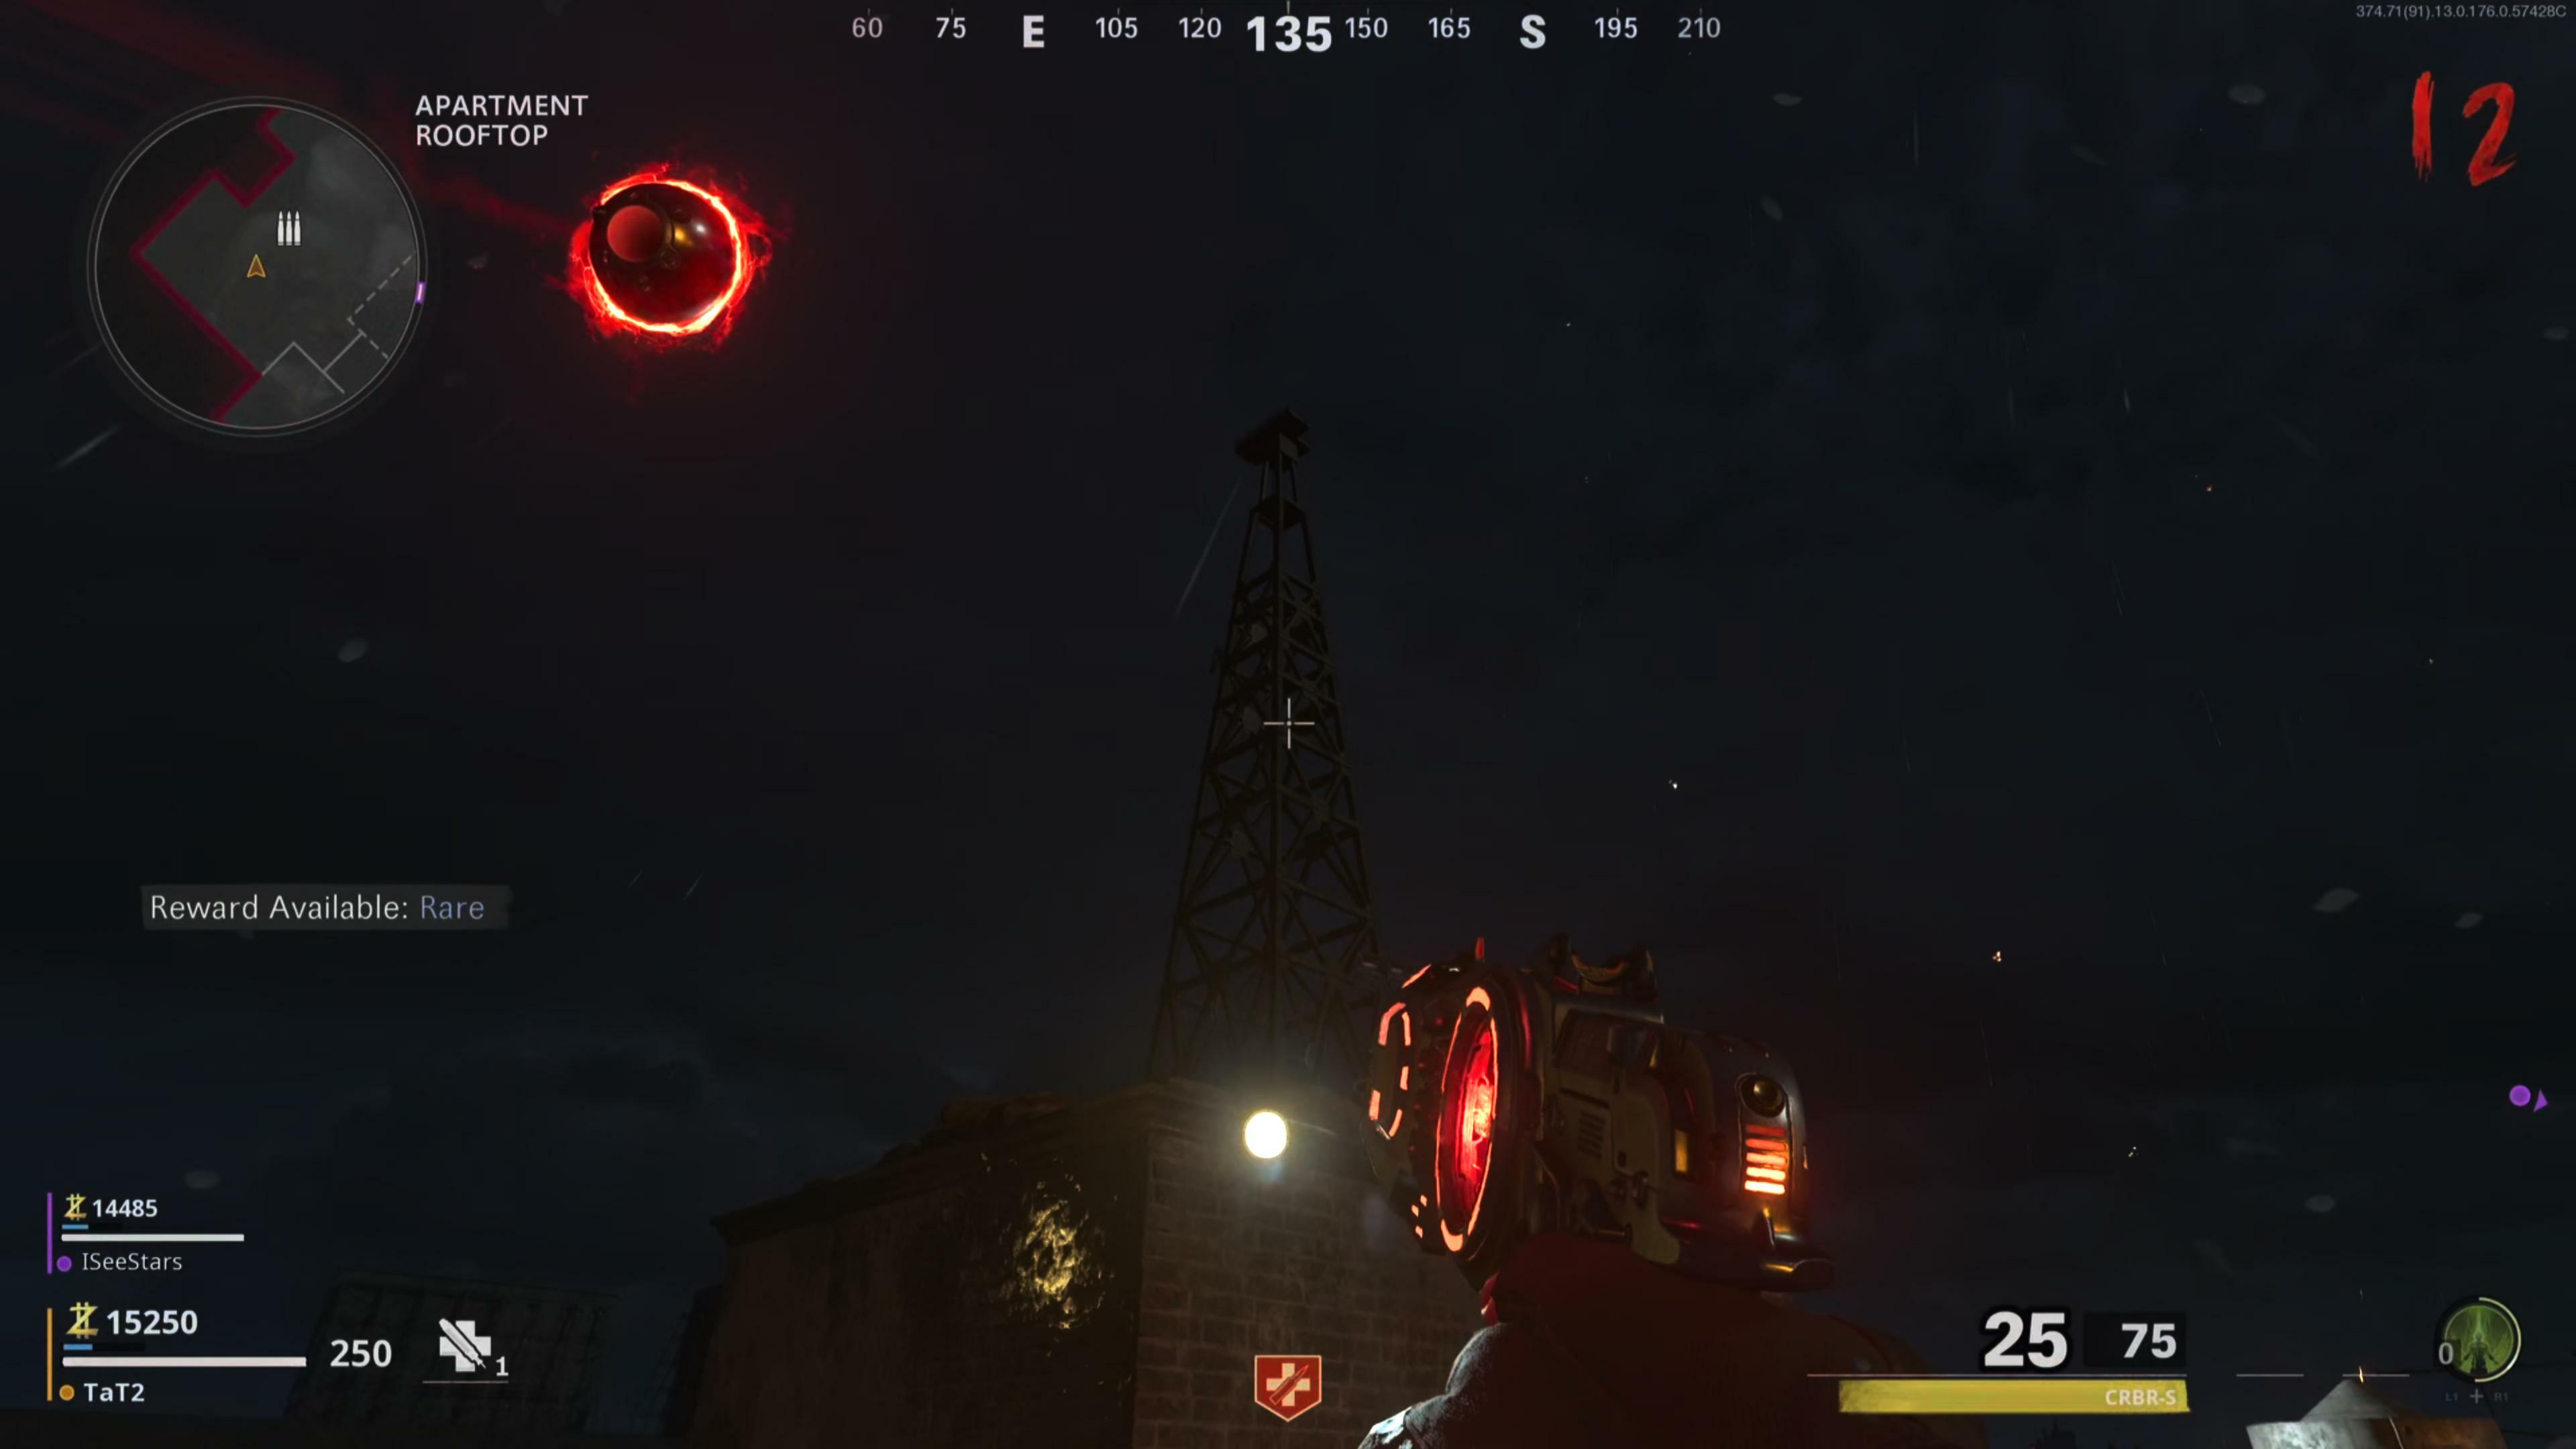
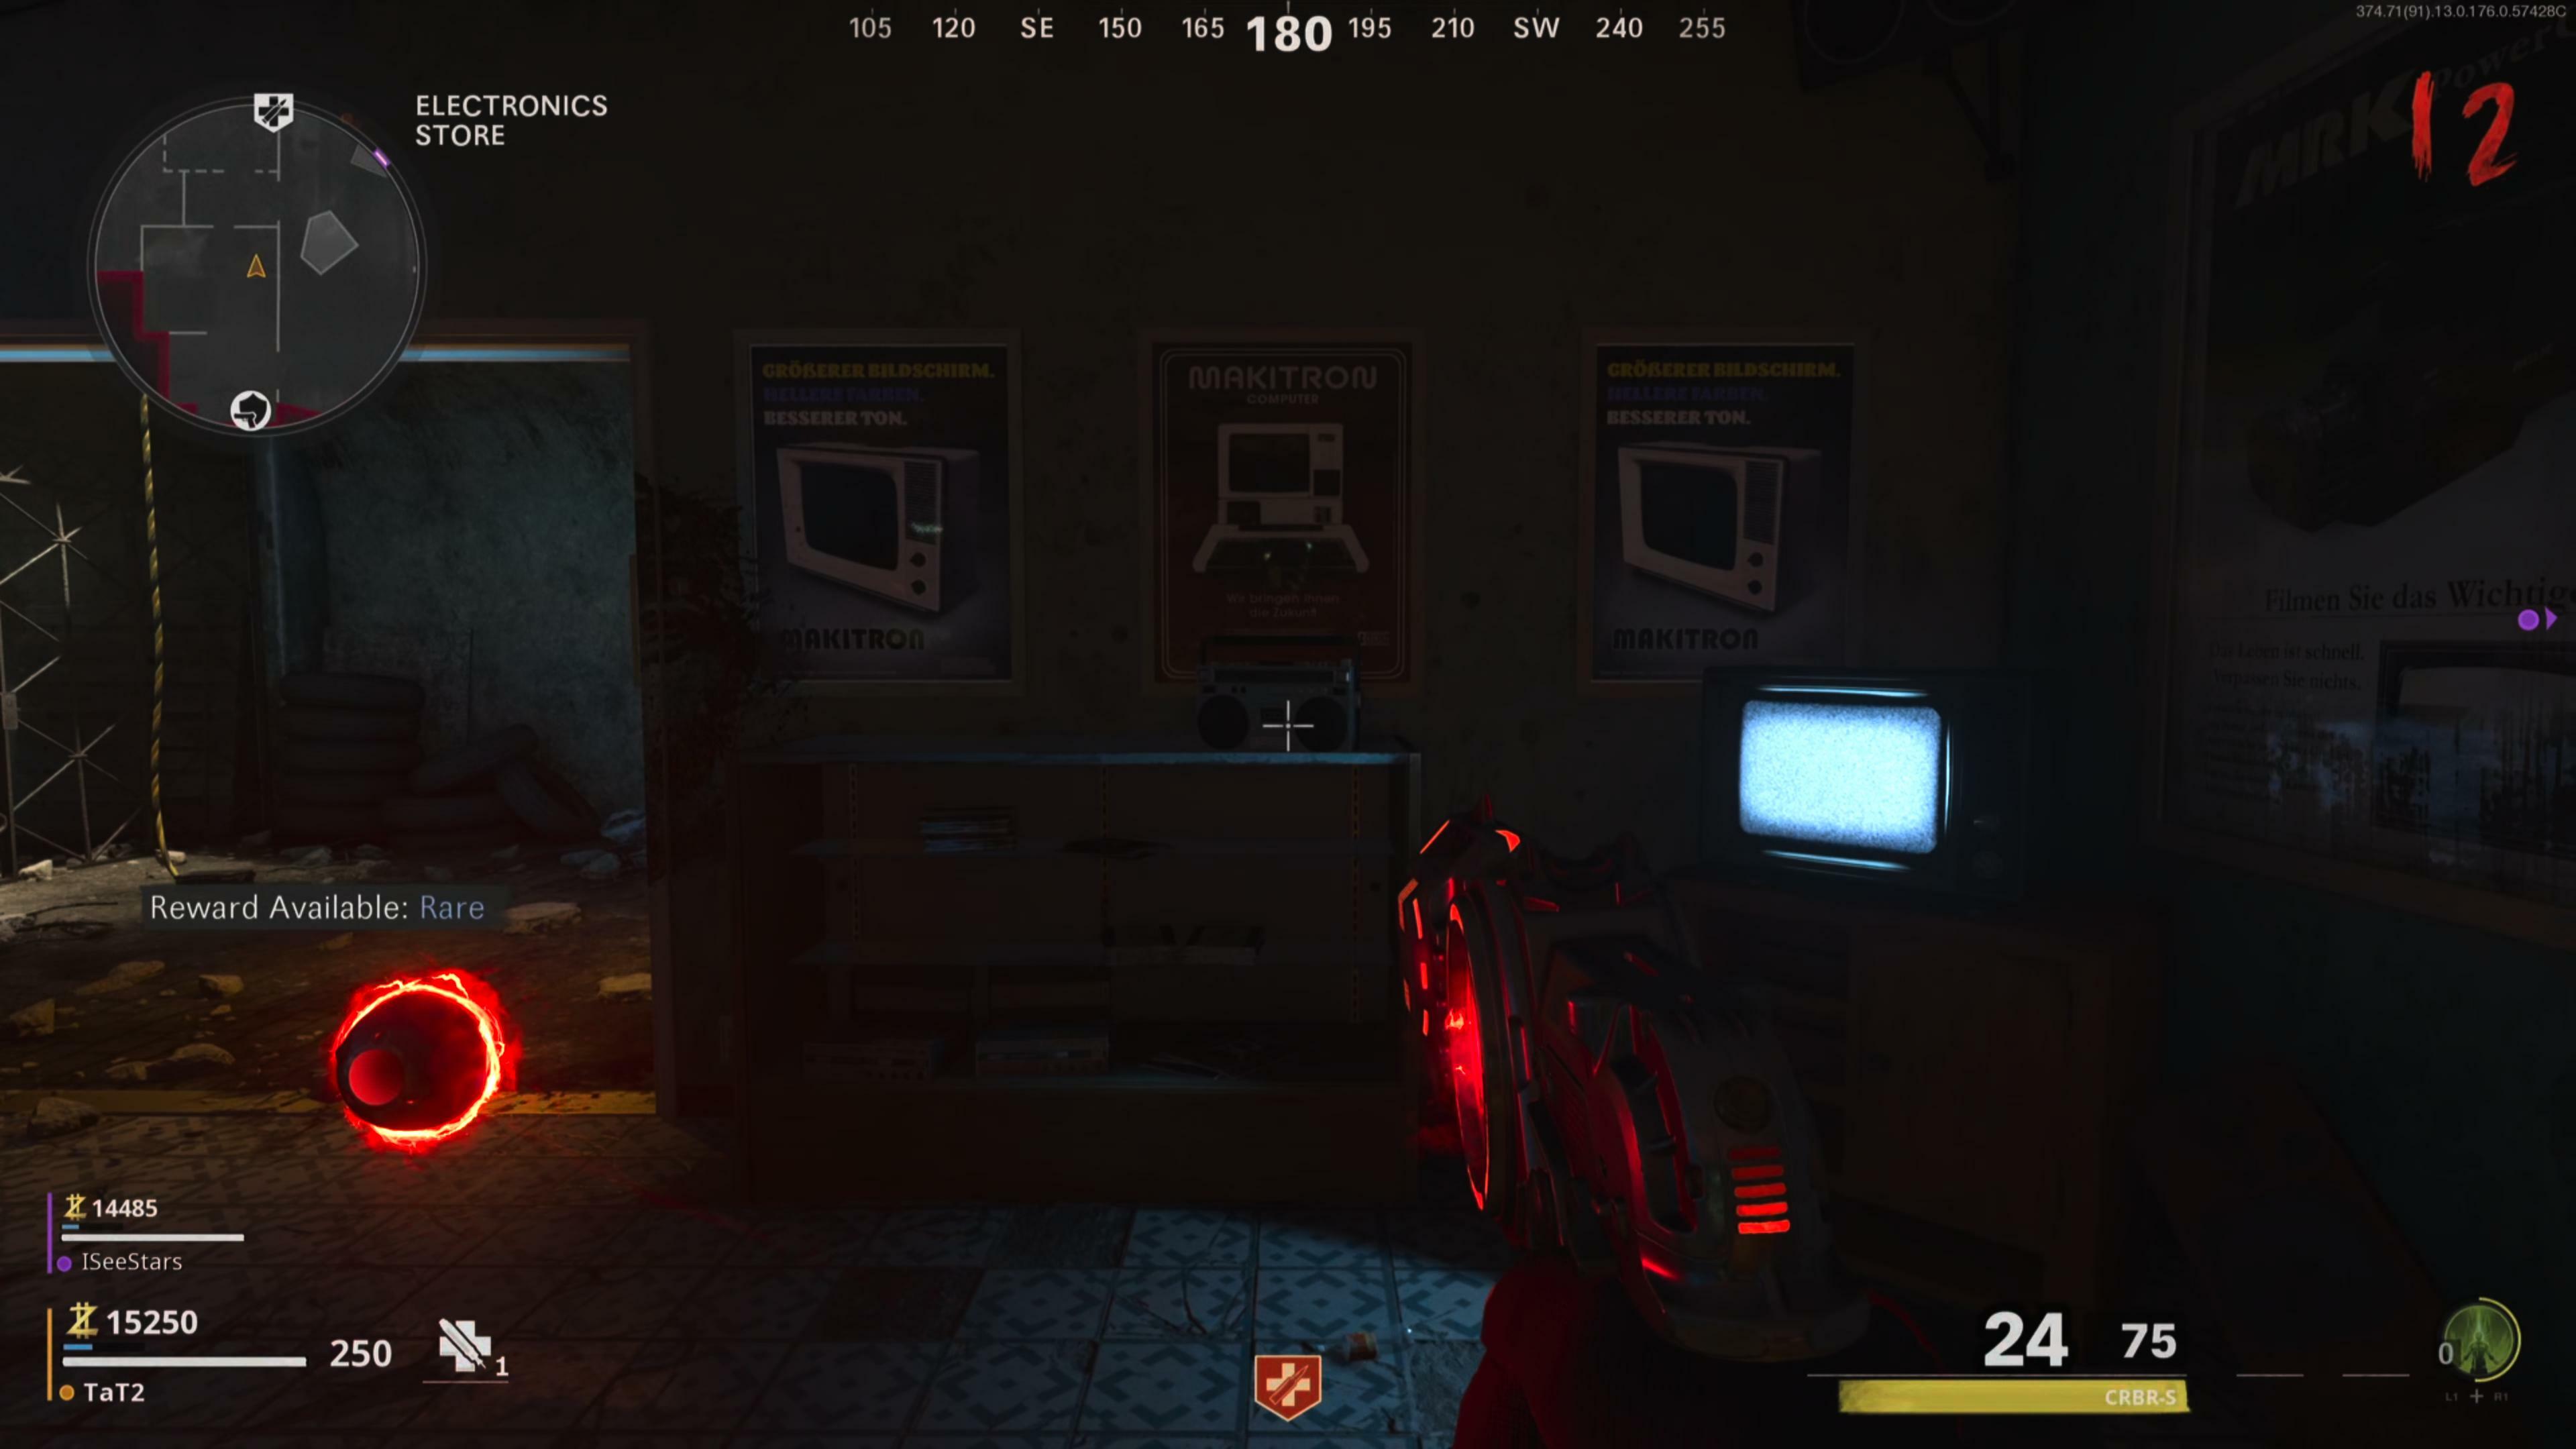
This is an additional upgrade required for Klaus. You need to collect three items: Antenna, Transistor, and Electronic Boards.
Antenna: Located on the Apartment Rooftop spawn area. Shoot the antenna tower on the rooftop with the Wonder Weapon to knock it down. This will drop an antenna part you'll need to pick up.
Transistor: In the Electronics Store you'll find boombox radios. Shoot them with any Wonder Weapon and eventually the part will drop.
Electronic Boards: At the Ghost Station platform you'll find a ticket booth window. There's a small box top left of the window. Shoot this box with any Wonder Weapon to retrieve the part.

Once you have the parts, return to the Safe House and interact with Klaus in his chair to install them. You've now upgraded Klaus with the Hacking Helm.
You can do the two Klaus upgrade steps in either order or have teammates working on both at the same time. However, I recommend doing the Upgrade Station step as soon as possible, as it gets dicey to defend the Garment Factory in later rounds.
Step 6: Access The Secret Lab and Charge The Canisters
To unlock Mauer der Toten's Secret Lab, you need Klaus and an upgraded Wonder Weapon.
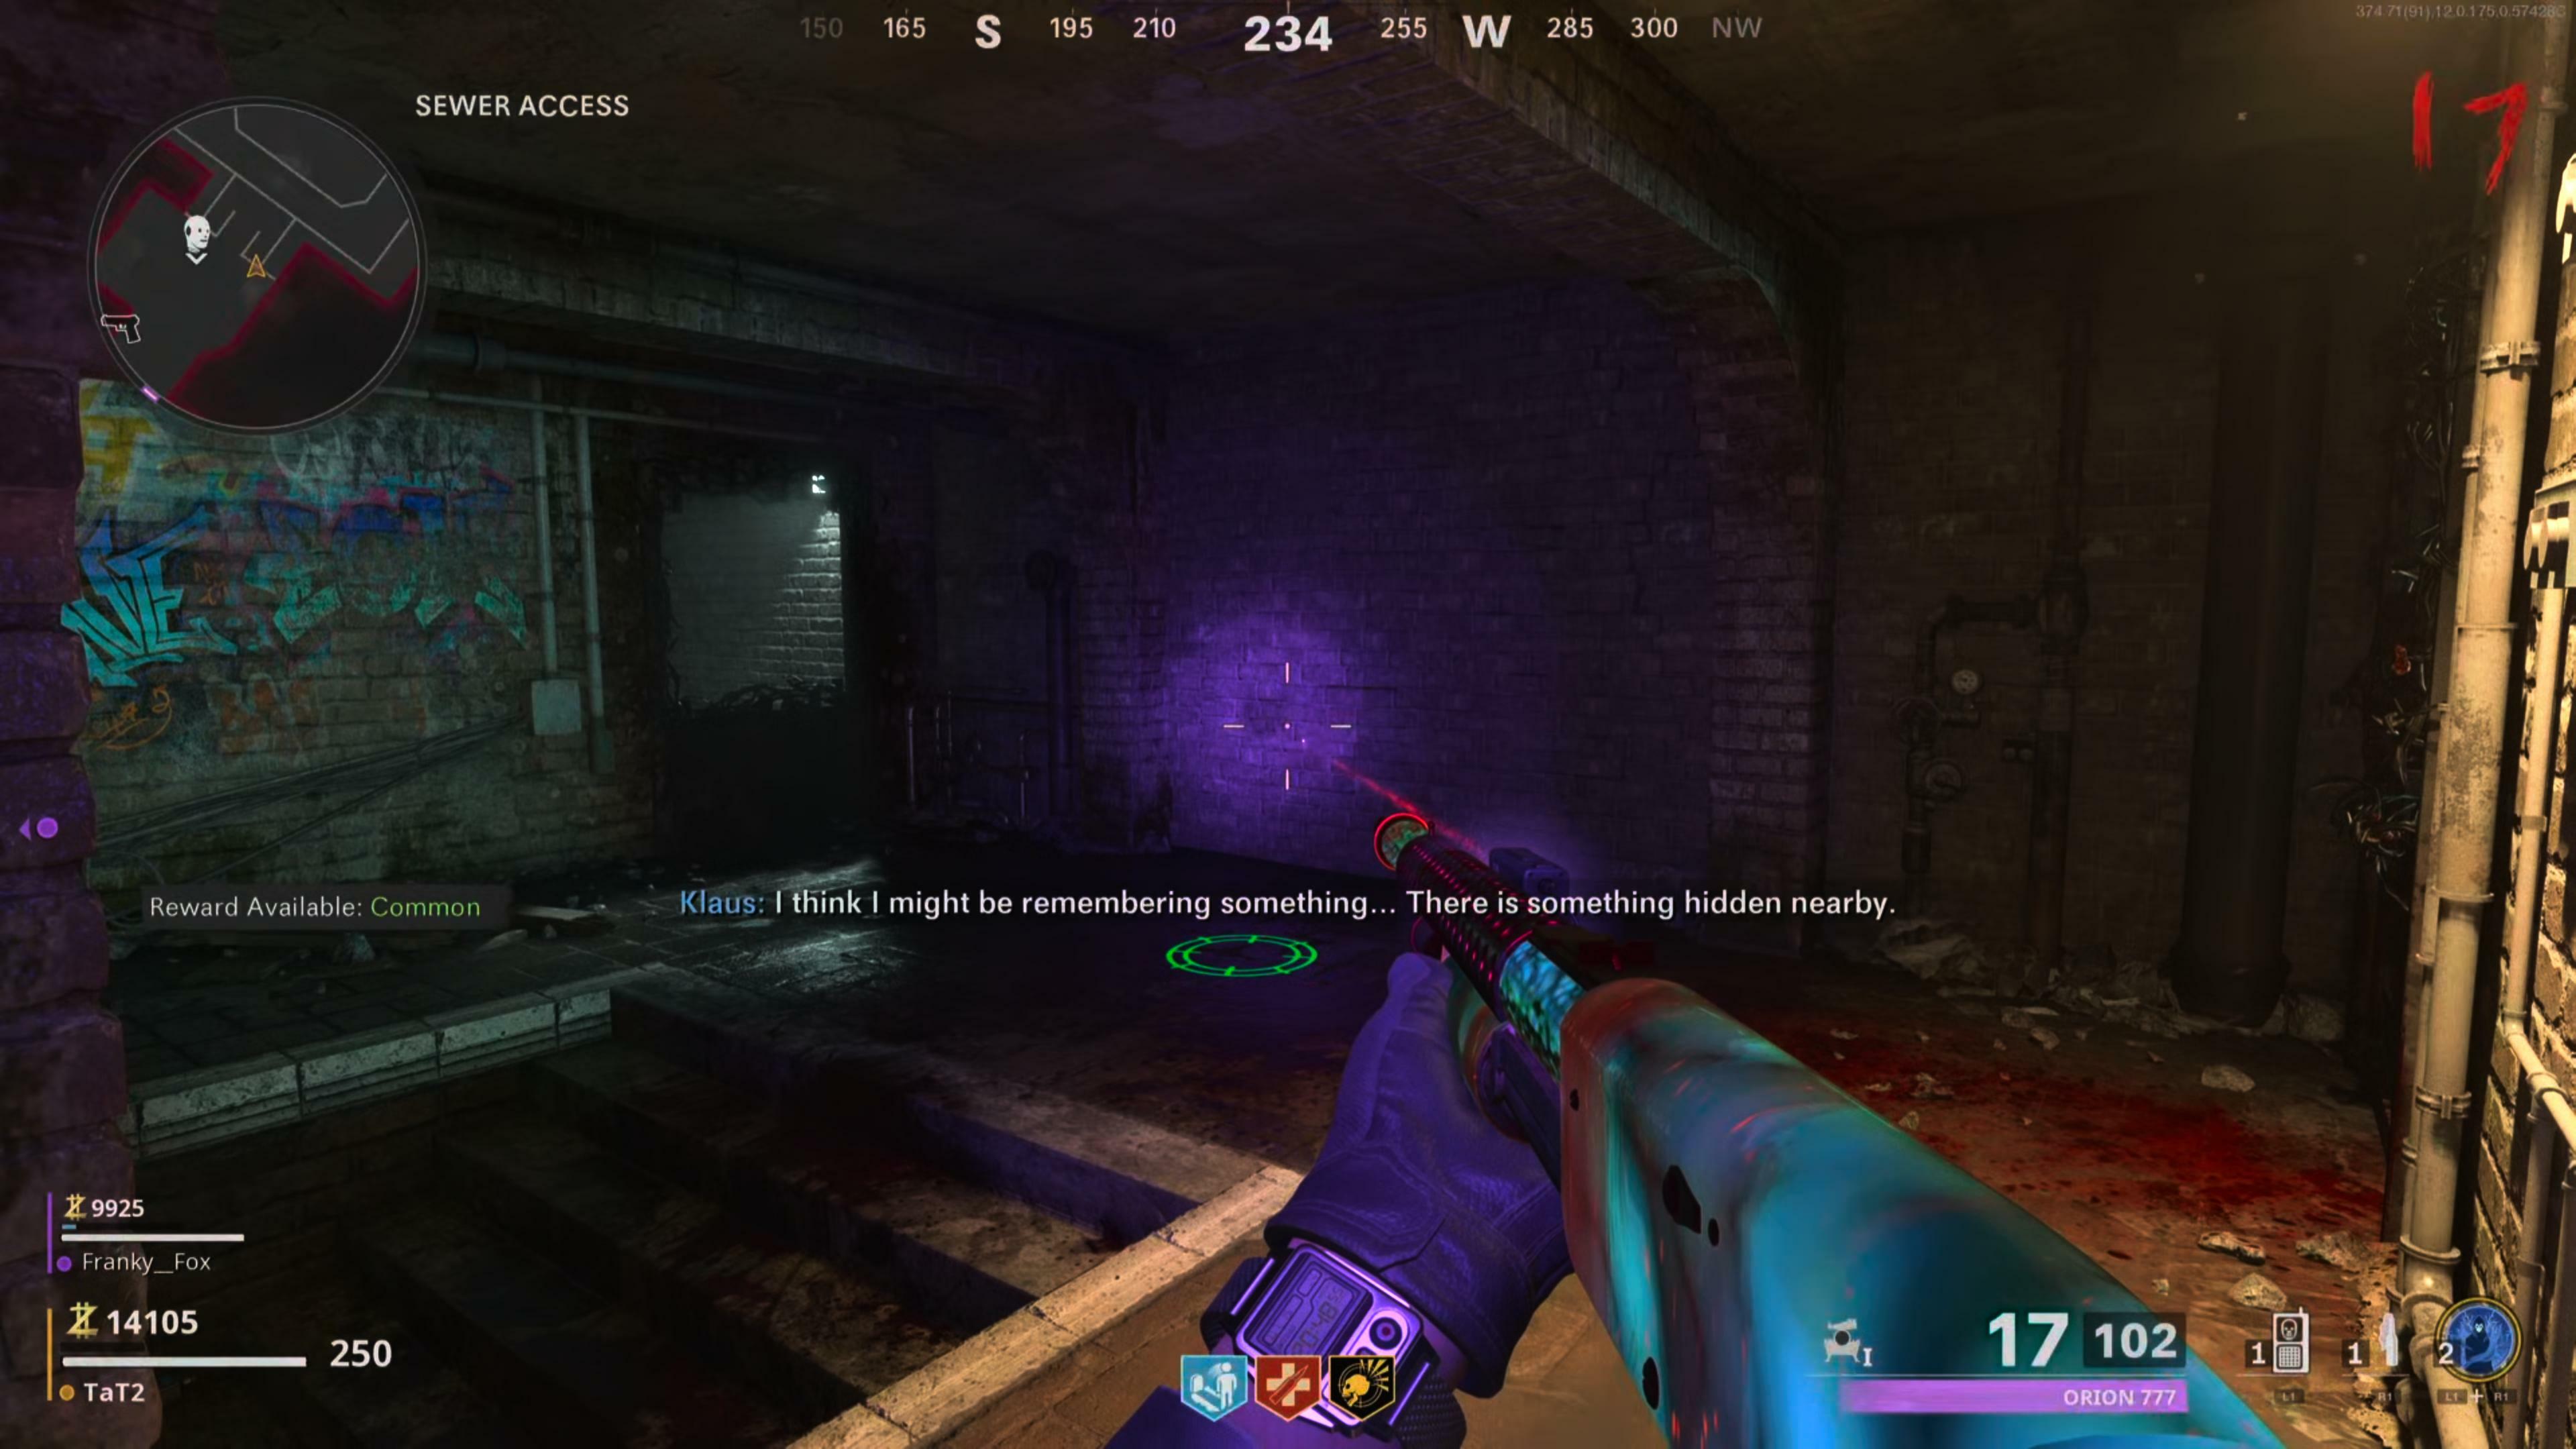
First, you'll need to kill zombies until you get one to drop the Blazer mod for the CRBR-S Wonder Weapon. Once your CRBR-S has the Blazer mod equipped, lead Klaus to Sewer Access and direct him up the small set of stairs that lead to a section of blank brick wall. Direct Klaus to the wall and he'll punch right through the brick to reveal a secret metal door.
Shoot the secret door with the Blazer modded Wonder Weapon until the door melts away.
Once inside the Secret Lab, you'll see two devices locked under red energy shields. Clear any zombies or Tormentors that spawn. You basically need to survive in this room until the red energy shields disappear. Once down, you'll be able to interact with a canister pedestal. Take all three canisters that rise from the canister device pedestal.
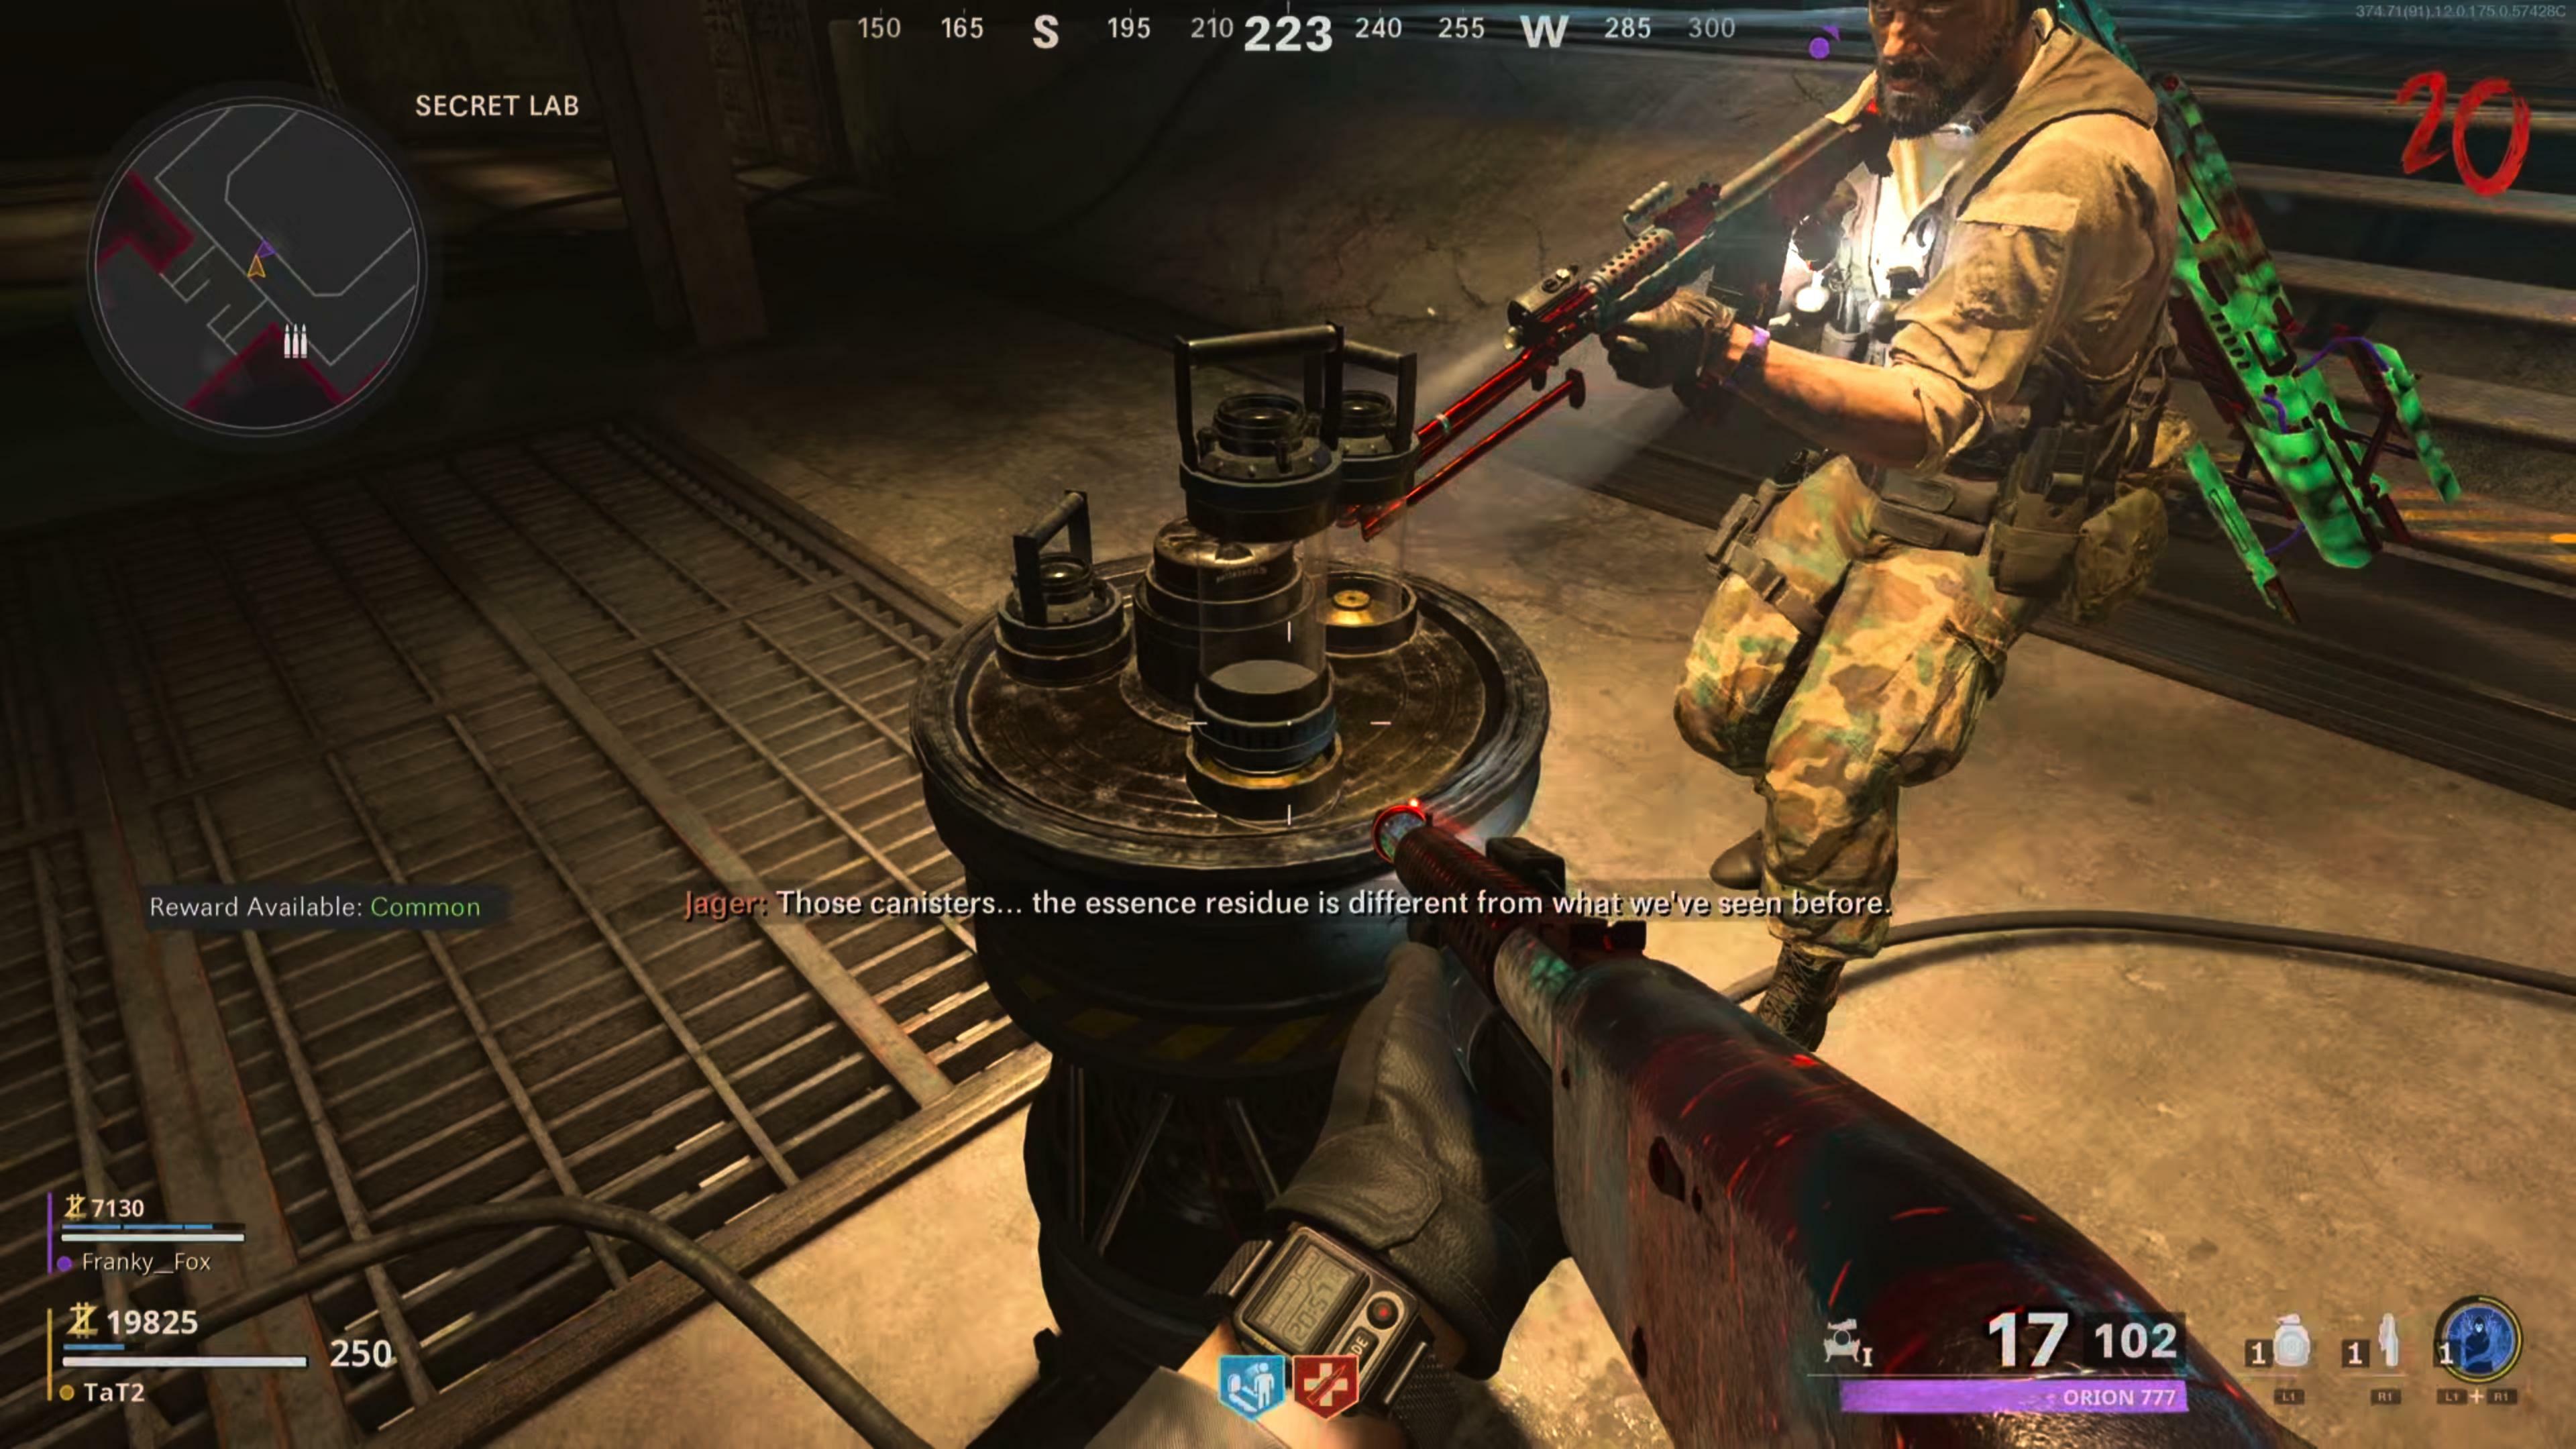
These canisters fit in the three bulky, green harvester boxes found randomly around the map. Find and place all your canisters in the harvester boxes. These are pretty easy to see, so you shouldn't have much trouble locating them in your match.
There are multiple spawn locations for these:
- Sewer Access: Against the wall near where the fuse Tempest spawns
- West Berlin Street: Against a shed, near the junk ramp you cross over to access PAP
- Ghost Station: Near the train loading platform
- Alley: Next to a dumpster
- Korber Rooftop: Next to the water tower
- Destroyed Penthouse: In a room sitting between the windows
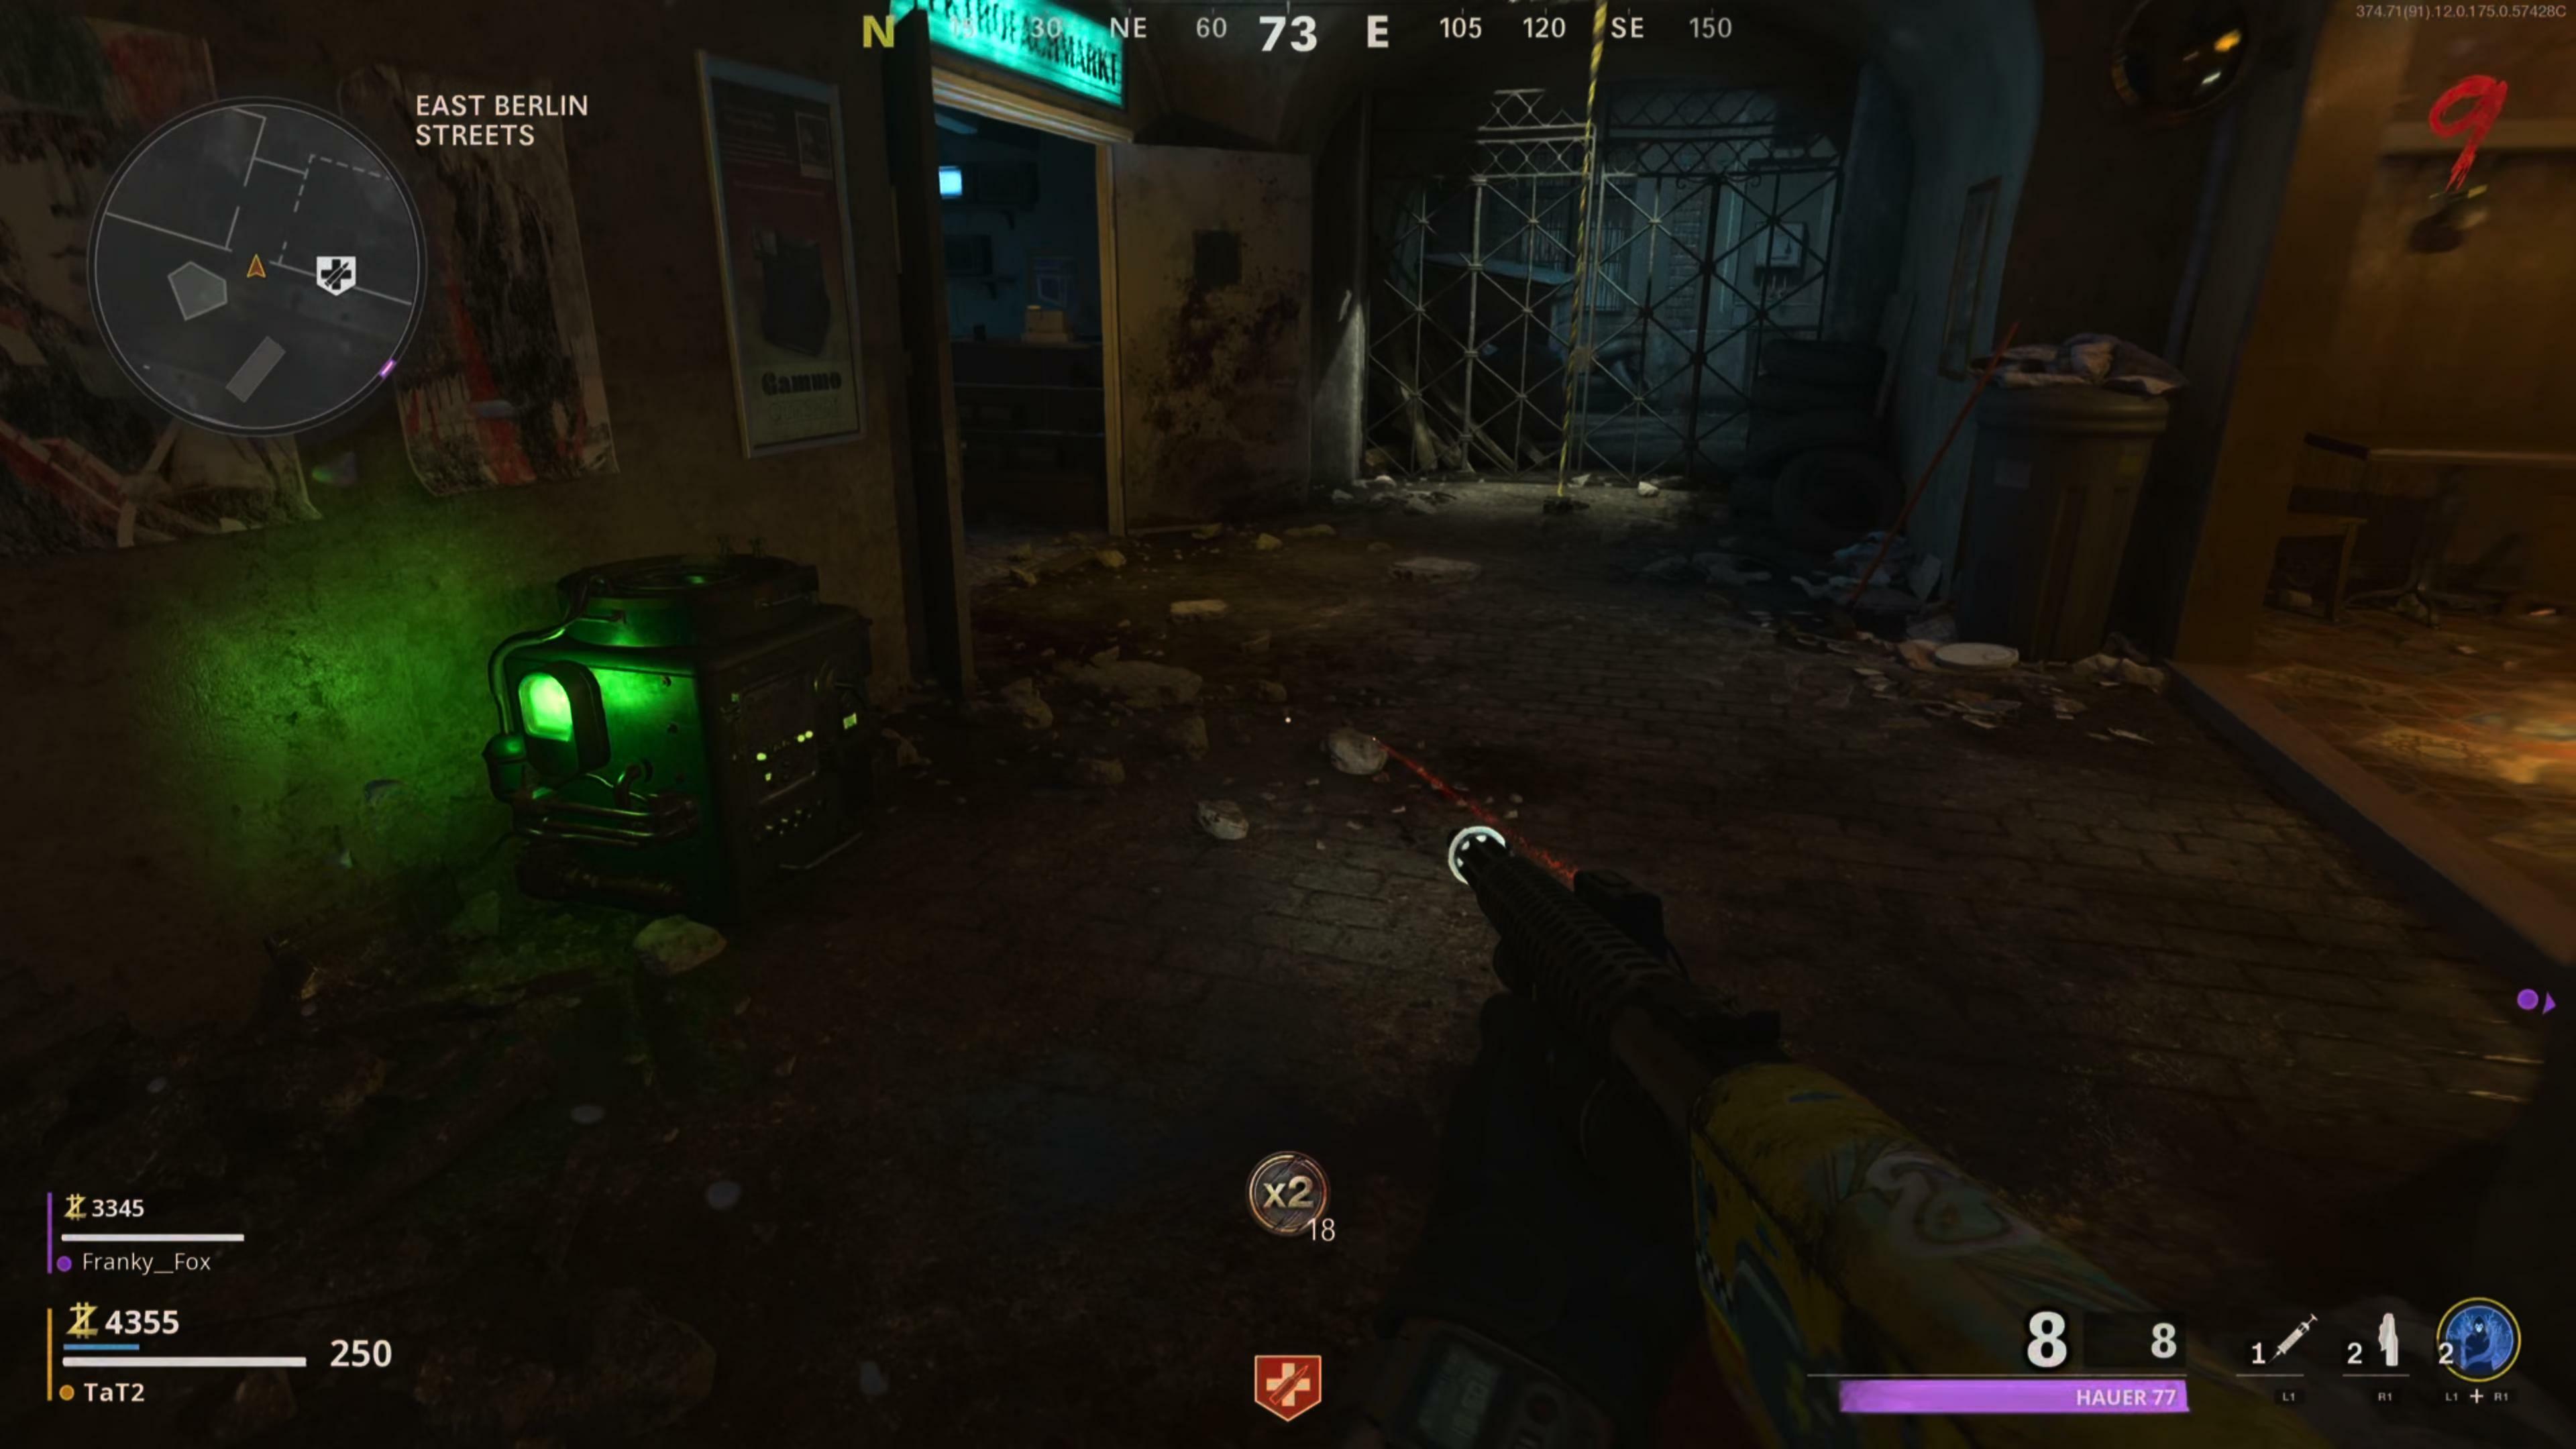
- East Berlin Streets: In the archway between the Bar and the Electronics Store.
Now head back to the Secret Lab. The other device in the Secret Lab that was previously covered by a red shield is a piece of equipment that provides you with Tempest lures. You need to shoot the device with your Wonder Weapon, and it will activate and spawn a lure. You can only carry one of these lures at a time, and you'll need multiple lures to complete this step, so make sure everyone in your party picks up a lure as well.
Throw a lure down by one of your harvester boxes, and it will cause Tempests to spawn. Kill the Tempests near the harvester box to fill the canister.

The canister will turn bright purple once full, and then you can grab the filled canister and navigate back to the Secret Lab, where you'll place it back on its original pedestal. You'll want to repeat this process for all three canisters. If everyone in your party has used their lure and you need more, you might need to proceed to the next round to get more lures to spawn at the machine.
Step 7: Stop The Train, Get A Nuke
Once all the canisters are charged, you'll be prompted to get a nuke.
Go to the Switch Control Room. You'll find the controls in the room will now give you the option to interact with them. This new prompt allows you to pull a lever to switch the train tracks. Pull the lever and switch the tracks.
Next, summon Klaus and go to the Ghost Station. Direct Klaus on the train tracks furthest away from the Mule Kick perk machine. A train will arrive and Klaus will stop it on the tracks. You can now hop aboard the train to collect two items:
- Keycard: Retrieve this from a dead body in one of the seats
- Warhead: In a crate at the middle of the train car
If you fail this step or Klaus deactivates before you've stopped the train, you'll have to go to the next round to try again. You'll also need to hit the button to switch the tracks again.
Step 8: Activate The Disruptor Satellite
It's important to note here that this step will eventually prompt a 5 minute timer, and your match will end if you fail to complete this within that time frame. So, I'd recommend reading this all the way through to have a good understanding before attempting this step.
First, take the warhead back to the Secret Lab. You'll interact with the canister pedestal that has your three glowing purple canisters, and it will let you add the nuke item to the pedestal.
Then take the keycard to the Safe Room. Here you can use the computer on the table in the center of the room. Select "Browse Files" and continue to do this until you get a prompt that says: "Activate The Disruptor Satellite."
Go to the military tent found at West Berlin Streets. Use the computer inside the tent. This will spawn elite enemies including an HVT Megaton. Kill them, preferably saving your Megaton for last. As always, the Megaton will split into two halves. Kill both halves and they will each drop a piece of Uranium Rock. Killing them also starts your 5 minute countdown. Collect one of the Uranium Rock items that the Megaton drops, and rush it to the crafting bench that's located inside the tent where you first activated the computer. Use the crafting bench to craft the Uranium Device.

If you're playing in co-op, have a teammate grab the other piece of Uranium Rock, and rush it to the same crafting bench to make the second Uranium Device. If you're playing solo, you'll have to rush each piece separately, so familiarize yourself with the map layout before attempting this step.
It's important to note that you'll take a small amount of damage while holding the Uranium Device. Drop it if you need to recover your health, but don't take much of a break because you're still being timed. I used Healing Aura as my Field Upgrade, so I never had to drop the Uranium. I simply activated Healing Aura when my health got low.
Rush one of the Uranium Devices up to the spawn roof (Apartment Rooftop) and interact with the zipline that attaches to the Korber building. Then rush the other Uranium Device to the Korber rooftop and interact with the zipline headed to the Apartment Rooftop.
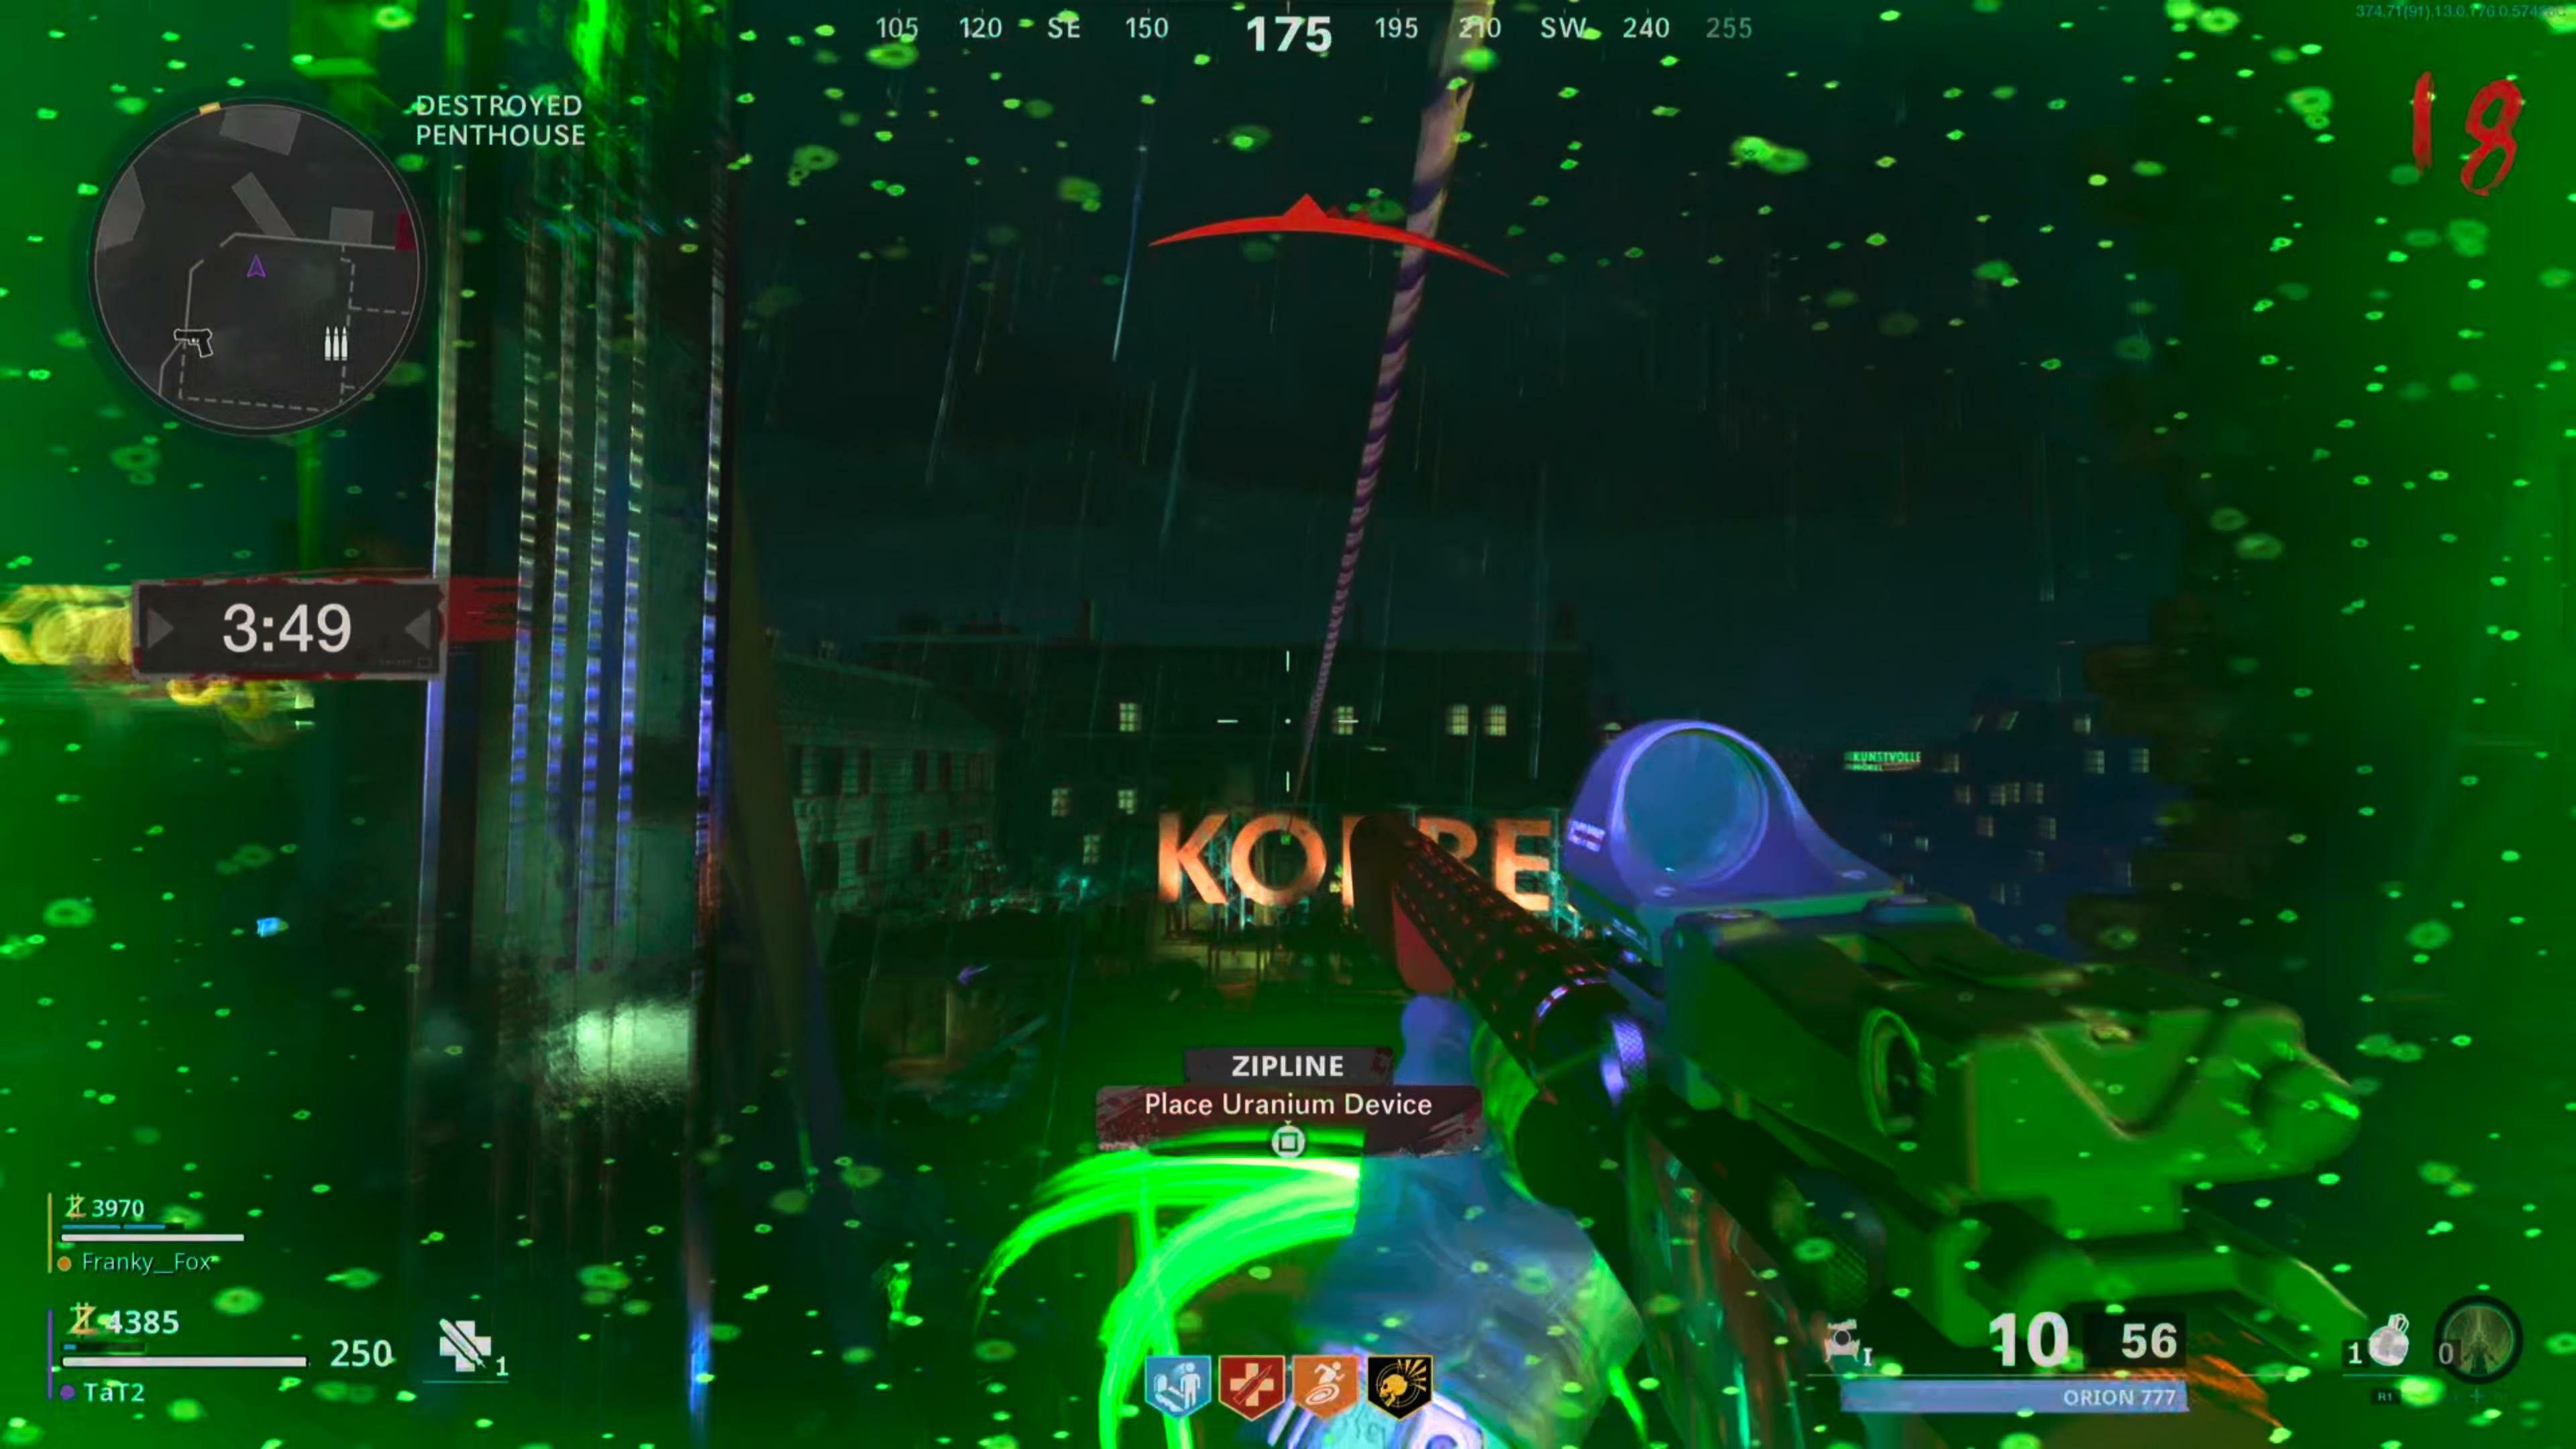
Basically, this will cause the two Uranium Devices to collide with each other on the zipline, and the collision will drop a new Cleansed Rock item onto the street below. This ends your timed objective.
Step 9: Cleansed Uranium
Go down to the East Berlin Streets and collect the Cleansed Rock item. Return to the Secret Lab and interact with the canister pedestal to add the uranium.
You now need to repeat the steps from Step 8 to get a second Cleansed Rock.
First, end the round to start a new round. Then repeat the same steps from Step 8, but this time you'll be using the tent found at East Berlin Streets. Interact with the computer, kill the Megaton that spawns, and craft the uranium items into Uranium Devices at the tent's craft bench, and take each piece to the opposite ends of the rooftop zipline to collide them.
Then grab the second Cleansed Rock item from the street below. However, this is where you want to stop. I recommend taking the Cleansed Rock back to the Secret Lab, but drop it near the pedestal to avoid taking any more damage, and then take some time to gear up for the boss fight. If you put the second Cleansed Rock into the pedestal straightaway, the boss fight will start without any hesitation.
Get all your perks, and fully upgrade your guns. Wonder Weapons and Death Machine killstreaks are recommended for this boss fight.
Step 10: Boss Fight
Muer der Toten's big boss fight is Valentina. She will spawn in the Secret Lab once you add that second Cleansed Rock to the pedestal, and she'll bring a horde of zombies with her. She has a blue shield bar and a red health bar. Take out her shield to start dealing damage to her. You need fully upgraded weapons and Wonder Wonder weapons, otherwise she'll just keep replenishing her shield if you don't damage her fast enough.

After dealing a bit of damage to her, she'll teleport out of the Secret Lab. You can use this brief intermission to restock your ammo, buy more armor, perks, whatever. You don't have long though. If you don't show up to the next part of the fight on your own, she'll just teleport you and any teammates to her new location. This fight will teleport from Apartment Rooftop, to West Berlin Streets, then East Berlin Streets, and finally Valentina will return to the Secret Lab for the final round.
This isn't a timed boss fight like the ones in Outbreak, so take your time and make use of the ammo crates nearby. This is a tedious fight.
It's also important to understand her different attacks. She can shoot fire at you, which obviously can do a fair bit of damage. When she spawns flying zombies around her, take them out quickly, otherwise she'll start siphoning health from them. And finally, she can attack with a move that creates a hazy and shaky effect on your screen. You want to take cover fast to avoid an insta-death.
Once you take her down in the Secret Lab, you'll need to interact with her body. There's a brief cutscene, and then you'll be back in the game for another part of the story with Klaus, and then a final main cutscene will play. Storyline quest complete.
If you're looking for more to do on Mauer der Toten, there's also a really fun Disco Bunny Easter egg to try.
Got a news tip or want to contact us directly? Email news@gamespot.com
Join the conversation