Ghost Of Tsushima Act 1 Walkthrough (Spoiler-Free)
Here's everything you need to know to get through the first act of Ghost of Tsushima.
Warning: We've ensured that our walkthrough contains minimal spoilers so you can still enjoy the game even if you need help completing all the story missions. However, if you want to know nothing about the game before playing, stop reading now and consult this walkthrough later.
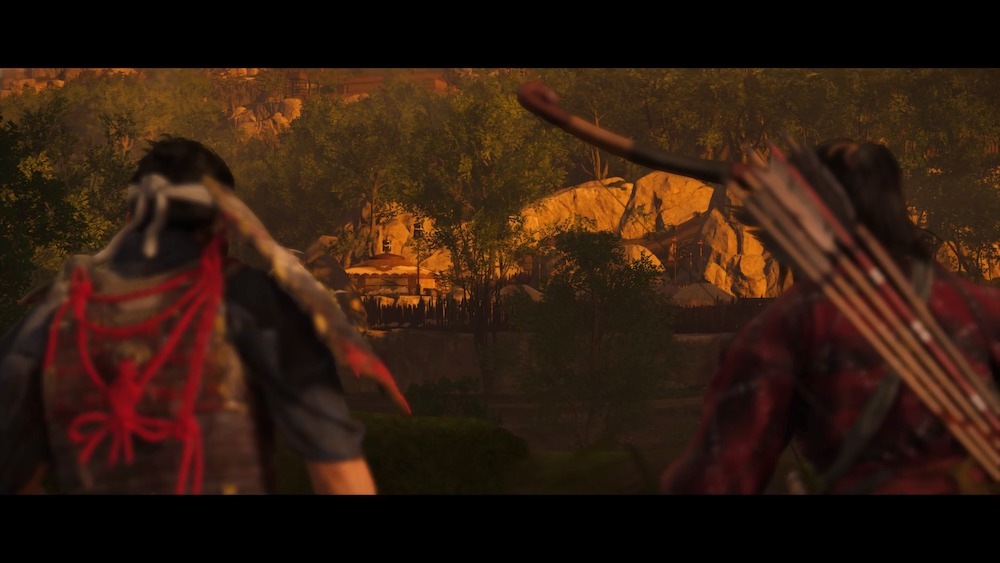
Ghost of Tsushima is a huge game, with a whole lot to explore and uncover. It'll also put you through your paces as a warrior, requiring you to not only fight off various kinds of enemies and parry their deadly blows, but to learn how to obfuscate, prioritize your foes, and control the battlefield. Every fight in Tsushima has the potential to be a tough one, especially as you're unlocking the tools you need to repel the Mongol invasion in the early game.
We're here to help, though. Our Ghost of Tsushima walkthrough will take you through all of the steps of Jin's Tale, the main story of the game, to help you best your opponents and find everything worth grabbing along the way. We'll do our best to take you through missions to help you when you need it, without spoiling the story.
Below is the complete walkthrough for Act 1, skipping the opening scenes of the game, which set up the story and mostly work to provide you a tutorial of the game. If you're looking for our walkthrough of subsequent sections of the game, be sure to jump into our Ghost of Tsushima Act 2 walkthrough. Otherwise, check out the rest of our Ghost of Tsushima guides for rundowns on all of the Character Tales, Mythic Tales, and sidequests--as well as detailed guides for finding all of Tsushima's many collectibles and upgrades.
Ghost Of Tsushima News
- Ghost Of Tsushima Getting "Legends" Co-Op Multiplayer For Free
- Ghost Of Tsushima Review - Chaos In The Windy City
- Ghost Of Tsushima Mythic Tales Guide: How To Complete Them All
- + Show More Ghost Of Tsushima News Links (2)
- Ghost Of Tsushima Armor Guide: All Armor Sets And Locations
- Ghost Of Tsushima Walkthrough, Guides, Collectibles, And Tips (Spoiler-Free)
The Warrior's Code
When you finally get full control of Jin, you'll have access to a couple of missions you can choose from, and the order of completing them is up to you. The Warrior's Code is your big introduction to stealth fighting in Ghost of Tsushima, and kicks off when you head to Kechi Fishing Village and meet with Yuna. Together, you'll ride for a Mongol prison camp.
The trick here is just to unlock the tools you're given--specifically Focused Listening, which allows you to pinpoint enemy soldiers at a distance and through objects, exactly like in The Last of Us games. You can use Focused Listening to seek out and eliminate each of the Mongols here without being detected.
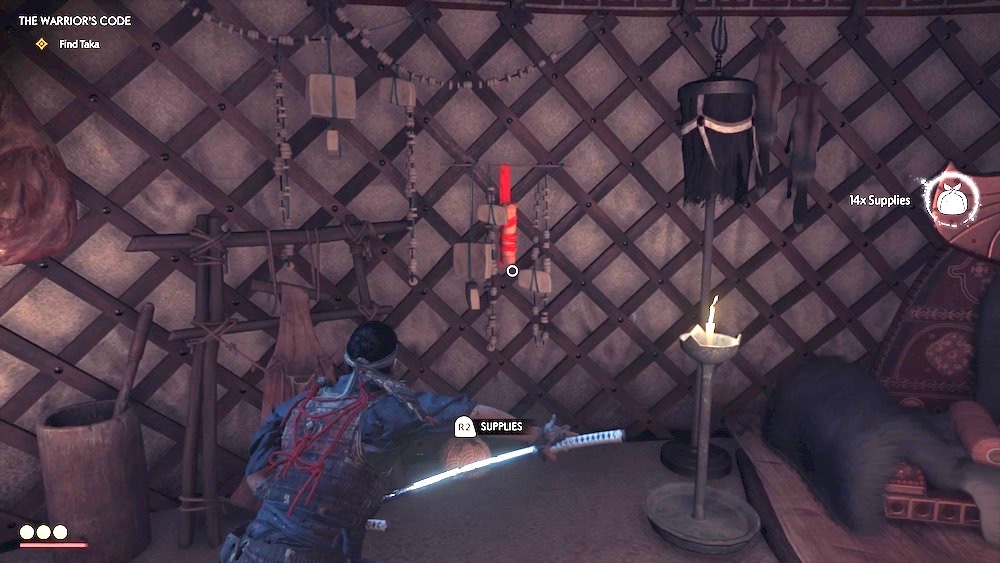
This camp isn't huge, but there's a lot you can loot from it, so take your time checking it out. You'll find plenty of supplies, the currency you'll use for all of your upgrades, scattered around in and out of tents. As you climb the hill, be careful going into the large tent--there's a tougher Mongol swordsman inside. As with everyone else, he's easy to take out silently if you're patient and give him time to turn his back to you.
Loot the big tent for materials and pick up your first Mongol Artifact. Grab the Record from the table as well. Just outside this tent is one more enemy and a prisoner. With everyone dead, you're free to leave the camp through the hole in the fence just next to the watchtower beside the cage.
Just south of where you wake up after The Warrior's Code is a Fox Den. Find the fox and follow it to an Inari Shrine to get a new Minor Charm.
The Tale of Sensei Ishikawa
Head to Hiyoshi Springs and talk to the innkeeper. Follow him into the woods to find the path to Sensei Ishikawa's dojo. Climb the cliff and turn left as you go to grab the Aozora Headband off an arrow.
Investigate the dojo to find Ishikawa; he'll take you with him to Fort Nakayama. You'll fight some Mongols on the way, but nothing that should give you trouble. You'll also receive the Half-Bow weapon during the trip.
With Ishikawa, you'll set up an ambush of a nearby Mongol camp. What you're learning here is that your bow is pretty great at distracting or even eliminating groups of enemies. Shooting torch braziers, wasp nests, and explosive barrels can take out a lot of enemies quickly. Follow Ishikawa's instructions and dispatch the Mongols. Remember that when you hear archers shouting, they're about to fire on you; a quick dodge can save you from taking an arrow in the chest.

Note also that this fort includes a Mongol Leader, a specific kind of enemy that's tougher than the rest. You'll know him by his golden armor. Leaders take additional damage to kill and often employ stronger, more varied moves than regular soldiers. Prioritize the Leader when he shows up and try to get rid of him quickly. Killing Leaders brings an added benefit: when you take out enough of them, you'll learn new stances that make you more effective at dealing with specific types of enemies, like those carrying shields or spears.
Once you've cleared the fort of Mongols, you can look around for clues and finish up the tale. Note that there are plenty of materials you'll want to grab in the fort as well, including Iron, which is used to upgrade your weapons. You can only get Iron from "Mongol Territory," meaning forts and strongholds, so grab it while it's convenient.
Completing The Tale of Sensei Ishikawa unlocks his extensive optional questline. For more details on Ishikawa's Tales, check out our extensive Tales of Tsushima side-missions guide.
The Tale of Lady Masako
Recruiting Lady Masako is also a high priority because completing her first tale will earn you a new set of armor, which will give you useful perks and is generally a lot better than the broken armor you've been wearing. To find her tale, ride south into toward Kuta Grasslands. Her marker will take you to her estate.
Approach Adachi Estate and you'll find it empty. Carefully approach the smaller guest house--an ambush awaits at the door.
You'll find Masako after following the horse trail. She'll take you to the Golden Temple, which is likely the first safe town you'll have encountered. Here, you can get upgrades to your weapons and armor. Talk to the armorer to get the Samurai Clan Armor, which will replace your broken samurai armor from the beginning of the game. There are several more armor sets to unlock throughout Ghost of Tsushima, each with its own special set of perks--the Samurai Clan Armor reduces incoming damage and boosts health. You can upgrade it by finding supplies and linen out in the world, but to reach the highest upgrade levels, you'll also need Silk, which you get from completing character-specific tales.
In towns like Golden Temple and Hiyoshi Springs, you can also talk to people to hear about rumors of tales you can follow up on. Talk to the woman near the armorer for a tidbit of info about a Mythic Tale. You'll want to follow up on these sooner rather than later, because Mythic Tales unlock some of the best gear and abilities in the game. Check out our Ghost of Tsushima Mythic Tales guide for more info.

Once you're done with your upgrades, speak with Sagen and the sweeping monk, then leave Golden Temple through its far exit to meet up with Lady Masako. Your job now will be to follow Sagen as he leaves the temple and heads for the Old Inn. Stick to the ridges and the tall grass as you trail Sagen, as he likes to turn around and look for followers anytime he hits a fork in the road. It's not hard to dodge him if you stay low. Just keep him in sight and you'll be okay.
When you get to the Old Inn, you'll have a big fight on your hands. If you've unlocked additional stances from taking out Mongol Leaders, make sure to cycle through them as appropriate here. You'll face a variety of enemies, so prioritize your targets. It's usually best to take out the big enemies first and anybody with a spear. Masako will hold her own pretty well, so you shouldn't need to worry about her--but do make sure she doesn't get totally surrounded and overwhelmed. Find Sagen on the second floor of the inn once you've cleared out the enemies, and you'll end the tale.
Completing The Tale of Lady Masako unlocks her extensive optional questline. For more details on Masako's Tales, consult our extensive Tales of Tsushima side-missions guide.
The Broken Blacksmith
Meet Yuna in River Child's Wetlands in a house north of Azamo Bay to talk about the mission to save her brother, Taka. You'll get introduced to Kenji and a possible way to get into the Mongol-occupied town. Head with him until you get into the town, where you'll get another stealth tutorial, with this one teaching you to keep to the rooftops. Follow Yuna as she climbs up, then follow the path to the left and stick with the slaver as he moves through the town.
You can stay with the slaver on the rooftops all the way to the market. When you get there, you'll have to drop down to cross the square, and it's crawling with guards. Luckily, they're not super attentive, and you find a solid way through even with lots of bodies around.

Start by dropping down and assassinating the guard next to the boat. With that done, you can cut across the open ground near the gate toward the house on the other side. There are lots of guards near the gate, but many enemies in this mission will start to move or patrol as you near them, making it easier to get by. Go slowly and use your Focused Listening to check that the coast is clear. If you're careful about it, you can either stick to the outside of the house near the wall--although you'll have to deal with a guard--or make your way through the interior of the building, taking out a few enemies along the way.
On the other side of the house, stay behind the slaver as he heads down the street and you can pretty easily stay with him until he gets to Taka. After that, just follow Yuna and Taka as they leave the town. Once you're over the wall, follow the road, but stick to the stands of tall grass, as you'll need to dodge a few Mongol patrols. Just hide out and let them pass and you should be fine. Keep moving along the path until Kenji shows up with the horses and the tale ends.
Completing The Broken Blacksmith unlocks Kenji's optional questline. For more details on Kenji's Tales, consult our extensive Tales of Tsushima side-missions guide.
Blood on the Grass
You still need more allies, so it's time to talk with the Straw Hat Ronin and see if you can add some soldiers to your ranks. Head to Kishi Grasslands near the coast in Tsutsu to find the start of the quest--a burning Mongol convoy the Straw Hats have seemingly ambushed. Investigate it to kick off the tale.
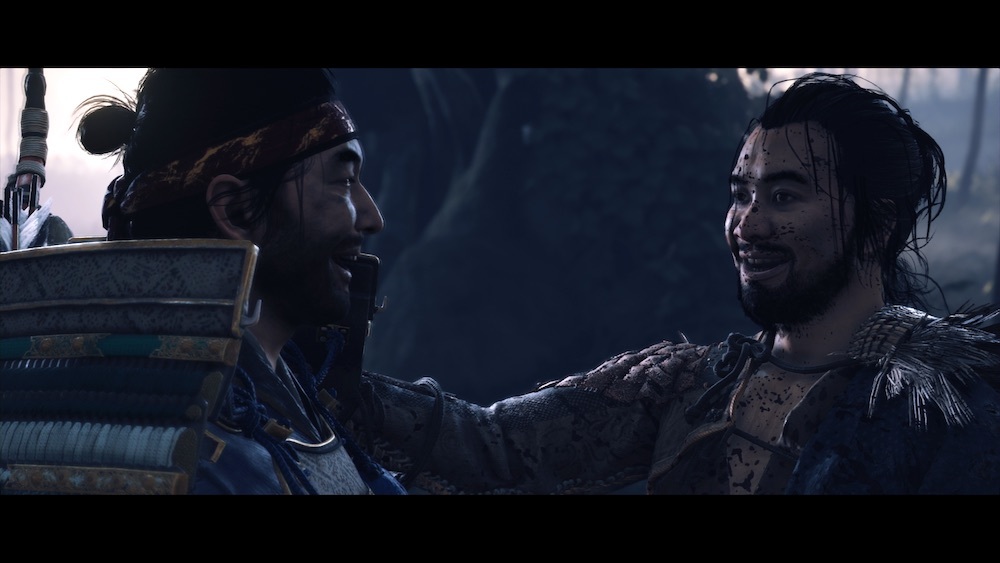
Follow the path of dead bodies to a Straw Hat lying on the ground--and Ryuzo. You'll get attacked by a large group of Mongols right afterward. By now you've probably got a good sense of how to deal with a group like this, but in this fight, it's useful to prioritize getting rid of the archers so they can't pepper you while you're fighting tougher enemies. This is a big fight with a few waves, so focus on eliminating tough enemies first so you can conserve health. Note also that there's also a Mongol Leader mixed in with the easier enemies, along with a guy carrying a huge battle ax that might give you trouble. It's not immediately clear, but watch for the ax-wielder's sweeping attack--you can jump over it, and if it hits you, it'll send you flying.
With so many Mongols running around, you might find the best strategy is to keep clear of the tougher enemies and clear out the weaker ones first. That'll give you more space to dodge the bigger enemies' attacks, so you can get in close and finish them off.
Stick with Ryuzo until you get back to the Straw Hat camp to wrap up the tale.
The Tale of Ryuzo
Talk to Ryuzo in the Straw Hat camp, and when you're ready, head to Takuzudama Cemetery to prepare your attack on the fort. You'll need to use stealth to get in and disable the signal in the lighthouse, but it's not especially difficult. Use the downed tree trunk to climb over the wall and onto a roof inside the fort, then drop down and circle around the back of the lighthouse. Enemies should tend to stay clear of you and move out of the way as you approach, so the way will be relatively clear. Get inside through the small opening in the back wall, and you can climb to the top and disable the signal.

Once that's done, the Straw Hats will attack. The Mongols won't know you're behind them as the ronin rush them, so you can snipe a few with arrows if you want, or just run out and join the fray. Either way, dispatch the archers as quickly and efficiently as you can, because they'll harry you as you try to fight off the more difficult shield-bearers. When the Mongols are eliminated, talk to Ryuzo.
After surveying the approach, head down along the coast path with Ryuzo to get behind the Mongols. Be careful not to get spotted, or you'll be forced to fight your way to the boat. Make it aboard and you can get out to the ships in the bay, but get ready for a fight as you go through them.
Search the first boat and you'll head out onto its deck. Fight your way through, noting that you'll have to face a Mongol Leader among the other enemies. Once they're cleared out, approach the next boat and use your bow to snipe the enemies; the bridge between ships makes for good cover to stop their arrows from hitting you, so run up to where Ryuzo is hiding. After you clear the next ship, you and Ryuzo will split up. Use the bridge to get onto the top deck and assassinate the Mongol there.
You can pretty easily sneak up and assassinate everyone on the deck, but don't open the cage in the middle unless you want to create some chaos--there's a bear inside and it's pretty deadly. That said, an arrow will pop open the cage and let the bear rampage through the Mongols, and if you can hit it in the head with an arrow or two, you can take it down much more safely than if you use your sword. Predator pelts are very useful for upgrading your ammo capacity for consumables, so it's worth dispatching the bear before you leave.

When you're done, head inside the ship's hold. In the captain's quarters in the center, you'll find a Mongol War Plans scroll. Head back to the first ship and you'll find Ryuzo in trouble. You'll need to best this guy as quickly as you can before Ryuzo bleeds out. You can also disable him briefly with kunai to give you a chance to revive Ryuzo and gain the upper-hand in the fight with your ally's help. Either way, dodge out of the way of the big guy's ax strikes; when he does his big vertical attack, he's open for attacks in his back. Killing him will finish the tale.
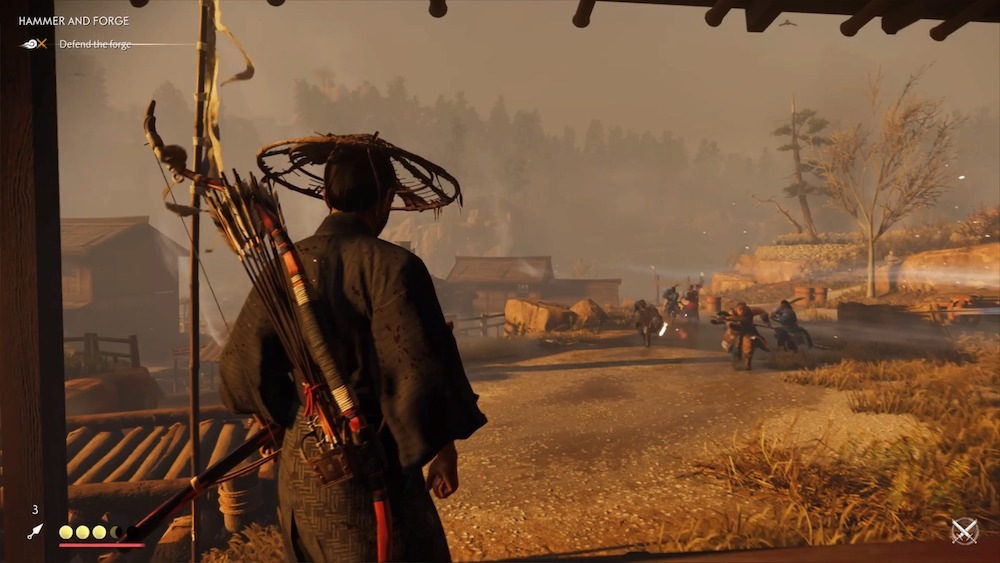
Hammer and Forge
Head to Komatsu and kill the Mongols to meet up with Yuna, who will tell you that Komatsu is about to come under attack. You'll then need to hold the town against Mongol reinforcements.
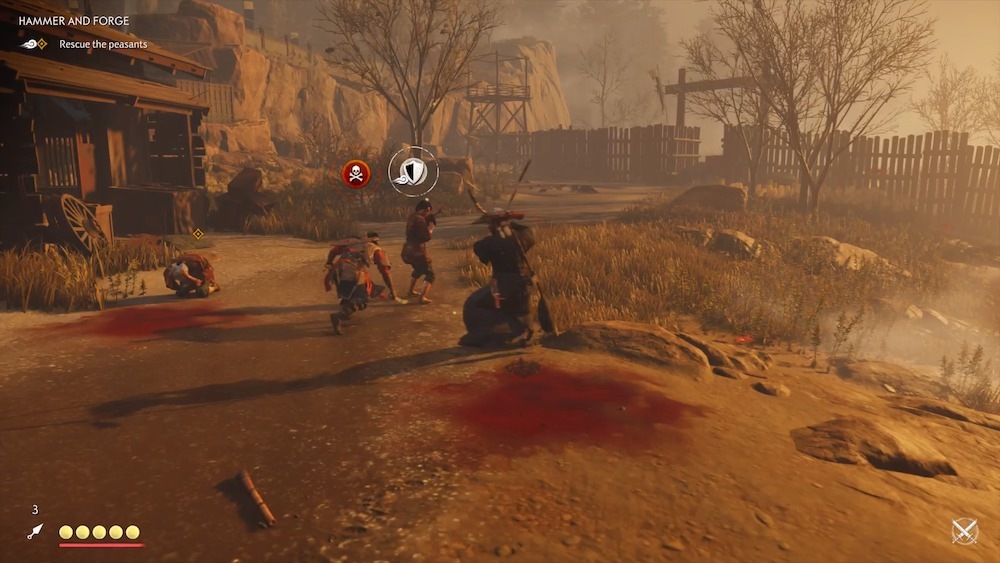
First, you'll need to sneak out from the forge and kill some Mongols to save the villagers they've taken as hostages. Do your best to avoid getting spotted, or the Mongols will attempt to execute any hostages or peasants around, and if they're killed, you'll be kicked back to your last checkpoint. If you do trigger combat, watch for a red skull icon over a Mongol's head that indicates he's going after a hostage, and prioritize killing that enemy. You'll have a bit before the Mongol actually executes the villager, but you'll need to move fast to stop them.
Your first goal is a building with hostages inside. Clear out the enemies and find their hostages on the second floor. Once you have them, they'll tell you about a second group; head down to the river and stop another group of Mongols, who are chasing several villagers. You'll need to quickly take them out, so try using arrows or other tools to thin out the enemies' numbers. Watch out for red skull icons and prioritize those soldiers to stop them from executing anybody.
After you rescue the hostages, you have to sneak back to the forge, and it can be difficult with Mongols running around that you might not see coming at you. The best way is to cut to the left and take the narrow passage beside the buildings. Go to the far end of town before climbing the hill to the forge--that should allow you to bypass all Mongols in the area and get the peasants back safely.
Next, you'll have to go find Yuna and help her rescue yet more villagers. Don't use the bridge; instead, cross through river and take out the patrolling guard there, staying left of the window so that another guard in your target building doesn't see you when he looks out. When he spins around, hop through and get him. You can then bust into the next room and take everyone out, or climb the ladder for a quick air assassination before you get into combat. Just be sure to keep any stray Mongols from killing your peasant pals. When you're done, leave the way you came, cross the river, and head back up the hill to the forge, being careful to watch for any patrols.
With everyone accounted for, you're ready to make your stand in the forge--which is actually just a frustrating fight in a tight space. When the Mongols charge, get your bow out and try to eliminate a few archers. Watch out for the dogs among the soldiers as well, because their attacks can be very annoying and they can't be parried. If you can shoot a few dogs before they reach you, you'll have an easier time.
Yuna will keep a few enemies busy, but you'll have to fight several waves here, and after the first one or two, the fight will creep into the forge. You still can't lose any peasants, so if a Mongol goes after an execution, you'll have to chase him down. Try to keep the fighting outside as best you can, because the tight interior quarters don't play well with Ghosts of Tsushima's camera. You also shouldn't be afraid to let Yuna keep one or two enemies busy while you run around handling anybody who gets too far away from where you want to keep the fighting.
The waves will get progressively tougher, with stronger swordsmen, spear carriers, and shield-bearers mixed in. You know how to deal with them at this point, so as long as nobody runs off to kill any peasants, you should be able to handle things as you prioritize targets. The best way to make it through here is to rely on your Ghost weapons and other techniques to try to control the crowd, especially if you can keep everyone, or most of everyone, outside the forge itself. Kunai can finish off enemies you've injured or stagger ones rushing toward you, for instance, and if you have bombs or smoke grenades, they can break up an enemy charge pretty effectively.
Toward the end of the fight, a Mongol Leader will join the fray, so either prioritize him to kill him fast, or avoid him while you take out the minions to give you a one-on-one fight--whichever style suits you better.
With the leader dead and the rest of the soldiers on the ground, the peasants will be safe. That'll allow you to capture Komatsu officially, making it a location you can revisit for its various vendors.
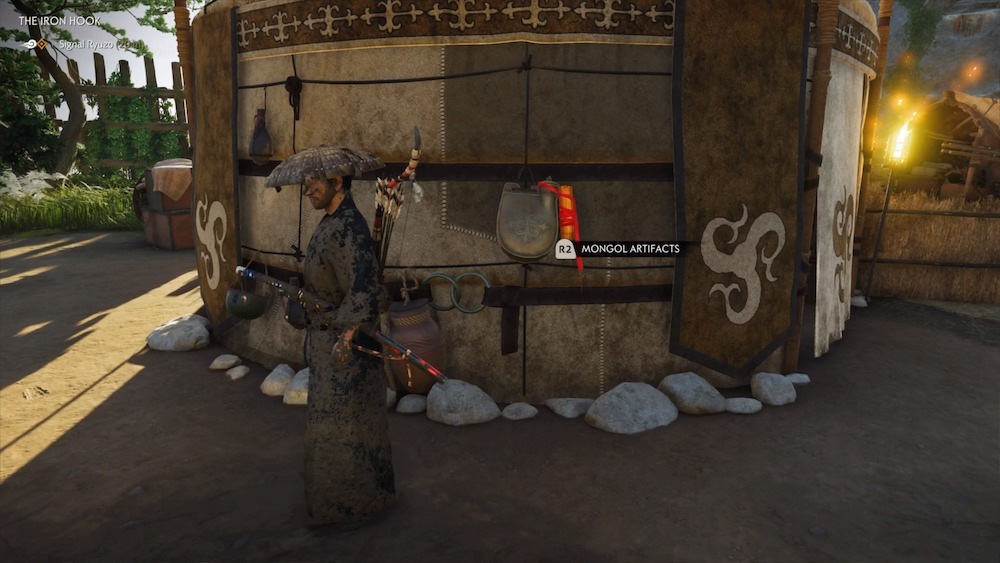
The Iron Hook
Talk to Yuna and then to Taka in Komatsu Forge to start this tale, which is one you'll want to prioritize--it'll get you a grappling hook you'll use extensively throughout the rest of the game, and without it, you're locked out of completing a lot of optional activities all over the island. Ryuzo will show up right afterward to give you a reason to try out your new gear. Ride with Ryuzo until you get to the fort, then head left to find the spot where you can start to make your way up the cliff.
When you get to the top, you'll need to make your way to through the fort, releasing Ryuzo's men from their cages. The iron hook gives you a handy way of getting around the rooftops. Use it first to get to the watchtower to your right to dispatch the guard there.
Your first batch of prisoners is ahead to the left. You'll see some guards around, plus two cages against the wall of the fort. The left cage has a bear, and if you can hit the lock with an arrow, you can release the animal and let it attack the Mongols while you watch. The cage you want to open is on the right, with two of Ryuzo's men inside.

It's best to try to sneak around and assassinate all the guards here so they don't bother you later. Between the rooftops and the tall grass, they're pretty easy to deal with. When you're ready, head down to the next section of the fort, where you'll see a pathway with two patrolling guards and a few others standing around. Quietly assassinating all of these guys is, unfortunately, out of the question. You can get behind at least one and take him out using the tall grass and a spot to slip through the fence, but the rest will start a fight. The good news is, if you can keep these four guys away from the rest of the Mongols, you and your allies can dispatch them with little difficulty and without alerting everyone else.
After they're gone, move up and stay hidden and you should be able to free the other four ronin. If you manage to stay stealthy, you might even be able to use assassination to get a critical strike on the Mongol leader up ahead, which will make him a lot easier to deal with when you inevitably trigger rest of the troops. Also note that there's another bear ahead, to the right of the gate, that you can release while you hang out in a high, safe spot.
Note: This fort has two bears in it, and you might want to release and kill them before you move on. With Ryuzo's men in tow, fighting the bears will be easier than if you were to encounter them out in the world, and their hides will earn you upgrades to your ammo capacity for arrows, quick-use items, and the like. The best way to handle bears is at a distance with your bow--if they get up close, they can be extremely dangerous, but headshots will take them down fast.
Make sure to grab the Hanging Pitcher Mongol Artifact off the round tent's outer wall before you move on.
After you've cleared out the enemies, you can activate the alarm, which will signal Ryuzo to attack the front gate. When that happens, you'll come in behind a group of Mongol soldiers. Handle them however you see fit--with the reinforcements, you shouldn't have a problem wiping them out. When you're done, sweep the fort for supplies before leaving to end the tale.
Shadow of the Samurai
Return to Komatsu Forge to kick off the final preparations for your assault on Castle Kaneda. When you arrive at the castle, you'll have a chance to speak with your allies. After that, climb up the cliff to get into the castle's courtyard. You'll see a lot of guards milling around, but if you're patient and careful, you can take them all out quietly--they'll tend to separate as you approach, giving you chances to eliminate them while they're alone. There are a few Mongols sleeping in the buildings, so if you get inside, you can kill them before they're alerted. Be sure not to get spotted here, because if you raise an alarm, you'll fail the mission.
Once you're ready, advance to the next area with Lady Masako. You have the choice of either going in the front door and getting right into a fight, or sneaking around the sides and using stealth. Either path is viable, but if you choose stealth, you can use your iron hook to approach from either the cliff on the right or the building on the left. The building seems like an easier option for getting into the area without being spotted, but either way, you'll have a difficult road ahead. You'll need to clear this area of Mongols before you can move on though.
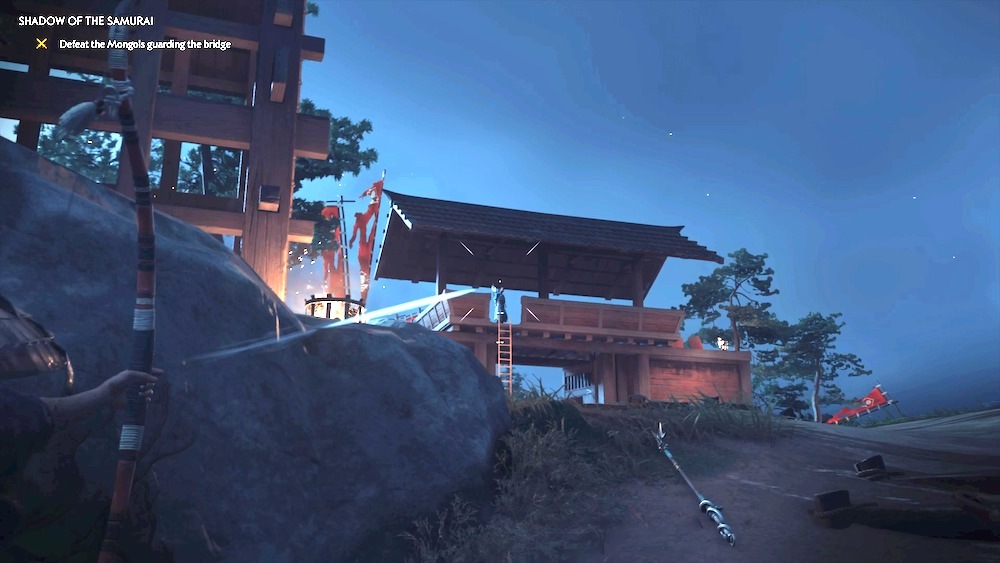
Next, you'll meet up with Yuna and approach the bridge gate. This is a tough approach without a lot of cover, so be careful. First, try to get up on the cliff and eliminate the guard closest to you while staying out of sight behind the ivy vines on the guard tower. Next, get back down, out of sight, and line up a shot to take out the archer on top of the gate. With those two down, you should be able to move around the area unimpeded if you don't get too close to the gate. Head to the building on the right and the two guys standing on the lookout platform behind it, facing out over the cliff. If you have Chain Assassination, you can kill both quickly, leaving only a couple of enemies by the gate proper. Note that the guy with the helmet can't easily be killed at range with your halfbow--his armor will deflect the headshot. He'll also throw flashbangs at you, so be ready for him. Kill them as you see fit and advance ahead until you hit the closed gate on the bridge's far end.
You'll have to find a way around this gate, so climb the cliff to the right. You'll come into the courtyard behind it. Your first order of business is to open the gate for Yuna, but if you're careful throughout this section, you can take out every guard (or almost every guard) without alerting anyone. Keep to the outer edges of the area after opening the gate; eliminate the blue-clad guards to the right of the gate first, then the ones in the back corner, noting where the Mongol Leader is in yellow--he's wandering in the center of the courtyard and is your last target. When he turns his back (as does the big guy in blue near him), kill the guy in yellow with the shield watching their meeting. You should now be able to circle around to get the big guy, then the two soldiers doing archery practice, and finally the leader himself.
A boss fight duel is next. For the most part, you should be able to handle this fight without much help, but there are a few moves in this boss's arsenal that are tricky to deal with. The first is the swirling sword attack in which he drags the blade in a circle close to the ground. Dodge well back into a roll when you see it, since there's no good way to sidestep. The other is a fast strike after sheathing the sword, which leads into a combo. You might see the first sword strike coming, but he'll follow it with a second, so make sure you're ready for two quick dodges to avoid taking much damage. You can follow up with attacks of your own if you sidestep. Be patient and look for your openings and parries in order to claim victory.
Once you're done with the duel, you'll face two big guys and a couple of archers. Draw the big fighters away from the archers so they don't bother you and lean hard on your dodge button. Take potshots until you can eliminate them, then run down the archers. In the next building, your best bet is to link together multiple showdown kills if you've unlocked that ability, since there are several enemies with big, sweeping weapons. If you can't get them with a showdown, try to clean up the smaller sword enemies first, then take down one the spear-wielders so you've got lots of room to fight the big guy. His ax will send you flying, so you'll want to dodge well away from him, not to the sides. Hit him when he's between moves, and try to hammer him with Water Stance heavy attacks to break his guard for extra damage. If you've got ghost weapons like kunai handy, this is a good chance to use them.

When you're done, head up to the second floor. You'll have a chance to assassinate an enemy through a paper door to learn a new technique. Keep going up, where you'll face two more swordsmen. Dispatch the one in blue first as quickly as you can, and switch to Water Stance. The yellow swordsman will set his blade on fire, and you won't be able to parry his strikes while it's aflame. He'll use a three-hit combo so be sure to keep dodging, then hit him with a flurry of Heavy strikes to break his guard and deal serious damage. He's not especially tough if you keep away from him and hit him between combos.
Continue up again to the next floor and you'll face another swordsman. Take him down to free Lord Shimura. You'll fight one last big battle in the courtyard, but this time, you'll have everyone helping you, which will make it go easier. Just be sure to keep everyone alive as you dispatch the enemies however you like. When they're all dead, Castle Kaneda will be yours and the tale will end, kicking off Act 2.
We've got plenty more Ghost of Tsushima guides and coverage to help you get everything out of the game. Check out our full Ghost of Tsushima guide rundown, and if you haven't already, read our Ghost of Tsushima review.
Continue to Act 2
Got a news tip or want to contact us directly? Email news@gamespot.com
Join the conversation