Devil May Cry 3: Dante's Awakening Walkthrough
Devil May Cry is back, better (and harder) than ever. GameSpot's here to help you guide Dante through 20 levels of demon-slaying, complete with tips on the secret missions and videos for all of the major bosses.
Design by Collin Oguro
When Devil May Cry first came out in 2001, gamers were excited by its fast-paced, retro gameplay, which combined with its over-the-top sense of style for a unique videogame experience. The half-demon, half-human Dante was forced to use a bevy of melee and ranged weapons to cut through legions of devils and defeat Mundus, a devil who was first defeated by Dante's father 2,000 years ago. What's more, the game tasked you with killing enemies in style, using all of your actions instead of just one or two powerful attacks.
After a misstep with Devil May Cry 2, the series finally has a true successor in Devil May Cry 3: Dante's Awakening. It hearkens back to the series' roots in fast-paced, fun, stylish action, giving you a boatload of weapons and multiple styles to use as you attempt to hunt down Vergil, Dante's twin brother, who seeks to undo the work of Sparda, their father, who sealed the demon world away from the human world two millenia ago.
Devil May Cry 3 is also notable as being really, really hard. Luckily for you, this game guide will give you a look at all of the game's weapons, secret missions, tips on banking plenty of cash, as well as a complete walk-through (perhaps the term run-through would really be more appropriate, though), including video for all of the major boss fights.
Weapons
Devil Arms
Rebellion
The sword you begin the game with, the Rebellion, is a quick, yet powerful weapon that'll suit you well throughout the game. Not many enemies are going to be specifically weak against its plain magic enchantment, but it's nice and quick and can hit multiple enemies with its default combos, provided they're grouped together.
Combo I: T, T, T. Simple three-swing maneuver that will usually knock weak enemies down. Continue to tap away for extra damage while they're on the ground. Excellent when used in the middle of a crowd of enemies; the wide swings will normally hit multiple foes.
Combo II: T, pause, T, T. Another forward-aiming combo with an extra swing.
High Time: Hold R1 to target, press back on the left analog stick, then hit T to launch your target up into the air. If you hold T, Dante will jump up after the target, allowing him to swing away in mid-air. Either variation can be a good starting point for a gun-assault; Ebony & Ivory can often juggle an enemy in mid-air indefinitely. Not all enemies will be launched upwards by this maneuver, though.
Helm Breaker: Hit T while in midair for a downward slash. This can be performed either after jumping or after holding down T to launch yourself during a High Time.

Stinger (2,500 Orbs): Hold R1, press forward on the LAS, and hit T. Dante will launch himself forward towards his enemy with his sword outstretched; if he hits the enemy (he might not, if the enemy moves or if it's too far away), it'll usually be knocked backwards and onto the ground.
Stinger: Level 2 (10,000 Orbs): This is an upgraded version of Stinger. When performed, Dante will hit with more power, and will be able to travel across a greater distance.
Drive (10,000 Orbs): If you hold down T, Rebellion will begin to glow; releasing it will send a shockwave towards a nearby enemy.
Air Hike (20,000 Orbs): Although expensive, Air Hike is going to be something you should save up for early on in the game. After you jump, Air Hike will allow you to double jump by tappping X again while you're in midair; this will effectively double the maximum height of your jumps, allowing you to escape from tight spots and stay off the ground for a longer period of time.
Million Stab: While performing either a Stinger or at the end of a Combo II, start rapidly tapping T, and Dante will begin repeatedly stabbing forward with his sword. Although this move doesn't have much of an arc of damage, it will do massive damage to anyone in front of Dante, and if you keep hitting the button for a while, he'll eventually finish it off with a single powerful thrust.
Cerberus
Cerberus is a set of cold-enchanted flails that Dante picks up early in his adventure. Although they have a slower attack speed than Rebellion, they do a decent amount of damage and can be used to strike enemies on multiple sides of Dante in short order.
Combo I: T, T, T, T, T. This simple combo will knock around enemies on all sides of Dante.
Combo II: T, T, pause, T, T. Getting the timing right on this can be difficult; you need to start the second set of taps just as Dante is about to place the weapon on his back. If you can pull it off, though, he'll conclude the combo with a Windmill attack. This isn't necessarily any better than Combo I, save for the fact that you'll need to do it to pull off a Satellite.
Swing: If you jump and hit T, Dante will swing at any nearby aerial enemies. Unlike the Rebellion's airborne attack, this won't hit any enemies on the ground, making it less useful.
Revolver: Hold R1, press forward towards your target, and hit T. Dante will swing around in midair, causing damage to all enemies in front of and behind him, then wind up hitting the ground with Cerberus. Even while locked on, this has a good chance of kind of warping around a stationary enemy, and doesn't revolve all that quickly.
Revolver Level II (15,000 Orbs): A much improved version of Revolver, level II will let Dante make more revolutions and hit for more power.
Windmill: Hold R1, hold back on the LAS, press T. Unlike most weapons, this sequence of presses for Cerberus doesn't launch enemies up into the air; instead, it'll send your weapon forward in a whirlwind maneuver, lightly damaging enemies immediately in front of you. Not a tremendously impressive move, and it's a bit slow for the damage.
Satellite: If you can pull off a Combo II, then start madly tapping away at T after the pause and you should wind up sending your flail rotating around your body, damaging enemies on all sides. Unfortunately, the damage radius for this is fairly small, so anyone nearby will have to basically be right on top of you before they get hit.
Agni & Rudra
Agni & Rudra are going to be one of the toughest bosses in the game, so it's only fitting that they drop a kick-ass pair of swords for you to play around with. After you possess them, you'll appreciate their lightning-quick speed and devastating flame and wind attacks. We personally used these throughout the rest of the game after getting them.
Paradoxically, the main weakness and strength of Agni & Rudra are encompassed in a single skill: Jet-Stream. Jet-Stream takes the place of Stinger, meaning that you won't be able to dash in on an enemy as quickly as you will with weapons like Rebellion or Beowulf, but if you upgrade Jet-Stream to level three, then you're probably going to find that the loss of speed is more than made up by the sheer power of that ability. When unleashed at close range, Jet-Stream III will hit an enemy five times with a single button press, and usually stagger or knock them down.
Combo I: T, T, T, T, T. A simple, but effective slashing combo. Has a good radius of effect and can hit numerous enemies in front of you.
Combo II: T, pause, T, T. Swing once, swing twice, charge forward with a flaming stab. Moderately useful for single enemies that are standing in front of you, but since you have to pause to pull it off and it can't be turned into something more useful, you're usually going to be better off with Combo I or Combo III.
Combo III: T, pause, T, pause, T. Although difficult to pull off when you're surrounded by enemies, thanks to the two pauses required, the final bit of this combo will send your swords flailing around in front of you, and you'll finish it off with a fierce kick. This isn't usually worth the effort on its own account, though, but rather for the purpose of iniating a Million Slash.
Aerial Cross: Jump and hit T. This causes you to swing both swords at any enemy near you in the air, but won't be followed down to the ground like Rebellion's Helm Breaker.
Jet-Stream: Hold R1, press the LAS towards your enemy, and hit T. You'll charge towards your enemy and slash at him with your swords.
Jet-Stream Level II (10,000 Orbs): An upgraded version of Jet-Stream, with more attacks being thrown at the enemies when you hit them.
Jet-Stream Level III (15,000 Orbs): The ultimate upgrade of Jet Stream, with four slashes at your target, followed by a huge flame attack that'll hurt all nearby enemies. You can even retarget this in mid-charge, if you're quick on the left analog stick.
Whirlwind (7,500 Orbs): Hold R1, press the LAS away from your target, hit T. Your typical throw-the-enemy-up-in-the-air maneuver which, like Rebellion's High Time, can be held to send yourself up in the air, allowing you to hit the enemy with an Aerial Cross.
Million Slash: This can only be performed at the end of a Combo III. If you manage to rapidly tap T after the second pause, Dante will start swinging his swords incredibly fast, damaging enemies on all sides of him save for the rear, and he'll finish it off with a single devestating blow on enemies in front of him. You'll still be vulnerable to hits from the rear, so you may want to try getting yourself into a corner before pulling this off.
Air Hike (20,000 Orbs): Although expensive, Air Hike is going to be something you should save up for early on in the game. After you jump, Air Hike will allow you to double jump by tappping X again while you're in midair; this will effectively double the maximum height of your jumps, allowing you to escape from tight spots and stay off the ground for a longer period of time. If you have Air Hike for Rebellion or another weapon, and are willing to switch out for it when you need the technique, then you don't need to purchase it for this weapon as well, but it can make things a bit less complicated if you buy it for all weapons that can use it.
Nevan
Nevan is perhaps the most difficult weapon in the game to use, but one with the most potential for big damage. It uses a much different style of attack than do the other weapons - you can't just keep mashing triangle to pull off big combos - and thus requires a lot of getting used to before you can use it to maximum effectiveness. Personally, we almost never used it, finding that it made fluid changes between weapons difficult, but it does offer some powerful effects if you can figure out how to pull them off.
Tune-Up: Hit T. Dante will bring the guitar around to his waist from his back, damaging enemies in front of him, and setting him up for most of the later combos.
Combo I: Hit or hold T while in Tune-Up. Dante will send a ball of electrified bats at a nearby enemy. If you hold down on the T button, more bats will be collected and sent out.
Combo II: If you hold the LAS to the left while in Tune-Up, then hit T, Dante will play a riff and send more electrified bats at the enemy. There doesn't appear to be a large difference between this and Combo I, save for the fact that Combo II sets up Jam Session.
Combo III: Hold the LAS to the right while in Tune-Up and hit T. Dante will surround himself with a ball of lightning, damaging all enemies in a good radius around himself.
Jam Session: If you can get into the animation for Combo II, then start madly tapping on the T button, Dante will go to his knees and summon in a huge swarm of bats that'll hit pretty much everyone close enough to be visible on your screen. Enemies that aren't stunned by damage will be able to hit you, but most low-level enemies won't be able to penetrate the shield without getting the crap kicked out of them. If you can get three our four lesser demons to be simultaneously hit by this, your combo meter should go up to SSStylish by the end of it.
Air Play: If you jump into the air and hit T, Dante will send out a single bat-ball; if you hold the button down, he'll summon in more bats and send them out at once. The kicker here is that if you summon more bats in, they'll be flung even after you hit the ground, allowing you to start another move or even switch to another weapon while nearby enemies are still getting hit.
Bat Rift: Hold R1, press away from the enemy, and tap T to send your foe flying into the air. You can't follow them up by holding down T.
Bat Rift Level II (10,000 Orbs): If you upgrade your Bat Rift, you'll be able to hold down T after uppercutting your enemy. You still won't follow them up into the air, but you will be able to summon a gang of electrical bats that'll hit them on their way down.
Reverb Shock: (7,500 Orbs): Hold R1, press the LAS towards your enemy, and hit T to dash forward and jam your guitar into their stomach. Pretty similar to Stinger.
Reverb Shock Level II (15,000 Orbs): It's still fairly similar to Stinger. This upgraded version of the power lets you dash farther and deal more damage with your attack.
Air Raid (20,000 Orbs): Air Raid allows you to hover in the air, but only if you jump while in Devil Trigger mode. If you do so, then you can hit R1 + X while in midair to start floating away.
Thunder Bolt: In Air Raid mode, hit X repeatedly to send lightning bolts towards foes on the ground.
Vortex: If you press T while in Air Raid mode, you'll dive-bomb an enemy with your body.
Volume Up (20,000 Orbs): This is one of the few passive abilities that you'll be able to buy. When you have it, you'll be able to summon bats more quickly for skills that require you to hold down the button to do so, such as Air Play and Nevan Combo I.
Beowulf
Although it's one of the slowest weapons you'll pick up in your travels, Beowulf makes up for this by being all about power. It can't hit a lot of enemies at once and doesn't possess many lightning-fast combos, but when you want to go after a single target and take it down, you can't go wrong with Beowulf. The key skill to acquire here is Straight Level II, which will let you dash across the distance between you and an enemy in the blink of an eye and deliver a massive strike straight to their solar plexus.
Note that a few of Beowulf's attacks can be powered-up by holding down the square button before releasing it. This is true of Straight and Beast Uppercut especially; the longer you prime these attacks by holding down the square button, the more damage you'll do with a successful strike.
Combo I: T, T, T. Standard three-attack combo.
Combo II: T, T, pause, T, T. This one's easy to pull off, but the flurry of kicks that comes with the third T has a tendency to push enemies away from you.
Hyper Fist: While performing Combo II, start tapping away at the T button while the kick flurry is ongoing; Dante will shift directly from the kicks to a flurry of fists, finishing with a devastating downwards blow. Again, this has a tendency to push enemies away, leaving you whiffing, so it's best used against stunned enemies or immobile foes. It is, luckily, quite easy to pull off.
Killer Bee: While in midair, target an enemy and hit T to stab them in the head with your feet. This is one of the few aerial attacks that will actually move Dante towards his target, so it can be quite useful on those elusive, quick-moving foes.
Straight: Straight! Hold R1, target an enemy, press forward, and hit T to send Dante flying forward, fists outstretched. The Beowulf equivalent of Stinger.
Straight Level II (10,000 Orbs): An upgraded version of Straight, with better range and damage.
Beast Uppercut (7,500 Orbs): This is the R1, hold LAS away, hit T attack; Dante will perform a massive uppercut that will send your target flying into the air.
Rising Dragon (15,000 Orbs): If you upgrade Beast Uppercut into Rising Dragon, Dante will be able to focus his energy and follow his foes up into the air after performing his uppercut. This isn't as simple as holding down T, though; you'll need to tap T twice in order to jet yourself off the ground.
Air Hike (20,000 Orbs): Expensive, but always useful.
Ranged
In addition to his melee weapons, Dante will also find plenty of ranged weapons to use on foes during his adventures. Unfortunately, these usually pale in terms of power when compared to your swords and other close-range weapons, so they won't get a lot of use. Ebony & Ivory will be the most handy, thanks to the fact that they instantly hit their target, so power them up and use them to fire on distant foes.
Ebony & Ivory
Ebony & Ivory are the default ranged weapons that Dante will wield, and are probably the most useful. Although they don't deal a tremendous amount of damage, they instantly hit their targets at any range, making them useful against long-distance targets, and you can fire them pretty rapidly by jamming on the square button repeatedly. Many enemies can be stunned if you hit them rapidly enough, allowing you to lock them down until you get close enough to finish them off with your melee weapons.
Shotgun
The Shotgun will be the first weapon you actually find in the game, but it won't remain useful very long. Although it does a good amount of damage, it's really only viable at close range, at which point you're probably going to want to be using melee weapons.
Artemis
Artemis is some kind of demonic gun, possessing the power to charge itself up for more powerful blows. This is one of the few weapons that can hit multiple foes. If you tap the square button, you'll fire a straight shot; if you hold down the square button, though, you'll home in on as many as three targets and hit them all with homing lasers. You can upgrade the weapon to allow for more simultaneous targets, as well.
Spiral
Spiral is a large, powerful, single-shot rifle that can only be fired while Dante is standing on the ground. Although its refire rate is terrible, its individual shots are more powerful than those of any other ranged weapon. They do take a bit of time to travel to your target, though, so hitting distant targets that move quickly may not be a sure thing.
Kalina Ann
The last weapon you pick up in your travels will be Kalina Ann, Lady's fiercesome rocket launcher. Although it has a woefully short range, Kalina Ann is quite powerful and can knock enemies back or onto the ground when it goes off. It's best used for crowds of weaker enemies, though, as the tougher foes will still be quicker to kill with your melee attacks.
Styles
Trickster
Trickster is, if we do say so ourselves, the best style for most players of Devil May Cry 3. Although it doesn't increase your offensive abilities like most of the other styles do, it will allow you to be much more agile and mobile during gameplay, which will, in turn, let you avoid damage more often. In essence, using Trickster means that you'll take longer to kill enemies and you'll have a harder time getting your combo meter up high, but you'll have a much easier time getting out of the way of attacks, which is especially useful during the game's many boss fights. Trickster will also let you maneuver to out-of-the-way areas of levels much more easily than you would be able to with other styles.
Moves
First Level
Dash: If you press O while holding the left analog stick in a certain direction, Dante will dash across the ground much more rapidly than with his normal movement. It'll take a second to perform another dash after the first, and Dante will pause after completing this move, making it best for avoiding short-range attacks.
Wall Hike/Wall Run: If you press O while standing next to a wall, Dante will either run straight up and flip away from the wall, or perform a wall-run maneuver. You can even perform these maneuvers after double-jumping from a wall, allowing you a bit of extra height.
Second Level
Sky Star: While in midair, press the left analog stick in a direction and tap O to cause Dante to perform something of a midair dash. We personally found this to be an endlessly useful maneuver, despite its simplicity, if only because Dante's great weakness is usually lateral movement; he just doesn't move tremendously fast when compared to some of the speedier enemy attacks. When going up against bosses, especially, combining Sky Star with Rebellion or Agni & Rudra's Air Hike manuever will let you get far away from wherever you're standing in a split-second, allowing you to avoid most any attack so long as you know it's coming.
Double Dash: This lets Dante enter a kart-racing game, filled with fun and laughs for as many as four players. Ah, we jest; this is just Dash, save for the fact that you can perform it twice in a row without the pause in between.
Third Level
Air Trick: When you finally reach level three in Trickster, you'll be able to use your newfound talents to disappear and reappear at will. With Air Trick, you can press towards an enemy and then hit R1 + O to instantly appear in front of that enemy (or at least cover a certain amount of the distance, if you're too far away). This isn't quite as useful as Sky Star, but can be combined with that move to get in close to your enemy from a good ways away without ever needing to hit the ground.
Triple Dash: Guess what this does? That's right, it lets you use Dash three times in a row without pausing.
Swordmaster
Swordmaster, obviously enough, enhances your ability to use your melee weapons by adding in new and powerful attacks that can be accessed with the O button.
Rebellion
Level One
Prop Shredder: Press O to flick your sword forward. Most demons will be thrown up into the air by this.
Aerial Rave: Repeatedly press O while in midair to perform a four-strike combo. This can be done immediately after a High Time, rather than following that move up with a Helm Breaker.
Level Two
Sword Pierce: If you hold R1, press towards an enemy, and tap O, Rebellion will be shot through the air like a gun, impaling them or impaling itself onto the first wall it hits. You can fire guns while the sword is out, or tap O again to force it to return to you.
Level Three
Dance Macabre: Dance Macabre is a juiced-up form of Million Stab. By holding R1, pressing away from the enemy, then tapping O rapidly, you'll send out a dizzying array of weapon strikes.
Crazy Dance: If you tap O enough during a Dance Macabre, Dante will spin around his blade to do damage to all nearby enemies.
Cerberus
Level One
Flicker: Flicker is an appropriately-named skill; it quickly flicks your flails around in front of and behind Dante, dealing damage to anyone in his immediate proximity. This can be done in mid-air, as well.
Level Two
Crystal: Hold R1, press forward, and tap O to shoot forward a beam of crystallized ice towards an enemy. These have a slightly wider area of effect than Agni & Rudra's Crawler skill, but don't do as much damage, it seems.
Million Carats: During Crawler, repeatedly tap O to cause Dante to slam Cerberus into the ground, causing a ring of crystals to appear around his body.
Level Three
Ice Age: Hold R1, press the analog stick away, then hit O to form a shield of ice all around Dante, protecting him from damage momentarily.
Nevan
Level One
Slash: Hitting O while standing on the ground will let Dante use Nevan for a fierce two-swing combo that covers a lot more ground than the regular T attack. You'll wind up in Tune-Up mode after this is done.
Air Slash: If you hit O while in mid-air, you'll perform the usual Slash animation, save for the fact that you're...in midair. Since you can't use Bat Rift to get yourself up in the air, this is mostly going to be useful against enemies that are already airborne, or after using another weapons R1 + back + T combo.
Level Two
Feedback: Hold R1, press towards an enemy, and tap O to send Nevan rotating around Dante's body. Any nearby enemies will be hit repeatedly, making this a useful maneuver for building up your combo meter in dense crowds of foes.
Crazy Roll: If you tap O while performing a Feedback, Dante will continue to spin rapidly and hit enemies with more force. The timing on this is pretty difficult, and seems to occur more often as a stroke of luck than something you actually intend to pull off.
Level Three
Distortion: Hold R1, press the left analog stick away, then tap O to send a stream of bats towards your foes.
Agni & Rudra
Level One
Crossed Swords: A simple extra melee attack maneuver. Pressing O while on the ground will send both swords out at once, slashing nearby enemies.
Sky Dance: If you jump into the air and start tapping madly at the O button, you'll hit any nearby enemies a few times, then start spinning downwards to the floor before finishing off with a small flaming combo when you hit the ground. This is best used after a Whirlwind, where you can hold T to follow your enemy up into the air, then get a half-dozen hits on them with Sky Dance. You can even use this after pumping them with your Ebony & Ivory, if you're quick enough.
Level Two
Crawler: Hold R1, press towards an enemy, hit O. Dante will spike his weapons into the ground and send a column of flames towards an enemy. This is a pretty thin ability, meaning that only enemies directly in front of you will be affected, although it does decent damage and can be pulled off relatively quickly.
Level Three
Twister: Hold R1, press away from an enemy, then tap O to create a pillar of flame around Dante that will damage and knock back nearby enemies.
Tempest: If you tap O rapidly while pulling off a Twister, one of your foes will be raised into the air and the pillar surrounding Dante will become larger.
Beowulf
Level One
Zodiac: This turns Beowulf into something of a rocket launcher; hitting O while you're on the ground will send out a flash of light towards the targeted enemy. This is a fairly slow attack, so you're unlikely to use it overmuch.
The Hammer: If you hit O in midair, Dante will use Beowulf to knock airborne enemies to the ground.
Level Two
Volcano: If you hold R1, press the stick towards an enemy, then hit O, Dante will hit the ground and cause damage to all nearby enemies.
Level Three
Real Impact: Hold R1, press away from the enemy, then hit O to cause Dante to perform a powerful uppercut that knocks your foe into the air.
Tornado: If you follow your enemy into the air with Real Impact, you can start tapping O to perform a dizzying array of punches while still in mid-air.
Gunslinger
Like Swordmaster, Gunslinger will enhance your ability to use your ranged weapons.
Ebony & Ivory
Level One
Twosome Time: By rapidly tapping O while standing on the ground, Dante will be able to fire Ebony & Ivory in two directions at once. One gun will always fire at the target you're locked onto, while the other can be aimed with the left analog stick. The relatively low power of Ebony & Ivory combined with the fact that you're held immobile while performing this attack makes it somewhat useless. Wild Stomp: If you get closed to an enemy that's been knocked down and rapidly tap the square button, Dante will put a foot on their head and attempt to finish them off with a barrage of bullets and a final kick. Unless there's only one enemy in the area, though, you can expect to be struck or forced to dodge well before you get the chance to kick the foe.
Rain Storm: After jumping into the air, press O to send Dante spinning around, firing upon all of the enemies below him. This move only lasts for a second, although you can extend it by rapidly tapping O. Unfortunately it doesn't seem to be targetable - the only enemies that will be damaged are those immediately beneath you - rendering it less than amazing.
Charge Shot: If you hold down the square button, Dante will charge his hands with demon power and unleash it when you let go of the button. At low levels, this isn't very powerful, but when you have Gunslinger levelled up it can become quite potent.
Rapid Shot: Hit square repeatedly to fire more rapidly.
Shotgun
Level One
Fireworks: If you tap O rapidly, then Dante will start using his shotgun to attack in front, behind, and on either side of him. There are some gaps in the coverage here, so you'll usually be hit by a quick enemy if you attempt to do this for too long, but if you jump into the middle of a group of weak foes and pull this off for a second or two, you have a good chance of knocking most of them down.
Rapid Shot: Hit the square button rapidly to fire the Shotgun as soon as its reloading animation is over.
Charge Shot: As with Ebony & Ivory, if you hold down the square button, the Shotgun will eventually glow red, allowing Dante to unleash it on the foe.
Level Three
Gun Stinger: Hold R1, press towards an enemy, and hit O to perform a Stinger move on the target, sending Dante dashing across the arena and unloading his shotgun in their chest.
Point Blank: If you rapidly tap O while performing a Gun Stinger, Dante will repeatedly fire at his target, causing large amounts of damage to their chestal regions.
Artemis
Level One
Multi-Lock: With the O button, Artemis can focus all of its shots on a single enemy, rather than having to lock onto multiple foes. If you pump it up with upgrades, you can fire a good number of projectiles at a single foe, making it a decent boss-killer.
Level Two
Sphere: Hold R1, press towards an enemy, and hold O. A sphere of energy will emanate from Dante's gun, damaging nearby enemies multiple times.
Acid Rain: If you rapidly press O while performing Sphere, it will change into an area-of-effect attack that will damage more foes in a greater radius.
Spiral
Level One
Trick Shot: With Trick Shot, you can fire Spiral up into the ceiling (even when there isn't a ceiling to hit), which will bounce the round off of it and into multiple targets at once.
Level Three
Sniper: If you hold R1 and press towards an enemy while pressing O, Dante will aim directly for your enemy's weak spot, causing extra damage.
Reflector: If you tap O while performing Sniper, your bullet will ricochet off of walls and floors before impacting the target for maximum hurt.
Kalina Ann
Level One
Hysteric: Press O while standing on the ground to emulate Lady's homing-missile attack. The individual missiles here will hit and stagger multiple foes, although they do very light damage.
Level Two
Grapple: Hold R1, press towards an enemy, then hit O to drag an enemy across the ground until they're standing in front of Dante.
Royal Guard
Royal Guard is the most difficult style to learn and use effectively. Instead of giving you new abilities, it simply lets you reduce the amount of damage you take, and reflect absorbed damage back to enemies. The advantages of taking less damage are obvious, especially on higher difficulty levels, but it is difficult to use without a lot of practice. Experts are almost untouchable when they're taking on predictable bosses with the Royal Guard style, though.
Block & Charge: You can block in one of two ways; you can either hold down O, which will cut most incoming attacks to around 25% of their normal damage, or you can wait until just before an enemy strike is about to hit you before hitting O. This latter will absorb all of the damage and will stun the attacking enemy for a second or so.
Release: By pressing O after you've blocked numerous attacks, you'll be able to release the energy you've absorbed in a short range, Stinger-like attack. This can be among the most devastating moves in the game, if you've absorbed a lot of hurt, but has a very short range, as mentioned, so get close to your foes before attempting to pull it off.
Air Block: It's like Block & Charge, but in the air! Brilliant! If you happen to run across a foe that attacks you while you're airborne, hit O to block the attack and absorb energy.
Air Release: It's like Release, but in the air! Brillianter!
Ultimate: After absorbing a lot of energy, you can hold R1, press the stick away from your target, and hit O to bring up a massive energy shield in front of Dante. Any attacks that impact this shield while it's up will be converted into life for Dante's health bar.
Quicksilver
With the Quicksilver style (which you obtain automatically when you defeat Geryon in the game), Dante can control time. By pressing R1 and O at the same time, Dante will slow time down almost to a stop...for everyone but himself. He'll still move at full speed, allowing him to blast enemies unfettered by their puny attacks and build up huge combos by juggling his foes in the air. The unfortunate thing here is that this ability will continually drain your Devil Trigger meter, but you can always flip it on and off by pressing the button combo again.
Doppelganger
After defeating the eponymous boss in mission 17 of the game, Dante will learn Doppelganger style. When he activates it (with the R1 + O combination), he'll flip to Devil Trigger mode, but will also summon in a shadow of himself that fights alongside him. In effect, this means that, for the duration of the effect, he'll deal double damage. The doppelganger will sometimes choose its own targets, but will mostly mimic your actions. This does, of course, drain your Devil Trigger meter.
As a note, if you have a second controller plugged into your PS2, you can have another player press Start while Doppelganger mode is active and control the shadow. Since the ability only lasts for something like 10 seconds with a maxed-out Devil Trigger meter, this isn't quite worth calling your friends over to your house for, but hey - it's a feature.
Walkthrough
Combat Tactics
Getting a Big Combo Meter
There are many different factors that come into play when you attempt to get your combo meter up to its highest ranks. Getting a high combo meter will get you more Style points at the end of a mission, and also seems to encourage enemies to drop more Red Orbs when they die.
Don't Get Hit: A single blow to Dante will reset your combo meter all the way down to Dope, so if you want to get up high, you'll have to ensure that he doesn't get hit throughout the combo. This is mostly a matter of being familiar with the enemies you're fighting against and being sure that they don't get a chance to impact you with their weapons.
Vary Your Attacks: After you perform a special attack or a combo, it ceases to count towards your style meter for a short period of time, so spamming out the basic triangle-triangle-triangle combo for a weapon isn't going to get you very far up the ladder. If you want to max the meter, you'll need to use all of the combos and attacks for a weapon while being sure to switch melee weapons occasionally for extra variety.
Keep The Pressure On: If you stop attacking, your style meter will start dropping, so you'll need to keep up the heat on your enemies if you don't want it to fade away completely. You can afford to rest a bit and reposition - the meter will stick around for a while - but you can't go too long without attacking if you want to keep the combo going.
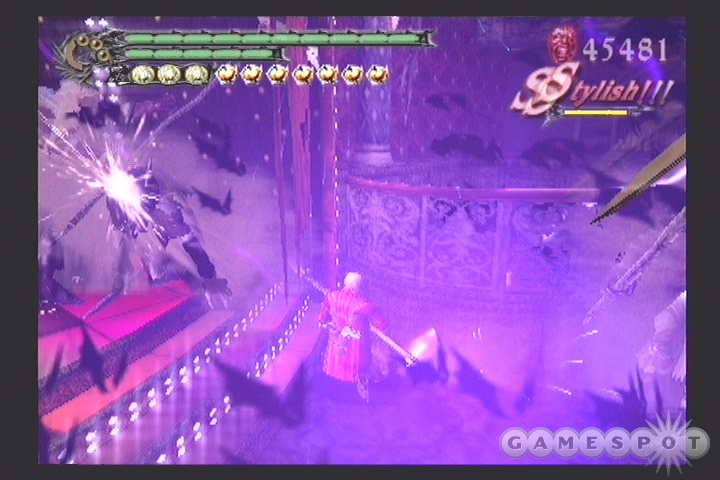
Attack Multiple Enemies: By far the easiest way to get up to Showtime or SSStylish rankings is to hit multiple enemies simultaneously and rapidly. There are plenty of rooms that feature multiple weak enemies, such as Prides or Envies; the Love Planet bar in Mission Two is a good example of such a location. If you can get yourself into position to hit multiple targets at the same time with a move like Rebellion's Million Stab or Agni & Rudra's Million Slash, or especially Nevan's Jam Session, then you should see your style meter accelerating upwards much more quickly than it would if you were using those moves on a single target.
Story Missions
Some Notes Before We Begin...
Difficulty
Before you begin going crazy with action style and brutality of screen and all that great stuff, it's worth saying: Devil May Cry 3 is hard. Hard. Normal mode is going to punish you unlike most game's easy modes, and even Easy mode is going to be challenging to skilled gamers the first time through.
This walkthrough was written with the Easy difficulty in mind, even though that mode isn't available at the beginning of the game (to unlock it, you need to die three times in Normal mode, which should occur in mission two for most players). Normal, Hard, and Dante Must Die! modes are for hardcore gamers, and it's pretty unlikely that you'll be able to come to DMC3 fresh and get very far in Normal mode. A better idea is to play through on Easy, get the weapons and life bar extensions, then start over on Normal and attempt it with all the items that you gained from your trip through Easy mode. It'll still be challenging to you, but it won't be as punitively difficult as it would've been if you attempt to complete it starting fresh at the beginning in Normal mode without the benefits of extra health and weapons.
Items
One thing that the game allows you to do to compensate for the difficulty somewhat is purchase healing items and continues from the Divinity Statues scattered throughout the game, or in between missions. Here's a list of the purchaseable items:
| Item | Effect When Used |
| Vital Star S | Restores a small amount of health. |
| Vital Star L | Restores your entire health bar. |
| Devil Star | Refills your Devil Trigger meter. |
| Holy Water | Damages all nearby enemies. |
| Blue Orb | Adds one bubble to your life bar. |
| Purple Orb | Adds one orb to your Devil Trigger meter. |
| Yellow Orb | Allows you to continue when you die, rather than have to start the entire mission over. |
Of these items, the ones you're going to want to focus on are Yellow Orbs, especially when facing off against a boss for the first time, Vital Star L's, which are also useful against bosses, and Purple Orbs. Purple Orbs are the only way to extend your Devil Trigger meter; you won't find any of them in the game world, so all of the ones that you want to possess will have to come from the item shop. Blue Orbs are also worthwhile, since they're a full life bar at one low price; you can find Orbs in the game itself, but they come in Fragments, of which you need four to form one full life bubble.
Gaining Cash
In order to make money, you have to find red orbs. These things pop out of every enemy that you kill, and you'll also gain a substantial amount at the end of a mission that contains a boss fight.
One of our favorite methods for gaining cash, though, is to enter a level, gain some easy orbs near the beginning of it, then save our data from the start menu and quit back out to the game's title screen. If you then reload your game, you can repeat this process numerous times, allowing you to gain a bunch of cash with minimal hassle.
The best area to do this is at the beginning of mission four. After you beat Cerberus, you can start mission four, return to 13th Avenue, grab all of the red orbs there (including the 1,000 orb at the top of one of the buildings, head back into the Love Planet bar, kill the enemies and destroy the tables there for more orbs, then return to the Bullseye Bar and destroy everything there for yet more orbs. Depending on how good you are at getting combos on your enemies, this run can net you five or six thousand orbs in the space of as many minutes, making it quite efficient.
Later in the game, the beginning of mission 17 becomes even more efficient for gaining cash while preparing for the last few boss fights. The Dark Corridor you begin in has around 1,700 orbs in the rafters, and if you walk back into the High-Fly Zone, another 1,500 or so are waiting for you to pick them up.
Tricksterish
Although the game has a few different styles, we found that the easiest one to win with was Trickster, so we'll go ahead and recommend that you stick with it throughout the game. It is a defensive style, allowing you to dodge enemy attacks quickly and painlessly, and as such might not seem as fun as the styles that give you a billion new attacks to use, but for most players it's going to be much easier to use Trickster to dodge than to attempt to use the game's built-in rollaway dodge method, because it's quicker and doesn't force you to change your stick presses based on which direction Dante's facing on the screen.
Of course, to each his own, and feel free to try out the other styles as you wish. The boss tips and videos will assume that you're using Trickster, though.
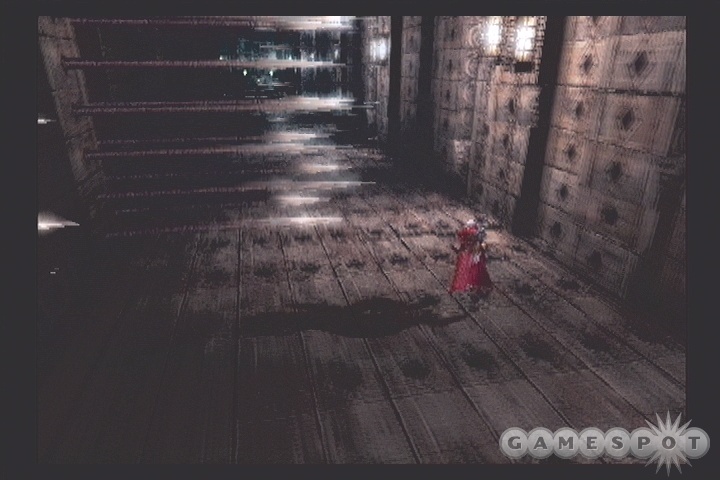
Mission 1: A Crazy Party
Violent response to an insane caller.
You won't have many special moves available to you at this early portion of the game. Besides just swinging your sword, then, you'll want to learn how to use the Blastoff technique, which can be done by locking on to an opponent (R1 button), pressing away from them on the left analog stick, and pressing the triangle button to attack. This will cause you to swing your sword upwards, which will cause your enemy to likewise be thrust into the air.
You have a few different ways of taking advantage of this maneuver. To begin with, if you hold the triangle button down after initiating the maneuver, you'll follow your foe up into the air, allowing you to hit him again by tapping triangle again and send him (it?) crashing back down to the ground. This combo can be made better by switching over to gunfire immediately after you send your foe flying; whether you remained on the ground or flew up after him, shooting your target will keep him floating, allowing you to do a bit more damage and get your style meter up. After floating him for a bit, use your melee attack again for an extra burst of damage.
Due to the number of enemies here, though, you're not always going to want to have one locked on; sometime it's better to just let Dante roam free and slice at enemies in large groups, especially when there are enemies on all sides of you. You can't block attacks, but you can usually stagger large groups of enemies by swiping at them with your sword slashes until you can isolate one of them and finish it off.
Mission 2: The Blood Link
Bludgeon the devils like an iron hammer.
Before you begin mission 2, you'll have a chance to upgrade Dante's actions or firepower with the Customize menu. You won't be able to afford much - it's unlikely you got more than four or five thousand red orbs for beating mission one - but you can get the Stinger attack, at least, which is one more thing you can throw into combos to earn more style points. It'll also be helpful in defeating the boss of this level, as it lets you cross large amounts of ground in a single speedy flash.
As you play through this level, concentrate on trying to get more stylish combos. The number of enemies makes it easier to land attacks on multiple targets simultaneously, which in turn pumps up your combo meter more than if you were attacking a single enemy. Try to get yourself up to Alright or Showtime, if possible; if you're really good, you might be able to use Stinger and continually tap the triangle button for an attack that shoots out a rapid succession of sword thrusts. If you can get this to land on two or three targets simultaneously, they'll get locked into place by the blows, and you may be able to get your meter all the way up to SSStylish!
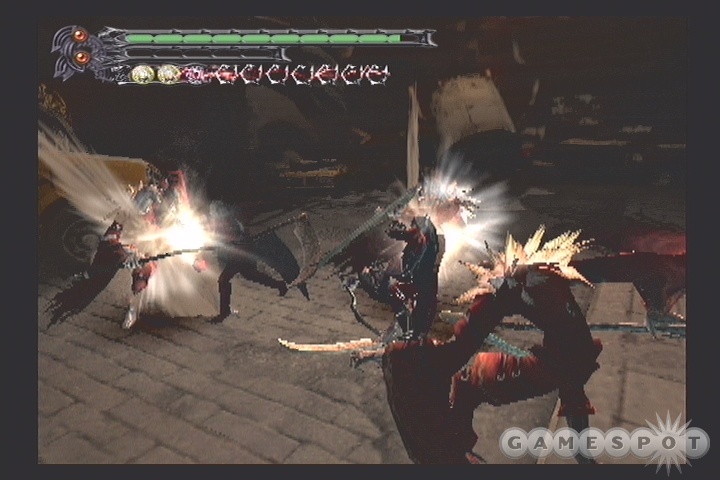
Boss Fight: Vanguard
The Vanguard enemy is going to be fairly frustrating to beat if you don't know his patterns. Even knowing his patterns won't help you overmuch, as dodging his attacks is quite difficult, but familiarity will at least get you an edge up on the competition.
The main reason that Vanguard is confusing is that he warps around the battlefield; he'll disappear, then reappear a second later in another part of the map and launch an attack. He has a few different maneuvers that he'll choose from, the most devastating of which are a flight attack in which he'll immediately fly forward, twirling his scythe, and a stationary two-swing attack with a good range. If he doesn't use one of these, then you'll be able to avoid damage just by keeping your distance from the spot where he appears (although this obviously does require a good degree of coordination).
Unfortunately, it's extremely difficult to tell what he's going to do before he actually does it, leaving you little time to choose between rolling or dodging to the side (to avoid the flight attack) or jumping backwards (to avoid the two-swing maneuver). You're going to take some damage here, no doubt, but you should have a Vital Star S that you picked up off of the ground next to your shop, so if worst comes to worst, you can use that.
Luckily, you can sometimes avoid the worst of the Hell Vanguard's attacks simply by pressing your own attacks. When you get a feel for how he moves and swings, you can start moving in and swinging away with your sword. You can usually cause the Vanguard to staggar a bit by just hitting him; when he disappears, dash away from his initial attack, then lock onto him and use a Stinger to get right back into melee range and repeat the process.
If you use your sword a lot, you can expect the Vanguard to eventually start blocking your attacks, but this is actually a good thing; when you get the load clang and see Dante stagger for a second, you can either roll or dash to the side to avoid the big swing that the Vanguard will use and attack from the side. This is usually going to be your ticket to big damage, so get the timing down and stay up close against the Vanguard to finish it off.
Mission 3: The Devil's Tower
Invade the colossal tower.
66 Slum Avenue
(Note that, if you want a few extra red orbs, you can immediately head backwards at the beginning of this level to return to the street outside Dante's shop, where a few enemies will be waiting for the sweet release of death.)
You're going to come across your first Enigma enemies on 66 Slum Avenue, which is obviously a wellspring of urban renewal. These guys are formed out of statues, and possess annoying projectile attacks, which don't do an insane amount of damage but can still hit you in mid-air and knock you down. You'll need to double-jump up to the upper levels where they reside if you want to kill them. Just get in close and slash at them with your sword and they'll go down fairly quickly.
After the Enigmas are dead, you can kill all of the rest of the enemies here, if you wish, or just enter the bar immediately through the red doors at the end of the alley. It's best to go ahead and kill everything, as you'll get a health refresh in the bar, and every orb will count when it comes time to gear up for the boss fight at the end of this level.
Bullseye Bar
The interior of this bar is deserted, thankfully, but there are plenty of barstools, tables, barrels, and even a jukebox, all of which will drop red orbs when destroyed, so go through and thoroughly demolish the place. On top of the bar itself you'll find three barrels, one of which should contain a green orb that'll completely restore your health.
If you cut down the three slot machines near the blue force field, you'll find one of DMC3's "puzzles". All you have to do to drop the forcefield is hit the pedestal here a few times with your sword; the flames around the edges will start to light up, and when they're all lit, the field will drop. Before you move on to the next area, though, grab the Shotgun on the wall.
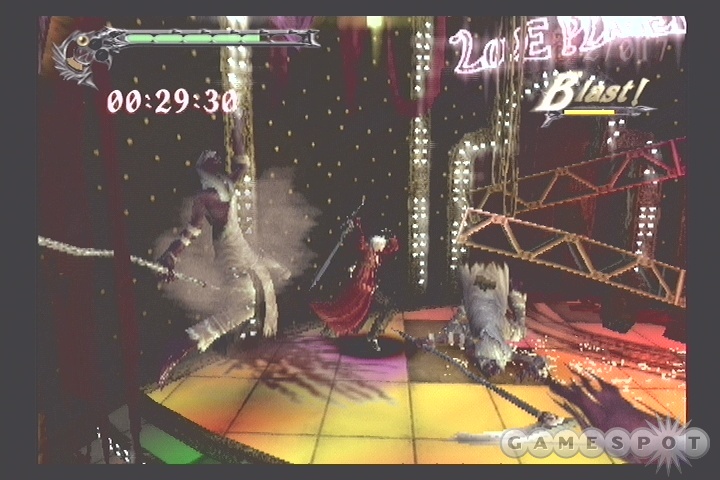
Love Planet
The strip bar adjacent to Bullseye is populated by a new enemy, the Hell Sloth. These mummyish foes have a limited warp capability, similar in nature to the Hell Vanguard, and are going to take a lot of damage before being defeated. They're slow, though, so you should be able to outrun them and overpower them.
Notable features of this room include the stripping pole on the runway; if you hit the triangle button while standing near it, Dante will swing around it, lightly damaging all nearby enemies before jumping off. You can also destroy most of the tables and chairs here for a good number of red orbs, and there's also a green orb at the top of the staircase that leads above the door leading out to the street.
13th Avenue
There are a fair amount of items for you to collect here; luckily, there aren't any enemies to hamper your style. A number of red orbs can be found by double-jumping up the sides of the buildings (including jumping on top of the sign for Love Planet); you'll also get your first blue orb fragment here, as well; when you collect four of them, you'll extend your life meter by one bubble.
On the left side of the street, there are two features of note. If you smash through the weak-looking wall near one of the streetlights, you'll find a giant red orb crystal. Continue to whack at it with your sword, and you should be able to collect a couple thousand orbs before it disintegrates. On top of a building nearby, you'll find a statue with red flames coming out of it; if you can get yourself up to a Blast combo ranking while swinging at it, you'll be able to gain another Blue Orb Fragment. By combining Blastoff, Breakdowns, Stingers, and your two normal combos, this shouldn't be too difficult to achieve.
In addition to all of the normal items here, you can also find the entrance to Secret Mission One by pressing O near the doorway beneath the railing that holds the free-standing blue orb, on the right side of the street. See our Secret Missions section for details.
Now, before you head on to the next area, stop by the golden statue and invest some of your red orbs into items. Before you fight the boss here, you're almost certainly going to want one or two yellow orbs (which let you continue from this point when you die rather than being forced to do the whole level over again) and probably one Vital Star L, and perhaps a Vital Star S if you've already used the one you found in mission two. If you have the scratch, feel free to buy another blue orb, especially if you've gotten the three it's been possible to find thus far (two from 13th Avenue and one from Secret Mission One). This will get you an extra bar of health, and will also completely heal you if you're running low on vitality. It's also a good idea to save your game data at this point, which will at least let you keep all of the cash that you've gained should you have to restart the level.
Ice Guardian's Chamber
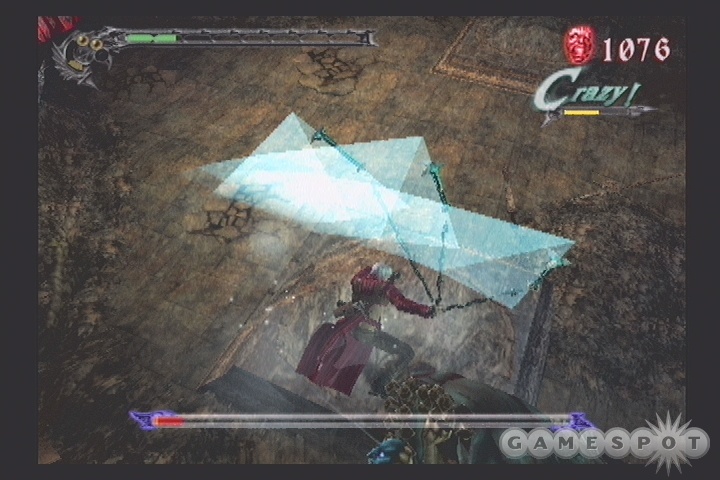
Boss Fight: Cerberus
Ah, time for the first really difficult boss fight here. Cerberus, the tri-headed devil dog that guard's the tower's entrance, is an ice-encrusted, chain-restrained beast that can absolutely rip through your health if you don't know how he moves. Unfortunately, knowing how he moves and attacks is going to be difficult to learn until you fight him, so you may just want to run around, watch his attacks, use your continues, and keep fighting until you get an idea as to how to beat him, then reset your PS2, load your savegame, and play through mission three again until you get to him, then try and fight him "for real".
Cerberus' Attacks One of the major aspects to this boss fight is knowing that his different heads each use different attacks; the head that's currently active is the one that's in the middle and lowest to the ground. In addition, he has some uber-attacks that he can use with any head, but these come out less often than the head-specific attacks, so if you can learn those and how to avoid them, you'll have a much easier time taking Cerberus down.
As he moves around, though, note which head is in the dominant position and prepare yourself to dodge the incoming attack as appropriate.
Yellow Eyes: When the yellow eye head flares, it'll call down a rain of ice from the ceiling. Dodge or roll from side to side to avoid this.
Blue Eyes: The blue eye head will usually use a breath attack in which it'll suck in air, then shoot out ice crystals in a straight line at you. You'll want to dodge or jump along a path perpendicular to Cerberus' head in order to get away from these; dashing towards or directly away from him will just get you pelted. If you're near a wall, double jumping above these iceballs will get you well out of harm's way.
Red Eyes: This head can suck in moisture, similar to the blue eye head, but instead of shooting it at you will instead point his maw at the floor and coat it with ice; if you get caught in the ice field you'll be frozen momentarily and take damage. You can jump over these fields, but it's safer to try and stay near a wall and double-jump to ensure that you're in the air long enough to avoid them entirely.
In addition to the discrete head attacks, Cerberus has a few others that he can perform at any time. One of these are a pair of paw stamps, where he'll hit the ground with both of his feet and send out a wave of ice. Again, it's best to double jump over these, if possible. The second are actual paw swipes, where he'll use his paws to smack at you; if you move away from him while this occurs, then you should be able to get out of range relatively quickly. The charge maneuver is most problematic, though; every once in a while, Cerberus will bend down low and suddenly charge out of his little area. If you're in front of him when this occurs, then you're going to get knocked around and take a bunch of damage. It's difficult to dodge this attack if you're not already in a position to avoid it, as it comes out very quickly. The best place for you to be is well off to one side of the chasm, but if you've gotten up to Trickster level 2 (which would have been very difficult to do by this point in the game), you may be able to double jump over it.
Attacking Cerberus
To begin with, you should be able to easily spot the fact that Cerberus is covered in ice. In order to damage him, you'll need to attack his five target points (three heads and two feet) in order to clear the ice off of them. This is most easily accomplished with your Ebony & Ivory guns from long range; you can shoot the ice off pretty quickly, then cycle to the next target and repeat the process until everything's clean. He'll periodically restore the ice, but he will remain vulnerable to your attacks for a decent interval of time.
In order to kill Cerberus, you're going to have to go after his heads and use your sword to deal major damage to them. You don't need to focus on one head at a time; all damage dealt to them will come off of his main life meter, although they may actually have individual healths which can let you cut one off early in the fight if you focus on it. Unfortunately, the most dangerous place to stand in this boss fight is directly in front of Cerberus, which also happens to be where his heads are located, so...you'll obviously need to find a way to hurt him without placing yourself at undue risk.
The "secret" technique here is to stay off to one side of the area, preferably as close to the wall as you can get. This is going to let you not only double-jump over a number of Cerb's attacks, but will also keep you fairly close to his feet, which are key to exposing his weak spot. When you slash at his feet repeatedly, Cerberus will eventually keel over and lay his heads on the ground for a moment, allowing you to get up close and personal with your sword. You'll have a good eight-ten seconds of this stun to work with before Cerb gets back up again, but you can do quite a bit of damage if you just free-attack his heads here. When he does get back up, though, quickly move back to the side of the chamber and repeat the process of shooting the ice off of his body and slicing away at his claws.
The first time you face off with Cerberus, he's likely going to polish the floor with you, but if you learn to stick close to him and not be too intimidated by his bulk and fierce demeanor, you should be able to conquer him, with the help of a healing item or continue or two.
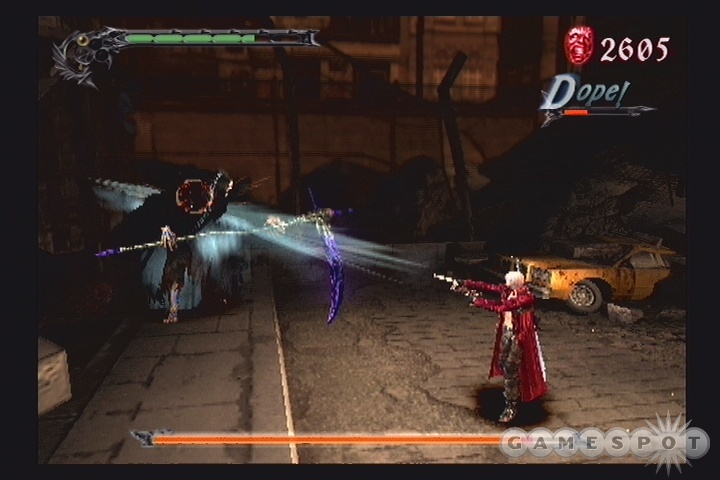
When the fight is over, Dante earns his first new weapon, the Cerberus ice flail, and has his first run-in with Lady, who carries a rocket launcher with a bayonet on it, which is a pretty good summation of DMC3's sense of realism and attitude.
Mission 4: The Uninvited One
Find the key to the stars.
Now that you have the Cerberus weapon, it might be a good idea to try it out and learn how to use it well. You can check out its combos on the info screen (found by pressing left on your d-pad), so browse the menus until you find that you're capable of pulling off combo II repeatedly. The timing on this is kind of odd; you have to hit triangle twice, wait until Dante is just about to place the weapon on his back, then tap triangle again twice to spin the flail around. If you tap really rapidly, then you'll pull off a Satellite move, which can really bust your combo meter through the roof if you use it in the middle of a group of enemies.
This is also an exceedingly good time to stop moving forward in the game and get yourself some cashola. You've obviously only just begun playing, but if you're willing to put a little time in, you can purchase most of the moves that are available to you by backtracking a bit and getting all of the cash that you've just picked up over and over again. You see, each time you start mission four, the red orbs in 13th Avenue and the Bullseye Bar will respawn, allowing you to head backwards from the tower and pick them all up again. If you start the mission, head back to 13th Avenue, get all of the red orbs there, repeat Secret Mission one for more orbs, kill everything in Love Planet and destroy the tables and chairs, then head into Bullseye to get all of the orbs there, you can get around 6,000 orbs per run if you're stylish enough, with 3,000 being more of an absolute minimum. If you then save your game from the start menu, quit the mission, exit out to the game's main menu, and reload your game, you'll be able to restart the mission and keep all of the cash that you picked up. (Just restarting from the start menu will reset your cash to what it was at the beginning, though.)
Each run should only take a few minutes to pull off, giving you easy access to a bunch of cash, which will let you buy continues, healing items, gun upgrades, and new moves for your weapons. You'll also be earning experience towards your Style by fighting the previous enemies. Although there isn't a boss at the end of mission four, you'll definitely want to get Trickster up to level two by the end of mission five, as you'll need maximum mobility to defeat the bosses there.
Chamber of Echoes
The Chamber of Echoes is enemyless, so you won't have to defeat wave upon wave of hellspawn in order to advance. You can examine a few of the items in this chamber, such as the large statue in the middle, but your goal is to climb the stairs and reach the blue door that's shown to you in the opening cinematic.
Entranceway
There's nothing especially interesting about the Entranceway; there are just a bunch of entry-level grunts waiting for you to kill them. Do so, and move on to the Living Statue Room
Living Statue Room
There is an item here that you'll be able to pick up later, but for now, all you can do is kill the Enigmas and other hellspawn, then head through the red door on the upper level.
Silence Sanctuary
There aren't any enemies here, although there is a semi-puzzling puzzle. Well, actually, calling it a puzzle is an insult to the word-search booklets that litter the checkout lines of our less intellectual supermarkets; all you need to do to make the platform raise is to destroy the statues on it, then whack away at the flame meter on the wall. Don't miss the red orb crystal, though.
Incandescent Space
Another room, another fight. Although the initial enemies look very similar to Prides, they're actually Gluttonies, and are capable of spitting out large clouds of sand in a straight line in front of them. You should be able to see this coming a mile away, though, thanks to the extended windup animation for it. Defeat them and the Sloths, then jump up onto the pipes above the exit door to find another blue orb. If you haven't bought one, then this should get you up to four, which will net you a new life meter bar.
Chamber of Echoes
Endless Infernum When you reach the Chamber of Echoes again, work your way up the steps towards the yellow door, then head through to the Endless Infernum. Although the doors here will seal with red, there aren't any enemies - the only thing you can do is run up the stairways, which will break and send you plummeting into the depths, Gandalf-like.
Chamber of Sins
Fight! Kill everything that moves in this abattoir, and you'll be warped back up to the Endless Infernum, where the doors will have been unlocked. Leave through the red door.
Giantwalker Chamber
Boss Fight: Gigapede
Well, you should be happy to note that the Gigapede is much, much easier than either the Vanguard or Cerberus; his attacks are relatively easy to dodge, and it's not difficult to do damage to him. He has no particular weak spots, so you can hit him all over and wear him down as you like.
Gigapede's sole attack comes in the form of electrical balls of light that he'll generate underneath his "wings" and shoot at you. You can see these coming from a mile away, relatively speaking, thanks to the long warmup time, so get ready to dodge when you spot them coming. How to best do so will depend on your relative location to the beast: if it's on one side of the chamber, then hide on the other side of a pillar or stone; similarly, if it's flying low to the ground, you can sometimes avoid the damage by getting on top of one of the bridges on the upper level of the chamber. Having Trickster up to level two, and preferably the Air Strike command for your Rebellion will make this dodging process much easier, as you'll be able to double jump in midair and dash away, leaving most of the orbs flying to your previous position. So long as you can get a bit of distance between you and Giga, this should be sufficient to dodge all of the orbs it fires.
Actually damaging Gigapede is a bit more difficult, although not prohibitively so. You can, of course, shoot it from a distance away; there are numerous targets on its bodies, so cycle through them as they turn grey and waste away under your fire. In order to do the most damage to him, though, you'll need to doublejump onto one of the upper levels of the room, then wait for it to fly underneath you and jump onto Gigapede's back; you can then lock onto the closest bit of flesh to you and start slashing away at it from close range, which will let you pop off huge amounts of damage. If it fires orbs at you, you may want to just take the damage, as this opportunity for big damage will usually outweigh considerations of the damage that you'll be taking.
Incandescent Space
The lower door in this room will lead back to Incandescent Space, albeit another part of the room than the one you were in earlier. You'll find the Astronomical Board here, and will have an encounter with a bizarre and disturbing jester character, appropriately named Jester. You can go on and skip the cutscene if you wish; if all boils down to Jester telling Dante that he needs to strike the pedestal by the door with his sword if he wants to unlock it. End of chapter.
Mission Five: Of Devils And Swords
Unleash Your Might On the Demonic GatekeepersThe boss fight at the end of this chapter is going to be very challenging, so if you're running low on cash for items, you might want to play from the beginning of chapter four and backtrack a few times until you have enough scratch for a couple of Vital Star L's and a couple of Yellow Orbs. It's also a very good idea to upgrade to Cerberus' Revolver Lv. II, which will let you inflict mucho damage on the end bosses.
Giantwalker Chamber
Immediately after you re-enter this chamber after leaving the Incandescent Space, Jester will introduce you to a new enemy, the Blood-Goyle. These flying foes will attack after whirling themselves around in the air, but they're not too difficult to defeat. In order to make them vulnerable, shoot them with a ranged weapon until they turn to stone; when that occurs, get in close with your melee weapon and finish them off. If you attack them with melee weapons while they're red, they'll just split in two and create more problems for you.
When all of the Blood-Goyles are dead, head back to the Endless Infernum.
Endless Infernum
Chamber of Echoes
After passing through back to the Chamber of Echoes, you'll need to ascend the stairwell until you reach one of the uppermost areas; taking a right out of the door from the Infernum will get you on the right track. When you see a small pedestal next to a glowing yellow clockwork background, press the O button to insert the Astronomical Board, which will unlock an area of the stairwell a bit further down. If you reach the unlocked area, you'll be able to grab the Vajura, a gigglishly-named key that you need to take back to the Living Statue Room. You'll also unlock a springpad at the very bottom of the chamber; if you need to reach one of the upper levels quickly, jump onto it and you'll be propelled upwards to the top. For now, though, drop down and reach the blue door.
Entranceway
Living Statue Room
When you reach the Living Statue room, return to the upper level and place the Vajura in the chain-winch system in the little alcove there; this will open the cage in the center of the room and give you the Soul of Steel. It'll also spawn in a bunch of Enigmas and Gluttonies, so fight them off before returning through the Entranceway.
Entranceway
Chamber of Echoes
Endless Infernum
After returning to the Chamber of Echoes, climb the steps to the uppermost door (the yellow one) to return to the Endless Infernum. When you're there, you'll find that your Soul of Steel allows you to pass over the area where the walkway fell into the pit, even though there's nothing to really walk on. Hey, if it works, it works.
On the upper end of the room, you'll find another flame pedestal; get an Alright combo on it with your Cerberus weapon to unlock another Blue Orb fragment. (This can be difficult to do if you haven't upgraded the Cerberus' abilities, so if you can't quite manage it, mark the position and come back later.) Placing the Soul into the hole in the wall will also open a doorway.
Surge of Fortunas
The Surge of Fortunas features little save for an elevator, but if you examine the icon on the wall near the flame switch, you'll be whisked away to Secret Mission Two.
When you activate the elevator, you'll have to ride the elevator to the top while avoiding falling off or getting taken out by the Prides that'll appear. If you remember that they take a swing as soon as they appear, though, and avoid that one, you should be able to finish them off. Since they're so tightly packed, you may want to use your Cerberus to get your combo meter up and earn yourself some extra points at the end of the level.
Azure Garden
No enemies to see here, but there are a bunch of smashable objects by the doorway leading on, as well as an Divinity Statue, so be sure to upgrade and buy new items for yourself. Save your game before moving on, even if you're not planning on dying - because you probably will.
Firestorm Chamber
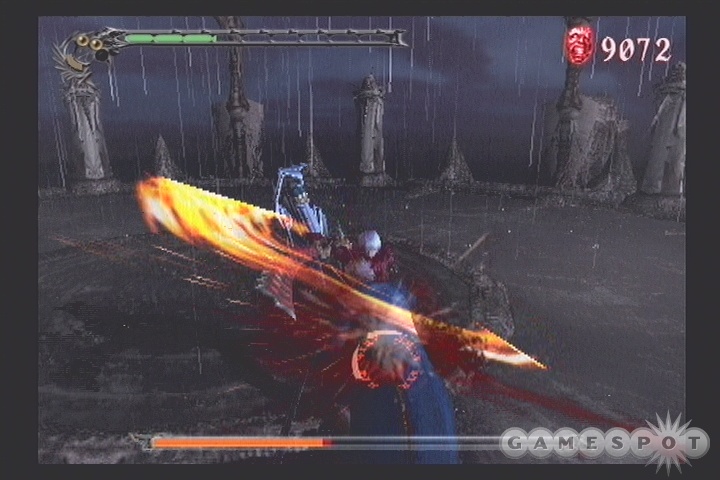
Boss Fight: Agni & Rudra
Agni & Rudra, the twin, headless guardians of the door leading further up the castle, are freaking hard. Prepare to die a lot, and we mean a lot while you warm up to their insanely quick attack style. Dealing with one of these guys would be difficult, but with two of them, you're just going to be outmatched.
The key to this fight, we found, was going after them with Trickster upgraded to level two and a Rebellion with Air Strike; you're going to need the extra jumping and dashing mobility afforded to you by these upgrades if you want to avoid A&R's attacks. Another key to the fight will be upgrading Cerebus to Revolver Lv. II, which will be your prime attacking ability when facing off against these guys.
Agni & Rudra's Attacks
Well, they use their swords on you quite a bit. Beyond just normal swinging, of which they have a few different tempos (the most common of which is a powerful swing that comes with a pause when they hold their sword up in the air), AR will also utilize a pair of special attacks where they'll run towards one end of the hall, line up in the corners, then run at you and leap into the air for a jumping attack. To avoid damage here, you'll want to be just about in the middle of the hall, then start running away from AR when they start running, then immediately jump into the air, double-jump with your Rebellion's Air Strike, then dash away again in midair, thanks to your Trickster Lv. II's upgraded ability. You may have to do this twice, depending on how far you got, as the second demon follows his brother in quite closesly, so even if you avoid one, the other one may still hit you.
Beyond that, there's not much to say about their first form, but make no mistakes; you're gonna get mauled the first time you face these guys. The main problem is that you can only really take on one of them at a time, leaving the other free to fight back.
Attacking Agni & Rudra
We're kind of torn between recommending a wholesale policy of avoidance here, in which you'll jump around and make quick strikes with aerial blows from your Rebellion, or just pressing the attack with your Cerebus. We found that Revolver Lv. II worked wonders on these guys, especially the orange one, who's of a firey nature and therefore seems to be weak to ice damage.
The key thing is that, if you just absolutely go on full-spam mode with Revolver II, you're going to force AR to guard for much of the time if they're near you, and will also be able to occasionally fling their swords out of their hands, leaving them defenseless for a few seconds during which time you'll be free to wail on them constantly and repeatedly, either with the normal Cerberus swings or by continuing to use Revolver II. We recommend the latter course of action, as Revolver will usually hit the other brother while you're going crazy on the first. Unfortunately, the disarming effect is seemingly random, so it's difficult to predict when it'll happen or attempt to force it to occur, although we can say that it always seems to occur while one of the brothers is in the process of a swing animation. With a little luck, you can just keep spamming Revolver and hope that you'll disarm one of them just as the other one is recovering from his own disarmament. Check our video for a good example of this.
Make no mistake, though, you're going to get hit during all of this, and hit a lot. You'll probably want to just go ahead and fool around with AR during the first couple of times you fight them, continuing when you die, then just reloading a save and working your way back through the mission to take them on again when you feel comfortable doing so. Save your Vital Stars for when you feel absolutely certain that you've got a chance to beat these guys, as using them before you use a yellow orb effectively wastes them.
Agni & Rudra's Second Form
After you defeat one of the two brothers (they have separate life totals), you'll have a few moments in which to engage the other one solo, so go crazy with Revolver and try to sap as much life off of their total as possible. After a dozen seconds or so, though, the remaining brother will jump up onto one of the pillars in the room, call the sword of the other brother to himself, and start using both of them at once.
We'll be honest - this guy is much tougher than even the two separate brothers. He's quicker, his attacks are harder to dodge, and he's more likely to jump up and attack, making you more likely to get whacked out of the air when you attempt to avoid attacks. Luckily, Revolver still works pretty well (although you do have a good chance to get hit while you're in the animation for it), and there's also a little trick you can pursue to make this second part of the fight a bit easier on you.
You see, the health for the second form of AR is the same as the health of the second brother after he calls the second form to him. Thus, if you manage to wail on both brothers during the first part of the fight and bring them both down close to death, then the second form here will be near death when he pops down, allowing you to polish him off with a few hits. If you solely concentrate on one of the brothers during the first part of the fight, then you're going to have to bring the second form all the way down from a full life bar in order to defeat him, and this is going to be tough.
Regardless of your chosen path, after defeating Agni & Rudra, you'll gain the swords which they used during the fighting, after making a bit of a discovery - the swords themselves contain the consciousness of the brothers. After a stern talking-to, though, Dante'll take them along for the ride.
Mission 6: Family Ties
Clear the trial and forge a new path.
Mute Goddess' Chamber
There isn't much you can do here - yet. Feel free to examine the statue in the middle of the arena, then move on.
Chamber of Three Trials
Ok, as you might guess from the name, there are going to be three trials to complete here. Completing two will unlock a door in the Mute Goddess' Chamber, while beating three will net you a new gun, so, obviously enough, you'll want to do all three.
Test of Wisdom: Blue Pillar
If you examine the blue pillar in the Chamber of Three Trials, you'll get a bit of a riddle, although not much of one; anyone who's heard of Oedipus or the Riddle of the Sphinx should know the answer. Heck, it's fairly well spelled-out by the "riddle" itself; in order to pass through the rooms beyond, you'll have to go through the door with four lights, then the door with two, then the door with three lights. After the third door, you'll gain an Essence of Intelligence.
Test of Technique: Orange Pillar
Before you take the test of Technique, switch yourself over to Trickster style. It's not necessary to beat the trial, but it is helpful.
In this test, you'll have to make your through a hallway of moving spike traps until you reach the end, where the Essence of Technique awaits you. They can either pop up out of the ground (a single jump can get you over these if you time them right), the right or left walls, or the ceiling (you can walk underneath these). Dodge your way past them all until you reach the end of the hallway. The only hard part comes at the end, where you have to walk directly past where the spikes appear, and so won't have much time to reposition yourself. When you're almost at the end, just jump and dash your way past the last set of spikes, if possible, and grab the Essence. Enemies will appear in the hallway after you do so; if you don't feel like fighting Blood-Goyles, just run past them and back to the Chamber of Three Trials.
Test Of The Warrior's Heart: Green Pillar
In the Test of Warrior's Heart, you'll be pitted against a bevy of invincible opponents on a platform with two flame switches. In order to pass the test, you'll have to drop the invincibility shields by lighting up both flame switches, attacking the enemies while they're vulnerable, then repeating the process when the flame switches go out. After a couple of rounds of this, you'll net the Essence of Fighting.
Mute Goddess' Chamber
After you have all three Essences, return to the Mute Goddess' Chamber and insert them into the pedestal there. You'll find that the way has been unblocked, and that you'll have obtained the Artemis gun. Feel free to go to the Divinity Statue in the Chamber of Three Trials and equip it, if you wish. You'll probably want to, because in...
The Dark Corridor
...the first thing that you'll find is a Combat Adjudicator keyed to the Agni & Rudra swords. Get an Alright combo on it to earn a Blue Orb Fragment. If you jump around in the rafters here, you can also find a good amount of red orbs. Moving down the hallway will end the mission.
Mission 7: A Chance Meeting
Duel of the demon children.
The Dark Corridor
After the intermezzo, work your way back down the Dark Corridor and get all of the red orbs in the rafters again. Free money! There isn't more than a few hundred orbs here, so it's not worth quitting and restarting to get it over and over again, but every little bit helps.
You can also find Secret Mission 3 here, by jumping up into one of the alcoves near the door leading on.
Heavenrise Chamber
Heavenrise is one, huge, vertical chamber. There are launching pads on every level, allowing you to go up as far as you like, but for now, drop all the way down to the bottom - there's no falling damage, so just jump - and enter the doorway there.
The Divine Library
The doorway here will seal with blue when you enter, denoting a puzzle. No need to tax your brain overmuch; just find the set of three Damned Pawns, whack the middle one until it moves, then grab the Orihalcon Fragment from the ground beneath it. That will unlock the door, allowing you to proceed if you wish. The Damned Pawns will drop red orbs if you kill them, of course, but it's difficult to build your combo meter up on them since they're so well spaced here.
Heavenrise Chamber
Now that you have the Fragment, return to the Heavenrise Chamber and start ascending via the launchpads. There's a Holy Water on one of the levels, so grab it before heading all the way to the top and proceeding through the green door there.
Pitch-Black Void
This area is pretty much the mirror image of the Dark Corridor, save for the fact that there's a Blue Orb Fragment in the rafters here. We found it easiest to get by double-jumping up the wall across from it (near the balcony), then wall-running up with Trickster style and launching off backwards. This should place you right on its little area. You can also jump from rafter to rafter to reach it, if you have to, but this is pretty difficult.
Skull Spire
Defeat the Damned Pawns here, if you wish, or just run past them. You'll notice a locked door at the end of the hall, but you don't have the requisite key to open it yet, so backtrack a bit and find the other door. There's a Vital Star S behind the fences near by, so grab it before moving on.
Tranquil Souls Room

When you approach the statue in this room, a new enemy will appear. Greeds are one of the hardiest of the Hell enemies, and can summon in other Hell enemies thanks to their coffins. This is annoying enough, but they also have a fiercesome two-swing combo that can't be interrupted, so if you see them winding up for it, dash away from them and give them a couple of seconds to complete the animation before charging in. Luckily, these guys only summon Pride enemies, which are among the easiest in the game, so you can use the density of souls as a launching ground for high-level combo meter attacks, if you wish. If you don't concentrate on the Greeds, though, they'll just keep on summoning more enemies, so they should be your focus here.
When you kill all of the Greeds, you'll obtain the Siren's Shriek. Move on through the large door opposite the statue.
Lift Room
Ugh. The major task here is the Combat Adjuticator; you're going to need to get all the way to SSStylish on it to unlock the Blue Orb Fragment within. This is doable without Swordmaster style, but the extra attacks afforded to you by that style make it a bit easier to get your combo up to those airy reaches.
The upper level of the stairs here holds an elevator control panel. If you examine it, you'll automatically insert the Orihalicon Fragment, which will power up the elevator nearby, so use it.
Chamber of Echoes
The Siren's Shriek is powerful enough to put out any flames, including the magical conflagration that covers the red door on one of the lowest levels of the Chamber of Echoes. Go ahead and douse it, then head through.
Entranceway
Cursed Skull Chamber
When you reach the Cursed Skull Chamber, cut through the wall in front of you to reveal the room itself. The flameswitch here can be activated to drop a massive crushing ball; lock onto this and whack it a few good times and it'll explode, dropping the Crystal Skull.
Unfortunately, this also launches one of the most difficult of the normal-enemy fights you'll have encountered in the game. The first wave consists of Lusts and a single Greed, who happens to summon in more Lusts with his coffin, while the second wave consists of more Lusts and two Greeds who'll summon in more Lusts. It's difficult to get a sword in edgewise against the massive number of Lusts, unless perhaps you keep yourself airborne with the Aerial Rave technique or something; we just bit the bullet and used the Holy Water we picked up earlier to clear out the entire second wave, thus unlocking the door and allowing us to move on.
Entranceway
Chamber of Echoes
Lift Room
Tranquil Souls' Room
Take the elevator in the Chamber of Echoes back up to the upper reaches of the tower. (If you need a good heal, you may want to exit to 13th Avenue and blast the garbage bin near the door to Secret Mission One.) You're going to be forced to fight in the Tranquil Souls' Room, though, where a pair of Greeds will summon in more Prides. After the Greeds are dead, though, a Vanguard will appear - you'll remember him as the boss of mission two, way back when. With your upgraded Trickster movement, though, you should have an easier time dodging its attacks, so finish it off and move on.
Skull Spire
If you can find the locked door you couldn't unlock earlier, you'll be able to insert the Crystal Skull into the hole in one of the pillars, allowing you to move on.
Moonlight Mile
Well, by the ominous appearance of this outdoor corridor - including a Divinity Statue at the end - you should be able to tell what's about to occur.... Be sure that you have Agni & Sparda equipped, and, as usual, Trickster style.
Peak of Darkness
Boss Fight: Vergil
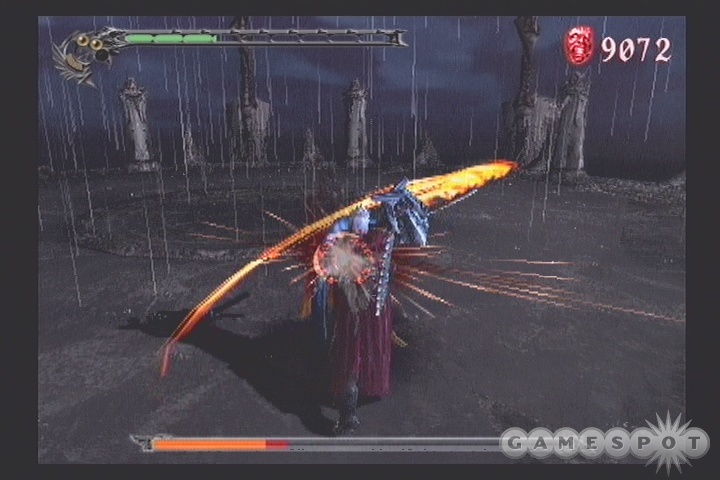
Believe it or not, your first encounter with your brother isn't all that challenging, to be honest, although you may still have to use a yellow orb here, due to the fact that you probably haven't had a chance to heal in a while.
At any rate, Vergil has a bit of his own Trickster-style attacks, where he'll disappear and dash across the distance between he and you, immediately slashing at you with his sword. Luckily for you, though, you don't really have to deal with this too often if you just stay on the offensive. What you want to do is just get up close, use Agni & Rudra to attack Vergil until he performs one of his flash-blocks. When this occurs, he'll immediately counterattack, but you should be able to jump forward and land behind him while he's attacking and start beating him down from behind. Lather, rinse, repeat, and Vergil will go down before he knows what hit him. You will still take damage during all of this, unless you're insanely good at avoidance, but if you go in with a full life bar, that should be more than you need to finish off Vergil.
Mission 8: A Renewed Fear
Burst forth from the great demon's womb.
After your fight with Vergil, you now possess the ability to Devil Trigger. Upon hitting the L1 button, you'll flip over to a demon state that changes bases on your current melee weapon. While in this state, you'll slowly regain health, deal more damage, and take less damage from enemies. Unfortunately, this will only last for a few seconds initially and then short out. In order to gain the ability to Devil Trigger for longer, you'll need to buy Purple Orbs from the item shop. These start out pretty cheap, you should be able to get two or three of them right away with the rewards from the Vergil boss fight.
Leviathan's Stomach
After being swallowed up by the Leviathan, Dante will have to fight his way through the beast and attempt to find an exit. In this first room, though, the only possible exit is blocked by five tusks, each of which is bound to a seal elsewhere in the room; these seals look like pulsating pillars. Find and destroy all five to unlock the doorway leading on.
Before you move on, though, you'll want to scout around for a bit and find some extra bits and pieces. If you fall down to the lowest level of the room and walk underneath the wooden ship, you can cut through some boards to reach Secret Mission Four. (This is unfortunately more or less impossible to complete at the moment, though, so you'll probably have to come back later for it.) Also, if you jump up onto the front of said wooden ship from the second level of the room, you'll be able to find a Blue Orb Fragment.
Leviathan's Intestines
Leviathan's Heartcore
Walk through the Intestines, being careful to avoid the acid on the floor, until you reach the Heartcore, which almost sounds like it should be a music style. (If you don't have the Cerberus equipped, do so at the Divinity Statue just before the door leading to this room.) Hmm, pulsing organs - this obviously won't be something you have to worry about later. Yeah, right.... For now, though, keep moving on.
Intestines
In the second set of Intestines, a Gigapede will quickly come after you, fomenting an Indiana Jones-like race against impending doom. It's not obscenely difficult to outrun him, but it'll certainly help to have the Trickster mode's air dash technique handy when he gets close. If you hear him squealing, quickly jump and dash further down the corridor to avoid damage from his maw. Eventually you'll reach an orifice which you can go through to protect yourself from its attacks; cut through the door nearby and move on.
The next set of Intestines will have Envy opponents, which are very similar to Pride enemies save for being a bit tougher. Nothing too threatening, though, so cut through them and move on.
Leviathan's Retina
The Retina of the Leviathan is, oddly enough, also the source of its interior power. In order to find the item that powers its inner core, though, you're going to need to power up the retina, which requires you to kill a lot of Envies, so jump around and slash through them until the Ignis Fatuus appears. Grabbing it will power down the interior of the Leviathan, and also open a passageway leading on.
Intestines
As the map of this chamber notes, there are two small off-shoots from the main path that you can find off to your left. One of them contains a large green orb, while the other has a Combat Adjudicator which will require your Cerberus to bust; it'll contain a Blue Orb Fragment when you do so, though. Both of these chambers can be difficult to see, but you should be able to spot them if you get close enough to the wall.
The next set of intestines features another Gigapede, so avoid its attacks and return to the Stomach. In the Stomach, you'll find more Envies. If you want to fight them, feel free to do so; one of them will drop more health if you want to heal up before facing off against the boss. Otherwise, jump up on the bus and return to the path leading to the Heartcore. Before you go in, though, you'll probably want to switch your Cerebus for the Agni & Rudra.
Heartcore
Boss Fight: Heart of Leviathan
Although you're probably getting tired of hearing this, the HoL fight isn't all that difficult when you get the boss's patterns down. In point of fact, it doesn't move, and only has two easy-to-avoid attacks; the real damage that you'll take will come from the Envy enemies that will continually spawn. If you get surrounded by these guys, they can all swing at you and damage you multiple times before you can jump away, so you'll want to try to include them in your orgies of destruction.
Heart of Leviathan's Attacks
As mentioned, the Heart only has two attacks. The first occurs after the screen turns blue; the middle stalk of the heart will shoot out three or four glowing blue balls that will attempt to track Dante down and damage him. They move extremely slowly, although they may move more quickly on higher difficulties. Avoiding them for a few seconds or attempting to place one of the Envies between you and the balls will take care of them.
The second attack occurs after the screen glows red. A laser beam will pop out from the central stalk and sweep the room from side to side, but you can easily jump over it as it passes. After you deal enough damage to the Heart, it'll start popping out two laser beams simultaneously, but you should be able to avoid them just as easily by standing in the center of the room and jumping straight up.
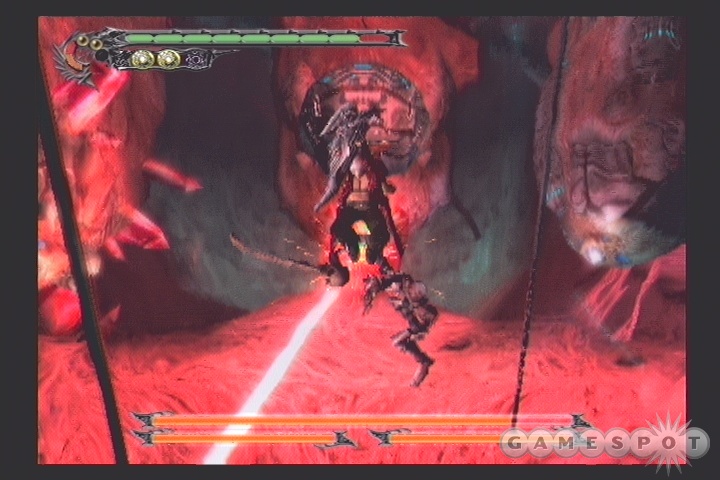
Damaging the Heart of Leviathan
You'll note that the Heart has three separate health meters, with one corresponding to each of the three stalks of the Heart. The only one that really matters is the central stalk (with the longest health bar), but it's shielded and invulnerable to your attacks - at first, anyway.
In order to unshield the central stalk, you'll have to whack on the two side stalks. Fitting with the color scheme, these come in red (left side) and blue (right side). The red stalk will suck up all of the orbs that fall from the Envies that you kill, making it impossible to heal yourself from the green orbs that they occasionally plop out, while the blue one will periodically absorb your magic energy, preventing you from using your Demon Trigger. Since you're going to get plenty of orbs from killing the boss itself (5,000 in all),
Mission 9: Faded Memories
Christen the sorceress of the abyss with a blade
Note that the boss at the end of this mission is rather tough. Before going to meet her, it'd be wise to farm for some red orbs and purchase some Purple Orbs from a Divinity Statue. Each one of these will let you extend the amount of time that your Devil Trigger state lasts. Getting three or four would be ideal, but like most items, they will become more expensive as you buy more.
The Rotating Bridge
Welcome...to the Forbidden Land! Now that Vergil has unlocked the big bad door, guess it's time for Dante to follow him inside.
There aren't any enemies here, so move on to the next room to find a new enemy.
Provisions Storeroom
The Arachne enemies here can definitely put the hurt on you if you're not ready for them. They're big, hit hard, and move quickly, and can also spit spiderwebs on you to freeze you in place momentarily; this mostly occurs after they jump onto a wall. They seem to be a bit weak to fire, so A&R is a good weapon to use against them. Just be prepared to jump over them when they lunge at you. Don't hesitate to treat this like a boss fight and use some healing items to get the hang of their attacks before restarting the level from a fresh savegame load and trying again.
Subterranean Garden
Oh noes; a puzzle. This thing is a piece of cake, though, so don't even worry about the blue seal on the door. All you need to do is slice at the two mirrors that prevent the light beam from hitting the statue - check our screenshot to learn which ones to hit. If you mess up, use the flameswitch nearby to reset the puzzle. After you get it done, though, you'll be able to move on.
Subground Water Vein
There are five Enigmas here that'll shoot at you as you proceed around the large room. If you have Ebony and Ivory equipped, though, you can shoot them quickly enough to prevent them from firing until you get close enough to finish them off with melee attacks. After you kill the two near the end door, proceed on.
Rounded Pathway
The important thing to note here is that the walls of this corridor are lined with razor-sharp...well, razors. They spin around and will damage you if you come into contact with them. Unfortunately, there are Greeds and Prides blocking you from reaching the exit, but all you need to do is jump over them and reach the far door to move on; there's no fighting required here. You can kill the Greeds and everyone else if you wish, of course, but it's probably better to just leave them be and keep your health up.
Subterranean Lake
When you reach this area, take a left from the door (heading southwest on the map) and you'll find a little field of red orbs, along with a green orb another another bunch of reds on the platforms above the lower level.
Head back to the other side of the door and take a left near the Divinity Statue. If you jump to where the large red orb is above the Divinity Statue, you can find a pedestal holding the Spiral weapon. You have two exits from the room: one through the waterfall, and one door near the Divinity Statue. Take the door to reach another Rounded Walkway.
Rounded Walkway
A pair of Enigmas rest in this walkway; if their fire annoys you while you dodge the razors, use your ranged weapons to lock them down as you move.
Provisions Storeroom
Hmm, an unprotected item all alone in an empty room - there's no way there's an ambush here, is there? Well, guess again: as soon as you pick up the Ambrosia, more Arachnes will appear and assault you. The second wave actually pits you against three at once, so you'll want to Devil Trigger as soon as possible and wipe the floor with one of them to improve the fight's manageability.
Rounded Walkway
Subterranean Lake
Limestone Cavern
After you get the Ambrosia, run back to the Subterranean Lake and move into the waterfall cave to reach the Limestone Cavern. As you head down the path, take a right when you reach the first pair of red orbs and pick up the Devil Star, then return back up and slice your way through the Envies. A few of these guys will drop green orbs when you kill them, so heal yourself up and try not to get hit.
Secret Mission Five can be found here, as well. If you want to give 'er a go, jump up into the barely-visible upper corridor that's near the entrance to this area from the Subterranean Lake and use the red crystals.
At the end of the path, you'll find a statue that will accept the Ambrosia. This will unlock the door leading to the Sunken Opera House. Before you head in, it'd be wise to have both Agri & Rudra and especially Cerberus equipped; the upcoming boss will be weak against the latter weapon's ice damage.
Sunken Opera House
Boss Fight: Nevan
Alright, here's one of the lengthier and more difficult boss fights you'll have had in a while. Before you head in, recall our advice; get some more Purple Orbs from a Divinity Statue, and be sure to have Cerberus equipped. We chose to pair Cerberus up with Agni & Rudra with Air Hike and Jet-Stream Level III; we just found that this made it much easier to approach Nevan and strip away her defenses. As usual, we used Trickster to avoid her attacks.
Nevan is something of a vampire/succubus/guitar creature; it's a long story. Suffice to say that she's intent on stopping your progress in the game, and will definitely want to kill you big time. Like the Heart of Leviathan, though, she'll usually be completely invincible; in order to defeat her, you'll need to learn some special tactics, and bring along a few Yellow Orbs and Vital Stars.
Nevan's Attacks
Nevan is going to come at you with a large number of attacks, so you'll probably have to try her a couple of times to get the feel on what she's going to do and when. No shame in dying here; even on Easy mode she's something of a bruiser.
Most of her attacks are cued by sounds; she'll yell out something, then follow through with a linked attack. If you know which attack her saying will presage, then you can base your reaction on that, rather than having to wait for her animation to begin. Here's a short list of these; we'll explain them more in-depth in our strategy below.
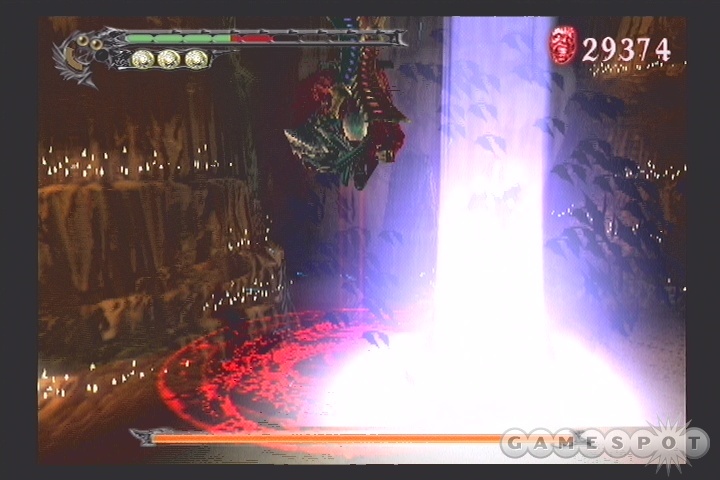
1: "How's This?" After this saying, Nevan will spit out a stream of electrified bats, of all things. Easily dodged by lateral movement if you're a good way away from her, or by jumping/dashing in midair.
2: "Now You Will Become Tired!" This meaningless statement comes immediately before a beam of lightning shoots up from under your feet. Again, walking in a straight line or jumping/dashing will let you avoid it. Keep moving, though, as more than one beam can sometimes erupt.
3: "(giggles)" Her giggling is usually accompanied by a weird kind of backflip; shortly afterwards, she send out razors towards you in a more-or-less straight line. Dodging laterally or jumping should get you clear of these, but don't be too quick to dash in for a melee attack; she'll often follow it up with Get Ready or Don't Feel Lightning?, both of which can be hurtful when they impact you at close range.
4: "Don't Feel Lightning?" We'll admit that we're not quite sure what she's saying here, but when she does say it, Nevan will send out one large ball of lightning bats towards you. It's tougher to dodge than How's This, so try to keep away from her as this goes off.
5: "Get Ready!" Nevan will usually call this out when you're nearby. Shortly afterward, icy black razors will begin spinning around her, dealing mucho damage if you're anywhere within range; if you happen to be standing right up next to her, you can easily lose half your life to this, and you won't be able to escape the damage field due to the stunning effect. You'll want to quickly jump away from her whenever she says this!
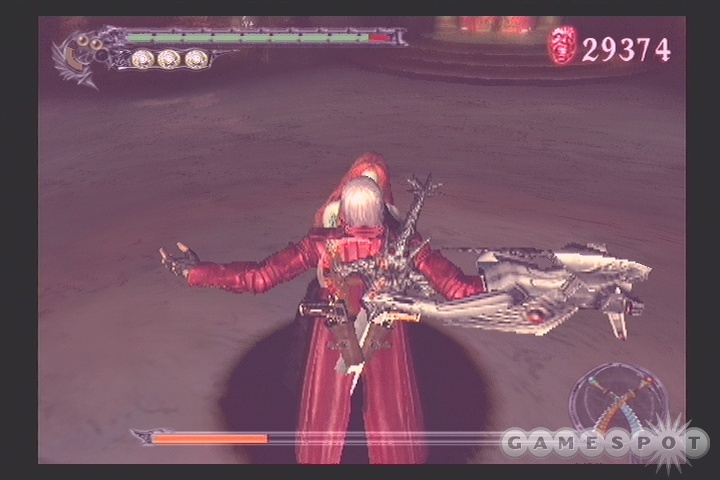
6: "Are You Enjoying Yourself?" Nevan doesn't start popping this attack off until later in the fight; when she does, though, you'll see a bunch of electricity start to appear around her. She'll shortly start throwing it at you; it can either come in vertical lines, which you can step between to avoid, or horizontal, which can be jumped over or dodged laterally.
7: "You Can't Escape!" When you've knocked Nevan down to something like one-third of her health bar, she'll start whipping out her desperation attack. With it, she'll warp to the middle of the room, send all of her bats away (to appear defenseless), then glide across the floor towards you. You cannot let her get close to you during this move, though, as if she grabs a hold of you, she'll suck away a substantial amount of your life and add it to her own, greatly shifting the balance of power.
Attacking Nevan
Taking Nevan down is going to be tough; it took us four or five fights before we could consistently do it without having to use healing items. Your mileage may vary, of course. There are three basic phases to the fight.
First Phase
The first phase of the fight lasts from the beginning until you knock Nevan down to two-thirds health or so. You should begin to get a feel for how she moves, how she attacks, and how to deal damage to her during this portion of the fight; only small adaptations to the strategy you adopt here should be necessary to finish her off in the later portions of the battle.
To begin with, you'll note that Nevan is normally undamageable; she has a rotating shield of bats that will protect her from all of your damage. These bats will be used up by her attacks, though, such as How's This, and can also be removed by melee attacks. The basic strategy here is to just toy around with her and learn her patterns. At the very beginning of the fight, she'll normally stick to How's This and Now You Will Become Tired, both of which are relatively easy to dodge. If you feel like getting in close, wait for Tired to come off, then charge in with Jet Stream or another quick-dash attack and start swinging away at Nevan; you should notice her bat-shield dissolving in bloody clouds. She'll also use attacks three, four, and five during this part of the fight, especially when you attempt to get in close to her, so watch out for those. You can expect to take a good amount of damage here, especially during your first couple of fights, so again, just take the blows, learn her moves, and restart the level from your last save when you feel ready to proceed.
As mentioned, Nevan will use up her bats with her attacks, and they can also be slashed away with melee attacks. You should attempt the latter after moves such as her back-flip razors, and especially after Get Ready, which generally forces her to keep still for a few seconds after she completes it. When all of the bats are gone, Nevan will be stunned for a second as she collects her darkness again; you'll be able to keep track of the progress of this by watching the black pool spread across the ground. This is the only part of this fight during which Nevan will be vulnerable to your attacks, so it's time to go crazy! When this occurs, switch to Cerberus, initiate Devil Trigger, and start wailing away on her. There's no reason to do any special attacks; we found the normal T, T, T combo to work just fine, although you can of course try anything else you have available, especially some of the Swordmaster attacks.
Anyway, after a few seconds, the pool of darkness will stop spreading and will retract back around Nevan. If you're in this radius when it does so, Dante will take a bubble's worth of damage (less if you're still in Devil Trigger state) and get knocked around, and Nevan will reform herself and her bat-shield on one end of the room and start the cycle over again.
Second Phase
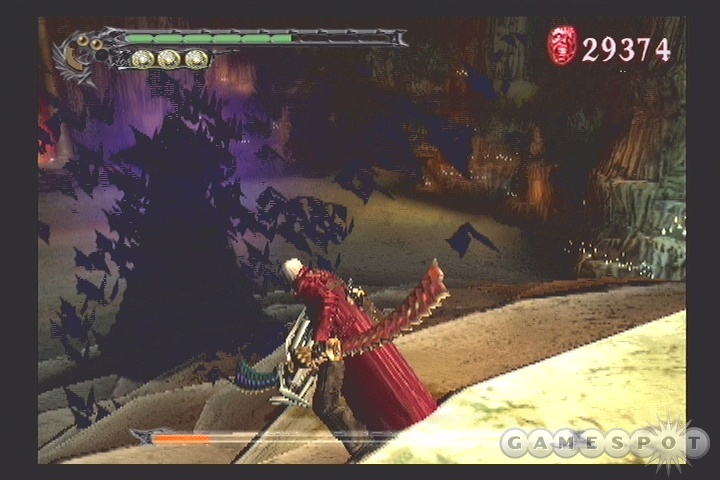
After you get Nevan down to around two-thirds of her full health bar, she'll start turning up the juice. You'll notice that she gets much taller than she was previously; this indicates that it'll take a bit more damage to knock all of the bats off of her to damage her. She also uses two new abilities here, both of which will only be used when she's standing near one end of the room. The first occurs when the ground starts to crackle with electricity; you only have a second or two to start jumping before the entire floor is covered with lightning. A double jump should be enough to keep you up in the air until the electricity fades away. Secondly, she'll start using the Are You Enjoying Yourself? lightning attacks, which can be avoided with relative ease if you get some distance between yourself and Nevan as soon as they start popping out.
Otherwise, just repeat the same process of darting in for attacks when she pauses, or after Get Ready and the back-flip razors, and you should be able to knock more of her health bar off without too much of a hassle.
Third Phase
The third phase introduces only one new attack, the devastating You Can't Escape! If Nevan disappears in a cloud of blood and reforms in the middle of the room (not at one of the ends), then you can be sure that You Can't Escape will be coming your way shortly. As mentioned, this will suck a substantial amount of life from you and add it to Nevan's health bar, which is a bad, bad thing. Luckily, it's not too difficult to avoid, thanks to the fact that she doesn't glide for very long and doesn't move too fast anyway. A double jump plus air dash is enough to get you out of the way.
If you happen to have enough orbs for a Devil Trigger, though, feel free to activate it and switch to Cerberus when she starts this move, as that state should render you immune to its effects and allow you to walk up and whack her with your flails, immediately triggering her pool-of-darkness move. Just hit her as hard as you can until she reconstitutes, then repeat the process until she dies. The You Can't Escape move will appear often enough in this phase of the fight to prevent you from working up three Devil Trigger orbs between each appearance, probably, but if you can avoid it, you can take your time, get your hits in on her when she's fully bat-shielded, and wait until you have three orbs before going after her during the You Can't Escape.
After Nevan goes down, you'll gain the Nevan weapon. Leave through the green door here to end the mission.
Mission 10: The Job
Strengthen The Silent Bridge
Limestone Cavern
The Limestone Cavern is the area that you were in previously; the green door just leads to a different part of it, where you'll be able to pick up the Stone Mask item.
Sunken Opera House
Limestone Cavern
Subterranean Lake
Make your way back to the Subterranean Lake. There's a Combat Adjudicator here that you weren't able to destroy before, on account of you not having Nevan; you can use it now, though, so get up to Blast and grab your Blue Orb Fragment.
With that out of the way, use the Stone Mask on the pedestal near the Divinity Statue here to raise the bridge leading across the water. This will let you grab the Neo-Generator, which helps you create bad acting performances in otherwise decent movies, although Dante certainly doesn't need much help in that department.
Rounded Hallway
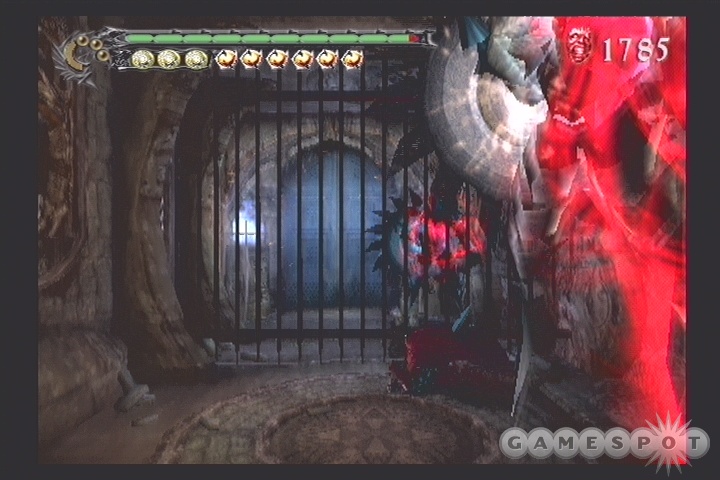
Heading back through the Hallway here will mark your first introduction to Dullahans. These guys aren't very difficult to beat, although they can be annoying; all you need to do is get behind them and slice them in the back. Unfortunately, they fly, so it can be tough to get yourself in position for an attack. If you have Nevan and Swordmaster style, then your mid-air O button attack will work nicely; otherwise, you'll just have to get behind the last Dullahan and attempt to hit him when you can. When all three are dead, you'll be free to move on.
Subground Water Vein
Subterranean Garden
Provisions Storeroom
When you return to the Provisions Storeroom, get ready for another fight against multiple Arachnes, including a couple of uber-sized ones. Ideally, you'll have a full Devil trigger bar ready to go for this fight, but even if you don't, you'll need to kill six or seven of them to move on.
Rotating Bridge
When you reach the Rotating Bridge, Dante will automatically insert the Neo-Generator where it needs to go. Before you move across the freshly-rotated bridge, though, head out through the orange door to the Forbidden Land: Front area; there's both a hidden bunch of orbs in the eye of the Leviathan that you killed earlier, and an orb crystal on a platform above the door.
Marble Throughway
When you're ready to end the chapter, return to the rotating bridge and exit through the green door.
Mission 11: Revenge
Give a guest from the past an adequate homecoming.
Having Spiral along for this mission is going to be a good idea.
Gears of Madness There are only two Enigmas here, so defeat them, then grab the Devil Star by the exit (you have to drop down to the lower level).
Altar Of Evil Pathway
Your first encounter with Soul Eaters will come in here. These guys like to resolve themselves into dew when you get too close, so attacking them from long range with your guns will probably be required; the Spiral does the job nicely, if you happen to have it. They can lock onto you and lift you up into the air before sapping your life; if this occurs, hit your Devil Trigger quickly to escape their grip. You can attack Soul Eaters with melee weapons, if you must, but this is exceedingly difficult to do without something like the Trickster style's Air Trick, since they generally just dissolve when you get close.
Altar Of Evil
A simple puzzle blocks your passage here; in order to find the exit, you'll need to jump to the second level of the room and push two blocks into the little slots on the ends of the balcony. The first block should be easy to spot; just slam it with your sword until it winds up in the receptacle. The second block, however, is hidden behind a cracked wall, but it shouldn't be too difficult to track it down.
After both blocks are in place, you'll have a mini boss-fight, which takes the form of a Hell Vanguard (i.e. the boss you fought in Mission Two) and two more Soul Eaters. Focus on the Vanguard first, obviously; by this point in the game you should have a wealth of tactical advantages and new weaponry to use on it. If you have Trickster level three by now, then you should be able to toy with it and use Air Trick to get yourself in position for devastating blows to the head.
Temperance Wagon
Before you hop onto the Wagon here, head underneath the stairs to find a Combat Adjudicator. If you can get up to SShowtime! with your Agni & Rudra weapons, then you'll be able to obtain another Blue Orb Fragment here. Also, if you whack the statue near the wagon with your sword, you'll uncover a hole leading down to a sub-platform on which you'll find a Holy Water and some orbs. Collect everything before you head onto the wagon itself.
Doing so will plunge you into a feverish melee against multiple opponents at once, all while the wagon attempts to travel along the rails to its destination. You won't be able to leave the train's boundaries, but the enemies themselves aren't all that difficult to fend off, so kill everything that moves and eventually you'll find yourself on the far end of the track, atop an ominous-looking foundry and near a Divinity Statue. Boss fight coming up, or so it would seem...
Torture Chamber
Boss Fight: Beowulf
As soon as you attempt to grab the precious shiny on the far side of the room, Beowulf will appear and engage in you mortal combat. Finish him!
Beowulf's Attacks
Beowulf is a bruiser; he likes to get up close and personal and slam you with blows from his fists whenever possible. In the first portion of the fight, then, he'll usually resort to a set of three swings: one sideways, followed by an uppercut, followed by a fist into the ground. With Trickster on, it's not difficult to jump out of the way of these attacks; even without it, it's still feasible to just roll around until you're safe. In addition, Beowulf has a kind of lightning rage attack here, where he'll pull his head back and let loose with a blinding shout from his mouth. This has very little chance of hitting you unless you're directly in front of his face; unfortunately, that's where you're going to want to be to damage him.
After you knock Beo down to two-thirds of his health or so, he'll incorporate a couple of new attacks into his retinue. The most obvious of these comes when he gets down on all fours; this will usually presage a charging attack which you can dodge by double-jumping over him or perhaps by rolling. Be sure to incorporate some lateral movement into your dodges, though, as he will sometimes jump into the air during a charge.
Another primary aspect of this phase is Beowulf's ability to call down an endless number of cement cages from the ceiling; he'll stomp his feet a few times, and then, miraculously, a cage will appear. He'll then punch these at you. If you're standing a good distance away from him, you can just walk to the side to avoid these, but at close range they'll almost always hit. The lesson being that you'll want to stay away when he starts summoning these things; he'll usually do so three or four times in a row.
Lastly, Beowulf has two more energy attacks that'll hit you if you're anywhere near him. They're both cued by audio taunts; "I will kill you!" and "Crush the brothers!" (or something like that) will let you know that one of these is coming. They both have a similar area of effect, but so long as you dash or jump away from Beowulf as soon as he sends out one of these audio signals, though, you should be ok.
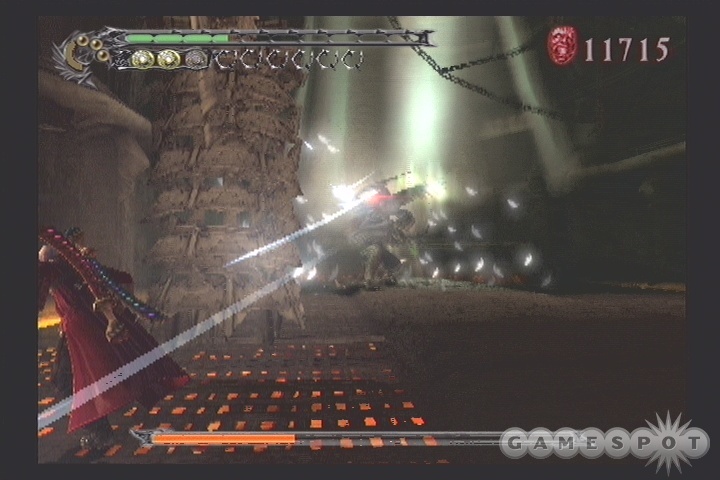
After you send Beowulf to half health or below, he'll also start whipping out a laser-like attack, in which he'll rear up to his feet, extend his wings, shout "Sparda!" and chuck a bunch of stingers at you, in two waves. These things are really difficult to dodge, so we found it best to just try and be in Devil Trigger form while they're coming at you in order to dissipate some of the damage that you take.
Attacking Beowulf
Luckily, Beowulf isn't too difficult to actually hurt; he doesn't have any of the immunities that the last couple of bosses did, so feel free to shoot away from long distance with Ebony & Ivory to whittle away at his health while you're avoiding his attacks. The primary source of damage here, though, will of course be from melee attacks, so you're going to have to learn when to strike and how to do the most damage to him.
In most cases, you're going to want to wait until Beowulf is standing on two feet before moving in for the kill, and as usual, you'll be best served by waiting until he pauses for a second before unleashing your strike. In the first segment of the fight, he'll generally pause after throwing out his three-swing combo, so you can dart in, get a couple of hits, then dodge away as he unloads another trio. His real weak spot, however, is his face, or more accurately, the single good eye he has remaining. If you can jump up and slash him in the eye, he'll take a good amount of damage and be stunned for a short period of time, allowing you to deal more damage after hitting the floor, but you have to be careful, as hitting him in the eye will sometimes cause Beowulf to flail around with his fists, which can knock you back and prevent you from getting your blows in.
If you have Swordmaster style, then Rebellion's Aerial Rave is a good technique to get going with the face-pain, or its Helm Breaker; you may also want to try Nevan's Air Raid. The easiest way to perform a face-slash, though, is to get your Trickster up to Level III and use its Air Trick maneuver, which will warp you directly in front of Beowulf's head, assuming you were on the correct heading to begin with.
If you can't consistently manage to hit Beowulf in the face, then there's no need to worry; he'll still take plenty of damage from your attacks that are aimed at his feet. Because of his combination of a lack of immunity and general hardiness, there's no perfect time to whip out your Devil Trigger for maximum damage; we generally just used it to avoid the damage from his Sparda attack and to gain back health.
After you do manage to bring Beowulf down to zero health, he won't technically die, but neither will he give you his namesake weapon. Instead, all you get is the end of the mission.
Mission 12: Hunter And Hunted
Reclaim The Bridge Before the soul is lost forever.
At the beginning of this level, Dante will get the Haywire Neo-Generator, a device which is stealing your soul! While you retain it on your person, Dante will continually be in Devil Trigger mode, but instead of gaining life, you'll steadily lose it. You'll have to get all the way back to the Rotating Bridge before your life drains completely.
The boss of this level is something of a doozy, so if possible, get Ebony & Ivory fully upgraded in power. Spiral is going to be the alternate weapon of choice, most likely, with Artemis being another good choice if you happen to be a Gunslinger. Your melee weapon choice matters less; we went with Rebellion and Agni & Rudra.
Temperance Wagon
If you quickly run to the wagon and jump, you'll start another series of fights with low-level enemies. Since you're going to be in Devil Trigger for this whole run, you can easily chop through your enemies; almost all of them will drop green orbs to restore your health. If you happen to run low, then you'll be able to retrieve the Green Orb again on the far platform by slashing the statue and dropping down.
Altar Of Evil
More Lesser Demons will await you here, but again, they'll all drop green orbs, so as long as you don't get horrifically slammed here, you should be fine.
Altar Of Evil Pathway
Gears of Madness
Both of these areas will be overrun by Blood-Goyles. In our opinion, it's best to just run past these guys back to the Marble Throughway rather than deal with them directly, as they're still slow to die. They do drop green orbs, but you're likely to lose health overall during these fights.
Marble Throughway
The Throughway is going to be home to yet another Vanguard, one that is further surrounded by Envies. The Envies are here solely to provide you with green orbs, so slice through them as quickly as possible to restore your health while you take slashes at the Vanguard as the opportunity arises. Eventually you'll defeat it, and it should drop a green orb that will take you to full health or very near it.
The Rotating Bridge
True to its name, the Rotating Bridge will rotate when you insert the Neo-Generator into one of the statue mouths (which is done automatically), allowing you to move on to the Spiral Corridor.
Spiral Corridor
Underground Arena
Shortly after you reach the Arena, you'll find yourself face to face with Geryon.
Boss Fight: Geryon

The first encounter with Geryon, a flaming blue horse, will occur on the bridge overlooking the namesake arena. It will continually attempt to charge at you, then warp itself back to it starting position and try again. If you have Air Hike, then you can use that to jump over the horse; otherwise you'll need to double-jump against the wall. Just try and shoot Geryon in the face when you have a clean shot. You won't do much damage to it, but every once in a while it'll get wounded and pause, allowing you to close in and use melee attacks before dashing away again. After you deal enough damage to it in this way, Geryon and Dante will fall through the bridge to the Arena, where the real fight begins. You can also use the Swordmaster style with Nevan to use Air Scythe, which will knock Geryon down in one blow.
Geryon's Attacks
For a horse with a big carriage attached to its back, Geryon is pretty mobile. You're going to find that most of this fight will take place at long range, so you'll want to keep your Ebony & Ivory equipped and use them to fire away at Geryon while it moves around.
The first attack of note comes as Geryon gallops around the edge of the arena. As it does so, it'll send missiles out of the carriage towards your position, but they're not homing or anything, and can be easily dodged so long as you're in midair. Just jump as they come out, start firing Ebony & Ivory to keep yourself afloat, then Air Hike again when another set comes down. If you happen to land right where the missiles land, you'll get knocked down and take light damage.
When Geryon pauses in the middle of the arena, more missiles will appear in a different pattern, but again, these are easy enough to dodge by just jumping out of the way.
Geryon's pause in the middle of the arena does portend the appearance of more damaging attacks, though. Most of these are based on foot-stomps; the first stomp will send a wave of blue flames radiating outward from Geryon; double jump over these, or try to fit yourself into the narrow channel between flames to avoid the damage. The second stomp will either repeat the first attack, or will spawn a huge number of flames that will rush in to your current position. Again, you can double jump over these.
Second Phase
After you whittle down more of Geryon's health, it'll start warping around the arena by jumping into the walls and attempt to trample you by suddenly appearing from one side of the arena and running straight at you. If you have Trickster, then you should be able to easily avoid these charges; otherwise, Air Hike or rolling side to side should get you out of the way. Geryon will also spawn numerous red orbs during this portion of the fight. If you hit these, you'll be frozen in time for a few seconds, during which interval Geryon will be moving as normal and will attempt to run you down again. You can either use your double jump to get above it, or Devil Trigger to break the lock on you.
As you whittle Geryon's life further down, it may start summoning in red orbs as it gallops around the arena, instead of shooting missiles at you. When this occurs, you'll need to avoid the orbs, as they'll correspond to the appearance of spears that will attempt to lance you. If you do happen to get caught in the blast, Air Hike as soon as you regain control of yourself.
Attacking Geryon
As with Beowulf, Geryon has no particular immunity to damage, so you'll be able to damage it whenever you happen to have the opportunity to swing at it. You can use Ebony & Ivory to whittle away at its health over time, but they won't do a huge amount of damage compared to the beast's life total.
We found that switching between Spiral and Ebony & Ivory worked well for when Geryon happened to be standing still for a second, but if it does happen to pause, you'll usually want to charge in and start using melee attacks on the horse part of the boss, preferably with your Devil Trigger activated. If you can hit the horse hard enough, it'll fall over, allowing you to do even more damage. Just unload on it at this point with everything you've got.
After dealing enough damage to the beast, though, one of two things will happen: either Geryon will disappear and you'll be frozen in time, in which case you can expect to be the recipient of a charge-through-the-wall maneuver. If you happen to be somewhere behind the horse, in between it and the carriage, though, it's more likely to flare up one of its eyeballs with a hideous red glow and let loose with a kick from the hindquarters which causes an explosion, followed by a spin-in-place maneuver from the carriage that will do huge damage to you if you're caught in the radius of effect. Needless to say, if you see that red glow from the eye, start running away!
After enough repetitions of beating-the-dead-horse, Geryon will keel over for the last time, giving you the Quicksilver Style.
Mission 13: Chaos' Warm Welcome
Battle of blood and of brothers.
The good old combo of Rebellion and Agni & Rudra will be quite helpful in the boss fight at the end of this level. Guns won't matter as much, since the boss is immune to their fire, but one thing you will want to have is a Holy Water; if you still have the one from Mission 11 (which you found near the Temperance Wagon), then great, if not, you may want to buy one. It's not truly necessary, but will be quite helpful.
Effervescence Corridor
You'll immediately start in with some fighting here, as Damned Knights and Damned Bishops gang up on you. Attack them from range, if you wish; the Bishops bring a simple fireball attack to the fray, but that can easily be doublejumped over.
Spiral Staircase
The Spiral Staircase is a rather nondescript passage, save for the fact that it has an exit to Secret Mission 8, which you can find by hitting O while standing next to the red orb in the wall. When you reach the bottom of the steps, head down the hallway (the door across from the stairs doesn't lead anywhere at the moment) and leave through the door there.
Lux-luminous Corridor
Take a right out of the door here to reach a dead with with a Devil Star floating near the ceiling; grab it, then return down the hallway and head on. After fighting your way through the Knights and Bishops, take the door near the end of their little section of corridor to reach the Vestibule.
Vestibule
The Vestibule is home to another retardedly easy light puzzle. All you need to destroy here is a single laser emitter towards the top of the room, then destroy the emitter near the cracked wall, then the wall itself. Follow the newly-found corridor and smash another laser to find the Orihalcon.
Lux-luminous Corridor
Obsidian Path
Return to the Lux-luminous corridor and fight your way through the Knights and Bishops that have appeared to reach the Obsidian Path. There isn't much for you to do here save use the Orihalcon in the large door leading onwards. There's a Combat Adjudicator here, which you can smash with your Nevan. Getting Nevan all the way up to SShowtime will be difficult without Swordmaster Level II, however.
Sacrifical Chamber
Boss Fight: Vergil II
This is going to be a tough one, make no mistake about it. Vergil has...improved himself since the last time you fought him, both in terms of new armament (he boasts the Beowulf set of hand-to-hand weapons as well as his sword) and new abilities (he can now morph into Devil Trigger state, just like you can.
Vergil's Attacks
Luckily, Vergil only has a few attacks to his name, albeit damaging ones. The one you're going to see most often will be similar to Beowulf's three-swing attack, in which Vergil hits once, hits twice, then jumps up into the air to dive-bomb your current position. This little dive-bomb maneuver will appear quite often on its own, actually, especially after Vergil blocks one of your attacks, so you'll need to be quick with the dashes or with the Trickster dodging to avoid it.
After you knock him down a bit, Vergil will start using his sword, Yamato, for a ranged attack in which he'll flick his sword and create bubbles of slashiness near your position. Sustained lateral movement (i.e. running) should get you clear of these without a problem.
Near the end of the fight, Vergil will start using Yamato for real in a variety of ways, both in counterattacks after he blocks your sword (as you'll remember from the first fight against him) and as a dash technique where you'll take severe damage. Hopefully this won't be a problem, thanks to the Holy Water; all that you can really do about them is dodge quickly and hope your attacks don't get blocked.
Attacking Vergil
Getting Vergil down near death isn't all that complicated; it's finishing him off that's the annoying part. Vergil can block most of your attacks, including all of your ranged attacks, so concentrate on bringing him down with melee attacks. The only time he'll be truly vulnerable is just after he completes an attack of his own; this is especially true after he does one of the three-part attacks that culminates in a downward kick. The best thing to do here is to simply jump up and over the kick so that you land near Vergil after he hits the ground, then start wailing on him with Rebellion or Agni & Rudra. Simple combos work best here; you don't want to use any techniques that'll push him away from you, since you'll only have a few seconds of combo time before he starts blocking your attacks again. This is the time to use your Devil Trigger for extra damage; just switch it on when you're getting blows in, then flip it off when he warps away to save the remainder for the next go-round.
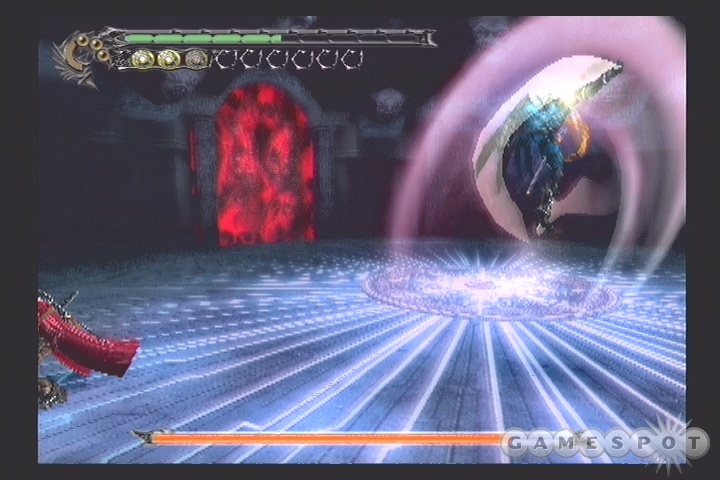
Unfortunately, it won't take long for Vergil to start using his Devil Trigger state, in which case a new rule applies: Stay away! Get distance on Vergil and hope he doesn't come in to attack you. He can use all of his normal attacks here, and will often warp around and use his dropkick. All of his attacks are more damaging than they normally are while he's in Devil Trigger mode, and he, in turn, takes much less damage than he normally does. He will regain health, but there's not much you can do about this. Just leave him be, stay away from him, and wait for him to shift back.
The main problem with actually killing Vergil lies in the fact that he will start to stay in Devil Trigger for a long time when he's near death, enough so that he can regain his health up to near the halfway mark after a couple of stretches of the DT's. There isn't much you can do to convince him to get out of Devil Trigger mode, so the key here is to knock him down low (until he starts slashing at you with Yamato), then use your Holy Water to finish him off once and for all. Be sure to do this while he's in his normal form, though.
If you have no Holy Water, then you'll be forced to press the attack on Vergil's human form and hope to finish him off before he goes into a marathon Devil Trigger form. If you can get him to block your attack and use the same slashes as he did in the first fight, then no problem; just jump over him and skewer him in the back. Alternately, if you don't want to spend the cash on the Holy Water, then you can use a healing item to ensure that you're not going to die immediately and start attacking him in the Devil Trigger state to finish him off. He can still take damage from melee weapons, but not as much, so it's a dicey proposition, but it may be the only one available to you.
Mission 14: Drive!
Charge upward to the sky.
Lair of Judgement Ruins You can find 1,500 red orbs right off the bat here by walking to your left, jumping over the broken brick wall, walking up the darkened corridor, and jumping up into the air. The orbs are invisible, but they're there.
Walking the opposite way around the central spire, you'll come to the Beowulf, the last weapon in the game. Go ahead and bring them back to the Divinity Statue elsewhere in the room and equip them. There's a Combat Adjudicator blocking your exit from the room, so smash it with Beowulf, grab the Blue Orb Fragment, then move on.
Underwater Elevator
Well, it's not underwater - yet - but it's definitely an elevator. Before you hop on board, though, walk to the left around the elevator's cage to find a red orb crystal and grab all of the orbs from it before moving on.
Top Obsidian Path
When you reach the top of the elevator, exit it and head into the doorway immediately across from it. This is the Top Obsidian Path. Jump in the corner near the far door to find more hidden red orbs. Mmm...delicious.
Vestibule
Altar of Evil
In order to escape from the Altar of Evil, you'll need to dispatch a horde of Blood-Goyles. It's no particular secret that you need to use ranged weapons to freeze them up, so go to town and polish them off to move on. When that's accomplished, head out to the Temperance Wagon through the same exit you used before and move on.
Temperance Wagon
You know the drill by now; hop on the train, enemies come on after you, you fight. The trouble here is that the last group of enemies includes a Hell Vanguard, and there's just not enough room to dodge its attacks. Save your Devil Trigger until it appears, then unload on it and attempt to finish it off as quickly as possible.
Hell's Highway
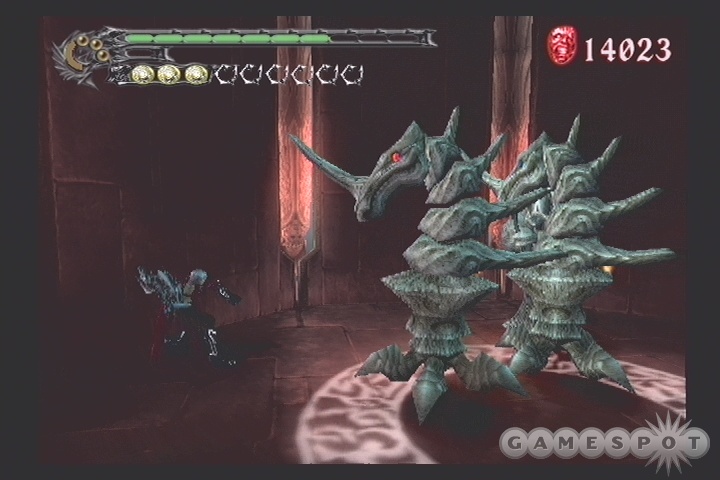
When you enter Hell's Highway, you'll be forced to choose between two rooms to enter. The green room will face you off against Damned Pawns, but will otherwise be a dead-end; the pink room, however, will feature your first Damned Knights, soldiers that attempt to dive-bomb you after launching themselves up into the air. If you still have Beowulf equipped, take advantage of these guy's slow rates of movement by pounding on them with it.
From the pink room, you can backtrack into a dead end for a Vital Star S (check your map to locate this room), or head into the orange room for another fight. From there, head into the normally-colored rooms to move on towards the exit. You'll pick up a Blue Orb Fragment for your troubles.
Subterran Garden
Subground Water Vein
Ah, more Enigmas - now with more redness! These guys are still called Enigmas, but they are much more mobile than they used to be, and will now dodge your melee attacks until they're cornered. Kill them or just run past until you see the blue shaft of light on one of the platforms, and enter that.
Love Planet
13th Avenue: Aftermath
Well, déjà vu all over again. When you reach 13th Avenue, hug the buildings to the right and round the corner into a blind spot on the map. If you double jump here, you'll see a shiny precious on top of a building; grab it for another Holy Water pickup. Walk further up the street to end the mission.
Chapter 15: The Gatecrasher
Control the tower, control your destiny
Upper Subterran Garden
Your first fight of the level is going to be an annoyingly difficult one. The Fallen that are given the task of defeating you are completely invulnerable to your attacks, save when they open their wings and expose the inner skull that adorns their chest, and that only happens when they charge up one of their really powerful attacks. At the very least you have the luxury of restarting the mission if you die here, and you probably will a couple of times before you get the hang of beating these guys. You can actually clip their wings, so to speak, and remove their wing-shield, by repeatedly hitting them with melee attacks, but you probably won't want to try this without having Devil Trigger activated.
Provisions Storeroom
Another fight here, against three Arachne, including one of the larger variety. For a change, though, you won't have to fight another wave afterwards, so get the first group out of the way and move on. You don't even have to kill them, if you don't want to; the doors aren't locked here.
Devilsprout Lift
Here's where things get annoying. You have to find three Orihalcon Fragments to power the elevator switch here, but they're unfortunately locked away in other parts of the tower. In order to reach them, you'll have to rotate the entire structure so that you have access through the door in the Provisions Storeroom. You'll need to activate a couple of flame switches before this occurs, though.
Forbidden Land: Front
For now, return to the dead Leviathan and activate the flame switch near it. This will unlock the door you passed by earlier in the Provisions Storeroom.
Devilsprout Lift
Provisions Storeroom
When you return to the Storeroom, you'll find a new flame switch on the wall. This is the device that rotates the Devilsprout lift, so hit it until it lights up once, then exit through the door nearby (the one with the tripartite seal on it, through which you entered from the Subterran Garden).
Gears of Madness
Ugh, time for fun with sharp rotating gears. You should remember this room from a few chapters back, the main difference being that it's now inhabited by Blood-Goyles. Kill them, if you wish - there are only three - before dropping down to the lower level of the gears and leaving through the far door. Ignore the flameswitch here for now.
Altar of Evil Pathway
The first Orihalcon Fragment lies at the end of this path; the only thing standing in your way are a bunch of Soul Eaters and rotating gears that'll damage you if you get caught while they're passing through the floors. The gears aren't too hard to dodge, especially if you have the Trickster dash ability, but the Soul Eaters can be annoying. You may want to just dash to the end of the passage, get the Fragment, use your Devil Trigger to kill off a few of the Eaters, then start making your way back. It's more difficult to work backwards down the passage than it is to walk up it, of course, so hopefull you do have Dash, as it'll make the job easier.
Gears of Madness
Now is the time to activate the flame switch here, but be sure to kill the Blood-Goyles in the room first, or they'll make your job really annoying. Since the gear underneath the switch is rotating, it's best to lock onto it and use a move like Agni & Rudra's Jet Stream to continually get back in position to hit it. Activating it will rotate the tower, letting you return through the door above the switch to a new area.
Rounded Hallway

Hah, and you thought the Rounded Hallway was annoying before? Now it's been flipped on its side, meaning that you'll have to jump over the damn razor walls. Doing so isn't too difficult, but you're all but assured of taking damage here, so you may have to use a Vital Star, though it'll pain you to do so, no doubt. To clear the razors, stand near the middle of the hall (perhaps a bit off to the side where the razor is thinner, but not too close to the wall), then jump and Air Hike over them. Ignore the Dullahans and the flame switch at the end of the hall, and head into the next room.
Provisions Storeroom
Well, the encounter with the Arachnes here isn't too difficult to predict. If you don't want to deal with them, just grab the Orihalcon Fragment from the pedestal and move back through the doorway.
Rounded Hallway
Top Subterria Lack
After activating the flameswitch in the Rounded Hallway and making the perilous trip back over the razors, you'll find yourself in the Top Subterria Lack, whatever that means. You'll be able to find some red orbs floating around on the far side of the blue door, but your objective lies through it.
Rounded Hallway
Yeah, thanks, more razors. These are even more densely packed than the previous bunch, forcing you to lightly jump over them to reach the Orihalcon Fragment at the rear of the room. At the very least, there's a green orb here that'll get you a bunch of your life back.
Top Subterria Lack
Marble Throughway
Devilsprout Lift
After whacking the flameswitch in the Lack, you'll pass through the room where Arkham kinda/sorta was killed earlier, and from there reach the Lift again. Your only path will take you to...
Spiral Corridor
Underground Arena
When you reach the Underground Arena, you'll face off against another Fallen; we recommend just ignoring it and falling down to the lower level. There's a Blue Orb Fragment here, as well as a doorway leading back to 13th Avenue. If you want to, you can scope out the Bullseye Bar for more orbs, or even head all the way back to Dante's shop to fight a pair of Vanguards; there aren't any special rewards for this, though. There's not much point to it, and there's no way to move on, so when you're ready to finish off the level, ride the lift in the Arena back topside and return to the Subterria Lack.
Top Subterria Lack
Provisions Storeroom
If you return to the lack and flip the flameswitch there one more time, the door will now lead you back to the Provisions Storeroom you initially entered the level through.
Devilsprout Lift
Now that you have the three Orihalcon Fragments, you'll be able to activate the lift itself. Do so and ride up to reach the top, and the end of the level.
Mission 16: Win or Lose
Stand up for your beliefs!
Get up, stand up...stand up for your beliefs.
Sun & Moon Chamber
If you examine the pedestals near the barred door here, you'll see that you're going to need to find two keys to unlock it. These are the Onyx Sunstone and Onyx Moonshard, one of which can be found behind each of the other doors in this room. You can do them in any order, and neither are too complicated to get so feel free to pick one and set out. The upper door leads to the Sunstone, while the lower leads to the Moonstone.
Moonstone Entranceway
If you're going after the Moonstone first, you'll find yourself in an Entranceway. If you take a right outside of the door (check your map to get your bearings), you'll find the Cursed Skull Chamber. Entering here is optional, and will pit you against a few Gluttonies, but you'll pick up a Devil Star for your troubles. The moonstone, however, is located to the left of the door leading to the Entranceway; you'll find a crack in the wall, which leads to...
Chamber of Sins
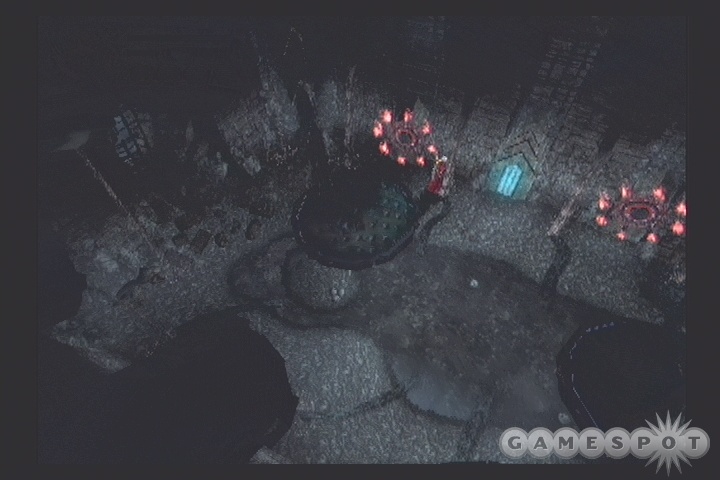
There are two flameswitches here, each of which will drop a crushing ball from the ceiling. In order to obtain the Moonstone, you'll need to get the balls to clang into each other; do this by running towards one end of the room, hitting the ball so that it dashes in towards the center, then do the same for the other ball. They should hit each other eventually, letting you retrieve the Onyx Moonshard. Unfortunately, you'll have to defeat two Fallen to escape.
Entranceway
Sun & Moon Chamber
Sunshard Entranceway
Return to the Sun & Moon Chamber and take the higher path. There's only one door in the second Entranceway, one which leads to the Living Statue Room.
Living Statue Room
Another room, another set of enemies to kill. Defeat the Blood-Goyles and Enigmas to move on.
Waking Sun Chamber
The first little puzzle to maneuver through here involves another flameswitch and another crushing ball; this one, though, you'll have to hit until it's destroyed, but you only have 15 seconds or so before it's retracted to the ceiling, so you'll need to be quick about it.
After the crushing ball is destroyed, one side of the wall here will retract, allowing you to pick up the Golden Sun. After you do, though, you'll have to face off against your first Damned Rooks. The attack patterns of these guys shouldn't be too difficult to figure out; they'll occasionally pop open and shoot laser beams out in four directions, but it's relatively easy to avoid these. Defeat everything to leave the room.
Sun & Moon Chamber
Now that you have both of the items required of you, you can unlock the door leading on here. You may want to switch over to Spiral if you don't have it equipped as a sidearm.
Ice Guardian's Chamber
Blood-Goyles and Enigmas assault you here. One of Spiral's many benefits is its ability to freeze Blood-Goyles in one hit, so use it on them, then break them to bits with Beowulf or your melee weapons. You'll need to jump up the stone here to move out.
Surge of Fortunas
Endless Infernum
Giantwalker Chamber
Incandescent Space
Most of these spaces will hold enemies of some sort, so battle your way through them until you reach the Incandescent Space. There'll be a Vital Star S here on the little walkway near the Divinity Statue, so grab it before moving on.
The Divine Library
Boss Fight: Lady
Lady, in contrast to most of the previous bosses, isn't too difficult to defeat, mostly thanks to her attacks, which are both relatively easy to avoid and don't deal large amounts of damage. You'll probably want to have either Rebellion (with Stinger Level II) or Beowulf (with Straight Level II), just for the ability to dart into Lady with a swift attack that can be launched from a good ways away; she's quite adept at dodging your blows, so you'll need to get in close as quickly as possible.
Lady's Attacks
Luckily, she doesn't have many attacks, and those that Lady does possess are relatively benign.
At the beginning of the fight, Lady will usually resort to either pistol attacks or her rocket launcher. The pistol damage is negligible, and can usually be dodged once you know when she'll be attacking. She usually fires when you're either approaching her, just as she uses her rocket launcher's climber attachment to rocket towards the ceiling, or just after you knock her down.
Her rocket launcher will usually only be fired when you and Lady are a good distance apart. Luckily, there's an obvious audio cue for you to lock onto; she'll either say "Okay!" or "Get Ready!" or "All Right..." immediately before launching these. Obviously, if you get hit by it, you'll take a severe amount of damage, but there are plenty of walls and library shelves that offer you plenty of cover, so find something to hide behind and wait out the blow.
After you get Lady down to around three-quarters of her health, she'll start incorporating grenade attacks into her retinue. These come after she uses her wire to fly up towards the ceiling; she'll land on one of the middle racks of the library and start throwing grenades down onto the floor, and onto her own little pedestal. These are easy enough to dodge if you're mobile, so jump out of the blast zone or dash away.
Lastly, she'll eventually start to use her rocket launcher to fire a large number of smaller homing missiles. These are pretty difficult to dodge - they don't seem to be as likely to impact the walls as the normal rockets are - so you may want to use Devil Trigger to reduce the amount of damage that you're going to be taking from them.
Attacking Lady
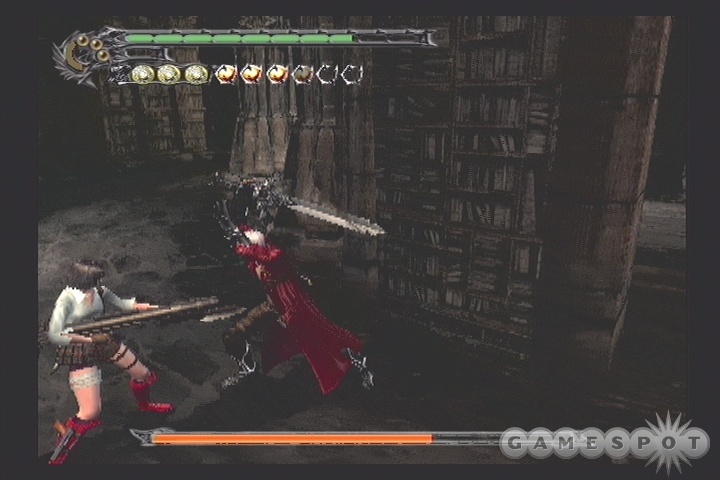
Doing damage to Lady is pretty much a game of cat-and-mouse; she'll dodge many of your swings, so you're going to have to pick when to get close and when to avoid her attacks. For much of the early part of the fight, your best bet for dealing damage will be to follow her around and use either Stinger or Straight when she stands still. This will usually knock her down, causing her to spray gunfire wildly, so be prepared to jump away. Alternately, if you manage to stand near her while she's preparing to fire her rocket launcher, just pump away with Beowulf to break her animation and get some licks in.
When Lady starts using grenades, you should attempt to learn her movement pattern and close in on her while she's throwing them. She'll usually rope herself up to the ceiling, jump to one of the middle stands, then start chucking; if you can anticipate her movement to the stand and get up there with her, then you'll have a few seconds to stab at her while she's throwing, but be sure to note the presence of grenades at your feet and jump away if you have to.
Towards the end of the fight is when you're going to want to press in on Lady and attempt to finish her off with Devil Trigger attacks. The windup animation for her homing missiles attack is pretty long, so that'd be a good time to start wailing away on her and attempt to finish her off.
After Lady does go down, you'll obtain her rocket launcher. Sweet!
Mission 17: Inner-Demons
Confront your shadow
The Dark Corridor
Not much to see here, save for the fact that the Red Orbs have respawned in their rafter roosts. Grab them before moving around the corridor.
Note that there are two exits here, a blue door and a crack in the wall. The crack leads to an optional fight in the...
Trial of the Warrior
You probably remember the routine; the enemies here are initially unkillable, but you can weaken them by lighting up the flame switches on either side of the room. Kill everything here - including a Vanguard - for a Yellow Orb. This is all optional, so if you want to just take the blue door out of the Dark Corridor, feel free to do so. It leads to...
God-Cube Chamber
Warning!!! Creation is cubic, but you are educated singularity stupid!!!
With that obscure reference out of the way, get the goodies here on the first floor of the room. There's a red orb crystal, along with a Combat Adjudicator that'll require you to get all the way up to SSStylish with Beowulf on it. This is a pretty tough task, even for those of you with good reflexes. The default attacks for lower-level Swordmaster won't help much, either, but it can be done with just the normal attacks if you can combo them together well. Getting from SShowtime to SSStylish is going to be a chore, though, as the meter starts to quickly fall, so abuse Hyper Fist to get a good amount of that bar built up before using Beast Uppercut (likely to be required to get all the way up to SSStylish, so you may have to buy it), Straight, and the normal combo to get it over the hump.
When you're ready to move on, start jumping up the cubes in the room until you reach the doorway on the middle level of the chamber.
Firestorm Chamber
Defeat the enemies here (which include a Vanguard) to unlock the doors here.
Azure Garden
Not much here save for a blue orb fragment, but that alone is pretty worthwhile. There's also a Divinity Statue which you can use to exchange weapons and styles, if you wish.
God-Cube Chamber
Upon returning to the God-Cube Chamber, jump up to the upper level to reach the door there. Having a weapon with Air Hike is more or less a requirement here, as the cubes above you will often rotate, forcing you to move quickly. If you drop down, you'll obviously have to start over.
Tri-Sealed Antechamber
Trial Of Wisdom
Trial Of Skill
The path here is fairly straightforward. When you reach the end of the Trial of Skill, take the shuttle up to the upper level of Temen-ni-gru.
Pitch-Black Void
There's plenty of red orbs to be found here. If you jump into the rafters, you can also find Secret Mission 11 by touching the glowing statue in the middle.
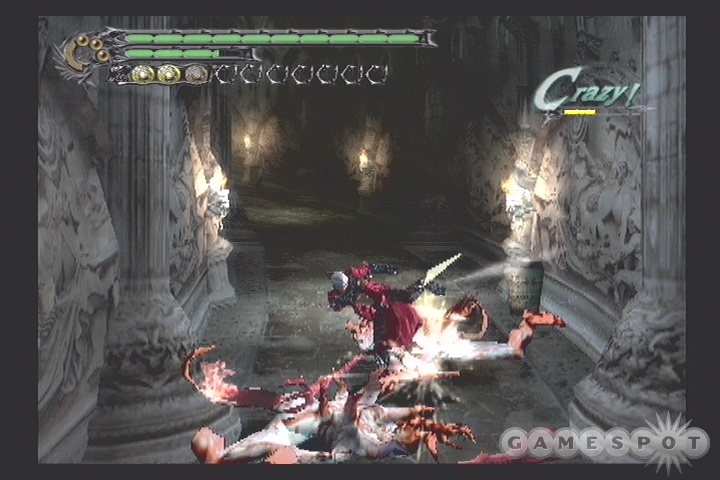
Skull Spire
The Skull Spire hallway will feature your first meeting with Abyss enemies, generals of the 7 Hells. These are the last iteration of the Pride-style enemies, and feature some mild ranged attacks. They can't block very well, so all you really need to do is wade in and start going crazy with combos to kill them off.
Moonlight Mile
Dark-Pact Chamber
Boss Fight: Doppelganger
The Doppelganger is actually quite easy to defeat when you know how to do so - it doesn't help that he's invulnerable to your normal attacks, though. Luckily, it's a simple matter to damage him when you know how to.
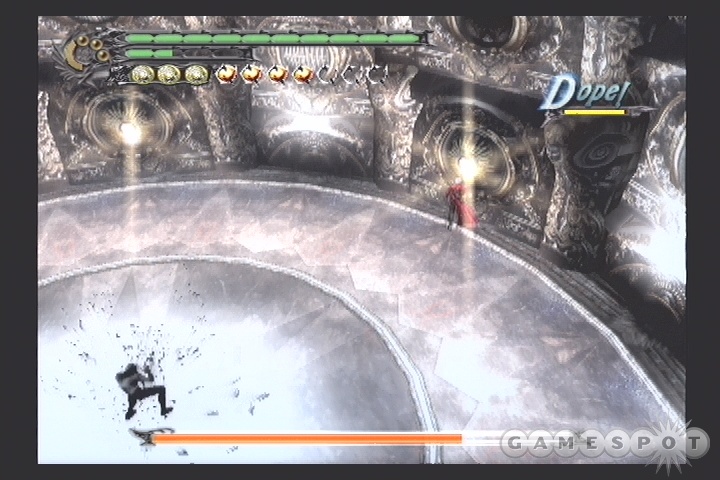
The basic strategy of attack is to revolve around the arena that you're in and flip open the shutters that line the arena; there are five or six in all. Agni & Rudra's Jet-Stream move is best for this, if you happen to have it up to level III, but any weapon will do. The Doppelganger will dash in towards you from the center of the room while you open these shutters, so jump out of his way when he does so, then go back to work. Don't dawdle in the pool of light, though; he can't enter them, so he'll use a powerful ranged attack to dash your life away.
If you revolve around the arena and open all of the shutters, then Doppelganger will be frozen in the center of the arena and vulnerable to your attacks. (He's also vulnerable if he gets caught in one of the smaller pools of light, but for a very short time.) This is your opportunity to unload on him with Devil Trigger attacks and combos. Be careful, though, as he'll explode in shadow when the shutters flip off; be ready to jump away after you land a couple of solid combos on him.
And...that's pretty much it. Ol' Doppel doesn't change his attack pattern overmuch as his health goes down, so you can simply repeat the above steps a few times to finish him off.
Mission 18: Invading Hell
Break the seal and battle into the depths.
Now that Arkham has opened the gates to Hell itself, it's up to Dante to fight and conquer!
Unsacred Hellgate
Damned Chess Board
Oh noes, more chess pieces! The King and Queen here should be the last Lesser Demons in your library file. The King is going to be your priority, if you happen to be able to catch him, as killing him will eliminate all remaining pieces from the board, but first, take your time to eliminate a few of the Pawns to clear up the board a bit. The enemies here are either going to be grey, in which case they're damageable, or a darker gray, which indicates that they're invulnerable to your attacks.
Most of the enemies should be familiar to you save for the aforementioned King and Queen, both of which are understandably powerful. The Queen is the killer, as she'll warp around the field attempting to stab you with her chest-spikes, as odd as that sounds. The King, however, can send up an explosion when you get close to him, so you'll have to float like a butterfly and sting like a bee to avoid the blast. He can also switch places with any nearby Rooks when you attack. It'll take a while to kill everything, but you're not on a timer, so feel free to take your time.
Road to Despair
There are a couple of secret areas here, both off to one side of the large foot at the end of the path (just ignore the Fallen, as they're more trouble than they're worth). To the left, you can find the entrance to secret mission 12; to the right, you can find a red orb crystal.
Lost Souls Nirvana

Uh-oh, time for the obligatory fight-every-boss-in-the-game level. Well, actually, it's not that bad. There are multiple pedestals around the arena for you to examine, each of which corresponds to a different boss encounter. Examining the pedestals will send you to a new boss encounter with that boss and force you to fight them again. With your super-duper devil trigger and extended life bar, though, you shouldn't have too much of a problem killing most of the earlier enemies, but surviving against the later foes can be tough. Luckily, Vergil doesn't make an appearance here.
There isn't much to say about these fights that we didn't cover in our boss fight walkthroughs earlier. None of their attack patterns have changed. All you need to do is to make sure to bring the appropriate weapons for each boss fight; e.g. Cerberus for Nevan and Agni & Rudra, and A & R for Cerberus. Note that you don't need to complete every boss fight in the arena; all you need to do are Cerberus, Agni & Rudra, and Beowulf. That will form a circle in the middle of the large scoreboard and let you move on. Lighting up the scoreboard by completing each fight, however, will earn you a blue orb fragment.
| Tombstone Color | Encounter |
| Black | Doppelganger |
| Blue | Geryon |
| Light Blue | Cerberus |
| Green | Angi & Rudra |
| Orange | Vanguard and friends |
| Red | Heart of Leviathan |
| Purple | Nevan |
| White | Beowulf |
| Yellow | Gigapede |
Mission 19: Forces Collide
Topple the great beast with fate's bullet
There is another end boss at the end of this level, of course. Trickster isn't 100% necessary - this is more of a brute force kind of fight - you feel free to take Swordmaster or something similar along, if you wish. Your equipment is more or less optional, but the one thing you want to be sure to bring is Kalina Ann.
Room of Fallen Souls Defeat the enemies here to unlock the portal leading onward.
Nirvana Of Illusions
You can't actually damage the Abyss enemies here with your weapons; instead, you'll need to track around the room and hit the mirrors that are tinted green. After you deal enough damage to them, they'll break; do this twice to open the portal leading onward, ever onward.
Infinity Nirvana
Someone's got his hand on the Dagger of Time, apparently, as the hourglass here will continually roll back time to when you first enter the room. To break the chain, you'll need to kill all of the enemies before the hourglass runs down entirely. With Beowulf by your side, it shouldn't be too difficult, so kill all the Abysses, then grab the Samsara from the hourglass when it appears. The portal here will lead you back to...
Lost Souls Nirvana
Room of Fallen Ones
Nirvana of Illusions
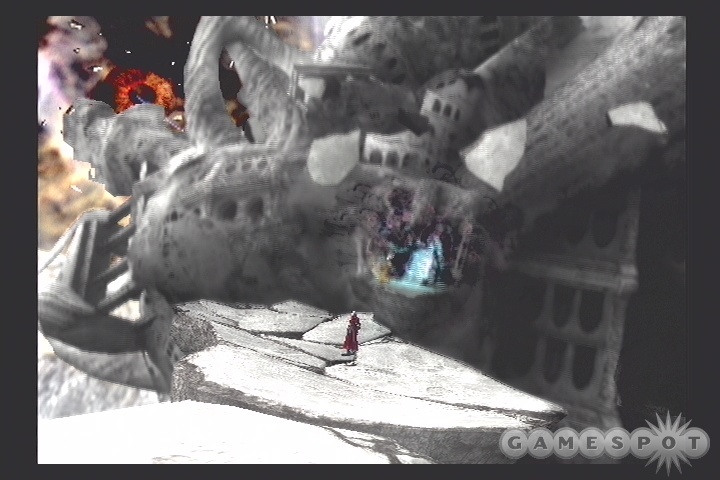
In the Lost Souls Nirvana, head into the portal immediately near where you land, then jump back from the Room of Fallen Ones into the Nirvana of Illusions. Use the Samsara on the golden statue here; this will open up the portal to the ominously titled...
End of the Line
Boss Fight: Arkham
It's time to finish this! Arkham has to go down if the demon world is to be resealed, and it's up to you, and a surprise guest, to kill him once and for all.
Although the Arkham fight is split into two segments, the boss strategy and movement patterns remains the same for both. It's all fairly simple, really; Arkham appears as a huge gelatinous blob of goo and will attempt to slash at you with his arms. All you really need to do here is activate your Devil Trigger and wade in for melee attacks; the Devil Trigger will protect you from most of the damage that you're going to take, and the melee attacks will, well, bring his health down, obviously. Feel free to get in on Arkham even if you don't have enough Devil Trigger built up, as his slashes aren't too powerful. If you have Beowulf's Rising Dragon attack, you should find that it keeps you up above the lower slash attacks, if it matters.
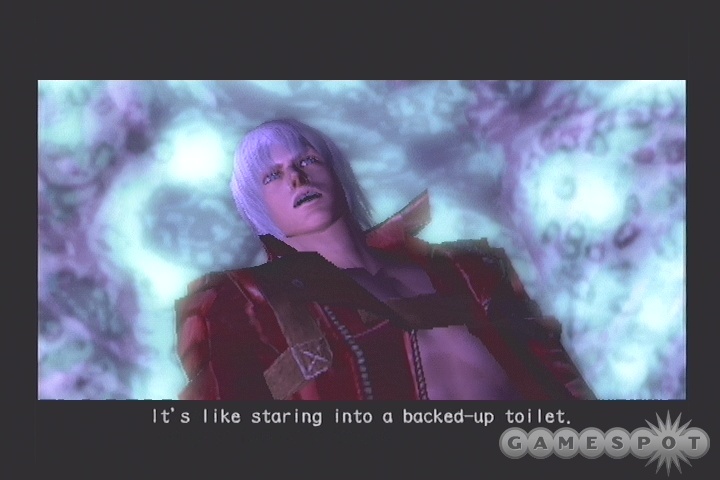
After you deal enough damage to Arkham's pustulating form, he'll sink into the ether beneath your feet and summon up his Legions. These slug-like creatures will attempt to latch on to Dante and explode, so don't let them! This is where the Kalina Ann rocket launcher will come in handy; just jump once, lock on and fire, jump again to reset the weapon timer and get to a new position, fire again, etc. The slugs won't die in one hit, but they'll go down quickly enough, and you'll gain some Devil Trigger orbs from the fighting.
After you repeat this process a few times, Vergil will show up, fiercely wielding Yamato. In the spirit of brotherhood, he'll join you in taking down Arkham. This obviously makes the fight a lot easier, so repeat the same attacks as before (you can no longer use Devil Trigger, so heal yourself with an item if need be) until Arkham is finally finished off.
Mission 20: Screaming Souls
Cast off your pride and embrace your fate.
Boss Fight: Vergil
The last Vergil fight is going to be a doozy. He's hard to hit, doesn't take much damage, is lightning quick, and can pour out a pounding onto you in the blink of an eye. He's upgraded himself with some new combos, including a five or six-hit dealie that can knock off four or five bars of health in just a couple of seconds.
In other words, Vergil is hizard. Even on Easy mode, you'd be advised not to attempt this fight without at least two Vital Star S's, preferably three. Yellow Orbs aren't as necessary, thanks to the fact that the entire last level consists of this fight; it's not going to pain you if you have to restart it or load from a previous save.
Sizing Him Up
As per the last fight with Vergil, he can shift and become a devil or human, almost at will. He no longer has Beowulf, though, meaning that he can only use his sword attacks to damage you, but that's a small consolation, considering that they're awfully painful.
In his human form, Vergil has a number of incredibly powerful sword slashes and attacks, most of which he'll automatically throw out when you come into range of him. Many of these will be familiar from the first fight, but the most dangerous are the two extended combos, which can hit you for four or five straight hits apiece. As per usual, though, he's vulnerable immediately after these attacks, so try to both stay away from his melee attacks and stay close enough to dash in and attack him after he's done with his animations. You may find it helpful to dart in with a Stinger or Straight attack, but it's better to try and just run up and whack him with normal melee attacks, as he'll often immediately guard the first attack after a Stinger. If you go in with normal combos, though, you should be able to string together two or three of them before he manages to block you off.
We found that the most opportune way to approach Vergil was to take up a holding position near him; try and find a comfortable distance to stay away from him, and maintain it as he moves around. He normally walks slowly, so this isn't too difficult to do. If you dart in and out of his melee attack range, you can normally goad him into unleashing one of his blows; if you can dodge this, then you'll usually have a good shot at getting up close and unloading on him with your own melee combos before he gets back into dodge mode. The best times to try this approach are when he starts flicking out the slashing balls from his sheath (just run towards him and start attacking, even if he's not done with the animation yet) and his two or four-hit combo that finishes off with the upward and downward slice (which he used in the very first fight, way back when).
(If you happen to have Trickster Level III by this point, you can also use Air Trick, even while you're standing on the ground, to immediately close in on him and start your combo off.)
When you manage to start a melee combo on him, immediately flip over to Devil Trigger mode to regenerate some health and deal extra damage. After a few seconds, he'll block one of your attacks, so jump and dash away from him to avoid whatever his next attack will consist of.
Dealing with Demon Vergil
Of course, Vergil's Devil Trigger ability is in full force here. He'll stay in Devil Trigger for longer periods of time here and constantly regenerate his health while he does so. He has all of his normal attacks while in Devil Trigger, which will of course deal more damage than they normally do.
One thing to note is that Vergil does seem to revert back to human form more quickly if you damage him a bit. This is going to be difficult to do, and is somewhat optional, but we always hated having to walk around and watch him regenerate during the second fight, so we took advantage of the fact that we had some Vital Stars to burn and took the fight to him while he was in Devil Trigger state. Our chosen attack for this was Beowulf's Killer Bee, which lets you jump up into the air, spike him in the head, then (hopefully) jump away before he can counterattack. (We usually got hit a few times thanks to this policy, but had the healing items to cope.) Three or four of these will generally force Vergil back to human form, preventing him from regenerating.
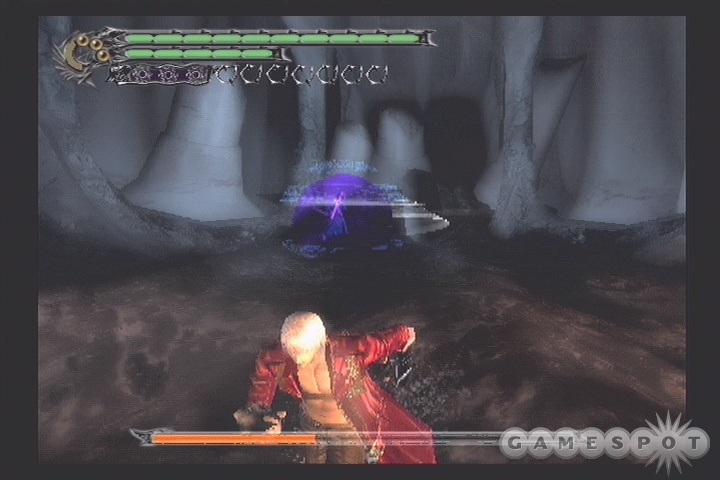
In addition to his usual attacks, Demon Vergil has a couple of special attacks. The first will appear after you knock him down to around half health; he'll spit out a "You're going down!" comment and summon a large ball of darkness around him. Immediately afterward, he'll start a dizzying array of dashing and vanishing-into-thin-air moves, most of which will culminate in his "Blast!" move, which sees him attempting to crash into you from midair. You can dodge these attacks with Trickster's Sky Star ability, if you can time it right; if you have Devil Trigger yourself, you can also just use that and round around to avoid the damage.
The second special attack is similar to the first, but instead of retaining his corporeal form, Vergil will morph into pure energy and follow you around the room, attempting to hit you with the little slashy-balls (for lack of a better term) that he formerly flung from his sheath. Again, your choices here are to either dash around and hope to keep out of their path, or just use Devil Trigger to run around. Don't forget about Devil Stars; you probably have one or two in your inventory, so use them to recharge your meter if you need to.
The good news is that Vergil will be completely vulnerable for a couple of seconds after completing either of these special moves, at which point he'll revert back to human form. You won't always be very close to where he winds up after reverting back to human, but if you are, flip to Devil Trigger and wail away.
Finish Him!
As mentioned, the best (and only) time to damage is immediately after he completes one of his attacks. With a little practice, you'll start getting an idea of when the best time to attack him is, so feel free to try the fight a few times before buckling down, reloading a save game, and giving him all you've got. This is the last fight in the game, so feel free to use all of the items you have in your inventory.
After the Fight
Well, this being the end boss, there's not too much to do after him save watch the end cutscenes. Capcom has, however, seen fit to include a little mini-game that plays over the end credits. You and Lady will be accosted by demons in the wreckage of 13th Avenue; you'll have until the end of the credits to kill 100 of them. Doing so will unlock a short secret ending featuring Vergil's adventures in hell; not doing so carries no penalty. The easiest way to go through this is to use Kalina Ann to pop the Prides that pop up while finishing off the stronger enemies with your normal melee combos. The 100th demon is a Vanguard, though, so you'll have to do your best to finish him off before the credits wind up! The last few screens denote art director, director, and producer, with the very final screen reading "Presented By Capcom."
When you do finally get your final score, you'll unlock any unlockable features, based on your difficulty level and final ranking. Here's a listing of those. In addition to the items listed, there are also special unlockables, such as new promo movies or screenshots that'll appear in the Gallery which is unlocked when you first beat the game. Some of these are tied to your Total Ranking, which is an aggregate of your scores for each level; if you can get an S or SS ranking for each mission in the game on each difficult ranking (save for Heaven and Hell), then you'll have the pleasure of unlocking a new piece of art! Oh boy, art!
| Task: | Completion Unlocks: |
| Clear Easy or Normal Mode | Shirtless Dante Costume Total Ranking Gallery |
| Clear Normal Mode | Devil May Cry Dante Costume Hard Difficulty Mode |
| Clear Hard Mode | DMC Dante Shirtless Costume Lady Alternate Costume Dante Must Die Difficulty Mode |
| Clear Dante Must Die Mode | Super Dante Costume Lady Alternate Costume Heaven or Hell Difficulty |
| Heaven or Hell Difficulty | No rewards |
Secret Missions
Secret missions pop up from time to time in the game, in the form of some sort of odd-looking structure that stands out from the background. The object itself varies from mission to mission, but the location descriptions we give you below should point you in the right direction. Completing the task assigned to you by the mission will net you a blue orb fragment.
Secret Mission One: The Exorcist
Defeat All Enemies Within The Time Limit.
Mission 2: 13th Avenue (Doorway near one of the dumpsters)
This isn't a very difficult mission to accomplish; you have one minute in which to defeat a half-dozen or so enemies, including Sloths, Lusts, and Prides. Don't go for the showboating moves like Breakdowns; just use your normal combos and attack as quickly as possible. When all of the Sloths are dead, you'll gain a Blue Orb, but before you nab it, break all of the chairs and tables again for more red orbs. If you want to repeat the mission, you can; the blue orb reward is replaced by 100 red orbs, which is a marginal prize for the effort, even including the orbs you get from the enemies.
Secret Mission Two: Untouchable
Defeat all enemies while taking no damage.
Mission 5: Surge of Fortunas (Before riding the elevator up, examine the red structure on the wall.)
In this mission, you'll be tasked with killing four Enigmas without taking any damage at all. This can be difficult, thanks to their quick-moving projectile attacks; if you're having trouble, you may hold off on this mission until you have a weapon like Nevan or Kalina Ann to affect all or most of the Enigmas at once.
Secret Mission Three: Death From Above
Stay in the air for 20 seconds or more.
Mission 7: The Dark Corridor (Immediately after the mission begins, double-jump over a lamp to reach a small alcove with a red orb in it.)
The goal here is to stay afloat for a full 20 seconds. Yeah, 20 seconds! It's going to be pretty challenging, but since you have the ability to customize your equipment at the beginning of the level, and this secret mission is found immediately afterwards, you should be able to pull it off. Grab Rebellion and Swordmaster to have an easier time of it, and if you have Nevan's Air Raid, all's the better. This latter isn't necessary, though.
The key here is to know that you can jump off of the heads of the Pride enemies that appear here. This is easiest to do if you herd them into one of the corners of the room and start jumping; as you jump into the air, they'll start leaping after you, allowing you to boost up off of their heads and repeat the process. You can Rebellions' Aerial Rave move (just hit O while in midair) to keep yourself afloat for a moment if no one's jumping up after you, or use Ebony & Ivory for the same purpose. This mission isn't too tall of a task when you know what to do; check our video for a more exact demonstration.
Secret Mission Four: Devil's Teeter-totter
Ride the elevator to the top.
Mission 8: Leviathan's Stomach (Jump to the rear of the cavern, underneath the pirate ship, and break the planks there to reveal a blue panel.)
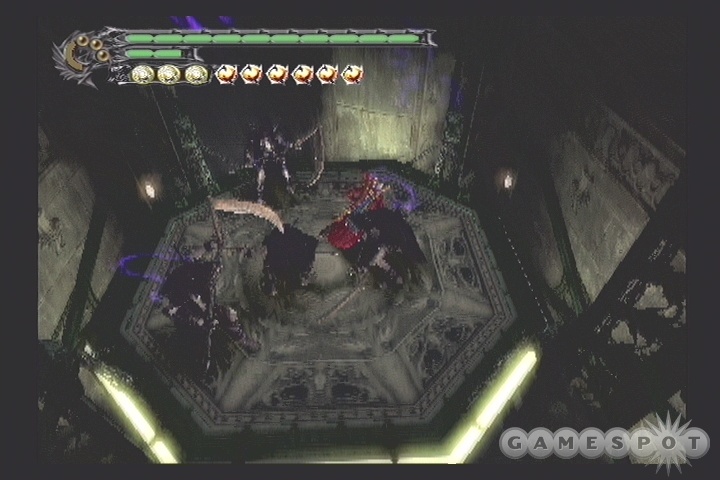
This one is going to be nearly impossible to do when you first come across it. The problem here is that the elevator you're supposed to ride to the top will be continually under siege by Devil Triggered (and nigh unkillable) Prides, who will weight down the platform until it eventually crashes back to the bottom of the shaft. In order to get the platform all the way to the top of the shaft, then, you'll need to find some way to get them off.
One method of doing so is to use Rebellion's Stinger attack to push enemies off; feel free to try this when you first reach the mission if you wish. A much, much simpler way to do this is to wait until you get Lady's Kalina Ann rocket launcher, and use that; although it won't damage these guys very much, it will still retain its explosive properties and will easily knock them off. You can also try using Nevan's Combo #3 while you're in Devil Trigger mode, which should knock enemies back as soon as they touch the electrical orb. You may need to use a couple of Devil Stars to keep your Trigger fueled throughout the entire ride, though.
Secret Mission Five: Destroyer
Destroy every destructible background object within the time limit.
Mission 9: Limestone Cavern (Jump up to the upper level of the area (check the map to spot where it is), then use the red panel.)
Your goal here is to destroy all 50 objects in the Bullseye bar within 40 seconds. This is doable with the equipment you have when you first reach this area - we managed to do it with nothing but Rebellion's normal attacks. The primary confusion factor is not knowing where all of the objects are. The most confusing are the barstool in the darkness near the central pillar here and the few new objects in the area, such as the beer bottles on the shelves by the wall and the barrels hidden behind the three dartboards.
Secret Mission Six: Flight Of The Demon
Collect every red orb within the time limit.
Mission 10: Subterranean Lake (After using the Stone Mask to raise the bridge and grabbing the Neo-Generator, walk around to the right of the statue there and use the small pillar to enter the mission.)
Your goal here is to collect all forty orbs in Leviathan's Stomach before the time runs out. This is only going to be possible to do if you use Nevan's Air Raid ability and have a good number of Purple Orbs to extend your meter; you may just want to wait a few levels to get the red orbs to afford this stuff, then come back and polish this mission off.
To begin with, start out by jumping up and starting an Air Raid, then following the trail of red orbs to your right until you reach a set that lead down to the lower level. Disengage the Air Raid, drop down to grab the orbs, then start another Air Raid when you hit the bottom of the area to collect the rest.
Secret Mission Seven: Hang 10
Obtain the blue orb fragment within the time limit.
Mission 11: Gears of Madness (This one's tough to spot. If you drop down to the lower portion of the gears and head towards the door there, there'll be a small, dark platform near it. You need to jump up there, then Air Hike up to the platform above it to find the secret mission.)
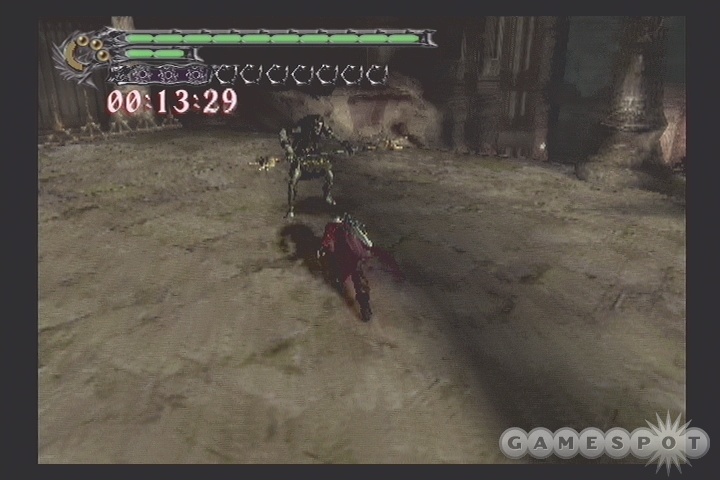
This is a pretty tough mission to get through when you first come across it. In order to get to the blue orb fragment in time, you'll either need to knock down the enemies here and jump onto their bodies (as the loading screen indicates) or just use your Devil Trigger for the boost of speed that it affords. If you have seven or more Devil Trigger orbs in your gauge, then you should only need to use all of that (you can repeat the mission and fail it repeatedly after whacking on one of the enemies to build the gauge up), then just run or dash to the fragment to make it within the time limit. If you have a Devil Star, then you can also use that when you run out of Devil Trigger to recharge your gauge.
Secret Mission Eight: Tough Guys
Destroy Every Enemy.
Mission 13: Spiral Staircase (As you descend the staircase, note that the third light you see is red instead of white; tap O near it to find the secret mission.)
There's no time limits here, so feel free to whittle away at your enemies at your own speed. You'll mostly be fighting Arachnes, but the final two foes are both Vanguards, so be sure to choose your weapons appropriately.
Secret Mission Nine: Target Practice
Do not let a single enemy escape.
Mission 14: Vestibule (As you pass through the corridor with two blue flames, look up to find a hole in the wall. Jump in here to find the mission.)
The goal here is to kill all of the enemies on the upper railcars as they glide by your position. To do this, you're going to need to target the Wrath enemies, then polish off any remaining enemies on the trams before they whir away; if any cars manage to leave the screen with enemies still on them, you'll lose.
We like to bring Ebony & Ivory and Spiral to this party. Spiral will usually be a one-shot kill on the Wraths, allowing you to flip between them and E & I to finish off any remaining foes. After you kill four cars or so of mixed enemies, cars with just Wraths will start appearing; you'll only have a second to shoot these cars, so be quick about it. If you're having trouble getting the timing right, come back with Quicksilver style and use Time Lag to slow things down a bit.
Secret Mission 10: Guiding Light
Solve The Crystal Puzzle
Mission 16: Waking Sun Chamber (After destroying the crushing ball, examine the glowing wall in the chamber that opens up to reveal the mission.)
Unfortunately, the puzzles in this room appear to be randomized; you'll just have to smash your way through them yourselves. It usually helps to work your way back from the targets and see which ones have crystals pointing at them and seeing how you could reorganize the beam so that it points to one of them. If worst comes to worst, you can always just reset the puzzle with the flameswitch and try a different approach to the puzzle.
Secret Mission Eleven: On Pins And Needles
Avoid the spikes and obtain the blue orb.
Mission 17: Pitch-Black Corridor (If you jump into the rafters, you'll notice a glowing statue. Touch it to find the mission.)
To get this blue orb fragment, you're going to have to make your way through a hallway filled with moving spike traps. These things move much faster than you've seen in other parts of the game, so it's going to be tough to get through...unless, that is, you have Trickster up to level two. If you do, then you can use its Sky Star maneuver to dash right through the spikes without taking damage. This is by far the easiest way to get this mission done.
Secret Mission Twelve: Final Ascension
Obtain the blue orb fragment.
Mission 18: Road To Despair (If you head up towards the massive foot at the end of the road here and drop down off of its left side, you'll find some orbs and a tablet of runes. Use this to enter the mission.)
This is probably the hardest secret mission in the game, or at least the most frustrating. It takes you back to the God-Cube Chamber and forces you to make the jumps up to the tip-top platform. You're going to absolutely need either Nevan's Air Raid or Trickster Level II to pull this off, as well as a weapon with Air Hike.
On the lowest level of the chamber, jump on the cube near the wall and wait for the rotating cube above it to pass overhead. You'll need to make an almost-blind jump from the rotating cube (just after it shifts direction) to a cube that lowers itself to the middle of the chamber. This is a difficult jump, and we encourage you to check out our video to see precisely what we're talking about.
From the second block, you'll be able to reach the second platform. Another cube will extract and retract itself into the wall next to this platform; jump onto it as it extracts, then jump onto the non-rotating cube above it that's making a figure-eight in the air. From there, you'll need to make a jump to one of the rotating cubes that's floating up and down, and then make an almost blind jump to the platform with the blue orb fragment on it. Again, check our video for most of the details on this.
Got a news tip or want to contact us directly? Email news@gamespot.com
Join the conversation