Destiny 2 Wish-Keeper Exotic Bow Guide - How To Start, Starcrossed Mission, And Catalysts
There's a new Exotic weapon in Destiny 2, but to get it, you'll need to complete a new mission.
The latest week of Destiny 2's Season of the Wish brings a new Exotic weapon into the game for players to chase: Wish-Keeper, a new Exotic bow. This one is similar to past seasonal Exotics, like Vexcalibur and Retrofit Zero, in that you'll earn the opportunities to craft different versions over time as you replay its Exotic mission, Starcrossed.
Here's everything you need to know to start Starcrossed, complete the mission, earn Wish-Keeper and use it effectively.
How to Start the Starcrossed mission and Wish-Keeper Exotic bow quest
You won't find the mission as soon as you boot up Destiny 2 this week. In order to unlock the Starcrossed mission, you'll need to advance the seasonal story, the Wishing All The Best quest line, so if you've been neglecting your duties in The Coil and Riven's Lair, you'll need to catch up on past weeks first.

Next, complete this week's seasonal mission, Apophasis. That'll take you through the story of the Vex of the Sol Divisive making a play for Ahamkara eggs in Riven's Lair. Once you've beaten that mission, return to the HELM and talk to Crow, who will tell you that the Vex have absconded to the Black Garden with one of Riven's eggs. That'll unlock the Exotic mission on the Director, which you can access from the HELM.
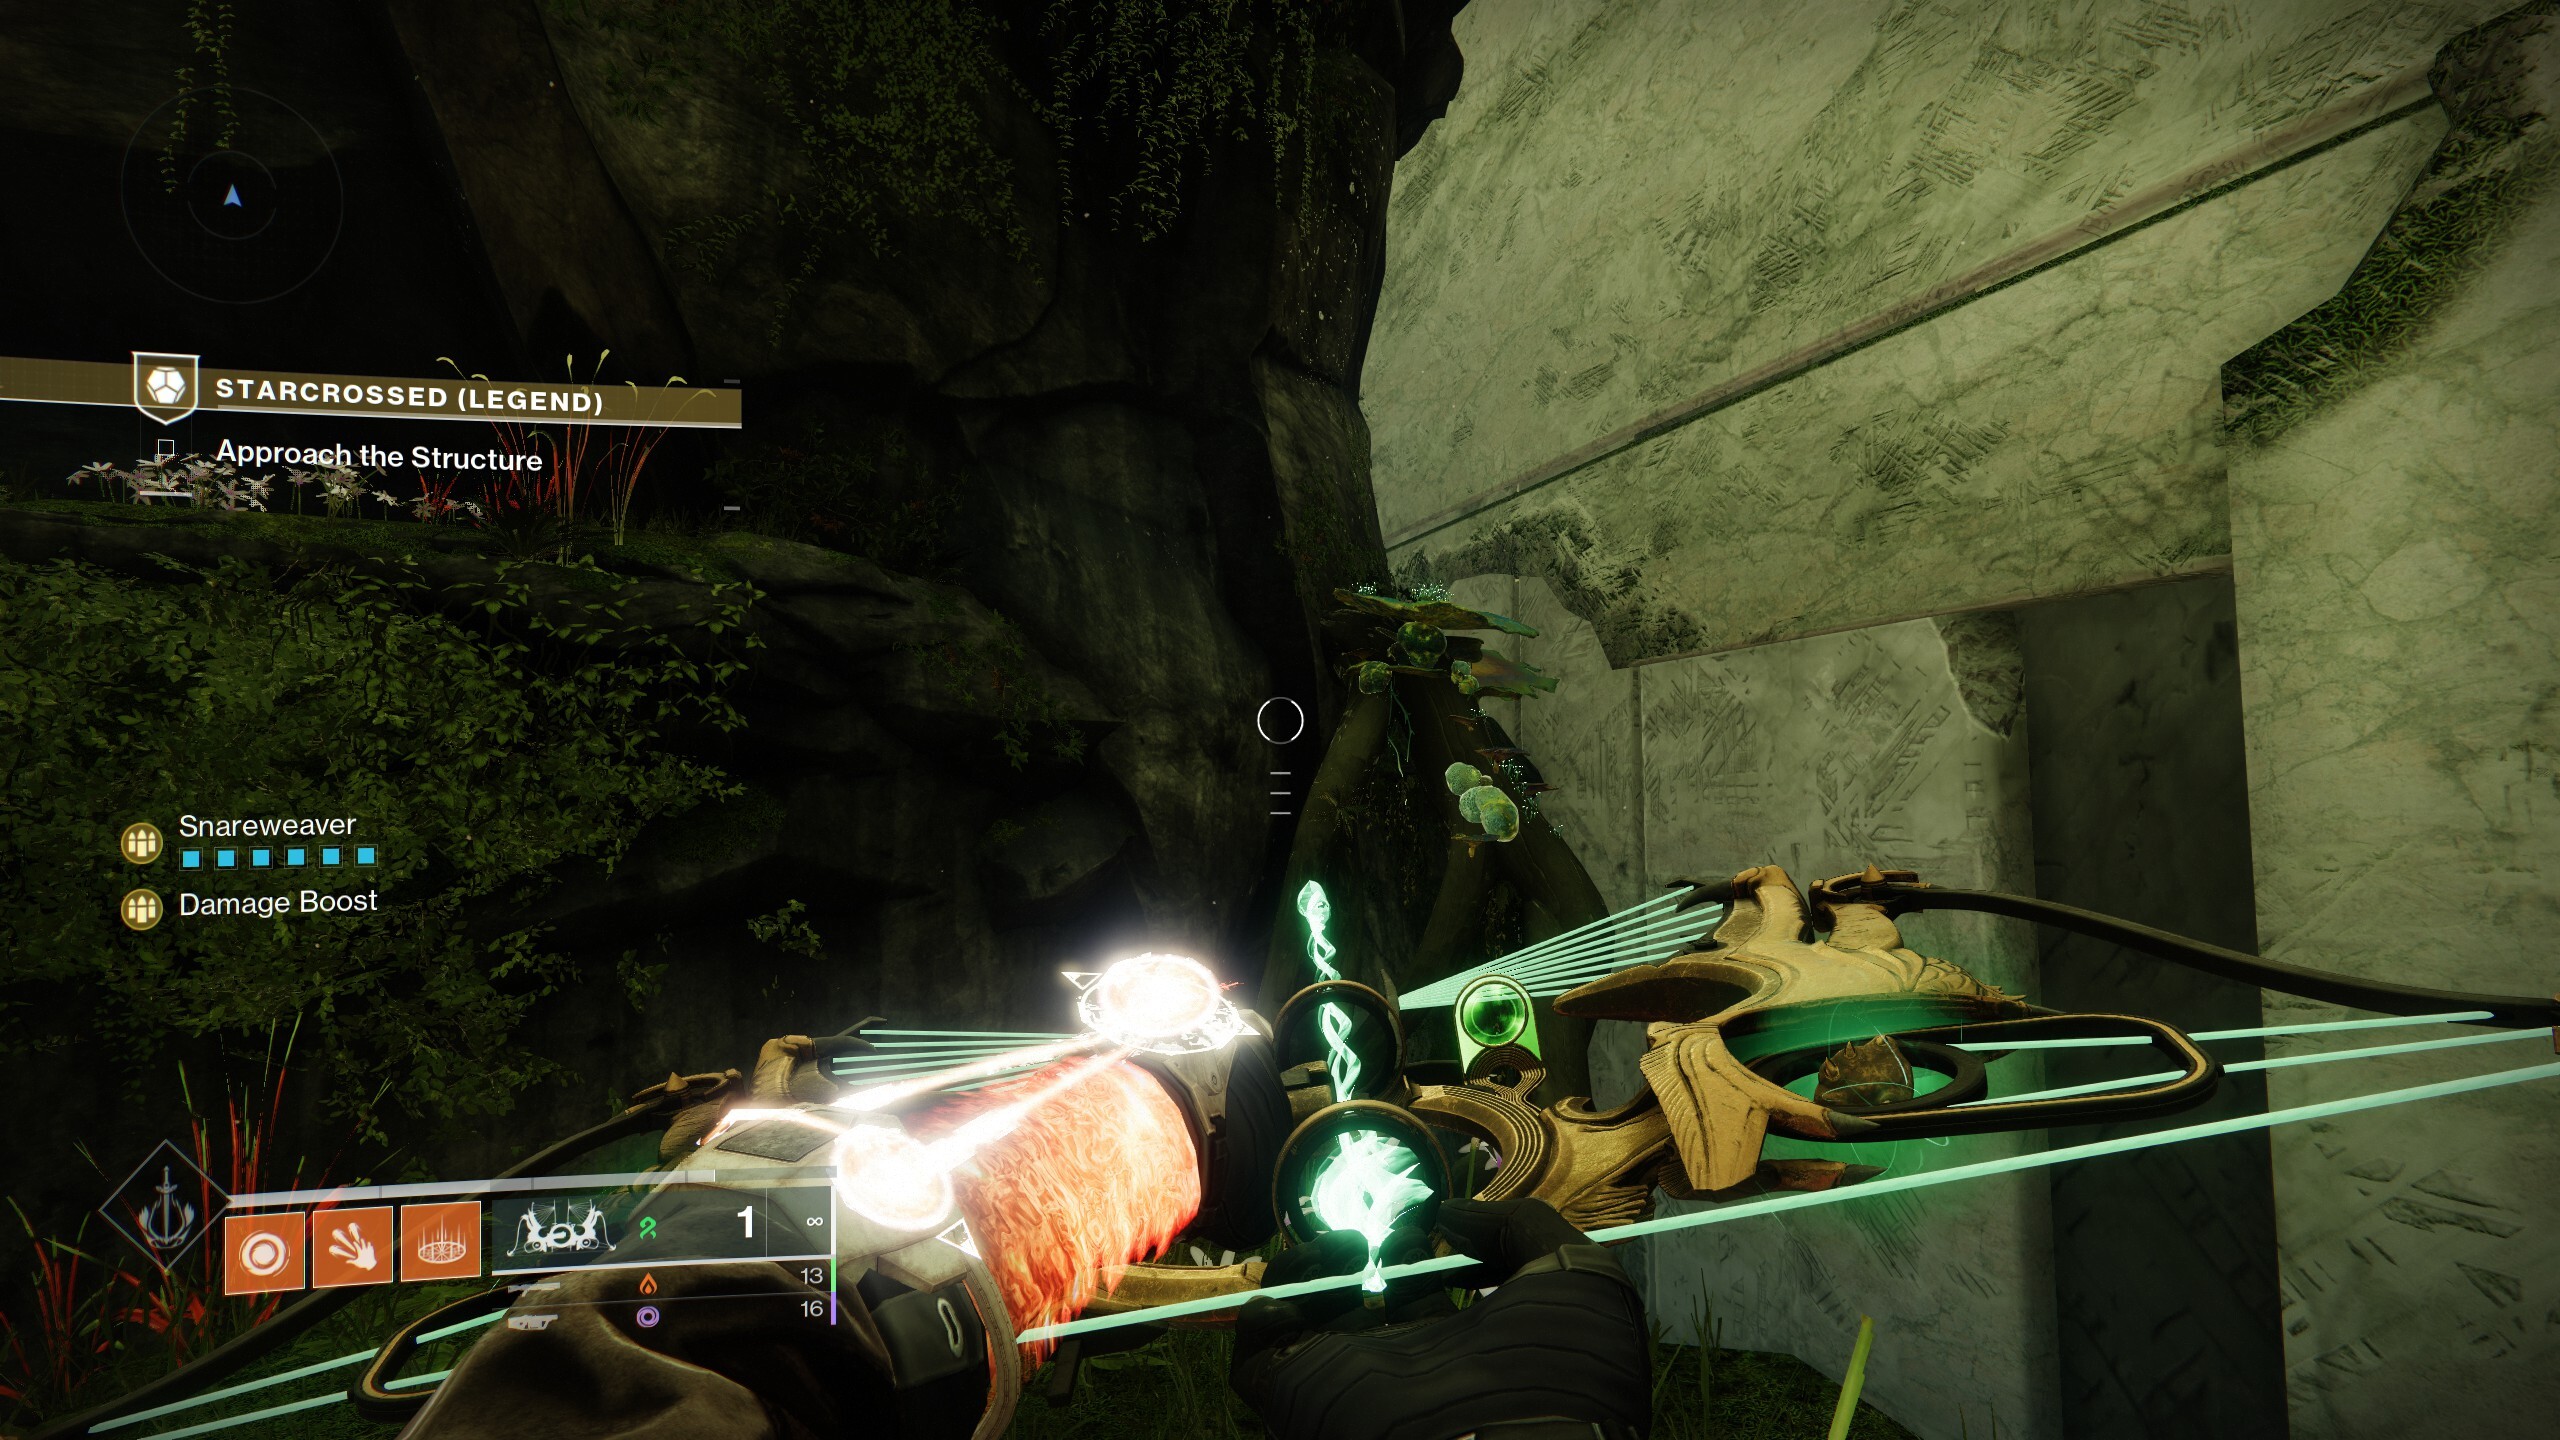
Starcrossed Exotic Mission Guide
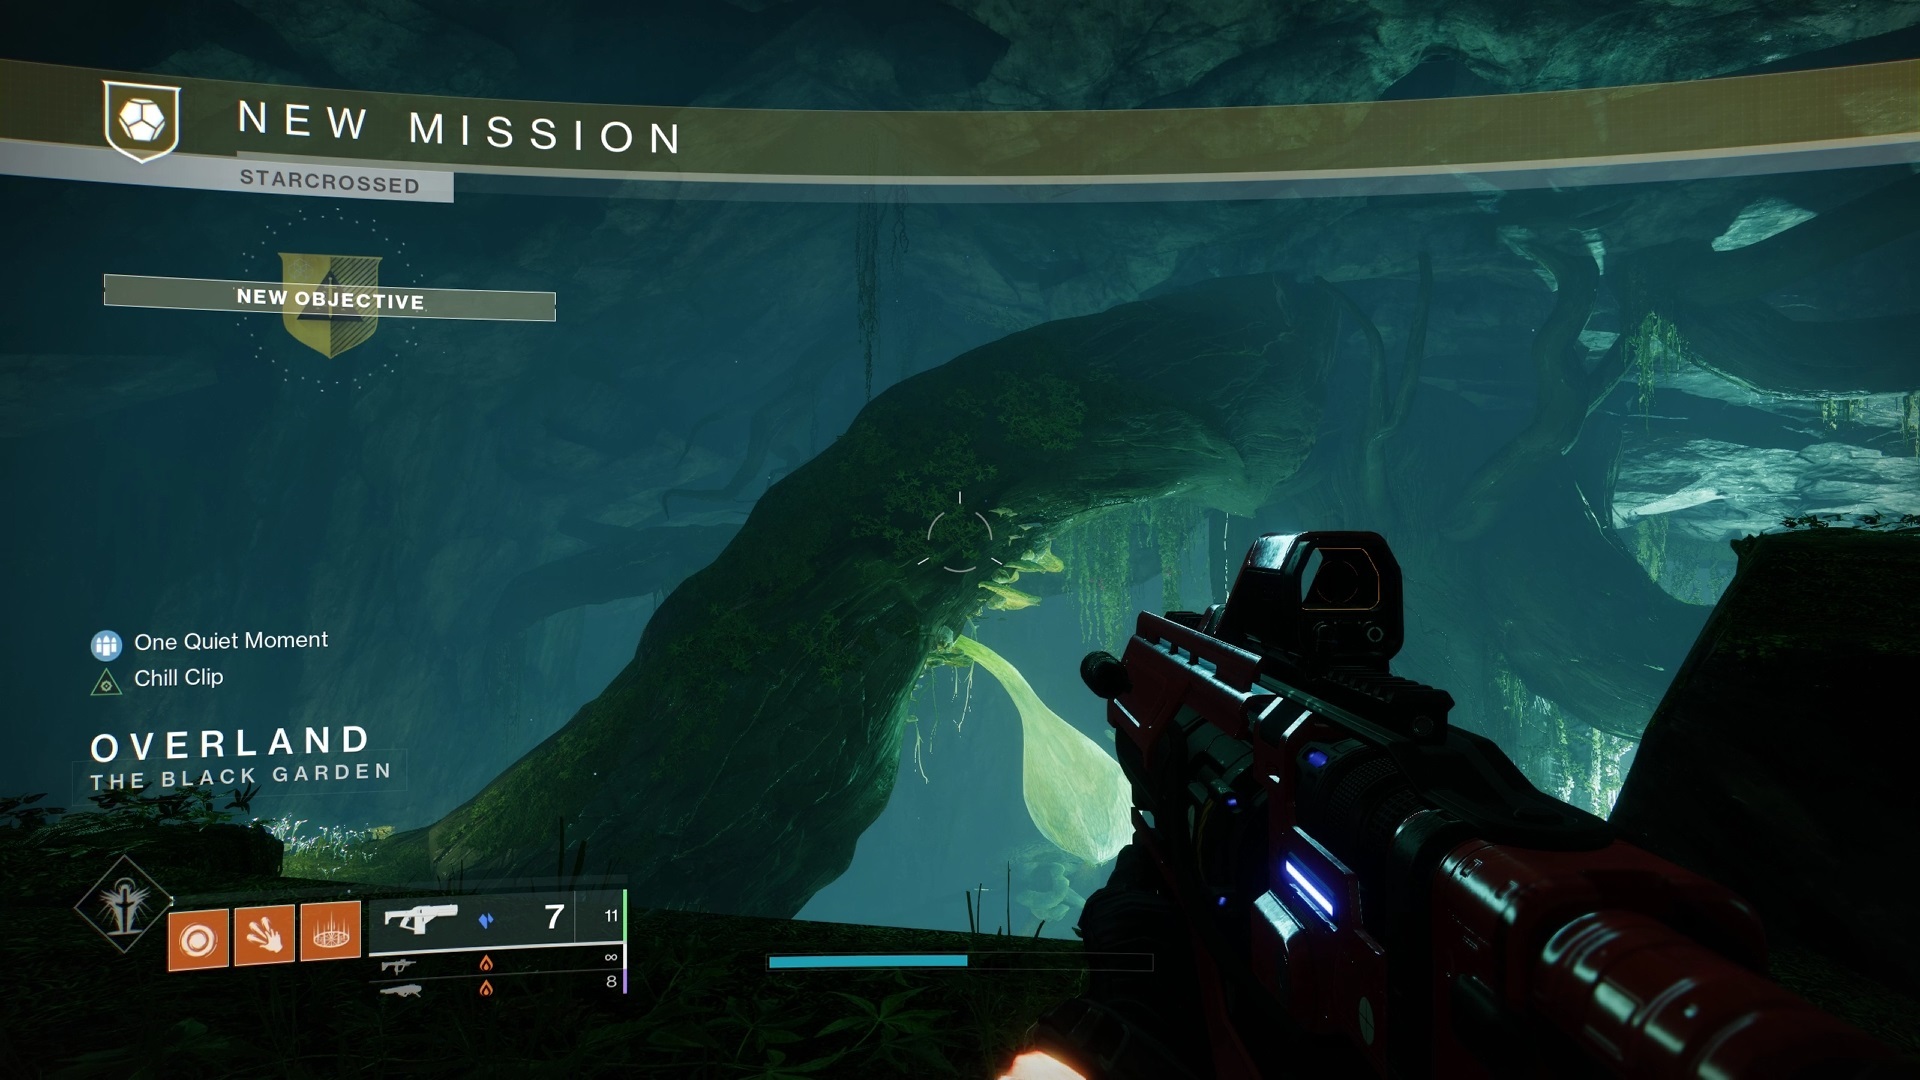
The first area you'll enter in Starcrossed will take you through a big cave that's very reminiscent of an area you traverse in the Garden of Salvation mission. To get across, shoot the big flower buds to create temporary platforms you can jump onto. This is a pretty straightforward path, but there is something to find here before you continue too far.
Secret Chest 1
Head through the big cave to the orange gap in the split tree, which marks roughly the midpoint of this area. There are paths to the right and left of this spot. If you go to the left toward the wall of the area and look down, you'll see a flower bud you can shoot. Drop down to it and look to the left, to the wall of the area, to see an opening you can jump into. Inside is an opening with the first secret chest.
With that done, keep moving to the exit of the cave and into the Black Garden proper, where you'll see a big Vex structure in the distance. That's your goal.
Overland
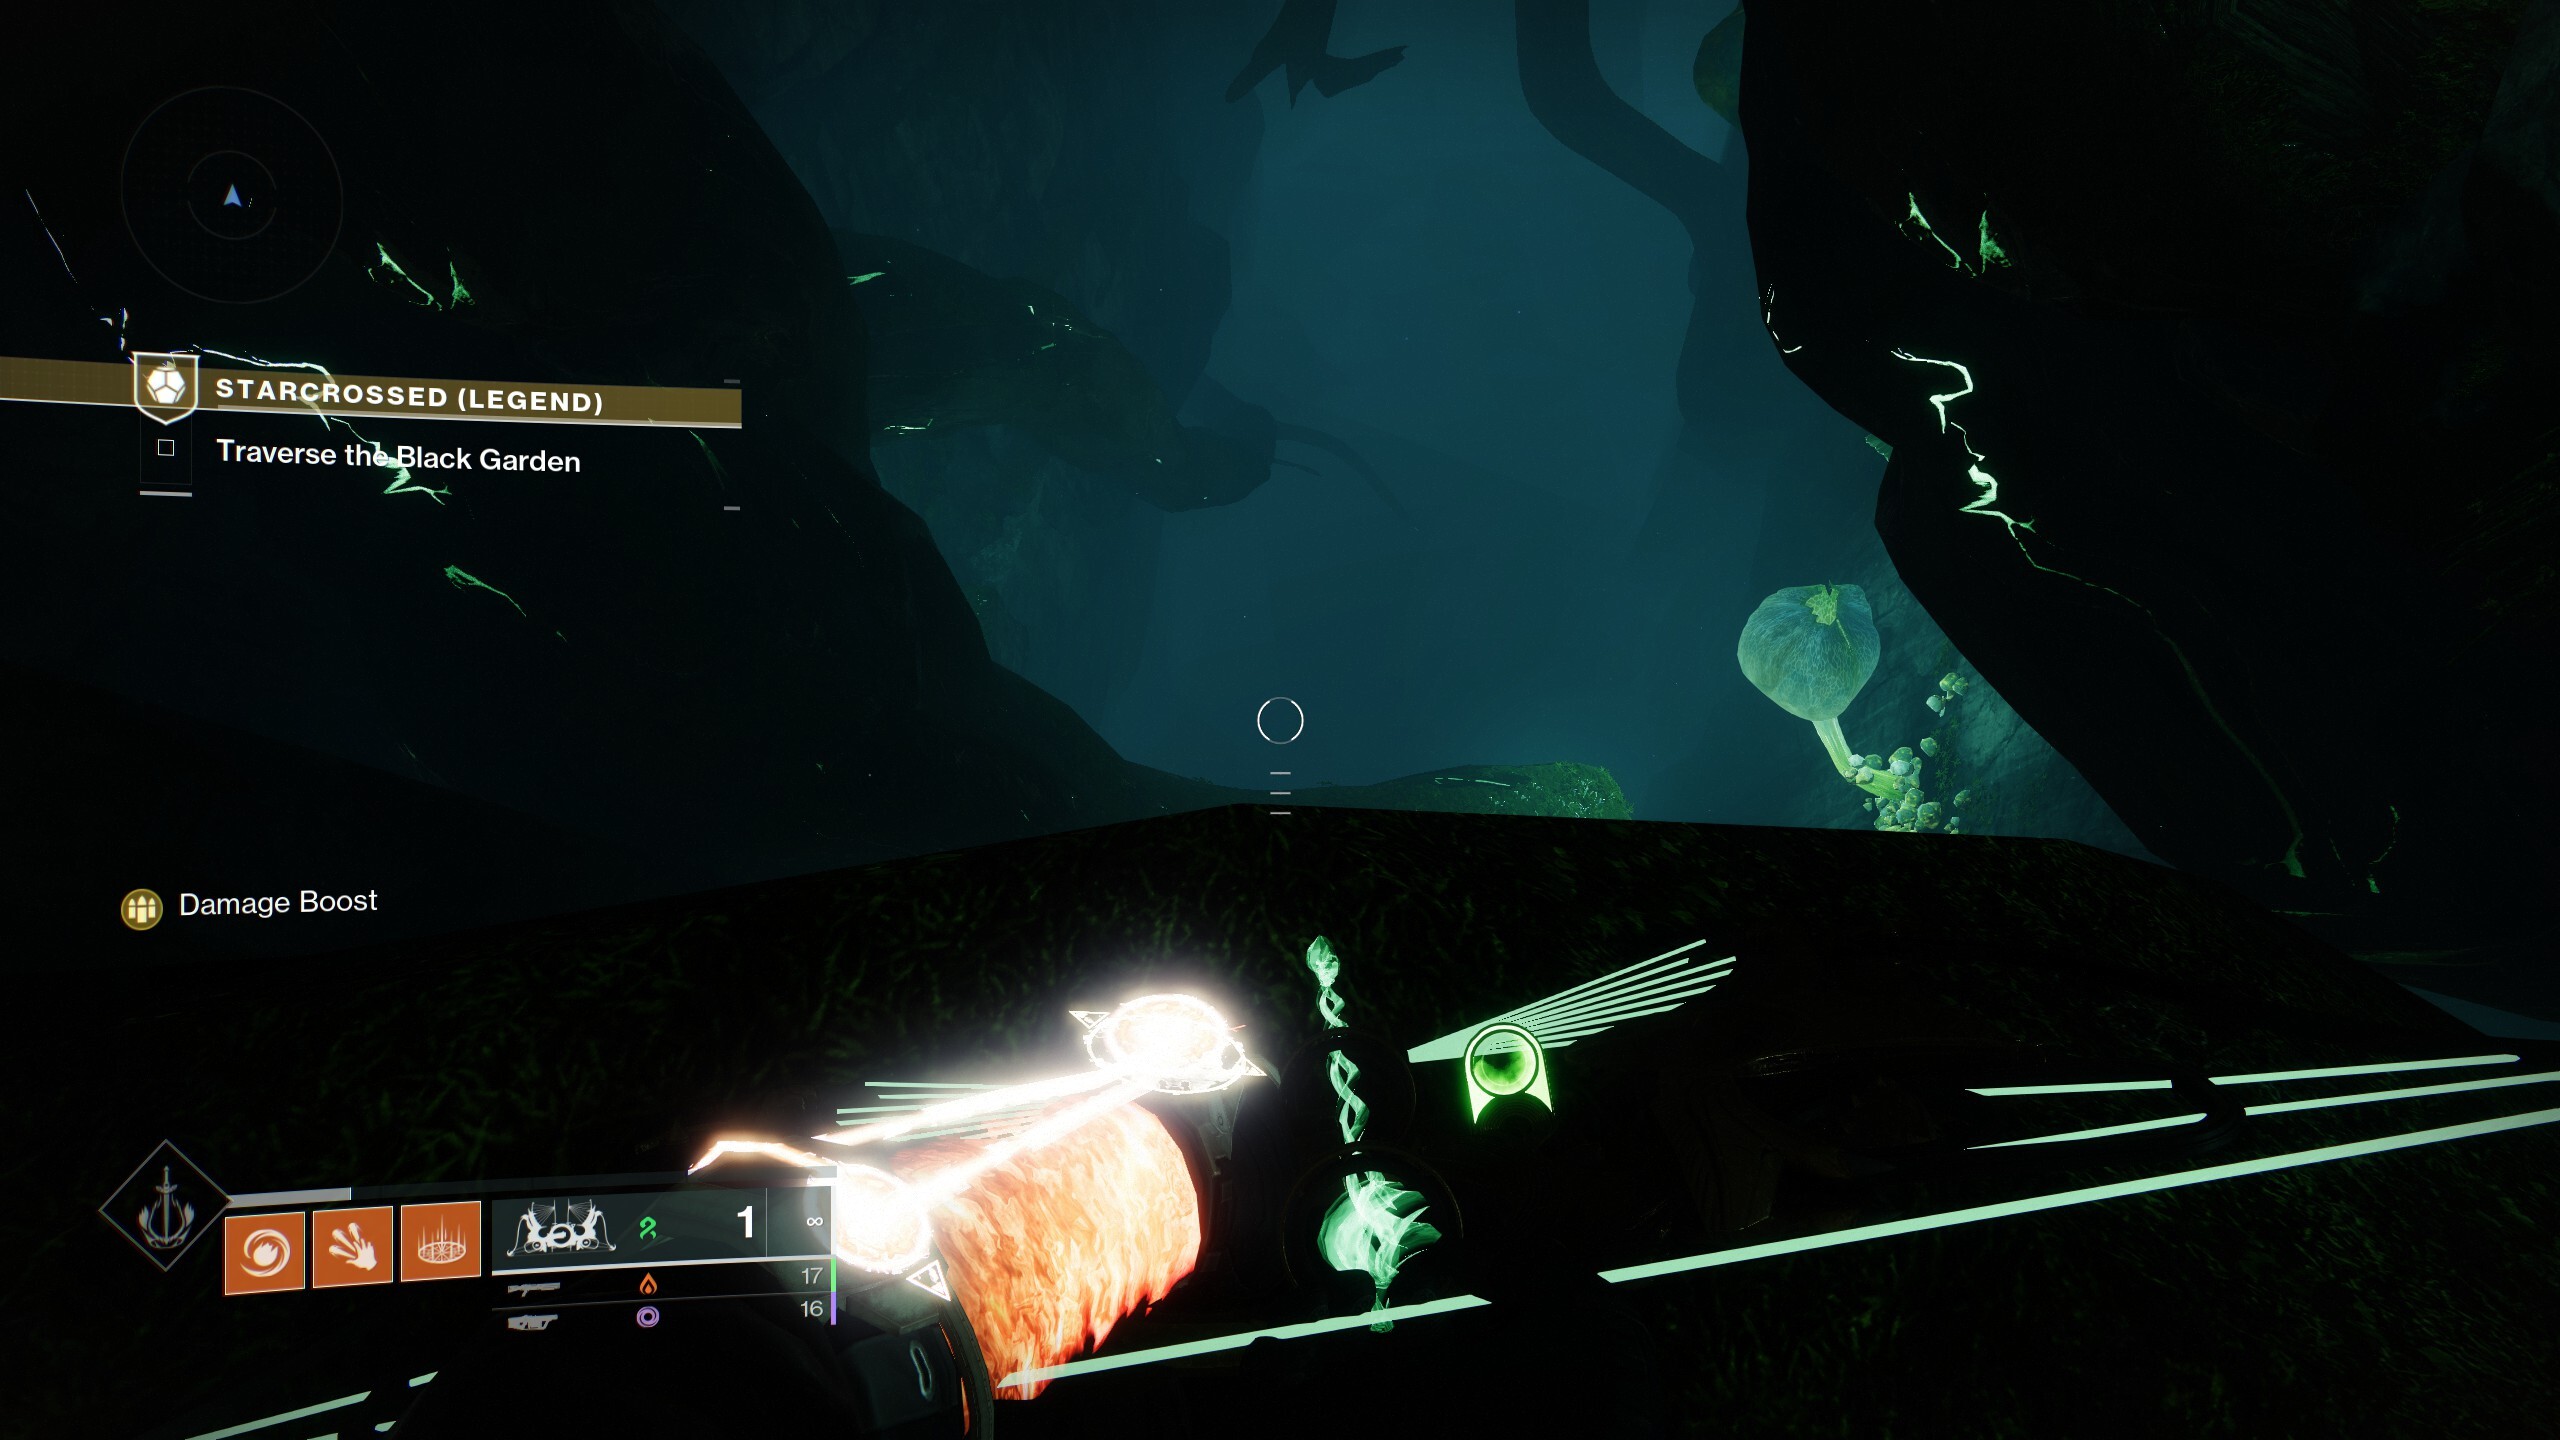
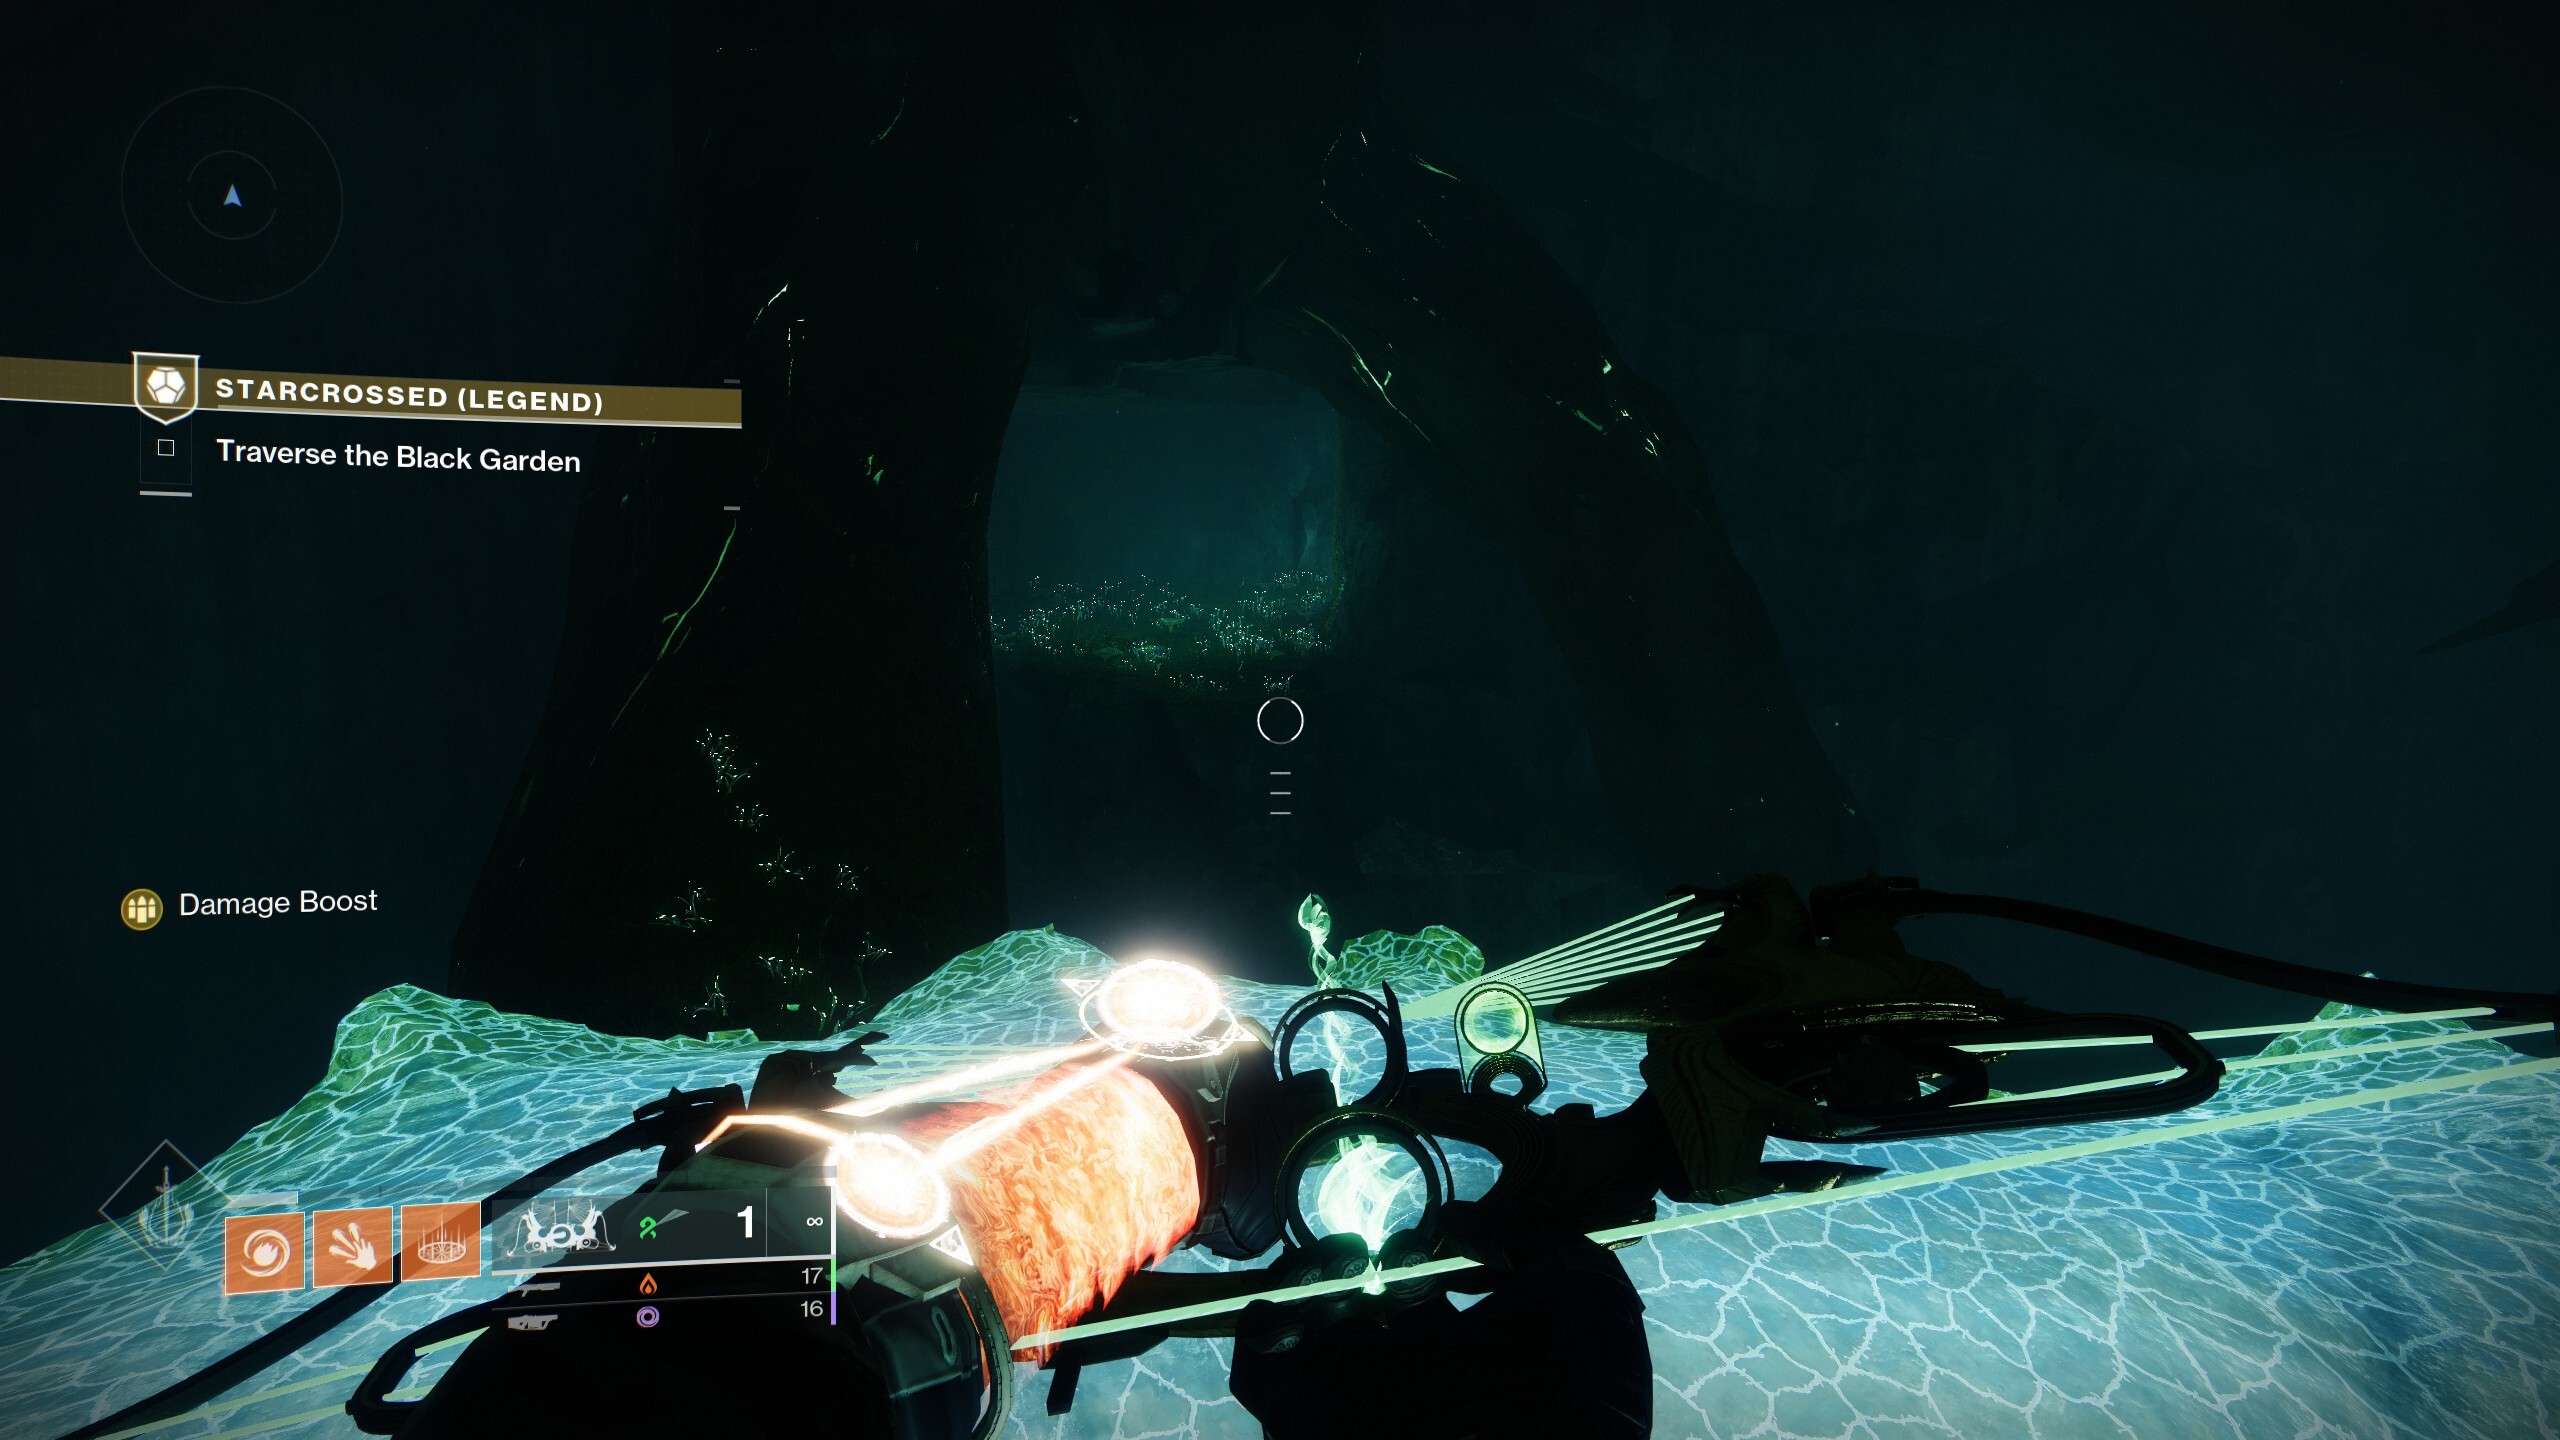
The Starcrossed mission, like a lot of recent Exotic missions, is an expansive run through an area with its own dedicated mechanics. In this case, you're working through the Black Garden, and have to make your way through special barriers by certain enemies.
The barriers look like a blue mist and require the Sire's Obligation buff to open. You can gain the buff by stepping into blue wells found in the arena near the barrier. Without using the Sire's Obligation buff and killing the corresponding Obdurate Phalanx, a Taken Phalanx enemy, you can't pass through those barriers. The Sire's Obligation buff lasts about 45 seconds.
You can pass into the orange mist, on the other hand, but you'll receive a debuff called Unwelcome that will slowly kill you, while sapping your ability to sprint. Look for orange wells to gain the Dam's Gift buff, which will protect you from the orange mist for about 45 seconds.
Advance through the Black Garden until you hit your first Obdurate Phalanx, which will teach you the main mechanic for the rest of the mission. You'll see an icon above the barrier, which you should recognize from the Last Wish dungeon and the Wall of Wishes. The same icon appears over the Phalanx. You need to kill the Obdurate Phalanx while you have the Sire's Obligation buff in order to dispel the bird icon and open the barrier.
Obdurate Phalanxes - Open The Way objective
After you pass through the first barrier, you'll soon come to what is essentially your first major encounter of the mission, where you have to kill three Obdurate Phalanxes to open another barrier. Here, the mission adds some complexity to the Sire's Obligation mechanic, requiring you to both maintain the buff and kill the Obdurate Phalanxes in a specific order.
Before you start fighting, get close to the barrier and look at the three icons that appear before it. Our run had bird, fish, and dragon icons, but these seem like they could be randomized. These correspond to the three Taken Phalanxes scattered throughout the room. Standing at the entrance to this arena and facing the barrier, you'll have one Phalanx immediately to your right close to the entrance, one in the middle of the room beneath an overhanging rock, in front of the barrier, and one in the back-left corner of the room, behind some rocks.
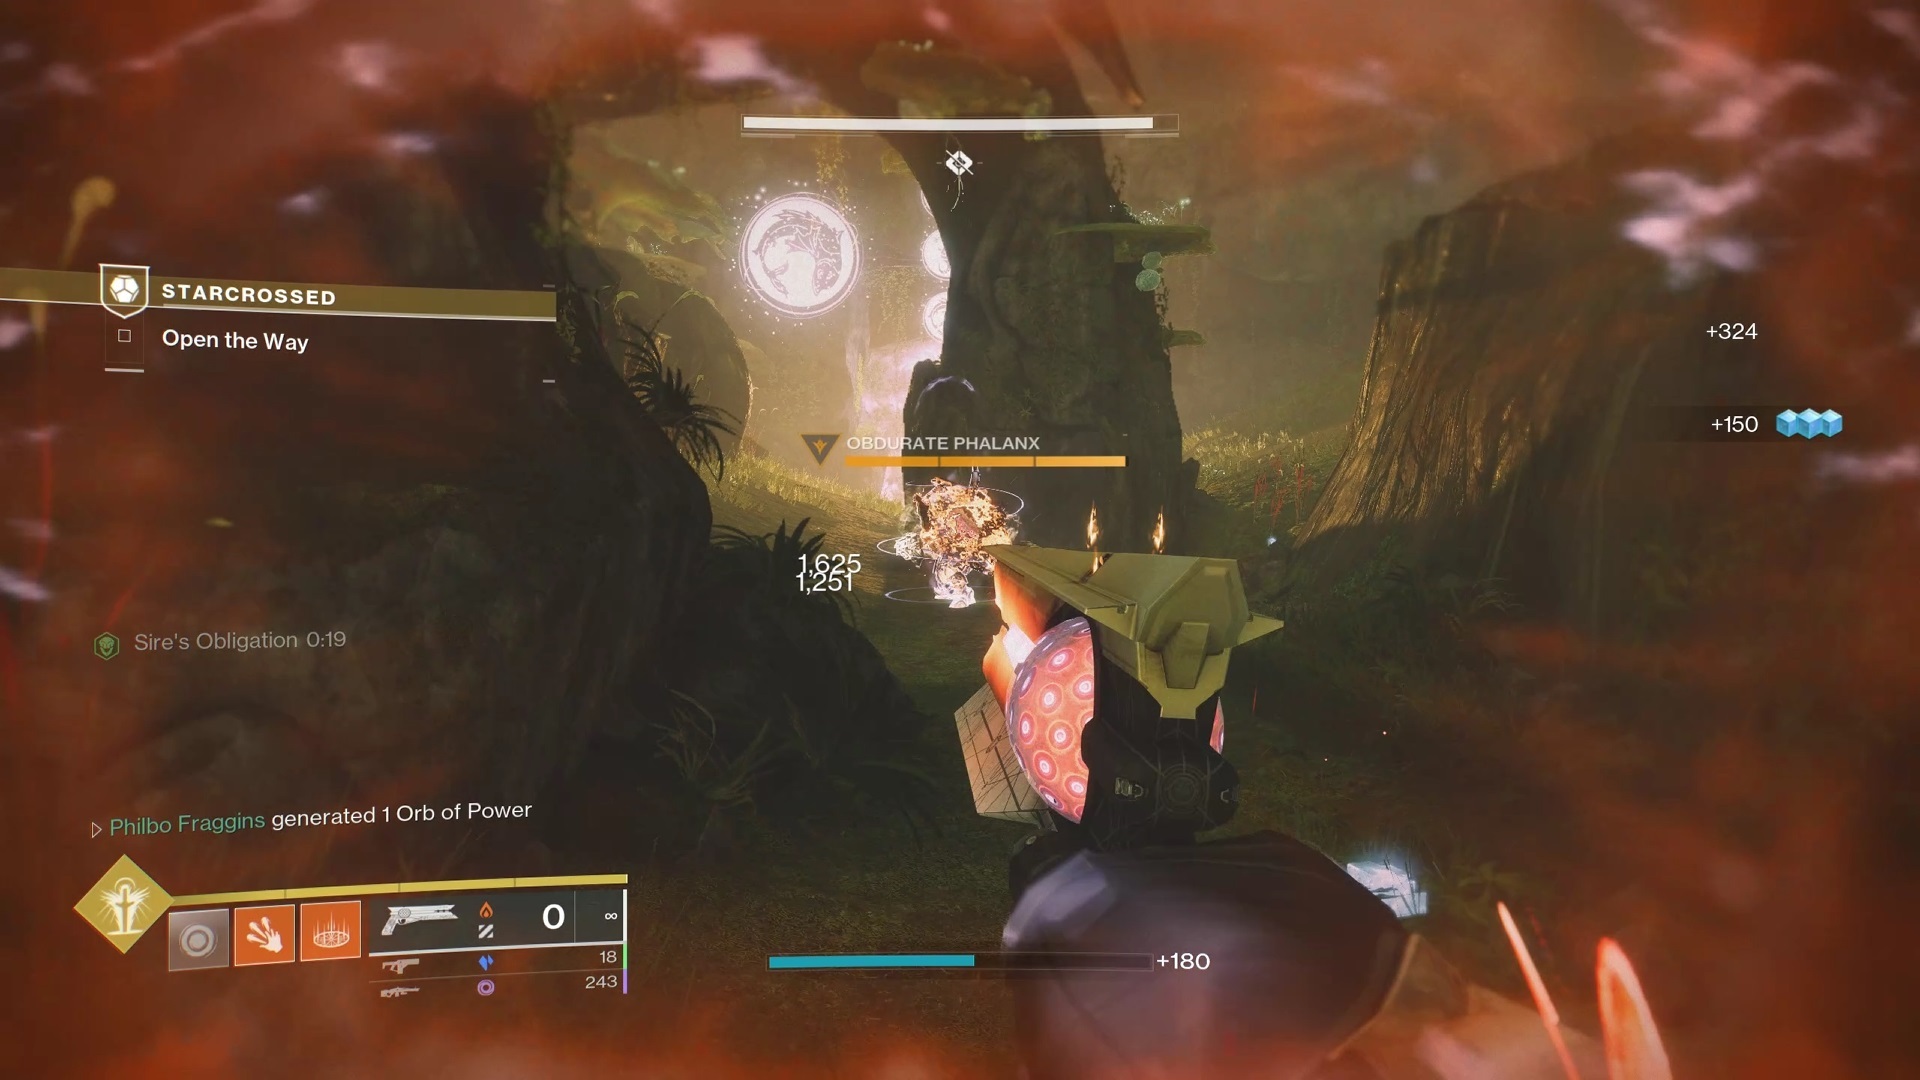
Timing and speed are important in this encounter and throughout the mission, because if you mess up the mechanics, the lock sealing the barrier will reset, forcing you to kill each Obdurate Phalanx more than once. To open the lock, you need to kill the Obdurate Phalanxes in the order shown at the barrier as indicated by their icons, top to bottom. If you kill a Phalanx out of order, the lock will reset and scramble the icons, so you'll need to learn the new order.
You can only kill Obdurate Phalanxes with the Sire's Obligation buff, but letting the buff run out also resets the lock and scrambles the icons. So once you pick up the Sire's Obligation buff, you need to keep an eye on the timer in the corner of your screen and continually reset the buff before it runs out. You don't have to kill Obdurate Phalanxes under any kind of time limit, though, so you can attack, do some damage, and then withdraw to refresh your buff (which you'll need to do if you play the mission solo).
Look for the Sire's Obligation well to the left of the entrance to the arena. Note where it is and return to it frequently to keep the lock from resetting. After you kill your first Phalanx, a new Sire's Obligation well should open up on the rock archway in the center of the room, giving you another place to refresh your buff. However, be aware that killing each Phalanx spawns Vex Cyclopes around the room, and you'll want to take them down so they don't snipe you when you're not paying attention. Smaller enemies will also continually respawn, especially snipers, so be careful about moving around in the open.
Once you've killed all three Phalanxes, the lock will open and clear the barrier, allowing you to move forward.
Just ahead, you'll find the Dam's Gift buff in a well. Ahead, you'll see the orange mist that gives you the Unwelcome debuff, but with Dam's Gift you can traverse it without issue.
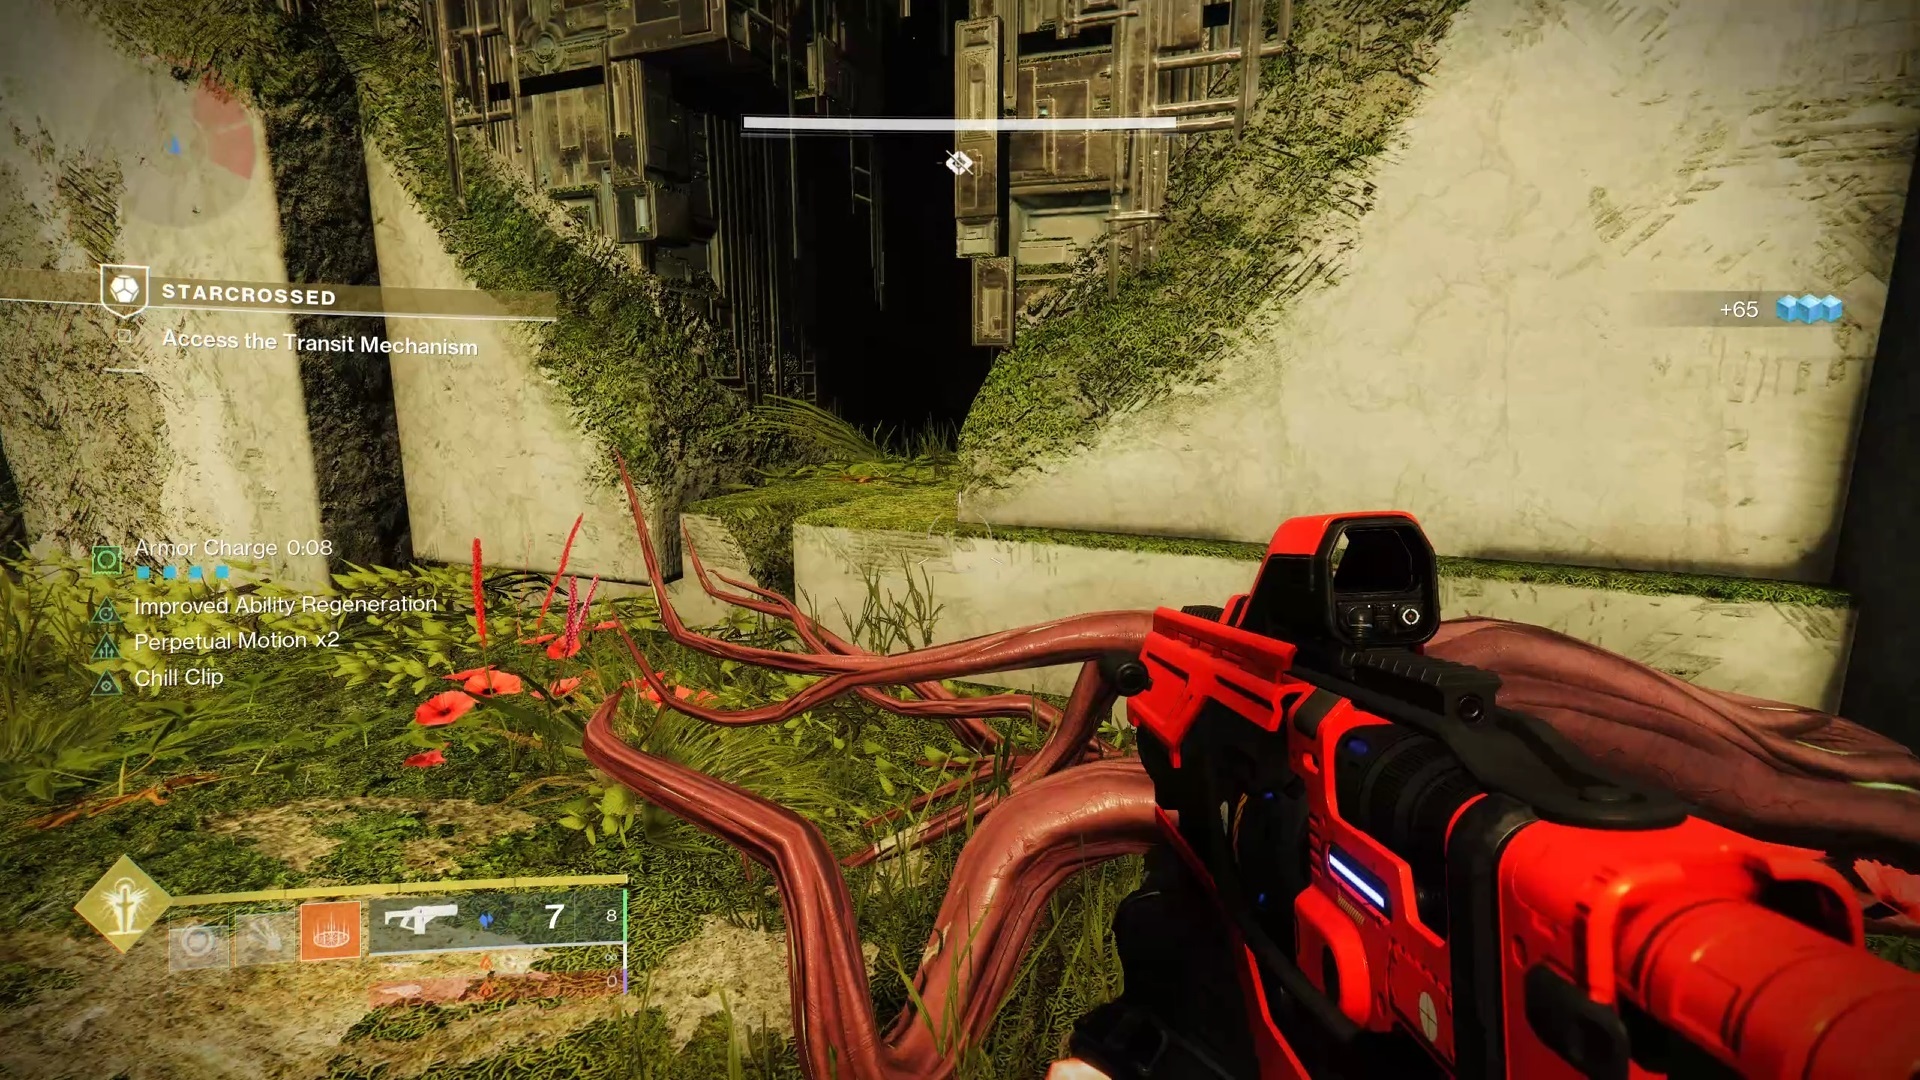
Gatekeeper Wyverns - Transit Mechanism objective
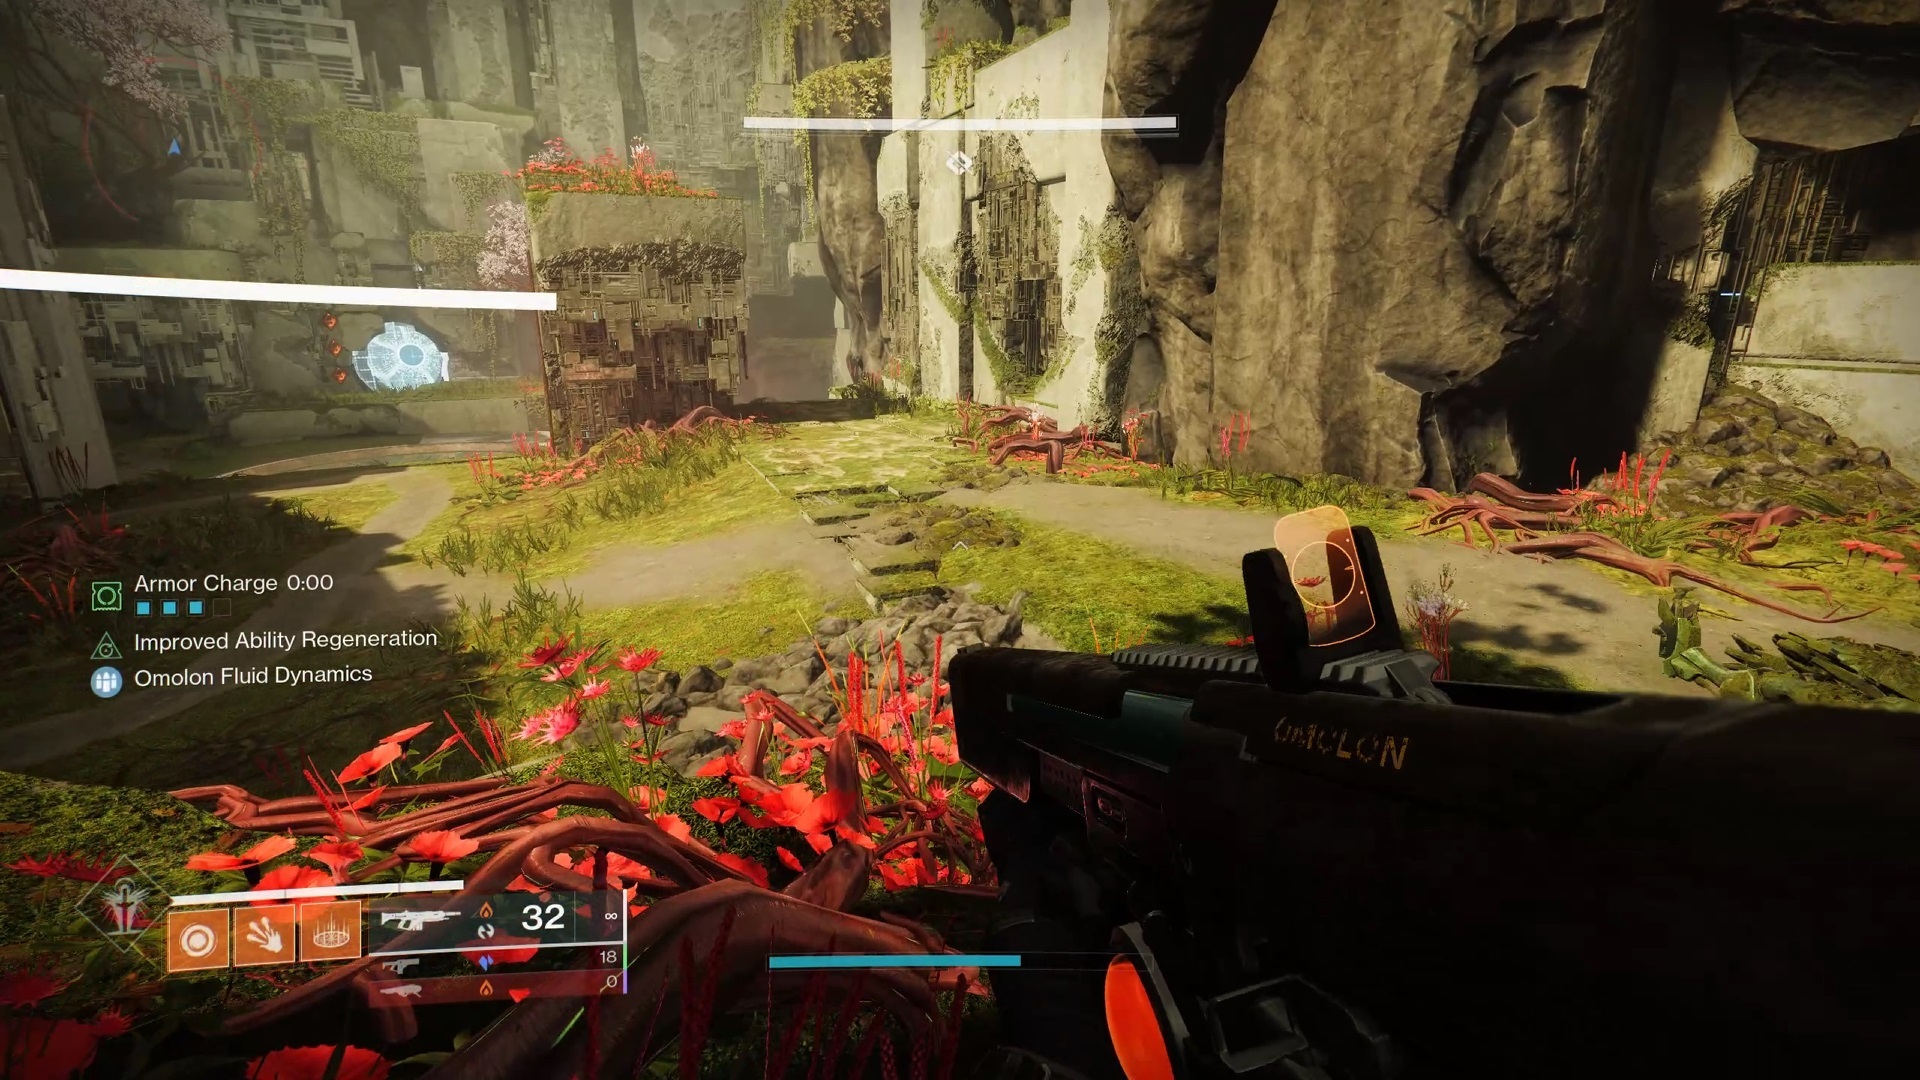
Just a little further, you'll find a Vex gate blocked by a barrier with three red diamonds beside it. These indicate three locking mechanisms you'll need to find throughout the next area. It's a bit of a maze, so you'll need to explore a bit.
In the center of the arena up ahead, you'll find an orange well once you kill the enemies there. To the right is a field of orange mist you can traverse with the buff. Don't go that way just yet, though.
Instead, look to the left wall right before the round dais that has the well and you'll find a small hole you can sneak through. That'll put you above a room with the first locking mechanism inside, blocked by a Vex barrier dome. There are also a bunch of enemies in the room, including a Gatekeeper Wyvern. You need to kill the Gatekeeper Wyvern to dispel the barrier and access the locking mechanism. From this vantage, you're a bit tougher to kill than if you entered the room normally, which would require you to pass through an Unwelcome field.
Be careful with the Gatekeepr Wyverns--they're tough to kill and will shred you quickly, making this a difficult encounter if you're solo. Weapons such as Dragon's Breath are great throughout this mission for dealing massive damage to tough enemies; a few rockets can handle the Wyverns pretty handily. You might also want to consider Strand or Stasis abilities that can suspend and freeze enemies for crowd control as well.
After killing the first Wyvern, look for a tunnel near where you entered the room and follow that forward, killing the mess of enemies you find. The next Wyvern is in a room that's full of orange Unwelcome mist; you'll find a well at the base of some stairs just ahead. Follow the stairs up and then jump up to a ledge above for another useful vantage to kill the Wyvern. If you're careful about it, you can stay out of the mist until you kill everything in this room, then run back and get the Dam's Gift buff to protect yourself to hit the switch. Just be careful of respawning enemies both in the Wyvern room and behind you, including Quantum Hobgoblin snipers.
After flipping the second switch, leave the room through the mist barrier on the right if the switch is at your back. You'll exit into a corridor with no floor, where you'll need to make your way along the walls. Watch out for traps here, as bricks will move to push you off the ledge at certain places. There are also enemies ahead, including snipers, so deal with them carefully before proceeding.

At the end of the hallway, you'll find another orange well, but you don't need to worry about it from this side. Jump across the gap to the platforms on the far side and you'll find a room with a round entranceway and a rotating door. This spot provides pretty good cover to kill the enemies inside, giving you an easier time of taking down the third and final Wyvern. When you hit the third switch, all the Unwelcome mist will disappear. From the switch, head out through the hole on the right side of the room, beside the round entrance you came in through, to return to the first arena.
The Vex portal you first passed as you came in is now unlocked, but is guarded by several strong foes. You'll see an Elite enemy called a Malignant Wyvern, and a giant Gate Lord-like Minotaur called Ixion, Covetous Mind. Both are tough, but especially with Dragon's Breath, you should be able to hang well back in cover and hit them for major damage from far away, making this fight pretty simple. Clear out all the enemies to open the gate and progress.
The gate will take you into a minor jumping puzzle, where you'll need to make your way across some large gaps to small ledges. It's not especially difficult to cross, though. You'll exit into an open area with some enemies. Make your way along the path to the right and follow it through the Vex structure. You'll hit a large gap that you can't cross, but you can follow the ledges to the right along the cliff walls until you reach a cave full of Taken. Clear them out, and then a handful of Vex just beyond them, to enter another arena called the Roost.
Roost - Deactivate the Barrier objective
Here's where the mission combines everything you've previously had to do into a new mechanic. Taken enemies will spawn in this room including an Obdurate Phalanx with an icon, and you'll find an orange well for the Dam's Gift buff here. You're working to open another blue barrier, which is just ahead and down a short flight of stairs. Just in front of the barrier is the blue well for the Sire's Obligation buff. As before, the barrier has three icons, indicating that you have to kill three Obdurate Phalanxes to open it, and to do so in order.
The other two Phalanxes are in caves that connect to this central location. One is to the left of the barrier and the other is to the right of the orange well. Icons can be found at the opening of the caves to tell you which Phalanx is inside.
So to advance through this encounter, you need both the Dam's Gift buff and the Sire's Obligation buff. When you pick up both, they combine into a new buff called Crowned by Dragons. The good news is that Crowned by Dragons will protect you from orange Unwelcome mist and let you kill Obdurate Phalanxes. As before, though, you need to continually reclaim the buff to keep the timer from running out. If the buff timer expires, the barrier lock will reset and you'll need to start over. However, touching either the blue or the orange well will restore the Crowned by Dragons timer. Once you have both buffs, either well will refresh it, so you no longer have to worry about touching both.
The encounter is a bit difficult just because of the constantly respawning enemies, especially solo, but there's lots of cover everywhere so you can generally keep out of harm's way as you do hit-and-run attacks on the Phalanxes between sprints to refresh your Crowned by Dragons buff. If you're alone, take your time to keep yourself buffed and healthy and take out the enemies through multiple rounds of attacks.
After all three Phalanxes die, you'll be able to pass through the barrier for a final boss fight.
Akardon, Pitiless Mind boss fight
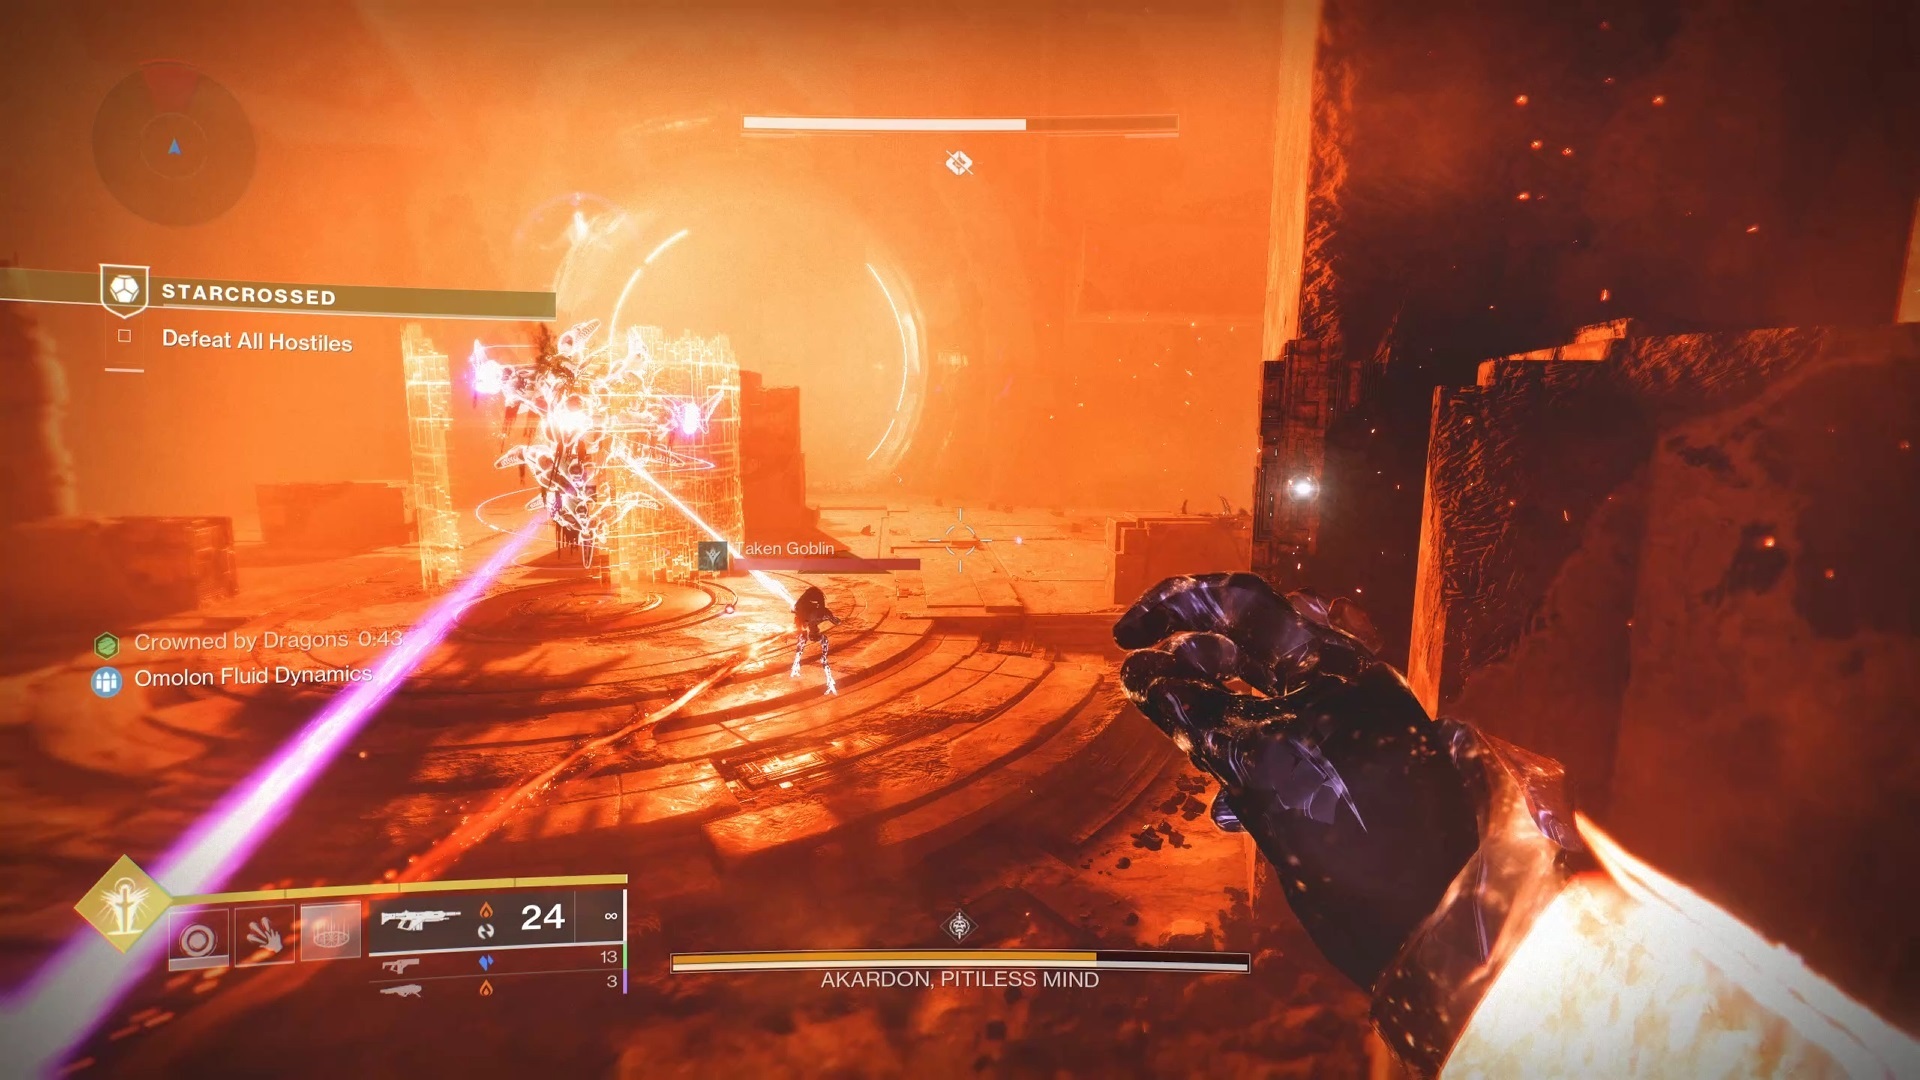
Just through the barrier is a short drop into a large, round arena. Inside is a big Vex Hydra called Akardon. You'll notice right before you enter that the room is full of orange Unwelcome mist and that Akardon is marked by the same blue glow as the Obdurate Phalanxes. A blue well and an orange well are right at the entrance to the boss fight, allowing you to nab the Crowned by Dragons buff immediately.
There are a lot of enemies in here as well, but also a lot of cover. You can usually hang out on the sides of the room and find good protection from most attacks. You'll also see wells to restore your Crowned by Dragons buffs on the left and right sides of the room, near where the boss starts, if you need a quick refresh.
First, you'll want to destroy the two Taken Phalanxes on the sides of the room, called Pitiless Attendants. They're pretty spongey enemies, but they like to hang out toward the back of the room and will have a hard time hitting you if you use the stairs and platforms nearby for cover. Kill the Pitiless Attendants and you'll destroy Akardon's rotating shield, making it much easier to deal with the boss.
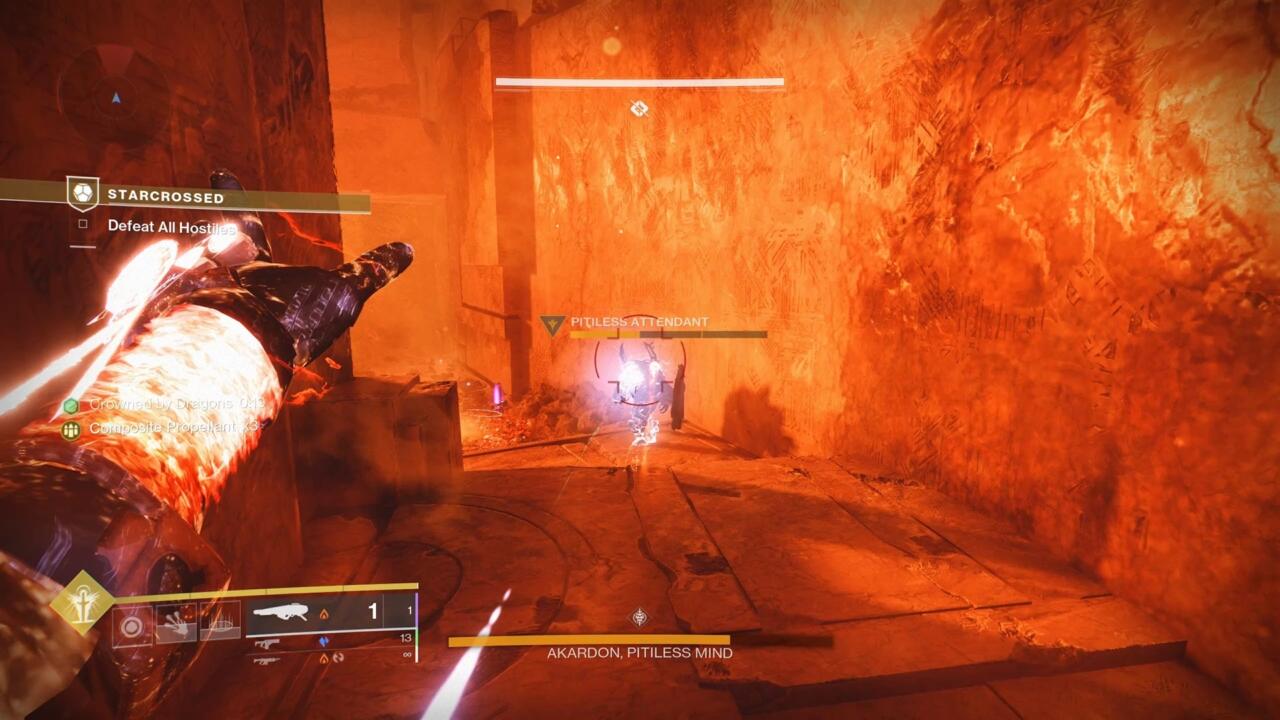
Once that's done, this is a pretty straightforward fight, with the note that you'll want to continually clear out enemies to make your life a little easier. Akardon will occasionally summon small Vex robots to rush and detain you in round Vex shields, which can leave you very vulnerable. Taken Goblins will spawn every so often and can shield the boss, so you'll need to deal with them as well. Finally, Vex Harpies like to float around the air in the middle of the arena to hammer you if you leave cover.
Dragon's Breath is pretty overpowered for this fight, however, since it allows you to deal huge damage to the boss while staying very safe. Enemies don't really venture to the sides of the room, so when I fought this solo, I stuck behind the wall on the right and took my time killing everything, finishing the boss without much trouble. The toughest part is venturing out of cover to refresh the Crowned by Dragons buff and to gather ammo.
Once Akardon is dead, head through the round doorway it was guarding at the back of the room. You'll find a chest on the other side along with the bones of an Ahamkara. The chest will award you Wish-Keeper, an Exotic Strand bow.
As with other, similar Exotic missions, you can unlock Catalysts for Wish-Keeper by replaying the mission on Legendary difficulty. It appears that, just like those other Exotic missions, a new Catalyst will become available each week going forward, for a total of four. None of those Catalysts are currently available as of this writing, so we'll update this guide with more information when they drop.
What does Wish-Keeper do?
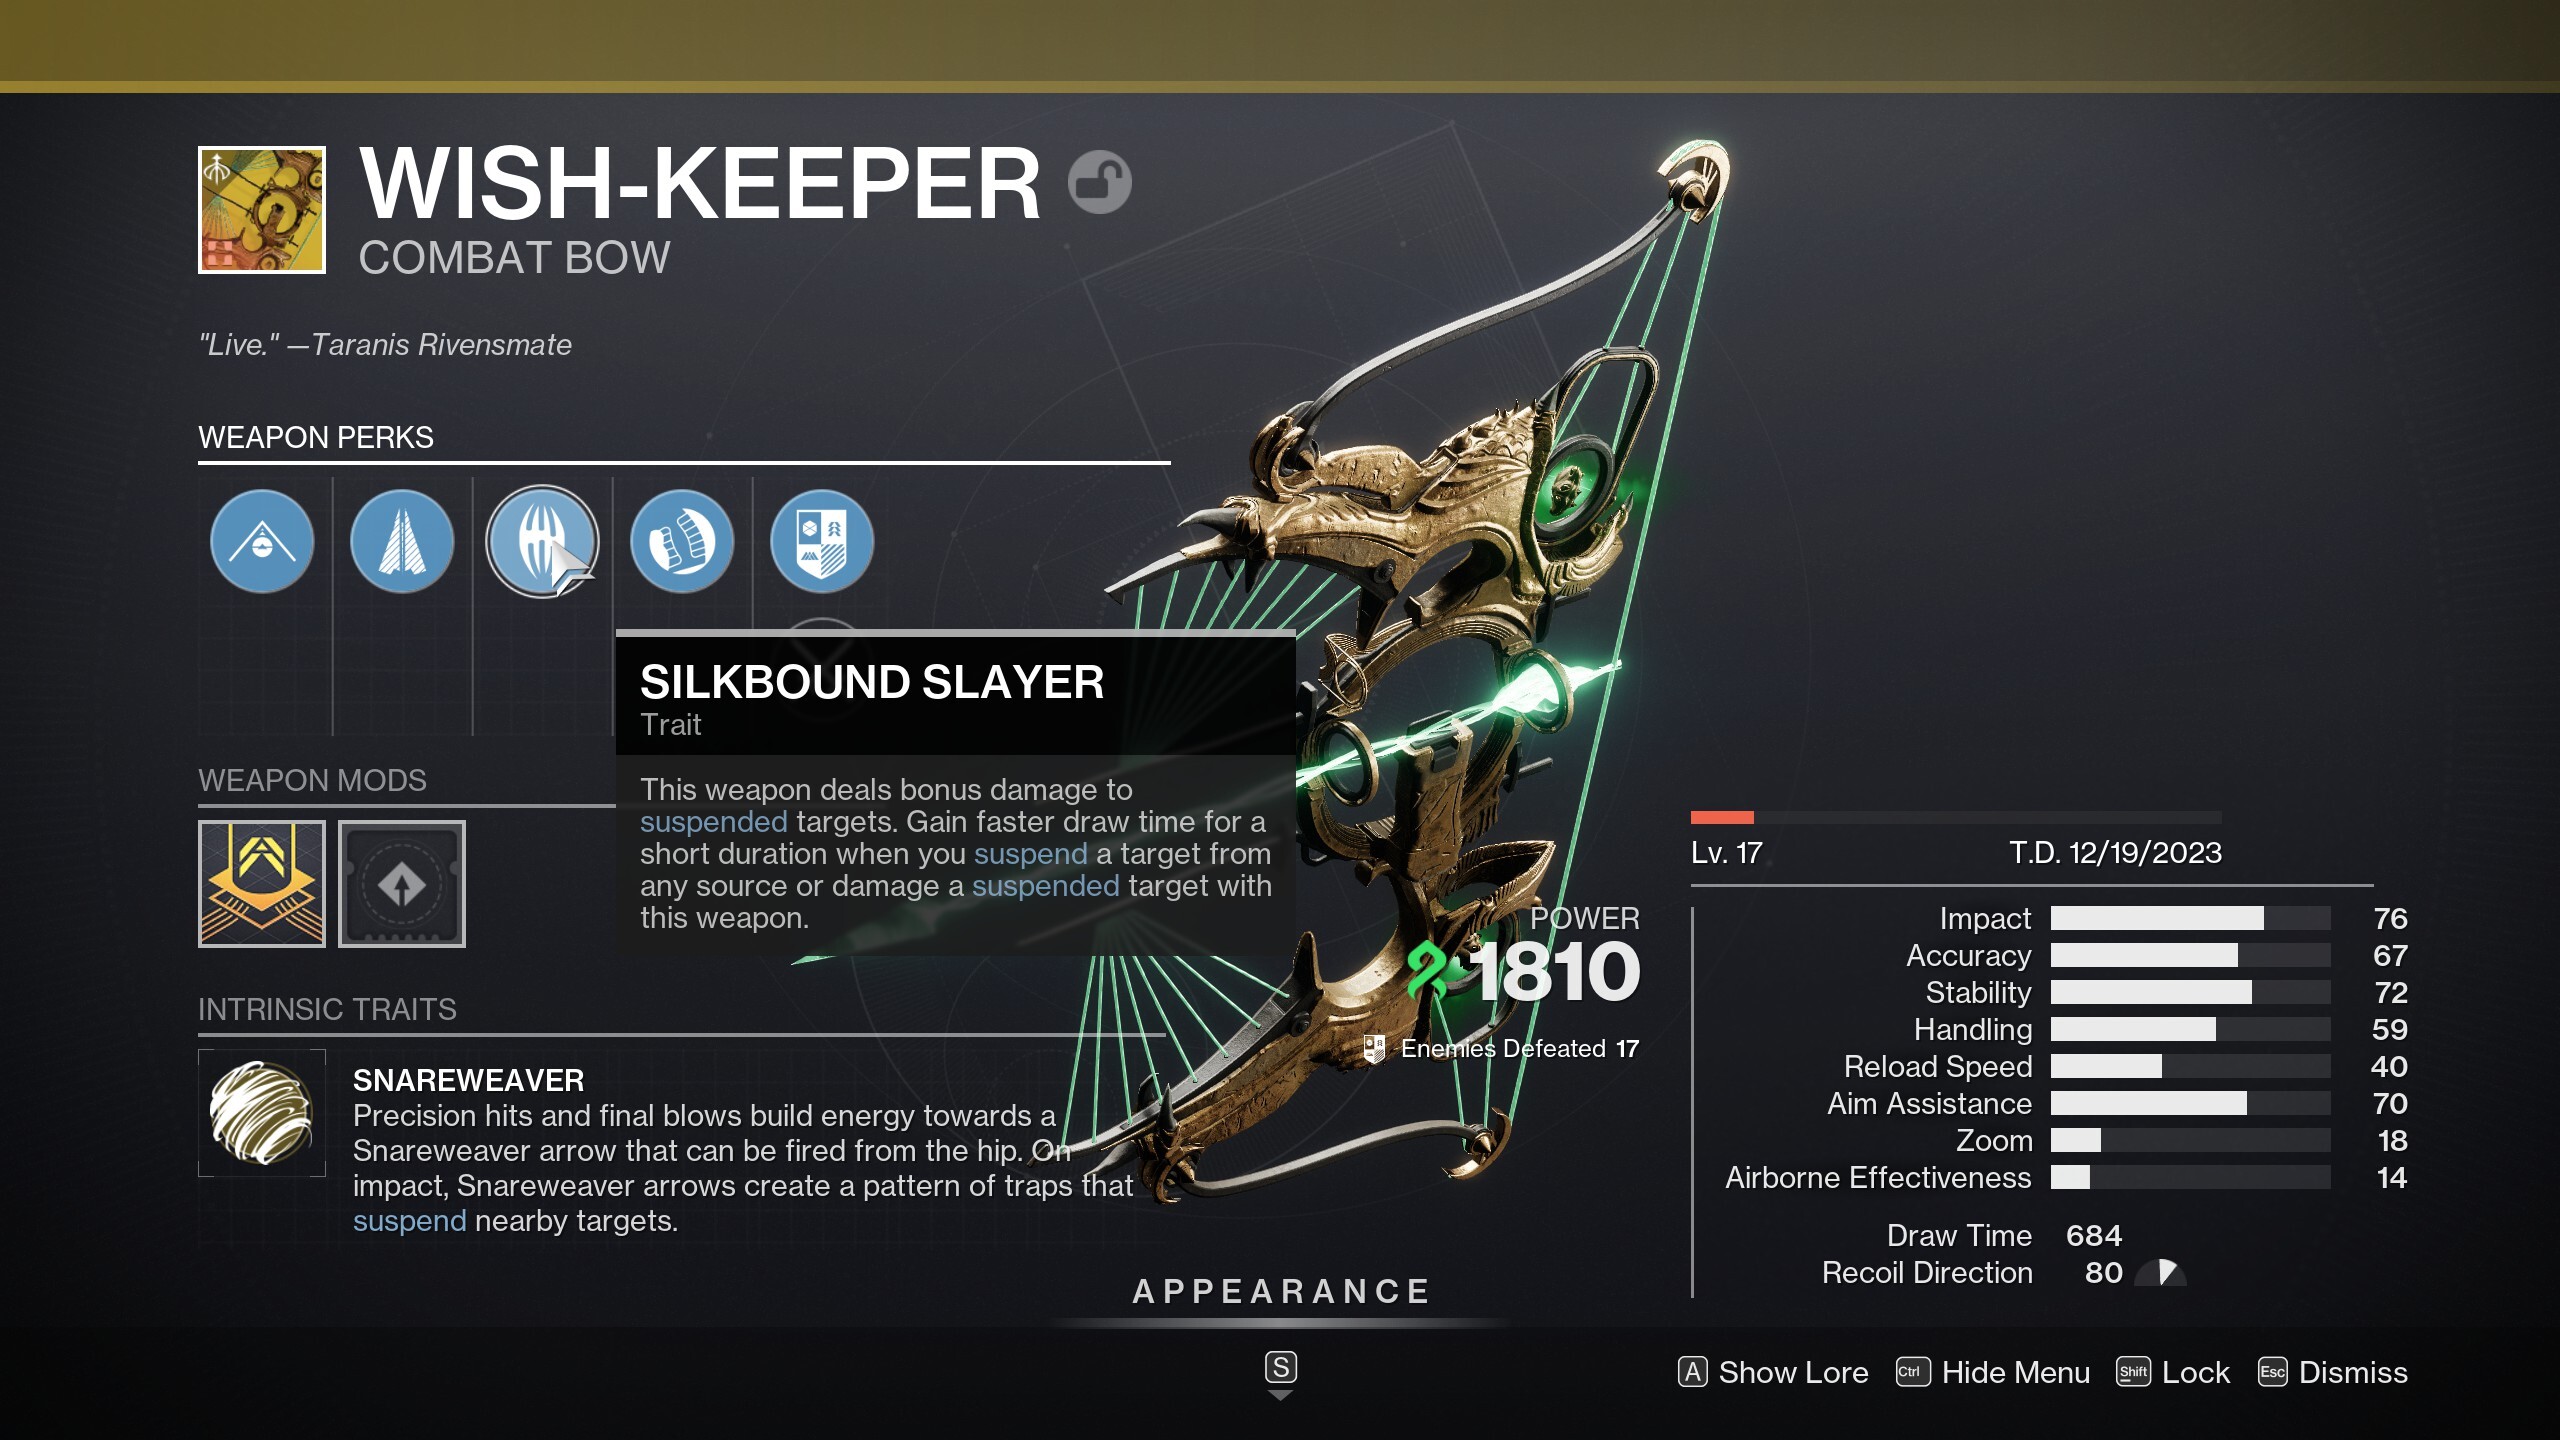
Wish-Keeper is a Strand bow you can use in your Primary weapon slot, and it looks to have some serious potential synergy with Strand builds focusing on using the suspend debuff on enemies. The bow shoots normally when you aim down the sights, but each time you land a precision hit or a final blow with it, you'll charge the bow up slightly, as indicated on the side of your screen.
When you hit six charges, Wish-Keeper can fire a special Strand arrow when aiming from the hip, called a Snareweaver arrow. That arrow will suspend a target you hit with it, while also creating a grid of Strand energy on the ground near where it impacts. Any enemy that walks into the grid will also become suspended, allowing you to set a big suspension trap in the middle of groups of enemies.
What's more, Wish-Keeper gains a faster draw time when you suspend enemies with any method (that includes both the bow and your Strand abilities), or use it to damage suspended enemies. So you'll shoot faster and do more damage when you shoot suspended enemies, and you can use the bow to add Strand suspension to your other subclasses. With all the Seasonal Artifact mods that bring synergy between Solar and Strand effects this season, Wish-Keeper should allow you some powerful build options.
Wish-Keeper Exotic Catalysts
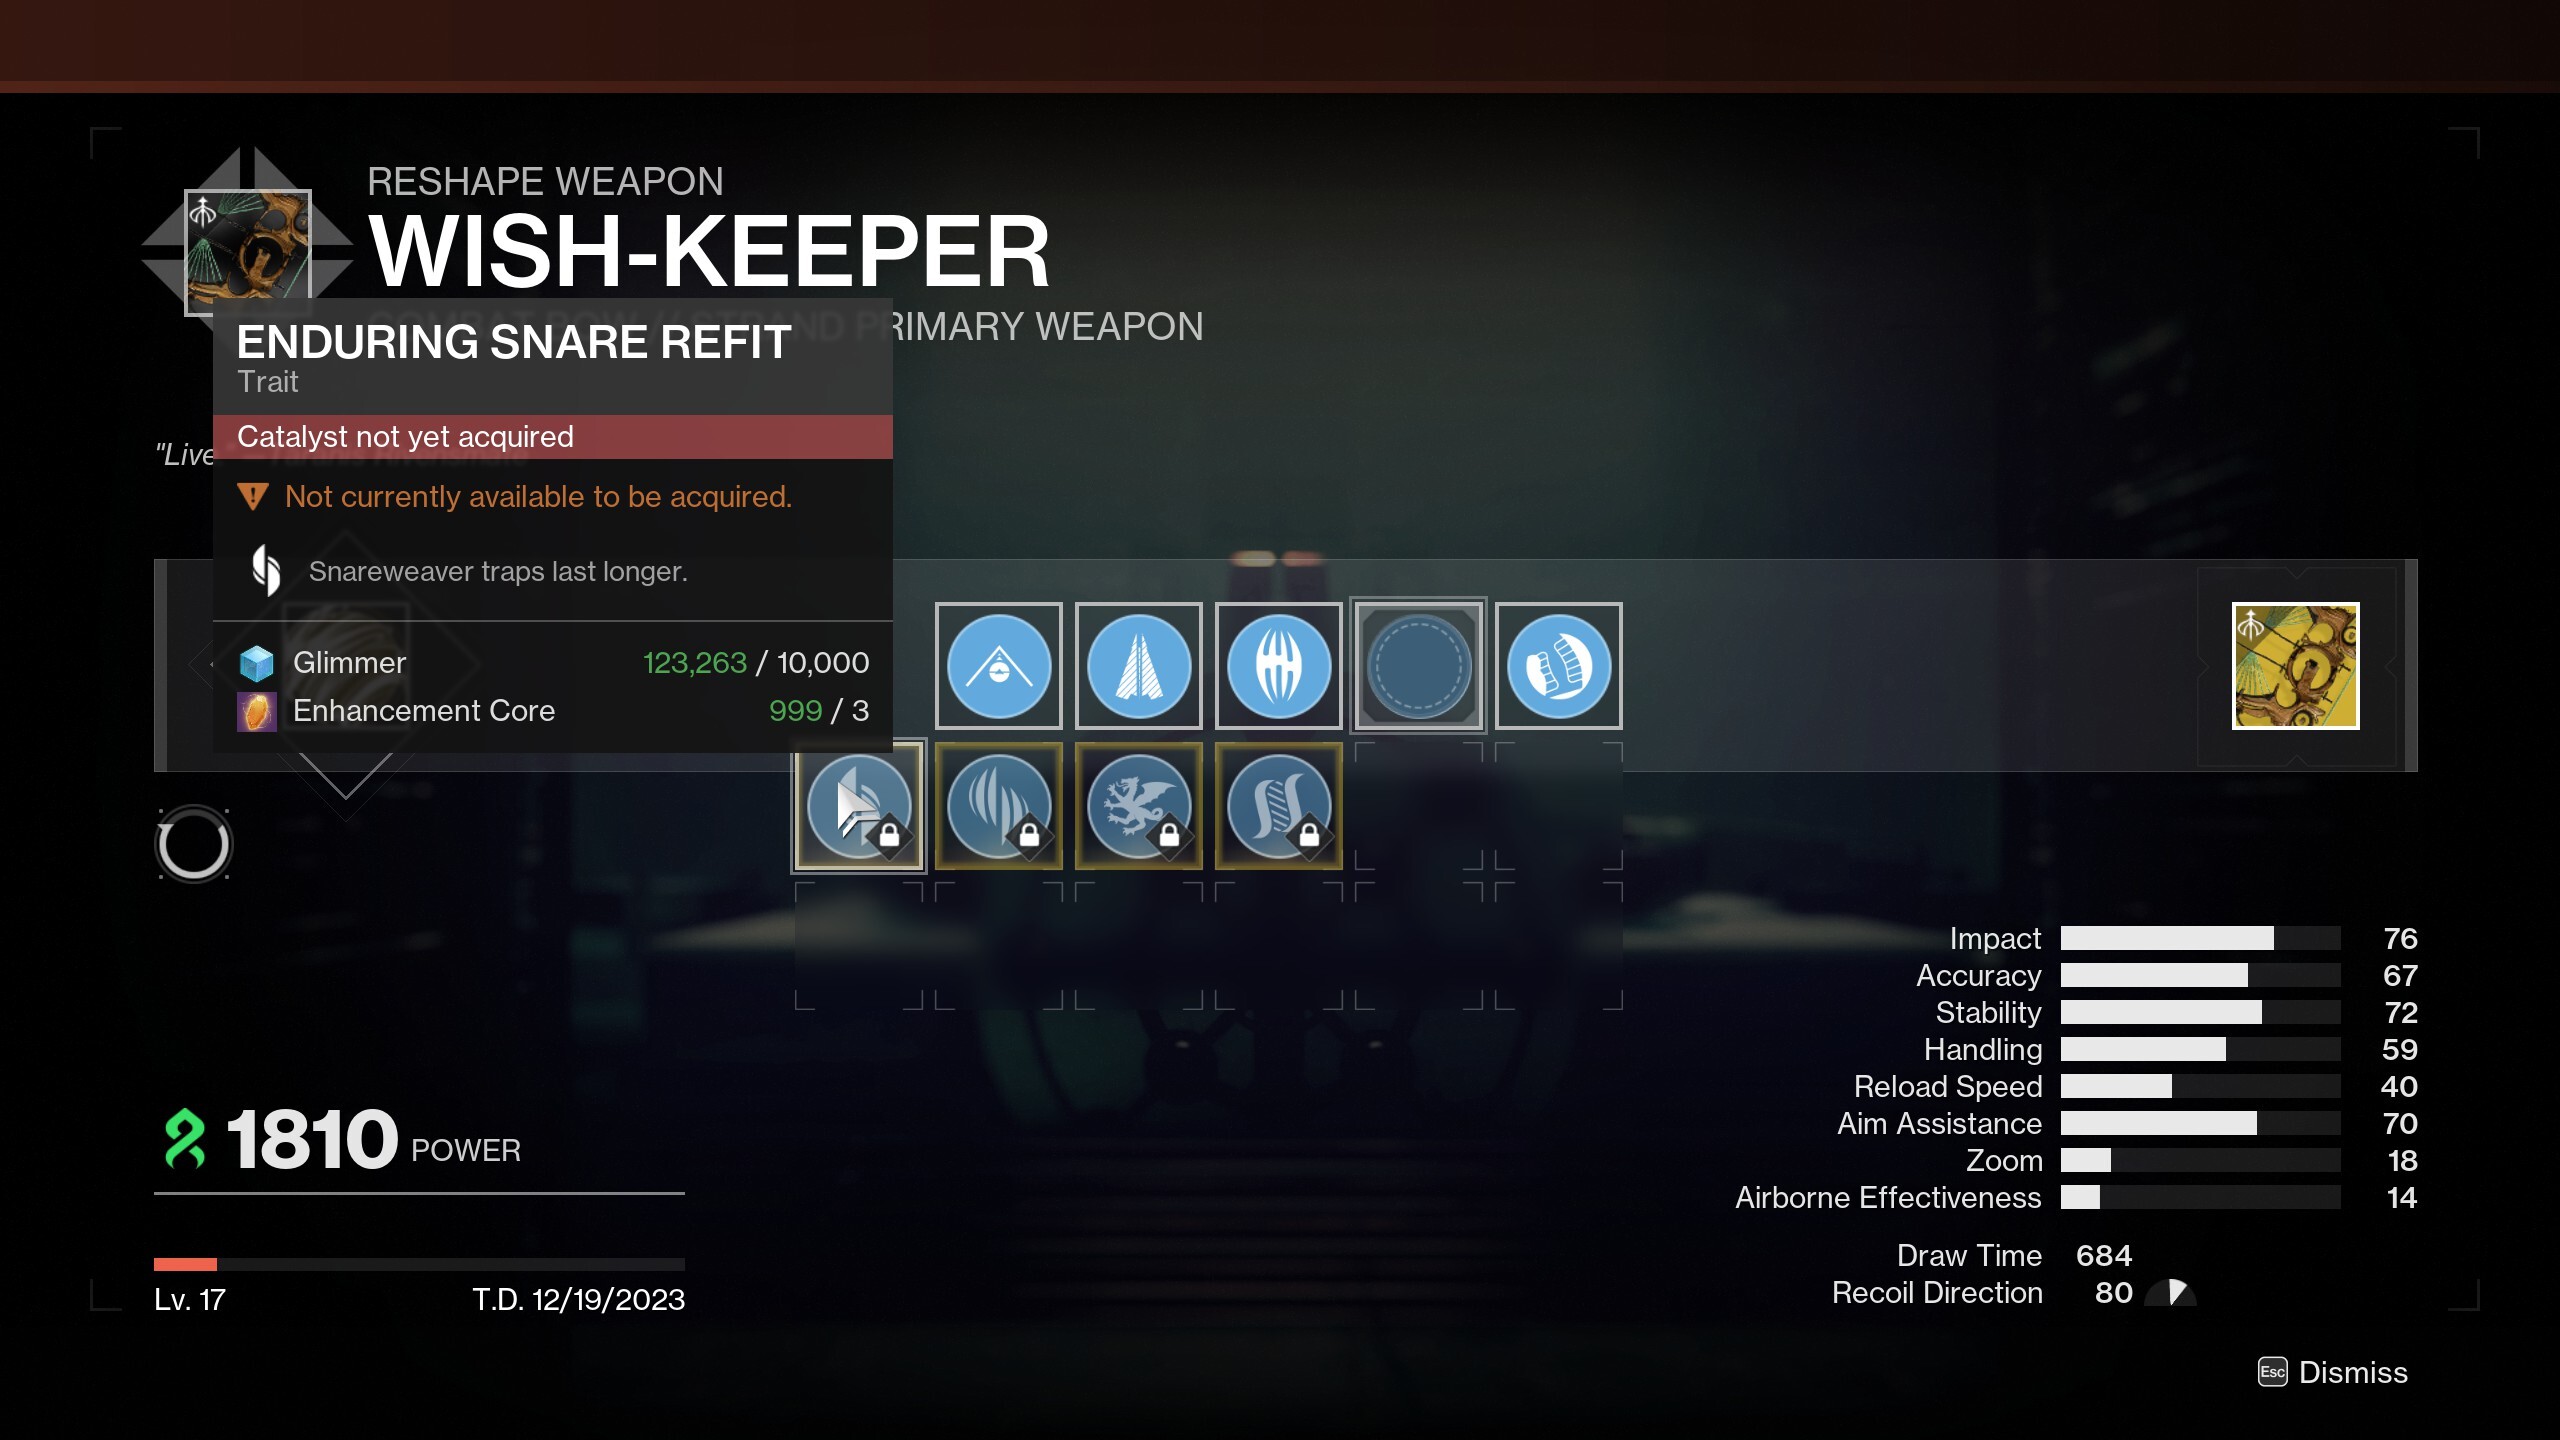
There are four Exotic Catalysts for Wish-Keeper. Fully upgrading it through its four Intrinsic enhancements adds 10 points to its Stability, Handling, and Range stats. You can also add Enduring Snare, which causes your Snareweaver trap to last longer; Multithreaded Snare, which increases the number of enemies that can get caught in your Snareweaver trap; Vorpal Weapon for increased damage against major enemies and Guardians; or Hatchling, which creates Threadlings when you get rapid kills or precision kills with the bow.
To unlock the catalysts, you'll need to revisit Starcrossed four more times, but you'll have to best the Legendary version of the mission. Visit Mara Sov in the HELM and you can pick up a new quest from her each week, which will send you to unlock new secrets from within the Black Garden to earn the catalysts. Here's a rundown of each of those missions as they become available.
Constellation: Tower
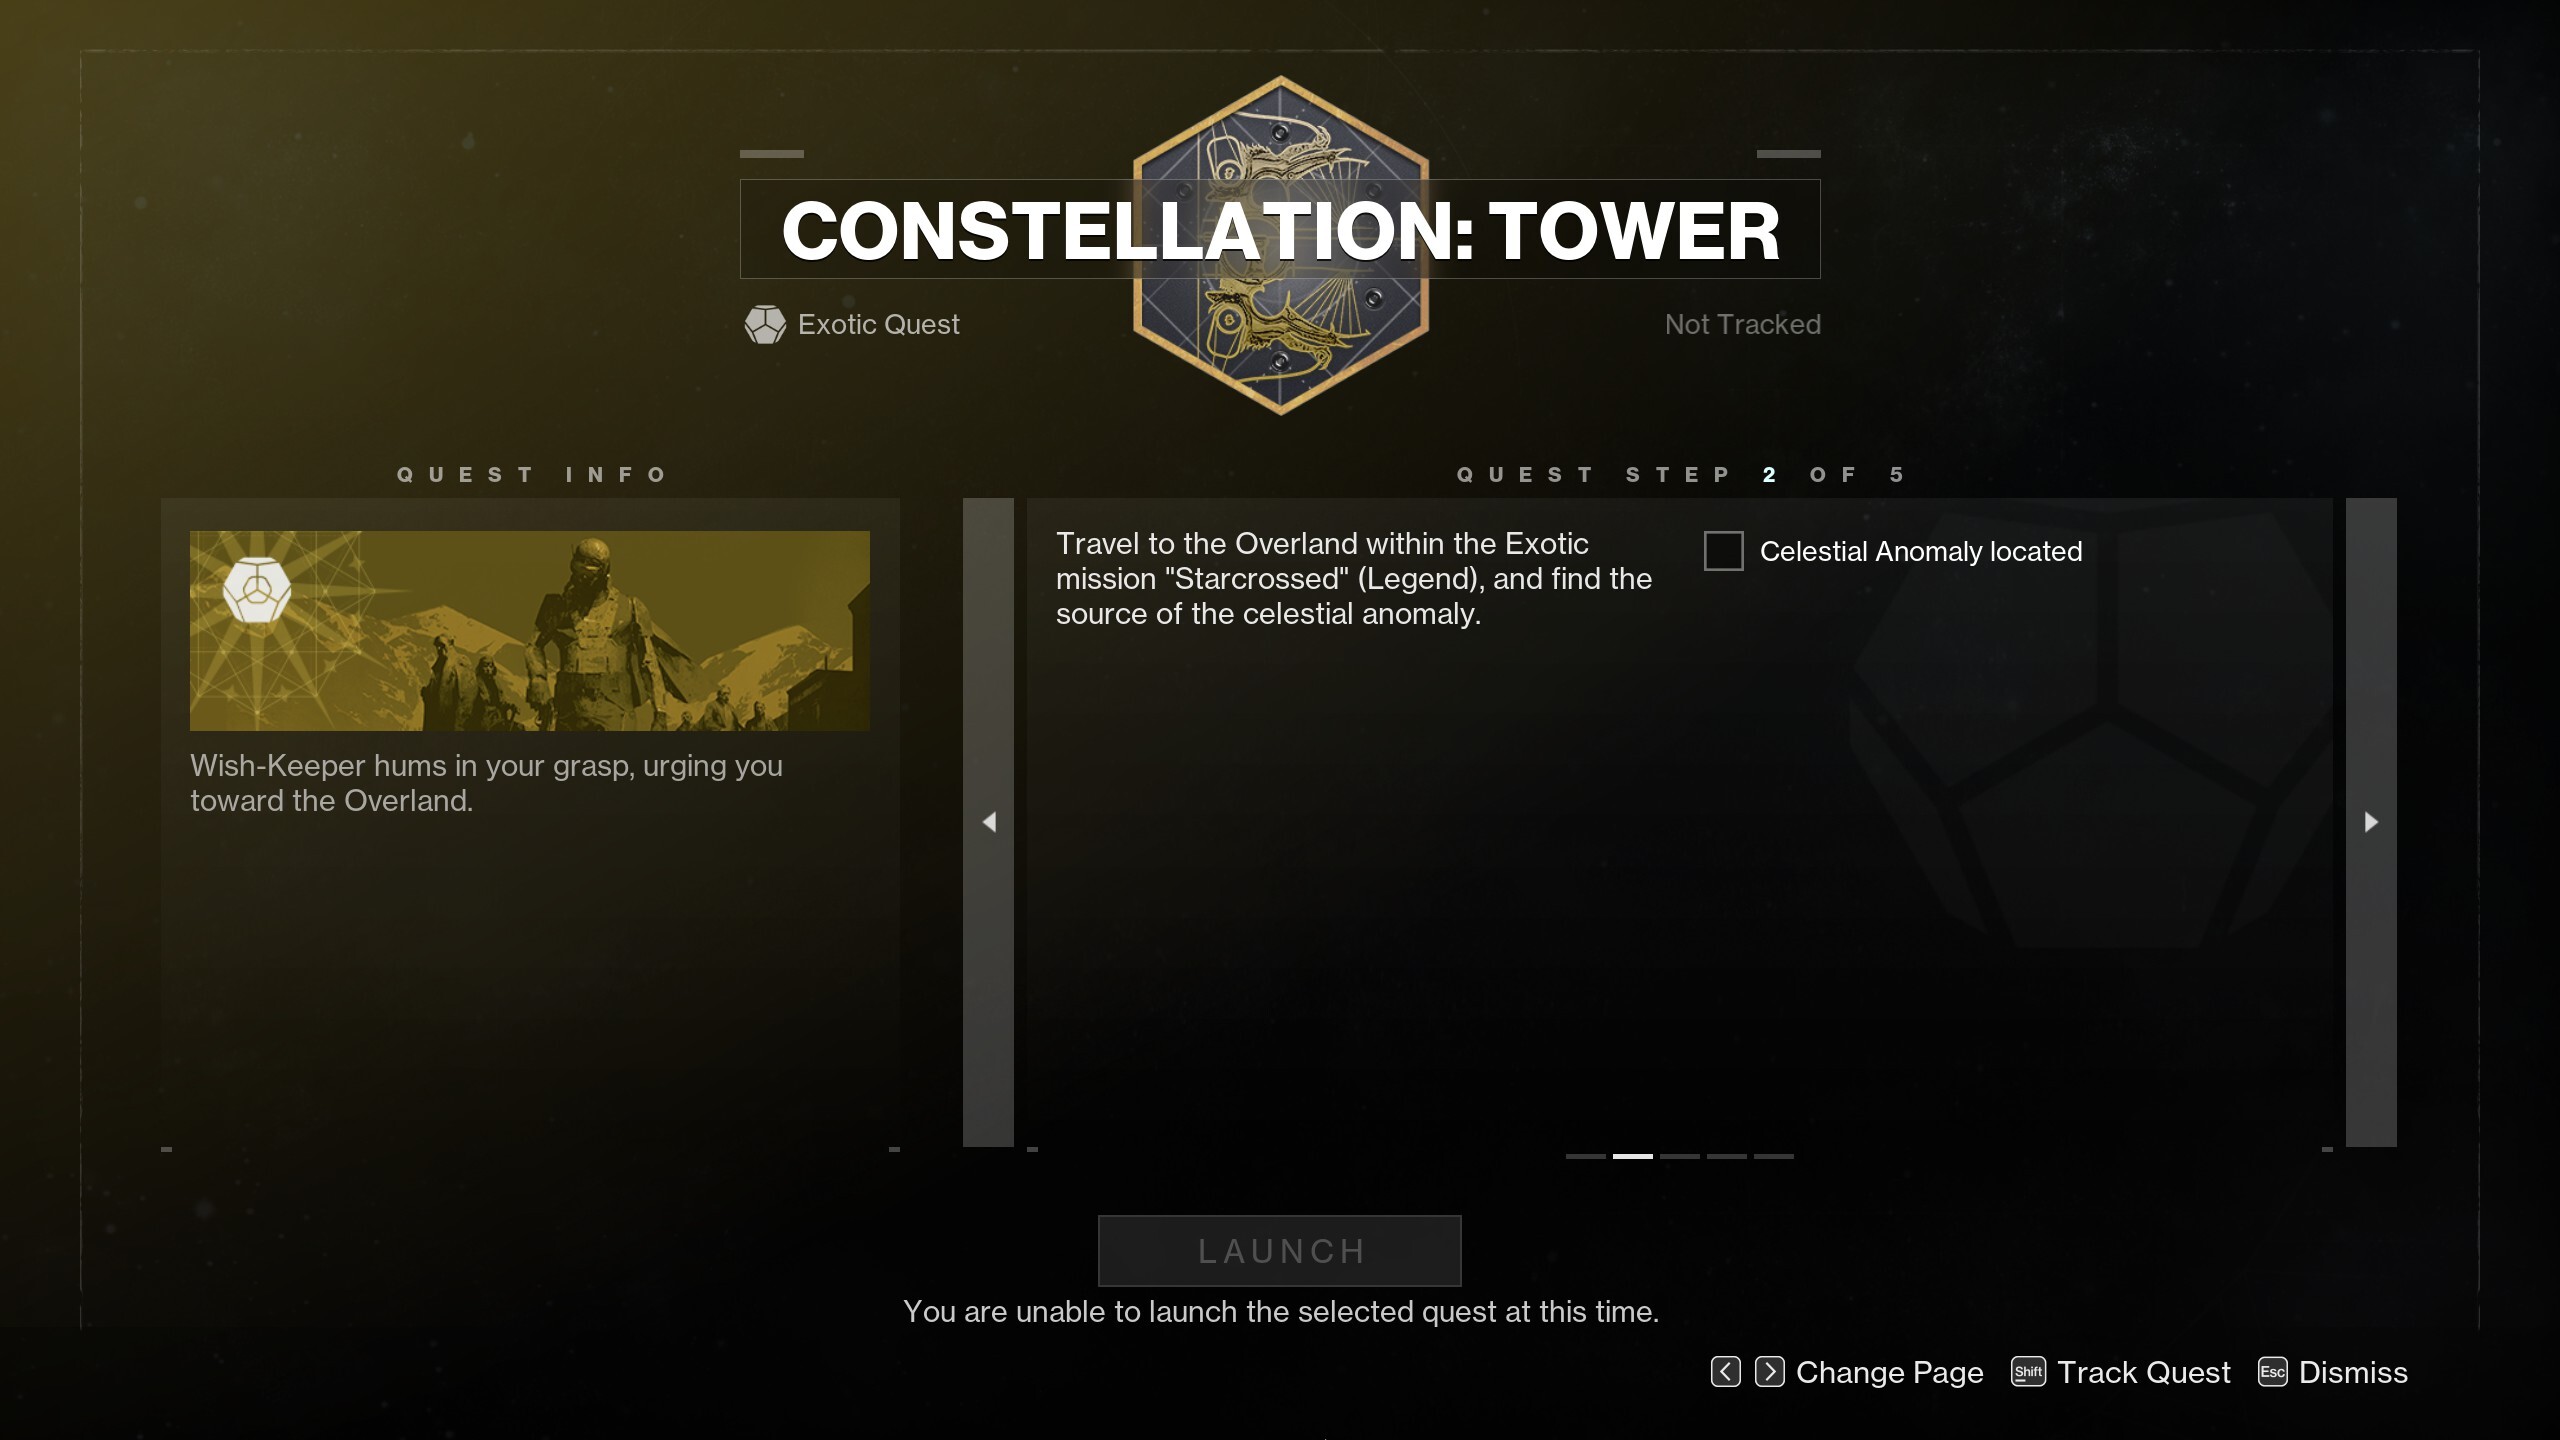
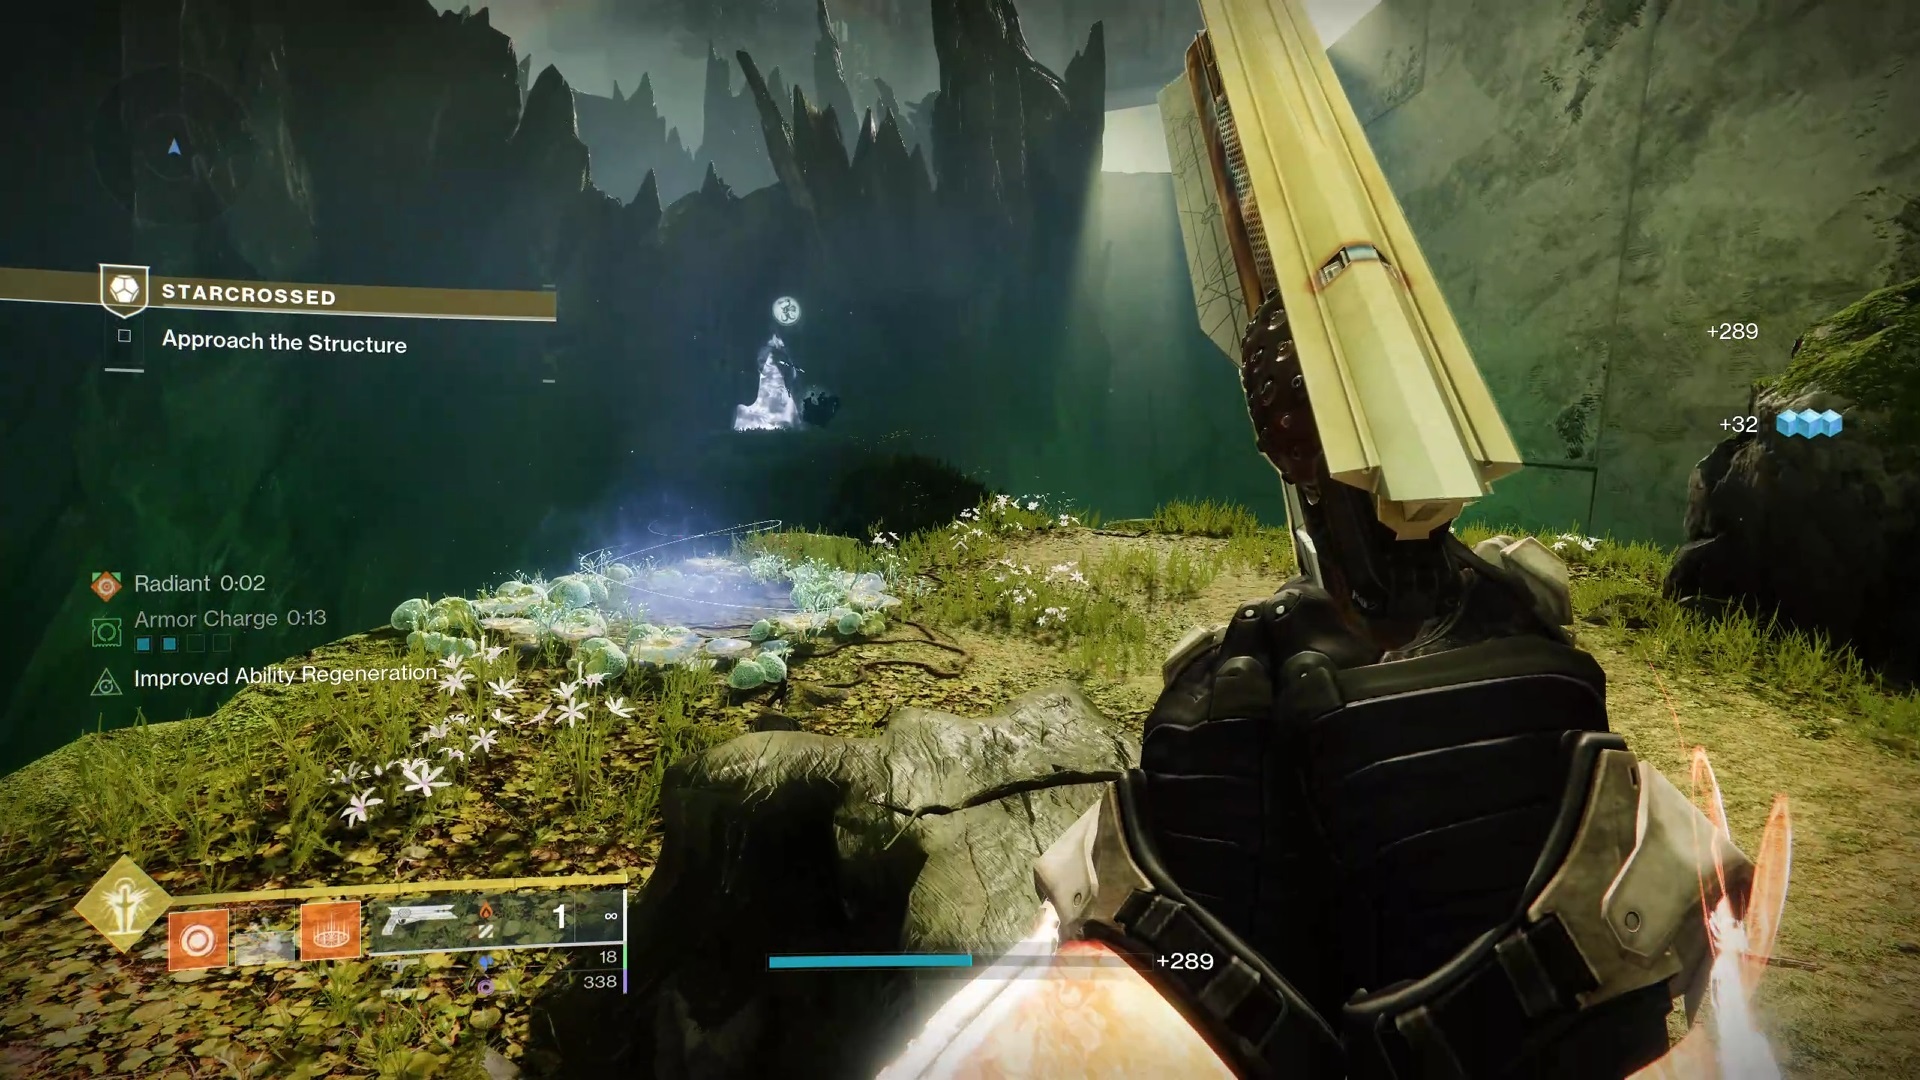
The first of the Catalyst missions for Wish-Keeper sends you heading to the Overland area of the Legendary Starcrossed mission, which is very early in the mission and easy to get to even on your own. You need to uncover a "celestial anomaly" in the Black Garden, which isn't too tough to find if you know where to look. Make sure you bring the Wish-Keeper bow with you, as you'll need to use it throughout the mission.
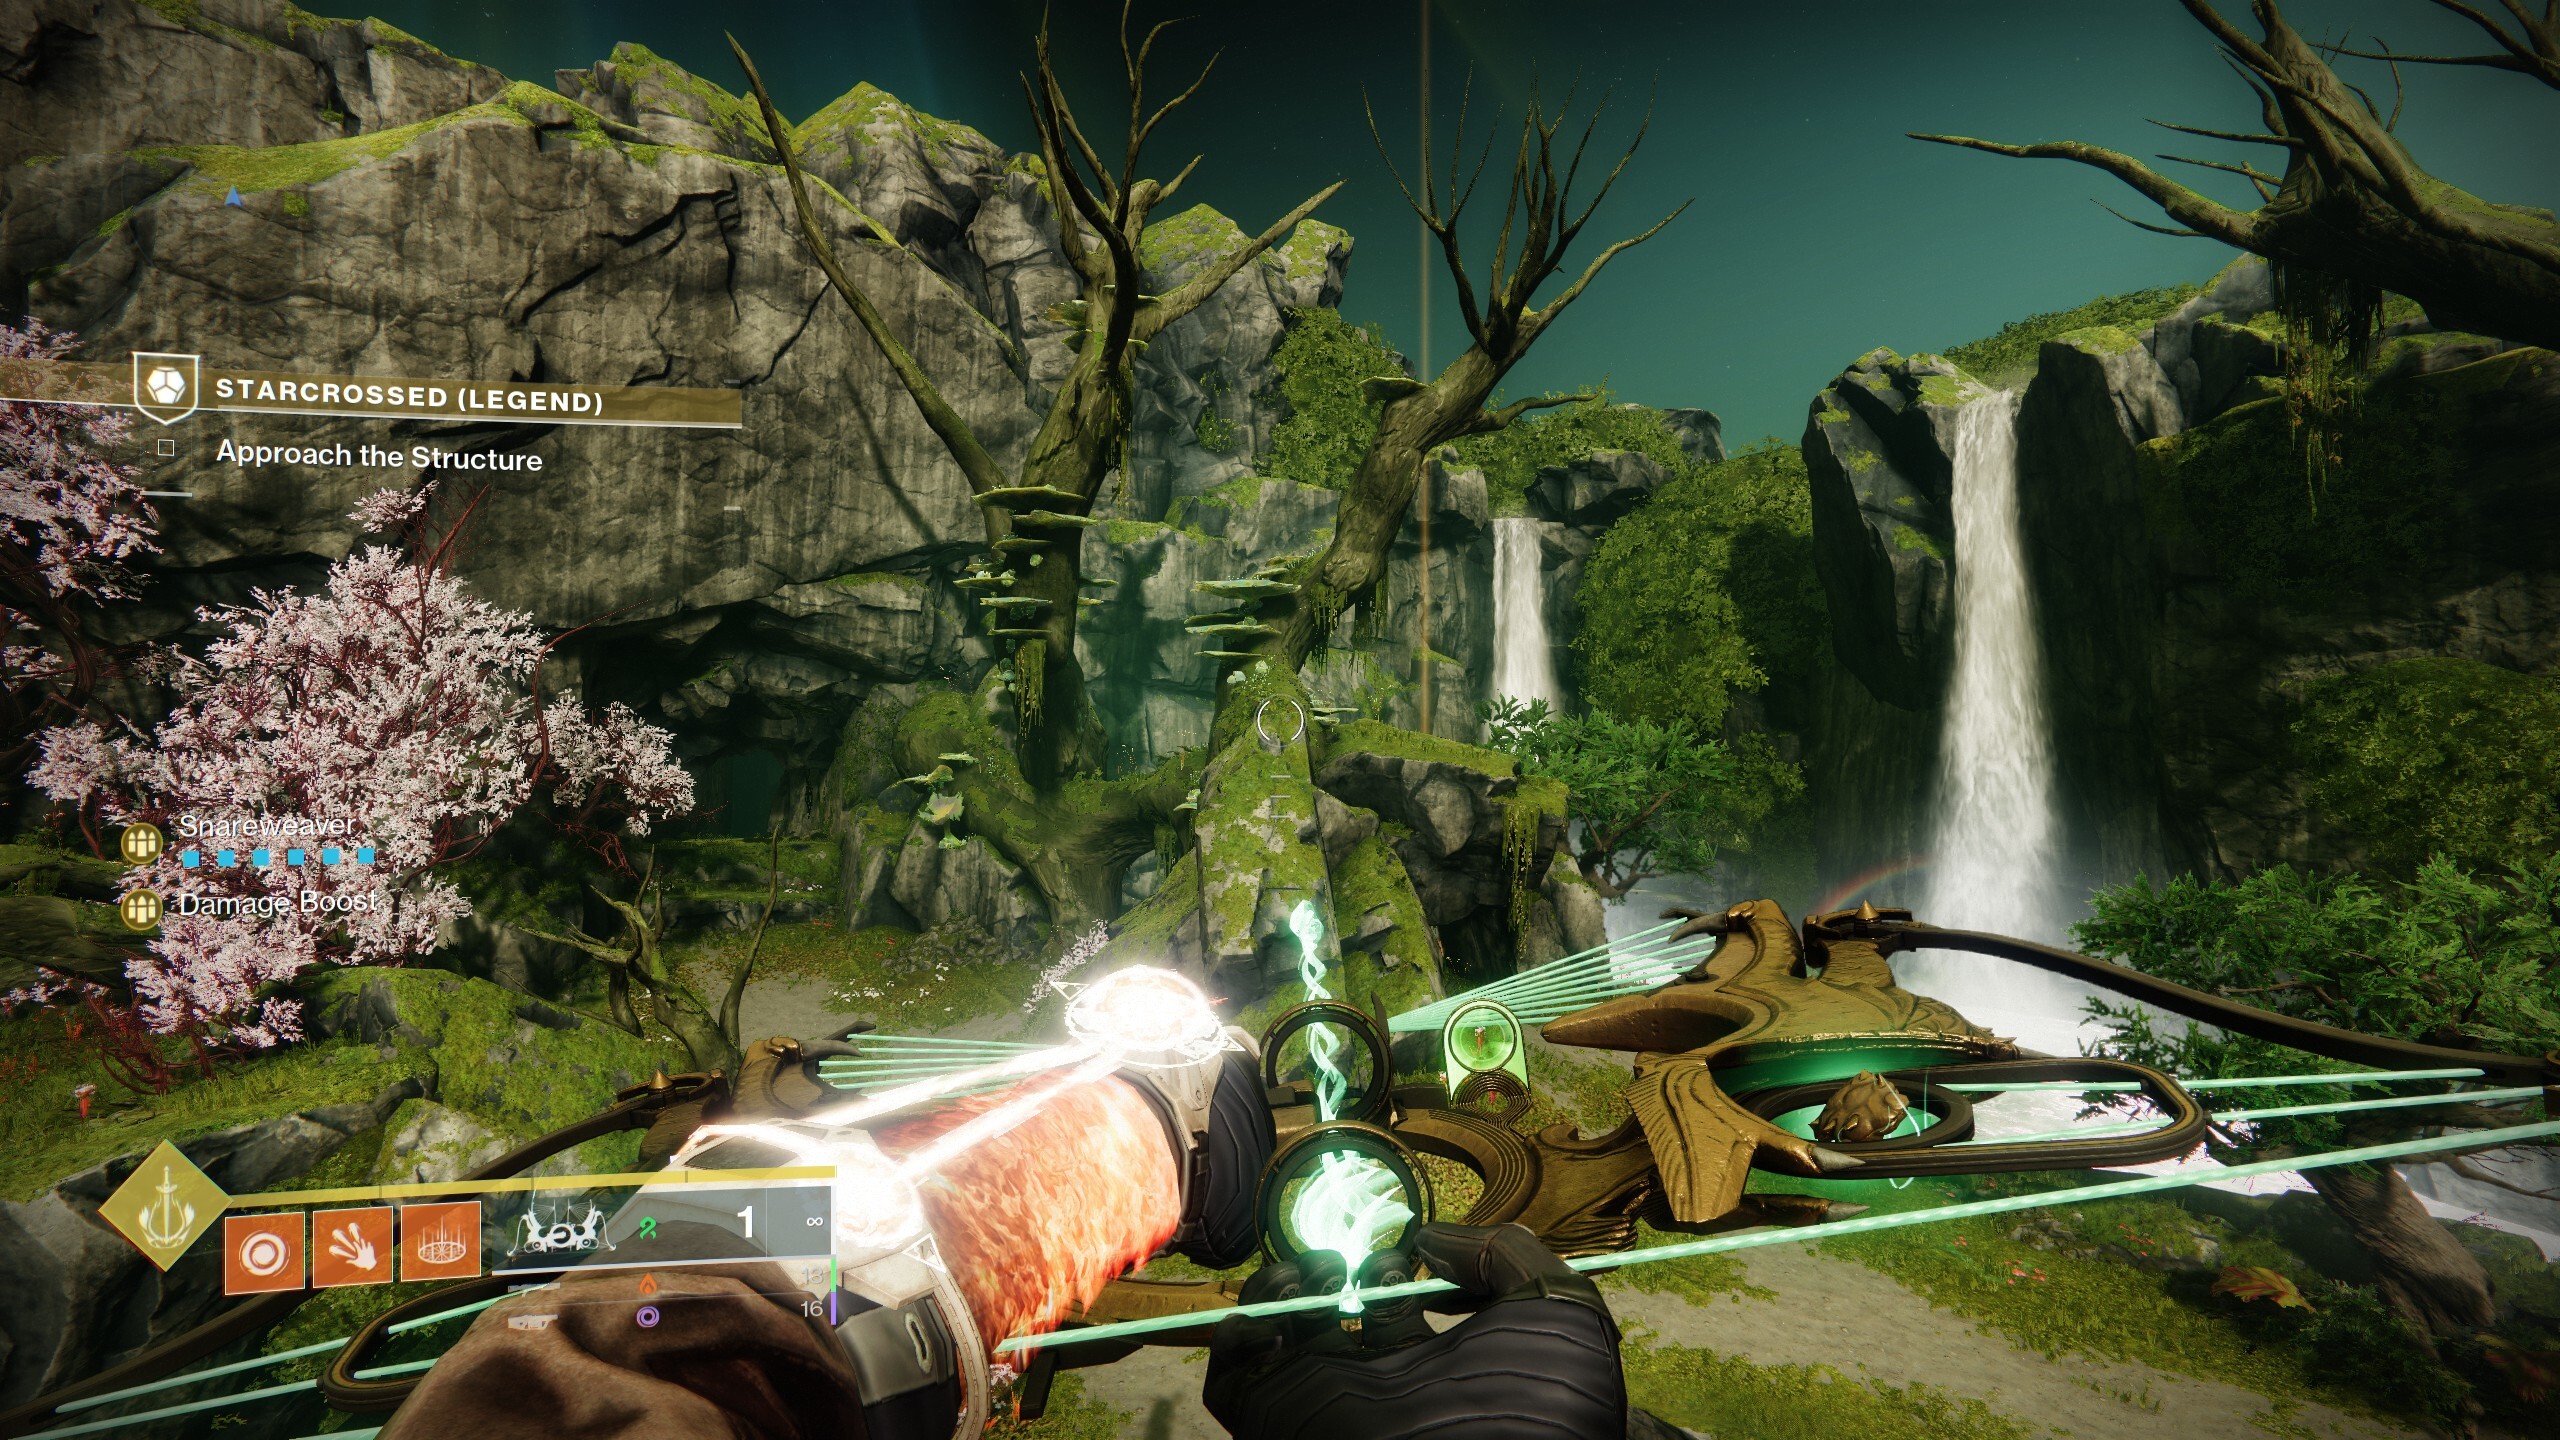
Overland is the first section of the Black Garden you reach as soon as you step out of the big cave where you start the mission, where you need to cross a series of gaps by shooting flowers to create platforms. When you come out and can see the big Vex structure in the distance with rainbows in front of it, you're in the right place.

To find the celestial anomaly, make your way to the right side of the area as you enter it. There's a big ravine here and you should see a rock spire with a waterfall, which creates another rainbow toward the bottom. You need to climb to the top of that spire. If you look to the back of the rocks, you should see a path where you can climb up a series of rock and flower platforms.
When you get to the top, look for the pink cherry blossom-like tree in the middle of the ledge and you'll see a glowing spot. Activate it and look up into the sky to see a glowing star above you. Shoot that star with Wish-Keeper and you'll see more glowing stars appear.

Keep shooting the stars to draw a constellation in the sky above you. When it's complete, you'll unlock a message from Riven.
Secret Chest 2
Your visit to the Legendary version of Starcrossed has also unlocked the ability to reach a new secret chest in the Overland, which is necessary to getting the most out of Wish-Keeper. Head back toward the entrance to this area. You're looking for a pillar of orange light that marks a Dam's Gift buff well. It's immediately next to the entrance door, to the left of the door when it's at your back.
When you find the well, you'll have a stream of water and a waterfall on your left. Behind the waterfall is a hidden cave that's filled with orange mist. With the Dam's Gift buff, you can jump into the cave to find a secret chest. That'll give you the first Snareweaver upgrade for Wish-Keeper, buffing the bow's stats.

To unlock the first Catalyst and gain a new perk for Wish-Keeper, you'll now need to finish the mission and kill the final boss on Legendary difficulty. The Catalyst will come out of one of the two final chests at the end of the mission. Head to the Enclave on Mars to upgrade the bow.
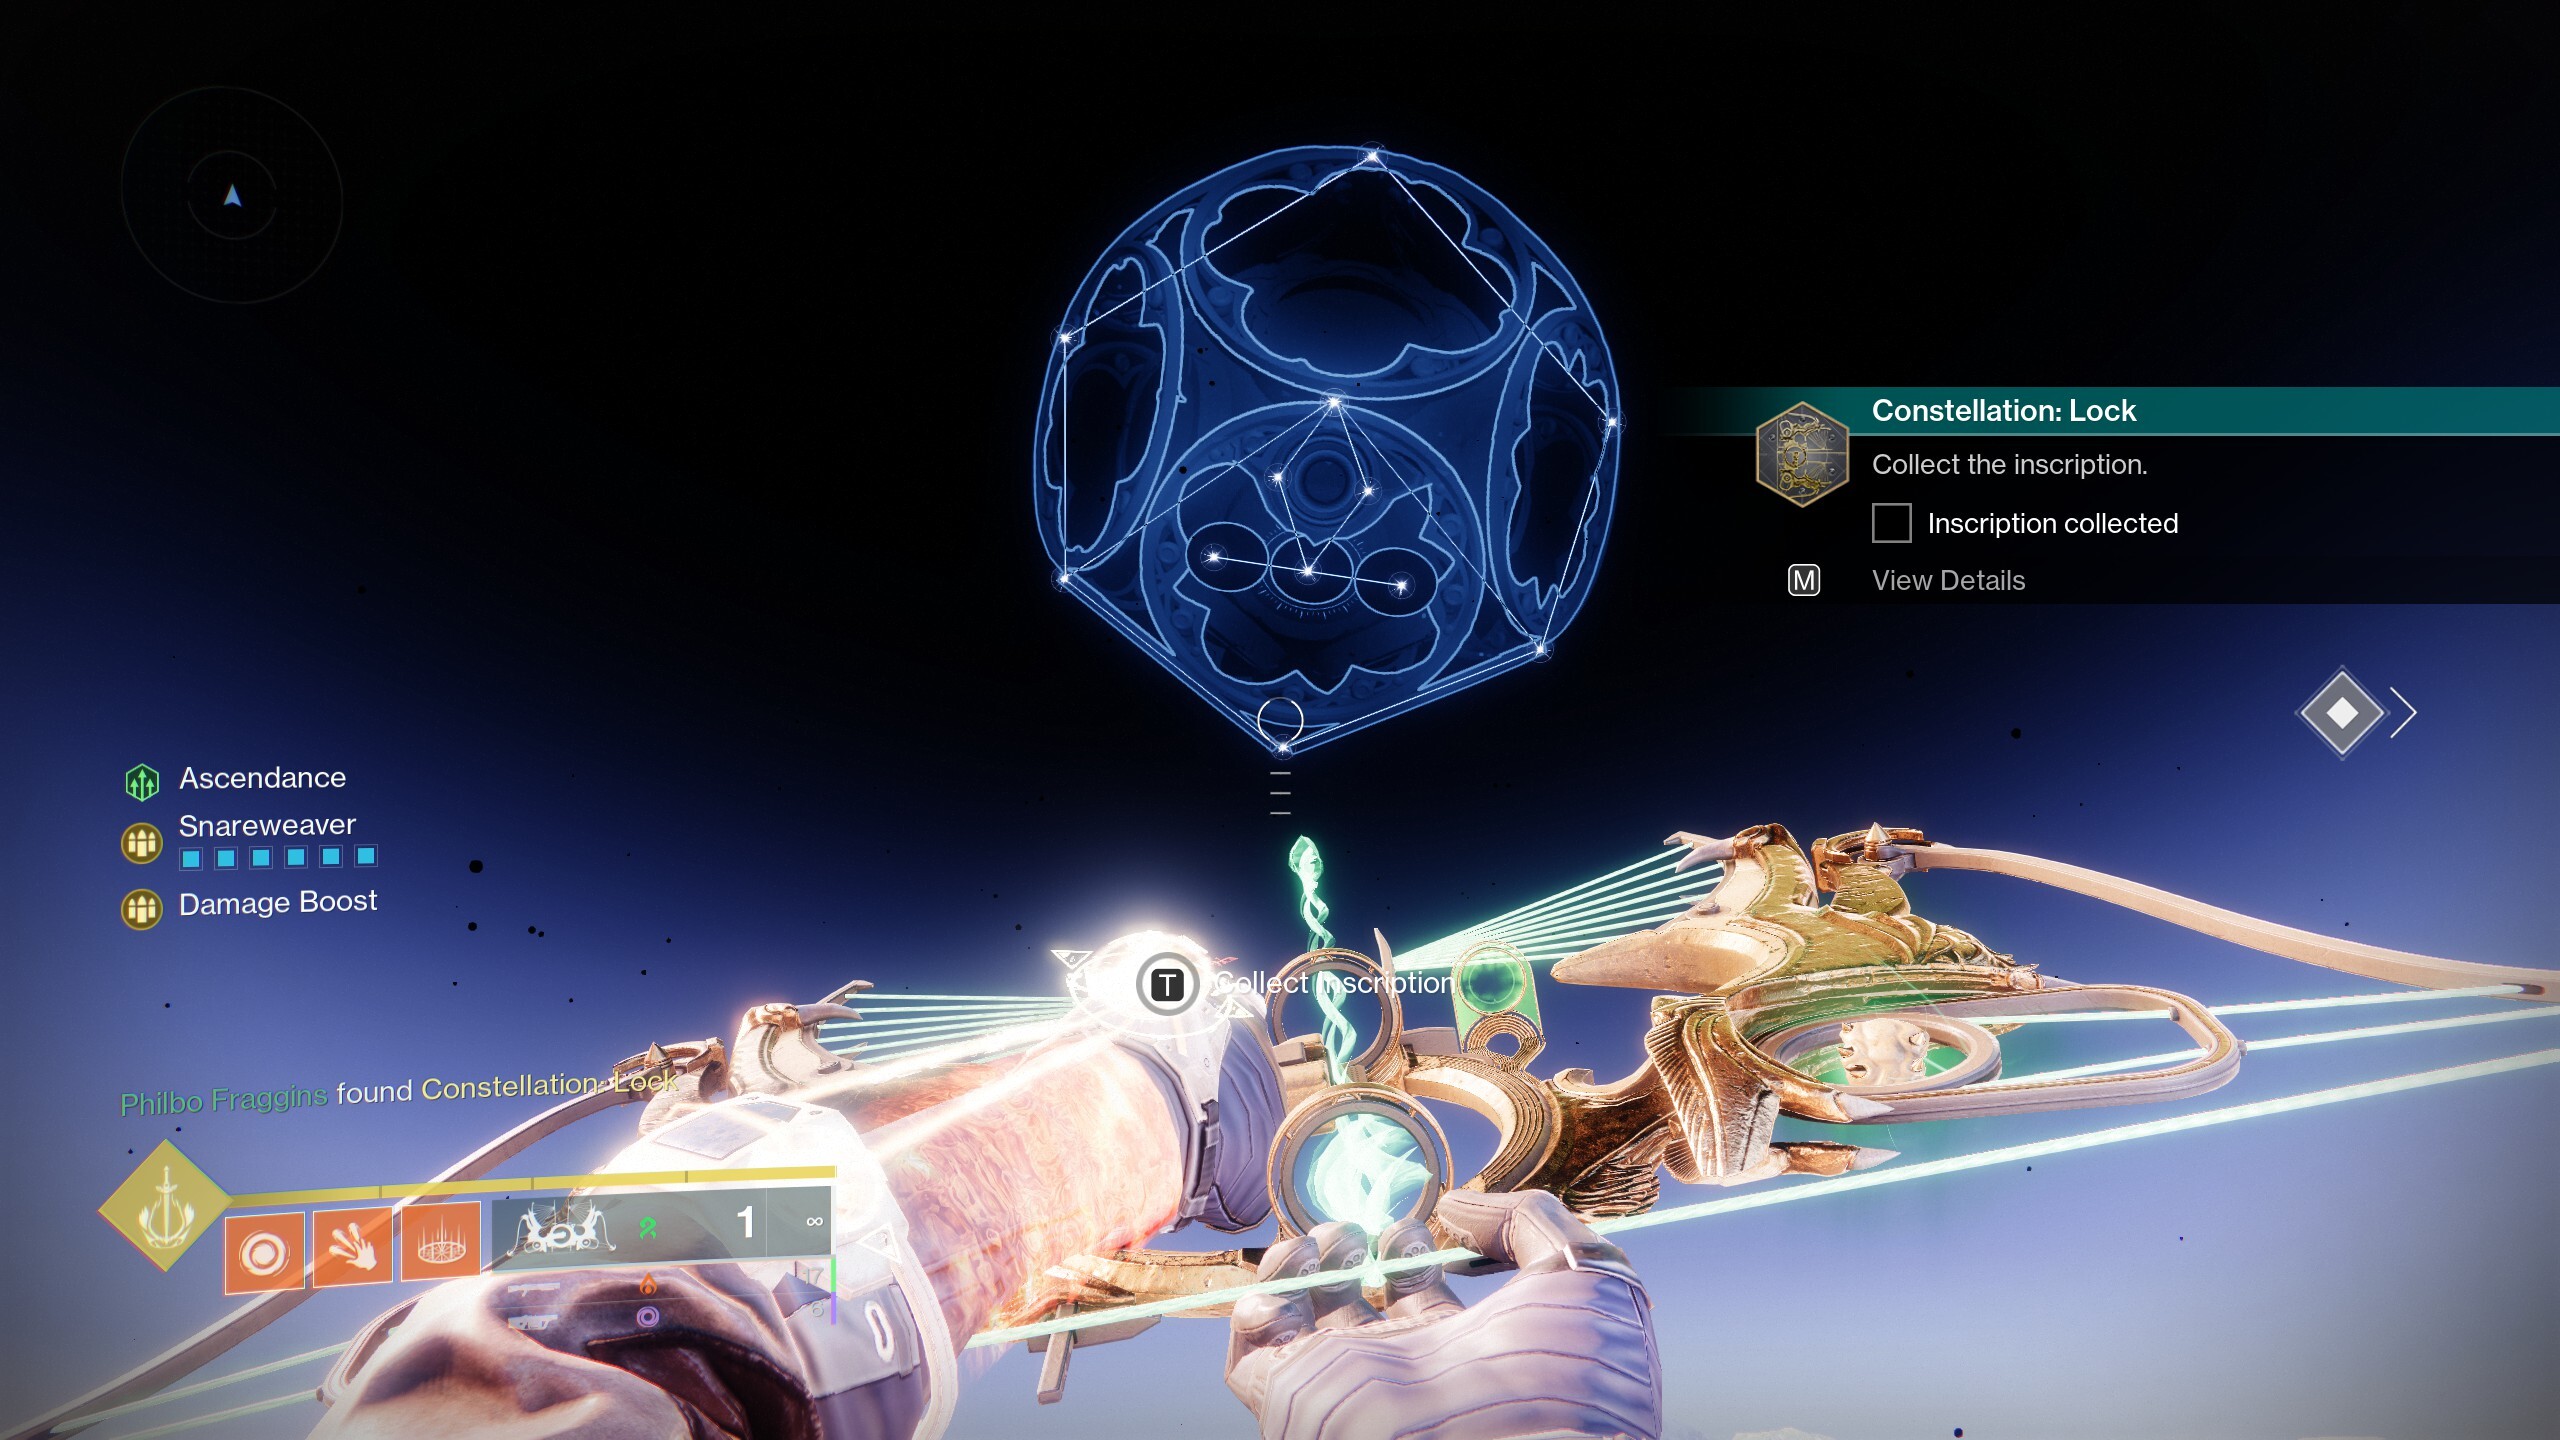
Constellation: Lock
For the second Catalyst, return to Mara Sov in the HELM to get the Constellation: Lock quest. It directs you to take Wish-Keeper to the Dreaming City, so you can knock this step out before you play through the Starcrossed mission on Legendary once again.

Head to the Dreaming City and the quest will update to direct you to the Spine of Keres, where you'll need to search for another constellation message like you found in the Overland. The constellation spot is not immediately obvious, though, and is actually off in a corner of the area that you'll need to walk a bit to get to.
Continue into the Spine of Keres until you reach the big tower with Mara's Oracle Engine. Instead of going into the tower, turn left and follow the path around the back of the tower, across a series of bridges and past a bunch of Taken enemies. If you look into the distance, you should see a glowing white object in the distance, marking the Celestial Anomaly on top of a rock tower.
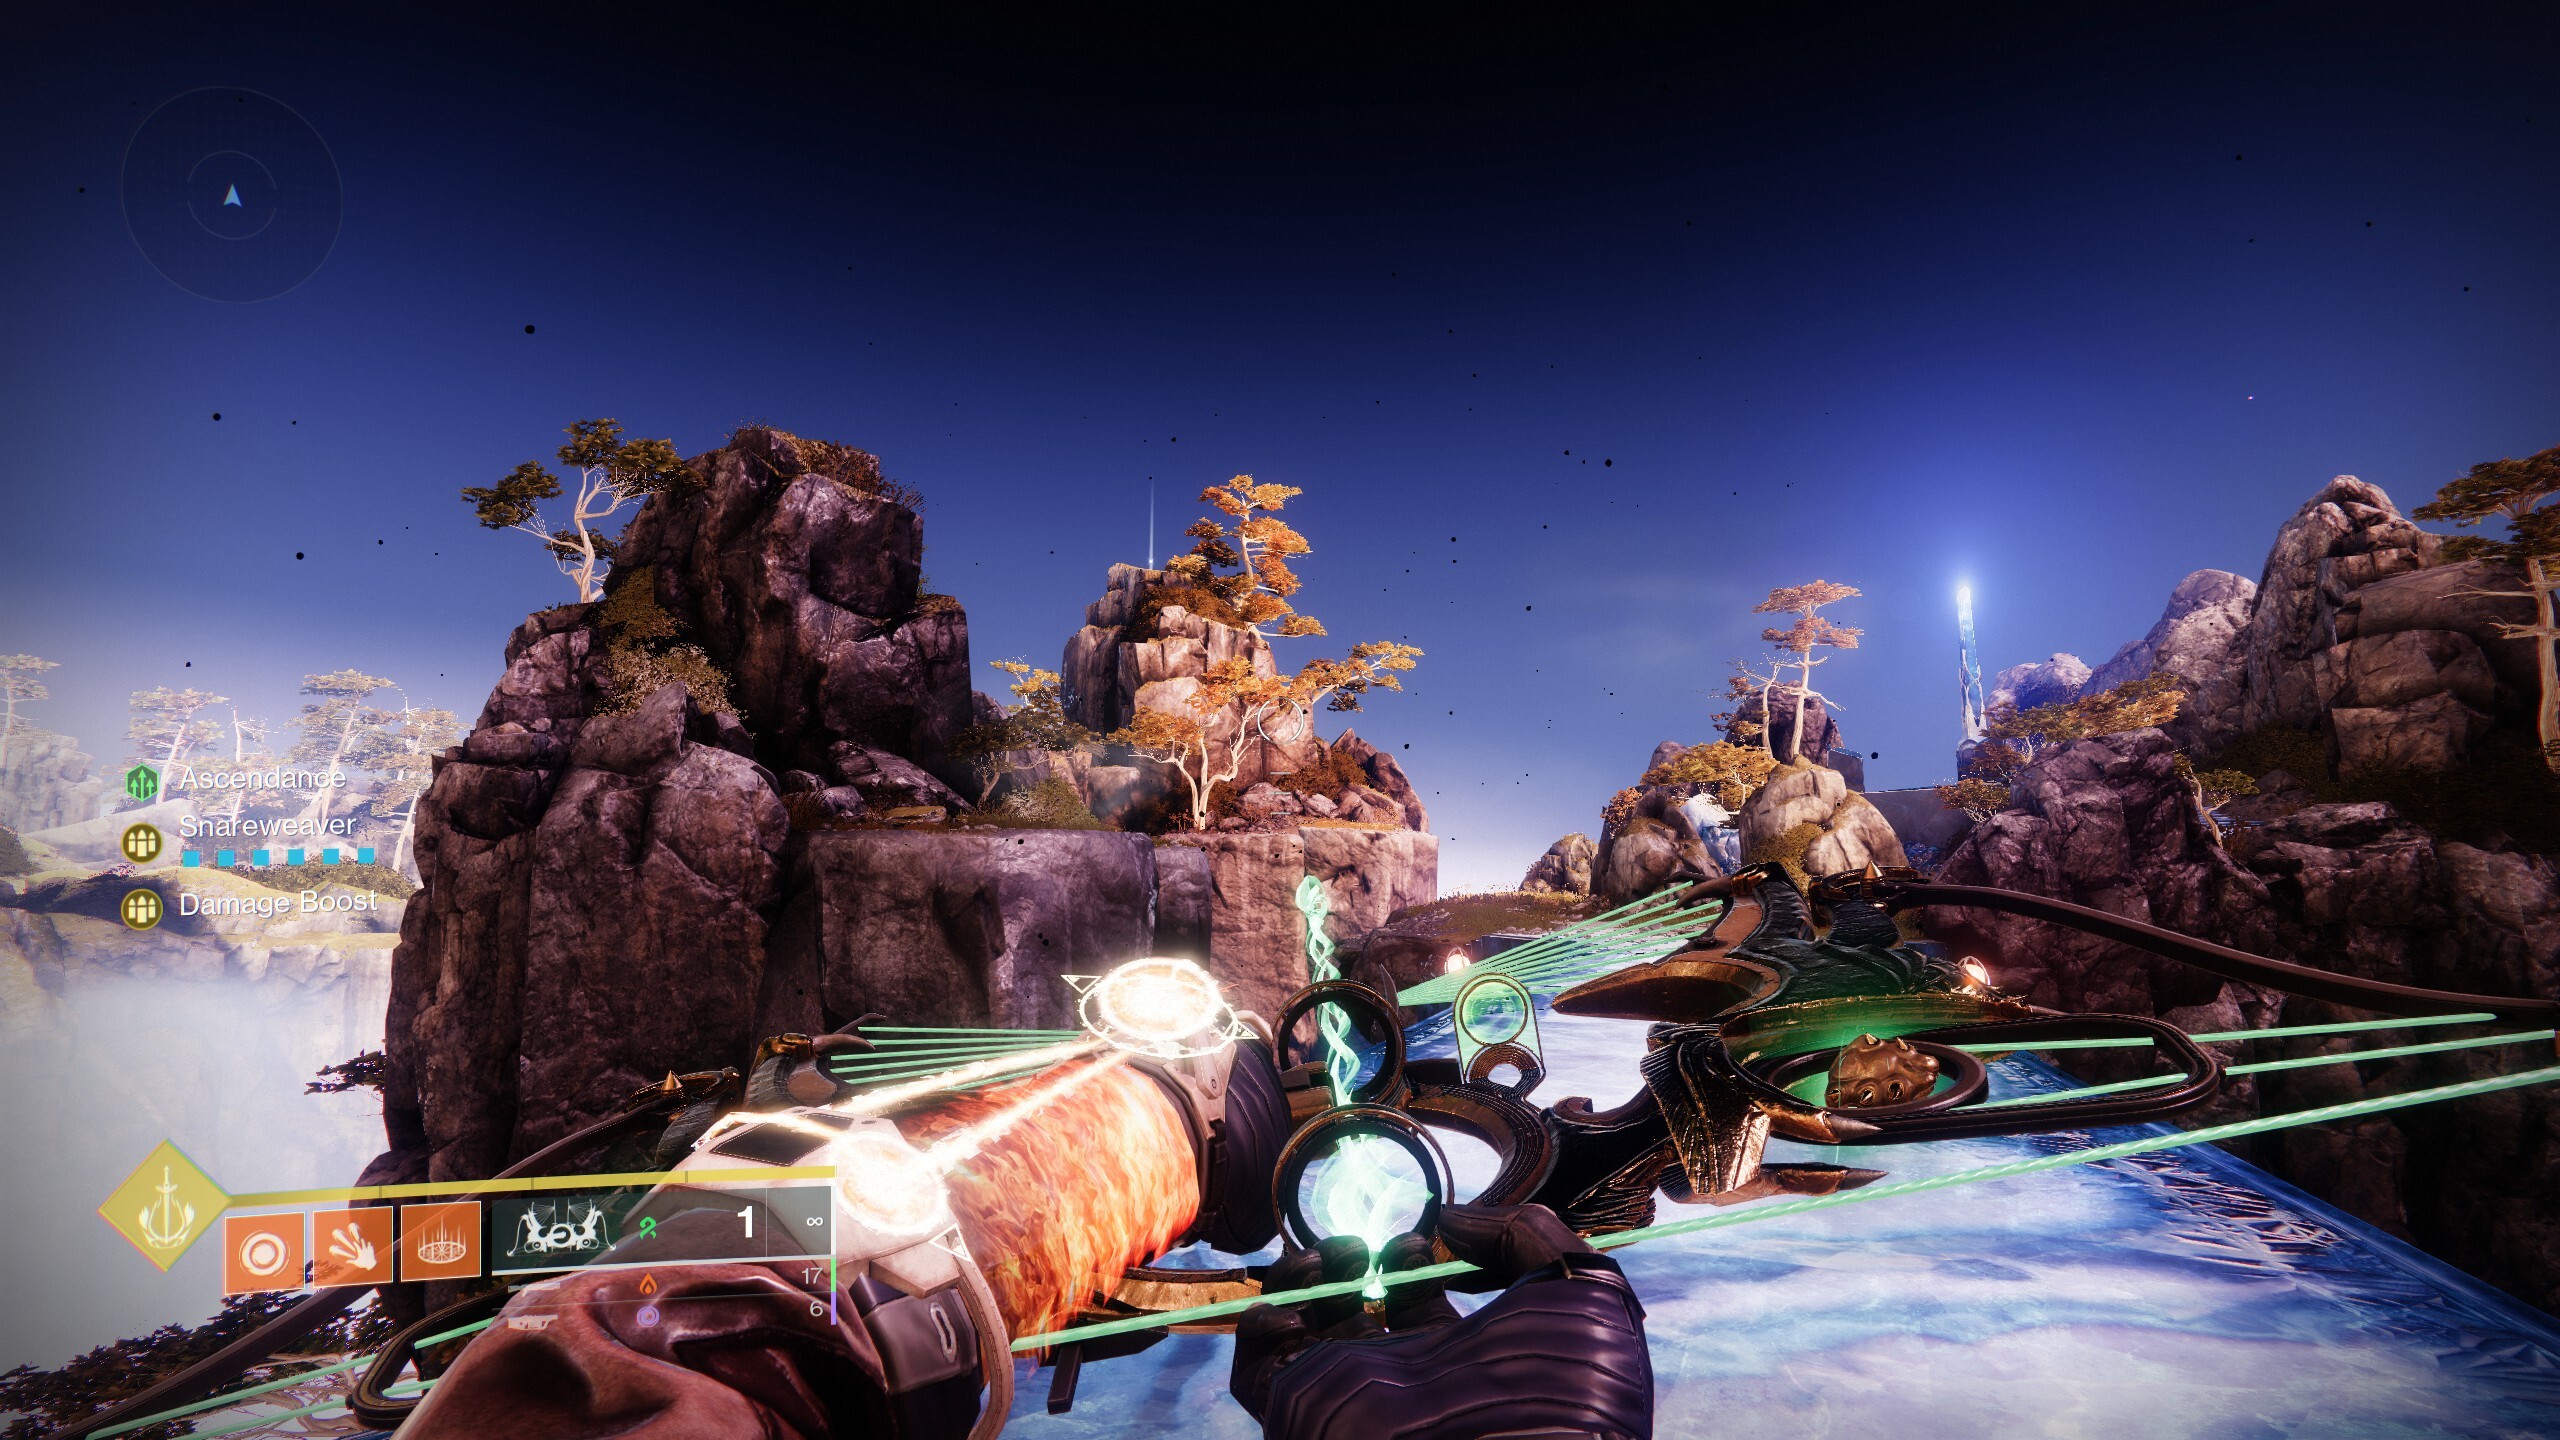
Climb up to that spot and activate it to create another constellation above you. Shoot the stars with Wish-Keeper to activate another message from Riven.
With that done, you need to complete the Legendary version of Starcrossed again to unlock the catalyst.
Got a news tip or want to contact us directly? Email news@gamespot.com
Join the conversation