Command & Conquer 3: Tiberium Wars Walkthrough
Kane lives! And he's not just fighting against GDI this time. GameSpot's Walkthrough will show you how to fight off the alien aggressors in Command & Conquer 3.
Design: Randall Montanari
Introduction
Although it's been over seven years since the last release of a Command & Conquer real-time strategy game set in the Tiberium universe, the announcement of Command & Conquer: Tiberium Wars was of great interest to PC gamers, who have been waiting that long to find out precisely what's been happening to Kane and GDI in the years since the last Tiberium War. Now that it's finally arrived, we're all about to find out...
Like the previous games in the series, Tiberium Wars takes place on an earth that's been seeded with a substance known as Tiberium, which fell to earth in a meteor collision in the 1990's. Tiberium is a radioactive, toxic substance that leeches the mineral contents of the earth below it to seep to the surface. Thus, although it kills unprotected humans, it can be harvested by robotics and converted into energy or building supplies. However, the fact that it inexorably spreads across any land surface that it encounters means that its presence on Earth is something of a plague; it has been slowly spreading across the Earth since it first arrived, and by the time of Tiberium Wars, 2047, it has rendered 20% of the Earth's surface completely uninhabitable, with another 50% being dangerously infested by Tiberium.
Into this volatile situation is inserted a growing conflict between the forces of the Global Defense Initiative, who wants to somehow stop the spread of Tiberium in an effort to make Earth inhabitable again, and the Brotherhood of Nod, which believes that the arrival of Tiberium is a message from the gods and the form in which mankind's ultimate "ascension" will be accomplished. While these forces appear to have existing in an uncomfortable stasis for the past decade or so, the reappearance of Kane, the oft-dead leader of Nod, has thrown the balance out of sync, and now Nod is intent on reasserting their claim on Tiberium and Earth.
GameSpot's Game Guide to Command & Conquer 3: Tiberium Wars has a complete walkthrough for the game's campaign missions, as well as some general tips to help you get into the game. Enjoy!
General Tips
Smash Them Bridges
Plenty of the maps in CNC3 feature bridges. These rugged devices will let you move your units past otherwise impassable chasms, but they can also allow your enemy's forces to attack you, as well.
It can sometimes be helpful to knock out a bridge that's leading into your base, assuming you want to turtle up, build your defenses, and scale the research tree, giving you a position of strength from which to attack. Doing so cannot be done by just attacking the bridge outright, though, since it's not considered hostile to you. If you want to destroy a bridge section, you can do so by selecting an offensive unit, holding down the CTRL key, then right-clicking on one of the links in the bridge. They can take a bit of time to be fully destroyed, however, depending on the type of unit that attacks them.

Relatively few maps in the campaign, at least, will let you totally defend yourself just by smashing a bridge; there will often be another, more circuitous route that the enemy forces will be able to use. But still, smashing the bridges can sometimes let you divert a two-pronged attack into a single channel and thus let you more easily defend yourself.
Bridges can be repaired by the slow-moving engineer units each side can make, whether they're called Engineers, Saboteurs, or Assimilators. Still, it'll take time for an enemy to get an engineer across the battlefield, whereas you will be able to march one over from your infantry factory in minimal time when you want to repair the bridge and move out.
Hold Your Ground For Automatic Repairs
Each unit will have four levels of aggression you can set, but most of the time you'll want to be toggling between Guard stance, the default, and Hold Ground. These are basically identical, but units on Guard setting will move a bit when they spot enemy units and fire on them, then return to their previous position when the enemies are dead.
Hold Ground can be useful to help you defend a base, however. Every faction here has a building that constructs vehicles. These buildings can also repair vehicles that are stationed nearby. If you build one of these buildings at the front of your base, near where your enemies are likely to attack, then you can park some of your advanced units near the building in Hold Ground stance. That way, they won't move away from the building, and as soon as they take damage they'll start getting repaired. The repairs are fairly slow, and the building will only repair one unit at a time, so your forces can still be overrun if the enemy attacks with a large enough force, but for taking out small patrols, this should help quite a bit.
Note that this can also work for air units in some instances. If you hover a Venom Patrol Craft above a Nod air tower, or a Destroyer above a Scrin gravity stabilizer, they'll automatically be repaired, as well, but it can sometimes be difficult positioning them precisely enough to make the building activate for repairs.
Find The Crates!
There are plenty of scattered supply crates around many of the maps in CNC3. While in previous games, some of these crates would have neutral or even harmful effects when opened, all of the crates in CNC3 have positive effects. To open a crate, simply move a unit across it.
Crates here have three effects. The first is a healing crate, which completely heals all units in a small radius around it when opened. It doesn't appear capable of actually bringing fallen members of an infantry squad back to life, however. The second is a cash crate, which simply adds a set amount of cash (usually a thousand bucks) to the purse of whoever picks it up. Lastly, veterancy crates will increase the veterancy of all nearby units (in a very small radius) by one level when opened.
Note that you can't tell these crates apart just by looking at them, as far as we can tell, but you can get a readout on the contents by moving your mouse over the crate and holding it there for a few seconds. Eventually a readout will pop up detailing what's inside, allowing you to decide whether or not you want to pick it up. Veterancy crates can be activated at any time, and are especially helpful for expensive units or units that are about to become heroic, while cash crates should only be picked up if you have enough room in your cash cap to get the whole stash. Healing crates should likewise only be picked up by units that have been damaged.
Factions
You'll probably discover a lot of the nuances of the different factions in Tiberium Wars as you play the game, but here's a basic rundown on the differences between the three factions.
GDI
GDI is the baseline faction here, without any stunning abilities or notable weaknesses. Its units are powerful, but slow, making it difficult for them to react to new threats, but when leading a charge into an enemy base, they're tough to stop.
Infantry: Generally speaking, GDI's units are a bit more expensive than those of other factions, or have other drawbacks that make them difficult to use. Their infantry is arguably the best in the game, with an excellent commando and superb, if expensive, Zone Troopers to help guard against both infantry and vehicular attacks. Their normal riflemen squads are also excellent, especially since they have the Dig In power, which lets them create bunkers on the battlefield, for free, which protect them from the assaults of most other infantry and vehicles. Handy for setting up defensive positions if you know the direction from which enemies will arrive. Keep in mind that you can make a bunker, then tell the riflemen to get out and make another one, as often as you like. That will let you pop in other infantry, such as rocket squads or snipers, into the bunkers that get left behind.
Vehicles: So far as vehicles go, the GDI are among the most powerful factions in the game, with an excellent (although, again, expensive) baseline tank in the Predator, and a very nice Mammoth tank that will be a great finishing weapon when you head into an enemy base. The Mammoth is slow, but is quite powerful, especially when upgraded with a railgun, and is the only oversized ground unit in the game (counting the Juggernaut, Tripod, and Avatar as well) that can defend itself against air units, since it has rocket pods. (The Avatar can upgrade itself with rockets as well, but this is a laborious procedure in the best of times, and expensive to boot.)
The Juggernaut unit has perhaps the farthest range of any ground-based unit in the game, and can take a beating, but can be easily destroyed by opposing commandos and is only at his best when paired with a sniper team that can get close to the enemy and spot for it.
Aerial Units: GDI is somewhat weak aerially, with very fragile air bases support either Orca gunships or Firehawk jets. Each air base will have four slots for airplanes, each of which can either house an Orca or a Firehawk, but not both. The Orcas are decent at disrupting enemy advances, but will be quickly shot down by enemy forces if they get caught by an anti-air turret or ground unit. They also suffer from limited ammunition, which forces them to often return to the airbase to be resupplied.
Firehawks are a bit better off, as they're able to switch between air-to-air missiles and surface bombs when docked at an airbase. They're a bit more vulnerable than, say, the Nod Vertigo is, since they don’t have any kind of stealth capabilities. When used as a bomber, they can also sometimes have low survivability, thanks to the fact that they drop two bombs. Sometimes, if the first ship in a group destroys their target, the other ships will whirl around looking for other targets to bomb, which can lead to them getting chewed up by defenses. Still, don't discount them. The air-to-air missiles are especially useful against the Scrin.
Structures: Although we can't justify this empirically, it feels like GDI's base defenses are slightly weaker than those of the other races. They often seem to focus on rate of fire instead of burst damage, though, so it's possible that the damage put out is equal over a given period of time.
Brotherhood of Nod
The Brotherhood of Nod is used to sticking to the shadows; it's had to do so for a long time to avoid the glare of the GDI. Now that they're ready to burst back onto the world, they're building up a new army with new strengths and weaknesses.
Nod forces are typically going to be a tad weaker than those of other factions, but will often be cheaper and quicker when moving around. Stealth is also an important factor of the Nod tactical plan, as they're capable of hiding an entire base with just a couple of structures, and many of their units (Shadow Teams, the commando, stealth tanks, etc.) have built-in stealthing capabilities. They'll arguably take more skill to work with in multiplayer, but we'll let the game theorists puzzle over that one.

Infantry: The early infantry units here are of fairly poor quality, with the militia squads being probably the worst unit in the game, but in this case you get what you pay for. You can eventually build fanatics, which are expensive, but which can quickly brunt an enemy assault that's coming your way. Fanatics are useful in the open, but assaulting a well-designed enemy base is another matter, since they'll often be taken out by defenses before they can get close enough to do real damage.
In the hands of a skilled player, the Shadow Teams will be interesting to watch, as they're capable of gliding over the battlefield and landing behind enemy lines to bomb their structures. They're undone by stealth-detecting turrets and units, but will be murderous when used against unsuspecting players.
Nod, Continued
Vehicles: One of the biggest weaknesses of Nod is its early lack of decent anti-vehicle units and vehicles. While they have rocket soldiers, their basic early vehicles aren't capable of dealing much damage to opposing vehicles. The Scorpion tank is really their only option here, but it's going to be fairly weak in the face of opposing Predators, at least until it's upgraded with laser capacitors. Stealth tanks are likewise a bit too lightly armored for their own good. Don’t neglect to build buggies, though; they're cheap and fast and can be moved around to deal with infantry or planes that assault you.

Avatars are an interesting unit that serve as the superunit for the Nod. It can assimilate technology from other nearby Nod vehicles, allowing it to use their weapons to supplement its own, but this destroys the unit that you steal from. You can add multiple pieces of technology to a single Avatar, conceivably pushing the aggregate cost of it up over 5,000 bucks, but in general it's probably better not to put your eggs in one basket and simply keep the units separated, unless you have a way of quickly repairing the Avatar when it's damaged.
Aerial Units: Nod gets to use both Venom Patrol Craft and Vertigo bombers here. The Venom craft are unique in CNC3 in that they're completely detached from the air tower that spawns them; the normal scout/fighter craft for the GDI and Scrin have to return to base to be repaired, and can only be built in limited numbers, but a single air tower can pump out as many Venoms as it likes, and can do so cheaply. Venoms are great for dealing with enemy infantry, especially when they're upgraded with laser capacitors, and in sufficient numbers can wreak havoc on enemy vehicles as well, or shoot down incoming Firehawks or light Scrin fighters. They're very weak, however, and will be shot down after just a few rockets shots, and can't be told to automatically return to an air tower to be repaired.
The Vertigo is the best bomber in the game (assuming you don't consider any of the Scrin vehicles to be "bombers" as such). It's more expensive than the Firehawk, but has the advantage of stealth and the bonus of concentrating all its firepower in one bomb, thus reducing the amount of time it takes to reload and also making it easier for them to find new targets and run if their target is destroyed before they reach it. They're very tough to kill unless they run into a large patch of turrets or get pursued by enemy fighter planes.
Structures: The Nod turrets are among the best in the game. They're not overwhelmingly powerful, but their construction makes it difficult to take them out. The earlier turrets will have one central pod from which three smaller turrets are distributed. Killing the smaller turrets will prevent them from firing, but the central pod will eventually reconstruct them automatically. Destroying the central pod will eliminate the turrets, but still, they're a pretty efficient system, especially since a lot of AI opponents will fire on the turrets first, allowing you to react before they manage to dish out the hurt to the central pod.
Obelisks of Light are powerful but slow-firing defensive structures that can be set up to chew through incoming vehicles. They can also fire on infantry but are inefficient at taking them out, even if they do suppress them almost instantly. They can't fire at aerial units, however. Note that Beam Cannon vehicles can be positioned behind Obelisks and supercharge them with their beam weapons, which reportedly increases their range and damage, but these additions are apparently somewhat marginal.
Scrin
The deadly Scrin invaders are the cause of the Tiberium infestation on Earth, and have come to reap their bounty. They're played a bit differently than the other factions, and so will require a bit of practice to get used to.
If the GDI focuses on powerful but slow units, and Nod focuses on units that are quick and stealthy, the Scrin could arguably be said to be the best faction for attacking at range and using trickery to achieve their aims. Their aerial units, especially the fearsome Destroyer, can attack from well away from their targets, while their Mastermind units can warp other units around the battlefield and steal enemy units and bases. It's complicated, but in the right hands, it can work wonders.
Note that the Scrin don't require tiberium silos, and can apparently harvest as much tiberium as they like without worrying about a cap.
Infantry: Scrin infantry are somewhat unique and difficult to get a handle on, but the buzzer infantry units can be interesting, since they can attach themselves to vehicles and hop rides on them, essentially. Shock Troopers can arguably become the best infantry unit in the game, especially when fully upgraded.
Vehicles: The usual assortment of vehicles for your playing enjoyment here, with some minor differences when compared to other races. The devourer tank has an excellent range for its beam weapon, and the Scrin harvester unit will automatically repair itself while working in tiberium fields, thus making them less likely to be destroyed by a sneak attack. They will also cause an ion storm to pop up when they're destroyed, which will automatically attack opposing units for a minute or so.
The Tripod, the Scrin superunit, can fire multiple small lasers at nearby vehicles or structures for heavy damage. It can even fire at multiple targets independently if attacked from multiple directions, but only deals good damage if it's concentrating its fire on a single target. It can be upgraded with a weak shield at the Technology Assembler, which can boost its abilities to act as a defensive bulwark when guarding your base.

Aerial Units: The Scrin shines when it comes to aerial combat. While their baseline storm rider unit isn't terrifically impressive, the Devastator Warship and the Planetary Assault Carrier are pretty badass. The Devastator can fire plasma discs over long ranges, which are best used against enemy structures, but they can still rip up enemy infantry. In numbers, Devastators can completely destroy enemy forces that aren't prepared for aircraft to be coming their way, especially when they're upgraded with shields.
Planetary Assault Carriers are expensive, but worthwhile. They launch with a large number of smaller fighters that can target enemy planes or ground units. When shot down, these fighters will eventually grow back inside the Carrier, but if the Carrier is destroyed, all of the smaller planes go down as well. The smaller planes are great for distracting enemy units while your Devastators approach.
Structures: Storm Towers are perhaps the most impressive all-purpose defensive structure in the game, capable of hitting infantry, vehicles, and planes with powerful blasts of lightning. The growth accelerator, which speeds up the growth of tiberium in tiberium fields, will undoubtedly make a difference for players that prefer turtling, or in lengthy games.
GDI Walkthrough
The missions in Command and Conquer 3 start off relatively easy, but by the end of the game, you’re going to be quite challenged by the encounters you come across. We’re going to write this walkthrough based on the assumption that you’re playing on the default difficulty, Normal.
Prologue
Mission One: North Carolina Badlands
Primary Objectives
- Determine the status of the GDI Outpost
- Build a Barracks and 3 GDI Riflemen Squads
- Build a Power Plant
- Repair the Command Post
- Eliminate the Nod Outpost
- Repair the Bridge
- Build an Airfield
- Destroy the Nod Barracks, War Factory, and Construction Yard
Bonus Objectives
- Build a Watchtower
- Build a second Infantry Queue
- Build a Tiberium Silo
- Capture one of Nod’s buildings
- Sell the captured Nod structure
- Capture the Tiberium Spike
Getting Started
You have two riflemen squads under your command here, both of which are at a heroic status, meaning that they’ll deal more damage than normal and regenerate their health when they’re not in combat. Move them up to the east and take out the Nod soldiers in the middle of the GDI base; when you do so, it’ll come under your control.
After building a barracks, queue up five or six more riflemen squads and start following the instructions as given to you. You’ll have your hand held through most of the early primary objectives here, so don’t worry too much about them. If you want to build a Watchtower as part of your bonus objectives, select the Support Structure Tab (you can hit the R key to flip to it automatically), click on a Watchtower, then set it down.
After you unlock missile launchers, head east to the Nod base and destroy the two structures highlighted in yellow. Doing so will let command send you a pair of engineers. Have one of them enter the bridge structure to repair it, while the other one enters one of the Nod buildings to capture it. When you get the bonus objective to sell it, hit Z and click on it to do so.
Crossing the Rubicon

Build up a group of missile launchers and position them at the base of the bridge to protect you, then send up an engineer to capture the Tiberium spike there. Move up a few riflemen and send them towards the Nod vehicles; they’ll be quickly killed, but doing so will open up the option to build airfields back at your base. Build two of them and fill them with Orcas.
After pounding the ground a bit, fly the Orcas over the main Nod base. They’ll get shot down or wounded by anti-air turrets, prompting control to unlock the satellite weapon for you to use. Aim it at the main base to take it out, and you win the mission!
Act I: America
Mission One: The Pentagon
Primary Objectives
- Bring the Pentagon’s defensive power system online
- Capture the Pentagon with an Engineer
- Garrison each of the four Guard Towers
- Eliminate the Nod Central HQ
Bonus Objectives
- Eliminate the small Nod base to the north
- Take back the city by clearing 4 garrisoned buildings
Mr. GDI Goes To Washington
This is another fairly simple mission here, made simpler for the fact that you don’t have any construction buildings; you’ll have to make do with what you’ve got. You will get reinforcements periodically, however, which will make things a good deal easier.

To begin with, move your riflemen to the east and clear out the Nod attacking the power supplies and the Pentagon. When you have a free moment, move your engineers into the power generators, and garrison your soldiers in one of the four towers guarding the northwestern side of the Pentagon perimeter. When you take control of the Pentagon with your engineers, you’ll also gain control of the soldiers outside, so quickly move them, as well as the riflemen that appear outside the Pentagon, into the small towers. If you don’t have enough to completely fill them, concentrate your forces on the middle two towers.
After a few minutes, your APC reinforcements will arrive, along with a number of grenadiers to the south. Take one of your APCs and move it across the three yellow crates on the northern side of the base; that will rank it up to hero status and allow it to repair itself when damaged. If you put one of your grenadiers into the APC (select the grenadier and right-click on the APC), then you’ll be able to move it out into the city and start clearing out the occupied buildings. Just move the APC up near the building, and the grenadiers will automatically fire out of it at the occupied buildings, killing the inhabitants.
Destroying Nod
Your first task should be the bonus objective: destroying the Nod base to your north. It’s easy enough to do with your APCs, especially if you have one at Hero status. Simply move a few of them towards the base, kill off the soldiers around it, then shell the barracks to destroy them. When that’s done, a few more APCs will ride to your support.
When you have a group of APCs that are loaded up with grenadiers, and a few with riflemen inside (don’t forget that you can unload them from the towers around the Pentagon), head west and attempt to approach the Nod base from the small park to its south; that will let you avoid most of the troops that are positioned out to its east. Sweep through the base, having your troops grenade the yellow-designated buildings, and you’ll win shortly.
Mission Two: Langley Air Force Base
You can technically choose between doing this mission or Hampton Roads next, but it doesn’t really matter which one you choose, as you’ll have to do them both eventually.
Primary Objectives
- Eliminate the Nod forces attacking the GDI base
- Reclaim the GDI Airfields to the northeast
- Destroy the Nod base to the northwest
Bonus Objectives
- Rescue all 4 Snipers from Bravo Team
- Recapture the Tiberium Refinery in the city
Staking Your Claim
Begin here by moving your troops into the city and clearing out the troops that are assaulting your little base here. Be sure not to let your grenadiers accidentally grenade your own troops, though, or you’ll wind up taking significant losses!
When you have the base cleared out and functional again, build up a few more riflemen and missile squads and position them to defend the northwestern side of the base. You’ll mostly be facing infantry assaults, but there will be periodic air attacks, as well, which is why you want to have a couple missile squads or Pitbulls around to protect you. Don’t forget to repair all the buildings here, as well.
After setting up a defensive perimeter, use grenadiers to destroy the Nod positioned in the buildings near your base. That will free up a couple of sniper units here; you may have to paint some big squares in order to find their locations, though. Snipers are master anti-infantry units, but you won’t be able to build any more of them, so you’ll want to keep these guys safe and sound. Snipers do have a special ability, though, in that they can call in a cruise missile from the battleship to any area within a certain radius around them. These missiles are free and reload quickly, so make use of them when possible.
For instance, there’s a small enemy turret checkpoint to the northwest of the base. Nod turrets are unique in that they’re connected to a master control structure. If you destroy the turrets, they’ll automatically rebuild themselves, so you want to take out the control structure. Doing so here consists of sneaking up a sniper team, then using a cruise missile on the small structure near the tower here that’s connected to the turrets by wires. That will destroy both of the nearby turrets.
If you poke around to the west a bit, you’ll notice a set of three buildings; two large ones, with a smaller office building to the north. This will be your defensive perimeter here; load up each of the buildings with two riflemen and one missile squad, and you should be able to take out any enemies that come your way.
Reclaiming the Airfield and Refinery
Move a set of riflemen and missile squads, in APCs, to the northern airbases when you have your defensive line set up. When all of the enemy squads nearby are dead, you’ll gain the use of the two airfields here. Defend them with the soldiers, as enemy units will occasionally come this way, especially the anti-air motorcycles.
With eight Orcas on your side, you’ve essentially won the match. If you want the bonus objectives, however, use them to clear out the turrets on the perimeter of the Nod base, destroy their barracks and vehicle structure to reduce the pressure on your troops, then move an engineer and multiple grenade units in APCs to the southwest corner of the map. After rescuing the snipers, capture the refinery here to complete the bonus objectives, then use the Orcas to take out the enemy base and move on.
Mission Three: Hampton Roads
Primary Objectives
- Destroy the Nod operations center
- Destroy the bombers harrassing the battleships
- Destroy the Nod production facilities
Bonus Objectives
- Complete the mission using only the Commando
Schwarzenegger It
You take control of a Commando here, an elite anti-infantry and anti-structure unit. Commandos can rip through any infantry that they face in seconds, and can destroy any building they can reach with their explosives. They’re pretty badass, and although they’re weak against vehicles, you won’t have to worry about that much here.

Begin by jumpjetting or walking up to the northern operations center and destroying it with your bombs, then repeating the process on the bomber hangar tower nearby. At this point, you’ll get reinforcements to work with, but if you want the bonus objective, don’t select them or use them to destroy anything. The Commando here doesn’t take much damage from enemy fire or vehicles, so you can feel free to sweep him into the enemy encampment to the west and destroy the targeted buildings with his explosives. If you look around for crates, you can upgrade his veterancy level to Hero, allowing him to really tear through the enemy infantry, although it’s not really necessary to kill them. When all the targeted buildings are dead, the mission will end.
Mission Four: The White House
Primary Objectives
- Destroy the Nod air defenses
- Use your Firehawk Airstrike power on Nod’s Artillery outposts
- Destroy the surrounding Nod base to reclaim the White House
- Destroy the Disruption Towers around the Nod base
Bonus Objectives
- Suppress the Nod infantry advances by placing snipers in the designated buildings
- Destroy Nod’s power plants
- Destroy the Nod Secret Shrine
It’s True...The President of the United States is a Spy
Begin by taking your missile squads and firing on the designated buildings here. Don’t get too close to the center of the enemy base, though, or you’ll be toasted by the soldiers there. Just destroy the anti-air turrets, bomb the hell out of the base with the Firehawk Airstrike power, and deploy the base structure that is airdropped in afterward.

When you have your base built, begin by clearing out any enemy-populated buildings to your east and west with grenadiers, then positioning snipers in the two designated buildings there. They’ll be able to keep all the infantry that’s coming your way at bay, allowing you to concentrate on building up your forces. You’ll want to build five or six Predator tanks when you have the opportunity to do so, as eventually the Nod forces will rush you from the north.
After fending off the enemies, it’s time to go after the bonus objectives. The first is to destroy the power plants in the northwestern corner of the map. A mixed group of APCs loaded with grenadiers and missile squads will be ideal for the task; if you have around ten of them all together, you should be able to roll straight north from the southwestern corner of the map, destroying the garrisoned buildings along the way and repelling the Nod vehicle counterattack, until you’re finally able to reach the power supplies and destroy them, thus revealing the bulk of the Nod base.
A Hidden Objective
There’s a semi-hidden bonus objective located in the northeastern corner of the map. A Nod Secret Shrine is located here, which allows the Nod to build Shadow Teams, which are flying anti-infantry units. If you head up to this corner of the map, you’ll be given the bonus objective: destroy the Nod Secret Shrine. Instead of doing that, though, you may want to bring up a few engineers in APCs and have them capture the Secret Shrine and the Hand of Nod nearby. Doing so will let you build Nod infantry. It’s not necessary to do so, but it can be fun to build your own Militias and Shadow Teams.
Regardless, when you’re ready to do so, build up a large force of laden APCs and Predator tanks, then sweep into the Nod base from the south to crush it and win the map.
Act II: Egypt
Mission One: Casabad
Primary Objectives
- Secure the Barracks by defeating the nearby Nod
- Destroy the Weapons Research Lab
- Destroy the Nod War Factories
Bonus Objectives
- Capture all three Tiberium Spikes
- Destroy the Nod Outpost
Hot Hot Heat
Destroy the Nod near the barracks to your north with your riflemen, then capture the Tiberium Spike in the middle of the base. Build another Engineer and send him towards the Spike to the north, then start investing your resources in more Zone Troopers, with a few missile soldiers to provide anti-air support. Don’t forget to research the upgrades at the Armory, either.
After fending off the first few rounds of enemy attacks while you build up your forces, send an engineer to the third Spike to the southeast of your base and capture it. The Nod forces won’t attack or try to recapture the spikes, so don’t worry about defending it. Just build up a large force (perhaps 15 units) of zone troopers and missile soldiers for your main assault. Start with the bonus objective, the outpost near the third Spike, then sweep to the north, defeating the weapons lab and factories, to beat the mission.
Mission Two: Alexandria
Primary Objectives
- Destroy all Nod loading dock cranes
- Destroy all Nod Port Authority buildings
Bonus Objectives
- Destroy all Nod ships docked at the port
- Capture the EMP Control Center in the city
- Deploy a Surveyor at the northern Tiberium Field
Turtling
You start the mission without much of a base, so immediately begin building yourself up a bit. When you build a War Factory, don’t forget to construct another harvester to hasten the speed of your Tiberium collection.
Your first goal here should be to protect your base from the constant onslaught it’ll come under. At first, you’ll be facing light assaults from the east, but eventually the enemy will begin coming from the north as well, so race out a Tech Center to build up a few more Mammoth tanks, and don’t forget to research railguns! In the meantime, four or five Predators and a couple of Zone troopers should be fine for defending against the light assaults coming your way, so let them do their job, repairing them at the War Factory or Armory as needed, until you can start rolling out the heavy guns. The riflemen you begin with can Dig In near your base perimeter to make some bunkers, which you can then put missile squads into.
After you build up enough of your forces, you can start working on expanding your base a bit. Build a Surveyor in the support tab of your main construction base, and send it northwest towards the Tiberium field there. Unpack it to the west of the field, then quickly build another refinery and war factory there. The war factory will allow you to move your vehicles up near the Tiberium and block enemy attacks from that direction.
As your tanks block off enemy attacks (Predators and Mammoths with rail guns will be adequate at defeating infantry rushes as well as vehicle attacks), they’ll gain experience and some will eventually wind up at Hero status, capable of regenerating themselves after they take damage, letting you easily repel further assaults. As the round progresses, you’ll eventually start facing more advanced units with upgrades, but your Mammoths should be able to face off against anything that comes your way, so long as you return them to a War Factory for repairs when needed.
Capturing the EMP
One of your bonus objectives is to capture the EMP projector in the southeastern corner of the map. To do so, load up a bunch of APCs with grenadiers and a couple of engineers, and have them escorted by a couple of predators. When you near the EMP projector, use the grenadiers to clear out any buildings (a commando can do this, as well), then move the engineer into the EMP projector to capture it. It can disable enemy tanks and buildings for a few seconds when fired. If you leave it unprotected, the enemies will eventually recapture it, but you’ll still have completed the bonus objective.
Destroy The Docks
Your main goal here is to destroy the docks to the north. If you build up a fleet of eight Orcas, they’ll be able to do so easily. Just take out any missile squads first, then reload and repair your Orcas and let them sweep through the cranes and ships there to take them out.
When the ships and cranes have been destroyed, you can feel free to press forward for the final assault. If you have at least ten Mammoths built, feel free to sweep into the enemy base and destroy everything in your path, concentrating on the turrets, then moving in to destroy the buildings.
Mission Three: Cairo
Primary Objectives
- Destroy the Nod nuke facility
- Destroy the Nod compound headquarters
Bonus Objectives
- Capture or destroy the Nod power plants
- Destroy all Nod structures
Nuke-u-lar
You’ve got around a minute after the game starts before a seven-minute long countdown begins. When the countdown is up, the Nod forces will launch a nuke, and presumably your game will end. Don’t worry about the timer here; you’ll have plenty of time, so long as you do things quickly.
Start out by building a War Factory and have it make another Harvester to increase your cash income. With that done, you can build a few APCs with missile launchers or riflemen squads in them to defend the base while building a Tech Center and Armory. These will let you build more Zone Troopers and upgrade them.
Again, don’t worry about the timer overmuch; just build up a small fleet of eight or nine Zone Troopers. When they’re all assembled, move them up along the western side of the map here and have them jump up and over the wall protecting the Nod compound. There’ll be light defenses on this side of the map, so have them destroy turrets as they proceed, then move them up and around the Nod base to reach the three green power supplies there. (If they come under fire from the turrets near the nuke, jumpjet them away.) Destroying any of the three power supplies on the north side of the base will knock the power for the nuclear facility offline, thus stopping the launch countdown.
You can leave the Troopers up by the power supplies, if you wish; they won’t be attacked by many units and will be able to destroy the power supplies again when they get rebuilt.
At this point, you’ve basically won, since the Nod won’t be able to fire their rockets as long as your Troopers are in the area. If you wish, you can leave one Trooper unit up here as insurance, and move the rest of them to the southeast, where the main building structures are located for the Nod. They do have an air platform, which will launch gunships that will probably find and kill your troopers eventually, but not before they do some severe damage. If you want to finish off the base, you can send in Troopers or Mammoth from the south, accompanied by Bulldogs to shoot down the gunships. Keep in mind that one of the bonus objectives involves destroying every structure in the area, so be thorough!
Act III: Eastern Europe
Mission One: Croatia
Primary Objectives
- Secure this GDI base until reinforcements arrive
- Send aid to the reinforcement team ambushed in the city
- Destroy the southwest Nod base
- Destroy the northeast Nod base
- Destroy the southeast Nod base
Bonus Objectives
- All base defenses survive until the reinforcement team arrives
Need...More...Power!
Get ready for a difficult, difficult slog through this mission. You start off with a small base, not much cash, and not enough power to run all of the defensive structures in the area. Your goal at the outset is to simply not die, with a bonus objective involving keeping all of the turrets around your base alive. Difficulties abound!

First things first: build another Harvester and start repairing the turrets around your base and reactivating the turrets around your base. The catch? You don’t have enough power for them all; perhaps six at most can be powered concurrently. You can use the X button to quickly shut down or restore power to individual turrets, which will be helpful here. Don’t forget that the C button will also be used to quickly repair turrets and buildings, as well, which is helpful when the anti-vehicle turrets get pounded by enemy vehicles.
You’re going to be facing off against vehicle assaults from the north and east and infantry assaults from the south and west, along with sporadic aerial assaults. Immediately after you begin the game, then, build another couple of Riflemen squads and use their Dig In abilities to move them into bunkers near the entrances to the base there, but mostly on the southwestern sides. Try not to actually block the entrances with the bunkers, though, as that will simply make life difficult for you later on. A couple of dug in riflemen squads near each entrance will effectively neuter the ability of the Nod infantry to get anywhere near your base, but feel free to build a couple more every now and then to replace those that wind up taking fatal damage.
The vehicle attacks will be more problematic to you here, and will require you to micromanage a bit. All of your anti-vehicle turrets should be kept powered up as much as possible; you can safely de-power the anti-infantry turrets when you have your bunkers built. To back up the turrets, which really don’t do much damage, you’re going to need to build lots of Predator tanks and have them continually move back into the base to be repaired at the War Factory. This is going to be the most aggravating part of the mission, most likely, as you’ll have to micromanage these two fronts for a long time to come. Nothing to do but put up with it for the moment. Just keep an eye on the health of your units here (you can use the CTRL and tilde keys to spot-check all of your units’ health) and move them back towards the War Factory when they’re damaged. Keep your Predators just behind the turrets, if possible. The turrets can take a much bigger beating than the Predators, and can be repaired much more easily. Eventually you will want four or five Predators at each opening, if possible.
The anti-air turrets are situational, and only need to be powered up when you have aerial problems. You may simply want to build a few Bulldogs and bind them into a group to move them around when you spot a new plane. Alternately, you can simply have your riflemen build a bunker, exit it, then load it up with a missile squad. If you have the time to build a couple of these in each corner of your base, you’ll be able to withstand pretty much any aerial assaults that come your way. That’s somewhat impractical, though, so simply building a few Bulldogs will probably be your best bet.
Retrieving the MCV
After the countdown for reinforcements is up, an MCV will appear in the city to your west. You’re going to have to go there, destroy the turret that’s preventing it from moving, and escort it back to your camp. What’s more, you’ll have to do so while the attacks are still coming your way. Ugh! You need to move quickly here, nonetheless, as the enemies you face will be building up the tech tree. It might be tempting to simply sit back and turtle up while building up an unstoppably large force of troops, but that’s not going to happen.
Build a fleet of around ten APCs and load most of them up with missile squads; these are going to be your anti-building units while you march. You don’t have access to grenadiers here, so it’s going to be a slog to take out enemy units that are holed up in building. Fill any remaining APCs with riflemen, and build up as many more riflemen squads as you can afford. The more the merrier, really. Keep building more of them as you move your APCs and the existing riflemen across the bridge to the southwest of your base, then start filling up as many of the buildings here as you can with the riflemen. They’ll fire on any enemy infantry that come your way, and will also more importantly prevent the enemy infantry from garrisoning the buildings in a second.
When you have enough of the buildings along the route to the MCV lined with riflemen, move your APCs up to the north and start rocketing the garrisonned buildings there. There should only be two of them, along with the turrets that were firing on the MCV. Destroy them, and you’ll gain control of the MCV and its escort vehicles.
Return To Base
Your goal now is to get the MCV back to base. There’s a bonus objective to get it back there unharmed, as well. If you managed to plant enough of the buildings along the route here with riflemen, then you should be able to accomplish this, but if you’re running low on APCs with riflemen in there, you may want to build a couple more back in the base and use them to escort the MCV.
Regardless, your entrenched riflemen should be able to protect most of the route here from enemy incursions, allowing you to slowly move the MCV along the road by the river. Some of the garrisons will be burned out by flamethrower enemies, so resign yourself to losing them, but the flamethrower guys will hopefully fall to your APC soldiers.
When the MCV returns to your base, expand it in the southwestern corner, inside the walls, obviously. At this point you need to start rapidly scaling up the tech tree, building a Tech Center to equip all of your Predators with railguns, and to enable you to build Mammoths and Zone Troopers. Keep in mind that your harvesters will be the weak link in your supply chain; if they get hurt, move them back to the war factory for a bit to repair them. Always have at least two running around; if you lose your harvesters when you’re low on money, you won’t be able to win the game.
Defense and Offense
After a while, the situation will mostly stabilize. More powerful units will be coming at you from every direction, but you should be able to hold them off. The infantry coming from the southwest will start to be a problem if you’re still in foxholes, as they’ll begin to get close to the bunkers and burn them out; switch as many of your riflemen there into APCs as possible, and don’t forget to build a commando and plunk him into an APC as well. The gunships coming your way will give way to bombers, but you should be able to decoy them by powering up the anti-air turret in the southeastern corner of the base. They’ll swoop in, bomb it, and reduce it to half-health or so, letting you repair it. Build another one nearby if you want to increase your protection.
The vehicles coming from the north and east will be the biggest problem here, and you’ll want to deal with those factories first. Start building Mammoths! You can attack from either direction, but be sure to keep your base protected. If you attack out of your northern exit, leave a Mammoth and a few Predators to the east, or vice versa. Your attack force should consist of as many of your Mammoths and Predators as you can afford without leaving the other side of the base unprotected. We used four Mammoths and perhaps half a dozen Predators and were able to destroy the base without too many problems once our Mammoths were past the walls.
Clean Up
Now go after the air bases to the southeast. These guys are tough to hit, since they’re up on a large hill and can’t be reached by most ground units. Unfortunately, the large number of laser-equipped gunships will likewise make it difficult to assault them, and the anti-air turrets will make fighting fire with fire a losing proposition.

You have a couple of options here: build a huge number of Zone Troopers and use them to jump onto the plateau, or use air transport to move units up there to attack the base. The latter is probably the better bet. You should still have plenty of Predator tanks around your base, so move them all into the zone to the east of your base, near the clear, northern side of the plateau, and build around 15 Pitbulls to escort them, or load up missile squads into APCs. When you have perhaps 15 Predators and a like number of anti-air units, move the whole mess up onto the plateau and head into the base, focusing on the anti-air turrets first. Use the Pitbulls to destroy any planes that come your way, while the Predators start taking out the ground units and buildings, targeting the two hangars when the anti-air turrets are dead. Don’t be surprised if your initial advance gets rebuffed, however; if you get wiped out, there’s nothing to do but build up another force and try again, the quicker the better!
The infantry base to the southwest is the easiest target to take out. Most of its defenses are oriented against infantry, so just take all of your remaining tanks and flood them into the zone. A half-dozen Mammoths will be able to finish the job themselves.
Mission Two: Albania
Primary Objectives
- Clear Nod border defenses
- Infiltrate Nod supply depot
- Eliminate Nod rocket bunkers
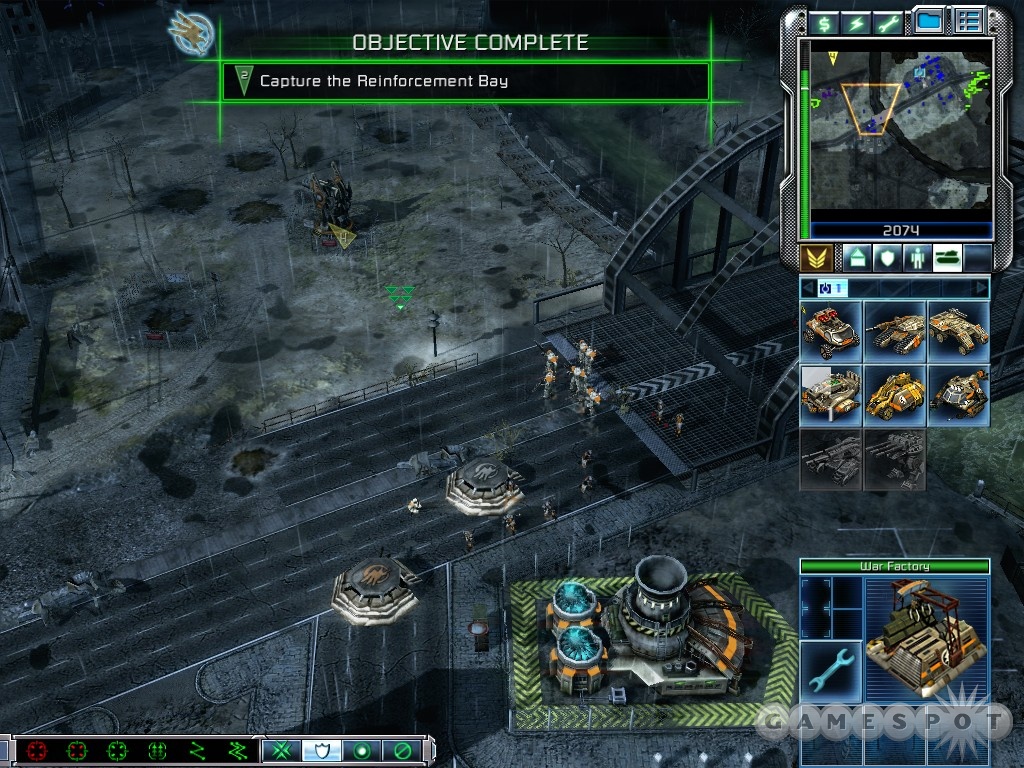
- Capture east ridge Reinforcement Bay
- Destroy Nod supply depot
Bonus Objectives
- Survive the Nod assault unharmed
- Capture Airfield Reinforcement Bay
- Capture motorpool Reinforcement Bay
- Arm a Firehawk with a missile and shoot down a Nod Venom
Limited Resources
This is another tough mission, mostly because of the fact that you can’t build any more new units at the outset; you only have a small group of grenadiers and riflemen. Your bonus objective is to destroy the nearby Nod outpost while remaining “unharmed”. This is a bit disingenuous; you can take damage here, and even lose individual soldiers within a squad, but if you lose one full unit of soldiers, then you lose the bonus objective as well. Regardless, move up and have your grenadiers take out the turret control system while the riflemen deal with the militia, then destroy the Hand of Nod and the power supply.
Move off to the west a bit and deploy your Battle Base. It’s a small rig that will automatically repair nearby vehicles, and will be vital to your continued success here. When you have it set up, take your vehicles off to the west and destroy the anti-air turrets there, but first take out any enemy vehicles and the construction yard that they’ve set up nearby.
When you take out the anti-air turrets, you’ll receive a loadout of four Engineers and a couple missile squads. This is where the hard stuff begins.
Bonus Objectives
At this point, you have a couple of options: go for the quick win, or go for the bonus objectives. Either way you shake it, your goal will start the same way: get to the eastern Reinforcement Bay and capture it.
After you repair the bridge, wait for the enemy counterattack to occur, wipe it out (while keeping your vehicles near the Battle Base for repairs), then load up your remaining three Engineers in the APCs here. Move the vehicles to the north, destroy the turrets by the bridge, then move the Battle Base up there and deploy it for some quick repairs. If you have any riflemen remaining, have them Dig In nearby, but don’t get too cozy, as you’ll have to move soon. Make a new save here.
When all of the vehicles here are repaired, group all of the APCs and Predators into one ground, the Pitbulls into another group, and the Battle Base into a third. Pack up the Battle Base and move it, along with the rest of your vehicles, up the northeastern road towards the east ridge reinforcement bay. After fighting off some minor vehicle attacks, you need to move your vehicles up the ramp near the reinforcement bay, then follow it up with the Battle Base. Quickly repair your vehicles, then move them towards the turret control center nearby. Destroy that and the Hand of Nod building, then quickly capture the reinforcement bay and plant your Battle Base closer to it to protect it. A Mammoth will pop out of the reinforcement bay, so move it to a position where it can protect the Battle Base from damage.
The Other Bays
Make a new savegame here. Now, if you still have the two remaining engineers alive and in your APCs, then you can rather easily complete the bonus objectives if you wish to. The Firehawk jets that you’ve received are all at Hero status, so they can run over any enemies that you encounter without getting seriously hurt. You might want to have a couple of them set to missile loadouts for shooting down enemy gunships, but the rest can all be set for bombing runs. Make a few teams of two bombers each and start going crazy on the enemy buildings, starting with the factory to the north, then proceeding on to the air hangars off to the west, and finishing with the factories and power supplies in the middle of the zone.
After pounding the enemy back to the stone age, you can capture the remaining reinforcement bays if you wish, then finish off the remaining stand-alone units in the storage depot to finish the mission.
Mission Three: Sarajevo
Primary Objectives
- Destroy Ion Disruption Field Generator 1
- Destroy Ion Disruption Field Generator 2
- Destroy Ion Disruption Field Generator 3
- Build an Ion Cannon control center
- Destroy Temple Prime with the Ion Cannon
Bonus Objectives
- Capture Nod’s science ministry building
- Capture the Mutant Hovel
- Capture Liquid Tiberium Factory
- Destroy an Avatar with the Commando
Let’s Finish This, Kane
Your final goal is at hand: the sinister Kane and his temple. You have to assault his base if you want to take him out. Your final goal? Destroy the Ion Disruption Field Generators so that you can fire your Ion Cannon into the temple and destroy the area.
Begin by moving your MVC up a bit from the corner of the screen and deploying it. Be sure to give yourself plenty of room to build with, though, and don’t forget that you have a Rig to deploy into a Battle Base. Use that to provide repairs for your tanks, which will be your main source of protection for a while.
You won’t need to build many defenses here for a while, in fact, thanks to the two Mammoths that you start out with. Begin with a power generator, then build a refinery and a war factory right next to each other. Your harvesters will be taking damage here, so if you build the refinery next to them, they’ll automatically be repaired when they return to deliver their wares. Build another harvester, and some APC/Riflemen combos. Enemy infantry will primarily be coming from the northern side of the area, while vehicles will come from the south. Plan accordingly.
When you have your tech tree built out, build a squad of four Bulldogs and have them run in on a suicide mission to the interior of Kane’s base. They won’t kill anything, but so long as one of them manages to breach the defensive perimeter around the base, you’ll unlock a new unit: the Juggernaut mobile artillery piece. These guys are powerful and have a decidedly lengthy range to their fire, but they don’t appear to be capable of firing on units automatically. Assign them to a battle group and direct their fire manually at distant enemies. Note that you get three free Juggernauts in the bottom corner of the screen when you unlock them.
Expansion
Eventually, you’ll want to expand to the northwestern tiberium field here. Build a few Zone Troopers, a couple of Mammoths, a Surveyor, and some APCs, including one with an Engineer inside of it. When these are assembled, move the group up to the north, quickly plant the Surveyor near the field, and build another refinery and war factory. A couple more Mammoths will help you defend the area well, but don’t venture too far to the east, as the Obelisks of Light there will fry your units.
Eventually you’ll be able to build a Space Command Uplink and an Ion Cannon Control Center, which will place the Ion Cannon under your control. You can’t use it to fire very often, and you won’t be able to attack the Nob base until you destroy the Ion Field Distruptors, but when you do have it built, you can start working your way into the base for the final assault.
With two tiberium fields pumping your reserves, what you want here is a ton of Mammoths, backed up by a lot of Pitbulls for anti-air capabilities. Heck, even the Pitbulls are fairly optional. We chose to launch our assault from the northwestern expansion, as that seemed to be a bit easier to attack from.
Into The Base

When you’re ready to attack, muster 20 or so Mammoths. You should take out the Obelisks of Light near the northern entrance to the Temple, either with bombers or your Ion Cannon. When that’s done, start moving your Mammoths into the base via the gate at the bottom of the ramp and get to work destroying stuff.
When you do enter the base, Kane will start a ten-minute or so counter for launching a nuke. The nuke is apparently located within the Ion Field Disruptor located closest to the temple itself; destroying it will cancel the countdown. With your Mammoths, start sweeping through the base, destroying everything in its path (except the bonus objective buildings marked with green).
Note on Bonus Objectives: Keep in mind that the only bonus objective that you can really screw yourself on here is taking down an Avatar with a Commando. Avatars are the large, bipedal walking destroyers that the Nod will start throwing your way, but if you clear out the Nod base before you kill one with a Commando, no more will be built. Build a Commando at your main base, assign him to a special group, and save your game when you spot a group of Avatars and other units coming your way. Wait for them to get close to your base and engage your Mammoths, then rocket your Commando towards the Avatars and hope that you get one to fall down before your Commando bites it. You’ll have to reload the game if it dies before it can complete the objective.
Note that you only get this objective after your forces enter the base and the nuclear launch countdown begins, so you won’t have a huge amount of time to get it done. If you rampage through the base and destroy the Field Generator that houses the nuke, it’s unlikely that any Avatars will remain to attack your base, so you have a fairly slim margin of error here.
Anyway, when you’ve destroyed the factories and Ion Field Disruptors, you can load up a couple of APCs with engineers and capture the two remaining bonus objective buildings. With that done, fire the Ion Cannon at Temple Prime, and watch the tremendous explosion that occurs. Eastern Europe? Looks more like the entire eastern hemisphere gets taken out.
Act IV: Northern Europe
Mission One: Munich
Primary Objectives
- Protect the Civilian Transports
Bonus Objectives
- Capture the GDI Lab
- Capture the Power Plant
Escape!
A short mission here, being completable in around five minutes altogether. Your goal is to escort three vans full of Munich scientists to the outskirts of town, with the main goal of having one survive. When the mission begins, group all of your selectable units into one large group, and have them tag along with the trucks as they move (they won’t be under your control). Try to stay out of the way of the trucks, or they’ll start moving oddly to get around your units, but stay close to them.
After the trucks twist away to avoid a busted bridge, they’ll start heading south, near a Battle Base. You only have two vehicles in your party, Pitbulls which are already Heroic, so you won’t need any repairs yourself, but the trucks may want to stop by here. When you hear some chatter about APCs, look to your south to find a large number of troops that jump into the fray for your team. Save your game here! Included in this group are three engineers, and you have two bonus objectives to accomplish: capture the GDI Lab in the northeastern corner of the map, and capture the Power Plant in the southwest, across the bridge. It’s best to instantly select two engineers and send them towards the GDI Lab, without giving them any kind of infantry to protect them, while one engineer heads towards the Power Plant. If you issue these orders as soon as the infantry come under your control (which may require you to anticipate the actual issuing of the bonus orders a bit), they should reach their buildings without a problem.
So far as the trucks go, just keep escorting them as best you can. Having all three survive will be unlikely, so don’t worry too much if one or two bite the dust; just try to stay near one or two of them to defend them. The sonic emitters that are powered up when you capture the power plant will guard your rear when you cross the bridge, so at that point you shouldn’t have any problems escaping.
Mission Two: Stuttgart
Primary Objectives
- Capture or Destroy Alien Structure
- Rescue Engineers
- Capture the eastern Power Plant, activating the GDI Base
Bonus Objectives
- Rescue Zone Troopers
- Rescue Snipers
- Rescue Infantry Squad
- Destroy a Tripod with the Commando
- Capture the northern and western Power Plants
- Capture the southern Power Plant
- Capture the southwest Power Plant
Building A Base
All you start with here is your Commando, but you’ll find plenty more soldiers as you move around the city. You may want to simply stand still for a moment until you get all of the initial bonus objectives delivered to you. Your commando will be able to take down pretty much anything you see here, including the large Annihilator Tripods that the Scrin will be sending your way, so don’t worry too much about him. Before heading to the engineers to your west, though, you’ll want to head towards some of the nearby trapped units and build up a small force. When you have four or five units under your belt, move to the engineers and kill the aliens nearby to rescue them.
With the engineers under your wing, start heading east towards the GDI base on the far side of the map. If you don’t keep at least one engineer alive, you won’t be able to win this mission, but that shouldn’t be too much of a problem, since there are so many of them. Just keep an eye out for Tripods and tell your Commando to explode them when they get close. If you do so, you can place an Engineer into the Tripod and use it for yourself, which will be handy. If you get back to the base and capture the power plant there, the war factory will come back online, allowing you to repair any Tripods that you’ve salvaged.
When you have the base under your protection, move engineers to capture the Tiberium spikes and silos to the south of your position. No need to guard them, as they won’t be attacked by the Scrin. The spikes will provide you with effectively limitless cash, albeit at a slow rate, so quickly repair the base and start making a fleet of Predators with railguns to protect you. Ten or so Predators should guard the eastern side of the base, with five or six missile squads in APCs scattered around to shoot down the planes that fly overhead. The planes aren’t going to attack you, but still, shooting them down will give your missile squads plenty of experience.
Taking the Command Post and Armory
Although the bonus objectives here are optional in a strict interpretation, taking them back will still be very beneficial for you. Begin with the Command Post, on the middle-southern portion of the map. When you head out that way, roll out with plenty of riflemen and missile squad soldiers in APCs, with perhaps a few Predators for good measure. You won’t need them all, but better safe than sorry. Don’t forget to place an engineer into an APC as well.
When you capture the command post, your radar will come back online, and the defensive turrets around the command post will activate as well. These will destroy any vehicles that come nearby, but ground units will still be a problem. You may want to dig in a couple of Riflemen squads on the hills leading up to the command post to leave it somewhat autonomous.
With the Command Post under your belt, you can head west to the Armory. Reinforce your little army with more APCs and Engineers. (You may want some empty APCs to hold any troops you discover as you move.)
In For The Kill
At this point, you should have basically infinite money, so load up a bunch more APCs with Zone Troopers (which the armory lets you build) and engineers. Send a bunch more Predators and APCs down to the armory point and thrust north from there. Recapture the two power plants near the enemy base and repair them to start getting the Sonic Emitters up and running; they’ll contain the enemy in its base, allowing you to form up and sweep through to clear them out.
Mission Three: Cologne
Primary Objectives
- Scout Alien Structure
- Protect the Engineers
- Capture the northeastern Power Plant
- Destroy Alien Command Center
Bonus Objectives
- Capture the northwestern Power Plant
- Capture the Reinforcement Bay
Something Stinks
Time to take back Cologne. You start with a group of soldiers here, mostly heroic and veteran units. You may want to split your Commando into a separate group from the rest and move him ahead forward of the rest of the soldiers here. If one of your Zone Trooper squads loses a member, he won’t come back, but the Commando, being a single soldier, can regenerate from near death, given enough time.
Move to the northwest in this fashion, with the Commando taking cover inside a building when things get hot. Eventually you’ll see a Tripod; have your Commando destroy it. Continue north until you reach Point 1 on your map. You should see a power plant nearby; note the location!
Across the river to your east, a group of soldiers and engineers will be waiting for you. Head to them and protect the engineers. Things are about to start happening very quickly...
Restoring Power
Now, note that the only power plant on your objectives list is the one on the eastern side of the river: the one to the west is a bonus objective that will only unlock after you inhabit the eastern plant. However, you can feel free to bring an engineer across the bridge and inhabit the power plant there first, if you like.
Your basic goal is to have engineers near both of the power plants before you inhabit either one of them, actually. Putting engineers in the eastern plant will restore power to your base, allowing you access to the construction facility there and letting you nab Tiberium from the fields nearby. The first thing you want to do is build another power plant to get your juice flowing, then construct a war factory and make two more harvesters. There’s plenty of tiberium to capture here, and you’re going to want a lot of it.
On the western side of the bridge, restoring the power will bring four sonic emitters online, although they’ll need immediate repairs if you want them to stay alive. These guys will be a big help to you, in that you can just constantly repair them as they take damage, and they’ll keep the light enemy vehicles from reaching the bridge and thus assaulting your base. Just keep them repaired, and back them up with some light anti-infantry units, like perhaps the Commando in an APC.
The End
As you build your base, construct a Tech Center. You have a couple of options here: you can finish off the enemies with Firehawks, or with Mammoths, or with a combination of the two. If you do build some Firehawks (two airbases full would be ideal), a squad of four should be able to take out the large portal devices that the Scrin are using to spawn in troops. Destroying them will lighten up the enemy load considerably.
Unfortunately, the Scrin air force is badass. Every few minutes, they’ll receive a new load of planes from offscreen, and eventually they’ll be getting heavy artillery planes and mobile aircraft carriers that will send out large amounts of smaller planes. You can use Firehawks with missiles to shoot these down, but there’s no way to stop them from coming. It’s best to build up five or six Mammoths after the two portals are destroyed and send them towards the enemy command structure to destroy it and finish the mission, as quick as possible. You can technically use the snipers and Juggernauts you received from the reinforcement bay, but doing so will require a good amount of finesse, and dealing with the airships will be taking up a lot of your micromanagement skills to boot.
Mission Four: Berne
Primary Objectives
- Destroy the primary base Drone Platform
Bonus Objectives
- Destroy the Alien Signal Transmitter
- Destroy the Mothership
- Destroy the air base Drone Platform
- Destroy the motor base Drone Platform
Digging In
At the outset, you have a sizable base to work with here, but as you might expect it’ll come under fire fairly quick. Build a war factory near the front lines and crank out a couple of harvesters, then build a Rig and deploy a Battle Base on the other side of your construction yard. You’ll need to have tanks defending both sides of the main approach to your base, so get them set up with the war factory and battle base so that they can get repaired as necessary. Position the war factory in front of the construction yard a bit so that you can cluster more vehicles around it, and do the same for the Battle Base. Feel free to add another Battle Base in front of the construction yard, as well, to ensure that there are no gaps in your repair coverage.
Enemies will attack from the front, but you’ll also have plenty of enemy light vehicles coming your way from the north and planes coming from the east. Spread some Predators around in the north, then, and seed the eastern side of your base with missile squads or Pitbulls. There are going to be more of those annoying, long-range artillery aircraft coming from multiple sides during this battle, so you may want to create a squad of ten or fifteen Bulldogs and keep them in reserve to deal with these guys.
Build up the tech tree here as quickly as you can, starting with a Tech Center to enable you to build a few Mammoths, and don’t forget the railguns! After the initial assault by the Scrin, things will settle into a frenetic but relatively stable routine. Heavy ground assaults featuring Tripods will come at you from the east, so build a few Mammoths and keep them near the war factory or Battle Base to keep them repaired, and plop down a sonic emitter or two on that side of the base to help in the defense. The Tripods are upgraded with shielding, so they’re tougher than normal, and seem to attack more ferociously as well.
Lastly, build a couple of airbases to the rear of your little base here. Firehawks with missile loadouts will be big helps when dealing with the artillery planes; your missile launchers of various stripes can deal with the smaller planes.
The Bonus Objectives
Now, when you have the situation relatively stabilized, it’s time to focus on your bonus objectives. Build a Space Command Uplink and an Ion Cannon Control Center for a bit more help, then focus whatever cash you have on building a fleet of Mammoths. You’ll want around ten or fifteen of them.

There are two ancillary bases on this map, as mentioned in the briefing, one to the north of your base and one to the east. Your Mammoths will be able to run through the crystals surrounding them and destroy the bulk of each base, with hopefully minor losses. We took out the airbase first, to the east, as those air units are damn annoying. It won’t stop all of the air units coming your way, as some come from the main base, but it’ll help a lot.
When you destroy either of the two ancillary base Drone Platforms, you’ll get another bonus objective: Destroy the Alien Signal Transmitter. The transmitter is located at the rear of the enemy base, and as such will be almost impossible to get to with any conventional units. Your Ion Cannon can fire through the fog of war, though, so use that to take it down. If you’re unable to destroy it, you’ll only have around a minute before it summons a Mothership, a huge alien flying warship. You have a bonus objective for destroying it, but you won’t have any choice, since it’ll come straight towards your base. Your Firehawks with missile loadouts should be capable of taking it down.
When the first Drone Platform is down, return your Mammoths to your main base and repair them. Build up a few more to replenish their numbers and take down the second ancillary base, then gird yourself for a major attack on the enemy’s main base.
The Berne Ultimatum
The Scrim’s main base in the northeastern corner of the zone is filled with artillery aircraft and shielded Tripods. It has plenty of anti-air defenses, as well. You have to take out the primary Drone Platform here, but again, it’s well guarded. Since the attacks on your own main base will mostly have died down, though, you should be able to get as much cash as you want at this point, so feel free to build 30 or more Mammoths and a dozen or more Firehawks with bomb loadouts. When you’re ready for the main assault, you can send in your Mammoths to start the fun, weaken the Drone Platform with an Ion Cannon strike, then send in the Firehawks on a suicide run to destroy it entirely and win the fight.
Act V: Italian Red Zone
Mission One: Rome
Primary Objectives
- Destroy Three Alien Phase Generators
- Destroy the Alien Tower
Bonus Objectives
- Destroy the Alien Masterminds teleporting the forces
- Prevent Aliens from using Rift Generator
Building
Start building your base up here, getting an armory out quick to repair your Zone Troopers - no sense in letting them go to waste. When you get a war factory built up, plop out a few Pitbulls or some anti-air turrets to protect you from air units, along with a couple more harvesters.

You need to very rapidly escalate yourself up the tech tree here, until you’re capable of building Zone Troopers. You’ll want perhaps ten Zone Troopers, and maybe a Commando, when you warp across the chasm to your east. Engaging the base here is something you should do as soon as possible, as the alien Mastermind here is going to be the one responsible for warping units across the chasm, and if you don’t act soon, eventually he’ll start warping Tripods, which is a bad scene all around. Still, a group of ten or so Zone Troopers should be able to wreak havoc in the base, killing the Mastermind (he may hide behind a shield for a while; just wait for him to come out and kill them then), then moving farther to the east and killing the Rift Generator there. This alien superweapon will pound your base six minutes after it’s revealed to you, so take it down now, and eliminate the alien portal just to the north of it for good measure.
Expansion
Expanding to the east is a delicate matter, but you are lucky in that the Nod and Scrin forces will be battling in the valley to the north, hopefully distracting you from their presence. You need to air drop either a Surveyor or an engineer across the valley. A Surveyor can set themselves up and let you build, or the engineer can capture the expansion tower nearby and perform the same function. Either way, quickly build a war factory to defend your settlement with, then a refinery and another harvester. The blue tiberium here is worth a bit more than the green stuff, so you should be set for cash if you can set all this up.
Meanwhile, get your airfields built and have Firehawks with anti-air missiles set up on the north side of your main base; the Nod forces there will be sending bombers your way, and you’ll want to interdict them as best you can. An Ion Cannon Control Center will also be required.
When you feel like the situation has settled somewhat (we had barely any Scrim attacks at any location, oddly enough, but we still kept cranking out Mammoths during this entire period at our eastern base), you can start working on the Nod forces, if you like. It’s not 100% necessary to do so, but removing their airbases will at least be helpful. Send teams of four Firehawk bombers up the extreme western side of the map, and you’ll find the air forts to the north of their refineries. Drop the bombs, then manually move them back down the western side of the map to avoid running over the center of the Nod base, where the missile squads will deal damage to them.
Taking Down The Tower
After destroying the Nod air hangars and their refineries, you can Ion Cannon them at the middle of the base a couple of times to run down their money supply and effectively sterilize them - they won’t be able to build new structures or units.
Now, during this time, we still had not had any attacks from the Scrin, and we found out why as we sent out our fleet of 15 Mammoths; apparently the Nod had destroyed most of their production abilities before getting driven back. Regardless, get close to the three Phase Generators and destroy them. They’ll open up wormholes that spawn enemy troops in an effort to protect themselves, but with enough Mammoths that shouldn’t be a problem. Enemies will attack your main base, though, so keep your Zone troopers nearby and have your Firehawks with missile attachments on patrol around there.
When you destroy the three Phase Generators, get to the alien tower and focus your fire on it. The Ion Cannon will destroy it instantly.
Mission Two: Ground Zero
Primary Objectives
- Destroy the Alien Control Node
- Defeat the Nod Forces
Bonus Objectives
- Capture an Enemy Superweapon
- Divert the Alien Mothership to the Nod Base
Relentless Assault
This is going to be a pretty difficult mission here, so we hope you like a challenge. Getting the bonus objectives will especially be a task and a half.
Begin by building up your base and getting up the tech tree rapidly. You’ll want a war factory to your west and a Battle Base on the northern side, as you’ll be pincered in between the Nod coming from the north and the Scrin coming in from your west; use the Base and factory to repair the vehicles that protect you. The Nod forces will be especially infantry heavy, so a Commando in an APC might be worth your while here. Otherwise, some Zone troopers will help clear out the herd.

Unfortunately, you’re eventually going to discover that the Scrin have built up a Rift Generator to your west. This leads to a bonus objective for you: Capture an Enemy Superweapon. This can be done, but it’ll be difficult; take three Mammoth tanks to the west, followed by some APCs with engineers in them, and plop out an engineer as soon as you can get near the Rift Generator. Capturing it is one thing, but protecting it is another thing entirely, as the Scrim will soon arrive with aircraft carriers in the sky and some ground forces. Expand if you wish, but again - difficult.
A couple of things will begin happening here. A Scrin mothership will appear off on the western side of the map and begin heading towards your base; build an airbase with Firehawks when you see this, if you haven’t already. A Nod nuke in the middle of the map will be revealed. Also, the Nod forces to the north will begin building a Tiberium chemical weapons factory, as well as a structure that can launch tiberium bombs into your base. Airships are going to be key to dealing with all of these threats, so try to build a couple of airbases, at a minimum, to deal with them.
Soaring Over The Tib
First up is a bonus objective: you can divert the alien mothership to the Nod base by destroying a pair of dampeners on the ridges to the south of the base. These are easy; just fly a single Firehawk with a bomb loadout over to them, and they should go down with just that amount of explosives. Alternately, a single Mammoth might be able to get up there and deal with them.
The nuke can be left alone until it has a minute or so left on its countdown, then bombed with your Firehawks. Shouldn’t be a big deal. The Scrin mothership will likely deal a good amount of damage to it, as well, when it flies over it.
The Nod chemical factory and airbomb launcher are other matters, though. You need to deal with them, and fast, before they start hitting your base and crippling your forces. Bombers are going to be the quickest way to do so, even if it is somewhat suicidal for the bombers. Be sure you have some extra cash!
Note the position of the main Nod force to your north. The chemical factory is just to the east, between the two refineries the Nod have constructed in the small valley below their main base; that can be bombed to hell without endangering your bombers overmuch, since most of the anti-air forces are going to be concentrated inside the main Nod base. The bomb launcher, however, is on the northern side of the base, next to the two air towers. Destroying it will be a suicide mission. Move your bombers off to the west of the base, move them north over the tiberium fields to avoid the anti-air, then skirt them along the northern side of the map so that avoid running directly up over the base, and have them bomb the bombing structure. A group of four should be able to destroy it.
Taking Out Nod
A cutscene will play around halfway through this mission, wherein Lando Calrissian will emplore you to use the Liquid Tiberium Bomb to end the war. You can do so, if you wish, and taking out the Nod forces will significantly reduce the amount of pressure that you feel. It’s your choice.
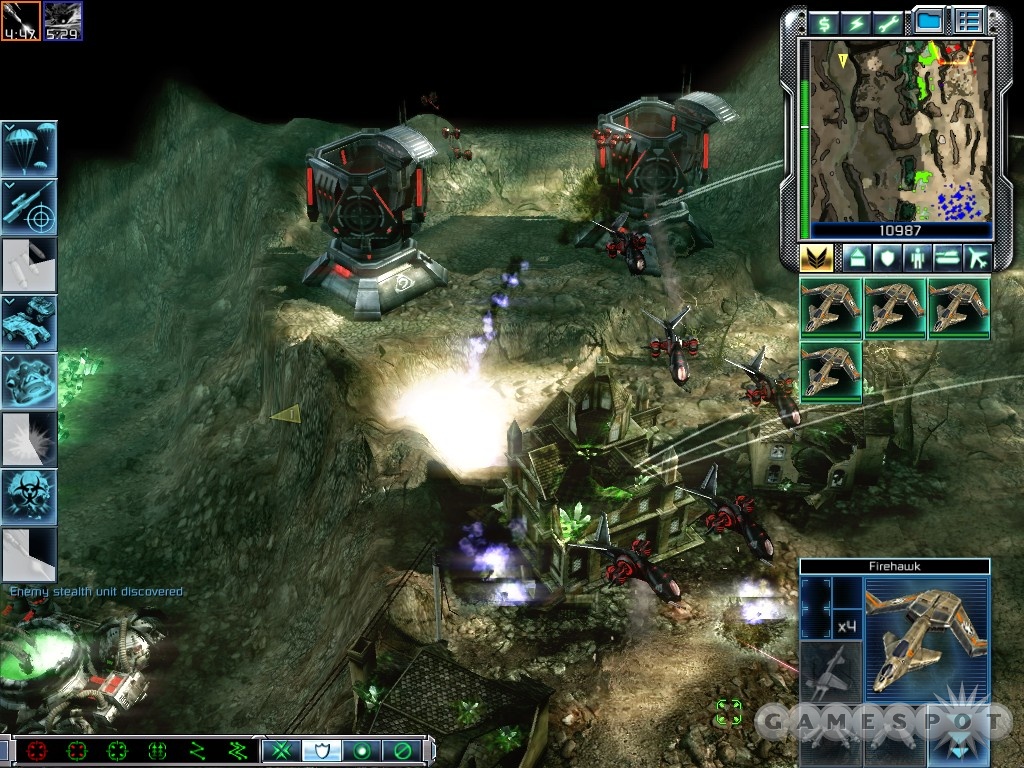
However, dealing with the Nod base is generally just a matter of constructing five or six Mammoth tanks with railguns and moving them north along the eastern ridge here. Most of the defenses in the base are targeted towards air units, except for a Pillar of Light or two, so you can move the tanks into the base, destroy the Pillars, then take out the marked structure to mostly cripple the Nod forces. Don’t worry about anything but the construction factory! You might even want to set your Mammoths to hold their fire except when you command them to hit something. When the construction factory goes down, immediately abandon the base and return home.
The reason for all this is that leaving the rest of the Nod base intact will give the Scrin a hell of a roadbump to deal with before they come to deal with your base. If you leave most of the anti-air turrets and the air bases intact, then their air forces will have a heck of a time dealing with the base and will be tangled up there for a good long while, giving you plenty of time to prepare for the final assault.
Finish It!
At this point, you only have the Scrin structure in the northwest to deal with. The Scrin may build another Rift Generator around the map, so be ready to suicide some Firehawks to deal with it; try and plot a route that minimizes their journey over anti-air turrets. Needless to say, if you haven’t done so yet, build your Ion Cannon Control Center and get it started on the countdown. The Rift Generators can be hit with your Ion Cannon, obviously, but even that and a Shockwave Artillery won’t completely destroy the Generator, so keep your planes at the ready and be prepared to suicide them.
Expand your base with another refinery to the west, if you haven’t done so yet, and use the funds to start building up a fleet of Mammoths. You’ll need 15 or 20 to deal with the Radiation Transmitter in the northwest. You can’t attack with infantry, since the path to the Transmitter is lined with blue tiberium, so build up as many Mammoths as you can and roll them up to towards the Transmitter. The Scrin aren’t going to let it go down lightly, obviously, so they’ll summon in plenty of shielded destroyer planes and Tripods to defend it, but still; have you encountered anything that could stand up to 20 Mammoths? I think not.
Your ending cinematic will depend on whether or not you used the Liquid Tiberium Bomb. If you did use, it, Lando Calrissian will congratulate you on a job well done; if you refrained from its use, Sam Fisher will be the one to praise you.
Nod Campaign: Prologue
Primary Objectives
- Destroy the Wall
- Capture the GDI Command Post
- Destroy the secondary Power Plants
- Destroy the primary power plants
- Destroy the Ground Control for GDI’s A-SAT system
Bonus Objectives
- Use the Shadows to destroy the final Power Plant
- Capture the Reinforcement Bay
Into the Base
Begin by destroying the wall indicated on your HUD with your Fanatics, then capture the Command Post with your Saboteur. That will give you plenty of reinforcements. Don’t worry about your soldiers here; as you lose them, more will be supplied to you. Garrison the large building to the northwest of your command post with a couple of militias and a rocket soldier to help thin the numbers of troops in the area, then move the Fanatics up to the northwest and destroy the enemy barracks and the power plants. That will eliminate the power to the turrets nearby, allowing you to take your rocket soldiers and fanatics up there to destroy the vehicle base and the other two power plants.
At this point, you can move in and destroy the final structure, but completing the bonus objectives will entail capturing the reinforcement bay to the east. Use your fanatics to take out the barracks nearby, then move the Saboteur that you’re supplied with into the reinforcement bay to capture it. That’s bringing coals to Newcastle, though, as the A-SAT controls are easily destroyed by using your Shadow Team. Have them glide up to near the structure, then focus their bomb power on the structure to destroy it and complete the mission. If you want to complete the bonus mission, then be sure to have them take out the power plant before destroying the A-SAT controls!
Act I
Mission One: Andrews Air Force Base
Primary Objectives
- Destroy the two Airfields at the rear of the airbase
- Eliminate the GDI Patrols and destroy the GDI Outpost
- Disable the GDI defenses
- Destroy the Control Tower
Bonus Objectives
- Capture two Tiberium Spikes to fund this mission
Into The Base
In order to set up your home base here, you’ll need to take out the southern GDI outpost. Do so with your vehicles; group them together, run them over to the west, and have them fire on the fuel tank in the middle of the structures. That will destroy all of them, letting you sweep up the patrols and get your base set up.
When you have the base established, destroy the soldiers to your north, then move your Saboteur into the tiberium spike there to capture it and get yourself some cashola. There’s another Tiberium spike to the north, but you won’t be able to reach it just yet. You’ll have to deal with some incoming GDI air assaults, so use buggies or missile squads to deal with them as they arrive, and build up your forces to extend yourself northward.

As you scout a bit, you’ll discover that the GDI has defensive turrets on the northern wall, but you’ll receive some Shadow Teams to help deal with them. Glide them up and over the wall and land them near the power plant to destroy it and shut down the turrets. With that done, you can quickly take out the nearby infantry with your Shadow Team, then move a few missile squads into the building on the road, near the wailing sirens, to deal with the nearby APC and bunker.
At this point, you’ll want to move a whole mess of units up to the northern side of the wall, keeping them between the wall and the large buildings off to the east of the road. Just build up a large force of fanatics and missile squads and defend yourself with them. You can use fanatics to bust through the wall to the south of the second tiberium spike and capture it with a saboteur.
Finishing Off GDI
When you have a good number of Fanatics built up, send them to the north and have them destroy the control tower there. That will unlock scout bikes for you to build. You won’t need them, though! Instead, build a half-dozen or so buggies and move them through the enemy base, shooting all of the red barrels to weaken it up, then follow up with a group of 20 or so Fanatics. They’ll be able to take out both of the airbases without too much trouble if you keep them focused.
Mission Two: The White House
Primary Objectives
- Destroy the GDI Logistics Center
- Destroy the remaining GDI forces guarding the White House
Bonus Objectives
- Capture two Tiberium Silos to fund this mission
- Capture two Tiberium Spikes to fund this mission
- Destroy five Ox Transports
Easy Peasy
Some easy fights to begin with here, as only riflemen will be coming your way from the north. When you have a moment to do so, send Saboteurs to capture the two tiberium spikes in the southwest and eastern corners of the map here. Two more Saboteurs can be used to capture the tiberium silos in the northeast and northwest, but be sure to move them up the sides of the map to avoid running into the GDI forces in the middle.
Send a group of buggies to the north to take out the riflemen, and finish off the barracks with rockets or fanatics. Before you destroy the logistics center, though, build up a fleet of around 20 rocket bikes and have them bound as a separate combat squad, and garrison each of the buildings near the center with a couple of rocket squads and a militia.
Center Down!

When the logistics center is destroyed, you’ll have to start using your group of rocket bikes to counterattack air supply reinforcements that the GDI are attempting to get delivered to their base. The announcer will tell you where the supplies are coming from, and a marker will appear on your map, so move your group of bikes underneath the approach vector, and the planes will get shot down as they come onto the screen. The only difficulty here is that one of the vectors is from the north, above the White House, but you can still get there by just rushing all of your bikes up through the enemy base. The next spot will be at the south of your base, but you’ll have plenty of time to destroy those units.
As you run around shooting down planes, there’ll be light assaults from the north. Your garrisoned forces will deal with most of them as they approach, but having a few more rocket bikes or buggies will help, as well.
When all of the planes have been shot down, sweep north with fanatics and the rest of your vehicles and soldiers to destroy the base quickly and win the mission.
Mission Three: Hampton Roads
Primary Objectives
- Destroy the GDI Aircraft Carrier
- Destroy the GDI Port Authority Building
Bonus Objectives
- Find the lost Saboteur
- Capture the GDI Command Post
Fun With Tanya
Your commando here is probably not as powerful as the GDI Commando, since she doesn’t have the ability to jetpack around and won’t be able to take as much damage as her male counterpart, but she’s still a pretty badass, what with her adorable little laser. Move her up towards the ship that’s your initial target, planting her in buildings to protect her from the infantry fire. Be sure to grab the supply crates to quickly level Tanya up and let her heal herself. When you reach the ship, destroy the tanks outside by firing at the explosive barrels nearby, then move around to the ship and blow it away with Tanya.
At this point, you’ll get reinforcements in the form of a number of fanatics and some gunships. Bind them to individual groups, but stick with Tanya for the moment. Start moving her to the south, jumping from building to building to wipe out the groups of infantry around there. Sending your gunships might sound like a good idea, but they’ll be damaged by missile launchers and you have no way to repair them.
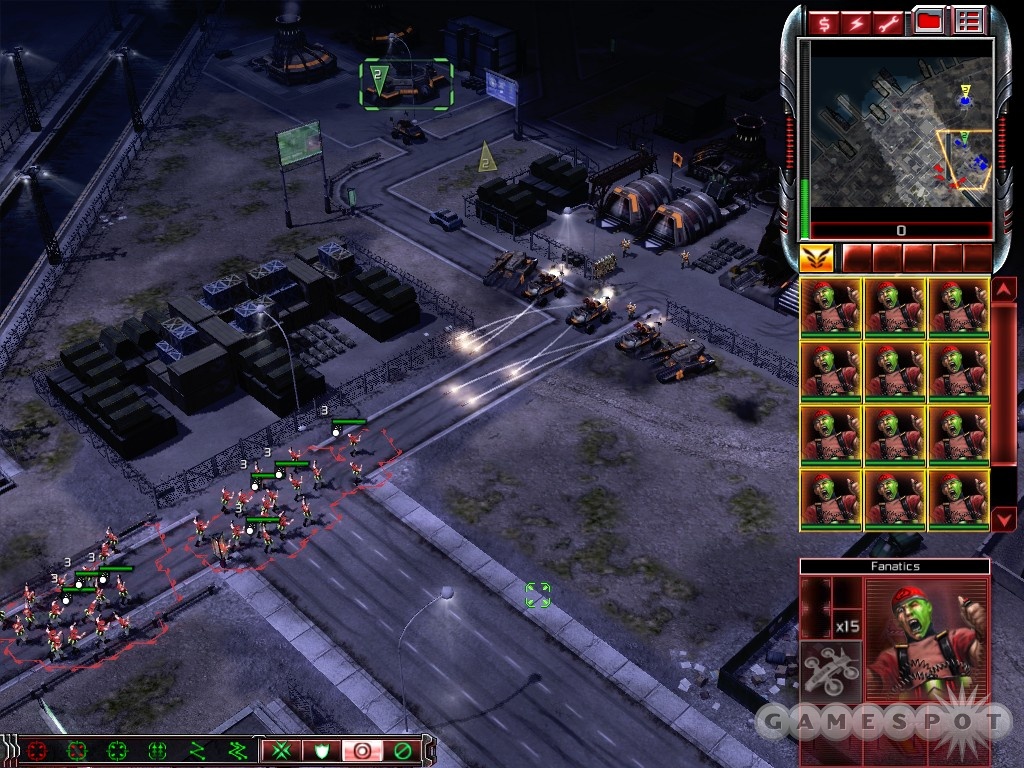
Move your commando down to the south towards the small forward base of the GDI. Getting in there and destroying stuff will require you to take out the garrisoned forces in the buildings nearby, but this can be tough to do, since Tanya has a nasty habit of getting suppressed by their fire, but if you run up to the buildings, blow them with explosives, then get away as quickly as you can, you can make repeated trips to the periphery of the area and blow any inhabited buildings away, then take out the barracks and power plants nearby.
With that done, ensure that there aren’t any more rocket soldiers in the area, plant Tanya in a building near the bridge leading to the southeastern GDI base, and sweep the area with your gunships to ensure that there aren’t any more snipers waiting around. With that done, head to the point on your map where the saboteur is supposed to be located and destroy the tanks there by shooting the red barrels near their locations. When they’re all dead, the saboteur uncovers himself and joins the fight.
Capturing The Command Post
When you have the southeastern base contained with Tanya, get all of your fanatics together and move into it, destroying the barracks and war factory and all of the vehicles around. When that’s done, move your fanatics down to the south and let your saboteur capture the command post to complete your bonus objective. Tanya can destroy the power plants in the area, which will turn off the automated defenses around the Port Authority Building, which will let you move your remaining fanatics in to destroy it and win the mission. Might want to follow them up with Tanya to ensure its destruction.
Mission Four: Washington DC
Primary Objectives
- Destroy the primary GDI base
Bonus Objectives
- Build a Shredder Turret base defense
- Build a Laser Turret base defense
- Capture the Subway Hub
- Destroy the Tiberium Silos
Defeating GDI
Quickly build up your base a bit, starting with a war factory and another harvester. Your Black Hand soldiers can clear out the buildings in front of you; restock them with a couple of missile squads in each one of the buildings near your base, as funds allow, as well as either a Black Hand or militia unit. They won’t last long - enemy grenadiers will take them out eventually - but you can still hold the enemy forces back while you build up your base a bit.
After building an Operations Center, start building up turrets to surround your base with. Build a couple of laser turrets to guard the main path into your base, and cluster up the mini-turrets around each other so that they can focus their fire when vehicles approach. A couple of flak cannons will be helpful, too. You have a lot of tiberium to work with here, so don’t hesitate to spend it on turtling up.
After you’re well enough defended, you can start working on the secondary objectives. Sending a Shadow Team to fly off to the east of the base will reveal a tiberium silo; land them and destroy it. There are two others in the area, with one being just north of the subway entrance. Destroy that one as well, and save the one to the north for last.
Attacking The Base

Before taking down the GDI base, you can spare yourself a bit of trouble. Build a Shadow Team and glide them up the extreme eastern side of the map. You’ll see a few power generators surrounded by barbed wire. If you manage to land a few Shadow Teams in here while avoiding the stealth-penetrating glare of the turrets nearby (put them in Hold Fire stance to ensure that they don’t give themselves away), a pair of Shadow Teams should be able to destroy one power plant. When all three are destroyed, the nearby turrets will be de-powered.
Your best bet for dealing with the GDI base will be fanatics, and lots of them. Go ahead and build up something like 20 or 30 of the teams. You’ll notice the Subway Hub to the north of your base. Well, if you capture that with a saboteur, you can enter your fanatics into the subway opening to the east of your base, near the first tiberium silo that you destroyed. You can only put in three at a time, but they’ll be able to pop up out of any of the northern subway exits. The exits will be quickly destroyed, though, so this isn’t going to win you the game.
Defeating the enemy base will be a straightforward slog. Build up a ton of flame tanks, perhaps 20 or 30 altogether, and pair them with a like number of fanatics. Start working your way up the eastern side of the map, burning out buildings as you come to them, and using your fanatics to destroy vehicles that get in your way. Don’t forget to take out the last cluster of tiberium silos, then force your way into the main enemy base and destroy everything in sight. Don’t be surprised if you get wiped out a couple times before making it all the way to the base; you’ll get there eventually though.
Act II
Mission One: Amazon Desert
Primary Objectives
- Protect the Nod Lab
- Eliminate the GDI Expansion Base to the north
- Destroy the GDI Construction Yard, Command Post, and Refinery
Bonus Objectives
- Capture the Reinforcement Bay
Base Defense
This opening defense of the lab isn’t as bad as you might expect. Get your three missile squads into the building on the northeast side of the base, or perhaps go with two missile squads and one of your Black Hand squads, then just repair the laser turret on the other side of the small passage and let it deal damage as well. You can build another laser turret here, or a flak turret if you’re worried about infantry.
When you get the prompt to start attacking the enemy base, start building up your own first. Another harvester would be nice, as well as some silos, and don’t miss that you can now start building air towers. Build a tech center to boot to research some nice upgrades for your units.
Now, feel free to take up a bunch of spider tanks and buggies to the north and destroy their base, but you’ll want to pause before taking out the refinery there. Leave it alone for the moment, actually; if you just destroy the two factories here, you can prevent the enemy from building any more units. Do so, then move an Emissary unit from your main construction facility up here to make an outpost. If you do so, you can build another refinery and another war factory up here.
It’s pretty obvious that you’re going to face off against more troops on the eastern side of the map when it expands, so build up turrets on each of the eastward-facing roads. A couple lasers, a flak, you know the drill. Also don’t be afraid to build a couple of anti-air turrets in each of the main bases, and don’t forget to start pumping out many more spider bots and buggies for your eventual assault into the enemy base!
Expanding the Map

When you take out the northern base, finally, the map will indeed expand, revealing an enemy base to the northwest. Your goal? Get in there and destroy it.
First off, though, you’ll want to complete the bonus objective by capturing the reinforcement bay to the southeast. You can fly over a saboteur if you’ve built an air tower, land him nearby, and grab it. Use your Venom fighters to clear out the town nearby if they’re giving you trouble.
When you’re ready to take out the northwestern base, a fleet of around 30 scorpion tanks and ten or fifteen buggies (to deal with air units) will be more than sufficient to run in there and start smashing the buildings.
Mission Two: Atlantic Coast
Primary Objectives
- Destroy the GDI Artillery Emplacement
- Destroy the GDI Artillery Emplacement to the east
- Destroy the GDI Artillery Emplacement in the northeast
Bonus Objectives
- Destroy the GDI Construction Yard
- Destroy the Rig before it can reach the Artillery Emplacement
- Eliminate the GDI Aircraft Carrier
Turtling Up
You can turtle up a bit here at the beginning of the fight, although you will likely take some damage from the enemies that will assault you from the north. Go ahead and destroy the first artillery emplacement with your Vertigos to expand the map.
After doing so, quickly build a new refinery near the southwestern tiberium field in your base. Each refinery only needs one harvester, though; don’t want the fields depleting, after all. With that done, build another shredder turret outside your northeastern wall, near the existing laser turret. That will help ward off the enemy advances and let you build in peace. You may wish to simply build another war factory just to the north of your walls, as well, to let the bulk of your vehicles get repaired as they defend you from your opponents.
Keep in mind that you can build more Vertigo bombers at your air tower, and that you can build more towers. No need to make do with the two you’re given; eight would be a more appropriate number for you. The first thing you’ll want to do with them is move them up into the northwest corner and destroy the refinery that the GDI has probably built near the blue tiberium up there. Might as well make them work for their tiberium, after all.
Bonus Objectives
While you turtle up, send your Vertigos out on bombing runs. You can take out the two anti-vehicle turrets in front of the GDI base in the middle of the map, if you like, but don’t fly over the base itself unless you want to lose your units. To the east, you can start taking out the anti-air turrets near the eastern artillery point, as well as the Battle Base there.
Eventually you’ll get a new bonus objective: a rig is heading to one of the two artillery emplacements, and needs to be destroyed before it can get there. If you have four or eight Vertigos, this is a simple matter of flying over and bombing it. You can route yourself along the extreme southern edge of the map to avoid most of the damage from any anti-air units in your way.
Likewise for the aircraft carrier that’s in the southeastern corner of the map. It’ll take repeated bombing runs to destroy, so skirt the southern half of the map until it goes down. This isn’t on a timer and isn’t a pressing concern, so don’t worry about doing it right away.
The Central Base

One of the optional objectives is to destroy the construction yard in the middle of the area. To do so, build up a force of perhaps 20 to 25 scorpions and mix in a few stealth tanks and buggies for good measure. You can weaken up the defenders in the base with some of your special powers or bombers if you like, but this is a ground attack all the way. Get your forces into the base and wipe everything out, being sure to take down the power plants here. That will disable all enemy turrets on the map and make your job a lot easier.
If you wind up needing more tiberium at any point, don’t forget about the blue tiberium field in the northwestern corner of the map. You can expand up that way (after checking for any enemies with your bombers) and build another refinery for some blue tib goodness.
With the central base out of the way, bomb the heck out of the eastern artillery to take it out of the picture. The northeastern base will be defended by Firehawks, so you’ll have to go in on the ground. Most of the defenses around the base should be shut down, and most of the bunkers here will be filled with riflemen, so you won’t need a huge number of ground forces to take with you, but it’s still fun to build up a large force and march up the side of the mountain to the last artillery piece.
Act III: Eastern Europe
Mission One: Slovenia
Primary Objectives
- Investigate the Crash Site
- Escort the device into the Nod Encampment
- Protect the device until the Avatar Warmechs arrive
- Move the device to the evacuation point
Bonus Objectives
- Destroy the Anti-Air Guns to Obtain Reinforcements
- Build and maintain three Obelisks of Light
- Upgrade an Avatar Warmech
Why You Gotta Do Me Like That
You start this mission with nothing but a commando, and your goal is to clear out the AA turrets to the west of your start point. This can be a difficult task, since there are plenty of infantrymen running around down here, as well as a few roaming APCs. When faced with a vehicle, try to wait until it moves past one of the red barrels, and shoot that to destroy it. You can also grab any crates that you see; there are a couple of veterancy crates around, as well as plenty of healing.
After the first couple of AA turrets go out, you’ll be given a couple of missile squads; they’ll be pretty worthless to you, since the first APC that comes along will probably kill them before they can do anything to it, but keep them close to Tanya and hopefully they’ll help a bit before they bite it. Move over to the west and take out the turrets there for some Shadow Teams, which will be more helpful, although all they can really do is anti-infantry, which Tanya is already good at. Be sure to grab the veterancy crates for Tanya and try to get her fully upgraded, as she’ll fire a lot more rapidly at that point.
Killing the small base that remains and the AA guns nearby will net you a relatively pointless drop of fanatics. Take whatever troops you’ve assembled and head down to the crash site to retrieve the liquid tiberium vehicle. A small group of rocket soldiers and Pitbulls will land to the southwest, so deal with them, then have Tanya take the lead as you move up north into the base. In case you have any problems, you’ll probably want to make a save just before the tiberium truck enters the base here.
Base Defense
Before moving the tiberium truck into the base, position Tanya on the western side, right near the entrance, and have the rest of your forces guard the north side.
When the truck enters, you gain control of the buildings here. Immediately repair all of them and have your vehicle factory create another Harvester, and research Laser Capacitors at the tech center to increase the firepower of your scorpions. Speaking of scorpions, build five or so at the outset to deal with the early vehicle rushes. You’ll be facing vehicles from the north and the west, and the occasional plane from the east, so park a rocket bike or buggy over at that entrance.

One of your bonus objectives here is to build three Obelisks of Light, but your real goal should be to build at least four, with two each at the northern and western exits. One at the eastern base would be nice, as well, since there are some light vehicles that will come from that way; back it up with a few scorpions. Also, keep in mind that a Mammoth or two will eventually roll down from the north; a third Obelisk at that entrance might not be a bad idea.
Upgrade all of your power plants with liquid tiberium cores to boost their power output, and build a couple more around the base. Keep in mind that both your crane and your construction base can build main buildings and support buildings at the same time, so you can conceivably build two power plants and two Obelisks of Light at the same time. Don’t worry about building infantry here; just keep pumping out scorpions, with the occasional buggy thrown into the mix to deal with infantry that get too close to your base.
Escorting the Truck
With around 30 seconds left on the countdown clock, a Mammoth tank will come from the north, so be ready to throw some Scorpions at it to destroy it before it can kill one of your Obelisks. You’ll want to build a few flame tanks at this point, for reasons that will become obvious soon. When the countdown finally ends, you’ll receive a few Avatar Warmechs at the eastern side of your base. Get them to the war factory to repair them, then fulfill the bonus objective by upgrading them. To do so, click on the little hand icon in their unit options, then left-click on a flame tank. Boom! One less flame tank, one more flamethrower for your Avatar. That will help them deal with the infantry they’re going to be wading through soon.
Queue up three or four more Avatars at this point and use them to ward off the Mammoths coming from the north. When you have six or seven (or nine or ten), group them together with the rest of whatever smaller vehicles or infantry you have left and start moving the whole mess north. The weaker vehicles and infantry will move out ahead of the Avatars, most likely, which is fine since that will distract their fire from the Avatars. With the Avatars, clear out the turrets and the two barracks and war factories on either side of the ridge. When the coast is clear, move up the truck behind the Avatars and get it to the road to the north, where it’ll take off and end the mission.
Mission Two: Sarajevo
Primary Objectives
- Escort the transport truck back to Temple Prime
- Eliminate GDI blockade by destroying all GDI forces
- We’ve been betrayed! Destroy the forces of the traitors!
Bonus Objectives
- Return the transport truck back to Temple Prime unharmed
The Green Truck
Your first task here is to get the tiberium truck back to Temple Prime. As soon as you can control your units, assign the truck to a squad, with the rest of your units in another squad. You can probably go a number of ways here, but we chose the northern passage here. We used our Avatar to distract the antitank turret on the eastern corner of the GDI base here while the truck and the rest of the units went up the ramp nearby. The units we had distracted the GDI forces that pursued while the truck laid down tracks towards the ramp leading down into the Nod base. Not the northernmost ramp, but the one below that. The truck arrived without a scratch, allowing us to move the remaining forces into the base and completing our bonus objective.
The Buildup

Your goal now? Defeat the GDI forces. This will be a defensive battle at the outset, so quickly build a couple more harvesters at one of your rear factories and have your construction center build a crane. When the crane is done, immediately build a Tech Lab and Secret Shrine, then crank out a few Avatars at your front-line factories to help in the defense. With that done, start cranking out more power plants and Obelisks of Light. You should be familiar with the basic layout of the base here from your days as a GDI commander, so try to get plenty of Obelisks set up near the four main gaps in your walls. Three Obelisks per gap is a good number to try on for size, spread out just a bit so that they don’t all get hit by bombers when they start coming your way. Back these up with anti-air turrets to deal with the Orcas that will periodically arrive, and try to have two or three Avatars at each gap as well. Building more War Factories near the gaps that get assaulted often and setting your Avatars to the Hold Ground stance will make your base all but impenetrable to enemy ground units.
You’ll want to build another refinery up near the second tiberium field on the south side of the base to help finance all this. Build it behind the walls and it should be fairly well protected.
Predictable Plot Twist
Just hole up inside your base and wait at this point. After a few minutes of bickering, the GDI forces will be wiped out by a bombing run from an unidentified source. As it turns out, rogue Nod forces have decided to instigate a coup against Kane. That’s a bad thing.
The bulk of the enemy attacks will come through the northwestern and southeastern entrances to the base, so bulk up your defenses there. Most annoying will be the bombers that come your way; they’ll strike at your Obelisks, but they shouldn’t be able to take them out in one hit, so be on the ball about repairing them, and double up on your anti-air turret defenses to deal with the Orcas that are also going to come your way.
Beyond that, the last phase of this isn’t too difficult. Build a couple more harvesters if you need to, then assemble a large number of Avatars, perhaps 15 or 20 altogether, and have 15 or so buggies escort them into one of the bases. The Avatars should focus on the buildings and the opposing Obelisks while the buggies take up the rear and shoot down planes and opposing infantry. Just be sure to keep the alternate flank defended while your robots are rampaging through the opposing bases.
Act IV: Australia
Mission One: Outback
Primary Objectives
- Capture Convoy
Bonus Objectives
- Destroy Tiberium Tower
- Capture GDI Research Facility
Tough!
Your goal here is to liberate a few nuclear transports from GDI control, then get them to a holding point until your Nod transports can arrive to carry them away. You only have a few units to work with here, and won’t be able to build more until it largely becomes unimportant to do so. Fulfilling the bonus objectives will likewise be very tricky, but at least the mission is short so you can try again as often as you like.
Immediately group your Venoms into one group, your ground units into another, and your saboteurs into a third. If you’re interested in the bonus objectives, then start the game by moving your ground units towards the tiberium spike in the northwestern corner, destroying its defenders, and knocking it down. That will block the road leading to the northeast, preventing any of the nukes from leaving the map.
Capturing the research facility will be much more difficulty, since your saboteurs will have to reach the extreme southwestern corner of the area. Still, no more enemy units should be constructed here, so if you manage to move your gunships over to the southwestern base, they can destroy the anti-infantry turret there and allow your saboteurs free access to the research facility.
Defense

While all this is going down, have your ground units destroy the escorts for one of the nuclear bombs as it approachs the eastern exit to the zone. The destroyed orchard to the south is your pickup point, so move the nuclear bomb when it’s under your control up against the mountains there. You only need one here; don’t waste your units trying to take out the other escorts. When you manage to move one of the nukes into the orchard, some defensive turrets will spring up and the Scrin will attack.
At this point, you get a war factory, so start building as many stealth tanks as you can afford; they’ll be decent against both the ground and air units that will be coming your way. Move your nuke around so that the countdown for the Nod carryalls begins, then get ready to make a defensive stand. The Scrin will be attacking with plenty of air units here, so keep your Venoms to the rear of your base where they can shoot down enemy fighters without coming under fire from the enemy ground vehicles. Hold up behind the turrets and wait for the minute and a half it takes for the carryalls to arrive, and you’ll win the mission.
Mission Two: Sydney City Wall
Primary Objectives
- Eliminate Three Alien Targets for GDI
- Capture the GDI Lab
Bonus Objectives
- Capture two Tiberium Spikes
- Destroy the Ion Control Center
Defending The Base
Your mission here is to help the GDI forces fight off the Scrin that are attacking Sydney, but you have a secondary mission, as well: capture the GDI lab inside the city walls to obtain the nuclear launch codes that you require for your nukes.
At the outset, build another harvester, then an air tower to go along with five saboteurs. Airlift the saboteurs and send them all north into Sydney. You’ll notice that there’s an Ion Cannon Control Center here; capture it first! It has a seven minute countdown timer, and around nine minutes after the mission starts, it will be unusable. If you want to get one good shot off with the Ion Cannon, then you need to land here and capture it ASAP. Land another saboteur to capture the GDI lab, and another for the Space Command Uplink. Then send the other two off to the west, skirting the northern side of the map, where they’ll find two tiberium spikes. Capture them both to give your base a little extra funding.
While this is going on, build a Secret Shrine to unlock some new tech, and start building up your base defenses. A couple of Avatars in Hold Ground stance near your war factory would be a nice start, but you know you’re going to want to have a bunch of Obelisks of light scattered around as well; you will eventually be seeing some large numbers of Scrin coming your way after they get bored of the GDI, so you want to make sure that you can withstand the assaults. The enemy has a huge number of Tripods here, so don’t discount your Venoms. Tripods have no anti-air capabilities, so a huge fleet of Venoms may wind up saving your life here. You may also be capable of holding the line with buggies if they’re upgraded with EMP coils; just run a mess of buggies into the oncoming assault and flip the switch to render them temporarily inert, allowing your Obelisks to get a few more shots in before they reactivate.
The Endgame

At nine or ten minutes into the mission, a few things will start to happen. Scrin Destroyers will knock down the walls leading into Sydney, first off. This may be preventable if you have five or six Venoms at each location they appear to shoot them down, but it’s probably not meant to be stopped. When this occurs, you’ll lose control of the Ion Cannon Control Center, and in fact will be told to destroy it. If you already captured it, this will prevent you from making use of the Ion Cannon. Around this time, you’ll probably also be facing off against a large number of Scrin coming towards your base.
Now, if you want everything to go smoothly, you’ll want to plan ahead for these occurances. First off, have your air towers build up four or eight Vertigo bombers, as well as a large number of Venoms, perhaps twelve or so, in a group. With that done, you should be prepared for a nice little airstrike. What you want to do is have your Ion Cannon shoot the northernmost of the three alien target structures, the Warp Sphere, here as soon as it comes online. At the same time, fly four or more of your bombers to the north of your base, then fly them in towards the portal (the easternmost Scrin structure) from the northeast to avoid some of the anti-air units, bomb it, then return to base. If done properly, you can destroy two of the three target structures before the Ion Cannon gets taken offline. This may provoke a Scrin attack, though, so be ready with your Venoms and Avatars in your base. You should still have the Space Uplink structure, which will let you use Shockwave Artillery on incoming Tripods. Taking them offline will again let you defeat most of them, assuming you have a good number of Avatars and Obelisks protecting your base.
Anyway, your goal here isn’t to fight the Scrin; it’s to destroy their buildings. If you don’t manage to get the Ion Cannon to fire, then your best bet is to simply build up a large force of Vertigo bombers and use them to head straight to your targets. The Portal and Signal Array will each go down with just a couple of bombs, but the Warp Sphere will be a bit tougher. Even if the Scrin are rampaging through your base, though, it’s still possible to win by simply bombing out their buildings while you control the GDI base to the north.
Mission Three: Downtown Sydney
Primary Objectives
- Help GDI hold out against the aliens for ten minutes
Bonus Objectives
- Help GDI protect their Ox transports during the evacuation
- Mine 25,000 Tiberium
We Gotta Help The GDI...Or Not
At the outset, you’re going to have a few objectives to work with here, but don’t worry about them. Just start building up the defenses of your base here, concentrating on getting a few anti-air turrets set up. Build a refinery and a few harvesters to get you on the path to riches, and send out a saboteur to capture the tiberium spike near the GDI base. You can also start capturing other GDI buildings near you, if you like, including the Space Command Uplink. The troops there will not be hostile to your saboteurs, and capturing some of the war factories will make your job easier later on. If you do decide to do this, though, be sure to build up your saboteurs and have them capture all the buildings in sync, as you will become hostile to the GDI when you start taking their buildings. They don’t seem to actually attack the buildings, though.
Whatever you do, don’t move out of your base, as there are tons of enemy airships to the north. Just sit back, build up a defensive perimeter, and wait. No need to go overboard on Obelisks here, as you won’t be facing any real threats. You can put some rocket soldiers in the buildings near your base if you want to give the enemies that approach you something to think about.
Kane Lives!

Eventually Kane will pop onto your screen, informing you that GDI is not to be allied with after all. Dissension in the ranks! Well, he gives you the command to wipe out GDI, which is good, since the bonus objectives you received earlier are wiped out, replaced with a simple-to-achieve goal of nuking the GDI base.
At this point, you have basically infinite time to work with, since the GDI and Scrin will be duking it out near the GDI base. Feel free to take your time building up a couple dozen Avatars here, then complete the bonus objective by nuking the GDI war factories. They won’t be destroyed, but you’ll take out a lot of their units. Flood the area with Avatars to destroy the targeted buildings and win the battle.
Mission Four: Ayers Rock
Primary Objectives
- Capture Kilian’s southern base
- Capture or Destroy the Temple of Nod
Bonus Objectives
- Capture Three Tiberium Silos
- Recruit Five Mutant Marauder Squads
Time to Take Out The Trash
Kilian’s desire to rule Nod has led to her downfall. The reappearance of Kane has sent her forces into a defensive stance, and it’s up to you to bring her to justice.
You begin the mission with a fully-upgraded Avatar and a few saboteurs. You have to keep at least two of the saboteurs alive here, so move the group off to the west a bit so that they’re south of the base you’re trying to capture. The Avatar you have has a stealth module, which can make his AI a bit funky; he won’t often fire on things unless his stealth is lifted, so you may want to set him to an Aggressive stance to encourage his automatic fire. Just keep him on a tight leash.
Move the Avatar into the base and clear out the defenders there while trying to avoid destroying the buildings. When the coast is relatively clear, blast a hole in the southern wall and let your saboteurs move up and capture the two buildings. With that done, the entire base will come online and you’ll have something to start with.
A Defensive Perimeter
Of course, Kilian’s forces aren’t going to like you being around. You’ll have to deal with air assaults from the northwest and increasingly stubborn vehicle assaults from the east. Build some anti-air SAMs near your refineries, repair them when they get bombed, and build your own air tower with some Vertigos. When they’re up and running, bomb the enemy air towers to eliminate that source of threat.
Your Avatar will be able to protect you to the east for a while, but not forever, as eventually the enemy will start sending their own Avatars your way. Build up saboteurs and capture the fallen Avatars to create your own little army at a cheap cost, and build up a couple of Obelisks with beam cannons to super power their defensive capabilities.
When you’re relatively stable on the eastern front, it’s time to deal with some of the bonus objectives. Build a number of Venoms, first off, and group them together. There are a large number of mutants hanging around the mutant hovel to the east, as well as around the tiberium spikes on the eastern side of the map and the tiberium silos to the north. Run around and kill all of them.
Flying Mayhem
Note that the enemy base is suspiciously free of anti-air defenses; feel free to bomb the hell out of them. Assuming they’re working by normal supply line rules, you can also choke their cash by hovering Venoms over the northwestern tiberium field and killing their harvesters as they come. A large enough squad of Venoms or Vertigos will be able to destroy all of their manufacturing buildings, thus stopping the flow of enemies to your eastern flank and let you work pretty much unchallenged. The area near the Temple of Nod is heavily guarded from air attack, though, so don’t get anywhere near it.
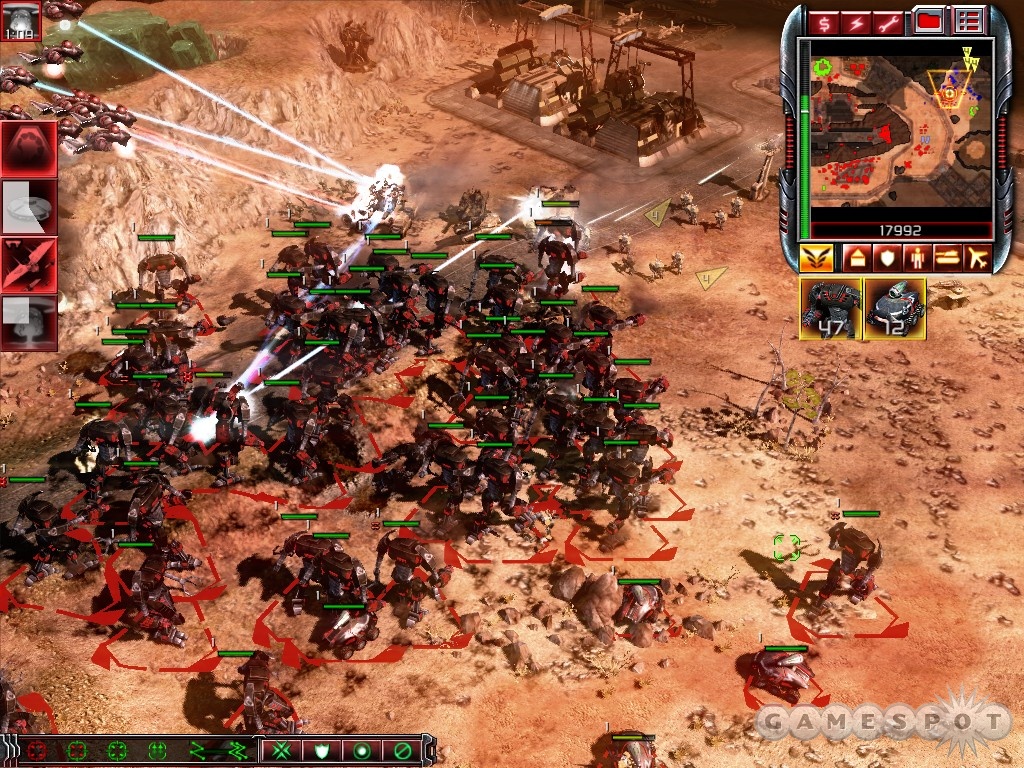
When you’ve knocked Kilian’s troops back to the stone age, run around and complete the bonus objectives by capturing the various points on the map that are required. Five mutant squads will be easier to create when you’re not facing constant attack.
When you’ve eliminated most of Killian’s defenses, march a few Venoms over the flame tanks in front of her base to eliminate them. Now, before you march yourself up and capture the Temple of Nod, it’ll be wise to build up for the next phase of the mission. Since you shouldn’t have any competition for the tiberium fields elsewhere in the area, build expansion bases near the green tiberium in the northwest and the blue tib to the east. Build a full-fledged expansion base near the blue tib, in fact, with another war factory and air tower there. You’ll also want to build your own Temple of Nod somewhere where you can protect it. When you start collecting the massive amounts of tiberium that you’re going to be raking in, start building up an army. Unlimited funds means you can make it basically as large as you want it to be; 30 Avatars? 50? 100? Whatever you like, just build up something capable of dealing with an enemy base that’s going to be more strongly defended than you’re used to.
After the Capture
When you have a sufficiently large army at your beck and call, move them to the eastern side of the map, then capture Kilian’s Temple of Nod. A GDI base will appear to the east, including an Ion Cannon Control Center directly to the east of the blue tiberium field. March there first to destroy it, then nuke away the large number of defenders in the northeastern base before assaulting it and destroying everything that moves.
Act V: Italian Red Zone
Mission One: Northern Italy
Primary Objectives
- Capture the Catalyst Launch Facility
- Repair the Catalyst Launch Facility to full health
- Destroy three Alien Gravity Stabilizers
Bonus Objectives
- Capture the Reinforcement Bay
- Destroy all three Gravity Stabilizers without using the Catalyst Missile
No Pressure
This is one of those semi-painful missions that may perplex you. You have to infiltrate a Nod facility that’s been overrun by Scrin and restore a Catalyst Missile that’s been damaged to full health. When you do so, you can use it on the nearby Scrin forces that will be attacking you.
First things first: you want to consolidate your positions, not deal with two separate bases. For that reason, as soon as the MCV was unpacked at the beginning of the mission, we packed it right back up and moved it into the larger city to the northeast, near the Catalyst Missile. You might not find this to be an ideal solution, but we’re a lot better at playing when we only need to defend one base. If you do this, immediately build a Hand of Nod barracks when you plant it and build a saboteur. Capture the other nearby Construction Yard. That will open up all of the other buildings in the base here to your control, allowing you to repair them as necessary.
Important! Although you gain control of the Catalyst Missile when you capture the Construction Yard, don’t repair it. Repairing it fully will move you to the next part of the mission, which is tougher than this one.
While you do all this, enemy planes will be running around all over the place here. Your rocket bikes can shoot some of them down; have the rocket bikes run over some of the crates here, and hopefully they’ll all achieve a higher veterancy. To supplement your defenses, have the barracks near your original base pump out a bunch of rocket squads and get them to move into the base here, preferably guarding the northern exit.

Build a new refinery when you’re set up angled towards the southern blue tiberium field, first thing, then a war factory for another harvester. You need to get your tech tree up, so build a tech center first off to enable you to research laser capacitors and build Avatars. While you do this, try to build a new air tower and construct five or six Venoms. These guys can be parked up near the canyon to the north, where the small, annoying alien enemies are warping across. If you put them right on top of that in a Hold Ground stance, they’ll shoot the aliens as they warp, before they can fire back.
Enemy airplanes will be flying over your base often at this point, so some flak turrets along the northwestern wall will be a good idea, as would some rocket bikes or stealth tanks parked around your war factory.
Stealing Their Base
At this point, if you can figure out where the enemies are coming from (it’ll all be airplanes except for the little guys to the north), you can lock them down with anti-air turrets and achieve a rough stasis. When you have yourself defended satisfactorily, build a Temple of Nod and start the nuke countdown. Don’t miss the tiberium spike in the northeastern corner of the map.

When you have four bombers made up and ten or fifteen Venoms, launch your nuke directly on the drone platform. That will shut down the nearby Storm Columns, letting you move in with your bombers and gunships any other nearby defenses and construction buildings. If you wish to do so, you can leave the drone platform intact, kill the buzzers on the ground (can be difficult since they’re stealthed; might want to drop a minefield around the drone platform), then land a bunch of saboteurs to capture it and the nearby buildings as well. Doing so will of course grant you access to a whole lot of unfamiliar technology, but you’ve been facing off against the bulk of it for a while now, so you should at least be somewhat familiar with it. We also had the game bug out and remove the cash cap when we took over the buildings, but with two blue tiberium fields on the map, you should be basically as rich as you want to be at this point regardless.
So...start building things up. Build up the alien tech tree if you like, or if you’re capable of doing so. It’ll give you access to Destroyers, Motherships, Rift Generators...pretty much anything you’ve wanted to play around with since the Scrin first appeared. It’s not necessary to build Scrin vehicles to win, but some of their support powers will help you out a bit, especially the Wormhole Generator at the Signal Array.
Anyhoo...
When you have a large, large force of units to work with, park them on the western side of the map, preferably on the northern side, and start repairing your Catalyst Missile. When it’s complete, two more bases will appear to the west, so get in there and start taking them out! You only have two buildings to destroy, and with an infinite amount of time to prepare for the fights you should be able to overpower the outposts fairly easily. Note that one of the bonus objectives is to win without using the Catalyst Missile, which should be easy enough to do.
Mission Two: Italian Hills
Primary Objectives
- Retrieve the Mapkey from the Alien Relay Node
Bonus Objectives
- Destroy the Gravity Stabilizers on the north ridge
- Destroy the Stasis Chamber
- Capture Three Alien Tiberium Extractors
Build It Up!
Quickly establish your base near the tiberium spike here. Build up as quickly as possible to get a reactor and a refinery down, then nab your armory and build a saboteur to capture the spike and a war factory. The war factory will need to make a few rocket bikes to help shoot down the planes that will be coming at you from the north pretty soon; SAM installations along the northern wall of your base will help here, as well. Be sure to place the core modules a bit away from the wall, and the actual sub-turrets up against the wall itself; that will encourage your enemies to shoot the turrets first, which will repair themselves.
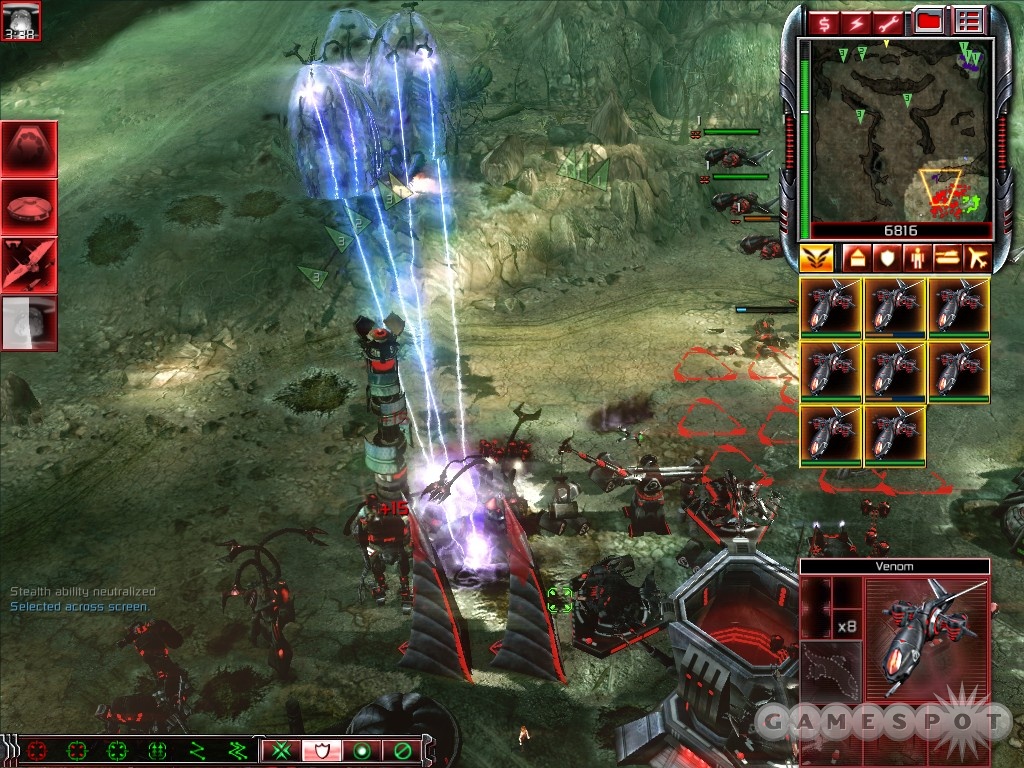
Quickly build up the tech tree here, and make an air tower to pump out some Venoms; you can use these to destroy the guard structures up to the north, near the first Tiberium Extractor. Don’t capture it yet, though, as you’ll need to hold three of them simultaneously to accomplish the bonus objective, and this one will probably be impossible to keep alive for now. Feel free to use Venoms to kill the Harvester in it, though.
Eventually you’ll want to build a Temple of Nod around to start your nuke timer. Near the Tiberium Spike, lay down a few Obelisks of Light, and have a war factory with an Avatar or Two in Hold Ground stance nearby. If you get a moment, have your Hand of Nod build four or five saboteurs, and build some Vertigos, preferably at least eight of them.
The airbases to your north will hurt you periodically here; your SAM defenses will help repel them, and you can use your Venoms to take down the Destroyers when they get too close for comfort. When your nuke timer goes down all the way, use it to destroy the gravity stabilizers, which will mostly eliminate that threat to you.
Stability
As you build up here, the enemy will start coming at you with groups consisting of three shielded Tripods and assorted smaller units. The first assault that comes your way will be the most difficult to repel; if you can take out the Tripods, though, you can use saboteurs to reanimate the bodies (along with the bodies of any fallen Avatars), and repair them. Set up a defensive line with two war factories and some Obelisks of Light near the edge of your base. Try to spot the waves when they reach your radar zone and bomb them with your Vertigos to weaken them up, and every time they get broken, capture the Tripods to add to your numbers.
With a strong defense, you can start progressing in your aims here. Start to use bombing runs (more air towers and Vertigos will help) alongside nukes to take out the vehicle generation structures near the tiberium extractors of your enemies, while being careful not to get the extractors themselves caught in ther crossfire. You can also nuke the Drone Platform to the north. If nothing else, make bombing runs to take out the turrets that you see, if only to clear the path for future aerial incursions. If you can take out reactors, do that as well, and you may eventually depower all of the turrets.
When you have defeated all of the enemy structures and defenses, go ahead and fly out a few saboteurs under Venom cover and land them at the required tiberium facilities for the bonus objective, as well as the northern mapkey facility to end the mission.
Mission Three: Operation Stiletto
Primary Objectives
- Capture both GDI Construction Yards
- Capture or Destroy all GDI Barracks, War Factories and Airfields
- Capture both Alien Drone Platforms
- Capture or Destroy all Alien Gravity Stabilizers, Portals, and Warp Spheres
Bonus Objectives
- Build a Mammoth Tank
Wow, Tough!
This is a challenging mission, mostly because it involves a bit of luck on your side. If a couple of things happen here, you can wind up losing after getting through a fair portion of the level, regardless of whether or not you did anything wrong. Frustrating, sure, but hey - it’s act five.
Everything needs to go right and you need to move quickly in order to ensure that it does. The most pressing concern you could have here is the fact that you automatically lose if any of the four construction buildings on the map are destroyed, even if you’ve already captured them. You have to capture each of them in order to win the map - if one of the computer armies overwhelms another computer army and destroys their factory, you lose, even if you were nowhere around. Begin by splitting your little team into groups. Get a couple of Shadow Teams into their own groups, and have the commando and the saboteurs in their own separate groups as well. Your first target will be the base in the southwestern corner of the map.

Step One: Begin by having your Shadow Teams glide along the southern portion of the map until they’re in the southwestern corner; they should be able to avoid the stealth-penetrating glare of the turrets this way. Have one team land to the southeast of the small factory there, and one to the northwest, both in Hold Fire stance. Each of them will be able to destroy one of the anti-infantry turrets here with their explosives. Don’t bother engaging any of the other units here just yet.
Step Two: The commando and the saboteurs have to get to this same area, but they can’t glide and can’t avoid detection. With Tanya in a group separate from the saboteurs, move her and them along, with Tanya just leading the way. You can’t just walk into the base, obviously; you’ll be killed. Instead, you’ll have to follow on of the paths to the north of the base. There’s a small refinery sub-base in the middle of the map’s eastern side, which is guarded by anti-vehicle turrets. Walk the troops up there, using Tanya to kill off any pesky ground units in your way (but staying away from the refinery base itself, which has an anti-infantry turret).
When you reach the southern portion of the refinery base, walk south along the path and save your game. What you need to do here is move the saboteurs around the jutting piece of earth between you and the power supplies to the south. If they get spotted by an APC or get hit by a wandering riflemen group, your game will end right quick. Technically you can finish this mission with only one saboteur, but it’ll be far easier to do it with all four of them around.
Capturing The Base
You may need to practice steps one and two until you can perform them roughly simultaneously. The bombings of the anti-infantry turrets should take priority, but Tanya and the saboteurs should be on the move while you’re plotting your terror.
Anyway, if all goes well, you’ll get all four saboteurs behind the power plants of the enemy in the southwestern corner of the map. In order of priority, you’ll want to have them nab the construction yard, the refinery, the battle base nearby, and a power plant. Save your game before attempting to do any of this, though.
If you manage to get the battle base, move it back to the south a bit and deploy it where it’s out of range of the enemy fire. Now, if you notice a flood of enemy APCs and Predators coming your way, you’ve probably already lost. You have to time your capturing so that you get the structures around here while the Predators and APCs that the factories are sending away are actually leaving. This is mostly a matter of luck; if you get caught by the vehicles, just reload and try again, perhaps waiting a couple seconds this time.
Messiness
Anyway, if everything go absolutely perfectly, you’ll have control of the construction yard and the two facilities, the power plant and refinery, that you need to instantly start working on a war factory. Build it, lay it down somewhere, and have it begin cranking out five Predators instantly. Here’s where things get kind of messy, so save your game at this point. You need to capture the nearby structures, but they’re well defended by vehicles, infantry, and turrets. You can deal with the anti-infantry turrets by summoning all of your remaining Shadow Teams and instructing them to blow up one of the turrets with their bombs, then summon another team in with your special Shadow Strike Team power and instructing them to do the same to the other one.
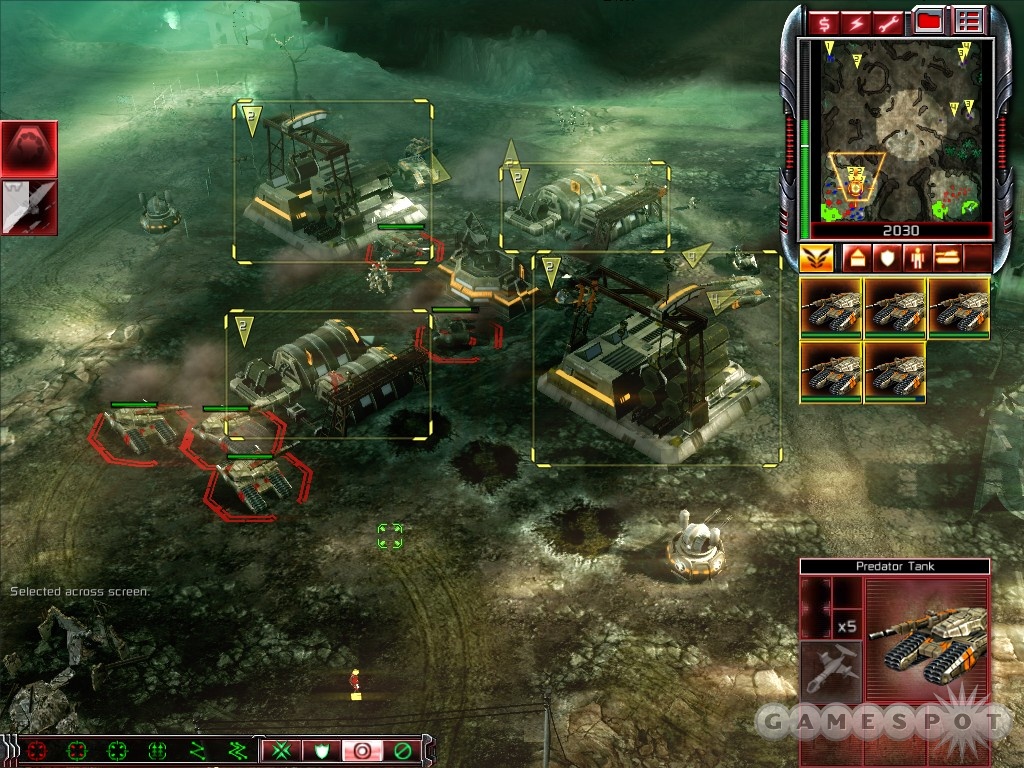
When you have a few Predators built, move them north into the factories and have them start killing any opposing Predators and APCs. Build some APCs yourself to deal with the opposing infantry, and build a barracks to start pumping out a few engineers. As the scrum is going on, try to sneak up the engineers into the factories there. Doing so will prevent them from making any more enemy units, and will allow you to build up your own forces to begin clearing out the remaining enemies.
Static Electricity
After the base is yours (don’t forget the command post in the middle of the factories), build another harvester, first off, then lay down a couple of anti-aircraft turrets on the northern side of your base. Having some Pitbulls scattered around near your war factories would be a good idea, too. Again, saving your game now would be wise. Just get in the habit of doing it every couple of minutes in case something goes awry.
Now that you have a base, it’s time to start accelerating up the tech tree. You have plenty of tiberium, and if you want more, you can build a refinery back at the southeastern base and a war factory to make a couple more harvesters there, as well. You’re going to need as much cash as you can get here.
Anyway, tech tree ascension. You won’t be facing big assaults coming your way, so concentrate on building up your aerial defenses with anti-air turrets scattered around the base, but keep building new units and structures as you go. Don’t bother with the small stuff; just try to get up to Mammoth Tanks and Firehawks as soon as you can.
Expansion
When you have the cash, start building up more airbases. The Firehawks inside should be armed with missile loadouts and told to patrol over your bases. More enemy Firehawks will periodically come from the north and bomb your base, but you should be able to get used to their avenues of attack eventually; they’ll typically go for your anti-air turrets, which is fine. Repair them and make the enemy pay by shooting down his planes.
Now, at this point, a heavy element of luck comes into play. We’ve had games end here because the Scrin forces were attacking the northwestern GDI, and we’ve had a game end because the GDI tanks took out the southeastern Scrin Drone Platform before we could do anything to save it. If all goes according to plan, though, the Scrin will be hostile to GDI, the GDI forces will be hostile to you, and you’ll be able to defend yourself against anything the GDI guys throw at you.
Expand your presence at your southeastern base by building some airbases and more anti-air defenses inside of it (you’ll probably want at least four full squads of Firehawks with missile loadouts patrolling various parts of the map eventually), and have a War Factory there begin cranking out Mammoths. If you haven’t built a refinery here yet, do so now and stock it up with multiple harvesters. In your southwestern base, build five or ten APCs and load them all up with engineers.
A Scrin Base Of Your Very Own

The southeastern Scrin base should be your next target, so get there and capture it as best you can. If there are any units or structures around it, you can use your airplanes to bomb them out, or send in the Mammoths. If you spot any Storm Towers, hit them with Shockwave artillery to render them inert before bombing them.
When you’ve cleared out hostile buildings, get an engineer up to the tower and capture and repair it, then start building up the Scrin tech tree towards their air units.
At this point, you’ve probably won, assuming the Scrin haven’t managed to overpower the GDI in the northwest. If there appears to be a stalemate between them, feel free to summon your forces and attack the northeastern Scrin to take over their tower there, then repeat the process on the northwestern GDI to finish them off as well.
Mission Four: Kane’s Tower
Primary Objectives
- Defend the Alien Phase Generators
- Destroy the GDI bases
Bonus Objectives
- Capture 3 GDI Juggernauts
- Destroy the GDI Ion Cannon Control Centers
Tense Moments
You’re going to have a wild one on your hands here, as the GDI is attacking both you and the Scrin. If the GDI manage to destroy all three of the Phase Generators here, you lose. The Scrin won’t attack you outright, but you are considered hostile to each other, so don’t get too close to them.
Begin by immediately building another harvester and a crane. While the crane is queued up, build an anti-infantry cannon and build it to the east, where your tiberium field is. When the crane is done, queue up an air tower and a tech center.
Before you do anything else, concentrate on protecting the eastern flank of your base, near the tiberium field. You’ll want two Obelisks of Light there, as well as the anti-infantry turret. Try to position them so that the Obelisks will be able to hit the enemies that fire on the harvesters, but that the turrets for the infantry are in front of the Obelisks so that they take the first fire. You can hold this entrance to your base with just these three units, but you’ll need to constantly repair your Obelisks. And keep in mind that the harvesters will have to move all the way to the west to get repaired when they take damage.
Now, the bonus objective here is to grab hold of the GDI Juggernauts in the middle of the map. They’re firing on the Phase Generators to the west. It’s definitely more important to just kill them as opposed to capturing them, but if you want the bonus objectives, you have a couple of different ways to proceed. It’s worth making the effort to nab these guys, since they can apparently fire anywhere on the map without needing snipers to spot for them.
Capturing The Juggernauts
Unfortunately, the Juggernauts are protected by two anti-air turrets and a team of Zone Troopers, so they’ll be difficult to get to. If you attempt to sneak in a Commando, she’ll be killed by the Troopers; if you try to fly over with Venoms, they’ll get shot down. There are two basic ways to proceed here.

The first is to build four Venoms and a commando. The Venoms can be moved off to the northeast of your base, hopefully avoiding both the turret fire and any fire from enemy troops below, until they reach the eastern side of the small hill the Juggernauts are on. Have them quickly take out the Zone Troopers here, then save your game and try to get your commando up onto the hill without having her get killed. When she’s up there, she can knock out the Juggernauts, then take out the two anti-air turrets to boot. Build three or four saboteurs and airlift them on top of the hill to take over the Juggernauts.
Secondly, you can focus on building up a suite of Vertigo bombers. Have them bomb the anti-air turrets first off to take them out, then bomb the Juggernauts to death and repeat the process of airlifting saboteurs up to the mountaintop.
D-Fence
If you manage to capture the Juggernauts, have them first take out the airfield to the north, then set them to Hold Ground stance and take out any other GDI structures you can see around the map. Try not to move them off the hill if possible, as they will be easily taken out by the troops that walk by the eastern ramp. If you’re flush with cash, you might want to try airlifting an Emissary vehicle over there, setting up a small encampment, and using shredder turrets to take down the passing troops.
Whether you get the Juggernauts or not, though, you’ll want to start cranking out some seriously large numbers of Venoms, upgraded with lasers. They’re going to be your best bet to protect the remaining Phase Generators (the Juggernauts will almost certainly knock one out before you can destroy them). Eventually the pressure on the eastern edge of your base will let up; that’s your cue that the GDI is going to start pressing in on the Scrin forces much more heavily. You may want to build another refinery in the northwestern corner of the your base to start nabbing some of the tiberium there, as well.

Now, whether or not the Scrin survive here is irrelevant; they’ll probably be wiped out by the GDI before long, and that’s fine. You might even want to assist in the process by destroying their harvesting facility near your base to leave more tiberium for you. At this point, most of the GDI focus will be on the remaining Phase Generators. They’ll be sending Firehawks towards them from the northeast, so try to position a large group of Venoms in their path so that they can shoot them down as they arrive. Again, if you like, you can airlift an Emissary up near the remaining Phase Generators and set up some defenses nearby. If you have the cash, build up another air tower with more Vertigos, and try to defend the Juggernauts with a few Venoms.
Routing the GDI
At this point, your main problem will be the appearance of an Ion Cannon Control Center in the northeastern corner of the base. Take it out however you can. The Juggernauts will be able to fire on it if you have any left; apart from that, you might want to try suiciding some Vertigos over there. The GDI will periodically use Shockwave Artillery on your base, so be quick to repair those buildings, and scatter some extra power plants around to absorb the temporary energy loss. Build your own Temple of Nod if you wish to get your nuking on.
Focus on the enemy construction buildings in their bases. To the south, take out the war factories and barracks to staunch the flow of enemies from that direction (use your mine power or Shadow Teams to scout them out if you can’t see them), and deal with the airbase to the north as well. These facilities apparently aren’t rebuilt when they’re destroyed, so killing them off will effectively eliminate any chance that the GDI has to win. Just take out the structures, then start working on the power plants to take their turrets offline, then start bombing the hell out of them, or move your Venoms in for the kill.
This is a difficult mission, but if you make enough saves during it. Fulfill the glory of Nod by defeating the GDI. If you’ve beaten both campaigns, you can then begin the Scrin campaign by going back to the main menu and hitting the Campaign button.
Scrin Campaign
If you jumped ahead to this page, then we'll answer your question: in order to unlock the Scrin campaign, you have to first beat both the Nod and GDI campaigns, then return to the main menu and hit the Campaign button.
Mission One: London
Primary Objectives
- Destroy 15 civilian buildings in the city
- Destroy the GDI presence
Bonus Objectives
- Destroy the structures known as Parliament and Big Ben
- Destroy Buckingham Palace
- Construct Growth Accelerators at each of the Ichor fields
Get The Kids! Run!
Your first goal here is to take out fifteen buildings. No sweat. Just band together your forces and get them started on destroying the structures nearby. Some light vehicle opposition will come your way, so deal with them as they come, but quickly take out the buildings. Your infantry units are pretty decent at getting the buildings down, too, so have them focus on different structures than your vehicles.

When the Drone Platform arrives, quickly move it up near the tiberium field here. Unpack it to the northwest of the field, so that it’s protected from attack to the east by the buildings. Build a reactor or two, then crank out some buzzer hives and hide them amongst the buildings on the northern side of the field. Properly placed, they’ll protect you from most of the infantry that will be coming from that direction without exposing themselves to fire.
Build a harvesting facility and destroy one of the links in the fence around the tiberium field to allow your harvesters access to it. With that done, start building up the tech tree. Build a warp portal and another harvester, then start cranking out more seekers, the anti-vehicle vehicle that you can create. Your buzzer hives will deal with most of the infantry coming from the northeast, but the vehicles coming from the southeast will be more annoying. A couple of photon cannon turrets along their direction of attack will help thin their numbers, but you’ll want to have plenty of seekers to deal with them, as well.
Readying The Assault
You have bonus objectives here, but don’t worry about them until you manage to take out the pressure that the enemy is placing on you. Build up a force of perhaps 25 or 30 seekers and a few gun walkers and march them to the southeast. Don’t worry overmuch about the turrets that fire on you here; take out the factories and barracks first, then deal with the construction yard itself. If you don’t destroy the construction yard, it’ll simply rebuild the factories. When it and the factories are dead, you can start worrying about the turrets, or simply retreat from the base and send over some storm rider planes to mop up.
When you have the vehicle factories taken out permanently, you can start mopping up the bonus objectives. Building the three growth accelerators isn’t difficult, and destroying the buildings won’t be, either. When you’re ready to assault the final base, build up a large force of gun walkers and seekers, then run over there and wipe them off the map.
Mission Two: Munich
Primary Objectives
- Plant the Mastermind's manipulator device on the Barracks and train an Engineer
- Use the Engineer to capture the power supply
- Destroy the GDI forces with your reinforcements
Bonus Objectives
- Keep your Mastermind alive throughout the entire mission
Tiptoe Through The Turrets
It’s going to take you a while to finish this mission, so strap in and start saving your game as often as possible. Your only unit here at the outset is a Mastermind, a Scrin commando unit. He’s not a badass for taking out infantry, though; in fact, he can’t really kill much at all. His power is that he can instantly take over enemy infantry and vehicles and let you use them. Only one target can be turned to your side at a time, though, and you can’t take over turrets, of which there are a lot running around.
There are plenty of healing crates scattered around; note their locations and save them for your Mastermind when it’s wounded. Don’t bother using them on any stolen units you possess. There are also veterancy crates around; you obviously want to give those to your Mastermind, as well, if only to let it heal when it maxes its rank out.
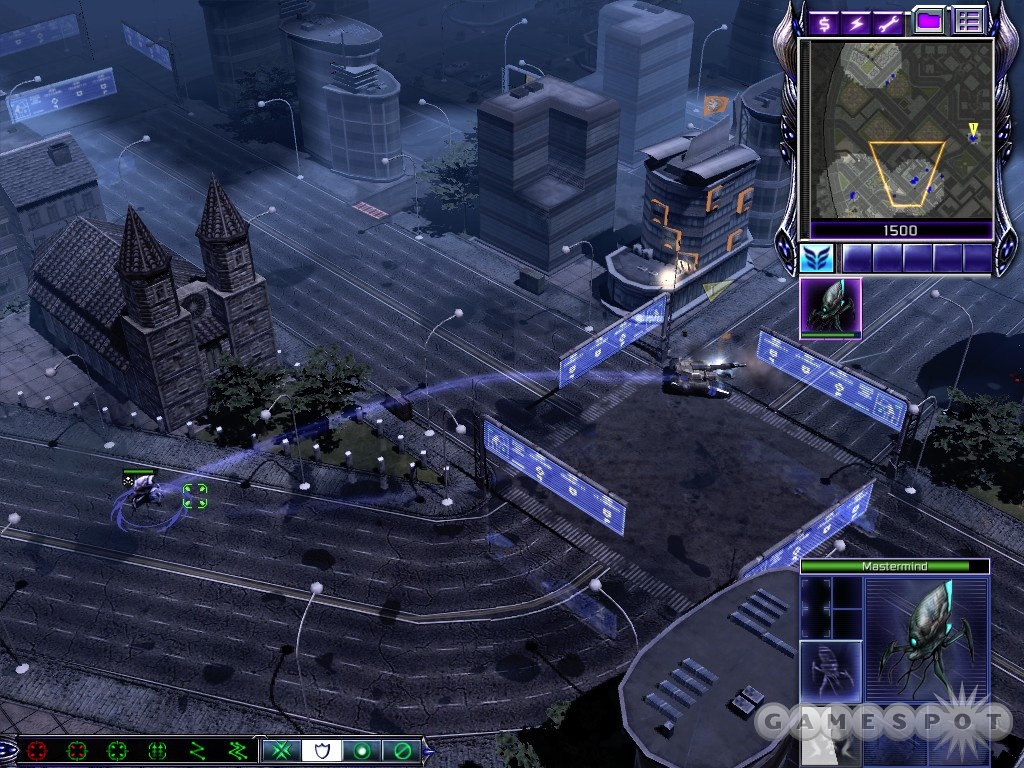
Begin by skirting along the southern portion of the map, taking over any units that you see and using them to distract other enemy units. If you get grenadiers, use them to bomb out occupied buildings; tanks should be used to destroy the turrets that litter the landscape. Feel free to pop your Mastermind into a building if you need to scout out the land around you. This is going to be very slow going here, especially when it comes time to deal with the turrets, but since all of the units that you capture are effectively disposable, don’t worry about keeping them alive. Just grab a unit (tanks especially should be prized), move them towards the nearest turret, and start firing away. If another tank comes along and pounds it, so be it; let the first one die, then grab the new one and repeat the process.
Try to keep your Mastermind out of sight during all of this, obviously. Eventually you’ll get past the zone where the grenadiers are located (they mostly stick to the west), so you’ll be able to hop into a building to protect the Mastermind until you need to leave to grab a new tank.
The Big Fight
Eventually you’ll come to the southeastern corner of the map. Tanks will periodically come by on the roads here, so grab them as they do and use the teleport power to get them up near the barracks that’s highlighted on your map. After taking out the three anti-infantry turrets around there, sneak up and take over the barracks to build an engineer or three; you won’t have need of your excess cash here.
If you care about the bonus objective, sneak back to the southeastern corner, then escort the engineers back to the southwestern corner, near where you started the mission. From there, teleport one of the engineers to the power supply station marked on your map, then run him into it to take it over and shut down the power for all the sonic emitters.

At this point, you gain a large number of reinforcements from the southwest. Immediately group all of your ground units into one group, make another for your storm riders and planetary assault carriers, and another for your destroyers. Move the whole lot up to the northern side of the map and head into the enemy base as quickly as you can from its northwestern entrance; this will put you near the factories, which will soon be kicking out Mammoths and Predators in large numbers, which will be problematic.
First move your planetary assault craft near the base so that they distract ground units, then move in with your ground forces, which should concentrate on taking down turrets and enemy units. Meanwhile, the destroyers will be doing the dirty work of taking out the factories so that they can’t pump out more units. They can also take out any anti-air turrets that they spot, as well as quickly eliminate the airbases.
When the western section of the base is done for, glide your destroyers over to the power plants and destroy them. That will knock the rest of the turrets offline, letting your remaining forces deal the coup d’grace.
Mission Three: Croatia
Primary Objectives
- Capture the two Nod information facilities
- Destroy the defenses around the information facilities
Bonus Objectives
- Destroy the GDI Base
Witness to a Catastrophe
You begin this fight with little but a Drone Platform to work with. Quickly get yourself situated here, and be sure to have your Mastermind bound to a hotkey. After getting your warp sphere up and running, build a couple of anti-vehicle turrets, especially to the northeast, where the GDI will be coming for you. Eventually you want to have a pair of warp spheres up and running, which will let you repair your units as they defend your base.

At the outset you might have some tough fights as the enemies send an Avatar or Mammoth or two your way. Use your Mastermind to capture any superunits that come close and bring them back to your warp sphere to repair them. If any other walkers come around, like Juggernauts, be sure to capture them with assimilators.
You don’t have to worry about air units here, so concentrate on building anti-vehicle turrets around the base to help you defend it, and don’t forget to build a growth accelerator on the tiberium field to help keep it fresh. An airbase with some stormriders will help you shoot any Juggernauts or large enemies that are coming your way through the town, since you can see it all.
Finishing The Fight
The GDI and Nod forces will likely fight against each other a fair amount here, with the GDI being the more powerful. If the GDI force their way into the Nod base, they’ll probably destroy the buildings you want to capture. Luckily, this will take quite some time, giving you plenty of time to build up a force large enough to take out the GDI and accomplish the bonus objective. 10 or 12 Tripods should do the trick, so long as you remember to research their shield technology at the technology assembler.
With the GDI out of the way, you can toy with Nod as much as you like. Get over there, take down the Obelisks of Light, and warp a couple of assimilators to the laboratories with your Mastermind to finish the mission.
Mission Four: Threshold 19
Primary Objectives
- Defend the Tower
- Construct a Signal Transmitter and summon the Mothership
- Guide the Mothership to the Tower
Bonus Objectives
- Destroy the GDI base
Defend The Tower!
A tough mission to round out the game here. You have two bases to defend, and apparently both of them need to survive in order to win the mission. You’re going to have to do a lot of stuff really quickly if you want to survive here.
Here are a number of things that should be done at roughly the same time:
- Move your Planetary Assault Carrier in the northwestern base up to the bridge in the middle-northern side of the map. Hold CTRL and right-click on one of the bridge sections to have it destroy it. That will mostly guard your northern flank of that base from attack. Move the Carrier to the southeastern corner of the base at that point. Also destroy the bridge to the north of your southeastern base, or at least a couple of links of it.
- The gravity sphere in the southeastern base should queue up ten Destroyers and situate them where the GDI forces are attacking from the north. The warp sphere here will also want to build five or so Tripods.
- Your Technology Assembly Center should research shielding for Tripods and Destroyers.
- Build a new warp sphere and gravity stabilizer in your northwestern base. Queue up a couple of Destroyers and four or five Tripods.
- Start building new Storm Columnss and pepper them around the map. You may need to learn where the enemies are attacking from to learn where best to position them; you’ll probably want one near your southeastern Drone Platform, one in the tiberium fields in the southeastern corner, and a couple in the southeastern corner of your northwestern base.
All of this construction will be expensive, obviously, but there’s not a whole lot you can do about it. You’ll get a boost of cash in a few minutes, which will help you out a bit.

At this point, all you can really do is wait and attempt to hold off the enemy units. The fiercest attacks will be directed at the southeastern corner of the northwestern base, so build up your forces there with more Tripods, Destroyers, and Storm Columns. You will periodically get hit with Shockwave Artillery, so you may also want to build new power plants in the northwestern base and upgrade them to assure that you have surplus power in case some get EMPed. Don’t forget to look around and repair damaged power plants when this hits. You can also probably sell the Storm Columns near the tower itself to get back some money and energy.
All you can really do at this point is wait for the timer to count down. Have your Destroyers at each base in special groups and use them to take out annoying units. Keep in mind that the snipers that appear in your tiberium fields might just be annoying to you, but they also are spotting for the Juggernauts in the enemy base, so take them out as best you can.
Ensuring that you’re not overrun will probably require you to restart the mission until you get a feeling for where the enemy will attack, but over time you’ll get used to it. Keeping the northern bridge destroyed is a key thing to do here. If you build a Storm Column near it, it can be used to attack the bridge whenever enemy engineers repair it.
After The Countdown
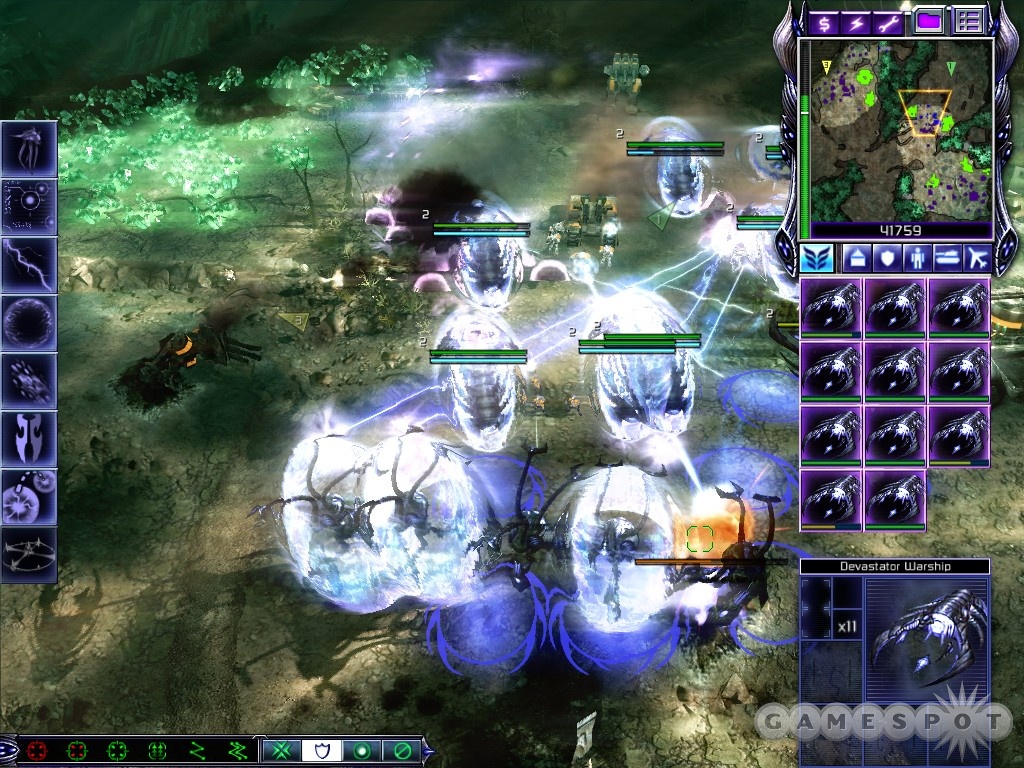
When the countdown is done, you’ll be told that the tower is complete, and will thus be allowed to build a Signal Transmitter. You’ll also get around 60,000 bucks to spend, so queue up more Destroyers and Tripods in the southeastern base, and shore up the defenses in the northwestern. Build your Signal Transmitter and immediately summon the Mothership. It’ll appear in the southeastern base, no matter where you built your Signal Transmitter.
At this point, your bonus objective will appear: your goal is to destroy the GDI base. Difficult, but not impossible, especially if you get a large enough fleet of Destroyers and Tripods together. Since all of the opposing forces will be pouring out of the southwestern exit from their base, you can command all of your construction bases to set their waypoints there, then start moving in all of your Tripods and Destroyers into the area from that channel. If you want to be sneaky, you can build up a fleet of five or six Destroyers, set them to be Aggressive, then tell them to fly up along the northern or eastern edge of the map to reach the northeastern corner, where all of the enemy power plants are located.
Anyway, if you set your Destroyers to Aggressive and move them into the base, they’ll be able to take out the enemy factories relatively quickly, which will pretty much ensure you a win, assuming you don’t get chewed up by enemy turrets and the like. You can also have your Tripods do a forced move into the base (use the G button and right click), which will let them trample enemy infantry and small tanks. Your only real objective here is to destroy the Construction Yard, as that’s the goal of the bonus objective. If you wish, you can simply move a fleet of Destroyers in, take out that building to accomplish the objective, then leave again. But if you can survive, then keeping a lot of Destroyers in Aggressive mode above the central part of the GDI base will let them destroy the buildings as they pop up.
If you don’t care about the bonus objectives, then just start moving your Mothership towards the northwestern base and have your existing units guard it as it slowly moves along. When it reaches the point indicated on the map, you win! Now you get to think about an inconclusive storyline that will only see a modicum of resolution in the expansion pack, which will no doubt be coming this fall.
Got a news tip or want to contact us directly? Email news@gamespot.com
Join the conversation