Call of Duty: Modern Warfare 2 Walkthrough
Stay frosty with our step-by-step walkthrough for Call of Duty: Modern Warfare 2.
The launch of Modern Warfare 2 may be one of the biggest gaming events in recent memory…and also one of the toughest. As such, we've prepared a step-by-step guide that'll hold your hand through every battle, providing you with the information you need out on the field. Oh, and we'll even point out the locations of the enemy intel as well.
Stay frosty.
Here's what you'll find in GameSpot's the Modern Warfare 2 Game Guide:
- Boot Camp: Our boot camp will whip your sorry butt into shape for the battlefield.
- Walkthrough: War's tough, but we're tougher--check here for a step-by-step guide through every mission.
- Intel Locations: Track down all of the enemy intel with our list.
- Xbox 360 Achievements: Find out how to unlock Modern Warfare 2's achievements.
- PS3 Trophies: We've got your trophies right here.
General Tips
Why Are Video Game Adaptations Good Now? | Spot On Fallout 4 Next Gen Update Comparison Fallout 4 Steam Deck Verified Gameplay ALIEN: Rogue Incursion - Announcement Teaser Trailer Stellar Blade - 13 Things I Wish I Knew S.T.A.L.K.E.R. 2: Heart of Chornobyl — Official "Not a Paradise" Trailer On the Spot - Firefall, Infinity Blade: Dungeons, Diablo III On the Spot - Renassiance Heroes, Portal 2 DLC, Diablo III On the Spot - Starhawk, Game of Thrones, Way of the Samurai 4 On the Spot - Bloodforge, Prototype 2, Trials Evo On the Spot - Legend of Grimrock, Dirt Showdown, Akai Katana On the Spot - Fez, Infinity Blade II, The Walking Dead
Please enter your date of birth to view this video
By clicking 'enter', you agree to GameSpot's
Terms of Use and Privacy Policy
Act I: S.S.D.D
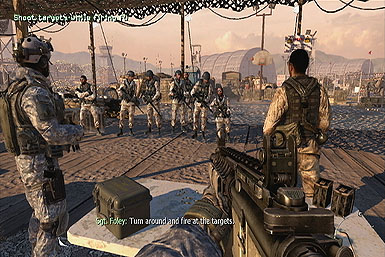
Shoot the Targets
You heard the man! Grab the weapon from the table before you by holding "X" (360) or "Triangle" (PS3) while looking at it. After grabbing your weapon, spin around and begin shooting the targets while firing from the hip (that is, don't look down the weapons' sight). As the sergent points out, shooting from the hip gets the job done, but is widely inaccurate. Now try crouching first (which stabilizes your aim) and look down the weapon's sights (by holding left-trigger) to aim for the remaining targets. The insturctuer will then walk you through quickly switching between targets and shooting through wooden material. Finally, he'll conclude with a quick grenade tutorial--grab from some the table and lob one into the group of targets by tapping the right-bumper (360) or R1 (PS3).
Use Your Objective Indicator to Locate the Pit
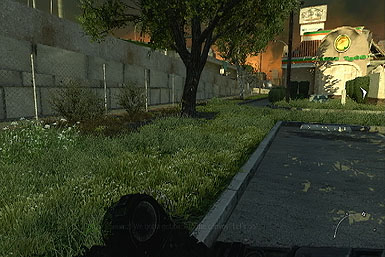
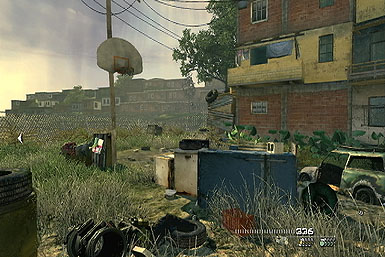
With your firearm training complete, follow the on-screen objective indicator to the Pit (located down a corridor on the right side of camp, just past the basketball court).

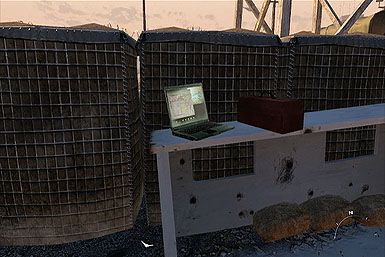
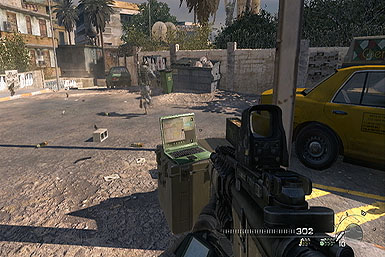
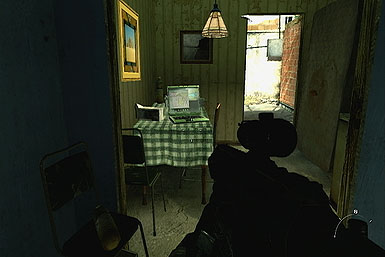
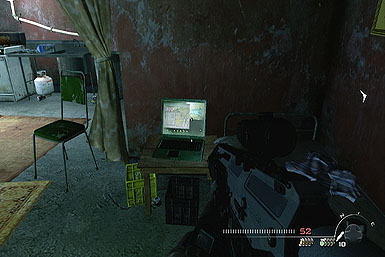
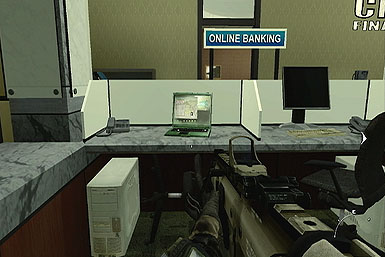
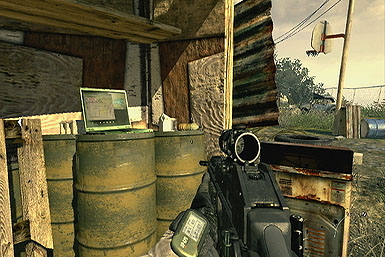
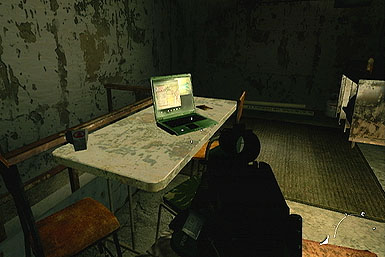
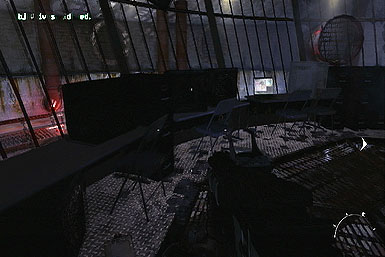
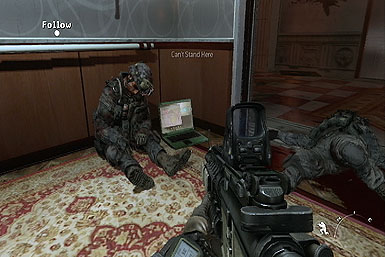
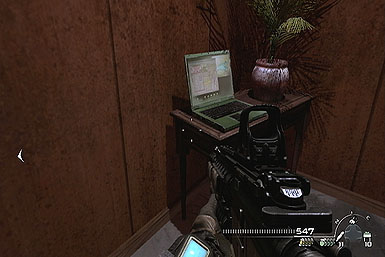
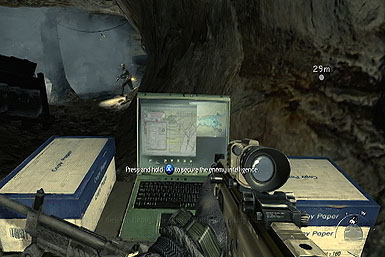
Intel (1/1) After stepping into the field just past the basketball hoop, look for the first Intel (a laptop) resting on a shelf by the guard tower in the far left corner.
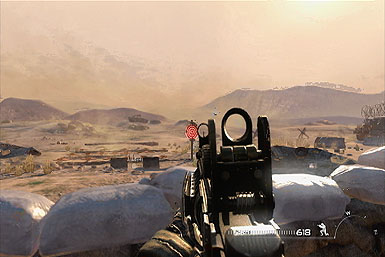
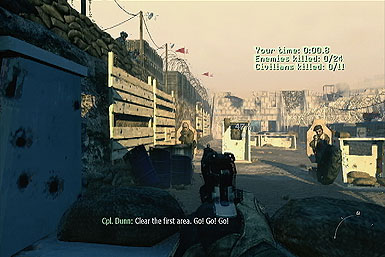
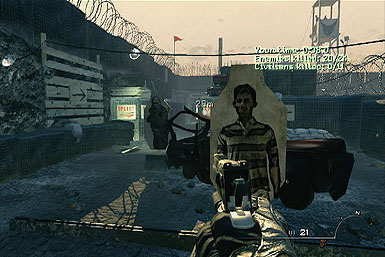
Shoot as Many Valid Targets as You Can in the Fastest Possible Time
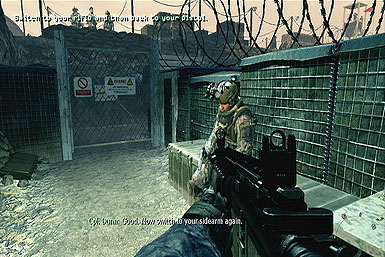
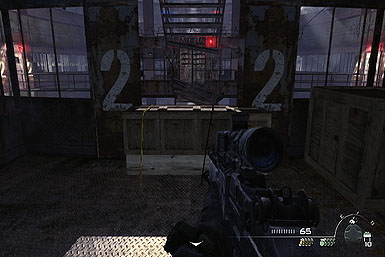
Upon entering the pit, grab a pistol from the table and practice switching weapons--remember, if your ammo clip runs out, it's always faster to switch to your secondary firearm than it is to reload. Now that you're equipped, you'll have to run the course--keep in mind that your performance merely dictates which difficultly the game recommends for you, though you're still free to choose among them, so don't sweat it too much.
Start off using your rifle, only switching to your pistol once you've depleted its clip (you'll have a chance to reload as you climb the first staircase.) Look down your sights to quickly focus in on the enemy targets, but make sure to avoid the civilian ones! Melee the target at the top of the stairs, then drop back into the field and push forward to the end corridor that you should dash down (by pressing the control-thumb stick in).
After completing the pit, climb up the final staircase to the waiting jeeps to complete the tutorial.
Act I: Team Player
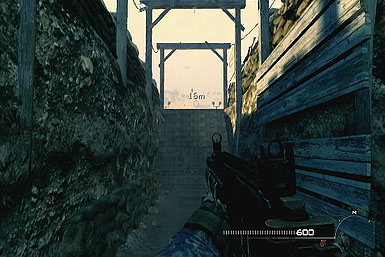
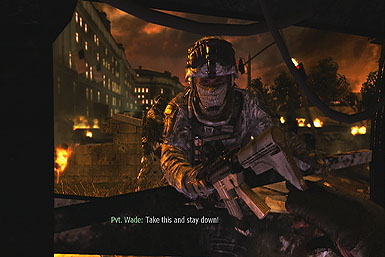
Protect the Bridge Layer
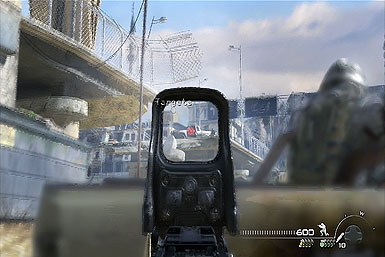
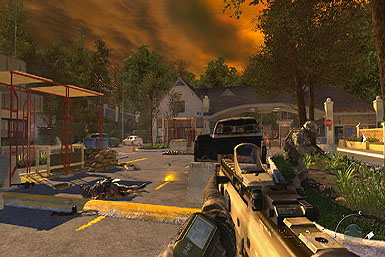
Training's over soldier, now this is war. Immediately seek cover behind the truck (or inside the building) on the left and just hang tight for a while. Don't bother shooting the targets across the river yet, and instead conserve your ammo. Switch to your grenade launcher when the on-screen message indicates so just to appease it (by tapping left on the control-pad), though we recommend switching back to your rifle afterward. Before long, a truck will drop off some enemies on the far end of the bridge--pick them off from behind the truck by using your rifle's sights.
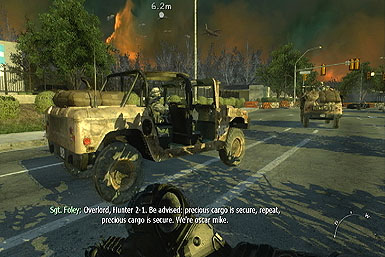
Get in Your Humvee
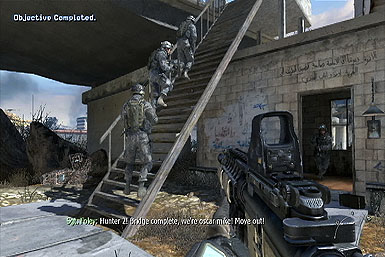
After killing the enemies that departed from the truck, hightail it to the Humvees via the staircase on the left. Climb inside the closest vehicle that pulls up, with the flashing yellow seat.
Stand by for Airstrike
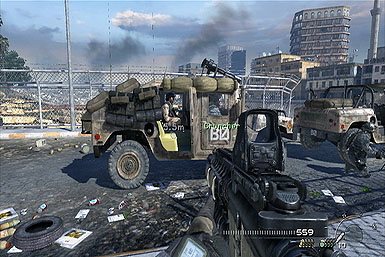
We know you'll be tempted to try out the mounted gatling gun, but resist firing until after the next objective appears, when you stop at the large building with enemies on the rooftop.

Destroy Targets of Opportunity
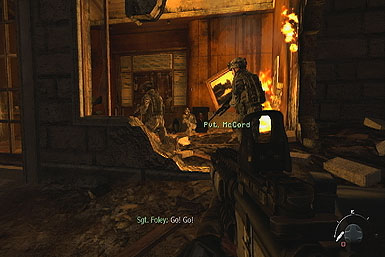
Upon reaching the large enemy-infested building, feel free to open fire. But don't worry about being too accurate as--at least on the lower difficulties--you cannot die during this segment (unless you blow up a nearby vehicle, so try not to do that). After pulling out, you'll wind up on a short roller coaster ride through the city before being flipped over by an RPG. Immediately seek cover inside the building on the right.

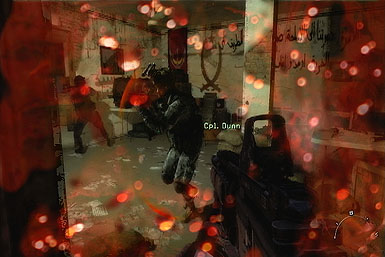
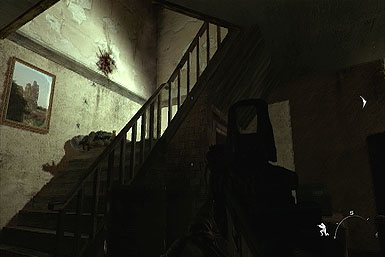
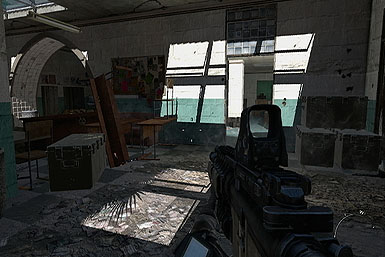
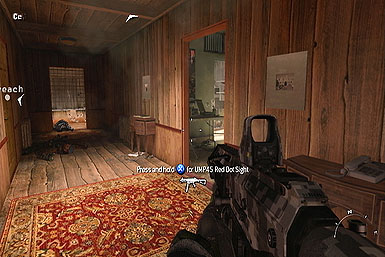
Inside the building? Good--approach the staircase ahead and shoot the enemy coming down stairs. Now climb up it slowly, so that your head is just barely peeking over the floor, allowing you to target the enemies ahead from relative safety. Once you've taken down one or two, consider climbing up and targeting the remaining enemies through the door from the right side of the room.
Push forward to the back room, ready for any additional enemies, including any injured ones who may be crawling along the ground. Take cover below the window until your squad darts outside--follow them across the street and into the school.
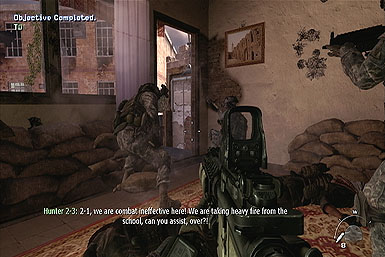
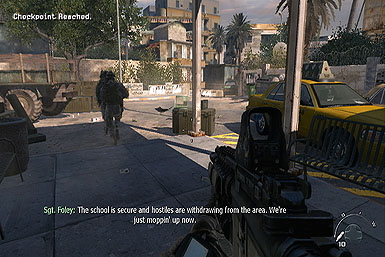
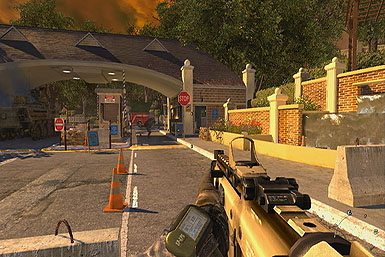
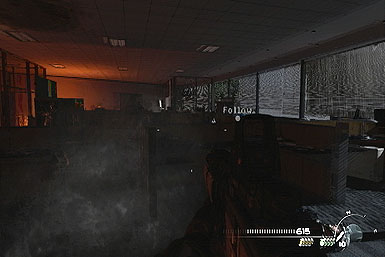
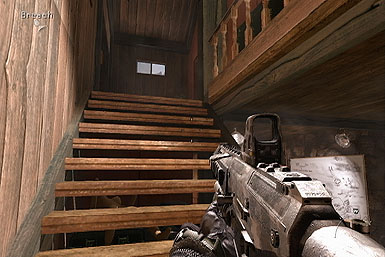
Terminate the Enemy Presence in the School
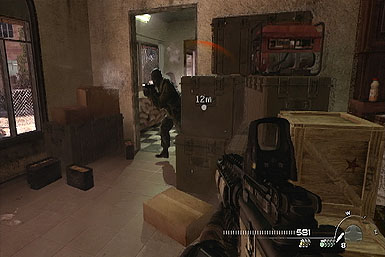
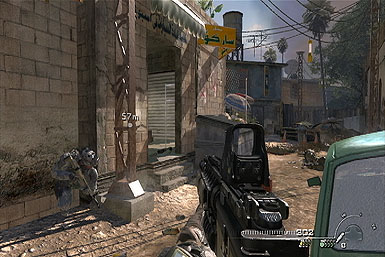
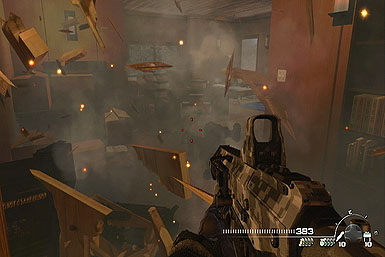
As soon as you enter the school, crouch behind the sandbags and target the enemies ahead. Clear out the classroom on the right (which may contain two enemies) before climbing the staircase in the back. After entering the hallway at the top, take cover behind the boxes on the right and peek around them to take down a pair of enemies by the windows ahead.

With the hall clear, take cover by the next corner (just past the classroom) to clear out the enemies around it. As you approach the room at the end of that second hall, get ready to take cover on either side in order to target enemies that storm in ahead. Push forward to that room and use the central column as a shield while you target enemies down a third corridor.

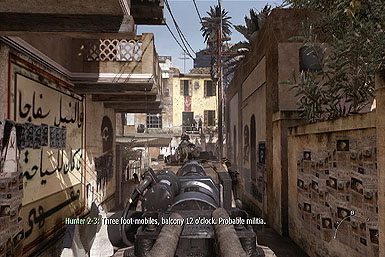
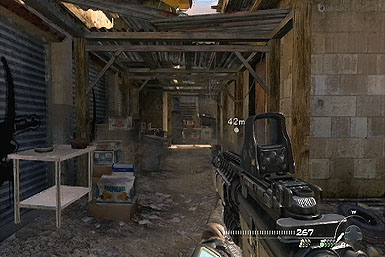
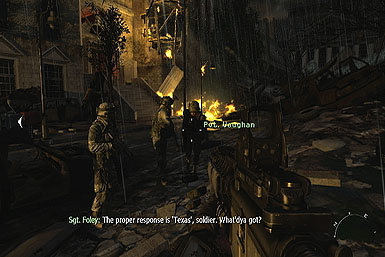
With the area clear, exit out the left side of the hall and follow your squad down the street to an alley on the right. Hang back and take aim at the enemies that dart in ahead.
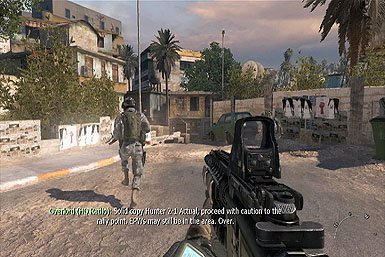
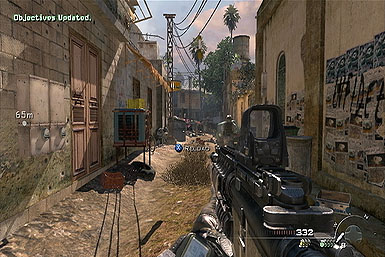
Report to General Shepard at the Rally Point
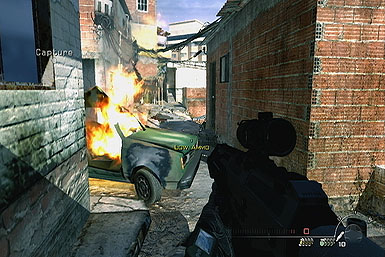
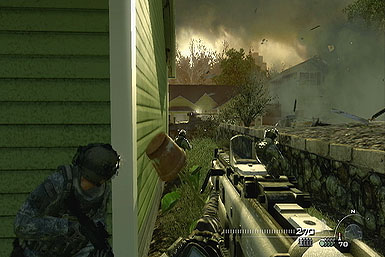
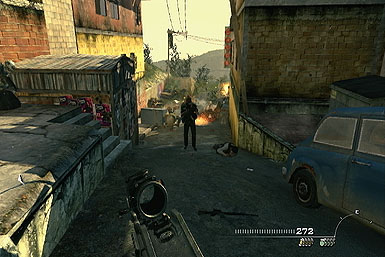
With the first wave down, push forward to the green car and target an enemy inside the room on the left. Continue further up to a gate on the left and shoot any enemies visible through it (you can crouch down below the wall for cover too).
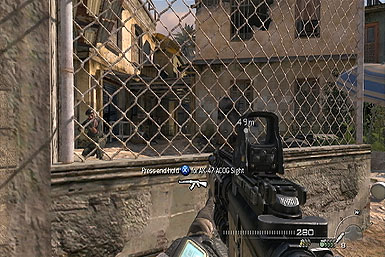
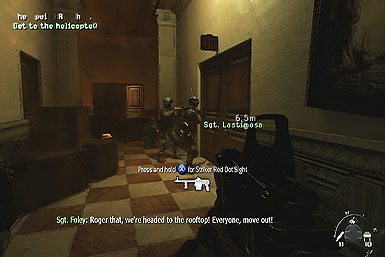
Now get ready to shoot one more enemy that makes himself visible in the corridor ahead, then follow your squad up the alley to the helicopter, where you'll complete the mission.

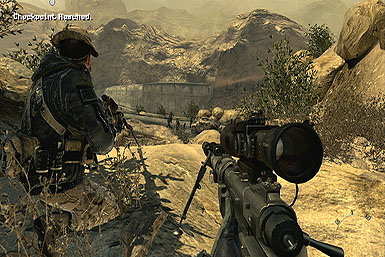
Act I: Cliffhanger
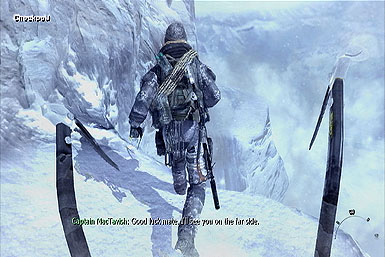
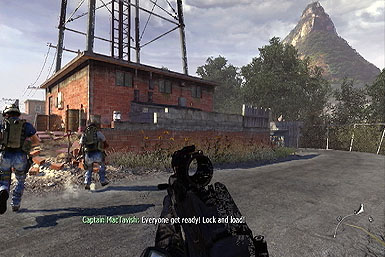
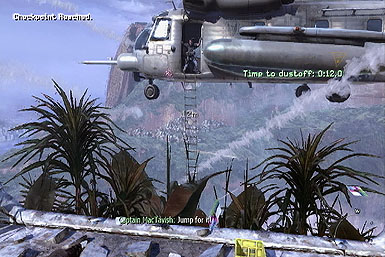
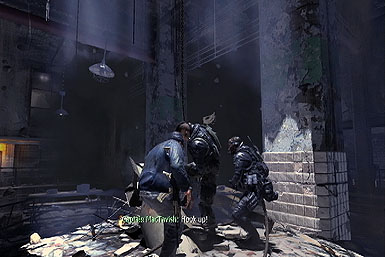
Follow Captain MacTavish
Carefully sidle along the ice wall, after your teammate, and follow his lead up the cliff wall. Thankfully, you're equipped with a pair of Ice Axes which are necessary for scaling these babies. To use them, alternate pressing the left and right triggers as you scale the cliff--make sure to keep holding the trigger of the respective Pick Axe until you've firmly planted the second one, otherwise you'll fall. If you're having trouble, you can also simply pump both triggers at each interval, holding them between, to scale the mountain.


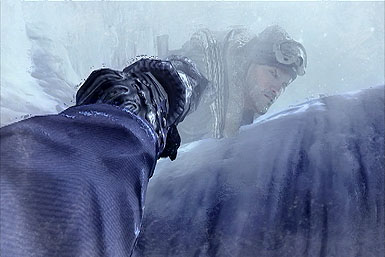
After climbing the first section, your teammate will take a flying leap toward a nearby ledge. Follow his lead and take a running leap--although you'll almost fall to your death, MacTavish will save you just in time, allowing you to scale the rest of the wall.
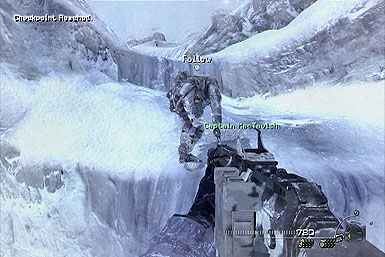
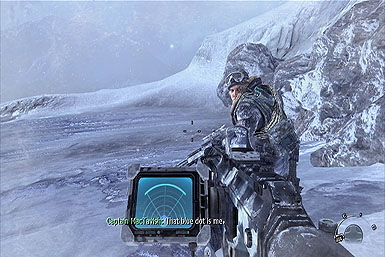
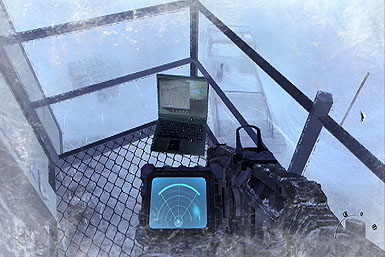
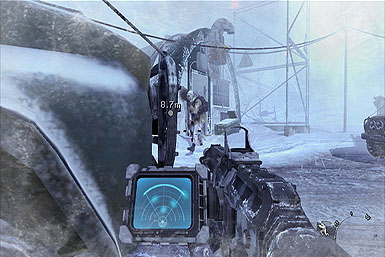
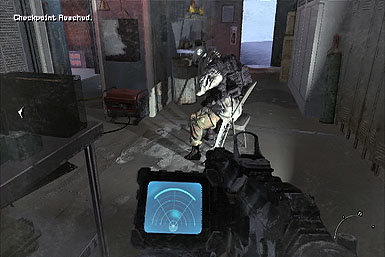
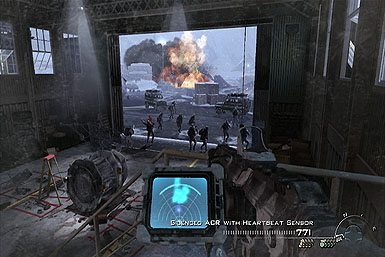
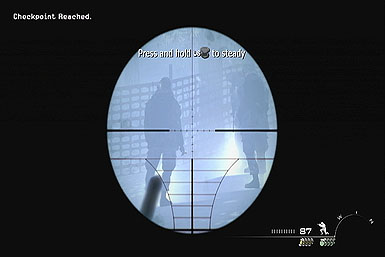
After pulling yourself up, follow the Captain up a couple of ledges. He'll soon instruct you to whip out your heartbeat monitor, by tapping left on the control-pad. This baby functions like a radar, displaying the location of nearby enemies, as represented by white dots (your partner shows up as a blue dot). Now keep in mind that the heartbeat monitor only updates every few seconds, so it's often best to move slowly to ensure you don't draw unnecessary before the monitor alerts you to the presence of nearby enemies.
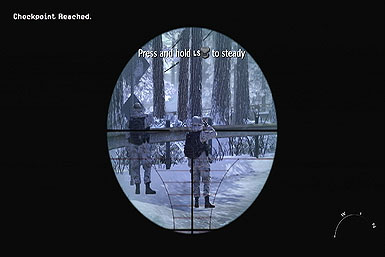
Up ahead are a pair of enemies--focus your sight on the left one and shoot as soon as your partner says "three." Do the same for another pair ahead. Shortly thereafter, your teammate will take off and watch over you from a nearby cliff--although you'll be trekking ahead alone, he'll provide sniper support from time to time.
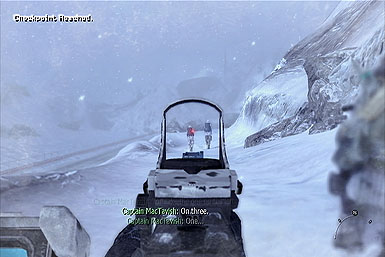

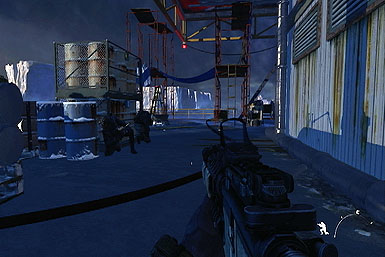
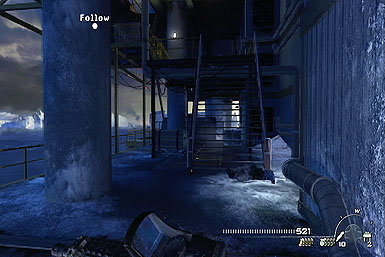
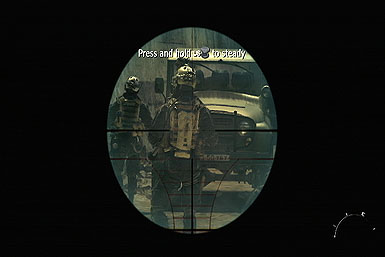
Find a Way into the Base
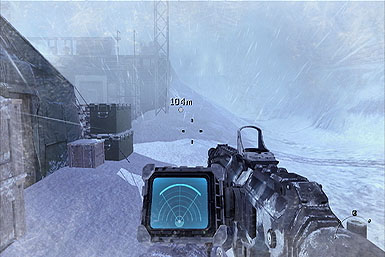
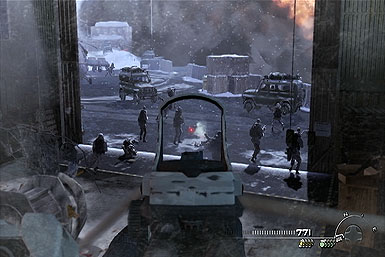
Push forward through the storm, toward the on-screen marker. As you approach the base, duck behind the first vehicle on the left, and wait a few moments for a couple of enemies to get into position. Thankfully, as long as you merely peek at them--one around the right of the vehicle, the other through a fence on the left--your teammate will take them out for you!
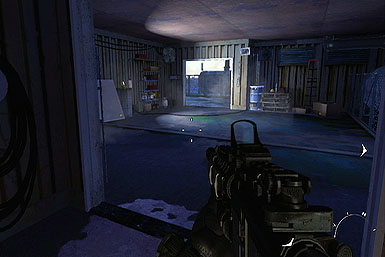
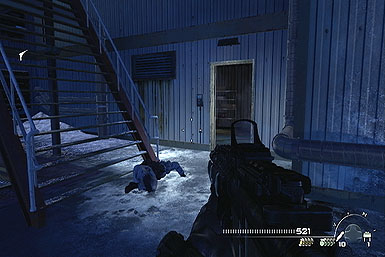
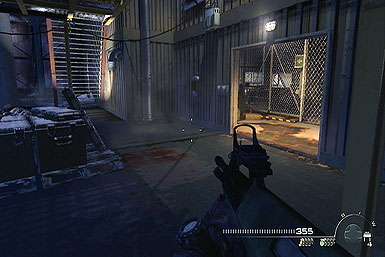
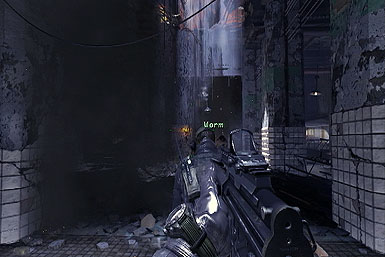
With the first two enemies down, dart into the building ahead, as marked. Inside, sneak up behind the sleeping guard in the chair and melee him to death.
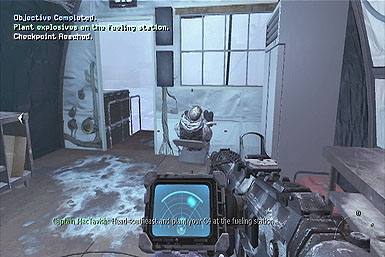
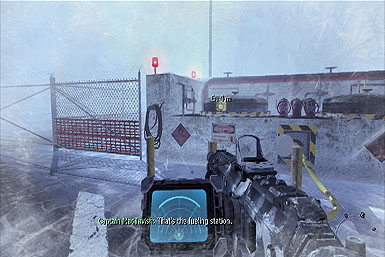
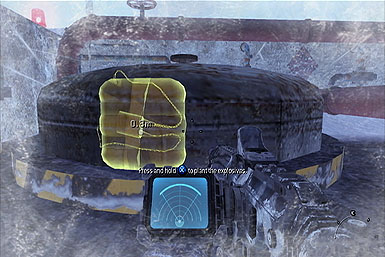
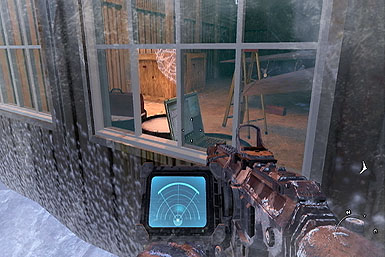
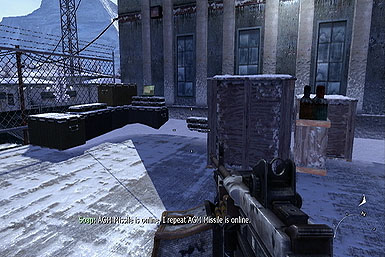
Plant Explosives on the Fueling Station
With the room cleared, look through the nearby window to spot another building just across from it--dart to it before a patrolling truck spots you! Be quiet as you enter to stealth melee two more guards inside--one in a chair on the right, the other resting inside a door frame on the left.
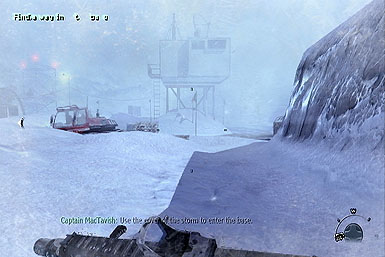
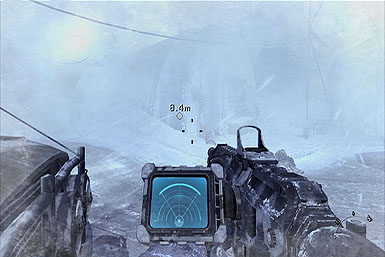
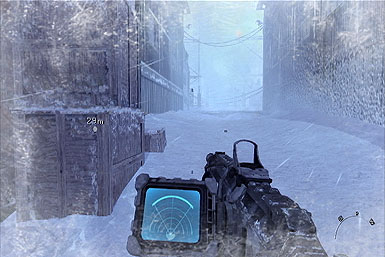
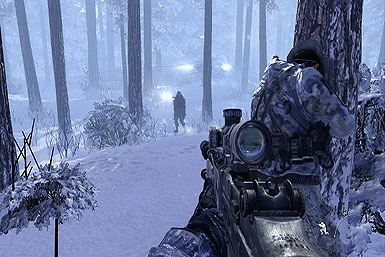
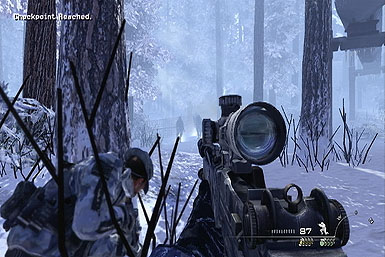
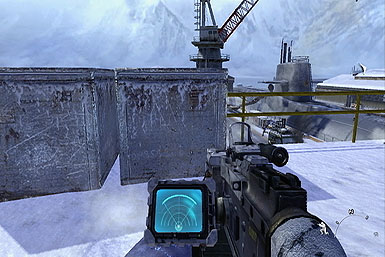
Now that you've cleared this second building, it's time to work your way across the base to the fueling station. The trick is to move slowly, and keep an eye on your heartbeat monitor to avoid arousing suspicion--if you can avoid being spotted, you won't have to fire a single shot! The easiest way to do this is to exit the current building out the back side (opposite of where you came in) and head toward the marker, while hugging the right cliff wall until you reach the street.
Here are some quick tips for getting through this section:
- Move slowly and keep watching your heartbeat monitor to make sure you avoid running into any enemies.
- Don't sweat the enemy on the high right ridge early--just glance his way to have your partner take him out.
- Take cover behind a building whenever your partner alerts you to the inbound truck, and be especially cautious when crossing the street to the runway.
- As you cross street just before the runway, you may encounter a trio of enemies walking along slowly. Just hang back and wait a few moments for them to walk away before continuing.
- When you reach the runaway, you can make a straight shot for the fueling station without having to worry about drawing attention (contrary to what your partner suggests).
Once you reach the fueling station, plant the bomb where the marker indicates by holding "X" (360) or "Square" (PS3).
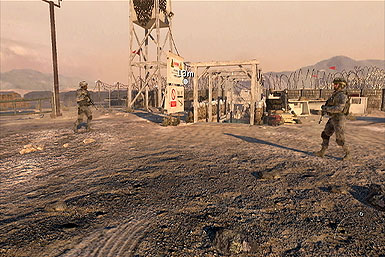
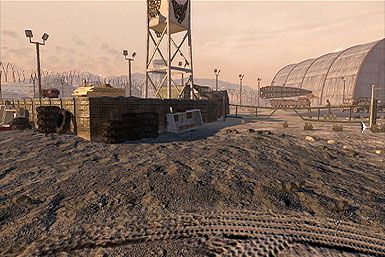
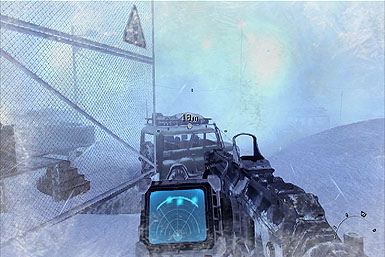
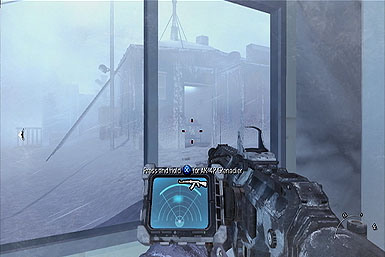
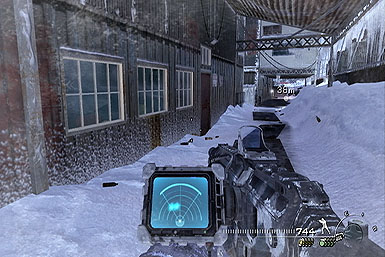
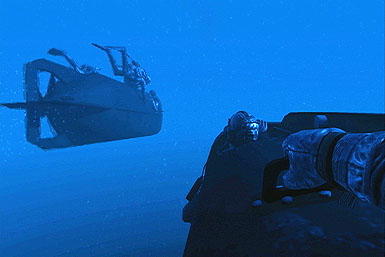
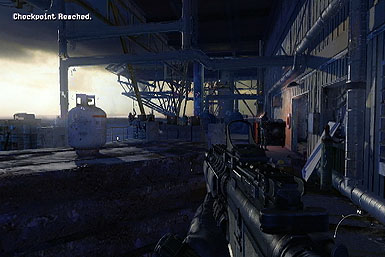
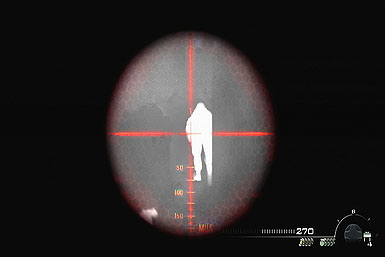
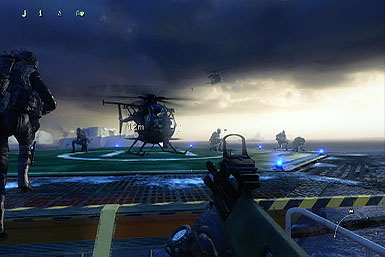
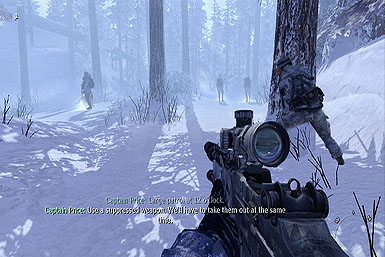
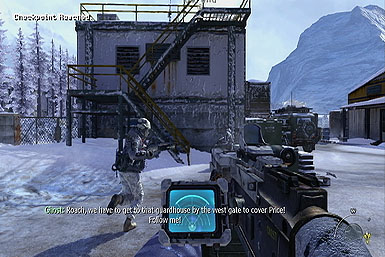
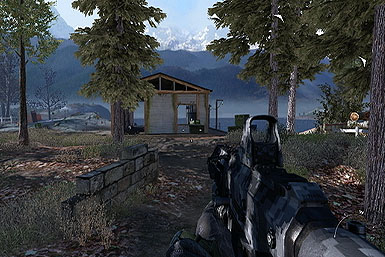
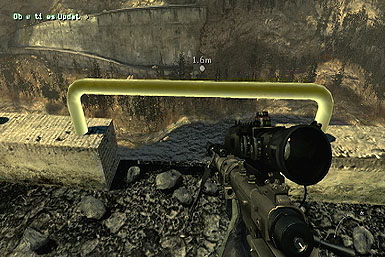
Get to the Satellite
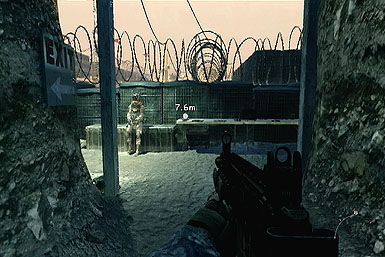
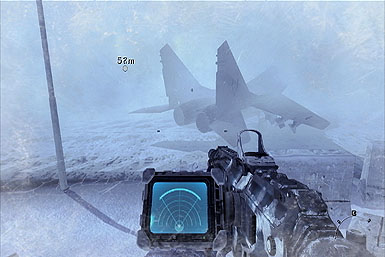
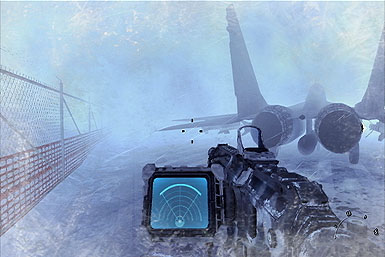
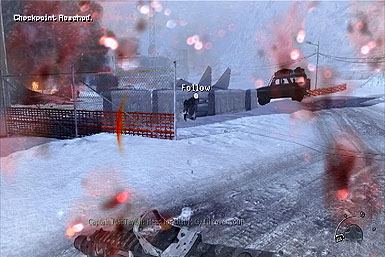
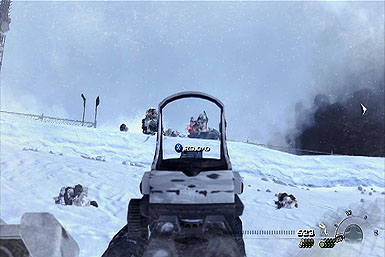
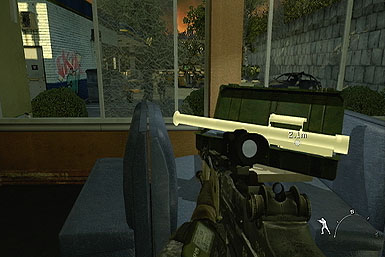
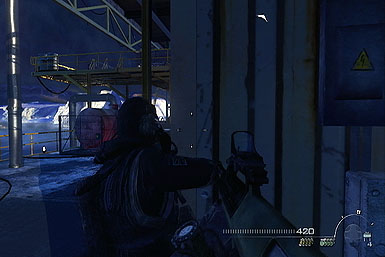
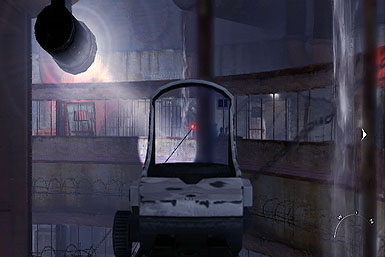
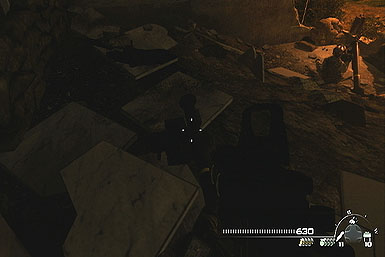
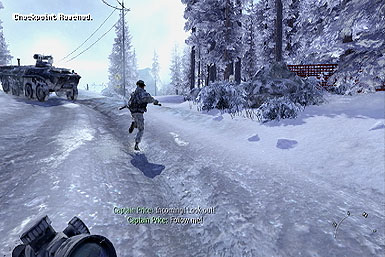
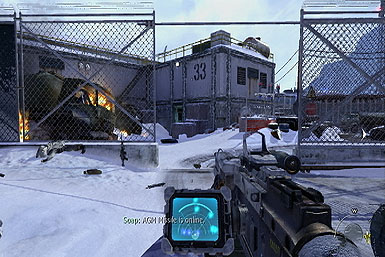
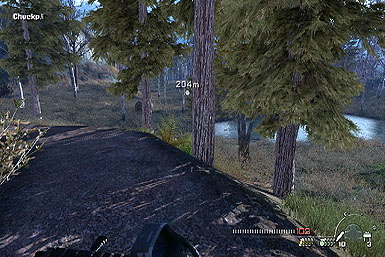
With the bomb set, the marker will now point to a hanger containing the satellite. There are many ways to get there, but only one we recommend. Follow the fence--the same one connected to the wall where you planted the bomb--west toward the rear of the runaway. There, your partner will tip you off to a tank nearby--as long as you cross a ways in front of it, he won't notice you (if you're unsure of the distance, he should be barely visible, as shown below).
After crossing in front of the tank, head straight for the marker--when you reach the building, follow it around to the gap leading to its backside, where you'll meet with your partner.

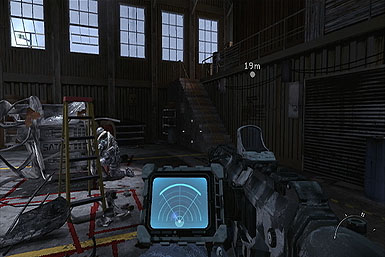
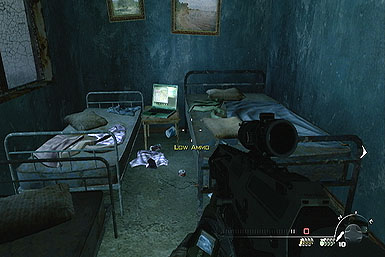
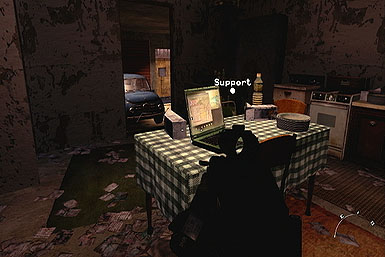
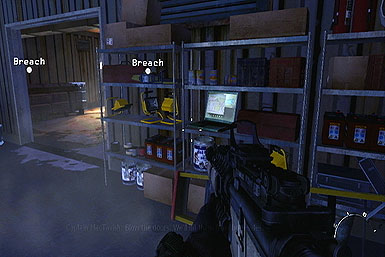
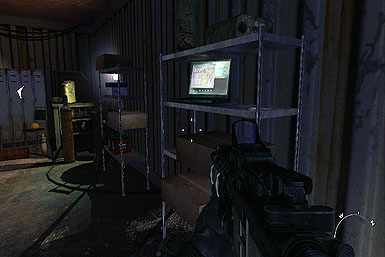
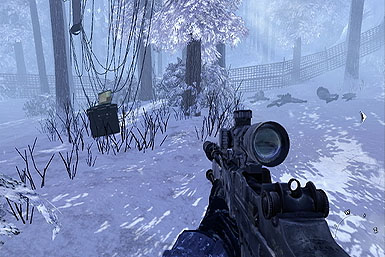
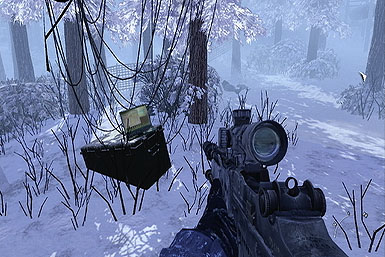
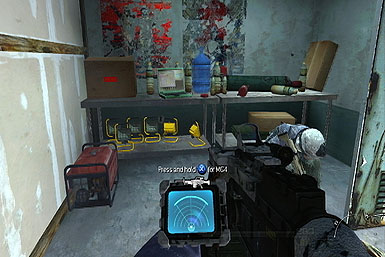
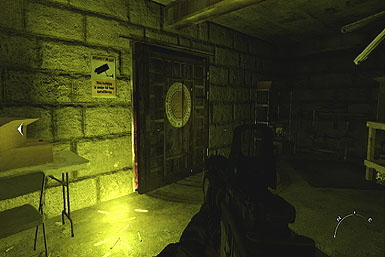
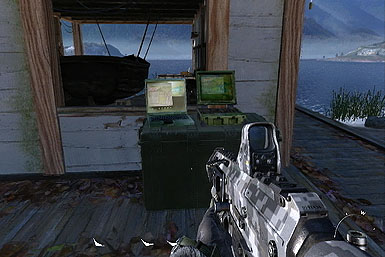
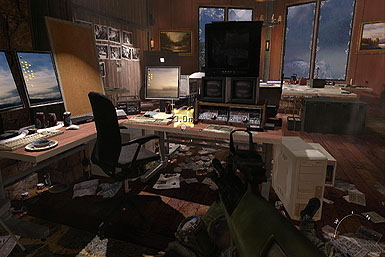
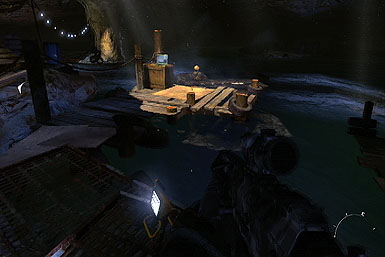
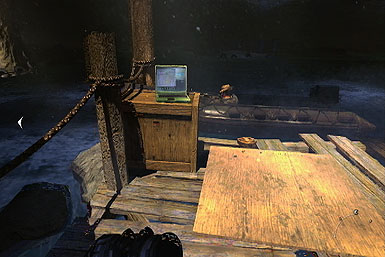
Retrieve the ACS Module
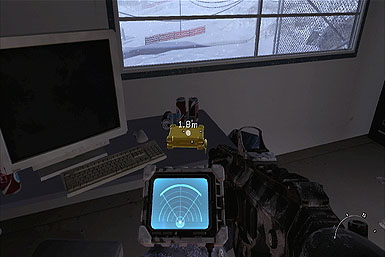
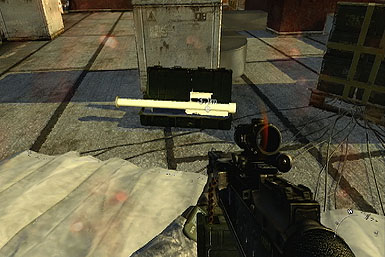
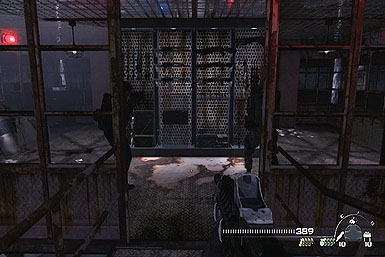
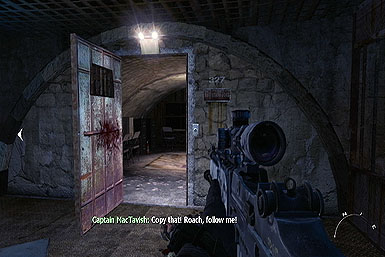
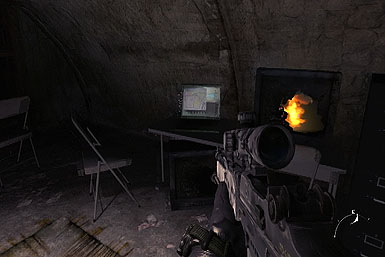
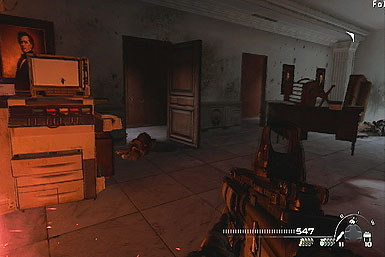
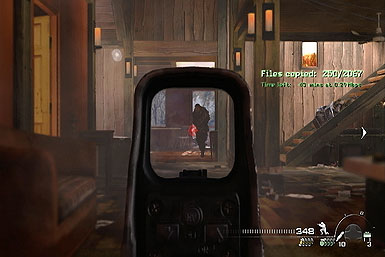
After regrouping with your partner, follow him inside and let him take down the guard within. While he works on the satellite, head up stairs and look for the ACS Module on a table by the far window.
After retrieving it, return to the main hangar to find your ally has been taken hostage. Wait at the top of the stairs and don't do anything--that is until MacTavish announces it's time for "Plan B." That's your cue to detonate the bomb you just planted by tapping the right-trigger. This will distract the enemy troops, enabling you to take them all down while they're confused.
Escape with Captain MacTavish
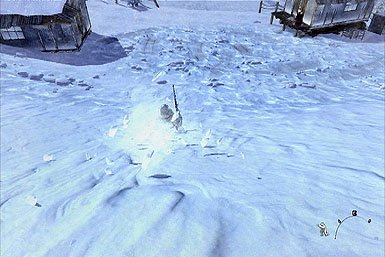
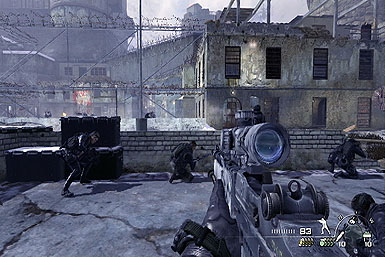
With the hangar cleared, make a right outside the hangar and follow MacTavish across the base to a gap in the fence. You should be able to dart to it without dying, but if you're having trouble, take it slowly, pushing forward only when MacTavish instructs you to, and take down the enemies along the way.
Through the fence, slide down the snowy hill just after and immediately turn around to take down the enemies gunning for you from atop it. Once they're down, some snow mobiles will come for you--picking them off is pretty easy, and you can use the enemy-free ones for cover to target the remainders.
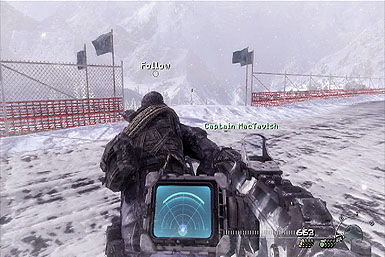
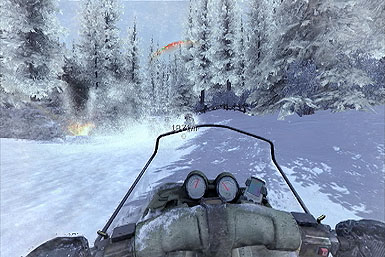
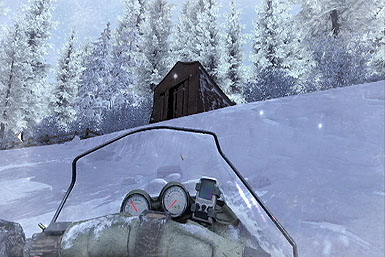
Get to the Extraction Point
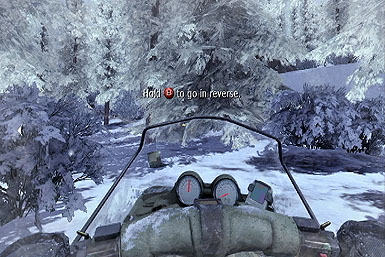
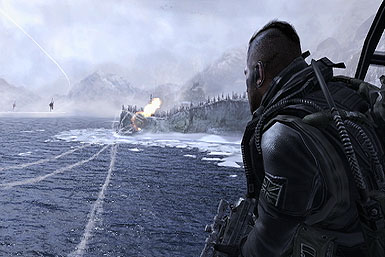
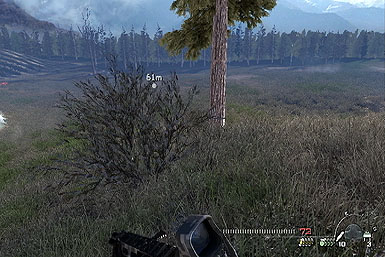
With the area cleared, hop aboard the marked snowmobile and zoom zoom to the marker, a few miles away! While driving, you can even shoot the enemy snow-mobilers, though this isn't necessary on the lower difficulties. As long as you can avoid driving into trees, off of cliffs, and avoid the incoming helicopter fire (simply by veering to the side around its path of fire) this shouldn't pose any trouble.

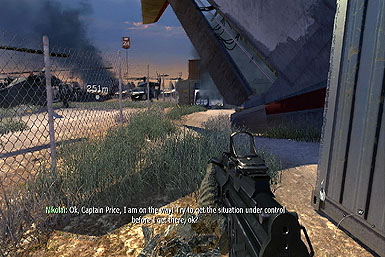
Act I: No Russian
Follow Makarov's Lead
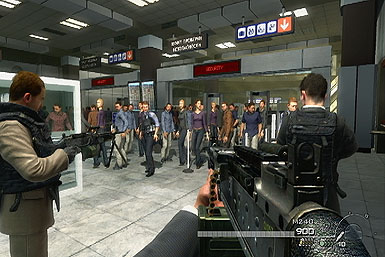
Keep behind Makarov and his comrades as you trail them through the airport, as they'll have no reservations about shooting you if you get in the way. That aside, note that you do not need to shoot anyone at all until you encounter the police outside, but you won't be penalized for doing so either--it's up to you.
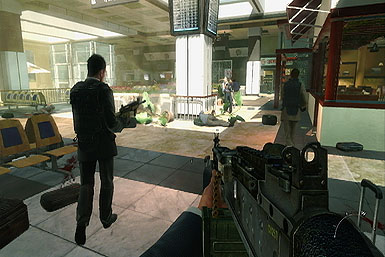
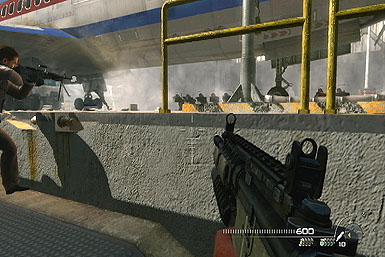
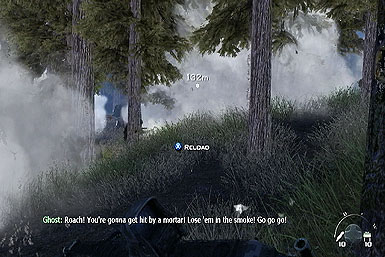
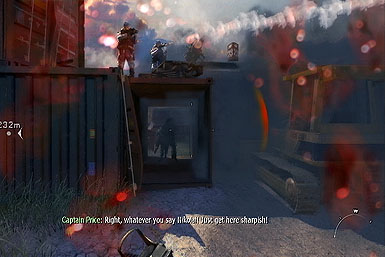
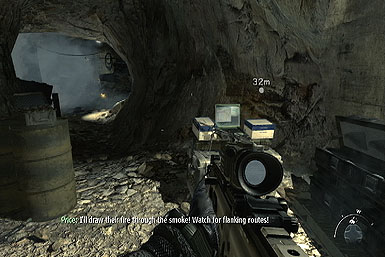
As you step out onto the tarmac, you'll spot a line of police officers emerging from the smoke equipped with riot shields. Quickly seek cover down the ramp ahead. Now switch to your grenade launcher and use it--while peeking over the wall--to clear out the initial wave.
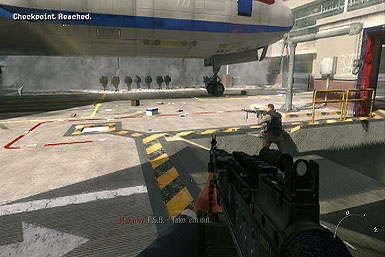
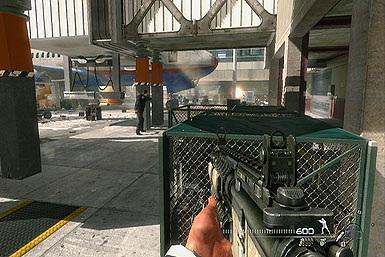
With the first wave down, grab one of their dropped shields (but swap weapons first, so that you don't accidentally ditch the grenade launcher) before the smoke screen dissipates and use it to push forward to the next point of cover. We suggest taking residence by the green electrical boxes on the right--it may seem far, but you can easily launch grenades from here to clear the enemies ahead. After clearing the next wave, you may have to step forward a bit to trigger the next group of enemies--after doing so, we suggest returning to this point of cover and targeting the enemies appear both ahead, as well as in the walkway above. When the SWAT truck rolls in, toss a grenade its way to destroy it, quickly taking down the departing SWAT members.

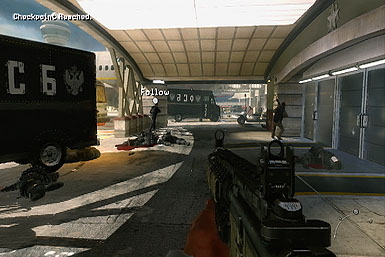
As you pass through a corridor, another SWAT truck will roll in ahead. Duck behind a recessed portion of wall on the right and fire at them from around it. Once clear, follow your team down a ramp ahead, leading to the get-away vehicle.
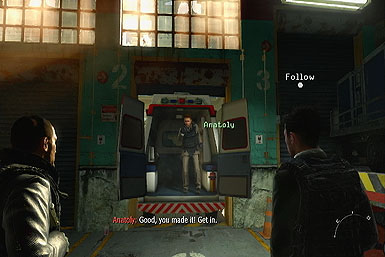
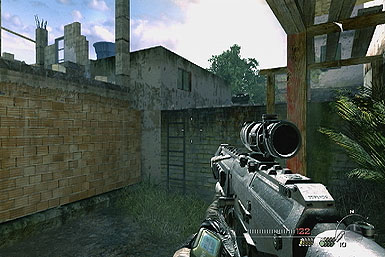
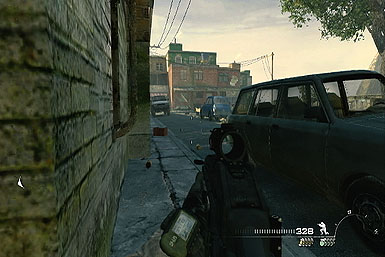
Act I: Takedown
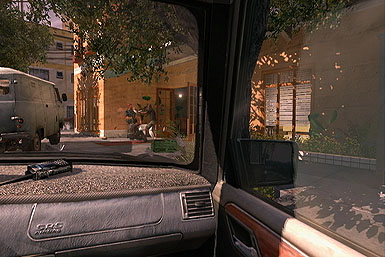
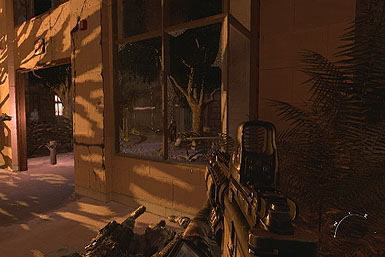
Capture Roja's Right-Hand Man Alive
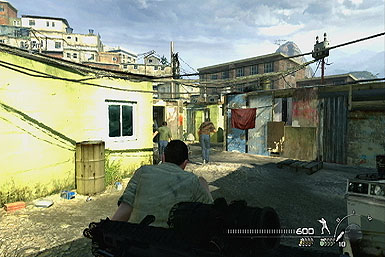
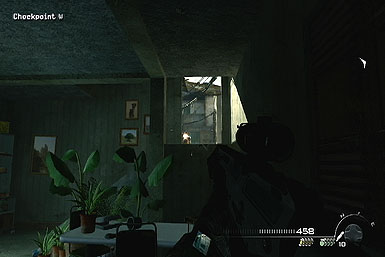
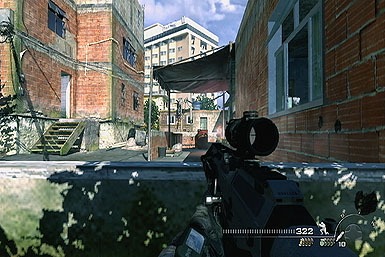
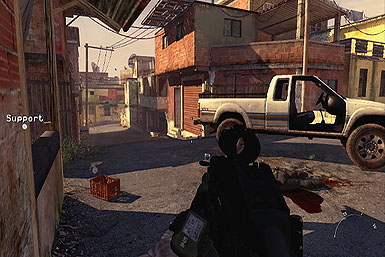
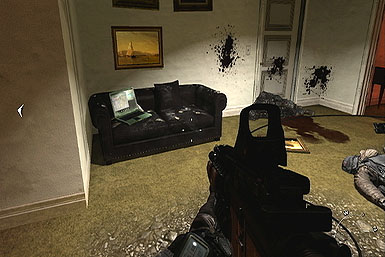
Enjoy the car ride--it won't last long. When the car parks, get ready to crouch by the seat (by tapping the "crouch" button) as soon as the gunmen open fire, otherwise you'll find your brain smeared all over the seat. After getting out of the car, follow your squadmate around the corner, after the perpetrator!

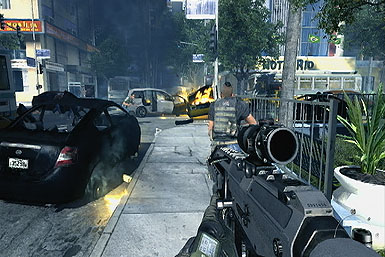
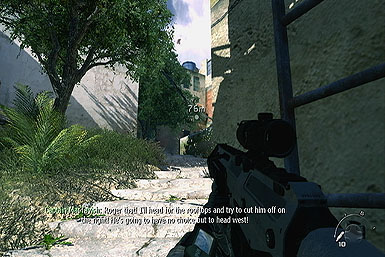
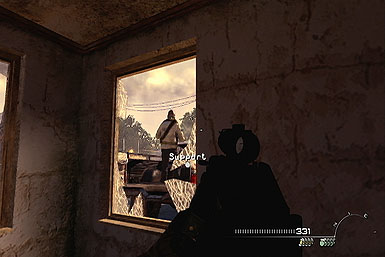
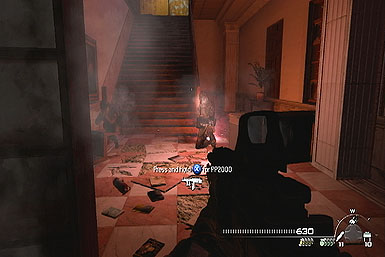
Follow him right around a second corner, then into an alley on the left--after the second turn, you'll spot him just ahead! Quickly take aim and shoot his lower-body to injure, but not kill him.

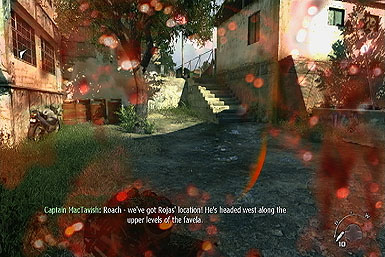
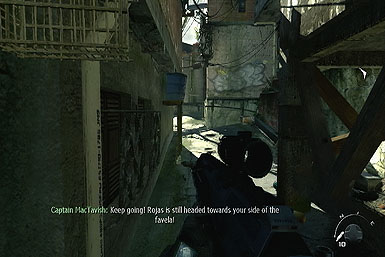
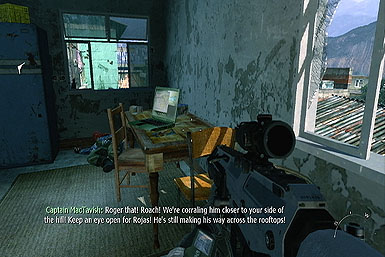
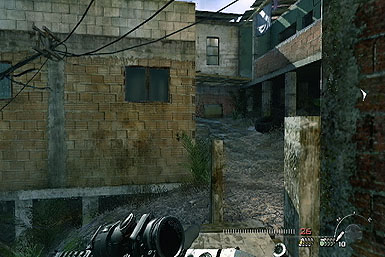
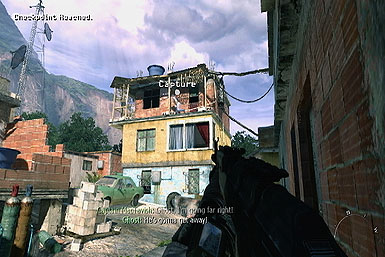
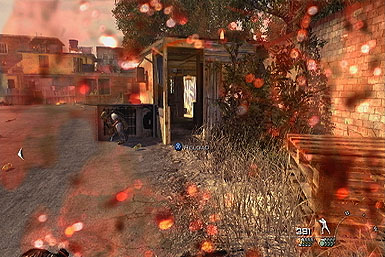
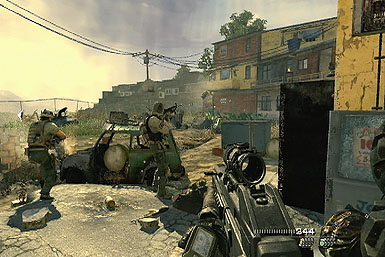
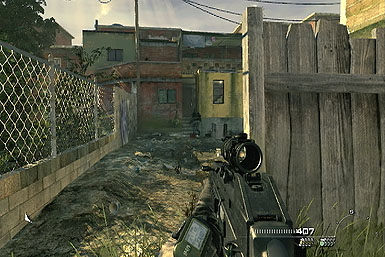
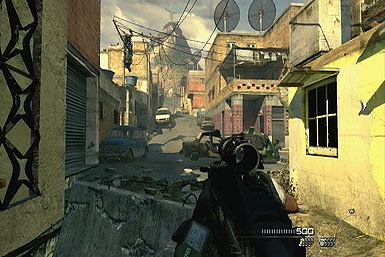
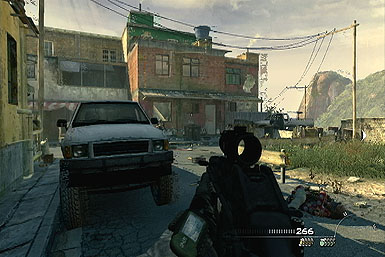
Fight to the Top of the Favela and Capture Rojas
With the right-hand man captured, follow your squad up the stairs to a broken fence overlooking some civilians below.
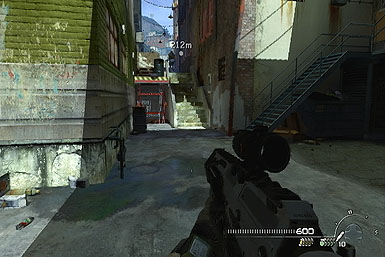
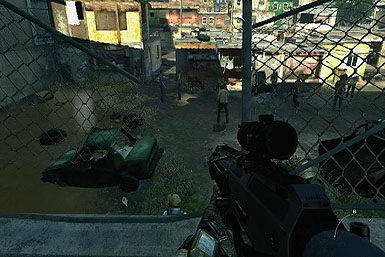
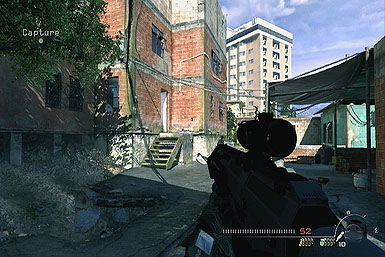
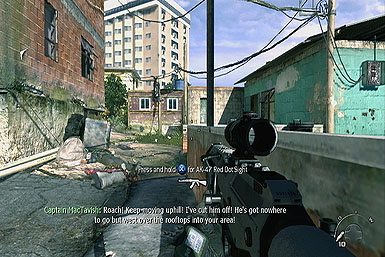
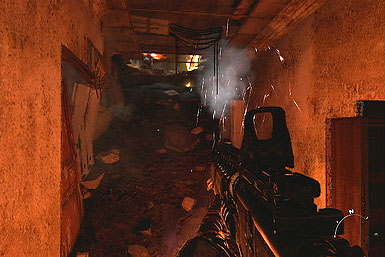
Now here's the thing: in just a few moments, a ton of armed baddies are about to storm the area, but if you get moving fast, you can actually run through most of this first section before they get into position! As soon as you drop through the fence into the field, hightail it into a passage on the right, in the southwest corner. Once there, keep following the right wall, running the entire way--it will eventually lead to a staircase with a fenced-in field on the right. Just before it though, you'll likely run into a group of three enemies, also running to get into position--take them down before continuing.
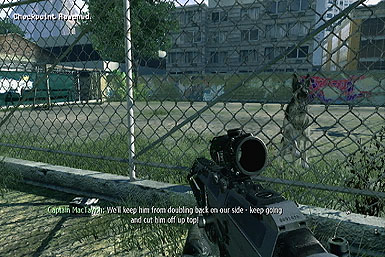
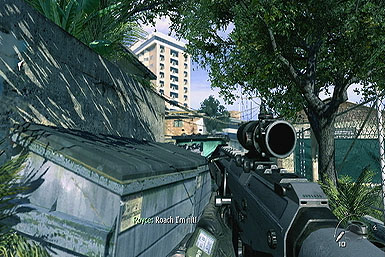
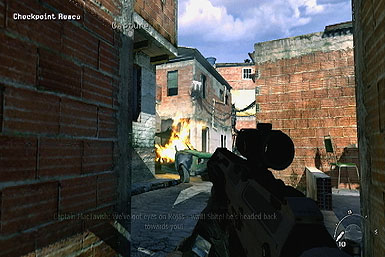
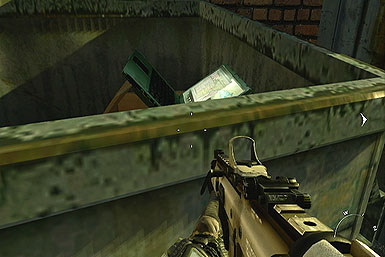
After climbing the stairs, a dog will try and get at you from the other side of the fence on the right--shoot him head before he comes at you from another direction.Now take cover behind the dumpster on the left, just ahead, and take aim at the baddies on the rooftops ahead.
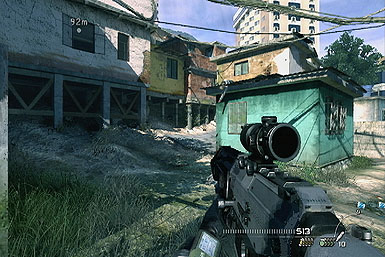
Once clear, get ready to shoot a dog from the left as you move ahead, then go left around the house and up a staircase. As soon as you step on the stairs, aim for an enemy in a window ahead, then take cover by the left corner to target the enemies just around it.
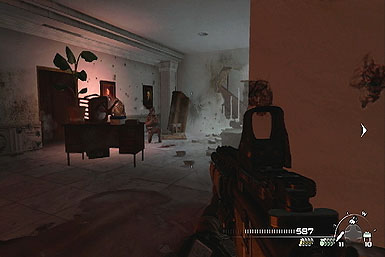
When clear, dart into the house ahead, on the left and aim out the window directly opposite the entrance to kill the enemies farther up (including an annoying sniper on a balcony). If you need cover, either go prone or duck left, outside of the window's view.
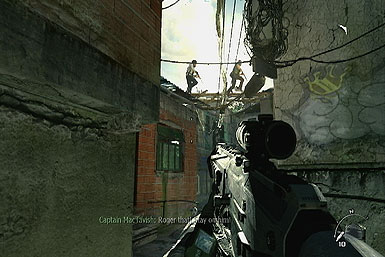
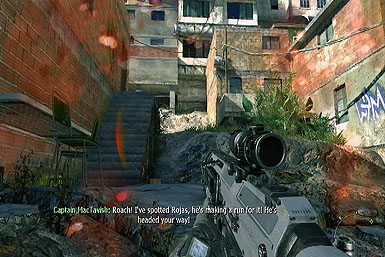
After clearing the area ahead from the house, venture back in the alley and hug the left wall as you push forward slowly to target a few more baddies ahead, such as on the staircase. Once they're down, look up at the wooden footbridge overhead, and try to take down the trio of enemies that cross over as soon as you step far enough forward.
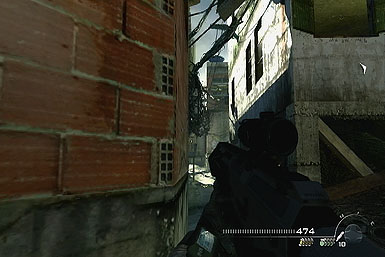
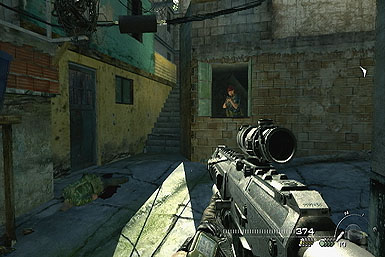
Push forward, ready to target an enemy who'll surprise you through the green window just ahead (right of the stairs). After killing him, follow the house around the corner to a ladder. Don't climb it--instead use that corner for cover as you target the enemies around it, which in turn will cause a few more to appear on the rooftop to your left--back up to deal with them. Also be wary of any opponents on the roof, to which the ladder leads--take them down when they peek over to target you.

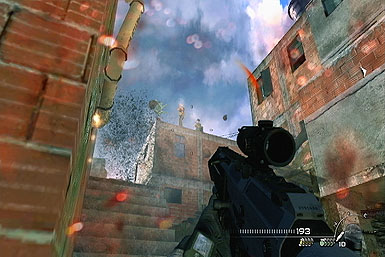
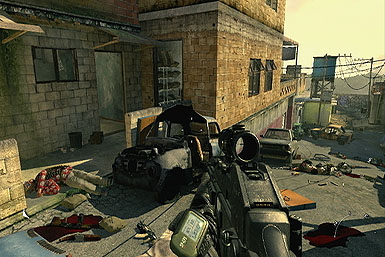
After clearing the area past the ladder, climb that hill to a low wall on the right you can duck behind. From here, take aim at the red barrel ahead to clear out most of the enemies, then pick off the stragglers. Now continue up the street a ways to the next wall, on the right--take cover there too to cap a few more enemies still inside the nearby buildings.
When done, push forward up the street, and around the corner to a staircase leading inside a building. We recommend ducking inside the building for cover, and peer through that same entranceway at the rooftop enemies surrounding you. Edge your way around the back side, to a ladder you can climb up the wall.
As soon as you climb the ladder, take down any nearby foes, then dart up to the wall on the right. Although another enemy will pop out of the window there when you get close, just step to the side to avoid its fire, allowing you to take him down as soon as he stops firing. Once he's down, peer around that same corner and target the enemies up ahead.
When clear, continue along to a hill on the right, leading to a staircase. Pause at the top of the stairs to target the visible enemies ahead, both on the ground and rooftops. It's then best to hurry up and duck into the building on the left, killing the guard there, then target any remaining enemies through the doorway.
Once you've cleaned up, venture down an alley on the left, just ahead, and watch (but don't shoot!) as Favela falls right into your squad's hands--how nice of him!

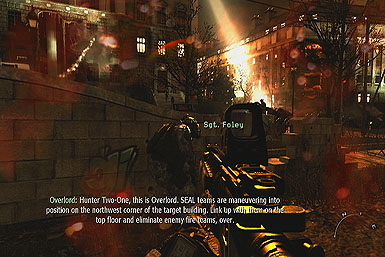
Act II: Wolverines!
Follow Sgt Foley
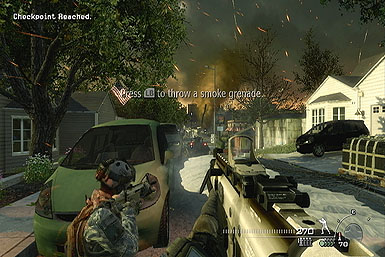
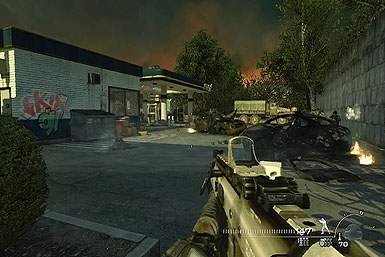
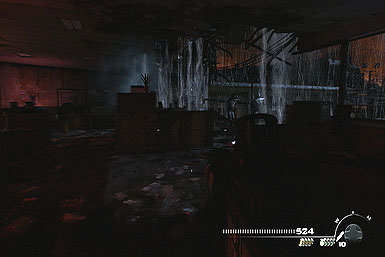
After exiting the vehicle, follow your squad down the alley on the right. Trail them through town until you reach a house, just before a BTR. Wait for it to roll past, then follow Sgt. Foley to a car on the street for cover.
While behind the car, lob a smoke grenade at the BTR. In just a few moments, it'll unleash a smoke screen, allowing you to safely run past the BTR--stick to the right side of the street to duck into an alley just beyond. Immediately take cover behind the dumpster there and target the enemies beyond.
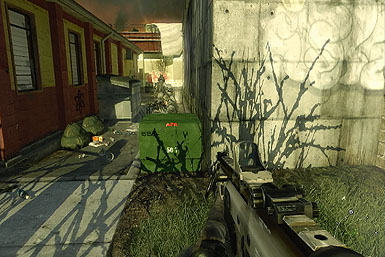
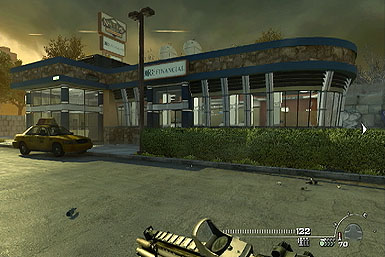
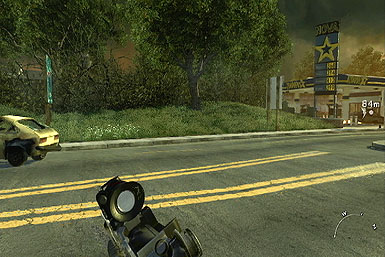
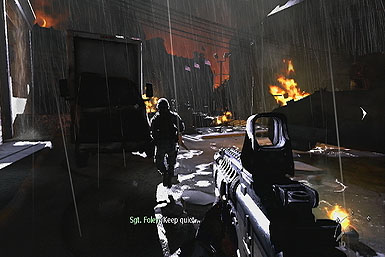
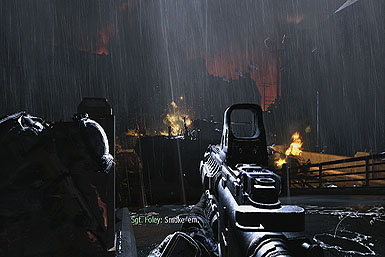
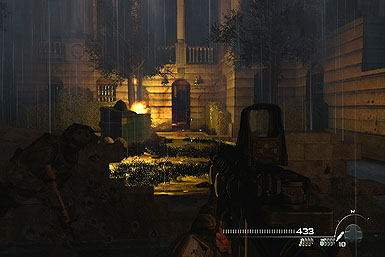
Push forward through the alley, taking cover by another dumpster ahead, then the jutting wall just before the gas station's parking lot--this provides fantastic protection as you target the inbound enemies. After thinning the herd, push forward to the gas station's office on the left, just before the window. Peek inside to take down a few enemies there.
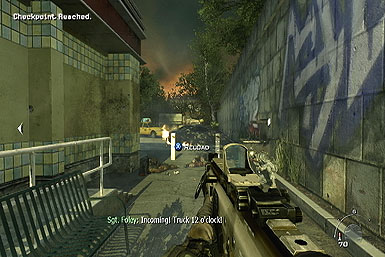

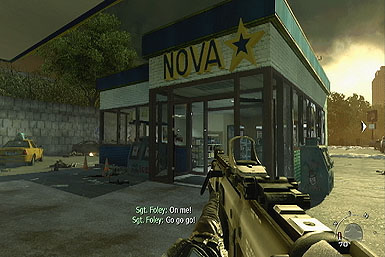
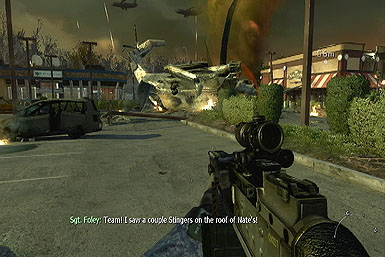
With the gas station cleared, follow Foley across the street to a car, just in front of Nate's restaurant.
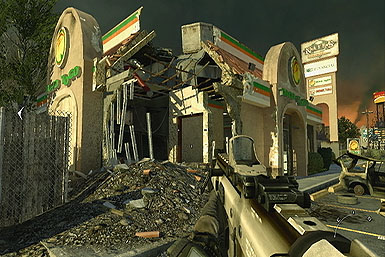
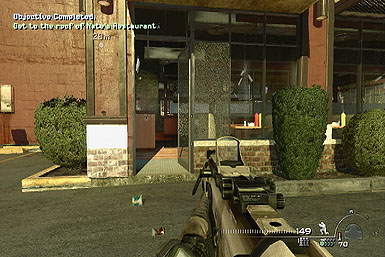
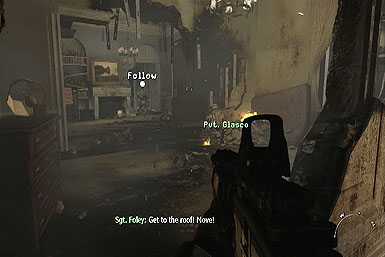
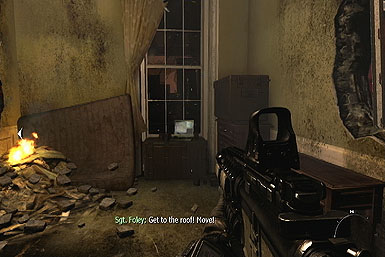
Get to the Roof of Nate's Restaurant
You heard the Sergent! The entrance into Nate's is just behind you--head inside and make a left to enter the kitchen, where you'll find the ladder leading to the roof.
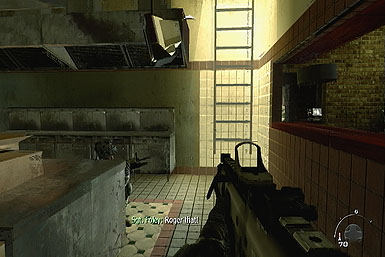
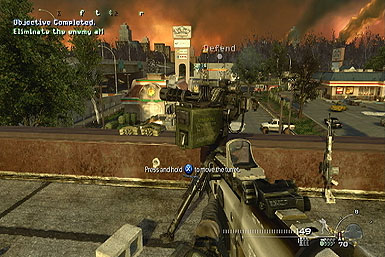
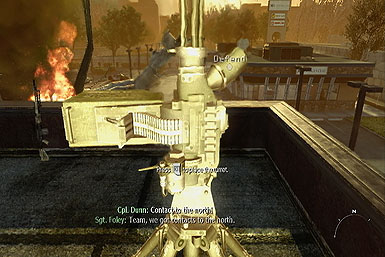
Eliminate the Enemy Assault
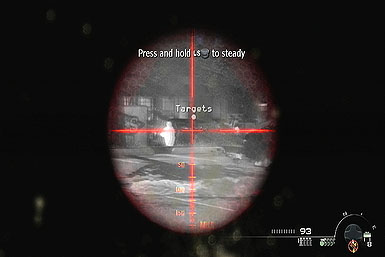
On the roof? Good--as you're going to have hold off some inbound troops from here. You may have noticed an automated turret by the roof's ledge--you can move this baby around by grabbing it like any other weapon, but leave it its current location for now. On either side of the turret are some trip-mines and a thermal rifle--if you want, you can set up the mines around the various rooftop entrance (such as by the ladder, or gaps in the wall), but we actually recommend ignoring them and instead using only the turret and the rifle, as you don't have much time.
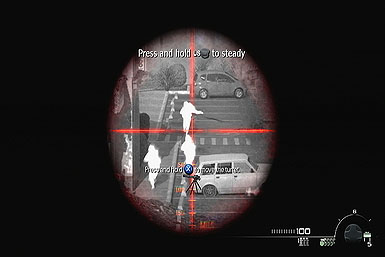
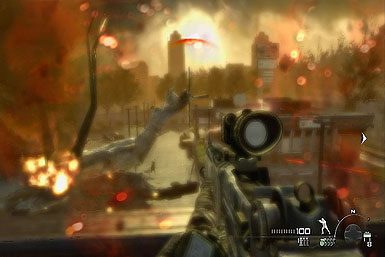
After grabbing the thermal rifle, use its scope to pick off the enemies attacking from the north--the more enemies you take down, the fewer you'll have to deal with climbing onto your rooftop. Of course, your peripheral vision is limited when using the scope, so be sure to zoom out between targets to quickly acquire another. If you run low on ammo at any point, an ammo box behind you provides an unlimited supply.
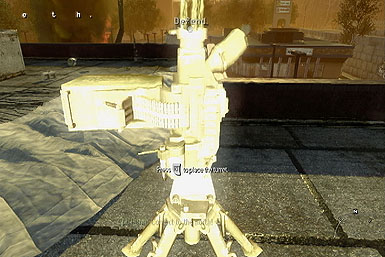
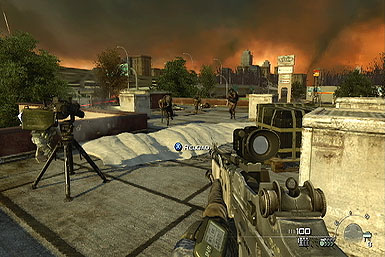
Before long, Sargent Foley will alert you to more troops inbound from the south, which is the direct opposite ledge. Grab the turret and plant it down on the opposite ledge, then use your thermal scope again to pick off the inbound troops--you'll need the thermal scope to see through the smoke screen they set up. Remember, if any enemies get onto the roof, reposition the turret so it faces them, then take cover behind any of the rooftop's structures if you need to. Once you've cleared out the attacking forces, drop back inside the restaurant when the sergeant instructs you to.
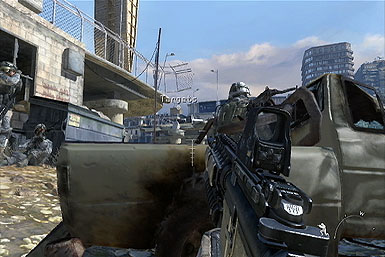
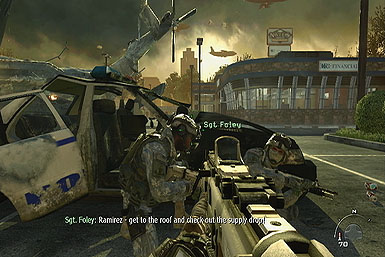
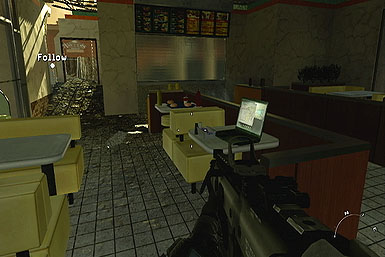
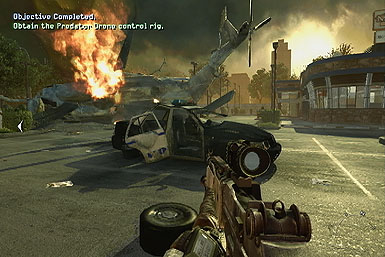
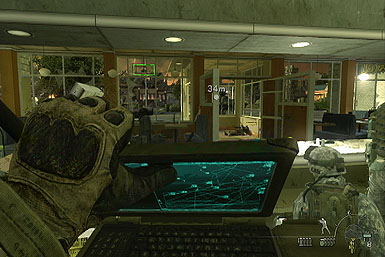
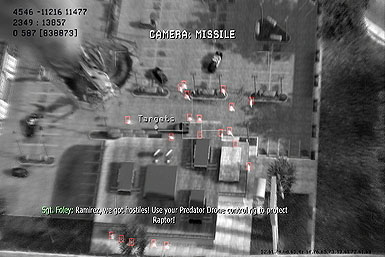
Obtain the Predator Drone Control Rig
After dropping into the restaurant, you'll be tasked with grabbing the predator drone control rig from the diner across the street--which is teeming with enemies. The best way to go about this is to exit through the door you entered from, and head around the backside of the burning helicopter wreckage--now run parallel to it, across the street and make your way to the marked diner.
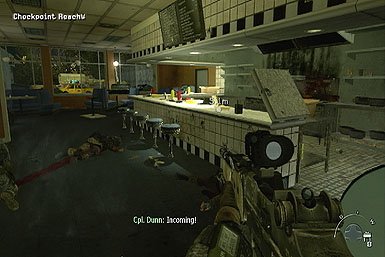
As you approach the diner, crouch before one of the windows for cover, enabling you to target the enemies inside. When clear, enter the diner and grab the control rig from the counter.
Destroy the BTR80s
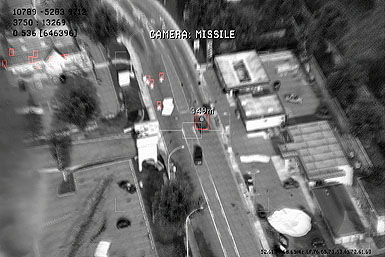
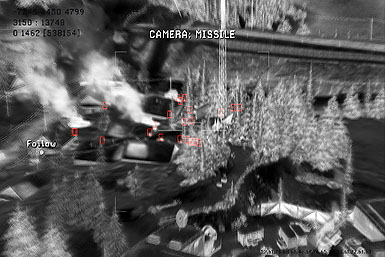
After grabbing the rig, crouch behind the counter and equip it by tapping down on the control-pad. Your view will now switch to that of a missile on the predator drone--use it to launch a couple of missiles, steering them into the marked BTR80 vehicles on the ground.
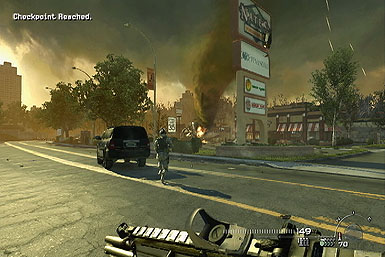
Regroup at Nate's Restaurant
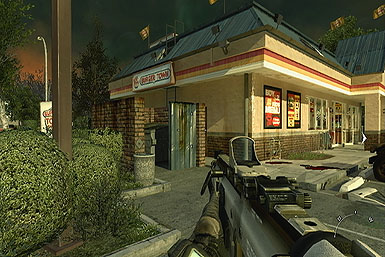
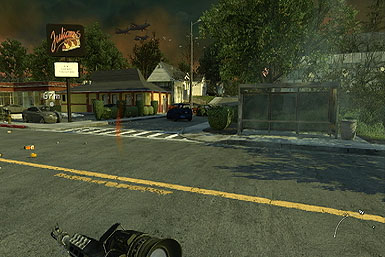
With both BTR80s destroyed, Foley will instruct you to head for Nate's restaurant--don't. It'll be destroyed before you can arrive, so head for the Burger Town instead, to the southeast, just right of Nate's.
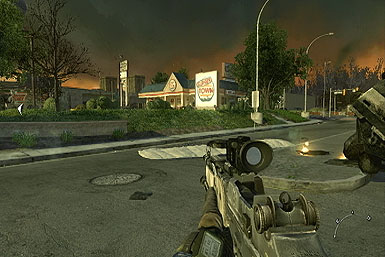
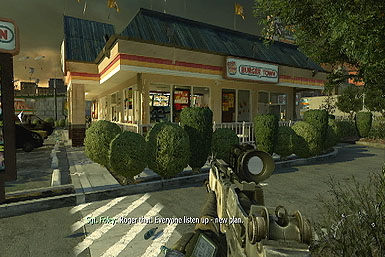
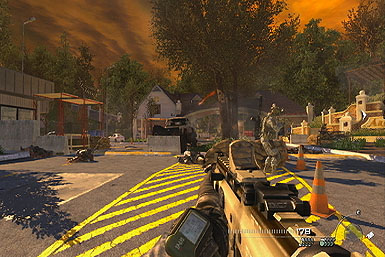
Secure Burger Town
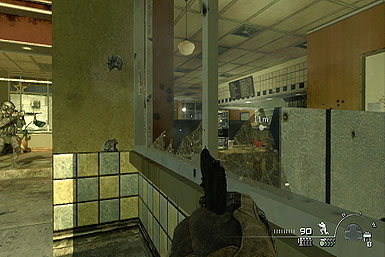
Approach Burger Town and take cover below the windows, peeking up every now and then to target the enemies within.
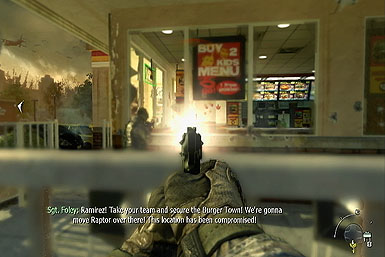
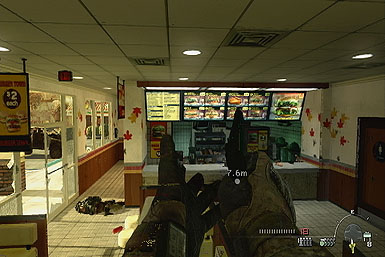
Protect the VIP / Neutralize the Enemy Forces
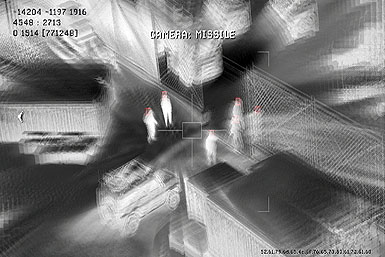
With Burger Town cleared, wait here for Sergent Foley to carry over the VIP. Once he's safely holed up in the meat locker, take cover somewhere in the restaurant, such as behind the counter, and use the Predator Drone once again to wipe out the attacking enemy forces outside. Continue firing missiles at large groups of enemies until the drone is destroyed.
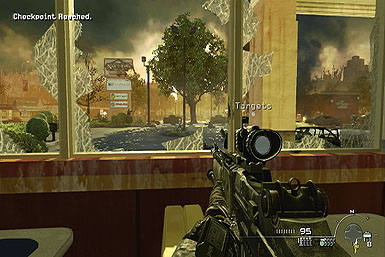
Once the drone's destroyed, you'll have to hold off the enemies attacking from the direction as marked on your HUD. Remain in the restaurant and use your thermal rifle to pick them off either through the windows, or from the backside. Keep in mind that the enemies will attack in waves from different directions, so adjust your aim toward the market 'target' location.

Neutralize the Enemy Helicopter
Before long, you'll be alerted to an inbound chopper; thankfully there's a rocket launcher in the diner to the west ideal for taking it down. The best way to get there is to exit the Burger Town to the south, crossing the street far away from the action, then head for the diner.

Grab the launcher inside, then aim it at the chopper and fire a missile as soon as you have a lock-on to destroy it.
With the first chopper destroyed, another will soon roll in. Luckily, there's another launcher on top of Nate's. We recommend running north up the street first, before crossing over to Nate's to avoid enemy encounters. Quickly climb to Nate's roof via the ladder in the kitchen, grab the stinger, and use it to take down the second chopper.
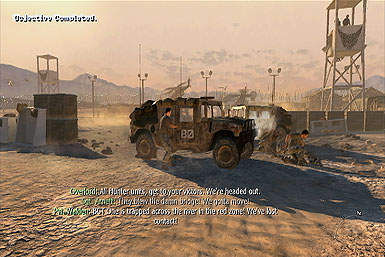
Regroup at the Convoy
With the second helicopter down, your escape convoy will roll in ahead--if you try and dash straight for it, you'll get creamed. Instead, exit Nate's out to the west and run alongside the Taco building, before making a straight shop for your escape ride. This route will ensure you don't take any heavy fire.
Act II: The Hornet's Nest
Support Captain MacTavish as the Squad Heads for the LZ
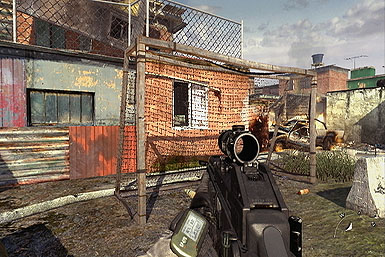
Dart up the hill, after your squad. Head right around the brick building at the top, but stay on the lower level. Use the corner for cover as you target the enemies around it--you'll find a couple of explosive barrels (one by the shack on the right, another on the rooftop ahead) that can be detonated for a few quick kills.

After thinning the enemy presence, dash through the shack on the right, into a small house just ahead--just be sure to shoot the gunmen inside through the door before entering. Hole up in here for a few moments and shoot the enemies through the window and back door, including the pair of gunners on the back of a couple of trucks.
When you reach the field ahead, you should be able to simply dart alongside the chain link fence on the left to a staircase behind the building.

After climbing the stairs, take cover by the wooden fence on the right to clear out the enemies ahead, including those within the building. Continue around the corner and take cover by a low, concrete wall on the left and work on clearing the street. Push your way up it, taking cover when necessary, and continue up the hill in the back.
At the top of the hill, use the building on the left for cover as you peer around it to target the enemies beyond. Push forward, using the vehicles for cover, up to an alley on the left--clear out the enemies there, then use the wall closest to the street you just emerged from for cover to clear out the remaining enemies, including a gunner on a truck in the bar.
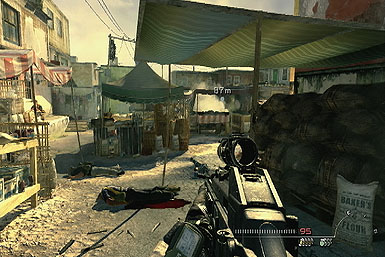
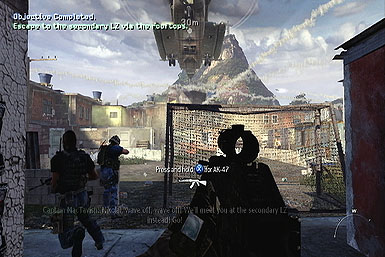
Head for the LZ to the Southeast of the Market
Just around the next corner is the market--hang back and slowly peek around it to target the first few enemies. Now slowly work your way through the market toward your destination, sticking to the right wall--the myriad tables and objects along the way provide great cover. When you reach the burning turn, enter the building on the left and continue through it to find the chopper.

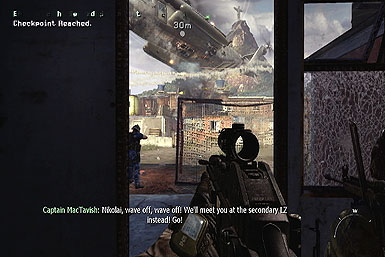
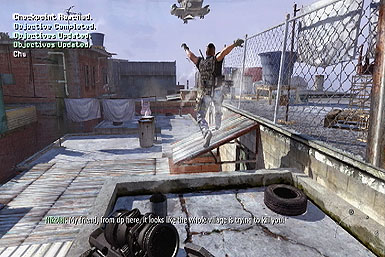
Escape to the Secondary LZ Via the Rooftops
Unfortunately, there's too much action for the chopper to land, so you'll have to relocate it elsewhere. For now, clear out the few enemies outside, then follow your squad up a wall on the other side of the courtyard, then across the rooftops. As you attempt the final jump just before the chopper, you'll fall to the ground below.
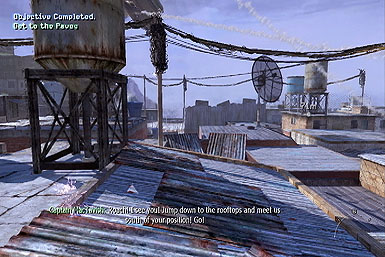
Find a Way Back to the Rooftops
You gotta get out of there, and fast! Dash into the building dead-ahead and follow the route up to the rooftops. Once there, head toward the marker--upon reaching it, make a sharp left and drop to the rooftops below, then make a right. Just a bit further until the chopper! Once it comes into view, make a running jump for it!
Act II: Exodus
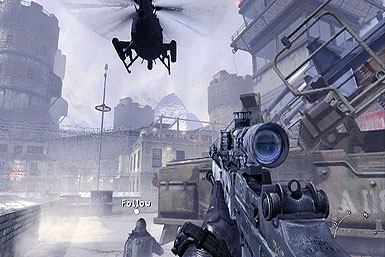
Locate and Neutralize the Anti-Aircraft Guns
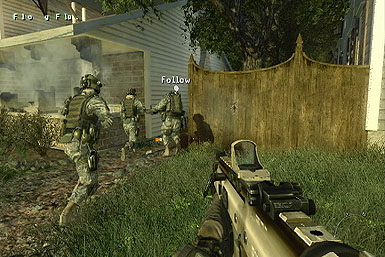
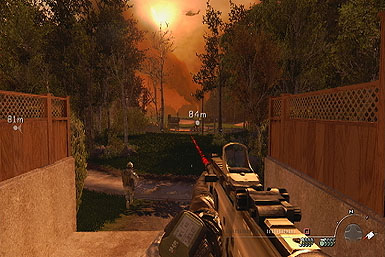
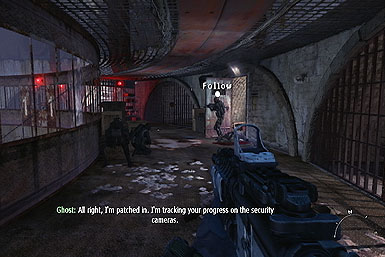
For most of this mission, you'll be assisted by a tank that can provide cover fire. However, you'll have to designate where it shoots by selecting targets with your laser (activate it by tapping right on the control-pad, then confirm a target by pulling the right-trigger.) You can target practically anything, such as homes or groups of enemies, then watch with glee as the tank mows down the combatants.
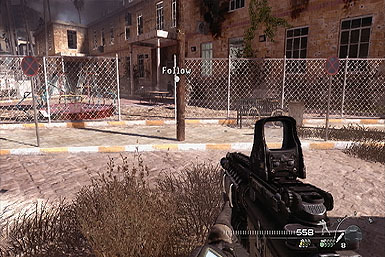
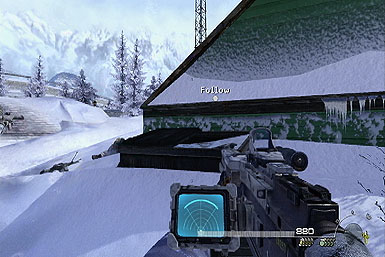
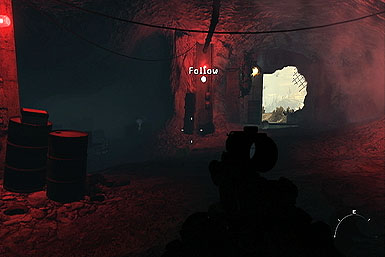
For the most part, you should hang back behind the tank and let it take out the targets you select. This will keep you out of harm's way, though if you do draw fire, simply reposition yourself and use the tank as a shield. On occasion, you may have to push forward, ahead of the tank, toward the sergeant (who's marked with the "follow" icon), triggering the next segment. Once you have, you can then pull back again and resume the same strategy.


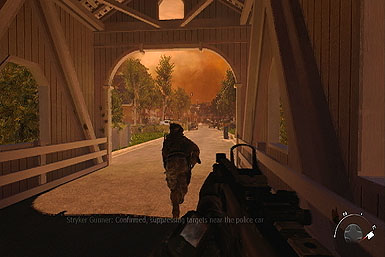
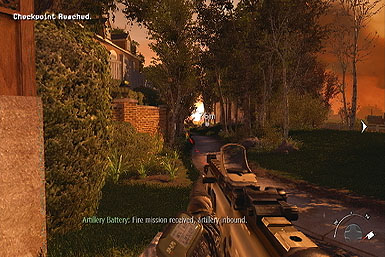
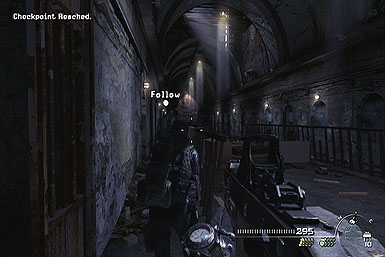
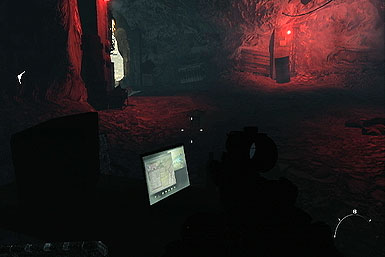
Before long, you'll encounter a fortified checkpoint, just before an overpass. Again, hang back and target the various buildings and groups of enemies with the targeting laser and let the tank clear most of them out, leaving you with clear-up duty.
A short distance past the checkpoint, you'll begin crossing over a bridge. Makle sure to select targets for the tank to target as you cross!
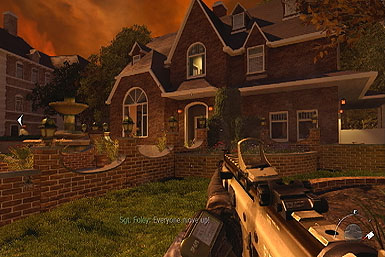
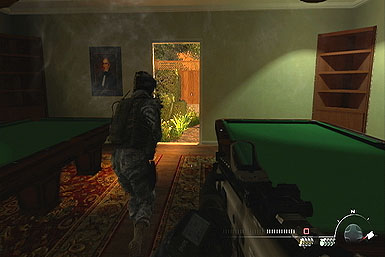
Further up the street is a large mansion you'll have to enter in order to exit out a side door on the left side. Focus the tank's fire on it first, then enter through the garage and clear it out. Now enter the house proper via the left door and continue to follow the left wall to the exit (in the room with the billiard tables).
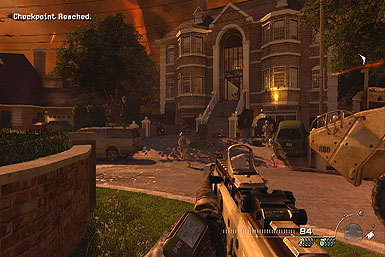
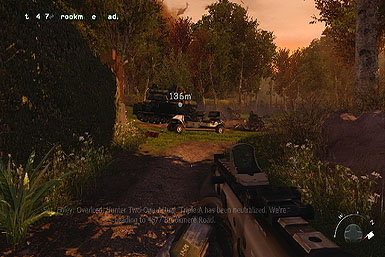
Back outside, you'll spot two vehicles: one ahead, another to the left. Target each with your laser to star a bombing raid, taking them out.
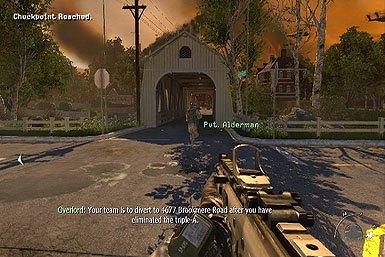
Go to 4677 Brookmere Road.
After the bombing raid, follow the dirt trail on the left back to the main street, and cross the bridge to the burning building.
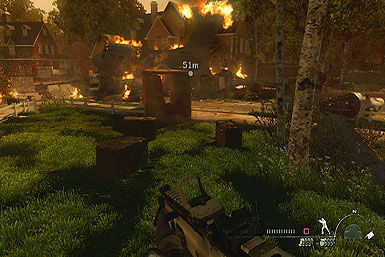
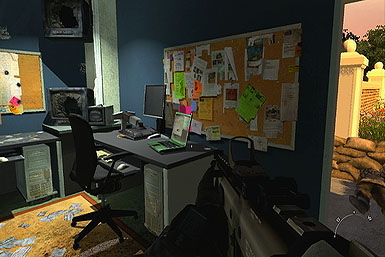
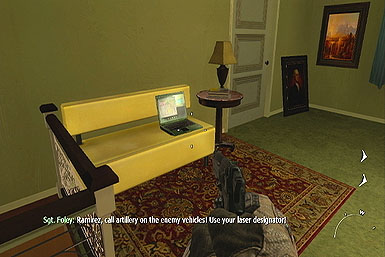
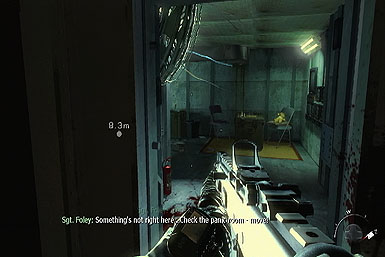
Retrieve Intel from the 'Panic Room' at 4677 Brookmere Road
Don't worry, there's no more enemies to deal with. Enter the burning building and head upstairs. Grab the briefcase by the corpse in the panic room to complete the mission.

Act II: The Only Easy Day…Was Yesterday
Take Out the Guard Quietly
After surfacing, swim up to the guard ahead and grab him by using a melee attack.

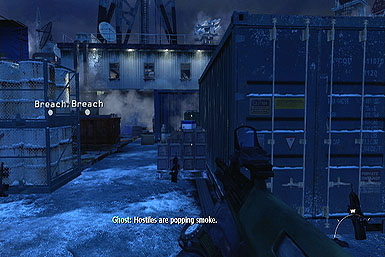
Secure the Hostages
After pulling yourself onto the platform, follow the squad up the stairs. There you'll notice a guard looking over the railing--take him out with your default weapon, which is suppressed.
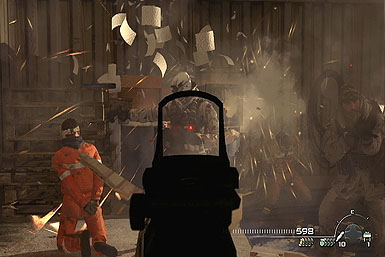
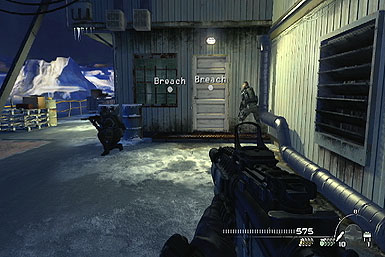
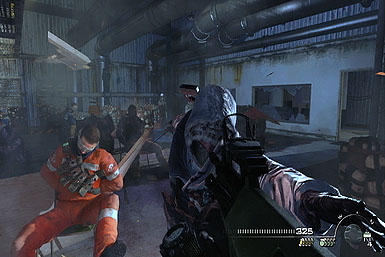
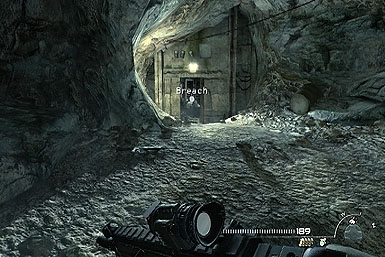
The first few hostages are being held in a room on the left, which you'll have to breach via either of the two doors. Approach either door and plant a charge on it. After it detonates, you'll automatically swivel through the door--at this point, the game plays in slow-motion for a few seconds, giving you a chance to take down the hostage takers before they can react. Depending on which door you came in from, begin aiming from that side of the room and work your way toward the opposite end, making sure not to kill any hostages. The enemies are easily visible as they're all dressed in white, and are standing.
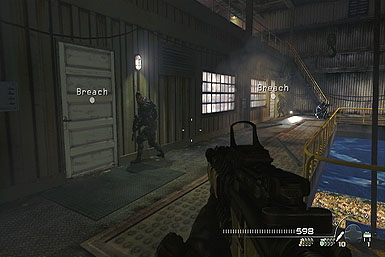
With the first room clear, follow your squad up a couple flights of stairs to an exterior walkway. They'll lead you to a second room that also needs to be breached.
We recommend breaching the second room via the closest door, as it provides an easier vantage point in which to target the enemies inside--remember to avoid the hostages!
Plant C4 on the Dead Bodies
With the second room cleared, plant a charge on one of the marked bodies--your partner will take care of the other.
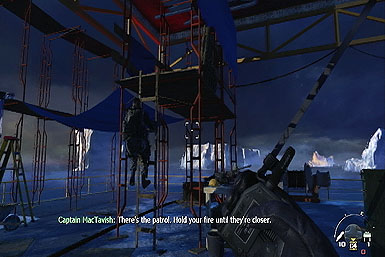
Take Up Ambush Positions Near the Scaffolding
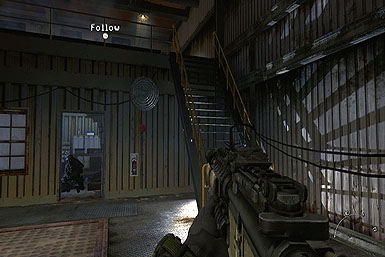
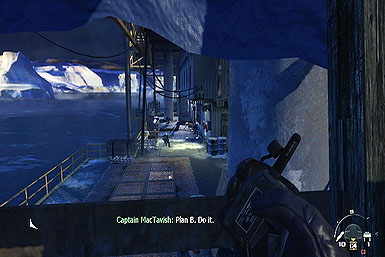
With the C4 planted, exit the room and follow MacTavish up the scaffolding back in the direction you just came from. Wait here for the inbound enemy units to discover the corpses, then blow them away when MacTavish says "do it." Now quickly use your gun to take down the remaining enemies from your present location.
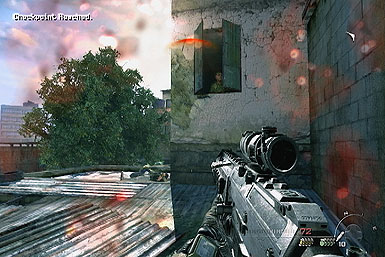
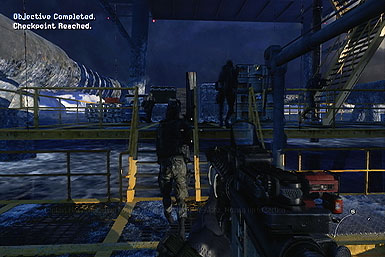
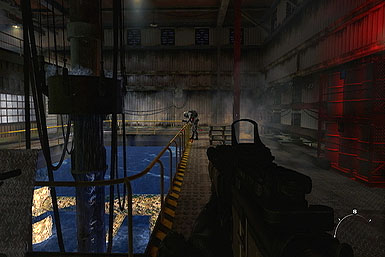
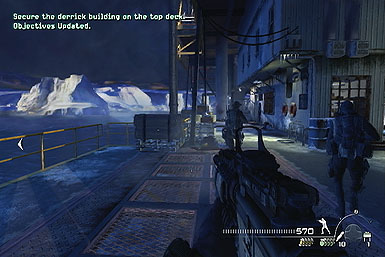
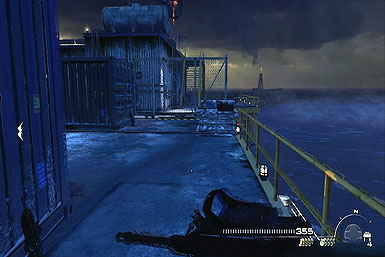
Secure the Derrick Building on the Top Deck
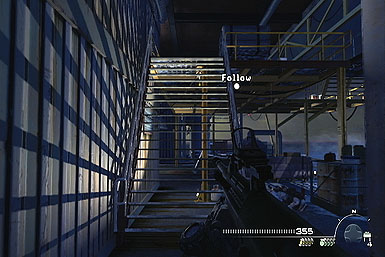
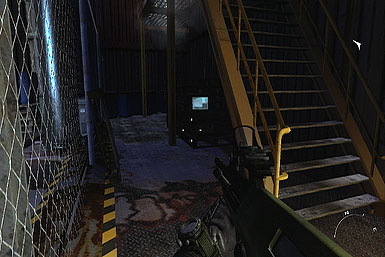
Drop off the scaffolding and push forward along the walkway, using the stacked materials on the left for cover, then moving up to the corner ahead to target the enemies on the staircase, before climbing up to the third level.
After climbing the stairs, take cover behind the pile of wooden planks and target the enemies beyond. As you push forward, an attack chopper will drop in--duck into a room on the right for both protection, as well as a rocket launcher that can be used to take it down. However, before grabbing it, target any remaining enemies through the room's far exit. Now grab the launcher, and fire a rocket as soon as you obtain a lock-on.

With the helicopter down, continue along the walkway around the corner. Use the barrels on the left for cover, then push forward to the next corner and use it for cover as well to clear out the remaining enemies, before climbing the far staircase to the top level.
So here's the deal: the top-deck will soon be saturated with smoke, making it impossible to see without the assistance of a thermal scope. Even worse, your enemies are equipped with thermal vision, making you easy pickings. If you don't already have a thermal rifle, you'll find them scattered all over, so be sure to grab one. At any rate, because of your visibilly, finding a good place cover-point is crucial. We found the best place for cover is a large storage crate on the right side. To get there, turn right as soon at the top of the stairs and follow the railing to a chain link fence, then follow that up to the shipping container.

Once at the shipping container, go prone and use whip out your thermal rifle (if you don't already have one, there's one resting against this very crate). Now face out, parallel to the container and take down anyone that crosses your field of vision. As long as you can kill them quickly, you shouldn't take any fire. Once you've thinned the crowd, it's time to pick off the remaining baddies holed up in the windows above. You can pick off the first few by sniping from around the corner of the shipping crate. For the rest, simply back away from it to make them visible.
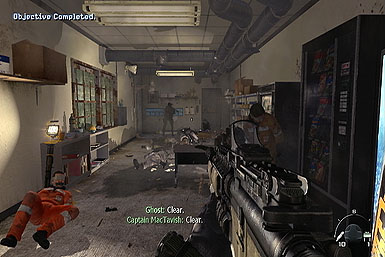
With the area cleared, breach the room ahead and quickly take down the hostage takers--make sure to target some dude trying to knife you on the right, and be careful not to hit any of the explosive barrels. After saving the hostages, follow the squad out to the waiting helicopter.
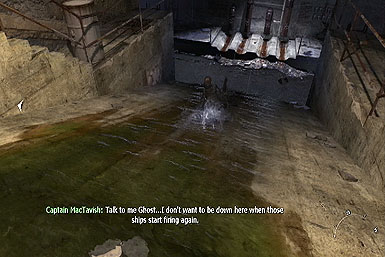
Act II: The Gulag
Rescue Prisoner #627
The chopper will drop you off inside the prison soon, but before then it'll stop occasionally giving you a chance to snipe the enemies on the various towers. Take aim if you wish, but you can also conserve your ammo and let your teammates take everyone down for you.
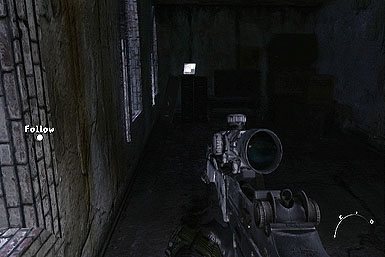
Follow Captain MacTavish Into the Gulag
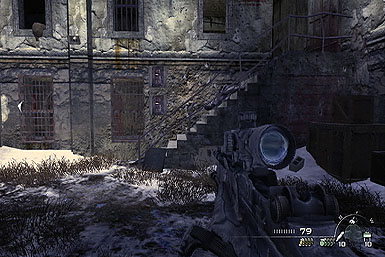
After disembarking from the chopper, follow your squad up to the corner by the chain link fence and target the enemies on the high ridge ahead. Follow your squad up to the anti-aircraft vehicle and wait here--a friendly chopper will drop in and take care of the enemies on the rooftop ahead.
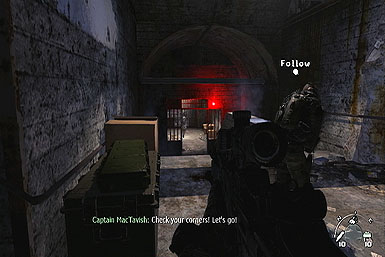
After the helicopter finishes up, you'll find more enemies just beyond the chain link fence ahead. Instead of tackling them head-on, head inside the building via a broken window just right of the fence, allowing you to safely target them through another window. Once clear, follow your squad into the next area, ready to kill two soldiers who'll attempt to climb the staircase ahead.
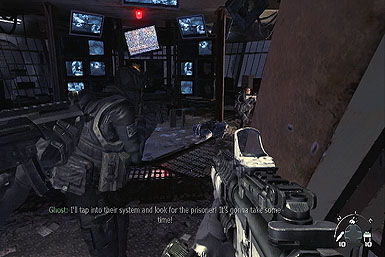
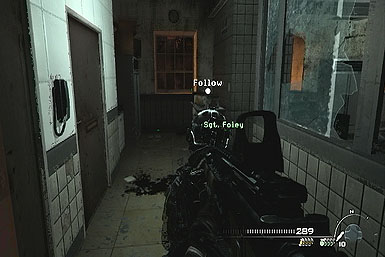
Trail your squad down the stairs, leading into the prison. Use the corner at the base of the stairs to take down the enemies guarding the control room.
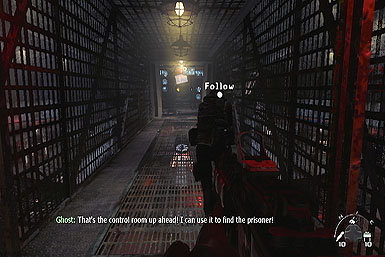
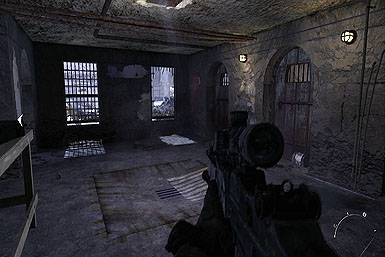
Sweep the Cells for the Prisoner
Exit the control room via the staircase down to a circular corridor bordering the jail cells. We recommend pushing through the corridor slowly, and only after clearing out all the visible enemies ahead--because the corridor is circular, you can target any enemy from any point in the corridor, enabling you to take them down before they pose much of a threat. If you do take fire, simply crouch beneath the barred windows to recover health. Follow your squad down the stairs into the small armory room at the end of the walkway.
You'll wind up locked inside the armory for a short period. Grab a riot shield from the center wall and swap to it between kills to regain health--try to keep your back to the center wall whenever possible to minimize exposure. Before long, even more will storm in. Hunker down and wait until your squad can get the door open, allowing you to escape back to another circular corridor. Keep your shield equipped as you push forward, using its melee attack to take down any nearby enemies. Once you've cleared out the nearby ones, you can use your guns to pick-off the others on the walkway ahead from your present position. At the end of the walkway, rappel down the wall.
After rappelling down the wall, activate your night-vision (up on control-pad) and proceed into the dark corridor. Take cover by each corner within and peek around them to target the enemies beyond. Make sure to deactivate night-vision when you enter the light-filled room.

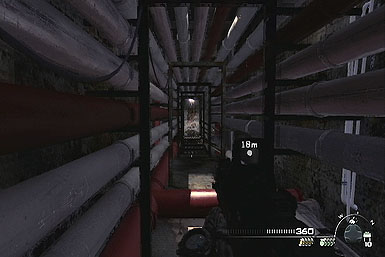
You'll soon reach a room with myriad pipes running along the walls. Take cover by the first corner to target the enemies hiding among the pipes in the room ahead. Push forward, crouching below the pipes and continue down a thin corridor. Now three enemies await just around the corner at the end, and they'll quickly turn you into hamburger if you're not careful. As such, we recommend going prone at the end of the corridor, then peeking around the corner just enough to target a single enemy at the time.

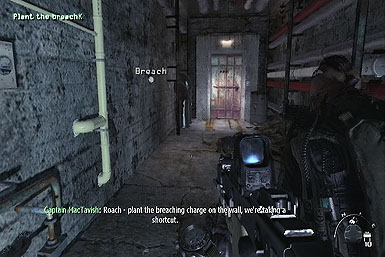
Plant the Breaching Charge
Once you've cleared the area, go downstairs and plant a charge on the wall to create an entrance. When everything goes slow-motion, take down as many enemies as you can. Okay, so this locker room is divided into three main section--we recommend hanging back as far as you can and clearing out all visible enemies before pushing forward to the next section. To start things off, hang back by the breached entrance and use the three shower stalls for cover as you target both the enemies further up, as well as those on the upper walkways.

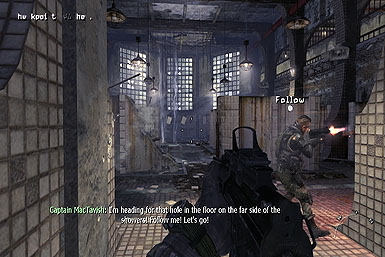
With the first area cleared out, take cover to either side of the entrance leading into the next one and focus on clearing it out too. This time, some riot guards will roll in ahead--toss cooked grenades (if you have any) behind them to quickly thin them out. Barring that, you can also flank them from the sides, but make sure you've cleared the walkways first! Once you've cleared the area enough, make a dash for a hole in the ground, in the back, dropping you into the sewer.
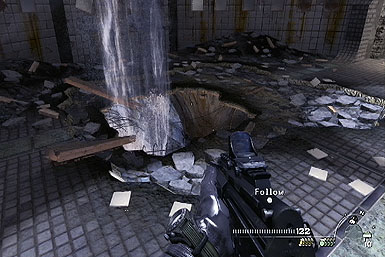
After dropping into the sewer, follow your teammates down the ramp, to a wall you can breach where you'll find Price.
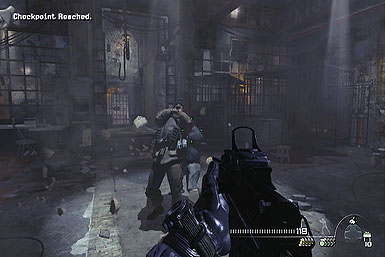
Escape the Gulag
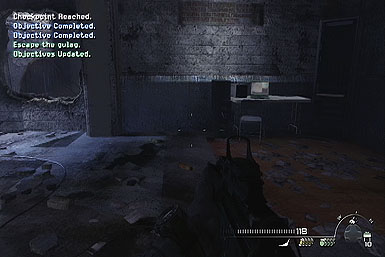
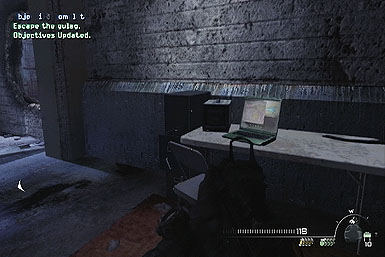
The next part is simple, as there are no enemies to watch out for. Just stay close to your squad as you follow them through the sewer. Although one of the paths will be blocked off, they'll quickly lead you to another. There, you'll wind up covered in debris, but worry not for your teammates never leave a solder behind! As soon as you come to, dash to the rope and latch on before it departs!
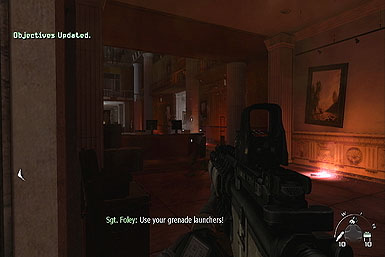
Act II: Of Their Own Accord
Follow Sgt. Foley
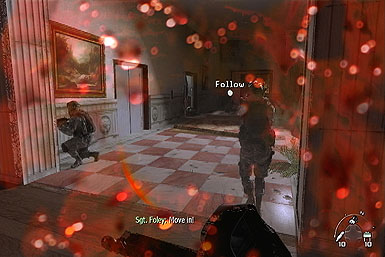
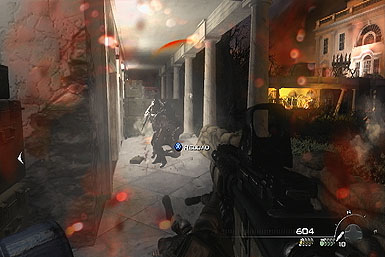
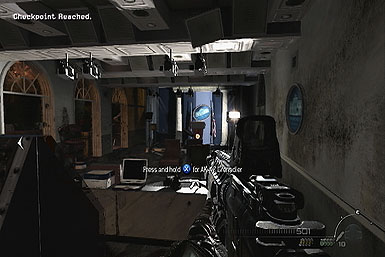
Proceed through the underground corridors to regroup with your squad. Follow them outside and through the trenches and field up to a wall, just before the Capital building. Wait here until the sergent instructs you to move into the building--make a mad dash for the right staircase and head inside!
As soon as you enter the Capital building, take cover behind a pillar along the left wall, and peek around it to target the enemies ahead and on the walkway. Push forward after your squad, through the elevator lobby.
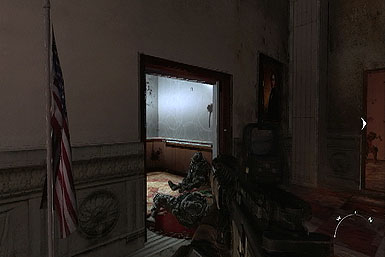
Secure the Enemy 'Crow's Nest' on the Fifth Floor
Take cover by the windows in the room ahead and take down the enemies before proceeding into the next area. There, use the desks for cover to clear the room, before climbing the staircase in the back to the second floor.
Follow your squad along the second floor walkway to some piled rubble you can use to climb up to the fourth floor. You'll face some mild resistance along the way, but it's nothing you can't handle. Once there, take cover by the window to clear the balcony, then do the same at the nearby corner to clear the remainder of the room. Now climb the stairs in the back to the fifth level.
On the fifth level, follow the hall to the first room on the left. Shoot the enemies through the door before heading inside. Now work your way through the series of rooms to an exit leading onto the balcony. Clear the balcony first by targeting the enemies through the door before stepping out onto it.

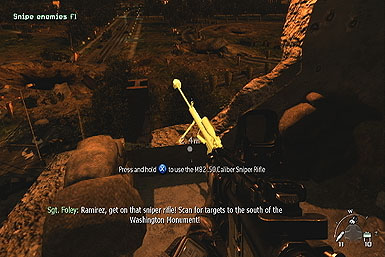
Snipe Enemies Firing on the Evac Site
Take control of the sniper rifle on the edge of the balcony and use it to kill the targets setting up mortars in the distance. You can try and shoot them while they're running, but it's easier to wait until they get into position.

Defend the 'Crow's Nest'
As soon as this objective appears, turn around and get ready to shoot several enemies storming out onto the balcony through the door--if you have any grenades, you may want to use them now. A jutting section of wall can provide cover from their fire.
Use Javelins to Destroy Enemy Vehicles
When the vehicles start rolling in, grab the Javelin from the ground (close to the wall) and then use it to take down three or four vehicles to the right of the Washington Monument.

Get to the Helicopter on the Rooftop
You only have a minute and a half to get to the rooftop…and that's plenty of time. Just dash toward the markers; they'll lead you right to it!
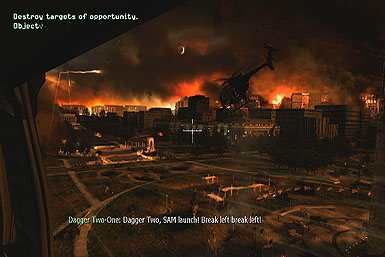
Destroy Targets of Opportunity
Like is usually the case with these vehicle sections, you don't actually have to do anything if you don't want to--you're not going to get shot out of the sky or anything.
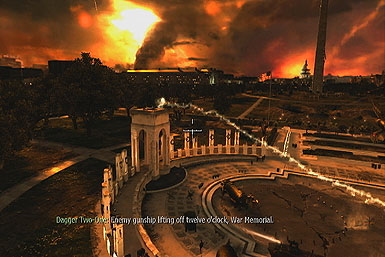
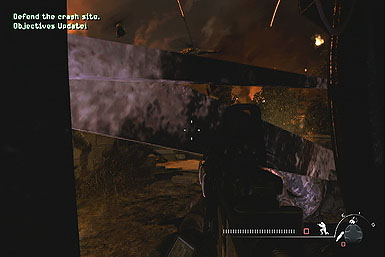
Defend the Crash Site
Same deal here. Just sit tight and the mission will soon end.
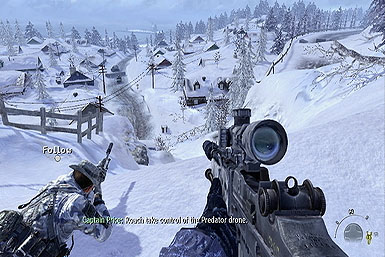
Act III: Contingency
Follow Captain Price
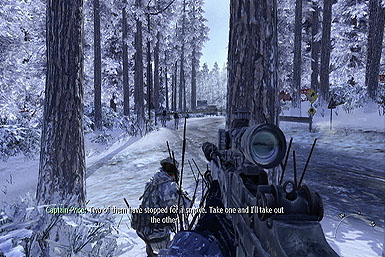
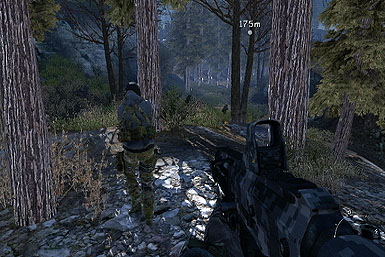
The first half of this mission sees you and Captain Price pushing through the forest toward an enemy camp. You'll encounter several groups of enemy units along the way, and each time you have the option of sneaking past or taking them down. We'll suggest which option you should take at each encounter.
Start off by trailing Captain price up to the brush by the road. Wait here for a pair of jeeps to pass, then target one of the guards ahead when Price instructs you to--he'll take care of the other. Follow Price up the street and then take down both the soldier and the dog on the left, while Price handles the others.
Carry on across the bridge. a BTR will roll in ahead--take after Price into the forest to easily evade it. Before long, a small team of soldiers will come searching for you; stay near Price and don't move until they pass by to avoid engagement.
Just ahead, you'll encounter a three-man squad--pick them off quickly with your sniper.
Just ahead are three more patrols and a dog. Take out the two on the right (it's faster and easier to target both the further back you are) while Price handles the one and his best friend on the left. You'll encounter a larger squad up ahead--for this one it's best to remain out of sight and then follow Price once they pass. Although you'll encounter them again just ahead, continue to wait by Price to remain out of sight until he starts heading up the hill.

At the top of the ridge, Price will instruct you to take control of the Predator Drone--do so, but don't bother trying to do anything with it, as it's about to be shot out of the sky. Now follow Price down the hill.
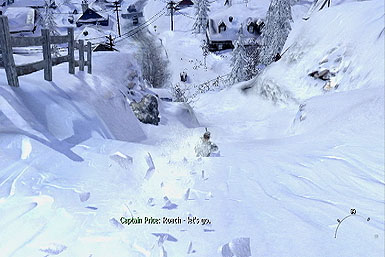
After sliding down the hill, follow Price to a box ahead and replace your sniper with the weapons there. Now follow the street up to the jeep ahead and stay behind it for cover. By this point, you should now have access to a new predator drone--this should be your primary weapon for clearing the field. You have an unlimited supply of missiles, and each one can take down numerous enemies at a time. The only quirk is that you'll have to wait about 20 seconds between missiles, so use that time to take down any enemies who may be approaching and reload your weapons.
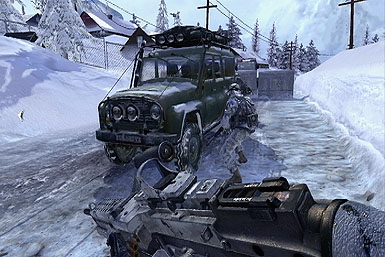
Once you've cleared the first wave, push forward to trigger the next. Take cover somewhere, such as behind the green house on the right side, and use the Predator Drone to once again clean house.
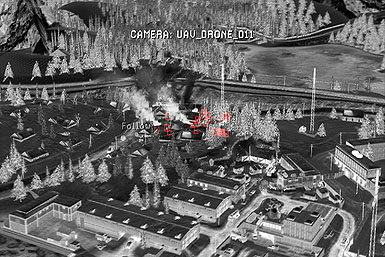
With the area cleared, follow Price afterward up a path to the northwest to some boulders overlooking the enemy base. We recommend going prone here and using the Predator Drone for a couple of minutes to completely clear the area of enemies--target the helicopter first, then go after the ground troops. Once clear, loosely follow Price through the base, sticking to the left side. You'll find that at several points, more guards will appear. Each time this happens, take cover (either inside a building, or behind an object) and use the Predator Drone exclusively to completely eradicate the enemies before pushing forward.

Keep Enemies Away from the Submarine
After Price boards the docked submarine, climb up the tower to the left of it and go prone behind the boxes there. This will shield you from enemy fire, allowing you to once again use the Predator Drone to easily kill the enemy infantry. Before long, the submarine will launch a nuclear missile, ending the mission.

Act III: Second Sun
Defend the Crash Site
For the first portion of this mission, you don't have to do much of anything. Just chill inside the chopper until your view switches to that of an astronaut. Now this next part can be slightly tricky: look to the right. Yup, that's it: look to the right to spot an inbound nuclear missile.

Get Off the Street and Find Shelter
After your buddy lifts the debris blocking the exit, follow the squad up the street into a building on the right.

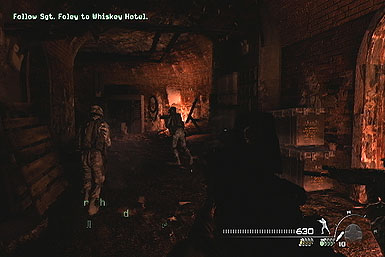
Follow Sgt. Foley to Whiskey Hotel
Following the brief discussion, follow Foley up the street, where you'll meet up with a runner. Enter the building beyond and climb the staircase to a door. Take cover on the left side and target the enemies within, moving up to the first corner inside when able, then up to the cubicles to target the enemies in the back.
Exit the room through the back and take cover by the entrance into the next one and do the same. When empty, drop outside through the large hole on the right and follow your squad through the courtyard.
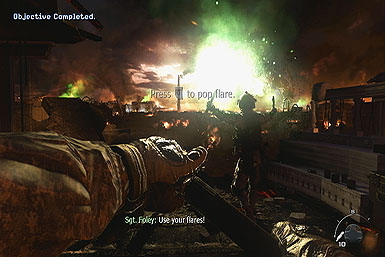
You'll soon encounter three enemies on a vehicle ahead--stay cool and let your squad take 'em down. Further up you'll encounter another group that Foley initially mistakes for friendlies. Start gunning for them as soon as Foley tosses the flare. The wall you're at now should provide a good vantage point, though you may want to move up to the overturned vehicle ahead.

When clear, enter the building across the street and head down the stairs on the ride to the bunker, ending the chapter.
Act III: Whiskey Hotel
Follow Sgt. Foley to Whiskey Hotel
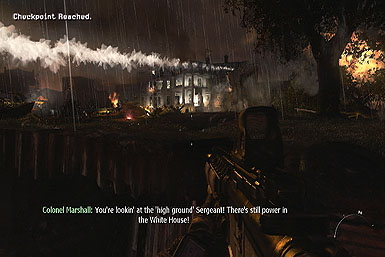
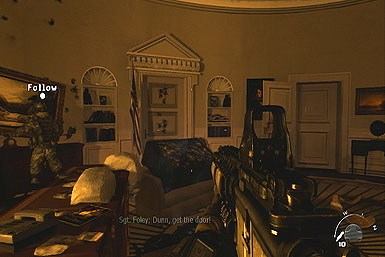
Work your way through the bunker, leading out into the field just before the White House.
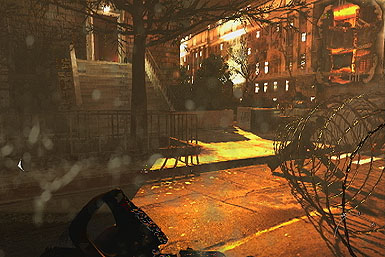
Enter the West Wing
You need to work your way to the west wing, but it's heavily fortified. The best way to get there is to run along the barbed wire to the left, leading up to an overturned vehicle. If you get hit along the way, drop into one of the holes along the way and go prone, positioning yourself so the white house is not visible (meaning they can't see you). Once you've recovered, hurry along to the overturned vehicle, just before the west wing.
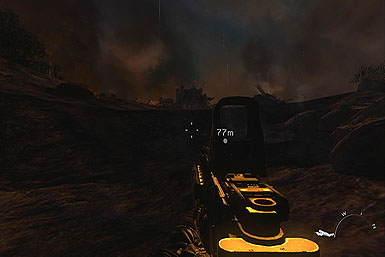
When at the overturned vehicle, go prone and shoot any enemies in the field perpendicular to it, before attempting to target those by the west wing itself. If you're having trouble targetting them, either by peeking around the vehicle, or backing away from it, wait a few moments for your squad to take care of most of them for you.
Once things have quieted down a bit, dart around the vehicle and follow the barbed wire up to the left side of the west wing. Quickly take down the enemies nearby, then look for the entrance on the other side--take down the enemies through it first before heading in.
Head to the back room, where one of your teammates will shoot open a door. Before heading through, shoot the enemies in the room beyond through it.
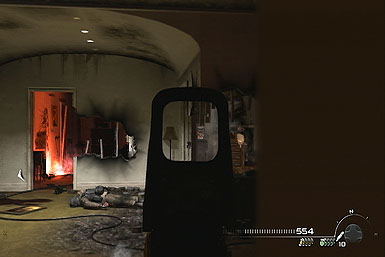
Deploy Green Flares on the Roof
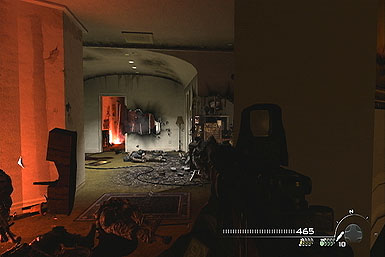
Push forward through the room, using the corners for cover. When you turn the bend ahead, you'll wind up in the West Wing's press room. Use the low counter for cover to target the enemies ahead. Now you may have noticed some columns on the left separating the room from the outside--use them for cover, while strafing between the two to kill the enemies both within and outside (including those rappelling down a wall ahead).
Push forward through the room, where you'll be alerted that you only have two minutes to make it to the roof. Don't sweat the timer too much though, as it's plenty of time. Just follow Foley through the rooms, stopping before each to take down the few enemies beyond--he'll lead you right to the roof where you can strike a flare to complete the mission.
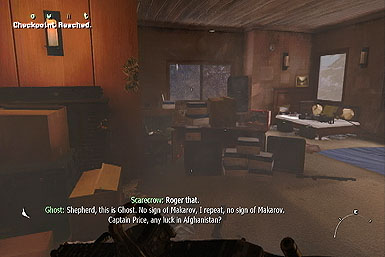
Act III: Loose Ends
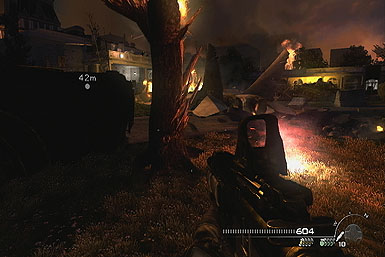
Neutralize Vladimir Makarov
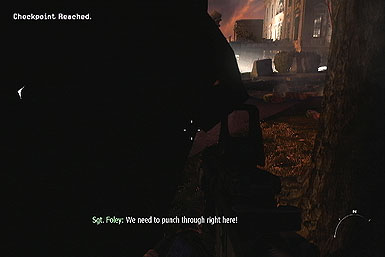
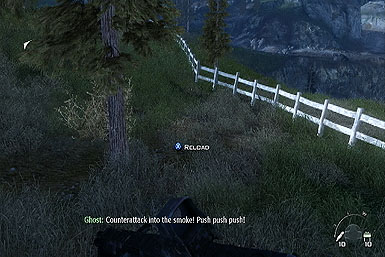
Follow your squad down the hill where you'll suddenly encounter some land mines--immediately hold crouch to go prone and avoid being blown to pieces. Now seek cover behind a nearby tree (a think one to the right works great) and open fire on the enemies ahead.

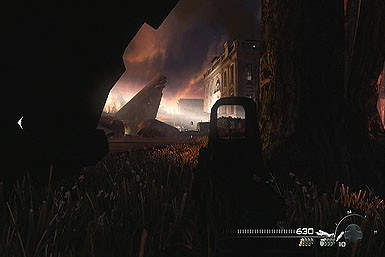
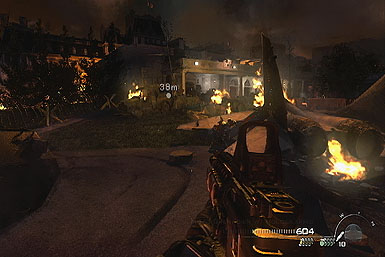
Once you've cleared the first few enemies, they'll set up a smoke screen. Instead of trying to battle them through it, simply hug the right wall and run right through it! Continue to follow the wooden fence bordering the cliff's edge up to the road. Avoid being run over by the trucks, then follow the road up to house. There's a few enemies outside--back down the hill if you need to recover health.
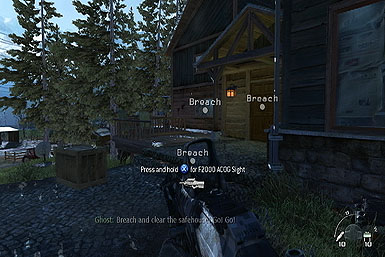
Breach and Clear Makarov's Safehouse
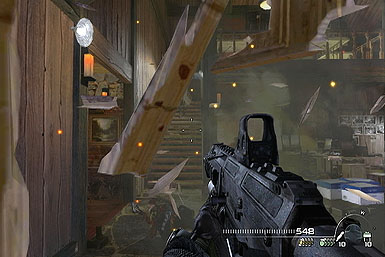
Breach the front entrance of the safehouse and immediately target two soldiers ahead, one on the stairs, and another just right. As soon as they're down, aim for two more around the right corner. If you take damage, simply back outside for safety.
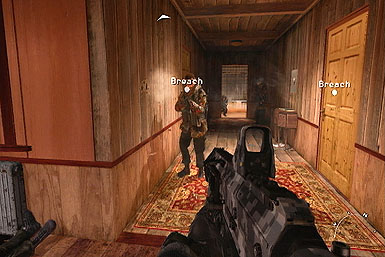
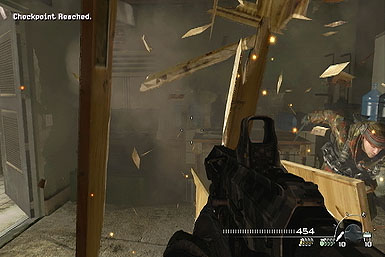
Once clear, head downstairs to find a few more soldiers in a hallway, right by two more rooms that need to be breached--use the corner just before the hall for cover. Once clear, breach the room on the left first and shoot the three guards trying to escape. Now breach the other room, targeting a soldier on the right first, then another in the armory on the left.
With the basement cleared, head back to the ground floor, then climb the stairs to the top-level. Be careful as you near the top, as an enemy will surprise-attack from the bathroom on the right. Subsequently, take down another in the room on the left then breach the final room--target the three dudes ahead, and one more around the right corner.
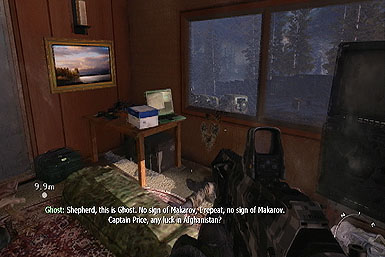
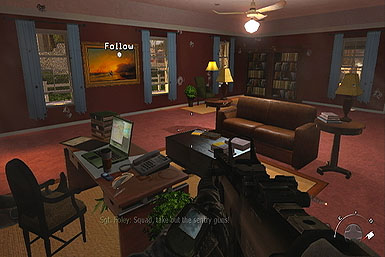
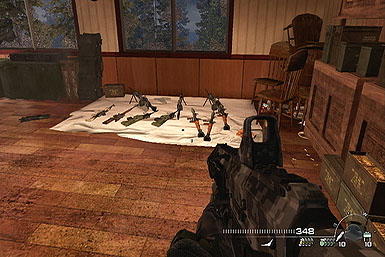
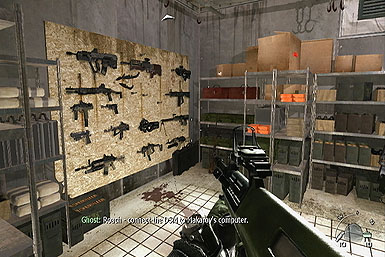
Connect the DSM to Makarov's Computer Network
Before connecting the DSM to the computer in the living room, we recommend stocking up on weapons first, and replacing your pistol with something a bit more formidable (and faster). You'll find an ample supply in the back room of the house, as well as the armory downstairs.
Once you've stocked up, attach the DSM to the computer. Now you'll have to protect it for several minutes from numerous incoming waves of enemies while it downloads the files. This part can be incredibly difficult unless you have a great vantage point, and we have just the spot! From the front door, facing the stairs, turn right and head for the corner, just right of the windows. Crouch here and face the stairs--this position allows you to target and instantly kill the enemies coming in through both entrances: the side-door dead-ahead, and the front door, just to the left. As long as you pick them off quickly, they won't be able to get anywhere near the computer! Try to avoid reloading until your clip is almost empty, and just after killing a soldier to avoid wasting time. Oh, and remember to switch to your secondary weapon instead of your clip runs empty while engaged. Use your scope to increase your accuracy--this should prevent you from running out of ammo entirely.
Retrieve the DSM
Once the files are finished download, make sure there are no more enemies nearby and grab the DSM!
Go to the Landing Zone for Extraction
After collecting the DSM, clear any remaining enemies entering the house, then make a mad dash for the marked landing zone. We recommend heading straight through the lake, then hugging the cliff wall just beyond on the right up for the remainder of the journey. As you follow that cliff wall, you will encounter several soldiers ahead--take a moment to clear out the closest ones before resuming your run.
Unfortunately, no matter what you do, a mortar will take you out, setting forth a chain a most surprising chain of events.
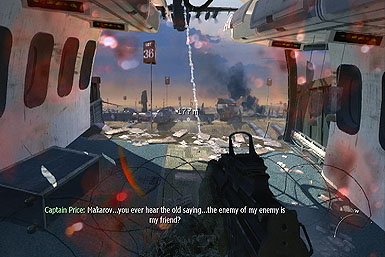
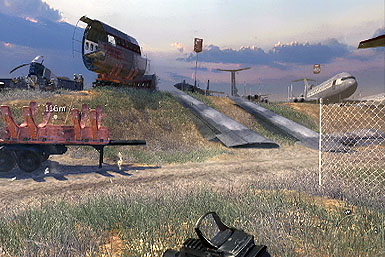
Act III: The Enemy of My Enemy
Get to the Rally Point
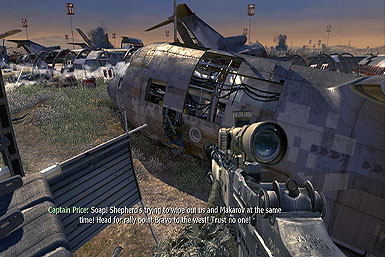
This mission is all about keeping on the move, using the scattered debris strategically for cover. It's best to stick to the outside walls, that way you can only be attacked from the inside. Also, because of this, taking cover by any of the scattered debris bordering the exterior route should shield you from most incoming fire, enabling you to regain health if need be. Although killing enemies shouldn't be a priority, it is worth it to take down any directly in your path.
From the get-go, turn left and exit the plane--or what's left of it. Now turn right and hug the left wall as close as you can, running through the entire area (note that you will have to stray from the wall on occasion to veer around large objects, such as shipping crates). Pause a moment when you reach the road early on to avoid being run over by a passing tank. Continue along the left wall until you reach an open shipping crate--head inside, go prone, and kill any enemies you can see on the other side.
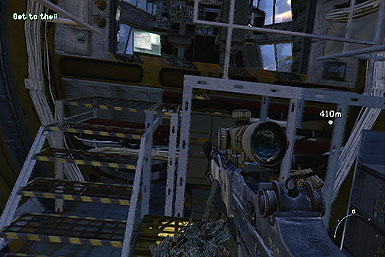
Exit the shipping crate and resume following the left wall--you may have to take cover a couple times as you will likely draw fire. Hurry up into the remnants of the large plane and climb up the incline inside, dropping out the other side and head down the hill.

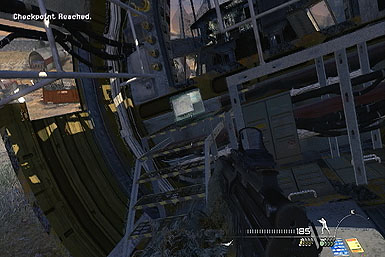
After exiting the plane, you'll find a very wide hill ahead. We suggest climbing up it via the right side, but wait a few moments for three vehicles to swing through and leave the area (otherwise they'll blast you to pieces).
Get in the UAZ
After climbing the hill, you'll find the jeep just a short ways beyond. You might have to get a bit more aggressive with your shooting, as you move from cover to cover up to the waiting vehicle.

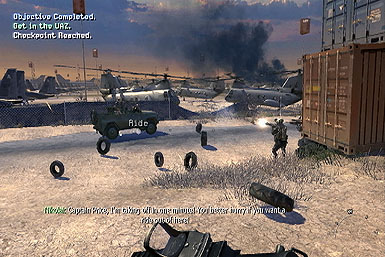
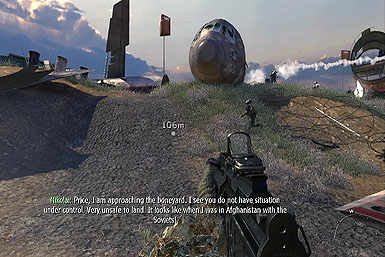
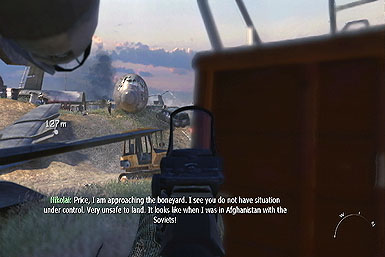
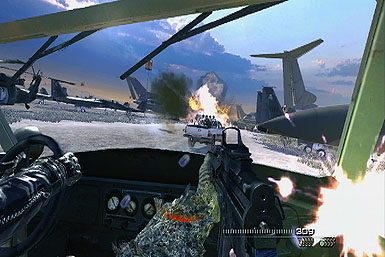
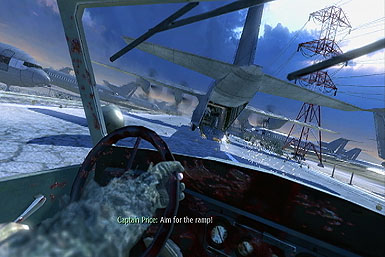
Get On Board Nikolai's Plane
After boarding the jeep, shoot down the gunners while en route toward the plane. When you get close, you'll be given the wheel--just aim for the plane's ramp and you'll be good to go!
Act III: Just Like Old Times
Follow Captain Price
Follow Captain Price up to the ridge and take out the two enemies on the right below when he says "mark"--he'll take care of the rest. Now slide down the hill and do the same for the guards walking away (this time, you only need to take out one on the right).
Hook Up to the Railing
With the enemies down, hook up to the glowing railing to lower yourself to the ground--don't worry about braking, as the game will take care of it for you. Just before touching down, you'll find yourself hanging right above a soldier--press the melee button to take him down.
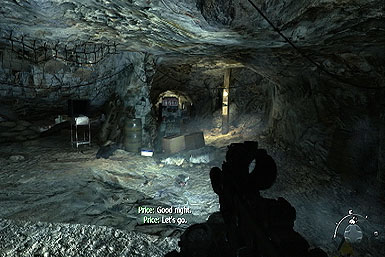
After dropping to the ground, enter the cave behind you and follow Price into an alcove on the left to remain out of sight while an enemy patrol strolls by. Once they do, take down the dude smoking, then follow Price up the left tunnel.

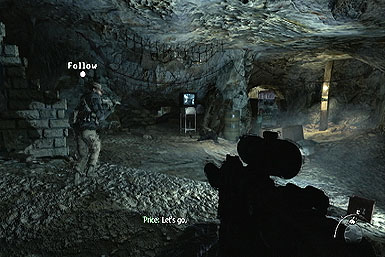
Trail Price closely, crouching when he does, to skate past the guards in the room beyond. Further up, you'll encounter two more units--target the one on the left and kill him when Price says so.
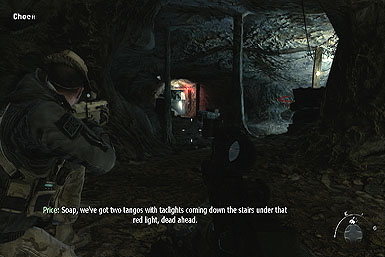
Support Captain Price
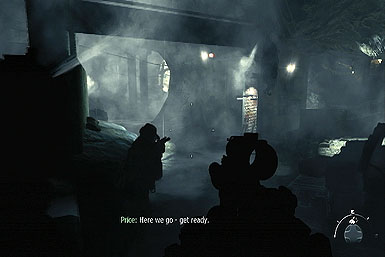
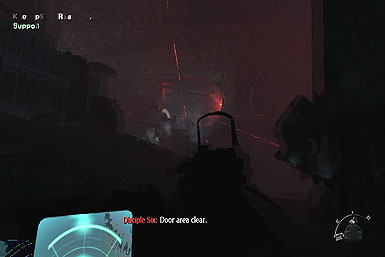
After sniping the two guards, follow Price up the stairs ahead and let Price take down the guard at the top. Just beyond, the lights will go out and laser-equipped guards will burst in from ahead. Quickly climb up a hill on the left side of the room, just beyond some large pipes, for both an excellent vantage point as well as great cover from their fire. Aim for where the laser sights are coming from to target them through the darkness.
Traverse the Rock Bridge
With the room cleared, follow Price outside.

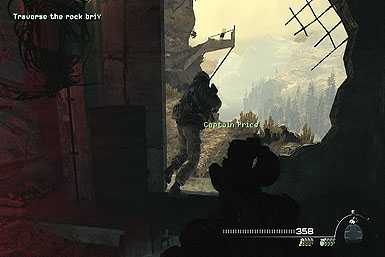
Outside, grab a riot shield from the corner, as Price suggests and keep it equipped as you follow the bridge up to two guards--Price will take them down when you get close.
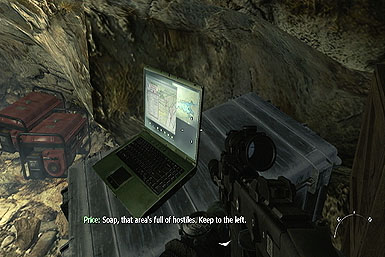
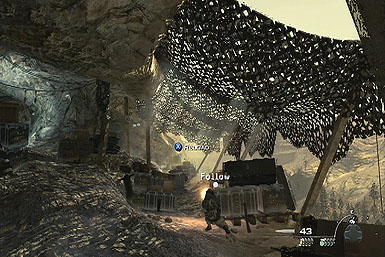
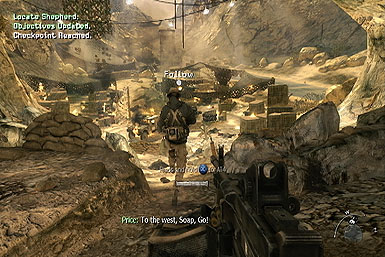
Locate Shepherd
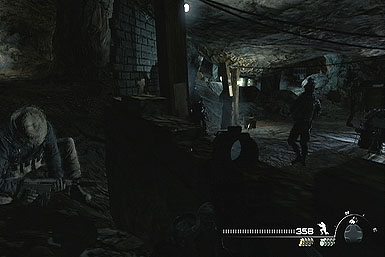
Climb down the hill after the bridge, but stop at the base. From here, pick off the enemies rappelling in ahead. Shortly after, a group of riot guards will attack from the same direction--toss frag grenades to deal with them quickly. Now work your way up to a tunnel in the back of the room--take cover by the storage boxes and target the enemies beyond.
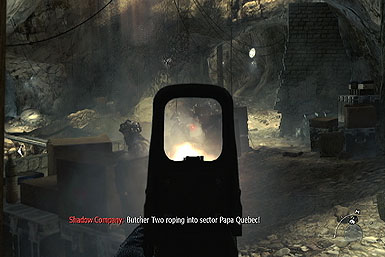
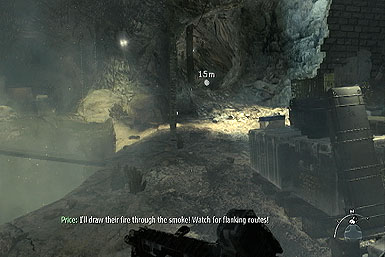
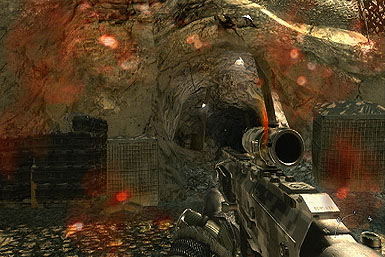
In the area ahead, the enemy will setup a smoke screen. Don't even attempt to tackle them head-on. Instead, follow the ledge into the cave, allowing you to target them from the side, through the exit. This provides a great vantage point and decent cover. Also, there are a couple of explosive barrels you can aim for through the exit that'll take down several enemies at once.
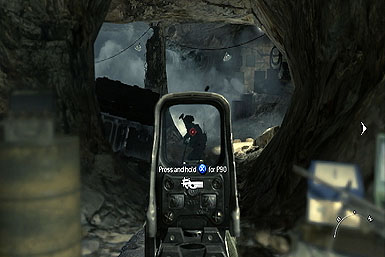
With the enemies down, continue up to a door you can breach and kill the 5 guards inside.
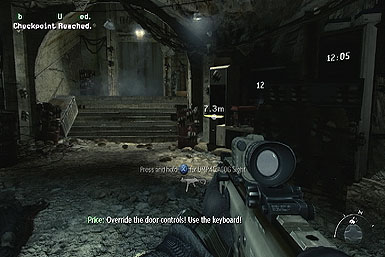
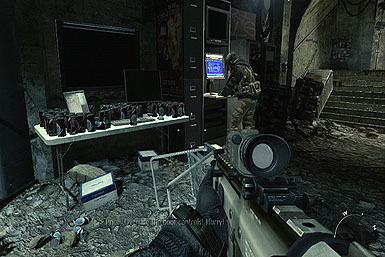
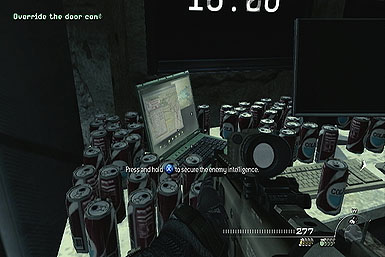
Overide the Door Controls
With the room cleared, head for a terminal on the right to override the door controls and quickly dart out of the cave before it implodes with you in it!
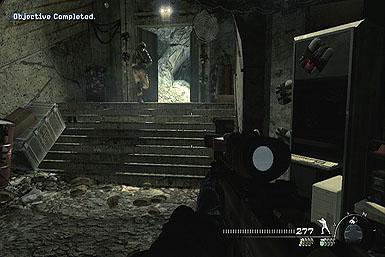
After escaping the cave, shoot the enemies ahead, then follow Shepherd down into the field, taking cover where he does to target a few more ahead and work your into a cave in the back.
Act III: End Game
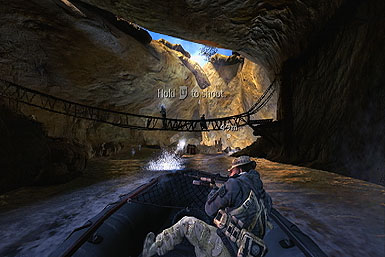
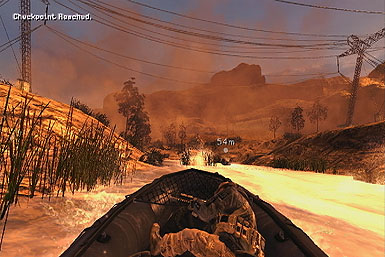
Hop aboard the boat and chase after Shepard! Don't let him get too far ahead, otherwise you'll fail the mission. There really isn't much more to say--just gun down the enemies ahead of you and then line the boat up with the helicopter at the end.
Don't Let Shepherd Get Away
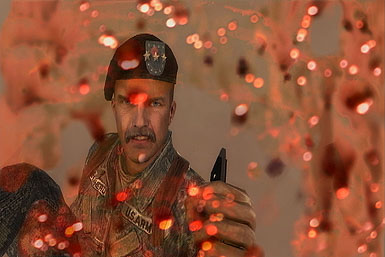
Kill Shepherd
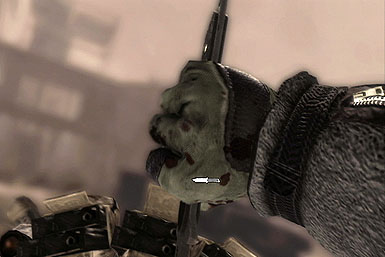
Walk through the desert toward the flaming wreckage. Knife the guy on the ground, then chase the escaping Shepherd to the car. Although he'll beat you to a pulp, you can pull the knife out of you by hammer the reload button, then aim at him and throw it to take him down once and for all.
Hidden Intel
Act I: S.S.D.S.
Intel (1/1) After stepping into the field just past the basketball hoop, look for the first Intel (a laptop) resting on a shelf by the guard tower in the far left corner.
Act I: S.S.D.S.
Act I: Cliffhanger
Act I: Takedown
Act II: Wolverines!
Act II: The Hornets Nest
Exodus
The Only Easy Day…Was Yesterday
The Gulag
Act II: Of Their Own Accord
Act III: Contingency
Act III: Whiskey Hotel
Act III: Loose Ends
Act III: The Enemy of My Enemy
Act III: Just Like Old Times
Act III: End Game
Xbox 360 Achievements
Note that there are Spoilers on this list.
| Achievement Name | How To Earn | Reward |
|---|---|---|
| Back in the Saddle | Help train the local militia. | 15 |
| Black Diamond | Complete 'Cliffhanger' on Veteran Difficulty. | 25 |
| Blackjack | Earn 21 stars in Special Ops. | 20 |
| Charlie On Our Six | Earn 8 stars in Special Ops. | 20 |
| Cold Shoulder | Infiltrate the snowy mountain side base. | 15 |
| Colonel Sanderson | Kill 7 chickens in under 10 seconds in 'The Hornet's Nest'. | 10 |
| Danger Close | Get hand picked for Shepherd's elite squa | 15 |
| Desperado | Kill 5 enemies in a row using 5 different weapons or attachments in Single Player or Special Ops. | 10 |
| Desperate Times | Execute the plan to help the Americans. | 15 |
| Downed but Not Out | Kill 4 enemies in a row while downed in Special Ops. | 10 |
| Drive By | Kill 20 enemies in a row while driving a vehicle in Single Player or Special Ops. | 10 |
| Ends Justify the Means | Complete 'Contingency' on Veteran Difficulty | 25 |
| First Day of School | Complete 'S.S.D.D' and 'Team Player' on Veteran Difficulty. | 25 |
| For the Record | Complete the Single Player campaign on any difficulty. | 35 |
| Ghost | Plant the C4 in 'Cliffhanger' without alerting or injuring anyone in the blizzard. | 10 |
| Gold Star | Earn 1 star in Special Ops. | 20 |
| Homecoming | Complete 'Of Their Own Accord', 'Second Sun', and 'Whiskey Hotel' on Veteran Difficulty. | 25 |
| Honor Roll | Earn at least 1 star in each Special Op mission. | 20 |
| Hotel Bravo | Earn 4 stars in Special Ops. | 20 |
| I'm the Juggernaut… | Kill a Juggernaut in Special Ops | 10 |
| It Goes to Eleven | Earn at least 1 star in 11 different Special Op missions. | 20 |
| Knock-knock | Kill 4 enemies with 4 shots during a slow-mo breach in Single Player or Special Ops. | 10 |
| Leave No Stone Unturned | Collect 45 enemy intel items. | 10 |
| Look Ma Two Hands | Kill 10 enemies in a row using akimbo weapons in Single Player or Special Ops. | 10 |
| No Rest For the Wary | Knife an enemy without him ever knowing you were there in Single Player or Special Ops. | 10 |
| Off the Grid | Complete 'Just Like Old Times' and 'Endgame' on Veteran Difficulty. | 25 |
| Operational Asset | Earn all 3 stars in at least 5 different Special Op missions. | 20 |
| Operative | Earn all 3 stars in at least 10 different Special Op missions. | 20 |
| Out of the Frying Pan… | Complete the mission in the airplane graveyard. | 15 |
| Pit Boss | Run The Pit in 'S.S.D.D' and finish with a final time under 30 seconds. | 10 |
| Prisoner #627 | Complete 'The Only Easy Day…Was Yesterday' and 'The Gulag' on Veteran Difficulty. | 25 |
| Professional | Earn all 3 stars in at least 15 different Special Op missions | 30 |
| Queen takes Rook | Complete 'Loose Ends' and 'The Enemy of My Enemy' on Veteran Difficulty. | 25 |
| Red Dawn | Complete 'Wolverines!' and 'Exodus' on Veteran Difficulty. | 25 |
| Royale with Cheese | Defend Burger Town. | 15 |
| Soap on a Rope | Storm the gulag. | 15 |
| Some Like it Hot | Kill 6 enemies in a row using a thermal weapon in Single Player or Special Ops. | 10 |
| Specialist | Earn 30 stars in Special Ops. | 30 |
| Star 69 | Earn 69 stars in Special Ops. | 90 |
| Tag 'em and bag 'em | Find Rojas in the Favelas. | 15 |
| Ten plus foot-mobiles | Kill at least 10 enemies with one Predator missile in Single Player or Special Ops. | 10 |
| The Harder They Fall | Kill 2 rappelling enemies in a row before they land on their feet in Single Player or Special Ops | 10 |
| The Pawn | Assault Makarov's safe house. | 15 |
| The Price of War | Complete the single player campaign on Hardened or Veteran Difficulty. | 90 |
| The Road Less Traveled | Collect 22 enemy intel items. | 10 |
| Three-some | Kill at least 3 enemies with a single shot from a grenade launcher in Single Player or Special Op | 10 |
| Turistas | Complete 'Takedown' and 'The Hornet's Nest' on Veteran Difficulty. | 25 |
| Two Birds with One Stone | Kill 2 enemies with a single bullet in Single Player or Special Ops. | 10 |
| Unnecessary Roughness | Use a riot shield to beat down an enemy in Single Player or Special Ops. | 10 |
| Whiskey Hotel | Take back Whiskey Hotel. | 15 |
PlayStation 3 Trophies
Note that there are Spoilers on this list.
| Achievement Name | How To Earn | Reward |
|---|---|---|
| Back in the Saddle | Help train the local militia. | Bronze |
| Black Diamond | Complete 'Cliffhanger' on Veteran Difficulty. | Silver |
| Blackjack | Earn 21 stars in Special Ops. | Bronze |
| Charlie On Our Six | Earn 8 stars in Special Ops. | Bronze |
| Cold Shoulder | Infiltrate the snowy mountain side base. | Bronze |
| Colonel Sanderson | Kill 7 chickens in under 10 seconds in 'The Hornet's Nest'. | Bronze |
| Danger Close | Get hand picked for Shepherd's elite squa | Bronze |
| Desperado | Kill 5 enemies in a row using 5 different weapons or attachments in Single Player or Special Ops. | Bronze |
| Desperate Times | Execute the plan to help the Americans. | Bronze |
| Downed but Not Out | Kill 4 enemies in a row while downed in Special Ops. | Bronze |
| Drive By | Kill 20 enemies in a row while driving a vehicle in Single Player or Special Ops. | Bronze |
| Ends Justify the Means | Complete 'Contingency' on Veteran Difficulty | Silver |
| First Day of School | Complete 'S.S.D.D' and 'Team Player' on Veteran Difficulty. | Silver |
| For the Record | Complete the Single Player campaign on any difficulty. | Silver |
| Ghost | Plant the C4 in 'Cliffhanger' without alerting or injuring anyone in the blizzard. | Bronze |
| Gold Star | Earn 1 star in Special Ops. | Bronze |
| Homecoming | Complete 'Of Their Own Accord', 'Second Sun', and 'Whiskey Hotel' on Veteran Difficulty. | Silver |
| Honor Roll | Earn at least 1 star in each Special Op mission. | Bronze |
| Hotel Bravo | Earn 4 stars in Special Ops. | Bronze |
| I'm the Juggernaut… | Kill a Juggernaut in Special Ops | Bronze |
| It Goes to Eleven | Earn at least 1 star in 11 different Special Op missions. | Bronze |
| Knock-knock | Kill 4 enemies with 4 shots during a slow-mo breach in Single Player or Special Ops. | Bronze |
| Leave No Stone Unturned | Collect 45 enemy intel items. | Bronze |
| Look Ma Two Hands | Kill 10 enemies in a row using akimbo weapons in Single Player or Special Ops. | Bronze |
| No Rest For the Wary | Knife an enemy without him ever knowing you were there in Single Player or Special Ops. | Bronze |
| Off the Grid | Complete 'Just Like Old Times' and 'Endgame' on Veteran Difficulty. | Silver |
| Operational Asset | Earn all 3 stars in at least 5 different Special Op missions. | Bronze |
| Operative | Earn all 3 stars in at least 10 different Special Op missions. | Silver |
| Out of the Frying Pan… | Complete the mission in the airplane graveyard. | Bronze |
| Pit Boss | Run The Pit in 'S.S.D.D' and finish with a final time under 30 seconds. | Bronze |
| Prisoner #627 | Complete 'The Only Easy Day…Was Yesterday' and 'The Gulag' on Veteran Difficulty. | Silver |
| Professional | Earn all 3 stars in at least 15 different Special Op missions | Silver |
| Queen takes Rook | Complete 'Loose Ends' and 'The Enemy of My Enemy' on Veteran Difficulty. | Silver |
| Red Dawn | Complete 'Wolverines!' and 'Exodus' on Veteran Difficulty. | Silver |
| Royale with Cheese | Defend Burger Town. | Bronze |
| Soap on a Rope | Storm the gulag. | Bronze |
| Some Like it Hot | Kill 6 enemies in a row using a thermal weapon in Single Player or Special Ops. | Bronze |
| Specialist | Earn 30 stars in Special Ops. | Silver |
| Star 69 | Earn 69 stars in Special Ops. | Gold |
| Tag 'em and bag 'em | Find Rojas in the Favelas. | Bronze |
| Ten plus foot-mobiles | Kill at least 10 enemies with one Predator missile in Single Player or Special Ops. | Bronze |
| The Harder They Fall | Kill 2 rappelling enemies in a row before they land on their feet in Single Player or Special Ops | Bronze |
| The Pawn | Assault Makarov's safe house. | Bronze |
| The Price of War | Complete the single player campaign on Hardened or Veteran Difficulty. | Gold |
| The Road Less Traveled | Collect 22 enemy intel items. | Bronze |
| Three-some | Kill at least 3 enemies with a single shot from a grenade launcher in Single Player or Special Op | Bronze |
| Turistas | Complete 'Takedown' and 'The Hornet's Nest' on Veteran Difficulty. | Silver |
| Two Birds with One Stone | Kill 2 enemies with a single bullet in Single Player or Special Ops. | Bronze |
| Unnecessary Roughness | Use a riot shield to beat down an enemy in Single Player or Special Ops. | Bronze |
| Whiskey Hotel | Take back Whiskey Hotel. | Bronze |
Got a news tip or want to contact us directly? Email news@gamespot.com
Join the conversation