Baldur's Gate 3 - How To Beat Grym In The Adamantine Forge
Bring down Grym so you can craft items via the Baldur's Gate 3 Adamantine Forge.
There are many locations that you can visit in Baldur's Gate 3. One of these is the Adamantine Forge, which has a machine that lets you craft weapons and shields. However, you need to eliminate a boss, and you might encounter a bug while doing so. Our guide discusses the Baldur's Gate 3 Grym boss fight, as well as how to make use of the Adamantine Forge.
How to Beat Grym in Baldur's Gate 3
The Baldur's Gate 3 Adamantine Forge is found in the deeper recesses of an area called the Grymforge. To get there, you have to go through the Underdark. Here's what you can expect:
- You can reach the Underdark via the Goblin Camp/Shattered Sanctum passage, the Zhentarim Hideout elevator, or the portal in Auntie Ethel's lair.
- Once there, you'll find numerous quests and tasks, though your main goal is to head to the center of the region. There's a boat that you can sail to the Grymforge.
- The Grymforge also presents several tasks, including a battle against True Soul Nere (or his rivals).
- While exploring, you might see a barred section with Deep Rothe (i.e. buffalo-oxen hybrids). You can use Animal Handling to make them turn against their Duergar captors, while also convincing them to clear the rubble. This reveals a passageway to the next area.
- You'll then arrive at a platforming and puzzle area, where you can collect various equipment molds (which you can use in a short while).


The Adamantine Forge
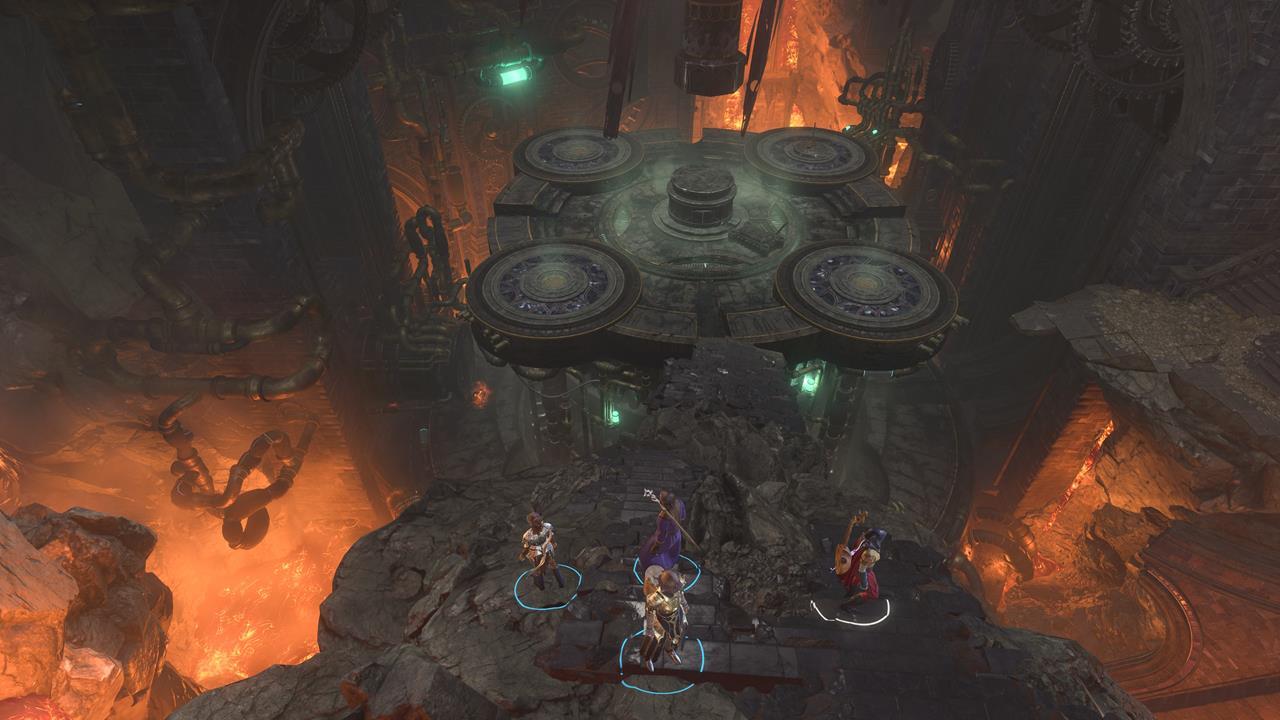
Eventually, you'll arrive at the Adamantine Forge. There's a section near the waypoint that has a lava flow and solidified igneous rocks. You can cross to the other side where you can break an ore deposit, netting you a Mithral Ore. Then, as you approach the forge machinery, you can battle Mephit mobs to your left. The small area beyond also has another Mithral Ore.
Our goal now is to make use of the Adamantine Forge to make an item and spawn the Baldur's Gate 3 Grym boss. Here's what you need to do:
- Place the Mithral Ore in the central node.
- Place any type of weapon/shield mold in the small box. You can choose a weapon that your character might use as an upgrade for a short while.
- Pull the forge control lever on the far corner. This will bring the entire machine to the lower area.
We suggest ungrouping your team and repositioning them in this manner:
- One character should always stand next to the control lever.
- One or two ranged DPS characters should stand on top of the mold box/container.
- The last character has to be next to the lava valve.
The Grym Boss Fight
When a character interacts with the lava valve, it will flood the arena with molten liquid, save for the elevated sections. It also causes the Baldur's Gate 3 Grym boss to appear. This fight has the following mechanics:
- Grym is immune to most types of damage, and is resistant to cold, lightning, and force elements. However, you can only deal damage when it's standing in lava.
- Grym will target and move to the last character that dealt damage to it. Ideally, this has to be a character standing on top of the mold box.
- You can deal 100+ damage to the boss by causing the piston to slam on top of it. This is why we want it to target someone on the mold box.
- When Grym moves toward a character on the mold box, it will likely stand in the very center of the machinery. When the opportunity arises, pull the control lever and smash it with the piston. It will also get knocked down for two turns.
- The first time smash Grym, half a dozen Mephit enemies will spawn, but you can take care of them via spells and ranged weapons.
In any case, the Baldur's Gate 3 Grym boss fight does require a bit of trial and error, and maybe some extra saves, too. What's important is that you aggro the boss so that it's positioned and ready to get pounded to oblivion. For your efforts, you'll receive the Grymskull Helm, which gives the Hunter's Mark spell, resistance to fire damage, and prevention of enemies landing a critical hit.

Possible Bugs and Workarounds
That does it for the Baldur's Gate 3 Grym boss fight in the Adamantine Forge. To get back up top, just press the small button behind the control lever. That should work most of the time.
However, there's also a nasty bug that prevents that from happening. If this occurs, one option is to reload your save (hopefully you have one during the fight so you don't lose several hours of progress). Alternatively, you can just fast travel to another location. Just remember that you won't be able to access the Adamantine Forge normally unless you use the Fly spell to get back down.
Baldur's Gate 3 is filled to the brim with activities and secrets. You'll no doubt be part of an adventure that can take countless hours to complete. For other tips, you can visit our BG3 guides hub.
Got a news tip or want to contact us directly? Email news@gamespot.com
Join the conversation