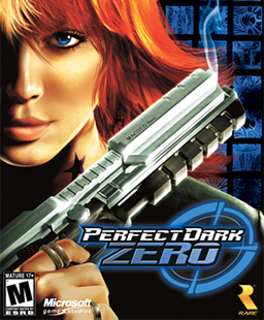
Perfect Dark Zero is a first-person shooter video game developed by Rare and published by Microsoft for the XBOX 360!!!!
Rare's two N64 first-person shooters, GoldenEye 007 and Perfect Dark, received strong acclaim from critics and players, and demand for another title in the Perfect Dark franchise was high. Development of Perfect Dark Zero began on the Nintendo GameCube. At the time, Nintendo had a 49% stake in Rare, making Rare a Nintendo second-party developer. The game made a small appearance at Spaceworld 2000, an event exclusive to Nintendo. But apart from the confirmation that it was in development, few official announcements were made. Perfect Dark Zero, along with several other Rare games, was intended to be finished in time for the Gamecube's launch, but for unknown reasons did not.
In September 2002, Rare Ltd was purchased by Microsoft. Around the same time, Rare released several images of Joanna Dark, the protagonist of the Perfect Dark games. The "cartoony" style of these pictures incited speculation that the final game — then intended for the original Xbox — would employ a less realistic graphical style than the original game; possibly an anime like cel-shading technique, (RARE had hired UK Manga artist Wil Overton to work with them, after seeing an anime-like image of the Original Perfect Dark game he had created for the cover of N64 Magazine.)
Development of the title was later transferred to the Xbox 360. Perfect Dark Zero's senior designer Chris Tilston (also one of the project leads for the game) later revealed that the Xbox version was "about twelve months away" from completion when the switch occurred.
In 2005, one of the rewards in the OurColony viral marketing campaign for Microsoft's next Xbox video game console was an image of Joanna Dark. At the official unveiling of the Xbox 360 on May 12, 2005, it was revealed that Perfect Dark Zero would be a launch title for the new system in the fall of 2005. The game's development has therefore spanned three platforms: the Nintendo GameCube, the Microsoft Xbox and the Xbox 360.
Limited Collector's Edition
Zero was released in two forms: the standard version and a "Limited Collector's Edition." The collector's edition features a second disc of content, a black metal game case, images of the staff and most of testers which gave a glimpse to behind the scenes into Rare, a comic booklet set in the Perfect Dark universe, which sets the scene for the game, and one of nine holographic collectible cards.
Soundtrack
The official game's soundtrack was produced by Nile Rodgers through his Sumthing Else Music Works label, whose past credits include the soundtracks for Halo:Combat Evolved, Halo 2, and Halo 2, Vol. 2: Original Soundtrack, among many others. The original score was composed and arranged by David Clynick. Additional songs include Kepi and Kat's "Limelight", a popular club favorite, as well as two songs by Nile Rodgers protéges MorissonPoe entitled Glitter Girl *Evil Side* (the game's opening number), and Pearl Necklace (the game's closing credits).
Story
The story is set in 2020, three years prior to the events of the original game. Joanna Dark is a bounty hunter working with her father Jack and her friend Chandra. On Joanna's first mission, they rescue a scientist named Zeigler from the hands of a Triad crime lord: Killian. Zeigler uses a neurodrive to implant information into Jack's mind. Jack gets captured by a megacorporation known as 'dataDyne, and Jo rescues her father, only for Jack to die at the hands of Mai-Hem, whose father, Zhang Li, is dataDyne's founder. Jo is then sent on a mission to find Dr. Eustace Caroll, who then uses the same neurodrive technology to extract any memory of the words her father said concerning Ziegler's secrets. Dr. Caroll is then killed by Chandra, who is secretly working for Zhang Li. Jo joins the Carrington Institute and infiltrates a mining operation in an ancient Peruvian Temple where she discovers the conspiracy.
Zhang Li and Mai-Hem are searching for an ancient artifact known as the Graal, which imbues its possessor with superhuman powers. Traveling to Africa, Jo rescues prisoners including Jonathan and several other Carrington boys, before running into Mai-Hem again. Jo avenges her father's death and kills Mai-Hem and the party is air-lifted out. The Carrington Institute plans an offensive on dataDyne forces with the battle taking place on a large bridge. Jo infiltrates an arena and faces off against Zhang Li after he dispatches Chandra. Defeating the seemingly invincible power-hungry genius, Jo is met by Jonathan and Daniel Carrington. When Jo asks, "How did I do, Boss?" Carrington replies: "Perfect."
Weapons
Close Combat Weapons
The Shotgun
Definitely the best close combat weapon, the Shotgun in Perfect Dark Zero works in a similar manner to a real life shotgun. When you fire a real shotgun, a whole pile of pellets will come out which spread over a wide area but only being effective for a short distance. In Perfect Dark Zero the shotgun causes immense damage at short range, often one shot is enough to kill if you get the range correct. Another great feature is that if the shot pellets get a chance to spread out you inflict damage on multiple enemies with just one shot. Just don't bother using this weapon in anything other than close combat because it will be totally ineffective at medium or long range.
The shotgun has both secondary and tertiary uses. The secondary use will enable you to see all enemies on your radar whilst the tertiary use will fool the enemy by making you appear as friendly to them on their radar.
Weapon Slots Used: 2
Damage Inflicted: High (at short range only)
Accuracy: Medium (at short range only)
Range: Short
Armor: Medium (at short range only)
Amunition per clip: 6
Maximum Rounds: 80
The Combat Shield
This is not a weapon but rather an effective method of defense. It will give protection against bullets for a limited amount of time. Beware though, if an enemy fires at you from the side of the Combat Shield, you will be hit!
Weapon Slots Used: 2
Damage Inflicted: None
Accuracy: Not relevant
Range: Not relevant
Armor: Not relevant
Amunition per clip: Not relevant
Maximum Rounds: Not relevant
Viblade Sword
An interesting weapon this, which is extremely effective at very close combat. Use it as a sword when you are literally upon your enemy and it will slice them in two with little problem. But getting that near most enemies is very difficult. This is where the secondary function of the Viblade Sword plays its part. Press the secondary fire button and a very effective (but temporary) shield will appear which protects you from bullets. More than that, the bullets will bounce off the shield and hopefully inflict damage on your enemy.
Weapon Slots Used: 2
Damage Inflicted: High
Accuracy: Under your control
Range: Hand to hand combat only
Armor: Medium
Amunition per clip: 1
Maximum Rounds: 1
Pistols
These are the most useful general purpose weapons in your arsenal so get used to handling them. It's possible to use two pistols of the same type simultaneously or any one pistol with a shield or grenade.
P9P
When you start perfect Dark Zero this will be the weapon you will first have in your arsenal. It's reasonably useful for attacking many enemies and it's silencer (it's secondary use) enables you to use it against targets without always giving away your position. This is a mid-range weapon which has only one significant drawback, the ammunition in each clip is a rather miserly 9 making frequent reloading necessary. On the plus side, reloading is a relatively speedy operation and the P9P has a scope fitted as standard.
The P9P's tertiary function is a Flashlight which is very useful in low light conditions.
Weapon Slots Used: 1
Damage Inflicted: Medium (less powerful with silencer)
Accuracy: Medium
Range: Medium
Armor: Medium
Amunition per clip: 9
Maximum Rounds: 200
Falcon
The Falcon has three advantages over the P9P: it's more accurate, it has a far larger amount of ammunition per clip making reloading a less frequent task and it has a rapid rate of fire. Having the said that, the damage potential per bullet from the Falcon is lower than the P9P. The general view is that this is the pistol of choice for most situations in perfect Dark Zero. The secondary function of the Falcon pistol is: You eject a loaded clip and throw it, it will hit the ground and eject all the bullets out in random directions. The bullets rarely hit an enemy and even when they do, they inflict minimal damage. On the other hand, the bots are tricked into thinking a person is shooting at them, and when they are distracted you can go and kill them.
Weapon Slots Used: 1
Damage Inflicted: Low
Accuracy: High
Range: Medium
Armor: Medium
Ammunition per clip: 18
Maximum Rounds: 200
MAGSEC 4
With it's high-powered scope the MAGSEC 4 is a good pistol for for long distance sniping. It does lack a silencer but this is not too much of a disadvantage at long distances. The secondary function is to magnetize the bullets which exasperates the ricochet effect when aimed at walls - the result (if you are sufficiently skilled) it to enable you to fire at enemies round corners.
Weapon Slots Used: 1
Damage Inflicted: Medium
Accuracy: Low
Range: High
Armor: Medium
Ammunition per clip: 9
Maximum Rounds: 200
Magnum
Raw firepower that can kill an enemy with only two shots but it is fairly inaccurate and has a delay between shots. Extra bullets for your Magnum are not easily found. The only way to get more bullets is from other Magnums dropped by enemies. The secondary function is: the Magnum bullet will be silent when it is shot, but it then expodes very noisily when it hits an enemy. The effect is to draw attention away from your position and attract attention to where the enemy is.
Weapon Slots Used: 1
Damage Inflicted: High
Accuracy: Low
Range: Medium
Armor: Medium
Amunition per clip: 6
Maximum Rounds: 200
Psychosis Gun
The Psychosis Gun fires tranquilizer darts which may be of limited use in some situations. The reload time is quite long.
Weapon Slots Used: 1
Damage Inflicted: Low
Accuracy: Medium
Range: Medium
Armor: High
Amunition per clip: 6
Maximum Rounds: 200
Sub Machine Guns (SMGs)
RCP-90
You won't come across this SMG until late in the single-player game and it's at this stage that the RCP-90s functions will prove most useful. In it's basic mode the RCP-90 has an impressive rate of fire and a clip size large enough to make this useful. The downside is that it's not too accurate.
The secondary function is a Threat Detector which blurs normal vision but highlights enemies in red and friends in green. The tertiary function is to confuse the electronics of the enemy and cause them to fire at enemy positions rather than you.
Weapon Slots Used: 2
Damage Inflicted: Medium
Accuracy: Low
Range: Medium
Armor: Medium
Amunition per clip: 40
Maximum Rounds: 200
DW-P5
A tricky SMG to get to grips with at first because when using the silencer (the secondary function) the damage inflicted on an enemy decreases but the accuracy increases. Probably the best use for this SMG is long distance shooting with the silencer on. The DW-P5 is ready-equipped with a good quality scope. The tertiary function is a flashlight for dark conditions.
Weapon Slots Used: 2
Damage Inflicted: Medium
Accuracy: Medium
Range: Medium
Armor: Medium
Amunition per clip: 24
Maximum Rounds: 200
UGL Liberator
The most easily available SMG in the early part of the game, the UGL Liberator, it's definitely not the best of the SMGs. Use it at short to medium range though and it's reasonably effective with a good fire rate. It has one neat trick, throw it away (when you are finished with it) and it will turn into a land mine and explode soon after. The trick is to lure your enemies towards it as you run for cover.
Weapon Slots Used: 2
Damage Inflicted: Medium
Accuracy: Low
Range: Low
Armor: Medium
Amunition per clip: 24
Maximum Rounds: 200
CMP 150
A good alternative to the UGL Liberator where accuracy is more important than raw fire power. The CMPs secondary function is the Hologram. The idea is that the Hologram will distract an enemy, while you shoot at them!
Weapon Slots Used: 2
Damage Inflicted: Low
Accuracy: High
Range: Medium
Armor: Medium
Amunition per clip: 24
Maximum Rounds: 200
Assault Rifles
Laptop Gun
A very useful rifle because of it's high rate of fire, accuracy and it's ability to knock off armor from enemies. it's downfall is that it inflicts a low amount of damage.
It runs on Windows 2020! (A Microsoft joke added into one of their many loading screens!)
The secondary function is: The Laptop will transform itself into an automatic sentry gun.
Weapon Slots Used: 2
Damage Inflicted: Low
Accuracy: High
Range: Medium
Armor: High
Amunition per clip: 30
Maximum Rounds: 200
KSI-74
Best used when fired in short bursts otherwise the accuracy is too low to be of much use. The KSI-74 is a powerful rifle equipped with a bayonet (or Harpoon) which, in secondary mode, can be silently fired, this deals a powerful blow to an enemy. You only have one bayonet/harpoon however, others must be picked up along your way.
It is also fun, when playing multiplayer (or even playing by your self) to Say - or Shout - "HarPOONED" when an enemy is hit by the Bayonet/Harpoon. The Pooned coming from the end of Harpoon, and a nod on to the gamers 'Leet' (1337) term Pwn3d.
Weapon Slots Used: 2
Damage Inflicted: High
Accuracy: Low
Range: Medium
Armor: Medium
Amunition per clip: 30 plus 1 Bayonet/Harpoon
Maximum Rounds: 200 plus 1 Bayonet/Harpoon
Superdragon
This is the best gun for long distance shooting. The Superdragon has a powerful built-in scope and it's range and accuracy are impressive. What is even more useful is that automatic fire can be used with the scope.
The secondary function is a grenade launcher which cause sever enemy damage. Bounce the grenades aff walls with accuracy and this grenade launcher can be used to great effect. The tertiary function is night-vision.
Weapon Slots Used: 2
Damage Inflicted: Medium
Accuracy: Medium
Range: High
Armor: Medium
Amunition per clip: 20 plus 6 grenades
Maximum Rounds: 200 plus 12 grenades
FAC-16
Similar to the Superdragon above but lacking in a couple of areas. First the range is not so high, second you can only fire semi-automatically when using the scope and thirdly the delay between launching the secondary function grenades is longer. On the plus side, each clip has 30 rounds as opposed to the 20 of the Superdragon. The tertiary function is a silencer.
Weapon Slots Used: 2
Damage Inflicted: Medium
Accuracy: Medium
Range: Medium
Armor: Medium
Amunition per clip: 30 plus 1 grenade
Maximum Rounds: 200 plus 6 grenades
Sniper Rifles
Jackal
The Jackal sniper rifle will kill most enemies with a single shot, this is a truly powerful mid-range rifle. A cornea tracking zoom ensures total accuracy. The reload speed is extremely slow, so if you miss your target first time, take avoiding action immediately! Also remember that although the tracer is small it may give away your position in some cases.
The secondary function will deactivate the enemies radar for a short time. At the same time the enemy positions will be seen on the radar of all friendly players.
Weapon Slots Used: 3
Damage Inflicted: High
Accuracy: Low
Range: Medium
Armor: Medium
Amunition per clip: 1
Maximum Rounds: 30
Shockwave
The Shockwave is not quite as powerful as the Jackal but it will allow to get off a few shots in quick succession. Beware though, the rifle can overheat and it will then be several seconds before it can be fired again. The tracer will give away your position clearly to the enemy so don't stay in the same spot for long after firing it.
The secondary function allows you to see enemies through walls and other objects.
Weapon Slots Used: 3
Damage Inflicted: Medium
Accuracy: Medium
Range: High
Armor: Medium
Amunition per clip: 1
Maximum Rounds: 30
Heavy Weapons
Note that whilst using any of the heavy weapons below you will be significantly slowed down so have an exit strategy ready in case you run out of ammunition before you have slaughtered most of the enemy.
Plasma Rifle
A very handy weapon to be armed with in most instances, the Plasma Rifle has only one drawback which is the speed of firing the plasma - it's much slower than a bullet which allows the enemy to dodge it more easily than a rifle, hence the low damage rating. But when you do hit an enemy, it will be an instant and deathly blow.
Another unique feature of the Plasma Rifle is that it creates splash damage all around the initial area of impact. This gives it the potential to damage multiple targets in one go. But beware, the splash goes all over the place and you could well end up damaging yourself in the process.
The secondary function is the invisibility cloak. Click this button and you will be invisible (well, nearly invisible!) for a period of time - if you stay still you can remain invisible for some time but once you start moving the invisibility soon wares off.
The Plasma Rifle has unlimited power but it does require periods of no-use for it to charge automatically back up again.
Weapon Slots Used: 3
Damage Inflicted: Low
Accuracy: High
Range: High
Armor: Medium
Amunition per clip: Unlimited but it needs recharging
Maximum Rounds: Unlimited but it needs recharging
Rocket Launcher
One of the most destructive weapons in Perfect Dark Zero. When the rocket hits a target everything the surrounding area will be destroyed. What makes this weapon extra special is the secondary function, the ability to fly the rocket remotely straight to a given target using the flip out target finder. The downside to this is that you must direct the rocket to the target before it runs out of fuel. If you fail, it will explode in mid-air.
Weapon Slots Used: 3
Damage Inflicted: High
Accuracy: Medium - High with the help of the target finder
Range: Medium
Armor: Medium
Amunition per clip: 4
Maximum Rounds: 30
M60
The most powerful weapon in Perfect Dark Zero, an M60 is best kept for close range destruction because at medium range the fire power is spread over such a large area that it is mainly wasted. A huge capacity of 80 rounds is available and the ammunition is belt-fed for maximum speed and effect. Once the ammunition is exhausted it takes quite a while for the machine to reload as you would expect.
Use the secondary function and caltrops will be let loose which don't damage the enemy but slow them and their vehicles down considerably giving you a more time to shoot them up.
Weapon Slots Used: 3
Damage Inflicted: Medium
Accuracy: Low
Range: Medium
Armor: Medium
Amunition per clip: 80
Maximum Rounds: 200
Hand Thrown Weapons
Frag Grenade
Very damaging fragmentation grenade with a fuse set initially set to 4 seconds. Hold down the fire button for four seconds or more (it will not explode in your hands) the grenade will explode on impact with whatever it hits with a blast radius of 5 metres.
Weapon Slots Used: 1
Damage Inflicted: High
Accuracy: Depends on your aim
Range: Medium dependant on how thrown
Armor: Medium
Amunition per: clip 1
Maximum Rounds: 1
Hawk Boomerang
Fling the Hawk (anti-gravity tungsten alloy bladed boomerang) at an enemy and if you hit them it will slice them up. But hitting an enemy is the problem, it's quite hard. What's more while the Hawk is flying you can not change weapons or put them away, the best thing to do if you miss the enemy, is to melee attack them. (The 'B' Button)
If you hold the 'Left Trigger' then the enemy will be highlighted yellow, and the Hawk will try its best to hit this target. NOTE: This auto locking function does not lock on to the skeleton in the Multi-Player 'Infection' Mode.
The secondary function button will protect you against shrapnel wounds from grenades and rockets.
Weapon Slots Used: 1
Damage Inflicted: Almost certain death
Accuracy: Dependant on your aim
Range: Medium
Armor: High
Amunition per clip: 1
Maximum Rounds: 1
Flash Grenade
Throw a flash grenade at an enemy and it will not harm them at all, but it will produce a blinding flash of light which will blind them for five seconds or so. The advantage comes in that you can use these grenades at the same time as a pistol or some of the SMGs. Whilst the enemy is blinded you can shoot at them with your other weapon.
NOTE: Look away when you throw the flash grenade otherwise you'll be blinded as well.
Weapon Slots Used: 1
Damage Inflicted: None
Accuracy: Dependant on your aim
Range: Medium
Armor: None
Amunition per clip: 1
Maximum Rounds: 1
Multi-mine
Multimines are close-proximity mines which detonate when an enemy comes into range. They cause severe damage or death.
In secondary mode you place mines where you expect the enemy to pass and then detonate them by remote control.
Weapon Slots Used: 1
Damage Inflicted: High
Accuracy: Low
Range: 2 meters
Armor: Medium
Amunition per clip: 1
Maximum Rounds: 1
[edit] Multiplayer
In Perfect Dark Zero there are two versions of multiplayer, and within each version are four different game modes.
DeathMatch
This is a standard gametype where players spawn in rooms, collect weapons, and continue to the actual map. Weapons are also available on the map itself. Bots are included in all DeathMatch game modes. * Killcount: This is a free-for-all where the winner is the player that achieves the most kills. * Team Killcount: A team based version of Killcount where the team with the most kills wins. * Capture the Flag: A team-only match. Each team tries to grab the enemy’s flag and return it to their base. The winning team is the one with the most flags captured. * Territorial Gains: A team-only match. The goal is to capture and hold several neutral hills until they generate points. The team with the most territories held is the winner.
DarkOps
This is a round-based, team-only gametype that was heavily inspired by the popular PC FPS Counter-Strike. It is generally slower-paced, and is more tactical than DeathMatch. Weapons must be purchased from a player's stock of credits. Credits are earned by killing enemies and obtaining objectives. Bots were implemented in an update on May 4, 2006.
* Eradication: A team-only game. Teams take turns trying to eliminate each other. The team that stays alive the longest, or that kills the other team while still living wins. * Onslaught: A team-only game. Teams take turns defending and attacking a base. The defenders get one life (but can be revived), and can purchase weapons. The attackers have unlimited lives, but have basic weapons (choice of a Falcon, CMP 150 and a DEF-12 Shotgun). The team that holds the base the longest wins. * Infection: A free-for-all game. Players start as either infected or uninfected. When a player dies, they become infected. If the uninfected stay alive for the duration of the round, only they get points. If the infected eliminate them, then only they get points. The player with the most points overall is the winner. (This can seem like a team game as uninfected huddle in a room to survive, or as infected team up to eliminate them). * Sabotage: A team-only game. Teams take turns attacking and defending certain pieces of property on the map. The team that destroys the most property or eliminates the other team wins.