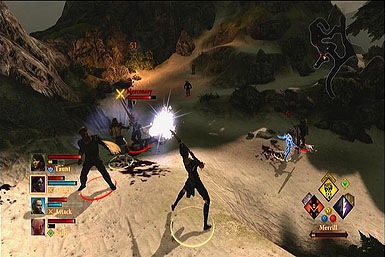
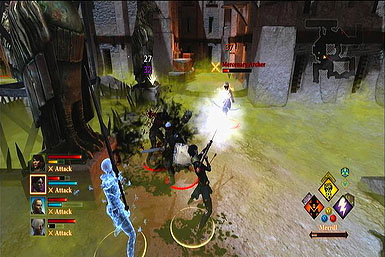
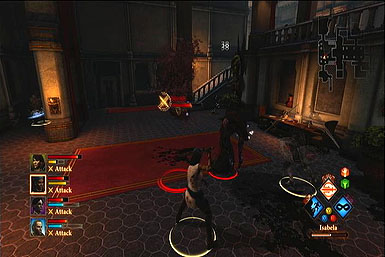
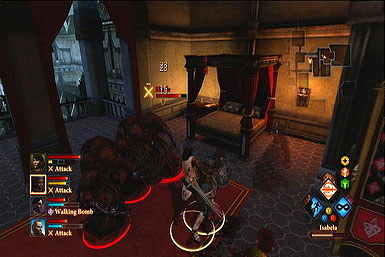
Dragon Age II Walkthrough
Escape the Blight and explore the Free Marches. Our Dragon Age II Walkthrough provides a full walkthrough, side quests, and tips on building a powerful party.
Escape the Blight and explore the Free Marches. Our Dragon Age II Game Guide provides a full walkthrough, side quests, and tips on building a powerful party. Here's what's inside:
- Walkthrough: The complete tale through all three acts
- Side Quests: Find out about various side quests to fill your coffers
- Party and Classes: Discover how to recruit party members and how to train your team
- Xbox 360 Achievements: Boost your Gamerscore with a huge list of Achievements
- PlayStation 3 Trophies: Gain new Trophies for your collection
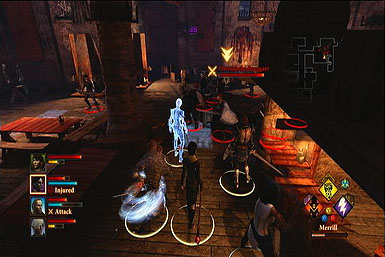
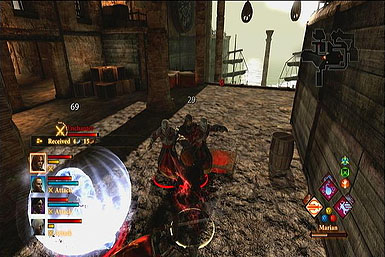
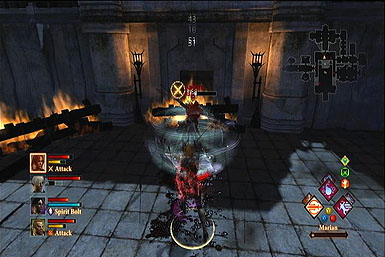
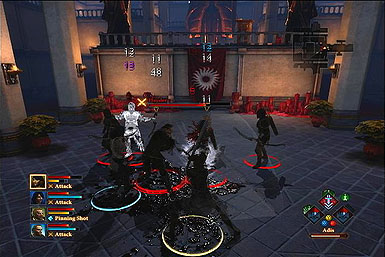
Party Members
Why Are Video Game Adaptations Good Now? | Spot On Fallout 4 Next Gen Update Comparison Fallout 4 Steam Deck Verified Gameplay ALIEN: Rogue Incursion - Announcement Teaser Trailer Stellar Blade - 13 Things I Wish I Knew S.T.A.L.K.E.R. 2: Heart of Chornobyl — Official "Not a Paradise" Trailer Manor Lords - Official Medieval City Builder/RTS Launch Trailer Honkai: Star Rail - "Then Wake to Weep" | Version 2.2 Trailer Devil May Cry: Peak Of Combat | Dante: Blazing Tempest Gameplay Trailer SAND LAND — Official Launch Trailer Sea of Thieves Season 12: Official Content Update Video Stellar Blade - Hard Mode No Damage Gigas Boss Gameplay
Please enter your date of birth to view this video
By clicking 'enter', you agree to GameSpot's
Terms of Use and Privacy Policy
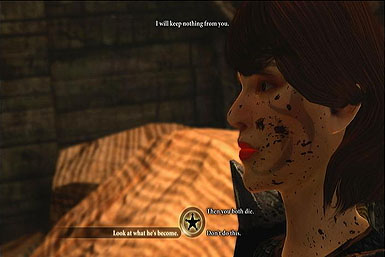
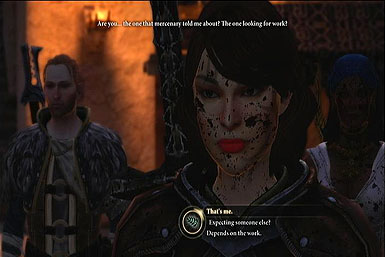
Hawke
Hawke is the main character and can select from any of the three classes. Hawk is the only Warrior/Rogue that can use multiple weapon types, and the only Mages that gets all spell trees. Hawke is also the only character that gains two Specialization trees.
Bethany
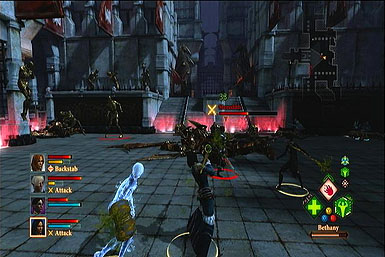
Hawke's younger sister. To gain her in the party you must select Warrior or Rogue as your class. During the Act 1 Quest The Deep Roads Expedition you must exclude her from your party. Finally, during the Act 3 Quest The Last Straw you must side with the Circle of Magi; although she can also rejoin your active party for the very last battle if you side with the Templars. Alternately, During The Deep Roads Expedition bring Bethany along with Anders. He will locate Stroud and allow your sibling to join the Grey Wardens. She does not have the Primal tree, denying her some defenses and control spells. She makes for a good back up healer if you choose not to bring along Anders.
Carver
Hawke's brother and twin of Bethany. To keep him as a party member you must select Mage as your class. During the Act 1 Quest The Deep Roads Expedition you must exclude him from your party. Finally, during the Act 3 Quest The Last Straw you must side with the Templars; although he can also serve as an out of party helper if for the very last battle if you side with the Mages. Alternately, During The Deep Roads Expedition bring Carver along with Anders. He will locate Stroud and allow your sibling to join the Grey Wardens. He does not have Weapon and Shield, lowering his tanking potential, but he is still a powerful damage dealer.
Varric
The narrator who retells the story of Dragon Age 2. He is a mandatory character who joins shortly after arriving at Kirkwall. He is an Archer type Rogue and cannot access Dual Wield. His special Marksman tree augments his ranged attacks further by boosting damage and attack speed. His Friendship adds extra Attack Speed and Dodge rates, while his Rivalry gives a Stealth chance with Varric takes damage.
Aveline
Aveline is met in the Prologue and can join your party again by talking to her in the Viscount's Keep, which can also start the Side Quest The Way It Should Be (but does not need to be completed). To keep her in the party you must side with the Templars during the Act 3 Quest The Last Straw, or have a Friendship with her. She is a Warrior that only uses one handed weapons and shields, lowering her damage output. Her Guardian tree amps up her tanking abilities by providing damage resistance and damage transfer. A Friendship with her will transfer damage from Hawke, while a Rivalry will further increase her damage resistance.
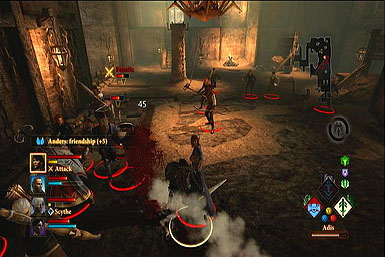
Anders
Anders is gained through the main storyline Quest Tranquility. To keep him in the party you must side with the Mages during the Act 3 Quest The Last Straw. Anders is a mage that lacks the Entropy tree, meaning he cannot sleep or hex enemies. His Vengeance tree allows for top of the line healing and faster spell casting. His Friendship boosts all of his damage outputs, while his Rivalry increases his health regeneration.
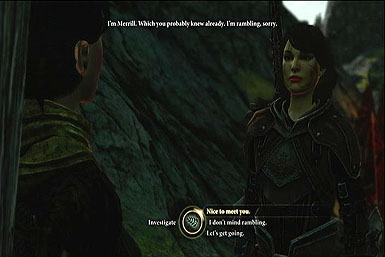
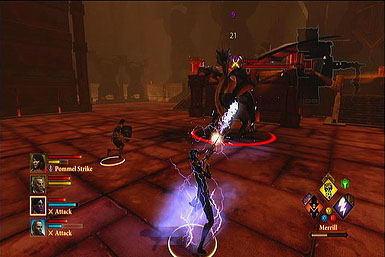
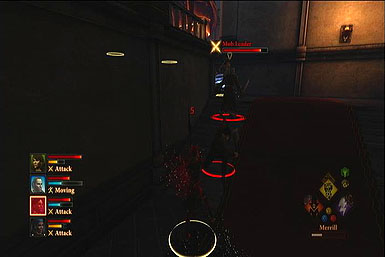
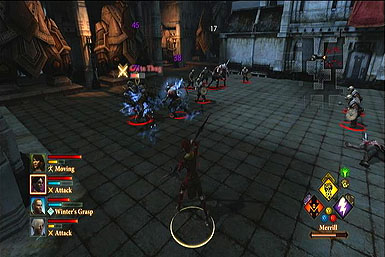
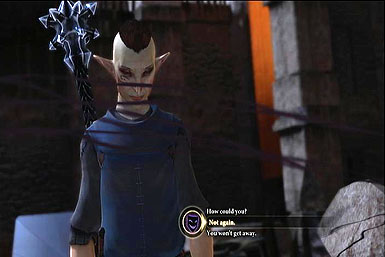
Merrill
Merrill is gained through the main storyline Quest Long Way Home. To keep her in the party you must side with the Mages during the Act 3 Quest The Last Straw, or have a Friendship with her. She is a mage that is missing the Creation tree, which disallows her from healing or hasting the party. Her Dalish Pariah tree allows her to wield blood magic and use area of affect nature spells. A Friendship with her will make her a more effective blood mage, while a Rivalry will boost her damage resistance.
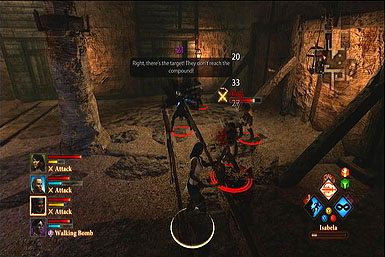
Isabela
Isabela is an optional character that can be recruited during the Act 1 Side Quest Fools Rush In. To keep her in your party you must gain a Friendship before completing the Act 2 Quest To Catch a Thief and promise her the reward. She is Rogue who cannot use Archery. Her Swashbuckler tree increases her defenses, boosts critical chance, and allows her to provoke enemies. A Friendship with her will increase the attack speed of both her and Hawke, while her Rivalry improves her dodge chance.
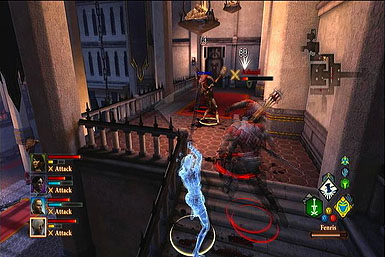
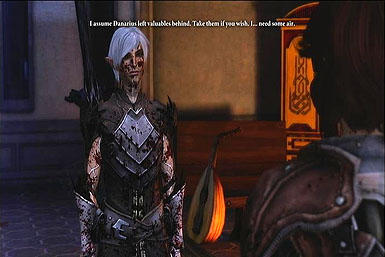
Fenris
Fenris is an optional character that can be recruited during the Act 1 Side Quest Bait and Switch. To keep him in the party you must side with the Templars during the Act 3 Quest The Last Straw, or have a Friendship with him. He is a Warrior that uses the Two-Handed weapons and cannot use shields or one handed weapons. His Tevinter Fugitive tree gives him boosts to magic resistance, defense, and speed. A Friendship with him increases his resistance to magic, while a Rivalry gives him more critical damage.
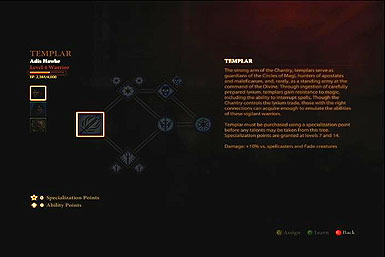
Classes
There are three classes in the game. Hawke can freely pick from any of them at the start of the game. Hawke is the only character that can use multiple weapon types, can use all mage spell trees and has access to more then one specialization.
Warrior
Warriors can act as tanks and front line damage dealers. They use Strength to deal damage and Constitution to survive blows. Consider raising them with 2 Strength and 1 Constitution per level damage dealers. For a more tank based Warrior you may want to remove some points in Strength for Cunning. If you plan on using many sustained abilities at once, place a few points into Willpower.
The Weapon and Shield tree is good for both tanking and making use of cross-class attacks. Shield Bash with Pummel has a 100% chance to Stagger, while Scatter and Assault deal extra damage during Disoriented from a Rogue. Two-Handed Warriors will also want Mighty Blow and Scythe to follow-up any mage that manages to Brittle the enemy.
Any Warrior will want to have Taunt to keep the mages safe, though damage dealers won't really need to upgrade it. Tanks should make use of Turn the Blade, while damage dealers rely on Might (However both can be used at once). Battle Synergy is also a great means of helping tanks keep hate and reduce damage.
For Fenris be sure to get Vener of Calm, Battle Tempo and Inner Reserves. For Aveline consider Thickskin, Immovable and Bodyguard.
Rogue
Rogues can sneak around, fight with dual daggers, or shoot from afar with archery. Dexterity is the key ability to deal damage, though Cunning can help once scoring criticals. For archers try putting in 3 Dexterity each level (Though spending some in Cunning, Willpower and Constitution once in a while will help). For dual wielding Rogues consider 2 Dexterity and 1 Cunning (And of course some Willpower and Constitution now and again).
Archery users will want to upgrade Bursting Arrow with Shattering Arrow and Archer's Lance with Punishing Lance to deal extra damage to Brittle targets. Pinning Shot is also great for setting up Disorient. Dual-Wielders will want Merciless strike as their main attack, but Backstab with Murder is also very powerful.
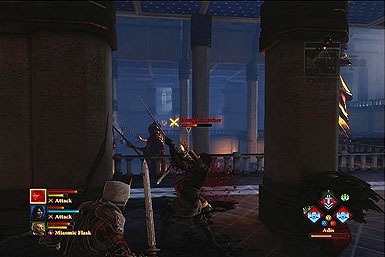
Rogue can really help out the team by using Miasmic Flask, Chaos, and Overpowering Fog to keep the enemies under control. Both Speed and Precision from the Specialist tree have there uses, though Speed will come in handy more often. Because you should have a good Warrior tank, go for Blindside and Brand from the Scoundrel tree.
Isabela's Swashbucklers tree can transform her into a form of dodge tank, though it Experienced Hand is still good for damage. Varric's best skills include Well-Oiled, Embellishment, and Backlash.
Mage
Mages can serve as healers, supporters, or powerful damage dealers with area of effect spells. They will need Magic to boost their spells effects. For damage based Mages consider 2 Magic and 1 Willpower per level. If you plan on using many sustained abilities consider flipping it to 1 Magic and 2 Willpower. As always put a few points into Constitution (Especially if you go down the blood mage path for Hawke or Merrill).
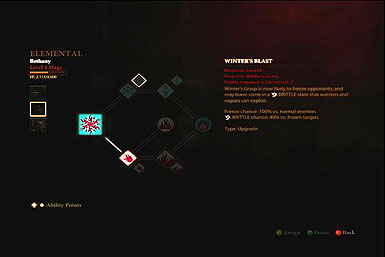
From the Elemental tree you'll want to pick up Winter's Blast and Deep Freeze to set up Brittle combos. The same holds true in the Primal tree where you can gain Golem's Fist and Desiccate. Also spend a point in Rock Armor for your support characters. Both Spirit Strike and Walking Bomb are excellent choices for finishing a combo set up by a Rogue's Disoriented. Likewise, use Crushing Prison and Chain Reaction to end combos set up by a Warrior's Stunned.
Any mage should have Greater Heal, even if their main task is damage. Support mages should consider Valiant Aura, Elemental Weapons and Barrier to protect allies and boost damage. Glyph of Binding, Shackling Hex, and Death Hex are great means for debuffing enemy targets.
For Anders pick up Panacea, Regroup, and Aid Allies. Swift Justice is also nice as it is a passive skill. Merrill will have a greater support role when using Wrath of Elvhen and its upgrades. Blood of the First can also be useful if you have plenty of health to spare; Wounds of the Past is a great debuff for tormenting enemies.
Prologue
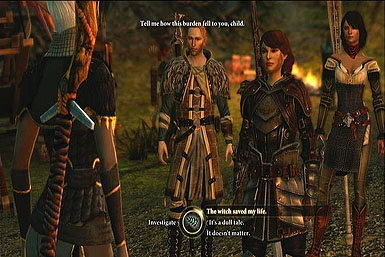
After listening to Varric's less than accurate intro--a tutorial to get you familiar with the controls--and designing your main character, you'll enter the "real" events of the game. You'll have Bethany and Carver in your team for now; Carver should serve as your tank if you selected Mage or Rogue, and Bethany should handle healing and other spells if you are not a Mage yourself. Smash through the first wave of Darkspawn and you'll soon gain the help of Aveline. She is a core tank and can take over that task, allowing Carver or Hawke to focus on damage.
Head up the hill and clear out a few more Darkspawn. You'll be attacked by an Ogre who will kill off Bethany or Carver (Based on Hawke's class: there will always be only one mage). Have Aveline tank the brunt of the forces while the rest of your party concentrates on killing the Ogre and healing up. You may only have one or two health potions at the moment, so reserve those for your frontline Warriors. You don't need to worry about the smaller Darkspawn, as once the Ogre is dead you'll soon be rescued by Flemeth.
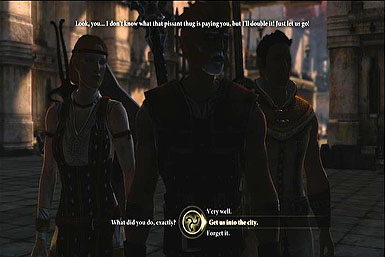
After a few more scenes you'll arrive at Kirkwall. Talk to the guard blocking the way and head to the Gallows. Here you'll convince the men in charge that you know someone in the city, but will in turn be attacked by other Ferelden refugees. The town guards will help you during the fight, so there isn't a lot to worry about. Focus on the gang's leader and his allies will quickly fall. Afterwards you'll get a scene where you'll meet with your Uncle Gamlen. He won't be able to fund your entry into the city, but will suggest talking to Meeran or Athenril.
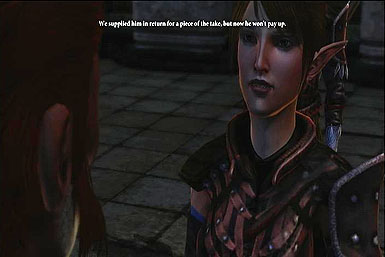
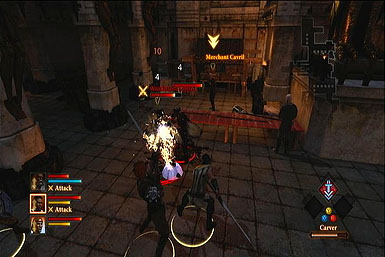
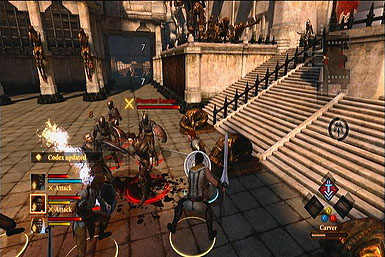
If you choose to help Meeran, head to the south of the map and kill Friedrich and his guards. If you make a deal with Friedrich you won't have enough money to get into the city and will be forced to work for Athenril. For Athenril's quest you'll need to take money from Cavril. This can be achieved by threatening him or killing the guards. You can gain Friendship with Aveline by letting her "Talk" to Cavril. Regardless of whom you get the money from, talk to Gamlen afterwards to enter the city.
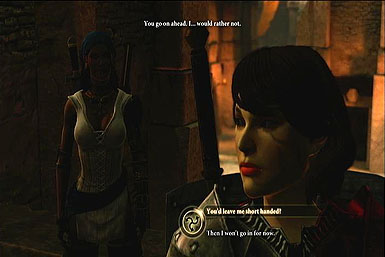
After a few more scenes you'll form a party with your sibling and Varric. If you are a Rogue, you'll defiantly want to head to the Viscount's Keep to regain Aveline. Otherwise, you'll want to gain some other party members by completing the quests Tranquility, Long Way Home, and Bait and Switch
Tranquility
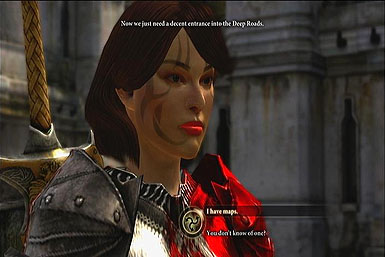
Head to the Hanged Man in Lowtown and talk to Varric. He'll let you know that you'll need maps to the Deep Roads and to seek out a Grey Warden. Head to the Ferelden imports shop in Lowtown and ask the merchant about the Grey Warden Healer. Afterwards go to Darktown and into the clinic to meet with Anders. He will agree to give you maps if you help save his friend Karl.
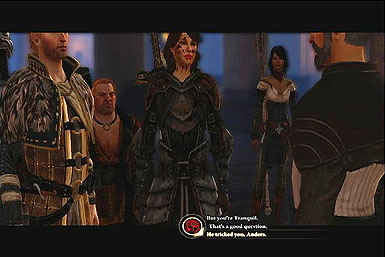
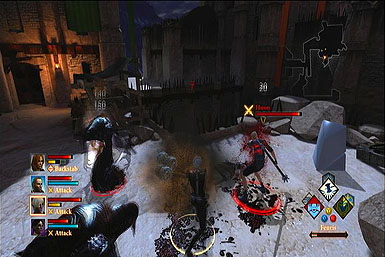
Head to the Chantry at night and you'll find that Karl has already been made Tranquil, selling you out to the Templars. Fight the incoming Templars, focusing on holding threat against the Lieutenant and Hunters wile you clear out the lower end Archers. After the smaller enemies are dealt with, have the whole party gang up on the Lieutenant. You'll probably be too low of a level at this point to have an array of skills, but if you have access to Stagger/Brittle/Disorientate, use a class-combo attack to deal extra damage.
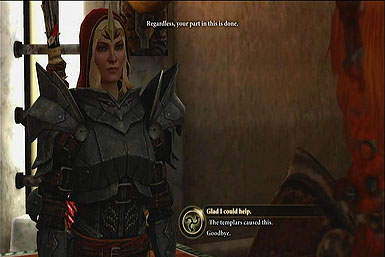
After killing the guards, convince Anders to kill Karl to gain some Friendship. You'll be taken back to Darktown where you can further help or hurt your relationship with your new party member. Since your business is done at the Hanged man, returning there will now start the Side Quest Fools Rush In.
Long Way Home
You'll most likely want to form up a solid party of one tank, one healer and two damage dealers before journeying out of Kirkwall. On the way to this mission you may come across the start of Blackpowder Promise, but it is a completely unrelated task. Once at Sundermount talk to the two Dalish guards and enter the encampment.
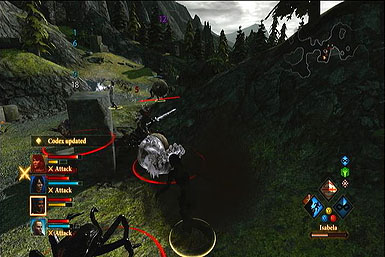
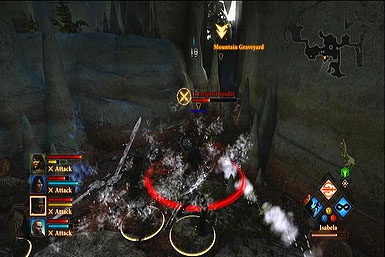
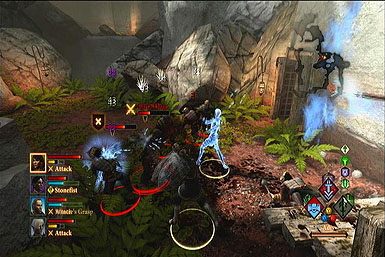
After talking to Keeper Marethari you'll be introduced to Merrill and be sent into one of the mountain's caves. You'll be in for some beefy fights so be sure to stock up on potions from the Dalish store before heading in further. You'll be fighting a large gang of Giant Spiders as you make your way through the cave. Take out the weaker enemies before smashing down the stronger spider leaders. Afterwards you'll reach the exit to the mountain's ridge.
There will be a barrier to the ritual site, however Merrill will lower it by using blood magic. You can gain some Friendship by condoning her actions, though use of blood magic can hurt your Friendships with Anders and Fenris. Make sure to cross the barrier, as the rest of the mountain is crawling with tough groups of enemies that may be too much to deal with right now.
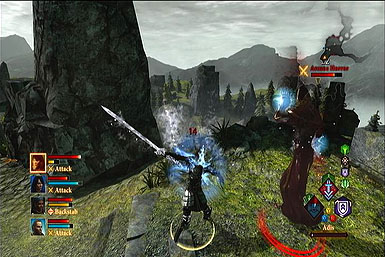
You'll face off against an Arcane Horror, Shadow Warrior and a huge amount of Skeletons. You'll want you tank on the Horror while the rest of the party clears out the lower end Skeleton Archers. After the Horror is dead the main focus should turn to the Shadow Warrior. As with most fights be sure to inflict status debuffs, mainly ones that boost damage such as Stagger, Brittle, and Disorientate.
After the fight, talk to Flemeth and return back to the Dalish. You'll be taken back to the Kirkwall Alienage where Merrill will now reside. Visit her home to start up a Friendship or learn more about her.
Blackpowder Promise
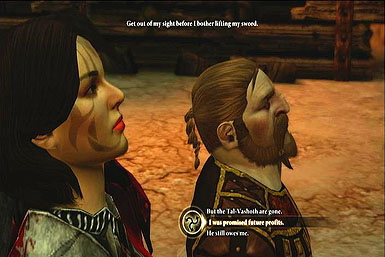
During your trip to Sundermount you may encounter the Dwarf Javaris and his less than alive guards. Help save him from spiders on the mountainside and he'll ask you to take down the Tal-Vashoth Qunari. Head to a lower part of the mountain and you'll find a Qunari that has abandoned the Tal-Vashoth. You can't convince him to help, but he will warn you about his former clan's actions.
Head up the cliff and kill the Qunari. Use cross-class combos if you've unlocked them along with strong elemental spells. The line of Elemental Cold spells along with a Two-Handed Warrior are a good means of taking on any Qunari enemy. After taking down the outside guards head into the cave.
You'll mostly be fighting the same enemies with the same tactics: freeze with ice magic and follow up by exploiting Brittle damage boosters. Some of the main threats are the Qunari mages that have powerful magic of their own. Stall them with spells such as Petrify or Sleep, or just be quick on killing them first. There will be at least two mages: one at the top rafter, and a second that will appear near the ground. Be sure to move your ranged characters away from these deadly mages or they will be caught in some fierce spells.
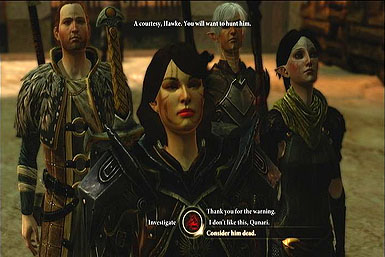
After clearing out the Tal-Vashoth, head to the Kirkwall Docks and into the Qunari compound. If Isabela is in your party she will refuse to enter, leaving you with only three party members. Inside you'll witness a chat between Javaris and the Arishok. Convince the Arishok to force Javaris to pay you to gain not only a reward, but some respect from the Qunari leader.
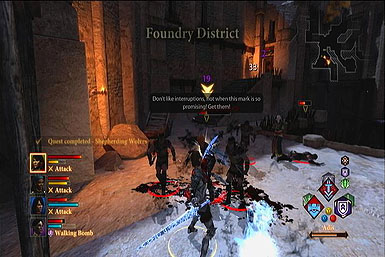
Shepherding Wolves
Travel to Lowtown at night at you'll come across Sister Petrice looking for aid in the totally wrong place. Move to the back alley and murder her "helpers". She'll thank you and tell you to meet her at a nearby building. Go over there and you'll discover the true nature of her mission: To escort a Qunari mage back to freedom.
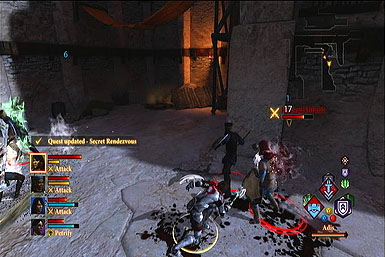
Take the secret passageway to the Undercity Warrens. There are Giant Spiders down here that you'll need to kill along the way. Near the end of the halls you'll encounter a band of thugs that will try and stop you, but aren't much of a threat.

After getting out of the passageway and arriving at Vimmark, you'll be confronted by a group of Qunari that want the Saarebas. It doesn't matter if you try and reason with them, as they will attack no matter your selection: however if you refuse the Saarebas will reward you later. The Qunari start cramped in a bundle so be sure to use area of effect attacks quickly before they separate. Living Bomb and Miasmic Flask are a great means of taking care of the enemies fast. Once the enemies move apart, switch back to the old tactics of ice magic along with moves that abuse Brittle.
With the Qunari dead, loot the bodies and return back to Petrice. While you can scold her, there is no option for a straight up fight. Take what little reward to conclude the quest.
Wayward Son
Head to the Alienage to talk with Arianni and Thrask. Arianni's soon is a half-elf mage that seems to have disappeared. You can follow Thrask back to the Gallows to learn more about the situation. When ready, travel to Lowtown at night to meet with the disgraced former Templar Samson.
With your new info gained from Samson, head to the Docks and into Arthuris' domain. Disarm whatever traps are around with your Rogue and take down the cannon fodder enemies. You'll enter a smaller corridor where you'll have to deal with both the pirate slavers and abominations on the loose. Area effect magic works the best here, as does luring out enemies and taking them down one at a time. The abomination and the shades it summons are the biggest threat, so you might want to keep a few human enemies around to cause a three way battle. After clearing the area be sure to loot the letter for Thrask, which can be used for a future reward.
With your new knowledge, head to Darktown and find Danzig and his gang. They can be easily killed with area of effect magic and a few debuffs. However, a second wave of enemies will arrive with some heavy firepower and good defenses. It's a good idea to retreat back up the stairs and fight each enemy one by one. When everyone is dead loot Danzig's body for the slaver's location.

Travel outside of Kirkwall and to the Wounded Coast. Fight anything you encounter on the way and enter the Slaver's Cavern. Kill more Slavers and you'll eventually find the Slaver leader Varian. You can pay him for Feynriel's freedom, or fight off the Slaver goons. If you want to retain some money, go ahead and kill the enemies inside. After either outcome, return to the Gallows to blackmail Thrask with the letter.
Enemies Among Us
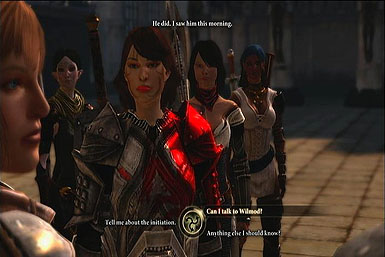
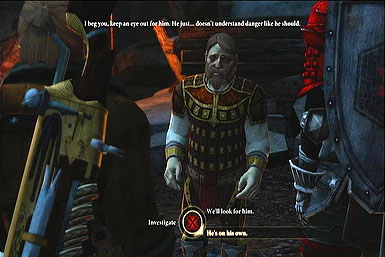
Head to the Gallows and speak with Hugh to discover that one of the Templars, Wilmond, vanished but has suddenly re-appeared again. Head out to the Free Marches and into Wilmond's camp.
The Templar is possessed by demons and you'll be forced to kill him and the abominations he summons. You also have the assistance of the Knight-Commander Cullen for this battle. Use ice magic and focus on the Rage Demon that will eventually arrive. After killing Wilmond, return to Kirkwall.
If you don't already have a mage in the party switch one in now. Head to the Blooming Ross in High Town and talk to the workers. Talk to the prostitute Idunna and she will use magic to take over your mind. Use one of your mages to break free from her control, but be sure to spare her life so that she can be met later.
Head to the Sanctuary in Darktown and fight through the Shades inside. You'll eventually find the captured Keran and the blood mages that took him. These blood mages start in a huddle, so be sure to nuke them with heavy area of effect attacks before they are able to spread out. Heal up from any damage you have and then concentrate on the remaining demons that spawn out. The desire demon should be tanked while you concentrate attacks on the weaker shades and abominations.
With Keran saved, return to the Gallows and report to Cullen. It's up to you to decide if Keran is really human any more: either let him remain in the Templars or have him expelled.
Act of Mercy
After checking your mail at home, head to the Wounded Coast and talk to Thrask. There are blood mages inside the cave and it's your charge to flush them out. Head into the cave and fight few a few waves of rather weak skeletons and skeleton archers.
You'll eventually fight the blood mage leader, his assisting mages, and a few more skeletons. Tank the main enemy, but be careful of his magic spells that can do some heavy damage. If you have Varric or another ranged fighter try to take out the mages from afar before they become too much to handle.
Talk to the surviving mages and try to make a deal with them. It doesn't really matter what you choose, as they will attempt to exit no matter what. However, you can get bonus rewards for letting them go free and killing the Templars.

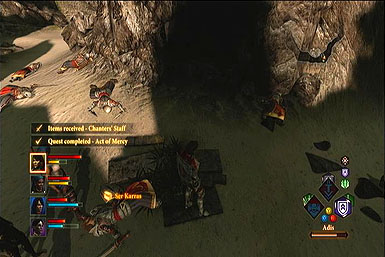
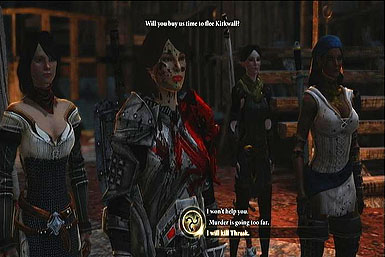
Exit outside and talk with Thrask again. More Templars will arrive and want the mage's heads. If you have Varric he can convince them to leave no matter what. If you choose to fight, Thrask will help you take on his fellow Templars. During the fight take down the weaker enemies quickly so that they can't layer on extra damage. Get your tank on the Templars leader so that he can't harm your weaker enemies. Use cross-class attacks such as Winter's Grasp followed by Mighty Blow. After everyone is cleared, get your reward from Grace and any dead enemies.
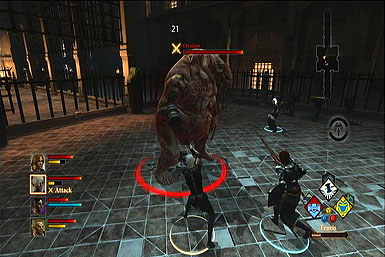
Deep Roads Expedition
Friends in Low Places
Your normal task for this quest is to gather up at least 50 gold from various quests and selling items. However, if you don't want to save up and would rather hold on to your money, head to Gamlen's house and read a letter from Dougal. Head to Lowtown at night and meet with the Dwarf to gain extra funds that will be sent straight to Bartrand. You can now use your own money to purchase extra supplies and better gear. Keep in mind that in the next Act you will need to either pay Dougal back or fight him.
The Deep Roads
With either your own 50 gold or by agreeing with Dougal, place Varric in your party and head to Bartrand in Hightown. You'll need to organize a team to enter the Deep Roads and Varric will automatically place himself in. You may want to omit Carver/Bethany from your party, as there is a high risk they will not survive. However, if you bring them along with Anders your sibling will be infected with the Taint and brought the Grey Wardens instead of dying outright. Your team should consist of a tank, healer, and two ranged damage dealers.
After some scenes you'll discover that Sandal has run off on his own and you can choose to rescue him. Head down the tunnels and fight the Darkspawn. You'll want to assume direct control of your tank and pack the enemies so that your mages can nuke them effectively. Make sure to concentrate on the enemy mages, as their powerful spells can really harm your team. When the dust settles, keep moving down and killing Darkspawn and you'll soon find Sandal that will reward you with a new rune.
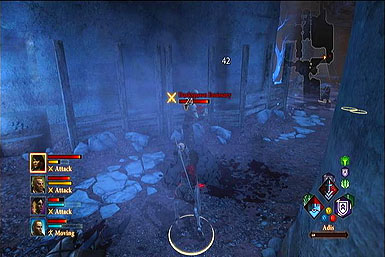

You'll be attacked by Darkspawn on two sides, so be ready to backtrack and defend your rear. First kill the enemies in front before moving your ranged fighters to safety. Head into the next small room and be ready for an Ogre that charges from the lower left corner. He won't have support so just pile on the pain to kill the Ogre. You can now explore a few of the side rooms and battle extra enemies.
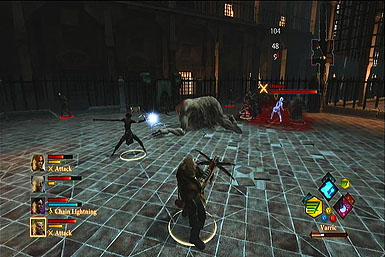
As you near the end of the hall you'll now do battle with a dragon and its dragonlings. As with many enemies, they are weak to ice attacks so stick with Winter's Grasp and Cone of cold before following up with cross-class attacks that do extra damage to Brittle enemies. After the fight, stock up on potions from Bodhan's store and head down deeper into the roads.
You'll fight golems and more shades before arriving at a Hunger Demon. You can try reasoning with him, but this won't sit well with Anders or Fenris. Dealing with the demon will also not avoid a fight, it will simply delay it until later. It's better to just get the fight out of the way now.
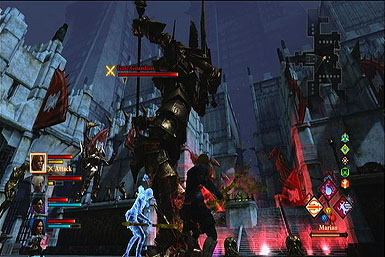
Keep moving and you'll fight a Rock Wraith. This boss is strong and can do some serious damage to non-Warriors. Get your Tank in close and concentrate on maintaining threat while your ranged attackers belt it with spells, debuffs and arrows. If it moves to the center of the room, move behind any of the four pillars to block the energy blasts. After this deadly attack it will be prone and easy to damage, though it will keep summoning Profanes to support it. Clear out the Wraith's helpers before attacking him directly. After completing this pattern four times (Or less if you are able to greatly damage the Wraith), it will no longer use the energy beams or become weakened. Just pile on more attacks until it finally dies.
Head to the treasure cache that contains a key. If you made a deal with the Hunger Demon you will now need to kill it. Move to the exit door to watch the conclusion of the Act. If you brought Carver/Bethany along without a Warden they will not survive the trek out. If you brought Anders with your sibling you'll fight some extra Darkspawn and meet the Wardens. Finally, if you left Carver or Bethany at home they will join the Templars or Circle of Magi.
Offered and Lost
You'll start the Act in the Viscount's Keep. Talk to Senchal Ban to learn about a disappearance of a Qunari envoy that came to speak with the Viscount. Someone at the Hanged man might know something more regarding the ordeal. Before heading there you might want to spend some time purchasing new armor and weapons for your allies in Lowtown (Apparel Shop, Fereldan Imports, Armor Shop), Hightown (Robes by Jean Luc), the Gallows (Mage Goods), Docks (Shady Merchandise), and Sundermount (Ilen's Crafts).
Travel to the Hanged Man at night and talk to Orwald. There is a likely chance that he will attack along with his new friends. Kill them with area effect attacks and class-combo attacks. You'll learn from the scared Orwald that that the Qunari were taken the Chantry.
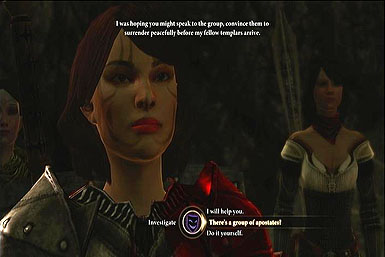
Travel to the Chantry and Petrice will inform you that Varnell is the one who took the Arishok's men. Travel to Varnell's Refuge and locate the captured Qunari. Regardless of your dialogue choices you will be unable to save the prisoners. Get ready to face Varnell and fanatics. Concentrate on tanking and dealing with the Templars, as the normal citizens are cannon fodder that can easily be killed off.
After the battle tell the Viscount to tell the Arishok the truth and loot the items around before leaving.
Blackpowder Courtesy
Head to the docks and inside the Qunari compound. Talk to the Arishok and he'll inform you that Javaris has stolen poison in an attempt to acquire black powder explosives. Head to Darktown and talk to Barker to discover that Javaris went through the Smuggler's Cut.
Take the passage to the Cut and you'll do battle with tons of dwarven Carta members. They are resistance to most magic, but can still be taken out with ice and nature type spells. Clear out the cave and exit out to fight another mild battle against more mercenaries. With his guards dead, confront Javaris. There is no reason to keep him alive, so feel free to stab him in the back.
Return back to Kirkwall and stock up on healing items. Travel to the Side Alley and do battle with more waves of mercenaries. There will be poison gas flowing, but it does very little damage, even while in battle. Collect Steel Latches from the ground and off enemy leaders to seal all of the poison barrels. You'll finally fight one last wave lead by a crazed Elven Warrior. Be sure to loot her corpse and steal her Two-Handed sword for one of your own teammates.
Prime Suspect
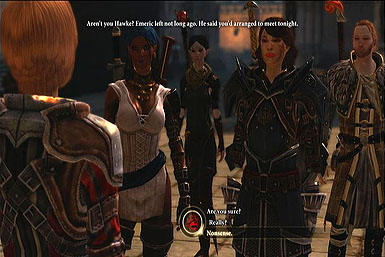
Head to Hawke Estate and read the letter from the Templars. If you worked for Dougal in the previous chapter you can now either pay him off or confront him in a random fight later on. Either way, travel to the Gallows and talk to the letter writer, Emeric.
Emeric will instruct you to find Gascard DuPuis at his estate in Hightown. Head there at night and you'll be ambushed by Shades and Abominations; use nature based magic to deal with them quickly. Seems DuPuis is a blood mage and has taken a woman hostage to save her from the real killer. You can choose to hear him out or attack him. The latter isn't needed, but can be used to gain extra XP. Either way Gascard will still make his leave from the estate.

Return to the Gallows and talk to Moria about a fake letter that arrived for Emeric. Head to the Blind Alley to fight more Shades and even a Desire Demon. This demon is able to heal, so be sure to take her out first. When Moria arrives after the battle you can choose to arrest Gascard, or let him go free so that he can take part in a future quest.
All That Remains
Head back to the Estate and you'll discover that your mother was kidnapped. If you saved Gascard during Prime Suspect head to Darktown and let him complete his blood magic ritual. Otherwise head to Lowtown and fight through a few enemies. Either way you'll win up inside the Killer's Lair.
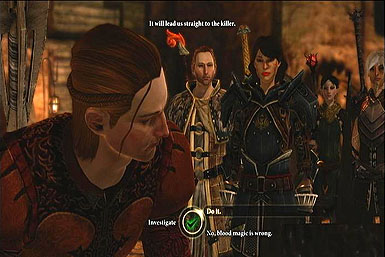
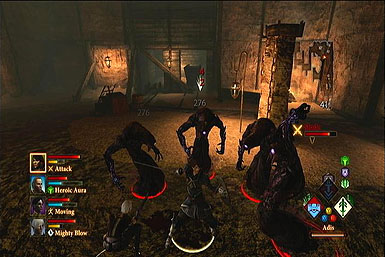
Fight through the waves of various enemies in the Lair: Shades, Demons, and Corpses. They are all weak to nature and ice damage so stick to those elemental spells. Eventually you'll arrive at a shrine and a group of skeletons. Kill them off, loot the area for some good new equipment and head down the hall for the quest's final battle.
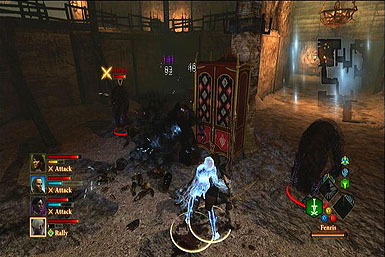
Based on your dialogue choices Gascard may turn on you or stick on your side to fight Quentin. Either way concentrate on the human mages until they put up magic barriers. Next take down the Desire Demons so they can't prolong the battle with their healing spells. Once Quentin re-enters the fight concentrate all of your attacks and spells on him. As with other blood mages, try to fight with range so you aren't hit with his waves of blood magic.
Following the Qun
While back at the estate, read your mail and you'll be called in to see the Viscount. He'll instruct you to talk to the Arishok. Attempt to head to the docks and you'll be ambushed by a band of mercenaries in the Winding Alley. They aren't much trouble, so simply kill them and enter the Qunari Compound.
Speak to the Arishok and you'll find out that the Viscount and his son are meeting in the Chantry. Head there and you'll be attacked by Templars. They aren't any more trouble than previous encounter: simply kill the weaker enemies with area effect magic before taking on the stronger Templar leaders.
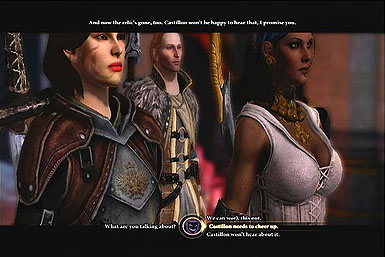
To Catch a Thief
You will only need to complete this quest if you recruited Isabela back in Act 1. You may want to finish establishing a friendship or romance with her before attempting this quest. When ready, head to your estate and you'll be confronted by Aveline and Isabela. Aveline will urge you to skip this current quest and head to the end of the Act, but Isabela will ask you to help her one last time.
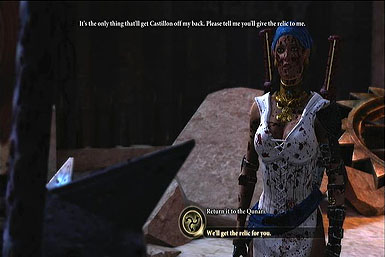
Place Isabela into your party and travel Lowtown at night. You'll fight about five Qunari, including a powerful Sten that should be your main target. After the fight tell Isabela that she can have the relic for herself. This may garner you a tad more friendship with her, though it might not be enough in the end.
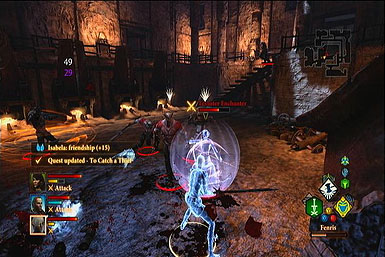
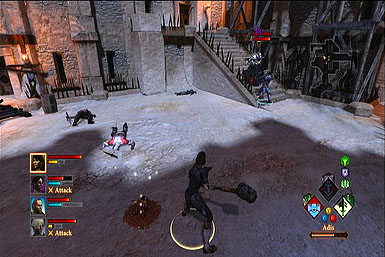
Enter the building on the right and Isabela will run off after one of the smugglers. This will leave you in a three battle with the Tevinter and Qunari. The amount of Qunari out number the humans, so you might want to ignore the Tevinter so that they can provide distraction. However if the Tevinter do attack, kill them quickly. As far as the Qunari, take down the Sten Warriors and Saarebas Mages before cleaning up the other cannon fodder.
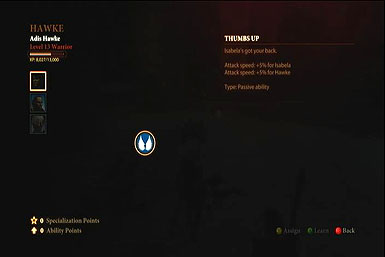
After the fight loot the building for an extra armor upgrade. Exit the building again and you'll find a letter from Isabela: She's gone and has taken the relic. However, she may have a change of heart. Go into the level up menu and check to see if Hawke posses the Thumbs Up ability from a friendship with the wayward pirate. This can be a good sign that you'll run into Isabela again.
Demands of the Qun
This is the very last quest of Act 2 so be sure to restock on potions and buy the latest equipment. When ready meet with Aveline at the Docks and confront the Arishok about his actions. In your dialogue with the Arishok you can earn his respect by being truthful and forward with him about the situation. This can help later during the end of the Act.
After a few scenes you'll want to build your strongest party. If you don't already have a tank consider taking Aveline with you, otherwise she'll gain Rivalry points. With your team ready travel through Lowtown killing off Qunari mages and fighters.
You'll come across a group of Grey Wardens that will assist you with taking down a group of Qunari. It doesn't matter how you respond to the Grey Wardens, as they will take off and provide you with a Warden ring for your stock of items. When ready, head to High Town.
You'll fight even more Saabres and Stens, even engaging in three way battles with the Qunari and Carta. As with all three way battles, let your enemies distract each other so that they all don't gang up on you. Eventually you'll meet up with Meredith, Orsino, and any surviving sibling.
You can choose to listen to Orsino and sneak into the Viscount's Keep or listen to Meredith and charge right through the front gate. Pick Meredith's option if you need extra XP, otherwise just sneak inside.

You'll be ambushed by several more waves of Qunari. Focus on taking out the ranged enemies, such as mages and spear chuckers. Enter the main hall of the Keep and the Arishok will make you prove yourself against a few more fodder enemies.
If you managed to complete To Catch a Thief correctly, Isabela will arrive again. You have several options for dealing with the Arishok and his men. You can turn in Isabela to end the conflict without a fight, though this will remove Isabela from your party. An alternative is to duel the Arishok for Isabela's freedom, or if you the leader's respect (You might also want to have Fenris in your party, who knows some Qunari customs).
If you duel the Arishok, be sure to keep your distance when he attacks, as his slashes can be brutal. You'll need to chug potions to keep your health and stamina/mana up to combat this boss. The Arishok himself will also heal a few times during the fight, but will eventually run out of potions. Outside of his normal attacks, the Arishok can attempt a charge, but it is easy to avoid. He can also impale you on his sword, which can do a lot of damage. Be sure to keep your health up and recover quickly if he manages to get you in this close range attack. A good offensive tactic is to hit him with debuffs, such as stunning or freezing him in his track. While the Arishok is prone hit him hard with your strongest attacks before fleeing and repeating the pattern.
However, you might either opt or be forced to fight all of the Qunari at once. You will however retain your entire party for this fight. Take out any strong Stens first before attacking the ranged enemies, especially those on the stairs and balcony. Like in the duel, keep the Arishok stunned or otherwise imbalanced so he can't impale or aid his men.
On The Loose
Start off the Act by heading to your Estate and reading a letter from Meredith. Report to the Templar Hall in the Gallows and Talk to Meredith. Your task is to track down three apostates that are rumored to be blood mages: Emile, Huon, and Evelina. Your orders are to capture or kill these rogue outcasts.
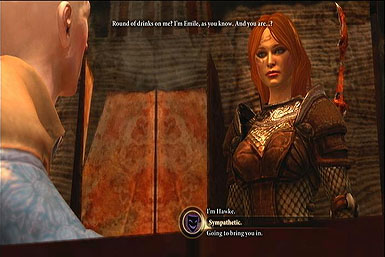
To find Emile, head to Hightown and talk to his parents at the De Launcer Mansion. Afterwards head to the Hanged Man at night and talk to Emile. It turns out he made up the blood mage rumor to sound tough. You can choose to either let him go free or return him to the Circle.
Huon can be found in the Elven Alienage in Lowtown. First visit the area during the day and talk to his wife Nyssa. After the chat return to the same location at night to battle Huon. He only has Shades as his support, so it won't be much effort to subdue the apostate.
Evelina can be found in Darktown's sewer. She will transform into an Abomination and summon both Shades and Rage Demons. Like always, free or petrify them quickly and follow up with cross-class skills that abuse Brittle status.
After all three mages are dealt with, return to Meredith to end the quest and receive your rewards.
Best Served Cold
Return to the Hawke estate and except a letter from Orsino. Head to the Templar Hall and talk to Orsino about a strange meeting between mages and templars. This quest will conclude many of the hanging threads from the first Act.
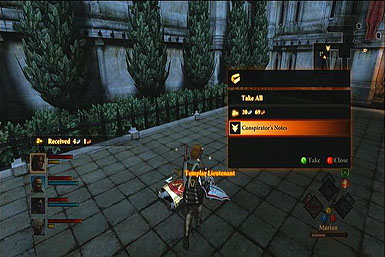
First off, head to Hightown at night and fight the templars and mages hanging around. Always take down the cannon fodder weaker enemies before heading after the stronger templars. Search the bodies to discover the conscriptor's note.
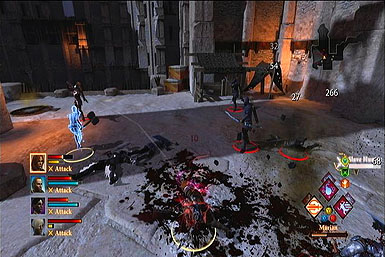
Next head to the Docks and battle your way through cronies to reach the secret meeting place. You'll face more mages and templars. Your main focus should be taking down the Hunters and Enchanters before they can pile on the hurt. After the fight you may run into Keran. He'll inform you that the rest of the coup is at the Wounded Coast and that you should head there.
Head down to the Wounded Coast's beach area and you'll run into Thrask and Grace. It doesn't matter what dialogue choices you make here: Thrask will always back off and Grace will attack your party. Take out the mages and Abominations first, leaving the various Templars for last. As always area of effect attacks are your best option, especially those that set up cross-class attacks for your Warriors.
After the fight talk to Cullen to decide the fate of the surrendering mages and rogue templars. Return back to Orsino and end the quest.
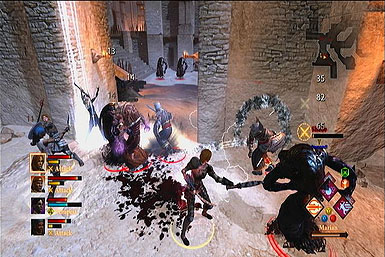
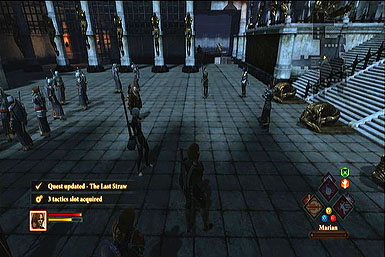
The Last Straw
This is the final phase of the game. Make sure you've completed every other mission you want, established friendships and are well stocked on items and equipment. When ready read a final letter on your desk and head to the Gallows.
Anders will destroy the Chantry and cause chaos through out the city, causing the final conflict between the crazed Templar Meredith and the Blood Magic condoning Orsino. You must select a side to join with for the last part of the game. Each has its pros and cons:
Templars:
- Fenris and Aveline will stay loyal, but Merrill may betray you.
- Anders will not rejoin and you may have to face him in battle.
- Carver will join you upon reaching the Gallows, but Bethany can only rejoin the party for the last battle. They will both join early if they are a Warden.
- You will fight only demons and mages
- You will fight through the Gallows, followed by the last two bosses
- There will be two shopping chances from Sandal's store
Mages:
- Merrill will stay loyal, but Fenris or Aveline may betray you.
- You can choose to regain Anders into your party.
- Bethany will join you upon reaching the Gallows, but Carver cannot rejoin the party (but can still fight as an NPC during the last battle). They will both join early if they are a Warden.
- You will get in three way fights against templars, demons, and mages
- You first face off against one boss, fight through the Gallows, and then the last boss
- There is only one chance to buy goods from Sandal's shop
After making your selection and dealing with Anders, head through Lowtown fighting the hordes of demons, blood mages, and either Circle Mages or Templars. Among battles to be careful of are those involving Abominations that summon waves of Shades. as always stick to cross-class combos that use Stun and Brittle to increase damage.
One of the hardest fights--possibly harder than the last boss--is against a Blood Mage, Pride Demon and nearly ten Shades. The Shades themselves are merely distractions that serve to annoy you. The main threat is actually the Blood Mage, who should be killed right away to avoid being hit with their draining spells. Need be sure to avoid the Pride Demon's swirling vortex spell, as it can trap you, deal heavy damage, and leave you open to be ganged up on by the Shades. Have your tank lure the brunt of the Shades while your ranged attackers deal with the demon.
Once clearing out of Lowtown and the Docks, take a boat ride to where your adventure in Kirkwall began: The Gallows. You'll have one last chance to regain the trust of Fenris, Aveline, or Merrill if they fled your party earlier. Carver will also join if you sided with the Templars, and Bethany will join if you sided with the Mages. If you let Anders survive he will also be with the Mages and can be re-recruited one last time. When ready, talk to Meredith/Orsino to launch the final assault.
The Gallows Final Push
If you sided with the Templars this will be your first task and will be charging through the main gate to deeper into the Gallows. If you sided with the Mages this will be your second task and will be exiting the Gallows from the central hall.
There are many demons in the corridors, including both Rage Demons and Pride Demons. The main threats are in the courtyards that are crawling with powerful Mage/Templars. Use the seasoned tactic of tanking the fodder while using cross-class attacks to clear out the strongest enemies.
If you sided with the Templars and let Anders live you will now do battle with him. His casting times are fairly long, so rush him quickly with a Warrior or Rogue to smash his brains in. Keep heading through the building, clearing out assorted enemies. you'll soon reach one of your goals and will be facing off against a boss.
Battle with Orsino
This will be your first task while siding with the Mages, and your second task from siding with the Templars. If you sided with the Templars Meredith, Bethany, and a few weaker Templars will help you. If you sided with the Mages you will have all of your reserve party members fighting on your side.
Orsino has three different forms that he will morph through. The first is rather weak and can be stunned, frozen, and petrified with ease. Eventually his head will separate and many undead cronies will emerge from the sides. Kill these enemies with area of effect spells before turning back on Orsino himself.
For the last part of the fight Orsino will make use of drain attacks that can also keep a single party member stunned. Still, the best tactic is to stun and slow down the blood mage so that he can't attack in the first place.
If you sided with the Templars, make one last choice to reconcile with Bethany or let Meredith slay her. Stock up at Sandal's shop and get ready for the final bout.
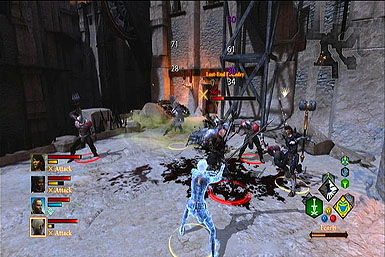
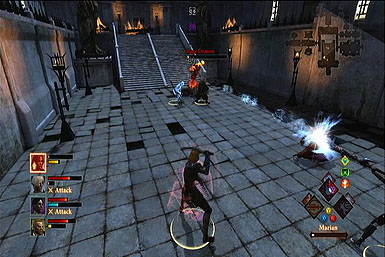
Battle with Meredith
Regardless of who you sided with, you'll always fight against Meredith as the last boss. Carver and Cullen will defy her orders and assist as NPC helpers during this fight.
Meredith will first fight you solo with her lyrium idol sword. She isn't much of a problem as long as you keep a Warrior tanking her. If Meredith does attack a mage, be quick order them to run towards your melee characters. After each phase of the fight one of your reserve party members will join in as an NPC until the whole team as arrived.
Each time Meredith takes a significant amount of damage, she will retreat to the upper level and summon a Gate Guardian to do battle with. This enemy has a wide sweep attack, so be sure to keep your mages and archers far from this enemy. Meredith will re-summon this enemy about three times during the course of the fight. In its final form it will tend to use homing attacks, so be sure to keep your tank on it on all times to reduce the amount of damage your mages take.
Meredith will also bring to life Slave Statues, but they are simply trash mobs that the friendly NPCs can deal with. Concentrate all of your most powerful attacks against Meredith until she a powerful stun move. This will dizzy both your own party, the NPCs, and the enemies. After Meredith makes a short speech, resume your assault until she finally kicks the bucket. The death of the Templar Commander will draw the conclusion of Dragon Age II.
Act 1 Side Quests
These Quests must be completed before under going the main quest Deep Roads Expedition.
Fools Rush In
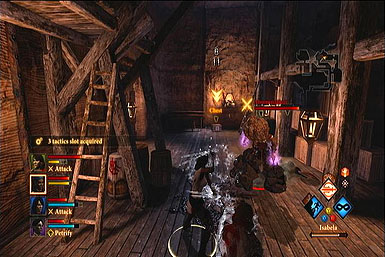
After completing Tranquility enter the Hanged Man and you will meet with Isabela. Agree to her request and head to Hightown at night.

Fight through the guards in the street and follow Isabela around town. She is capable on her own and being an NPC is nearly invincible. She will eventually lead you inside a mansion where you will fight more enemies.
Make sure to guard your back when reinforcements approach. If need be, move your mages up the stairs to give them some distance from the enemy. After the fight Isabela will join your party. She will stay at the Hanged Man and can be talked to in order to form a friendship or romance. If you want to keep her in the team, take the time to get on her good side before Act 2 draws near a close.
Bait and Switch
Head to Gamlen's House and read a letter from Anso. Head to Lowtown at night and talk to the letter writer. He will request that you recover some goods that were stolen from him. Move to the Elven Alienage and inside the abandoned house.

There will be some thugs inside, but not much of a threat. You should be more cautious about the explosive traps that can injure your team. Take control of one of your Rogues and disable the device before starting the fight. You'll discover that the goods aren't here so head outside.
You'll be ambushed by more Tevinter mercenaries. Hustle your Warrior forward and quickly tank the enemies so that they don't goad your weaker team members. The Tevinter have high numbers, but each enemy isn't that much of a threat. After the battle you'll meet Fenris. Agree to his request and head for Hightown.

Fenris will lock himself into the party and can serve as a fairly good tank. Form a team around him and head into the mansion. Take out each wave of Tevinter located in each room. If you run too far in more enemies from other rooms will barge in, overwhelming your party. As long as you keep amount of enemies low, they will die rather quickly.
Fenris will stay in the mansion. Travel here if you ever want to build a friendship or romance with him.
The Way it Should Be
After picking up Aveline you can undertake this side quest to gain some friendship or rivalry points with her. Head to the Free Marches and Aveline will force her way into the party. If you already have a Warrior based Hawke, allow Aveline to handle the tanking. Fight and kill the enemies lurking around the mountains before heading back to the Viscount's Keep.
After a few scenes you will discover that Ser Donnic is running into a trap in Lowtown. Head there at night and save the unsuspecting trooper from the various thugs and mercenaries. Afterwards return to the Viscount's Keep again to instate Aveline as the head of the guardsmen.
Birthright
Travel to Gamlen's house and talk to both your mother and uncle. After hearing about the lost will talk to Bethany/Carver. Agree with them to locate the will with in the slaver's hideout.
Travel to Darktown with your sibling and into the hideout. Battle your way through, killing enemies and disarming traps until you reach the leaders. They will consist of some deadly mages and other brutes, so be swift with taking down the softer foes before butting heads with the main threat.
Collect the will and return to Gamlen. This will provoke your mother to win back the Amell estate. It doesn't matter too much, as you will gain the estate back in Act 2 no matter what.
The Unbidden Rescue
Read the wanted poster in Hightown to learn that the Viscount's son has been kidnapped. Travel to the Keep and talk to Senchal about the mess. Travel to the wounded coast and discover that the son really wasn't kidnapped and a rivalry bounty hunter has killed his friend.
Cut down the bounty hunter leader and the various waves of enemies that will periodically emerge. There will be nearly three waves of enemies, so be sure to heal up and regroup between each fight. When Saemus asks to return home, decline and loot the bodies first before returning to the Keep.
The Bone Pit
Talk to the merchant Hubert in Hightown to learn that there is trouble in the Bone Pit. Buy potions as needed and make a sturdy team with one Warrior tank, a healer and two ranged damage dealers.
The Bone Pit itself have been over taken by a force of dragons. The Dragonlings aren't much to worry about. However you will eventually face a High Dragon that can deal brutal damage to your tank via its jaw grapple. Keep the tank healed constantly and hit the dragon from afar with arrows and magic spells. As always stunning or otherwise debuffing the enemy is preferred.
The First Sacrifice
In Hightown talk to Ghyslain to learn that his wife Ninette has run off. Enter the Blooming Rose and talk with Jethann. If you want you can take part in Jethann's "services", though it may boost your rivalry with some party members. Next head to Darktown and speak with Emeric in the Meeting Place. There will be some thugs here as well, but are easily dealt with.
Next head to Lowtown and track down Mharen's trail. Enter the Dark Foundry and kill the demons and Shades inside. Search the stack of bones to discover Ninette's Ring. Return to Emeric in the Gallows and Ghyslain in Hightown to finish the quest.
Act 2 Side Quests
These Quests must be completed before under going the main quest Demands of the Qun.
Night Terrors
This is a good side quest to boost your relationship with party members. Place at least tow characters that you want to patch up relations with and head to the Alienage in Lowtown. Talk to Arianni and agree with Keeper Marethari's ritual.
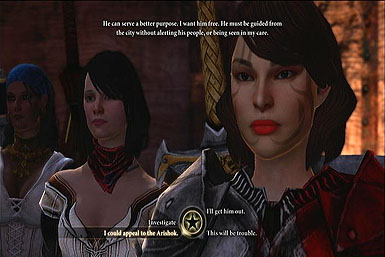
You will be taken into the fade and will meet with a lesser demon that will ask for your help in taking over Feynriel's body. You can agree with him to receive bonus attributes or ability points. However this will cause Justice (Anders) to attack you before fleeing. Otherwise kill the Sloth demon and loot it remains.
Enter the two side doors and break Feynriel out of his dreams. Each demon will goad a party member into betraying you, forcing you to fight them for a short while. There will also be Pride Demons and Desire Demons around, so be sure to take care of your defecting party member until they retreat.
Once both rooms are cleared return to the center hall and speak with Feynriel or the Sloth Demon. Once returning to Kirkwall discuss Feynriel's fate with his mother and the Keeper. As a bonus head to any defecting party member's home base to hear an apology from them and receive extra friendship points.
Family Matter
This is Varric's companion quest that can be completed to boost friendship. Talk to him in the Hanged Man and then travel to Bartrand's Estate in Hightown at night. You'll first battle through Varric's fake events before listen to the "real" outcome.
Battle through the mansion and kill all of the guards. Search the entire area and open up the various containers. This will lead you to the main hall and a battle against Bartrand. He is a slippery dual-wield Rogue, so watch out for his various assassination attempts. After the battle decide to kill him or let Varric babysit his broken brother.
The Long Road
This is Aveline's companion quest that can be completed to boost friendship and even allow her to remarry if completed correctly. Travel to the Viscount's Keep and talk to Aveline. Talk to Her and Donnic and attempt to play match maker. It won't go over so well, so head to the Hanged Man for yet another failed attempt. Return to the Keep again and come up with another plan: setting up a romantic patrol in the brutal Wounded Coast.
Travel to the coast and spearhead the area so that the guardsmen can briskly travel. Each time a wave of enemies is killed off, move to one of the large torches and single to Aveline that the coast is clear. Repeat this process about three times.
At the end of the "date" you can attempt to talk Donnic into going for Aveline or openly flirt with your party member. Either way return to the Keep and speak with Aveline again to complete the quest.
Dissent
This is Anders' companion quest that can be completed to boost your relationship. Travel to the Gallows Dungeon in the southern part of Darktown. The dungeon is crawling with templars that may attempt to silence you and prevent ability use for a short time. Like all Templar fights, take down the Lieutenants first follow by any Hunters.
Travel deeper into the cave and you'll face off against Ser Alrik. Keep a hearty tank on him while the rest of the team deals out the lesser Templars. Keep Alrik Stunned and Brittle to deal out the most damage. Afterwards, keep Justice under control and return back to his clinic.
Mirror Image
This is Merrill's companion quest that can be completed to boost your relationship. Head to her place and discus the Mirror she is repairing. Head to Sundermount and speak to Keeper Marethari. Enter the cave and battle your way through the spiders until meeting Pol.
The City-Born elf will flee and you will have to do battle with a Varterral. Like most fights make sure that your tank has enough damage resistance and defense to survive, along with enough threat generation to keep the monster off your Mages. If need be pile on both Battle Synergy and Taunt to make sure that the Varterral doesn't stray. Pound it with magic and class combos to finally crush the beast. Finish up the mission by talking to Keeper Marethari and Merrill back at her home.
A Bitter Pill
This is Fenris's companion quest that can be completed to boost friendship. Place him into your team and travel around the Free Marches. You will be ambushed by Tevinters as you attempt to move to a new location. Kill all of the enemies, concentrating on the mages and ranged fighters. Interrogate the last survivor and let Fenris make his own choices. You'll learn that more Tevinter slavers are rummaging around the country side.
Travel to the Tevinter hideout and kill everyone before moving inside. You can encounter an Elven slave that you set free or provide with money, which will increase Fenris' friendship. You can also build rivalry by insisting that the former slave work for you in your estate.
You will face several mages that should be your prime targets, though you will also encounter back up in the form of archers and hefty warriors. Stick to magic that will disable the enemy and allow you to class combo. After the fighting allow Fenris to kill his former master.
Xbox 360 Achievements
| Achievement Name | How To Earn | Reward |
|---|---|---|
| A Friend in Need | Upgraded the armor of one of your party members. | 5 |
| A Worthy Rival | Earned the Arishok's respect. | 25 |
| Archeologist | During each year in Kirkwall, discovered 3 secret messages from the Band of Three. | 50 |
| Birthright | Kicked the slavers out of your ancestral mansion. | 15 |
| Champion | Completed Dragon Age II. | 20 |
| Chantry Historian | Found all four chapters of "The History of the Chantry," by Brother Genitivi. | 25 |
| Craftsman | Acquired your first crafting recipe. | 5 |
| Crowning Glory | Became the viscount of Kirkwall. | 25 |
| Darkness Falls | Toggled the map from day to night. | 5 |
| Dedicated | Reached Level 10. | 15 |
| Delver of the Deep | Explored the Deep Roads. | 10 |
| Demon Slayer | Found and killed the ancient demon, Hybris. | 25 |
| Dragon Slayer | Found and killed a high dragon. | 25 |
| Enchanter | Enchanted an item. | 5 |
| Epic | Completed Dragon Age II twice, or completed it once with a save imported from Dragon Age Origins. | 50 |
| Exorcist | Found and killed the undying Xebenkeck. | 25 |
| Explorer | Left Kirkwall to explore the outlying regions. | 5 |
| Financier | Became a partner in a Deep Roads expedition. | 10 |
| Flirtatious | Flirted with one of your party members to begin a romance. | 5 |
| Friend | Earned the friendship of one of your party members. | 25 |
| Friends in High Places | Met Grand Cleric Elthina, Viscount Dumar, Knight-Commander Meredith, and First Enchanter Orsino. | 15 |
| Full House | Recruited four party members. | 10 |
| Gift Giver | Gave a gift to one of your party members. | 5 |
| Great Minds Think Alike | Earned the friendship or rivalry of four party members. | 50 |
| I Got Your Back | Completely upgraded the armor of one of your party members. | 25 |
| Immigrant | Became a resident of Kirkwall. | 5 |
| Knowledgeable | Unlocked 100 codex entries. | 25 |
| Legendary | Reached Level 20. | 50 |
| Mass Exodus | Reached Kirkwall with each character class across multiple playthroughs. | 25 |
| Master Craftsman | Crafted all of the items from a single crafting tree. | 25 |
| Mercenary | Allied yourself with the mercenaries upon arriving in Kirkwall. | 10 |
| Mogul | Had 100 or more sovereigns in your purse. | 25 |
| Nefarious | Allied yourself with the smugglers upon arriving in Kirkwall. | 10 |
| Rival | Earned the rivalry of one of your party members. | 25 |
| Romantic | Completed a romance with one of your party members. | 25 |
| Specialized | Learned two class specializations. | 25 |
| Spelunker | Visited 10 caves in Kirkwall and the surrounding area. | 25 |
| Supplier | Found every variety of crafting resources. | 25 |
| Tag Team | Used teamwork to perform a cross-class combo. | 5 |
| A Tale Within a Tale | Listened to Varric begin his tale of the Champion of Kirkwall. | 5 |
| Talented | Upgraded a spell or talent. | 5 |
| That Thing Has Legs | Found and killed a varterral. | 25 |
| Treasure Hunter | Opened 50 chests. | 25 |
| Unstoppable | Completed a full year in Kirkwall without any party member being knocked unconscious. | 50 |
| Weapon Master | Mastered a weapon style. | 25 |
| Arcane Defender | Sided with the mages five times. | 25 |
| Conqueror | Defeated Meredith, knight-commander of Kirkwall's templars. | 15 |
| King of the Hill | Defeated the Arishok. | 10 |
| Mage Hunter | Sided with the templars five times. | 25 |
| Stone Cold | Defeated the rock wraith on your expedition into the Deep Roads. | 5 |
PlayStation 3 Trophies
PlayStation 3 Trophies
| Achievement Name | How To Earn | Reward |
|---|---|---|
| A Friend in Need | Upgraded the armor of one of your party members. | Bronze |
| A Worthy Rival | Earned the Arishok's respect. | Silver |
| Archeologist | During each year in Kirkwall, discovered 3 secret messages from the Band of Three. | Silver |
| Birthright | Kicked the slavers out of your ancestral mansion. | Bonze |
| Champion | Completed Dragon Age II. | Silver |
| Chantry Historian | Found all four chapters of "The History of the Chantry," by Brother Genitivi. | Silver |
| Craftsman | Acquired your first crafting recipe. | Bronze |
| Crowning Glory | Became the viscount of Kirkwall. | Silver |
| Darkness Falls | Toggled the map from day to night. | Bronze |
| Dedicated | Reached Level 10. | Bronze |
| Delver of the Deep | Explored the Deep Roads. | Bronze |
| Demon Slayer | Found and killed the ancient demon, Hybris. | Silver |
| Dragon Slayer | Found and killed a high dragon. | Silver |
| Enchanter | Enchanted an item. | Bronze |
| Epic | Completed Dragon Age II twice, or completed it once with a save imported from Dragon Age Origins. | Gold |
| Exorcist | Found and killed the undying Xebenkeck. | Bronze |
| Explorer | Left Kirkwall to explore the outlying regions. | Bronze |
| Financier | Became a partner in a Deep Roads expedition. | Bronze |
| Flirtatious | Flirted with one of your party members to begin a romance. | Bronze |
| Friend | Earned the friendship of one of your party members. | Bronze |
| Friends in High Places | Met Grand Cleric Elthina, Viscount Dumar, Knight-Commander Meredith, and First Enchanter Orsino. | Bronze |
| Full House | Recruited four party members. | Bronze |
| Gift Giver | Gave a gift to one of your party members. | Bronze |
| Great Minds Think Alike | Earned the friendship or rivalry of four party members. | Silver |
| I Got Your Back | Completely upgraded the armor of one of your party members. | Bronze |
| Immigrant | Became a resident of Kirkwall. | Bronze |
| Knowledgeable | Unlocked 100 codex entries. | Bronze |
| Legendary | Reached Level 20. | Silver |
| Mass Exodus | Reached Kirkwall with each character class across multiple playthroughs. | Bronze |
| Master Craftsman | Crafted all of the items from a single crafting tree. | Silver |
| Mercenary | Allied yourself with the mercenaries upon arriving in Kirkwall. | Bronze |
| Mogul | Had 100 or more sovereigns in your purse. | Bronze |
| Nefarious | Allied yourself with the smugglers upon arriving in Kirkwall. | Bronze |
| Rival | Earned the rivalry of one of your party members. | Bronze |
| Romantic | Completed a romance with one of your party members. | Bronze |
| Specialized | Learned two class specializations. | Bronze |
| Spelunker | Visited 10 caves in Kirkwall and the surrounding area. | Bronze |
| Supplier | Found every variety of crafting resources. | Silver |
| Tag Team | Used teamwork to perform a cross-class combo. | Bronze |
| A Tale Within a Tale | Listened to Varric begin his tale of the Champion of Kirkwall. | Bronze |
| Talented | Upgraded a spell or talent. | Bronze |
| That Thing Has Legs | Found and killed a varterral. | Bronze |
| Treasure Hunter | Opened 50 chests. | Silver |
| Unstoppable | Completed a full year in Kirkwall without any party member being knocked unconscious. | Silver |
| Weapon Master | Mastered a weapon style. | Silver |
| Arcane Defender | Sided with the mages five times. | Bronze |
| Conqueror | Defeated Meredith, knight-commander of Kirkwall's templars. | Bronze |
| King of the Hill | Defeated the Arishok. | Bronze |
| Mage Hunter | Sided with the templars five times. | Silver |
| Stone Cold | Defeated the rock wraith on your expedition into the Deep Roads. | Bronze |
| The Ultimate Reward | Completed all Bronze, Silver and Gold Trophies | Platinum |
Got a news tip or want to contact us directly? Email news@gamespot.com
Join the conversation