Killzone 2 Walkthrough
Show the Helghast what you've got with our Killzone 2 walkthrough. Check it out for our complete walkthrough, boss tips, trophy details, and more!
The Helghast are back and ready for more in Killzone 2, the follow-up to the heavily hyped PlayStation 2 original. But this time, the battle's being taken to the Helghast's home turf, striking them where it matters most. Of course, life on the battlefield is no cakewalk, but we're here to whip you into shape for anything and everything it tosses at you.
Here's what you'll find in GameSpot's Killzone 2 Game Guide:
- General Tips: Learn how to deal with life on the battlefield.
- Walkthrough: The war zone can be a hectic and confusing place, but we'll be there to guide you every step of the way.
- Ranks, Ribbons, Medals: Test your multiplayer mettle by improving your rank and grabbing medals.
- Trophies: Want trophies? We've got the info you need here!
General Tips
Listen Soldier, it's do or die time. Shoot or be shot. Kill or be killed. You get the picture. Now we're fully aware you're already familiar with "First-Person Shooters," but those mere games can't quite prepare you for the battles you'll soon be facing. This is real, son, so it's important that you pay attention.
Fallout 4 Next Gen Update Comparison ALIEN: Rogue Incursion - Announcement Teaser Trailer Stellar Blade - 13 Things I Wish I Knew S.T.A.L.K.E.R. 2: Heart of Chornobyl — Official "Not a Paradise" Trailer Sea of Thieves Season 12: Official Content Update Video Devil May Cry: Peak Of Combat | Dante: Blazing Tempest Gameplay Trailer Fallout 4 Steam Deck Verified Gameplay Manor Lords - Official Medieval City Builder/RTS Launch Trailer Honkai: Star Rail - "Then Wake to Weep" | Version 2.2 Trailer SAND LAND — Official Launch Trailer Stellar Blade - Hard Mode No Damage Gigas Boss Gameplay Stellar Blade - Hard Mode No Damage Abaddon Boss Gameplay
Please enter your date of birth to view this video
By clicking 'enter', you agree to GameSpot's
Terms of Use and Privacy Policy
Taking Cover
When engaged with enemy forces, priority #1 should always be to take cover. The Helghast are ruthless and deadly accurate; if you take more than a few shots you can kiss your butt goodbye. Thankfully, almost anything on the field can serve as a cover-point, whether it's a wall, pillar, car, fence, whatever--as long as you can place it between you and the enemy's bullets, it'll work. In fact, cover is so important, there's a button dedicated specifically to it (L2, on most control schemes). Pressing it when near a cover-point will cause you to "stick" to it, allowing you to peek around its sides using the left-control still.
The cover-button also acts as a "crouch" button whenever you're not actually by a point of cover. There's actually not much reason to use it for this purpose, unless you're taking cover by a low object.
Battle Tips
Aim Accurately
So you're probably wondering what the big deal is, right? You aim the cursor and pull the trigger--that's it, right? Wrong! The crosshair in Killzone is dynamic, changing size in relation to both how fast you're moving and also how much recoil your current weapon has--the larger the crosshair, the more sporadic your aim will be. In short, it's best to shoot while stationary, and even then, only in short bursts (with automatic weapons), otherwise the weapon's recoil will cause your shots to spray all over. That is, pull the trigger to shoot a few bullets, quickly release, then pull it again briefly, repeating the process until the enemy is dead.
Grenades!
The enemies in Killzone 2, while perhaps not the sharpest tools in the shed, certainly aren't dummies. And no where is this more apparent than when throwing a grenade at them--they'll immediately dive out of the way, well before your grenades has a chance to explode, rendering your grenade ineffective. However, you can counter this by "cooking" the grenade. That is, pull the pin and holding onto the grenade for several seconds (by holding the grenade button), then tossing it just before it explodes. Of course, you have to plan ahead, so if the enemy's on the move, try to gauge where you think they'll be.
Suppressive fire works!
Killzone 2 may be one of the first games to make strong use of "suppressive fire." What is suppressive fire? Glad you asked! Essentially, the mere act of firing bullets anywhere near an enemy will causes them to seek cover--if you continue to shoot in their direction, they won't even stick their head out until you cease fire. This can be useful if you're being chased by the enemy and need to seek cover.
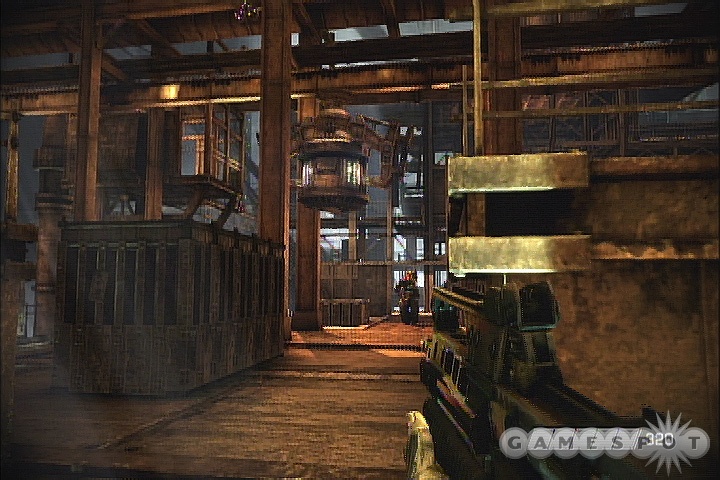
Corinth River
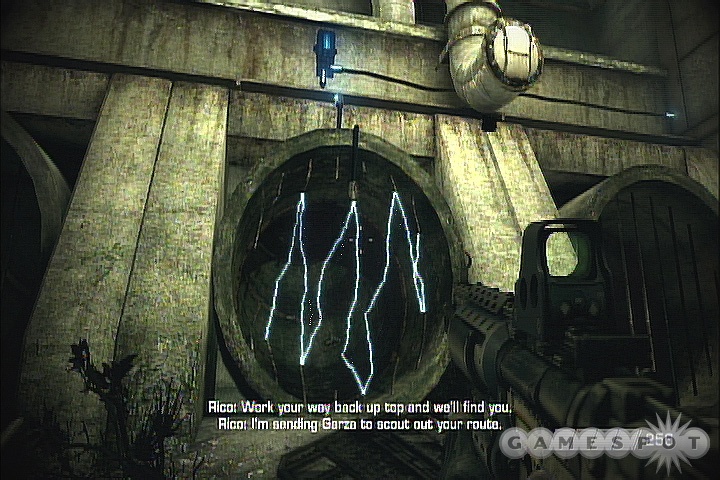
Follow Garza to the Launch Bay
Okay Sergent, it's time to get a move on. Tag behind Garza to the Launch Bay and decend the stairs to begin your mission preparation. The game will teach you the basic controls along the way, so get used to them.
Rendezvous With Echo Squad
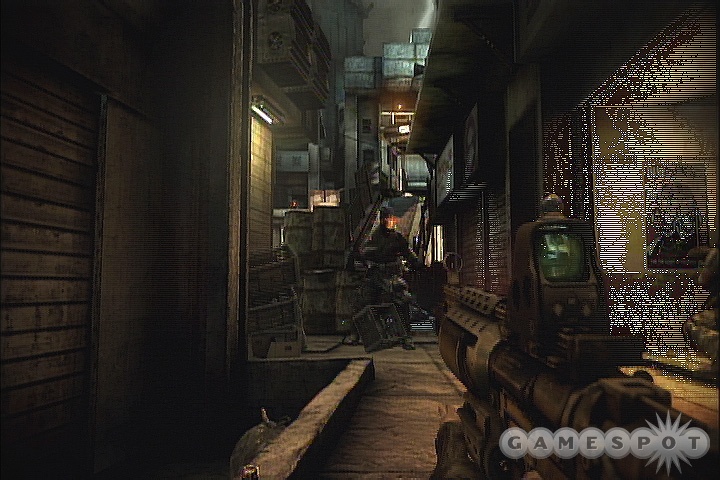
After touching down, follow your squad up to the wall and prepare to blast a trio of enemies just around the corner. Follow them into the field and take cover (by holding L2) by the same low-wall they do. Now destroy the the enemies on the bridge ahead by shooting the nearby red cannisters.
Secure the Beach
Push forward until you round a corner near the waterfront that several enemies in the building. Take cover then aim for the red cannister--one on the walkway above and another on the ground--to quickly take them out. Continue up the beach to the next war zone, where a couple of tanks wait.Take them on from behind the barbed wire, on the path leading to the war zone--this provides a great vantage point that not only allows you to target the enemies with ease (even the shielded turrets), but they'll also practically ignore you here!
Secure Flood Gate Control
With the beach secured, look for a lift on the right (near the water) that Garza will lift you up to. Push the button to ride it into the building. Follow Garza through the hall, grab the ammo just before the stairs, then continue up to a walkway overlooking several soldiers below. Take cover by the wall and then pick them off--if you're quick, you can take most of them down before they realize where you are. Oh, and there are numerous explosive lying around, such as red barrels, cannisters, and jugs, all of which pack and explosive punch. Feel free to use them as you like, though we suggest saving them for the reinforcements that'll show up soon. At any rate, follow Garza down stairs to trigger a new batch of foes, then retreat back upstairs and tackle them from your previous point of cover--use the explosives we mentioned earlier as you see fit.
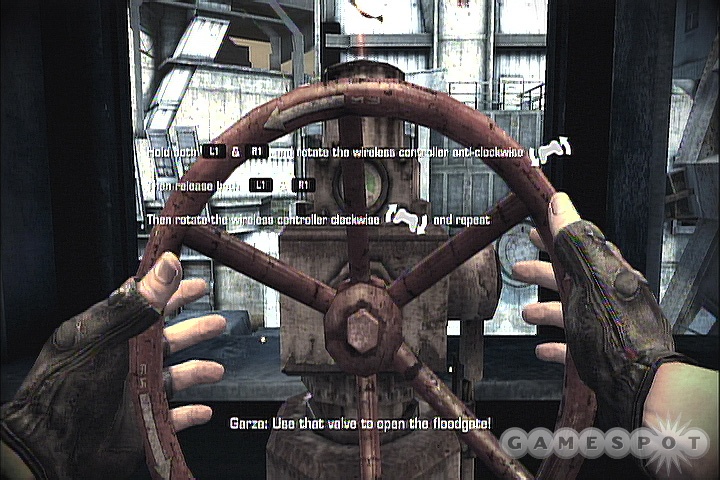
Once things cool down, return to the lower floor, then dart through the small room onto the walkway to a locked door. While Garza tried to unlock it, you're going to have to hold off a few more enemies that appear--use the low wall for cover then get ready for the enemies to rappel in from the ceiling. Try to shoot them while they're rappelling, as they're helpless in this state. With the area cleared and the door unlocked, follow Garza outside and then into a small building, where you'll find the Flood Gate Control--but don't use it yet, instead take cover by the window to protect yourself from some enemies across the way--shoot the red cannister behind them to lay down the explosive smackdown. You may now turn the wheel by dripping both the L1 & R1 buttons to grasp it, then physically spinning the PS3 controller counter-clockwise, like a wheel (oh, those clever developers…). Make sure to release the L1 & R1 buttons after each turn (but before resetting your hand position), then do it again, until the flood gates are secured.
Defend the Convoy
As you exit the Flood Gate Control Room, a few enemies will attack outside. Take cover either inside the doorway or by the low wall and take them from here. Once clear, follow Garza through a door on the left, but be ready for an enemy to charge. Grab the weapons you need from the room at the end of the walkway, then drop through the thin opening in the wall and continue onward until you encounter a swarm of enemies at the top of a small staircase--take cover by the base and either shoot them from around the corner, or toss a grenade up to blow them up. Once clear, you'll find a Rocket Launcher in the area, but we suggest skipping it as it occupies precious inventory space. Push forward into the building and down the stairs.
As you wind through the corridors, you'll soon encounter a couple of enemies--stay by the doorway and target them through it, before continuing onward.
Eliminate All Hostiles
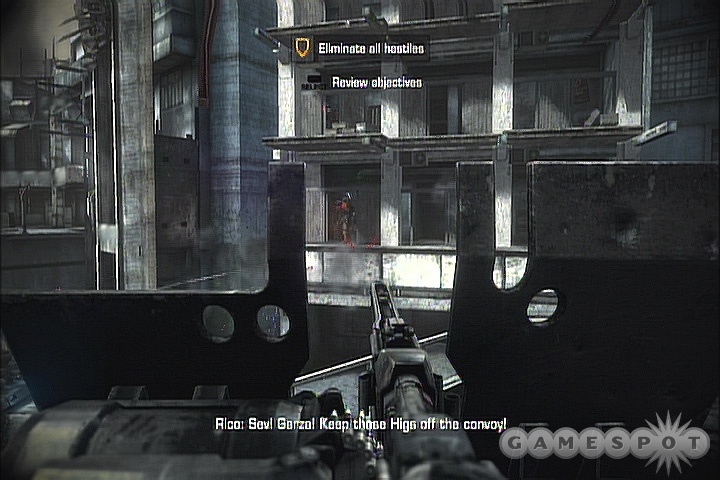
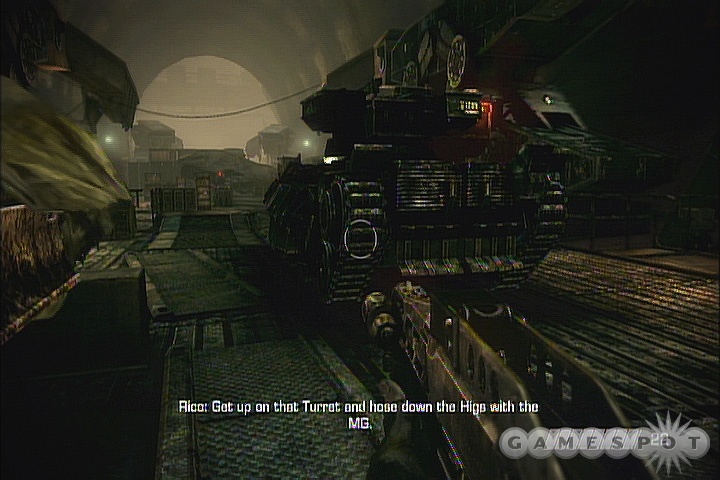
While Garza makes small talk with the nearby flying squad, head inside the building ahead and take control of the turret there and prepare to tackle several enemies that will appear in the building directly across from you. Be especially careful of the rocket launcher who'll appear on the lower floor--try to take him down ASAP. Oh, and don't forget you can continue to take cover while manning a turret, by holding L2.
Secure the Crash Site
You'll soon encounter a few enemies in a small outdoor area--just hang back and blast them on at a time from behind the corner. Once clear, grab the Rocket Launcher from the dead soldier Garza points out then use it to blow open a hole in the cracked wall, at the top of the stairs. Continue through and into a room. Kill the foe inside then continue out the other side.
Rendezvous With Alpha Squad
You're now faced with a split path, one high, the other low, and just around the corner are several enemies. We've found the higher path to typically work best, allowing you to quickly target the foes below--retreat back around the corner for cover. Once they're down, quickly run to the base of the staircase ahead and crouch to avoid the turret fire ahead. Instead, move up the staircase slowly (it'll act as cover), then zoom in and place your crosshair on the gunner's noggin to pick him off. Now head inside that tower, shoot whoever remains, then grab the turret and aim it all the way right to target a second turret in the neighboring tower. Head there next, but before entering, take cover just before the staircase and target some some soldiers through the upper-floor window, then head inside for a few more.

With the tower cleared, grab the Rocket Launcher then climb down the ladder and dart across the field toward the friendly tank. Shortly thereafter, an enemytank will approach from the side you just ran from. Quickly seek cover by the nearest central pillar and fire off a couple rockets toward the tank--if both connect, he's done for! If you need more rockets, look for some by a concrete slab in the back corner.
Shortly after, the driver of your friendly tank will be killed, and you've just been promoted to tank driver! Hop inside and take a few seconds to get used to the controls: Left Stick moves the tank itself, Right Stick the turret. R1 fires the turret, while L1 handles rockets. All you have to do is mow down the enemies--pretty easy stuff. Save the rockets for the hard-to-reach enemies on the walkways above, as well as some tanks that will attack from the far-right side, as well as from a ramp on the left. In general, it's best to stay by the back wall and keep movement to a minimum, mostly to avoid enemy tank shells.
Blood Meridian
Rendezvous With Narville
Dart straight up the road to find Narville taking cover by a couple of steel plates--there's no need to worry about the enemies for now.
Destroy the Arc Tower
After regrouping, turn right and run to the door, which you can blow open by planting explosives on it. The process is very similar to turning the wheel in act one, except this time turn the controller both ways quickly to set the charge, then back away a few meters and detonate it, before darting inside. Jump over the debris and trudge through the dank halls, and make sure to grab the grenades from a room just before your first encounter with the opposition, who you'll encounter around a corner--take cover by the nearby boxes initially before pushing forward to the next set, where you'll spot an enemy to the left. Once clear, dart into the alley to trigger the next group of enemies, then retreat to the first pair of boxes (the ones you used moments ago) for cover, and wait for them to come to you. Afterward, keep an eye out for an enemy behind the gate on the right, just before the corner, then push onward up the street.
As you close in on the end of the street, use the pillars for cover to target an enemy inside the building, just around the corner, and on the balcony above. Head inside and continue through to a room opposite, where enemies will be waiting for you from across the way. Take cover by the window and aim for the red cannister in the center of the opposing room to take most of them down. If you run low on weapons or ammo, more can be found along the back wall of your current location. Cross over when clear and continue until you reemerge outside.
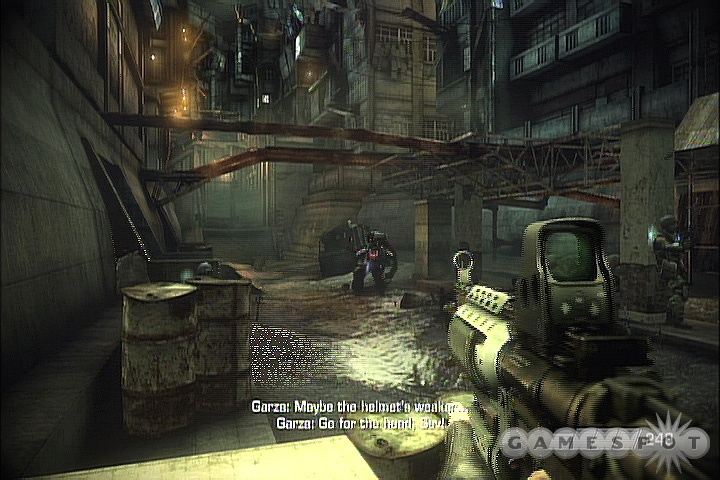
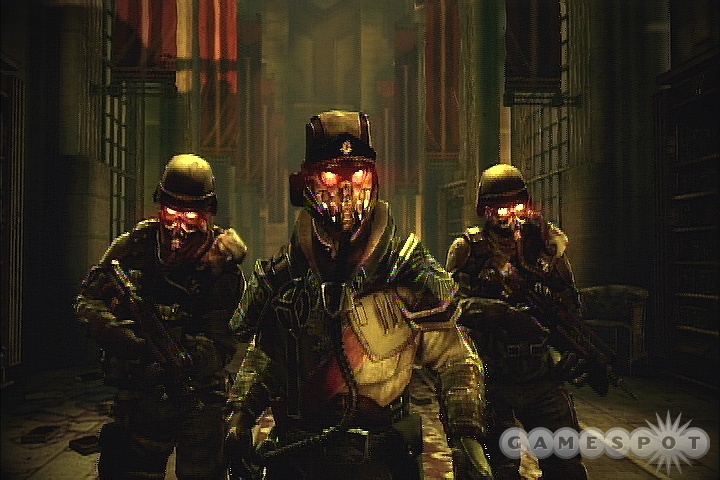
Uh-oh, that giant mechanical looking thing heading your way is a Blood Meridian Heavy unit--that is to say they're quite strong. Stay where you are (as it provides decent cover) and focus on taking him down. His weak-point are the red tanks on his lower back, which you can expose by shooting him in the head, which causes him to turn around, revealing them. So in short: Shoot head first, then red tanks on lower back. It'll take a few rounds, but he'll go down soon enough. When clear, head up the street and turn the wheel on the left, to open the door.
Dart through the trench and up the stairs, then into the small room on the left. While there's a ton of ammo along the back wall, you're best off going upstairs and using the turret there to mow down your foes. There's a small red cannister directly across the bridge that can be used to take a few down easily. Once clear, head across the bridge and up the stairs, but be ready for a couple of foes at the top. Continue onward across another bridge and down the stairs, which lead to an alley.
As you step out into the alley, a squad of baddies will run at you from a ramp dead-ahead. Hang back by the left wall (to protect yourself from some stationary gunners) and blast them as they head your way--if you need to seek cover, duck back into the doorway you just came from. Once they're down, you can try and target the remaining few on the walkway far above, but you're probably best off running up the ramp and tackling them from a closer perspective--remember, you can always backup around a corner for cover if things get dicey.
Proceed through the nearby door and ride the elevator in the back.
After riding the lift and popping back outside, ignore the enemies and dart across the bridge to meet up with a friendly squad who'll help you out. Head downstairs and shoot the first few enemies through the doorway, then push forward using the metal-slabs for cover (you can also find more ammo and grenades along the right wall). Coming up, you're going to want to enter a building just across the way, but there's a couple of ways to go about this: Head across the bridge in front of you, or duck into a hallway on the right, which will take you to a lower bridge, which will take you to the other side as well. Take whichever you prefer, though we actually suggest a combination of the two--that is, take the lower bridge first to kill the enemies there, then proceed across the upper-bridge slowly and take down the remainders (there's a red barrel or two lying around that can help you out.)
At any rate, continue into the building just across the upper bridge and follow the walkway to a staircase (there's also ammo and grenades nearby). Take cover by the low-barrier at the top of the stairs and focus on the enemies on the walkway beyond--a grenades thrown between them should take 'em all down. Immediately after, take cover by the ventilation fan to your right and peek around its side to target a few more foes.
With the area cleared, continue across the rooftop (either by jumping the low barrier or taking the stairs) and activate a switch on the far side, causing the Arc Tower to activate. Now it will alternate firing every few seconds, exposing a pair of electrical tubes each time--you'll have to destroy both, but you can only shoot them when exposed. To complicate matters, a small army of Helghasts will attack simultaneously. You can either fight them off, shooting the Arc Tower whenever it's exposed, or focus all of your efforts on the enemy until they're all defeated--this option may take a while, but is the safer choice. Take cover by the nearby sandbags in either case to protect yourself, then focus on the tower whenever you get a moment.
Visari Square
Rendezvous With Alpha Squad
Work your way across the rooftops and drop into the trench ahead. Drop through a couple of holes to the ground floor to regroup with your squad on street level (look for supplies in the left room, on the bottom floor), where a large-scale battle is waging with the enemies in the opposite building. If you get too close, they'll mow you down, but stay too far back and you'll have trouble targeting them--ugh, what a dilemma. The best course of action is to use the tanks in the street for cover (we prefer the left one, but it's up to you) and peek around their sides to target the enemies beyond--keep an eye out for several explosive cannisters that you can target.
Once you've cleared most of the visible enemies, it's time to head inside and take down the remaining stragglers. As you enter through the left-most door, shoot the cannister on the ground to kill the enemies rushing from the stairs. Continue upstairs and carefully explore the rooms, using the doorways for cover, as you kill the remainders.
You'll soon stumble upon a room second-story room overlooking the garage. Continue onward to a hole you can drop through.
After dropping, take cover by the door and get ready to target the enemies beyond, including one annoying fellow on the ground floor, as well as others on the walkway and in the windows ahead. Once clear, climb the stairs ahead to a door blocking by flowing electricity. Shoot the electrical generator just left of the door to power it off, allowing you through.
Continue through the unbarred door, then through a second and down the stairs. You'll pop-out behind two soldiers on a bridge--take them out before they see you. Prepare for a third across the way, a fourth just above, and a few below. Additional ammo can be found on the far side of the stairs.
When cleared, cross the bridge and follow the tunnel up to a ladder on a high walkway, which will lead you down to the street. Once there, immediately seek cover by the wall bordering the staircase and tackle a couple of enemies. Push further up the street to regroup with Alpha Squad by the sandbags.
Eliminate All Hostiles
Although you've regrouped, you don't want to hang by them for long as they're in a piss-poor location. Instead, dart into the far room of the partially destroyed building on the right, past the stairs. Stock up on guns/ammo (may we suggest grabbing the M224--A1 LMG?) and take cover by the low-wall, which provides a great vantage point, as well as fantastic shielding. Target the enemies that attack from the stairs on the right, as well as a passage toward the left. Eventually, a dropship will release more troops into the building across the way--hold your ground and shoot them from here. Soon after, a few troops may desend the nearby staircase, so be ready for them. After a short while, your squad should open a door near the sandbags--dart inside as soon as they do.
Secure Visari Square
Once inside, continue through the open door in the back, and work your way through the building.
After dropping outside, seek cover behind the boxes and blast the enemies on the ridge ahead. Once they've died down (heh), proceed up the staircase on either side and take down the remainders. Now get ready for several waves of enemies to attack! For the first wave, we suggest climbing the ladder on top of the structure and grabbing the sniper--this will allow you to easily take down the first few foes. Soon after, a second wave will attack--during this stage we suggest . Third wave, back away to either side of the central tower and shoot them as they come into view. Finally, two Heavy Helghast will attack. Grab hold of the left turret and nail both at once (aim for the head first, then the red tanks on their back), but don't neglect the other enemies if they get close.
Salamun District
Rejoin the Convoy
Destroy the generator above the electrified sewer entrance to power it down, then head on through. It will lead you into an enemy facility, where you'll be privy to a conversation amongst two guards. Take them down from the pipe before they're made aware of your presence.
With the two grunts down, hop onto the walkway and turn right to find a laser-activated trip-mine--send a couple of bullets its way to detonate it, then continue down the ladder, but be ready for a guy at the bottom. Now climb up another set of ladders and climb the stairs into the room beyond (we strongly suggest skipping the flame-throwers you can grab on the staircase, as they're only effective at close-range).
Rendezvous with Garza
Hey look, it's Garza! Join him upstairs via the door on the right. As you climb the stairs, get ready for a couple foes, then seek cover behind the first pair of boxes to target the enemies beyond. Subsequently, turn left at the walkway and enter the nearby room, ready for the guard inside. Continue through it until you reach the doorway leading back onto the walkway--hang back by this entrance as you peek around it to target the enemies in the next room. When clear, enter that room and get ready for a couple of troopers to storm through a hole in the wall they'll blow open.
Head through that hole, grab the supplies from the table (except for the flamethrower, because it sucks) then step back out onto the walkway. As you approach the staircase, a ship overhead will drop off some enemies. Here's a tip: Wait by the base and take cover by the railing, then look at the high walkway across from you--three enemies will drop right onto that walkway, giving you three easy kills. Now hang tight and blast a few who'll emerge from the building. When all's clear, head upstairs and get ready for an enemy to blow through a wall in the first room, then meet with Garza on the far end and follow him to the next area.
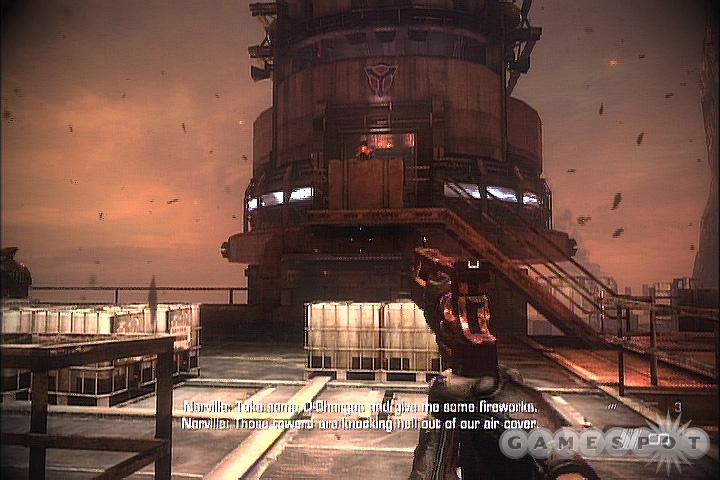
Destroy Enemy Artillery
Stock up on weapons/ammo via the cache in the corner, then follow Garza to the parking garage. There's a small group of enemies surrounding the artillery unit on the left--hang back by the corner and blast them from here, and be mindful of a stationed gunner on a walkway above. Once things have quieted down, dart to the artillery unit and plant a charge on its front side and detonate it. One down, one more to go.
Take down any remaining enemies in the room (including a couple of gunners on the remainder of the walkway), then proceed into the hallway next to the artillery unit you destroyed. Take cover by the next corner to kill anyone inside the next room, then climb the stairs and crouch by the low wall as you target a couple of enemies beyond. Continue through the door, and immediately grab hold of the turret to your left and lay waste to the attacking enemies (be watchful for a few that'll drop onto the walkway to your right).
When clear, approach the closed door on the right, then quickly get ready for more enemies to appear (both through that door, and elsewhere)--we suggest backing into the previous room and firing at them through the doorway. Afterward, proceed through that door and through a second on the right, but watch out for more guards inside (again, hang back by the door). Now slowly climb the staircase, as you'll be vulnerable to both enemies--it's best to edge up only enough to spot the enemies ahead and take them down, then focus on the ones to the right. Now head outside to find the second Artillery Unit and plant a charge on it, then detonate, to complete the objective.
Rendezvous with ISA Forces in the Shanties
With both Artillery units destroyed, continue onward toward a door at the end of a hall--several enemies will storm out, so hang back from the hallway's entrance and blast them from there. Continue through a couple more rooms, then drop through a few holes to the lowest level. Continue down the stairs into the sewer (gross!) and follow the passageway deeper into the sewer. Turn right when you reach the large sewage-filled pool and proceed up the walkway in the back.
Eliminate All Hostiles
After stumbling upon the barely live--wait, make that dead--soldier, you'll be ambushed by quite a few foes. It's best to duck behind the left wall (the one with the ramp on the opposite side), just before the ammo central cache, and make this your home. Don't stray from this location, as it only fantastic cover (allowing you to backup for cover) and a great vantage point. Eventually, a drop-ship will release a few more foes in the wild--try and toss a grenade just below their landing point to quickly take down the soldiers. Also, rocket-launching baddies will soon show up, but they're pretty inept. As long as you avoid the rocket itself, they shouldn't detonate anywhere near you.
Secure the Power Station
With the area clear, meet Garza on the far side, who'll give you a lift to the level above. Grab the Rocket Launcher from the ground, then climb the stairs and enter the hall and drop into the room at the end. Watch out for the trip-mines--make sure to stand back and shoot each one, then climb a pair of ladders in the back to the surface.
Back on the surface, head down the corridor and shoot the trip-mines at the end. Now use the corner for cover as you blast the foes just around it. Once they're down, ignore the enemies on the street (as they continually respawn) and instead plant a charge on the door ahead to blow it open. Wait by the entrance to target the first few foes, then follow the room's perimeter around targeting those you missed, such as some on the rooftop.
Head up the stairs in the back, when it's clear, but be watchful for anyone else you may have missed. At any rate, Garza will soon comment there's no way out, so you'll have to make one! Plant a charge on each of the four upstairs pillars, then get outta there and detonate them to complete the mission!
Salamun Bridge
Secure the Bridge

Alright, so the bridge has a very heavy enemy presence, and they'll try their damnedest to protect it--even going to far as having soldiers respawn continually, which just isn't cool. So here's the thing, while the first few enemy lines are finite in numbers (meaning it's wroth your while to take cover and take them down), eventually you'll reach a section (with the gunners) where they respawn continually--at which most it's no longer worth trying to kill them all. Instead, dart forward just enough to trigger the "bridge raising" sequence, as indicated by the blaring siren--once you hear it, turn around and get back behind cover, then focus on taking down the remaining foes, as they'll no longer respawn--we found the white van on the right to provide a great cover location.
Lower the Bridge
With the bridge cleared, but raised, follow a ramp on the left side, leading to ground below the bridge.
Secure Enemy AA Gun
Use the central low-walls for cover and target the few foes ahead, before moving up and around the corner--use the fallen stone walls for cover from the AA gun, which you're going to have to take out. We strongly recommend grabbing the M82 Assault Rifle from the gun rack on the left, as its zooming capabilities are unmatched. Now here's the kicker: the soldiers again respawn continually until you take down the AA gunner, so the trick is to mow down the closest few, then move up just close enough so you can zoom in on the dude's noggin and take him down, then immediately retreat back to cover to take down the remaining soldiers (who will no longer respawn indefinitely).
Once clear, climb up to the AA gun and hop in (by approaching it from the back) and target the enemies now coming your way. Now cross over the platforms and enter the building in the far corner, then climb the stairwells up to the control room. Ignore the enemies outside and just turn the wheel to the right to lower the bridge.
With the bridge lowered, wait for your buddy to open the door, then drop into the street and use the tank for cover as you blast the enemies up road. Push forward toward the far wall where several more enemies and gunners await. Your best bet is to grab some heavy artillery from the weapon-rack on the left, such as a rocket launcher, and go nuts.
Rendezvous with Alpha Squad
Umm, go forward to the jeep, and that's it.
Secure the Academy
Proceed up the stairs and regroup with your squad, then head for the next room.
Eliminate All Hostiles
Okay, you may not want to enter the next room too far, as you're about to be ambushed! There are actually three entrances into that room: The obvious ground-floor entrance, as well as two upper-floor entrances, reachable from either staircase. We found the best method was to head upstairs first, via either staircase, and blast whatever enemies you can see through the doorway, then do the same for the other side. Continue to clean up the second floor, then make your way down to ground-level via an additional set of staircases on the other end of the walkway, and clear out the rest of the room. Once done, your team will open the door leading into an office area.
After entering the office area, climb the stairs on either side to the floor above and continue into the office, proper. After a few moments, you'll be attacked by a large flying drone, who'll you then have to battle by your lonesome on the rooftop.
Okay, so the giant flying drone can tear you to shreds if he catches sight of you for more than a second or two. As such, you want to avoid his line-of-sight as much as possible, and there's actually a hallway on the lower level that's perfect for such an occasion--but before heading down, grab the Rocket Launcher from the left side of the pillar start by. With Rocket Launcher in tow, dash down to the lower hallway, where you should be safe. Now, time to discuss taking down the big guy. So here's the thing: If you fire a rocket at him normally, he'll dodge out of the way, with nary a scratch. However, you can hold him in place by waiting for him to hover near the blue-generators on either side, then shooting them, creating an electrical storm which stuns the boss. Now first a rocket or two while he's being held to deal some pain. Do this a few more times to destroy him for good.
Suljeva Village
Secure the Village
Cross over a couple of bridges, then follow the descending path into the canyon. Continue into a complex, leading to a control room--and this will somehow complete your first objective.
Activate the Antenna
From the control room, hop aboard the lift on the left and ride it down. Now follow Rico through town, to a locked door, which even he won't be able to open. Trail him to the other side of the area, where he'll spot a blood-covered entrance. Follow him inside and into the next room. Load up at the weapon cache and then activate the switch on the wall to unlock the door from earlier. As soon as you do, some enemies will bust through the nearby door, so be ready. Once they're down, push forward through the area until you encounter some enemies on the right--run up to the stack of 3 boxes for cover, which should get you close enough to the enemies to take them down--just be aware that an enemy or two may pop in behind you, too. There's also an explosive barrel on the right that can come in handy.
Once they're down, push forward and expect more resistance both ahead, and some from the left. You can grab a grenade launcher from a rack on the right to help thin the herd, otherwise stick with an assault rifle. Once clear, continue forward to the unlocked door, but be ready for a couple enemies who'll charge from inside. Follow the dank interior, shooting the large spiders as you go--they don't pose much of a threat, but it's better safe than sorry--plus we hate spiders.
You'll soon find the exit, which leads into a field full of snipers. Seek cover, and fast! The steel cannister ahead can be a good starting point, allowing you to target the sniper on the roofop to the left, but you're going to have to move in closer to target the remaining few further up. Run to a second cannister can on the left to target another in a building beyond, then dart up the ramp on the right to some boxes and immediately crouch behind them. Now lean out to the right to target two more ahead. Once they're down, grab one of their snipers as you move forward to a ledge overlooking a few soldiers below--shoot an explosive cannister to take down at least one of them, then focus your sights on the rest. Now you won't be able to target everyone, so drop down when it's clear and dart up to some cover, close to the building and take down the rest. When all is said and done, climb the ramp into the building.
Trek through the building and up a couple of staircases until you're at the base of the antenna. Watch out for a pair of enemies inside the tunnel at the antenna's base, then head inside. But after stepping no more than a few feet inside, a pair of flying droids will shoot at you through the roof and windows. Although you can attempt to shoot them down from here, it's much easier to target them from outside. Afterward, turn the wheel at the end of the hall to activate the antenna.
Rendezvous With Alpha Squad
With the antenna now active, head back down the tower and into the field. A short ways into your journey back to Alpha Squad, more enemies will appear. Use any of the steel structures for cover as you battle them. More wait around the corner, though the ample support beams are a good place to hide. Finally, prepare for a swarm of baddies to emerge from the tunnel leading back to the village--if you're quick, you can mow most of them down before they can reach cover. Thankfully, the coast is clear the rest of the way back to Alpha Squad.
Rescue Alpha Squad
Oh no, Alpha Squad's been taken prisoner, and it's up to you to save them. After the cutscene ends, immediately seek cover (away from the fire, because fire burns!), as a horde of baddies are heading your way--the wall just in front of the fire works well. Move up the hill and duck behind the elevator shaft and shoot the barrel behind the boxes to clear out the enemies there. Now proceed into the facility ahead.
After climbing a staircase inside, get ready for two foes ahead, another on a bridge to the left, and a flying drone. Remember, back down the stairs if you need cover. Once clear, seek cover behind the boxes as more enemies are inbound. Afterward, continue through the halls, taking down the few remaining baddies.
Secure the Train
Uh-oh, the train containing your allies is departing! Well, we'll worry about that later, for now you have enemies to kill, and boy there's a lot of them. Before exiting the room, try peaking out the right window and targeting one or two you may be able to see. After, exit onto the walkway and head left around the corner (to shield yourself from the foes further up) and target the soldiers below. Head down when clear and take cover to target the remaining few.
Push forward to the far staircase and climb it to a series of walkways above. Now this portion can be very difficult, as the walkways are filled to the gill with enemies, three of whom are equipped with Rocket Launchers--you should target those guys first. The first two can be easily found: The first is on the walkway directly ahead (parallel to the one you're on now), and the second is further up, on your right. It can be difficult to find them amongst all the enemies, so watch for where those rockets are coming from--if you see one coming your way, run!
Okay, so we've mentioned killing the rocket-guys are key, but taking down the rest of the enemies is no cakewalk either, as they're scattered all over and have tons of cover. At any rate, here's a few tips you may want to mix and match to see what works best for you:
- Use the blue, explosive cannisters! There are several of them scattered on the walkway and they can be a huge help in clearing out the enemy's forces.
- Attack them head on. This can be tricky, but is sometimes the best option. In short, you want to get close and strike fast, minimizing the amount of time you're exposed. If you start taking fire, seek cover immediately and don't leave it until you've fully regained your health, as you're only ever a few shots away from death during this segment.
- Take them down from below! That's right, targeting from ground level is often easier than from the walkway, as their cover isn't nearly as effective from this angle. Now keep in mind they can hit you down here too, so use the boxes for cover. Oh, and you may want to grab the sniper rifle from the base of the stairs.
- After stepping onto the walkway, duck behind the left wall and use a Sniper Rifle to shoot at the enemies through the grate--you can target quite a few enemies from here.
Once clear, simply approach the end of the walkway to drop onto the train.
Tharsis Refinery
Secure the Train
Although you start with only a pistol, you'll have a chance to grab something better soon enough. Run along the train and take down a trio of enemies along the way, and make sure to steal one of their guns. Enter the train car at the end and climb the stairs to the walkway above and follow it into the next room. Target the enemies below, using the guardrails for cover, if you must. Drop down and continue through the door back outside.
See that tank ahead? Hop into its turret and lay waste to the enemies beyond--make use of the myriad cannisters lying about for easy kills. The train car just ahead is home to an enemy tank, which you'll have to destroy with a rocket-launcher (look for the rocket launcher by the gun rack in the center). However, the tank's joined by an army of respawning soldiers that won't stop respawning until the tank is destroyed. As such, don't waste too much time shooting them--just enough to allow you time to grab the rocket launcher, then retreat back behind cover and fire rockets at it until it's destroyed.
With the tank destroyed, continue onward toward the next train car. As you approach, more enemies will appear, including a rocket launching one on the left deck. Focus on him first, then seek cover behind a box and target the rest. Once clear, proceed inside the next interior to complete the current objective.
Locate Alpha Squad
Open fire on the talking guards before they notice your presence, because as soon as they do, they'll rush you. Once they're down, meet with your teammate by the fence to give him a lift over. Now immediately seek cover behind some boxes, as more Helghast are heading your way, but thankfully there's a ton of explosive cannisters lying around that you should aim for. When clear, continue through a door on the left.
Kill the spiders in the hall before turning your attention to the electric barrier--shoot the blue generator on the far wall to power it off, then continue onward. Now just outside await more enemies, so it's best to tackle them from here, through the doorway. Once clear, shoot climb the stairs on the right and shoot the blue fuse box to disable the electrical sparks, then board the lift in the center and activate it via the control panel to ride it down a level.
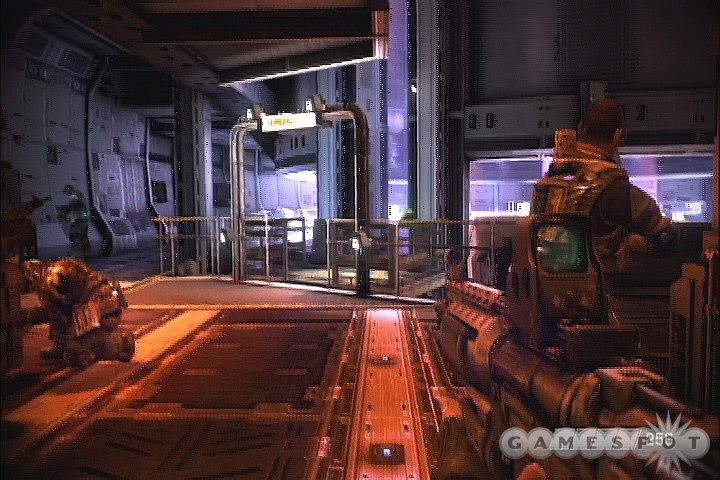
After riding the lift, you'll have your first encounter with an ArcTrooper, a powerful super-soldier that can take you down fast. Thankfully, you can take him down even faster! Like the enemies you've faced before, the red tanks on his back are his weak point, but he doesn't expose them easily. The trick is to shoot the objects on the conveyer belt overhead so they land on the ArcTrooper, stunning him. Then quickly move to his backside and lay into the tanks (don't get too close though, as the resulting explosion will kill you). One round probably won't be enough, so quickly duck behind the box on the right and do the same once more to do him in for good.
With the ArcTrooper down, climb the ladder on the left and activate a switch there to open a door below, exposing two enemies. Take them down from here then head on through, and target an enemy on a walkway above. Now climb a second ladder to find a gun rack containing the Electrical Gun--a powerful long-range weapon with unlimited ammo. Grab it and climb a third ladder. Follow the walkway to the conveyor belt and hop into one of the buckets.
As you ride the buckets, use the Electrical Gun (you did grab it, right) to easily kill the enemies along the way--if you need cover, simply duck. You'll soon come across an electrical field blocking the way--quickly target the blue fuse box on the left to power it down, causing you to drop from the bucket.
Enter the building via the entrance on the left and mow down the guards inside using your sweet Electrical Gun--this gun is so effective you shouldn't even have to take cover. Continue out the other side and down the staircase--stop by the gun rack only if you don't already have the Electrical Gun.
Rendezvous with Rico
You'll soon have to cross a series of walkways while being bombarded by flying drones. Simply use the boxes for cover and overload them with sparks from your Electric Gun, then ride the lift at the end. Continue into the passage beyond, which leads to a large room, which is home to a few spiders. Your Electric Gun will not work on them, so either switch to your pistol or melee them. Continue onward into the next room to regroup with Rico.
After regrouping with Rico, follow him across a long bridge to find Alpha Squad.
Secure the LZ
Now that you're one big happy family again, you need to work your way to the control room at the top. The easiest way is to just storm your way up asap, mowing down everyone along the way with your Electrical Gun--as long as you move fast, the flying droids shouldn't be able to do much. As you near the top, you'll find both a ramp and a ladder--it doesn't matter which you take, as they lead to the same place. After climbing either, take cover and target the remaining enemies, then continue into the control room and trigger a switch, activating a lift your injured ally can ride. Now hop into a nearby elevator and ride it to another level.
After getting off the elevator, follow your squad outside, for a medium-sized battle, starting with a few foes on the ground-level, followed by more on the surrounding walkways. Because the Electric Gun kicks so much ass, you really don't have to worry much about cover--just lay into the enemies as you spot them.
Secure the Comms Tower
With the courtyard cleared, make your way through the door on the last that your Squadmate unlocks and run up to the tower. Grab the Sniper Rifle and use it to target the remaining baddies below--an explosive barrel on the right can be used to take down the turret. Once clear, rejoin your squad in the courtyard to complete the level.
The Cruiser
Report to the Bridge
Board the lift dead-ahead and ride it to the top. Once there, a horde of enemies will drill through a wall on the other side--toss a grenade to take most of them down with ease, otherwise seek cover behind a box and shoot them down. When clear, cross to the other side and board another lift and ride it up to the Bridge.
Report to the Gun Deck
Return to the previous hall and ride either lift down to the Gun Deck.
Eliminate All Hostiles
Grab a gun from the gun rack and prepare yourself as you enter the next room, as enemies may potentially attack from all sides. Your best bet is to dart down the hallway on either side, kill whatever you see, then hang back by the corner as you scan the hall in either direction for anyone else coming your way--if you need cover, simply head down the opposite hall that the enemy's coming from. Now work your way down to the bottom level, via the staircases, killing everyone along the way. As you near the bottom, you'll face relativley heavy resistance from several soldiers and dlying droids--look for a nearby dead-end hall, which can shield you if you need health.
On the bottom level, you'll face off against a flame thrower and Blood Meridian Heavy unit. Take cover behind the low wall and focus on the flame thrower first, leaving just you and the Blood Meridian Heavy unit. Remember, shoot him in the head, then in the back while stunned--piece of cake. With the area cleared, continue through the door to regroup with your squad leaders.
Man the AA Gun
Head downstairs and hob aboard the AA Gun.
Eliminate All Hostiles
Now while you have unlimited bullets, you only have 20 or so rockets, so it's best to save them for large swarms of fighters. Remember to zoom to pick-off the distance ships.
Evacuate from the Cruiser
With the AA gun section finished, follow your teammate down the hall to a lift you can ride down. Don't worry about the enemies you spot along the way, as they'll mostly leave you alone. Once at the base, seek cover behind the flaming wreckage to target the foes ahead, then move up to the far box to finish off a few more. After entering the next room, head downstairs and tackle a few guards, then follow the walkway into the next room. Wait by the door and target the enemies within, then climb the stairs and follow them around the corner to kill the remainders.
Once clear, descend the staircase in the corner, then down a second set where a few more enemies await, but a few local squad mates should take care of 'em for you. Continue along across the bridge and prepare for a flame-thrower in the next area, and a couple more enemies just down the stairs. Now just follow your teammate down a couple of walkways to the Launch Bay to complete the level.
Maelstra Barrens
Secure the Crash Site

Head across the desert to hop inside the EVA suit, which grants you access to a machine gun on R1 and a missile launcher on L1. Up ahead, you'll find your first batch of enemies--a single rocket should clear them out. After a short while, you'll encounter a pretty large battle with enemy-laden buildings on either side. Use the large rock at the entrance for cover as you blast the enemies beyond.
A short while after, you'll reach a bridge, which is guarded by two tanks: one across the bridge, another on a second bridge to the right. Target the first relentlessly with missiles, then fire a couple at the bridge itself that the second tank is on to collapse it, destroying the tank in the process. Now cross over to regroup with your convoy.
Eliminate Hostile Armor
After regrouping with the convoy, you'll face three tanks ahead, as well as countless soldiers. The first tank will emerge on ground-level to the right--hang back and blast him from here, moving behind the wall for cover, if need be. Once clear, move up to the top of the ramp and strafe left or right while blasting the two final tanks. Now you will take heavy fire, so back up down the ramp occasionally for cover. Once they're down, your mission is over.
Visari Palace
Destroy the Enemy Towers
Push up the street, to the indestructible tank, then take the stairs down on the right. Jump over the guardrail and use the shipping crates for cover as you target the enemies on the building beyond. If you want absolute cover from the turrets, hang by the wall just below them, but make sure to take out any enemies in that lower area first. Once clear, climb onto the upper walkway and continue through the door.
Run through the halls until a fenced-off staircase comes into view. There are enemies nearby, so inch up to the corner and use it as cover as you open fire on the enemies beyond. Push forward to the the boxes when clear. A tank is roaming around just outside, but ignore it for now and instead, target any nearby soldiers. Once they're down, grab the Rocket Launcher from the gun rack in the hall, then step outside and fire a trio of rockets at the tank to destroy it.
Alright, now there are four towers you need to destroy by planting charges inside each one. Of course, there are a few enemies stationed in and around them, so you'll want to take them out first before heading in. We suggest tackling them in a clockwise fashion, starting with the one on the left. Climb the staircase leading to it and use the boxes for cover to kill the guards just outside. Now there's going to be a few more inside the tower itself, so target them from the entrance--you can even bounce grenades off the back wall to target the ones out of view. Once clear, dart in and plant a charge on the wall, then detonate it after exiting the building.
With the first tower down, follow the walkway that hugs the back wall for a direct route to tower 2, and do the same thing there. Now follow the walkway to the third tower, on the left, then to the final.
Secure the Palace Courtyard
You've destroyed all four towers, right? Good! Then it's time to make your way to a lift along the back wall, but you'll find some enemies there cramping your style. Try taking them on from the central walkway, directly opposite them. There's a rocket launcher there that will make short work of them. Once clear, follow the walkway there and ride the lift to the top.
After rising the lift, dart across the bridge into the next building and take cover by the exit to clear out a few enemies in the courtyard. Now they will respawn, so clear just enough that you can dart up the center of the courtyard and duck into a passage just past the staircase, along the center wall. This tunnel will lead you right up to the sandbags--hang back by the exit to reduce the amount of foes, then dash into a small room on either the left or right side. Use this room for protection as you clear out some more foes up the stairs-the grenade launcher here is ideal for taking down the hovering droids.
Once you've cleared out some of the enemies, it's time to push forward toward the far central door. The key is to move up, cover-to-cover, only when the immediate area is clear. It can be a tough call at times when to push forward, but as long as there aren't any enemies directly to either side, you should be good to go. However, it will require patience each time you take cover, as it can take a few moments to clear out the inbound enemies around your next point of cover. At any rate, once you close in on the door, you should be make a mad dash through it, triggering a cutscene and saving your hide. But if you prefer to be more cautious, a single grenade should be able to take out most of the enemies surrounding the door.
Secure the Palace
Walk through the palace to the second room and you've got it.
Fight Off Radec's Support Waves
Great, you and your partner are now going to have to face several waves of Radec's cronies. Your best bet is to seek cover behind one of the jutting wall sections on either side of the room, toward the door you came through. This will shield you from the northern half of the room, allowing you to peek around the corner and target them. Just be careful for a few enemies who will drop from the balcony behind you. Oh, and if someone tosses a grenade your way, run either to the central structure, or a similar wall on the opposite side for cover until it detonates.
Take Position on the 2nd Floor Balcony
Once you've cleared out the initial waves, you'll be instructed to take residence on the 2nd floor. The enemy's presence should be light enough that you can dart right up the staircase, then to the closed door (just above where you entered)--but watch out for a couple of flamethrowers guarding the area. Now that you've completed that objective, it's time to focus on the remaining waves, of which there are several. While the game strongly hints that you should tackle the enemy from your present location, we suggest otherwise, as it leaves you far too vulnerable. Instead, grab a grenade launcher from either one of the nearby gun racks (you can grab additional ammo from either as well, should you run low) then hang out by the staircase you just climbed to reach the 2nd floor. From here, you should be able to launch grenades at the waves of enemies as they appear, while giving you room to retreat back up the stairs for cover. And remember do return to the gun racks for a grenade refill should you run low.
Eventually, some rocket-launching baddies will appear on the far balcony. It's crucial that you stay on the move until you can find some cover--we found the two far ends of the walkway (by the staircase) to be an excellent point for cover. From here, you should be able to target most of the rocket-launchers, though make sure to duck behind the wall anytime you see a rocket coming your way.
Kill Radec
Once everyone's defeated, Radec himself will challenge you to a duel. Radec's skill set is quite strong, and he's deadly-efficient at both close and long-range combat. But perhaps his most distinct move is his ability to turn invisible and seemingly teleport wherever he likes, though most often it's somewhere within just a few feet of you. When he does so, he'll attempt to knife you to death, and a single hit can take you down, so it's crucial you quickly figure out where around you he is, then back away while shooting him. After a few shots, he'll vanish and reappear elsewhere (again, likely somewhere really close by)--look for the white glow that appears to help figure out where he is. Alternatively, he will sometimes appear on the far balconey, where he'll attempt to mow you down with his machine gun. Take cover (ideally by the center pillar) and try to shoot him during pauses.
Perhaps the most important part of the battle is figuring out where to combat it from, but that's what we're here for, right? Take the battle to the ground floor and circle the central pillar to force Radec to teleport somewhere nearby--listen for the noise and keep an eye out for the white glow to quickly figure out where he is, then lay into him while backing away, circling the central pillar. Repeat this strategy until he eventually teleports to the balcony, then simply take cover behind that same pillar and shoot him during pauses. Before you know it, you'll have won the battle, and the war. Congratulations!
Ranks, Ribbons, Medals
Ranks
| Rank | Total Pts | Difference | Reward |
|---|---|---|---|
| Private | 0 | -- | -- |
| Corporal | 30 | 30 | Create Squad Option |
| Sergeant | 100 | 70 | Create Clan Option |
| Sergeant 1st Class | 200 | 100 | Unlocks SMG and Shotgun |
| Master Sergeant | 350 | 150 | Unlocks Medic Badge |
| Sergeant Major | 550 | 250 | Unlcocks HG and ISA LMG |
| Lieutenant | 800 | 250 | Unlocks Engineer Badge |
| Captain | 1100 | 300 | Unlocks VC9 Missile Launcher |
| Major | 1450 | 350 | Unlocks Tactician Badge |
| Lieutenant-Colonel | 1850 | 400 | Unlocks Saboteur Badge |
| Colonel | 2300 | 450 | Unlocks Saboteur Badge |
| General | 2800 | 500 | Unlocks Scout Badge |
Ribbons
| Ribbon | Requirement |
|---|---|
| Good Conduct | 0 Team-Kills/Suicides are made by the Player and they have scored at least 20 points |
| Kill Count | 10 Kills are accounted to the Player |
| Air Support Specialist | 5 Kills by Air Support Called |
| Boost Specialist | Perform 5 Boosts |
| C4 Specialist | 5 Kills by Placed C4 Explosives |
| Cloak Specialist | Kill 5 Enemies while Cloaked |
| Disguise Specialist | Kill 5 Enemies while Disguised |
| Healing Specialist | Heal 5 Players |
| Repair Specialist | Repair 5 Objects |
| Revival Specialist | Successfully Revive 5 Players |
| Spawn Point Specialist | 5 Players Spawned on Placed Area |
| Spot and Mark Specialist | Spot and Mark 5 Players |
| Turret Specialist | 5 Kills by Sentry Turret Placed |
| Close Combat Specialist | 10 Kills by Close Combat Melee |
| Headshot Specialist | 10 Kills by Headshots |
| Sidearm Specialist | 10 Kills by Pistols |
| Sniper Specialist | 10 Kills by Sniper Rifle |
| Assassination Defend Specialist | Stayed Alive as Target |
| Assassination Kill Specialist | 1 Assassination Target Killed |
| Body Count Specialist | 10% of Kills made during Mission |
| Capture and Hold Defend Specialist | 10 Mission Points Earned Capturing a Point |
| Search and Destroy Specialist | 2 Objectives Placed/Disarmed |
| Search and Retrieve Specialist | 2 Objectives Returned |
Medals
| Medals | Requirement | Unlocks |
|---|---|---|
| Example Soldier | 8x Good Conduct | Increased Start Ammo Amount |
| Natural Born Killer | 8x Kill Count | Increased Grenade Amount |
| Aerial Supportive | 8x Air Support Specialist | Combine Tactician 2nd Ability |
| Defensive Specialist | 8x Turret Specialist | 2nd Engineer Ability |
| Explosives Expert | 8x C4 Specialist | Combine Saboteur 2nd Ability |
| Field Mechanic | 8x Repair Specialist | Combine Engineer 2nd Ability |
| Field Medic | 8x Healing Specialist | Combine Medic 2nd Ability |
| Forward Observer | 8x Spot and Mark Specialist | Combine Scout 2nd Ability |
| Front Runner | 8x Boost Specialist | Combine Assault 2nd Ability |
| Master of Disguise | 8x Disguise Specialist | 2nd Saboteur Ability |
| Shadow Marshall | 8x Cloak Specialist | 2nd Scout Ability |
| Spawn Authority | 8x Spawn Point Specialist | 2nd Tactician Ability |
| Trauma Surgeon | 8x Revival Specialist | 2nd Medic Ability |
| Meritorious Unit Award | 10x Clan Matches Won with Clan | 1000 Valor |
| Meritorious Unit Award | 25x Clan Matches Won with Clan | 10,000 Valor |
| Army Superior Unit Award | 50x Clan Matches Won with Clan | 100,000 Valor |
| Black Belt | 5x Close Combat Specialist | Increased Points/Melee Kill |
| Hawk’s Eye | 5x Sniper Specialist | Second Sniper Zoom |
| Head Fetish | 5x Headshot Specialist | Increased Points/Headshot |
| Quick Draw | 5x Sidearm Specialist | M4 Revolver 2nd Weapon |
| Assassins League | 5x Assassination Kill Specialist | Increased Points/Assassination Kills |
| Bodyguard Aliance | 5x Assassination Defend Specialist | Increased Points per Survival |
| Bomb Squad | 5x Search and Destroy Specialist | Increased Points/Returns/Disarms |
| Corpse Counters | 5x Body Count Specialist | Increased Points/Kills (Body Count only) |
| Defense Initiative | 5x Capture and Hold Defend Specialist | Increased Points/Defensive Kills |
| Retrieval Corpse | 5x Search and Retrieve Specialist | Increased Points/Return |
PlayStation 3 Trophies
Note that there are Spoilers on this list.
| Trophy Name | How To Earn | Reward |
|---|---|---|
| War Zone | Collect all Killzone 2 trophies | Platinum |
| Corinth Ribbon | Complete Corinth River on any difficulty level | Bronze |
| Blood Ribbon | Complete Blood Meridian on any difficulty level | Bronze |
| Visari Ribbon | Complete Visari Square on any difficulty level | Bronze |
| Salamun Ribbon | Complete Salamun District on any difficulty level | Bronze |
| Bridge Ribbon | Complete Salamun Bridge on any difficulty level | Bronze |
| Suljeve Ribbon | Complete Suljeve Village on any difficulty level | Bronze |
| Tharsis Ribbon | Complete Tharsis Refinery on any difficulty level | Bronze |
| Cruiser Ribbon | Complete The Cruiser on any difficulty level | Bronze |
| Maelstra Ribbon | Complete Maelstra Barrens on any difficulty level | Silver |
| Survivor | Complete all missions on any difficulty level | Silver |
| Heroic Survivor | Complete all missions on Elite difficulty level | Gold |
| Pallbearer | Kill 500 Helghast soldiers | Bronze |
| Undertaker | Kill 1000 Helghast soldiers | Bronze |
| Reaper | Kill 1500 Helghast soldiers | Bronze |
| Field Agent - Collect all intel | Collect all intel within the game | Bronze |
| Iconoclast - Destroy all symbols | Destroy all Helghast symbols within the game | Bronze |
| Untouchable | Complete all missions on any difficulty level without dying., | Silver |
| Babysitter | Revive your biddies a total of 25 times | Bronze |
| Elemental Slayer | Kill the Tharsis Refinery ArcTrooper in under 1 minute 30 seconds | Bronze |
| Giantslayer | Kill the Blood Meridian heavy in under 1 minute | Bronze |
| Demonslayer | Kill Radex at Visari Palace within 20 minutes | Bronze |
| Safari Hunter | Kill each enemy infantry type with a melee attack | Bronze |
| Killing Spree | Kill 5 Helghast in 15 seconds whilst on foot and maintaining at least 85% health | Bronze |
| Bullet Counter | Manually reload 150 times | Bronze |
| Safety First | Shoot off 100 Helghast helments during battle | Bronze |
| Berserker | Kill 25Helghast with melee attacks | Bronze |
| Barrel of Death | Kill 3 Helghast at once using the surrounding environment | Bronze |
| Professional | Get 3 headshots in a row using the same clip of M4 Revolver ammunition | Bronze |
| Fragnerchant | Kill 5 Helghast at once using a single frag grenade | Bronze |
| Fragmartyr | Kill 2 Helghast at once and take your own life using a single frag grenade | Bronze |
| Melonpopper | Get 15 headshots using the VC32 Sniper Rifle | Bronze |
| Blade Runner | Kill 75 Helghast using the knife | Bronze |
| Run and Gunner | Kill 3 Helghast using an M82 or StA52 assault rifle | Bronze |
| Defensive Fighter | Kill 30 Helghast using the StA3 fixed gun emplacement | Bronze |
| Can Opener | Destroy any Helghast APC during battle | Bronze |
| Spare Parts | Destroy all Leech Pods | Bronze |
| Treadhead | Take 30 Helghast lives whilst using the ISA tank | Bronze |
| Career Ribbon | Achieve an online rank of General | Gold |
| Valor Grand Cross | Achieve weekly online honor rank #4 | Gold |
| Valor Cross | Achieve weekly online honor rank #3 | Silver |
| Valor Medal | Achieve weekly online honor rank #2 | Bronze |
| Valor Citation | Achieve weekly honor rank #1 | Bronze |
| Cross-Training Ribbon | Acquire all badge specific medals | Bronze |
| Veteran Ribbon | Acquire all mission specific medals | Bronze |
| Expert Ribbon | Acquire all combat specific medals | Bronze |
| Wargod Ribbon | Acquire all remaining medals | Bronze |
| Blitzkrieg Robbon | Win 50 online matches | Bronze |
Got a news tip or want to contact us directly? Email news@gamespot.com
Join the conversation