Spore Walkthrough
Having growing pains? Evolve your game with our guide and turn your puny creature into a galactic dictator!
Life is a delicate and beautiful thing. Given our comparatively limited time on this planet, it can be difficult to appreciate the events that have transpired over the last several billion years which have lead to our existence today.
Welcome to Spore. Will Wright's latest creation offers what is perhaps the best approximation of the evolution process. It's up to you to nurture a single cell and ensure its lineage's survival across countless generations. But such success doesn't come easily, and that's where we come in!
This Gamespot Spore game guide features:
- The Creators: Get the lowdown on making the best creations that were ever created.
- Cell Stage: Come to grips with the fundamentals of Spore.
- Creature Stage: Learn how to interact with the environment and improve your social skills.
- Tribal Stage: Discover the best methods for interacting with other tribes.
- Civilization Stage: Figure out how to dominate other societies and take over the world!
- Space Stage: Explore the vast reaches of space and colonize other planets.
The Creators
Throughout your Spore experience, you'll have the opportunity to utilize various creators to construct your creatures, buildings, vehicles, and more. Here's a quick rundown of the various creators you'll use:
The Creature Creator
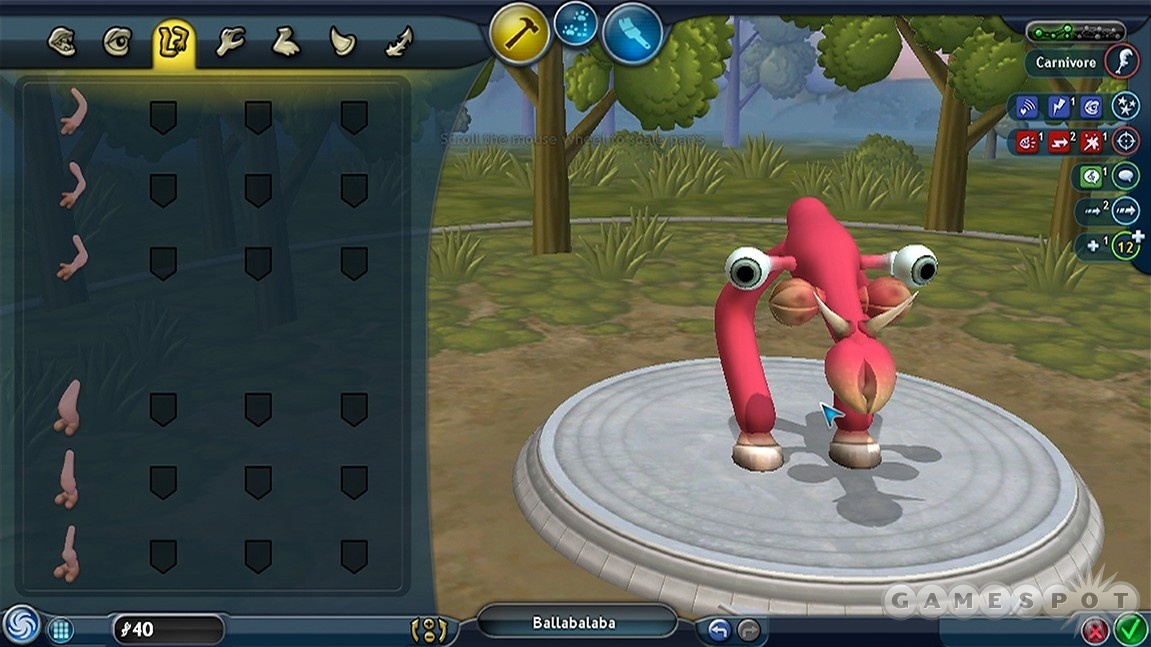
The creature creator is a powerful tool which enables you to give birth to your very own organism! Although you'll have a chance to toy around with it during the cell stage, it really comes into its own during the creature stage (shocking, we know). With it, you can add, remove, or change the various body parts on your creature to shape him (or her!) as you see fit. Each part costs a certain amount of points, so you have to carefully balance what you add. In addition, you can only use parts that you've found, and the "complexity meter" (in the upper-right corner) ultimately restricts how many parts you can add.
When designing a creature, each body part has certain attributes associated with it, which can enhance its ability to perform specific actions. For instance, when trying to socialize with another creature, you'll have to match whatever action they perform with one of your own. However, performing these actions requires that you have the necessary body parts. For instance, without a mouth, you won't be able to sing (or eat…but that's another matter), and depending on what type of mouth you have, your singing ability may actually improve!
As such, it's important to balance which parts you add to your creature. For example, the Mollrat mouth has a rating of Bite:1, Sing: 2, whereas the Laardvark mouth is rated Bite: 1, Sing:3. In short, the Laardvark mouth is superior in every way (except that it costs more), and as such, there is no point in having both mouths on the creature; sell one before adding the other.
The Vehicle Creator
The vehicle creator functions very much like the creature creator, except in this case, most of the parts you add are merely cosmetic and serve no actual purpose. However, there is one exception: depending on which civilization type you're playing as (religious, military, or economic), you will find a single parts category that will enhance your vehicle's specialty, but it comes at the expense of two other statistics: health and speed. In general, your default statistics are good enough to complete this mode, but if you wish to beef up your vehicle's specialty, try not to go overboard, otherwise you may find yourself too weak or too slow to escape an enemy's grasp.
The Rest…
The remaining creators, such as for buildings and your spaceship, are purely aesthetic and serve no functional gameplay purpose. As such, feel free to go nuts with your designs!
Cell Stage
See that cute little cell right there? That's you! Isn't he adorable? But he won't remain that way for long—it's up to you to nurture him so can he can grow more cells and eventually become a full-blown creature.
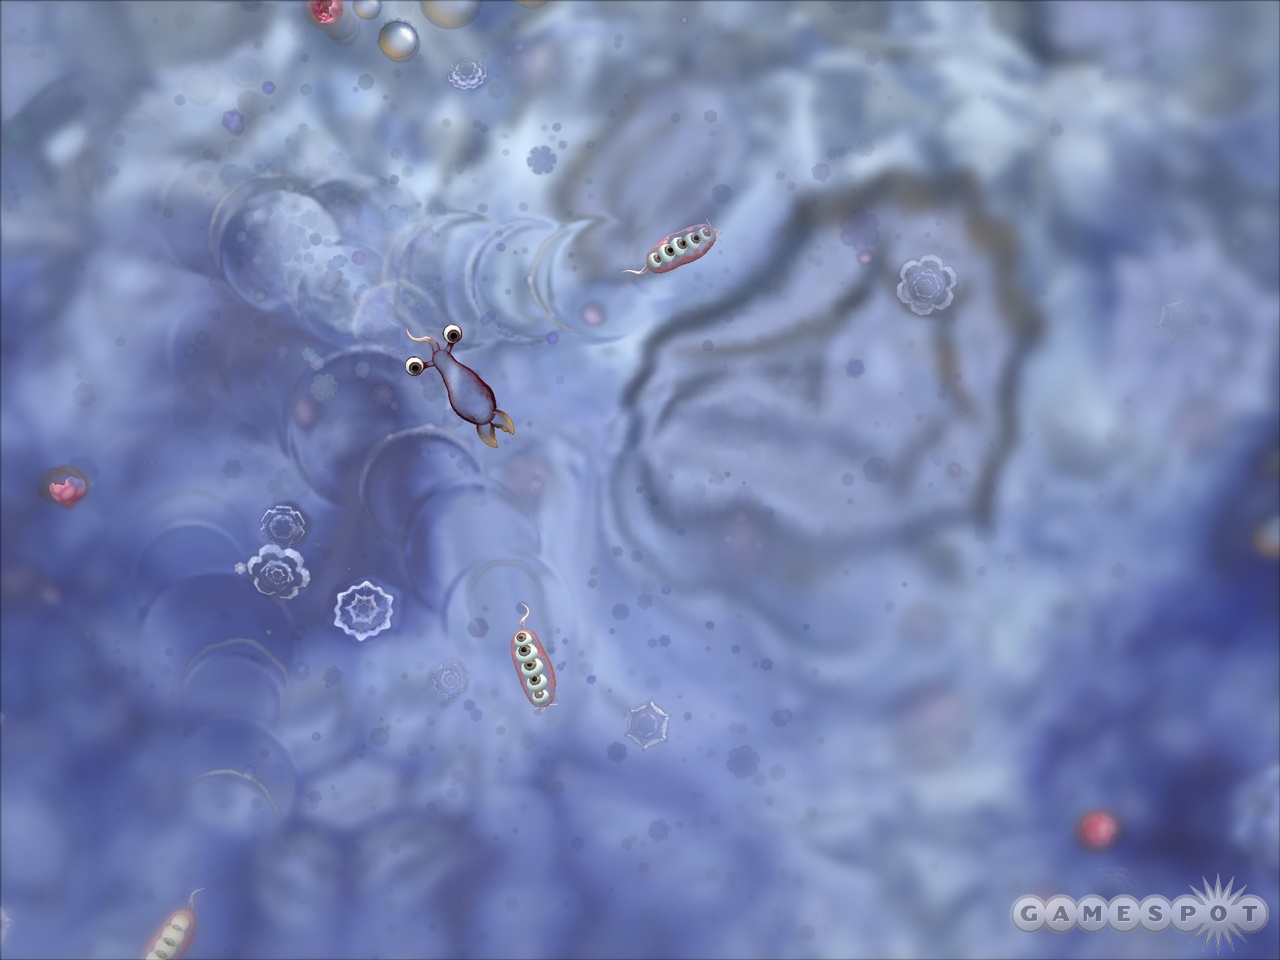
See that cute little cell right there? That's you! Isn't he adorable? But he won't remain that way for long—it's up to you to nurture him so can he can grow more cells and eventually become a full-blown creature.
Your life begins in a pool of primordial ooze. Take some time to explore your surroundings by pointing and clicking where you want to go. As you meander about, you'll find bits of food in the form of plant life (green) and meat (red). You can devour these by swimming through them;—they are crucial to your creature's growth! Remember: only herbivores can eat plants, whereas carnivores must consume meat.
Speaking of those blood-thirsty carnivores, they can also attack other creatures you encounter by ramming into them. If you defeat another, they'll drop several bits of food! But keep this in mind: size does matter. While you can easily tackle a creature your size or smaller, it's best to avoid the larger ones for now unless you wish to become a working example of the bottom of the food chain.
Mating
As you consume food, you'll find yourself growing larger while your DNA bar slowly fills. Marked on the bar are certain DNA milestones. The first time you reach one, you'll be able to call for a mate to pass your genes onto the next generation. To call for a mate, press the large button that appears at the bottom of the screen, then follow your heart (seriously, follow the hearts that appear) to find your soulmate! After they do their thing, you'll be taken to the "creature creator" where you can trick out your-cell. So anytime you want to change your creature, make sure to mate with another.
Creature Creator
Think of the creature creator as a living canvas. With it, you can add, remove, or change the various body parts on your creature to shape him as you see fit. Each part costs a certain amount of points, so you have to carefully balance what you add. In addition, you can only use parts that you've found, and the "complexity meter" (in the upper-right corner) ultimately restricts how many parts you can add.
When customizing your creature, you can only apply the body parts that you have found. They can be collected in one of two ways: Bust open meteor fragments, or defeat creatures to have a chance at them dropping one. The available body parts range from mouths, to spikes, to eyes. Each serves a different purpose: spikes are great for ramming and damaging opponents, while a mouth is helpful for eating the aftermath.
Evolving!
Once you fill up your DNA bar, just slap a pair of legs onto your baby to enter the next evolution stage: creature!
Creature Stage
Congratulations on making it out of the cell-stage! You're now a full-blown creature, with legs and everything! But there's still much to do. Evolving works a bit differently in this mode; instead of just eating, you're going to have to become a bit more social and meet with the planet's other species. But that doesn't mean you have to be friendly! While becoming acquainted with the other civilizations will fill your progress bar (and allow you to team up with them), so will making another species extinct!
Before you begin exploring, you may want to become acquainted with the goals that appear in the upper-left corner. These are simple objectives that, if met, will reward you with DNA points. One of your first objectives will be to find food; remember, the type of food you are able to eat is dictated by whether you're an herbivore, carnivore, or omnivore, as established during the cell stage. Other goals can be found by clicking on other creatures; most can be completed by simply befriending all the creatures in a pack (usually 3 or 4) or destroying them. But keep in mind that not all species can be befriended, so keep a close eye on the information box in the upper-left corner, as it'll let you know when you encounter one.
The Others…
As you begin to venture out and explore the planet, you'll encounter other creatures who, like yourself, are just trying to survive. Some of them may be friendly, while others may try and take you down without warning. Most, however, will be largely indifferent and will leave it to you to make the first move.
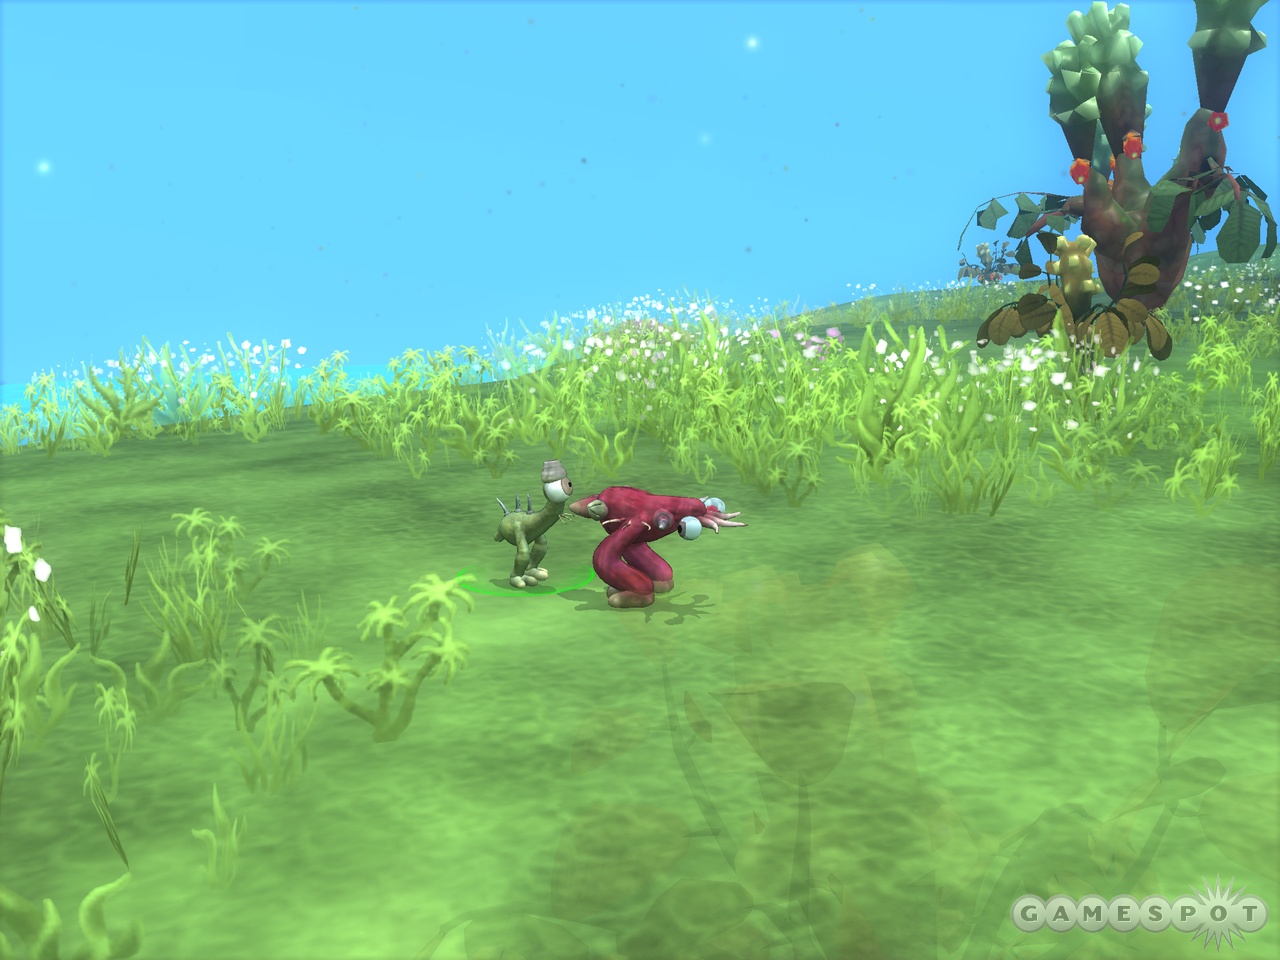
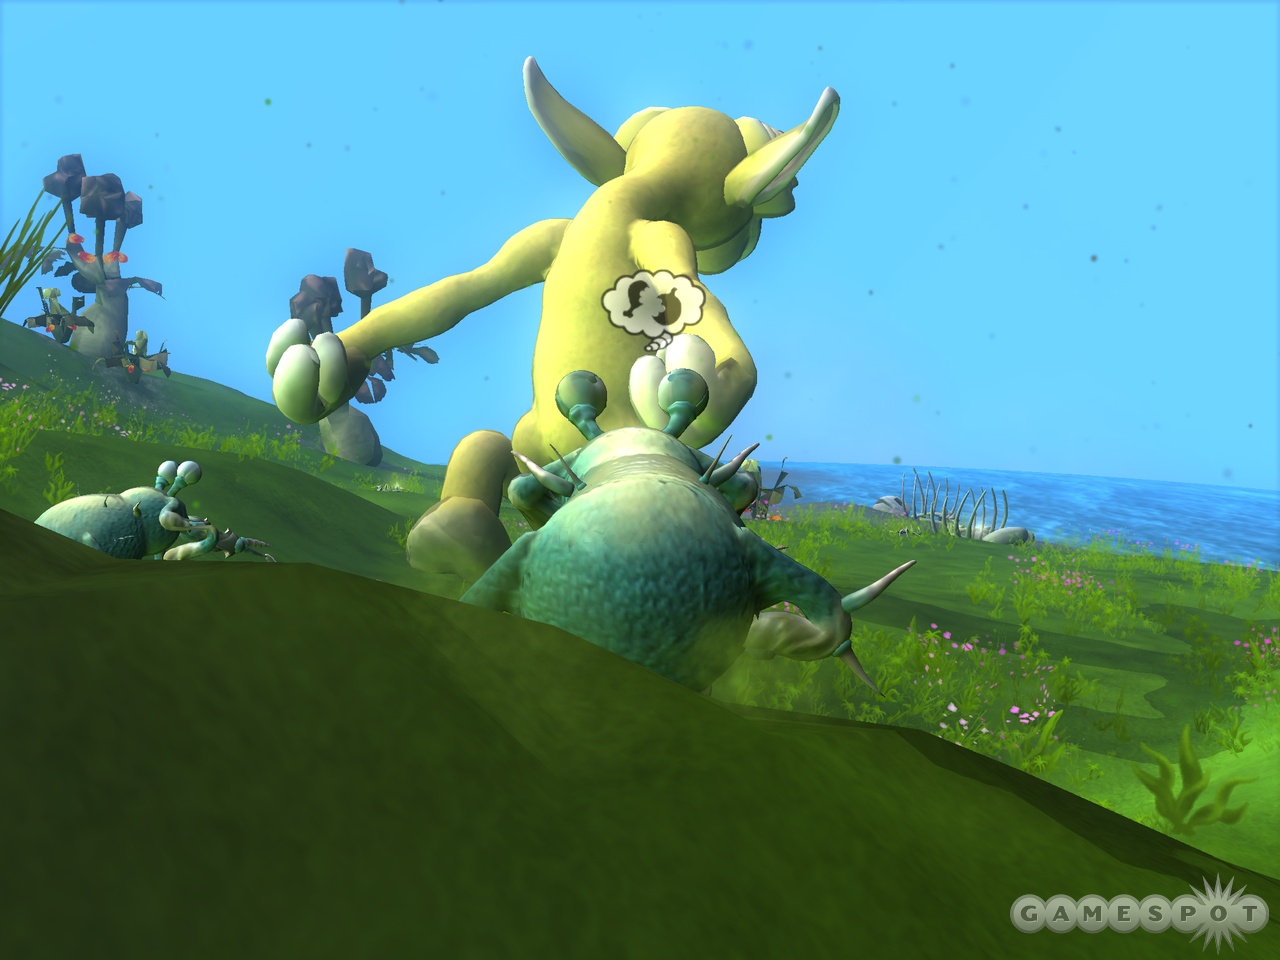
When you encounter a new creature, you can either befriend it or attack it by using the "stance" buttons at the bottom of the screen. The green one makes your creature assume the "social stance," which allows you to befriend others, whereas the red one is for the "combat stance," which is how you attack.
Social Stance
If you want to make nice with the other species, the social stance is for you. Before interacting with another creature, click the green "social" button to assume the social stance, and then double click on the creature you wish to befriend. At this point, that creature will perform some kind of action (such as singing), which you must then mirror using the same action—tap the appropriate button on the "actions" bar to mimic their move. If you mirror their actions correctly, the meter at the top of the screen will fill and they'll become your friend! How nice! However, sometimes a creature will perform an action that you don't yet have; in this case, you'll have to acquire additional parts that can enable that action.
So why would you want to make peace with other creatures instead of killing them all? For one, it's one less hostile creature you have to worry about. But perhaps more importantly, you can now use their nest to heal yourself!
Combat Stance
If you don't want to be bothered with that pesky "being nice" stuff, then you're reading the right section. Assuming the "combat stance" (by clicking the red stance button at the bottom of the screen) allows you to attack other creatures. With the stance activated, target the creature then select the attack you wish to use from the attack icons. If you're victorious, you'll earn DNA points (and sometimes a new body part), and can even eat their remains…assuming you're a carnivore. But if things start to go sour, it's advised you hightail it out of there—try backing off and using your "sneak" ability to make a clean get-away! You may also want to try jumping (if you have the ability) to avoid taking further damage. But if you do wind up defeated, you'll simply respawn back at the nest.
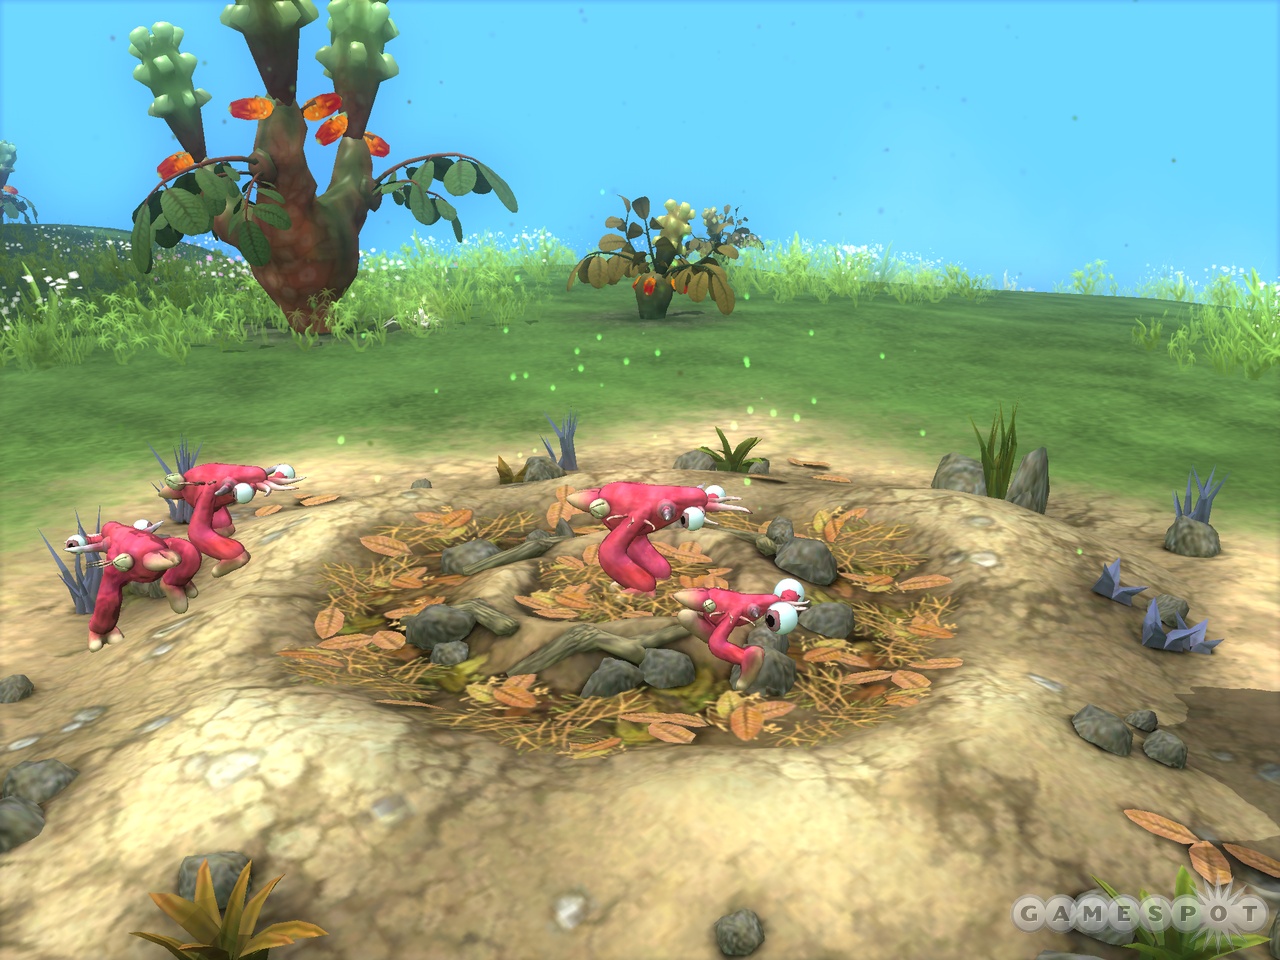
Your Pack
Your creature is a social animal, and as such, you'll benefit greatly by forming a pack. With others at your side, you'll be more effective at both socializing and battling. You can form a pack by interacting with ether members of your own tribe or any species you have befriended. However, the number of pack members is restricted by how intelligent your creature is (or, in other words, how many milestones you've reached on the progress bar). For each milestone (and increase in intelligence), you can add one pack member. Ultimately, you can have up to three others on your side! If at any time you want to drop a creature from your pack, simply click the "X" on his icon on the right side of the screen.
Mating
Like before, mating is essential in order to evolve your creature. You can find your mate at your tribe's nest (she's the one with hearts around her). After the G-rated mating ritual, you'll be taken to the creature creator where you can modify them to your heart's content. If you're trying to take a friendlier route, make sure to focus on body parts that enhance your social actions (such as feet for dancing). However, if you're thirsty for blood, the weapons section is for you.
Evolving!
As we touched on before, befriending other species or making them extinct will add to your DNA bar. But there's one more thing you can do too. Periodically, your tribe will migrate to a new nesting spot—simply find it (as marked on your map) to gain additional DNA points. Once you completely fill your progress bar, it's time to move onto the Tribal stage. Beware: this is the last chance you have to further modify your creature, so make sure he looks like what you want. Oh, and it's advised you slap some arms on him too, if you haven't already, as they will come in handy (no pun intended) for the next stage…tribal.
Tribal Stage
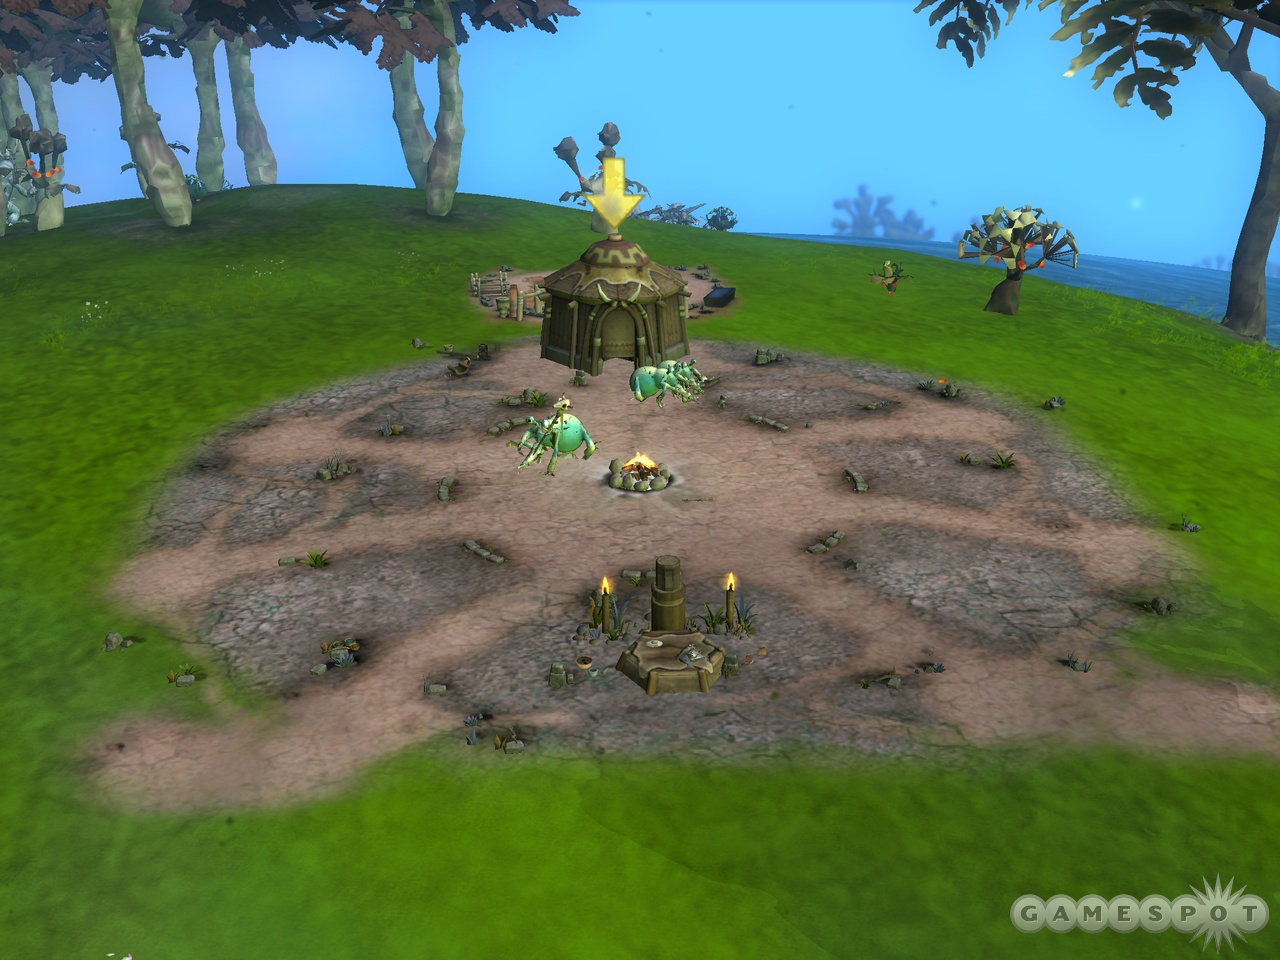
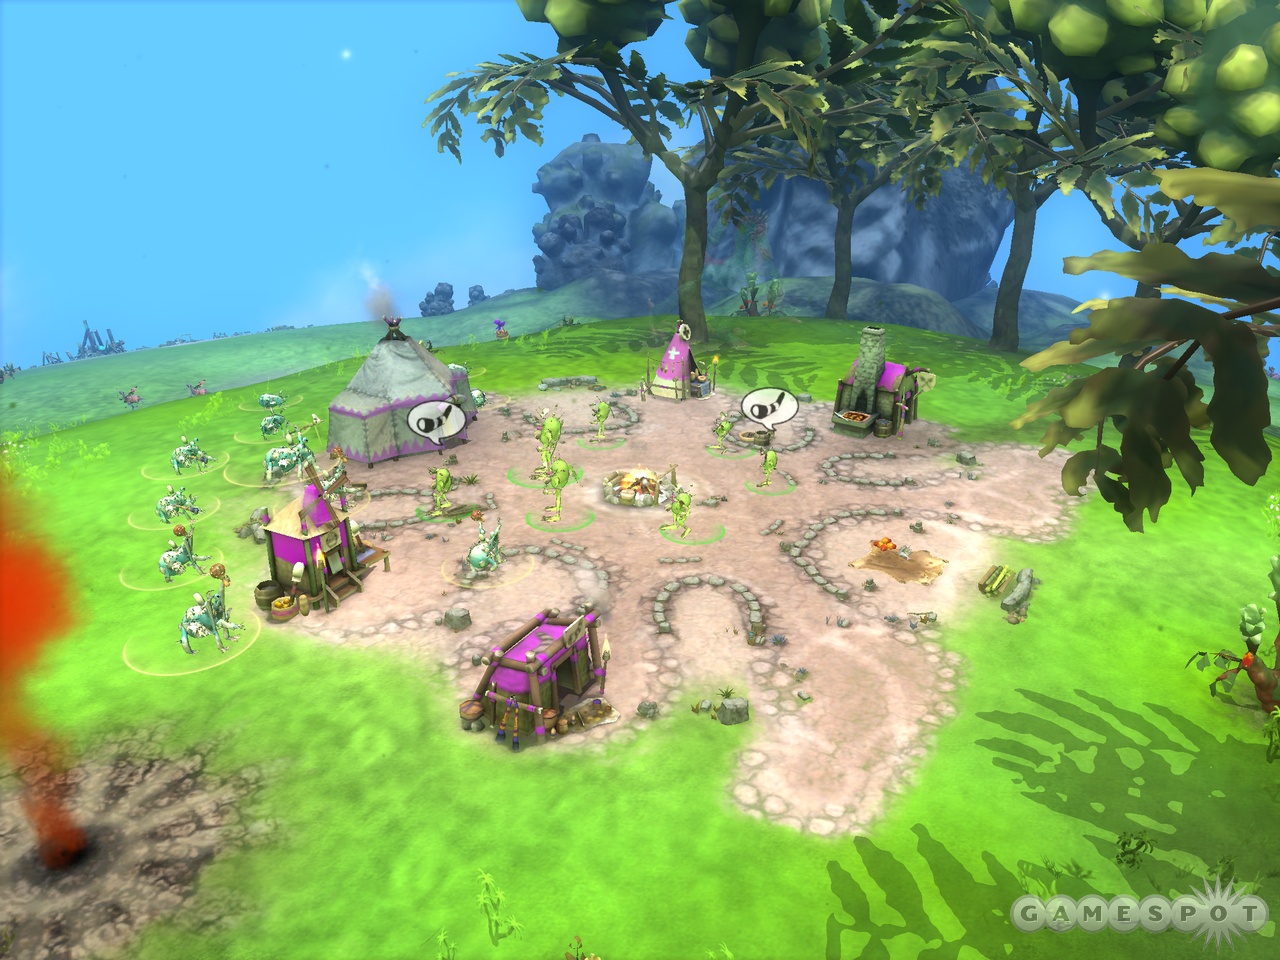
Welcome to the tribal stage. This segment plays quite differently from those before. Instead of being in control of a single creature, you have an entire tribe to manage (if you've ever played an RTS, you should feel right at home)! Although, your tribe starts rather small, it will grow soon enough, but we'll get to that in a moment. Like before, the goal box in the top-left corner of the screen will help you get started. It will walk you through your first few tasks, which include making your tribe look cool and raising a baby (cost: 10 food units), which increases your population by one. Although your tribe can only contain a maximum of six members at first, it will soon grow to accommodate many more.
Ultimately, you fill in your progress bar by either befriending or destroying competing tribes. But you can't just march in and expect them to bow to your demands…oh no, this is something you'll have to prepare for!
Tribal Chieftain
Like most tribes, yours has a chief. The chief is, by far, the most important member of your tribe. Not only can his staff perform the function of every tool (meaning there's no need to equip him with others), but only he can initiate social actions with other tribes and make use of the tribe's "consequence abilities." As such, it's important to have him on-hand whenever dealing with another tribe. Oh, and don't sweat it too much if he bites the big one; a new one will be soon be born at your camp.
Tribal Outfitter
While you may not be able to change your creature's physical attributes any longer, that doesn't mean you can't deck him out in the latest fashion styles! By using the tribal outfitter, you can equip your tribe members with various accessories that will enhance their abilities. Make sure to cater them toward your goal: battling or befriending.
Resource Gathering & Building
So here's the thing: in order to grow, or do much of anything as a tribe, you'll have to construct buildings. These are essentially tool-sheds (one tool-type per building) that enable your tribe members to equip themselves with the proper gear. Each one serves a different purpose. But constructing buildings requires food (think of it as money) which you'll have to gather in order to fund your projects. As such, your first priority should be to gather as much food as you can—simply select the tribe members you wish to do the gathering, then select a food source (such as the plants if you're an herbivore, or the fish in the ocean if a carnivore). They will continue to gather resources until you tell them otherwise, or if they run out of things to gather. As your tribe grows, try to keep at least a few members on food gathering detail so your supplies don't run low.
Once you have the resources, it's time to start building! Each building serves a different purpose, such as impressing fellow tribes (if you want to become friends), or bestowing your tribe's members with weapons in preparation for battle. Either way, you should choose the building that suits your needs (that is, don't bother building too many weapon shacks if you're going for a peaceful victory).
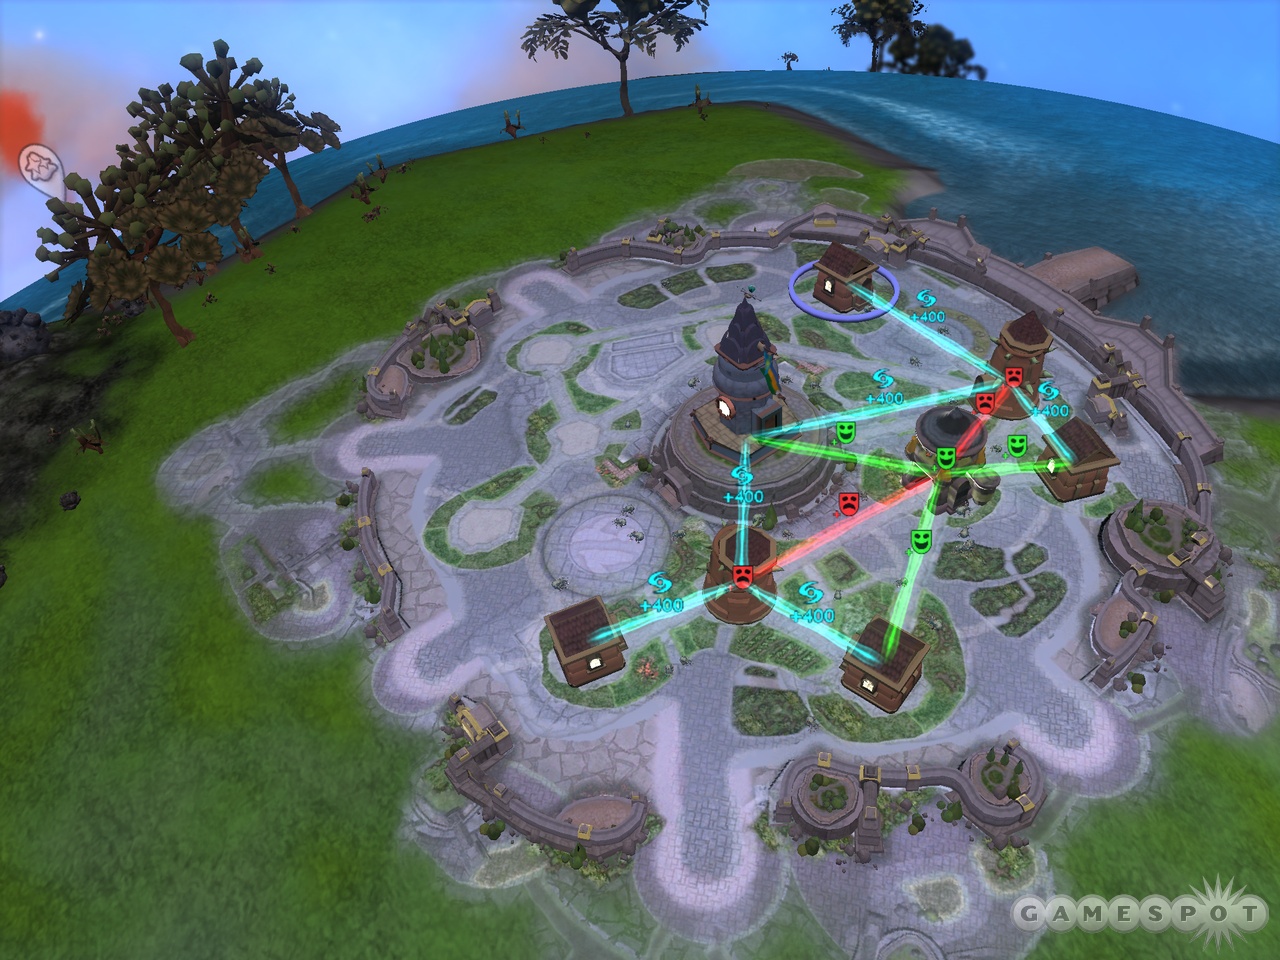
Tribal Interaction
Okay, so you've built a few buildings and want to venture outward and interact with other tribes - you'll find them marked on your map. If you're going to attempt to wipe them out, make sure to equip your tribe-mates with weapons (such as spears) from a weapons building you've (hopefully) constructed and send them on their way toward the camp.
Likewise, if you wish to befriend the other tribe, you can play music for them and have them join your side; just make sure that your group includes the chief, as he's the only got who can initiate social interactions. Before departing your camp, equip your tribe members with at least two different instruments (divvy them up evenly)—if you only have access to one type of instrument, you may want to consider battling the other tribe instead. Once equipped, proceed onward to their tribe and right-click on any one of their members (with your "social" button activated) to begin the musical performance.
As you perform, keep an eye on the thought bubbles that appear over the other tribe members' heads—these indicate which instrument you should play. Click on the respective instrument from the menu to the left of the social button to respond and improve your performance. If you manage to completely fill the meter, the other tribe will become friendlier toward your tribe—now perform the music show once more to get them to join your cause!
Regardless of whether you make peace with or wipe out an opposing tribe, you'll inherit their tools and outfits which you can then use to deck out your own tribe.
Other things to Watch Out For…
While you're away, other creatures may come and steal your food! So try to keep at least a few tribe members at home-base to scare them away. Furthermore, other tribes may attempt to attack you without much warning. If you hear the sound of the war horn, gear up and get ready to mount a defensive.
Evolving
As mentioned, befriending or destroying other tribes fills in your progress meter. Whenever you reach a milestone (after befriending or conquering the 1st, 3rd, and 5th tribes), your main hut will grow in size, and the total amount of tribe members you can have will increase! Once you've filled the progress bar completely, it's time to move onto the civilization stage!
Civilization Stage
The Civilization stage is where things really start to heat-up. Depending on your actions in the tribal stage, you'll be automatically assigned to one of three empire specialties (military, economic, or religious). But how do they differ?
The Three Civs:
As mentioned, your performance during the Tribes stage dictates what type of civilization you are. There are three types, and they will mostly dictate how you complete this mode:
- Military: You have access to military vehicles, which can be used to demolish other cities. Other civilizations are less likely to be your friend.
- Economic: Collect money to purchase competing cities.
- Religious: Vehicles can convert other cities to your religion, thereby having them fall under your command.
Okay, so you got to where you are by leading a tribe to the world's very first civilization. But you won't be alone for long, as others will soon sprout around the globe. In order to progress further, you must interact with these other civilizations and become the dominate society. Every time you conquer (military), convert (religion), or purchase (economic) an opposing city, your progress bar will fill slightly—repeat this ten times to complete Civilization mode (although there are shortcuts, which we'll discuss later). In addition, although your city has already been assigned a specialty, you can inherit other types from the very cities you dominate.
The Vehicle Creator
One of your first tasks will be to create a vehicle. The vehicle creator functions very much like the creature creator, except in this case, most of the parts you add are merely cosmetic and serve no actual purpose. However, there is one exception: depending on which civilization type you're playing as (religious, military, or economic), you will find a single parts category that will enhance your vehicle's specialty, but it comes at the expense of two other statistics: health and speed. In general, your default statistics are good enough to complete this mode, but if you wish to beef up your vehicle's specialty, try not to go overboard, otherwise you may find yourself too weak or too slow to escape an enemy's grasp.
Getting Started—Spice Geysers?!
You read correctly! It appears that spice has become quite the commodity, but thankfully, the planet contains several geysers just spitting the stuff out. As such, you'll want to claim these as your nation's own by driving your vehicle to them one by one; once claimed, their icon on the mini-map will convert to your nation's color and you'll begin to collect some moolah. But beware, other civilizations will try to steal these later on, but that may or may not matter depending on how your city is doing financially.
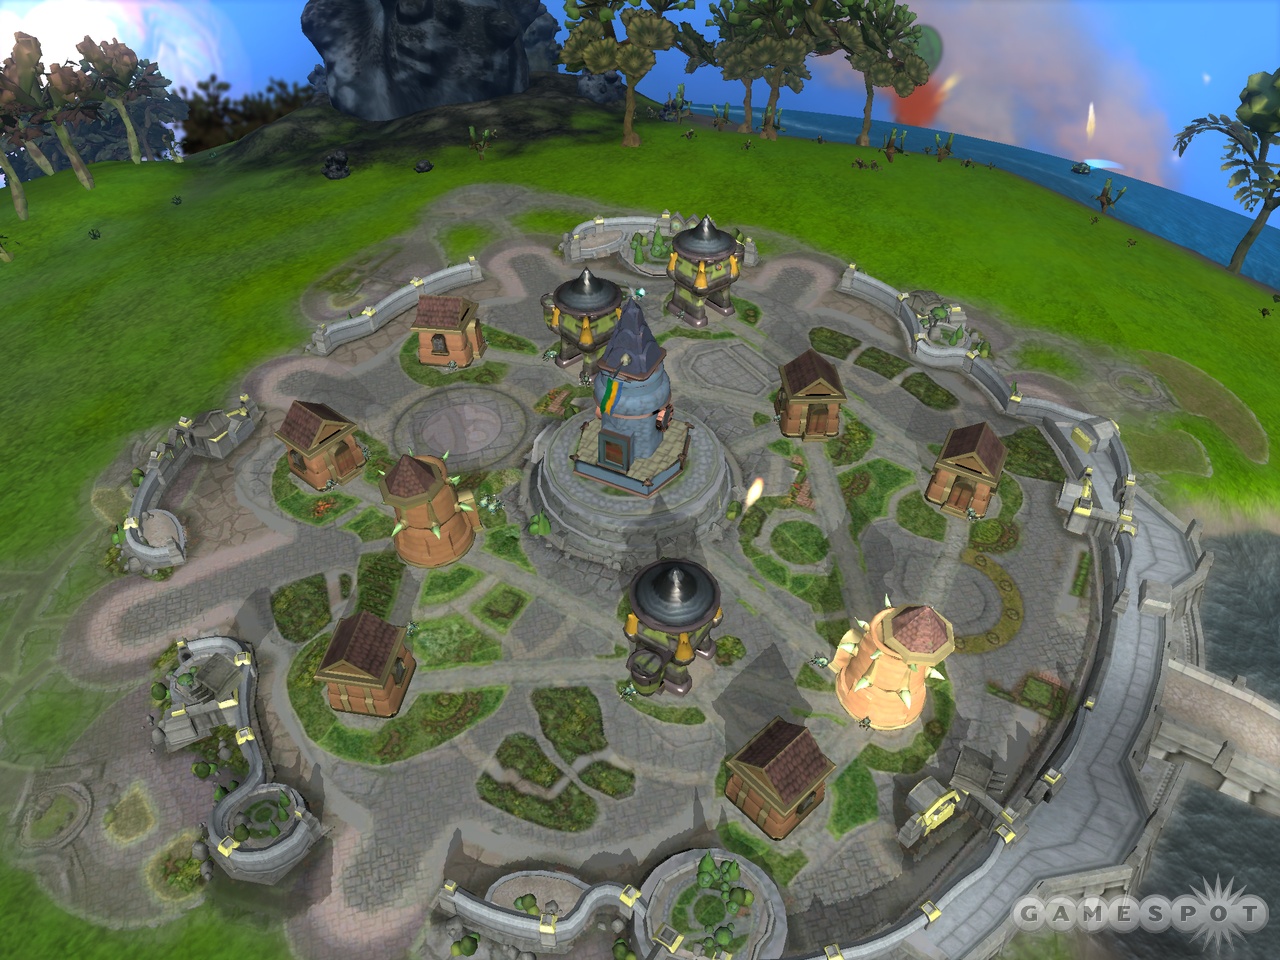
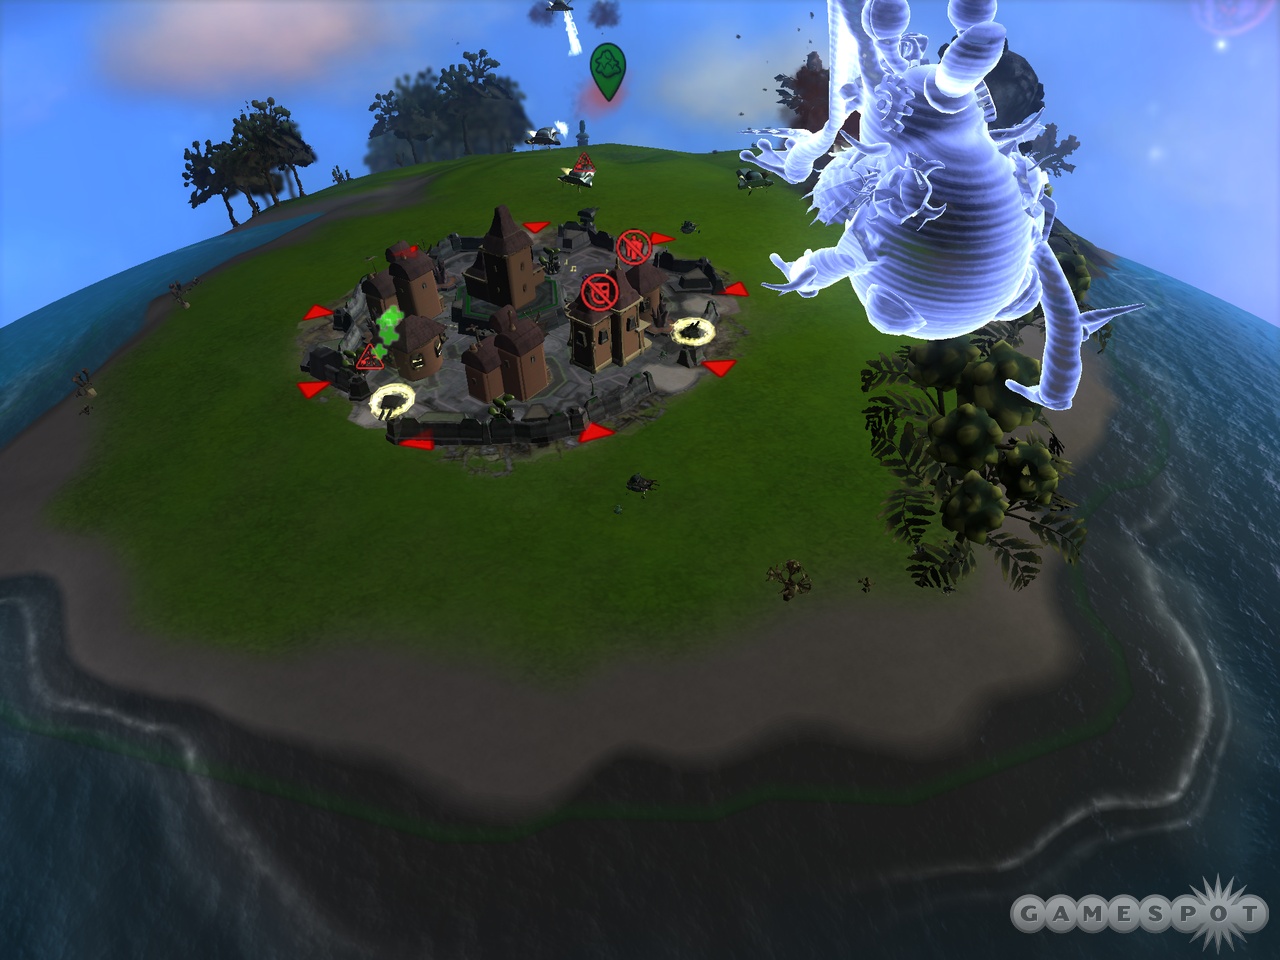
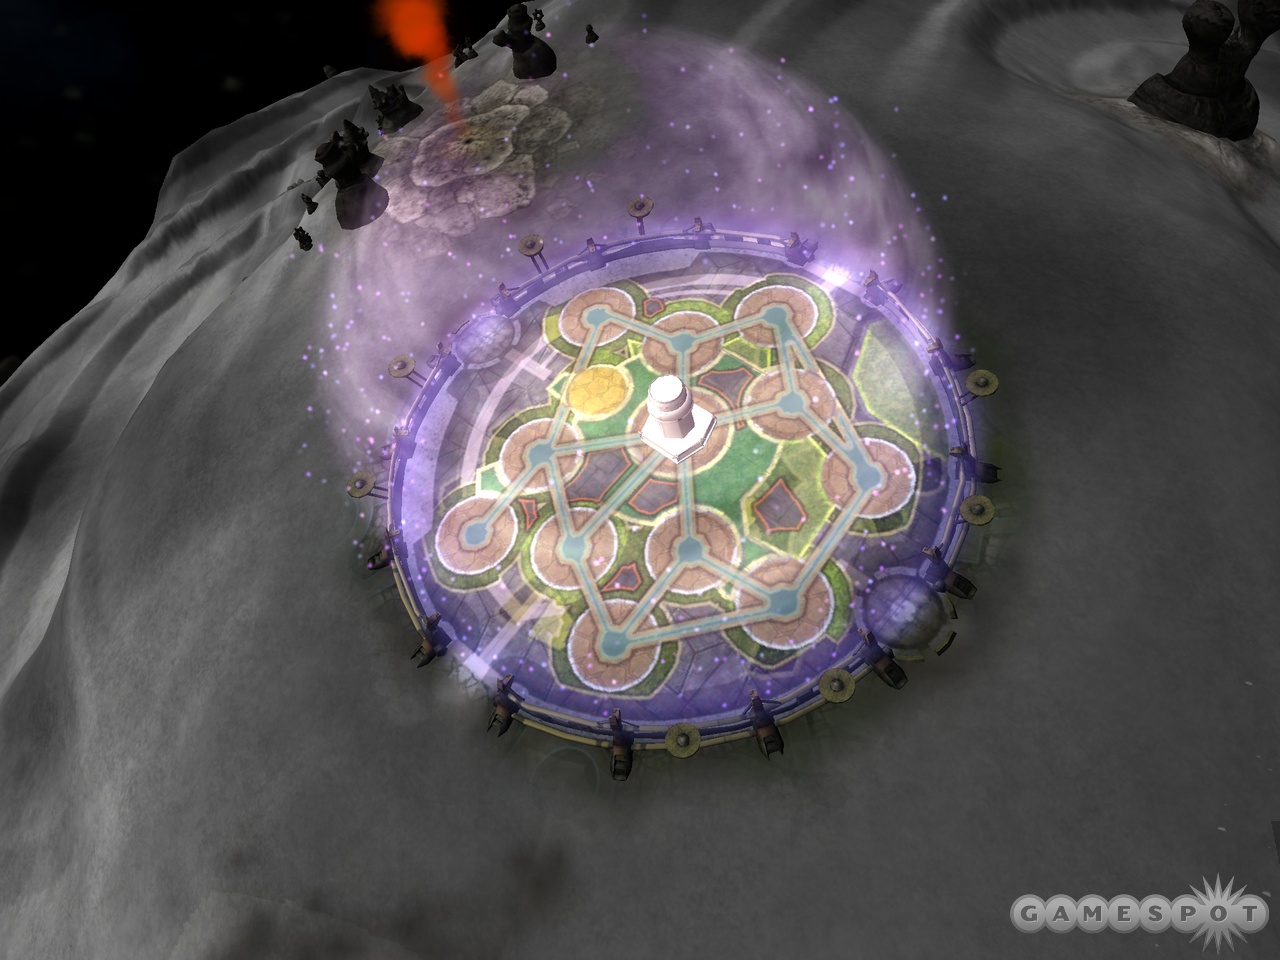
Building Your City
After taking control of a few spice geysers, you should have accrued enough money to start building your city. There are three buildings you can choose from:
- Homes: This is where your citizens live; without them, you'll have no one to staff your factories, which means you'll be a very poor city indeed. Build them adjacent to factories to enhance their monetary output. (recommended amount: 5)
- Factories: These are your bread and butter. In other words, they're the only way you can make money, aside from geysers and trading with other cities (economic civs only). However, these drastically reduce your citizens' quality of life, making them less productive. Be sure to build entertainment buildings nearby to help offset this. (recommended amount: 2)
- Entertainment: The entertainment buildings help to offset the negative effects of the factories, and increase your citizens' happiness, allowing them to be more productive. (recommended amount: 3)
It's important to strike a balance between the three units—if you have too many factories and too few entertainment buildings, your society will be most unhappy. Likewise, if the inverse is true, you simply won't be making much money! And if there are no homes, then you'll have no one to staff the factories! Oh, what's a city builder to do?! Don't be afraid of moving buildings around to enhance their effectiveness. Ideally, you should be making close to $3,000 per minute, with a fully constructed city. This should provide more than enough resources to do as you please.
Oh, and before you start building vehicles en masse, it's highly recommended that you construct the maximum amount of turrets you can for defense. They're able to deal with most land-based threats without breaking a sweat, so their investment is well worth your while. Similarly, you should add turrets to any city you inherit as soon as you can. However, they're not too effective at combating water-based vehicles, so be ready to build a boat or two to help with the naval defense.
Dominating
Now this is what we're talking about! As we alluded to before, the only way to complete this mode is by dominating the other societies. The manner in which you do this depends on which civilization type you're playing as. If you're playing as military, you'll have to build weapon-based vehicles and physically attack the other cities (unfortunately, you will have to rebuild the city afterward if you wish to make use of it). Similarly, if playing as a religious civ, you'll also have to build vehicles and roll use them to "convert" the city using their powers of propaganda. A meter above the city shows how much more convincing the citizens need to join your side. In the case of both of both a military and religious civs, the more vehicles you have, the better. It's best to focus on attacking or converting just one city at a time, so you're not spreading your resources too thin. To improve your odds of succeeding, get ready to rebuild vehicles as soon as they're destroyed to maintain a consistent attacking (or converting) force of which your enemy cannot escape.
Now the economic civilization plays a bit differently than the other two. Instead of using vehicles to attack or convert an oppose civ, you'll have to amass enough funds and purchase the cities out-right. You can interact with another city's leader by right-clicking on it and choosing the appropriate action.
Evolution
After taking control of 10 other civilizations, you will be able to advance to the final frontier: space.
Space Stage
Congratulations on making it to the final stage of Spore! You're now the commander of your very own spaceship, which will allow you to explore the far reaches of the galaxy! However, you'll first be tasked with a few basic missions to help you get the hang of your ship. These include scanning a creature, abducting it, dropping it off in your city, then destroying the infected species (follow the radar waves that emit from your ship and look for the yellow arrows marking the creatures). Once finished, you'll be gifted an interplanetary drive which will allow you to escape the confines of your planet's orbit and begin to explore the galaxy. Continue to keep an eye on your goal box to stay informed of your next objective.
Your Goal
The Space Stage is a bit more free-form than the others. That is, while your ultimate goal is to expand your civilization across the galaxy (by colonizing other planets), there are countless missions you can engage in during your journey, which provides quite a bit of flexibility in how you go about this. Completing these missions will earn you badges, which improves your rank and title, while unlocking new tools and abilities that ultimately enhance your ability to expand your civilization.
Combat
Early in your space career (and many times thereafter), you'll come under attack from space aliens. Battling them is pretty basic: select a weapon from your weapons menu and then blow them away. As you earn more badges, be sure to purchase additional weaponry so you can stay competitive. If you need to heal or refuel at any point, return to any world in which you have founded a colony (including your home world) or that of an ally for refreshment.
Terraforming & Colonizing
As mentioned, your ultimate goal is to colonize as many planets as you can. By doing so, you'll not only be able to extend your galactic reach, but it also provides a steady income thanks to the spice resources your colony mines (make sure to revisit your colonies periodically to collect said spice). However, most planets are uninhabitable until they have been terraformed—that is, you must make the planet livable by adjusting the temperature and atmosphere.
When visiting a planet, a circular meter in the bottom-left corner shows the current state of the atmosphere. Each ring within that circle represents the different terraform levels, with the inner-ring representing the best possible level, known as "T1." The icons bordering the meter convey different information about the atmosphere—the ones to the side represent temperature, while the icons above and below display atmospheric pressure. The dot within that circular meter shows the current level your atmosphere is at, and what you need to improve in order to score better. For example, if the dot is in the top-right, that indicates the planet is too hot and the atmosphere too dense to support life. Ideally, you want that dot in the very center to best support life and your colonies.
In order to begin the terraforming process, you're going to need the proper tools. Items such as the Cloud Seeder or Atmosphere Generator can increase the atmosphere, whereas Ice Storm and Cloud Vacuum will lower the temperature. As the dot on the atmosphere monitor moves inward to better T-Levels, you're going to have to stabilize the atmosphere along the way by planting various plants and creatures—if you don't do this quickly, the atmosphere will destabilize, and essentially erase all of your hard work.
To drop off plants and animals, access your cargo bay and lower them to the planet using your tractor beam (if you need additional wildlife, you can collect more from most other planets in the galaxy). Make sure to populate the planet with plants of all three sizes (small, medium, large) to further stabilize the atmosphere. Once you're done gardening, it's time to add some creatures! Make sure to add herbivores first, followed by the carnivores, otherwise the latter will become extinct due to a lack of food.
Once you've stabilized the atmosphere, you may now plant a colony and add buildings as the T-Level improves!
Onward!
So that's the basics of Space Stage! Continue to explore the galaxy, complete missions, and expand your empire to eventually dominate the galaxy!
Got a news tip or want to contact us directly? Email news@gamespot.com
Join the conversation