Resistance: Fall of Man Walkthrough
It's time to take back Europe and crush the Chimeran threat! GameSpot's Walkthrough to Resistance: Fall Of Man will help you accomplish your mission.
Although the Playstation 3 has plenty of stunning-looking games coming up for it, the one that most piqued people’s interest as a launch title is arguably Resistance: Fall of Man by Insomniac Games, creators of the Ratchet and Clank series of games.
There have been plenty of stellar first-person shooters to hit shelves in the past few years, and Resistance definitely tips its cap to them, as it’s strongly influenced by games like Half-Life 2 and the Halo series. In it, you take on the role of one Sergeant Hale, a hearty American soldier sent to England to help fight the forces of the Chimera, a technologically advanced species that is attempting to assimilate the human race. Through a twist of genetic fate, Hale is able to resist their borgification attempts and use their own genetic powers against them.
What’s more, though, is that you’re able to use the Chimeran weapons, as well, and that’s where the game really sets itself apart. The weapon design in Resistance is incredibly unique, with a blend of real-world machineguns and shotguns and alien technology, such as rifles that can fire around walls and guns that can fire through walls. It’s a crazy trip, but hey - that’s why you’re reading GameSpot’s Game Guide, right? Inside, we’ve got a complete walkthrough, details on the weapons you find, and much more.
Weapons
These descriptions are for the weapons that are available during the first play-through of the game. More guns and one new grenade become available after you beat the game for the first time; we’ll discuss them in an update to this guide should we have the chance to play the game a bit more.
M5A2 Carbine
Best Against: Hybrids, Rollers, Leapers
Your standard assault rifle, the M5A2 should be familiar to anyone who’s ever played a game with an M16 rifle in it; it has a large clip, accurate fire, and an underslung grenade launcher that’ll help you quickly deal with clusters of enemies.
The most notable thing about the M5 is that it fires extremely accurately when you zoom in with the right analog stick. You can press the fire button once for a single, accurate shot, but even when you go to full-auto mode, the grouping of the shots will still be quite close. (Much closer than, say, that of the Bullseye.) Use it at medium or long range before you get the Fareye or when you simply want to conserve ammo for that weapon.
Bullseye
Best Against: Hybrids, Slipstreams, fast-moving enemies
At first glance, the Bullseye might appear to be an objectively worse variant of the M5A2; it doesn’t deal quite as much damage, and the rounds it fires have a much worse spread effect, making it unreliable at anything but short range. When you get used to tagging your enemies with the weapon’s alt-fire, though, it’ll quickly become one of your mainstays.
If you manage to alt-fire at an enemy and hit it with the tag, then all the bullets you fire from your weapon will home in on that enemy, allowing you to fire from behind cover. The best way to take advantage of this is to get near a piece of cover, such as a corner or a barricade, tag a Hybrid, then duck behind the cover and fire into the air in front of or on top of you. All your rounds will make a hard 90 degree turn and zoom in towards your enemy, killing them post-haste. Keep in mind that if your reticule turns red when you’re aiming at an enemy, then you’re guaranteed to hit them with a tag, but even if the reticule doesn’t turn red, you can still attach a tag to them if you aim properly. You’ll know you’ve tagged a foe by hearing the small tone that indicates contact.
Bullseye tagging can also be useful against enemies that force you to move, like Howlers. If you’re running from a Howler, or attempt to lead a Titan around an obstacle, just tag them with the Bullseye and fire up into the air.
Note that Bullseye tags are ineffectual if your foe is actively taking cover. The bullets are capable of heading straight for your enemies, but they won’t navigate around barricades or through corridors or anything like that.
A hidden function of the Bullseye is the ability to make a grenade. If you fire a tag at the ground and hold down the L1 button, you’ll eventually hear the tag-lock tone. Let go of L1 and start firing the weapon at the tag; the rounds will be caught by the tag and float in the air, making a kind of bullet-grenade. If you target an enemy and hit L1 again, the bullet grenade will fly through the air and all of the rounds will impact them instantly. This is a pretty flashy function, but takes a long time to set up and is rarely very useful.
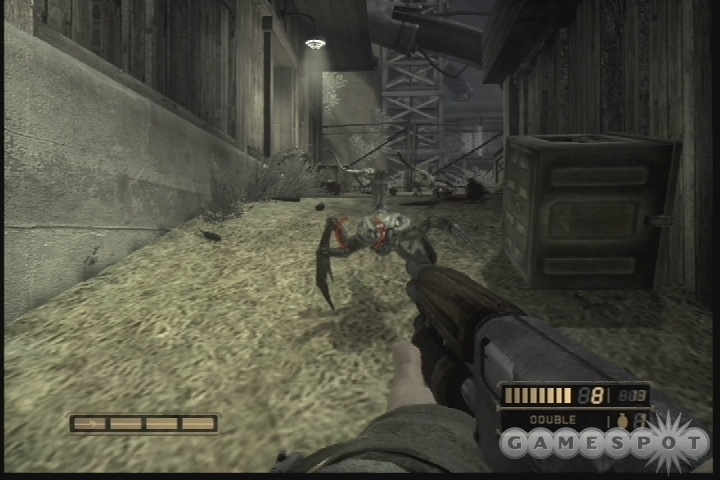
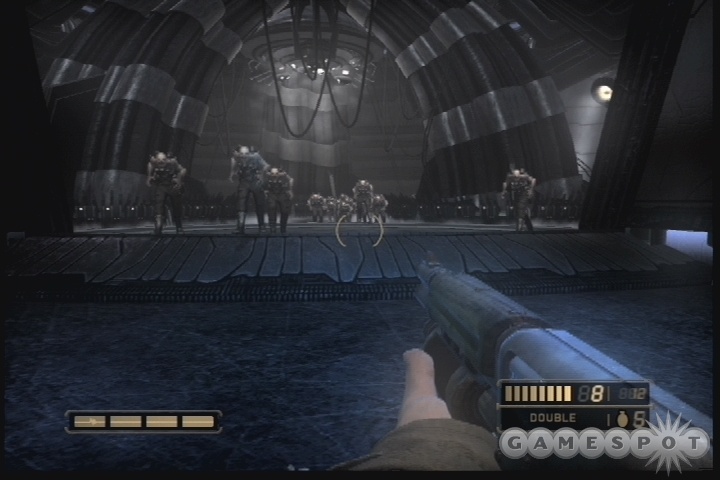
Rossmore 236
Best Against: Howlers, Grey Jacks, anything that gets close.
Your standard shotgun. R1 fires a single shell; L1 fires both barrels simultaneously. This is, as you may expect, a weapon that only works well at extremely close ranges, so it’s best to use it on enemies that attack at melee range, like Grey Jacks and Howlers. You can keep it up while corridor-crawling; even if it doesn’t kill a Hybrid on the first shot, you’ll usually send it to its feet, allowing you to finish up with a melee attack for the kill.
Auger
Best Against: Enemies that man sentry guns, enemies behind cover.
The Auger isn’t the first weapon in FPS history that lets you shoot through walls; games such as Red Faction have had them for years. However, it is one of the few that actually makes the process fairly easy. When fired, an Auger round will travel straight, and pass through any walls that it encounters (although it slows down on the way through solid objects). The more walls it travels through, the more powerful it becomes. What’s more, your aiming reticule will actually turn red if you’re aiming at an enemy through a wall, letting you know if they’re going to be hit or not.
Generally we found this to be best at killing enemies that are stationary, or when they’re just on the opposite side of a wall from us. Enemies that man the many sentry guns you’re going to find in the game are also prime targets; their shielding protects them from normal fire, but not from Auger rounds. Many of the Hybrids you encounter will also duck behind cover in between firing at you; shoot at the cover and you’ll kill them easily. Firing the Auger by itself, in the clear, isn’t really worthwhile, as it doesn’t seem to be very powerful unless it travels through walls.
The secondary fire here pops up a force barrier that temporarily shields you from enemy fire while letting you fire the Auger through it. It’s great for travelling through areas with mines in them, since you don’t always know from where they’ll pop; simply throw up a force barrier when they explode to avoid all damage. Apart from that, we confess to not using this ability very often, although individual tastes may very. In general, it seems better to just get used to taking cover and knowing how to do that.
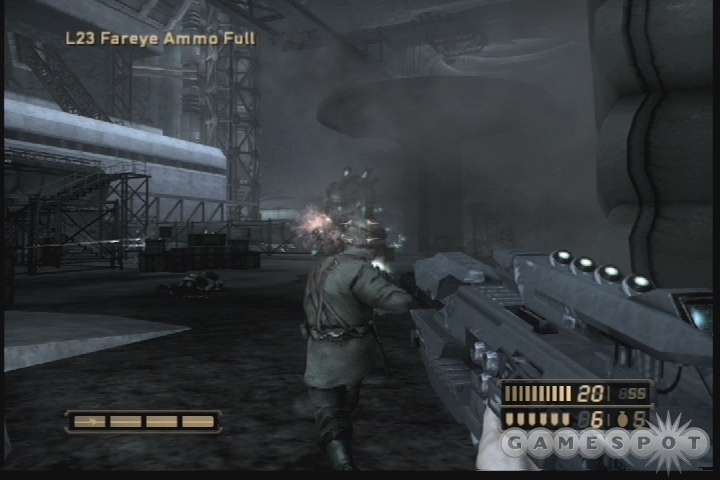
L23 Fareye
Best Against: Steelheads, Hybrids.
This is a pretty standard sniper rifle, with a bit of a twist: holding down the L1 button will slow time down, letting you line up a perfect headshot. Since most enemies, even Hybrids, can take multiple rounds to the body without dying, headshots are going to be almost required while using this weapon. Get used to ducking out of cover, sighting an enemy, tapping L1, tapping right on the d-pad to zoom in fully (if necessary), lining up a headshot, firing, then quickly ducking back behind cover. You can continue to hold L1 after firing, but it’s better to let go and wait for it to cool down. It takes too long to fire again in slow-motion, and the cooldown on the timer when it reaches the red zone is pretty lengthy.
You can only carry 12 rounds of ammo for the Fareye, so it’s not something you want to keep firing all the time. It’s best for using against Steelheads, who’ll otherwise screw up your cover with their Auger fire, but you can, of course, take down almost anything that you spot at long distance with it.
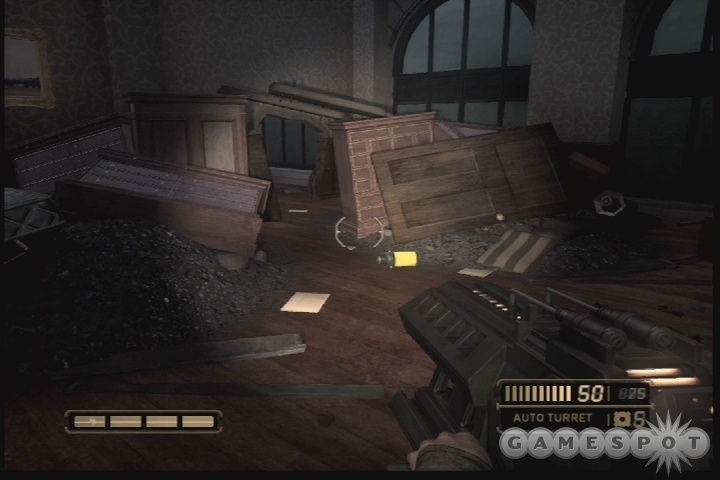
XR-005 Hailstorm
Best Against: Hybrids, enemies around corners.
The Hailstorm is an interesting weapon, although "interesting" doesn’t always translate into "overwhelmingly useful". When fired, it sends out a stream of bolts that bounce off of walls and corners until they come into contact with flesh. In theory, this lets you bounce your shots around corners towards enemies, but in practice, the damage done is so light, and the ammo runs out so quickly, that you may as well wait until you have an enemy in your sights and simply fire away at them headon. The damage is still pretty light on a per-bolt basis, but the rapidity of the firing will overwhelm most standard-sized foes.
The alt-fire is a bit more useful. When you hit it, the remainder of your clip will launch into the air, where the bolts will auto-fire at the closest enemies to it, acting as an auto-turret. This lets you, for instance, jump up and launch an auto-turret into the air, where it’ll be able to fire down on enemies in the distance that are hiding behind cover, or fire it into the air near a corner, letting you hang back while it shoots the enemies that are coming at you. There are some drawbacks, though; the turret has a hard time tracking enemies that move at even a modest pace, which will waste some of your ammo, and it won’t prioritize enemies very well, meaning that it’ll often shoot at a close enemy that’s behind cover instead of a more distant enemy that’s exposed. Still, if you store up a goodly amount of ammo for this because you don’t use the auto-fire, you can use this to help clear out some dense concentrations of enemies a bit.
XR-003 Sapper
Best Against: Rollers, Leapers, Slipstreams
The Sapper lays organic mines that stick to walls and each other. Each individual mine, when fired, will sit where it’s laid until an enemy comes close, when it will explode. Unfortunately, the individual mines don’t deal much damage, so you’ll have to fire out five to ten of them to take down a Hybrid or a Steelhead. That’s not such a problem, usually, especially if you know that one of them is coming down a hallway or is attempting to rush you, but when coupled with the limited range of the device makes it a weapon best suited to weaker enemies. Laying down a thick layer of mines in front of you when Leapers or Rollers come your way is a great way to eliminate them all without having to waste more valuable ammo.
The L1 button here will detonate any mines in the area when held down, but since they blow up when enemies approach them anyway, this is only really useful if you happen to block off a corridor that you need to pass through or something. Even then, you can shoot the mines to destroy them.
L209 LAARK
Best Against: Large enemies, dense groups of Hybrids or Steelheads.
Every shooter game has to have a rocket launcher: this is a federal law. The L209 LAARK fulfills this requirement for Resistance. When fired normally, it pretty much acts as you suspect it might: a rocket shoots out, impacts whatever you were aiming at, and does a great deal of damage, enough to kill anything in a good-sized radius around the blast zone.
If you fire the rocket and then hold the L1 button, though, you can actually slow the rocket down in midair and re-aim it. You can simply slow it down by lightly pressing the button, or completely stop it by jamming the button all the way down. When you let go of the L1 button, the rocket will immediately take off and fly towards whatever you’re currently aiming at, allowing you to adjust for a missed shot by forcing your rocket to reverse course. Of course, it’s better not to miss the first time.
If you hold down the R1 button after you fire the rocket, the shell will launcher small munitions that will automatically track down and hit individual targets. Useful for dealing with clusters of Hybrids.
Walkthrough
Note that much of the walkthrough is dedicated to pointing out the location of the Intelligence files that are hidden in the levels. We did miss a few of them in the last four levels, so feel free to use the Feedback link to point out where they are if you happen to find them!
York: Operation Deliverance The Gauntlet
This opening level of Resistance can be somewhat confusing, and we’re not just talking about the storyline introduction. What, the Americans managed to keep secret the fact that mutants were overrunning all of Europe? What did people think, that everyone in Europe and Russia had just gotten really busy and couldn’t telephone them for two years? The soldiers didn’t know what they were going to be facing - didn’t they think it was a little odd to be invading England then?
But whatevs, as the saying goes. No, it’s mostly confusing because you’re not going to be able to heal yourself here, which is initially somewhat offputting. You’ll take damage as you play, obviously - it’s not super easy to fire on the Chimera without doing so. But again, no way to heal yourself. When you die, though, you’ll respawn at the last checkpoint with your health intact and will be able to forge on ahead. So...yeah. You’ll need to die at least once, most likely, but you can die as often as you like without ending your game, so you can afford to be a bit reckless here.
Anyway. You’re going to drop with your squad into a hostile firezone. Take a moment to get used to your controls. For now, all you need to know is that R1 fires, Square reloads, Circle throws a grenade, and Triangle is a melee attack. More commands will be popped up via the help text as you play. Get started killing Chimera, then!
The Bulwark
After you move through the city streets for a while, you’ll come to a checkpoint where the Hybrids have barricaded themselves in front of a set of buildings. You can flank them to the left and work behind their defenses, if you wish. Your squadmates will quickly be finished off, so you’ll have to do the bulk of the killing yourself.
As you head into the building here, you’ll see a Hybrid walking up the stairs, but before you follow him, check the ground floor for a box of frags. When you do head upstairs, kill the Hybrids, move across the balcony where the snipers were located before, and kill the other Hybrids there. Before dropping down to the alleyway behind the houses, though, head back downstairs to find the first piece of Intel beside a body. This is the York: Guidelines piece of Intel. Finding Intel doesn’t have much of an immediate effect, but we’re betting that it’ll unlock skills for you later on.
Alleyway
When you’re ready to move on, drop into the alleyway near the dead soldiers. If you head down towards the end of the alley, near the quarantine sign, you can find a couple of M5A2 grenades in a corridor there. Down the opposite end of the alley, though, you’ll find a Bullseye weapon, which is the weapon of choice for the Hybrids. (Guess the other Hybrids that you’ve been facing have simply been disintegrating their weapons as they come along.) It doesn’t have a grenade launcher, but can instead fire tags at enemies, which will then let you fire at them from around corners. Niiiiice.
As you move forward, you’ll come across a few Hybrids that will crouch down next to a bus and fire on you. If you crouch down behind the barriers on the left side of the street and bank a grenade off of the bus back towards their position, you stand a good chance of unlocking the In For A Penny skill. As you head down the street towards the burning piles of rubble, check the left side of the alley for a small courtyard, where you can find the Intel: York: Infection.
Fight your way past the group of Hybrids in the next small yard (this would be a prime time to use a grenade or two) to find a couple more soldiers. Follow them to the end of the level.
A Lone Survivor
You have...changed. You will now regenerate damage that you take, up to one-quarter of your maximum life bar. You’re going to be harrassed by Crawlers on your way to the first checkpoint, but they shouldn’t be too troublesome if you stay mobile and shoot them from a distance. If they jump onto one of your friends, shoot above their heads quickly, or they’ll die.
When you reach the Hybrids that fire on you from atop the building, shoot them until they run off, then pursue them. You’ll apparently automatically obtain the Intel: York: Regeneration as you climb the stairs in pursuit of them. Head into the building at the top of the steps, but before heading up the stairs, check the ground floor to find the Intel: York: Isolationism.
Moving on, you’ll find plenty of Hybrids waiting for you at the top of the building. Tag them and take them down one by one. Keep moving until you drop back down to the street, then hop into the tank there.
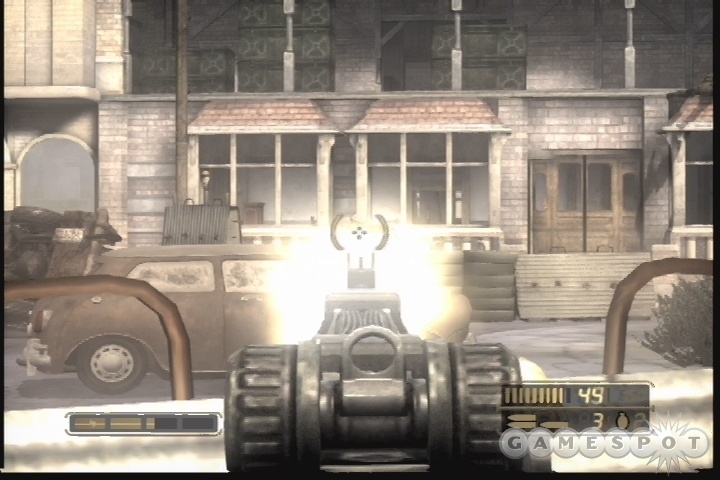
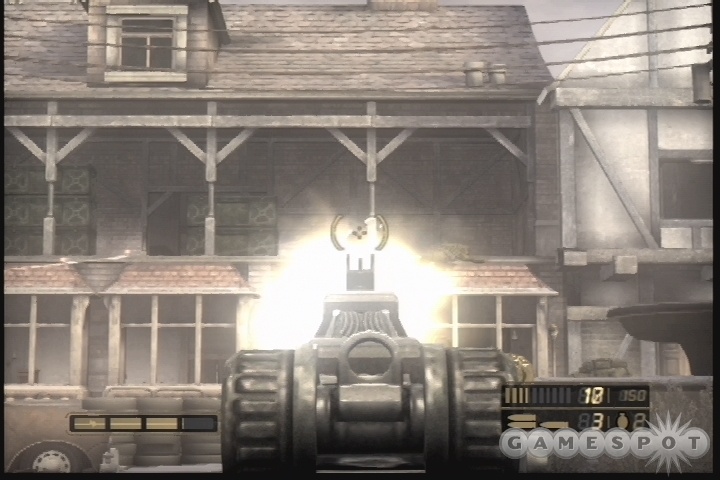
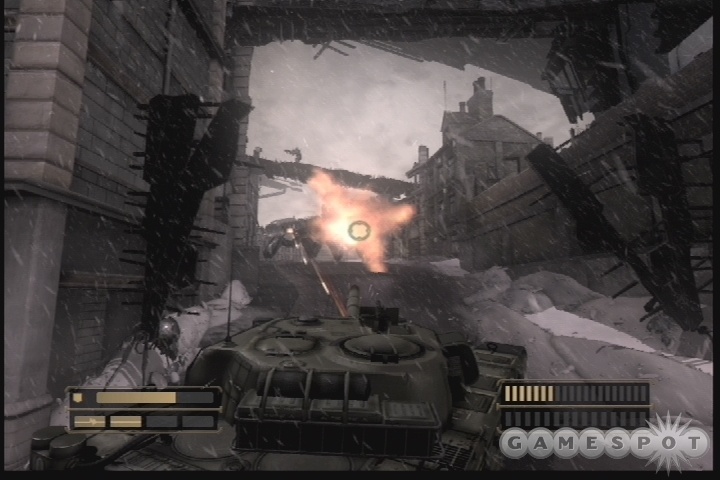
Aw Yeah, Baby
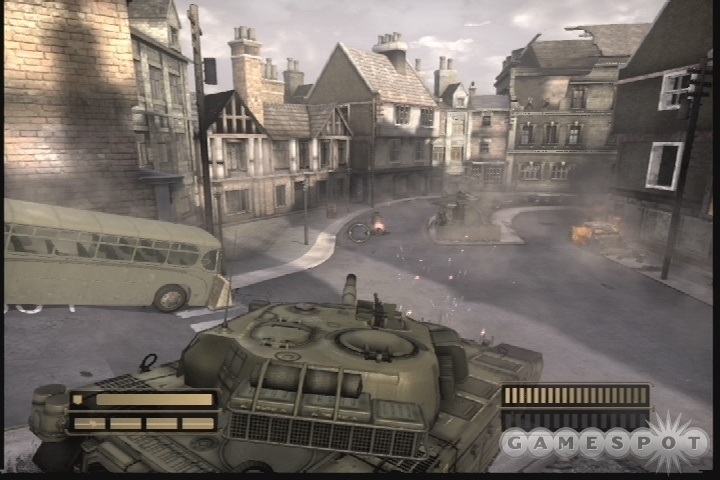
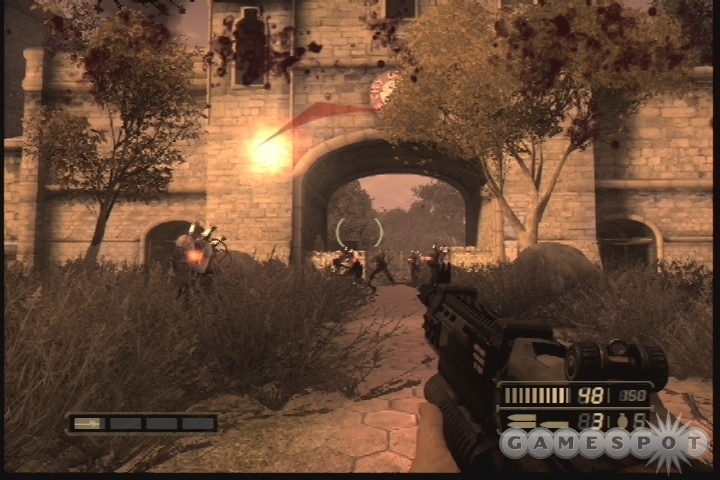
The tank combat section of the game is almost unloseable, at least on Medium difficulty. You’ve got a tank...your enemies have rifles. Do the math. That’s not entirely true; your foes will have some anti-tank guns scattered in the streets, but they almost always will miss with their first shot. You can switch to the turret with the O button if you need to, but you probably won’t, unless a Hybrid gets so close that you can’t shoot it with the main cannon. When you clear the large archway after the main concentration of Hybrids, you’ll finish the level.
Spires
As soon as the level begins, head left along the building’s helipad, then hang a left down the stairs. Up the next flight of stairs, you’ll find the Intel: York: Landing document, right near the building where you started the level, where the general was screaming at everyone.
With that done, your goal now is to assault and defeat three enemy machinegun nests that are pinning your men inside the bus depot. This is more or less a straightforward fight; the nests are tough to crack, but you can use the buses for cover as you approach them. The area you’re fighting in is essentially a large square, with the bus depot in one corner, the fuel station (with the most well-defended nest) at the opposite corner, and two more lightly defended nests in the other corners. You’ll want to nab one of the lightly-defended nests first, using grenades or by tagging enemies and firing up into the air, then turn its machineguns on any enemies you see before sweeping through the rest of the area.
When the nests are down, you’ll have two counterattacks to deal with. You can stand atop the bus depot if you want a better view of the battlefield; your M5A2 can snipe with decent accuracy if you zoom in (click the right analog stick). Go ahead and use up your grenades to wipe out the Hybrids; these are some tough fights. When the second counterattack is finished, you move on to the next area of the game.
Grimsby: Chimeran Conversion Center
Fates Worse Than Death
Feel free to look around this area. There are some Menials wandering around. They’re not warriors, as their name should suggest, but they’ll still attempt to grab onto you if they see you. You can kill them with one melee blow. Scout around; when you find the door with the switch, open it to meet with Parker.
Keep moving on through the facility from this area, being mindful of the small electrical balls that roll around; when shot, they explode something fierce. Venture onward until you come across more Hybrid. If you head out to the left corridor in the small room where they ambush you, you can find a bathroom with the Intel: Grimsby: Conversion document. Move from there into the elevator nearby and flip the switch to move up. (If it doesn’t move, make sure the power switch outside the elevator is flipped to the green position.)
The Factory
Move through the factory until you come to an open, exterior area. Little knownst to you, this area is infested with popper mines; they’ll pop up into the air when you come close, levitate there, and fire lasers at you. They can’t take much damage, though, so try to duck behind cover when you spot them and tap them with a weapon to take them down. Also in this area are a set of Hedgehog Grenades on the small patio, and a Rossmore 236 shotgun underneath the stairs leading upwards.
Head up the stairs and smash the boxes with your melee attack to open the path onward. When you come to a point where you can jump down, instead jump across to the busted walkway to open up the mines below you, then shoot them from the upper vantage point. Drop down and start making your way through the Hybrids and Menials that you encounter. When you pass through the second large warehouse here, you’ll find an alien switch on the upper walkway, near where the Hybrids were standing on the boxes. Bust through the door there, fire away at the mines, and drop down when the path ends to move on.
Conversion
A better name for this level would’ve been "A Series of Tubes," but we guess that Gears of War already nabbed that in-joke. Nothing too crazy at the outset of this; just kill the Hybrids that you see and try not to die. Eventually you’ll reach a cutscene; sit through it, then follow the path onwards to encounter some Crawlers. Hey, guess what! You need to shoot them before you die.
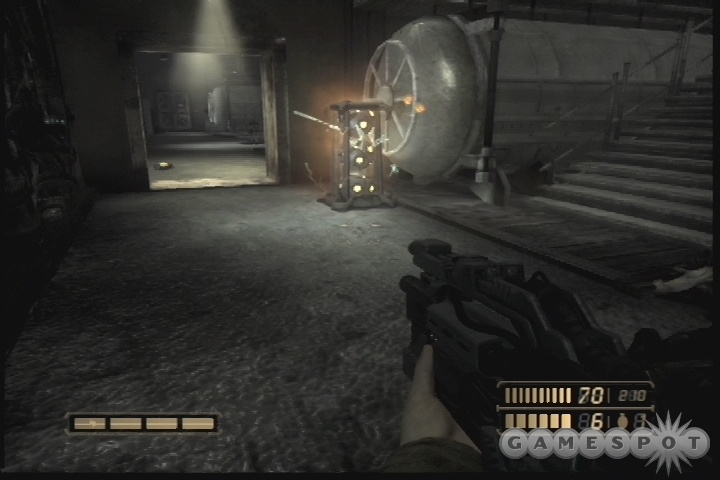
Press forward until you come to a room full of cocoons. Nothing you can do for these poor souls; you can’t even put them out of their misery. You can settle for killing all of the Hybrids in the airship repair factory around the corner. There are a lot of them, though, so use your M5A2 and zoom in to snipe them, using the corner for cover. Just zoom in, aim at the corner, strafe until you see a single Hybrid, and take it down, then move over just a bit more and repeat the process.
Kill your way forward until you find another alien switch that’ll let you descend into the inner workings of the conversion factory. Kill kill kill until you reach the elevator that leads to the next level.
Hunted Down
Move down the elevator that you eventually reach and head into the bar nearby. After killing the mines, you can find more Rossmore ammo behind the bar itself, which apparently was quite popular with midgets, judging from the size of the bottles. In another one of the small rooms on the docks, you can find the Intel: Grimsby: Captured document. It’s actually lying on a counter in the room with two mines inside of it.
Keep moving along the docks, but be mindful of the mines. When you reach a safe harbor in a seemingly empty room at the empty path, you can probably already tell that eight or nine Hybrids are going to jump out at you. Enjoy the ambush!
Around the corner from that area, you’ll take on more Hybrids. Climb the stairs here and poke around near the bodies to find the Intel: Grimsby: York Set Up document. After moving outside, you’ll come across more Leapers, but luckily, they’ll attack you just as you walk through a doorway, allowing you to back up a bit and cover the doorway with fire, making it a natural chokepoint. When you reach the elevator moving on, Parker will radio in. Ever the bearer of good news, she reports that the Hybrids have covered your escape route with sentry guns. This is gonna get sloppy....
Well, not incredibly so. There are plenty of Hybrids here, but they’ll be split up into small squads, allowing you to use your grenades to off them. There are two sentry guns set up in the middle of the area, but you can easily flank them by sticking to the right side of the area and moving along it. After defeating the nest of five Hybrids (a perfect time to pick up the multi-kill grenade skills if you haven’t done so yet), continue along the right side until you can jump onto the flatbeds there, then climb up onto the shipping containers and drop a grenade on the gunners. Follow the path behind them until you can drop down onto the street, and you’ll move on to the next area.
Manchester: Convoy Recovery
Path of Least Resistance
It is chaos on a half-shell at the beginning of this level, as you lend your American brute strength to the British forces as they attempt to reach the convoy that was recently lost to the Chimera. At the start, take a left and walk along the street, then run across to the left side of the Chimera position. From there, you can hide behind the corner and flank the enemy positions as they attempt to reinforce themselves.
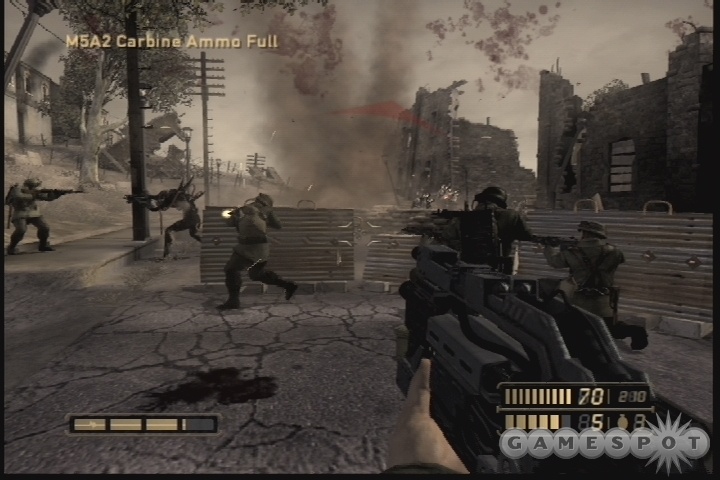
Proceed slowly here; it may seem like the enemies have infinite numbers, but they will indeed eventually stop coming if you shoot them enough. One thing that is unlimited is the number of reinforcements that you have on your side; they’ll continually stream from out of nowhere to help you out, just like a Call of Duty game. Let them kill off the Hybrids as they appear; you’ll have to do a fair amount of killing yourself, but every little bit helps. You will also run into Leapers near the end of the first slope. When you run across them, backtrack into a chokepoint of some sort, preferably away from the fire of the Hybrids, and unload on them with your M5A4.
It’s a fairly straight line to follow here. Head down the path until you can’t go any further, take a right onto the street there, then hang another right to further continue down the street. After killing off all of the Leapers that appear, fight your way towards the bridge over the river nearby. Before heading across though, veer off to the left and find the steps that lead underneath the bridge; the Intel: Manchester: Of Howlers document is down there.
Bridgetime
When you cross the bridge, expect most of your followers to bite the dust; there’s a sentry gun across the way that’ll light you up when you near the far side. Dash behind the sandbags if you can and take it out. (If you’re quick, you can just make a mad run for it as you’re crossing the bridge, which will let you get behind it before the Hybrids can run over to it and use it.) As you approach the cathedral nearby, a Howler will attack you. They’re resistant to most of your weapons, so switch over to your shotgun and blast away at it until it goes down. Try to stay in the middle of the group of soldiers that pop up here; they’ll goad the Howler into leaping at them and distract it while you take it on. (On Medium difficulty, attaching a Bullseye tag to the beasts head then unloading a clip into the air will usually solve your troubles.)
The Cathedral
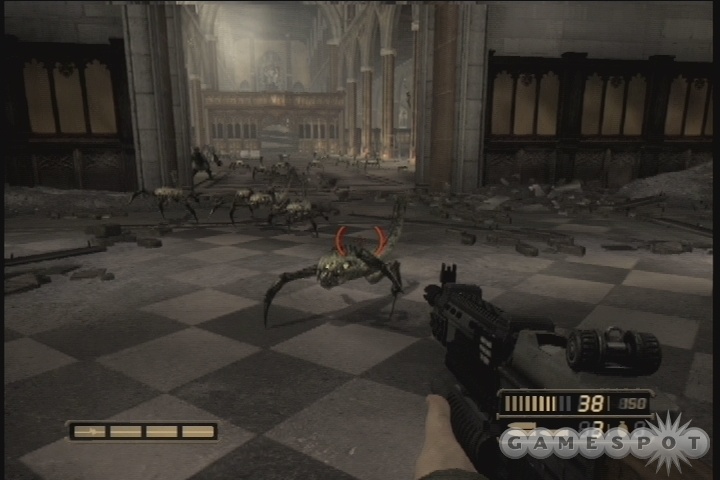
As soon as you enter the cathedral, the biggest Leaper attack you’ve yet seen will commence; they’ll flood the area almost completely, and won’t stop coming for quite a while. If you stay out in the middle of the floor, you’re going to die! Your best bet to survive here is to move off to one side of the cathedral floor and try to get the Leapers off your tail by running around in the church pews while intermittently turning around and shooting a bunch of them out of the crowd. If you can herd them into a chokepoint, you can chuck a grenade or two at the crowd to off a bunch of them.
However, you might want to hold onto your grenades, as a pair of Steelheads will bust out through the wooden barrier when the Leapers finally shuffle off and meet their makers. Steelheads wield Augers, weapons that can punch right through solid objects, so you can’t hide behind anything to take cover from their fire. Besides that, they’re essentially super-upgraded Hybrids, with stronger armor and a lot more health. If you nail them with a grenade as they come through the wall, you can knock both of them over, then finish them off with another grenade after that. Otherwise, two barrels of shotgun will help you out here. Save some shells for the Howler that comes into the area after them, though. It’s a madhouse! A madhouse!
When you’re done with all of these enemies and the Hybrids that follow them, head out through the small connecting corridor and start looking around. You can find the Intel: Manchester: Crawlers document on the base of one of the large shelves here. With that done, start moving through the buildings outside of the cathedral until you reach another checkpoint.
Back On The Streets
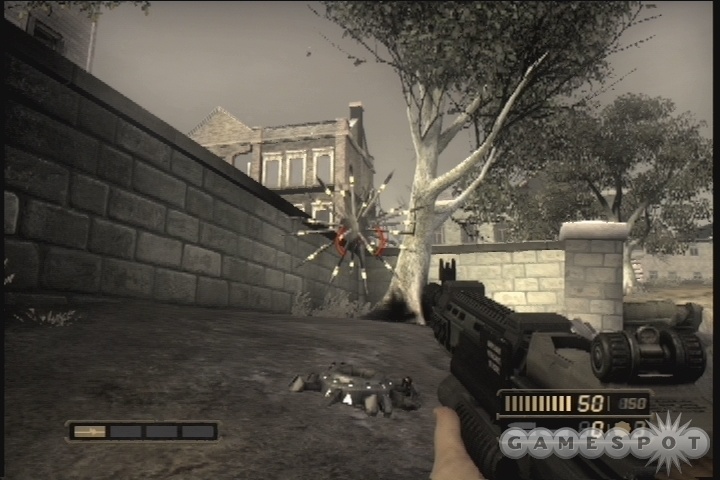
Start making your way down the street after the initial flood of Leapers gets past you. The next corridor, with all the Hybrids, is an ideal spot to earn the Nowhere to Hide skill, which rewards you for killing five enemies in one level by shooting them through the wall with the Auger. Keep in mind that if you’re close enough to an enemy, the Auger’s crosshairs will glow red when you can hit them, even when they’re behind a wall or obstacle.
Eventually you’ll come to an open courtyard where two Howlers will attack you. Take them out, then move on to find an unpleasant surprise: mine emplacements that pop up Hedgehog grenades. Nothing to do but walk close enough to spring them, then quickly backtrack and hope that they don’t deal enough damage to kill you. More new mines await you in the field below this position, where you’ll stumble across a mine that pops up, then floats back down to the ground before sending out a sonic wave along the surface of the grass. A properly timed jump will let you avoid damage here, but there’s nothing you can do for the Hedgehog mines save get behind cover.
Tip: That’s not entirely true. If you use the Auger’s Force Shields, you can quickly raise a barrier that will prevent any damage from the mines, if you fire it off quickly enough.
The long, wooden creekbed here holds the Intel: Manchester: Stalker Hunt document near a body at the end of it. Grab it, then climb back up and walk up the grassy slope leading up to the playground. Kill the Hybrids in the area and move around to the street with the mines on it. The sonic mines here are similar to the ones that you saw earlier, save for the fact that they detonate at chest height; you’ll need to duck in order to avoid getting damaged.
Keep fighting your way through the streets and buildings until you hear human voices. You’ll come to a sentry gun here; fire at the explosives next to it to kill it, then move up the steps to end the mission.
Outgunned
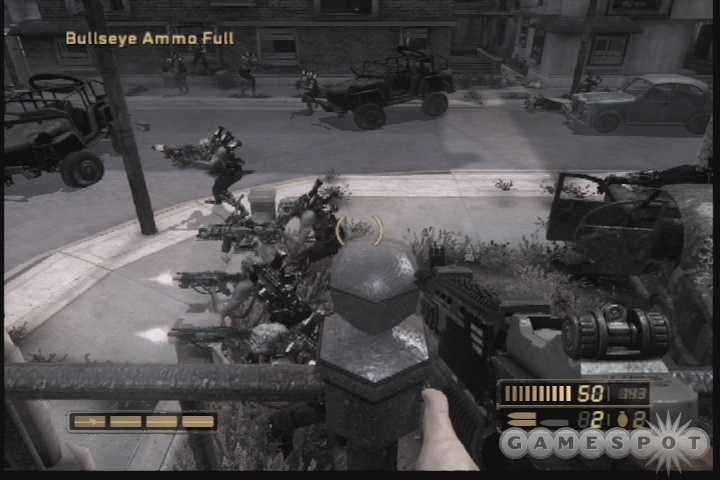
Time to bag yourself some big game. As per usual, there isn’t much in the way of strategy here; it’s just one big fight. You’ll have to begin by circling around the amassed Chimera forces. They’re concentrated mostly to the left side of the fountain in the middle of the square here, so flank left, use cover, and drive them back from the buildings on the periphery of the area while also using grenades to weaken the forces around the fountain.
After all of the Chimera are dead, you’ll have a couple of seconds to wait and rest; take the time to run around and pick up any grenades or health that you may need. When you spot the landing craft coming in overhead, know that they’re going to be dropping their load down where you first entered the area. As soon as the troop carrier is set down, get ready for a deluge of Hybrids. You can sit back and let your squadmates deal with them, if you wish, but it’s probably for the best to chuck grenades at the enemies as they flood forth, or hunker down behind some cover and start blasting Auger shots through it.
Stalker
When all the normal foes are dead, your big challenge arrives in the form of a Stalker. These large anti-aircraft vehicles are preventing you from being airlifted out of the area, so you have to take it out. Luckily, it’s not all that difficult to do so. Switch to your M5A2 and take cover from the Stalker’s fire. It may initially target you, or it may not. Regardless, you have to duck behind cover and wait for it to start firing on someone else; it’ll periodically run off and do so.
The best method for dealing with this guy is to hide behind the large convoy truck that dominates one corner of the map. The Stalker has two methods of dealing damage: an extremely high-speed turret that’ll spit out shells at you and quickly wear your health down, and guided missiles which will launch up into the air and slam back down on you. The only way to really dodge the turrets are to get behind cover; dodging the missiles involves running in any direction as fast as you can. The missiles go high enough into the air to reach you behind most cover.
Of course, if you hide behind the convoy truck, nothing can really hit you, including the missiles; just duck underneath the truck when you hear them launch and sit back in comfort as they impact the truck, leaving you without a scratch. That doesn’t solve the problem of how to actually defeat the Stalker, though. It only has one weak spot, on its rear side: a small power core. You need to wait for it to fire at another soldier, then scope in on the core and unload on it.
And that’s, as they say, all she wrote. You’ll have to shoot the core as many as three times before the Stalker blows up. When it does, the mission ends.
Nottingham: Chimera Tunnel Nexus
Into The Fire
There’ll be a hell of a fight as you start this mission off. The Hybrids have completely covered the hill in front of you with sentry guns and trenches, so you’ll need to persuade them to evacuate the area. Your Rossmore can be very convincing.
The three sentry guns will be the first obstacle in your way, and they can be tough to take down. If you have enough rounds for your Auger, you can definitely just dash out from behind cover and paste them with that; their faceshields won’t protect them. If not, you’ll have to dash across the street, taking cover from the gun’s fire, until you can flank them on their left side.
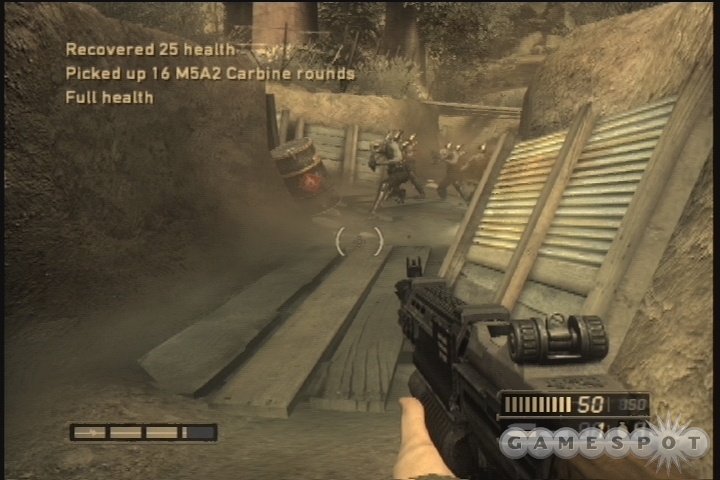
The fighting in the trenches here is going to be rough, as plenty of Hybrids will be pressing you and attempting to push you back. Trenches are made for the Rossmore, but only if you’re bold enough to rush your foes. Otherwise you may find it best to just deplete your grenade ammo to deal with these groups.
At the end of the trench, you’ll come up and find yourself pinned down by another sentry gun. You can flank it by heading to your right, digging into the trench there, and jumping up the boxes at the far end. When you’ve cleared the sentry gun, head down into another ditch and take out the gun positioned there. Check the rooms here to find the Intel: Nottingham: Harbinger document, on one of the tables near all the health and ammo.
When you reach the house atop the hill, throw grenades through the door to hopefully ignite the explosive barrels within and clear out some of the Hybrids. Regardless, you need to kill them off. The Intel: Nottingham: Tunnels documents are on the table at the base of the stairs. The upper floor of the house is where the mortars are; kill everyone there to move on.
Conduits
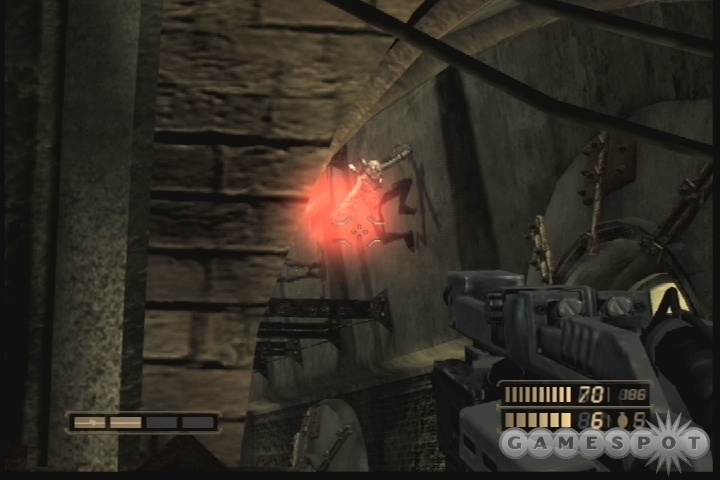
Your first big fight here will be against a Titan, the massive engines of the Chimeran war machine. These 20-foot-tall beasts are essentially uber-Hybrids; they have the same basic body shape, but possess skin that’s much more resistant to attack, along with a homing rocket launcher that will knock off three full bars of health on the Medium difficulty. Yep - they’re tough.
They don’t have any particular weak spots, although attacking their head is apparently the best way to go, according to the game’s intel file on the beasts. You can stagger a Titan by dropping a grenade at its feet; this is often a good way to prevent it from firing on you with its launcher, if you see it start to prime it with fire. If you suspect that the launcher’s about to go off, strafe and jump away simultaneously; you should be able to dodge the fire. The Titan will also smack you with his weapon if it gets close to you, so continuously backpedal away from it!
There’s no magic secret here; you just have to deal a lot of damage to the Titan before it goes down for the count. Double-firing your Rossmore is one way to quickly dish it out; the animal will be close enough for all the rounds to hit it most of the time.
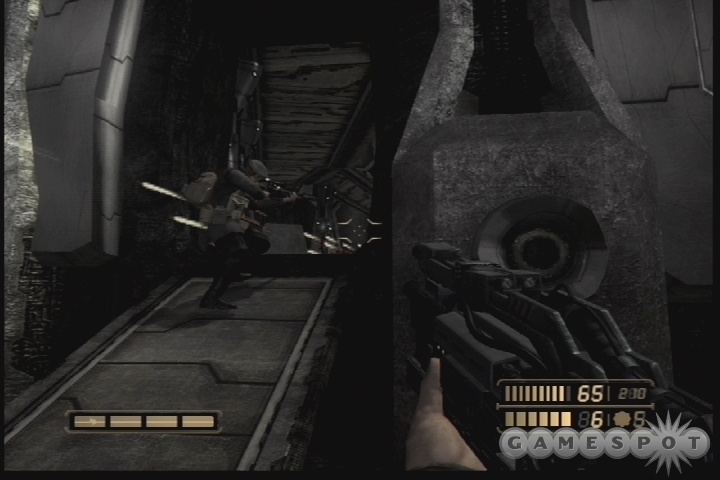
The Tunnels
Move on from the Titan fight to find an L23 Fareye sniper rifle. This bad boy has an intriguing alt-fire mode that slows down time and zooms your vision, allowing you to easily pop off headshots at the incoming Hybrids. Feel free to get used to it all you like; you’ll find more ammo for it shortly.
When you’re ready to move on, drop down to the floor below and start taking out the Hybrids in the trench nearby. There’s plenty of ammo scattered around for your M5A4, so scope in with that, or the L23, and pop some heads. When you reach the ramp leading up to the main battlefield, though, you’ll find that the zone is completely overrun by Hybrids. All you can really do here is duck down the ramp and attempt to grenade the hell out of these guys; sticking your head up will result in its swift and complete annihilation. There are so many enemies here that you may be tempted to find some way around them, but there ain’t! You just have to pile on them, reaping five or six kills with each grenade toss, until their numbers lax a bit. When you hear one of the Brits yelling at you that you have to cross the bridge, try to thin the ranks of the Hybrids a bit and get across. The soldiers will quickly follow you, so duck behind some cover and wait for them before poking around a bit.
After fighting your way down the street and into the building here, check around on the large shelf inside to find the Intel: Nottingham: Regarding Cloven file, then head up the ramp to move on.
Viper’s Nest
One big-ass fight will start this level, as a Titan is slaughtering a group of soldiers at the bottom of the ramp here. Don’t bother getting up close and personal; just stay on the ramp, use the cover afforded you, and slam the Titan with Bullseye shots to the dome, tagging him as you see fit. He should stay focused on the soldiers, for the most part, allowing you to deal plenty of damage while easily avoiding any stray launcher shots that come your way. When the flood of Hybrids come out of the elevator, you’ll know the Titan is about to blow; just get behind cover and let nature take its course at that point.
Head up the elevator and grab the ammo up top, which includes some Fareye rounds. Use those on the sentry gunners on the second pylon, then move across and finish off the defenders; they’ll come around the corner on you, so be ready for them! Finish them off, then move around to where the Steelhead comes at you. Kill him, cross the walkway, then flip the switch behind all the menials. That will rotate one of the nearby walkways and let you move on to the third pylon.
When you reach the elevator leading down, you’ll have to take on a Titan by yourself. The best approach here is to just rotate around the elevator shaft and keep it between you and the Titan; doing so will let you duck out as often as you like to fire on him, but will let you easily get behind cover when it fires its rocket. Unload on him with all the ammo you have, and he’ll go down eventually, ending the mission.
Cheshire: Northern Command
No Way Out
This mission starts out somewhat unfairly, with a group of eight or so Hybrids jumping you as soon as it starts. There’s cover in one of the short hallways nearby, so duck into it before tagging and taking out the Hybrids one by one, or killing them off with grenades. Move through the mess hall beyond them, then back into the tunnels beyond that. You have to be careful here, as Hybrids will attempt to ambush you, both by surprising you from in front of you and from behind.
When you head out to a larger corridor that leads off to the right, you can search off to the left to find some grenades and other items, but two Steelheads will come after you. The sound of Auger rounds penetrating the base’s hallways will still echo after you take them both down. Up the steps in the hallway, you’ll find the Intel: Cheshire: Invasion intel, near a dead body in the tangled generator room. It’s right in the middle of the room, so it shouldn’t be hard to spot.
There are plenty more Hybrids in the rail room nearby, mostly clustered within the storage boxes. You can snipe them from afar, if you like, or unload your Auger into the boxes to tag most of them before moving on. Pass through the bunking corridor to the shower room, and from the hole there move through the tunnels beyond the armory until you reach a corridor where a new type of enemy awaits you: the Slipskulls. These are essentially smaller Hybrids, built for speed and stealth; they can attach to walls and fire on you from above. Don’t enter the corridor where they dwell; just hang back in the tunnel, lean out to tag one of them at a time, and fire from cover; they’ll die pretty quick.
He Who Controls The Spice
The officer’s quarters here are threadbare, but they do contain a couple of useful items. If you head into the doors on the right side of the corridor, you’ll find a tunnel that’s been dug between two of the quarters; the one at the end of the tunnel you’ll find a desk in the darkness with Air-Fuel Grenades on it, as well as the Intel: Cheshire: Specimen Tank document.
At the end of the corridor here, it’ll look like you’re heading for a dead end, but before you know it, a huge Chimeran worm will tunnel through the corridor. Jump up into the tunnel it leaves behind and follow it until you reach another room, which suspiciously enough bears no other tunnels in it; apparently the worm was created here, grew to full size, and then tunneled through to your location without boring through any other walls. Regardless, head up the walkways to the top of the room and flip the switch there to open the doorway leading on.
The large generator room here is empty, until you drop down, when two Howlers attack you. Take them both out, then wander through the corridors beyond this area to find the switches that will reactivate the generators.
Secrets
The lights are on! Kill your way back to the generator and climb the stairs. A new path is open to you, so head through. When you reach the long, darkened corridor, get ready for an ambush. Eight hybrids all told will come at you, and you don’t have much cover to work with. We found it best to use the Fareye to take them down; once you get into the rhythm of tapping L1 to zoom in, hitting right on your d-pad to zoom in, firing at their head, and letting go of L1, you should find yourself able to chain together headshots quickly enough to take them down before they reach you. It’s important to let go of the button after firing; if you hold it down your slomo meter will fill up and take a goodly amount of time to recharge.
Head into the open room here, follow the path through the vents below through the Leapers, then come up into another small generator room and flip the switch in the hallway. You’re going to face a Steelhead ambush in the next tunnel, so be ready for bullets coming at you through the walls. Best to take them down with grenades, if possible.
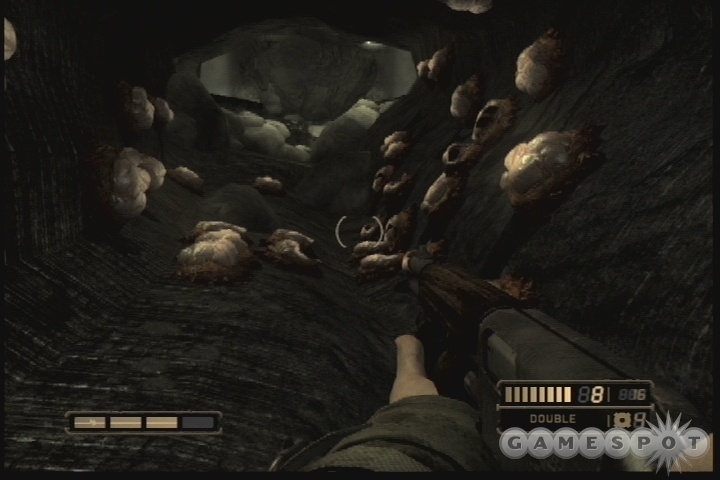
Crawl through the next worm tunnel, but be ready for Leaper Pods. Each of these will eventually hatch and issue forth a leaper. You can only destroy them with explosives, but if you want to save your grenades, feel free to walk forward enough to trigger the pods, then back up as they slither out and shoot them with your shotgun.
You’ll reach the Map Room shortly thereafter.
Angel
Time to kill a vampire with a soul. Make your way out of the map room to the autopsy room nearby. Kill the Menials, then look at the desks in the center of the room to find the Intel: Cheshire: Post Mortem document. Bust through the glass here and move up the stairs to find a small room that’ll be flooding with Hybrids as you arrive. If you want to get the "Why are these candles screaming?" Skill, bust out your air-fuel grenades and throw them into the room as Hybrids arrive. You need to kill 8 of them with fire in 30 seconds to earn the skill.
More autopsy rooms await you as you move on. The Hybrids will fire through the frosted windows, so be careful not to think you’re safe just because you can’t see anyone. The first autopsy room on your right will have the Intel: Cheshire: Autopsy file on a table inside.
Move on to have your first encounter with Grey Jacks, failed Hybrids that are being cooked from the inside out by their speedy metabolisms. They’re big and move quick, and will slash away at your life with each swipe of their claws. Keep your Rossmore handy; one round will stun them and three will usually finish them off. If you want to get tricky, making Bullseye grenades with the tags can be an amusing way to take them down, since there’s a bit of a gap in between rounds of Grey Jack action. There’s a box of Fareye ammo in the middle of the room, too, so feel free to use that to nab some slo-mo headshots.
The Fight
When you’re good to go, head up the stairs nearby and wade out into the firefight going on between the Hybrids and the soldiers outside the Angel’s cell. Bust some heads with your Fareye, if you can, but try not to take much damage either way, as this is only the preliminary fight.

When all of the Hybrids are dead, you should start hearing some odd noises in the area. This presages the appearance of a Chimera worm that’ll pop out of the rear wall of the room when you approach it. This fight can either be really, really tough or really, really easy. You’re going to be facing numerous Hybrids, as well as a couple of Steelheads, so there won’t be many places to hide. You can try to fire back with the Auger, but you’ll likely get surrounded by foes and taken down rather quickly.
In one of the train cars, though, you can find some air-fuel grenades. If you wait for the worm to pop out of the wall, then lay down a couple of grenades in front of the hatch as it opens up, you’ll kill everything that comes out in one fell swoop.
Somerset: Cheddar Gorge
Search and Rescue
You’ve got to find Cartwright, but doing so won’t be easy; he’s surrounded by Chimera. Lots of Chimera. Luckily for you, the XR-005 Hailstorm lies directly in your path as you make it out to the street. It’s a powerful weapon, with a primary fire that can bounce around corners, and an alt-fire that will issue forth a floating Hedgehog-esque turret that will automatically target any enemies in the area.
And there are going to be a lot of enemies in the area. As you head out to the street, you’ll notice a number of Hybrids and a Steelhead run past you, presumably on their way to Cartwright’s area. You’re going to run straight into their rear if you follow them (there’s also a Howler in the area), and the Steelhead, in particular, will make life difficult. You may want to have an air-fuel grenade ready when you catch up to them, drop it near the Steelhead, and simply retreat from there, bringing the Hybrids back to a point where you can snipe them out or use your Bullseye to tag and bag them. If they hide behind the cars in the street, don’t forget that you can shoot them until they explode.
After killing off a number of Hybrids, head down the street to the left of where you found the Hailstorm. You’ll eventually come to a four-way intersection. Your goal lies to the right, but first, take a left and head under the metal archway into the graveyard-looking area to find the Intel: Somerset: Field Guide 1.
In the distance, you should be able to hear gunfire; this is from where Cartwright and his men are set upon by numerous Hybrids. Head up the stairs near the barricade and start clearing the foes out. The ones up top can be brought down from behind, but there’ll be many more enemies in the street below. This is the perfect time to use up your Hailstorm ammo if you haven’t yet; just alt-fire it up into the air and let the bullets rain down on the enemies below while you crouch behind cover.
After killing off a few Slipskulls and some more Hybrids, you’ll finally end the mission.
Common Ground
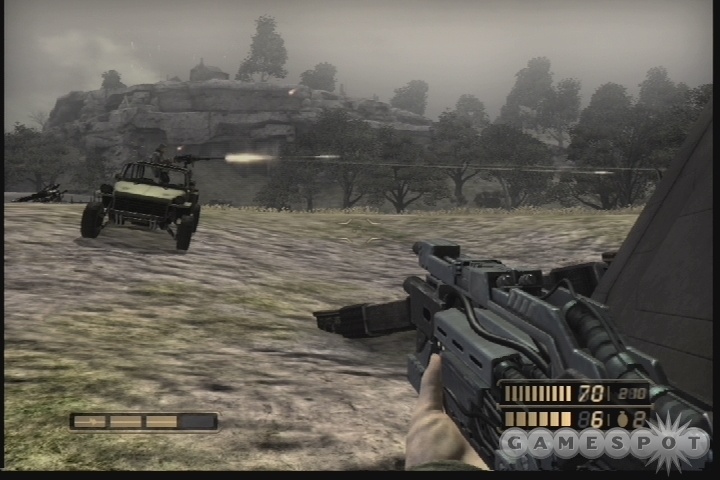
This mission takes place as you and Cartwright attempt to storm the Chimera forces in Cheddar Gorge. You’ll be in a jeep here, with you driving and Cartwright manning the turret. The key thing to keep in mind here is that Cartwright is apparently unkillable.
As such, he’ll be one heck of an offensive weapon for you here, even if his machinegun isn’t exactly perfectly accurate. Your goal in this mission is to open a series of gates for yourself; the gate controls, though, are inside large bunkers which are inhabited by large numbers of Hybrids. What you want to do here is run up to the bunkers, park the car outside, get to cover, and let Cartwright start firing away. He won’t be able to kill everyone, especially the people on the second story, so you may want to toss grenades up top to thin the numbers a bit.
You’ll almost always have to assault a pair of bunkers and flip switches on the second story of each before the gates open up. After the first gate, drive off to the right a bit to find an abandoned hut in a shady grove there; inside is the Intel: Somerset: Spires document. Down the next small canyon, you’ll come across a set of Leapers that will attempt to block your path. Unluckily for them, you can simply run them over (you’ll take light damage); when you get around them, though, you may want to simply turn around for another pass. It’s best not to proceed until all of the Leapers are dead, or they’ll continue to harrass you as you move out to the next set of bunkers.
Speaking of which, the next two bunkers are a decidedly tougher nut to crack. Take out the soldiers in the field, then stop by the burning jeep to pick up some ammo. The bunkers here have a few Steelheads in them, which make them difficult to assault, since you’re not sure when you’ll be taking fire from inside a wall. It’s best to run up towards them in the jeep, get everyone riled up, then drive backwards a bit and attempt to take out the Steelheads with your Fareye, if possible. When you’re ready to move on, rush up and park Cartwright outside the entrance to the base and let him go to town while you fire the Auger up at the turrets above you.
Into the Gorge
After killing off the second set of bunkers and opening the gate, move on towards the dropship that waits in the distance. Only four Chimera pop out, so it shouldn’t be a big deal to kill them and move on.
The last set of bunkers is also the most difficult, since they’re almost on top of one another. They sit at the top of a small hill, so drive Cartwright up until it crests, hop out, then run down the hill a bit and let him work. You can snipe out the gunners from the bunkers from here, if you wish, or just wait until the road is clear before charging up and clearing them at close range.
When you’ve opened the gate, bust down the fence down the hill to move on.
A Disturbing Discovery
Time to split up for a while. Too bad, Cartwright’s a handy fellow to have around, as you’ll discover shortly. Anyway, fight your way into the factory in front of you, where Stalkers in various states of disassembly lay. Kill everything inside, then check the two exits from the facility. One is a small door in the left rear, while one is a larger door to the right. There’s also an XR-003 Sapper near the body cart between these two rooms.
Take the smaller door to the left first, to find the Intel: Somerset: Field Guide 2 document. Come back in, kill the Slipskulls, and move on through the right exit to proceed. Be careful in the next factory, as it’s been well-mined by the Menials that inhabit it. Beyond that, you’ll find some Grey Jacks, then a bridge that will hook you back up with Cartwright.
As he was in the jeep, Cartwright is apparently unkillable here, and he’ll actually be able to kill enemies with his sniper rifle; a welcome change from the usual soldiers that have been accompanying you. After cresting the ridge and spotting the Chimeran facility, you’ll have to backtrack a bit to reach the next factory you have to assault. Luckily, there’s plenty of cover for you; just hop from cover to cover, using your shotgun to blast anything that gets to close, while Cartwright finishes your foes off with his Fareye.
Make your way through the factories here; the second one will be populated by Slipskulls, so walk in until you can rouse them, then back out again and let Cartwright pop some heads. When you open the large door leading onward, be ready for a bit of an ambush; you may want to mine the area in front of the door with your Sapper before opening it. When you do head out, take a left to find the Intel: Somerset: Tower Notes behind one of the large tanks there, then head up the black ramp and find the jeep to end the level.
Bristol: Southern Command
Devil At The Door
It’s hell on earth outside of southern command building, as the entire area is under Chimeran assault. Wait for Cartwright to lure the Stalkers away from the building before charging through the Hybrid lines. Be very careful when you come across the health and shotgun ammo; Hedgehog mines are hidden in the grassy area nearby. Avoid them, then take down the Howlers before moving on. There’s a group of soldiers holed up in a bunker nearby; kill off the Hybrids that are attacking them to save them, then move inside for an ammo resupply.
As an annoying pre-checkpoint exercise, you’ll have to take down a Titan. You’ll have soldiers that will act as distractions during the fight, but it’ll mostly fire at you. We took it down the old fashioned-way: tagged its head and Bullseyed it while strafe-dodging the explosives.
Mortars
After you hit the checkpoint beyond the gate, turn left. The path with all of the mines will have some health and Hailstorm ammo at the end; the path to the right is the one that leads on, though. You’ll come across some mortars; you can destroy them by shooting them (or just by hitting them with your melee attack a half-dozen times or so). You get a little fanfare sound for doing so, but there isn’t any particular point, it seems; no skills or rewards are incoming.
Grab the Fareye ammo and start taking down the Hybrids nearby. Run up the road to meet up with Cartwright to end the level.
Evacuation
Kill the Slipskulls in the stairwell near the entrance here, then defend yourself against the Hybrids that start charging your way. If you stay out in the room at the top of the stairs, you should be able to pound them with your shotgun as they approach. At the bottom of the stairs, take a right to find a few Leapers chewing a body; the Intel: Bristol: Crates document is nearby. Kill off the Hybrids in the bunk area, then move out to the cafeteria, where you’ll come across your first Hardfang. These guys are essentially super-Hybrids (how many times have we used that description?) that use the Arc Charger weapon, which seems to act in a manner similar to a lightning gun. Keep them away from you and kill them before they can fire.
Hangar
Grab the ammo from the cafeteria and the next room before flipping the switch that opens the elevator leading down to the hangar. Be sure to grab the box of air-fuel grenades next to one of the pool tables; there’s a Titan waiting for you in the hangar, but if you drop a pair of AFG’s on it, it’ll go down right quick, at least on Medium difficulty. The Intel: Bristol: Preparations document is at the bottom of one of the large circular elevator shafts here; it should be the first one you encounter as you walk forward from the lift you rode in on.
With the Titan down, your goal is to reach the far end of the hangar and kill the Hybrids that are manning the three Sentry guns that are preventing the transport from taking off. Killing them will, well, allow the transport to take off, and also trigger a large white platform that lowers in the corner nearby. Get on it, flip the switch, then ride up and find the corridor leading onward. You’ll come to a large tactical room here; start killing the Hybrids, but be ready for the Steelhead that appears and attacks from long range.
Use your Sapper to eliminate the Leapers that attack you in the corridor beyond, then head up the elevator and start making your way through the interior of the base. You’ll find the Intel: Bristol: Broadcast Guide in one of the rooms here, which is bathed in red light and has the body of a soldier inside of it. There’s a map room nearby; kill the Slipskulls and Steelheads inhabiting it, then check the upper rear corner to find an ammo cache before moving on to the end of the level.
Parting Ways
Surprise! Cartwright has somehow managed to commandeer a Stalker, and you’re going to use it to defend the southern portion of the base. This is a very small level, with only a few kills being necessary to clear the area. You’ve got Titans and a few mortars to kill. If you move forward, things get pretty choppy, since almost everything will be firing at you, so be smart and stay put! There are two large walls on either side of where you start; if you hang behind one of these and try to aim at the Titans over them, you’ll be able to use your alt-fire missiles to pound them from a distance without any fear of counter-attacks. The mortars won’t even bother firing at you if you stay behind the walls, so strafe around until you hit them all with missiles. Killing three titans and three mortars will let you end the level.
Bracknell: Chimeran Tunnels
Into The Depths
Start killing off the Menials in front of you and move ahead. There are plenty of Leaper Pods in the room in front of you; you can lace the areas around them with Sapper mines before approaching them, and they’ll jump right into them when they hatch. The Intel: Bracknell: Conduits document is in a small hole in the floor on one side of this room.
Be ready for an ambush of Grey Jacks in the next room; luckily, there’s plenty of shotgun ammo before the entrance. Hybrids and a Steelhead will attack when they die, so be ready to rush forward and ice them with an air-fuel grenade.
Keep moving through the tunnels until you find a circular platform with ammo and health on it. This is the mining platform, and will be the scene of a tough-ass fight. After you drop down, a series of platforms will begin rising up, bringing enemies right to your doorstep, with anything from Menials to Grey Jacks approaching. The platforms come up at set times, and won’t wait for you to kill previous waves, so it’ll be in your best interest to kill your enemies quickly.
The Menials and Grey Jacks can be easily taken out with shotgun blasts, but the Hybrids will be more wearing on your health. They’ll be close enough to deal serious damage, so either shotgun them or switch to your M5 and quickly grenade them when they appear. You can earn a Skill achievement by preventing any of your foes from being on the mining platform for more than ten seconds. There’s also an Intel: Bracknell: Surrounded document on the outer ring of the platform, near a health module.
Move from here into the cavern beyond, but be ready for a flood of Rollers. These are basically upgraded Leapers, and can be tackled in precisely the same way. If you have Sapper ammo, lay some down around the doorway leading into the cavern, then run in until you trigger the appearance of the Rollers before retreating; the mines will kill anything that comes close.
The Conduits
You’ll come to a wonderful series of tubes when you fall down the hole that the Rollers emerged from. Three Slipskulls will attack when you hit the first platform, so quickly take them down, then start jumping into the jets of air nearby to move on to the other tubes here.
When you reach solid ground and hit a checkpoint, be ready for a fight; at the top of the ramp are two Steelheads and a huge number of Menials. Try roasting the group with an air-fuel grenade before mopping up the Steelheads. There’s plenty of Sapper ammo up top, so laying some mines from the cover of the overhang is a possibility. Keep moving up the ramps you encounter until you reach an elevator, which signals the end of the level.
In A Darker Place
You’re going to start off against a huge number of Menials in this area. There are at least three boxes of Frag Grenades here, so feel free to use those if you like. When you clear out most of the Menials, a group of Hybrids will attack from three directions, so be ready to take them down! Using the alt-fire on the Hailstorm is a good way to weaken your foes while you run for cover.
Don’t miss the appearance of the L209 LAARK rocket launcher here; it’ll come in handy later in the level, even if you don’t have a large enough ammo capacity to make constant use of it. Save it for tough encounters. It’s on the floor near the cache of grenades and ammo.
Speak of the devil! Large groups of Steelheads wait for you when you reach the top of the lift here. There are three groups in all, and you should have three rounds for the LAARK, so feel free to roast them with it. You’ll eventually come to a small passageway in the outside ring of this area, which leads to a tunnel heading upward. Kill everything in the tunnel, and be sure to grab the LAARK round near the Hybrid here.
Drop down into the circle here, kill the Grey Jacks and Menials, then grab as much ammo as you can before flipping the two switches on the wall. You should have a full load of LAARK ammo, with some likely left over, and you’ll need it: a Stalker waits for you on the other side of the door that opens. On medium difficulty, it’ll take five rockets to kill the Stalker, assuming you manage to land all of them right on its noggin. Including the round that you found up in the tunnel before this area, you should have exactly enough (with a few to spare if you didn’t fire them on the Steelheads earlier).
If you don’t have enough rockets, though, you’ll have to get creative. You can try using other explosive, such as frag grenades or the M5 grenade launcher, or you may have to attempt walking underneath the Stalker and attempting to quickly whip around and fire on its weakspot after doing so. It can be difficult to manage, though, obviously, without getting crushed by a leg. Still, if you don’t have enough ammo to finish the tank off with rockets, then you’re not going to have many other options available to you.
London: City Outskirts
A Desperate Gamble
You start this level off inside what appears to be a train station terminal. There are going to be some tough fights before you can get out of here, so be ready for anything! Begin by scouting the rooms near you for health and ammo; when you move through the small tunnel, you’ll be ambushed by rollers, so be ready with your Sapper.
Make your way under the arch and duck into the room nearby for some cover as the Hybrids attack you. There’s Fareye ammo on the bar here, so feel free to use that on the more distant enemies. When they’re cleared out, grab any ammo that they’ve dropped on move on to the stairs on the other side of the area. You have to sweep through all of the rooms here until you reach the windows again, but be ready to run: a large group of Hybrids and Rollers will attempt to attack you then, and if you stand in front of the windows for too long you’ll be cut to pieces. Run across the small walkway there and take refuge in the room near the patio area. You can wait for most of your enemies to come to you if you wait here, then head out to the patio and take the stairs down to move on.
After clearing the helicopter and the enemies around the small bunker nearby, head into the ruined hotel. All of the walls here are fractured and disintegrating, giving your enemies perfect firing lines through them. The Intel: London: Drowned document is in a partially-hidden room here. As you enter the hotel, you hang a left into a room filled with junk. If you look at the junk carefully you should see a small archway in the middle of the trash; the document is on the bed in the room beyond. You’ll likely have a harder time returning fire without hitting the walls, but one way to proceed is to lay down Sapper mines through the gaps as you walk along; the enemies that pop up in front of you will be damaged when they come your way. You’ll need to clear out the grand staircase room, then move up and into the rooms above to move on.
Ice and Iron
Time for a hell of a fight. You’ve got a tank on the way, but you have to take out both a Stalker and a Titan before it can be dropped off!
If you have an adequate supply of LAARK rounds and air-fuel grenades, then these fights should be easy, but you probably won’t have enough LAARK rounds for the Stalker. You can weaken it up with any explosives you have in your inventory, if you like, but otherwise, there is a place you can go to hide and get the Stalker off your tail, allowing you to shoot it in the rear.
Unfortunately, it’s difficult to really describe this location, since the entire area is a mess of broken streets. If you watch our video (in the HTML version of this guide), you’ll be able to get a feel for where the location is. Our screenshot might help, as well, if you’re looking at the PDF. Anyway, if you can wait until the Stalker is on the far side of the map, then hide in this little corner, it’ll probably shoot at the wall nearby for a couple of volleys, then stop. When it does, sneak out from behind the wall and look for it; it’ll almost certainly have its back turned to you, allowing you to drop a clip from your M5 into its power core. Repeat the process a couple of times to finish it off. If it manages to track you down, run into the bunker nearby to avoid its fire, but keep in mind that its missiles will hurt you through the roof of the bunker.
After the Stalker has been dispatched, you have a Titan to deal with. As per usual, the easiest way to deal with the beast is to tag it with a couple of air-fuel grenades and watch it pop. Other than that, try to get plenty of headshots, or just tag it with the Bullseye and fire up into the air. If you run around the central bunker here (but not inside it), you should be able to keep the Titan running and prevent it from firing on you. It’s fun!
Tanks for the...Tank
After your tank is dropped off, quickly hop in and get a move on. You’ll face off against a Widowmaker as soon as you do, so hit it with a few tank shells to demolish it. More Stalkers will await you in the streets beyond this area, so proceed slowly but surely through them, firing your cannon at them from as long a distance as possible. They aren’t dangerous from long range, but if you let them get close, they’ll pound you with missiles. When you reach the open square, then, simply pause and wait for them to appear in the distance before shelling them. When they stop coming, a gate will open to your left.
Proceed through a couple more Stalkers and Widowmakers, and be sure to take out the enemies in the buildings and walkways above you; you may want to just strafe over them with your machinegun and see when your crosshairs turn red, then follow it up with a shell.
After defeating the Titan, run your tank onto the bridge, and you’ll automatically hop out. Head into the hotel nearby and check around on the first floor; you can find the Intel: London: Goliath document on the first floor behind one of the bars in an otherwise empty room. Fight your way through the Hybrids and Steelheads on the second floor to reach the top of the hotel, where the mission ends.
London: River Thames
Burning Bridges
Get ready to dig deep into your reservoir of expletives. If you’ve been cruising through the game thus far, be prepared for a surprise or two: the final two levels here are way ramped-up, difficulty wise.
To start off here, you’re going to have to destroy two Stalkers and a Widowmaker. Sounds like a fair fight! Well, don’t worry, because it mostly is; there’s plenty of LAARK ammo in the area for you to work with. Each of the two buildings that you can enter will have four rounds on the upper floors, and there are two rounds in the ruined building that the Hybrids initially hold, as well as two rounds near a shrub on the street to the left of where you start the level.
The sequence here isn’t too difficult to figure out, but it’ll be way easier to know what we’re talking about after you die a couple of times. From the start point, head up and into the building on your right to find the LAARK ammo. You may want to use the Sapper on the bottom of the stairs to discourage any Hybrids from following you up. When the Stalkers appear, nail them with a couple of LAARK rounds; your soldiers may be able to finish them off with their fire, but feel free to add a third or fourth round to the dome if you need to destroy them. Grab whatever ammo remains in the building, then drop down to the ground and run down the street to the other building with two floors.
The same process plays out on the Stalker that approaches you. You may actually want to just let your soldiers fire on it while you guard the staircase, then move over and use your rockets on it; we’ve managed to destroy a Stalker with only two rockets after the soldiers have weakened it up. When it goes down, a Widowmaker will approach from the street near this building. If you manage to get down to the street as its coming, you can nail it with a few rockets, then finish it off with an Auger from the bottom floor of the two-story building, where you’ll mostly be safe from its mine-laying abilities.
Roofjumping
Collect any ammo or health you might need from the area before moving out into the alleyways beyond. To the left of the exit is a path leading through a garden, towards a long street with some mines and Hybrids on it. If you check out the right side of the street, you’ll see some M5A2 ammo; jump up there to find the Intel: Thames: Construction document.
With that in hand, head back through the garden and into the ruined building here. You need to jump from rooftop to rooftop, being wary of ambushes, until you can drop down into the alleyway where the Steelheads were located. Move from there around the building to its rear, where you can find the Intel: Thames: Demolitions document. Climb the stairs to move onto the roof, kill the enemies there, then find the path leading into another building across the way and kill the enemies there as well. One last group of foes will charge up out of the subways when you head down there, so kill them and move down to complete the level.
On The Ice
Time to clear out the subways. You start off with goodly amount of shotgun, Fareye, and Auger ammo near your starting position, so start sniping some Hybrids to thin their numbers, and use your shotgun to kill them if they pursue you too far. When they stop coming for you, you can hit the stairwell to the left to find a unit of health.
The stairwell to the right is heavily populated, with a couple of Steelheads and numerous Hybrids. There’s a box of Hedgehogs behind the rail car here, so if you’re full up on those, feel free to chuck some down to thin out the enemies a bit before using your Auger or Fareye to kill the rest of them. There’s also some health near the Hedgehogs.
Head up the stairs here, but pause when you hit the health and ammo boxes. One of the ammo boxes will be for your Sapper, which is perfect. As you head down the steps, a few enemies, including a Steelhead, will spawn behind the railcar below you. You can get a jump on them by laying down a bunch of mines below you before heading down. There are also some LAARK rounds in one of the subway cars here (the one that’s suspended in the air), so feel free to use one of those on the enemies as you proceed down. There are a pair of Steelheads that wait for you near the end of the rail tunnel, so take them out to finally reach a checkpoint.
Making A Fire
When you reach the river outside the tunnel, start proceeding down the path, but get ready to reload your checkpoint a few times, as the ambushes here are swift and often fatal. You do have a couple boxes of LAARK ammo ahead of you, so feel free to use the rockets on the worst of the encounters you face. You can find it when you wrap backwards up the path and bypass the two Steelheads in front of you; it’s near the fire. Move up the path and head through one more curve, then kill off all the Menials and find the tunnel at the far end of the ice to end the level.
Giant Slayer
The Stalker at the beginning of this level isn’t tough to deal with; just circle-strafe around it (as the case may be) in the Jeep while Cartwright dishes out hot lead into its underbelly. So long as you keep moving fast enough to stay outside of firing range of it, you should be fine. Finish off the Hybrids near the gate, then jump out of the jeep and head inside.
After killing off the Steelheads and Hybrids inside the base, you’ll have to hop inside a Stalker yourself for a tedious fight against an enemy Goliath, which is basically a huge walking tank. There’s nothing particularly special about this fight; it’ll just take a long time to complete. Your main weapon is going to be your missiles, so just hold down that right trigger throughout the entire fight! The Goliath, like your Stalker, will strafe from side to side, albeit a bit more slowly, so you’ll have to lead it a bit, especially if you fire on it from a distance.
Keep in mind that the Goliath will wear your shields down quickly if it hits you with its weapons, of which it has three. It can launch a volley of missiles, fire a single large missile, or launch a slow-moving mortar in your direction. Well, all of these attacks actually move fairly slowly, so as long as you’re strafing away from it they should dodge you. In addition, feel free to hit the X button; it will give you a temporary burst of speed in the direction you’re moving. It’s perfect for quickly changing direction or dodging an incoming volley, but you won’t be able to use it twice in a row; it takes a few seconds to recharge.
For the most part, though, you should try to lead the Goliath around the large pieces of rock in the middle of the zone and use that to block its shots while you fire into the air to anticipate the placement of its legs as it moves. The video on this page will illustrate this technique fairly well. Again, the fight isn’t too awful when you know how to move, but it will be a fairly tedious exercise of holding down a button for three or four minutes while you wait for the Goliath to blow up. Unfortunately, that doesn’t even earn you a checkpoint; you’ll have to kill two more Stalkers before you manage to get a savegame.
Into The Tower
After the two Stalkers go down, head towards the area they came from to find a hangar bay leading into the tower. Two more Stalkers dwell outside, but if they blow you up, at least you’ll regenerate with full health. Kill them and all the Hybrids outside the base to open the doorway up; ram your Stalker right up into the gate to hop out and proceed inside.
One last challenge for you to face, as a Widowmaker will pop through the wall here and attack you and Cartwright. If you’ve got LAARK ammo, feel free to unload on it until it goes down. Otherwise, retreat behind the elevator on the far side of the area for some cover and unload on it from there. You’ll have plenty of Bullseye ammo, so feel free to tag its body and fire at it from around the corner.
London: Chimeran Tower
Angel’s Lair
You’ll come across the Bullseye Mark II when you enter this level. It’s a more powerful version of the Bullseye, capable of quickly taking down enemies. Unfortunately for you, most of your enemies will have the same weapon in their hands. Things are about to get very, very dicey. You also get your first view of an Angel, outside of an earlier cutscene, as you attempt to exit the tube here. Get ready to face them in combat.
Leave the tube and hop down to the platform below; note the LAARK ammo nearby. This’ll come in handy if you don’t mind backtracking to it. Up the ramp are ten or so Hybrids, of the interior base defense sort; they wield the Bullseye Mark II and will quickly kill you if you don’t kill them first. It’s best to try and weaken up the first wave with rockets, then retreat back to the lowest barricade block on the left side of the ramp, crouch, and wait with your shotgun for them to come get you. Two shotgun blasts at close range should finish off any of these guys, but there are a heck of a lot of them! Finish off any stragglers with the sniper rifle. Get used to using the Fareye a lot here. There’s plenty of ammo, and it’ll be the best way to take down the Hybrids and Steelheads, both of which are huge threats to your continued existence.
After clearing out the Hybrids and flipping the switch in the next zone, be ready for the first fight against an Angel. These aerial Chimera tend to try and drop acidic gases down on top of you, so stay mobile! Since they move fairly quickly, it’s best to try and tag them with the Bullseye and finish them off with homed pellets.
Moving On Up
On the next bridge, two Steelheads will attack you just after you hit the checkpoint; be ready with your Fareye and get some headshots. If you check the underbridge section here by heading down one of the ramps, you can find the Intel: Tower: Power Source document and some LAARK rounds. If you’re already at full ammo, then feel free to rocket the Hybrids that attack you when you approach the next elevator before coming back down here for a refill.
Take the elevator up and head into the tube nearby, but be careful: a Hybrid will approach from behind when you hit the shotgun ammo. Guess he must’ve teleported in. You can lay down mines in advance of his approach, if you wish. Slipskulls await you in the large room beyond; a Hailstorm auto-turret should finish the bulk of them off easily. There’s some Fareye ammo in the center of the floor of the next large room, so grab it after you use it to headshot the Steelheads at the top of the ramps.
The next elevator you take will lead you to an incubation area, where numerous Chimera-to-be are kept in large cocoons. Don’t worry about the cocoons; they never pop open or anything, and are simply there to freak you out. You’ve got LAARK ammo at the beginning of this section, so feel free to use it on the four Hybrids and the two Steelheads that you eventually encounter. The elevator that you find after encountering Slipskulls in the tunnels will lead on to the next level. Finally!
Last Hope

Gosh, you think there’ll be a fight in this area? Head in, whip out your Sapper to defeat the Rollers and Leapers that come your way, the flip over to the LAARK to take out the Widowmaker that approaches afterwards. When it goes down, quickly use your Fareye to deal with the Hybrids before running around and collecting all of the remaining ammo and health in the area.
There’s a small ramp leading up to a tunnel that the Hybrids came through. At the end of it, you’ll grab some Fareye ammo; use it to headshot the Steelheads in the area that’ll be firing you from atop a series of tubes, then start scaling the tubes yourself. Just be careful not to move around too much on the tubes while your scope is zoomed; you’ll stand a good chance of running off the edge of the cliff.
Argggggh
Get ready to be frustrated. When you hit the next large, open area after defeating the Steelheads, you’ll be treated to the sight of a helicopter crashing. When it does, you’ll have to kill off two (2) Angels while numerous Hybrids will fire their Bullseye Mark II’s at you from elevated positions. This fight sucks.
So long as you keep moving, the Angels won’t be able to hit you with their acid attacks, but the Hybrids appear from enough different angles that one of them will almost always be able to hit you. You can avoid their fire by ducking behind cover, but if you stop moving, the Angels will get you. Decisions, decisions!
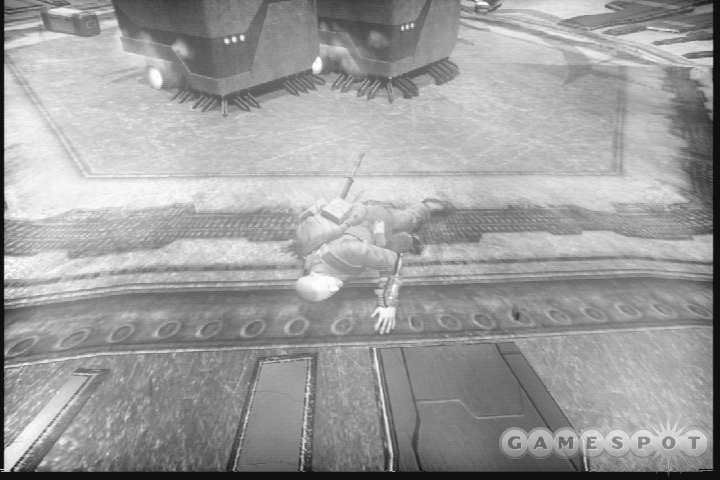
Luckily, there’s plenty of LAARK ammo in the area, so as soon as you see the first Angel, try to blast it out of the sky with a few good hits; don’t forget about the airbrake effect if you happen to miss it initially. You need to get the Angels down quickly; killing both of them will trigger the appearance of a couple of helpful soldiers that’ll help you take down the Hybrids.
No lie, this fight is really frustrating. Be ready to throw your controller a couple of times. If you want to take a different tack, try using your rockets or Fareye to kill off the Hybrids first, then using your Bullseye to take down the Angels. The only problem here will be that you’ll probably run out of tags as you try to hit them with it.
You can find the Intel: Tower: Angels document in the middle of the hallway leading on from this area, just past the Fareye ammo. Proceed to the end and wait for your fellow soldiers to get into the elevator before hitting the switch.
The Core
Now it’s time for a real ass-kicking! The final fight of the game is upon you, and it’s going to take a fair amount of reloading to make it through alive.
You begin the fight by dropping down to witness a Titan and assorted Hybrids taking on a squad of soldiers. Quickly tag the Titan with an air-fuel grenade, if you have one, or two if you have more than that. It’s a pretty standard fight around the ring here, but keep your sniper rifle equipped, since you’ll be running across plenty of Hybrids and Steelheads; pop them with headshots to quickly eliminate them. Another Titan will wait for you near the ramp leading up to the control room, so take it down as well.
When you eliminate the Hybrids in the control (up the ramp to your right after the second Titan), flip the switch in the center of the area to lower the containment shields on the main reactor. Hey...alien tower in a human city...a valiant, last-ditch effort to reach the top...destroying the reactor to eliminate the alien threat once and for all...this game is completely and 100% original.
Snarkiness aside, flipping the switch here will lower the containment shields, allowing you to fire on the four quadrants of the main reactor, one at a time. The first one will open up in front of you, but it’ll come down slowly; chuck a rocket through it to destroy the quadrant, but be ready for a Hybrid counterattack. They’ll mostly come from your right side, so you may want to get ready to chuck grenades at them as they approach.
After you destroy a quadrant of the power core, the shields on the next quadrant (it goes from right to left) will start to drop after a few moments. Unfortunately, the successive quadrants appear to require more damage to destroy; the last quadrant will take three rockets before it blows up! (Of course, you can use other ammo as well, and will probably have to.) You aren’t going to just be able to stand around twiddling your thumbs, either, as Hybrids and an Angel will appear on the battlefield. Try to leave the control room and take a left on the inner ring of the area. Another large control-room esque area will have opened up with some health and ammo; it’ll be helpful to stay here while you’re waiting for quadrants to open up, as the two bridges will act as chokepoints for you to deal with the Hybrids that follow you.
That’s essentially it, in a reductive sense: you blow up the quadrants and kill off enemies in between. The last quadrant will probably take a lot of ammo to kill, but it will blow up eventually, and when it does...you’ve beaten the game! There’s a credit sequence, obviously, but there’s also a short cutscene that plays after that, so be sure to wait for the credits to end. Doing so will also let you play through the game again with a few new weapons....
Skills
Skills are fun little accomplishments that you can pick up as you play the game. They’re split up into General skills, which can be obtained at any point in the game, and level-specific skills, which can only be acquired in the level they’re assigned to.
Skills accord you points, which are automatically used to unlock Rewards, which also can be checked with the game’s start menu. The rewards start off somewhat unimpressively, with some concept art, but we’re told that the later rewards let you unlock cheat codes and the like.
We obviously don’t have data on all the skills in the game, since the game doesn’t tell you the requirements for unlocking them until you actually perform the action. We’ll update this list as we learn more about them.
| General | ||
|---|---|---|
| Name | Description | Point Reward |
| Reading is Fun! | Pick up 10 intel documents. | 2 |
| Chicks Dig Eyestrain | Pick up 20 intel documents. | 3 |
| Too Many Secrets | Pick up all intel documents. (???) | 7 |
| In For A Penny... | Kill 3 Hybrids with a single grenade. | 1 |
| Fetch | Kill a Howler with a grenade. | 2 |
| Acupuncture is Cheaper | Kill three Hybrids with a single Hedgehog. | 2 |
| Why Are These Candles Screaming? | Kill 8 Hybrids with fire in 30 seconds. | 3 |
| Lovely Parting Gifts | Squat over 15 Hybrid corpses. | 2 |
| Tag You’re It | Kill five Hybrids with the Bullseye in 30 seconds. | 2 |
| Gasping For Air | Kill two Hybrids in a level only after severing all of their hoses. | 3 |
| Nowhere to Hide | Kill five Chimera in a level using the Auger while firing through walls. | 3 |
| Twirly-Whirly | Kill five Menials with a Bullseye trap. | 3 |
| Turrets | Use the Chimeran sentry gun to kill six enemies. | 3 |
| Mechanical Thumbs | Beat game on Hard difficulty. | 5 |
| York | ||
| Supersonic Meat Cubes | Kill three Leapers with one frag grenade. | 3 |
| Homing Beacons | Tag 4 Hybrids with the Bullseye. | 3 |
| Chimera Pate | Run over 10 enemies with the tank. | 3 |
| Grimsby | ||
| Don’t Worry, Insurance Has It Covered | Break at least five Chimeran boxes in the conversion center. | 3 |
| 20th Sentry | Do not get hit at all by a Lancer mine in the Chimera Conversion Center (all three levels). | 3 |
| Personal Space Bubble | Escape the Grimsby Conversion Center without being grappled by a single Menial. | 4 |
| Manchester | ||
| Lightfoot | Take no damage from mines in Manchester. | 4 |
| This Is My Rifle, This Is My Gun | Kill the Stalker in the Manchester traffic circle with the M5A2 Carbine alone. | 2 |
| Nottingham | ||
| In One Ear, Out The Other | Kill 5 Hybrids with headshots from the L23 Fareye. | 2 |
| Cheshire | ||
| Passive Aggressive | Kill 4 Hybrids or Menials with non-weapon damage. | 3 |
| We’ve Lost The Security Deposit Anyway | Break 10 medical lamps in Northern Command. | 2 |
| Mirror, Mirror | Destroy all glass in the windows of Northern Command. | 3 |
| Somerset | ||
| Next Speed Trap, 50 Miles | Use the jeep to make it through Cheddar Gorge in eight minutes or fewer. | 3 |
| I Can See My House From Here! | Jump at least 50 meters with the LU-P in Cheddar Gorge. | 2 |
| Misplaced Aggression | Blow up all cars in the town of Cheddar Gorge. | 2 |
| They Came From Behind | Run over 3 Hybrids while driving in reverse (Common Ground level). | 3 |
| I Believe This Is Yours | Use only Chimeran weapons during the final approach to the Tower (Disturbing Recovery level) | 3 |
| Bristol | ||
| One Eye Dog! | Kill a Howler with the Fareye. | 3 |
| A New Kind of Sourdough | Kill all enemies in the cafeteria with the Sapper (Evacuation level). | 4 |
| Pint In One Hand, Darts In The Other | In Southern Command, bullseye the four dartboards with the Fareye. | 2 |
| Bracknell | ||
| Karma’s A Bitch | Kill all enemies in the tunnel with only their native weapons. (Into the Depths) | 3 |
| This is MY House | Don’t let any Chimera stand on the mining platform in the Chimeran Tunnels for more than 10 seconds. | 4 |
| London | ||
| Leapin’ Lizards | Take no damage from Rollers in the outskirts of London. | 3 |
| Fast Like The Tortoise | Take no damage from Slipskulls in the outskirts of London. | 2 |
| Thames | ||
| Le Parkour | Finish the first level of Thames within five minutes. | 4 |
| Tower | ||
| Breakin’ The Law | Destroy the Reactor without using the L209 LAARK. | 3 |
| Vanilla Only, Please | Reach the reactor without using secondary fire or grenades. | 4 |
| What Would Hale Do? | Kill an Angel using only the Rossmore 236 shotgun. | 2 |
| Return To Sender | Shoot five objects thrown at you by the Angel before they reach you. | 3 |
Rewards
The Skill points above unlock rewards for you. We don’t have a complete listing of these, either, but again, we’ll update it when we do!
| Reward | Skill Points To Unlock |
|---|---|
| Concept Art Pack I | 10 |
| Concept Art Pack II | 20 |
| The Mighty Wrench | 40 |
| Flip Levels | 70 |
| Clank Backpacks | 100 |
| Multiplayer Mechanic Skin | 126 |
| Multiplayer Soldier Skin | Beat game in Superhuman difficulty. |
| Multiplayer Mechanic Head Skin | Beat game in Superhuman difficulty and possess the maximum number of skill points. |
| Unlock the Movie Player | Beat the game once on any difficulty. |
Got a news tip or want to contact us directly? Email news@gamespot.com
Join the conversation