Black & White 2 Walkthrough
It's time to wreak vengeance on the Aztecs for almost destroying your civilization! GameSpot's Walkthrough has plenty of tips and hints to help you on your way.
Design: Collin Oguro
Black & White was a very ambitious game when it hit shelves way back in 2001. Melding god games, city-building, and a virtual pet simulator, it had a unique blend of cerebral strategy and moral dilemmas, as you were asked to choose between being either a benevolent god that helped its beloved population achieve their goals, or an evil god that existed merely to extract servitude through fear and pain.
Now, over four years later, Black & White 2 has finally arrived, and it has some significant changes from the first game. Your creature is a bit easier to train this time around, there's a more straightforward, story-based plot, and the combat system involves a bit more of an RTS influence. That said, if you played the first one, you'll feel right at home with Black & White 2, and if you didn't play the first one, then you should feel equally comfortable with the game; it's very accessible and has a lengthy set of tutorial missions to get you started.
If you're interested in learning about stuff not covered in the tutorials, though, then we're happy to present GameSpot's Game Guide to Black & White 2. In it, you'll find a listing of major quests in the game, tips on beating each of the seven main lands that you'll be passing through, and plenty of general tips for getting yourself off to a good start. Enjoy!
City Building Tips
Roads

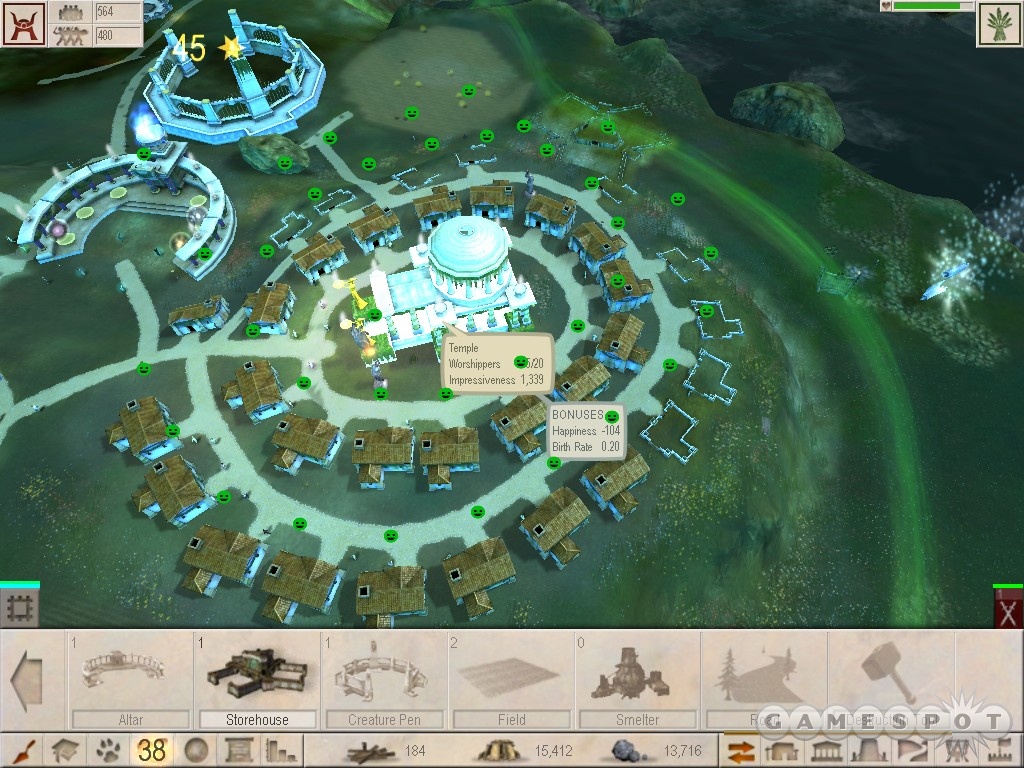
One word: roads. Roads are good, easy to build, and apparently free, so there's no reason not to build them wherever you need them. They help improve the speed of your villager transit, and also add to the overall impressiveness of your town when they connect to buildings. In general, you'll want to make sure that every building has some kind of road access, as it's the cheapest way to add to your town's impressiveness.
To build a road, just place your cursor over an existing road segment and drag the mouse. You can curve your roads around obstacles, and will often have to do so. Laying a road doesn't cause it to instantly come into being; it just lays down a path that will eventually become a road as villagers use them.
Note that, if your villagers have to travel to a certain area of a map without the benefit of a road, they'll eventually wear down the grass under their feet. If you spot one of these dirt trails, then you'll definitely want to extend one of your existing roads to cover it.
Lastly, note that storehouses have three entrances, one for each type of resource. If you have a storehouse, be sure that you have a road circling it, with offshoot roads leading to major resource supplies, such as mines or fields.
Housing
Housing is one of the most vital aspects of a new city; all of your villagers need places to live and sleep. However, they like to do so with a modicum of comfort, so if you're playing as a Good god, you'll need to carefully consider the placement of various buildings around your houses, as well as the types of buildings that you build for them.
First off, try not to place homes extremely close together, if you can avoid it. The presence of a house will have an oh-so-slightly bad effect on the happiness of nearby houses. In point of fact, though, it's all but impossible to cluster houses together; just try to break up the monotony with happiness-increasing structures like wells, lamps, and stores, and you should be able to counteract the unhappiness that comes from being crammed into a Levittown. You can also try to plan on building homes around structures with large happiness bonuses, such as Temples or Baths. Keep in mind that Skyscrapers, although they're efficient at saving your village space, will eventually grow into slum conditions if you build too many of them atop one another. You can still safely get away with skyscrapers of five or six stories, though, especially if you build them near extremely happy-making buildings, such as an Ampitheater.
Also, make sure that you avoid building structures that your citizens find unpleasant near their homes. Armories are the prime culprit here for Good players, as they have a markedly bad effect on the morale of people who live in nearby homes, but so do industrial buildings like the Granary or the Smelter. Try to build them in a separate section of town, if possible, to mitigate their negative impact on your town.
Of course, if you're playing as an evil god, you don't have to worry very much about the happiness of your citizens; you need to focus on their productivity, which can often actually be boosted by scaring the crap out of the townspeople. Putting up Sacrifice Pits in the middle of a residential block will remind your peons what fate awaits them if they don't shut up and work, as will erecting a bunch of spikes with decapitated heads on them. You can be a lot more practical in your city designs than the goody two-shoes city planners, if only because your only real concern is to ensure that your citizens don't starve to death. Beyond that, you don't really have to care about them!
Lastly, keep in mind that different kinds of homes will get you either Good or Evil bonuses, depending on what you're building. Building the worst kind of home, a Hovel, is an automatically Evil act, whereas building a Mansion or a Manor will usually earn you Good points.
Extending Your Influence
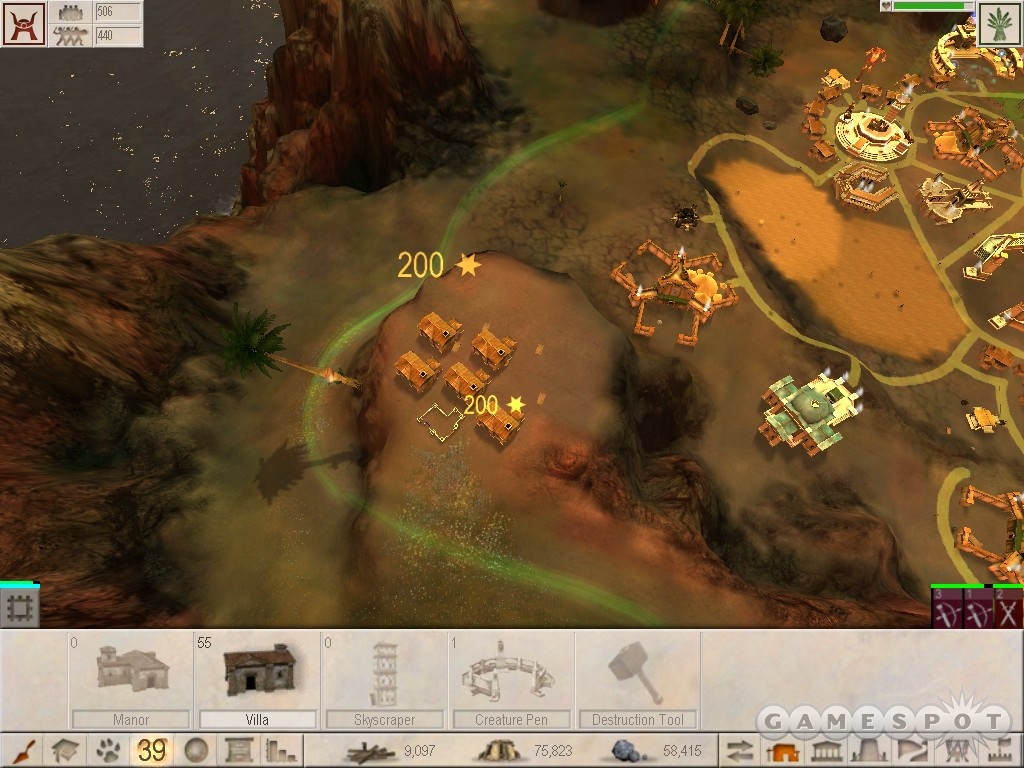
One of the primary benefits of building a large town is the way in which it allows you to extend your influence, which is shown as a green boundary around your town. Within this boundary, you can cast miracles and manipulate rocks, trees, and other items. You can also only build structures within your area of influence, so extending your borders is definitely an objective worth achieving.
Your borders are affected by two factors: the overall Impressiveness of your city, and the specific Impressiveness of buildings near the borders themselves. The most obvious factor is the building-specific Impressiveness factor. If you build a building near the border to your realm, the boundary will extend outwards from it; the more Impressive the building, the farther the boundary will extend. While you might be able to cheaply extend your border by building a small Villa right on the edge, you're going to get a much, much larger boost if you build a hugely Impressive building like an Ampitheatre or a Wonder in the same spot.
The overall Impressiveness of your town will also have an impact on your borders, albeit a much more subtle one. If you construct a highly Impressive building in the middle of your town, you won't get a big benefit to your borders, but the increased Impressiveness will be felt all around your borders, which will be slightly extended in all directions.
In general, then, you're going to want to try and extend your borders by building Impressive buildings on the edge of your domain. This takes a while, but if you have an area you need to access, such as an ore mine, you can start laying down buildings in a line until you finally manage to edge your border over to where it needs to be. Note that walls don't extend your influence at all, but that walls are the only structures which can be built outside your influence. You have to start a length of wall inside your influence boundary, but you can stretch it outside the bubble and it'll be built as normal.
Winning through Impressiveness
If you're playing as a Good god, then your ultimate goal is to convert all enemy cities to your own side by building a massively Impressive city. Doing so can be difficult, though, especially when it comes time to take over the last city on a map, which will require a large number of Impressive buildings. Here are a few tips to keep in mind.
Only One City Counts
If you happen to take over more cities with armies, then keep in mind that their Impressiveness doesn't count towards your overall total. Don't waste your resources on building Ampitheaters or Temples in secondary towns; just focus on their basic needs and save your ore for your primary town.
Multiple Copies Hurt Your Impressiveness
The more copies of a building you build, the less Impressiveness they'll be worth. You can build a dozen Siren Wonders, if you want, but eventually they'll stop being worth much Impressiveness. You're going to need to build multiple copies of buildings in order to win each map, but try not to exceed more than four copies if you can avoid it. Variety is key.
Connect Buildings to Roads
If you connect a building to a road, you'll earn an automatic 45 Impressiveness. This is a small bonus, but for a town with 50 or 60 buildings in it, it definitely adds up quite a bit.
Keep An Eye On Height
All locations that you can build on come with built-in Impressiveness bonuses or penalties, and taking advantage of these can help you maximize your land area. When you're holding a foundation up above the ground and are deciding where to place it, you should see a small stat window pop up; one of the stats that's listed within, next to the green star, will display both the Impressiveness of the building itself, as well as any applicable bonuses (indicated with a number after a plus sign) or penalties (indicated by a number after a minus sign).
In general, Impressiveness bonuses seem to be reliant on height. If a building's near the top of a hill, then it should get a nice Impressiveness bonus, sometimes up to +200. If you find one of these hotspots, you're going to be best suited by building a bunch of smaller buildings on it, rather than one large, Impressive building. If you build five villas on a +200 Impressiveness hotspot, then each of them will get the bonus, for a net +1000 Impressiveness; if you build a single Temple up there, you'll only get the +200 bonus one time. Skyscrapers are especially good for this purpose, since it seems that each layer of the scraper gets some portion of the Impressiveness bonus, resulting in a building that takes up very little land area yet still has a huge Impressiveness bonus.
Most hotspots are going to be worth substantially less than 200 points, though, so you shouldn't have too many problems taking advantage of them. Keep in mind that some low-lying areas can indeed have negative Impressiveness. If you build a Villa worth 40 Impressiveness, but build it on an area with a -80 Impressiveness, then the final building will actually subtract Impressiveness from your town.
Defending Yourself
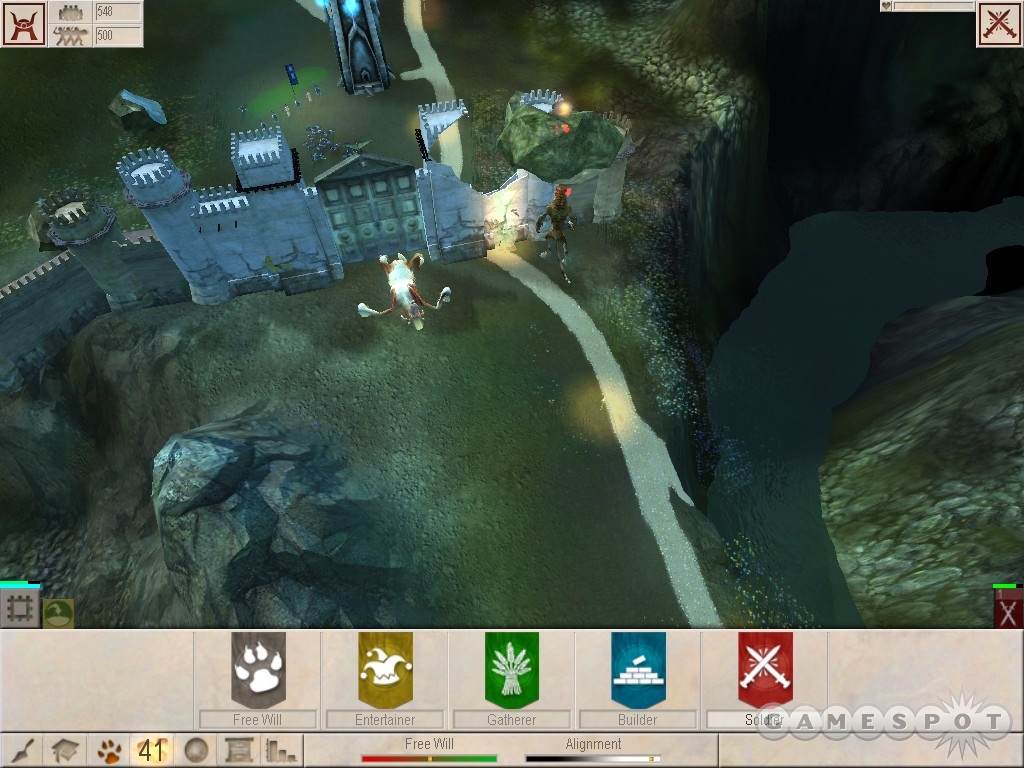
As a Good god, you might wish to sit back and turtle up inside your town to Impress all of the other cities, but you'll rarely be able to do so without fending off attackers. Thus, you'll probably need to avail yourself of the military structures and units available to you.
The first line of defense will be your walls. On most maps, you'll find that your section of the area is separated from the main enemy concentration by a chokepoint, or narrow band of land through which the enemy has to pass to get to you. If you can build your influence bubble out so that it takes over this chokepoint, building a wall across it will prevent the enemy from reaching you unless they bring in a creature or siege weapon to knock it down. You can also build a gatehouse in the wall to allow you to open and close the path into your city as you see fit.
Repelling Invaders
When you have your walls up, try to build a couple of archer platoons and put them on top of the walls on either side. If you do so, they'll be able to take potshots at any enemy platoons or creatures that happen to approach your wall. If you want to, you can just leave the gates open to encourage enemies to approach; if you have archers on the wall and either a sword platoon or a soldier creature just inside the gate, you should be able to wipe out any individual platoons that come towards you, and earn experience for doing so. However, keep in mind that your platoons are considered to be moving while they're on top of walls, and will thus require twice their normal amount of food. Archers on the walls are also tremendously vulnerable to the effects of catapults or creatures that attack the walls.
Keep in mind, however, that engaging in warfare outside your influence border will sometimes earn you Evil points. You're not going to become the Devil just for a few skirmishes outside your borders, but if you make a habit of it you will start to shift a bit towards the dark side. To avoid this, try and build a highly Impressive building just inside your walls, to extend your influence ring well outside. This will generally let you attack units with your archers without taking Evil points, but will also let you do things like cast Miracles on enemy units or drop big rocks on an enemy creature that's coming after your wall.
The only threat to your walls are enemy creatures and enemy siege weapons. If you can extend your influence far enough outside the walls, then you might be able to throw rocks or a Fire Miracle at an enemy siege unit and destroy it without a problem, but they fire from extremely long range, so you'll need something like a Siren on the other side of your wall to give you the necessary range. Enemy creatures are easier to deal with; they'll have to come right up against your wall to hit it, so they'll definitely be inside your influence ring. Just pick up a huge rock and start dropping it on their head, and they'll eventually keel over and die.
Winning Through Combat
Creating an Army
If you're an Evil god, then you're going to want to take over enemy cities through force. That means that you'll need to make large armies, which in turn require two things: a city with a large population (since your platoons are derived from the unDiscipled male population of a city), and a lot of food. Soldiers don't need to visit a storehouse to eat, but will require larger amounts of food than a normal civilian does, and they actually require twice their normal rations when they move.
Actually building the infrastructure for a large army is going to be easier if you're playing as an Evil god, of course, since you won't have to worry about spending resources on satisfying your citizenry's need for happiness, free time, or other such trifle. Just build large fields on the most fertile land you can find, build granaries between them and the storehouses, and you should be rolling in food quickly enough. Food is actually easy to make if you're willing to do it manually; just find the largest field you have in your possession, pour a Water miracle on, and collect the resulting grain and plop it in a storehouse. Although this is quick, it does bypass the granary which can sometimes double the yield of a field if it's filled with refiners. Also, don't forget that you're going to need plenty of storehouses to hold the food that you're going to be creating.
So far as population goes, you can get up to around half of a city's population into the army, so you'll want to be sure that your town is making babies as quickly as possible. This obviously entails converting as many spare citizens into breeders as possible, but you can also boost your population growth by unlocking and building Nurseries and Fertility Statues near your suburbs. The faster your population grows, the more quickly you'll be able to build and replenish your armies. For the first few lands, though, you won't have to worry about getting a huge early boost to your population; you can just adopt a defensive tack and wait for your population to swell naturally before fielding your massive army and sweeping out for the win.
Also note that you can't explicitly focus on food if you want to build an army; all of your platoons will require a certain amount of ore, as well, so you'll have to have a number of mineworkers if you want to actually build your platoons.
Healing and Replenishment
Any army that's used in combat will take damage; that's just a fact of life. Each platoon in your army actually has a couple different methods of calculating its health. Each soldier in a platoon has an individual health meter, which determines how close he or she is to death. The platoon as a whole will also keep track of how many soldiers in it have died.
The easiest way to replenish the health of individual soldiers is to cast a Heal Miracle on them when they're inside an influence bubble of yours; this will usually heal each individual soldier to full health, but will also cause you to earn Good points for each soldier that you heal. This isn't necessarily a bad thing, though, as you'll be capable of earning more evil points in the long run with a healthy group of soldiers. If you buy the Heal spell for your creature, it will also be capable of casting Heal spells, but it typically focuses on its own health instead of that of your troops. They may also heal naturally over time if you keep them out of battle; we're not too sure on this, though.
No matter how often you heal a platoon, though, it's going to lose a few soldiers during battle. You can check and see how many soldiers a platoon is missing by moving your mouse over it and leaving it there for a second. Losses in a platoon are permanent - soldiers won't magically come back to life or join up from a town - but you can replace the losses by essentially creating Soldier Disciples. Pick up a bunch of civilians with your Multi Hand Pickup, making sure that the last civilian you pick up is an adult male (it can't be a woman, or a child, or an old man, in other words), then hold down the button to drop all of the civilians onto the platoon. If it said that they were going to turn into Soldiers, then they'll instantly join the platoon as new soldiers.
You can usually exceed the maximum size of the platoon in this manner. If a platoon has 36/40 soldiers alive, and you pick up 20 civilians and drop them all in, then you should wind up with 56 soldiers in a platoon that originally had 40 units. There's no particular benefit or drawback to this, although with certain special units, like the Undead Legion or the Seven Samurai, you can make super-huge platoons of super-powerful units.
Attacking Cities
Most cities typically have two lines of defense: walls, and platoons. Thankfully (or not thankfully, depending on your point of view), the enemy AI in Black & White 2 is somewhat less than intelligent, making for some simple strategies.
Dealing with platoons is fairly easy, and if you're in an offensive mode, then you'll have to get used to taking them out. Most platoons you encounter will be best dealt with via platoons of your own, or, if you're using your creature as an offensive weapon, by sending your creature in and taking them out. Note that your creature is fairly vulnerable to archer fire, though, and be especially careful not to use your creature and your platoons to attack the same targets. Your creature's attacks are powerful, but they're not targeted, so they'll hit your own platoons if they happen to be fighting near its feet.
Anyway, the typical army organization involves a large group of swordsmen, with a group of archers linked to the swordsmen. (You can link a platoon to another platoon by picking up its flag, then clicking and holding on the platoon you wish to link it to.) The swordsmen are going to be your shock troopers; you send them towards enemy platoons first, and the linked archers will follow closely behind and open fire when they're within range. While your swordsmen will take a bit of damage, your archers should be able to help them finish off their opponents, and since linked platoons follow behind their leader, they won't get into close quarters combat which they're unsuited for.
Walls are another matter. In order to destroy walls, you'll need to either use a catapult, or your creature. Any creature can destroy a wall, but a creature that's been working out or has the Advanced Soldier upgrade will be better at it, and will be better able to resist damage from the archers on the wall. Catapults have the advantage of firing from long distance, but they are vulnerable to enemy platoons if they should happen to leave through their gates and come after you.
In the end, combat in Black & White 2 isn't especially tactical or difficult; it's mostly a matter of building up your infrastructure to the point where you can sustain an army big enough to kick your opponent's butt. If you can do that, then you should be able to win fairly handily in most battles. Even when you do lose a battle, your usual penalty is to just wait a little while until your Breeders build your population back up; the enemy AI here rarely goes for the kill in a particularly severe manner.
Creatures
As in the first Black & White, your creature is going to be a vital part of your success in this game. Luckily, it's a bit easier to train your creature in B & W 2, so if you found the process laborious in the first game, you should have a much easier time with it here.
In The Beginning...
Most of your creature training will take place as soon as you wake it up, on the game's third level (after the tutorial and Aztec invasion levels). You'll play through a short tutorial here that will explain the basics behind the game's reinforcement system. In short, when you see your creature doing something, you can click and hold on it to bring up the reinforcement system. While holding down your mouse, you can either slap the creature by rapidly moving your mouse back and forth across its face, or rub it by gently moving your mouse over its body.
Slapping a creature will tell it that you don't like what it was doing, and that it shouldn't do it again, while rubbing it will act as a reward, and encourage the creature to perform the action more often when it's not under your direct control. Using these feedback systems, you can build up a custom AI for your creature, which it'll follow when you're not directly control it. You can also reinforce the creature's alignment by telling it to perform evil actions or good actions.
There are far too many actions to compile a complete list of, but you can definitely figure out most of the major ones for yourself, and their ramifications. Encouraging your creature to collect resources will make it easier to amass stores in your storehouse, while encouraging it to eat your villagers will thin your population, but will also make the creature strong and evil, and ready for combat. We'll go over some specific actions to encourage to customize your AI below.
AI Settings
You have four AI settings for your creature; flipping it to one of these will tell it to focus on the actions represented by the setting, but won't necessarily prevent it from performing other actions if it runs out of things to do.
Gatherer: The creature will seek out trees, grain, and ore, and deliver them to your storehouse. You can prioritize one kind of resource over another, of course, by discouraging your creature from collecting the easy-to-find resources, like wood. One of the drawbacks to creature collection is that it will bypass your refineries, such as granaries and smelters.
Entertainer: Your creature will perform his critically-acclaimed one-man-show, "Lions And Tigers, But Not Bears," for the populace, which will quickly become tired of his pretentious and nonsensical ramblings and go to sleep. But seriously, folks, the creature will roam around, dancing and generally making a fool of himself for the edification of your civilians, increasing their happiness and possibly their productivity as well.
Builder: Your creature will attempt to gather resources needed for new foundations and place them for the builders. It doesn't seem to actually want to construct the buildings itself, although you can order it to do so manually by leashing it and clicking on a foundation. If you buy Advanced Builder skills for the creature, it may choose to perform more constructions autonomously.
Soldier: If you want a rough and buff creature, then you'll need to get it big and beefy by keeping it well fed, and letting it use trees, rocks, or even your villagers as weightlifting accessories. And, of course, you'll need to have your creature fight any platoons it happens to get close to to raise its skill in battle. Most creatures, even ones that are fully good and placid, will be able to stomp all over the standard 20-man platoons that your enemies typically send your way early on in a round, so you should be able to just set your creature to Soldier AI and leash it onto a building near the entrance to your city so that it can intercept any incoming platoons and decimate them before they get into the middle of your town.
Upgrade Notes
There are a lot of things you can buy with your Tribute. We're not going to make a list of every single one of them here, but we are going to talk about some of the interesting options.
Miracles
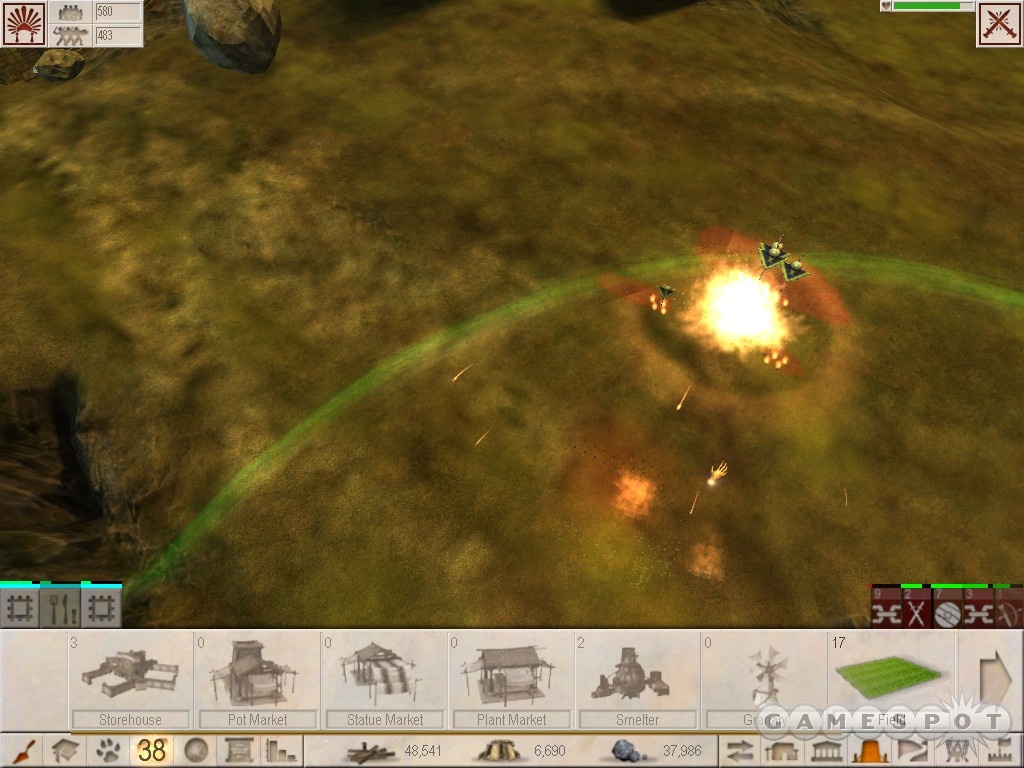
For our purposes, we found the Fire and Water miracles to be the most useful. Water is a cheap miracle that you'll be constantly using on your fields to grow more food, or casting on trees to grow more wood! It's a simple, but efficient spell, and should be the first thing on your list.
If you're trying to defend your city against invaders, then Fire is definitely the best choice for you. If you drop it on an enemy platoon, it'll blow up and they'll all die pretty much right away; if you can keep an eye on your influence boundaries and be ready when they pass into your territory, you can zap them and return to more pressing matters. Catapults can be destroyed with Fire as well, although they'll take a few more hits than a normal platoon will.
Healing is another useful spell, albeit one that's not as useful as you might think. Healing will restore health to each individual unit in a platoon, or restore a good amount of health to your creature, but can't restore dead soldiers in a platoon back to life. It is a great defensive spell, however.
Meteor is the most expensive miracle to buy, and also the most expensive to cast. It's harder to aim than Fire is, if you're aiming at a platoon, but is great for taking out catapults, if they come into your area of influence. It's also great for throwing at enemy walls, if you happen to extend your influence out far enough towards them.
Best 100 Soldiers
Note that the Best 100 Soldiers option is currently either broken or just kind of dumb. When you purchase it (at over 200,000 tribute for either the Swordsmen or the Archer variety), you'll get the most experienced 100 soldiers from your previous map. That's great, obviously, but it can only be bought once, and it doesn't work for any map after the one you buy it on. It doesn't let you continually take your 100 best units through each map in the game, in other words. You might want to save these upgrades for the final map of the game.
Walkthrough
Tutorial / Home City
The tutorial and Home City sections of Black and White 2 are pretty easy, as you might expect, seeing as they serve simply as an introduction to the game. You'll learn how to move your view, manipulate the environment, move villagers around, etc.
The one difficult aspect of the tutorial level involves the quest to unblock the waterfall for the villagers. You can't pick up the rocks at the end of the waterfall, so you'll have to use the rocks that are supplied to you and throw them across the gap towards the blockage rocks until you manage to hit it. If you turned your mouse sensitivity up, this is going to be a frustrating process of figuring out precisely how fast to move your mouse before letting the rocks go; if you throw too hard, they might bounce off the mountain and crush a few villagers in the nearby town for Evil points. If you're looking to have an easier time of this puzzle, you can adjust your mouse sensitivity to make it easier to get just the right speed on your throw, or just skip it entirely by clicking on the gold scroll on the mountain.
Also, when you get to the Aztec invasion, if you're having trouble dropping your villagers into the portals, try grabbing them, then holding down the action button over the center of the portal. Just clicking the button doesn't seem to always force them to fall. Shortly after you get through saving the villagers (and killing a few of the Aztecs), then you should be well on your way to reaching the first land, where your adventure really begins.
Land Three: Starting Out
Technically, the tutorial and Aztec invasion levels count as lands one and two of the game, brief though they are, so the first real land of the game is land three.
Getting Started
Well, you've luckily managed to get all of your villagers up and away from their razed hometown, and you've just happened to stumble across an abandoned settlement that's perfect for setting up a new civlization! What luck!
The bulk of the early portions of this age are simply a continuation of the tutorial level, as your assistants will laboriously go over every little detail of the game. And there are a lot of details. You'll first learn about creating disciples, which involves picking up villagers and placing them atop certain parts of the map to task them, such as by making farmers by dropping villagers on the field, etc. It's best to assign villagers to certain tasks to fulfill whatever needs your village currently is lacking in; you'll learn all about this as the little tutorial goes on.
Housing
After getting your villagers fed, you'll need to start building them some housing. You'll be asked to place down 12 villa foundations. You can place these anywhere you wish, but keep in mind that you might want to eventually lay down some roads extending from the center of town, so try to leave at least a little space between every couple of houses to ensure that your villagers have a place to walk. You'll also be taught about Godbuilding, where you can grab a tree or ore and hold down the action button over the building to speed up the resource requirements of the building. You lose a bit of the value of the item that you're expending in this manner, but it's generally worth it if you need a building in a hurry.
Moving On...
Anyway, the rest of these initial tasks are fairly easy, as expected. You'll need to increase your village's population by making breeders, build a temple, learn about the Toolbar, and so on and so forth. Everything will proceed at a pretty slow pace during all of this, and indeed one of the tasks you're given (to increase your population by 50 villagers) can be slowed down simply by not making any more breeders, should you want to take your time and get used to things.
Attack!
Eventually, you'll be told to make an Armory and start constructing platoons of troops. (You might also want to check your Storehouse around this point and see if it's getting full of certain materials; if it is, build another one to hold the overflow.) Keep in mind that Armories have a negative effect on the happiness of people who live in nearby houses; if you intend to become a Good god (Good God Yall!), try building the Armory at the end of a road, away from your villas.
To build a platoon, just click the flag on top of the Armory and place it within your area of influence; some of the population will automatically run over and join the army. It's important to leave the platoon's tent in place until it's done forming; clicking on it before the platoon is ready will cause you to create a smaller platoon.
When you have a full platoon built, you'll be able to easily capture one of the nearby towns by dint of your superior forces. It won't have much of an infrastructure in place, so you'll need to build a storehouse, roads, etc. After you've expanded a bit, you'll need to start playing a bit of a more free-form adventure. Your choice between good and evil is up to you!
Expansion
If you wish, at this point you can go ahead and start your creature tutorial. The creature requires a bit of training before he can be used well, though, so you might want to make sure that you've got your second city up and running before you spend too much time with your creature. After you capture the second town, you'll immediately have problems with homelessness, wood, and ore. First thing on the order of business will be to build a storehouse for the town, preferable near the large forest nearby. You might need to grab trees from the first town to Godbuild the storehouse more quickly. When it's up, you'll be able to start making disciples and laying down a few more Villas and roads for the townspeople. They're going to be an unhappy lot for the first few minutes after you capture the town, so try to appease some of their needs as quickly as possible.
Also, take note of the objectives menu in your toolbar (one of the tutorials deals with this). One of these objectives is to increase your Impressiveness to 9,000. Impressiveness rises slowly over time, but you can jumpstart it by buying more buildings in the toolbar and building them; things like wells, graveyards, pot shops, and the like will all add to your town's impressiveness. What's more, your impressiveness will allow you to take over more towns without having to send in the troops; an important point if you're playing as a Good god. If you are playing as a Good god, then you'll likely win the map by Impressiveness fairly soon after taking over the second town here.
Silver Scroll: Paternity Suit
The first Silver Scroll on this first island involves a wee bit of hanky panky. One of your villagers seems to think that you, a god, managed to impregnate his daughter, and demands a dowry of 1,000 wood. What you should do, of course, is remind him that in most patriarchical societies, a dowry is given from the father of the bride to the husband's family, and then demand his life's accumulation. That'll show him.
You have a few options on how to proceed here: you can either agree to pay him the dowry, by picking up 1,000 wood from a storehouse and dropping it near his house, or you can follow the daughter as she makes her way to one of your villas. When she finally reaches a villa, you'll notice hearts popping up above it; pick up her father and drop him on the house to prove the child's true lineage to him. Either method will earn you 20,000 tribute; a sizable reward for such a small effort.
Silver Scroll: Rooster
After completing the time-movement tutorial, you'll be able to open up the Rooster Silver Scroll. This one's not so hard to accomplish; just look out at the sky near where the sun comes up and repeatedly cause it to rise and set a few times. After it's risen four or five times in a row, the rooster will lose its voice and you'll win the challenge. Yay!
Creature Tutorial
When you're ready to start training your creature, click on the Gold Scroll above the Creature Pen to wake the little guy up. It'll be groggy at first, and not move very quickly, but you'll eventually get it out of the Pen and will be able to move it out to reach the town. At this point, there are only a few things to do before the tutorial is over, but you should definitely keep an eye on your creature for a while to reinforce its basic habits. You can hit the C button at any time to snap to your creature, so there's no excuse for losing track of it!
If you're playing as a Good god, then you'll probably want to have your creature become either a builder, gatherer, or entertainer, or some mixture of these three vocations. Be sure that it can feed itself and sleep when it needs to, and slap it around a bit when it attempts to eat villagers, poop on them or their houses, or other nefarious deeds. Your creature has to poop; just try to make sure that it doesn't do it in a field or in a storehouse. If you notice it dropping a load somewhere, grab the poop and fling it off into the hills to ensure that your villagers aren't upset by it.
For the Evil gods among you, you'll want your creature to start becoming a Soldier. This entails fighting, for the most part, but you can also train your creature in the art of war by making it work out, such as by lifting rocks. You probably won't be able to proceed too far along this path at this point, but if you haven't conquered the map with Impressiveness yet, try sending your creature to deal with some of the roaming enemy soldiers near the far villages.
Winding Things Down
In the end, you'll need to conquer all of the towns on the island to achieve primacy and be able to move on. You can either do so through Impressiveness (Good) or warfare (Evil). If you're aiming to impress, just cash in some of your Tribute that's been building up and unlock some highly Impressive buildings, like Graveyards, and start building them. Eventually your impressiveness will spread through the entire land, and all of the cities should just pop over to your control at once, without even requiring any fighting. Don't get the impression that this is a cakewalk, though; the rest of the game is going to be a bit more bruising.
As far as an Evil path to conquest goes, you'll have to build up your armies, obviously, using your most populous town to create three or four squads of sword soldiers, link them together, and start going after nearby towns! It'll take a while to take over the Town Centers for each town, but you'll be able to immediately move on to the next one, so long as you ensure that only the most basic needs of the conquered villagers are satisified. Build some homes and a field on fertile ground and you shouldn't have to worry about them at all after that, since you don't really care if they're miserable or not.
Land Four: Nordic Paradise
Now that you've gotten the basics out of the way, you'll find that your advisors will thankfully be spending a lot less time yapping at you - you might want to make a real save game at this point, in case you want to start the game over again at some point, but don't want to sit through all the unskippable tutorial stuff. There's not going to be much handholding from this point on; you'll get a list of objectives and will be expected to fulfill them as best you can, with the ultimate objective being to take over all of the towns on the map, of course.
You begin with virtually nothing of consequence; a town center, a creature pen, and that's essentially it. You should immediately start building out a spider's web of roads, houses, and a storehouse in a convenient area, while setting the population that you began with to a variety of collection and building tasks. (Note that one of your objectives is to have your creature build 12 houses; if you plan on accomplishing this objective, try to keep your number of builders relatively low, or they'll get to the foundations and sometimes build the houses before you do.)
Your newfound power on this map will let you eavesdrop on the leader of the Norse city elsewhere on the island. This guy likes to think about how devastating his attacks on you will be, and how he's going to crush your city like a ripe grape, etc., but you don't have to worry about him for the most part. Although he will eventually get around to sending troops into your town, even a creature that's been going along with a Good orientation can easily handle the single platoons that come in at a time. You don't get Evil points for attacking units that come within your area of influence.
Objectives
Many of the following objectives are fairly trivial. For example, you're going to be hard pressed not to build a field on fertile land at some point during this map. We do have some specific notes below the table here, though.
| Objective | Tribute reward |
| 1: Villagers must collect 4,000 wood, ore, grain. | 3,000 (for each resource) |
| 2: Create 12 Breeders | 4,000 |
| 3: Reach 150 Population | 10,000 |
| 4: Build field on fertile land | 3,000 |
| 5: Use Water miracle on field and forest | 3,000 (for each type of terrain) |
| 6: Creature entertains five people | 8,000 |
| 7: Creature builds 12 houses | 10,000 |
| 8: Create 10 Disciple Worshippers | 5,000 |
| 9: Build 12 buildings on Impressive areas | 3,000 |
| 10: Level up a Platoon | 4,000 |
| 11: Creature collects 3,000 food | 3,000 |
| 12: Deforest the land (special) | 30,000 |
| 13: Increase Impressiveness by 30,000 (special) | 10,000 |
| 14: Creature kills two platoons | 4,000 |
| 15: Win the Land | 100,000 |
Objective 6: Setting your creature to Entertainer and tasking him on a group of people, such as farmers, should complete this pretty easily. If you've rewarded him for Entertaining in the past, though, he'll probably do it autonomously at some point.
Objective 7: It's easiest to do this by keeping your Builder population low at first, laying a bunch of foundations, then dropping trees on them (not Godbuilding, just dropping the resource), and tasking your creature to build the house. If the resources aren't in place when the creature goes to build something, it'll often get distracted on its way to collect them unless you micromanage. Having the wood by the foundations ahead of time will make it easier to convince it to build.
Objective 9: This basically means to build buildings on areas with impressive views. The simplest way to fulfill this task is to wait until you've conquered the Norse city. Take a look at the two hills near your own town center; if you try and build a Villa on the peak of the second hill, you should notice that it'll get an Impressive bonus of almost 200 points, depending on where you position it. You'll need to build ten Villas up on the hill, making sure that they all have Impressiveness bonuses of at least 175 or so for them to fulfill the requirements of the task.
Objective 11: If you find it tedious to have your creature go all the way to a field and back to a storehouse over and over again, just pull up over 3,000 grain from a storehouse, drop it right next to the grain storage, and have your creature pick that up and put it back. It still counts as collecting, technically, and it'll be a lot quicker and easier than having it grab grain from a field.
Objective 12: This quest is apparently broken; clearing all of the trees off of the map doesn't get you the tribute bonus. If you're interested in trying, first you need to conquer the map, then you have to start multi-collecting as many trees as you can before chucking them into the ocean, or you can cast Fireballs on them, as well. Spread Foresters around the land and see if they make tracks for any trees that you missed. Many people are reporting scouring the entire island for trees and making upwards of three or four hundred foresters, without being able to complete this objective. Try it if you wish, though.
Objective 14: If you're playing as a Good god, then you can accomplish this goal without getting Evil points by keeping your town's gates open and letting a couple of squads inside. Your creature can easily defeat a single squad or two at a time without being wounded overmuch.
General Strategies
Regardless of whether you're Good or Evil, you're going to want to place a priority here on completing the busted wall to one side of your starting area. With that wall completed, and the gate in the other wall closed, the enemy troops won't be able to reach you, and thus won't be able to ever attack you. You can use your creature to build the wall off to the side, so long as you give it the ore to use ahead of time. If it gets stuck outside the wall after building it, go into your build menu and find the gate structure and build one on the wall to let it back inside.
For the main wall, the one with the road leading to it, you'll want to eventually place an archer platoon on the walls on either side of the gate here. Doing so will let you open the gate (by clicking on it) to accept migrations, while keeping the gate covered with archers to prevent the enemy platoons that'll be arriving from getting in. One of our favorite tactics here was to open the gate until an enemy squad started charging for it, then closing it just as they were about to head through; this will let your archers take them out on both their advance and retreat. You'll probably want to let a couple get through the gates, though; they'll be wounded enough for your creature to easily defeat them, which will let you complete the Objective requiring it to kill two platoons. It's also fun to build a few highly Impressive buildings near the walls, so that your influence spreads out to the other side; this will let you peg enemy squads with rocks as they come towards your city.
You'll need to turtle up in the beginning of the map even if you're planning on playing as an Evil character; it'll take a bit of time to build up your population to the point where you can support the multiple platoons you'll need to cut a swath through the towns on this map (and there are plenty of them). Luckily for you, the advent of the Temple and Miracles will greatly improve the fighting efficiency of your forces; the Heal power will let you heal platoons, while the Shield miracle will let you encase your archers in an impenetrable bubble. They'll be able to fire out, but your opponents won't be able to enter or attack them. Sweet! You can only use Miracles in your areas of influence, though, so be sure to pause after each time you capture a Town Center and Heal everyone up. You'll also have infinite ore from your Bottomless Mine; don't get used to this luxury, as Ore is very scarce on most other maps.
Healing will also let you get your creature back up to speed if it happens to take damage, and it definitely will if you plan on attacking the enemy city. The Norse capital has a Wolf protecting it, so you'll need to attack en masse if you want to take down the creature and then bust through the walls. Your own creature will hopefully be a good match for the enemy creature by this point; a mass of archers backing it up will hopefully enable you to help out while the rest of your soldiers or siege units go for the walls. Note that the creature still remains on the map, and is hostile to you, even if you happen to beat the enemy through Impressiveness.
Silver Scrolls
Nut Oil
This is a pretty simple physics-based game, which sees you throwing barrels of alkeehaul from island to island. You get an unlimited number of tries for each throw, so there's nothing major to worry about. The only really difficult throw is the final one, which orients you against a large hill. You can't really clear the hill, so aim to the right of where you first look and try to bank the barrel down the slope by throwing it against the hill above it. This quest is worth 20,000 tribute, so it's worth doing, even though it is pretty annoying.
Undead Legion
This is a much easier Silver Scroll. To find it, wait for night to fall (or set the skyclock to midnight), then find the scroll's beacon near the enemy city, at the bottom of the large hill nearby. Clicking on the pyres around the skull statue there in the correct order (assuming it's not random, it goes Podrekr, Dufniall, Gieri, Oli, and then the last remaining pyre), to get yourself an Undead Legion, which seems to be quite a bit more powerful than a normal swordsman legion. You'll also get 20,000 Tribute, so even if you don't plan on waging much war, you'll definitely want to pick these guys up anyway. Also note that if you Merge a normal swordsman platoon with the Undead, the entire platoon will benefit from the Undead's massively increased speed.
The Old Man And His Back
This isn't really a Silver Scroll, per se, but if you examine the coastline near your starting point, you should see an old man by a cave. If you pick him up and throw him down the coastline, you'll be able to try and set a record; anything over 100 units of distance or so should net you 15,000 tribute. Nice!
Land Five: The Turtle
Welcome to Japanland. This island is somewhat bigger than the last one, but a bit more linear in that you and your foe are on opposite ends, with many towns in between. The Japanese forces here will give you plenty of time to set up, but will be marshalling an army and working on taking over the cities nearby themselves, so you can't dilly dally forever, especially if you're an Evil god and are planning to attack them.
This is the part of the game where Ore starts to morph into a rare substance. You're not going to have any bottomless mines to begin with here; all you have are a few ore rocks within your circle of influence. Since it's difficult to make someone a minework when those run out, you should take a good number of your starting villagers and multi-drop them onto the ore rocks to get a good number of miners up and running right away. There are more mines in the hills near your base, but it'll take a while before you can extend your influence ring towards them. You'll want to start doing so, at any rate, and also probably build a smelter somewhere between the hills and your storehouse, and stock with refiners so that you can boost your ore yield.
Beyond simple mining, you can also obtain ore through conquest or migrations, but this latter option will take a while to pay dividends, as the first couple of towns to come your way are simply not going to have much ore in their storehouses. They're actually such tiny towns that they'll literally destroy all of their homes when they come to join you. At any rate, you'll need to be careful about how you spend your ore early in the game; avoid Godbuilding with it and attempting to collect it yourself, definitely, as that will decrease the efficiency with which you can expend it.
Objectives
| Objective | Tribute reward |
| 1: Villagers must collect 6,000 wood, ore, grain. | 3,000 (for each resource) |
| 2: Create 20 Breeders | 4,000 |
| 3: Reach 300 Population | 20,000 |
| 4: Build five fields next to each other on fertile land | 4,000 |
| 5: Build 10 Embellishments | 5,000 |
| 6: Create 100 Soldiers | 10,000 |
| 7: Take over three towns by force | 15,000 |
| 8: Kill every living thing (including animals) | 20,000 |
| 9: Creature collects 5,000 ore, food, wood | 3,000 (for each resource) |
| 10: Creature builds 30 houses | 10,000 |
| 11: Enclose town with walls | 15,000 |
| 12: Take over three towns with Impressiveness | 15,000 |
| 13: Increase Impressiveness by 30,000 | 10,000 |
| 14: Link three influence bubbles together | 5,000 |
| 15: Build a Wonder | 100,000 |
| 16: Win the Land | 120,000 |
Objective 4: These fields can be any size. You might want to build a bunch of small fields first, just for the Tribute bonus, then demolish them and build one larger field to make it easier to assign Farmers to the land.
Objective 5:These are things like Columns, Wells, Fertility Statues, etc.
Objective 6: The 50 archers you get at the beginning of the round count towards this limit, making it easy to build another 50 soldiers, even for Good gods.
Objective 7:If you're interested in getting the tribute here even if you're playing as a Good god, have the archers you begin with take over the small towns near where you start. Just be sure to stockpile food before you do so, as these guys will eat quite a bit when they're moving. Alternately you can just wait until you're about to capture the final enemy city with Impressiveness and just take over some of the smaller cities outside their walls, if you can avoid their armies.
Objective 8:This presumably requires you to kill your own citizens, which will obviously be best to hold off on until after you conquer the Japanese. After that, take out the deconstruction tool to clear away your cities and fields, throw away all of your food, and start either crushing people with rocks or throwing them into the ocean. This will obviously raise your evil bar pretty high, so you'll just have to kiss off the
Objective 10: If you're interested in getting the tribute here, but don't want to bother wasting your creature's time early on in the game, you can wait until you win the land, lay down a huge number of foundations away from your city, drop wood on all of them, and leash your creature to them while it's in Builder mode. Just be sure to drop it some food.
Objective 11:This doesn't require you to completely encircle your town; it just means that you need to make sure that any Japanese troops attempting to attack you will have to come through a wall section to do so. If you can capture Oki, the large town near yours, you can extend the wall across the mountains. Then you can start capturing Yuki, the town across the mountain, near the ore mine. If you do so, start building your influence up to the land bridge across the waterway, build a wall across it, and you should get the tribute for this.
Objective 14:This requires you to conquer a couple of other towns, then build structures until the bubbles come together. If you don't conquer the two small towns near your starting area, this can be difficult to accomplish, since they'll pack up their Town Centers when they migrate to your town, thus preventing you from creating a bubble there, and the other nearby towns are rather distant. This will generally be difficult for Good gods to accomplish, and will be impossible to complete after you win the land.
Objective 15: In order to build a wonder, you'll have to first purchase one, which will cost you a huge amount of tribute. Unless you've managed to stockpile a huge amount of tribute, there's not much of a chance you'll be able to afford more than a Siren or an Earthquake wonder, at the outside. If you're playing as an Evil god, then you might be able to make it to an Earthquake if you do every silver scroll and every objective available to you. Good gods should try and save up for the Siren regardless of this objective, since it'll let you construct buildings with 3,000 impressiveness. You probably won't be able to use its effect on any enemy troops, since they'll rarely attack you, but it'll still help to increase your city's Impressiveness.
General Strategies
Luckily for you, you're going to have 50 well-trained archers in your service at the beginning of this map. While they'll be a problem in terms of feeding during the early game, especially if you move them around a lot, they'll be able to mount the few half-walls near your city to provide defense against any incoming enemies (of which there won't be any for quite a while), or capture enemy Town Centers without much of a problem.
Good Gods
Note that, if you're playing as a Good god, it's almost impossible to lose here, due to the fact that the Japanese army will never attack you. At least, it didn't for us; the Japanese master seems content to try and lure in most nearby towns via Impressiveness, and although he builds a large army, he seems content to have it hang back on defense. Thus, you can feel free to wall yourself in if you like, and start amassing huge numbers of highly Impressive buildings - just be sure to periodically take stock of your Ore resources so that you don't run out, and be sure to have an armory and ranged armory, and maybe a siege factory in place just in case you do wind up having to bust out with troops of your own. The Japanese leader will eventually build a Siren, and will require a huge amount of Impressiveness to overtake, so if you run out of ore you might be forced to go through things the hard way.
That said, if you want to stick to your guns and win by Impressiveness, amass as much ore as you can in your home city and start building multiple buildings with big Impressiveness bonuses. Altars and Creature Pens are both good for this, since you have a lot of land mass to work with, and plenty of trees to godbuild them, and they're worth good Impressivness amounts. They'll eventually start to become less impressive as you build more and more of them, but if you also use your ore to build a few baths, temples, taverns, or the like, you should be able to get over the hump and win the land without sending out the troops. Note that only your city with the largest amount of Impressiveness will affect the enemy capital, so build everything within the limits of your starting city.
Evil Gods
Again, the Japanese citizens here won't attack you at all, so you'll have plenty of time to build up your population and food resources before building a massive army to crush your foes. One thing to note is that, as you move to attack the 50-unit archer platoon that patrols near the front gate of the city, the enemy will probably unveil their Siren attack, which freezes all of the troops in the area of effect and eventually converts them into citizens for his town. It's difficult to avoid this fate; your Creature might be able to lure out the effect without getting converted, or you may just have to send in a small squad to trigger the effect without sacrificing too many men. After the Siren's gone, though, you can destroy the archery range and armory with your siege weapons, since they're so close to the walls, then take down the walls themselves and charge in for the win.
Silver Scroll: Monk Test
To even attempt Monk Test, you'll have to purchase the Hand Forcing ability from the tribute menu. When you have it, you'll be asked to "destroy" the blocks that the monk is attempting to hit with his fist. This is incorrect, and more than a little confusing; what you actually need to do is heat up the stones so that the monk can more easily break them himself. To do so, hold down the action button, and your hand should turn sideways, or curve into a fist. If you move the hand over a block at this point, it should begin to vibrate the block, and if you move it very very rapidly, the block will start to smoke and give off sparks. If the monk hits the block at this point, it'll break, and you'll earn your 40,000 tribute. You can try this as many times as you like, of course, since you'll fail and have to start over if the monk doesn't manage to break a block when he hits it.
Silver Scroll: Forest Ambush
This scroll is located on the large island off to one side of the main landmass. In it, a spy is attempting to maneuver through a dense forest, but he'll have to avoid the enemy soldiers that are lurking about; if he gets detected while walking, you'll have to start over. You can guide the spy, and trick the enemy soldiers, by turning the arrow signs at most of the intersections.
Although it's implied that you have to lead the spy "through" the maze, there really isn't any exit from the forest; your real goal is to pass the spy over the four glowing pieces of information in the maze. When you get them all, you'll be told to exit the maze, but in fact the task should immediately end.
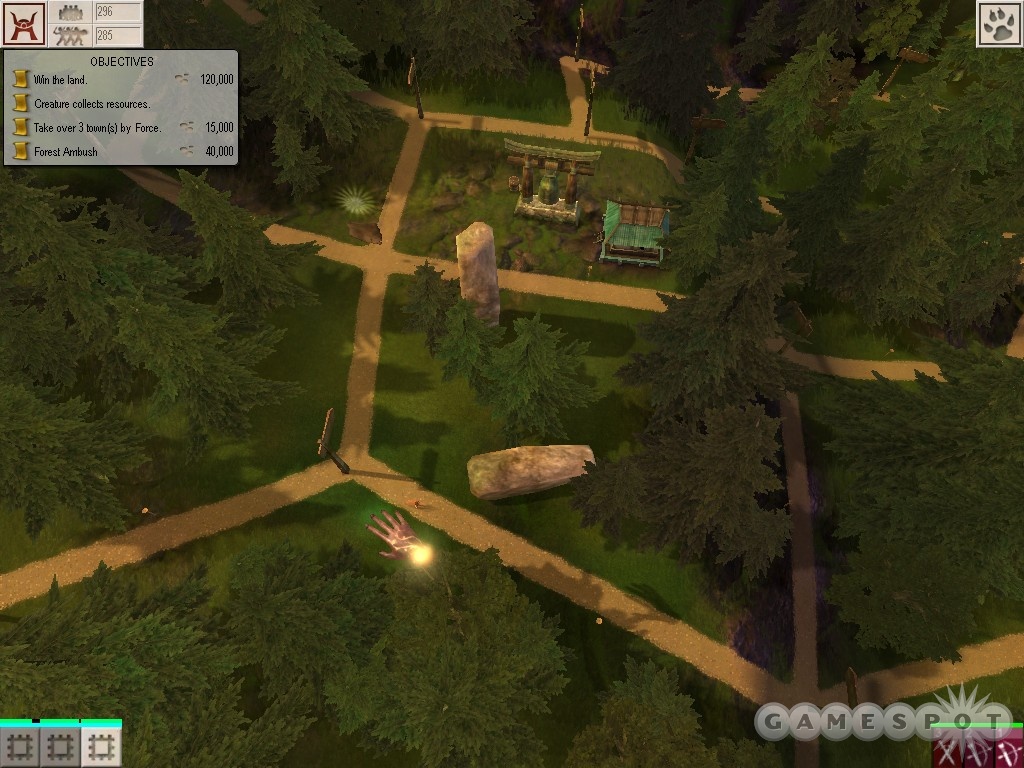
Anyway, you'll need to keep an eye on the path both in front of and behind your spy to prevent him from being hit by any soldiers. Since the spy moves relatively slowly, you should be able to zoom out after he passes through an intersection, and try to shephard the soldiers while they're still far away from your spy so that they're wandering around in a section of the maze far from him. Be sure to flip signs as soon as your spy goes through them to prevent anyone from following him, and try to wait until the last minute to flip signs in front of him the correct way, to prevent soldiers approaching from the opposite side from hitting him.
Keep in mind that the signs will occasionally flip by themselves, so it's almost impossible to get all of the soldiers trapped, but if you can prevent anyone from getting on the same road as your spy, you should be able to shephard him through the maze without too many major problems.
Silver Scroll: Save The Lambs
Save the Lambs is found on a scroll near the enemy city. After you click on the scroll, you'll be asked to grab flying lambs out of the air and set them safely back down to earth. You don't have to click on them in mid-flight, though; you seem to to be able to hold down the action button before they reach your hand, and that'll let you grab them from the air. Unfortunately, you can only hold one lamb at a time (no multi-pickups, in other words), and they require you to hold down the action button before you can set them back on the ground. This makes it problematic when more than one lamb comes out in rapid succession, but you don't need to get all of the lambs to get the tribute reward; we managed to pass with 21, so we're assuming that 20 is the cutoff.
Land Six: The Japanese Brothers
Whooo, you're up for a pretty big fight here! You're going to be facing off against what appears to be the entire population of Japan, and they are freaking dug in. They're going to be able to constantly keep their forces up to around 500 soldiers at a time, although they will generally tend to send only one platoon your way every few minutes. You'll be able to easily defend yourself with your creature or with the Seven Samurai that you obtain through a Silver Scroll quest, though, at least until you manage to build a wall to keep your opponents out.
Objectives
| Objective | Tribute reward |
| 1: Only attack at night. | 5,000 |
| 2: Create 20 Breeders | 3,000 |
| 3: Reach 500 Population | 20,000 |
| 4: Level up a platoon to rank 6 | 7,000 |
| 5: Use Shield miracle on five people | 3,000 |
| 6: Have your creature kill 10 platoons | 7,000 |
| 7: Take over three towns by force | 20,000 |
| 8: Use creature to destroy enemy walls | 7,000 |
| 9: Win three creature vs. creature fights | 8,000 |
| 10: Change from good to evil | 5,000 |
| 11: Segregate Men and Women into separate towns | 10,000 |
| 12: Take over three towns with Impressiveness | 20,000 |
| 13: Build a Wonder | 100,000 |
| 14: Win the Land | 150,000 |
Objective 1:This is one of the few objectives that you can actually fail outright if you're not careful. This basically prevents you from engaging in any combat during the day; if an enemy platoon runs into your town during the day (and they'll come all around the clock), and one of your platoons automatically starts to fight them, then you'll lose this objective. Unless you enjoy letting your villagers sleep all the time by manually setting the time to the middle of the night, just ignore this task.
Objective 5:This seems to only work if the Shield actually does something; i.e. if you shield a bunch of villagers doing nothing, you don't get the tribute reward. You may have to wait for someone to attack you before using this for the reward.
Objective 6:Even a weak creature can take out the platoons that attack you solo in the beginning of the map. Just set it to be a soldier and leash it to a building near the narrow spot of land they come through, or set a bookmark to overlook the approach to your town and attack them when they reach your borders.
Objective 9: If your creature has mostly been avoiding fighting, then it'll likely get pounded by the enemy creature when it comes your way. You can even the odds by blocking it with a wall and dropping a rock on its head for a while, then sending in your own creature.
Objective 10:This apparently requires you to be good, first off, then do enough evil acts to cause your fountain at your town center to change to a flame. We weren't going to bother chucking out 80% goodness just for the sake of 5,000 tribute points, so you might need to get a bit more evil than that to earn the reward.
Objective 11: How this is supposed to be possible without taking massive Evil points is beyond us. It's likely going to be way too much trouble to actually go around picking up all of your citizens and trying to sort them out into male and female than it's really worth. If you can kill enough of them, though, after destroying all of your buildings (and after winning the map, of course), you should be able to get down to manageable numbers of citizens and finally separate out the girls from the boys and plop them into separate towns. If you're playing as a Good god, this objective would seem to be almost impossible to accomplish without some major time wastage.
General Strategies
Obviously enough, if you're planning on turtling up, you'll want to build a wall across the narrow band of land that the enemy platoons are forced to come up through. You can just build a simple wall across the land if you want something cheap, but keep in mind that you'll need to build something fairly wide in order to fit a gate into it. Just quicksave before you lay your wall, and reload if you happen to make one that's too small.
Even if you do build a wall, though, you'll probably want to keep the gate open to allow the enemy platoons to come your way, and use either your creature, Seven Samurai, or archers on the walls to decimate them and earn some experience. Almost all of the troops coming your way will be swordsmen, but you might also face the odd catapult or even a creature attack eventually, so be ready. It'll be handy to have a highly Impressive building just inside your walls to extend your influence out a little bit; that'll let you bring out big rocks to drop on enemy platoons or their creature. The creature will usually just bang on your walls and try to break them, but if you drop a big enough rock on it over and over again, you can stun it and prevent it from attacking until it dies, hopefully while your archers are going crazy on it as well.
As on the last map, ore is going to be in pretty short supply, so you'll want to build a smelter between the mine and your storehouse and process the ore before it gets stored. Unfortunately for you (if you're a Good god), this will render most of the nearby land almost uninhabitable for homes, since there's such a severe happiness hit. Also unfortunately for you, you're almost definitely going to have to build homes out there at some point, due to the fact that building them on the bottom of the slope leading to the land bridge will actually cause many of them to be built for negative Impressiveness. The bottom of the slope should be used for buildings that will extend your influence out far enough for you to build a wall across the landbridge, like a Siren. Anything smaller, like embellishments or houses, will be hit with the Impressiveness penalty from the low ground and will wind up actually subtracting from your city's overall Impressiveness.
Eventually the mine will run dry and you'll be able to scrap the smelter and start expanding out along the plateau. Use the F key to take a look for fertile ground for your fields; it's surprisingly rare up here, so build big fields in the spots where the land is fertile and construct granaries between them and the storehouse. Food will be a big problem for you on this map, especially if you're going for an Evil win by conquest, so do everything you can to ensure that you can get as much of it as possible.
Unfortunately, the Japanese boss here will construct a Hurricane Wonder near the midpoint of the map and eventually unleash it just outside your area of influence. It'll likely sweep in and deal massive damage to your homes and buildings. If you've been building villas, then no big deal; you can just repair those yourself with Godbuilding while you let your peons rebuild the bigger buildings. If you have a lot of ore-heavy buildings, though, such as Manors or Mansions, then you could find yourself stretched thin on that particular resource after the Hurricane hits. It'll only come out once, though, unless you take an exceedingly long time to win the map.
Good Gods
Although difficult, this land can be won by Impressiveness; you just need to ensure that you avoid building homes or small structures on the low ground near the land bridge, as the negative Impressiveness there will be harmful to your cause. Instead, focus your homes on the starting area of your zone, and if you can expand far enough, try to reach the top of the small hill near your mine and build villas up there; there are a few spots up there worth up to 200 extra Impressiveness.
Beyond that, all you really need to do is wall yourself in to prevent the sword platoons from coming your way, watch for the odd siege weapon (we only saw one in three or four hours of play), and keep an eye on the enemy creature. If you have a gate in your wall, then you can just shut it when the creature comes to play, drop a big rock on its head a few dozen times, then open the gate to allow your own creature to exit for the kill, as winning three fights will let you earn a bit of tribute from a secondary objective. Alternately you can just let your archers on the wall do the deed, but dropping rocks on the creature's head is usually going to be mightily efficient.
Anyway, your walls should prevent most enemies from getting anywhere near your city, but you'll need to open them eventually to allow migrants to arrive, especially since some of them carry precious, precious ore. Be sure to have two storehouses built before an ore-heavy contingent arrives so that you can hold all of it. One of the migrations should bring a whole 20,000 ore with it, which should put you over the hump in terms of resources, and let you build any Sirens, Ampitheatres, Baths, etc., that you've been holding off on.
If you do happen to get a Siren up and running, and are able to charge it up before winning the round through impressiveness, be sure to use its effect on one of the densest concentrations of enemy troops. You'll get a huge and immediate influx of civilians for your cause, so you might want to have a little extra housing prepared ahead of time.
Evil Gods
This is going to be the steepest military challenge you've faced thus far, since there are cities all around the map that will need to be conquered, along with plenty of walls to deal with. If your creature has managed to work himself up into a buff killing machine, you should be able to use him to break down any walls in your path; you might want to purchase the Heal Miracle for him so that he can repair any damage he takes from archers on the walls. Or you can build a siege factory, of course, but you'll need to keep them protected.
After walling your home city in, you'll definitely want to take advantage of the Seven Samurai trick listed in its description below; a squad of fifty or a hundred Samurai will be almost unstoppable against enemy swordsmen, although you will have to keep them well out of range of enemy archers or the enemy creature. They'll serve you well, though, if you do actually manage to get them up to a huge number.
Silver Scrolls
Seven Samurai
The Seven Samurai quest can be completed easily, and will be quite important to your success on this island, mostly because you can use the reward in a rather unorthodox way. To begin it, find the altar-shaped area with the silver scroll on it, and examine it to learn about the seven samurai who were turned to stone.
At this point, you'll be able to look around the island and find the seven statues scattered around, mostly in mountainous areas. When you click on one, it'll be teleported back to the altar. Finding all seven can be tricky, but one thing to remember about the statues is that they glow, so if you're not zoomed out all the way, you can spot them from above by their auras. This is made easier if you tilt the camera all the way up and look straight down at the ground. The statues are fairly well spread out, unfortunately, so it's difficult to describe all of their locations with any accuracy (mostly thanks to the fact that there's not a map or a compass), but if you check the video on this page (sorry PDF folks, you'll have to visit our web version of this document to see it), you'll be able to find all of the statues in short order.
When all of the statues have been returned to the altar, you need to place them all on the pedestals in the correct order to revert the samurai back to human form. They're all color-coded, and each of them matches one color of the rainbow. Thus, you need to place them on the altar in this order: red, orange, yellow, green, blue, indigo, violet. If you're looking towards the altar, the red statue goes on the rightmost pedestal, and so on.
After you have the seven samurai at your disposal, you'll find that they're a dominating force on the battlefield; they can usually take out a 20-man platoon without losing a single soldier. For the moment, you can park them on the narrow land bridge that leads to your area and let them guard against any incoming foes. When you build up your town a bit, though, you can actually strengthen the squad well beyond its intended power. If you intentionally let a member of the squad die, so that there are less than seven members of the platoon, you'll be able to pick up as many civilians as you like and drop them on the squad, making a huge squad of almost unkillable samurai. Just make sure that the last civilian you pick up is a valid male target (i.e. not an old man or a child), and you should be able to convert all of them into samurai, even the women.
If you want to intentionally kill off one of the samurai, just drop a rock on one of their heads. If you want to avoid getting Evil points, you can run them up towards an enemy archer platoon and let them take some potshots before retreating to your city.
Nut Oil
This is another tough barrel-tossing contest for you, in similar fashion to the Nut Oil contest from a previous land. Unfortunately, this one's a lot tougher than the previous one was, since you have to hit your target in one throw. Also making trouble for you is the fact that, if you proceed past the first target or two (there are three in all), then flub one, you have to start over all the way at the beginning.
Luckily, the first target here is probably the hardest one to hit. You need to pick up the barrel, then fling it at the pyre so that it impacts the pyre directly and explodes. That'll light the pyre, letting you move on to the next. The third pyre is actually the easiest to hit, since it's fairly close to your position, but the first couple will be frustrating. Again, you might want to lower the sensitivity on your mouse for the purpose of this silver scroll; otherwise it can be difficult to make your throws accurately. If you win, you should obtain a few free fire miracles.
Archaeologists
You can find the Archaelogists quest on an island, far away from your home town on this map. To help them out, you're going to have to help them locate a hidden set of ruins on their little island. Doing so will first require you to find some buried runes, buried beneath the sand around the island.
To find the runes, listen to the clues that the head archaelogist gives you. When you're ready to interact with the island, close your hand by holding down the action button and move it rapidly over the sand behind the three archaeologists; you should eventually spot a circular rune start to appear, so rub more quickly over that spot to uncover it completely.
The second rune is located near the tree at the top of the hill near the excavation; this is the only tree on the island that can't be moved, and is also the only tree that stands by itself. Rubbing the ground near it will reveal the second rune.
The third rune is by the solo rock on the beach here; this, again, is the only rock that can't be moved. You'll only be able to uncover the rune at night, though, so you might need to flip the time a bit before you can uncover it.
The last rune is located at the midpoint between all three previous runes. In other words, it's just up the hill from the excavation, near the solo archaelogist who's working there and the four rocks.
After you uncover the ruins, you'll have to move the rocks to give the archaelogists access to them. Fling them into the sea, and you'll earn your 40,000 tribute.
Sick Town
The Sick Town quest is located in one of the towns under Japanese control. To complete this objective, you'll need to have purchased Hand Forcing from the tribute menu. In order to cleanse the town of its disease, you simply have to find the civilians giving off green smoke from their bodies, click and hold the mouse button to make your hand corporeal, then quickly move it back and forth over their heads to cause gusts of wind to blow away the smoke. After a few seconds of movement on each civilian, they'll stop emitting the smoke, and will be cured. Cure all of the civilians in the town, and you'll earn an easy 40,000 tribute. Note that this quest can only be attempted before you win the land.
Land Seven: Finish The Japanese
Well, you've finally gotten the attention of both of the Japanese brothers, and they're determined to make their stand against you now, before you manage to reach their Aztec masters. They've got you boxed in here, as well, with a difficult land in front of you. Oddly enough, you should have plenty of ore to work with here; it'll be wood that'll wind up being a rare substance, due to the rocky surroundings you begin, and the fact that there are no other large forests anywhere near your starting area.
Objectives
| Objective | Tribute reward |
| 1: Villagers must collect 6,000 ore. | 3,000 |
| 2: Reach Ultimate Goodness | 50,000 |
| 3: Never lose a villager to attack. | 20,000 |
| 4: Create 20 platoons | 8,000 |
| 5: Put all the men in the army | 8,000 |
| 6: Have your creature kill 12 platoons | 12,000 |
| 7: Take over four towns by force | 20,000 |
| 8: Creature collects 3,000 ore | 5,000 |
| 9: Win four creature vs. creature fights | 12,000 |
| 10: Use Heal miracle to heal people | 10,000 |
| 11: Use Fire miracle to destroy an army | 5,000 |
| 12: Take over four towns with Impressiveness | 20,000 |
| 13: Win the Land | 150,000 |
Objective 2: This appears to require you to be at above 90% Goodness, or somewhat higher. If you've consciously been good throughout the game, then you'll probably earn this tribute as soon as you start the round. There may also be an Evil variant of this, depending on your choice of alignment.
Objective 3: Usually villagers aren't attacked by enemy soldiers, for whatever reason, although enemy archers might take potshots at them. There's not a whole lot you can do about this one, unless you're willing to completely micromanage your villagers. You can wall yourself in and keep the gates shut the entire round, which might work. Even with a bunch of villagers roaming well away from our city, we still managed to keep this objective intact until the end of the map.
Objective 4: Obviously enough, wait until you have a large population, then build a large number of small platoons. You'll need multiple armories for this, since each one can only create so many platoons.
Objective 5:This is pretty tough to accomplish, especially since you can easily wind up with an odd number of civilians. Completing this will probably require you to make a large army after you've won the map, then destroy your city and kill all of the civilians within it, to ensure that there's no one alive who isn't in the army. Alternately, you can try destroying your town, then wounding a squad and placing all of the civilians into the army by pouring them onto the platoon, but we're not sure if that would actually work or not. We're also not sure if this counts old men or not. Probably more trouble than it's worth, at any rate.
Objective 10: It doesn't seem to matter whether you use this on a wounded character or not; just dump it on your townsmen and you should get the tribute.
Objective 11: You need to wipe out a whole platoon to earn this.
Hidden Objective: There's another man sitting by a campfire, near the sea by your starting city here. As per usual, you can pick him up and throw him, and the farther he goes, the more tribute you'll get.
General Strategies
Obviously enough, you need to get yourself walled in here as soon as possible, at least on one side of the area, so that you can force enemy troops to come around the long way and run straight into your creature. Building out to the far wall segment will take a while, but it's doable. Each of the walls that you build should have some kind of extremely Impressive building just within the walls, so that you can fling fireballs or large rocks at your opponents as they come in.
After an hour or two of playtime, you'll notice that your enemies will start approaching in greater numbers and sending a fairly constant stream of catapults your way. You'll probably need to keep your archers off the walls when the catapults start coming towards you. If you've extended your area of influence far enough, you'll probably be able to drop fireballs on the catapults as they come, although it'll take three or four to really do them in.
The Wonder you're going up against here is the Earthquake, but we happened to see this go off a few times without ever destroying anything more devastating than a wall section. Just build out your influence to ensure that it encompasses the ridge face near the closest wall section to you, and your foe will be forced to start his Earthquake down the ridge a bit. It rarely seems to head towards your town, but of course we might've just gotten lucky. Unfortunately, if it does hit, it'll do severe damage, both when it opens up the fissures in the ground and when it closes them up again, since it instantly destroys buildings near it. If you have any highly critical building, like a Wonder, try to build it close to the center of town to avoid its untimely demise.
Good God
Winning against the enemy here will require a lot of building, obviously, so you're going to feel the lack of wood more surely than an Evil god will. You'll run low on it surprisingly quickly, but you can restore your supply by wise applications of your Water miracle. Note where the trees grow around your little plateau at the beginning of the map, and try to build around them as best you can. When you have an Altar up and have plenty of mana, choose your Water miracle, and drop it on the areas where there used to be trees; you should be able to start a couple of little saplings if your timing is right (sometimes it can take a while for trees to start growing back after deforestation). If you can spot a sapling, hit M to get the miracle back into your, and hold down the button to pour water on the tree and quickly grow it back.
Beyond that, you should wall yourself in, and purchase the Fire miracle if you haven't done so yet. Although using it on your enemies is an Evil act, whether they're in your area of influence or not, it's by far the easiest way to take down enemy platoons when they come into your domain, and you can even toss it outside your influence to pop the large platoons that often make camp just downslope from you.
While the big, impressive buildings will be your bread and butter here, you can also put yourself over the hump for the last two city takeovers by building backwards towards the island's edge and using the high plateau up there as a spot to construct a large number of villas. If you can repopulate your forests with the Water miracle, then you'll be able to lay down a bunch of villas and Godbuild them relatively quickly. There are plenty of spots up there that will result in villas with 200 impressiveness, so lay down a dozen or so foundations, then grab a bunch of trees and get to work! Don't forget to build a road to connect to each of the homes for the extra Impressiveness bonus.
Evil God
Luckily, you'll be able to wall yourself in just as surely as a Good god will here, and you'll have more fertile land here than you did on the last map, allowing you to get more food production started. You'll also have more than enough ore to build your armies, since the mine here contains 30,000 ore, and the rocks scattered around it are good for five thousand or so more.
Your creature should be able to handle the platoons that come at you early on in the round, so feel free to build up your infrastructure here and take your time getting your army set up. The enemies here keep a lot of soldiers spread out around the map, but will usually constantly resupply the forces that they park outside your walls, so you'll need to be careful about blocking their supply lines, and be especially watchful for catapults, which can do severe damage to your platoons if you leave them unattended and don't notice them approaching. If you're having a hard time taking over the big cities, you might want to try a little feint by knocking down a wall, sending in your creature to distract the enemy and lead away their platoons, while you send in your largest platoon to capture the city center. The opposing AI here is sadly vulnerable to such tricks, but it'll make your life a bit easier.
Silver Scrolls
Dark Disciples
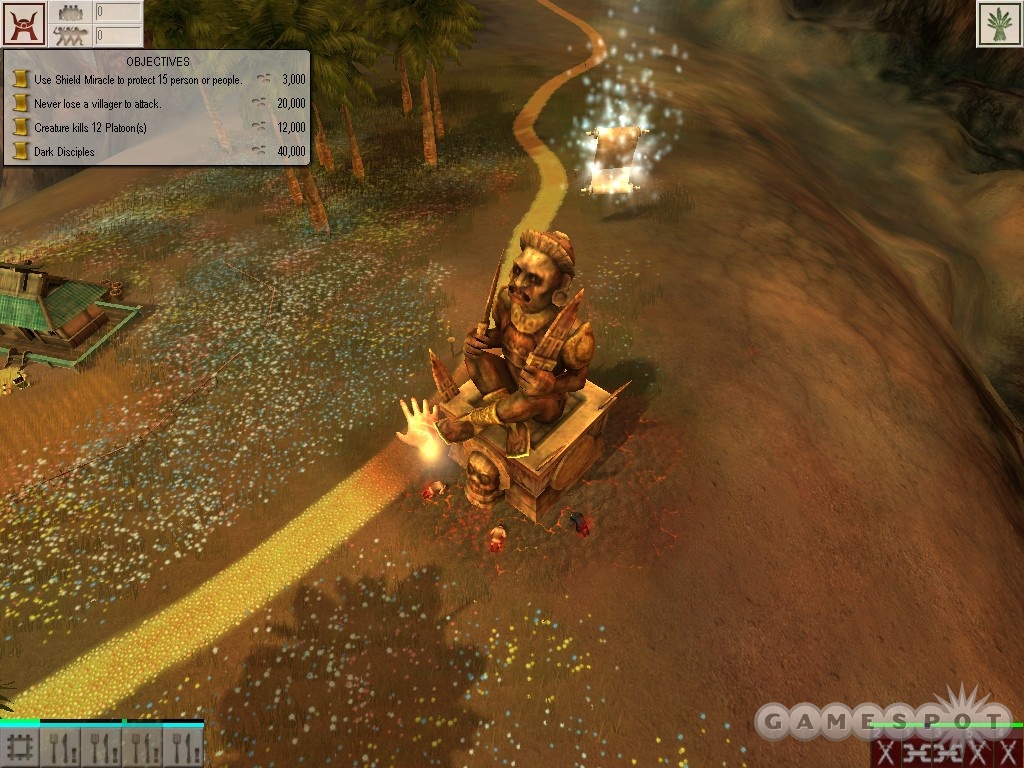
This Silver Scroll only becomes available if you take one of the towns along the road that runs along the left side of the map, if you look "up" from the perspective of your city. If you do, you'll be able to examine a strange obelisk that's apparently causing some of the townsmen here to go crazy and worship it. You have two options here: you can either pick up the worshipers one by one and shake them to free them from their madness, or you can pick up more villagers from your home city and drop them inside the red field around the statue to cause them to worship it as well. Either way, you'll get the tribute for the quest, but creating more worshipers is an Evil act, since they'll all get zapped when the statue disappears.
Mine Monster
After you've mined about half of the ore from your mine, you'll get a little cutscene indicating that something bad is happening over there, and indeed, it appears that there's monster inside the mine that's killing your miners. You have two options here: you can either send in a 20-man platoon to defeat the beast, or you can pick up one of the poisoned cows that appears around this time and drop it into the mine. Doing so will kill the beast and earn you your cash. If you send in your platoon, it'll gain experience, but will also become slightly smaller. Bigger platoons don't seem to be able to fit in the mine, though.
Poisoned Herd
Although this isn't a true silver scroll, you'll notice that the guy who owns the sick cows is still going to be complaining at you after the Mine Monster quest, at least if you have subtitles on. Whether or not you really care is debatable, but you'll want to heal his cows with a heal spell just to get him to shut up. The earlier you do this, the more cows you'll save, and the more grateful the man will be, in terms of the amount of Tribute that he'll offer up.
Burning Wells
In the middle of the map, you'll find a silver scroll that, when clicked on, will cause a bunch of oil wells to explode! Good job! Anyway, the wells here can only be doused with a Water miracle, so you can either try to take over the nearby town and extend your influence over them, or send your creature out (after you've bought the Water miracle for it), or just wait until the end of the map and douse the flames yourself when you enter sandbox mode.
Land Eight: Back To The Aztecs
It's time to wreak bloody vengeance in the deserts of the Aztecs! These guys are intent on smacking you down just as surely as they did before, and they're going to have help on their side, in the form of a Hurricane Wonder that's being built in one of their cities. You're going to be stuck in a pretty small area here, but you should have the resources required to build your way to success if you're planning on a Good win, or get your army together for a military victory if you so choose.
Objectives
| Objective | Tribute reward |
| 1: Water your fields every day | 3,000 |
| 2: Build all fields on fertile land | 5,000 |
| 3: Reach 1,000 Population | 25,000 |
| 4: Never attack | 10,000 |
| 5: Only attack at night | 10,000 |
| 6: Have your creature kill 10 platoons | 12,000 |
| 7: Take over four towns by force | 20,000 |
| 8: Creature collects 5,000 ore, food, and wood | 5,000 (for each resource) |
| 9: Take over four towns with Impressiveness | 20,000 |
| 10: Connect three towns with roads | 10,000 |
| 11: Win the Land | 200,000 |
Objective 3: This is possible for Evil gods; you'll need a lot of Fertility Statues, Nurseries, and Breeders, of course. Good gods will have an easier time of it; the two main enemy cities should send you huge migrations when you Impress them.
Objective 4: Ha, ha. Although once Ylaruam falls, you won't have to worry about any incoming enemies, it'll be very difficult for you to fulfill this objective, since most enemy attacks will cancel it.
Objective 10: This is very difficult to accomplish, as you apparently have to do it before you win the land, which means that you'll have to conquer towns, then build roads between them while the enemy still has a presence in the area. Since the towns are so far apart here, this probably isn't worth bothering with, especially since you'd have to build buildings along the road to connect your influence bubbles.
General Tips

Well, as mentioned above, you're going to be stuck in a pretty small area here, especially if you intend to wall yourself in. There's nothing that technically prevents you from building out in the desert, but doing so will probably require you to manually transport food out there from your closer storehouses, since fields will only grow near the lake here. The same situation applies to trees, and we personally had a hard time getting trees to re-grow after they were cut down, water miracles or no.
Anyway, with the land area you have, you're going to have a somewhat hard time fitting in all the buildings that you like. You'll probably want to use skyscrapers here instead of villas, if you haven't been doing so already. They'll require ore, obviously, so be absolutely sure you have a smelter going with eight Refiners before making people head for the mines.
Thankfully, the military threat presented to you by the Aztecs on this map isn't as severe as you might think. They will send platoons your way, to be sure, so you'll want to wall yourself in and get your Fire miracles ready, but your part of the map is a good distance from their two main cities, so you should be able to see any incoming threats well before they reach you and deal with them accordingly. Most of the early platoons can be taken out by your creature, while later threats can be dealt with through your army or miracles.
The key thing to know here is that your foes will be building up a charge on their Hurricane Wonder in the town of Ylaruam, their second largest city. Whether you're Good or Evil, you'll want to take this town over before they can cast their spell at you; a Hurricane would really, really ruin your day, especially if you have a bunch of skyscrapers clustered into a small area and they all get hit. That'd be ruinous!
Good God

Although building skyscrapers is technically an evil act, they're going to be quite advantageous to you here, especially when you climb the hill to the small plateau near your ore mine. If you can get up there (we managed to do so by just building a road up the hill, and lining it with villas), then you can build a central happy structure, such as a Temple or an Ampitheater, and then start packin' em in with skyscrapers build around the perimeter of your happy structure. The Impressiveness bonuses up here are substantial, so a skyscraper just five or six levels tall should wind up worth in excess of 1,000 Impressiveness. They'll also do a great job of helping you store all your citizens, and you're going to have a lot of them, especially after Ylaruam falls; it'll send you a migration of around 250 civilians when it goes.
You shouldn't have to worry too much about resources here, except perhaps wood; many of the forests here won't regrow after they've been chopped down, and your fields will take up a lot of prime forest real estate. Still, if you're careful you won't have to worry too much about it, and should be clear to build your little heart out.
Evil God
Besides population and food problems (which shouldn't be too severe, considering the yields of the fields by your lake), you shouldn't have a horrific amount to worry about here. The Aztecs are surprisingly passive in military terms, especially after Ylaruam falls, so you'll be able to bide your time and build your forces for the final strike. You'll definitely want some catapults for the assault on the enemy capital, as there are four platoons of archers on their walls, and they'll do severe damage to your creature if you're used to using it to destroy enemy walls.
Silver Scrolls
Isle of Nymphs
The Isle of Nymphs is located in the middle of one of the large lakes here. When you click on the scroll, the Nymphs will ask you to bring them...something. They don't say what, and they don't appear to know themselves. You can drop anything on their island to see their reaction to it, but, being Nymphs, it should be pretty obvious to the mythology or fantasy literature peeps what they need: a man. Not just any man, though, but a young one. You need to find someone precisely 21 years old; you can check on the ages of your civilians by hitting the S button while you're looking at your city. Grab a 21 year old male, drop him on the island, and you're set.
If you can't find someone precisely 21, grab a 19 or 20 year old, drop him on the island, then come back in a few minutes and he should be 21. Pick him up and drop him again to complete the objective. If a 21-year-old gets rejected, you might need to try someone a bit older, so start with a 25-year-old and figure out what precise age they need.
Note that, since you can manipulate objects on this island, you can pick up all of the trees and stick them in your town's storehouse if you're running low on wood.
Sun Dial
The Sun Dial scroll is found near your home city, and involves four sundials set out in a circle, each one giving you a different time of day if you hover your mouse over it. One is set to 7 - 9 PM, one to 6 AM - 8 AM, one to Midnight - 2 AM, and one to 1 - 3 PM. You need to set the clock in the sky to these precise times, in the order that we just listed them; doing so will let you light them up in order, and you'll gain the tribute reward. Note that this can screw you over for the "Water your fields every day" objective if you move the clock forwards instead of backwards.
Rain Dance
Near the large volcanos on this map, you'll find the Rain Dance objective. Your task here is simple: memorize the pattern of drums that the drummer plays, and play them back when it's your turn. It's effectly a memory puzzle rather than a rhythm puzzle, then. Unfortunately, the beats are randomized, so no amount of coaching or spoiling would help you here. You just have to be quick with the ol' brain!
Land Nine: The Finish Line
Ok, so you've finally reached the Aztec capital, and are keen on making them pay for their crimes against your civilization. It's not going to be easy to do so, though, as you're going to come under ferocious assault almost immediately. Winning this land as a Good god will be difficult; we recommend that you go for the easier path and win through warfare.
Objectives
| Objective | Tribute reward |
| 1: Win the land | 500,000 |
| 2: Change alignment from good to evil (or reverse?) | 100,000 |
General Strategies
Alright, this is one of those awkward computer game moments where you have to play through the level, get creamed, then reload at the beginning of the level with the knowledge of the scripted events in your head and win that way. There's little chance that you're going to be able to win on your first try, if only because things happen in a very specific order and are hard to deal with without forewarning.
Some things to consider: there are three cities on this map, one large, two small. The two small cities are the ones that are going to be sending most of the troops your way, while the larger one is going to be charging up its Volcano power for its eventual attack, and it'll be coming along quicker than you probably think. Things start to move very quickly as soon as you begin this level, but fortunately you already have infrastructure in place to deal with it, including a large set of troops.
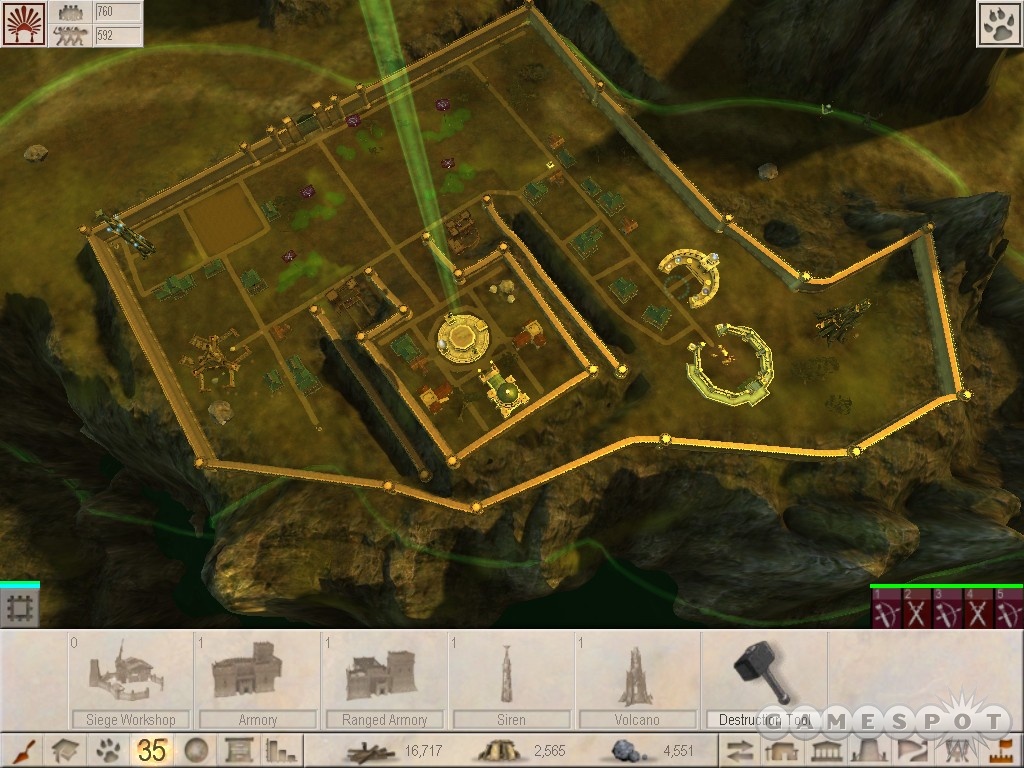
The first thing you'll probably want to do here is to get started on two, count 'em TWO, Wonders. If you've only unlocked one, then don't worry about it; you can build two of the same variety, or you can buy a new one in the Tribute menu to use. What we normally did was to use the demolish tool to blow away the field in the corner of our base near Tlapacoya, which is where the first wave of attacks will be coming from, and build a Siren there, but anything will work. The other Wonder should be build in the small alcove of your base near the creature pen, on the other side of your little fortress; this should be an offensive power like Earthquake, or Volcano if you can afford it. You have enough resources in your storehouse to build both of these, so lay foundations for them, drop the resources by one of the structures and command your creature to build it, then start Godbuilding the other one yourself. Don't worry about the resource inefficiency. Time is of the essence, people!
Another thing you'll want to do is pick up all of the people worshipping at your Altar and make them into Disciple worshippers. You're going to be casting a lot of Fire spells here, so you'll want to make sure that you have plenty of mana flowing. If you leave these guys as just voluntary worshipers, they'll eventually wander off, which can leave you in a rough spot when you need a Fire spell but don't have the mana for it.
When you're done with all this, if you still have time, you should take out your destruction tool and destroy all of the Hovels in your base. If you're Evil, these are no big deal, but if you're Good, you can get your Happiness rating up from zero to almost 50% just by destroying the hovels. Build more villas if you like, but don't waste too much time; your people aren't going to be sleeping much during this land. If you can, build more fields in the large open areas in the center of your base. You're going to be needing a lot of food later on. Note that your people here are going to be miserable for most of this map, meaning that you'll have a gradual shift towards the Evil side of the equation, but attending to all of their needs is very difficult without exposing yourself to attack.
The First Waves
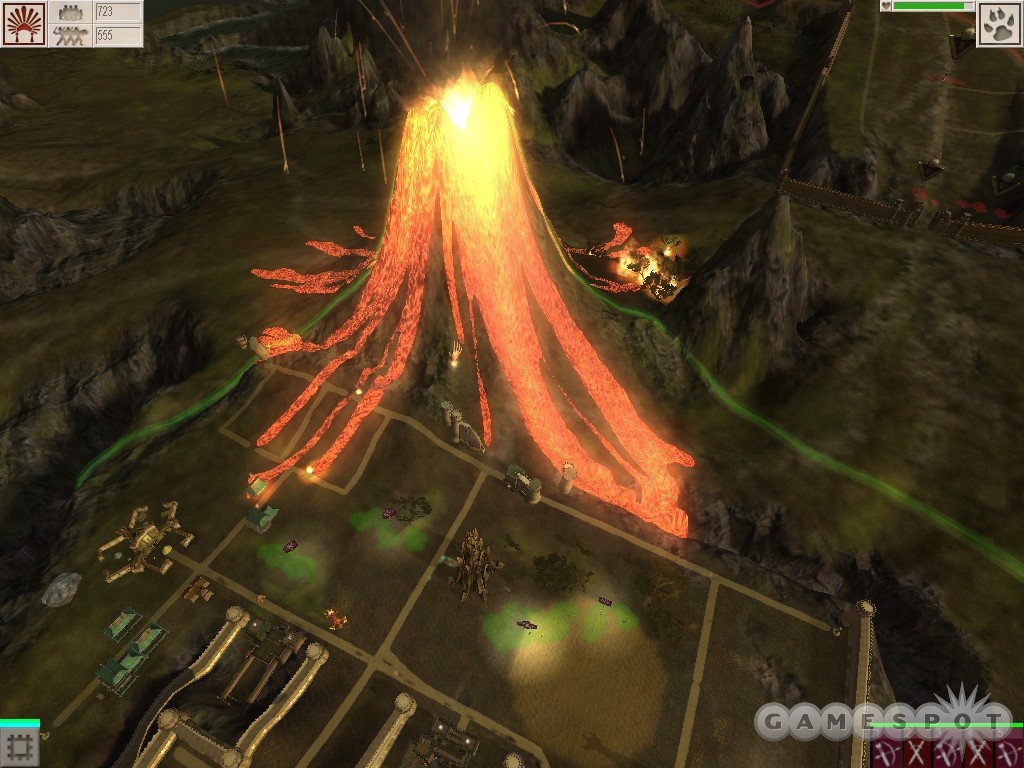
After this burst of activity subsides, you'll notice that there are small armies coming at you from the two smaller cities on this map. If you've built your Wonders in the right spots, your area of influence should be big enough for you to cast Fire on any incoming platoons, and drop big rocks on the catapults or the creature. The gorilla here is a monster, and very tough for your own creature to defeat. There isn't an objective for winning creature fights, so it's easier to just drop a rock on its head over and over again until it dies, in our opinion, but if you want your own creature to duke it out, feel free.
Shortly after the first couple of attacks, which you should repel, you'll get a squawk from the enemy commander and learn that the Volcano power is coming your way, and indeed it is. Now, this is super cheap and annoying, but the Volcano of the Aztecs can be cast inside your area of influence, even though it definitely shouldn't be able to. It'll usually be cast along the long wall where your gate is, destroying the entire wall and probably some of your fields and the Wonder you've built there. This sucks, and is frustrating, but it all gets better after this.
Aftermath
Immediately after the Volcano goes off, most of the attacks from the neighboring cities will stop, so don't feel compelled to rebuild your wall. Instead, take your armies and your creature out towards Tlatoban, the city near your offensive Wonder. Soon enough, a Nordic army is going to appear within the city walls of Tlatoban, so you'll want to have your own army attack from the opposite side of town and take the town center as quickly as possible. Ideally, you'd want to start your creature breaking down the walls of the city even before the Volcano hits, but this isn't always possible. Unfortunately, the Norse soldiers are realtively few in number, so they might get wiped out before you can link up with them; if this happens, you might just want to start over and try the map again, because it's very important to take over this town.
When you do get the timing right on your little pincer assault (you might want to head out just after wiping out a Tlatoban army that's come into your area of influence), smash the walls, defeat any nearby platoons, and send your own platoons to tear down the Armory in town. When you're secure, take over the town center and transfer as much of the resources in the storehouse as you need back to your main city. The ore that they have should help you build more platoons, if you need to. Now would be a good time to scoop up some of the citizens of your primary town and make them into Breeders, come to think of it, to ensure that you have a large population to build from for the endgame.
The Second City
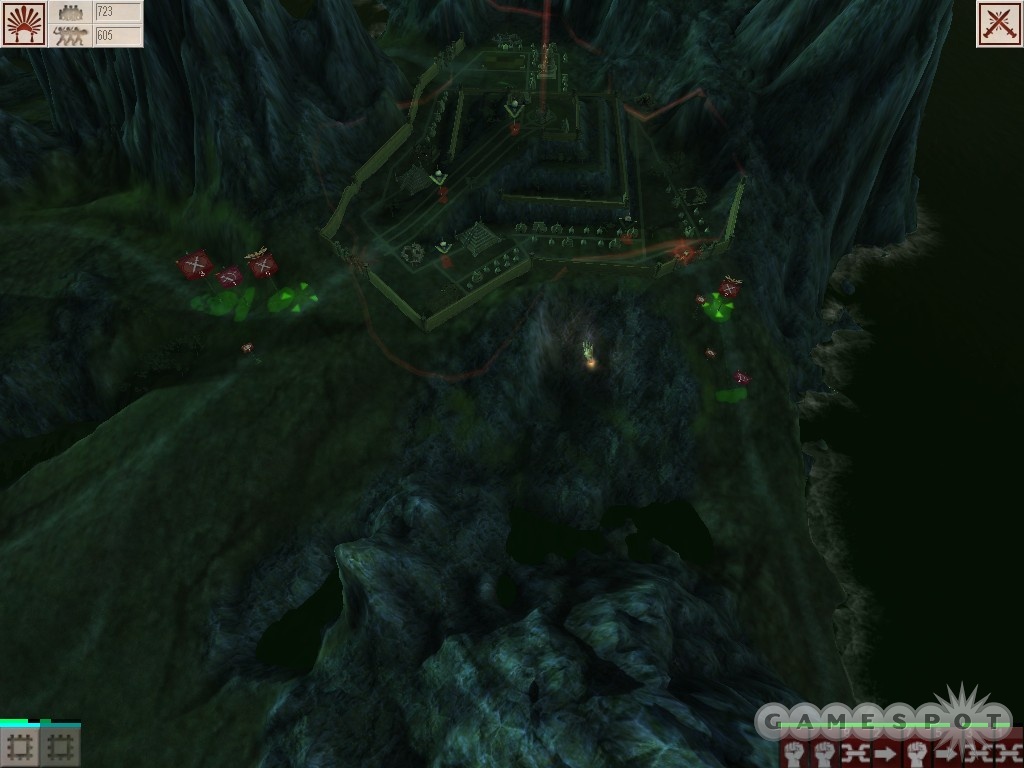
Shortly after Tlatoban goes down, a Japanese army will appear outside of Tlapacoya, the other small city on the map. Luckily, it will appear outside the walls, enabling you to catch your breath or even link the armies together if you wish to do so. We usually found it easier to manage our forces with one huge swordsman platoon, one huge archer platoon, and all of our catapults linked together to one master catapult, but that's just our style: straightforward and head-down. Regardless, with the combined forces of the Japanese, Norse, and the Greeks, you should be able to tear down the Tlapacoya walls and capture their town center relatively quickly.
The Final Blow
Now that you've conquered the two smaller cities here, all you have to worry about are the armies of the final city. If you want to, you can try going for a Good resolution to this conflict at this point, by setting up a bunch of resource gathering civilians at each of your cities to collect ore and wood, while retiring your army and converting them back into workers, and using rocks and Fire to wreak havoc on any enemy troops that come your way.
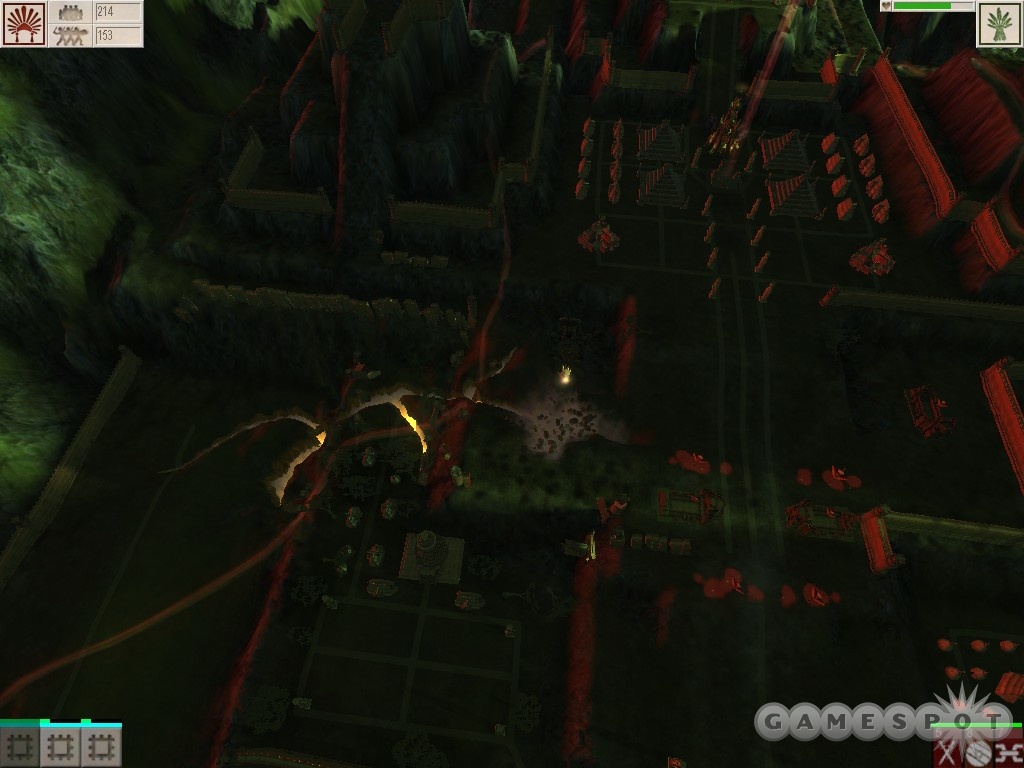
Regardless, you should have plenty of resources from your conquered city, and will hopefully still have something of an army left as well. If you want to exact bloody vengeance on your foe, then gear up for war, and be sure you have 30 worshippers or so at any offensive Wonders you might've built, as you'll probably be able to pop it off near their city to deal significant damage.
If you are interested in taking over their final city with your troops, you'll probably want to build three or four (or more) catapults and use them to tear down the walls of the city. There are concentric layers of defenses here, so you'll have to bust down a few sets of walls, but thanks to the rather stupid AI, this is more a matter of time than it is any specific strategy; just send in your catapults, watch the enemy mill about while their walls are destroyed, then send in your troops through the gap, and repeat.
One thing you'll definitely want to do, however, is destroy any armories that you spot along your way, and perhaps even leave behind a catapult at each one to destroy it again as the civilians here try to rebuild them. Nothing's going to be more frustrating than clearing out the city, then watching a few platoons come along and stab you in the back. You should be able to support an army of a few hundred soldiers by this point, so their little 20-man squads won't be able to do much, but it's still annoying.
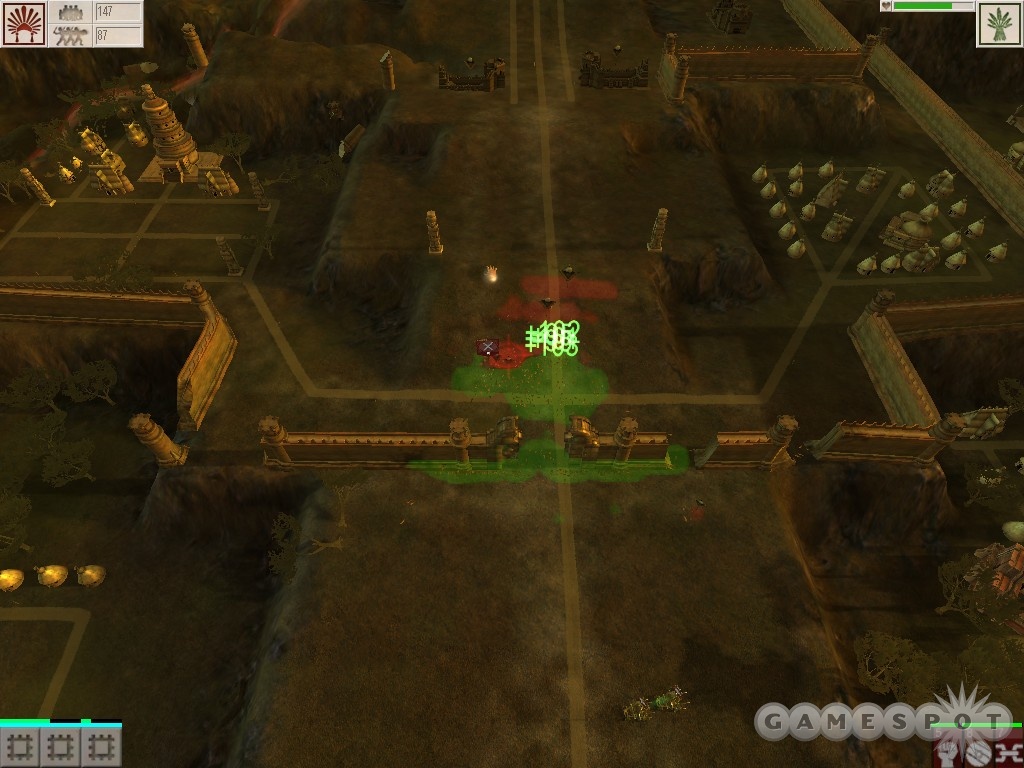
Anyway, that's about it for strategy. Catapults or your creature to tear down the walls, send your troops in, and repeat that step until you get to the enemy town center. Quickly use a catapult or your soldiers to demolish the Volcano Wonder here (it doesn't appear able to go off twice, but why take chances?), then get to work on converting the town center.
Regardless of whether you achieve your objectives militarily or through Impressiveness, converting this final town will win the game for you. After the longest credit sequence ever, there's a short scene before you get warped back to the third land of the game, where you can start playing through the game again, if you wish, with all of the tribute items that you unlocked available to you. If you want to Volcano the poor Norsemen, then here's your opportunity!
Got a news tip or want to contact us directly? Email news@gamespot.com
Join the conversation