Thief: Deadly Shadows Walkthrough
Garrett is back in action in the third chapter of the Thief stealth game saga. This walkthrough includes a full walkthrough, and general tips on sneaking and skulking around in the dark.
Design by Marty Smith
Eidos Interactive's 1998 classic Thief: The Dark Project is one of the pioneer games in the popular stealth action genre. In it you controlled the master thief Garrett and soon found that hiding in shadows and knocking out enemies from behind was much easier than attempting a frontal assault. Thief: Deadly Shadows, the third chapter in the series, mixes classic stealth gameplay with expansive missions, a deep storyline, and a sprawling city to rob.
This comprehensive GameSpot game guide for Thief: Deadly Shadows includes:
- Stealth Strategies: You're a thief--getting caught isn't an option. This section provides strategies on remaining undetected and what to do if you are seen.
- Weapons and Equipment: Check here for a list of Garrett's weaponry and equipment and tips on using them effectively.
- Mission Walk-throughs: This section features a complete walk-through for all missions, including all primary objectives found on the city sections. Walk-throughs include the location of all special loot.
- The City: Thief: Deadly Shadows offers a large city to navigate. Look here for a breakdown of each section with optional objectives to complete and extra loot to steal.
- Special Loot: This section provides a rundown of the special loot found in each level and their value.
Table of Contents
Stealth StrategiesWeapons and Equipment
Walk-Through
End of the Bloodline
Day One
St. Edgar's Eve
Day Two
Into the Pagan Sanctuary
Day Three
The Sunken Citadel
Day Four
The House of Widow Moira
Day Five
Killing Time
Day Six
Of Brethren...and Betrayers
Day Seven
Robbing the Cradle
Day Eight
Still Life with Blackjack
Day Nine
Special Loot
Chapter 1: Stealth Strategies
This chapter offers strategies on maintaining stealth throughout the missions and city streets.
- A thief that hopes to remain undetected needs to monitor the light gem carefully and hide within (and create more) shadows through most hallways and rooms. Remain stocked with water arrows (purchase more form the shop in South Quarter) to douse torches, fireplaces, and chandeliers. Also, put out table candles by approaching the candle and using it. Creating shadows provides additional surface area to maneuver within--invaluable for crossing populated rooms or hallways. Note that putting out a light can put a guard on alert. Use it to your advantage. While the guard approaches to investigate the light, maneuver past the guard and further into the mission.
- The noisemaker arrow is another important tool in remaining undetected throughout the missions. Upon encountering a group of enemies or a guard that simply can't be circumvented, fire the noisemaker arrow into a corner. You want to fire the arrow into an area where you want the guard or guards to investigate. Use the disruption to get the guards away from where you want to move to!
- Don't be impatient when approaching a new room that contains enemy guards. For instance, if you happen upon a couple guards engaged in conversation, allow the conversation to play out. First, the conversation may include clues about your current mission. Secondly, upon the conversation's conclusion, the guards will likely split up making them easier targets or easier to maneuver around.
- Another reason to remain patient is so you can monitor a guard's patrol pattern. Observe the guard closely and allow the pattern to complete. When the guard moves away from your position, sneak past. Since he's not looking and turned away, you can scamper through lit areas of the room without worry. Just maintain stealth and don't run, which could create enough noise to alert the nearby guard.
- If you don't mind using a little violence, the blackjack is an optimum way to disable a guard without causing much commotion. The most important elements to remember when using the blackjack is that you need to get behind the enemy and you must walk quietly or you will alert the enemy. It's also important to monitor patrol patterns. For instance, know how long an enemy stands turned away from you. If you're wrong, you could approach just as the enemy turns around.
- In the retail version of Thief, guards that are sitting down can't be blackjacked from behind. Instead, avoid them by slinking through the shadows or take them down with an alternate weapon, such as a broadhead arrow to the skull.
- Guards that are "on alert" can't be knocked out from behind with the blackjack. This means if the guard has drawn his weapon and is searching for you (but hasn't technically found you), you can't just sneak up behind and whack him with the blackjack. It's best to remain hidden in shadow (preferably far away from the guard since the guard could search your position) and wait for the guard to give up. It won't take long. Wait for the guard to resume the patrol pattern then resume your blackjack attack.
- You're a thief. Being seen isn't a welcome situation. If the worst happens and you are detected, spotted, and chased, a safe option is to run from your pursuer. Guards actually run out of breath if they run long enough. Also, if you make it around a couple corners, you can duck within a shadow (check the light gem to make sure it's fully dark) to avoid detection. Wait for the guard to give up his pursuit then resume your course through the mission. Trying to battle the guard is certainly possible but not a great option considering your weak weaponry and meager health.
- Guards notice disturbances, such as stolen items, open doors, extinguished torches, and even missing people. It's best not to stick around after you've stolen some loot off of a table. A patrolling guard may reach the table, notice the difference, and become on alert and start looking for you.
The chart below reveals the requirements and differences for each of Thief: Deadly Shadows' difficulty levels.
| Difficulty | Loot Requirement | Special Loot Requirement | Opponent Sensory Acuteness | Opponent Combat Ability | Number of Opponents | Player Damage Resistance | Special Requirements |
| Easy | 30% | N/A | Low | Low | Low | High | N/A |
| Normal | 40% | 1 | Normal | Normal | Normal | Normal | N/A |
| Hard | 60% | 2 | High | High | High | Low | N/A |
| Expert | 90% | 3 | Very High | Very High | High | Very Low | Don't kill any non-combatants |
Chapter 2: Weapons and Equipment
This section provides strategies and tips for the weapons and equipment available in Thief: Deadly Shadows.
Blackjack
The blackjack is a blunt weapon that can knock unsuspecting enemies out cold for the entire mission. You must attack from behind or slightly to the side. Sneak up behind, stand up, and note the raised blackjack--this means it's ready to strike and a successful strike will knock out your foe. You can't knock out an alert enemy. If you have alerted an enemy and he's currently searching for you, wait until he gives up and resumes his post or patrol before attempting to sneak up and attacking with the blackjack.
When sneaking up on a guard, be sure there aren't any other guards in the area looking in your direction. It's also possible to lure a guard into a darker corner or away from others using noise (such as a noisemaker arrow or by creating a sound with a jump or hitting an object). Note that the blackjack inflicts little or no damage as an attack weapon. Trying to fend off a guard with a sword by using the blackjack simply won't work. If you've alerted a foe and he sees you and you want to finish him off with the blackjack then you'll need to hide in a corner and wait for the guard to give up. Then you can sneak up behind him and take him down with the blackjack.
Dagger
The dagger offers an alternative to the blackjack. You can also use it to sneak up behind an enemy and take them down in a single blow. Once again you must use it on an enemy that hasn't been alerted in order to successfully score a one-hit take down. The dagger is much more useful as a hand-to-hand weapon against an alerted foe. But in nearly every situation, you're better off running and hiding than standing and fighting.
Broadhead Arrow
The broadhead arrow is essentially the Thief equivalent of a sniper rifle. Equip the broadhead arrow at long-range, aim for the target's head or chest, and let the arrow fly. Like the blackjack or dagger, it's a one-hit kill against an undisturbed enemy. Use the broadhead arrow when getting behind an enemy is difficult. For instance, perhaps the guard stands post with his back close to a wall. Or perhaps a light illuminates the guard's position. It's particularly useful for guards below your current position.
This weapon can also be used against an alerted enemy but it will require several arrows to finally take the foe down. When aiming at a guard, note that the arrow won't fly in a perfect straight line. The farther you are from the guard, the higher you'll need to aim. In general, aim slightly higher than the guard's eyes to score a killing blow into the guard's head or chest.
Gas Arrow
The gas arrow is similar to the gas bomb--but obviously it's an arrow. Unlike the gas bomb, this arrow can be used at long-range. Also, in contrast the gas bomb is best used against multiple enemies while the gas arrow will be primarily used against a tough single foe. Save for enemies you can't seem to get behind to use the blackjack. Or perhaps there's too much light in the room that your water arrows won't darken. You can find gas arrows scattered around the city streets, usually in vent shafts. If you want to purchase them, head to the shop in Old Quarter.
Water Arrow
The water arrow is an extremely important tool for players hoping to remain completely undetected and in stealth mode. You'll use water arrows to douse torches and other light sources to create additional shadow to maneuver and hide within. Fire the water arrow just above a wall torch to extinguish the light source. You can also put out a candle chandelier. Fire the torch at the ceiling over the chandelier. Fire the water arrow at the center and the water falls to douse the candles. Also fire the water arrow to put out the flames in a fireplace.
Another use of the water arrow is to clean up blood. If a guard patrols an area and finds blood on the floor, he'll be alerted and begin searching for you. If a civilian finds the blood, he or she may run to another guard and create an alert. Aim the arrow at the blood to wash it off the floor and keep your actions concealed.
Find respawning water arrows inside the fountain in South Quarter (just outside Garrett's apartment) as well as many other locations with water. You can also purchase more from the shop in South Quarter. The water arrows can also temporarily disable the electricity security systems inside the museum, Garrett's last mission.
Fire Arrow
Fire arrows offer good damage from their explosive impact. Fire them at tough enemies, especially those that have been alerted, to drop them quickly. The fire arrow is also effective against zombies. Search for fire arrows in fiery locations (such as a furnace, stove, or campfire) or purchase more at the shop in the Docks. Fire arrows can also be used to ignite oil flask puddles or even torches.
Noisemaker Arrow
The aptly named noisemaker arrow emits a loud sound and impact and will cause any enemies in the vicinity (that heard the sound) to go on alert and investigate the situation. So it's best to fire the noisemaker arrow at a position where you want the guards to search. For instance, fire the noisemaker arrow down a hall so guards standing post at an entrance move away allowing you to sneak by and into the room. Save your noisemaker arrows for use against multiple guards. It's wasteful to fire a noisemaker arrow to get a single guard out of the way.
Moss Arrow
Use the moss arrow to cover "loud" surfaces, such as metal or creaking wood, with moss--this provides a surface that you can walk over silently. Utilize when trying to sneak up on a particular guard. Don't waste unless you actually spot an enemy in the area. If there's no one to hear your loud footsteps then there's no reason to make them silent! You can also shoot an enemy in the face with a moss arrow to temporarily disable them.
As you move through the city streets, search the planters and bushes where moss arrows seem to hide. Do so each time you enter an area as you can find the moss arrows again and again. You can also purchase more from the shop in Stonemarket Proper. Moss arrows are also used to appease the Pagans. Fire them at the Pagan cornerstones and your relationship with the Pagans improves.
Flashbomb
Toss a flashbomb to temporarily disable a guard (or multiple guards) sight and hearing senses. The guard must be facing the flash bomb to suffer its effects. Keep stocked with flashbombs. They're a great tool in making a quick escape against an alerted foe, though best used to distract a group of guards. Avoid wasting on a single guard, though it can be handy to bypass a tough-to-eliminate foe standing in a well-lit area. The flashbombs can also be an important tool on the city street. If you've ruined a relationship with the Hammers and Pagans then you're a big target as you maneuver through each city section. Toss a flashbomb to get pursuers off your tail.
Gas Bomb
The gas bomb offers one of the best methods in disabling two or more enemies that are standing close together. Its blast radius is small so be sure the enemy guards are standing close enough before tossing the gas bomb. If you're approaching a couple guards, sneak around so you face the side of the two guards. That way you can toss the gas bomb between them. Both guards will be standing within the blast radius and will feel its effects. If you toss the bomb from behind one of the guards, you may only disable one guard instead of all of the guards. You can also nab a patrolling guard as he moves near another stationary guard. Save gas bombs for tough guards and, especially, a group of stationary guards.
Explosive Mine
Drop the explosive mine in an enemy's path. When the enemy moves close, the mine explodes. Note that the explosive mine takes a few seconds to arm (the red light indicates an armed mine) so it's difficult to try and blow up a pursuing enemy. Instead, combine the mine with stealth or even a noisemaker arrow. Place the mine then fire the noisemaker at the mine's position. Hopefully a group of guards will come investigate and perish in the explosion.
Oil Flask
Toss an oil flask on the ground to create a slippery surface that causes crossing enemies to fall down. Once down you can eliminate the enemy with a weapon or make a run for it and hide. The oil flask can be used in combination with the fire arrow as well. Toss the oil flask then shoot a flame arrow at the puddle to create a fiery disaster, perfect for eliminating a group of slipping enemies that have fallen into your trap.
Holy Water
Holy water is the optimum weapon against the undead (found in the Abysmal Gale and in the Hammers' catacombs). You can toss the water at the enemy or toss it at the ground and lure the undead over the puddle. Killing undead improves your relationship with the Hammers.
Chapter 3: Walk-through
This chapter contains complete mission walk-throughs for all Thief: Deadly Shadow missions. These walk-throughs also contain all primary objective related tasks featured on the city street sections as well as locations of all special loot items. For optional tasks to perform on the streets, see the City Streets section of this guide.
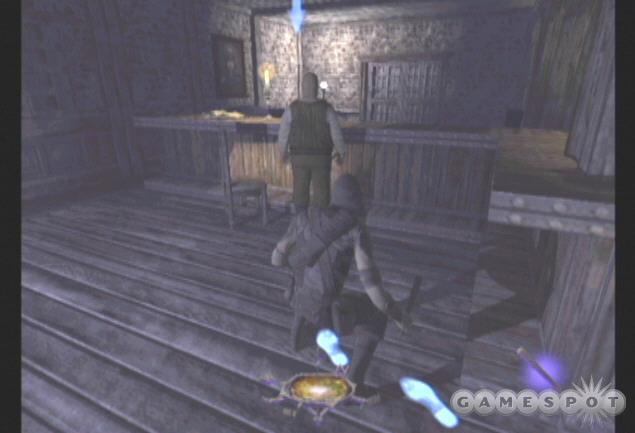
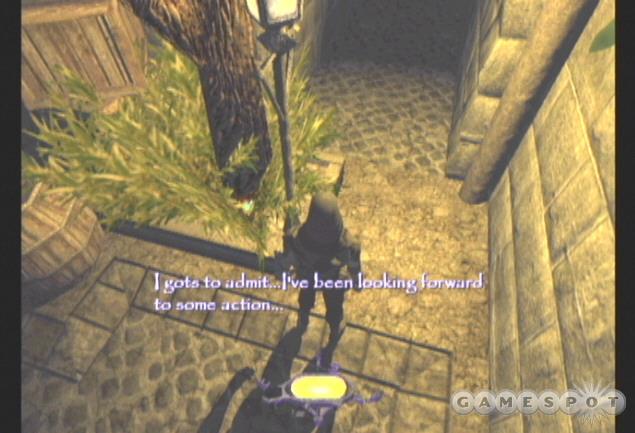
Checking Inn - Cashing Out
Objectives: Break into the Inn. Find out what room Lord Julian is staying in. Steal Lord Julian's velvet bag from his room. Leave the Inn once you have the velvet bag.
This is a training mission. Blue footprints illuminate the path through the mission and numerous skills are taught at stations throughout the location. Move forward and spot the guard ahead. Remain in the shadows on the left side to avoid detection. Follow the blue footprints east to the next station. Look around the left corner and watch the guard on patrol. Wait for him to pass then continue to follow the blue footprints around the corner.
The next station teaches the art of remaining quiet while moving across metal surfaces. Move slowly along the footprints to avoid making a sound and alerting the nearby guard. Crouch and crawl through the hatch to complete the first objective--you're now inside the Inn.
Descend the staircase and avoid the barrel. Knocking it around creates noise. Follow the footprints to the door. Open and maneuver inside. Practice picking up the crates then resume course north through the dark corridor. Learn how to extinguish a torch with a water arrow at the next station. Douse the flame and proceed. If you have problems, just grab more water crystals off of the nearby crate.
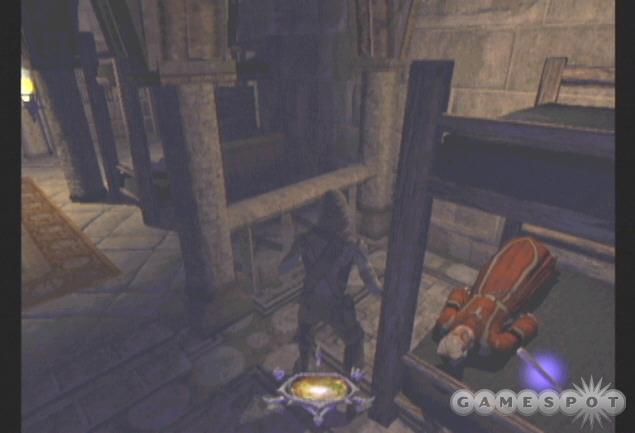
Continue north to the crates obstructing the path. Hop over the crates and go up the staircase through the doorway. Follow the blue footprints down the hall and reach the locked door. Pick the lock to complete the training station. Move around the corner to the right and climb the ladder. Move quietly through the next doorway. Use your blackjack to disable the civilian at the desk. Pick up his body and return to the ladder. Drop down and dump the body. Return up the ladder.
Read the book on the counter to see that Lord Julian rests in the Peony Suite. Cross the room following the footprints and find the staircase in the back corner. Ascend the stairs. At the top of the stairs, find the goblet resting on the small table. Grab it to obtain loot. Move through the next hall, performing the back to wall move, and follow the footprints toward the guard in the distance. Distract the guard by firing a noisemaker arrow toward the other side of the room. When the guard moves away, sneak into the Peony Suite on the right side.
Search the room for loot (on the dining room table and on the bedside table) then read the note by the bed. Looks like Lord Julian has gone for a stroll to the Lancaster room.
Objective: Find Lord Julian in the Lancaster room, and steal his velvet bag from him.
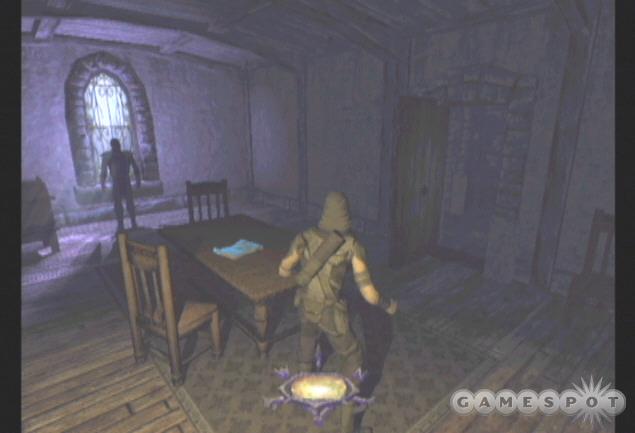
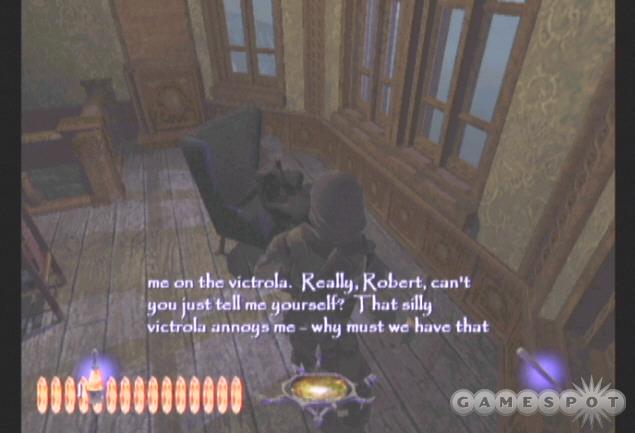
Exit through the rear door and follow the footprints. Snag more loot from the table and proceed east toward the Lancaster room. Descend the staircase and hide in the shadows at the bottom of the stairs. Spot Lord Julian and his guest sitting by the fire; there's also a guard that patrols to the left side of the room in a simple back-and-forth pattern. Listen to the conversation by the fireplace for a preview of the next level.
Use a water arrow to extinguish the torch on the right wall. That creates enough darkness to sneak along the right wall without being detected by the patrolling guard. Sneak up to Julian and his guest. Remain in the shadow created by the right chair. Get close enough until you can focus on the velvet bag (you don't have to be that close) and grab it to complete the objective.
Back up toward the staircase and carefully move to the bar area on the left side. Don't let the patrolling guard spot you. Use a water arrow to extinguish the candle illuminating the bar. Now shrouded in darkness, cross the bar area to find the footprints leading toward the exit. Grab the loot behind the bar before proceeding.
You've been trapped in the kitchen. Do as the training instructs and drop a flashbomb to temporarily blind your foe. While he's blind, exit through the opposite door and complete the level.
End of the Bloodline
Objectives: Break into Rutherford Castle. Find a clue about how to locate and open the vault. Steal the Bloodline Opal from the vault. When your other objectives are complete, leave the castle grounds the same way you came in, the front gate.
As the mission opens, a couple guards converse on the steps to your left and the lionhead torch is found in front of your current position. Mission notes explain that if you put out the lionhead torch, the castle cook will open a side entrance into Rutherford. While the guards remain to the left, use a water arrow to put out the lionhead torch. Spot the opened door above and to the left of the lionhead torch.
Turn around from your start position and spot the ladder leading up to the rampart. Ascend the ladder and go to the right. Reach the end of the rampart and turn right to face the open window just below your current position. Drop down and hop through the open window.
You've now successfully broken into Rutherford Castle. Approach the desk and extinguish the candle. Grab the loot and health potion. Read the note on the desk to discover that a new cellar portcullis protects the opal. There is a mechanism that controls it but its location is currently unknown. Reading the note provides the clue on how to locate and open the vault.
Objective: The vault is protected by a portcullis. Seach Lord Ember's chambers to figure out how to open the portcullis.
Turn around and exit into the dining room. Spot the guard with his back turned near the window. Ignore him or knock him out with your blackjack. Pick the lock on the chest to recover some loot. Read the note on the table. There's another locked door in this room. Pick its lock as you'll pass through here later in the mission. Return to the previous room and exit through the window back outside.
Observe the guard patrolling to the left and wait for him to turn away. Return to the ladder you ascended a moment ago. At the top, go to the left across the rampart. At the end of this rampart you'll find the opened side entrance into Rutherford Castle.
A torch at the top brightly illuminates the stairwell but there's no one around so move carefully down the steps to the bottom. A second torch illuminates the space just before the doorway. You can use a water arrow to extinguish this torch so you can enter the room under the cover of darkness. Grab the items off the table: a health potion and a note regarding Ember's role in the basement portcullis.
Beware of the guard patrolling down the western hall. There are two chests in these two sleeping quarters. Open them both (pick the lock if required) and snag the loot. Move north into the adjacent room. Move quietly so you don't disturb those that sleep. Find the western door out of the second room. Quietly maneuver outside and look to the left and spot a nearby guard. Instead turn right and creep into the hallway.
Descend the steps in this lit hallway to the entrance into an armory room. A single guard patrols this room. Wait for him to move away then sneak behind the crates along the eastern wall. Use the crates as cover when the guard returns along his patrol route. Be sure to grab the arrows off of the tables in the back corner.
Wait for the guard to move from north to south and away from the exit in the back western corner of the room. When the guard looks away, scamper into this exit and down the lit hall toward the shadow. Take the first right and move into the next section, the inner quarters.
Creep down the hall and take the right turn at its end. Stick along the shadows and corners. There's a guard that patrols through here. If you're in the shadow and against the wall, he won't be able to spot you. Knock him out with your blackjack if the opportunity arises. Exit to the exterior and move to the southeastern corner to find a door. Pick the lock.
Move just inside and into the shadow. A couple women share gossip to the left. Wait for their conversation to conclude. The women split up: one remains at the window and the second returns to a dining room to the left. Cross the hall into the adjacent lit passage. Douse the torch with water if you wish. Grab the candlestick look behind the boxes on the shelf.
Move east quietly so the nearby woman doesn't here you. Extinguish the candle in the corner then go south through the next hallway. A water arrow will put out the torch along the left wall. Search the table on the right for some loot in the form of a chalice. Enter the kitchen area through the first entrance on the right. Close to the oven to darken the room then grab the health potion on the adjacent table.
Return back to the hall adjacent to the woman by the window. Move to the locked door toward the west side. Pick the lock and enter the lit quarters. Extinguish the torch using a water arrow and put out the candle to your right. Snag some loot from the chest next to the bed. Beware of the cook on the southern side of this area. He may hear or see you wandering about. Knock him out with your blackjack if he moves close. Read the journal by the bedside to learn that the switch to open the portcullis is in Lord Ember's chamber.
End of the Bloodline - cont.
Objective: Find and activate the secret switch in Lord Ember's chambers to open the vault's portcullis.
Time for a little treasure hunting. Back out into the hall with the woman at the window. You can easily sneak by her if you're quiet enough and maneuver into the dining hall on the left. The amount of light in the room does make it challenging. You can use water arrows to extinguish the chandelier (shoot at the point where the chandelier connects to the ceiling) as well as the fireplace. Put out the candle on the table as well. Grab loot near the candle and on the dining hall table. You can also remain in shadow and wait for the woman to turn away from you. Don't make noise or you will alert another gentleman in an adjacent room.
It's easiest to simply exit the way you came in from there area. It's the hallway where the woman stands looking at the window. Return outside and move to the right. Find the lit area to the northwest. Beware of the patrolling guard if you didn't blackjack him before. Move into the back corner to find a lift. Get on and use the button to ascend.
Exit the lift to the right. Beware of a guard patrolling this rampart. Wait for him to leave or sneak up behind him when he's walking or standing away from you. Put out the candle as you move along to the door at the far end. Open the door and sneak into the shadows along the left wall. Listen to the nearby conversation and watch the patrolling guard on the other side of the room. Remain in a corner and away from his torchlight. Wait for the conversation to conclude.
The entrance into the stairwell is on the northern side. The conversationalists have split up. The woman is to the left in the corner and the man patrols the stairs to the right. There's some hidden treasure near the woman. You can sneak up near her and put out the candle to remain concealed in darkness. Alternatively, you can knock her out with the blackjack.
With the candlelight extinguished, maneuver beyond the table and through a crawlspace to find some loot. Return to the stairwell. Carefully ascend the stairs and extinguish the wall torches to shroud the area in darkness. Work your way up the stairs and stay in the dark and away from any patrolling guard. Take out the light at the top of the stairs. When the guard moves away, enter the room on the left. Cross to the door and pick its lock. Open the door and move up either staircase to the top room.
It's well-lit but no one is around. Pick the chest's lock and find a special loot item inside: the gilded helm. Search the shelves on the right side for more loot and notes. Return to the stairwell. There's a guard standing outside. Create a noise (for instance, hitting the overhead lamp with your blackjack). Once he moves inside, quickly sneak past him and into the stairwell. Return down the dark staircase and into the previous room to the south where the guard patrols.
Hug the western wall and remain out of the guard's torchlight. Find the window along the western wall and hop out onto the roofing. Find some loot on the right side then find an open window on the left side. Hop inside. Sneak up to the entrance to the main chamber. Spot the man patrolling inside. Pick the lock on the nearby chest for some valuable loot.
Darken the main room by shooting a water arrow over the chandelier. Read the book--Lord Ember's Journal--on the table and grab the loot nearby. This is Lord Ember's room. Enter the bedroom on the southern side. Douse the fireplace to create additional shadow. Search the desk for loot and the mantle for the Rutherford Medallion, a special loot item. There's also a key on the bookcase. After searching the room, find the torch holder to the right of the desk. Use it. That's the switch to the portcullis.
Return back outside to the rooftop. Drop down when the patrolling guard isn't near. Go to the lift again and ride it up. Instead of going right on the rampart, take the left route. Follow the rampart all the way back into the previous section, the castle front.
Open the door and peek inside. Maneuver into the western corner and into the small study. There's a patroller here so take out the torch to remain in the dark. Read the note on the desk. Keep going west and pick up some loot off the left table. Pick the lock at the rear of the room and enter a small storage area. Search the chest for loot. Push the crate out of the way and crawl through the small hole. You emerge onto a balcony. Go to the right and snag the large painting. It's a painting of Mortimer the Mad, the final special loot item on the map.
Return to the main room and move toward the stairwell on the eastern side. Hide in the corner and wait for the patrolling guard to move away. You can take him out with a blackjack or use water arrows to douse the chandeliers so you can remain in the dark. As you move down the stairwell, pick up the loot on the table. At the bottom of the stairs, spot the guard in the eastern alcove. Eliminate him by sneaking behind him or simply avoid him.
From the stairwell, go west and take the first right. Keep in the shadows and take the next left. You'll see a watchman in a station on the left side. Sneak through the shadows along the northern wall and reach the staircase at the end. Continue all the way down into the vault. Open the door, grab the loot, key, and the Bloodline Opal.
Return up the staircase and to the watchman's station. Sneak up behind him and take him out. Find the entrance on the southern wall just in front of the station. You could also sneak past the watchman's view by using the pillar and shadows here. Follow the route to the left and then into the first room on the right. Cross the room into an adjacent chamber and hop out the window. You're now at the castle's front. Avoid the patrolling guard on the steps then scamper to the front gate to complete the mission.
Day One
Objective: Go see your fence Heartless Perry in Black Alley to sell him the Bloodline Opal.
You begin in Garrett's sparse apartment. Explore and grab any equipment you find before exiting to the apartment staircase. At the bottom of the stairs go left and out into the South Quarter.
Check the fountain just in front of your start position to discover a couple water crystals. They respawn each time you reenter the South Quarter so don't forget to look for the free items. Your goal is to reach the Black Alley and speak with your fence about the Opal. Check the map and spot the Black Alley on the western side of the map.
Move south from your start position then to the west. You'll spot a merchant on the left side. Keep moving to the west and spot the red handprint--the mark of illegal establishments. The first door on the left is the equipment dealer. Here you can spend gold earned from sold loot on more arrows, bombs, etc. Continue to the next red handprint door on the left to find your fence. He won't take the Bloodline Opal; instead, he sends you to another fence in Stonemarket. He also mentions that Lady Elizabeth is hunting for you!
Objective: Deal with Lady Elizabeth and her thugs so you can get into Stonemarket. Sell the Bloodline Opal to Black Market Bertha, the fence in Stonemarket Proper.
As you move through the city streets, be sure to investigate shrubby and corners. You may find hidden items here. For instance, check the bushes across from Perry's door to find a moss arrow.
Return toward your apartment. Check the map and spot the route to Stonemarket on the northern side of the map just west of your apartment. As you near this position, you spot Lady Elizabeth and her thugs blocking the route. You have a few options here. You can complete the objective by simply running past the angry Elizabeth and her cohorts and into Stonemarket. Or you can hide in a corner and take them out from a distance with a broadhead arrow or confront them head on with your dagger. Proceed into Stonemarket Plaza.
Check the detailed Stonemarket map. Stonemarket Plaza lies on the western side of the map (your start position is the southwestern corner). Stonemarket Proper makes up the eastern side of the map. You current goal is to reach the red handprint on the middle of the eastern side.
Proceed east then turn to the north and find the entrance to Stonemarket Proper along the eastern wall. Move north around the church and take the first path to the east. Follow it around south down steps to the door marked by the red handprint. Go inside to speak with Black Market Bertha. Once inside, sell the Bloodline Opal.
You receive a note as you exit and begin up the staircase. Keeper Artemus wants you to meet with him in the Terces Courtyard in Stonemarket Plaza. Retrace your steps back to the plaza and find the Terces Courtyard in the northwest corner.
Objective: Meet with the Keepers in Terces Courtyard in Stonemarket Plaza.
Attend the secret meeting with the Keepers and learn of two objects, one held by the Hammerites and a second by the Pagans. Naturally the Keepers want you to acquire the objects for them. You receive a note detailing the two objects. The Chalice, a relic of the Hammerites, is kept in St. Edgar's Church in Stonemarket Proper. The Jacknall's Paw, a possession of the Pagans, is found in secret tunnels below the South Quarter well.
Objective: Steal the Chalice from St. Edgar's Church in Stonemarket Proper. Use the South Quarter well to enter the Pagan tunnels, and steal the Paw from them.
You can complete these tasks in either order. For the purpose of this walkthrough, we'll tackle the Chalice first. Return to Stonemarket Proper and move just ahead to the front of St. Edgar's Church. Use the front door to enter the next level.
St. Edgar's Eve
Objectives: Break into St. Edgar's Church. Find and steal the Builder's Chalice. One you have completed all your objectives, return to your entry point, the Front Courtyard.
You begin on the cathedral grounds. A guard patrols the path to the west. He stops to worship at the statue. You can take that opportunity to take him down with a blackjack. He carries a key on his belt. You can choose not to knock him out; just get close enough to steal the key. Check the statue area for loot then move to the church's front door and open it to complete the first objective.
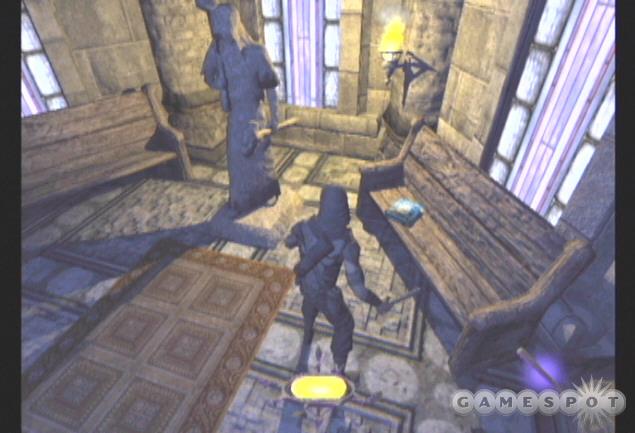
Move around the left or right side of this lobby into the main cathedral area. A group of hammerites stand near the front, pray, and converse about the chalice. Hide in the shadows and wait for their conversation to conclude. You receive a note regarding the high priest and the church bell. Wait for the hammerites to disperse and avoid the remaining guard on patrol.
Find some loot on a pew in the back area of the church. Read the book on the pulpit then search the items on the nearby desk for more loot and a note detailing the holy symbol, an important item kept in the room of high priest Greidus.
Objective: Steal the High Priest's holy symbol from his chambers.
Continue to avoid the patrolling guard and locate an exit on the northeastern side of the church. Exit the door back outside. You'll see a staircase in front of you. Beware of a patrolling guard to the south but there's plenty of shadow (stand behind the pillars) to avoid detection. If you can get over to the bushes to the east, you'll find a moss arrow, and over to the well to the south you'll find a water arrow.
Move to the door on the east side of this courtyard. The sign next to the door reads "Barracks." Pick the door lock and enter the barracks. Sneak into the shadow. There's a note on the desk detailing the holy symbol again. You'll receive the objective here if you missed the note earlier.
The exit lies to the south and there are guards inside the next room. Listen to their conversation and wait for them to split up. Hide in the shadows along the northern wall and wait for one of the guards to move by. Let him go or blackjack him from behind. From the northern wall, continue east into a stairwell. Grab a health potion off of the nearby shelf then ascend the stairs. Move carefully as there's a patrolling guard at the top.
At the top of the stairs, turn south and move into the dark room. Look left to spot a guard distracted at the window or at the desk. Knock him out and dump him in the dark corner. Remain in the dark in case the patrolling guard enters the room. Put out the candle at the desk then grab the gas bomb and read the note. Check a barrel to the south for loot and another bomb.
Turn toward the west passage and check for the patrolling guard. Hide in the shadows to avoid him (or blackjack him) as necessary. Move out onto this balcony. Grab some loot by the first statue on the left. Return to the stairwell. Turn north and spot the grate at ground level. Open and crawl through.
The area to the west is brightly illuminated but it's just someone sleeping. You can douse the torch with a water arrow or move quietly. Search the table on the north side for loot. Do it quietly or you'll wake the sleeper. Search the chest next to the bed (pick its lock) and find a special loot item inside, the Effigy of St. Edgar. Move to the west side of the room to find two exits to the north and south. Snag the painting on the wall to add to your loot total.
Exit through the north passage. Check around the corner toward the southern tunnel to find a guard at a statue. Wait for him to leave, knock him out, or douse all nearby torches to remain in the dark. Move to the door in the western corner.
This is Greidus' room and he's likely inside with another guard. You can sneak inside and steal what you need--the holy symbol--but if you're looking to get all special loot, it's time to use that gas bomb you procured from earlier. Otherwise you can also use a flashbomb to distract the two men or even lure them out of the room with some noise.
With the men gone, check the desk for a note regarding how to retrieve the chalice.
St. Edgar's Eve - cont.
Objective: Acquire an unstamped gear in the factory, then stamp it using the Stamping Machine.
The table also holds loot and the holy symbol. Check the bed for another note then use your lockpick to unlock the nearby chest. Inside recover the special loot item Cat O' Nine Tails.
Exit through the door in the back northwestern corner of the room. Snag loot off the barrel to the left then descend the staircase. Approach the door on the right and move inside. You're back in the cathedral. Avoid the patrolling guard and return to the lobby; it's to the south. Find a door on the western side of the lobby. Ascend the staircase in the hall. Snag loot off of the bench on the right side then read some books.
Continue up the stairs and take an eastern path back outside onto a balcony. Open the door at the far end. It's the bell tower, which you could have used to get Greidus out of the way. Open the door on the north side. Take the first path on the left.
Stick to the shadows and wait until you spot the patrolling guard. When he moves within range, knock him out with a blackjack or take him down from longer range with a broadhead arrow. Go to the western side of this balcony and find a small room containing several pews and a statue. Snag the third special loot item off of the bench; it's the Codex of the Admonitions.
Exit this small room through the southern passage. Continue south to the stairs and descend. Take a right at the intersection and go down all the way to the very bottom. You're back in the church lobby. Return to the main cathedral area and hug the western wall until you find the door. Listen to the conversation just outside.
Hide in the shadows to the south (douse that torch if necessary). Wait for the two guards to split up. One comes along the southern path. Bypass him or take him out with a blackjack swing.
The other guard remains close to the factory entrance around the corner and to the west. You can actually maneuver through the shadows to the northern side of the room and get behind and knock him out. Or just ignore him and get into the factory undetected. Enter the hammer factory.
Read the book just ahead and to the right and grab the bomb. Search the adjacent chest for broadhead arrows. Sneak into the northern passage and spot the switch. Wait for the patrolling guard in here to move along the sides of the room and then pull the switch. The flames will kill him. Even if you don't get him the first time, the guard will eventually get struck by the flames as he walks around the room. Another guard patrols an adjacent tunnel on the western side. Wait for him to approach within range and crack his skull with the blackjack.
Return to the factory entrance and move through the southern passage. Check for a guard to the left side. Sneak up on him and take him down with a blackjack. Read the note on the door on the right side to learn how to use the stamping machine. Go through this passage heading west. The stamping machine is just ahead down a small staircase. But you need the unstamped gear.
Go into the furnace room to the south. A guard watches a creature burn inside the furnace. Avoid the situation or just knock out the guard when he's looking away. Torch the creature inside the furnace using the switch then go inside to grab some loot. Return outside and go into the room on the southern side.
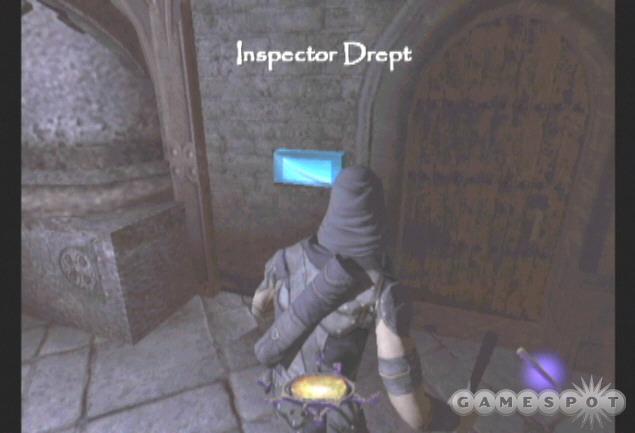
Read the note and grab the loot off of the table. Open the door ahead into inspector Drept's office by picking the lock. Search the room for loot (inside the chest) and read the notes and messages. Exit the room and go east. Go around the corner toward the southern side to find the storage room. Grab everything you can, including the unstamped gear. A switch in here also disables some lights.
Return to the stamping machine and use the unstamped gear on the left machine. Recover the stamped gear.
Objective: Attach the stamped gear and the holy symbol to the mechanism protecting the Chalice.
Go east back toward the factory entrance. Turn left at the intersection and enter through the door on the left side. This is the room containing the suspension cage holding the chalice. Use the two lock mechanisms on the southern side of the room. You automatically place the stamped gear and holy symbol inside. The cage lowers above you. Go up the stairs and into the cage and recover loot and The Builder's Chalice.
Turn around from the cage and go through the door. A guard patrols inside this hall. Wait for him to move away then blackjack him (or just avoid him) and run forward and down the staircase. You've been here before. Return to the factory entrance and go through the south passage. Ascend the staircase on the left side and find the level exit at the top. Exit to the previous section, the cathedral grounds.
Cross the balcony. Use the switch to open the door. Find the staircase on the left side of the room and take it all the way down to the cathedral's main floor. Exit the cathedral and complete the level.
Day Two
Now you must complete the second part of the Keepers' quest. Since you can do them in any order, either proceed to St. Edgar's Church in Stonemarket Proper for the chalice or the well in South Quarter to enter the Pagan tunnels for the paw. This walkthrough attains the paw second. Move to the well in South Quarter and use the Keeper glyph to enter the next level.
Into the Pagan Sanctuary
Objective: Steal the Jacknall's Paw from the Pagans. When your other objectives are complete leave by way of the Pagan tunnels.
Inch forward carefully and spot the two miners talking in the adjacent room. Wait for the conversation to conclude and watch the two miners walk away. Move out into the room and look to the right. One of the miners stops near the next tunnel. Sneak up behind him and lay him out with a blackjack. Search the cave's edge near the fire for some loot then move over to the left tunnel.
Grab some loot by the toolbox. Spot the ledge on the right side of the tunnel. There's some loot up here. Jump up to the ledge and pull up. Grab the loot off of the crate up here and return back down to the tunnel. Proceed to the east. Search along the left side of the tunnel for more loot.
There's a tough encounter around the corner. A Pagan Shaman guards the entrance into another cave that contains two Pagan females. It's difficult to sneak behind the guard. There's plenty of shadow but not much room. Also, a Pagan spell hovers around the tunnel providing some illumination. Stay in the shadow and out of the light.
An effective way to bypass these hostiles is to use a noisemaker arrow to create a distraction. You can lure the shaman and the two women away from the cave. Once they're gone, you can scurry inside, gather what's inside, and move on before the three Pagans return to their post.
Once inside the cave, search the chest for equipment and loot and read the nearby notes. The path intersects here. You can continue south through the tunnel and pick up more arrows off the crate. Round the corner carefully and spot the guard on the right side. Check behind in the rock in the back left corner for more loot. Return to the intersection and go east. Snag the arrow off the ground.
At the bottom of the ramp, move through the sewage tunnel. The better place to be is on the upper floor. Move forward and use the ramp to reach the upper catwalk. Ignore the beast that patrols the shallow water. Once up top, find a chest with some loot in the southeast corner. Check the northern corner for some explosive mines.
Move through the west tunnel into the adjacent chamber. Use the tunnel near the explosive mines. A couple hostiles patrol the back area. Move behind the woman first and knock her out with a blackjack. Check the wooden plank that runs along the catwalk for a health potion.
Sneak through the shadows up behind the second guard and lay him out with a blackjack. Search his chest for loot and a map. Continue down the catwalk on this side and look into a left alcove to find a ladder. Climb up into the Pagan Sanctuary.
You emerge into a room filled with crumbling walls and rumble. Stay out of the light provided by the Pagan spells. There's a couple patrolling guards on the southern side of this chamber. Avoid them or sneak up behind each and use your blackjack or dagger to complete the takedown. One patrols near the fire while the other moves close to the northern wall. Wait in the shadows to make your move. Search the chest near the fire for equipment and on some adjacent rubble for loot.
It's possible to climb the debris near the start position and reach the rafters above. From here you can find more loot and overlook adjacent hallways. From this vantage point it's easy to take out a guard with a broadhead arrow. Return back down and move through the room's southern exit.
Go around east and wait for the patrolling woman to move close to your shadow. Knock her out. Move down the next tunnel and find the last doorway on the right side. Move inside and approach the door on the southern side. You can hear the Pagans conducting a training session. Move through the east passage and Garrett notes that the Pagans are preparing for war. Climb the ladder in this room.
Find the staircase in this room and descend. You'll find yourself on rafters above the training room. The gigantic gear here can be pushed off and onto the trainees below. You can also annihilate them with mines or arrows from this vantage point or simply ignore them. Return up the stairs. Check a room on the northwest side for a special loot item, the Ancient Statuette.
From the special loot, exit out onto the piping system and crawl along the pipe. Face the northern side (on the western edge of the pipe) and drop down when the guards aren't looking. Sneak up behind or avoid the guard near the campfire. Check the fire for a fire arrow. Move to the north and dispatch a second guard if necessary. Search the area for a chest and an arrow in the corner. Pick the lock on the door on the east side. Enter this room and pick the lock on the chest. Find a second special loot item, the Bronze Beetle, inside.
Exit and go up the stairs. Go west onto the dark catwalk. Walk south toward the torch. Put it out with a water arrow then knock out the Pagan female patrolling the area. At the end of the catwalk, turn right and spot the staircase below you. Wait for the guard to look away and leap down onto the platform. Move inside and take cover in the shadows.
When the woman looks away, knock her out. Read the nearby books to complete an important objective: learning the Ritual of the Root to gain access to the Jacknall's Paw. Find a chest in the corner and grab its contents. Use the decrepit staircase in the room to ascend to the rafters. Cross to the far side and read the note. Jump onto the bed and snag the last special loot item overhead: the Precious Comb.
Exit the room and turn to the north. Put out the torch with a water arrow if necessary and sneak past the woman (or knock her out). Proceed down the stairs and snag the water arrow along the way. Get to the bottom and head west. There's a guard up ahead. Knock this guy out; you'll need him shortly. Search the shelves for loot then proceed to the back corner and the last tunnel. Read the note.
The following chamber contains the Jacknall's Paw. But before you can recover the artifact, you must complete the Ritual of the Root as outlined by the book and notes read earlier. You must place blood then offers of moss and water onto the shrine below the Paw. Thankfully there is a moss and water arrow next to the shrine in case you have exhausted your supply. Now all you need is blood. Return to the guard you knocked out in the previous storage room and drag him into the chamber and plop him onto the shrine.
Note that you must avoid the beast that patrols the chamber while conducting these tasks. After dropping the guard on the shrine, shoot him with a broadband arrow. When the blood hits the shrine, the area illuminates. Grab the two arrows and shoot them onto the shrine to complete the second and third tasks. Now grab the Paw!
The remainder of the mission requires you to backtrack through the Pagan Sanctuary and return to the entrance to the Pagan Tunnels. Once you reach the Pagan Tunnels, the mission concludes.
Day Three
Objective: Deliver the Chalice and Paw to Artemus in Terces Courtyard in Stonemarket Plaza.
Exit your apartment into South Quarter and proceed to the entrance into Stonemarket Plaza. Proceed to the northwest corner of Stonemarket Plaza to find the Keeper waiting for you near the courtyard. Follow him. He leads you to the secret entrance into the Keeper library. Remember its location as you will return here several times throughout the game.
Objectives: Search around the Keeper Library for clues about the Dark Age. Speak to Keeper Artemus before you leave the Library. Speak to Keeper Isolde before you leave the library.
Descend the staircase into the Keeper library. Listen to all conversations you approach; these contain valuable information about what's going on as well as help complete the primary objective to find clues about the Dark Age. You should also read every book and note you encounter. Walk forward and read the note ahead.
Enter the adjacent rooms and overhear the conversations. Cross the catwalk to the book on the far side of the southeastern chamber and check it out. This cues a new objective for an upcoming mission.
Objective: Search the sewers in the Docks to locate the entrance to the Sunken Citadel in order to find the missing Glyph Key that the Keepers are searching for.
Return to the center and use the lift to descend to the lower floor. Read more books and listen to the Artemus speak to you. He tells you that the Pagans and Hammerites are angry about your thievery but are willing to forgive if you help them out. A new objective appears.
Objective: Read the letter the Hammerite Inspector Drept has left for you. It is on the table in front of Artemus.
Read the note. If you kill any rust mites or undead encountered, the Hammerites begin to favor you once again. Artmus also says that a similar note is found near the docks. It tells you how to become back in favor with the Pagans.
Objective: Go to the Docks' Pagan stronghold and read the letter left for you by the Pagan priestess Dyan.
Enter all adjacent rooms and chambers and read all notes and listen to all conversations. You'll find Isolde in one of the library chambers. She has a small task for you.
Objective: Use the plaque on the wall near Keeper Isolde to receive the Keeper Door Glyph.
Use the plaque and you receive a new upgrade: the ability to see Keeper glyphs. Move into the northwest chamber and listen to the conversation here. It provides a new objective.
Objective: Enter the ship called the Abysmal Gale in the Docks to see if it's related to the Compendium of Reproach that the Keepers are searching for.
You should have completed all library objectives by now. Exit through the Keeper glyph on the bottom floor of the library. Return to Stonemarket Plaza. Return to South Quarter and use the map to reach the route to the Docks in the southern corner. You'll have to use the Keeper glyph to proceed through. As you move through these areas, don't forget to sell off your loot and acquire additional equipment. Stock up! There's no reason to hoard your loot.
The Docks merchant is also the only place to purchase the climbing gloves. You'll need them so save up 2,000 gold pieces (which shouldn't be tough if you've met loot requirements) and acquire them as soon as possible.
Check the map and proceed to the Pagan Stronghold. Read the note here to complete an objective. The Pagans will look favorably on you if you use moss arrows on the green cornerstones. Proceed to the Abysmal Gale in the southwestern corner. City Watch patrols the docks and they won't look too favorably on a thief so move with caution and stay in the shadows when possible. A new objective appears once you have made it to the Abysmal Gale.
Objective: Get to the cargo hold down below, then find and read the Ship's Manifest for clues about the Compendium of Reproach.
Undead roam the Abysmal Gale. Your best weapon against them is holy water. You'll find some just inside the entrance. You can choose to avoid the undead but killing them helps your relationship with the Hammerites (which prevents them from attacking you on sight as you move through the city streets).
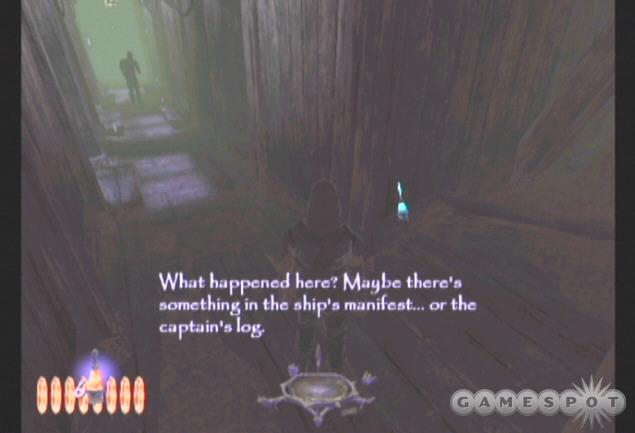
Move south and check the side rooms for loot and more holy water. Inside one of the rooms on the right is a staircase. Go up and then to the north and find the entrance into the captain's quarters. Loot the locked chest then read the captain's log.
Exit the captain's quarters and move into a room on the right side. Drop down to the ship's bottom. Exit through the passage and go south. Open the door at the end. Move around to the right and through the room on the right. Find the ship's manifest inside on a crate. Read it. This opens a new objective and a new mission.
Objective: Find a boat in the Docks and take it to Captain Moira's seaside mansion to steal the Compendium of Reproach.
Exit the Gale and return to the docks. You now have two missions open and can choose to take them in either order. For the purposes of this walkthrough, proceed to the entrance to the sewers just west of the path back to South Quarter. It's in a small alcove on the northern side of the path. Descend into the sewer and use the glyph to enter the citadel.
The Sunken Citadel
Objectives: Find the Keeper Glyph key. Get back to the surface by returning to your entry point. Note: Searching for Keeper Kafe might be a good start. Keepers on excursions often mark their trails with glyphs.
Follow the cavern path toward the southwest. Snag some loot along the cavern corners. Spot a patrolling guard in the next chamber. You should also overhear something talking about hatchlings. Wait in the shadows and knock out the guards or just bypass them by inching through the darkness. Read a book on top of the stone slab and grab a water arrow from the pool. Exit through the western cave path.
Move along the route until you reach an intersection. Three unexplored paths lie in front of you. Look to the west and spot the giant rat. Wait for him to move within range and knock him out. Approach the table to snag loot and read a book that provides a new objective.
Objective: Steal the Kurshok Crown from the former throne room.
Go south from the table and into the next passage. Read a note on the ground about the theater and another nearby about diamond lights. Enter the theater to the west. You can overhead a couple of guards talking nearby. They're on the platform above you and to the east. Lure them down with noise or take them out from a distance. There's also a rat in the area that might be lured by the noise so be prepared to knock him out as well.
Open the chests (pick the locks) for loot and equipment. Ascend the staircase. Find the red crystal on the right side. It's a special loot item: the Large Diamond.
Exit the theater and move through the southern passage. If any guards remain in this area, avoid or knock them out. Read the note on the slab about the battle horn--another special loot item to find.
You've reached a series of interconnected rooms. Most of these contain loot so it's wise to explore each room thoroughly. The path into the next area is also found here. Don't move into there until you have fully explored this area.
Return to the intersection and go east. You may hear combat ahead of you. Let those guys fight it out. Mop up any survivors or just avoid contact by sticking close to the shadows. Avoid or knock out the guards in the circular chamber then exit through the west passage.
More loot here. Go north at the intersection and be careful of the guards. The second loot item is in the room ahead: it's the Battle Horn. Snag it then return to the circular chamber. Go up the stairs in its center. Follow the path back to the interconnected rooms and toward the southern edge to find the misty path into the citadel core.
Advance forward then down the first path on the left. The torches here can be doused with a water arrow if you prefer the cover of shadow. Continue east and grab a health vial from a coffin on the left. Go around the corner to the right and listen to the guards talking inside the next room. Create some shadow by dousing torches and sneak past or wait for them to turn around and knock the guards out with a blackjack.
Exit to the south. A guard patrols to the east as you enter. Wait for him to move away and take him down. There are guards throughout this recessed section ahead. You can enter via the staircase ahead of you or through a window on the right hallway. Gather the loot inside as you avoid the guards. Go up the stairs in the back of the room and find another narrow staircase at the top. Go to the south and beware of another patrolling guard. Knock him out or douse the nearby torches to provide more cover.
Search the shelves for loot and reading material. Exit through a passage in the back corner of the room. Here you find the body of Keeper Kafe. A new objective appears.
Objective: Read Kafe's journal for a clue about how he died.
Pick up the glyph key, loot, and read the journal. The final objective remains: steal the crown! Exit this library section and return to the recessed room. Exit via the staircase to the north then turn right immediately to proceed east. Beware of the guard at the top of the stairs. Take him down with an arrow or sneak up behind him and blackjack him.
The throne room is to the left. It's heavily populated and getting the crown undetected is very difficult but possible. Just stay in the shadow and wait for guards to move away. An easier solution is to find a perch above the throne room to eliminate the crown guards from the safety of above.
Proceed south. Grab some arrows from the slab on the right side. Avoid the nearby guard. Go around east then north up the stairs. Spot a guard at the base of the next staircase. Avoid him or knock the guard out. Go up the stairs then around to the east. Enter a room on the right side and find a tapestry on the right wall. It's the third special loot item.
Exit the room then go up a staircase to the north. Ascend and find a perch above the throne room. Use your broadhead arrows to eliminate the guards around the crown. Drop down into the throne room and jump onto the throne. Leap up and grab the crown. This completes all mission objectives. Explore the throne room for locked chests containing loot then retrace your steps back to the citadel core. Now return through the initial section of the citadel. You don't have to be sneaky here unless you want to. You can outrun any enemy that spots you. Move back to the level entrance to complete the mission.
Day Four
You begin this day in the Keeper library. Exit and listen to any conversations you encounter. Exit the library via the Keeper glyph you used earlier. You end up in Stonemarket Plaza. Return to South Quarter. Take the chance to sell loot and acquire more equipment then return to the docks.
Go south then east toward the docks. Stick on the left side and find the small boat at the end of the dock. Use the Keeper glyph to begin the mission.
The House of Widow Moira
Objectives: Find a way into the Overlook Mansion. Find and steal the golden slab known as the Compendium of Reproach. Leave the Overlook Manse grounds.
You begin next to the small boat. Move into the tunnel and get on the lift. Use the button to ascend. Exit into the next tunnel and move along the edge into the shadow. There's a guard up ahead. You can dim the lights using a water arrow or wait until the guard moves away so you can sneak up behind him.
Continue down the tunnel to the next doorway. Listen to the two men at the table inside. Remain in the shadow and wait for one man to depart up the stairs. Make a noise and lure the other man into the shadow and knock him out. Or you can try and sneak past him or eliminate him with a broadhead arrow. Search the room for goodies then go up the staircase. Snag arrows off the table then go outside.
Proceed west and around the corner to the left. You're approaching the manor entrance. Beware of the guard patrolling near the front gate and another near the entrance. Knock out the guard near the front door when the second guard near the gate moves away. Now take out the second guard. Take cover behind the crates. When the guard turns his back, knock him out. Pick the lock on the front door and creep inside.
This completes the first objective. Read the note on the table in front of you. A guard patrols the adjacent room up the small staircase. Keep inside the shadows until he passes. You can avoid him by hiding behind pillars and putting out the candles or just smack him in the back of the head with the blackjack. Hide his body in a corner.
First a side trip for a special loot item. Exit through the southern passage. Listen to the voice in the next room. Creep inside and spot the guy at the table. You can avoid him completely or shoot a broadhead arrow into his skull. Open the double doors to the west and sneak inside using the shadows along the room's edge. Approach the table and grab the first special loot item, the lucky coin.
Return to the main lobby and open a door on the north wall. There's a woman inside the room. Move into the shadow. You can put out lights by dousing the fireplace or just remain in the dark corners. Grab loot from the room (candlesticks on the mantle, a goblet from a shelf). Go to the back corner of the room and find a path leading west.
Go up the staircase to the top. It's well-lit up here. There's a guard that patrols the area. Be sure he's not in the room before going up. Put out the candle and hide in the dark corner. Wait until he approaches and knock him out. Pick the lock on the chest and snag some loot. There's also a painting in the back corner.
Continue up the next set of stairs. There's a book inside the room ahead of you if you wish to read it. Go down the hall to the first door on the right. There's someone sleeping inside. Pillage the room of its loot then go up the back stairs to another door. Open and enter. More loot and reading material. There's a guard outside the rear door so create more darkness by putting out the fireplace. Hide in a corner and wait for your chance to knock out the guard if necessary.
Exit the room through that door. The entrance to the next level lies to the east. You can check the rooms to the west for more loot. Search the room on the left in the back corner for more loot. Exit and go down the staircase on the other side of the hall. Open the door at the bottom. There are several people inside engaged in conversation. Listen to the conversation. If you want the loot, use a flashbomb to distract all inside or wait for some of them to leave the room where you can knock them out quietly. When finished searching for loot, enter the next area into the Overlook proper.
The House of Widow Moira - cont.
Creep forward and spot the guard at the balcony. Knock him out and drop him in the dark. Turn left and move into the adjacent catwalks. You should see another guard patrolling in the distance. Move through the shadows and wait for your chance to knock him out. Listen to the conversation below about Widow Moira and her wine. Deposit the guard's body in the darkness.
Exit through the passage and look to the left. It's an exit to the previous section. Spot the double doors on the right side. Pick the lock and enter the room. Pillage it for loot. Use the phonograph and listen to the important message regarding a secret room.
Objective: Use the hidden switch in the study. Then get to the North Gallery before the secret door closes. The North Gallery is on the first floor of the Overlook Proper, directly below the Master Bedroom.
Check the bathroom in the southeast corner of the room and grab the second special loot item, the widow's mirror, off of the table. Exit the room and return to the main hallway. Go south back into the balcony area. Snag the painting on the right side if you haven't already. Return to the initial hall you entered from.
Though it's not mandatory, you can turn left and proceed down the hall. Go around the corner and listen to the conversation in the room on the right. Disable the people inside (or wait for them to move about so you can sneak up behind each one). Search the room for loot, equipment, and chests. There's also a staircase that leads up to Widow Moira herself. She's not right in the head. You can bring her some wine if you want but it's not necessary.
Return to the main hall and go down the staircase. Snag loot off of the table. A guard patrols the bottom of the stairs. A second female patrols on the right side at the bottom of the stairs. Wait for an opportunity to take them out. Knock out the man first and drop his body in a corner. When the woman moves into the room, sneak up behind and knock her out.
Check under the staircase for a grate on either side. Open the grate and crawl into the tight space to find some loot. The eastern grate path intersects into another room. Open that grate and crawl into the room.
It's the study. Walk forward the read the book on the desk. Grab all the loot from the room (including the chest in the corner). The hidden switch to open the secret door is on the desk. The problem is the door doesn't stay open for long. It's best to clear a path to the secret door ahead of time.
Pick the door lock on the northern side into the dining room. Put out the lights with some water arrows. Now you can avoid the people inside or knock them out cold. Open the next door on the north side into the kitchen. Beware of the cook patrolling the room. Wait for him to close the stove then knock him out from behind. Continue to the next door to the west. Open it and hide to avoid the guard in the next hall. When he turns away, knock him out.
Go to the end of the hall and enter the open passage on the south side. Approach the desk in the room's center and snag the Nereid telescope, the last special loot item. Exit and open the double doors on the other side of the hall. Grab loot from the chest and notice the bookcase on the east side of the room. The secret room is behind that bookcase.
Retrace your steps to the study. Use the switch on the desk and run into the room containing the bookcase. Go into the secret passage before the entrance closes. Use the lift inside the room and descend.
Go into the next room and grab the Compendium. Read the note and pillage the room of its remaining treasures. Exit into the Overlook grounds. You appear near the mission's start position. Go down the hall, descend the lift, and walk to your boat to complete the task.
Day Five
Objective: Visit the Forbidden Library to hear Caduca read from the Compendium of Reproach.
You appear in the Keeper library. Exit the door going west. Enter the door to your north. Cross the room and enter the door on the eastern side. Follow the steps down toward the Forbidden Library.
Objective: Break into the Stonemarket Clocktower via an upper-story access pipe in Stonemarket Plaza to sabotage the clockworks.
Make your way to Stonemarket Plaza and locate the clocktower in the northeastern side. Look up at the clocktower's location and find the piping above. Spot the Keeper glyph on a pipe above. You must use this secret entrance to get inside the clocktower. Use your climbing gloves to ascend the tower across from the Keeper glyph entrance. Get above the pipes then drop down onto the piping and cross to the glyph. Enter the clocktower.
Killing Time
Objectives: Locate a mechanical plan of the clockworks. Reach the basement of the Clocktower, where the furnace is. When all your other objectives are complete, sabotage the clockworks in the furnace room to stop the clock.
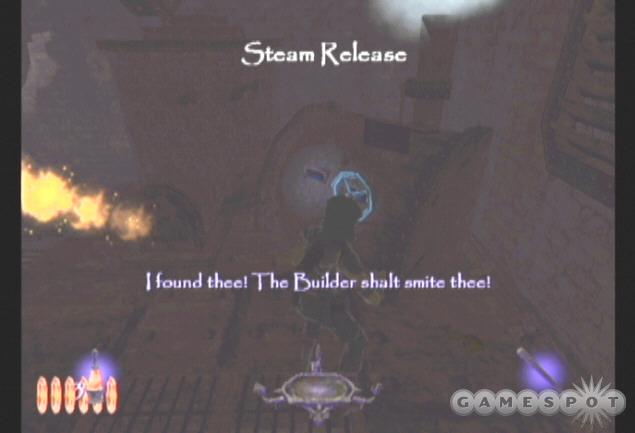
You begin in the pipe. Advance forward and drop into the lower clocktower. Find the ladder on the northwest side and descend. Move around the fans and the corner until you spot the machines ahead. Garrett takes notice. You must avoid the swinging gears. Don't get hit! Stay in the hall and spot the guard patrolling ahead of you.
Emerge into the room's shadow and go to the right side to find a locked chest. Open and snag the loot inside. Creep around to the left side of the path and remain out of the guard's view. Hide in the dark, narrow gap just east of the clock face. Listen to the nearby conversation. Wait for the guard to move by and knock him out cold with your blackjack. Toss him into the gap.
The other guard patrols the northern side. Sneak into the shadow nearby and wait for an opportunity to pounce. Dump his body in the gap. Drop down near the clock face and snag the equipment down there. Go to the right side of the clock face (the northwest corner) and use the climbing gloves to reach the high loot--it's a special loot item, the diamond gear.
Go east to the ladder. Read the note just right of the ladder then descend. Head down the second ladder. Move into the shadow and spot the patrolling guard to the west. Sneak up behind him and knock him out. Move south to the desk and grab the clocktower plans to complete an objective. Also read the book and snag the loot here, including a second special loot item, Father Debole's solace. Don't neglect the nearby chest as well. There are a few items inside.
Time for a looting side trip. Return to the main part of the room and find a door on the east side. Pick its lock and enter. Go down the stairs, grab the arrow on the floor, and proceed to another door around the corner to the right. Enter the next room quietly; there's a patrolling guard inside. Hide in the shadow and wait for an opportunity to knock him out or avoid him. Grab the loot off of him. Pillage the room of loot and items, including arrows and a chest in the back corner.
Return to the main room and head to the double doors to the west. Descend the stairs on the other side. Continue south down the next staircase. Stay in the shadows along the edge to avoid the patrolling guard at the bottom. There are two down here. Wait until they aren't within sight of one another then knock out the closest one. Remain in the shadows and watch the second guard's patrol pattern. When he's close and turned away, knock him out.
Read the note on the small stool. If you're seeking loot, find a grate on the northwest side of the room. Crawl inside the narrow space and find loot inside. There's also a chest in the southeast corner. Go down the eastern hall in the back corner of the room and grab the arrow. Follow it to the door and pick the lock. This dark room contains a chest and a door to the west. That leads back to the main room. Pick its lock and return or take the long way.
Killing Time - cont.
Move to the room's center and climb down the ladder at the hole. Open the grate at the bottom and crawl out onto the balcony. Quietly move to the right side and spot the guard on a platform below you. Eliminate him with a broadhead arrow. Return in front of the open grate and jump to the platform below you. Turn around and see another catwalk below you. Drop down onto it.
Spot the catwalk to your right. Jump to it. Spot the guard almost below you (he's a bit to your left, if you're facing the wall). You can eliminate him with an arrow. Drop onto his platform and remain hidden. Watch for the guards patrolling the ground level. Eliminate them with your broadhead arrows. Drop down and head through a tunnel in the southwest corner to reach the next section.
Move through the east tunnel onto a catwalk. Drop down onto the catwalk below (the right side) and check the chest behind you. Move slow so you don't alert the nearby patrolling guard. Move to the staircase and descend. If the guard is heading up, wait in a corner for him to return back down so you can sneak up behind and knock him out.
Approach the door on the left at the bottom of the stairs. Pick the lock and enter. Search the nearby chest for loot. Exit the room and walk to the ladder on the left. Check below to see if a nearby guard is patrolling there. When he moves away, descend the ladder. Take out the guard with your blackjack.
Creep past the door on the left (you don't need to go inside) and around the corner. Spot the guard in the distance. Creep up behind and knock him out. Search the window sill for the final special loot item, the Builder's ingot. Read the book. Exit to the north and continue around the corner to the west. There's a storage room on the left you can search to find loot behind a grate. Exit to the right and pick the lock on the door in the corner. Ride the lift down.
Peek out into the hall to make sure no guard is headed your way. Sneak out into the shadow and sneak up on the patrolling guard. There are two in the area so work quietly. Tag them both with your blackjack or shoot the second from long-range with a broadhead arrow. Exit through the north and around the giant cylinder. Approach the next doorway and spot two guards in the room ahead.
A third guard patrols the left side of the hall. Keep him out of play so wait until you hear him moving away. A good way to deal with the two stationary guards is with a gas bomb. It'll knock them out cold. You could create some noise and sneak up behind them as they search for you or take one out from long-range, wait for the chaos to calm down then finish the job on the other. Search the table and chests for loot.
Read the note to the left of the iron gate for instructions on shutting down the clocktower. According to the note you must close the steam pressure valve, pull the coal dispenser lever, then halt the mechanism to throw the gears off the track. Go south to the left (check the right side of the hall for an arrow). Use the lift.
Move forward to complete an objective: you've reached the basement. You're on a balcony. You can look at the room below and spot a couple guards. Another couple guards patrols the balcony. Don't go down. Stay in the shadows and check for the guards on the balcony. Eliminate them one at a time. Stay quiet to keep hidden from the remaining hostiles.
Go east along the balcony from your start position in the basement to find the steam pressure valve. If you're unsure, check the room's sign, which indicates exactly where you are positioned. Turn the steam release valve. Exit to the north. Pick the lock on the door and enter.
The foreman's office is to the north and the coal dispenser lever is to the west. Another guard patrols here. Wait for him to move away before using the lever or take him out with a blackjack. Pull the lever on the coal dispenser. Pillage the foreman's office for loot and equipment.
The final task lies at the bottom of the basement where additional hostiles stand guard or patrol. To complete the mission you must simply use the halting mechanism. You don't have to worry about being seen. You can use the mechanism before the guards reach you. This ends the level immediately. Go down the stairs and use the lever on the mechanism just to the left of the furnace. The clocktower stops and the mission ends.
Day Six
Objective: Return to Keeper library to see if Interpreter Caduca has discovered the identity of the Brethren and Bretrayer.
You begin in Stonemarket Plaza just outside the tower. You're near the entrance to the Keeper library. Just go west then north through the narrow tunnel and toward the northwest corner to find the Keeper glyph. Enter the library.
Objective: Get to your fence here in Old Quarter to see if he can help you before you are killed by the Keeper Assassins. Ramien's place is to the east.
You've been framed for Caduca's murder. Now even the Keepers are after you. It's best to remain in the shadows along the city streets. You can sneak up on the Keepers when the opportunity arises but try and remain out of sight and wait for them to turn away before continuing onward.
You're in Old Quarter now. The map reveals the red handprints on the east and northeast sides of the map. Ramien's place is the one marked on the eastern side. Remain in the bushes until the Keeper assassins move away. Stick on the eastern road and stay in the shadows. You may spot the Keeper assassins battling Hammerites or other city citizens. Make a run for it when these opportunities arise. Keep going east until you spot the red handprint on the right wall. Turn to the south and go up the steps.
The door at the top is locked. Pick it fast and enter your fence's shop. Ramien is dead.
Objective: Search for clues in your fence's shop about what you should do next.

Pillage the shop for items. He won't need them any longer. Read a note on a shelf in the back of the shop to complete the objective.
Objective: Go to your building in South Quarter as instructed by the mysterious note. After you enter your building, search around for clues about what's going on.
Exit Ramien's shop and return to the Old Quarter streets. There's no direct route to South Quarter so you'll have to go through Stonemarket. Go to the northwest corner of the Old Quarter to find the route back into Stonemarket. The Keepers are still hunting for you so remain in the shadows when possible. Go west along the streets then north back to the start location to find the route back into Stonemarket. If necessary, use broadhead arrows from long-range to terminate Keepers standing guard.
Go west, south, and west again to the entrance into Stonemarket Plaza. Beware of the Keepers patrolling the streets. They'll likely do battle with others so you can scurry by and get into the plaza without too much trouble. Navigate the plaza back into South Quarter. Once there, go east to your apartment entrance.
When you enter your apartment, you'll find a Keeper assassin inside. He's eliminated your contact. Eliminate the assassin from long-range with a broadhead arrow. Or you could lure him outside and into a confrontation with the apartment guard. After avoiding or eliminating the Keeper, move to the back room of Garrett's apartment and find a note on the table with new instructions.
Objective: Meet with the mysterious note writers in the Graveyard in Old Quarter.
The note says to look for something unusual in Black Alley in South Quarter. It's actually a portal that takes you straight to the Graveyard--which is nice so you aren't doing a bunch of backtracking. Exit into South Quarter and move to the far western side to Black Alley. Find the misty portal to take you into the graveyard. Move into the northwest area of the graveyard to find your contacts.
Objective: Return to the Keeper Library in Stonemarket Plaza, then find the secret tunnel which leads to the Keeper Compound.
Return to the portal. You're now in Old Quarter. Follow the same route back to Stonemarket Proper and avoid confrontation with the Keepers looking for you. Then proceed into Stonemarket Plaza and proceed to the Keeper library in the northwest corner. The usual entrance has been sealed. However, look above the glyph to spot an open tunnel. Use your climbing gloves to reach the tunnel and enter the Keeper library.
Hide in the shadow and avoid confrontation with the Keepers. Ready your blackjack and knock out the Keeper guards when they turn away. Cross the room carefully going west so you can reach the lift and ladder. Ride the lift or climb the ladder to the upper floor of the library. Go northeast and up the stairs to Orland's office door. Pick the lock and head inside. Read the note on the desk then find the secret entrance in the back corner; it's marked by a Keeper glyph.
Of Brethren... and Betrayers
Objectives: Search Orland's quarters on the top floor for information that might implicate him. Search Artemus's quarters in the dormitory for a clue to his whereabouts. Lastly, visit Caduca's murder site in the Lower Libraries to investigate the cause of her death. When all your objectives are complete, leave the Keeper Compound through the Old Quarter passage in the Lower Libraries.
Move to the grate on the left and crawl through the tunnel. Listen to the nearby conversation as you hide in the shadows. Wait for the conversation to conclude then follow them up the stairs on the left side. The woman takes a left turn early. Ignore her and follow the male and take him down with a blackjack. Return to the hall where the woman walked down and knock her out as well.

Return to the stairs and ascend to the top. Read the book on the table and pick up nearby loot. Go down the stairs to the very bottom of the room. Check out the note next to the doors if you wish. Pick the lock on the door to the southeast. Go down the steps and hide just outside the next room until it's been cleared. Watch the patrolling guard. When he's turned away, sneak past him or knock him out cold. Be quiet. There's another guard nearby.
Go to the south exit and spot the Keeper near the statue. Sneak up on him and knock him out. Go southwest into the Elder's Library. A guard patrols the room. Use the bookcases as cover as you sneak up and knock him out. Move to the table and grab the first special loot item, the Imbris Analects. Also read the note nearby.
The red glyph on the wall marks the locked entrance into the Lower Libraries. Can't get there yet but remember this location for later. Look up from the glyph and spot the shiny loot. It's a special item. Get up onto the bookcase to the right of the loot and pull up onto the adjacent pillar. Grab the golden scales.
Ascend the eastern stairs going south. A guard patrols the top so avoid him or wait until he's within range to be shot or whacked. A sign at the doorway marks the Scribe Room. Snag loot and read the note. Go down the north hall and find the room marked Dormitory on the right side. Enter the room.
There's a conversation going on to the north. Put out the candle on the desk to create more darkness. Grab the loot while you're at it. Wait for the group to split up and take each Keeper down one at a time. Check the chest for loot then go to the northwest door. Pick the lock and enter--it's Artemus's room.
Read the book on the table that informs you of Artemus's Keeper ring. Search the chest near the bed to find the Keeper ring. Exit the room and ascend the stairs to the top. Check around the northwest corner for a stationary guard. Ignore him or better yet, knock him out.
Go south and into the southwestern corner. Look for the small hole on the wall. It's a niche for the Keeper ring. Use the hole to automatically open the passage. Ascend the staircase. Go through the door on the south side into Orland's room. Read the books and notes in the room to receive a new objective.
Objective: To make the Keeper Door Glyphs usable again, destroy the binding seal in Orland's quarters.
Go to the left of the bed and find the seal used to hide the door glyphs. Grab it. Now you must destroy it. You can use a fire arrow if you have it or toss it into a fire (such as the blue flame at the beginning of the level). Pillage the room for loot then exit.
Descend the steps to the west. Find another Keeper ring niche at the bottom on the right. Use it to open the passage. Exit onto the balcony. A woman patrols the top balcony. Wait in the shadow then sneak up and knock her out. Go all the way around to the staircase on the other side.
Several guards patrol the bottom floor. Put out the lights by dousing the fireplace and chandelier with water arrows. Find loot on the table (there's also a painting above the fireplace) including the third special loot item, another Imbris Analects. Read all the notes.
Exit the bottom floor through a door in the southeastern corner. A couple Keepers populate the next hall. Put out the lights by dousing the chandeliers with water arrows. Go south to the doorway marked Scribe Room. You can explore here for loot if needed but it's heavily populated.
Turn around and descend the staircase going north. You're back in the library. Now you can move through the Keeper glyph and into the lower libraries.
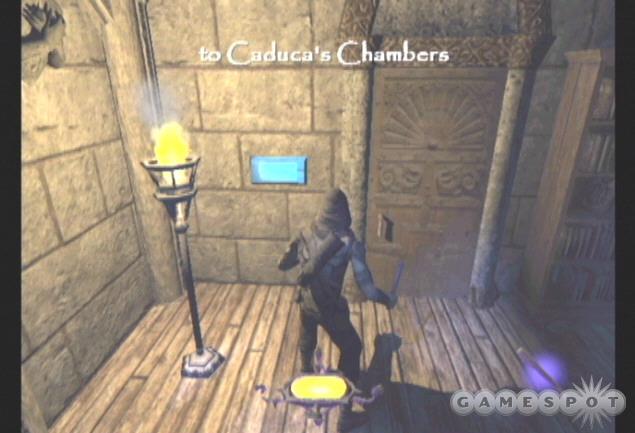
Approach the door to the west. It's Caduca's chambers. Approach Caduca's body. Loot the room and read all items. Enter a side room to the north and gather the loot there and read the note hanging from the gargoyle.
Objective: Go to the Hall of Statues to meet whoever left you the note.
Return to the previous room and cross to the Hall of Statues entrance. Walk out into the hall to start the cut scene.
The statues have come to life. They can be destroyed, primarily by fire arrows and explosive mines but it's also possible to avoid them completely. Use water arrows to put out as much light as possible then simply cross the room in shadow. Open the door at the north end. Another statue patrols inside. Put out the lights. Enter the door to the east.
Put out the chandelier in the next room. Take a shot at the torch on the balcony in the distance. Descend the stairs and put out the torch to the left of the staircase. Go left to the staircase on the northern wall. Proceed east up the stairs. Cross to the far balcony containing the Keeper glyph that's your escape route. Enter and climb the ladder to exit the mission.
Day Seven
Objective: Find Inspector Drept in Auldale to learn about the hag who set a trap for you in Keeper Compound. Enter Drept's workshop through the window.
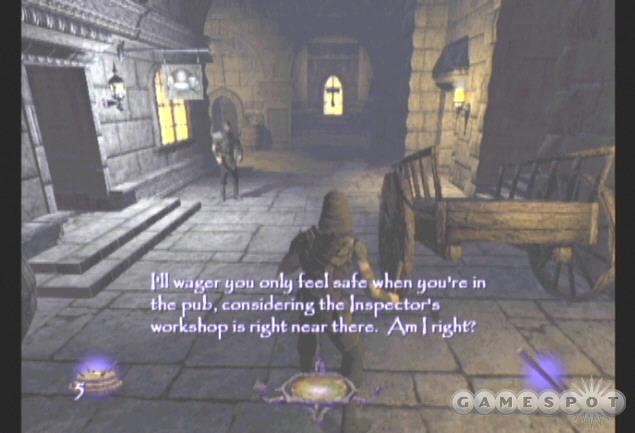
You begin on rooftops in Old Quarter. The route to Auldale is located in the northeastern corner of the map. Go to the cover and leap to the catwalk below you and finally to the street below. Proceed to the east and stay out of sight. You're a wanted man, possibly by three factions! Reach the northeast corner and scurry quickly into Auldale.
Listen to the conversation as you enter. Just run past them to the east. Follow the street south then up the stairs. Go up the ramp headed east. Spot the hammer in the distance. That's your destination. Run to that window to initiate the cut scene.
Objective: Go to the Shalebridge Cradle to see what you can learn about the hag. The Cradle is in Old Quarter, near the gate to the Docks.
Exit Auldale by retracing your steps to the route to Old Quarter. Shalebridge Cradle is near the route to the docks located in the southeastern corner of Old Quarter.
Scamper south to the red handprint. Take a turn through a tunnel to the east. Find the Keeper glyph on a door marked Shalebridge Cradle. Proceed into the mission.
Robbing the Cradle
Objective: Search for more information about the "Hag" who attacked you.
Check the fountain to the west for some water arrows. Go around to the east side to find the cellar entrance. Descend the stairs then find the staircase inside on the right side. Proceed up. A small storage room here contains an oil flask and a health potion. Go left from the staircase to a door marked Treasurer's Office. Snag all of the loot on the desk then open the safe for the first special loot item, a bottle of Gravecourt Red. Read the book before exiting.
Here's a quit looting side trip. Exit west then south across a catwalk. Enter a small room on the far side and read the note. Find an exit in the northeast corner and descend the stairs and take another set of stairs up to the west into the sleeping quarters. Grab a health potion and read the note. Snag the loot in the room to build your total. Find a locked chest at the end and pillage its reward.
Return all the way back across the catwalk. Look to the left in the next room and spot the stairs going up. Take them. Open the door at the top and enter the attic. Go to the south side of the attic and spot the painting. Use it and make contact with Lauryl.
Objective: Find a vial of Lauryl's blood in the storm cellar and drop it down a drainpipe. There is a drainpipe in the lobby.
Approach the ghostly image of Lauryl in the far corner and grab the generator fuse from the box.
Objective: Find a fuse and use it to repair the generator in the storm cellar.
Exit the attic via the stairs you entered from and exit via the doorway in the eastern corner. Turn left and go down the stairs ahead. Spot a fireplace in the distance. Turn left at the first chance and spot the sign ahead that reads Lobby. Turn right and descend into the lobby. Snag some loot off the shelf then exit through the north passage.
Spot the control switch on the right. Descend the ladder on the left. Explore this floor for a note in a back corner before taking a second ladder down into the storm cellar. Turn left and follow the hall to the generator room. Replace the fuse in the generator. Read a note in the corner.
Go right from the ladder into a room filled with shelves. Read the note and snag some loot. Move to the shelves on the right and pick up a vial of Lauryl's blood. Return up the ladders and back into the lobby. Turn right immediately and find the large pipe below the stairs. Use the pipe to automatically send Lauryl's blood out of the cradle.
Objective: Retrieve Lauryl's nightgown from the White Hall, and then incinerate it in the Morgue.
Return through the north passage and to the control switch. Use it. Now that power has been restored via the fuse, the portcullis opens. Continue north and into the inner cradle.
Head west into the area marked Lounge. You have to be more careful through this area. Unlike the previous cradle section, the inner half contains enemies. They're like former mental patients on steroids. These foes are extremely potent when agitated. It's best to avoid them completely or exhaust enough weaponry to put them out so you don't have to sneak around them. It's bad news just disturbing the patients. These foes are much faster and more aggressive than the enemies you're used to dealing with.
Continue to the sign marked Hall of Records. Read the book. This details the former patients, their room numbers, their favorite toy, and where they liked to bring it. You should note all of these if you're just looking at this walk-through for a hint. However, this walk-through will provide specific instructions on a specific patient/room/toy/location for you to use. More details on what these mean later in the walk-through.
Move to the east side and pick the lock on the nursery tower. Read the note inside then turn left and pick up some loot. You may spot a deranged patient in the distance. Jump over the barrier and move to the north. Stick in the shadows to avoid contact. Continue north and stay to the right. Move into the treatment room. Sneak to the back right of the treatment room to find the second special loot item, the silver surgical kit on the table.
Hop up into the narrow pathway behind the loot. Follow this dark corridor around to the left. Be cautious and don't disturb the mental patients. Move west all the way down the hall. Spot another mental patient digging into the ground ahead. Go around to the left and find more loot. Lauryl will tell you a story if you check out the basin. Continue south then turn to the west. Open the gate on the left side at the end. Turn right through the passage and finally to a locked door on the right side at the end of this hall. Pick its lock. Check the sign over the door: this is White Hall.
This is the area that contains all of the patient rooms. They're all marked by overhead signs. Each room requires lockpicking to open so you must be careful to make sure no mental patients are around before you try and open the doors or you could get ambushed. The door ahead of you is number six. You can explore and open these doors at your leisure (some contain loot and items) but the most important patient room right now is room number five.
Robbing the Cradle - cont.
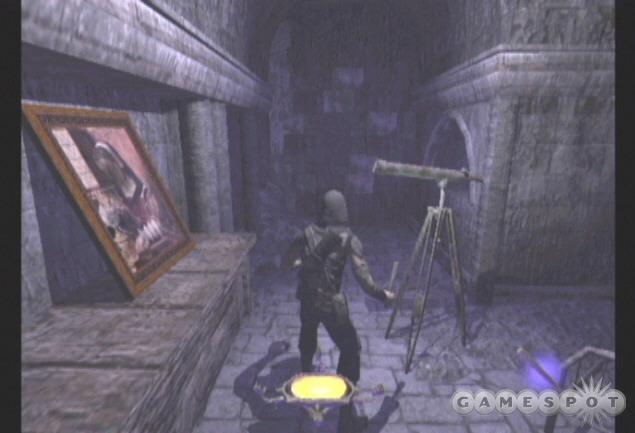
Just keep moving around White Hall (sticking to the right will move around to all rooms) until you find door marked five. Pick its lock and enter. You receive a note about the unusual bricks. Approach and use the bricks to move them. Find Lauryl's nightgown behind them.
Now you must head to the morgue. It's on the east side of this level back near the nursery tower and treatment room you explored earlier. Exit white hall by making your way around the patient rooms and toward the east side of the map. At the hall of records you can take a detour up the stairs on the right side into the observatory (a sign to the left of the stairs marks the path). There's plentiful loot at the top; grab the loot from the paintings while avoiding the foe up here.
Take the lift, ladder, or stairs into the morgue area. You're in the right location if you spot the orange hot furnace on the other side. Beware of the mental patient moving around the room. Sneak in the shadows along the right side and get close to the furnace. Use the furnace to drop in the nightgown. Grab the fire arrows from around the furnace if possible. Before leaving the morgue, search the south room near the furnace. Search the body cabinets for the last special loot item, the bag of gold teeth.
Objective: Find one of the "toys" Lauryl mentioned and bring it to the right place to enter the Cradle's memories of the past.
Here's where the patient rooms, toys, and locations come in to play. If you have forgotten them, check the hall of records or use the list below in this walk-through. The objective is to grab the toy from the patients room then deliver it to the specific location. If you return to each room, Lauyrl will provide a clue to the special place for each toy by essentially reciting what's contained in the hall of records book. Any toy and corresponding location will do the trick.
| PATIENT NUMBER | TOY | LOCATION |
| No. 2 | Blunt utensils | Meal Hall |
| No. 3 | Candle | Morgue |
| No. 4 | Clockworking tools in wooden box | Shock Therapy |
| No. 5 | Telescope | Observatory |
| No. 6 | Ashes in urn | Exercise Yard |
| No. 7 | Wooden birdhouse | Balcony |
| No. 8 | Victrola | Lobotomy Theater |
| No. 9 | Tinderbox | Lounge |
Return to White Hall and pick up one of the toys from the patient room. Now move inside the designated location to deliver the toy. Just use a table in the room to place the item inside. For instance, in the Morgue, place the candle at the table near the furnace.
This sends you immediately "into the past" which changes things slightly. First, the mental patients are now the cradle's staff. They're black apparitions and are as quick as the mental patients. If you're touched by one, you return to the present. That means you will have to retrieve another toy from a patient room and deliver it to the corresponding location. To prevent hassle, save your game before delivering the first toy so if you're caught, you can return to that point.
Objective: While in the cradle's memory, find Lauryl's diary in the Nursery Tower, and then incinerate it in the Morgue.
Return to the hall of records on the eastern side of the map and to the nearby nursery tower (across from the morgue entrance). If you haven't been here already, pick the lock and head inside. Continue east up the stairs. If you were here earlier, you'd remember this path was blocked by rubble. Go left and then right into the nursery area. A staff member patrols the room so you have to be careful. Stick in the shadows along the sides of the room.
Read the note at the podium to complete the mission's initial objective. Next find the diary on the south wall near the podium. Grab it. Exit the nursery tower and proceed across to the morgue. Go down to the furnace and use it to incinerate the diary. Beware of the staff members along the way, including one patrolling the morgue. Keep in the shadows to the right of the furnace and sneak quietly. Burn the diary to complete the objective.
Objective: While in the cradle's memory, find some ‘Dissolution Serum" in the treatment rooms, and use it on the bloodstain in the attic.
Return up the ladder out of the morgue. Follow the hall east toward the hall of records. Turn into the north hall then stay to the right into the treatment room. Continue to carefully avoid the staff members. Find the dissolution serum on the right table inside the treatment room. Grab it and exit and return through the hall of records and go south back to the previous section into the outer cradle--you're heading to the attic.
Go south back to the lobby. Ascend the stairs to the very top. You'll end up near the treasurer's office. Go west into the adjacent room and find the staircase in the northwest corner of the room. Take the stairs to the top. Approach the Lauryl apparition to clean the blood using the serum.
Objective: Meet Lauryl downstairs in the lobby, and leave the cradle with her.
Retrace your steps back down to the lobby. Find the Lauryl apparition there. Follow it slowly through the cradle rooms toward the exit. Stick close and remain out of sight of staff members. When you reach the exit, you're not allowed outside.
Objective: Lock yourself in the cage down in the storm cellar to enter the cradle's memories as yourself.
Return to the lobby. Exit through the north and take the two ladders down into the storm cellar. Go right and into the room with the shelves. The cage is in here. Go inside and close the door.
Objective: Leap to your "death" from the open window at the top of the staff tower.
You're now back in the past which means you must avoid the staff members again. Return up the ladders. At the top go left through the portcullis then take a right. Spot the stairs ahead to the east. The sign marks the route to the staff tower. Go up and follow the rooms to a door. Open and move inside. Beware of the staff members here. You emerge in a series off offices. Continue to the lift in the back northern corner of the offices. Ride the lift up to the top. Exit the lift to the east the turn south. Run quickly to the table in the southern corner. Jump onto it and leap out of the window.
Day Eight
Objective: Follow Lauryl's ghost to see where it leads you.
This objective is simple: just follow Lauryl's apparition. Stay out of the confusion going on around you. Don't get mixed up with any hostiles in the area. Stick close to Lauryl. She leads you to the fort in old quarter and down into the catacombs. Those Hammerites likely won't be too pleased to see you. There's also the undead patrolling the catacombs--and they aren't too friendly either! Reach the destination to initiate the cut scene.
Objective: Translator Gamall, the hag in disguise, is the one you've been after this whole time. Return to the Keeper library to inform the Keepers.
You must escape the catacombs first. Make your way out of the catacombs. Eliminate any hostiles that impede your progress or attempt to sneak around them. Return to Old Quarter. Head north then west then north again to find the path to Stonemarket. Go back to Stonemarket Plaza and finally the Keeper library in the northwest corner.
Objective: Go to Auldale, figure out where Gamall's hidden lair is located, then break into it. Steal back both the chalice and the paw from Gamall's lair. Search Gamall's lair for clues about the final glyph and why she wants the artifacts.
After getting an update inside the Keeper library, return to Stonemarket Plaza. Your destination is Auldale. Return through Stonemarket Proper and then into Old Quarter. You'll find Auldale in the northeastern corner of Old Quarter. Move south, then east, then back north to find the route into Auldale.
Check the Auldale map. First check out the pump station located north of your start position. As you move through Auldale, be wary of hostile factions! Take out foes from long-range or sneak through shadows to avoid them. Move north through the Plaza and over the canal. Go east and read the note next to the pump station door. You receive a new objective.
Objective: Obtain the magic amulet belonging to the Pagan priestess, Dyan, who is in Auldale Park.
Return toward the start position in Auldale and proceed east and then north toward the park. Pagans populate the park and unless you've been earning favor with the cornerstones, they won't appreciate your intrusion. Put out torches, sneak in corners, use long-range broadhead arrows, or toss a couple flashbombs to distract the Pagans while you snatch the amulet. It's located on a table to the left of the fountain. Note that this fountain will also replenish your health--though just a single time usage.
Return to the pump station and approach the vines covering the entrance. The amulet makes the vines disappear. Enter the pump station and use the valve to drain the canal. Now you must enter the canal. Find an entrance near the park. It's a grate on the floor on the right side of the pathway. Drop down and go north into Gamall's Lair.
Open the door ahead of you and enter the chamber. Grab some loot to the left then continue into the next room to the north then ascend the staircase. Read the book on the table to learn about the unbinding glyphs.
Objective: Find and obtain the Glyph of Unbinding, which can be used to destroy Gamall's statues.

Exit through the north and into the open door ahead. You'll hear statues patrolling. There are two inside the room. Hide in the shadows and wait for an opportunity to jump the railing to the bottom of the room. The paw is down there. There's a lot of shadow in the recess so wait until it's clear before dropping down. Return through the south exit.
Return to the dining room that contained the unbinding book. Exit the western room. Read the book and grab the flask. Open the door to the west. Spot the large crates in the room. There's also a patrolling statue here. Take cover and avoid the statue by sticking close to the shadows. Move around the north side of the room and find the chalice on a table. Wait until the statue moves away and exit through the door in the northwest corner.
Search the next room for reading material and loot. The book on the table contains a secret lever. Use the left book to open a door. Enter the new hallway. Climb the ladder, open the next door, and emerge onto a balcony. Go around to the left side and walk until the cut scene interrupts the action.
Objective: Break into the Museum in order to steal the remaining artifacts before Gamall does. When you have all the artifacts, meet Artemus in Terces Courtyard in Stonemarket Plaza.
Turn to your right and spot the glyph on the wall. It's the unbinding glyph. Read the book and use the glyph to receive the upgrade. You can now sneak up on statues and destroy them with your blackjack.
Exit this chamber by climbing the wall on the western side of the room. Climb and shimmy over to the southern balcony. Follow it to the exterior. Drop down of this balcony as quietly as possible and move south. Enter a door on the east side and scamper through to the dining room. Keep going until you're out of the lair and back in the canal.
Exit out of the grate near Auldale Park. Go north through the park and toward the museum. As you approach the museum, look to the left of the stairs to find a narrow alcove. Open the grate inside and drop down. Inside the tunnel, grab loot and read notes as you move through this entrance into the next mission.
Still Life with Blackjack
Objectives: Locate the Eye and steal it. Locate the Heart and steal it. Leave through the tunnel in the entrance courtyard.
You begin just outside the museum's front entrance. To your left, up the steps, and near the front door, two guards stand post and another guard patrols the front area. You can wait until the patrolling guard gets close and into the shadows and knock him out or just wait for him to move away. Wait for the conversation to conclude between the other two guards then steal the key off of the nearest guard's belt. When the patrolling guard moves away, scamper into the front entrance of the museum.
Enter either the left or right door. Both lead to the same location. Read the book on the table (there's a different note on each side). These reveal that important items are held in the east wing, west wing, and main atrium and reveal the location of the power stations. Before moving to the other side, eliminate the guard that patrols between each. Grab his key.
Snag the painting loot then exit through the eastern door. Grab more loot on the right then continue east into the storage room. Read a note in the back about a special loot item. Exit north. Go up the staircase to the top. Look around the right corner. The electricity in the distance protects the first artifact, the heart. Two guards stand nearby; another patrols a hall to the west. Listen for him to walk away then eliminate him or just sneak into the shadows to the east.
Wait for the guards to split up. One begins to patrol along the eastern hall. Wait for a chance to take him out. Move toward the artifact. Another guard remains at his post near the artifact and another guard patrols the staircases. Wait for the patrolling guard to move far up a staircase then eliminate the standing guard with a broadhead arrow. Grab his body and drop it in the dark. Sneak into a dark corner near the bottom of the stairs. When the patrolling guard moves down, take him out.
Now you have a decision. If you simply touch the electricity, you're dead. You can wait until you find the power station or you can disable the electricity temporarily by shooting the coil with a water arrow. If you do so you must grab the heart and retreat quickly.
Time for a quick special loot side trip. Return to the west and move down the hall on the right that leads to the west (where the guard patrolled if you took him out). Eliminate any remaining guard by waiting for him to move close on his patrol. Snag all of the loot throughout this hall. At the end of the hall, look to the right and spot the guard's shadow. Check behind the display case outside the room to find the first special loot item, the curator's monacle. Lure him out of the room and eliminate him or sneak past him into the room's shadows. Read a note in the room regarding another special loot item.
Now a side trip for some loot. Return to the museum's main lobby and enter the west wing. There's loot on the right side and stairs on the left. There's also a guard in an alcove on the right. Sneak up on the guard and disable him. Grab all nearby loot. Return to the stairs. Wait for the guard to move away and off the stairs before sneaking down and into the shadow at the bottom.
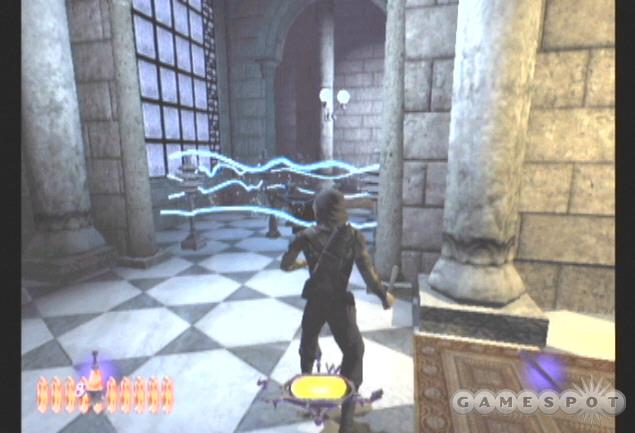
Move into the shadows on the southern wall. The guard's patrol moves past this point providing an opportunity to ambush him. Another valuable item rests behind the electricity. It's not an objective--just loot. A second guard patrols the other side. Hide around the corner then take him out. You can use a water arrow to temporarily disable the security so you can grab the loot or wait until you reach the power station.
Another guard patrols the northern exit hall. Sneak up and eliminate him. Grab the loot off of the table. Eliminate a guard patrolling to the east. Go east then south to return to the lobby.
Exit the lobby via the northern stairs to the upper floor. Go all the way to the top. A guard patrols this hall. Wait for him to get close and take him out. Spot another guard to the north down the hall. Take him out from long-range with a broadhead arrow. He guards the entrance to the power station. Open the door and spot the switch inside. Use it to disable all power, including the security.
Still Life with Blackjack - cont.
Exit through the east hall and follow it to the southeast. Sneak up on the guard here; it's much easier in the dark. Grab the painting he guards; it's the second special loot item, the Orbetti forgery. If you go north then east down the stairs you'll find the heart security station. You'll need to move down here quickly to recover the heart after disabling the power. Once you have the heart, it's time to move on. Return through the hall back toward the power station and enter the next section through the door on the right side.
You're now in Tesero Hall. Move to the left slowly and spot the guard patrolling to the right. Enter the door on the right marked "To Tesero Hall" and move into the shadows of the next hall. Avoid or eliminate the patrolling guard. Collect the loot in the circular room to the west. If you move into the next room, you'll spot the guard to the left side. He's guarding this area's power station. Shoot him with a broadhead arrow. Collect the loot from the other end of the balcony then return to the east.
Enter the lobby area. A guard patrols through here and the adjacent balcony. Hide in the shadows of the lobby and drop him with the blackjack. Snag the loot in the either end of the balcony then walk to the sign on the eastern side to receive a new objective and hear from the eye.
Objective: Reach the center of the main atrium to hear more from the eye.
Exit through the north hall then continue through the door on the right. As you continue east, you'll encounter guards, which can be distracted with flashbombs, disabled with gas bombs, or outright killed with a broadhead arrow. When you reach the opening to the north, turn left and follow it to the right side. Spot another guard patrolling ahead. Take him out while sticking close to the shadow.
Follow the hall around to the east side. Take out more guards at the end of the hall (under the painting). It's easiest if you want until the two guards are near one another and drop a gas bomb to disable them both. Go up the stairs to the south toward the curator's office. There's a guard in the first room; he sits in a chair. Take him out.
Snag all of the loot and continue through the next door to the south. Go up the stairs to the west and open the door at the top. Grab all of the loot. Exit onto the north balcony. Look to the right on the floor; there's a switch. Use it. It raises a statue in the main atrium--it contains the eye.
Return downstairs and retrace your steps to where you first heard from the eye. It's on the balcony containing the sign marked "The Eye". The statue rotates around the room. When it comes to the balcony, grab the eye to complete the objective.
Return toward the curator's office and go downstairs to the north instead. Continue all the way to the bottom. A guard stands post to the right at the bottom of the stairs. Lure him into shadow and take him down. Wait for another guard to the south to approach and bust him open.
Go down stairs south and open the gate. Stick in the shadows to avoid the patrolling guards inside the next room. Move into the shadows along the left wall. Spot the guard standing post near the gate controls. You can snipe him from long-range with a broadhead arrow. Use the controls.
Exit through the west gate. Exit the doorway to the north and follow the hall west. Spot the guards talking at the end underneath the statue. That statue holds the final special loot item. It's a necklace, the Coethe Medallion. To get it down you'll have to shoot it with an arrow. A third guard patrols near the bookcases. Eliminate him first. The best way to tackle the remaining two is with a gas bomb dropped right between them. Otherwise you can take one out from long-range then hide until you can get the other.
Exit through a southern door near the bookcases. It's very bright here and there's probably a guard approaching. A flashbomb works best here; drop it to distract him then scurry east. Turn south then go up stairs on the west side of this courtyard. Get to the balcony at the top. Go left and all the way around to the balcony's far side to return to Porter hall. Work your way back down to the museum's front entrance to complete the level.
Day Nine
Exit out of the museum's tunnel through the grate at the top. You automatically bump into Artemus and receive the final objectives.
Objectives: Place the heart on the Bradshaw Monument in the Auldale Plaza. Place the chalice on the Cataclysm Memorial in Fort Ironwood. Place the paw on the first landing marker in the Docks. Place the crown in the storage area at the base of the Clocktower in Stonemarket Plaza. Lastly, place the eye on the fountain in South Quarter.
Now you must navigate the city streets you've crossed throughout the game to place the five artifacts in their designated locations. The city streets are even more dangerous than before. Gamall in her monstrous form roams near most of the five designated locations. Don't mess with her! Steer clear and run by her or suffer serious damage. Gamall's statues also crowd the streets. It's usually best to just run from location to location instead of attempting to sneak around or battle these enemies.
Drop down off of the museum then go west and south away from the pump station. You'll likely spot Gamall ahead. The Bradshaw Monument is just ahead at the intersection. Walk up the steps and use the circle above the statues to complete the first task. Scurry down the stairs south and find the route into Old Quarter.
Move west, south, then west again (just at the red handprint) and turn south again into the Hammers territory. It's Fort Ironwood. Go to the far western side and into the misty portal to enter the cemetery.
Gamall will likely be here so move quickly. Find the Cataclysm Memorial in the center of the eastern side. Put the chalice in the hole and return back to Old Quarter.
Go east then north out of Fort Iron wood then move west and north into the route to Stonemarket Proper. Move through the proper into Stonemarket Plaza and into the northern corner to find the Clocktower. Find the designated spot inside a small alcove to the right of the door. Now make your way to South Quarter.

To get to the Docks you'll have to go through South Quarter. You must insert the eye last in South Quarter so proceed to the Docks. Once there, go toward the south then to the east onto the docks. Go through the building on the southern side. Avoid Gamall and scurry out onto the end of the dock on the northeastern edge. It's the first marker. Insert the fourth artifact.
Finally, return to South Quarter and to the fountain near your apartment. Enter the fifth and final artifact into the niche on the fountain's side to complete the last objective and the game.
Chapter 4: The City
Thief: Deadly Shadow's city streets offer primary and optional mission objectives. The mission walk-through section of this guide covers solutions for all primary city street objectives. This section lists optional things to find and do within the city streets and guidance on completing the tasks.
There are many hidden arrow types scattered around the city. For instance, the fountain just outside Garrett's apartment includes water arrows that regenerate. Check back when you reenter South Quarter each time. Search bushes for moss arrows, high places for gas arrows, and hot areas for fire arrows. Check each every time you reenter for additional items.
You'll also encounter other factions while roaming the street. The City Watch never really like you--you are a thief after all. The Pagans and Hammers share a mixed relationship with you. Early in the game you can help improve the relationship by performing tasks for them. The Hammers will look kindly if you kill the rust mites (15 total) throughout the city streets. Each one you kill--with a broadhead arrow--improves your standing. The rust mite explodes when killed so try to make sure no enemies are around that can hear the battle. Hammers will also like you if you harm undead or Pagans.
The Pagans want you to shoot moss arrows on the cornerstones. You can also fire elemental arrows into their cocoons to improve your standing. The Pagans also favor any task done against the Hammers. The reason you'd want to take the time to improve your standing is so you aren't assaulted during every street mission. This certainly increases the difficulty of the game.
South Quarter
- Be sure to check out the happenings in Garrett's apartment building. When the guard moves away, pick the lock on the landlord's door (across from Garrett's apartment) and read his journal. Apparently he's dropped off some loot for a blackmailer. It's located under a sewer grate in Black Alley on the west side of South Quarter. There's also some loot in his room. Find the grate on the right side just as Garrett notes the entrance into Black Alley.
- There are two other rooms in the apartment building. The one on the left contains a sleeping tenant; the one on the right contains a woman pacing through the room. Both offer some loot and the right room also contains reading material.
- Check the South Quarter map for the "well" on the east side. You can pick the lock on the house just south of the well and steal some loot and items from inside. If you don't want to pick the lock, get in through a window in an alley just south of the front door.
- Toward Black Alley there's a shopkeeper selling bread and other items. Those aren't of interest but he does have some cash on the table. When he's not looking, steal it. Do it again and again when you enter South Quarter.
- The South Quarter merchant's unique offering are water arrows. The water arrows cost 100 gold pieces each.
- Get caught on the streets (like falling into the canal or other deep water) and you're sent to Pavelock Prison. Wait until the guard (not the warden) walks up to your cell and grab the key ring. Exit out of the cell when the guard has moved away. Enter a crawlspace to the right out of your cell. From here you can move through to the left and deactivate the prison's power without the nearby guard seeing. Now move to the large cell across from the power controls. That's the depository. Find the key on the shelf to the left. Enter the depository to recover your equipment and score loot. There's also a safe here to pick! You're pretty deep into the bowels of South Quarter. Move up the stairs through the prison. Stay out of the light and away from guards. Search desks, chests, and shelves for more loot. When you reach the gates, look to their left side for the controls. You return down and search the depository later days for more loot.
Stonemarket
- The Tavern sign says it's closed after dark but that doesn't make it safe from a thief. You'll find the tavern just north of the route to South Quarter. Break into the front door using a lock pick. Beware of the guards patrolling outside and inside the tavern. Grab all of the loot inside! There are several other ways into the tavern, including a locked side entrance in the narrow tunnel south of the route to Stonemarket Proper.
- Sneak into the quarters on the northern side near the courtyard. Guards protect the entrances so be cautious and be ready to put out torches or knock them out with a blackjack. Find a room where two men are in conversation: one is posing as you! Listen to the conversation in full. Apparently there's a golden dagger in a basement safe in Cothron's Armory. Steal it and drop it into the dropbox at St. Edgar's church in Stonemarket Proper then check back in the same dropbox for your reward.
- A couple thugs hang around St. Edgar's church. The male has a map on his belt. Pick pocket him by sneaking up behind him in the shadows. It's a map of St. Edgar's church.
- Just north of the church thugs is an apartment on the left side of the street. Break into it using a lock pick and search it for loot. It's the stonecutter Crowley's apartment. Read the journal in the top bedroom to receive an optional quest. Apparently Crowley has hidden some gems behind a gargoyle in Terces Courtyard in Stonemarket Plaza.
- Look across from the church to find a jail cell holding a "strange creature". There's some loot and a guard here. If you free the creature, you can find a map inside for the Kurshok Citadel.
- Go to the east side of Stonemarket Proper to find the red handprint shops including the fence and the merchant. The Stonemarket merchant offers a couple unique items. She sells moss arrows for 125 gold pieces and an iron practice lock for 500 gold pieces.
Docks
- The shop in the Docks is located south from the entrance from South Quarter. The shop offers a couple unique items, including the climbing gloves (for 2,000 gold pieces), fire arrows for 225 gold pieces, and silver practice locks for 750 gold pieces.
- There's a balcony just across from the entrance into South Quarter. Use your climbing gloves to climb the wall to the left of the balcony. Drop down above the door. Snag some loot inside and read the note.
- The Pagan Stronghold in the southeastern corner of the docks contains some nice loot and even a health fountain (one use full regeneration of health) but unless you're Pagan friendly, it will require some combat to get that far inside.
- Get up the stairs in the back of the Pagan stronghold and read the notes about the Pagan sapling being held by the City Watch at the opposite end of the docks (spot it on top of the crates). You can help your standing with the Pagan faction by delivering it to their hideout and planting within the green circle. Or you can side with the Hammers and burn it in the tavern. Note that helping one side will damage your rep with the other.
- Check the tavern on the southwestern side of the docks. There's loot inside plus a note regarding the Pagan sapling if you haven't seen it before.
Old Quarter
- After checking with Ramien for information (and finding him dead), exit his building and take an immediate right before descending the steps. Crouch and crawl under the roofline to the first alcove on the left. Read the note there to find the last will and testament of Moresy Blander. He writes that he wants to be buried with the map of Shalebridge Cradle down in the Hammerites catacombs.
- Enter a small room across from Ramien's place to find Hauknor's diary. There's also loot in the room--valuable wine. Apparently he's extorting an expensive bottle of wine every night. Check back at this location each day for additional loot.
- Find the Old Quarter tavern across from the entrance to Fort Ironwood. Search inside for some loot, particularly in the "no patron allowed" upstairs room. Pick the door lock to get inside.
- Locate the Old Quarter shop in the northern corner of the map. Its unique offerings include the gas arrow at 325 gold pieces and the gold practice lock for 1,000 gold pieces.
- The Hammerite stronghold Fort Ironwood is found in the southern edge of Old Quarter. Enter through its front door. Read the note on the table in the rear of the initial chamber. Apparently the Hammers are having a problem with zombies. Go through the door on the left side of this room and descend into the catacombs. Slaughter the undead inside and search the place for loot. Don't forget to find Moresy Blander's map!
Auldale
- Listen to the conversation at Bradshaw Memorial in Auldale Plaza. Jimmy the Knife has closed down Fogerty the goldsmith's shop. You can also discover this by reading the note on the goldsmith's barricaded door (across from the memorial). To get inside, drain the canal then move to the entrance to Gamall's Lair. Look to the left and spot the grate. Climb up and open the grate. Crawl through the tunnel and to another grate. Open and enter the goldsmith's shop. Once inside, pillage it of its loot!
- Find the Auldale fence in an alley across the street from the tavern. Beware of the City Watch that patrol the area.
- The Pagan territory in Auldale Park contains a health fountain.
Chapter 5: Special Loot
The following chart reveals all special loot items and their value.
| MISSION | SPECIAL LOOT ITEM | VALUE |
| End of the Bloodline | Rutherford Medallion | 150 |
| End of the Bloodline | Gilded Helm | 300 |
| End of the Bloodline | Mortimer the Mad | 200 |
| St. Edgar's Eve | Effigy of St. Edgar | 50 |
| St. Edgar's Eve | Cat O' Nine Tails | 350 |
| St. Edgar's Eve | Codex of the Admonitions | 100 |
| Into the Pagan Sanctuary | Ancient Statuette | 50 |
| Into the Pagan Sanctuary | Bronze Beetle | 350 |
| Into the Pagan Sanctuary | Precious Comb | 125 |
| The Sunken Citadel | Large Diamond | 500 |
| The Sunken Citadel | Pagan Battle Horn | 50 |
| The Sunken Citadel | Kurshok Tapestry | 50 |
| The House of Widow Moira | Lucky Coin | 25 |
| The House of Widow Moira | Widow's Mirror | 125 |
| The House of Widow Moira | Nereid Telescope | 400 |
| Killing Time | Diamond Gear | 400 |
| Killing Time | Father Debole's Solace | 150 |
| Killing Time | The Builder's Ingot | 50 |
| Of Brethren...and Betrayers | Imbris Analects | 100 |
| Of Brethren...and Betrayers | Golden Scales | 450 |
| Of Brethren...and Betrayers | Imbris Analects | 100 |
| Robbing the Cradle | Gravecourt Red | 150 |
| Robbing the Cradle | Silver Surgical Kit | 300 |
| Robbing the Cradle | Bag of Gold Teeth | 50 |
| Still Life with Blackjack | Curator's Monacle | 500 |
| Still Life with Blackjack | Orbetti Forgery | 200 |
| Still Life with Blackjack | Coethe Medallion | 150 |
Got a news tip or want to contact us directly? Email news@gamespot.com
Join the conversation