INTRO:
During the years in which this game from Klei Entertainment debuted, there were a whirlwind of trends in the indie scene. In hindsight, many of these trends were not for the better; otherwise, they would have persisted until now. Indeed, most of them were fads that would have elicited groans from those who regretted following them.
One of these fads was that the lack of any in-game documentation in an indie game. This fad involved the likely frustrating experience from learning lessons first-hand about a game, but back then, it was somehow considered a “challenge” by some. The fad is still around of course, but with an audience that is increasingly jaded and has (hopefully) become wiser, its false lustre has faded.
Klei’s Don’t Starve is particularly emblematic of this fad, alongside other (even more recalcitrant) titles like The Binding of Isaac.

PREMISE:
Survival-oriented games with lonesome protagonists often require a setting where desperation and self-reliance are major themes in both the narrative and gameplay. More often than not, such a setting would have to be fictitious or ridiculous, because actual reality is often harsh on those who are on their own lonesome. Don’t Starve is not an exception, because its premise is obviously intended to be absurd.
The setting is unclear, due to the cartoonish and whimsical artstyle. However, the game is presumably set in a version of the early 20th century; incidentally, this is also the period when there was a lot of scientific endeavours of both unexpected successes and expected failures.
Wilson is one such scientist, hoping to reach into an alternate dimension for many reasons, the biggest of which is unwise curiosity. After a suggestion from a mysterious stranger, which he unwisely heeds, he did reach into another dimension – or rather, he was pulled in.
Wilson will not be the only one, nor will he be the only one whose name starts with the consonant/vowel “W”. There are other characters who got sucked into that other dimension too, but with a world-prison of sorts created for each of them. Furthermore, death is not their release to freedom; they appear to be doomed to relive their experience over and over again.
It would take the sequel to explain the actual backstory behind the other dimension, however. Therefore, this review article would omit that bit.
SURVIVAL GAME:
This other dimension is not kind, despite its initial appearance. A certain character would inform the player character that starvation is a major worry, and night is very dangerous. These are all the tips that he would give, however, because he is not there for the player character’s welfare.
The player character has to come up with the means to be fed quickly, and some source of light when the night comes. If not, the player would learn the lessons for these essentials the hard way.
As the days go by, the player character’s personal world-prison becomes even more dangerous. Dangerous fauna (and flora) appear more frequently, and the passing of the seasons require changes to routines. Meanwhile – in fact, all the time – the player needs to keep the player character fed, sane and healthy to stay alive for the sake of staying alive.
It is not a game for players who prefer an end-game, actually. There is content that would suggest an end-game of sorts, but it gives a different beginning rather than a conclusion – more on this later.
THE PLAYER CHARACTER – OVERVIEW:
Before the player starts a playthrough, the player picks the player character to use. There are quite a lot of player characters, with two of them available from the get-go. Each plays differently from the rest, but they otherwise share the same fundamentals which will be described shortly.
HEALTH:
Dying from being hurt is a very significant risk in this game. There are many, many things that are hostile to the player character. Provoked creatures can also quickly overwhelm the player character if the player is not prepared.
Injuries that a player character has sustained does not get worse but also does not get better either. Healing has to come from external sources, and the player has to expend effort to get them, in addition to dealing with whatever limitations that are imposed on them for the purpose of gameplay balance. Therefore, not having the player character harmed in the first place is a wise policy to have, with damage mitigation being the next.
Of course, there are many things that can heal the player character. However, many of them heal amounts that are less than the amounts of damage that hostile things can dish out. Therefore, healing implements alone are not enough; as mentioned already, damage prevention and mitigation is necessary.
Unfortunately for the new player that is obstinate about studying up before playing the game, the player would have to learn all that the hard way.
HUNGER:
This is the most prominent statistic that the player has to be concerned about; the name of the game already implies so. Every player character has to satiate their hunger, including even WX-78, a robot that runs on food.
Of course, there are some differences in this matter. Some characters that come after the conception of Wilson are even more finicky when it comes to hunger. Still, all of them has to do the same thing: stuff their mouths, chew and swallow. Their heightened metabolism utilizes the nutrition of the food that they have ingested near immediately.
(Most characters do not defecate by the way, probably due to some goofy sense of decency on Klei’s part. However, some non-human characters do leave behind things that come out from their behinds.)
Having the hunger meter empty completely does not kill the player character outright. Instead, the player character loses health rapidly. Fortunately, the lost health is not lost permanently and can be healed as “normal”, though it is best not to lose health due to hunger in the first place.
In the case of characters like Wolfgang, the hunger meter also affects their performance at doing what they need to do.
EATING FOOD:
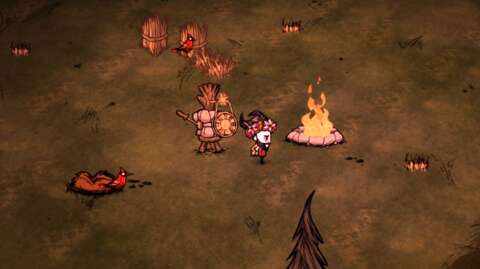
The gameplay designs for getting and preparing food (if they need any preparation) will be described later. However, generally, the effort that is expended to get and prepare a certain food is proportional to the amount of hunger that it satiates.
There is some flexibility to be had here, however. For one, the resulting food from a recipe may be greater than the sum of its ingredients at sating hunger. Updates to the game have balanced many things, but there are still more than a few things that the developers overlooked.
Not every food restores health, by the way. In fact, some food takes health away, especially if they have been made using parts of monstrous creatures.
SANITY:
The alternate dimension – called “The Constant” – is definitely not an extension of the real world, despite how it initially looks. The first few signs that it is not a normal place are that the rabbits there have horns, and the cycle of day and night happens in mere minutes. The humans are also a lot hungrier than normal.
There are more bizarre things, of course. Even the non-human characters would have trouble believing what they experience in the Constant, mainly because they are not native to it.
Their ordeal has consequences that are measured through the Sanity meter. This meter drains as the player character does things that are bizarre, eat food of awful provenance, encounter monstrous creatures and use sorcerous arcana. Only a few characters are capable of withstanding the Sanity drains, such as Maxwell, who is a very late-game character.
Sanity can restored by sleeping (of all things to do in the dangerous Constant), eating food that is cooked by the (self-cooking) Crock Pot, and prototyping or learning blueprints. The last source of Sanity restoration is the most potent and least difficult, but they are one-time only, meaning that Sanity becomes more difficult to maintain as the playthrough progresses.
As for the reason for maintaining Sanity, mostly bad things happen the meter drains to near-empty. Firstly, Shadow Creatures – nightmarish entities – become corporeal and attack the player character. Defeating the Shadow Creatures does restore Sanity, however (for whatever reason other than gameplay expedience), so the onslaught does eventually end if the player can fend them off.
Having low Sanity also impairs the player’s view; the fringes of the screen become warped, with the warping becoming worse as Sanity is drained.
There is something that can be gained from having low Sanity though. The effects are not merely happening in the player character’s head; it affects the Constant too, or rather, whatever that the player character interacts with. For example, the Rabbits become Beardlings, which can be killed to yield Beard Hair. (The veracity of these happenings is confirmed in the sequel; only the sanity-sapped characters are affected by the consequences.)
DAY-NIGHT CYCLE:
The day-night cycle in the Constant happens in mere minutes, as mentioned earlier. Every day in the Constant is 8 minutes in real-time. Each day has sixteen segments, with each segment having a duration of 30 seconds. This is the only certainty to be had from one day to the next, at least with the default difficulty settings in Survival mode.
To complicate daily life in the Constant though, there are three significant phases to each day: Daylight, Dusk, and Night. There is no dawn; Daylight replaces Night near-immediately (which is perhaps fortunate). As the days pass, these three phases cover different numbers of segments of the day; this happens at the same time as the changing of seasons.
Daylight helps the player, because the player can see everything on-screen. Daylight is also when plants can grow. At the default settings of the Survival mode, the Daylight phases are longer during the summer.
The Dusk phase dims overall illumination. The Constant and its denizens also shift to their night-time scripting. This is also a warning to the player that the dangerous Night phase is coming; the only visible signs that the new player would get is that otherwise harmless creatures like Rabbits and sapient creatures like Pig people rush back into their homes in a hurry. The Dusk phase gets longer during the Winter.
NIGHT & THE DARKNESS:
When night falls, the ambient lighting for the entire screen is removed. Without a light source on-screen, everything is pitch-black. The Sanity of the player character – even the most jaded one – will be drained, rapidly.
However, the main danger of night is the entity that lurks in the darkness: its actual identity is revealed in the sequel. For this game, it is Klei’s facsimile of the Grue in Zork.
If the player character stays in the pitch-black darkness for more than a few seconds, the entity begins hurting the player character. Massive damage to Health and Sanity is inflicted. It will not take long for it to finish off the player character.
Therefore, the player character must be subjected to some form of illumination in order to keep the entity away. It does not matter how strong it is; as long as the player can see the player character, he/she/it is safe. However, very low illumination will still inflict a significant Sanity drain.
Of course, if the player intends to drain the player character’s Sanity, standing in near-darkness is the easiest way to drain it. There are few other things that can drain Sanity as quick and as safely (discounting the consequences of having Sanity drained by the way; more on this later).
MOON PHASES:
For whatever reason, the Constant does have a Sun and a Moon giving it celestial illumination. In the case of the Moon, it has phases that the player can observe when night comes. The Moon’s phase advances every two nights. However, the Moon only provides illumination during its full phase; on any other nights, night is pitch-black dark.
On full moons, everything is dimly lit, but still somewhat visible. The drain on Sanity due to the night is still there, but it is as low as the drain during dusk.
BODY TEMPERATURE:
There are some statistics that are not readily visible to the player. There is the body temperature of the player character, which is actually being tracked in real-time. (Incidentally, the code for this would be adapted for use in Oxygen Not Included, another Klei title that came after Don’t Starve.)
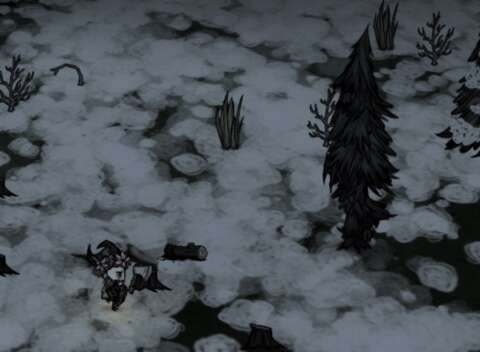
If the player character gets cold, rime starts to appear on the edges of the screen. Not only does this block the player’s view, it is also an indicator of how close the player character is getting to losing health from the cold.
In the base build of the game, the change from summer to winter is usually the main source of coldness. There are a few other sources of coldness, such as being wet due to a rainstorm at night.
To ward off the cold, the player character can equip items that slow down the loss of heat. Wilson, one of the starting player characters, has the advantage of automatically growing a beard that can reach great lengths; whimsically, it keeps his warmth in.
However, ultimately in the winter, all player characters eventually lose body heat to the point of being chilled. They need to find a heat source, or make one. Setting something on fire also counts, if the player is desperate (or opportunistic).
There is no overheating risk in the base build of the game. Rather, this was introduced in the expansion Shipwrecked.
BLUEPRINTS:
In addition to deceptively dangerous environments, the Constant also inflicts a subtle curse on the player characters. This curse is the knowledge of the bizarre sciences that happen to work in the Constant. This knowledge appears to benefit them, but they lose it as soon as they perish.
Thus, even though the player may become more experienced at playing the game with every run that ended in death, the next run has the player starting all over from scratch. This happens even if the player begins a parallel run with the same character.
Anyway, this knowledge is in the form of “blueprints” that they have learned. The blueprints provide the method of cobbling together something from materials that can be harvested from the Constant. As long as the player character knows a blueprint and has the materials, the character can cobble the thing in the blueprint together at any time and at any place, which is unbelievable but convenient.
There are two methods of learning blueprints. The first and rarer method is to come across blueprint schematics and study them. Any character can do this, regardless of their educational background (or whether they are human or not, for that matter).
The second method – called “prototyping” – is more commonly used. This will be described later.
MATERIALS:
Materials are the means through which the player character can advance in a playthrough. Even if the character knows the blueprint for an item, it cannot be made without the necessary materials. Furthermore, even if the character has yet to learn the blueprint for an item, the player can still have him/her look for and hoard the materials for making the item with.
Early in a run, the player would need to look around for loose materials that are lying about, especially flints and stones. There are saplings and tufts of tall grass that can be harvested, though the process does take a short but noticeably significant time. There are also berry bushes that can be foraged from (and which perhaps be the player character’s first meal in Survival mode).
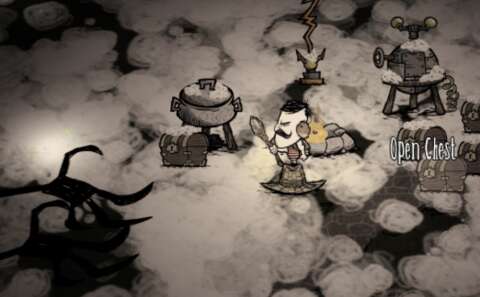
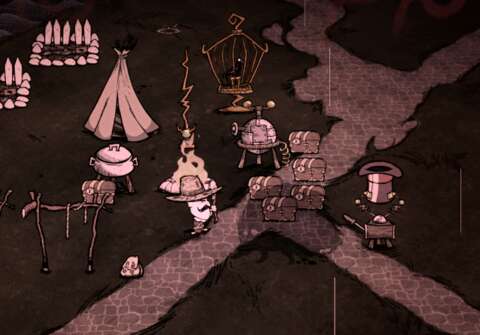
Soon, the player would gain the materials for establishing a camp, which the player should furnish with the basic amenities to survive, like a fire pit. The camp area can then be populated with other amenities, which would give the player the means to harvest more types of materials.
PROTOTYPING AND MACHINES FOR DOING SO:
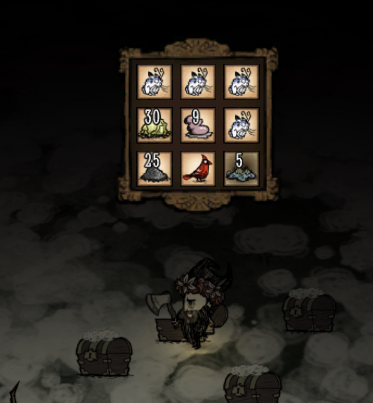
As mentioned earlier, the player characters inexplicably gained arcane knowledge when they were thrust into the Constant. However, in order to access this arcane knowledge, they need to build machines for the purpose of “prototyping”.
Somehow, these machines can teach them the means of cobbling materials into things, but only if they are close to the machine. The machines also have to be made with materials that are not easy to get, at least not early on. The player will also want to establish a camp in order to place these machines.
Prototyping something makes the blueprint for that item available, while also making the first unit of that item. In addition, the player character also regains a significant amount of Sanity.
FORAGING:
Early in any run, the player character’s only means of getting anything is to forage around. There are bushes to pick, grass to pull and saplings to strip, as well as loose items to pick off the ground. The player character can do these with just hands alone.
However, in the case of anything that is not picking stuff off the ground, the player character has to perform comical hand motions that last almost two seconds. This is not something that the player might want to do if the player character is in an urgent situation. However, the player can abort the animation at any time, but any progress in the foraging act is lost.
TREES - OVERVIEW:
The next resource that the player needs is lumber, so eventually the player character would progress to cutting trees. This requires axes, which are among the cheapest tools to make. However, even the act of cutting trees is not simple.
AXES:
Axes are needed to cut down trees to yield lumber; they are the only tools that can be used for this purpose. Among the tools that can be fashioned, axes can be used the longest. This is just as well, because trees can take a while to be cut down.
Despite their appearance, however, axes are terrible for the purpose of combat. In fact, using axes to hit enemies degrades them faster than using them to cut down trees.
CUTTING TREES:
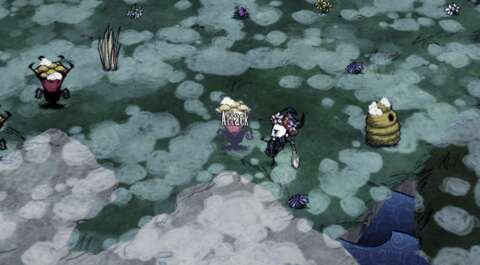
Each tree has a hidden health meter. It can lose health from being hit with an axe, but it regains health over every day, meaning that the player will want to finish any cutting job that has been started. There is no indicator that shows how close a tree is to being cut down.
STUMPS:
When a tree has been cut, it leaves behind a stump. This stump does nothing much. It will not regrow into a tree and it will take up space that new trees could have grown on. However, it can be dug up with a shovel to yield a piece of log; this will be the main use of the shovel as a tool.
EVERGREENS:
Evergreens are the most common trees in the Constant. As their name suggests, the evergreens are not affected by the seasons. Rather, each evergreen has its own growth and regrowth cycle. Assuming that an evergreen was planted, it will grow into a small tree, and then a bigger one up to its maximum size. The bigger it is, the greater the yield of lumber logs.
However, after it has reached a certain size, it may age instead of growing bigger; this is indicated with a darker coloration. Aging is also guaranteed if the tree has reached its maximum size. After it has aged enough, it loses all of its leaves and shrivels. In this state, the evergreen goes down with a single hit from an axe, but yields no lumber.
From the shrivelled state, it may regrow itself. Usually, it regrows itself to one or two sizes smaller, but it might regrow to the same size instead. The cycle continues until it is stopped, typically through destruction of the tree.
PINE CONES:
When a tree is struck down with an axe, regardless of its state, it drops at least one pine cone. If the tree has not shrivelled, the tree drops two pine cones.
Pine cones can be tossed into a fire or just lit up; they are good as fuel. Their only other use is for the replanting of evergreens. Evergreens can only ever be replanted in this way, i.e. player agency is much needed for their proliferation.
If for whatever reason all of the evergreens in the land have been removed and the pine cones are all gone, there will be no more trees and no more lumber. The player’s run is very much at an end, because logs are a resource that the player needs throughout a run.
FLAMMABLE RESOURCES:
Early-game resources like twigs, cut grass and logs are all terribly flammable. However, any resources that are in a container – including the player character – cannot be set on fire unless the container itself has been burnt.
As risky as this would sound, there are some strategies that do involve setting things on fire. The player is either being meticulously tactical, or very desperate.
For an example of the former, the player can set a few units of these resources on the ground, and then set them on fire in order to set something else on fire. This is especially useful for dealing with tree-guards (more on these later).
For an example of the latter, Spider Nests (more on this later) often occur in dangerous abundance in forest biomes. A player that wants to cull them can set the forest on fire, which destroys the Nests and just about everything else.
MINERALS & ROCKS:
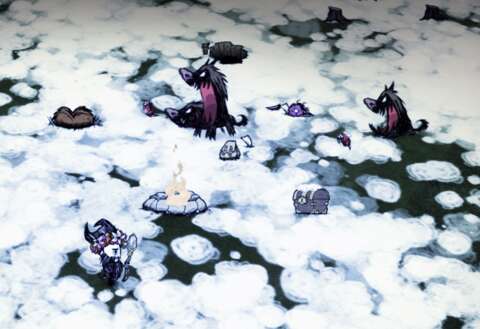
After getting lumber, the player needs mineral resources like stones, flint and gold next. Stone can be found as loose items lying on the ground, typically in the grassland biomes. However, these are finite sources, so the player would eventually have to find other finite sources.
These other finite sources are boulders that are jutting out of the ground. The player character can destroy these boulders by hitting them with a pickaxe. Boulders do not regain any health when they have been damaged, by the way, so the player could return to them later with fresh pickaxes (and the player would be frequently doing so; the regular pickaxes are rather flimsy).
The player can also use gunpowder for quicker removal of rocks; mineral resources do not catch on fire, so the gunpowder explosion won’t destroy the yields.
Rocks on the surface level of the Constant are limited in number; the player will eventually run out of them and lose the means to make the items that are made from them.
To address this issue, there are the Cave and Ruin levels. These will be described later.
ROCKLANDS:
Part and parcel of searching for rocks and mining them is venturing into the Rocklands. The rocklands are among the most barren of biomes, having next to nothing other than rocks spawn there. There may be a nest of Tallbirds and some loose stones and flints lying about, but that’s it.
Indeed, the only other resource that may be of note are the Rocky Turfs that can be dug up. This can be made into Cobblestones, which are useful for players who want to make facilities away from the camps and want a clear path between them.
However, in the late-game, the player may find a use for Rocklands after having encountered the Rock Lobsters, which will be described later.
SWAMPS & RESOURCES FROM THEM:
Eventually, in order to unlock more blueprints and be better prepared for the challenges in the double- and triple-digit days, the player needs to find the swamp biomes and harvest the resources from them.
Incidentally, there are not a lot of resources to be had from them. The “trees” there only yield pitiful amounts of twigs and the “bushes” there are hazardous to harvest.
The fauna there are also much more dangerous. In particular, there are tentacles that can pop out of the ground, with only a few (but very noticeable) signs that they are about to appear. Night is even worse, because large mosquitos appear and look for things to suck blood from. Swamp biomes also slow down the player character, except in winter. (Winter also freezes the ponds where the mosquitoes emerge from, so the swamps are less dangerous at night during winter.)
The only reason to go to the swamp biomes is to harvest the precious reeds that grow there. These can be used to make certain late-game items, such as the best healing item in the game and darts, which are potent ranged weapons. Perhaps the most important items that can be made from the reeds is the Bird Cage, which is one of the late-game food-producing amenities.
Some of the fauna there can also yield useful items. For example, the aforementioned tentacles have a chance of dropping the Tentacle Spike, which is a powerful weapon.
NIGHTMARES & SHADOW CREATURES:
The Constant’s greatest danger is that nightmares become corporeal. They take the form of the Shadow Creatures. These are near-silent creatures that are translucent and can be often glimpsed at the edges of the screen. They become more opaque as the player character’s Sanity plummets.
If the player character approaches them, they disappear. However, after Sanity drops below 50, at least one of the Shadow Creatures becomes bold enough to stalk the player character.
This is also the one that will go on the attack after Sanity drops below 25. This attack is signalled by tendrils reaching into the screen from the edges. This Shadow Creature will chase after the player character wherever he/she/it is. If the player does not resolve this situation, more Shadow Creatures become corporeal and go after the player character.
The Shadow Creature can be defeated, though it is one of those video-game enemies that teleport away when they are struck hard. Fortunately, the player character would automatically pursue them as long as the player holds down the control input for attacking them.
Shadow Creatures that are defeated restore some of the player character’s Sanity, but that is not the desired reward from dealing with them.
GETTING NIGHTMARE FUEL:
The main reward from defeating Shadow Creatures is Nightmare Fuel. They drop the Fuel when they are slain, though the Nightmare Fuel is quite translucent and can be difficult to spot, especially at night. (Incidentally, the Shadow Creatures often attack during the night, when the player character’s Sanity is suppressed.)
Of course, there are safer means of getting Nightmare Fuel. They can be made from Dark Petals, or harvested from Beardlings, which are what Rabbits turn into when the player character’s sanity drops below 50.
However, Dark Petals have to be harvested from Evil Flowers, which are rare and not easy to cultivate. As for Beardlings, they are practically still Rabbits and are still easy to catch because they retain their behaviour. However, their yields can be Monster Meat, Nightmare Fuel or Beard Hair, meaning that whatever the player gets from them is a matter of luck.
As for the reasons for getting Nightmare Fuel, it is needed to craft most of the late-game magical items. Many of these items cost Sanity to use, but they can make challenges rather trivial when used wisely. For example, the Ice Staff can freeze just about anything (except Ice Hounds), thus setting them up for elimination with lit gunpowder.
DIGGING:
The shovel is one of the tools that the player character can use. The outcomes of digging can be generally categorized into three types: sustainable, reversible and space-clearing.
Unsustainable digging yields resources, but also destroys the source of the resources. For example, the player can dig up the burrows of rabbits to force the rabbits out, but this effectively destroys sources of rabbits. The player will not want to do this kind of digging too much.
Reversible digging usually involves digging up an object so that the object can be placed elsewhere. This can be done with berry bushes, tufts of tall grass and turfs, to cite some examples. Of course, the player can toss the items that are dug up into a fire; they have very high value as fuel, though of course the player is destroying them.
Space-clearing digging has been mentioned already; the player is digging up the stumps of trees to clear space for tree-planting. This is the most practical thing that the player could do with stumps, which otherwise have little other use.
Shovels are the least durable tools, however; they have the least number of uses before they break.
FARMING:
Some naturally occurring sources of food are reliable, such as Rabbits (which always appear daily from the burrows regardless of the seasons). However, the player will want to diversify sources of food, if only to compensate for any drawbacks or costs of those natural sources. For one, Rabbits can be reliably caught with traps, but the traps require Twigs and Cut Grass, which are in short supply during winter because of the low regrowth rates of their associated plants.
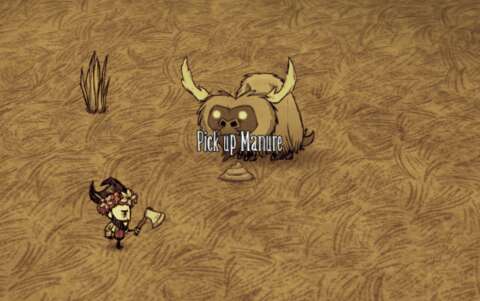
Thus, the player will want to consider farming. Farms can only be set up after having gathered enough Manure, which has to be obtained after locating fields of “Beefalo” or a settlement of Pigs. Both sources of Manure come with risks, some of which can be unpleasant to the new player; they will be described later.
After establishing a farm, the player can plant a seed in it. The seed grows into a plant produce, though the species of the plant is randomized and is not certain until the plant has fully matured.
The plant produce remains fresh until it is harvested, after which it begins to degrade. However, there is a risk that some creature could come over and eat the produce before it is harvested.
BIRD-CAGE:
The Bird-cage would reveal that the flying birds of the Constant are not ordinary birds. Each and every individual appears to be capable of laying eggs, though the eggs never hatch into anything.
The player can observe this after the player has trapped a bird and put it into a cage; any species would do. The bird can be released at any time, though there are few reasons to do so.
The main value of the bird is that it can be fed quite a number of things, and it promptly expels useful things. If the player feeds the bird with a fruit or vegetable, it produces two seeds, meaning that the player can build up a stock of seeds. The seeds can be stored for farming, or just eaten straight if there is an emergency.
If the player feeds the bird any cooked protein (it will not eat raw meat and eggs), including any cooked eggs, the bird produces fresh eggs. Indeed, as unsettling as this sounds, eggs that are close to being degraded can be recycled by cooking them and feeding them to the bird. Eggs in turn can be used in high-grade recipes that produce food that are greater than the sum of their ingredients.
FISHING:
Fishing is another mid- to late-game activity. The player character can perform this after obtaining the Fishing Rod.
The player can fish for two things: fish from ponds, and flotsam from the endless seas around the landmass of the Constant. Fish is always retrieved dead; they don’t stay alive out of the water for long.
Flotsam, when reeled in, can vary incredibly. The player might get mere twigs, but may also gain knick-knacks that are useful for certain trades. (There will be more on trading later.)
SPOILAGE:
Most foods and ingredients for cooking will spoil. Incidentally, anything that can spoil is edible – even if they are best not ingested.
As long as their freshness gauge is over 50%, they can be consumed with their full effects and benefits (if any). However, after the gauge drops below 50%, they lose most of their effects but will not harm the player character. After it drops below 25%, they have spoiled and are generally not suitable for eating.
Cooking spoiled ingredients sets the resulting cooked food to 55% freshness, as long as the ingredients have not turned to Rot; this is not told to the player, by the way.
After the freshness gauge drops to zero, the foods and ingredients turn to Rot. Rot has very little uses, other than replenishing the fertility of farms that have been exhausted.
CROCK POT – OVERVIEW:
One of the mid-to-early-game amenities is the Crock Pot. It is a device that can somehow cook ingredients into foodstuffs on their own, given enough time. Indeed, it is possible for the player to have multiple Crock Pots in order to accelerate the production of cooked food.
Anyway, all meals that are cooked with the Crock Pot restore a bit of Sanity, where the ingredients alone could not (even when they are cooked over an open fire). However, the main appeal of the Crock Pot is what the player would get from the combinations of ingredients that are thrown into it.
FAILED COMBINATIONS:
Not every combination of ingredients would yield things. If the combo does not fulfil any criteria for any recipe, the outcome is swift and certain: near-worthless Wet Goop is produced. It has no benefit whatsoever, thus wasting the ingredients that went into it. The most that the player could do with it is to let it turn into Rot, but there are other better means of getting Rot.
This is perhaps where the new player that refuses to look at the wiki would get the most frustrated – especially if his/her player character is dying from starvation.
TWIGS IN CROCK POT:
Many things cannot go into the crock pot, for good reason. Stones cannot go in, and monstrous organs cannot go in either. Even edible things like seeds and petals cannot go into the crock pot; any attempts to do so is rebuffed and an angry sound effect plays.
Oddly though, Twigs can go into the combinations. However, only one Twig is usable in recipes that allow it; any attempt to use more usually results in Wet Goop. (There is only one recipe that can use two of them, but this recipe requires Butterfly Wings, which are not easily cultivable.) Furthermore, adding twigs often cause most meat-based recipes to default to Kebabs.
GREATER THAN THE SUM:
The mark of an experienced Don’t Starve player is knowing which ingredients to use to get the most productive combinations for a recipe. Productivity is typically measured by the amounts of Hunger that can be satisfied by the individual ingredients (if they can be ingested) and the Hunger that the cooked foodstuff can provide.
For example, it has been mentioned earlier that recipes that use regular Eggs are quite productive. These cooked foods can satisfy more Hunger than the sum of reliably sourced ingredients, and they heal a lot of Health too.
DRYING MEATS:
All harvested/murdered flesh spoils quickly, faster than most other things that can spoil. The player can stall the loss of their usefulness by drying them.
Dried meats retain their Hunger satisfaction ratings, and can also restore Health and Sanity; in the case of Monster Meats, they are rendered less toxic. More importantly, their “freshness” (the term is probably no longer applicable to them) is reset after the meats have turned into their jerky forms. Most importantly, they still count as meat ingredients for the purpose of using the Crock Pot.
DENIZENS OF THE CONSTANT – OVERVIEW:
Don’t Starve has been described by some as being set in a world in which everything is trying to kill the player character. This is not an entirely true statement, of course, but the player character is alone, and being alone means always being outnumbered.
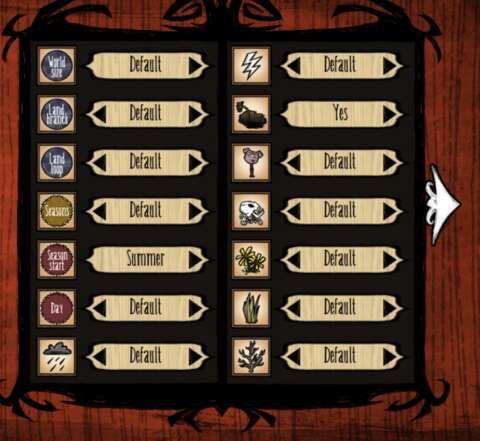
Before a run begins, the player can fiddle with the settings that determine the frequency of fauna and flora that are hostile to the player character. This can significantly change the difficulty of a run, as well as affect the sophistication of the gameplay.
The following sections are for fauna and flora that are particularly significant, mainly because they feature the most gameplay designs.
CREATURE HUNGER:
Most living creatures have Hunger meters of their own; these meters work like the player character’s own. If their Hunger meters are emptied, they begin to die. There are no visual indicators for any starvation that these creatures are suffering, however.
HARMLESS CREATURES - OVERVIEW:
Not all fauna in the Constant is hostile to the player character, and not all of them can harm the player character even if they want to. For better or worse, the player character will have to transgress against them in ways lethal to them if the player wants to make progress in a run.
Incidentally, killing otherwise harmless creatures would add to the “naughtiness” meter. This meter will be described later.
RABBITS:
Foremost of these harmless creatures are the aforementioned horned rabbits. They are skittish creatures that run away whenever the player character draws near. They usually run in the direction of the nearest rabbit hole, unless the player character is in the way. They also run into their homes when dusk comes.
Peculiarly though, they do not run away from other threats, not even hounds or fires. Perhaps this is a design oversight.
Anyway, rabbits have to be caught with traps or boomerangs, with the former being much more reliable. They still need to move into the traps, but eventually that would happen anyway because the rabbits wander randomly around. That is, provided that the player set the traps near their burrows.
As for the reason for catching them, live rabbits are used in certain important blueprints, like the Prestigihator and Rabbit Earmuffs. Rabbits can also be killed in order to yield “morsels”, which are the lesser variant of meat resources.
BIRDS:
As mentioned earlier, birds can be caught and placed in Bird-cages, or just killed for food. Bird-traps have to be specifically made for them, however, because they do not trip the regular traps.
BUTTERFLIES:
Butterflies are spawned from flowers of any kind, including the “Evil” ones. The butterflies are completely innocuous regardless of their plant of origin.
The player can catch them, but only with the use of the Net, which requires some mid-game materials to be made. After catching them, the player can kill them for their wings, which can be used for some bizarre purposes. An example of the uses of their wings is that their wings are somehow ingredients for “butter muffins”.
“Planting” butterflies somehow turns them into flowers, which imply something about their nature in the Constant. Anyway, it is possible for the player to cultivate entire fields of flowers, either for the purpose of picking them to restore Sanity, or to supply Bee Boxes for the production of Honey.
OTHERWISE NEUTRAL DENIZENS – OVERVIEW:
Some denizens of the Constant ignore the player character, even if he/she/it draws too close. However, if they are aggressed or trespassed against, they will turn hostile. Incidentally, these creatures can inflict considerable damage, more than their looks would suggest.
BEES:
Bees mind their own business, flitting from flower to flower and collecting nectar from them. They can propagate the spread of flowers, though they do this slower than butterflies do.
If bees become hostile, they can be observed using a hit-and-run routine. They sting once, and then fly away some distance. This is more to the player’s advantage, because this prevents them from mobbing the player character to death.
Unlike real bees, bees in this game can sting repeatedly. They do tend to leave behind their stingers after they are killed, but there are not a lot of uses for these.
KILLER BEES:
Killer bees are variants of bees that appear whenever the player character commits a transgression against a bee while being too close to a home of bees. Killer bees will pursue the player character for considerable distances.
Killer Bee Hives outright spawn Killer Bees if the player character gets too close. Clusters of Killer Bee Hives can be very dangerous.
BEES AND BEE-BOXES:
One of the late-game strategies of setting up a sustainable loop of food-making is to build bee boxes. These require considerable set-up, and even after setting up the boxes, the bees that spawn from them need to have sufficient flowers to feed from in order to sustain honey production for continuous consumption.
At winter, the bees sleep. The bee-boxes will still generate one unit of honey every few days, though this is not enough to last the player character through winter.
Even after the bee-boxes have been established, the player has to worry about the ability of the bee-boxes to hold honey. The player character has to regularly harvest them so as not to waste honey.
Perhaps the most subtle of their complexities is that each bee must visit several flowers before it would return to the bee-box to deposit its harvest. If it returns to the bee-box to retire for the day, anything that it has harvested is not deposited, i.e. will not contribute to honey production and is thus wasted. Therefore, the player needs to provide the bee-boxes with enough flowers and also space them apart so that the flowers are not exhausted too quickly.
None of this information is told to the player in-game.
On the other hand, learning to establish honey production is worthwhile. Honey is the most convenient and efficient foodstuff. It can be stacked in considerable amounts, and can stay fresh for a long time. It is also the ingredient for many potent items, such as the Honey Poultice, which is the most efficient healing item in the game. Eating Honey outright is worthwhile too; the stat replenishment is worth forgoing the trouble of converting the Honey into other things.
PENGULLS:
Pengulls are birds that appear on the onset of winter. They were implemented during the development of the game in order to give the player additional opportunities and dangers during the winter.
Pengulls spawn by jumping out of the waters that surround the landmass that the player character is on, which can be a startling but amusing display. They cannot increase in number after they are spawned, but they will always spawn again in the next winter. Pengulls will not attack the player unless provoked.
Pengulls have very little loot drops, meaning that killing them wholesale is a pointless endeavour. Rather, their value is that they will lay Eggs, which they will try to hide until the change of the seasons. The Eggs never hatch into Pengulls, and the Pengulls abandon them come summer. In fact, if the Eggs turn rotten during winter, they simply lay more and protect those instead.
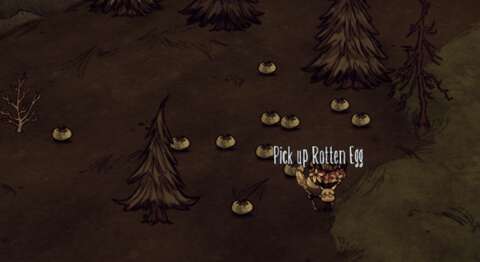
Gameplay-wise, they are mainly there to give the player a source of Rotten Eggs and near-spoiled Eggs close to the end of winter.
In addition, the player can attempt to lure hostile creatures into them. The pursuing creatures would attack them if they lose interest in the player character and the Pengulls are the only things nearby.
Pengulls attack en masse, and are generally capable of killing anything that is not a massive monster in one single attack wave. They have lousy attack patterns though; they need to get some distance in order to use their sliding attacks, yet they move slowly. Their pecks are also quite weak.
BEEFALOS:
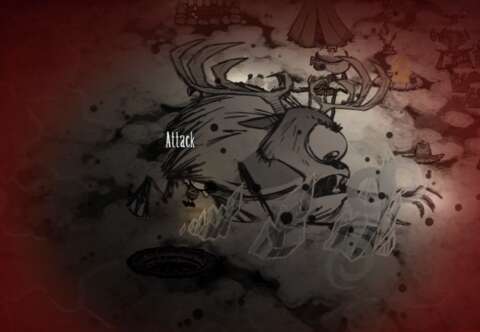
Beefalos have a silly name that suggests that they are there for use as food, but this is deliberately misleading. Beefalos are the most dangerous of the neutral creatures when provoked.
Anyway, Beefalos always mill about in herds; rubber-banding behaviour has them staying close to each other. Therefore, if the player character attacks one of them and provokes the herd, there are likely to be many more that would go after the player character.
The same response also occurs if they come under attack by aggressive creatures, such as Hounds. Indeed, it will not take long for a herd of beefalo to kill just about anything else in the base build of the game.
The main value of Beefalos is their wool, which the player will want for winter preparations. Yet, while they are awake, Beefalos do not take kindly to being shaved. If they are sleeping, they can be readily shaved. (They sleep at night, however, so the player has to consider some means of illumination.)
Beefalos also drop considerable amounts of meat when slain. However, killing them is not easy; the adults themselves can take considerable damage. The player is better off trying to lure powerful monsters into attacking them than trying to kill them directly.
At certain times, the adult Beefalos enter their mating ruts. They will breed and produce infant Beefalos, which start small and scruffy. Adults in mating ruts are inherently hostile to the player character if he/she/it gets too close.
(By the way, there are actual livestock called “Beefalos”. They are cattle-bison hybrids that behave more like cattle than bison.)
TAMING BEEFALOS:
A Beefalo can be tamed by feeding it food that it can ingest. The player will need to keep track of which Beefalo is being tamed, however; they all look alike. (There are visual cues that help the player in this matter, fortunately.)
Eventually, after being fed enough, a tamed Beefalo follows the player character around. It will also attack any hostile creature that is attacking the player character. However, the player has no control over their combat patterns, so such a companion is unreliable in a fight and at best something to distract enemies with.
The main purpose of having a tamed beefalo is that it can be shaved at any time to yield wool and it can be ridden after being equipped with a saddle. Riding a Beefalo is much faster than most movement methods, but the Beefalo will eventually hurl its rider from its saddle after having moved some distance, so they are entirely reliable. Better saddles (i.e. saddles made with rarer materials) provide longer distances between hurls, but will not prevent them.
Tamed beefalos do not enter mating ruts, so the player character is not at risk of being attacked.
HOSTILE DENIZENS – OVERVIEW:
The following are creatures of the Constant that are notably hostile to the player character. Some can be avoided or appeased, of course, but the player would likely remember them for being inimical to the player character more often than not.
TREE GUARDS:
The Tree Guards are an ever-present risk when the player character is cutting trees for lumber. Their appearance in the early days of a run is suppressed, but eventually they will appear.
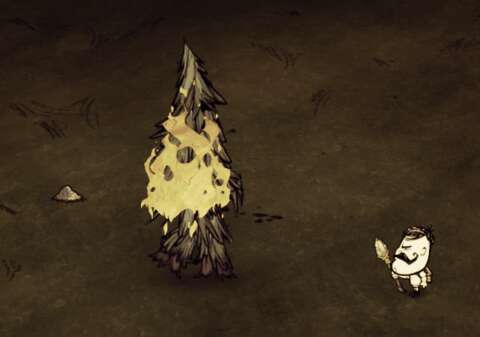
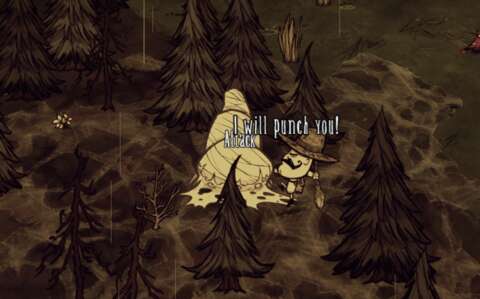
When the player character cuts down a tree, there is a chance that one of the trees turns into a “tree guard”. This is a slow but tough and powerful creature that is hell-bent on killing the player character. It will always know where the player character is and will give pursuit wherever the latter is on the surface.
They can be appeased by planting at least four pine cones. The tree guard then roots itself to wherever it is, content at the appeasement. It is, however, there in the game world now. If the player character cuts down any tree in the vicinity of the tree guard, it awakes again.
If the player runs out of pine cones to appease angry tree guards with, the player would have to cut trees to get them. However, doing so (understandably) resets the player’s progress in appeasing the pursuing tree guards, and there is chance of waking up another tree guard. However, planting pine cones appeases all pursuing tree guards.
If the player wishes to fight tree-guards, then ample preparation for combat is necessary. They are slow on the attack, but hit very hard and they can take a lot of damage. Cunning players would try to burn them instead, but this can still take a while – time spent that the player could not afford if the player has the need to gather logs. Fortunately, killing a tree guard will not trigger the awakening of other tree guards.
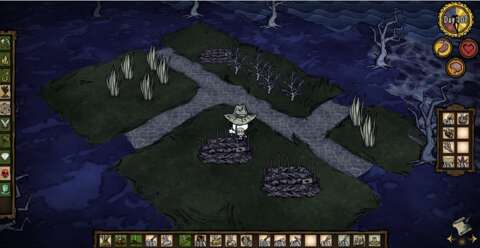
Tree guards that are appeased stay where they are until they are provoked. They also emit their Sanity-draining aura. This means that they are now hazards to the player character’s well-being. However, their guard is down (pun not intended), so the player could do shenanigans like placing gunpowder next to them before having it lit. (The tree-guards are none the wiser, by the way.)
NAUGHTINESS & KRAMPUS:
Unscrupulous players may realize that otherwise non-hostile and harmless creatures are near helpless in preventing the player character from massacring them for material gain. For one, Rabbits are more than likely to be trapped and killed wholesale for their meat.
To prevent the player from exploiting them too much, there is the “Naughtiness” meter. This meter builds up as the player character carries out the aforementioned acts. It drains over every two in-game hours that the player character does not engage in any of those acts.
If the meter has filled to a certain threshold, there is a significant chance of a demonic rascal appearing. This is one of the creatures called the “Krampus”, evidently named after the Balkan mythos from which Coca-Cola’s much nicer Santa Claus was conceived.
A Krampus spawns near the player character; more than one may be spawned if the player is particularly unlucky. The Krampus attempts to steal things from the player character, or any containers that happen to be nearby. Thus, the Krampus is much more troublesome if it appeared near the player character’s main camp than if it appeared elsewhere. Even if it appeared elsewhere, the Krampus will stalk the player character anyway.
The Krampus will not stop until it is killed or it has stolen everything in the player character’s vicinity. It is no slouch in combat either; of course, it hits the player character with its bag.
There is little reward from eliminating the Krampus, other than stopping it. The player does get to retrieve whatever that was stolen, but there is little else for the player’s trouble.
However, there is a very small chance that a defeated Krampus would yield its sack. The sack is the best backpack item in the game, having more inventory space than other backpacks and being fire-proof.
None of the abovementioned details are ever told to the new player in-game. There is very little warning about the impending incursion of the Krampus, other than some sibilant hissing. Much of this had to be gleaned from discussions among players who either observed the occurrences or who looked into the coding for the game.
HOUND ATTACKS:
Hounds are fast monsters that are particularly inimical to player characters. Without certain gameplay mechanisms, they are rare occurrences; indeed, with those mechanisms disabled, they might not even appear in the Constant at all.
Rather, the player would encounter them through the gameplay feature known as “Hound Attacks”. With this feature enabled, the player character will periodically come under attack by a wave of hounds that spawn off-screen and converge on his/her/its location.
The player is given some warning, fortunately. The player will hear deep animalistic grunts, which get louder and more frequent and eventually stop; this is when the Hounds spawn and the player would hear their pants as they run over to the player character.
Before the attack happens, the player might want to have the player character be somewhere that is advantageous, such as in the middle of a Beefalo herd. The Hounds are not entirely relentless in their pursuit, so they might attack other nearby creatures instead. (The Hounds are hostile to everything else, by the way.)
As the days go by, the Hound Attacks grow in severity; there are more of them, and some of them may be the special variants. The latter is the main problem with the Hound Attacks, especially if they include the dreaded Fire Hounds. The Fire Hounds set anything that they attack on fire, and if they stand next to anything flammable for more than a few moments, they set it on fire too.
SPIDERS:
Spiders are the most common hostile creatures that the player would come across. They are also the easiest to deal with.
At first, their ugly looks might perturb some players (especially those with arachnophobia). There are also quite a lot of them; if the player hits one of them, any spiders within two screens would come after the player character. This can be especially troublesome during the night.
Furthermore, if the player makes the mistake of fighting too close to their nests, the nests spawn all of their contents to go after the player character. Some of the spiders that come out are even upgraded into the warrior variant, which is tougher and fiercer.
If the player could manage the spiders with efficient crowd control and piece-meal elimination, they are among the easiest hostile creatures to deal with. They are also the weakest of hostile creatures, and they might even cower in fear if too many of them are being killed in a short time.
Indeed, the player would be killing a lot of them. Spiders yield two items that are needed to access mid- to late-game content, in addition to Monster Meat.
As for what the Spiders do when they are left to their own devices, they come out at dusk and night, looking for creatures of other species to kill. Spider Nests that occur in dangerous biomes are often sites of major battle, with a lot of spider silk and other inedible things lying about. Speaking of inedible things, Spiders will eat anything that is made of flesh in the vicinity, with the exception of Mosquito Sacks (more on these later). (They also eat the Monster Meat of their slain kin; waste not, want not.)
SPIDER NESTS:
Spiders are spawned from Spider Nests; without the latter, they neither occur nor persist. To help in their defence, the Nests project webs from where they are; anything that moves on the ground is slowed down when it moves through the webs, with the exception of the Spiders themselves.
Spider Nests produce Spiders and keep them within until dusk, after which they release several of them; the rest is kept as a defensive reserve that it will deploy if nearby spiders are attacked, or if something lingers too long over the webbing. If the Nests are hit, they unload all of the Spiders in them immediately.
As the days go by, the Spider Nests grow in size. Their webs reach further, and their reserves of Spiders increase in number. The greatest threat that the Nests pose emerges after they have reached their maximum size.

SPIDER QUEENS:
When a Spider Nest has reached its maximum size, it has a chance of spawning a Spider Queen. The Nest gets downgraded in size, but that is not going to help the player much because of the presence of the Spider Queen. Where the Spiders alone are easy to deal with, the addition of the Spider Queen makes them much more dangerous.
The Spider Queen wanders about where it was spawned; it does not eat and it does not sleep. However, it will continuously spawn Spiders until it has a coterie of them following it around. These Spiders are active during the day too. With its entourage – all of which can clip through each other and attack at once – the physically powerful Spider Queen can quickly overwhelm just about anything.
Defeating a Spider Queen yields a lot of things, including the Spider-hat. When worn, the Spider-hat renders the player character immune to the webs around Spider Nests, and Spiders ignore the player character. However, wearing it while in the vicinity of a Spider Queen draws its ire, after which it directs Spiders to attack the player character.
After it has wandered about for a few days, the Queen settles down and turns into a new Spider Nest. This means that Spider Nests can propagate over time, turning a region of the Constant into a spider-infested hell-scape.
TENTACLES:
Tentacles are an ever-present danger in swamp biomes; they begin to spawn if the swamp region encompasses a large enough area, at least twenty by twenty squares.
There are a few reliable warnings about the emergence of tentacles from the ground. The most noticeable is an ominous rumbling. Another warning is a fleshy lump that emerges, just before it extends and lashes out.
Tentacles are unpleasant enemies, but their most valuable loot yield is the Tentacle Spike, which is a decently powerful weapon that can be readily sourced (typically by killing more Tentacles).
FROGS:
Frogs are creatures that appear from ponds. Ponds in non-swamp biomes spawn them during the day. Despite their innocuous appearance, they become hostile to any other creature that is too close to them for more than a few seconds. Somehow, their tongues can strike rather forcefully, and if they hit the player character, they knock items out of his/her/its inventory, which is annoying.
MOSQUITOS:
Mosquitos spawn from ponds too, but only during the night and only in the swamp biomes. Like the frogs, they are hostile to anything else. There are few reasons to go after them, because their loot yields do not have many uses and even if there are any, there are less troublesome alternatives.
AGGRO:
Creatures that are in combat will focus on whichever enemy that is hurting them or their kin the most. This is not useful if the player character is the sole aggressor, but it will be useful to keep in mind if the player intends to set the creatures on each other.
INNATE INTER-HOSTILITIES:
Speaking of which, although intra-species hostility is near non-existent, the myriads of things that are trying to kill the player character are hostile to each other.
Of course, most of them will still prioritize the player character if there are multiple targets within range of detection (especially if the player character has been killing doles of them). However, when they do turn on each other, it is a very amusing sight to behold.
A fight can get very much out of hand, especially if the scripts that draw in creatures of the same species to the fight are active. For example, a fight between Spiders and Bees can result in Spider Nests and Bee Hives/Boxes emptying their reserves.
There are opportunities for material gain during these fights. Due to the aforementioned aggro system, the player character could dart in between the combatants and attempt to loot their remains. Accidentally hitting one of them and thus drawing aggro is a risk, of course.
MONSTER CLOSETS AND LIMITED CAPACITY:
If it is not apparent by now, the video game trope of monster closets is in this game. Two clear examples have been described already: Spider Nests and Bee Hives/Boxes. As a reminder, monster closets are in-game objects that spawn creatures out of them, often as fresh individuals, and have improbable physics for harbouring the creatures in the first place.
There are two major types of monster closets. The first kind is guaranteed to spawn monsters according to scripted cycles, and are indestructible. Ponds are examples of these, as are unplugged Sinkholes (more on these later). Although these will forever be hazards, the number of nasty things that they can spawn in every cycle is limited, and at the end of every cycle, the creatures either die or return to the closets to de-spawn.
The second kind of monster closet can be destroyed, but regenerates monsters continuously and stores them in reserve. Examples of these have been described already. These closets have limited storage capacity, and will eventually run out of creatures if the player persists in thinning their reserves.
SAPIENT CREATURES – OVERVIEW:
Not every creature in the Constant is bestial or animalistic. Some can talk, and even live in houses. None of them are readily willing to communicate with the player character, however.
All of them come out of special monster closets; these are houses with comically whimsical dimensions. They come out at certain times of the day, usually according to the day/night cycle. Different species have different responses to the player character’s presence, and in some cases, even what is in the player character’s pockets.
PIGS:
Pigs are likely the first sapient “natives” of the Constant that the player would come across. They are bipedal creatures, have functional hands, and have a considerable appetite. Every morning, they spawn from “Pig Homes”, which are ridiculously narrow houses that resemble outhouses more than anything habitable. They wander the area around their homes.
The Pigs will attack anything monstrous-looking that they come across. This includes most of the hostile denizens of the Constant, and also certain player characters that are certainly not human. They will also eat just about anything edible that they come across, meaning it would be difficult to loot any food item that is dropped in their vicinity.
The pigs are afraid of the dark, and for good reason, actually. That said, they rush back to their homes when dusk approaches and de-spawn. The pigs that come out of the houses the next day are entirely different individuals, even if they all look the same.
Pigs are initially not friendly to the player character; they will not attack the player character, but will put distance between them and the player character. However, they can be befriended by giving them food; handing them food causes them to stay put until they receive whatever that the player is giving.
The pigs would eat almost anything that is edible, with the exception of cheap fare like seeds, which they reject but are otherwise not angered by.
The individual pig that was fed will remember the player character’s generosity, at least until sun-down. Any pig that returns to its home will de-spawn, and any progress in befriending it is lost.
PIGS AS COMPANIONS:
After a Pig has been fed enough, the Pig becomes the player character’s companion, at least for about an in-game day. The player can prolong this friendship by feeding the Pig more food.
The main benefit of having a Pig as a companion is that companions of the sapient kind increases the Sanity of the player character over time. Their proximity to the player character does not matter (though they will always try to stay close – especially during the night).
Pigs are also tough combatants, though not so much if they are facing overwhelming odds. Furthermore, the Pigs can never be directed, and are at best unreliable distractions if the player favours meticulously tactical combat.
WEREPIGS:
Unfortunately, nothing in the Constant is entirely nice. The Pigs are afraid of the dark, not just because of what lurks in it, but also of what they might turn into when they stay too long in the dark.
Come the full moon, any Pigs that are out in the dark turns into Werepigs. These are inherently hostile to the player character. More often than not, Pigs that suffer this change are those that followed the player character around.
They can also turn into Werepigs if they have eaten one too many pieces of Monster Meat. Again, these are likely to be the pigs that the player character has befriended but has been carelessly feeding them.
All this is not told to the new player, and it can be very unpleasant when learned the hard way.
Werepigs that do survive until the morning revert to Pigs, but do not remember any friendship that has been cultivated with the player character.
BUNNYMEN:
Bunnymen are denizens of the Caves (more on the Caves later). They are the subterranean counterpart of the Pigs, but without any ugly full-moon transformations.
However, they do have a nasty quirk: they are immediately hostile to any player character that is carrying meat or fleshy edibles on their person. This hostility also extends to Eggs, and anything cooked with meats and/or eggs. This means that only strictly vegetarian player characters can befriend them.
If the player could adapt to that strict regimen, then Bunnymen offer a much greater Sanity replenishment than Pigs do when they are befriended. Of course, they have to be fed plant produce, which can be hard to find underground.
However, Bunnymen, like Rabbits, change into ghastly forms when the player character’s Sanity drops to dangerous levels. They do not become hostile and can still be befriended, but their proximity simply causes further Sanity loss.
In a fight, Bunnymen are even less reliable than Pigs. This is because Bunnymen run away when they are badly injured, apparently fearful of death.
Bunnymen can be befriended and brought up to the surface from the Caves. Afterwards, they adjust to life on the surface. They are not afraid of the night either; in fact, they only come out at night and go to sleep during the day.
ROCK LOBSTERS:
Like the Bunnymen, the Rock Lobsters are first found underground. Despite their fearsome appearance, they are not hostile to the player character and, more importantly, do not cause sanity loss.
They can be befriended by feeding them minerals. Their duration of companionship is much shorter than other sapient creatures, and minerals can be rather precious late-game. However, they are very powerful combatants, and only grow bigger and stronger as they age. (They do eventually reach a maximum size.) Furthermore, they do not need homes; they are sturdy enough to be their own homes, as is evident in their ability to mimic rocks.
If they are brought to the surface, they appear to gravitate towards Rocklands, preferring to sleep there (and presumably drawing sustenance from the biome). They otherwise have no issues adjusting to life on the surface.
Interestingly, they have been given asexual reproduction scripts to account for their lack of homes. A herd of Rock Lobsters eventually grow up to about seven individuals, but no more. (In previous less stable builds of the game, they reproduced uncontrollably.)
MERMS:
Merms are actually sapient, but they are incorrigibly xenophobic and will attack any player character – at least in this game. The sequel reveals that they are indeed sapient.
Anyway, Merms are hostile to everything else, including other sapient creatures. Indeed, a great way to cause some mayhem is to build Pig Houses or Bunny Hutches next to Merm Houses.
TRADES:
On the surface layer of the Constant, there are two characters that would deign to trade with the player character. They have considerable wealth, which is somehow, somewhere on their persons.
Anyway, the character that is almost always around for trades, except during the night, is the Pig King. He is a corpulent example of his kind and he is practically indestructible. He is also quite uncaring, because the player can kill Pigs in front of him and he would not even be perturbed.
He can be given certain items, usually those that have been categorized as Trinkets. This is just as well, because Trinkets have next to no other uses.
He gives Gold Nuggets in return. If the player is in great need of a lot of these mineral resources (especially when playing as Wagstaff), he is a great source.
The other character that offers trades is Wolly, a talking parrot. Wolly is only found during non-Winter seasons, and at one of the broken ships.
Wolly accepts most of the things that the Pig King accepts, but has more variety in the things that it would give in return. Gold Nuggets are one of the outcomes, but it may also give Dark Petals and Feathers, the sources of which are not easy to sustain.
After making a trade, however, Wolly leaves (though not before making a cryptic remark). Wolly only returns the next day, perhaps at the same broken ship or one of the others. There is no clear pattern to this.
(Wily players have figured out how to get Wolly to say by quitting before it flies and reloading the playthrough afterwards.)
TURFS AND TERRAINS:
The Constant occurs on yellow, hard and barren rock, which would not have done much of anything on its own. However, “turfs” occur on top of the rock, thus forming specific types of terrains. Some of the terrains in turn form biomes, which have been described earlier.
Turfs actually occur as items. The player character can get them by digging them from the ground with the Pitchfork. Turf items can be planted elsewhere, thus forming the terrains that the turfs are associated with. The player may even be able to transplant entire biomes.
Some turfs are used for crafting. The example of Rocky Turfs has already been described earlier.
Turf items can also be used as fuel; they have high fuel ratings, by the way. However, this is the most wasteful of their uses.
WEATHER:
For most of the base game, the weather in the Constant is mainly there to pose a challenge in dealing with changes in ambient temperatures.
However, occasionally, there are thunderstorms. During thunderstorms, they inflict the hidden “Wet” de-buff on the player character, which is applied as a Sanity drain. If the player character has gear that can keep out the rain, like a Straw Hat, the drain is reduced.
The rain also causes fires to die down faster. It won’t stop a forest fire though; the rain has been implemented mainly to vex the player’s attempt at keeping a fire going, especially during the night.
Thunderstorms can also bring down lightning. This occurs near the player character, and is more than likely to set entire forests on fire if the player character happens to be close to any forests at the time.
The player character may also be struck by lightning. Wielding metal objects increases this chance. WX-78, in particular, has a tendency to get hit by lightning.
Lightning strikes can be averted if there is a lightning rod close by. The lightning prioritizes striking the lightning rod, so anything else is not struck.
SPREADING FIRES:
Another hazard to watch out for is spreading fire. When something flammable burns, it can spread the fire to other flammable things nearby. Forests are particularly vulnerable to this.
This is generally not a good thing, especially if the player has been trying to conserve resources that happen to be flammable. However, there are times when spreading a fire would be useful, such as a cluster of Spider Nests that are in the way and are posing a danger to the player character.
Interestingly, fires do not spread to anything else that is beyond a certain a distance from the player character. This can be observed when setting fire to particularly large forests.
(Players who are experienced in games with sandbox designs would know why; due to computing limitations, scripts are only run for the region in the vicinity of the player character.)
MOVING ACROSS THE CONSTANT - OVERVIEW:
Generally, the player character has to depend on his/her/its own legs to move about. Fortunately, the player character is tireless at doing this. There are some other means of traversing the Constant, however.
RIDING:
Riding has been described earlier. In the base build of the game, Beefalos would be the player character’s main source of rides. As mentioned already, riding is not an entirely smooth method of moving about. However, if the player character is attacked while riding something, the mount takes the damage from the attack instead.
When the player character is hurled off a Beefalo, the saddle on it degrades. This means that the mount can only be ridden a limited number of times before replacement saddles are needed to continue doing so.
ROADS:
Some terrains, such as marshes, slow down the player character, but some others speed up the player character instead. The most common of these other terrains are roads. These exist as permanent improvements to any tile that they occur on, i.e. their effect supersedes any modifiers that is endemic to that terrain.
COBBLESTONES:
Cobblestones are made from Rocky turfs. They can be placed on the ground in order to make roads that can be removed and replaced elsewhere. These will be of great use to players who intend to build multiple settlements and link them together.
WORMHOLES:
Wormholes are apparently formed by living worms with lamprey mouths on both ends of their impossibly long bodies. Entering one of the wormholes has the player character being spat out of the wormhole on the other end. This process does not take long, but it saps the player character’s Sanity.
After the player has established Sanity-restoring means, wormholes become very convenient methods of reducing travel time.
OTHER LAYERS OF THE CONSTANT:
The surface layer is what the player sees most of the time. There are two layers that lie below the surface, with the deepest layer revealing some hints about the backstory of the game and the genesis of the Constant. The first layer below the surface is the Caves, while the Ruins are below those.
SINKHOLES:
Sinkholes are entries into the Caves, which is a substrate of the Constant that was implemented during the development of the game to address the limited supply of minerals on the surface.
Sinkholes are initially plugged with rocks. The player character can break these and thus gain access to the Caves. However, doing so also activates the Sinkholes’ other script, which is that they spawn Batilisks at dusk. Batilisks are hostile creatures.
Anyway, the transition between sinkholes is fast. The area around the entry point of the Caves is always lit, which is just as well because the Caves are very dark.
CAVES:
The pervasive darkness of the Caves means that the player character’s Sanity is constantly being sapped. Sanity-restoring items are important here; being attacked by Shadow Creatures in the Caves is not a great ordeal.
There are naturally occurring light sources, but there are not enough of them to illuminate every spot in the Caves. These light sources can also be readily snuffed out, e.g. set on fire or otherwise destroyed. That said, the player will want to conserve these, because there are few means of replacing them.
Interestingly, some flora from the surface occur in the Caves too, despite the lack of sunlight. These are likely there to ease the player into the gameplay experience of the Caves.
As for the denizens of the Caves, the Bunnymen have already been mentioned as examples. There are others, some of which are tougher and more troublesome versions of creatures on the surface. For example, there are the subterranean cousins of the surface Spiders; these are ghastlier, nastier and tougher. One of them even has a spitting attack that can hurt the player character and cause slow-down in movement.
Suffice to say here that many of the practices and tactics that the player has learned for survival on the surface are not readily applicable here, mainly due to the darkness. Having to hold a torch won’t help much when the player character needs to fight, for example.
There is also a subterranean variant of Hound Attacks. This variant runs on its own variable, which can be seen during world generation.
Still, despite the very different challenges, there are a lot of great late-game rewards to be had from exploiting the caves, not least of which are renewable sources of minerals.
EARTHQUAKES:
Speaking of which, minerals are renewed in the Caves through the gameplay mechanism of earthquakes. These occur occasionally, causing minerals to be dumped into the regions of the Caves in the vicinity of the player character.
The player character is at risk of getting hit by the falling minerals, but there is some forewarning in the form of shadows that appear on the ground and looms larger as the falling minerals come closer. If the player character survives the earthquakes, the fallen minerals can be harvested quite readily.
However, some denizens of the Caves do eat the minerals for food, so they will compete with the player character for them. (Some will even attack the player character if he/she/it has minerals, raw or refined, in his/her inventory.)
RUINS:
The Ruins are the remnants of a civilization that has sunken far underground, after what is implied to be a calamity from their attempt to harness Nightmare Fuel. Many of the terrains here echo the past glory of this civilization.
In terms of ecosystems, the Ruins are a harsher version of the Caves. Surface flora do not occur here, unless the player plants them here.
The denizens are more disturbing too. For example, there is the cute and seemingly playful Slurper – which attaches itself to a player character’s head and proceeds to somehow drain Hunger from its host.
Some dangers that occur in the Caves also occur here too. Depth Worms still attack the player character here, and earthquakes occur quite frequently here.
The main reason to venture into this layer of the Constant is Thulecite, the precious mineral that the fallen civilization has left behind. It is limited in supply; not even earthquakes make these. Thulecite is needed for some of the most potent items in the game. Thulecite-based items have to be prototyped with an irreplaceable prototyping machine that is only ever found in the Ruins.
NIGHTMARE CYCLE:
Perhaps the most dangerous aspect of the Ruins is their Nightmare Cycle. There are two phases to this cycle: ‘calm’, and nightmarish.
The calm phase is the starting phase. Most things in the Ruins appear in their default state, and are mostly inert.
In the nightmarish phase, earthquakes happen more often. Certain otherwise neutral denizens of the Ruins also turn into fiercer and hostile versions of themselves. Shadow Creatures also spawn and attack the player character, regardless of the player character’s Sanity.
The transition between the two main phases have visual cues, as well as significant intervals in between. This helps the player to prepare for the change in phases (or escape back into the Caves, if the player is not prepared).
Escaping into the Caves might not save the player character from the nightmarish phase either. There are cracks in the Caves layer from which the eldritch energies of the phase leak through; Shadow Creatures spawn from these cracks too. The Sinkhole that leads into the Ruins is also hazardous.
For players who are prepared, the nightmare phase can grant a lot of pay-off. The increased frequency of earthquakes means more minerals to harvest, and the constant attacks of nightmarish creatures means a lot of Nightmare Fuel can be collected if the player can handle the risks.
TELEPORTATO:
If, for whatever reason, a critical resource has been rendered extinct or exhausted in the instance of the Constant that was made for the run, the player character is doomed to a demise from scarcity – unless he/she/it moves to another landmass. (The animated screen for generating a new game world suggests that a new landmass is being made for the player.)
To move to another landmass from the current one, the player needs to find the “Teleportato”, and its parts. For whatever reason, this arcane device has its parts scattered across the surface layer of the landmass. Finding them is relatively straightforward; the player character only needs to reconnoitre the map until he/she finds them. Finding them is a bit easier if the player character has a Divining Rod, though the rod takes a lot of late-game resources to be made.
There are four parts, and each one has a theme of sorts. For example, one of the parts is almost always found in a small abandoned farm plot.
After the parts have been found, the player needs to install the parts into the Teleportato. That said, the Teleportato is often guarded by strong Clockwork constructs, which can complicate but otherwise not prevent attempts to use the device.
After the device has been completed, the player can then place four items into it. These items will go together with the player character into the next instance; everything else is left behind. However, the player character retains any knowledge of blueprints that has been obtained.
Another key thing to keep in mind is that the player character’s current state is also retained when going to the next instance of the Constant. The area around the Teleportato is often dangerous, so the player character might be battered if the player could not secure the area around it before using it.
ADVENTURE MODE - FOREWORD:
With enough experience, research and practice, the player could readily beat any challenges in Survival mode, which is the default mode. This is possible because of the procedural generation of the game world, which makes the landmass contiguous and having next to no chokepoints.
When this happens, the next level of challenge would be “Adventure mode”. This mode can be activated by finding a certain arcane structure that does not require anything to activate, other than the player’s consent. This saves the game world, while generating another for the Adventure mode.
DIRECTED PRODECURAL GENERATION:
The procedural generator is much more specific when generating the game worlds for runs in Adventure mode.
In particular, sources of resources and locations of monster closets are not so evenly distributed for the lands that are generated for the Adventure mode. The occurrence of certain resources may be suppressed, thus resulting in a noticeable scarcity of those resources.
For example, in the Archipelago chapter of the Adventure mode, the instance of the Constant that is generated has resources being sequestered onto different islands. The islands are connected via Wormholes, so the player character is required to sacrifice Sanity in order to gather resources.
Some other chapters have chokepoints being generated; chokepoints are a rarity in the default scripts for the procedural generators. Furthermore, these chokepoints are populated with dangerous creatures.
Indeed, these troublesome map layouts happen to be the primary challenges that the Adventure mode poses. The player would have to plan how to gather the resources to gain the means to remove the obstacles in the way, or at least circumvent them.
OBELISKS:
The player may have come across black edifices in the Survival mode. These edifices lower and raise according to the player character’s Sanity, though the player likely will not notice them if the player has been maintaining the player character’s Sanity while in that mode. The Obelisks are also not much trouble in Survival mode.
In Adventure mode, Obelisks become prominent. They often appear at chokepoints, preventing the player’s passage when they are raised. They only lower after the player has significantly changed the player character’s Sanity, for better or worse.
MOVING TO THE NEXT CHAPTER:
The player’s goal in every “chapter” of the Adventure mode is to find the Teleportato of that instance and its parts, and then perform the transfer to the next instance. This is not unlike what the player would do in Survival mode, though in some chapters, the parts are placed in especially dangerous places.
In the Survival mode, the player is given the guarantee that the next instance would be a lot like the previous one when using a Teleportato. This is not so for the Adventure mode.
In Adventure mode, the next instance is generated from the scripts that are chosen from a chart of scripts that control the procedural generator. The scripts that are chosen depends on how many chapters that the player has completed in Adventure mode. Typically, the scripts that are selected after the player has completed the previous chapter would result in an instance with tougher circumstances.
FIXED CONDITIONS:
In particular, some of these circumstances include fixed weather, skewed day-night cycles and even permanent night-time. If the player’s experience with the game has been mostly with the relatively balanced default settings of Survival mode, the Adventure mode can be quite punishing.
ONLY SURFACE LAYERS:
It is worth noting that the Adventure mode was conceived before content for the Caves and Ruins during the development of the game. The Adventure mode has not been reworked to include their content. Thus, the Adventure mode lacks anything from those layers of the Constant.
Interestingly, the character design for Maxwell has been adapted to reflect this gap too. He does not recall what has been wrought in these layers well.
UNLOCKING CHARACTERS:
Although there is no end-game, there are still long-term goals, if the player is interested in pursuing them. These goals are the unlocking of more player characters.
All of the player characters have been balanced against each other. For every advantage that a player character has, there is bound to be at least one disadvantage, if not more. Only Wilson is exempted from this, because he is the bog-standard character and is intended to be the default choice for anyone who is not confident about using anyone else for the next run.
Anyway, there are two means of unlocking characters: finding them and freeing them in Adventure mode, or gathering enough XP to unlock them. Generally, a character can only be unlocked one way or the other.
The ones that are unlocked through Adventure mode are the most complicated to play. Incidentally, they are among the physically frailest too.
The ones that are unlocked through gathering XP have additional gameplay mechanisms that are quite different from Wilson’s fast-growing beard. Learning about what can be done with them can make for a hard time, if the player does not do research before-hand.
For example, finding out first-hand that Willow automatically sets things on fire when she is engulfed in darkness for too long can be a frustrating experience if she sets fire to things that the player does not want to be burnt.
ACCUMULATING XP:
Even today, Klei’s designers regretted not having come up with more elegant ways of unlocking all of the characters. Thus, the player has to accumulate “experience points” (XP) in order to unlock characters.
XP is accumulated by having an instance of the Constant destroyed. This happens in one of two ways: using the Teleportato, or simply dying and having the run end. The player is given XP according to the number of days that the player character has managed to survive. It is a simple system, the appeal of which runs out as soon as the player has unlocked all unlockable characters.
NO IN-GAME DOCUMENTATION:
All of that which has been written in this article is not taught to the player in-game through any tutorial or in-game documentation. The player has to learn things first-hand (and the hard way), or consult the wiki for the game.
Furthermore, many things are not labelled in-game when the player hovers the mouse cursor over them. Examining them does nothing much either, because the feature of examining things is mainly there as an expression of the personality of the player character.
As mentioned already, this lack of information for the new player has been posited as a source of “challenge”, and Don’t Starve does have a following of players who consider this to be a genuine appeal. Conversely and perhaps understandably, there would be players who do not see it as such, and consider this as an excuse for the developers being lazy at documenting things.
(In contrast, Oxygen Not Included, which is another Klei game, is much, much more thorough at documenting things in-game.)
The most in-game help that the player would get is from looking through the lists that appear in the crafting tabs when the player is next to the prototyping machines. However, the player cannot look through the lists without in-game time progressing.
VISUAL DESIGNS:
Klei never was much into following, much less adopting cutting-edge graphics. Rather, its people favoured hand-drawn artwork, which is then spliced and put back together for the purpose of animation. This was the case for Don’t Starve (and still is now).
Don’t Starve uses a whimsical yet distinct art-style that is very different from Klei’s previous works. Pencil-work is prominent in this game, especially in the in-game sprites and especially for poster-guy Wilson. The limbs of many characters are little more than pencil-scratches, flailing about as they move in-game.
The use of 2D sprites on a flat plane that is otherwise generated with a 3D engine would be noticeable to players who have played a lot of indie games that are made using Unity and its indie-friendly ilk. Thus, the objects in the game world stand out with significant contrast, though the player would be seeing only one facing of any object because there is ever only one for their sprites.
That said, the aforementioned contrast does make things recognizable, as long as they are not being obscured by something that is in the foreground. There are sprites that are massive though, such as the sprites for the Deerclops and for the underground pillars.
As for animations, there are enough frames to enable relatively smooth motions that should be recognizable to most players. For example, the swinging animations for mining rocks and chopping trees are distinctly different, even though they could have used the same animations if Klei’s animators had been lazy.
SOUND DESIGNS:
There is no legible voice-acting in the game. This would be the case for quite a number of Klei games after this, at least until Griftlands.
Rather, when the player characters speak, musical instruments – or their digital facsimiles – play. Each player character has a specific combo of instruments played in sync, such as Wilson being ‘voiced’ by a combo of harmonica and trumpet mute. Such audio designs are bizarre, but they do serve the purpose of having every character sound distinct. (This is of greater practicality in Don’t Starve Together, where multiplayer is the norm of the gameplay.)
(Wes, being a mime, has no “voice-over” whatsoever – even when he is being mauled by terrifying monsters.)
The myriad of creatures in the Constant have audio clips that are recognizable as belonging to living creatures though. Birds chirp, hounds bark and bees buzz, to mention some examples. Of course, there are creatures with noises that are not entirely believable. For example, the Spiders have raspy roars, even though real spiders do not make noises (or have mouths for that matter).
In fact, most hostile creatures have unearthly noises. On the other hand, the monstrous noises do make it easier for the observant player to recognize when these monsters are nearby. Returning to the example of the Spiders, when they move around, they make clacking noises as their feet touch the ground. (Again, real spiders do not make such noises.)
The music tracks are determined by the current gameplay situation. There are tracks for summer and winter. There are also tracks for when night beckons and day breaks. Most importantly, there are tracks that take over when combat occurs.
As for the music, most of them are instrumental (though most likely of synthetic origin). Most of them are not displeasing to listen to. However, considering that the player characters have sound clips that are also instrumental, hearing them over the combat music can be a bit difficult. On the other hand, there are few reasons to keep an ear open for these, because there are other cues for when important things happen, like the player character being close to dying.
SUMMARY:
Despite its whimsical looks and presentation, Don’t Starve is a complex game and a competent contender in the survival game genre. It also has a lot of charm, mainly due to the aforementioned looks and presentation.
However, it also relies a lot on not telling the player anything so as to pose a challenge. Much of the difficulty in the game can be rendered moot by simply doing one’s homework.
Still, there is some appeal from setting up camps and amenities to survive the passing of days and seasons in the Constant. Eventually, the player would want to test his/her skill at planning and execution with the Adventure mode.
In other words, as long as the player wishes to play this game, it would offer the player a worthwhile time.
