Yakuza: Like a Dragon is a game full of surprises for new players and series veterans alike, but one thing is a constant: The game only really begins when you are free to explore the city at your leisure. The game starts you off in Tokyo's Kamurocho district (a common location across all Yakuza games) for the first two chapters, but don't get too comfortable here--it's basically a big tutorial for learning the basics of combat and exploration. Come Chapter 3, you'll be dumped in Yokohama's Isezaki Ijincho region, where the bulk of the game will take place, and in Chapter 4, you'll become free to explore this sprawling map in full.
But it's rough: Hero Kasuga Ichiban has barely any money or possessions to his name and needs to work his way up from rock bottom. To help you tackle the opening sections of Yakuza: Like a Dragon, we've compiled some tips on how to better make money, get around, and obtain the resources you need to fight some of the more challenging battles that lie ahead. For our thoughts on the game, read our Yakuza: Like a Dragon review.
Basic Combat Tips
Just because the battles are turn-based doesn’t mean you won’t be delivering some serious and painful beatdowns! Since your skills are limited early on, you’ll mostly be reliant on the skills of your team’s default jobs, but you should still pay attention when an enemy’s weakness is indicated. There are three types of physical attacks (bash, slash, and pierce) and three types of “magic” damage (fire, water, and electric), and enemies can have a combination of resistances and weaknesses to all of these. Pay attention to the properties of your attacks, and once you find an enemy’s weakness, use similar techniques to hammer away at their health!
Why Are Video Game Adaptations Good Now? | Spot On Fallout 4 Next Gen Update Comparison Fallout 4 Steam Deck Verified Gameplay ALIEN: Rogue Incursion - Announcement Teaser Trailer Stellar Blade - 13 Things I Wish I Knew S.T.A.L.K.E.R. 2: Heart of Chornobyl — Official "Not a Paradise" Trailer Manor Lords - Official Medieval City Builder/RTS Launch Trailer Honkai: Star Rail - "Then Wake to Weep" | Version 2.2 Trailer Devil May Cry: Peak Of Combat | Dante: Blazing Tempest Gameplay Trailer SAND LAND — Official Launch Trailer Sea of Thieves Season 12: Official Content Update Video Stellar Blade - Hard Mode No Damage Gigas Boss Gameplay
Please enter your date of birth to view this video
By clicking 'enter', you agree to GameSpot's
Terms of Use and Privacy Policy
Also, when an enemy is downed, follow up on your next turn with a normal attack as soon as you can! If you wait too long--even just stalling at the command menu--they might get up. Downed enemies cannot counter and will always take critical damage. However, if you use a skill attack on a foe, you won’t get the damage bonus, so it’s best to use skills to get knockdowns, then use normal attacks on downed foes to follow up. (It saves on MP, too!)
Finally, if your character is standing far away from an enemy and you have more than one foe on field, it’s best to use skills to attack them rather than normal strikes -- you run the risk of having your target’s buddies interrupt your attack with a counter otherwise. If you’re dealing with a particularly large group of combatants, consider using some AOE skills (indicated by an in-menu target description as "Enemy Area") to take them down. AOE skills do the most damage when targeting a character who is closely surrounded by his comrades.
Open Up The Pawnshop ASAP
Chapter 4 sees most of Ijincho open up to you, and while exploring is great, you can't do too much without some yen in your pocket. There are some solid ways to get extra scratch--we'll get to those in a bit--but they'll require you to unlock Benten Pawn, which you can find in the commercial district.
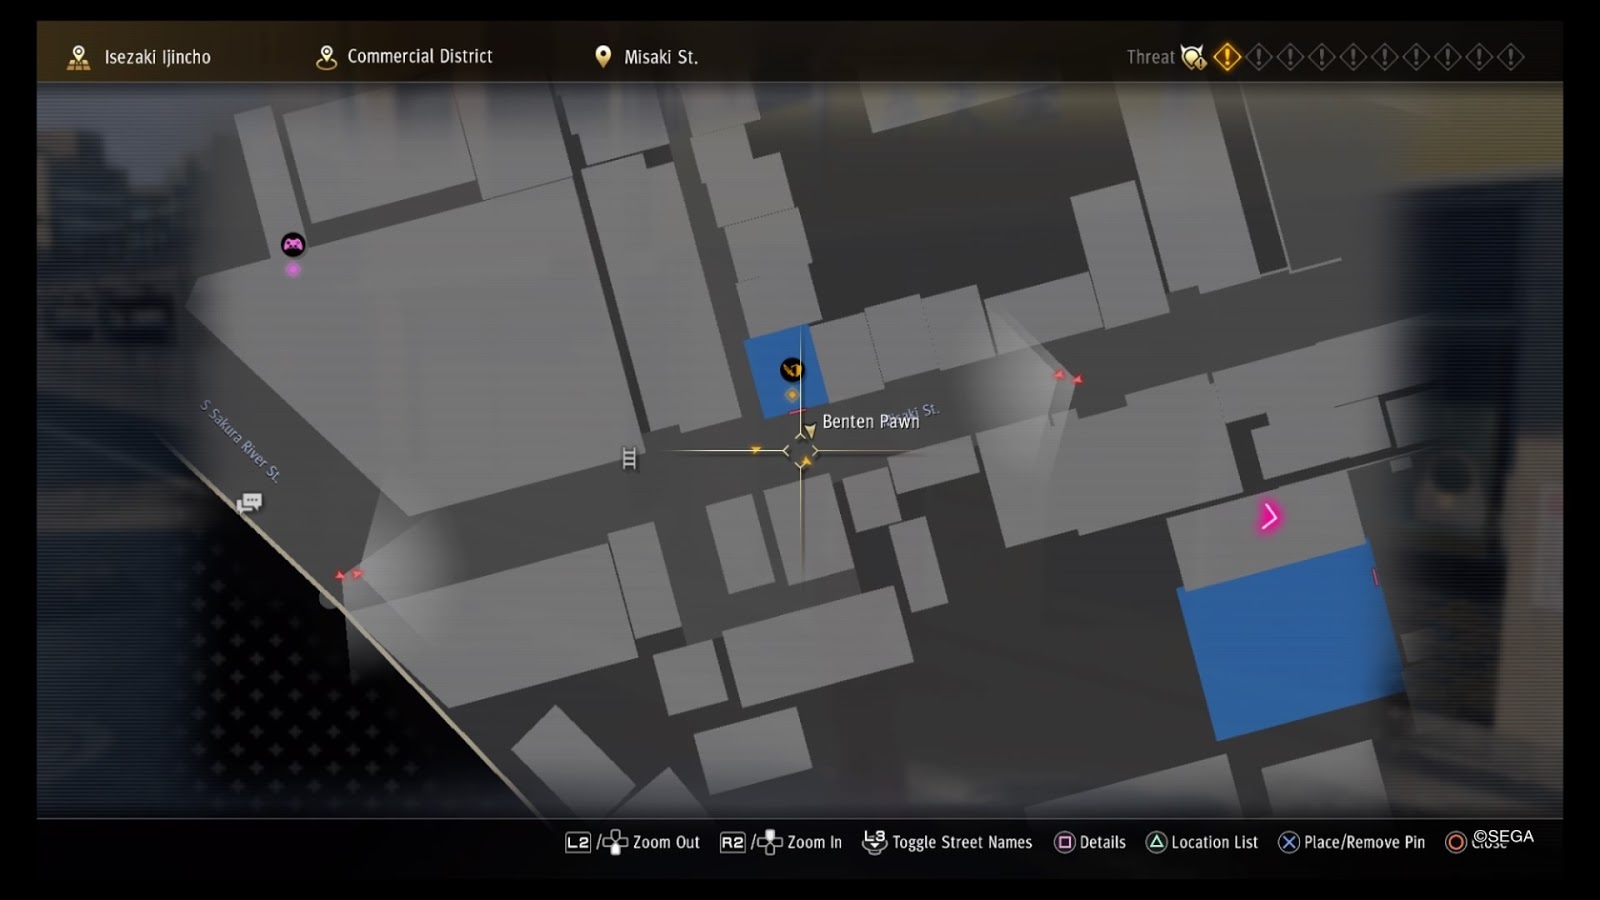
When you first walk by this location a little ways into Chapter 4, a cutscene plays where you'll notice that the store's entrance is completely blocked by garbage. Come back to the same location a bit later and you'll see another cutscene, followed by a battle. From this point on, Benten Pawn will be open for business. This will be your hub to sell unwanted and valuable items for a good chunk of the game and is indispensable during the early chapters. You can get some basic gear there, too, which will be useful for the big-time battles near the end of Chapters 4, 5, and most of 6.
Focus on Substories for Early-Game Funds
Most of the low-level punks you'll be pummeling around at this point in the game don't reward you much in terms of money, which makes finding alternative means of earning scratch important. While you can scrounge up some change (and occasionally a valuable item to pawn) by "treasure hunting" around vending machines and garbage piles, the most valuable rewards in Chapter 4 come from the handful of substories that are available to discover and complete. In particular, the “Baby Don't Cry” substory (which becomes available near Otohime Land after completing the mandatory Poundmates substory mid-chapter) rewards you with 20,000 yen in funds--enough for a nice weapon and some additional armor, which you'll need in order to progress.
Go Bug Hunting!
If you've done a bunch of Chapter 4's available substories but still need some money, why not take a walk in the park? Hamakita park in the northeast part of the map is filled with big, grassy fields where you can find and collect insects. Some of these bugs are surprisingly valuable, too--particularly beetles and scorpions, which can sell for upwards of 1,000 yen each at the pawnshop. A few creepy crawlers you trade in can fund the purchase of an additional piece of basic gear!
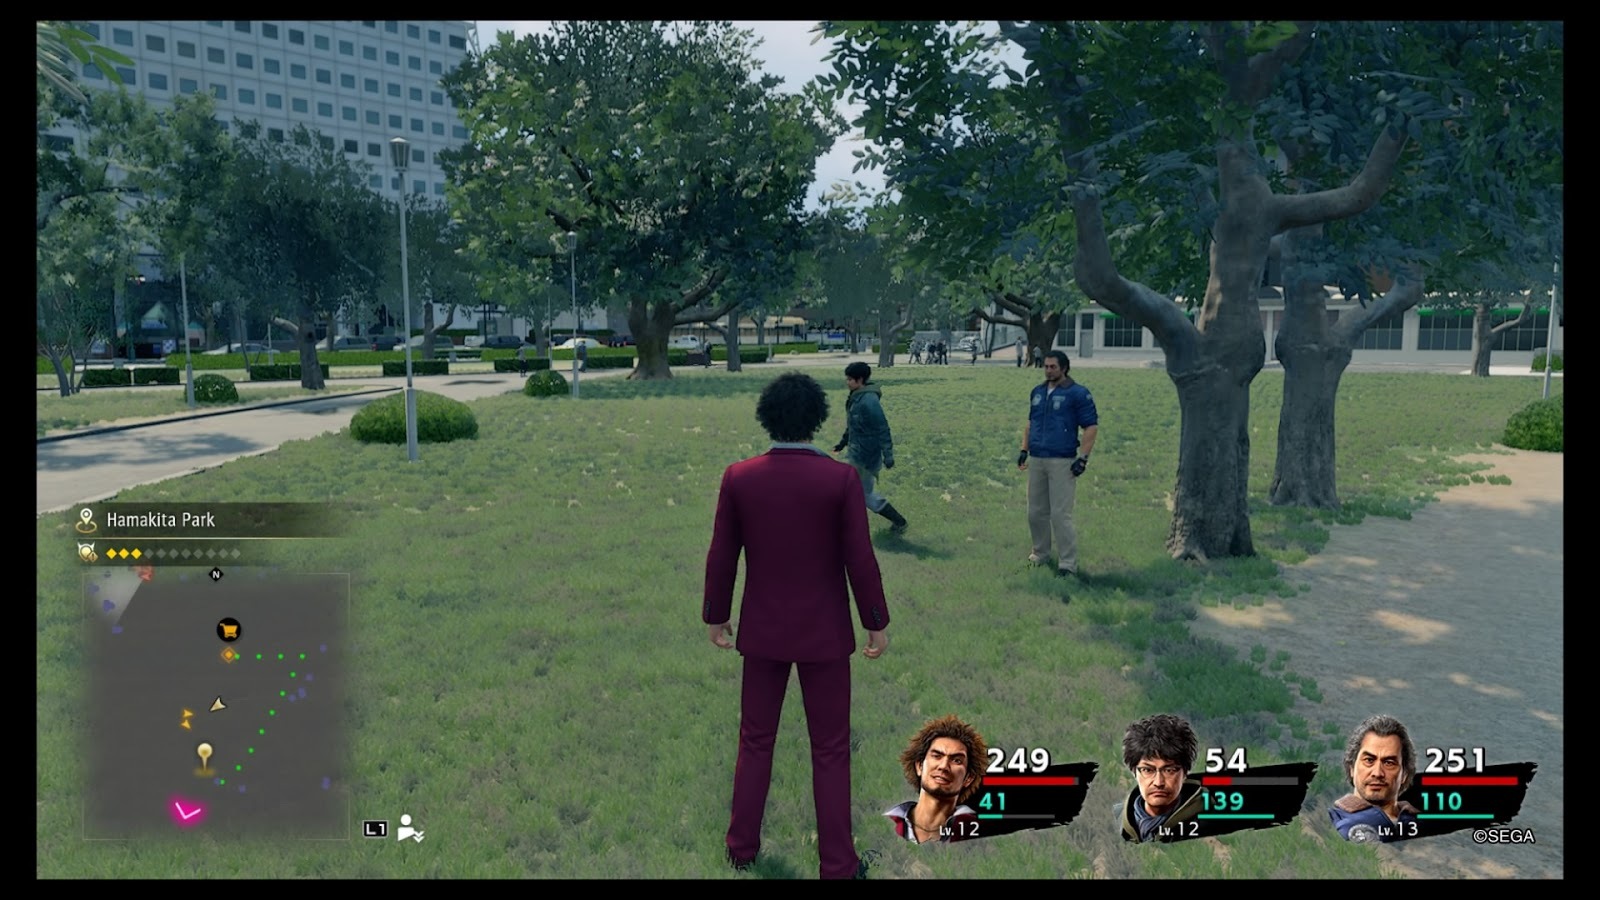
If you need a little more spending money, bug collecting can be an easy way to line your pockets. (You can also claim bugs as trade-in prizes from playing the Can Quest minigame, if you prefer.) Just be careful, because Hamakita Park has some high-level enemies roaming around--either do your best to avoid them or run for the hills if you do get into a fight.
Grab Some Basic Gear
Most of the game's weapon and armor shops will be available starting from Chapter 4, but you'll find prices in several of them to be way out of your league. For now, stick with getting weapons and armor from Love Magic, Benten Pawn, and Hustle Boutique. The gear is affordable and will help immensely during the climactic battles in this chapter--and even a bit into the next couple of major encounters. You’ll need to be geared up before beginning chapter 4’s climactic battle, so make sure you’re decked out!

Chapter 5: The Hero Everyone Needs
Towards the beginning of Chapter 5, you'll learn about the Part-Time Hero service, where you can do item-collection and rescue quests to earn items and money. Doing these missions can help bolster your funds significantly at this point. The SOS quests are particularly valuable, as they offer upwards of 10,000 yen and provide rewards immediately rather than having to report to an agent. Most of the fights you'll get into during these SOS rescues aren't much harder than your standard encounters, though you may run into a particularly tank-y foe every once in a while, so don't engage them unprepared.

The business management mini-game opens up during this chapter as well. It's very time-consuming but can yield a lot of additional funds if you're willing to put the main story on hold for a while. However, as the game progresses and more substories and recruits appear on the streets, the more potential employees and investment opportunities you'll have, so you might want to wait a couple more chapters before really digging into it.
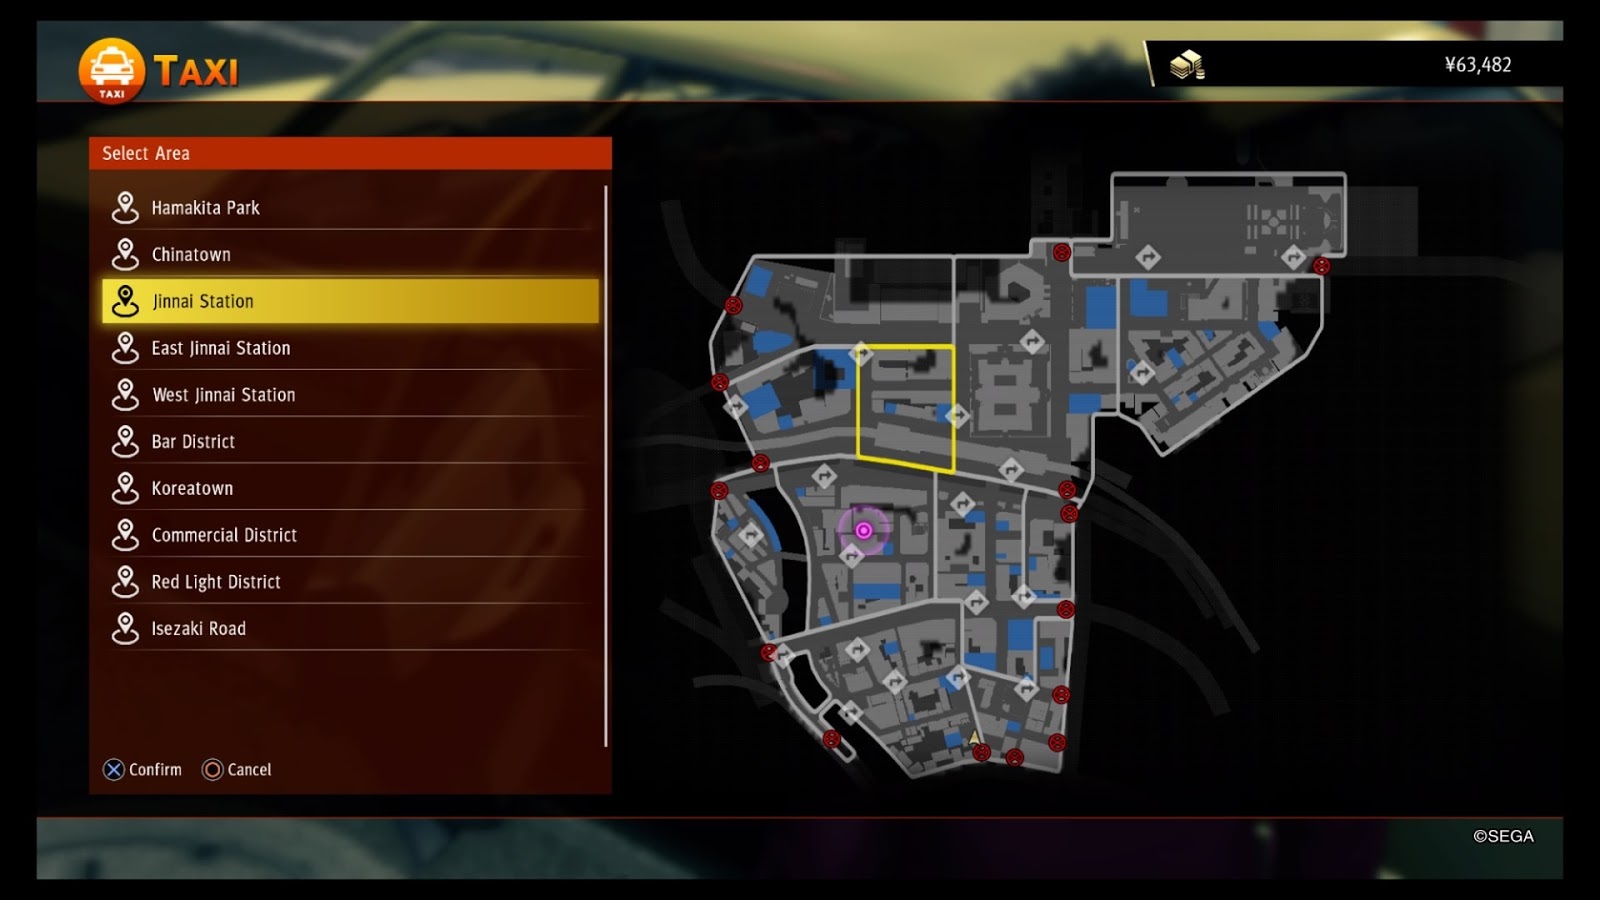
Start Accumulating Taxi Fast Travel Locations
Taxis act as fast-travel in Yakuza: Like a Dragon--once you've used a taxi, you can warp to that point on the map from any other taxi. However, each taxi ride costs 730 yen, meaning that it can be tough to start registering taxi locations in Chapter 4, where the money is tighter. Funds become a bit more readily available come Chapter 5, so wait until then before you start creating your fast-travel taxi network around Ijincho--you'll be using it plenty later on!
Upgrade Your Gear At Romance Workshop
Adachi will introduce you to Romance Workshop during Chapter 5. Here, you can upgrade the potency of certain weapons and gear using the materials you've gathered. It's nice to be able to give your gear some little boosts--however, before you spend the money and materials to do so, you should check to make sure that the upgraded piece will actually outperform anything else you might have equipped or sitting around in your inventory. Also, you can craft several weapon and armor items outright at the workshop, including some extremely potent weapons for jobs that open up during Chapter 5. You might be surprised at how cheap a high-quality crafted weapon can be.
Should You Change Jobs?
You'll be able to change the jobs of your characters starting around the middle of Chapter 5. While getting a new set of abilities for your team is a fun prospect, keep in mind that all of the new jobs start from level 1 and often require new gear to be purchased. You'll need to do quite a few battles before the jobs you'd swap to offer as many combat abilities as the ones you've been using from the outset, so a bit of grinding for experience is in order.
It's also worth keeping in mind that the end of Chapter 5 and most of Chapter 6 features a string of challenging battles and dungeon areas that you can't exit from until they're done. If your new jobs aren't properly leveled, you could be in for a very rough time. It may be worth waiting a bit before changing if you're comfortable with the default team--and also because more job options open up at level 20 and with teammate bonds.
One class change we can recommend at this point is putting Saeko in the Idol job. Idol is a fantastic support class with great healing skills and the ability to lock down enemies with the charm status ailment. It's also easy to obtain gear to enhance damage and status-affliction odds for the Idol. This job will be useful right away and only get better over time, plus Saeko won't suffer from the switch-over as much as the other party members at this point.
Raise Your Party Bond Levels ASAP
From Chapter 5 onward, you have a four-person party, and you'll be earning a lot more bond points for your crew from eating out, fighting battles, playing mini-games, and engaging in party conversations. However, in order to "uncap" each bond level, you'll need to go back to the Survive bar and have a conversation with your teammate once your bond points reach a certain threshold. If you don't do this ASAP, bond points that could go toward building another level will simply go to waste, so it's best to hightail it to the bar when you see your buddies' bond gauges stuck at the lock.

Adachi and Saeko can both be leveled up to level 5--the maximum--fairly quickly this way. Once they are at max level, new tag-team skills will open up for both of them, giving you more options in battle. Namba, unfortunately, can't be advanced past level 2 until a certain story event, but you may as well advance your other two teammates as far as you can early on.
Be Prepared For Chapter 6
The end of Chapter 5 begins when you leave through Jinnai Station for the second time. This will begin a very long stretch where you will have several challenging fights alongside a very lengthy dungeon crawl. You won't be able to return to town for a while once events are in motion, so be sure you're adequately geared and stocked up before you buy that train ticket. (And maybe make an extra save file, too!)