Spider-Man 2 Walkthrough
The newest game to feature Stan Lee's webslinging hero offers a great degree of freedom and new crime-fighting moves. Our walkthrough to Spider-Man 2 will help you keep Spider-Man on the right track, with general strategies, a walkthrough, and more.
Design by Marty Smith
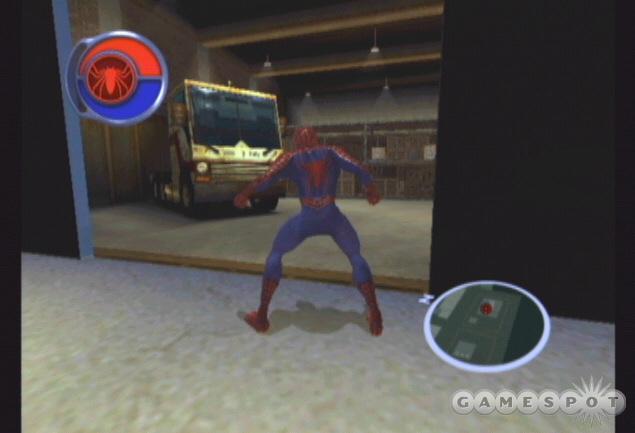
Activision's Spider-Man 2 provides a wide-open recreation of Manhattan to explore by foot or by web. Climb to the top of the tallest building or hitch a ride underneath a helicopter and visit the Statue of Liberty. But dangers lurk along the city's streets. Its citizens are always in the need of a helping hand and its criminals are always on the hunt for their next score. But most importantly, Dr. Otto Octavius's experiment may change the city forever and create a new menace for your friendly neighborhood Spider-Man.
This GameSpot game guide to Spider-Man 2 features:
- General Strategies: This section offers general strategies for gathering hero points, combat, and web-slinging.
- Citizens in Distress: Spider-Man is called upon often to aid citizens in distress. This section provides tips on completing the various citizens in distress scenarios so you can secure those hero points.
- Upgrades: This section lists Spider-Man's available combat, locomotion, air tricks, and other upgrades found in the upgrade stores found throughout the city.
- Walk-through: Look here for a complete walk-through of Spider-Man 2's storyline. You'll find tips on completing your to-do list and battling the game's tough bosses, including how to conquer Doc Ock!
- Awards: A list of all awards and how to obtain them.
- Cheat Code: If you are more interested in exploring the city and using all possible upgrades, check here for a cheat code that supplies you with a huge helping of hero points!
Table of Contents
General StrategiesCitizens in Distress
Upgrades
Walk-Through
Chapter 2
Chapter 3
Chapter 4
Chapter 5
Chapter 6
Chapter 7
Chapter 8
Chapter 9
Chapter 10
Chapter 11
Chapter 12
Chapter 13
Chapter 14
Chapter 15
Chapter 16
Chapter 1 - General Strategies
This section provides some general strategies for conquering the storyline and exploring the city as your friendly neighborhood Spider-Man. You'll find tips on gathering hero points, succeeding in combat, and being a web-slinger.
Gathering Hero Points
One of your primary tasks during the game will be to collect hero points. A series of chapters divide the main storyline. In nearly every chapter there's a specific hero point requirement to advance the storyline into the next sequences. If you don't gather hero points then you can't continue the main storyline and finish the game.
There are many, many different ways to collect hero points. This section provides a sampling and tips on completing them.
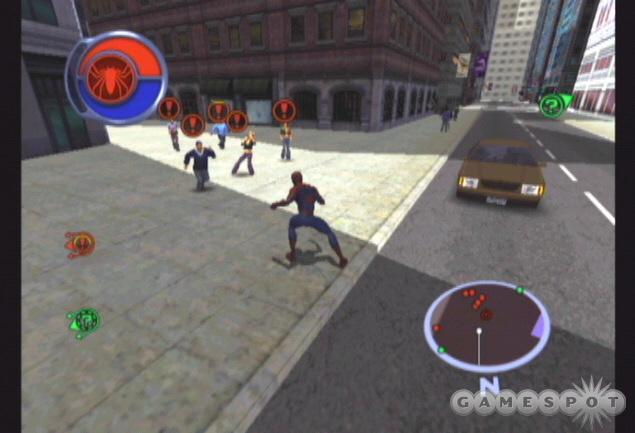
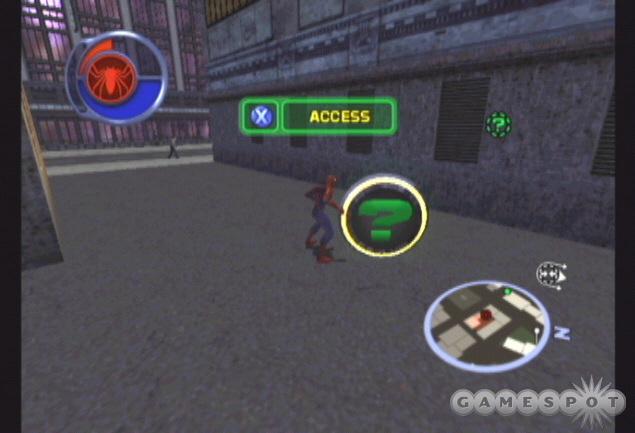
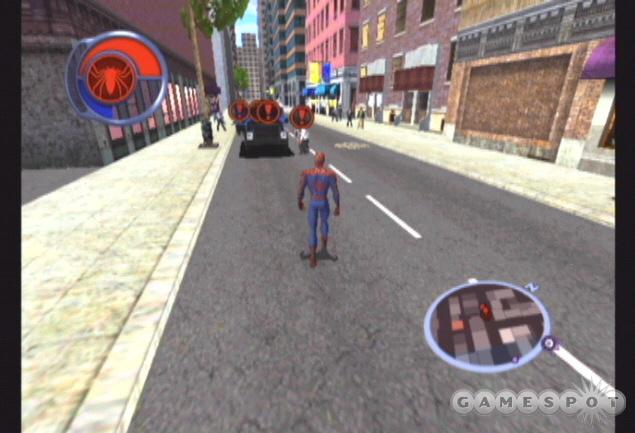
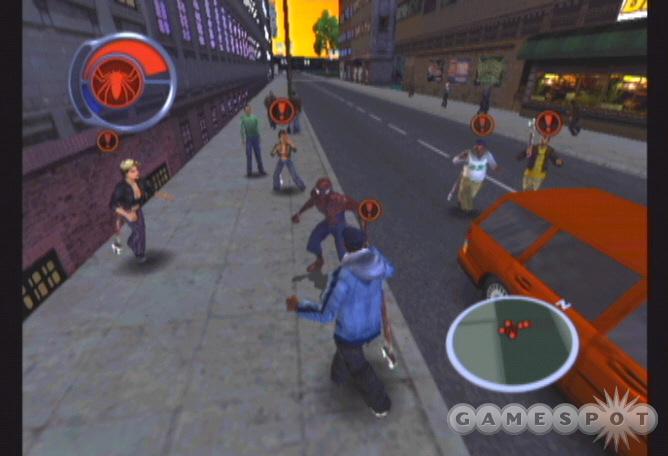
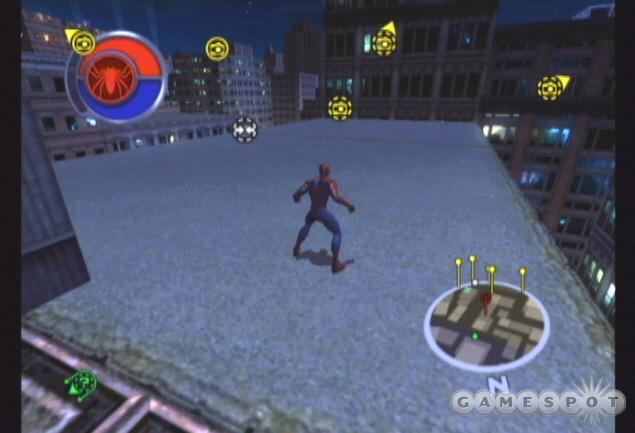
1. Citizens in Distress: Look for the green question mark icon on your screen. This indicates the position of a citizen in distress. Move to the icon's location and speak with the citizen, who will reveal their distress and ask for your help! It might be to help stop an armored car robbery, deliver an injured citizen to the hospital, or chase down a couple car jackers. Complete the tasks to receive your hero point reward. Note that you also receive additional hero points for each criminal you eliminate. Finally, failing most of these tasks decreases your hero point total so work carefully!
2. Random Crimes: Not all crimes are reported by citizens in distress. Look for the unique purpleish crime icon to appear on-screen. Move to the location to find the problem. It might be a mugging, a purse snatching, or even a child's lost balloon. Bust the criminals (or help the child) and receive more hero points.
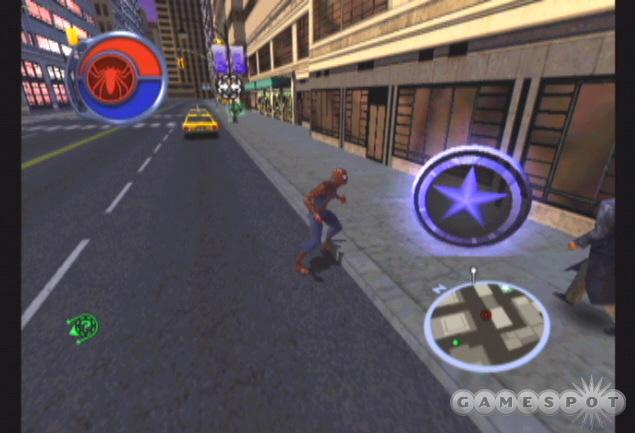
3. Challenges: These star symbol icons are scattered all over your map and represent a series of different challenges you can attempt and complete. These include various race, jumping, swinging, etc, type challenges. These carry decent hero point rewards, especially if you can beat the "mega time" revealed after you successfully complete the challenge. Check each challenge marker for its difficulty level; often you'll need to have some upgrades (namely swing speed) to complete the tougher challenges.
4. Pizza Deliveries: One of your objectives in the to-do list of Chapter 3 is to head to the pizza parlor. A new task appears once you get there but remember the parlor's location. You can acquire additional hero points by returning to the parlor and delivering some pizzas! There are 20 pizza delivery missions; each one harder than the last. It'll take some elite jumping and web-slinging skills (plus upgrades) to complete them.
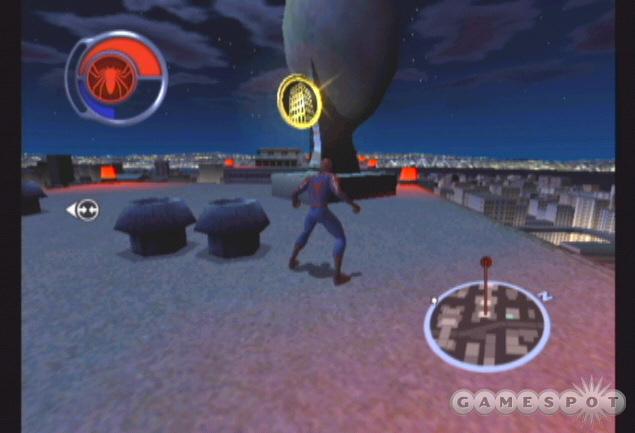
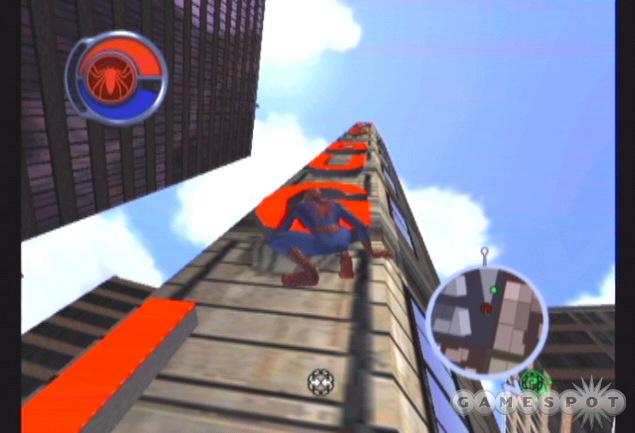
5. Skyscraper Tokens: Explore the top areas of the tallest skyscrapers in the city for skyscraper tokens, which add a small amount of hero points to your total. You can also find more than one skyscraper token per tall building so be sure to check all around its rooftop as well as any ledges near the very top of the structure. Collecting all skyscraper tokens unlocks the second wallsprint upgrade in the upgrade store.
6. Mary Jane Missions: A Chapter 6 task sends you to Mary Jane's apartment. Read the note on her door to begin the first of six special Mary Jane missions. Peter's always forgetting his appointments; being Spider-Man takes up a lot of his time. After completing missions, return to her apartment and read the note again for another task. Complete them for hero points and all six for an award.
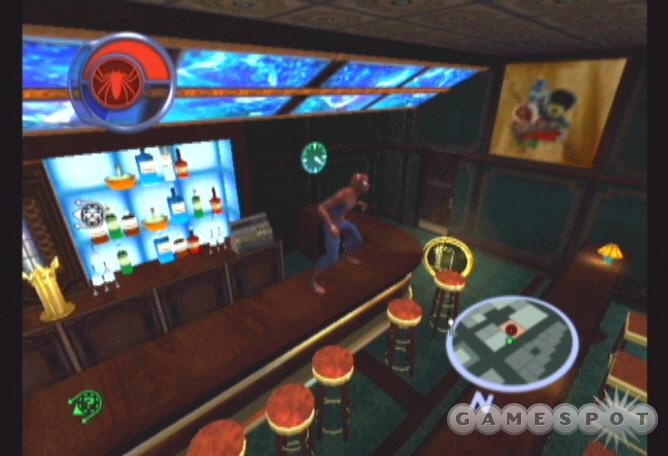
7. Hideout Tokens: Check your mini-map for red-colored structures: these are "secret" criminal hideouts. It might be a casino operation, a bar, or just a storage room. Search inside these locations for a hideout token worth valuable hero points. Finding these places is worth more than just the hideout token, though; often you'll encounter a group of bad guys inside. Defeat each one for additional hero points to add to your collection.
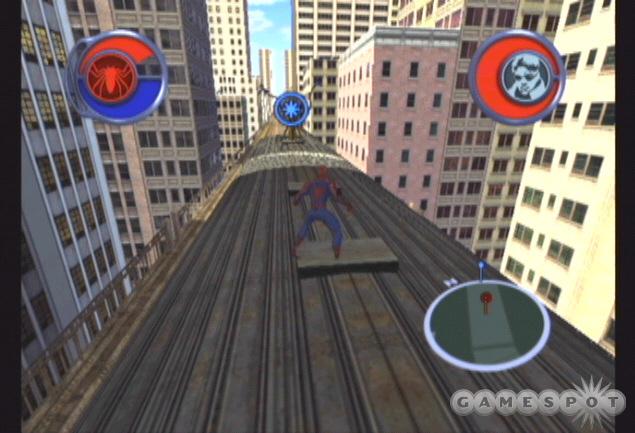
8. Photo Missions: Talk to Robbie in the Daily Bugle for photo mission opportunities. This set of ten missions takes you through the city to acquire photographs for the Daily Bugle. Complete them for hero points; complete them all for an award.
9. Hint Markers: The main map reveals the location of all question mark hint markers. Find and access them for numerous tips, strategies, and humorous comments from Bruce Campbell. Accessing hint markers won't provide a huge amount of hero points but it does add some. Plus, a few hint markers add even more: "Here's some hero points for you!"
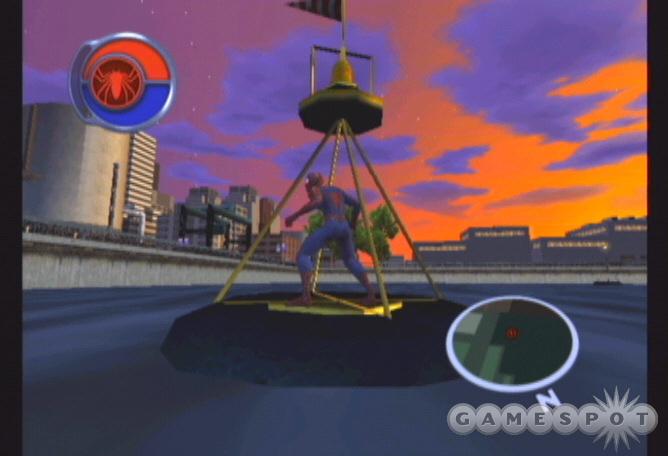
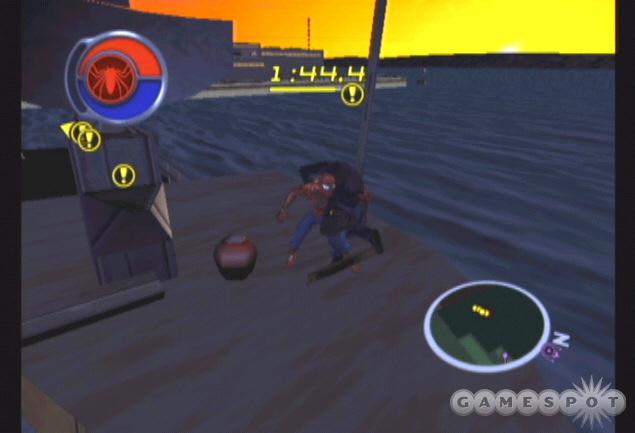
10. Buoy Tokens: Maneuver to the water's edge and search for the buoys that run along the shoreline. Perform some careful charged jumps to land on the buoy and collect the tokens at the top. Just run along the edge and circumvent the entire city and jump out to every new buoy in the distance to rack up additional hero points.
Check Out the Arcade
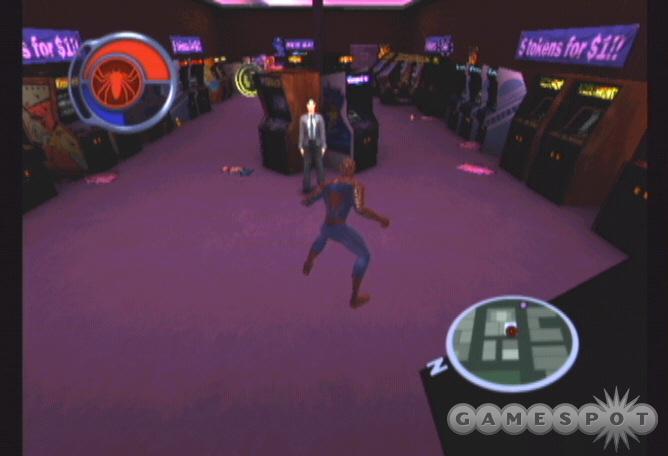
An early task in the game's storyline introduces you to the arcade. Find it later by going to the pizza parlor (marked with the pizza icon on your map) and go left and southeast away from the parlor. At the end of the park, take another left and find the arcade. Look at your mini-map and spot the distinct structure indicating a unique building. Go inside and you can play a series of arcade "games" that are basically additional tutorials. Complete each game to unlock the next one. Complete each one and receive an award. You'll need to unlock some additional combat upgrades to complete the last game.
Combat Techniques

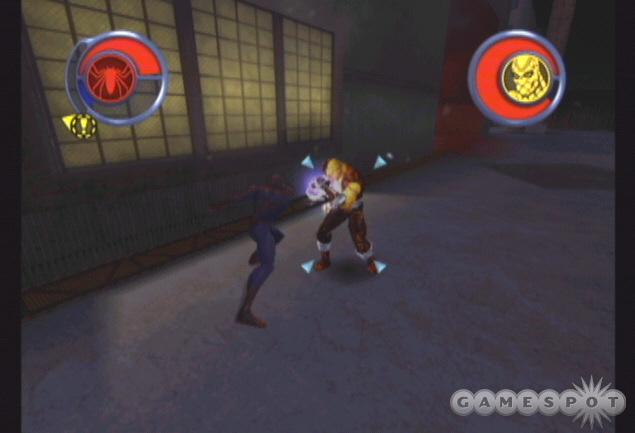
Spider-Man isn't a slouch in the combat department. He's got ample punch and kick strength but he also possesses something the criminals have a tough time countering: his spider web. Now granted, some of the tougher criminals will actually dodge the web but in most occasions you can certainly utilize the web to yank an enemy's weapon from his grasp or grab the enemy and pull him toward you and into your punch combination.
When approaching criminals from long-range, use your web to snatch their weaponry or yank them in your direction. Snag a criminal and start unleashing your combination attacks. You can keep it symbol with the attacks you begin the game with or, better yet, utilize those purchased from the upgrade store.
At close-range, you'll need to become the artful dodger. Watch for Spidey's spider sense to tingle (a flash around his head). When it does, press the dodge button. If you're dodging a melee attack then you can counter after the dodge with your own punch or combination. You'll have to dodge weaponry as well, most notably firearms. Dodge and try and yank the weapon out of the enemy's hands then approach quickly to finish him off.
Against multiple enemies, spider reflexes proves invaluable. Toggle spider reflexes on to slow time and increase your damage. You can hit multiple enemies in a combination. It's smart to stay on one enemy to decrease their numbers. Keep up the pressure even when the criminal has fallen to the ground.
Attacks that knock enemies into the air (such as the free sprint uppercut and other not-so-free combat upgrades at the store) are also powerful. Knock an enemy into the air, jump and start the attack. Juggle the enemy to continue the damaging blows. Toggle spider reflexes on for greater effect.
A Web-Slinger
One of the coolest parts of Spider-Man 2 is the ability to swing freely around the city. Often there's nothing pressing you to continue the storyline or save citizens in distress. Sometimes you may just want to swing around the city and sight-see. The following are a few tips on swinging effectively, including strategies for increasing speed so you can complete the tougher challenges and missions that require reaching a destination under a specific time limit.
- If you want to gain height on the swing (or at minimum, maintain height on the swing), charge your jump as you swing and release to leap off of the web-line and high into the air. Fire another web-line and continue the swing.
- Hold the sprint button while web-swinging to gain more height and speed on the swing. This builds momentum for height but can also be used for speed. Don't go to the height of the swing before firing another web-line. You lose speed at the end of your swing. Fire another web-line while moving the fastest to keep your speed.
- Press the controller in a direction to build momentum in that direction. Use this to turn down a street, for instance, if you're following a criminal's car or trying to get to a location quickly.
Chapter 2 - Citizens in Distress
The city's citizens are always in the need of help. If it isn't an armored car robbery, it's a sad child and his lost balloon. Perhaps it's a mugging in that alley, a medical emergency over in the intersection, or a sinking boat along the eastern shore. Spider-Man's job is a day shift and a night shift--when the people are in distress, he's always there to lend a hand or a web. This section provides tips on completing some of the random citizens in distress scenarios.
Armored Car: Cash-carrying armored cars are an inviting target in the city. A small group of thugs attempt to rob the armored cars. They tie up the guards then steal the cash. You'll approach the armored car from a distance. Use the opportunity to toss a web-line at a criminal and pull him toward you. Swipe any weapons out of the criminals' hands from long-range as well. Note that you can get extra hero points from untying the captured guards. A thug will try and make a getaway. Follow him with your web-swinging and drop down on the getaway car (you can also run and charge jump to catch up with the car). Pound on the car with the action button and dodge any return fire when you spot the spider sense. When the thugs exit the car, pound the one carrying the money and grab the money bag to complete the task. Finish off the other guard for a bit more hero points.
Officer Assistance: Officers are under heavy fire and need Spider-Man's assistance. Get to the scene and use your webbing to grab the thugs from long-range. Don't stand in the officers' line of fire. Stick on the other side and combat the guards there. Fire your web-lines to yank any firearms from the thugs' hands.
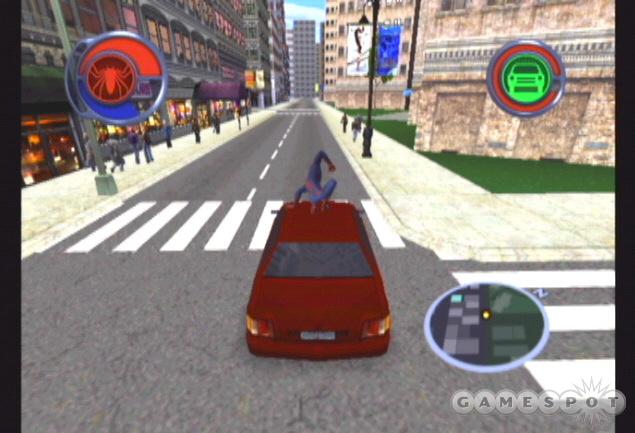
Car jacking: There are several different chase sequences as part of citizens in distress scenarios. You'll complete them in a similar fashion. Follow the marked car using web-slinging or even running. The car will likely be too fast, even with the sprint button held down. To catch up, charge a jump and leap toward the car. The charged jump will gain a lot of ground on the car. Position yourself over the car and drop onto it. Once on the car, hit the action button repeatedly. Watch for your spider sense to tingle. When it does, hit the evade button to dodge the criminals' counter attack. Defeating the car releases the crooks. Beat them down!
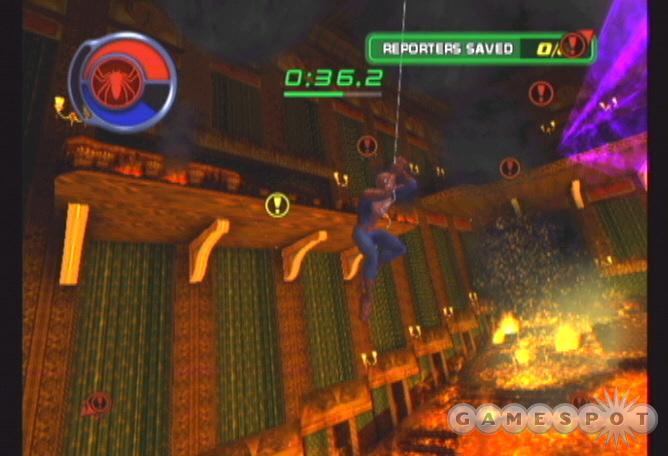
Citizen hanging off roof: These construction guys are a clumsy bunch. They conduct a little roof work and before long they're hanging off the side of the building. Unfortunately these guys aren't too strong. It's only a matter of seconds before they fall from the roof to certain death below. When a citizen points out a man hanging from a roof, a counter appears at the top of your screen. You must reach the man within the time limit. He's on a roof so your immediate course is likely up. A quick scan of the area can give you a clue on where this building stands. It might be next to you or a few streets over. Web-sling as necessary to the structure. Ascend buildings quickly using charged jumps and your sprint button. At the top, fire a web-line to grab the poor fellow. This stops the timer. The final part is to get the guy safely to the ground. Use your webbing to descend the building and drop the worker safely to the street to receive your reward.
Medical emergency: Injured citizens find themselves behind buildings or in the back of alleys with no helping hand or transportation to aid them. A countdown timer appears at the top of your screen. The timer indicates how long you have to deliver the injured citizen to the hospital for treatment. First scan the area for the symbol marking the injured citizen's location. It's likely nearby in an alley or behind a building. Move to the location and grab him using your webbing. Now it's a race to the hospital. Check the screen for a new yellow symbol marking the hospital's location. Web-swing quickly to the location and deliver the patient to the front entrance to complete the task.
Ambushed: Occasionally a citizen will feign distress when in fact he's set up a trap (usually because the thugs threatened the poor fellow). When this happens, you're almost immediately surrounded at the same position by a relatively large group of enemies. Your spider reflexes will pay off here. Toggle spider reflexes to battle the group initially. Otherwise you could jump away and combat the foes in lesser numbers or even individually. Defeat all of these enemies to gain your hero point reward.
Aliens attack: After facing Mysterio in the main storyline, a citizen may warn of an alien attack. Proceed to the location and find a group of Mysterio's alien hovering bot things. These foes hover at different heights so combating them isn't always a breeze. If you have trouble, move underneath one (using your mini-map as a guide) and jump up. Toggle spider reflexes to slow time and start punching when close to the hovering alien. Defeat them all to receive your reward.
Guys in costume: After facing Doc Ock in the Bank of Manhattan in the game's main storyline, you may be called to fight off some "guys in costume". These are the same type of enemies that accompanied Doc Ock to the bank. Beware of their bombs. Steer clear of these projectiles.
Boat crisis: Stick near the water long enough and you'll be called to aid citizens stranded on a sinking boat. This is one of the toughest citizens in distress scenarios. For starters there's a time limit: the boat is really sinking! Second, there's little margin for error. Spidey doesn't like the water. If you fall in, he has to swim back to shore costing valuable time. If you fall in while carrying a citizen, the mission ends in failure. At the mission's onset, move toward the boat. Position yourself so you can perform a charged jump (while sprinting) and land onto the boat. Grab one of the passengers then charge jump and web-sling onto shore. Drop the passenger off and repeat the process. Remember that the boat is sinking so aim toward its top or the greatest surface area.
Random Crimes: There are often "crimes in progress" that don't require a citizen alert. Look for the unique icon on your screen and proceed in its direction. It could be a group of thugs breaking into a building via a rooftop entrance, a couple thugs mugging a vulnerable citizen, a purse snatching in progress, or even a lost balloon. Most involve just beating criminals to a pulp. To rescue a lost balloon, follow it on your map and fire a web at its location. You may need to ascend a building and wait for it to rise nearby. Drop onto the ground and return the balloon to the child for your reward.
Chapter 3 - Upgrades
This section reveals combat, locomotion, air tricks, and other upgrades available at the upgrade store. The tables include descriptions and hero point prices for each upgrade.
Combat Upgrades
Acquire the following upgrades at the store to increase Spider-Man's combat repertoire. Upgrades lacking a price are already available to Spider-Man at the beginning of the game. Others may be purchased at the upgrade store during the course of the game. Check back each chapter to see if additional combat upgrades have been unlocked in the store. Note that one item is "Full Health". If you have been damaged, you can purchase full health from an upgrade store for hero points. The more health needed, the more hero points required.
| COMBAT UPGRADE | HERO POINT PRICE | DESCRIPTION |
| Dodge | N/A | Press "Evade" when Spidey's head flashes to dodge attacks. |
| Counter Flip Kick | N/A | After dodging an attack, press "Attack" to execute a counter flip kick. |
| Counter Web Slam | N/A | After dodging an attack, press "Web" to execute a counter web slam. |
| Left Dodge | N/A | Dodge to the left by holding left while dodging. |
| Counter Elbow | N/A | Use left dodge to dodge an attack, then press "Attack" to execute a counter elbow. |
| Counter Web Hammer | N/A | Use left dodge to dodge an attack, then press "Web" to execute a counter web hammer. |
| Right Dodge | N/A | Dodge to the right by holding right while dodging. |
| Counter Uppercut | N/A | Use right dodge to dodge an attack, then press "Attack" to execute a counter uppercut. |
| Counter Impact Web | N/A | Use right dodge to dodge an attack, then press "Web" to execute a counter impact web. |
| Web Hanger | 2,500 | Attack, Attack, Web, Jump: Web enemies up to light posts and traffic lights. |
| Air Jump Off Kick | 1,000 | At any point in an air combo, press "Jump" to execute a kick that will propel you higher into the air. |
| Cannonball Kick | 500 | Press "Attack" while swinging to execute a swinging kick that will hit enemies. |
| Rising Knee Kick | 1,000 | Attack, Web, Jump: Knock your target into the air with a powerful knee attack. |
| Yank Behind | 500 | Attack, Web, Evade: Web yank your target and hit enemies directly behind you. |
| Earth Breaker Punch | 1,250 | Web, Attack, Jump: Strike the ground with great force. |
| Level 3 Air Combo | 1,000 | Add a third hit to your air punches. |
| Launch Kick | 750 | After dodging an attack, press "Attack, Jump" to knock your target into the air. |
| Dizzy Strike | 1,000 | Attack, Attack, Evade: The target will be stunned and dizzy for some time. |
| Multi Web Hammer | 1,500 | Attack, Attack, Web x 6: Smash your target into the ground at the end of a web multiple times. |
| The Hero Punch | 1,250 | Charge your jump meter to full then press "Attack" to knock your enemies away. |
| Interceptor Kick | 1,000 | Web, Attack, Web, Attack: A long range kick with great power. |
| Level 4 Air Combo | 2,000 | Hit attack after your third punch in the air to knock the enemy away (must first purchase level 3 air combo). |
| Jaw Launcher | 1,000 | Attack, Attack, Jump: Launch enemies into the air. Only during spider reflexes. |
| Air Pile Driver | 1,250 | Press "Evade" while grappling an enemy in the air to execute a spinning pile driver (must first purchase grapple). |
| Double Heel Kick | 1,000 | Attack, Attack, Evade, Attack: Execute a hacking heel kick (must first purchase Dizzy Strike). |
| Stair Step Kicks Combo | 1,250 | Attack, Attack, Jump then press Attack rapidly. Execute many kicks on the enemy. Only during spider reflexes (must first purchase jaw launcher). |
| Super Web | 1,500 | Web, Attack, Web, Web: Disable enemies by engulfing them in a super web attack. |
| Whirlwind Kick | 3,000 | After dodging an attack, press "Attack, Attack" to execute a very powerful clearing kick. |
| Rising Shoulder Charge | 2,500 | Fully charge a jump, then press "Attack" while sprinting to knock enemies away and get up into the air. |
| Air Web Slam | 1,500 | Press "Web" while grappling an enemy in the air to spin flip enemy using a web line (must first purchase grapple). |
| Spider Missile | 1,500 | While wall sprinting or wall jumping, press "Attack" to execute a fast homing attack. |
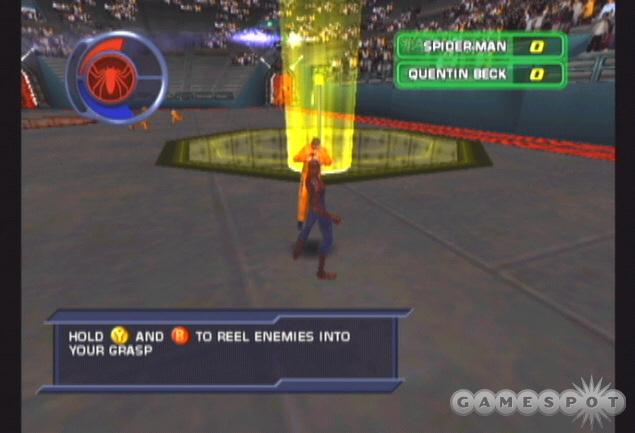
| Grapple | 750 | Hold "Web" and "Evade" to reel enemies into your grasp. |
| Multi-Web Tie Level 1 | 1,500 | While web tying an enemy, press and hold "Web" again to tie up two enemies at once. |
| Multi-Web Tie Level 2 | 2,000 | While web tying two enemies, press and hold "Web" again to tie up three enemies at once (must first purchase Multi-Web Tie Level 1). |
| Multi-Web Tie Level 3 | 2,000 | While web tying three enemies, press and hold "Web" again to tie up four enemies at once (must first purchase Multi-Web Tie Level 2). |
| Full Health | Variable | This will heal Spider-Man. The more damage healed, the more hero points it costs. |
Locomotion Upgrades
The following upgrades help Spider-Man get around the city faster.
| LOCOMOTION UPGRADE | HERO POINT PRICE | DESCRIPTION |
| Swing Speed Level 1 | 50 | This increases your swing speed. |
| Swing Speed Level 2 | 1,000 | This increases your swing speed (must first purchase swing speed level 1). |
| Swing Speed Level 3 | 1,250 | This increases your swing speed (must first purchase swing speed level 2). |
| Swing Speed Level 4 | 1,500 | This increases your swing speed (must first purchase swing speed level 3). |
| Swing Speed Level 5 | 2,000 | This increases your swing speed (must first purchase swing speed level 4). |
| Swing Speed Level 6 | 5,000 | This increases your swing speed (must first purchase swing speed level 5). |
| Swing Speed Level 7 | 20,000 | This increases your swing speed (must first purchase swing speed level 6). |
| Swing Speed Level 8 | 50,000 | This increases your swing speed (must first purchase swing speed level 7). |
| Web Zip | 1,000 | Pull "Web Swing" while pulling "Sprint" to web zip. |
| Wallsprint Duration Upgrade 1 | 1,000 | This will increase the time you can spend wallsprinting. |
| Slingshot Jump | 600 | While holding two webs, swing back and charge jump to get extra jump distance (normal swinging only). |
Air Tricks
The following table reveals air tricks available for purchase in the upgrade store. Tricks become available during the course of the game. Check back at the upgrade store to look for additional unlocked tricks.
| AIR TRICK | HERO POINT PRICE | DESCRIPTION |
| The Inverted Widow | 250 | Press "Jump" in the middle of double jumping to do this aerobatic trick. |
| Super Fly Spider Guy | 250 | Press "Jump" in the middle of falling twirl to do this aerobatic trick. |
| The Web Freak Tango | 250 | Press Jump, Jump in the middle of a falling twirl to do this acrobatic trick (must first purchase super fly spider guy). |
| Daddy Long Legs | 250 | Press Jump, Jump in the middle of double jumping to do this acrobatic trick (must first purchase the inverted widow). |
| Manhattan Web Roll | 500 | Press Jump, Jump, Jump in the middle of a falling twirl to do this acrobatic trick (must first purchase the web freak tango). |
| The Spinnaret | 500 | Press Jump, Jump, Jump in the middle of double jumping to do this acrobatic trick (must first purchase daddy long legs). |
| The Rolling Reporter | 1,000 | Press Jump, Jump, Jump, Jump in the middle of double jumping to do this acrobatic trick (must first purchase the spinnaret). |
| Webtastic 360 | 1,500 | Press Jump, Jump, Jump, Jump, Jump in the middle of double jumping to do this acrobatic trick (must first purchase the rolling reporter). |
| The Poison Pike | 2,000 | Press Jump, Jump, Jump, Jump, Jump, Jump in the middle of double jumping to do this acrobatic trick (must first purchase webtastic 360). |
Miscellaneous
The following items are unlocked in the upgrade store once you've completed the game's storyline.
| BONUS | HERO POINT PRICE | DESCRIPTION |
| Unlock Movie Theater | 1,000 | Watch movies from the game. Once unlocked, access the key locations section of the zoom map for directions to the movie theatre. |
| Unlock Fight Arena | 5,000 | Fight arena located in Shocker warehouse. Once unlocked, access the key locations section of the zoom map for directions. |
Chapter 4 - Walk-through
This section provides a complete walk-through of Spider-Man 2's storyline. The storyline is split into chapters and each chapter contains its own requirements. Meet all chapter requirements to advance the story to the next chapter. Most chapters require that you gather a certain number of hero points before advancing. You can gather hero points in a multitude of fashions, which are outlined in the walk-through.
Chapter 1 - What Might Have Been
To-Do List: Learn the basics.
This is essentially a tutorial mission to learn the ins-and-outs of movement, jumping, and climbing. Complete the wall-crawling task by pressing the attach to wall button against the building and climbing until the next task is presented. Then follow the jump tutorial by completing a charged jump and a little hop jump.
For the next task you must reach the top of the building, also marked on the map. Use a combination of wall-climbing and jumping to reach the top of the building. If you're on an adjacent structure, perform a charged jump to land on the target building. Reach the spot to complete the chapter.
Chapter 2 - A Day in the Life
To-Do List: Fight crime. Buy swing speed upgrade from store.
Your first task is to jump off the building...no really, just jump off the building! Time to try out web-slinging! Follow the instructions to fire web-lines and swing through the city. Gain greater height on swinging by pressing and holding the jump button to charge jumps. Release the web-line, soar with your charged jump, and fire another web-line to continue the swing.
Eventually a robbery at the arcade interrupts your web-slinging enjoyment. Face the blue symbol marking the location of the robbery and web-sling in its direction. The blue symbol actually marks the getaway car. You can catch the car on foot as well; hold the sprint button and use a charged jump to leap ahead of the getaway car to force it to stop. The criminals exit and are ready to fight! Practice combat using the attack button and try out the sprint uppercut maneuver during the tutorial as well. Defeat all criminals then return to the arcade owner (marked with another blue symbol).
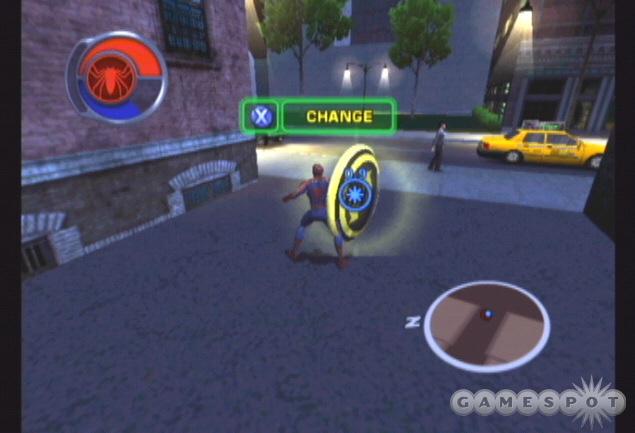
Follow on-screen instructions to receive the map tutorial. The upgrade store appears; time to purchase the swing speed upgrade. Swing to the blue symbol marking the upgrade store (you can also consult the map). Enter the store and access the marker to reveal the store's offering. Only the swing upgrade is available. Acquire the swing upgrade for a handful of hero points to complete the chapter.
Chapter 3 - Punctuality is the Thief of Time
To-Do List: Go to the pizza parlor. Earn 2,000 more hero points.
The pizza parlor is marked on your screen by the white symbol. You can head there at any time during the chapter to complete the to-do list item. But you'll also have to earn 2,000 hero points to meet the requirements to continue on with the main storyline. You'll earn hero points by helping citizens in distress, combating random crimes, finding hidden tokens, completing challenges, and other tasks.
But when the chapter opens, Peter Parker realizes he's late for Dr. Conners' class. A blue symbol appears; web-sling through the city to that location. There isn't a time limit so don't feel the need to hurry to the location. Practice your web-slinging techniques and approach the blue symbol.
You soon realize the blue symbol isn't Dr. Conners' class. It's a wounded police officer. A group of hoodlums are making off with an important case. Battle the thugs. Utilize spider reflexes to gain a quick upper hand against the crew. Use the attack and web buttons in conjunction to perfect various combinations and different web attacks. Grab the briefcase and return it to its owner.
Class isn't over. You can still make it. Resume course to the new blue symbol. Reach the ledge holding the symbol. Press the action button to change from Spider-Man to Peter Parker and automatically find Dr. Conners...too late.
Listen to the tutorial about citizens in distress. Speak with a citizen and help solve their problem. These are random elements to help you earn the hero points required to reach the next chapter (as well as purchase items in the upgrade store).
After reaching a certain level of hero points, Peter remembers he was supposed to meet his friends Harry and Mary Jane this evening. A blue symbol appears; web-sling to its location. Get to the symbol on top of the building and change out of your Spider-Man garb. Watch the cut scene of Peter, Harry, and MJ.
Upon the scene's conclusion, resume gathering hero points by exploring for tokens or helping citizens in distress. Once you have acquired at least 2,000 hero points, proceed to the white symbol marking the pizza parlor. It's along the western bank near Lower West Side.
When you reach the pizza parlor, Peter remembers he's late...again! He promised he'd meet Mary Jane for a birthday dinner. Press sprint and start web-slinging toward the blue symbol indicating your new destination. Reach the spot, change back into Peter Parker, and initiate the cut scene with MJ. Peter's spider sense must have tingled a bit; he spots a suspicious group entering a nearby art gallery.
After speaking with Mary Jane, approach the blue symbol to enter the gallery. There are criminals on the lower and upper floors. Concentrate on a single small group at once. For instance, charge to the left side of the bottom floor. Battle a group of three thugs. Use spider reflexes at close-range and your web attack button at long-range (to dislodge weapons or stun enemies).
Once you've defeated the group, proceed to the other side of the lower gallery and pummel the three thugs hanging out there. Jump up to the second floor or even take the stairs. Pound the final two thugs senseless. When you're finished, meet Black Cat.
She doesn't hang around for very long. Black Cat leaves the scene and Spider-Man must maintain pursuit. This is the first of several "keep up with Black Cat" missions. A meter at the top of the screen reveals your proximity to Black Cat. If Spidey's symbol moves to the far left, you're too far behind and the mission must be replayed. Remain close to Black Cat through sprinting, jumping, and quick web-slinging. She makes a few pit stops along the way; this gives you ample time to catch up.
If you get disoriented, look for her distinct white trail or just follow the arrow that surrounds Spider-Man. Move in that direction and remain as high as possible (the higher you are, the easier it is to spot Black Cat's trail). Use charged jumps to cross rooftops. If you miss the rooftop, use the attach to wall button to wall-climb to the rooftop (combine it with sprint and even jump) and resume course. Follow Black Cat until the cut scene interrupts the chase. Black Cat disappears for good...for now.
Chapter 4 - All in a Day's Work
To-Do List: Talk to Jameson at the Daily Bugle. Buy level 2 swing upgrade from store. Earn 3,000 more hero points.
You're free to do whatever you want at the beginning of this chapter. Start earning hero points by helping citizens in distress, searching for exploration tokens, or completing challenges.
At some point you must find an upgrade store and purchase the next swing upgrade. Toggle the map and locate the nearest upgrade store (indicated by the dollar sign symbol on the zoom map). Enter the upgrade store, access the inventory, and purchase the level 2 swing upgrade. You'll also find many more items available for sale, including various new moves, air tricks, and combat techniques.
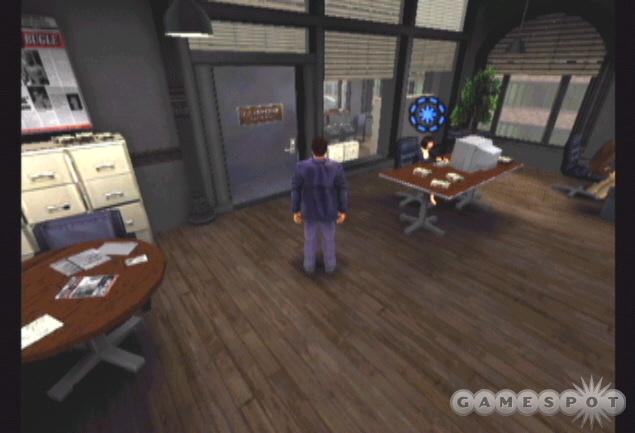
Gather hero points throughout the city and accumulate the 3,000 necessary to complete the chapter. Proceed toward Flat Iron and find the triangular-shaped building The Daily Bugle. Ascend to the building's top and find the air vent at the top. Open the vent by walking close; if you can't find the entrance, just walk along the edge until a vent opens. Drop inside the Daily Bugle.
You emerge as Peter Parker. Exit the bathroom and proceed down the hall on the left to enter the Bugle's offices. Speak with Betty at the desk; she ushers you inside Jameson's office. After the "meeting," speak with Robbie for an assignment. He needs pictures for a story--shots of the entire city. Exit the offices and return to the bathroom, otherwise known as your changing room. Access the change icon to return to the Bugle's rooftop.
Note the yellow marker within the city--that's that destination for your assignment. Reach the building at the destination and use your web-crawling techniques to maneuver around the structure and find the camera icons. Move onto each camera icon and use the action button to take the photo. Each time you snap a photo, another symbol appears to mark your next destination. Web-crawl around the building to each new photo and complete the task. The last one is at the extreme top of the tower.
The view from here is incredible so take the time to marvel at the city below. Now you must take the pictures back to the Bugle; a blue symbol appears on your map to note its location. Freefall to the city below and toss a web-line. Traverse the buildings to the Daily Bugle and enter through the rooftop air vents. Move into the office and speak with Robby. Move to Betty's desk and speak with her to gain access to Jameson's office. Deliver the pictures and return to the bathroom to return as Spider-Man to the Bugle's rooftop.
This triggers the next sequence--the appearance of Rhino. This battle also provides a quick tutorial of your spider sense. Whenever Spider-Man's head flashes, he's about to be struck by a fist or weapon projectile. Press the evade button when your spider sense goes off to dodge the attack. This method is the only way to take down Rhino; his armor is simply too strong without dodging!
Lock the camera onto Rhino so you can concentrate on dodging and not camera rotation. When Rhino charges close, the spider sense goes off; dodge the attack, which makes Rhino dizzy. Pummel him with a few combos before jumping away and repeating the entire event again. Wait for Rhino to move close, spot the spider sense, evade Rhino's attack, and then initiate your own combo against him.
Chapter 5 - A Meeting of the Minds
To-Do List: Go to Doctor Octavius's Apartment. Buy Grapple attack upgrade from store. Earn 2,000 more hero points.
A symbol marks Doctor Octavius's apartment on your screen. There's no rush to get there just yet. Instead, take the opportunity to earn more hero points. You'll need 2,000 to meet the requirement to complete the chapter. At some point you'll also need to visit an upgrade store and purchase the grapple attack upgrade for 750 hero points.
Once you've accomplished these tasks, proceed to the Upper West Side of the city and find Doctor Octavius's apartment marked on your screen. Reach the marker to change into your Peter Parker garb and automatically meet Harry out front. The extended cut scene concludes the chapter.
Chapter 6 - Cat and Mouse
To-Do List: Find the 5 Photo Op tokens. Go to Mary Jane's apartment. Buy level 3 swing upgrade from store. Earn 2,000 more hero points.
Spot the two symbols in the distance. The white marker indicates the location of Mary Jane's apartment; the yellow marker denotes the location of the photo ops. Work your way toward these markers while earning some hero points. Find citizens in distress, seek out random crimes, or hunt down skyscraper, buoy, hideout, or secret tokens.
As you earn hero points and work toward the location of the photo ops and Mary Jane's apartment, use the map to find the nearest upgrade store and pay it a visit. Before you complete the chapter, you must purchase the level 3 swing upgrade. Acquire the upgrade and cycle through the store's upgrade inventory for any additional wants and needs.
As you near the photo op tokens, the yellow marker splits into five noting the location of each of the five tokens. Work your way around this area of the city and collect each of the five photo op tokens. Upon collecting the final of the five tokens, an alarm sounds and Spider-Man spots a familiar face. It's Black Cat--she's back and the alarm would indicate that she's up to no good.
A marker appears on screen indicating Black Cat's position. Climb the building to its roof and find her. Unfortunately she's gone once again. It's another chase sequence. You must remain within close proximity of Black Cat to successfully complete the chase. A meter at the screen's top reveals your proximity to Black Cat. Don't let Spidey's symbol reach the far left side or the mission fails. Follow her glowing trail or use the arrow that surrounds Spidey. Stay as high as possible to aid in your navigation (better to see her trail).
Spidey eventually catches Black Cat and questions her about the alarm and stolen jewels. She leaves...again...and Spidey is free to resume the chapter's objectives. It's time to proceed to Mary Jane's apartment. Proceed to the white objective marker on your screen; it's over in Soho. Reach MJ's apartment door and find the note (this apartment will be marked by an "MJ" on the zoom map) to conclude the chapter.
Chapter 7 - Pride and Prejudice
To-Do List: Talk to Jameson at the Daily Bugle. Earn 3,000 more hero points.
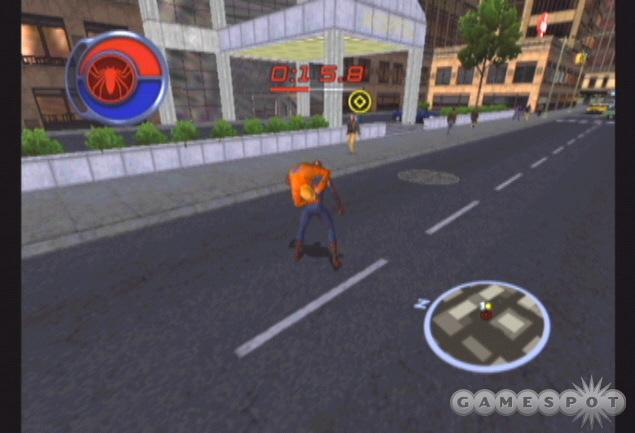
You can use the action button to read Mary Jane's note. Doing so activates the first of several Mary Jane missions. These aren't mandatory and are essentially "get to a location before the time expires" missions that test your skill with the web-line. The more difficult Mary Jane tasks will become much easier as you increase your swing speed via the upgrade store. The Mary Jane missions are a good source of hero points; further, completing all of them provides a special reward.
So start earning hero points to meet the 3,000 chapter requirement. Complete a couple Mary Jane missions to supply a large chunk of the requirement then help citizens, search for tokens, or complete challenges to gather the remaining points.
When you've gathered the hero points (or even before, it doesn't matter when), proceed to the Daily Bugle building in Flat Iron. Scale the building to its roof and find the air ventilation system at the top. Enter the open vent and drop into the bathroom as Peter Parker.
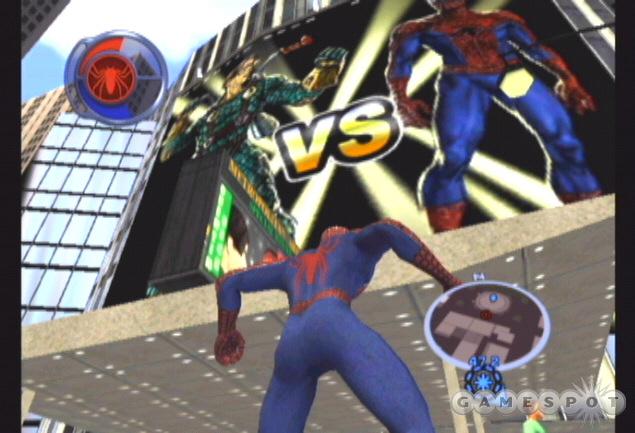
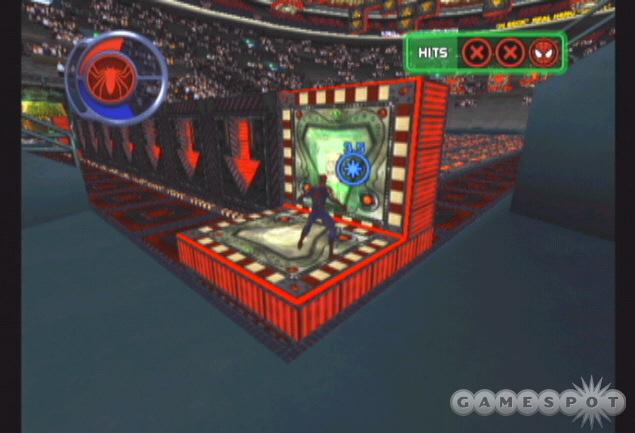
You'll automatically speak with Betty and then Jameson. Apparently something's going down at the sports arena. Quentin Beck has publicly challenged Spider-Man--Beck wants Spider-Man to prove his worth! Exit the Daily Bugle and swing toward the sports arena. Enter the main doors and continue inside to trigger the cut scene.
Beck challenges you to a competition. Criminals will flood the arena. You must collect criminals and drop them into the pit lit by the green light. To win the competition, you must gather more criminals than Quentin Beck. Follow the instructions and use the web-line and evade buttons to reel in the criminal. Gather him in Spidey's arms and toss the criminal into the pit lit by the green light. If you toss a criminal into a red pit, you won't receive a point.
To work quickly, run toward the pit lit by the green light. Reel in the criminals near that pit and drop them quickly then resume the technique. When the green lit pit switches, move toward the new location and start gathering. It is possible to fall into a pit. If this happens, charge a jump and get out quickly and resume criminal gathering!
There are three rounds in the competition. To win, have the highest score after the third round. If there's a tie, a fourth round is played and the first to score four points wins.
Complete the first competition successfully and advance to the next. Beck has created an obstacle course for Spidey to navigate. The catch is if Beck spots you, he'll fire his cannon in your direction. He'll hit you within seconds so it's imperative to remain behind cover. You can withstand three hits before the mission fails.
The following list provides tips for each step of the obstacle course.
1. The first part is easy. Just turn slightly to the right and sprint across. The panels drop down one by one at a fairly quick rate. If you start running immediately, you can make it to the far side without moving into Beck's view. At the end, press the switch to begin the next course sequence.
2. Ride the platform to the new destination. Use the attach to wall button and wall climb the blocks to the top. Wait for the block moving between the two sides to move adjacent to the block you're on and crawl onto it. Continue crawling along the side and traverse the next moving block. Wait for it to move toward you, crawl onto the block, and then wait until it reaches the adjacent path to continue to the final platform with the switch. Press the switch to begin the next course sequence.
3. Ride the platform to the next destination. This one is easy. Don't bother trying to crawl across the rotating platforms. Instead, just wall climb along the stationary wall and reach the far platform with the switch. Press it to begin the next course sequence.
4. Stay on the platform and ride it to the next pathway. Note the pattern. Every other block rotates in turn. That means there are plenty of safe blocks to move on. After the first block rotates, crawl into it. Wait for the next block to rotate and stop then crawl onto that adjacent block. Repeat it across the entire path to the far platform with the switch. Press it.
5. Remain on the platform until you reach the next course. Note the movement of the blocks. Each block moves up and down. Although the blocks are always touching, there's a point where the blocks are adjacent. It's possible to wall climb across the blocks very quickly by moving diagonally up then down and repeat. Or you can wait until the blocks are adjacent before crossing. There's no time limit so just make it across safely. Press the switch on the opposite side.
6. Not a surprise but the last part is the toughest part. Ride the platform to the final section. You can't just stand on these platforms because they move and rotate toward Beck. You'll be a sitting duck. Instead you have to jump carefully from platform to platform. From the start position you'll be moving to the left. Reach the final platform and hit the switch to complete the course and Beck's challenges. Should you fall from this final part of the course, try and jump back up to the platforms using a charged jump.
Chapter 8 - Sugar and Spice
To-Do List: Go to Doctor Octavius's apartment. Buy level 4 swing upgrade from store. Earn 3,000 more hero points.
A white objective symbol marks Doctor Octavius's apartment on your screen. But there's no hurry to complete that objective. Instead, start earning your hero points. Help some citizens in distress, seek out random crimes, or search for elusive tokens. There are also challenges to complete, Mary Jane missions to try, and even pizzas to deliver.
At some point during the chapter, find the nearest upgrade store and proceed inside. It's time to purchase another swing upgrade. You've now upgraded to level 4 swing speed. Increasing swing speed will help you complete other tasks, such as more difficult Mary Jane and pizza delivery missions. Time is critical in these tasks and additional swing speed becomes imperative.
Proceed toward the white objective symbol and find Doctor Octavius's apartment building. Get to its roof and walk to the marker and change into Peter Parker and automatically enter the residence. After the conversation, you leave the apartment and realize you're late...yet again! This time it's to Mary Jane's play. A timer of 3 minutes, 20 seconds appears at the top of the screen. It's a lot of time but the play isn't close!
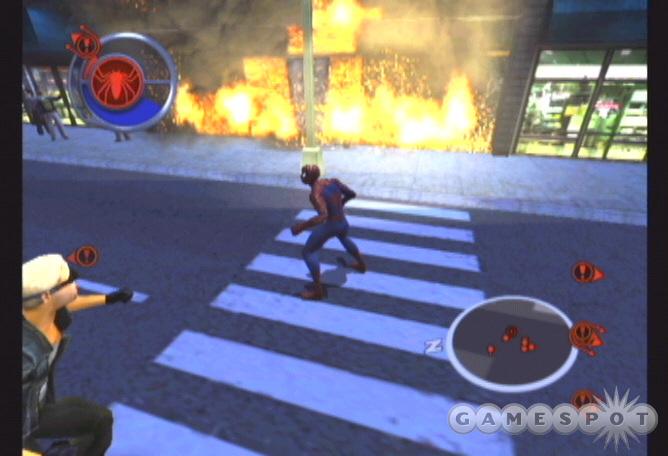
Start swinging toward the blue distance symbol marking the location of Mary Jane's play. Go through streets to work quickly. It's faster than traversing rooftops with charged jumps, climbs, and swings. A cut scene interrupts your approach when you get close. A crime is underway. When you regain control of Spidey, proceed to the blue distance marker and reach the scene.
There are plenty of bad guys to pummel here but the most dangerous one rests on the rooftop. It's a sniper with a precise and powerful shot. Getting tagged by his sniper projectile hurts a bunch. Use climbing and charged jumps to ascend the building quickly and pound the sniper into the ground. If he falls off, follow the sniper to the ground and get him out of commission as soon as possible.
The remaining thugs aren't as tough. Toggle spider reflexes when battling a large group. Dodge their attacks and counter with your combinations. If you're overwhelmed and without spider reflexes, back away down the street and use web attacks from a distance and regain some spider reflexes before returning close and resuming the beat down.
After conquering the crime scene, a sniper escapes in a getaway truck. Follow the truck. Do so ideally through web-swinging to avoid the sniper's projectiles. Land on the truck and start punching to stop the vehicle. Watch your spider sense. When it flashes, hit the evade button to dodge the impending attack. Stop the vehicle and defeat its passengers to complete the sequence.
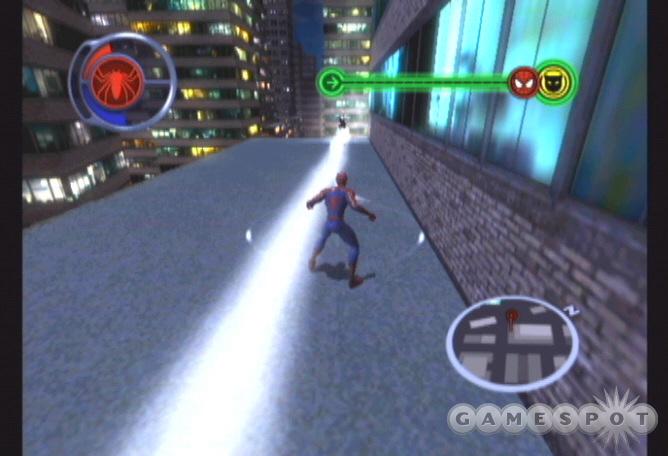
A cut scene shows Spidey spying on Mary Jane--he was too late to the play. Black Cat makes another appearance and it's time for another chase. A meter at the top of the screen reveals your proximity to Black Cat. If Spidey's symbol moves to the far left, you're too far behind and the mission must be replayed. Remain close to Black Cat through sprinting, jumping, and quick web-slinging. She makes a few pit stops along the way; this gives you ample time to catch up.
If you get disoriented, look for her distinct white trail or just follow the arrow that surrounds Spider-Man. Move in that direction and remain as high as possible (the higher you are, the easier it is to spot Black Cat's trail). Use charged jumps to cross rooftops. If you miss the rooftop, use the attach to wall button to wall-climb to the rooftop (combine it with sprint and even jump) and resume course.
She leads you to a heist-in-progress. The thugs below appear to be stealing some sort of artifact. Drop to the ground below and start pummeling enemies. Beware of the thugs' carrying firearms. Use your web attack to yank the weapon from their grasp. Toggle spider reflexes when battling larger groups. Try to keep the battles one-on-one by using your web attack to pull enemies close to you or away from the rest of the group. When the battle concludes, Black Cat has disappeared...along with the artifact.
Chapter 9 - When Aliens Attack
To-Do List: Talk to Jameson at the Daily Bugle.
There's no hero point requirement in this chapter but that doesn't stop you from gathering some anyhow. In fact, you may need some hero points to purchase more combat or speed upgrades. Work your way toward the Daily Bugle in Flat Iron and gather some hero points during the trek. Ascend to the top of the Daily Bugle, enter the ventilation system, and maneuver toward Jameson's office.
Quentin Beck's holding a news conference. Jameson wants photos! Exit the Daily Bugle via the bathroom and you witness a cut scene of the news conference. The theater holding the conference turns into a full-fledged alien attack--straight out of the 1950s! Time is critical. A countdown appears at the top of your screen. Swing toward the blue distance marker on your screen and reach the conference in time.
Reaching the theater isn't enough. Move inside the front doors then use charged jumps to quickly move to the upper floor. It's possible to take the stairs but it's also pretty slow. Enter the door at the top and into the theater to begin the next sequence.
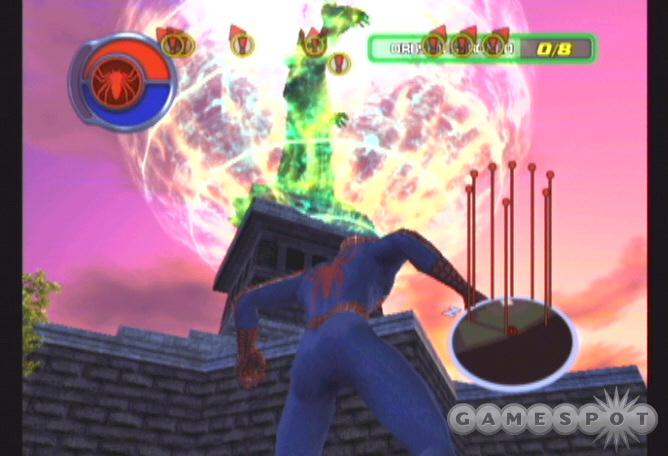
It's Mysterio! He's trapped several reporters amongst the fiery theater debris. There are six reporters total: two on the right balcony, one on the left balcony, and three on the stage. There's one reporter hanging from each balcony. You must rescue the hanging reporters before the countdown at the screen's top expires. Other alien creatures hover throughout the theater. Don't worry about them just yet. The reporters are your priority!
Swing over to the right balcony and grab the hanging reporter. Swing back to the start position and drop him. Grab the reporter hanging from the left balcony and return him to the start position. Utilize the sprint button as you swing to gain extra height to swing above the balconies so you can easily jump to the position. Grab the third reporter--he's on the right balcony--and return him to the start position.
Only three reporters remain. All three are on the stage near Mysterio. Leap to the right balcony then down to the stage. Grab a reporter and use a charged jump toward the start position. Launch a web-line and hold sprint and jump to swoop and leap up toward the start position. Deposit the reporter there and return to the stage. Repeat until the remaining reporters are rescued.
Your job isn't finished, though; you must destroy Mysterio's floating minions. Focus on particular enemies by locking on the camera. Move close to a floating minion and, if the floater is high, use jumps to reach it and pummel it with combo attacks. You can switch to spider reflexes for increased damage and hits during the attack. Obliterate all minions to complete the sequence.
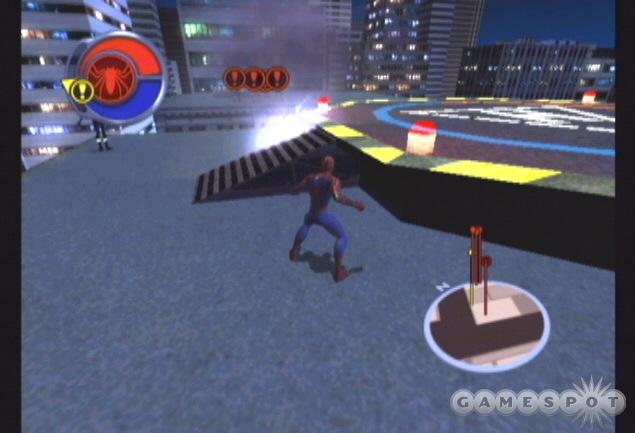
Mysterio leaves the theater for a new target: the Statue of Liberty. Proceed toward the blue distance marker on course toward the Statue of Liberty. You'll reach the city's edge and spot Lady Liberty in the distance. Alien craft hover in a formation that creates a path toward the city to the Statue of Liberty. That's your ticket! You must web-swing along the hovering craft and reach Liberty Island.
The key to successfully traversing the path is to use the sprint and jump buttons to maintain momentum and height as you cross the water toward Liberty Island. Jump off the web-line at the height of the swing (going quick using sprint) and toss another web-line at the next craft. Follow it to the right as the hovering craft form the path toward the island.
Falling in the water means starting over; however, once you've moved within a certain range, the counter "Orbs Destroyed" appears in the upper right corner of the screen. When it does, you're locked into the island. If you fall into the water beyond this point, you swim to the Statue of Liberty and begin there.
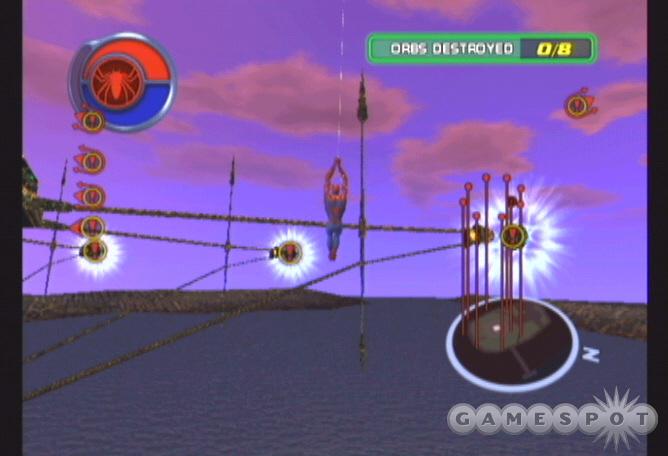
The goal at the Statue of Liberty sounds simple but it's not easy. You must swing around the top of the statue and destroy eight floating glowing orbs that surround the center structure. Destroying all eight orbs deactivates the shield around the brain, which lies in the center structure. With the shield down, you must destroy the brain. The catch is the shield eventually returns. If you fail to destroy the brain in time, the orbs return and you must destroy all eight orbs again.
A good way to tackle the orb objective is to use your web-swinging ability to navigate around the center structure in a clockwise or counter-clockwise direction. If you maneuver near an orb, jump toward it and start pressing the attack button. When you get close to an orb, Spidey automatically moves close. Hit the attack button vigorously and you can destroy the orb in a single pass. Don't use spider reflexes. Save them for the brain. Continue around to each orb. You may pass an orb but if you continue in a circular pattern, you'll reach them all.
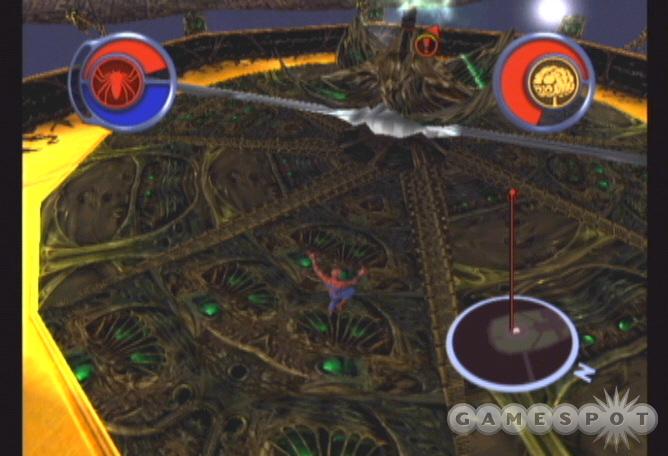
When you clear the last orb, you must focus your attention on getting to the brain (on the center structure) quickly. Swing and adjust your momentum toward the center. Use charged jumps to leap toward the center. Drop down near the unshielded brain. There's a rotating blade that protects the brain. Leap to avoid the spinning blade and move close to the brain. Toggle spider reflexes to increase damage and slow time, which allows you to score more hits. Remember, if you don't destroy the brain quickly, the orbs return and you will have to complete that sequence again to have an opportunity to punch the brain.
After completing the sequence at the Statue of Liberty, proceed toward the blue distance marker--it's Mysterio's "secret" hideout. Climb inside the apartment and approach the bookcase to find the secret passage to Mysterio's Funhouse of Doom.
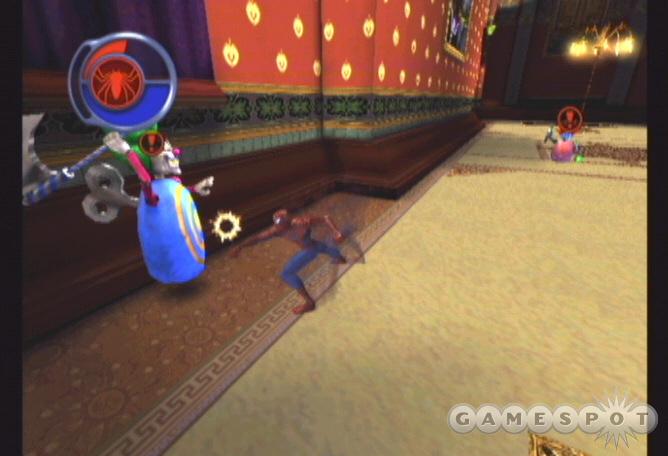
Your first battle is against a blow-up clown. The trouble is he bounces back after being struck; when the clown bounces back, you might get struck with his blade. Unleash a combo on the clown then jump away to avoid the bounce back strike. Defeat the inflatable foe and proceed inside the funhouse.
The room flips upside-down...but that's not a problem. It's three more inflatable enemies that are your main concern. Battle these foes the same way you tackled the first. Punch, punch, and punch, then jump away to avoid the bounce back attack. Conquer all three and continue on into the circular room of mirrors.
Spidey look-alikes appear from the mirrors. It's a waste of time to fight them. Instead, move in a circular pattern around the room and break all of the mirrors. Just bust them one by one. Ignore the look-alikes and start breaking glass. Shatter all mirrors and move through the open lit passageway to complete the sequence. Exit the funhouse and Mysterio's hideout to conclude the chapter.
Chapter 10 - When Good Men Go Bad
To-Do List: Buy level 5 swing upgrade from store. Earn 3,000 more hero points.
There's no pressing matter as the chapter opens. It's just time to collect more hero points. Start helping your fellow citizens or search for some tokens. Keep gathering more hero points until Spider-Man remembers an important appointment: Doctor Octavius's demonstration. Proceed to a nearby upgrade store if you have the chance and acquire the level 5 swing upgrade. If you don't get a chance to score the upgrade, remember you'll have to purchase the upgrade before you can complete the chapter.
Spot the blue distance marker on your screen and proceed toward the destination. Reach Doctor Octavius's Upper West Side apartment. Ascend to the roof and find the change icon. Access the icon to enter the apartment as Peter Parker. Watch as the disastrous demonstration unfolds. Regain control as Spider-Man with a dangerous task ahead of you.
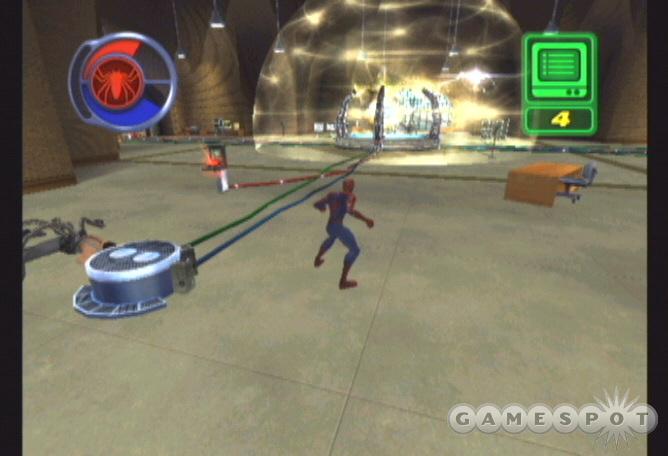
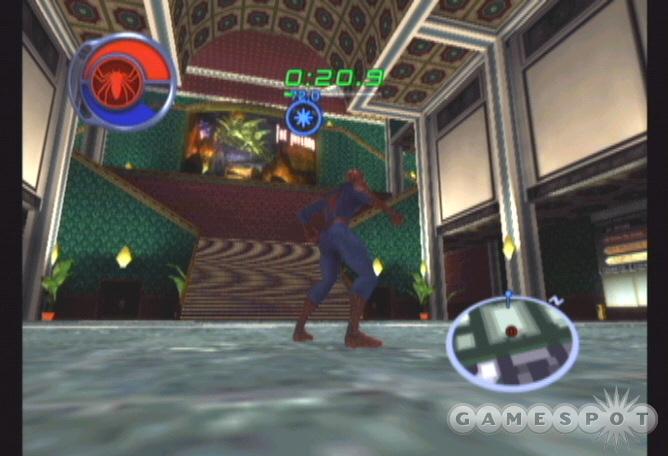
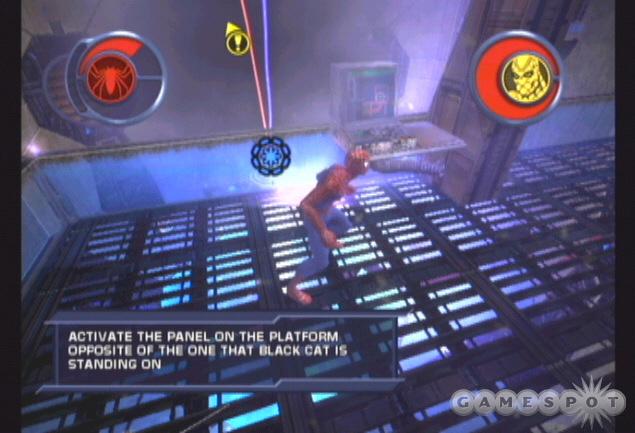
The sequence's goal is to break the four control panels. There's one panel on each side of the containment field. This means you must maneuver around the entire containment field to reach every control panel. The dangers here are the changing containment field and the plasma beams. First the good news: the plasma beams aren't difficult to dodge. Whenever the spider sense goes off, press the evade button to dodge the plasma beam.
The bad news: the containment field is nasty. If you brush against the containment field, you suffer major damage. Further your body is hurled against walls and far into corners forcing you to make an attempt to get around the containment field all over again. The containment field moves in a pattern and the pattern changes after each destroyed control panel.
The first control panel is right near your start position. Hold still until the containment field moves in tight around the experiment then punch the control panel and jump away quickly.
Reach the second control panel in the alcove right of the first panel. Watch the containment field pattern. It moves in stages from small to full. Wait until it starts moving to its smallest size, and sprint past the right side and into the alcove. Fire a web-line and swing into the alcove if necessary. Destroy the second control panel.
Two down and two to go. Watch the new containment field pattern. It goes full then shrinks to middle size then returns to full then shrinks all the way to its smallest size. Wait until it returns to full the second time and starts shrinking to its smallest size then sprint to the alcove on the right side. Again, use a web-line if necessary. Stick close to the wall on the right side to avoid the enlarging field and get to the third control panel. Destroy it.
Time to head for the last control panel. The containment field pattern moves wildly now. Watch it closely. Once again there are three positions for the containment field: largest size, middle size, and smallest size. The pattern is complex. The containment moves in this sequence: largest, smallest, middle, smallest, middle, largest, middle, largest, middle, smallest, largest, smallest, middle, smallest, largest, middle, largest...in a repeating pattern. The best time to move past the containment field is when it moves from its largest size to the smallest size, to middle, then to smallest again. Wait for that opportunity and sprint past along the right wall into the next alcove containing the last control panel. Destroy it to complete the mission.
Resume gathering hero points if you haven't met the chapter's quota. At some point, Peter remembers he's late--yet again--for a meeting with Dr. Conners. Proceed toward the blue distance symbol. As you get close, a quartet of Mysterio's alien bot minions appears. Check the map to gauge their height. You may need to climb a nearby building to reach one or more of the bots. Jump at the bot, toggle spider reflexes, and bash each bot into submission.
Doc Ock makes the meeting with Dr. Conners well before Peter arrives and the results aren't pretty. Move to the blue distance symbol to reach Dr. Conners and automatically usher him to the hospital.
Spider-Man goes hunting for a lead on what happened to Dr. Conners. He picks his first destination: Daily Bugle. Proceed to the blue distance marker and climb to the Bugle roof. Go down into the vent shaft. Listen to the conversation: Octavius is now Doc Ock. Exit the Bugle to conclude the chapter.
Chapter 11 - The Underworld of Crime
To-Do List: Meet Aunt May at the bank. Earn 4,000 more hero points.
The bank appears on your screen as a white objective marker. There's no rush to move to the bank. You can take time to earn some hero points to meet the chapter requirement or to save up for new upgrades available at the store. Help more citizens, find more tokens, or complete other challenges.
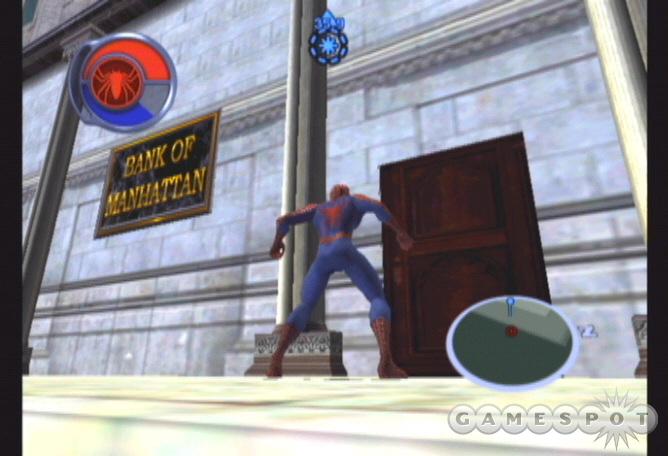
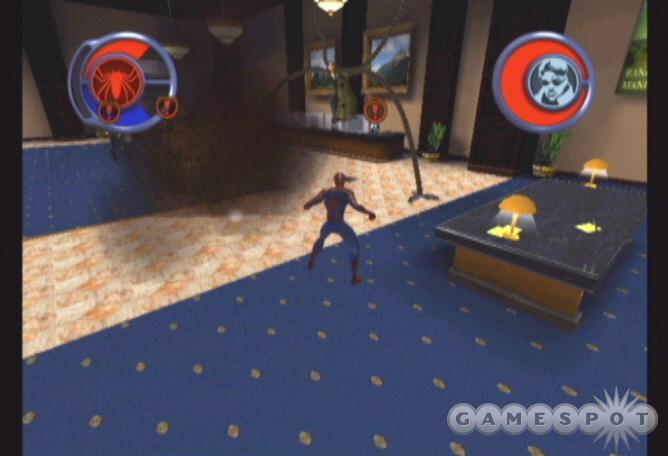
When ready, proceed to the objective marker to find the Bank of Manhattan. Maneuver to the roof and access the change icon to morph into Peter Parker and greet Aunt May at the door. The situation falls apart once you're inside the bank. Doc Ock appears with a group of thugs. A quick change into Spider-Man and you're ready to retaliate.
These aren't normal thugs. They're better armed. These guys can counter your punches with a close-range blade attack and can ruin your day with a longer range bomb attack. Avoid their bombs and attack the thugs before attempting to fight Doc Ock. Toggle spider reflexes if surrounded and attempt to battle one thug at a time. Jump out of the area if you spot a dropped bomb. Note that the bombs do damage the thugs, so you might get lucky. Steer clear of Doc Ock for the time being and counter the thugs.
When just Doc Ock remains the true battle has begun. Take note on how you battle Doc Ock here; it'll happen again in a very similar fashion later in the game. Watch his tentacles. When a tentacle turns red, Doc Ock is about to attack. Be prepared to press the evade button. After evading, follow up with a web attack. This traps Doc Ock's tentacle against the wall or ground in your webbing. Trap a couple tentacles and you can attack. Utilize your spider reflexes when attacking Doc Ock so you can inflict increased damage and more hits.
You won't defeat Doc Ock. After inflicting some damage, he flees the scene. Additional thugs appear near the exit. Defeat them as you did the first group. Avoid the bombs, utilize your spider reflexes, and pound them into submission.
When you exit the bank, you soon realize Aunt May is in a heap of trouble. Doc Ock found her and has taken her to a helicopter on the roof. When you regain control of Spidey, quickly ascend the building and beat the time limit to complete the objective. The copter makes an escape. Follow the copter through the streets via web-slinging. If possible, latch onto the helicopter with a web and just ride it!
There's a train on its way to Aunt May. As soon as you gain control, start web-slinging toward the blue distance marker to reach Aunt May. The train isn't slowing down so web-sling, don't run, to Aunt May. Reach her before the train arrives to complete the objective and the chapter.
Chapter 12 - Shocking Developments
To-Do List: Go to your apartment. Earn 4,000 more hero points.
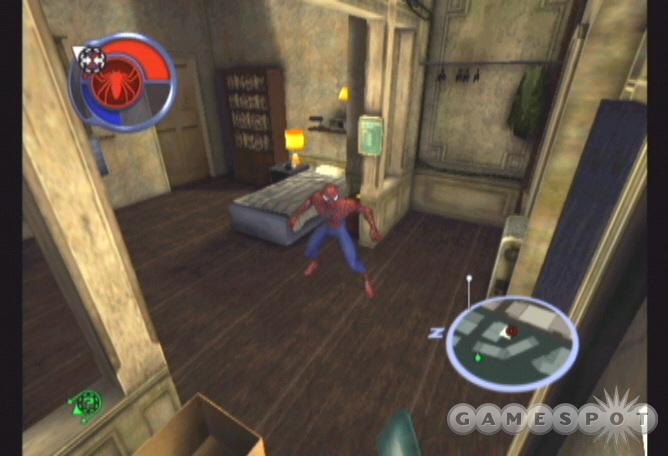
A white objective marker reveals the location of Peter's apartment. Proceed there when you're ready. Take the time to gather some hero points, purchase upgrades, or simply sightsee around town. Crawl up to your apartment's balcony and maneuver inside to trigger the cut scene.
You listen to a message from Jameson. Exit your apartment and proceed toward the next blue distance marker. Reach the top of the marked building and encounter Black Cat once again. She scuttles off and you must pursue!
A meter at the top of the screen reveals your proximity to Black Cat. If Spidey's symbol moves to the far left, you're too far behind and the mission must be replayed. Remain close to Black Cat through sprinting, jumping, and quick web-slinging. She makes a few pit stops along the way; this gives you ample time to catch up.
If you get disoriented, look for her distinct white trail or just follow the arrow that surrounds Spider-Man. Move in that direction and remain as high as possible (the higher you are, the easier it is to spot Black Cat's trail). Use charged jumps to cross rooftops. If you miss the rooftop, use the attach to wall button to wall-climb to the rooftop (combine it with sprint and even jump) and resume course.
Black Cat leads you to a warehouse near the southern edge. Follow her inside. Cross the first room to the adjacent chamber and encounter Shocker. A blue symbol marks his location; he hovers and jumps around the room so lock the camera onto Shocker if necessary.
The biggest dangers are Shocker's projectile attack (use the evade button to avoid when the spidey sense appears) and his shockwave attack. He'll stand still and build up a shockwave. The explosion causes significant damage and tosses Spider-Man across the warehouse. When you spot Shocker stand in place and build up the shockwave, immediately jump away and web-sling into an opposite corner. He also can push you away with another attack. Just back off and resume the attack when possible. Once you're in close, use spider reflexes and unleash combos.
At some point during the battle, a few of Shocker's friends appear on the upper area of the warehouse. Go beat them down. Dodge their attacks and unleash combinations. Or just ignore them and concentrate your attention on Shocker. Once you've crushed Shocker and his health bar has been exhausted, the chapter concludes.
Chapter 13 - Cleaning the Slate
To-Do List: Talk to Jameson at the Daily Bugle. Earn 4,000 more hero points.
A white objective indicator appears on your screen: follow it to the Daily Bugle. You can also spend time earning the hero point requirement or just go straight to the Daily Bugle and concentrate on gathering the remaining points later. Once at the Bugle, climb to the rooftop and enter through the vent shaft. Speak with Jameson; he has a photo assignment.
Exit the Daily Bugle and proceed toward the blue distance marker. As you near the marker, a cut scene interrupts the action. A distressed citizen exclaims that monsters are robbing the Speedy Mart. Resume course to the new blue distance marker.
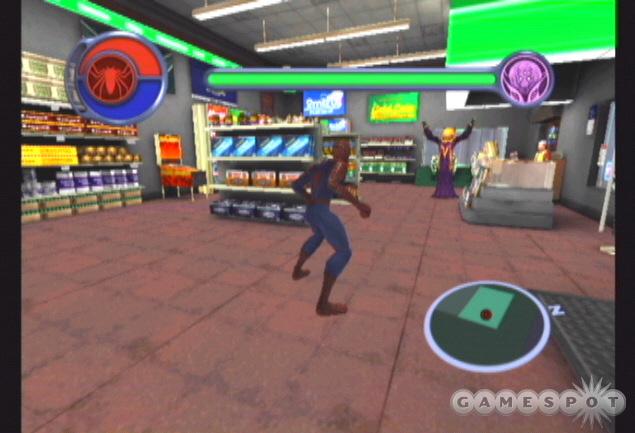
It's Mysterio inside the Speedy Mart. When you regain control of Spider-Man, just walk up to Mysterio and punch his lights out. The mystery of Mysterio has been solved. Exit the Speedy Mart and continue once again to the blue distance marker--this time it's back to the Daily Bugle. Speak with Betty and get inside Jameson's office. After the conversation, exit the Bugle and return to the rooftop.
The cries of a citizen in distress can be heard. Spidey automatically drops to help but she's too afraid to stand near Spider-Man. Return to the Bugle to give Jameson a piece of your mind. But Black Cat appears out of the blue (she has a way of doing that).
It's another chase sequence--with a couple twists. First, the recap. A meter at the top of the screen reveals your proximity to Black Cat. If Spidey's symbol moves to the far left, you're too far behind and the mission must be replayed. Remain close to Black Cat through sprinting, jumping, and quick web-slinging. She makes a few pit stops along the way; this gives you ample time to catch up.
If you get disoriented, look for her distinct white trail or just follow the arrow that surrounds Spider-Man. Move in that direction and remain as high as possible (the higher you are, the easier it is to spot Black Cat's trail). Use charged jumps to cross rooftops. If you miss the rooftop, use the attach to wall button to wall-climb to the rooftop (combine it with sprint and even jump) and resume course.
A few times during the chase, a group of Shocker's goons halts your progress. Black Cat remains nearby so there's no need to worry about the chase. Make the stop and clear out the goons before proceeding onward. They're not that tough. Use your spider reflexes to battle them up-close. You can even hurl them off the top of the building with your web-line skills. Repeat this sequence a few times as you begin to move east.
Black Cat moves to the nearby Roosevelt Island. Follow her by swinging underneath the bridge connecting the city to the island. Black Cat moves across the bridge so just follow her trail and web-sling underneath the bridge to follow her across. Continue to follow as she bends to the north toward another warehouse. Enter inside and proceed toward the symbol marking Black Cat's location. It's in a center chamber--another battle against Shocker.
When the battle begins, Shocker remains on a high pedestal and you soon discover a shield protects him. Black Cat looks for a way to shut down Shocker's force field. She soon finds it. Platforms near the top of the chamber hold control panels that can disable Shocker's shield. The catch is there are two switches to press. Black Cat presses one and you must press the other. The one to press is the switch directly across from Black Cat's switch position.
Quickly scamper up the wall toward the platform across from Black Cat's position. Do so when she says she's found the switch. With the shield down, drop down to the chamber's center and unleash combos (using spider reflexes) on Shocker. He possesses the same attacks as before. When he charges his shockwave, quickly back off using jump and web-lines to get to the opposite end of the chamber.
Repeat these tactics a few times. Black Cat eventually discovers a way to permanently disable Shocker's force field. Resume your attack. Don't get greedy. Get in a couple combos then begin to back away to avoid that damaging shockwave attack. Defeating Shocker concludes the level if you've met the hero point requirement. If not, go gather some more to finish off the section.
Chapter 14 - Burning Bridges
To-Do List: Earn 3,000 more hero points.
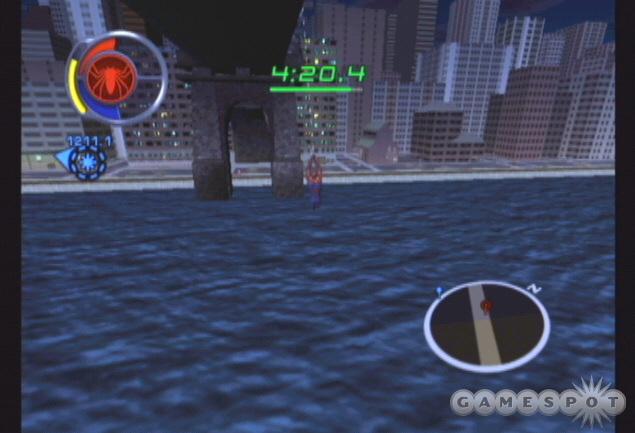
Spidey has another chance to make Mary Jane's play. As soon as the chapter opens, you're given a timed race sequence. A counter reveals 5 minutes to make it to the designated location. If you're on Roosevelt Island, return the same way you got there: swing underneath the bridge. Five minutes should be more than enough time to reach the distance marker.
A group of thugs threaten Mary Jane. Pummel them into submission with your combos and spider reflexes. After the battle, Spidey remembers a meeting with the other woman in his life: Black Cat. There's no timer on this one. Just proceed to the blue distance marker to encounter your feline friend. It's on a ledge of a very tall building.
Black Cat has a new destination for you--and she'll race you there. Unlike the chase sequences, the meter reveals who is ahead in the race. Beat her to the destination for a reward or lose and receive nothing. She leads Spidey to a rooftop overlooking a group of thugs and giant robots below.
This is a tough fight. The giant robots carry rocket projectile weapons that inflict serious damage. Plus, several of the thugs carry sniper rifles, also very damaging. You do have one advantage: Black Cat joins the battle and actually fares quite well. In fact, you could let her handle most and even all of the fight for you.
If you want to participate in the battle, turn right from your start position and proceed toward the farthest enemy. That's a sniper. Punish him and use the crates as cover against the giant robots and other enemies. Wait there for other thugs to arrive and defeat them behind the cover of the crates.
Traverse the rooftop (or go behind the building) to the far opposite side where there's another sniper perched on a crate. Defeat him and use the crate for cover. Finish off any remaining thugs nearby until only the two giant robots remain on your screen.
Defeating the giant robots is easy if you follow one rule: stay out of their line of fire. Allow Black Cat to distract a robot then move to its back side. Activate spider reflexes and unleash your favorite combos. If the robot begins to turn around, jump away and take cover. Repeat until the robots are destroyed...or wait for Black Cat to do the dirty work for you!
After the battle and some quiet thinking time, Spidey looks for Black Cat again. Follow the blue distance marker to Black Cat's new location. Upon the conversation's conclusion, another distance marker appears: it's Mary Jane's apartment. Watch a couple cut scenes (the second with Harry and Doc Ock plotting) and gather the remaining hero points needed to complete the level.
Chapter 15 - To Save the City
To-Do List: Go to your apartment.
A white objective symbol marks the location of your apartment. Acquire any remaining combo or speed upgrades you wish to use in the game's final battles before going to your apartment. When ready, proceed to the objective marker and enter your apartment. Spidey receives a message to meet Mary Jane. You have just 1 minute, 50 seconds to get there!
Swing out of your apartment and proceed to the location. It's a diner. Mary Jane and Peter enjoy a nice meal before a car through the window interrupts them (it's the infamous scene from the trailer). The menacing Doc Ock arrives and kidnaps Mary Jane and tells Peter to find Spider-Man immediately.
It's another timed chase. A counter of 1 minute, 50 seconds appears at the top of the screen. Proceed quickly and jump and web-sling your way toward the blue distance marker. Watch the cut scene upon arrival and prepare to battle Doc Ock on top of the moving train.
Catch up to the train when you regain control of Spidey and find Doc Ock waiting for you on its roof. The battle is similar to before. Dodge Doc Ock's tentacles and use your web-line button to trap the tentacle onto the train. When a tentacle turns red, watch for the spider sense and press the evade button. When a tentacle turns yellow, it can be webbed onto the train. It's easiest to wait for the red tentacle, dodge it, and then immediately fire a web to trap the tentacle. With Doc Ock trapped, move in close, activate spider reflexes, and unleash combinations on him. If you happen to fall off the tracks, return to the train and resume the battle against the Doc. Defeat him to conclude the sequence.
After the cut scenes, proceed to the blue distance marker under the 55 second time limit. It's the rooftop of a warehouse by the northwestern shore. Drop through the skylight to initiate the next sequence.
The final battle against Doc Ock occurs in two parts. The first part requires the unmasked Spider-Man to destroy 9 control panels scattered around the warehouse. This is similar to a task earlier in the game but with more panels, in scattered locations, with a more reasonable containment field, and an invincible Doc Ock hopping around.
The location of the 9 control panels is important to note.
- One is located on the wall to Spidey's right (at the start position). It's near the ceiling. Jump or crawl to it.
- Four panels are located along the four corners of the room on the same level as Spidey's start position.
- Three panels are located on one floor lower than Spidey's start position. They're in small side rooms.
- The final panel is on the bottom floor near the water. Drop through the hole, climb along the wall, and find the panel deep inside.
The order you destroy each panel isn't important. But some orders are certainly better than others. As soon as the task begins, jump to the wall on the right and climb up to the first panel near the ceiling. Get it out of the way quickly.
The four panels in the four corners are fairly easy and can be skipped for now. Drop to the bottom level and find the large hole near the corner. Crawl through and along the wall and disable the bottom most panel now. It's tougher to get this panel as the mission goes on because the containment field becomes slightly more deadly. Crawl through the hole and wait in the corner until the containment field buckles then sprint crawl to the panel and disable it. Wait for the buckling field then return up through the hole. Two down and just seven to go to complete this part of the battle.
The remaining seven are fairly easy. The main things to avoid are falling into the water, which immediately fails the mission. Go destroy the four panels in the four corners. Swing across each gap or scurry across the wall quickly. Stay close to the wall to avoid the containment field. If it strikes you, the resulting bounce could send you into the water putting a quick end to the mission. Destroy all nine panels to conclude the segment and begin the game's true final encounter--a one-on-one, no-holds barred match against Doc Ock.
You know the drill by now: dodge the tentacles (when they turn red) and use the web-line button to sling a web at the tentacle to trap it. Move into one of the lower level side rooms to battle Doc Ock. It's much safer than standing in the warehouse center where the water comes into play. Lock the camera on Doc Ock.
Wait for Doc Ock to approach and start moving. As tentacles turn red, dodge them, and then press the web-line button to trap each tentacle. It's easier to dodge the tentacles if you are moving slightly so press a direction on your controller while Doc Ock attacks and you dodge. If you're standing still, it's tougher to dodge for some reason. Trap all four of Doc Ock's tentacles then toggle spider reflexes and unleash a couple combos.
After a few successful hits, Doc frees himself from the webbing. Jump away and repeat the entire process again. You could also use spider reflexes to help you dodge Doc's tentacles but if you just keep moving as you dodge, you don't need the extra help. Defeating Doc Ock concludes the game's main storyline.
Chapter 16 - The First Day of the Rest of Your Life
To-Do List: Earn 50,000 more hero points.
It's the first day of the rest of your life. You saved the city from Doc Ock and you even got the girl. The city is open. Explore, gather tokens, help citizens, climb buildings, get all of the hint markers, whatever you want to do! There is an objective--to gather a staggering 50,000 hero points--and even a reward. If you manage to collect 50,000 more hero points, a new item becomes available at the upgrade store: Swing Speed Level 8. As you gather the 50,000 points, don't spend any! The final speed upgrade also costs 50,000 hero points. When you meet the chapter requirement, use those points for the final upgrade.
Chapter 5 - Awards and Cheats
The following table compiles the awards available in Spider-Man 2 and how to obtain them.
| AWARD | DESCRIPTION |
| Employee of the Month | Complete all pizza deliveries. |
| Shutterbug | Complete all photo missions. |
| Knowledge Seeker | Locate all hint markers. |
| Silver Medalist | Beat all challenges. |
| Gold Medalist | Beat all challenge mega times. |
| Drenched Explorer | Locate all buoy tokens. |
| Watchful Explorer | Locate all secret tokens. |
| Towering Explorer | Locate all skyscraper tokens. |
| Vigilant Explorer | Locate all hideout tokens. |
| Master Explorer | Locate all exploration tokens. |
| Friend to Children | Return 25 balloons. |
| Peace Maker | Prevent 25 gang wars. |
| Bane of Petty Thieves | Prevent 25 purse snatches. |
| Thug Mugger | Prevent 25 muggings. |
| Watch Dog | Foil 25 break-ins. |
| Anger Manager | Stop 25 road rages. |
| Stick Up Artist | Foil 25 robberies. |
| Partycrasher | Stop 25 battle royals. |
| Lifter of Spirits | Rescue 25 hanging citizens. |
| Sucker | Foil 25 ambushes. |
| Automobile Avenger | Stop 25 car jackings. |
| Life Preserver | Resolve 25 sinking boat crises. |
| Human Ambulance | Resolve 25 medical emergencies. |
| Honorary Deputy | Complete 25 officer assists. |
| Crime Stopper | Stop 250 petty crimes. |
| Good Samaritan | Help 250 citizens in distress. |
| Champ | Defeat 200 enemies. |
| Mega Champ | Defeat 500 enemies. |
| Big Game Hunter | Defeat Rhino |
| Alien Buster | Defeat Mysterio |
| Shock Absorber | Defeat Shocker |
| Tentacle Wrangler | Defeat Doc Ock |
| Speed Freak | Obtain max swing speed. |
| Hardcore Gamer | Obtain all arcade games. |
| Lover Not A Fighter | Complete all Mary Jane missions. |
| Hero in Training | Accumulate 15,000 hero points. |
| Hero | Accumulate 45,000 hero points. |
| Super Hero | Accumulate 100,000 hero points. |
| Mega Hero | Accumulate 200,000 hero points. |
| Game Master | Complete everything in the game. |
Cheat Code
When creating a new game, enter the name HCRAYERT. You'll begin a game with tons of hero points and little responsibility. Purchase and test out upgrades and explore the city to your Spidey heart's content.
Got a news tip or want to contact us directly? Email news@gamespot.com
Join the conversation