Resistance 2 Walkthrough
Resist falling prey to the Chimera with our complete Resistance 2 walkthrough.
Resistance 2 offers exactly what one would expect to find in a sequel: It's bigger, the enemies are badder, and your teammates are...well, as dumb as ever. And as a result of those three elements, Resistance 2 is one of the most difficult shooters we've seen this year. Unlike most other modern-day shooters, you can't just brute-force your way through these missions. Oh no, you'll be fending for your life from behind cover...the majority of the time. But with our guide at your side, no battle will be too harsh to wage.
Here's what you'll find in GameSpot's Resistance 2 Game Guide:
- General Tips: Learn how to deal with life on the battlefield.
- Walkthrough: The war zone can be a hectic and confusing place, but we'll be there to guide you every step of the way.
- Trophies: Want trophies? We've got the info you need here!
General Tips
The Basics: Health & Cover
Like most first-person shooters these days, Resistance 2 features a regenerative health system. In short, if you can avoid taking damage for several seconds, your health will automatically replenish. But in order to avoid fire, you're going to have to take cover--an important skill to master. Never enter a firefight without having a place you can retreat to for protection. Because the enemies are amazingly accurate, even a few seconds of exposure can leave you high and dry, which is why it's vital to always fire from behind cover whenever possible. Almost any kind of object can provide cover--so long as you can position it between you and them, you're good to go. Don't forget that you can crouch, enabling even shorter objects to provide protection.
The Weapons
Resistance 2 has quite an array of weapons, but most of the are self-explanatory. There are a few, however, that warrant further mention. The Auger, in particular, can be both your best friend and worst enemy, depending on who's wielding it. When in your hands, it's an incredibly potent weapon, able to both see and shoot enemies through walls and other objects. However, because of the time it takes for the rounds to burrow through objects, it's best used on stationary targets. But this weapon can be quite annoying when equipped by the enemy, as it renders most cover points completely useless. If you find yourself coming under fire from an Auger, seek cover a few meters behind any objects--you can actually see the round burrowing through the wall, giving you enough time to side-step its apparent trajectory.
The Magnum is another potent weapon. Yeah, it may not be able to hold many bullets, but those bullets are actually explosive rounds that can detonate at the touch of a button. Try shooting a target, then tapping the secondary fire button to try it out! It will completely destroy most enemies with a direct hit--and even those around them.
Periodically, you'll come across a Rocket Launcher, called the Laark. Finding one generally means something big will soon be headed your way, so its best to spare the rockets until you absolutely need them, instead of wasting them on the smaller game. Similarly, the Wraith is a powerful chain-gun with an ample supply of bullets that's just perfect for mowing down large waves of enemies. You should grab this whenever you find one, as it means a big battle is brewin'.
Prologue
Accompany Major Blake to the Detention Wing

After surviving the helicopter crash, you'll find Major Blake eager to roll on out. Follow him through the forest and into a building (his location is always marked by the on-screen emblem, so if you lose sight of him, just head for the icon). There appears to be no way out, so you're going to have to create one! The magnum you're carrying fires explosive rounds, which can be activated via the gun's secondary function--fire one at the propane tank along the back wall and detonate it to create an instant exit! Pretty cool, huh? Unfortunately, a few enemies will try and shoot you through the opening, though they can be easily dispensed of with your explosive rounds.
Continue into the next room and grab the Rocket Launcher from the table, then fire a rocket toward the exhaust pipes of the hulking beast outside (if you somehow miss, additional rockets can be obtained from the box on the left). But it seems the monster doesn't take kindly to your rocket gift, and will turn his attention to taking you down. Quickly follow Major Blake outside and into a sewer pipe to avoid the robot's counter-attack. Pick it up the Bullseye here and follow Blake up to some stacked pipes. Duck behind them for cover, then peek over them to open fire on the enemies heading your way. Make sure to keep an eye out for any who try to sneak up on you from the left. Once clear, ditch the rocket launcher for any of the weapons lying around and follow Blake to a walkway.
After climbing down the stairs to the walkway, get ready for a couple of enemies to appear on another walkway ahead, then follow Blake to a platform at the end of the walkway. Once at he platform, immediately turn around and seek cover behind either of the wooden planks by the railing and battle the aliens chasing after you from the same direction. Continue to follow Blake down a second staircase and through a gate he opens.
Locate Daedalus
Once through the first gate, get ready to tackle a couple of flying bots coming in from a gate to the left--it only takes a few shots to destroy each one. Afterward, you'll have to defend Blake while he tries to open the gate--turn around (so you're facing away from him) and target the flying bots as they come in. Once he gets the gate open, take cover to either side of the next opening and blast an enemy in the room ahead. Do the same at the opening ahead to target a pair of enemies on the walkway above.
After the drop-off, Blake is going to spend a few moments trying to get the gate open. Stay close to the wall you dropped from and prepare for a few enemies to attack from that same ledge. If you need cover, simply get close to the wall (so you're outside the enemies' range), though be prepared for them to drop on in.
Accompany Blake to the Airfield for Evac
Follow Blake through the next room and up the ramp. You'll soon come to a corridors packed with enemies--stay behind the same wall Blake's using for cover and peek around the side to target the enemies. Try shooting the explosive cannister on the right to easily clear most of them out. Continue up to a jutting wall on the left (by the tank where Blake seeks cover) and tackle a few more enemies. Follow Blake outside and up the stairs, then grab the Rocket Launcher from the floor and launch another rocket at the monster's back once he turns away. Like before, hightail it out of there by staying close to Blake.
Take Down the Goliath
Blake will lead you inside a building. After a few corners, you'll be facing down a long hall with a ramp at the end. Hang back in the previous hall for cover and shoot the explosive cannisters ahead to clear most of the enemies. Once clear, grab the Rocket Launcher at the base of the ramp and use it to shoot the giant monster one last time in the back, putting him down for good. Now follow Blake through the warehouse and onto the plane to complete the mission!
Chapter 1
Meet Blake at Tactical Command
Follow Warner down the hall, then go through the door to get briefed regarding the mission. But your orientation will be cut short by an enemy attack (go figure, right?).
Find and Secure the Moon Pool
When all is said and done, you'll wind up in a drab hall. After following it a short ways, you'll come across a flooded room--whatever you do, stay out of the water! In fact, you should avoid any deep water throughout this entire level, as most of it is infested with Furies--underwater creatures who'll kill you on sight! Jump to the walkway and follow it to the other side, jumping across the gaps and following the thin beams, when necessary.
Grab the Magnum from the next room and trudge through the flooded hall. Take cover behind the boxes around the corner and kill a few enemies further up. Proceed through the hall until you meet with Hawthorne on the other side of a gate--he'll open the nearby door for you. Proceed through the room and past a door in the back, leading into the next room. As you enter, take cover behind the boxes to the left and peek around the far side to shoot some flying bots coming your way, then target a couple of enemies on a walkway in the back of the room. When clear, follow the walkway to some windows along the back wall and shoot through them (or toss a grenade or two) to kill the enemies in the room behind (for cover, simply step to either side of the window). Climb down the stairs to regroup with a few team members by a door in the back, which will automatically open.
Secure the Moon Pool Doors
Follow your teammates down the hall and grab the Fareye (sniper rifle) by a box, just before the door. Once the door opens, stay put and use the Fareye to kill the enemies within--first an enemy on the stairs to the right, then a pair on the walkway above. Look for a few more to the left, then ready your reticule on a staircase in the very back of the room as a couple of enemies will appear there too (may take them a little while though). Once things calm down, you'll find the switches for the Moon Pool Doors inside the glass containers on either side of the room. Climb either staircase to the respective glass container, but take cover by the entrance way to take down any stragglers within. Once you're sure it's clear, activate the controls, then do the same thing for the glass container on the other side. With the Moon Pool room secured, continue along the walkway to eventually reach a large warehouse.
Rendezvous with Dr. Malikov at the Med Clinics
Follow the walkway to the lift and ride it to the lower level. There won't be any enemies for some time, so just follow the path into a large sewer pipe. At the exit, you'll spot several bots flying by. Hang back by the bend (so you can back up for cover) and blast them from here.
Afterward, drop from the pipe and head right, up to a pair of wooden boxes. Now this is where things get tricky--do you see the patrol bot just beyond? He's but the first of several, and if they find you, you're as good as dead. As such, it's important to stay out of their sight and move only when your buddy on the radio tells you to. So chill by the boxes until the voice tells you to "go left"--turn left at the corner and run up to the next set of boxes. Wait here until the voice tells you to head left again--run like the dickens around the boxes, then head right and dive into the water. Quickly swim into the grate and wait until the bots fly by. Climb onto the dry land ahead when told and turn left, then keep on trucking up the stairs.
Phew, you lost the patrol bots, but now what? The platform in the center of the warehouse is surrounded by water, which means there's a Furie swimming nearby. Wait for him to swim to the opposite end of the room, then quickly run and jump toward the platform. You'll land in the water, but you should be close enough to quickly reach the platform before becoming the Furie's dinner. Once on the platform, immediately seek cover behind any of the pillars and get ready to shoot some enemies who emerge from a lift on the ledge ahead. Just be ready to move if they fire a mine at the pillar behind you. With them killed, wait for the Furie to swim past again, then quickly run and jump toward the stairs and climb them to a lift.
After riding the lift, follow the hall to find the Doctor.
Escort Dr. Malikov to the Surface
Follow the Doctor into the prison block and take cover behind the same boxes he does to target a few enemies ahead. As you climb a short staircase ahead, you'll find a couple of fellow soldiers being ravaged by a Ravager (aka large enemy equipped with a long-range beam gun). Shoot him as much as you can while he's distracted by your teammates, but be ready to sidestep his beam when he comes for you (duck to either side of the entranceway for cover).
Once he's down, proceed up the staircase within, but take cover by the doorway at the top for a great location to target the enemies in the next room. As you head for the staircase on the right, more enemies will appear on the upper walkway, on the other side of the room. Stay on the bottom floor and target them from here--they'll be distracted by your teammates above, leaving you almost perfectly safe. Climb up the stairs afterward and continue into the next room.
Drop through the hole in the railing to the lower level and grab the Pulse Cannon from the rack. Wait for the doc to open a nearby door, then climb onto the platform in the center of the next room. As you do, the room will begin to flood and a Kraken will burst through the wall. Stay on the platform (unless you want to become Furie food) and seek cover behind the boxes, which will shield you from the Kraken's screams. Shoot the Kraken between his screams using the Pulse Cannon, but be ready to switch cover points to another box in the event yours is destroyed. It only takes a few hits to put the Kraken down.
With the Kraken defeated, run and jump toward the broken walkway on the right and follow it to a lift, which will return you to the surface.
Rendezvous with Echo Team at the Main Battery

Alright, so you've made it to the surface, but you're far from done. Follow the Doctor down the stairs and into a tunnel, which eventually leads to a large battle, alongside some teammates. Take cover by the sandbags and target the enemies on the ridge beyond (you may want to grab the Fareye from the box just ahead to make targeting them easier).
Escort Dr. Malikov to the Landing Platform for Extraction
With the area cleared, head through a corridor on the left to come across another on-doing battle. Take cover by the sandbags bordering a ramp to the right, and shoot the enemies at the base. Now head down the ramp and look for more enemies to the left--grenades can quickly clear them out. If some of those enemies come after you, retreat back to the sandbag wall you used moments before.
After descending that first ramp, you'll come across two more on either side of the building. We suggest going down the left ramp and seeking cover behind the left sandbag wall, just before the base. This will provide a great spot to target the bots coming in from the right (without leaving yourself vulnerable to the other Chimera), then the enemies on the ground and walkway ahead.
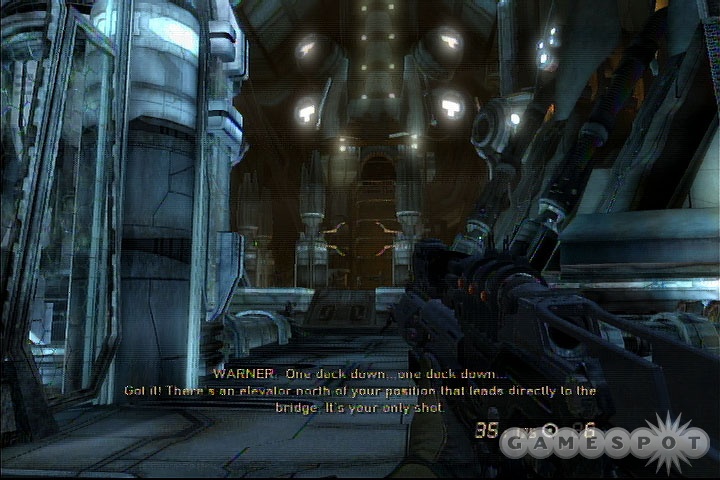
As you move up the street, take cover by the same wall the Doc does and get ready for some enemies to emerge from the passage just ahead, and to the right. Now it's smooth-sailing to the chopper at the
Retrieve the Inhibitors from Dr. Malikov's Lab
After the helicopter takes off, restock your supplies via the box, then drop off the ledge to the street below. As you do, prepare for another Ravager to emerge from the path between the two buildings ahead. Lay into him as much as you can at first, since he starts off distracted by a couple of humans. But when he starts heading your way, sidestep his fireballs while blasting him, and take cover behind either building to reload. If he gets close, use the spotlight to either side as a barrier to keep him away, then circle around it to his backside and lay into him. Once the Ravager's down, prepare for a second to come your way. Target him the same way. Now head up the path, and ride the lift in the back.
Yay, back underground! So this flooded basement is also teeming with Furies, so you're going to have to cross only the shallow portions in order to avoid their wrath. Begin by crossing through the broken railing on the left and walking over to the spotlight. Jump onto the pile of rocks and make a running leap toward the shallow ground, by the truck. Now follow the rocky (and hard to see!) path to a proper walkway on the other side. Step out onto the grate at the end, then run and leap to another. Climb up it, but get ready to shoot an enemy across the gap. Cross over to the other side by leaping off the steel extension, to the left, and continue into the tunnel.
When you reach the burning corridor, duck into the first passage on the right to find the Doctor's lab.
Evacuate the Base
With the inhibitors in hand, it's time to get the heck out of there. Go up the staircase, but watch out for a couple of flying droids at the top, and some enemies around the corner--look for an alcove on the left (just past the entrance into the room) that provides some cover.
You'll soon reach a long room with several staircases. Dart up them to a pile of boxes and shoot through the enemies through the gaps, then climb the series of ramps beyond. Get ready for a couple of flying droids after climbing the stairs at the top, and another around the corner.
When you reach the room with several burning boxes, prepare for several enemies, including a Ravager, to appear as you climb the second stairwell. Immediately crouch behind the stacked boxes on the left, and then look peek around the right corner to blast the smaller enemies, while staying outside the Ravager's view. Once they're down, focus your attention on the Ravager, ducking behind the boxes between his shots. Once clear, make way for a circular lift in the back of the room.
Neutralize the Kraken
After escaping the base, grab the Pulse Cannon and get ready for another Kraken attack. The basics are the same: Shoot him in the face whenever you get the chance, but now he has a couple of new tricks up his sleeve. First, he'll slap the ground with his tentacles on occasion--simply sidestep back and forth continually to easily evade them (just make sure you don't walk into one while it's resting on the ground). Second, he'll sometimes charge the platform and grab hold, tipping it toward his mouth--just keep back from the side he's charging on and blast him.
Chapter 2
Fight Off the Ambush
Well isn't that great, you're in the middle of an ambush! The enemy's too far away to target, so focus on pushing up the street, taking cover at the vehicles along the way to regain your health. Take cover by the last car, just before the bend, and target the enemies beyond--especially a few who'll come at you on street level, from the left. Because of the dense smoke, finding the enemies on the ridge above can be difficult, so keep an eye on your cursor--if it turns red, you know you're targeting an enemy.
Around the bend, take cover at the car just past some trucks to target a couple of aliens ahead, and prepare for a few more as you battle up the street. When you find the rest of your team, take cover by the overturned truck and peep around it to kill the enemies.
Reach the Town of Orick
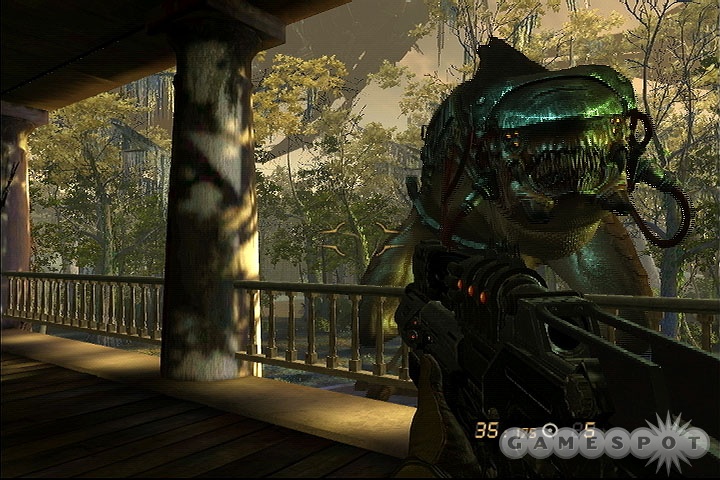
After trudging through some marshland, you'll witness a fellow soldier being ripped in half by a camouflaged enemy. Carry on into the forest, but get ready to seek cover behind a tree or rock, as a ton of flying droids will soon be heading your way. Afterward, stick to the left wall (to narrow where your opponents can surprise you from) and get ready for two of those camouflaged creatures to run toward you shortly--they're fast, but weak. After the bend, stick by the left ridge and prepare for one more camouflaged foe to attack from the trees.
You'll soon come across a vast clearing with several tree stumps. Again, stick to the left wall and prepare for three inbound camouflaged jerks. After the drop off, prepare for a few flying baddies just past the logging operation. Once done, drop off the bridge ahead and into the river. Follow it downstream to solid land. As you come around the bend, you'll spot numerous enemies on a bridge above. It's best to quickly take cover behind a jutting rock along the right wall and take 'em on from here.
Just after the bridge, you'll spot a motel in the town of Orick. Pick off the pair of enemies wandering on the roof, then drop into town.
Rendezvous with Echo Team
As you step toward the hotel, two drones will attack, followed by a shielded enemy. You'll have to shoot the shield repeatedly in order to destroy it, exposing him. Luckily, you have a few seconds before he can reach you, so pummel him with your most powerful weapon (the magnum works nicely). After passing through the motel, climb the staircase in the opposite corner, and drop out the other side of the building. As you step toward the street, a couple of flying bots will head your way from the wreckage on the opposite side--deal with them quickly, as they'll be followed by a Ravager. To deal with him, quickly find an object you can run around (we found the crashed tower-thing right by where the Ravager emerges to work great) so you can sneak up behind him for some easy shots.

Once the Ravager's down, prepare for a few enemies to attack from a street on the right--use the right wall for cover. Climb up the shipping container on the right afterward, then continue through another in the corner and crouch to get past the wreckage. You'll soon drop onto a ramp, which leads to the street. Now don't get carried away, as there's a turret just up the road which can kill you in seconds. Unfortantley, the only way to disable it is from behind, so you're going to have to move from cover to cover in order to reach it. Start off by staying on the right side of the central box and push forward to a block just ahead (in the center). Keep an eye out for an enemy who may attack from a building to the right, then crouch down and continue to the wooden platform in the center (next to an explosive barrel). Follow it left (while still crouching!) to a second platform, then make a mad dash for a short staircase to the left. Follow the walkway to get behind the turret, enabling you to deactivate it. With the turret deactivated, climb the nearby staircase into the building where the sole enemy was. As soon as you enter, turn around and take cover by the wall overlooking the field you just came from, as a ton of enemies are about to appear there. Hold them off by shooting the explosive barrels to take down several at a time--after a few moments, a hijacked patrol bot will assist you in taking them down. Once clear, continue through the opening the patrol bot blows open. After a short ways, you'll encounter more enemies around a corner--take cover behind a stack of girders and shoot the barrels to quickly destroy them, then continue into the factory.
Hijack a Chimeran Shuttle
Shortly after regrouping with Echo Team, you'll encounter more enemies. Take cover behind the wooden stack and blast them from here. Push forward when things die down, taking cover along the way. Around the corner, take cover by some planks of wood on the left and shoot the enemies beyond (including on the rooftops). Hang tight, for two Ravagers are inbound--if you have the Auger, consider planting a shield to better protect yourself. Once cleared, continue into the warehouse. Step a few feet into the warehouse to trigger the enemies, then retreat back to the entrance for cover and blast them from here. When things quiet down, head inside and use the center boxes for protection to kill whatever remaining enemies you can (look for some on the high walkway). After climbing the stairs in the back of the warehouse, prepare for a few flying enemies to come in from an entrance above. Continue along the path, out of the warehouse.
Great, looks like another turret's causing trouble. Drop from the deck to the ground, then head right and up a ramp. Climb over some obstacles to spot one of the turrets through a fence. Climb up (but not over!) another stack to the left and get ready to kick more alien booty--just make sure to stay on the second block from the top, so you can simply duck for cover. Once the path is clear, drop down and deactivate the turret on the left, but prepare for more enemies to attack from ahead, including a shielded one! Use the turret for cover, then board the ship when clear.
Chapter 3
Infiltrate the Chimeran Battleship
As you head down the hall, get ready for one of those camouflaged monsters to attack from the left, shortly after the first corner. At the end of the hall, get ready to shoot some spiders coming at you from the vent, before crawling through yourself (a few more will roll toward you as you do). After exiting the tunnel, consider grabbing the nearby Fareye, then continue onward to a lift and ride it down a level.
Once off the lift, follow the walkway until several enemies appear. We suggest ducking into an alley on the right and waiting until some enemies chase after you, giving you a few easy kills. Now there's still a ton of enemies left in the room and we've found it best to simply ignore most of them. Instead, target the few enemies on the platform to the left (the one the walkway connects to), then dart across and into the hall, which leads to a bridge. Kill the enemies on the bridge, then dash across to another hall (again, ignore the enemies elsewhere).
Plant Demo Charges on the Bridge
Be careful! A chameleon lurks a short ways into the hall, so keep facing forward until you've killed him. Get ready for another after two more corners (turn right, then left)--begin shooting before you can see him to ensure he doesn't kill you first. Crawl through the tunnel at the end, killing the spiders as you go. But be prepared for the floor to give out, causing you to fall several stores and wind up face to face with an enemy.
Just up the ramp and around the corner are several more enemies; get ready to duck back down the ramp for cover during reloads. However, there are a trio of enemies on a lift that can't be touched unless you have the Auger, so grab it from one of the fallen enemies and target the trio. As you open fire, they'll ride the lift down to your level--back down the ramp for cover and use that same weapon to shoot them through the floor. Once dead, ride the lift up to the bridge.
Evacuate the Battleship Before it Explodes
As you step foot onto the ramp, prepare for two chameleons to charge toward you, one after another. Continue through the chamber down another ramp, where you'll face another chameleon. Head right in the second chamber toward the ramp, but prepare for another chameleon to make an appearance.
You'll soon find out that you only have two minutes to escape the ship before it explodes! But don't sweat it, the path is really straight-forward and you won't face much resistance. Just run along the walkway until you meet-up with some teammates. They'll lead you to a small room where you'll have to fight off some invading enemies. Drop behind the wall and crouch whenever you need cover. Try tossing a grenade before reloading to ensure they get no where near you. Thankfully, your squad will get the door open just in the nick of time--run lile the dickens to the ship outside to complete the objective.
Search the Houses for Survivors
Work your way through the house and up a staircase. Although a couple of organic sacks block the path to the right, you can clear them out of the way with a few melee attacks. Continue to push your way through a few more homes. As you close in on your target, you'll reach a field jammed full of organic sacs. Be careful as you work your way through, as a few will burst open, revealing a newly born Chimeran (know as "Grims") that's ripe for the killing.
Rescue Warner
Upon meeting with a teammate, you'll be tasked with finding Warner. Proceed through another house, toward the target, but prepare for another Grimto burst from a sac in the second room. Continue across another field (check inside a barn on the right for some guns and ammo) and look for an entrance leading into the basement of the far house. Keep your shotgun at the ready and blast the three Chimeran that appear as you pass through the first doorway, then proceed up the staircase, where another enemy or two awaits. As you climb a second staircase, wait by the top to kill a few more aliens that stumble from the rooms upstairs. Turn the corner to meet with Warner, then drop on outside.
Rendezvous with Hawthorne at the Used Car Lot in Town
As you circle the house, a swarm of Chimeran will charge your way. Stay behind Warner and use a long-distance weapon to target them at first, but switch to your shotgun once they get close. A second group will appear just as you pass by the barn (which you may want to stop by again for more ammo)--as soon they do, backup and tackle them from a distance. Many of them will go for Warner, saving you some trouble. Once they're down, continue through the house, but prepare for more aliens in the first and third rooms. Oh, and as you try to exit the house, a massive swarm will attack--back into the corner and depend on your shotgun, only switching to another weapon when you're out of ammo.
After exiting the house, continue across the field to another staircase. Drop off the far side of the walkway and continue through the vacant semi-truck. Follow Warren up the street
Rendezvous with Hawthorne at the Used Car Lot in Town
Upon reaching the used car lot, take cover behind the first car on the left and blast the aliens beyond.
Rendezvous with Capelli in the Town Square
After clearing the car lot, push forward to the diner. Inside are several enemies equipped with Augers. The easiest way to take them out is to grab the Bellock just in front of the diner's entrance and lob a grenade at the enemy on either side, then head indoors to kill the last one, behind the counter.
After exiting the diner, follow your squad into another building. Use the shelves for cover as you tackle the enemies in the back of the room--a well placed grenade should take most of them down. As you enter the next building, we suggest staying outside and shooting the enemies through the entrance--this way you can easily duck to the side for cover.
The theater just after is home to a swarm of Grims. Once you've caught their attention, retreat back into the alley and wait for them to file through the doorway in a single-file line, making for easy pickings (there's quite a few of them).
Head to the North Tower
After exiting the theater, you'll encounter three Ravagers in the courtyard, who'll make short work of you if you run around willy-nilly. Immediately crouch and seek cover behind the short wall ahead--shoot the Ravagers as soon as they get close enough, allowing you to target them over the wall. Once they get too close for comfort, hightail it across the courtyard to the wall on the far side and target them from here--you should now be able to kill all three before they get close again. If you run low on ammo, more can be found scattered about, such as inside the gazebo in the center, or by the entrance to the theater. With the Ravager's down, follow your squad through an opening on the right. Stay behind the flipped car (but don't get too close in case it explodes) for protection as you target the enemies on a roof above, then the remainders on ground level. When you reach the tracks, make sure to stock up on the ammo scattered around a box (near the tunnel) before heading inside the tunnel. You may also want to grab the shotgun behind the left truck, just inside the tunnel's entrance (and more ammo can be found along the right wall, a short ways in). As you push through the tunnel, waves of Grims will periodically come after you. Start backing up as soon as you see them, giving you more time to shoot them. And if they get close, either melee or shotgun them. Thankfully, the tunnel's not that long, and you'll be climbing a ramp out of there soon enough. Once out of the tunnel, seek cover behind the truck on the right as you tackle the enemies up the street. If the enemies get too close for comfort, consider using the concrete barriers by the tunnel's exit for cover instead. Once clear, follow your teammate through the bowels of the tunnel ahead until you drop into a sewer. As soon as you do, a swarm of small creatures wll begin swimming your way--a well placed grenade will clear most of them out. Otherwise, shoot them quickly and melee those who get close. Continue up the staircase in the rear and into the next room.
Here's the deal: The door in the back of this flooded room is locked, but shortly after your teammate comments on such, a horde of bugs will climb down the support columns. The best place to tackle them from is atop either staircase leading from the central platform--now the trick is to get up there before the bugs reign down, which shouldn't be much trouble so long as you don't lallygag. Once they're down, activate the switch on that very platform to open the door and continue on. Prepare for a few more bugs to attack as you work through your way to a lift in the rear.
Restore the North Tower
After riding the lift, you'll watch in horror as your teammate is eaten alive! Oh well, no point in crying about it. Continue onto another lift and collect the ammo on the floor above. Once you're ready to roll, simply look above the hole in the center to spot the giant creature, which begins the boss fight (though we use the term loosely, as it's really quite a cakewalk).
The creature only has a few attacks, which includes spraying acid from his central perch (which you can easily avoid by stepping to the side), walking around the walkway slowly (back up while shooting at him), and summoning a few of his spidery friends (shoot them). Yeah, there's not much to it--just blast him whenever you get the shot (ideally in the face, but it doesn't seem to much matter) and he'll go down soon enough.
Chapter 4
Clear a Landing Zone for the Vtol
Don't get too relaxed, it's up to you to clear the landing zone! Use your sniper to target the drones on the platform, then make sure to look out the other window when the helicopter turns and target the flying enemies first, then the remaining foes below. The helicopter will touchdown when cleared.
After disembarking from the chopper, head down into the field and take cover behind the rocks, just below the archway. Focus your efforts on the flying bots (two waves) then turn your attention to the enemies on the ridge just beyond. Once clear, climb onto that very ridge.
Find a Way into Station Genesis
Once on the ridge, hang back and use your sniper to pick off the foes (if you need cover, the nearby rocks should work nicely). But keep an eye out for two chameleons who'll charge toward you--remember, if the screen starts to shake, one's nearby. If you have the sniper ammo to spare, resist pushing forward until the enemies completely retreat into the tunnel. Once they do, seek cover on the right side of the rocks ahead and blast the tunnel-based enemies ahead.
Head inside the tunnel when the enemies retreat and use the rocks on either side for protection as you kill them. But don't get cocky--once they're now, two Ravager's will burst through a wall ahead. Try shooting them up a bit here, but retreat outside once they start to get close and tackle them there for more room to maneuver. Once cleared, continue through the tunnel and off a drop off.
Check the tent on the left for guns and ammo, then continue onward up the hill and into the tunnel. You won't get very far, as you'll encounter a couple of Chimeran carrying shields and a few other drones. Immediately retreat back down the hillside and tackle them from afar--not only will this allow you to shoot them from the side (rendering their shields useless), but they also won't pay you much attention! Once clear, continue through the tunnel until you watch a cutscene.
After the cutscene, wait by the tunnel entrance and blast the Leapers that climb to your location. You'll encounter a second group just a bit further in--blast them while backing up, be careful not to fall into the abyss. You'll soon cross through a door into a rather industrial looking base. After crossing a bridge, you'll reach what appears to be a split-path, but the right route is merely a giant loop, which you'll be using shortly. As you open the door ahead, two shielded enemies and a ton of drones will come your way. This group will quickly devastate you if taken head-on, so back up into the hall, moving back from corner to corner as the wave comes your way (eventually retreating into the round-a-bout mentioned earlier), shooting them whenever you get the chance. If you have the shotgun, its secondary feature can take down the shielded enemies in just a few shots.
After passing through the room into the hall beyond, prepare for two chameleons to attack, one after the other. Grab the Wraith at the end, then ride the lift down a floor. Seek cover behind the first barrier and use the Wraith to destroy the enemies beyond--or try tossing a grenade at the group for a quick victory. Once everyone's dead, don't get too excited, as a few more drones are about to ride down the central lift--seek cover behind a barrier facing toward it. After you've cleared the lift, ride it down.
Locate Dr. Malikov
Once off the lift, you'll spot two enemies equipped with Augers in a tunnel ahead. Quickly run up the right hill to attack them from the side, then grab one of their dropped Augers. In the tunnel ahead, you'll come across a locked door, and for whatever reason, the switch to unlock it is further up the hall. Continue onward, but prepare for a few drones shortly, though your Auger should take care of them easily. You'll find the switch you're looking for at the end of the hall, on the right.
Hmm, maybe flipping the switch wasn't such a good idea, as a gnarly swarm of...something will chase you down the hall. You're going to have to run back to the now-unlocked door, whileshooting the swarm to keep it at bay. From the get-go, turn around (away from the swarm) and run down the hall to the second bend--turn around and fire a few shots at the creature to stun him, then continue onward, stopping at every corner or two to turn around fire a few more shots. The cable on the floor will lead you right through the door you unlocked and onto a lift, which will take you upward.
After riding the lift, continue onward through a hallway--but your smooth-sailing will be cut short by the reappearance of that damn swarm monster who's blocking the way! Quickly back away, while shooting it a few times to slow it down (like before) until the monster retreats through a vent into a side-room...but you're not done yet. The monster's merely going to reappear behind you, but now's your chance to get by! Dart down the hall, stalling the monster on occasion with a few shots, until you find the Doc in the room at the end of the hall.
Escort Dr. Malikov Out of Station Genesis
Follow the doctor through a few halls until you wind up on a walkway inside a vast cavern. Grab the Fareye by the door and use it to target the enemies along the left wall, including a couple of shielded foes--you should be able to kill them all before they pose a threat. Now follow the walkway to a lift at the end.
Continue across the rope bridge, then drop into the electrical-chamber thing on the left, which keeps the swarm monster at bay--shoot him a few times to send him reeling back to mommy, then follow the Doc into the tunnel beyond to another electrical chamber. Once there, the Doc will lower a bridge ahead, but that swarm-thing will reappear as you try to cross it. Quickly retreat back to the electrical chamber for protection, then blast an enemy that cross the bridge, and wait for the swarm-monster to circle around the back side, then make your way onward, across the bridge, shooting the swarm occasionally to hold it off.
You'll be ambushed by several drones as you enter the next room. Hug the left wall closely and attack the enemies as they enter your field of vision, peeking around the corner occassionaly to prevent them from getting two close. After the initial wave, two Ravagers will show up--tackle them the same way, using the wall for cover. They may get real close, but they should hopefully be distracted by the doctor, allowing you to go in for the kill.
Neutralize the Swarm
Follow the Doctor to control panel that governs the three electrical chambers--yup, you guessed it, you'll have to lure the Swarm into each one which the Doc handles the controls. Lucky you! Catch a ride on the nearby lift and hightail it over to the first chamber. Stand inside it for protection and wait for the Swarm to come for you. You'll find that the swarm will merely circle the chamber tirelessly, leaving it to you to actually lure him in. Inch toward the swarm until it starts coming your way, then quickly run back into the chamber and out another side. With the Swarm now caught in the chamber's grasp, the Doc will let the electricity fly, holding the Swarm in place. Now grab the Cannon from the nearby corpse and fire it at the swarm, but get ready to dash up the nearby ramp leading to the next chamber. Do the same thing there, then again at the third and final chamber to kill the swarm off for good.
Neutralize the Titans
Follow the Doc to a lift to get the heck outta here. Back on the surface, you'll have to face a couple of Titans just after a drop-off. As we're sure you know by now, Titans are tough, and taking on two is no cakewalk. However, there's a rocket launcher right by where you landed that can be instrumental in taking these guys down. Because you only have four rockets, you should only fire two per Titan--this will weaken them enough that a few shots from your gun can finish them off. Start off by firing a pair of rockets at the Titan on the left first (simply move side-to-side to evade his counter-fire), then quickly follow up with your gun to finish him off, before turning your attention to the Titan on the right. Do the same, then tackle the little leapers dancing around.
Once all is clear, continue onward to board the chopper and complete the level.
Chapter 5
Survive the Alleys

Follow your squad up the street and grab the Splicer along the way. Your squad will stop by the entrance of a long alley--stay here and get ready to kill the massive horde of approaching Grims. You'll also find that the Splicer is awesome for taking down several Grims at once, so save it for when the horde gets close, but conserve your ammo and use melee attacks instead if only a few Grims are currently a threat. If you absolutely must retreat, head to the other side of the current alley, but prepare for more Grims to enter the fray. Once clear, work your way down the alley--you'll face a few more Grims along the way, but nothing like the horde you just conquered.
Neutralize the Hellfire Turrets
After the cutscene, climb the fire escape into the building and deactivate the turret inside. Consider grabbing the Fareye by the window, then get ready to shoot three enemies that appear in the bottom floor windows of the building across the street--just make sure you don't expose yourself to the turret on the left. Once Hawthorne's deactivated that same turret, run along the balcony (to avoid another turret) into the next apartment and exit out the backside.Climb up another fire escape and deactivate the turret there. Now take cover behind the wall to the left and get ready to shoot the enemies entering the building across the street, but also be prepared to tackle a Grim who'll find his way to you soon enough. After Hawthorne deactivates his second turret, jump to the adjacent rooftop and dart to the turret ahead for deactivation, then immediately take cover behind the wall. Shoot the three flying drones that appear to allow Hawthorne to deactivate the final turret. Now cross over the nearby walkway leading into another building. Drop through the hole inside, then use a melee attack on the far door to open it and leap into the water beyond.
Lead Echo Team to the Chimeran Node
After diving into the water, three Chimeran will appear on the left walkway. Although you can't shoot them, the three structures jutting from the water provide enough cover for you to make it to the far ramp, leading to their walkway-use the first pillar for cover as you blast them to bits. Now immediately seek cover behind either the broken wall portions or the counter, as a few more Chimeran and some flying droids are about to appear from the other side.
With the area cleared, you''ll have to cross the flooded road by crossing over the cars peeking out from beneath the water. The path is pretty straight-forward, though make sure to go left around the first train car. Oh, and some flying bots will come after you a short ways in--there's no place for cover, so hold your ground and take them out quickly. Climb the train car at the end up to the tracks and follow them to a train below you can drop to, and follow it to the far side...sort of.
After your character somehow misses the jump, you're going to have to hightail it along the path and up some ramps fast, to avoid the rising water (otherwise you'll be eaten alive by the sea creatures). Just keep on running until you can find safe haven inside the nearby building. Now climb the staircase up to a hole in the floor you should drop through--but be ready to blast some Grims that will charge from the darkness. At the end of the hall, turn right to blast an enemy that pops from a sac, then proceed through a door on the other side. Kill a few more Grims, then drop through another hole, but be ready to kill four Grims that charge. Continue into a hall on the other side, but prepare for a door to burst open on the left as you pass by, revealing more Grims. Head on through when clear, then continue up the stairs and off a drop-off to regroup with your teammates.
Clear an Air Corridor for the VTOL
It's good to see some fellow humans again, eh? Anyway, take cover by the right wall and shoot the enemies outside, including a spider-like thing. Once you've cleared 'em out, move up to the downed chopper for cover and peer around either side to blast the enemies on a bridge and those further up the street. Continue to push your way up the street and onto the bridge, using the myriad cars for cover. Once at the bridge, hang back by the road, as a couple of turrets on the far side will murder you upon crossing. After tackling some drones, prepare for three shielded enemies to appear. Thankfully, they'll be distracted by your teammates, making them a breeze to take down. They'll be followed by a few shielded flying droids--shoot up their shield a bit, then get behind them and target their exposed rear.
With the area cleared, a friendly air strike will destroy the turrets at the end of the bridge, allowing you cross over to the other side. As you climb ramp on the bridge, overlooking the battle beyond, toss a grenade at the trio of cars to easily take down the first few troops. Ignore the spider-like creature beyond (you'll deal with them later) and drop down and climb halfway up the staircase on the left, while crouching--the stairs themselves will afford you some cover as you shoot the enemies ahead. When clear, move up to the far wall for cover and battle the enemies in the courtyard below. When they retreat into the building, use the entrance for cover, but be ready for a steady stream of Grims to charge toward you.
Now that the building's cleared, grab one of the Rocket-Launchers by the windows and fire them at the Spider-Bots outside--it takes 4 rockets to kill one. You'll find additional rockets scattered around on the floor and by the other windows (Note: We experienced a glitch that required us to drop our current rocket launcher and grab another in order to obtain more ammo).
Rendezvous with Ground Forces
Head across the street and kill the enemies atop the stairwell before climbing up to the courtyard. Seek refuge behind a nearby planter, as a couple of enemies lurk about. Once everyone's dead, a giant monster will make an apperance, forcing our hero into the bowels of a nearby building.
Neutralize the Leviathan
Follow the hall and bash through the door at the end, but be ready to blast a few enemies on the other side. Follow the walkway across the water, where you'll find two shielded baddies. Duck behind the wall and target a pair of drones trying to attack from the left first, then turn your attention back to the shielded foes. Continue up the wreckage and take cover behind the wall at the top, where you'll incidentally find a Fareye. Use it to target the enemies across the span, but keep your eyes open for a few more Grims who'll dash toward you. Continue across to another bridge, where even more Grims will charge. Back up and take them down (use a grenade if necessary), then take cover behind the pillars to target a few more enemies across the way.
As you enter the building, prepare for an explosive Grim to charge, then continue up the stairs where you'll spot several hovering drones juts outside the windows. Grab the Wraith from the ground and use the central pillar for cover to take them down.
Upon reaching the rooftop, grab the rocket launcher you're lead to--just then, a giant monster attacks! Don't bother shooting him yet--instead, wait until the creature grabs you then fire a rocket at him each time he opens his mouth (three times total). He'll then drop you on a nearby rooftop--quickly run up the stairs (as marked by the on-screen indicator) to the roof, then hightail it across the walkway into the tower. Descend to the lowest floor of the tower, then hop outside where the monster will again grab you. Fire another rocket at his mouth to cause him to hurl you through a bridge and into another tower.
Lure the Leviathan Underneath the Sky Bridge
Follow the interior of the second tunnel and prepare for some enemies just after a short hall. Battle your way back outside and grab the rockets to the right. Fire one at the Leviathan to catch his attention, then immediately switch to your gun to tackle some flying droids that appear. unfortunately, the charges on the bridge won't detonate, so fire a rocket toward it to help them along. Now quickly follow-up with a few more rocket into his ugly mug to knock him out!
Chapter 6
Plant Demo Charges on Chimeran AAGs
Follow the roads up to a staircase on the right, which leads to a field. Take cover at the base and focus your Marksman's sights dead-ahead. Once the enemies catch wind of your presence, they'll file down the staircase then cross right in front of your cursor, giving you a series of easy kills. Once they're down, head toward the staircase, but be ready for a couple of enemies to attack from a left bunker. As you climb the stairs, you'll encounter two-shielded enemies--you may want to back down and target them from afar in the field.After planting the first charge, proceed into the tunnel and down a stairwell. The hallway just beyond contains two turrets that will tear you to shreds if you dilly-dally. Position yourself by the right entrance, then dart into the tunnel on the other side--you'll take some damage, but should be okay. Now immediately turn your attention to a couple of enemies who'll charge toward you. Subsequently, take cover at the next corner and blast the enemies behind the fence.
You'll soon drop into a small room, where you'll spot a spider-bot patrolling outside. Ignore him for now and turn your attention to the tunnel you just dropped from, as a dozen or so flying droids are about to attack from that direction . Once they're down, make a mad dash through the open door, down the ramp dead-ahead. Turn into a tunnel on the right, about half-way, to find a Rocket Launcher. Now take it up one of the ramps and open fire on the spider-bot--you should be able to get two shots off. Since he's going to start heading your way, retreat back underground--reload--then fire two more shots from the ramp on the other side to finish him off. With the Spider-Bot taken care of, use the Auger to target a few drones on the walkways bordering the arena, then enter a garage on the far side and climb the tunnel within to find the second AAG.
Rendezvous with Echo Team in the Observation Room
With the second charge planted, continue through the tunnel to regroup with your squad.
Clear Chimeran Defenses for Aerial Assault
Now that you're one big, happy family again, seek cover away from the windows as soon as you regain control and target the flying droids outside. As soon as they're cleared out, take shelter behind something so you're facing toward the doors, opposite the windows, as an ass-ton of enemies is about to swarm in. A grenade launcher along the boxes to your left can help get the job done quickly.
With the room cleared, continue through either doorway to reach an open garage. You'll find a few-murder holes on either side that provides a great place to shoot the enemies outside. A third window along the left wall is a good starting location for clearing the concrete field, though some enemies will be too far to target--grab the Fareye just outside that window to make your job easier (don't forget to look for some on the far stairwell). Once they're dead, a few more will emerge from an entrance to the left. Head in there when done and wait for your teammate to open the door within.
Enter Holar Tower
You'll wind up in a room surrounded on two sides by Grim sacs. And as you've probably guessed, a whole bunch of Grims are about to head your way. Thankfully, your teammates will cover the left side by themselves, leaving you to stop those coming from ahead. We suggest using the shotgun (which can be found on that same platform) whenever they bunch up, otherwise melee them to death. Once clear, hop onto the lift that arrives and ride it down.
Rescue Foxtrot Unit
The lift will take you down in a field overrun with spider-bots. Quickly dive into a trench on the left and seek cover behind an odd-wall thing a short ways in. Look for a few enemies hiding in the upper-reaches of the valley, then continue onward to the crashed helicopter. Look for several foes to pop out on the ridge overlooking the helicopter's right side, then prepare for more to come down the opposite hillside once clear--try targeting them from around the back of the helicopter, since they won't seem to target you there.
Clear Out Chimeran Ground Forces
After rescuing Foxtrot, continue up the hillside and prepare for three chameleons to attack. Once they're dead, climb the short hill ahead and use it for protection as you target a Ravager below--if you place yourself properly, the hill will block his shots. Push forward and look for a few stragglers on the ledges ahead.
Enter Holar Tower
The large hallway before you is the entrance to Holar Tower. Before entering, it's best to stock up on the goodies lying about, such as the Rocket Launcher amongst the helicopter wreckage--trust us, you'll need it. Of course, as soon as you enter the hall, you'll hear some nasty sounds--you best retreat back outside. Take cover behind something and open fire on the little critters that scamper out...but just behind them awaits another Ravager. Launch three rockets at it (you did grab the Launcher, right?) to take him down before he gets a chance to get his bearings. With everyone dead, board the lift inside the hall.
Track Down Daedalus
Now that Hawthorne's torn in two, continue through the doorway and follow the hall. It'll lead to a room chock-full of enemy goodness. Crouch by the entrance leading into the room and peek around the corner to target a shielded-foe and some of his friends, then work your way through the room, using the corners for cover, until it's completely clear. Pick up an Auger from the fallen foes, then continue through a door that opens (along the same wall that you entered from). Use the Auger to kill the enclosed enemy at the top of the ramp, then proceed down the left tunnel.
After a brief cutscene, move into the room ahead and get ready to shoot some explosive Grims that'll rush from the opposite side. Continue onward, but prepare for another chameleon to attack in the second room you enter. Follow the path, blasting the few enemies you come across, until you reach a long, well-lit room. Tackle the three enemies atop the ramp, then climb up, grab one of their Augers, and prepare for a flood of foes to attack from the hallway you just came from. Use the wall on either side for cover and use the Auger to take them down, but keep an eye out for an explosive grim or two. Once the initial wave is defeated, one of your squad mates will help provide some cover-fire for the next. When the coast is clear, continue down the hall toward the on-screen marker.
Chapter 7
Clear out the Plantation House
Push through the marsh until a house comes into view. Take cover by a tree and use the sniper to pick off the enemies wandering around the house. Head inside and climb the stairs, where you'll find a small squad of enemies--toss a grenade for a quick victory. Continue up another flight to the attic and grab the Rocket Launcher from the corner--just in time, too, as a ton of enemies are now swarming around outside. Save the rockets for now, but feel free to use one on the Ravager lurking about (you can target him from the broken portion of the rooftop, if you jump before firing). Head back down one floor and shoot anyone who comes up the stairs, then continue to the ground floor and shoot the enemies through the windows.
Neutralize the Marauder
With the house cleared, a Marauder will storm onto the scene. Attack him from the second floor balcony and launch whatever rockets you have remaining at him (you should be able to grab two more by returning to where you found the rocket on the rooftop). If the rockets don't finish him off, follow-up with some gunfire. As for his attacks, simple move aside to avoid his fireballs, but you'll have to retreat inside the house if he unleashes his ivy attack--stand amidst them for too long and it's game over. With the Marauder defeated, cross over its corpse to the house on the other side and follow the path to the next objective.
Neutralize the Titans
You'll soon find yourself on a dock that's under fire from three Titans stationed on a nearby riverboat. Unless you have some rockets handy, ignore them for now and dash along the path into a house, where you'll find some teammates. Head downstairs and use the Fareye located by the exit to pick off the enemies in the house across the way (check the roof, too!). Once clear, quickly dart inside the house and look for a rocket-launcher on the floor above and aim it at the three Titans just outside. It won't be enough to take them all out, but there's another launcher just off of the next room, though you'll have to kill some flying droids first. Step into that room to catch their attention, then quickly retreat to the previous one and blast them through the doorway. Now that it's clear, head through the broken wall section to find a second Launcher, which should finish off most of the remaining Titans. If not, either toss grenades or shoot them. With the Titans finished, drop to the walkway below and follow it into the riverboat.
Clear the Riverboat
Explore the bottom-floor rooms for some goodies, then proceed up the stairs to the riverboat's roof. Grab the Wraith there and use it to kill the Titan facing toward you--so long as stay by the stairs, his shots won't be able to reach you. Cross over to where he was then drop into the house containing your squad and follow them to the bomb.
Suppress the Assault
If you don't have the Auger, you can find one in an alcove directly across the street from the fence opening. We suggest holding onto it for now, as it'll come in handy for an upcoming ambush. Now target the enemies from around the corner--don't forget you can explode the cars for some easy kills. Once the initial wave has been put down, the enemies will launch an ambush, containing a pair of shielded Ravagers--now's the time to use that Auger! When the street's cleared, continue over the far ramp and up a staircase, leading underneath the bridge.
Neutralize the Chimeran Outpost
Follow the bridge's support beams to the other side, where you'll regroup with your squad. Now follow them through the river to a gate at the end, which they'll forcibly open. As you cross through the pipe, you'll be ambushed by a ton of of swarming insects. Quickly back out of the pipe (before more attack from behind) and blast them from as far away as you can. Exit out the other side, when clear, then cross through a second pipe, which leads to a swamp. As you trudge through, prepare to tackle six chameleons along the way. As you climb the hill just beyond, grab the Fareye from the peak and use it to target the enemies roaming the base (if you need cover, simply back down the hill). With the base cleared, meet with your squad by another pipe, left of the base, and wait for them to blow it open.
Escort the Fission Bomb onto a Chimeran Shuttle
After riding the lift, you'll face a long ramp with a heavy enemy presence. However, it'll take them a while to descend the ramp, giving you plenty of time to clear most of them out. Simply stay near the lift and move side-to-side while blasting them to avoid their return fire. After a while, two Titans will also work their way down the ramp. Thankfully, the wall on the right side of the ramp's base is perfect for cover. If you stay a few feet back, but keep it between you and the Titans, their fire won't be able to reach you, since their guns are too low to shoot over the wall. Once the Titans are down, work your way up the ramp, using the short-walls for cover, to finish off the remaining baddies.
Find the Control Room
Follow your teammate into the next room, but remain on the raised walkway as you target the enemies below. When clear, follow the on-screen marker to the closed door and activate the control panel to summon an elevator. As you wait, more enemies--including a Titan--will emerge from a door on the right-half of the room. Stay where you are, but hug the right wall for cover and blast the enemies as they come into view. Once clear, catch a ride on the now-arrived lift and continue through the corridors.
After a short while, you'll finally encounter some more aliens. Wait by the entrance to that room for cover and shoot them through the door, then quickly climb down the ramp and kill the Auger-hogging son of a gun. Now continue through the right door.
Clear Out Chimeran Ground Forces
You'll soon emerge on a small catwalk overlooking a large room. Take cover behind any of the wall-sections and blast the few enemies that attack from the center platform. When finished, grab the Auger by continue through a door to your left (embedded in the same wall as the door you came through) and prepare for some more enemies at the base of the ramp. Once they're down, you'll find some more through the door at the base, but we found it's actually easier to target them from the main walkway you were just on moments before, as they won't actively target you there. But keep an eye out for a few enemies who'll chase after you directly. Now follow the lower level walkway to encounter two more shielded enemies--use the glass columns for cover.
Find the Conduit Hub
After riding the lift, you'll find that the path to the Conduit Hub is pretty straight-forward, thanks to your teammate giving you directions via radio (where was he the rest of the game?!). You also won't face too much resistance--nothing you can't handle, at least. However, be on the lookout for Chameleons whenever your radio buddy says something's comings your way. There's only one the first time, but you'll encounter three the second time, in addition to one more on the walkway just beyond. Eventually, you'll drop into a tunnel leading to the Hub.
Engage the Manual Override for the Blast Doors
Once you reach the Conduit Hub, climb up the series of ramps to a control panel you can activate, opening a nearby door. Before exiting, you may want to grab the nearby Wraith, on the other end of the room. Continue through the door and crouch behind the low-wall as soon as the enemies come into view for cover. Once you've cleared 'em out, catch a ride on the elevator beyond.
Locate Daedalus and the Fission Bomb
Disembark the elevator and climb a few more ramps, where you'll encounter a few more enemies--use the boxes for cover. Just beyond are a pair of Titans--since they have difficulty targeting those below them, back down a ramp or two and shoot them from a distance. Shortly thereafter, you'll enter a room containing a few enemies unaware of your presence. Crouch-walk to the wall ahead and take down the two guards to the left, then target the flying droids, and finally pick off a few more aliens on the far side--head over there to continue on.
You'll soon find a trio of alien foos carrying the bomb--although the one actually carrying the bomb will escape, you'll have to tackle the pair of shielded dudes. Now although the primary path is closed off, you can drop to a catwalk, just left of the door. Follow it to an alcove where you'll find a sniper rifle, then use it to kill the enemies on the far platform.
Battle Your Way to the Fission Bomb
In order to reach the Fission Bomb, you'll have to cross over several platforms, connected by walkways. At each platform, you'll be attacked by Daedalus, who'll slowly tear the structure apart, eventually allowing you to continue on. Don't bother shooting him at any of the three platforms, as it has no effect. Instead, simply stay back and to the side of him to avoid his attacks and wait patiently for the way to open. Once it has, you'll have to battle a few enemies before facing Daedalus again--repeat the process until you reach the far platform, where you'll finally do battle with him proper.
Defeat Daedalus
We are not kidding when we say this could not be easier. Just back away from Daedalus and shoot the white orbs bordering the arena as they're highlighted by the on-screen marker. It only takes a few direct shots to knock one out of commission, thereby damaging Daedalus in the process. Once all the orbs are destroyed, the battle's over. You won! Easy, huh? Just be careful not to stray too close to the ledge, to avoid falling.
Evacuate the Ship Before the Fission Bomb Detonates
You've inherited some kind of super power that can destroy any enemy with the touch of the weapon button--sweet. Now all you have to do is escape this place within four minutes. The path is simple and the enemies easy--just run the entire way and kill anything that obstructs your path.
PlayStation 3 Trophies
Note that there are Spoilers on this list.| Trophy Name | How To Earn | Reward |
|---|---|---|
| Rampage | Kill 40 hybrids in the Single Player Campaign. | Bronze |
| Covert Ops | Collect 5 pieces of Intel in the Single Player Campaign. | Bronze |
| Nowhere to Hide | Tag and kill 30 enemies with the Bullseye in the Single Player Campaign. | Bronze |
| Sharpshooter | Get 30 headshots while scoped in with the Fareye or Marksman in the Single Player Campaign. | Bronze |
| Explosives Expert | Get 150 kills with the Carbine 40mm, LAARK, or Frag Grenade in the Single Player Campaign. | Bronze |
| They Go "Boom" | Get 30 kills with the Magnum secondary fire in the Single Player Campaign. | Bronze |
| Pyromaniac | Set 100 enemies of fire with the Bellock Semi-Automic, Air-Fuel Grenade, Spider Grenade, or environmental hazard in the Single Player Campaign. | Bronze |
| Spitting Lead | Kill 50 enemies using the Wraith with the force barrier engaged in the Single Player Campaign. | Bronze |
| I See You | Kill 50 enemies through solid matter with the Auger in the Single Player Campaign. | Bronze |
| Talk To The Hand | Use the Auger force barrier to stop 150 incoming enemy shots in the single player Campaign. | Bronze |
| For Close Encounters | Get 10 one-hit head-shot kills with the Shotgun in the Single Player Campaign. | Bronze |
| Pincushion | Get 50 kills with the Hedgehog in the Single Player Campaign. | Bronze |
| Up Close and Personal | Get 50 melee kills with any weapon in the Single Player Campaign. | Bronze |
| Wrecking Machine | Destroy 40 vehicles in the Single Player Campaign. | Bronze |
| Mind Your Surroundings | Get 50 indirect kills using explosive objects in levels in the Single Player Campaign. | Bronze |
| Berserker | Use every berserk at least once in Online Competitive Multiplayer. | Bronze |
| Specter Recon | Collect 50 pieces of gray tech in the Cooperative Campaign. | Bronze |
| Specter Initiate | Complete 20 missions in the Cooperative Campaign. | Bronze |
| Team Player | Complete 5 missions with a full party of 8 in the Cooperative Campaign. | Bronze |
| Tour of Duty | Complete one mission on each region in the Cooperative Campaign. | Bronze |
| Salute Me | Achieve the rank of Lieutenant. | Silver |
| Exotic Weapon Collector | Get 20 kills with each weapon in the Single Player Campaign. | Silver |
| Master Spy | Collect all the Intel documents in the Single Player Campaign. | Collect all the Intel documents in the Single Player Campaign. |
| Snipe Hunt | Kill 30 Grims in the Single Player Campaign | Kill 30 Grims in the Single Player Campaign. |
| Xenocide | Kill 1000 enemies in the Single Player Campaign. | Kill 1000 enemies in the Single Player Campaign. |
| Point Man | Earn 1 million XP from ranked games in online Competitive mode. | Earn 1 million XP from ranked games in online Competitive mode. |
| Specter Officer | Reach max level (30) with one class in the Cooperative Campaign. | Reach max level (30) with one class in the Cooperative Campaign. |
| Primarch Hunter | Kill 200 Elite Chimerans in the Cooperative Campaign. | Silver |
| Killing Machine | Score 10,000 kills in ranked matches in Online Competitive Multiplayer. | Gold |
| Specter Intel | Collect all Intel in the Cooperative Campaign. | Gold |
| Recycler | Defeat the Goliath in the Single Player Campaign. | Bronze |
| Fried Calamari | Defeat the Kraken in the Single Player Campaign. | Bronze |
| Exterminator | Defeat the Mother Grim in the Single Player Campaign. | Bronze |
| Flyswatter | Defeat the Swarm in the Single Player Campaign. | Bronze |
| The Bigger They Are | Defeat the Leviathan in the Single Player Campaign. | Bronze |
| Big Game Hunter | Defeat the Marauder in the Single Player Campaign. | Bronze |
| R.I.P. Jordan Shepherd | Defeat Daedalus, Complete the Single Player Campaign. | Gold |
| OMGWTFBBQ | Complete the Single Player Campaign on Superhuman. | Gold |
| Platinum Trophy | Obtain all Gold, Silver, and Bronze Trophies for Resistance 2 | Platinum |
Got a news tip or want to contact us directly? Email news@gamespot.com
Join the conversation