Medal of Honor: Airborne Walkthrough
The battles of the airborne infantry come to life in Medal of Honor: Airborne, and GameSpot's Walkthrough is going to get you through them.
The Medal of Honor franchise is the grandaddy of all the many World War II FPS franchises: it got its start way back in 1999 on the Sony Playstation. Since then, many, many iterations of the series have come out, each revolving around a different aspect of the World War II conflict.
Now, though, eight years after the franchise's origin, it's arriving on next-gen consoles for the first time with Medal of Honor: Airborne. It places you in the shoes of one Travis Boyd, a private in the airborne infantry that would see their first experimental deployments in World War II. Unlike most FPS games, you're given a lot of freedom in Airborne: the levels are designed such that you can drop down from the sky, as opposed to being set on a specific path and being forced to go forward. As such, you can perform most of the objectives in any order that you choose, giving the missions a freeform feeling that's missing in most single-player FPS games.
In this game guide for Airborne, we're going to walk you through the six missions of the game, as well as give you some tips for getting through it alive. This guide isn't intended to be an exhaustive look at every facet of the game, but should hopefully be of some help if you're having troubel. Enjoy!
Hints and Tips
Aiming Down The Sights
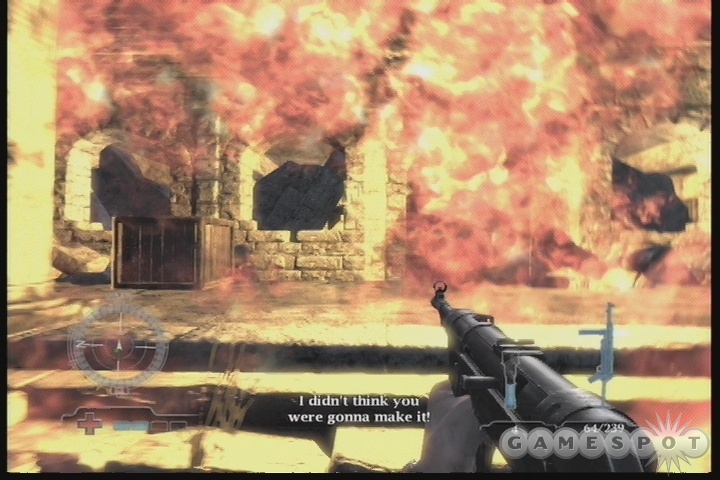
If you attempt to play MOH: Airborne as a standard shooter, then you're going to be confused at best, or worse, think that there's something wrong with the game's hit detection. In other words, you can't run forward and shoot your weapons without aiming, unless you want to get quickly dead.
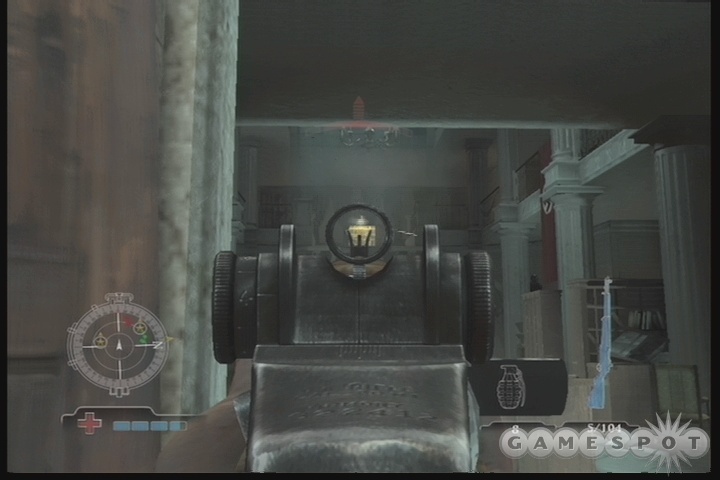
No, if you want to actually hit your foes, then get used to the practice of stopping and aiming. There's plenty of covers in the levels that you'll be playing in, so get used to ducking down low behind cover or around a corner, aiming down the sights, and popping up from behind cover to fire on your foes. You can quickly get behind cover by simply letting go of your analog stick, or by bending the other way. This is the only way to get maximum accuracy with your weapons. If you're not standing still and aiming down the sights while firing, you're not going to hit much.
Which isn't to say that you'll never hit someone if you don't fire down the sights: at extremely close ranges you can get by without aiming, especially if you use a rapid-fire weapon or something with a big spread, like the shotgun. If you're using a bolt-action rifle, though, just flip to melee attacks and use those instead.
Upgrading Your Weapons
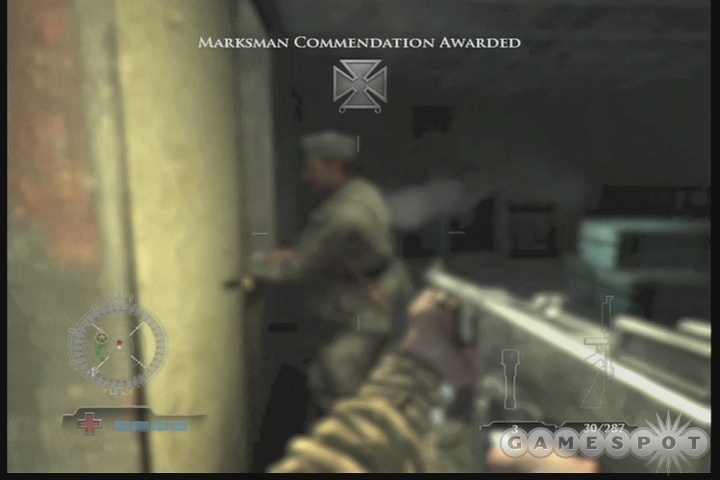
Each of the weapons that you use in Airborne has three different upgrade levels that it can reach. When you start killing opponents with a weapon, you'll see its icon in the bottom right corner of the screen start to fill up with blue. When it reaches the top of the icon, you'll unlock a new ability for the weapon.
Each weapon will have different bonuses applied to it when you reach a new level. SMGs and assault rifles will usually get larger ammo clips, faster reload times, and less recoil. Grenades will let you earn satchels and bandoliers that will let you carry more of them. Some weapons will even get bayonets and knives that will let you deal more damage in melee combat. You'll have to experiment to see what each weapon unlocks, but it's not difficult to do so: just use your gun to kill a bunch of enemies!
One thing to keep in mind is that you only keep the progress you've made with a weapon if you manage to hit a quicksave point. If you shoot a billion Germans with your shotgun and max it out, then die, you'll lose all the progress you've made. If, however, you shoot a billion Germans, max out the weapon, then perform an objective and reach a quicksave, then the weapon progress is locked into your profile and can't be lost, even if you subsequently quit the mission and go back to the main menu. So if you want to revisit an older level and build up your weapon skills, be sure to perioidically hit an objective to save your game.
Lastly, some weapons will eventually obtain removeable addons when you max them out, such as the G43, which gains a scope, and the Garand, which obtains a grenade launcher. If you don't particularly care for these addons, you can take them off your weapon with the alt-fire button (L1 on the Xbox 360 controller).
On Landing
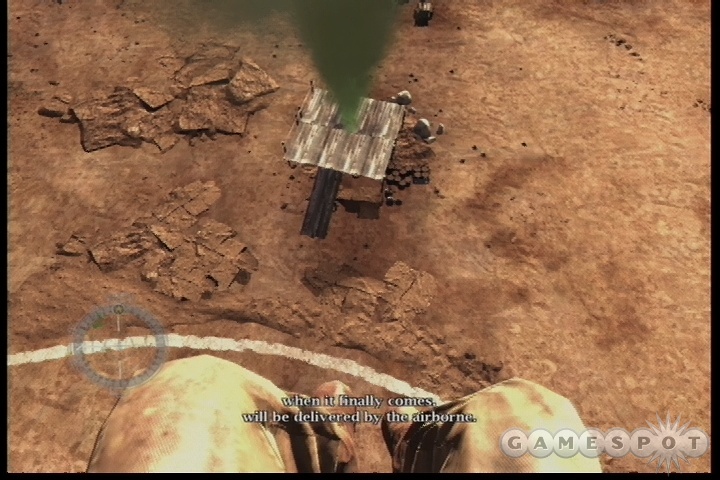
Although the game designates safe zones for your landing pleasure (as indicated by the green smoke flares), you can feel free to land anywhere you like in the level. Sometimes landing outside of the designated zone will gain you a marked benefit (such as by landing on the church steeple in the third mission and sniping away at the start, or by running around on the rooftops in Husky), but sometimes it'll land you directly into an enemy concentration and wind up killing you before you can react.
In general, if you want to land outside the safe zones, pick an elevated position and bring along a sniper rifle or another slow-firing, powerful weapon that'll let you pick off enemies until your friendly soldiers can get to you. It won't always be a big benefit to you, but it will let you vary up your game experience.
Training
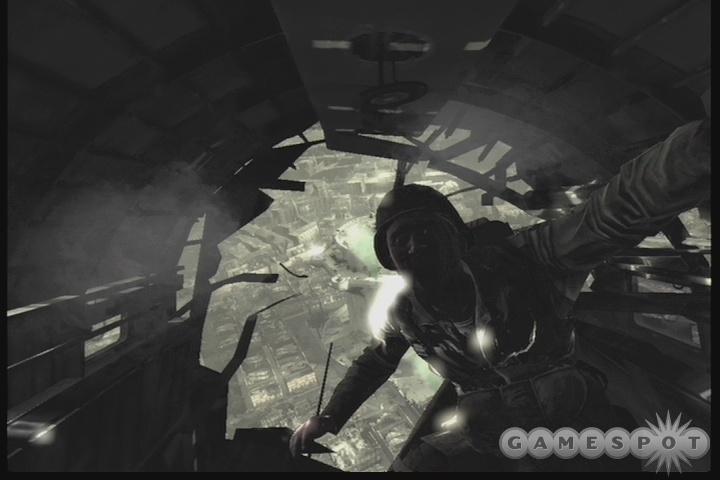
The game doesn't waste any time here; you're going to be jumping out of planes as soon as you start the main campaign. There are three training jumps that you'll have to complete. You can do pretty poorly and still get to the main part of the game, but you'll want to figure out how to control your chute here, as opposed to when you're trying to land in enemy territory.
There are three main aspects to controlling your chute: maneuvering with the left analog stick to adjust your drop position, pressing forward with the stick to increase your speed when you're near the ground, and pressing A to flare your parachute and slow yourself down. (All controls assume you're playing the 360 version of the game.) Maneuvering in midair will be important as you'll have to attempt to hit the green signal flares when you make a jump; landing anywhere else will cause you to land amongst your enemies. This can sometimes be advantageous, but in most cases will cause you to quickly get dead.
If you need more time to scout your dropzone on the way down, you can flare your chute, which will temporarily slow you down. That'll let you move a bit further laterally than you would otherwise, and will also let you make a softer landing than you will if you simply drop to the ground. Flaring only lasts a few seconds, though, so if you want to make a flared landing you'll have to time your button presses so that you flare just before you reach the ground.
Lastly, you can grease your landing by pressing forward on your analog stick while you're gliding down towards your drop zone. If you have a bit of space to move forward to, you'll hit the ground running and be able to save a few seconds of recovery time, allowing you to recover and get your weapon up that much more quickly.
Practice these techniques on the three training jumps that you have here while trying to get as close as possible to the green smoke flares. You have a lot of leeway in terms of how close you need to be to pass, and your performance here doesn't really affect the rest of the game, so just get used to the mechanics and move on to the first real mission.
Husky
Objectives
- Secure Town of Adanti
- Destroy Town Hall AA Guns (2)
- Destroy Hill Houses AA Gun
- Destroy Northeast Gate AA Gun
- Assemble with Airborne at North Gate
- Locate Missing Sniper Team
- Eliminate German Commander
- Repel Enemy Counterattack
- Assemble With Airborne at Town Square
- Eliminate German Officers
Recommended Weapons
You won't be able to choose from a big pile of weapons here (more weapons pop up in your selection screen as you pick them up in the game, kind of like Perfect Dark Zero), so you can feel comfortable going with the default Garand/Browning combo. We like the MP40 a bit more than the Browning, as it seems to be a bit easier to aim, but either one will do you fine.
Skill Drops
The sniper's tower near town hall, just to the south, has a destroyed rooftop. Land on the walkway inside of it.
The building just to the north of town hall has a balcony. Find the chute there, then flare your landing and press forward to land on it; it's covered.
Church Steeple: Near the northeastern green landing zone, there's a church. Land atop the steeple tower.
Small Rooftop: If you glide down to the eastern side of the city, you'll see an alleyway that isn't part of the main road of the town. There's a small, half-destroyed rooftop here that you need to land on. It's difficult to see from the air, but if you land in the road and look around, you'll spot the chute.
If you head towards the Northeast Gate AA gun, you'll come under an archway. See the parachute? You need to land through that window. Note that although the gate is the Northeast Gate, it'll actually appear on your compass to be in the southwestern portion of the city. Go figure.
Landing
The four AA guns are separated out into three zones, with one on either end of town and two atop the Mayor's house in the middle of town. Don't be afraid to take your time and get used to the firing controls here; they're a bit different than in most games and will take a bit of practice to use effectively. The two things you really want to get used to doing are crouching behind cover and using the ironsights view to peek over and around obstacles so that you can fire on your foes without exposing yourself to too much fire. You can fire without aiming inside buildings, when you're really close to your enemies, but if you try it on the streets, you won't be able to hit anything.
Secure Town Hall
You can take on the four AA guns in any order you like, but you'll probably hit either the northeast gate or Hill Houses before clearing out the Town Hall. When you do reach the Town Hall, it's probably worthwhile to move back across the street from it and clear out the building across the way before charging into the mayor's residence. Note that there are a couple of snipers in the tall tower to the left of the Town Hall; you can clean them out if you like, but they don't seem to drop weapons for you.

You'll need to be pretty aggressive to get into Town Hall, so pick off the defenders on the steps (the sniper's roosts are good for eliminating the machinegunner and any other soldiers in the area), then start heading up towards the door. There's another MG inside the front doors, so head down to the far side of the outside of the building where you can find a separate door into a smaller room. Clear it out, then start charging upstairs. There are plenty of enemies in the rooms here, so you may want to start using grenades to clear them out.
Moving On
After destroying all of the AA guns, you'll be told to reinforce a Sergeant Setzer. Do your best to restore your ammo as you move back through the town towards the rendezvous point.
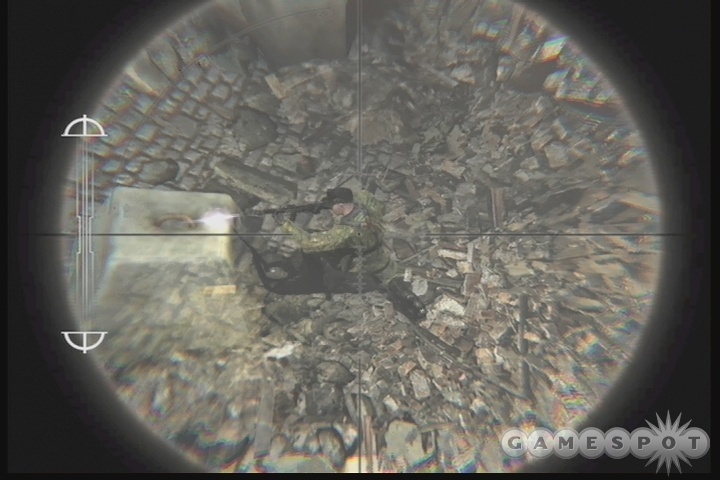
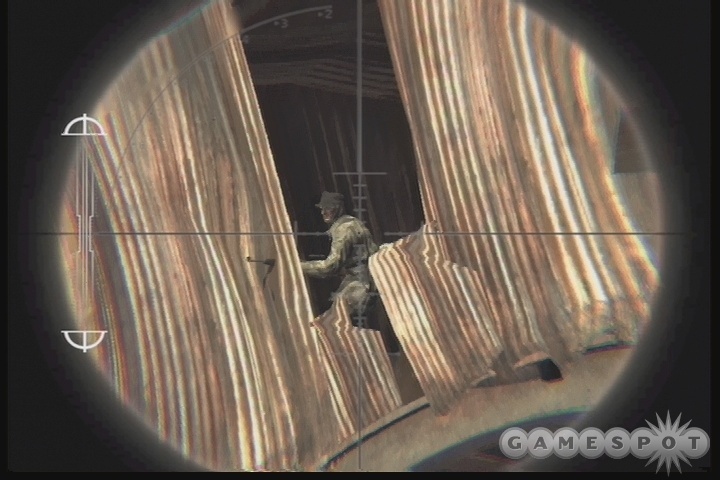
When you reach Setzer, head across the roadway and into the building there. That'll let you move up to the second floor and get to a position where you can fire down onto the Germans, or throw grenades at them. Make your way through their positions until you reach the sniper team, where you can trade your Garand for a Springfield sniper rifle. Duck under the window and peek above it to spot the German Commander in the window across the way. Zoom in on him (up on the directional pad on the 360 controller), then pop him in the head to dust him.
With that done, you'll have to head back to the center of town and help repel a counterattack. Snipe your way through the Germans that block your egress (if you move a bit past the MG42, one of your teammates will use it to provide suppressing fire), then regroup with your comrades.
Eliminating The Officers
At this point, you'll have to head back into town hall and take out the German officers and soldiers that have found their way back inside. It's best to approach on the right side of the building; there's a stone stairwell that will lead up to the right doorway of the building. You can destroy the Germans on the porch from the stairwell, then hop over to enter the building. After that, it's a relatively simple matter to clear the building and eliminate the three officers inside to end the mission.
Avalanche
Objectives
- Secure Paestum Ruins
- Sabotage Fuel Containers (2)
- Destroy Ammo Cache
- Sabotage Enemy Communications
- Disable Communications Antenna
- Disable Communications Radio
- Assemble with 5th Army Demo Team
- Defeat Enemy Ambush
- Assemble with Corporal Kish
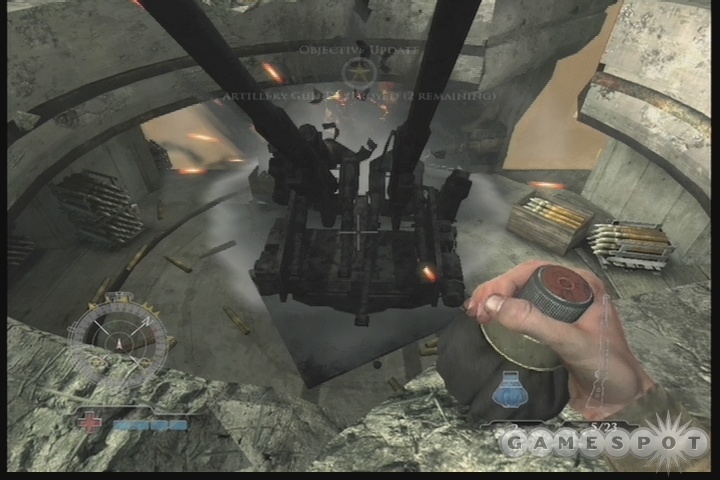
- Destroy Hilltop Artillery
- Ascend to Hilltop Temple
Recommended Weapons
Nothing too crazy going on here. A standard rifle/SMG combo should be fine.
Skill Drops
In the ampitheatre, land on top of the cargo loader.
Near the western drop flare, there's a large column. Land on top of it.
Near the eastern drop flare, look along the aqueduct that lines the road to spot a parachute and land through the opening there.
In the fuel depot where you destroy the fuel reservers, there's a water tower. Land on it.
To the west of the ammo depot that you destroy, there's an easy-to-miss set of stonework excavations. If you stick to the top of it, you can find a parachute. Land through the opening in the ceiling.
Landing
Try to hit one of the two green zones here when landing; you should have enough room to flare or grease the landing to get you up and running. You have two beginning objectives here, with one being some destruction objectives against the fuel and ammo depots to the east and the other being to take out the communications arrays to the west.
As per usual, you can attempt these in any order, but it's probably a bit easier to proceed by heading to the east and taking out the fuel containers first. There's actually a rear entrance to the motor depot where the fuel is being stored; if you head to the green smoke signal nearest the fuel, then head through the small grove with the low stone walls, you can find a hole in the wall and sneak around to the back entrance to the fuel. Kill the enemies and then fire your weapons into the large red fuel canisters to destroy them.
When the two fuel containers are done, you can move on to the ammo cache nearby. Fighting your way into it will be difficult, but if you have a few grenades, you can lighten up the defenses by cooking them and throwing them into the midst of the defenders. This is close quarters combat, so don't bother with ironsights if you're coming around a corner towards an enemy. When you find the explosives marker, attach your bombs to it, then quickly run out of the ammo depot before the whole thing comes down around your head.
Sabotaging the Communications
To the west, you can find the communications arrays. To reach them, you'll need to clear out a nest, then head down into the trenches beneath the building. You can pick up the shotgun on your way, but it might not be the best choice here; you'll probably find it more helpful to stick with a rapid-fire weapon like the MP40 or grenades to clean out the trenches. To each his own, but you will definitely want to keep a distance weapon, like the Springfield, Garand, or G43.
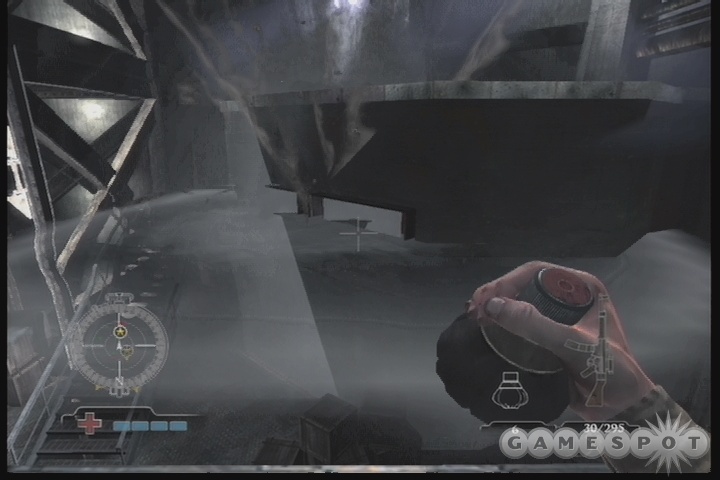
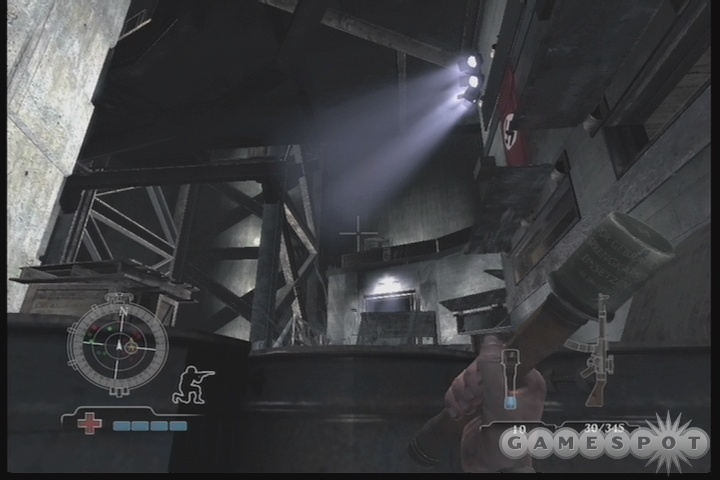
When you clear the trenches, you'll come to the bottom of the large temple here. You'll need to get up into the scaffolding in order to clear out the Germans, but this can be difficult, since they'll be firing on you from above. Hang back behind your teammates here and try to get headshots from a distance on the enemies above you.
When you reach the top level of the scaffolding, jump across the gap in the northwestern corner of the building to reach the outside scaffolding, which you can follow around to reach a balcony overlooking the German communications tents below. Snipe away at your foes from up here; this is a great opportunity to get some headshots and earn some experience with the Springfield or your other long-distance weapons. When the coast is clear, turn around and shoot down the communications antenna attached to the top of the building here, then make your way down and find the tent with the radios in it and shoot them as well.
Assemble With Demo Team
After all of the previous objectives are destroyed, you can reassemble with your demolitions team in the ampitheatre nearby. Unfortunately for you, you'll be ambushed as you enter the ampitheatre, with numerous Germans appearing on the upper levels here. If you're interested in surviving, run to the side of the theater here and find one of the small rooms there; you can hide inside and lean out to snipe at your foes.
When the ambush is defeated, move to Kish's position and start the ascent to the temple. The main stairs are covered by an MG; head to your left to find the small ramp that will let you bypass the most dangerous part of the approach. When you reach the last set of stairs, start mowing down your enemies by leaning out from around the corner, flush out the MG gunner, then start making your way to the temple itself.
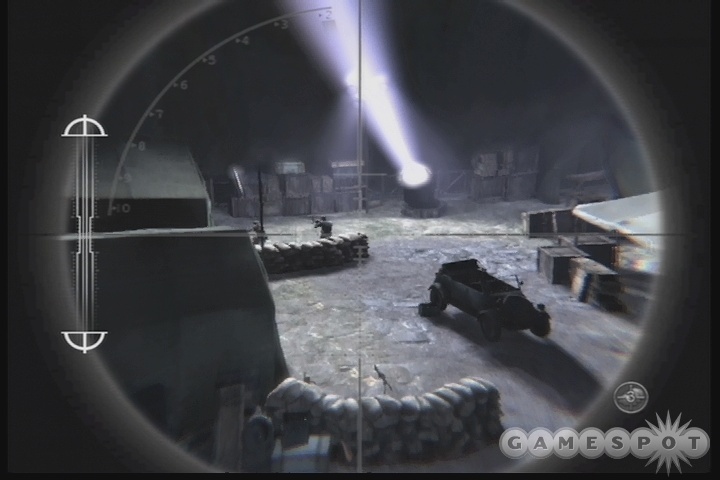
After you reach the temple, turn to your left to find the 88 millimeter artillery guns that are firing on the beaches. You can't destroy them; instead, you need to shoot the red barrels nearby to set a target light for your planes when they make their bombing run. Unfortunately there's also an AA gun nearby. Find it and destroy it to end the mission.
Neptune
Objectives
- Secure Audoueville Battery
- Collect M18 Bundles
- Clear and Secure Spotting Tower
- Destroy Radar Antenna Relay
- Knock Out Tiger Tank
- Clear Concrete Casement
- Clear Pillboxes
Recommended Weapons
You need some kind of ranged weapon here, alongside an up-close-and-personal device like an MP40 or the shotgun. Up to you, really, but keep in mind that you'll have to temporarily trade in one of your weapons for a recoilless rifle when you land.
Skill Drops
Near the green flare safe zone here, there are two skill drops in the large houses. These are pretty easy to find, so look on the upper floors to locate them.
In the small ruined house between the spotting tower and the radar antenna, you can find another parachute.
There are another pair of drops near the spotting tower. One of them is near the concrete bunker outside, while the other forces you to land on a narrow concrete wall near the entrance to the tower.
Landing
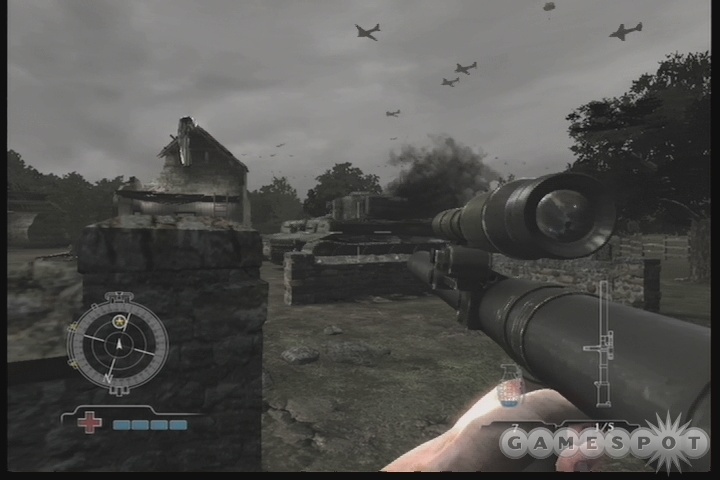
There's only one green zone on this map, so drop down to it and start running around. You're protected from enemy fire if you stay in between the houses, but unfortunately for you, a tank arrives pretty quickly. To take it down, find the four M18 bundles in the area to create the Recoilless Rifle, a powerful anti-tank device that will deal a good amount of damage to the Panzer here. Hunker down behind some cover, wait for it to roll around, then hit it with a few shots to finish it off.
At this point, you'll have to head to either the spotting tower or the radar antenna relay. You can find the path to the radar tower to the north, while the spotting tower is to the south; don't head directly west, no matter what you do, as the Germans are entrenched there and will make your life difficult. Find one of the dirt paths and proceed up that way.
No matter if you hit the spotting tower or the antenna, you'll have to fight your way through trenches and then head into a bunker, so bring weaponry that's appropriate. The recoilless rifle is fun to use against infantry, but you won't have many rounds for it and it'll take forever to reload. It's best to approach these situations with some kind of long-range weapon, like a Garand or G43, matched up with a close-up weapon like a shotgun or a Browning. Use the distance weapon to knock out MG gunners and riflemen from a distance, then follow your squadmates through the trenches with your close-up weapon at the ready.
The antenna needs to be destroyed, so head to the roof of the building and blow it up. The spotting tower merely needs to be killed, so head in with grenades and take out all of the soldiers within.
Following Up
Whether you clear out the antenna and then the radar, or the radar and then the antenna, you'll be given a third objective following those tasks: clear the central casemate in the area of enemy forces.
When you reach the compass marker, head into the concrete building there and start clearing it out. If you haven't gotten used to it yet, clearing buildings can be done by cooking grenades and bouncing them off of walls and around corners; pretty handy if you know that there are a bunch of enemies in the area. These bunkers can also make for a decent place to work your Colt handgun.
To The Beaches
When you clear the casement, you'll have to fight your way to through the beaches to the pillboxes there and support the invasion by removing the pressure on your soldiers landing on the beach. This is another trench mission, but with the bonus of having plenty of cover up top with all the boxes and supplies lying around.
You won't achieve much by staying back in the casement; move up as quickly as possible and creep along the left side of the area until you reach a trench. The enemies here will lob grenades at you, so be ready to run or kick them out of the way. At any rate, you need to clear the two pillboxes here of enemies in order to end the mission.
Operation Market Garden
Objectives
- Sabotage Bridge Demolitions Equipment
- Disable Explosives Plunger
- Disable Radio Equipment
- Secure Town of Nijmegan
- Collect Gammon Grenades
- Knock out Roving Tiger Tank
- Clear MG Nests (3)
- Clear Resistance and Assemble with Airborne
- Knockout Tiger Tank
- Assemble With Airborne at Bridge Surface
- Clear and Secure Bridge
- Knockout Tiger Tank
Recommended Weapons
There'll be a fair amount of sniping to be done here, so bring along the Springfield and a close-range weapon. You can select the STG .44 here, which is a fun weapon to use, even if it does have a lot of recoil. You'll be able to trade it in for the BAR that some of your teammates drop in the mission; they're both considered automatic rifles and thus share ammunition.
Skill Drops
There's one near the church steeple, on a platform just outside.
In between the buildings to the south that house two of the MG nests, there's a small plank connecting two of them. Land on the plank.
In the same buildings as above, head to the easternmost building and go upstairs. There's a parachute in the northwestern corner of the building, near a large hole in the wall. Land inside the hole.
On the northern side of the city, near the demolitions equipment, there's a large alleyway leading north. Spot the chute hanging down to the street, and land in the balcony above it.
In a building near the radio equipment, there's one last parachute.
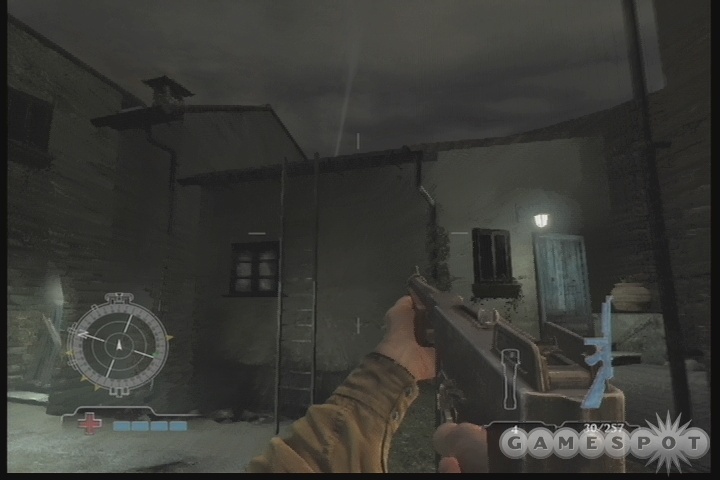
The Drop
If you look down below you, you'll see a couple of landing zones: one near the church, and one on the other side of a few destroyed houses. The church landing zone is arguably the easier one to use; if you brought along a Springfield, though, you can try landing near one of the ladders leading up to the church tower, or simply floating through the window, if you're really good, and sniping away from there after killing off the German sniper. You can also just go ahead and land on top of one of the buildings here and snipe from there; should be good to get your skill level with the rifle up a bit.
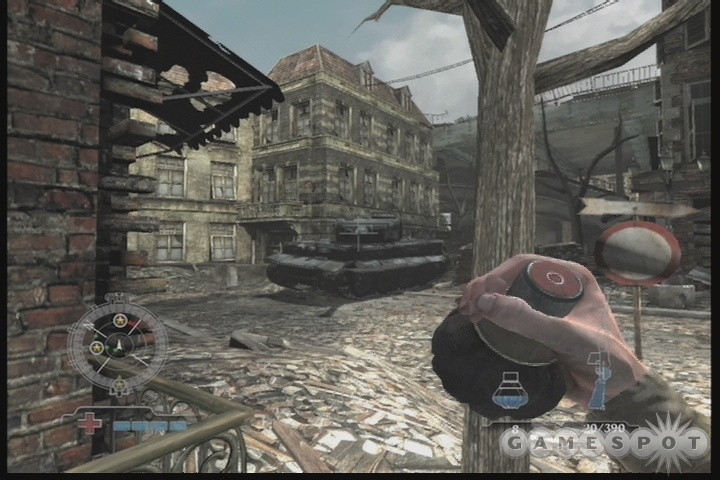
Eventually, though, you'll have to head down to the ground level here and engage the enemy. It's probably best to start by taking out the enemy tank that roams the streets. In order to do so, though, you'll need Gammon Grenades, which are high-explosive grenades that are the only thing you have that'll be capable of knocking the tank out. In order to find them, though, you'll need to head into the southern buildings here. There are a couple of MG nests that need to be taken out. A few feet from one of them, you'll find a box of explosives; open it to load yourself out with the Gammons. You'll need to litter the tank with around five of them to destroy it, assuming you manage to get them to blow up right nearby it. It can be tough to do, but it moves slowly enough that you should be able to take it out just by chucking the grenades in front of its path.
It's around this point that you might want to start looking around for more ammo for your sniper rifle. You can find a box of it near the church drop zone, if we recall correctly, and some enemies will drop boxes of rifle ammo. You'll need plenty of rounds for the end of the mission.
Completing the Sweep
When the two southern MGs are destroyed, start heading to the northern side of the city. There's another MG set up there, as well as the explosives plunger and radio. Kill the enemies in the area, find the plunger and radio, and shoot them to destroy them.
With that done, return to the center of town and assemble with the airborne. Soon enough, a new Tiger will pop out of a wall nearby. Ruh-roh! Luckily for you, a new box of Gammon grenades will have appeared in between the two ruined houses here. Find them and use them to destroy the tank.
Charge The Bridge
The Tiger's appearance has opened up a new passage behind it, leading to a building from which you can access the bridge. The trick is reaching the building; there's an MG set up inside of it, and a lot of Germans in the courtyard below it. You'll need to fight your way through them in order to hit the building.
If you want to play risky, try sprinting straight forward across the gap between the tank and the right side of the building. That'll set you up below the MG and will let you fire on the Germans here from the opposite side of the cover that they're hiding behind. Finish them off, then chuck a cooked grenade through the MG window from below it, then charge up through the building to reach the bridge.
Clearing The Bridge
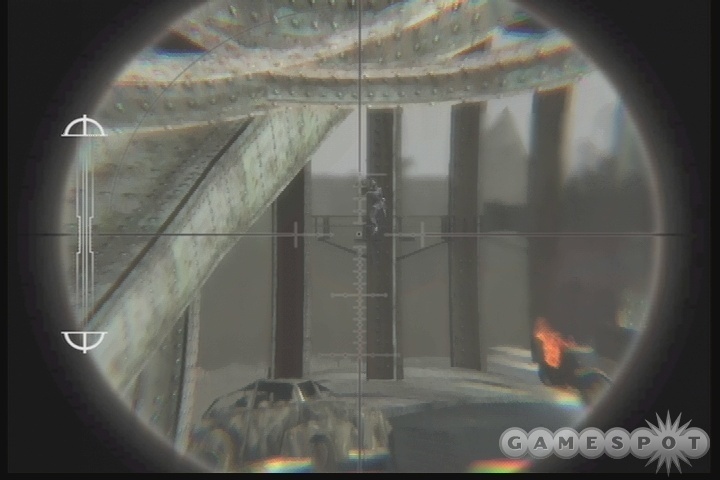
The bridge is overrun with panzerschrek soldiers, who'll start pounding your convoy as it approaches. If you head to the uppermost level of the building you're in, though, you should be able to get a little elevation on the bridge. Use your Springfield here and start sniping away! Your squadmates will probably advance along the bridge, and that's fine; let them flush out your opponents and act as targets. At maximum zoom, you should be able to see the panzerschrek soldiers in the walkways scattered around the inside structure of the bridge.
When you've cleared out everyone you can (including the MG gunner on the left side of the bridge), head down the ramp and keep to the left side. If you move around the MG pillbox, you should find some boxes of rockets, and probably a panzerschrek as well. As you might expect from your objective list, there's a third Tiger Tank at the end of the bridge, and you'll probably need the rockets to destroy it if you've run through most of your Gammon grenades.
Anyway, proceed very slowly down the bridge, sniping anyone that pops up. When you reach the destroyed buses, get an idea on the Tiger's location, chuck your remaining Gammon grenades at it, then finish it off with the panzerschrek. You can lean around the corner of the bus to fire it, if you must, but that'll open you up to fire from the tank itself. You can also climb up to one of the walkways here and fire from behind one of the steel pillars, as well.
When the tank is destroyed, the mission ends.
Varsity
Objectives
- Secure Factory Drop Zone
- Destroy Tanks on Railcars (3)
- Destroy Munitions Stockpile
- Destroy Railgun
- Sabotage Tank Factory Control Room
- Destroy Pressure Valves (2)
- Assemble with Airborne at Steel Mill
- Clear and Secure Entrance to Rail Yard
- Destroy Panzerzug Engine
- Destroy Panzerzug Cannon Cars (2)
Recommended Weapons
Again, there'll be a lot of sniping here, so drag along the Springfield and an up-close weapon.
Skill Drops
Land through the doorway of the balcony in the munitions factory on the middle southern side of the zone. The balcony is red, so this chute is difficult to miss.
There's a flatbed train car on the eastern side of the area, elevated off the ground and surrounded by snipers; it's up the ladder to your right if you exit the munitions factory through the doorway near the explosive charge point. Land on it.
On the fuel tanks across from the tank factory, there's a catwalk leading over to the upper entrance of the factory. Find it, then look around on the balcony for the chute.
The last two are pretty high up. Climb up from the landing zone between the two tall buildings and head east along the pipe there. You should find a chute on the pipe near a small hut with two snipers in it.
The last drop point is atop the three large fuel canisters in the middle of the map. You can't see the chute from the ground, so you'll have to just drop onto it to find it.
The Drop
If you can, steer yourself towards the central drop zone here, on top of the buildings, but between the two rooftops, so that you're clear of most enemy fire. If you land on the ground, you can have a tough time avoiding the sniper fire. It's best to get yourself a little elevation and scout out the area before picking an objective; you have plenty of them.
If you do land on the ground, especially to the east, you'll have to immediately start countersniping in order to survive. Some of the snipers here are exposed on the rooftops, but most of them are inside small rooms. Look for the flashes off of their lenses to locate them, then lean out and pop their heads off with your own sniper rifle. If you didn't land with the Springfield, you'll have an exceedingly tough time with these guys; might want to consider restarting if that's the case.
Anyway, there are plenty of objectives here, some more difficult than others. In no particular order:
Destroy Munitions Stockpile
The munitions factory is on the southern side of the area. There's no ground floor entrance, so you'll have to enter on the second or third floors and work your way down, being careful to avoid the fire of the MGs on the second and ground floor. There's a stairwell that will lead to the ground floor from the second floor, so take it down and clean out the enemies before heading for the basement. You'll have to enter the basement on your own, so grenade out the defenders and find the spot for the Composition B. Instead of backtracking after placing the explosives, continue on the path until you find the stairs leading up to the outside area and leave.
Destroy Tanks On Railcars
The eastern section of the exterior part of the level has the tanks on the railcars. There are three of them in all, but there are hordes of snipers in the buildings above them that you'll need to clear out before you can reach them safely.
If you exited from the munitions storehouse, you should see a ladder directly in front of you. Climb it, then walk down the railway until you can jump over it to reach one of the small cabins here. Kill the inhabitants, then start counter-sniping from the windows here. There are six to 10 snipers around the area, so start plonking them with headshots as best you can until the area is relatively clear.
Sabotage Tank Factory Control Room / Destroy Railgun
If you move around to the northern green smoke flare, you'll be near the entrance to the tank factory, a massive and heavily defended building. It's difficult, but possible, to attack it through the main entrance, but if you do, you'll have to fight your way through hordes of enemies. There is, however, another way inside: through the upper level entrance. To get there, you'll have to take the stairs from the factory's ground floor and maneuver through the silo-esque buildings, find the steps leading up, and cross back over to the upper floor of the factory. Or you could just let someone shoot you, then float down to the walkway when you parachute down, although that'll open you up to some sniper fire as you fall.
Anyway, when you reach the inside, upper walkway of the factory, let your friends charge forward while you shoot away at the enemies as they appear. Since you're up top, you won't have to worry about as many enemies as you would if you had stayed on the ground; your foes seem to be a lot more eager to go down stairs than they are to come up them.
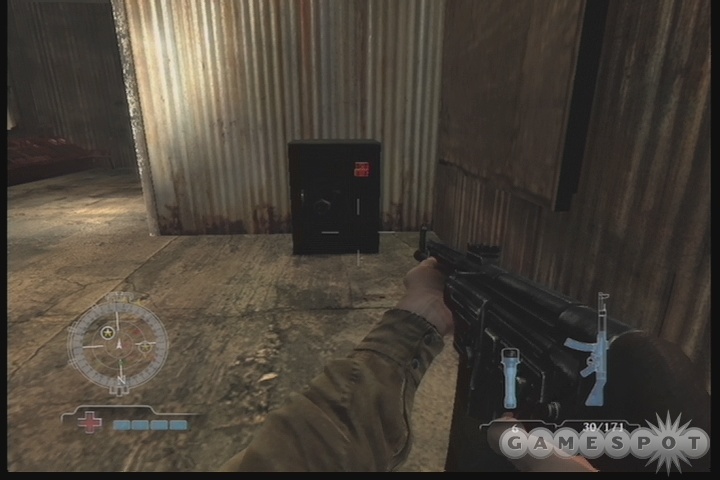
Stay on the upper level here, but take one of the left turns to find a walkway leading over the factory control room and drop down. There shouldn't be too many soldiers in here, so kill them, then plant a bomb on the safe here to find the semi-secret Mauser pistol, the only pistol option you'll get other than the Colt. Nab it, then shoot the control room panels to sabotage them and get the checkpoint. With that done, clear out the rest of the soldiers on the western side of the room and plant your Comp B on the railgun there to destroy it as well.
Destroy Pressure Valves
Lastly, there are two pressure valves in the factory area. They're not difficult to find, assuming you can survive the trip; the walkways and catwalks make for some confusing fighting. Pay attention to your radar and drop any fools willing to take you on.
Clear and Secure Entrance to Rail Yard
After you blow up the pressure valves, a new objective will appear: you'll need to clear your way to the rail yard on your map. A dozen or so Germans will appear in the area, so get above them on the factory scaffoldings and blast away at them from up there before heading to the point.
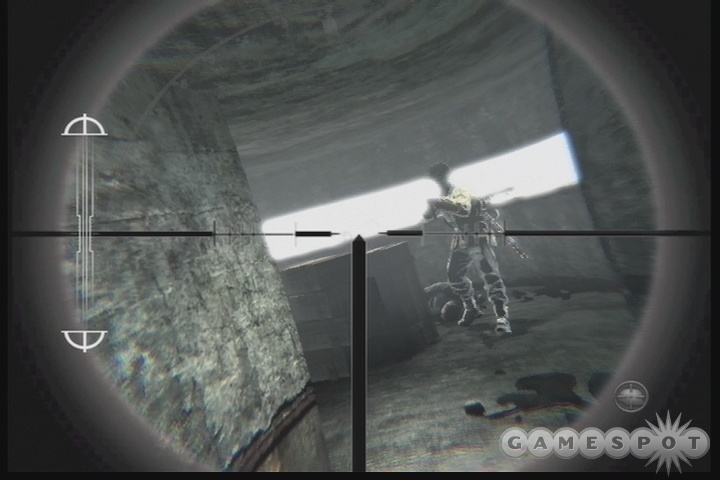
When you manage to secure the rail yard, you'll have an unpleasant surprise waiting for you: a super-powered German soldier with bulletproof armor will unload on your troops with a portable MG42. These guys are nigh-impossible to take down, but it can be done. If you have Gannon grenades, then dropping a couple at their feet (they're slow, and thus can't run away) will finish them off. Otherwise, you'll have to simply unload a full clip at them, aiming for the body since they're mostly immune to headshots. An automatic rifle is the best choice here. Alternately, you can also just attempt to run away from the ubermensch and try to get up on one of the upper catwalks. The stormtroopers are easier to take out from above, since they can't shoot you through the catwalks while you can lean out, hit them with a Springfield round to the chest, and duck back behind cover. It'll take a few rounds to kill them, but die they will.
When the elite trooper is dead, you can get down to business. There's three sections of the train to bomb; you have to drop down on them from above, via the catwalks, to nail them. Do so, and the mission's over.
Der Flakturm
Objectives
- Secure Flak Tower
- Destroy Artillery Guns (3)
- Destroy AA Guns (4)
- Eliminate Enemies on Halftracks (3)
- Disable Ammunition Lift Controls on 4th Floor
- Disable Ammunition Lift Controls on 2nd Floor
- Assemble at Main Control Room on 3rd Floor
- Assemble with Engineers in Ammunition Storage
- Escape Flak Tower
- Destroy Flak Tower
Recommended Weapons
This kind of depends on where you want to land. If you ignore our advice and land on the ground safe zone, then you'll want to have a Springfield, as you'll have to engage in some counter-sniping. If you land on the upper levels of the tower, you'll probably want to have the standard close and long-range weapons, like a G43 and a shotgun or something similar.
Skill Drops
On the southeastern side of the tower, between the uppermost roof level and the lower ring around it, there's a small balcony with a chute on it. Land through the doorway to receive your stripes.
If you head to the fourth floor of the interior of the tower, you should be able to spot a doorway leading to the sniper's scaffolding outside. There's a pretty obvious chute here that you need to land on.
The secret entrance! There's a very tough-to-spot window on the northwestern corner of the tower, above one of the markers for one of the halftrack soldiers. The easiest way to find the window is to land on top of the tower and head downwards completing objectives. After destroying the ammo lift controls on the fourth floor, take the ladder in the room downward to the semi-hidden ammo cache room. The walkways on either side of the room will lead you to the window.
On the western side of the tower, in the middle of all the sniper's scaffoldings, you can spot a row of small windows, including one with a chute in it.
This is on the ground floor. If you look from the tower back towards your ground drop zone, it'll be on the second floor of the house on the left.
The Drop
It's best to try and drop on either the roof of the tower here, or on the drop zone on the anti-aircraft ring that's slightly lower than the roof level. Starting at the bottom is possible, but very difficult due to snipers that will pop away at you, making it harder to take out the soldiers on the ground. It's best to land on the very top of the tower and head down from there, if possible.
The western side of the tower has a couple of drop zones. If you do manage to land on the roof, you'll have to quickly start eliminating the Panzerschrek soldiers up here with your long-distance weaponry. They can be difficult to kill without dying, especially since they'll usually be a bit above you and will thus be firing down at you, making it much more likely that you'll take splash damage. They reload and fire surprisingly quickly, as well. Regardless, you need to take them down, so do so, then focus on the rest of the soldiers on the rooftops.
The Artillery
There are three artillery cannons atop the tower. They can be destroyed either by dropping down into their holes and planting charges on them or by chucking Gammon grenades down onto them from above. You'll probably want to keep your Gammons for the moment, though, so do things the hard way and take them out with charges after clearing the rooms of enemies.
Anti-Aircraft
Next up are the five anti-aircraft turrets that you'll be finding on the exterior ring that's a bit lower down than the rooftop. You should find the western quadrant of the tower to have been destroyed by bombs; that'll make a decent rubble trail you can follow down to the AA ring, which you can then start following around the tower to find the five AA guns that you need to destroy. The first few are pretty easy to take out, as their only defenders are normal soldiers.

However, as you make your way around the ring, you'll start to encounter tougher foes, including a few Nazi Storm Elites that will make mincemeat out of you if you don't take them down quickly with Gammon grenades. If you have the BAR or STG44, you can also try to take them out by firing quick bursts into their chests, but if you have to trade fire with an MG44, then you're bound to lose. Just be sure to destroy the AA guns as you proceed around the ring to get the checkpoints; if you die, you can float back down to the safe landing zone on the ring itself and quickly regain your position.
At the end of the ring, you'll be facing two Storm Elites at the same time. When they spawn, it can help to backtrack a bit and go crazy with the Gammons and other grenades. When they do die, you can head up the stairs near the last AA gun to find another box of explosives, which will let you restore all of the grenades that you used up.
Stuck In The Middle
When all of the AA and artillery has been destroyed, make your way to the center of the tower; there should be an open doorway near the landing zone on the AA ring. You'll need to clear out the Germans here, including another Storm Elite, before you can make your way down the steps and towards a loading lift that runs down to the fourth floor. You'll need to call the lift up at the red light here, then use the lift controls in the corner of it to go down.
You'll come out to the fourth floor, where one of the ammo lift control boxes is located. Head to the right after exiting the lift; you should see one of the target markers on your compass that's changed to an up arrow, indicating that it's above you, as indeed it is. Find the stairs here leading up to the control room and start chuckin' some grenades into it. Keep in mind that the Germans can somewhat improbably jump out of the narrow windows in the room, so keep a short-range weapon in hand for that eventuality.
Down To The Second Floor
When you've gone into the room and destroyed the ammo lift controls, find the small hole in the ground and take the ladder downward. That'll lead you to a cache of ammo and weapons that you can use to restock your supplies; the walkways here will also lead you to a secret entrance that you can find a chute in. You can only parachute in this way, however.
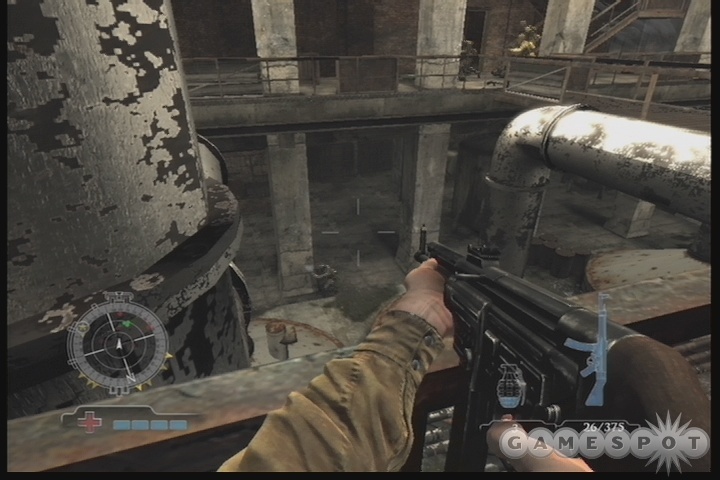
Anyway, grab your ammo and use the panzerschrek here to pelt some of the soldiers below you to clear them out a bit. This is actually the third floor of the facility, so there's not much to see here except a lot of Germans. Get down to the walkways, kill anything that moves, then find the stairway heading downwards. They're tough to see, but if you check the western part of the area you'll find them.
You'll come down to the second floor. Kill the soldiers, lob grenades into the control room to kill the Storm Elite, then find the control panel and destroy it as well to finish the ammo lifts off.
Away With The Halftracks
Now you should be on the second floor with three objectives remaining: the various halftrack crews are still up and running. You can get down to the ground floor either by heading out the doorway to the scaffolding and climbing down from there, or by finding the lift on the second floor and riding it downward. The lift is probably the better of the two methods, although you will have to hide behind the boxes on it to avoid getting chopped up by the Storm Elites that roam the interior of the tower.
When you find the halftracks, shoot the barrels near them to clear the areas a bit, then shoot the gunners to complete your objectives.
Assemble at Main Control Room
Before you head to the main control room on the third floor, make sure you have full grenade and weapon ammo. There's a couple boxes of each in the houses near the ground-level smoke flare, so fill up, then ride the lift back up to the second floor and proceed up the stairs from there.
The third floor will predictably be overrun with enemies, including a Storm Elite prowling the catwalks. Grenade everyone away (try to save your Gammon grenades for now, though), and pop the Elite in the chest with your assault rifle. When you make your way into the control room, clear out another Elite with 'nades, then climb the stairs to find the main conference room for the tower. One more Elite and some normal soldiers reside here, so kill them all.
Assemble With Engineers in Ammunition Storage
If you have a full loadout of Gammon grenades, then you can go ahead and meet up with the demo team. Although you're told to assemble in the basement, don't start returning down to the bottom of the tower; there's actually an elevator in the conference room that you need to use. Using it will cause you to hit a checkpoint, though, so you will want to be loaded out with grenades before heading down; you're going to be going up against a number of Storm Elites.
When you're ready, head into the elevator and meet up with the demo team. You'll need to be on the ball here: when they run, quickly sprint after them to avoid the fire of the first Elite that comes around the corner. There'll be two more Germans rushing after you, so quickly shoot them and follow the wires on the ground into the sewers.
Escape the Flak Tower
The sewers are a deathtrap. There are a couple of snipers up above you, but more troublesome will be the half-dozen or more Elites that are walking around. Move forward until you spot the two boxes of Gammon Grenades on the ground here. This is your choke point: move forward until you see the dots on your radar coming your way. The fast dots are normal enemies and can be taken down with your weapons, while the slower dots are the Elites; save your Gammons for these guys. Each Elite will take two Gammon grenades to kill, or a Gammon and a burst of machinegun fire. Unfortunately, there'll be two or three groups of them coming your way, and there's no health to find until you get past them, so it's best to just use up your Gammon grenades on the waves until the dots coming your way stop doing so.
When the Elites have subsided a bit, you can start moving through the sewers and taking out any remaining Elites; there will probably be at least a couple of stationary Elites that will wait for you to pass by. There's only a few steps from this area to the ladder leading topside, so you can probably sprint past them if you like, but you should probably just bank a bunch of grenades their way just to be on the safe side.
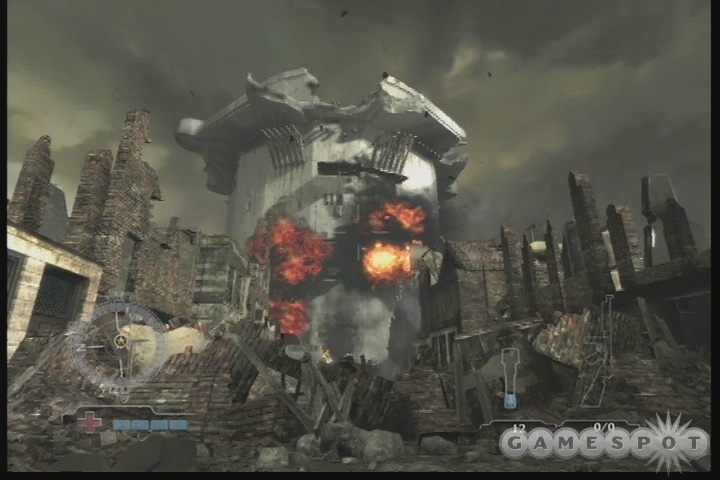
After avoiding or killing the Elites, make your way to the ladder leading upward and follow the sewer to the end of the path. When you find the dying demo engineer, grab the switchbox off the ground and use it to blow the tower. That will end the game, but you can still reload old missions and try them again to find more skill drops or max out your weapons rankings. Enjoy!
Got a news tip or want to contact us directly? Email news@gamespot.com
Join the conversation