Max Payne 2 Walkthrough
Do you die inside of a New York minute everytime you load up Max Payne 2? Try reading our walkthrough for a full walkthrough, general tips, weapon strategies, and cheats.
Design by Katie Bush
Max Payne 2: The Fall of Max Payne continues the exploits of Max Payne, a down-on-his-luck (that's an understatement!) detective seeking answers that no one can seem to provide. He finds an ally in Mona Sax, a femme fatale once thought dead. With an arsenal of weapons, array of action moves, and the ability to invoke "bullet time" at your disposal, guide Max and Mona through the New York underworld for the answers Max seeks.
Weapons
Walk-through
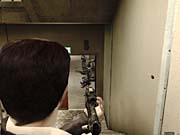
Chapter One: Elevator Doors
Chapter Two: A Criminal Mastermind
Chapter Three: The Depths of My Brain
Chapter Four: No 'Us' In This
Chapter Five: A Sign of Her Passage
Chapter Six: A Linear Sequence of Scares
Chapter Seven: The Million Dollar Question
Chapter One: The Things That I Want
Chapter Two: In the Middle of Something
Chapter Three: Blowing Up
Chapter Four: Routing Her Synapses
Chapter Five: Out of the Window
Chapter Six: The Genius of the Hole
Cheats and Secrets
Bullet Time Strategies
This section provides general strategies for Max Payne 2, including bullet time tactics.
- If you're trying to limit the number of times you die or how much damage you suffer, it's a wise choice to enter bullet time before you open doors or round corners. New rooms often contain enemies and you will often be surprised by a foe after rounding a corner. Activate bullet time before entering a room or rounding a corner and you can get a jump on any of the enemies in the next area.
- Having just cleared an area, disable bullet time and wait for it to replenish before continuing onward. Bullet time is your biggest ally in the game. Gunfights are extremely difficult if you aren't using bullet time. Enemies can fire their weapons very quickly; additionally, the enemies are quite accurate. Combine the two and you'll be lucky to survive most firefights without bullet time. So don't enter heavily populated areas with minimal bullet time. Be patient and wait for your bullet time to replenish either significantly or completely.
- Bullet time slows down enemy actions so much that you can even see the enemies' firearm projectiles and dodge them as necessary. When an enemy shoots (when you see their muzzle flash), move to the right or left (you could even shoot-dodge) to avoid the projectiles. Don't stand in one place or you will be an extremely easy target even under the influence of bullet time.
- Careful weapon selection can help you survive tough encounters. Shotguns are best used in close-quarters, such as when you surprise an enemy around a corner or lure them into a doorway; desert eagles are excellent at long-range because of their accuracy; and the MP5's zoom makes it an all-purpose weapon with good close and long-range power. Monitor your ammunition as you traverse a level and be prepared to switch to weapons as your ammo supply dictates.
- You can only carry eight painkillers at a time, so if you are currently holding eight, have suffered some damage, and discover a medical crate with a few more bottles of pain killers, don't pass them up. Instead, use some of your painkillers in your inventory to make room for the bottles you just found.
- Headshots inflict more damage. Aim for the head in every battle to dispatch enemies quickly. Obviously this is much easier with the help of bullet time so use the technique in combination. Precision weapons are much easier to use when aiming for the head. The assault rifles (MP5, M4 Carbine), sniper rifle, and the desert eagle are excellent in this regard.
- A good strategy when encountering a new group of enemies is to try and lure them through a doorway or around a corner giving you the opportunity to ambush them with bullet time and a huge dose of weaponry. Enemies often respond to noise so try and alert them with weapon fire or an explosion. They'll also react on sight. Let the enemies see you and they'll move toward your position. Hide around a corner or just beyond a doorway and wait for them to approach. You can even adjust the camera angle so you can see them approach but remain out of their line of sight.
- Enemies won't necessary perish in a single shot. Watch their hands for a sign on whether or not the enemy has been eliminated. If the enemy drops their weapon, you can shift your target crosshair to another foe.
Weapons
This section provides a rundown of the Max Payne 2 arsenal and provides tips for each.
Grenades and Molotov Cocktails
Grenades and Molotov cocktails offer a secondary means of damaging enemies. You can equip either into your secondary weapon slot and throw them using the default "F" key. These items can be thrown at any time and are ideally used against large group of enemies but can also be used to uproot stubborn enemies from behind cover or to damage them around corners or through doorways. You should also use grenades to create some devastating chain reactions. There are many objects to detonate in Max Payne 2: explosive crates, boxes of ammunition, toxic barrels, etc. Toss a grenade near them to create a more damaging explosion. Note that you can also equip "melee" as your secondary weapon. Here you'd use the "F" key to use your firearm as a melee weapon.
9MM Pistol and Desert Eagles
Both sets of pistols are good all-purpose weapons, though the desert eagle is the better choice at longer range. The desert eagle possesses excellent accuracy coupled with bullet time. If you don't have a sniper rifle, it's almost the next best thing (as long as you don't need zoom to see your target). Headshots are easier with the desert eagle than most other weapons. Note that both pistols can be dual-wielded. But if you're looking for an accurate shot, consider just the single variety. Then again, if you'd rather dish out a lot of damage in a short amount of time, equip dual pistols for maximum damage potential.
Ingrams and MP5
The Ingrams, which you can also wield in dual mode, possess an extremely high rate of fire. But the speed of these sub machine guns comes at a price: they're very inaccurate and consume ammunition extremely quickly. Though you should be in bullet time in nearly every combat situation, it can be even more important with the Ingram. Bullet time will help you adjust your aim precisely so you don't waste valuable ammunition. The MP5 is another submachine gun with a slower rate of fire than the Ingram but a more accurate shot. It also has a scope, which makes it more useful at longer range. With bullet time enabled, the MP5 can become a "poor man's" sniper rifle with its faster rate of fire.
Strikers, Pump-Action and Sawed-Off Shotguns
These three weapons comprise the shotgun set of weapons; each of these weapons is best used at close-range. Shotgun projectiles launch in a spread; the farther the target, the greater the spread. When less projectiles strike the target, the target sustains less damage. The shotguns are best used as ambush weapons. Lure an enemy around a corner and blast him at close-range with the pump-action or sawed-off shotgun. The striker is a drum-fed shotgun with a faster rate of fire. The concept remains the same, however; get close and crush the enemy at close-range. Watch your ammunition levels carefully, especially with the sawed-off shotgun. You'll have the reload these weapons frequently so be prepared to make a quick retreat or enable bullet time to reload safely.
M4 Carbine and Kalashnikov
These are the assault rifles and both are powerful weaponry excelling in any encounter. When you find ammunition for these weapons, use each shot wisely and conserve ammo for the most challenging battles. Push the fire button for each projectile launched. Aim for the enemy's head for the most damage. With bullet time, you can be extremely accurate at medium-range and eliminate a group of enemies very quickly.
Sniper Rifle and Dragunov
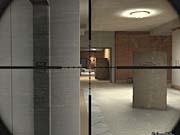
The sniper rifle and Mona's Dragunov are your long-range weapons. Enable zoom for pinpoint aim. Avoid using these weapons at close range and conserve ammunition for longer range engagements. Combine with bullet time to slow your enemies' movements so you can fire an accurate shot. Utilize these weapons in long hallways or in rooms with multiple levels (such as scaffolding).
Walk-through
This section provides complete chapter walk-throughs for the Max Payne 2 single-player storyline.
Part I: The Darkness Inside
Prologue
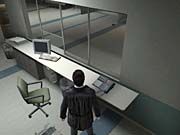
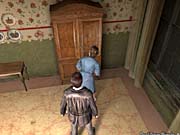
Max Payne awakens inside a hospital room; he's haunted by memories and delusions. Turn around and open the lockers on the right to grab some painkillers. Exit the hospital room and follow the hallway as it winds to the right. Follow those disembodied voices and go through the door ahead. Approach the lockers and door on the far side and another vision interrupts Max. Open the double doors and exit into the lobby. Turn left and enter the reception area and answer the phone for a brief message. Exit and walk toward the administration door. Turn left and enter the double doors. Approach the man on the ground.
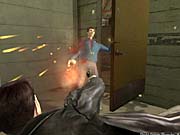
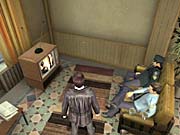
Max grabs a gun. An enemy emerges from the door on the left. Shoot-dodge left and pump the enemy full of lead. Enter the room from where the enemy emerged. Head around to the far door on the left. Enter the other lobby area and go around to the right, listening to the television as you move. Enter and use the elevator controls to descend.
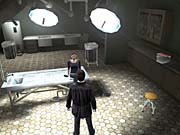
Meet Jim Bravura at the bottom. After the encounter, exit the smoky elevator shaft. Enter the examination room to find Winterson's body to conclude the prologue.
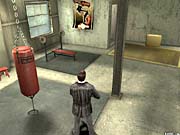
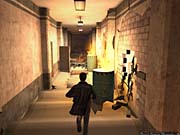
Chapter One: Elevator Doors
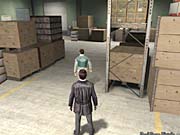
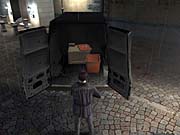
Search the black van on the right (facing the front of the van) for a bottle of painkillers and another 9mm pistol. None of the bay doors will open so head off to the right and proceed through the open gate. Follow the alley back around to the rear entrance. Enter the door and walk into the warehouse. Walk around the corner to the right and find the television, which sounds a lot like a hostage. Watch the television for a second and listen to the humorous parody of Max Payne. Search the desk on the right for a bottle of painkillers.
Continue to the far door on the left and find the janitor. He'll escort you. Follow close behind him. Once he says "after you," enter the room and wait for the cutscene. He's actually a perp: they're masquerading as cleaners. Kill him and another cleaner behind you. Use your shoot-dodge ability. You can even kill him before entering the room to get a jump on him or even tell him to go in first and get the jump on them that way. It doesn't matter when you kill him. Use the fork lift, which raises the end of the plank. Use the heightened plank to jump to the box on the left then around to the right. Find ammo, a grenade, and painkillers in the box.
Enter the unlocked bay door by using the control panel. Grab the painkillers from the cabinet on the right. Run in and interrupt the cleaners' conversation and shoot them in the back with the help of bullet time. Continue around to the left. The next room has two exits, though only one is unlocked. Open the door on the left and enter the stairwell. Annihilate the two guards at the top of the stairs. If possible, shoot the gas can resting behind one of the guards. The resulting explosion will cause plenty of damage.

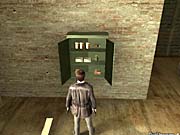
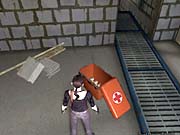
Enter the room with the large vodka sign. Turn left and snag the ammo from the cabinets on the left. Listen to the answering machine. Search the left desk for more ammunition. Enter the next hallway. Search the lockers on the left at the end for ammo. Enter the door on the right. Search the room for painkillers from the cabinets and ammo from the safe. There are more painkillers and ammo in another desk on the far left.
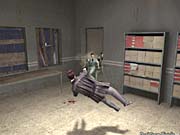
Approach the door on the right to find the hostage. She's guarded by two thugs. She's killed before you can act. When you regain control of Max, shoot-dodge to the left and kill the two enemies. Search their bodies for ammo and an Ingram and grab the shotgun off of the table to the right. More enemies arrive behind you. Shoot-dodge out of the room and annihilate them with the Ingram or your dual pistols.
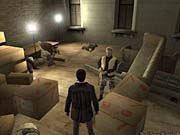
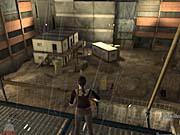
Exit the room and notice the door on the far right is now open. Enter the room and encounter more three more guards entering from the door on the opposite side of the room. You can take cover behind the boxes and shoot-dodge to the side or enter bullet time and waste them quickly. Gather their weapons, including a pump-action shotgun and search the room's lockers for painkillers and ammo.
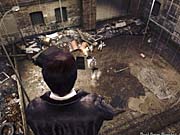
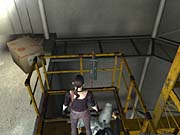
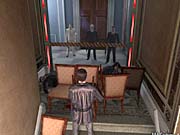
Cross the catwalk to the far side to trigger the cut scene and greet Mona Sax. Enter the elevator and use its controls. Alternatively you can remain up high and walk along the catwalk and try and pick off enemies below from up high. Exit the elevator and head to the right. Prepare for a huge firefight against several guards. Bullet time is your ally here. Shoot any gas cans you spot for additional damage and watch out for enemies driving fork lifts. Finish off all the guards and exit the warehouse through the far door beyond the body bags. Meet Detective Winterson as the chapter concludes.
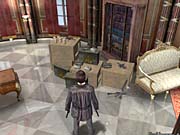
Chapter Two: A Criminal Mastermind
Explore to the right and find a couple bottles of painkillers next to some corpses. Ascend the staircase to the next floor. You'll discover a trio of enemies up here--one carries an Ingram. Utilize bullet time and shoot-dodge behind the crates as protection. Be sure to pick up the second Ingram so now you can wield dual Ingrams. Walk beyond the guards and search the room on the right. Use the phone to listen to the line. Search the cabinets on the left for some painkillers. Use the microphone and kill the guard that enters.
Ascend the next flight of stairs and watch the cutscene introducing Mike the Cowboy. Grab the ammunition scattered around the room and ascend the next flight of stairs. Watch the television if you wish (Mike the Cowboy seems to enjoy it). Locate a group of enemies around the corner in the room on the left. Mike will assist. Enable bullet time and head inside. Duck behind the cover on the right if needed. Grab the plentiful ammo from the room as well as the painkillers to mend any wounds.
Round the corner and the door ahead of you closes. Mike suggests taking the stairs. Head up. A gang of foes waits beyond the top door. Mike is fragile, so try to keep him alive. You can attempt to lure the enemies out of the door. Once inside, you can go down the right or left. A cabinet filled with painkillers can be found down to the left. Enter the door on the left and you're at the top of a large staircase; several enemies shoot at you from the bottom. Utilize your grenades (more can be found on the staircase). Watch your step in these areas as even a small fall can cause damage.
Collect all the discarded ammunition. Locate the unlocked door near the bottom of the stairs and go through. Find a group of enemies on the right. Blast the items on the shelf for additional explosive damage. There's plenty of cover in the room. Utilize bullet time and take out the enemies. Search the cabinet on the far side for ammo and painkillers.
Find the wooden door on the side of the room; the room contains more enemies. Activate bullet time and kill the enemy just beyond the door and another under the scaffolding to the right. Seek out two more guards on the ground level to the left. Gather the ammo (return to the previous room and grab any ammo you couldn't carry before). Descend the scaffolding and cross the room to the double wooden doors. Don't neglect to pick up any discarded weapons and ammo!
Next room: get the guys on the ground, one ahead, one left, and one right. Wait for enemies on the upper floor to expose themselves and blast them. Accurate desert eagle shots work well. Stand behind the wooden boxes to the right of where you terminate the last enemy on the bottom. From there you can shoot foes that drop down onto the boxes and have a clean shot at the gas canister on the upper level. Shoot it when enemies walk near it. Clear all the rooms of enemies to watch the cut scene where you meet Vinnie and Vlad.
Three enemies emerge from across the room. Activate bullet time and eliminate them. Gather the ammunition and enter the door from where they emerged. Walk down to the window to complete the chapter.
Chapter Three: The Depths of My Brain
Go to the front door. Someone's knocking and has slipped a note under the door. Exit and head left down the hallway. Take a left at the intersection. Descend the long staircase to the door at the bottom. Approach the door ajar on the cold storage then walk up to Mona; she's sitting on the hospital table. The phone behind her is ringing; walk up to the phone and answer it. Face the firing squad and wait for the cutscene. In the interrogation room, pick up the pistol and shoot both of the detectives to complete the chapter.
Chapter Four: No 'Us' In This
Be careful walking in front of the window; the sniper will shoot at you! Head to the right and use the phone to call Winterson. Also, find some painkillers here and ammo in the bathroom. You'll find more supplies in the cabinet to the right of the front door. Exit the front door. Move past the corpses and toward the intersection. You can't enter the door ahead; something's barring the door from the other side.
Head to the left and watch as a housewife blows away an enemy. You can follow her inside and grab a free shotgun. Search her other cabinets for painkillers. Exit and move through the open window on the left. Leap from ledge to ledge.
A van approaches from below. Kill the four guards that emerge using bullet time to assist. Enter the open window on the right. There's a guy sleeping here. You can wake him for fun by turning off the television. Exit the next open window and hop onto the ledge carefully. Enter the next open window on the right. Go around to the left and enter bullet time when you see the guard. There are three perps here; two in front of you and another around the corner. Blast them all at close range with the shotgun.
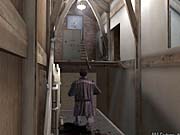
Turn down the hall on the left and speak with the woman at the end. She points you to some painkillers in her bathroom. Grab them if you need them. Enter her other room and find an open window to hop out of. Get onto the scaffolding and ascend. Enter the open window at the top and enter the sniper's hideout.
Use the camera to see perps in your apartment. They're setting a bomb in your apartment that accidentally goes off. Pick up the sniper rifle then listen to the tape machine for an enlightening call. Exit and enter the darkroom on the left to find painkillers. Exit the apartment. Enter bullet time and open the door. Blast the perps at close range with a shotgun.
Walk to the intersection. See a woman fleeing into her apartment; enemies enter from the staircase just to the left. Toss a grenade onto the stairwell and enter bullet time. Eliminate the group of guards. Ascend the stairs until you get to floor seven. Max comments on the suites. Enter the elevator on the left and use its controls.
Guards wait at the bottom, so prepare ahead with bullet time. Kill the perps quick and save the hobo. Speak with him. Follow the signs to the basement. Descend the staircase. Search the medical boxes on the right for painkillers. Get to the bottom and find the janitor. You'll ask him for the code; he states it's 667.
There are guards patrolling the hall. Enter bullet time when you exit into the hall and blast them. Return to the elevator and ascend to the seventh floor. Go to the right and prepare for battle with bullet time: perps emerge from a door on the left. Blast them at close range with the shotgun.
Enter the suite where the perps emerged from. Search the bathroom on the left to find more painkillers. Check the kitchen on the right, as well. A guard is inside chomping on pizza, so be ready. Search the sitting room adjacent to the kitchen for more ammo and painkillers. You can also search the main living room for more items. Exit the window in the sitting room.
Walk along the ledge to the left until you reach the dead-end. Enter bullet time, select your sniper rifle and drop down onto the ledge below. Turn around and aim the sniper rifle to the open window across the way. Blast the perp inside the room. Drop another ledge and enter the open window. Grab the painkillers scattered around the apartment if needed. Approach the front door to end the chapter.
Chapter Five: A Sign of Her Passage
Walk forward to the door. There are several cleaners in the stairwell. You can wait for them to emerge or attack them behind the door. Watch out for grenades! You can head up the stairs. Although it's a dead-end, there's a stack of boxes at the top that contains some ammo and painkillers. Knock over the boxes to retrieve the items. Descend the stairs.
You'll hear someone shouting that they're stuck. It's the hobo again. Move the board to rescue him and he'll help you out. Continue down the stairs. At the bottom, go right to the door marked "Exit". Talk to the woman behind the door. She suggests getting out via a window on the third floor.
Walk to the end of the hall and kill the three cleaners. Go down the stairs on the left. You'll enter the utility room. Turn the valve to shut off the gas. Search the nearby lockers for ammo and painkillers. Return up the stairs. Enemies are in the hall to the right so activate bullet time before exiting.
Return up the stairs to the floor marked "A3". It's where you found the hobo. The flames at the end of the hall are no longer there. Walk there and enter the doorway on the left. Search the bathroom for two bottles of painkillers. Approach the open window on the left and hop out to the ledge. Your two allies stay behind.
Scurry along the ledge to the left fast. Enemies emerge in the courtyard below. Your allies will shoot at them and, if you're lucky, finish them off. Hurry to the scaffolding on the left. You can stand here and eliminate remaining guards with a long-range weapon like a desert eagle or sniper rifle. Go up to the upper ledge and turn to the left to see another ledge you can jump to. Jump over there then hop down onto the next scaffolding.
Hop to the left and it starts to fall. As it does, hop off to the right onto another part of the scaffolding. It will begin to fall also. Now drop off to the left onto the solid piece of scaffolding. It will fall to the ground.
When it falls, a van backs into the courtyard and deposits several guards. Scurry around a corner and, if your allies are alive, these guards will start shooting at them. Activate bullet time and charge out into the courtyard and start blasting. Remain in bullet time for each kill and you'll begin to move even faster. Kill all guards and the chapter ends. You could also toss a grenade at the van doors and kill some or all of them. Then just mop up any survivors to complete the chapter.
Chapter Six: A Linear Sequence of Scares
Enter the ticket desk to find some painkillers. Start up the incline. At the top, turn toward the left and proceed into the tunnel. Enter Noir York at the bottom. Walk to the far end and start up the staircase. At the top of the staircase, walk onto the catwalk on the right. The telephone rings below. Go into the booth and answer the phone. Go to the right and enter the cage. Begin your descent.
Enter the Pink Bird Mental Institute. Approach the windows and watch the displays. Enter the bathroom at the far end and enjoy the shower. Go around to the left. Go down the hall and enter the cage at the end.
Exit the cage and enter the red doors on the right. Approach the sign marked "Welcome to the Next Level". Go around to the left and enter the mouth. Emerge onto Lunacy Lane. Approach the telephone and use it. Enter the starry tunnel and turn left at the escape (or "There is no Escape") sign.
Turn left at the opening and enter the first room on the right. Enjoy knocking over things and experimenting with the physics engine. Go down to the end of the hall and ascend the stairs. Go left at the top and enter the door at the end to emerge outside. Turn right and leap onto the roof and into the open window.
Search Mona's apartment for ammunition, painkillers, and an MP5. Open the door to the shower and find Mona.
Chapter Seven: The Million Dollar Question
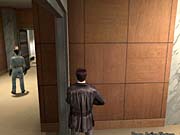
Exit the elevator and listen to Mona's instructions. She'll inform you when enemies are nearby. Walk forward and peer around the corner to the far left. Follow the cleaners' voices to find the small group. Stand at the corner, enter bullet time, then walk around and blast them. Try the door. It's locked. She points you toward another door near a large painting.
Turn around and go into the first left. Spot the painting and open the door at the end. The cleaners inside are engrossed in conversation. Listen or just take them out. Go around into the bathroom to the right and find the body. There are also plenty of painkillers too.
Go out onto the balcony. Move through the broken gate on the left and enter the adjacent room. Bust the glass. Search the bottom floor. Mona will tell you to go up the stairs. Listen for the cleaners above. Enter bullet time and start your rampage. The shotgun works great here. Search the bathroom for painkillers. Go into the kitchen and find the dead body. Mona says more cleaners are in the lobby and heading your way.
Approach the door to the right (just past the upstairs bathroom). Cleaners pour through this door, including one with an M4 Carbine. Search where they came from for some painkillers. Descend the stairs and spot the cleaners playing the piano. Kill them both. Another emerges from the balcony. Mona says you'll have to jump to the balcony below. Listen carefully and you can hear cleaners down there in conversation. Use an accurate weapon to defeat them (desert eagle works nicely). Drop down.
Enter bullet time and open the door. You'll find enemies ahead and another to the right. Switch to the Kalashnikov as the shotgun isn't too good at this range. Kill them all and get the word from Mona that more are in the lobby ahead.
Three more guards in the lobby. Defeat them, then search the suite to the left. Descend the stairs and Mona tells you that there are more cleaners in the next lobby. There's one to the right. Kill him and investigate the apartment he was guarding. There are two more cleaners in the apartment to the right. They're standing near the window washer. Meanwhile, Max loses contact with Mona.
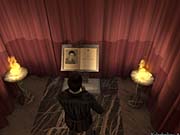
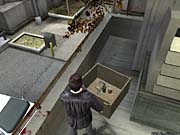
Drop down the scaffolding. Guys are tossing down grenades all over the place. Go right and spot the open window. Blast the guard inside. There's an Easter egg here. Keep going around to the left and find the open window. Check out the small memorial inside.
Enter the apartment and search it for ammo and painkillers. Enter the lobby and battle more cleaners using bullet time. Move to the adjacent lobby and take out two more.
Kaufman arrives on the elevator along with more cleaners. Even more enter the adjacent lobby. Return toward the previous apartment and deal with the cleaners that emerge so they don't sneak up on you. From this position you can take out the cleaners and Kaufman with your sniper rifle. Once you have sniped them all, either do the same against Kaufman or approach the hall that connects the lobbies and use shoot-dodges and shoot Kaufman with the M4 Carbine. Two or three successful dodges and he'll perish. Enter the elevator and use the controls to end the chapter.
Part II: A Binary Choice
Prologue
Talk to the officer. Enter the recreational room. Use the machine that says "do not use" for fun. Interrupt the viewing of the television by standing in front of it or switching it off. Listen to the police interview for more amusement. You can also go downstairs and listen to the dispatch, talk to the front desk receptionist, check the bathroom for "When It's Done" and even go to the parking garage to listen to a conversation between Broussard and Miller, an in-joke for those familiar with 3D Realms. When finished, go to your desk and use the computer.
Now you must find Winterson after Payne answers her phone. Watch Winterson in the interrogation room. When she leaves, talk to the guy who she interrogated. Exit the room.
Exit the upper floor of the station and go downstairs into lockup. Use the controls next to the doors to enter the cells. Go down the hall. Watch the hobo throw up if you want. Find Mona Sax at the end, on the right.
Return to the desk. You can go through the door on the left to listen to more conversations. Exit the door on the right and use the phone at the desk.
A bomb goes off upstairs. Grab the gun and items from the locker across the room. Enter bullet time, use the controls to open the door into the cellblock, and blast the cleaners. Go to the end of the hall and enter bullet time again. More cleaners wait on the other side of the door. Kill the first three and a van pulls up to your right. Kill more cleaners as they emerge from the van. You should have been able to pick up a Kalashnikov. After killing the first three, remain in the doorway so your bullet time replenishes. There are also grenades in the first van if you want to use explosives. To end the prologue, run up the ramp to the left.
Chapter One: The Things That I Want
Enable bullet time, move to the right, and kill the two cleaners. One goes up the stairs. You can nail him through the fence. Turn around and find two more at the top of the staircase on the left. Enable bullet time before approaching. Grab their weapons as you'll need to start replenishing your ammunition.
Enter the passage on your right. There are painkillers around the corner and a couple cleaners outside in conversation. Use the lever to scare them ("The boxes are gonna fall!"). While they're distracted, shoot them.
Go up the stairs and grab the cocktails. Open the door and hear more cleaners talking. Toss a grenade down to kill them both. Follow the narrow walkway around to the left and kill another guard by entering bullet time and picking him off with your desert eagle. Go all the way to the door and open it. Listen to the conversation below. When you tire of it, use the lever to kill both guards.
The next door is across the room on the left. More guards are outside. You can try and shoot the gas but if they've already detected you, it's better to lure them to the doorway and tackle them there with bullet time and close range shotgun blasts. Shoot the cleaners below (desert eagle or a grenade works well). Be sure to check the rooms to the left for more ammunition.
Go to the right. Exit the door at the end. Mona is up top sniping at the enemies near you. While they're distracted, enter bullet time and destroy them. Watch for more enemies to emerge from a door behind you.
Go up the stairs and kill the guard behind the cardboard cutouts. Emerge back outside where Mona is on a rampage again. Kill the cleaners nearby and to the right. More hide in the garage backdrop. Kill them then go inside the garage and to the left.
Tons of cleaners populate this hallway. Mona assists from up high. Keep moving and don't stand still or you'll be an easy target. Duck behind the wall and take your shots. Don't stand in the wide open. After clearing out all enemies, collect their ammo (use the wooden planks to get up top) and open the door at the far end on the right. There's another enemy on the other side so be ready. Kill him and exit to complete the chapter.
Chapter Two: In the Middle of Something

Check the van for some supplies. Approach the entrance and you'll hear cleaners in conversation. They're entering the room from the left so be prepared. Ascend the staircase and note the red barrel and containers: these are explosives and can be shot when found for added damage. Enter the double door on the left.
Two more guards are in here. Eliminate them then go up the escalator. In the next room, shoot the red boxes (from far away) to destroy the elevator door. Drop down inside the elevator. Search the next room for painkillers. Exit to the right.
You emerge outside. There's a guard above you and to the right and two more behind a van to the left. Shoot the red boxes for added damage. Beware of a few more cleaners emerging from a door to the far right. Duck behind the van once you've cleared the first guards. Be sure to search the interior of the outpost for an M4 Carbine and the top for additional ammo and painkillers.
Exit to the right. At the intersection, go forward. Walk to the double door in the next room and listen to the cleaners on the other side. Duck behind the wall to the left and wait for them to enter the room. Go into bullet time and eliminate them. The next hall splits to the left and right and guards are on both sides. Lure them back to the door and use bullet time and a shotgun for close range power.
Follow the left hall to a door on the left with a television blaring. Grab the painkillers inside the room. Across the hall on the right is another storage room with more ammo and painkillers. Three more guards patrol near the double doors at the far end of the hallway. Open the double doors to continue onward.
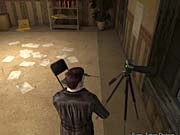
Spot the pile of chairs and tires in the corner. Shoot the red crate and you can collect some hidden items, including a sniper rifle. Enter the door on the left. Ascend the stairs making sure to watch your footing on the next level. At the top, there's a guard to the right. Eliminate him in bullet time. Leap into the opening and face more guards to the left. Clear all cleaners from the hallway.
Go into the open room and to the other side. This gets you around the fallen debris. Around the next corner are more cleaners. Eliminate them in bullet time. Approach the double doors and listen to the conversation.
The double doors are locked so you have to go around. Go to the left and follow the rooms. You'll discover a lot of enemies around the next corner. Soften them up with a grenade or lure them to the entrance and blast them at close-range. There are some red crates in the left side of the room so aim your grenade there or shoot them if possible. Cross the room to find supplies then jump over to the opening to the left.
Search the weapons cache for MP5 ammo and painkillers. Go up the staircase on the left. At the top, note the red barrels. You can shoot and push them over to kill the cleaners far below or just use a desert eagle or other accurate weapon. Jump over the gap and enter the far door.
Once inside the elevator, leap onto the crates and climb up to reach the next floor. Search the room for ammo. On the next walkway, spot the red crates. You can shoot them when the enemies emerge but it will bust the walkway. If the walkway breaks, jump around to the left to get to the far door. These enemies have much more armor than the cleaners so be prepared to expend much more ammunition to defeat them. As always, aim for headshots for quicker kills. As soon as they open the door, enter bullet time, and use the MP5 to fill them full of lead.
Keep going up. Kill the enemy at the top; he's carrying a carbine so watch it. Enter the left double doors. Encounter some tough enemies on the far side of the walkway. Utilize the same strategy as before. Open the door and back off. Enter bullet time and go for headshots with the MP5. Collect their discarded ammo. Find the room with body bags to complete the chapter.
Chapter Three: Blowing Up
Escape the exploding building! Exit the room quickly. Go around to the right. You'll spot a guard ahead (or more likely, he'll spot you). He'll explode soon enough so stay back. Go through the hole in the wall and shoot the ammunition in front of the crack to create another exit.
Hop outside and cross the girders to the left. Stay on the girders; it's tough to leap to the left and make it to the opening. Go around the far side and into the opening. Head down the hall on the right. Drop down at the end of the hall, turn around, and continue onward. Two guards are posted at the far end; they're standing near explosive barrels, so shoot the barrels if possible.
Go through the door into the next hall. A single foe patrols here. Use the table as cover and blast him. Continue until you reach the double doors on your left. Many enemies are inside so be prepared. Shoot the red barrel if possible or lure them toward your position. Exploding the red barrel should eliminate them all. Comb the room for ammo and painkillers.
Look down the hole and shoot some explosives. Drop down and finish off the remaining enemies. Drop down another hole and go to the double doors. Go to the right and make a mad dash through the fire. Go to the left at the opening and then go through the center until Max makes it out.
Chapter Four: Routing Her Synapses
You now assume the role of Mona in a mission that takes place at the same time as Max's previous missions in this same building. Cross the area to the left. Start up the staircase with caution as there is an enemy waiting on the next flight.
Proceed through the doorway that lies on your left. Watch out for the enemies above. Duck behind the wall on the left and pull out Mona's sniper rifle and eliminate the first one. When you run across the room, turn around and take out the second.
Start up the scaffolding. When you can emerge onto the floor, do so and take out the enemy across the way by shooting the red barrel. Gather any ammunition and continue up the scaffolding. There are more guards near the top. The explosion should lure them down. Hide behind the opening and take them out as they emerge down. Go to the very top and battle the enemy near the lift.
Use the lift to descend a floor. Grab the painkillers to the right. Continue onward to the marked door. There are lots of enemies in this area. Go off to the left and wait for them to pursue and ambush them. Take out the enemies at longer range with a desert eagle or her sniper rifle. Search the area for ammo and weapons (including the MP5). Go to the right and find the opening.
You'll discover plentiful enemies on this scaffolding. Lure them down the steps. Stand behind the crates to the left and blast them with the desert eagle as they round the corner. Finish off any remaining guards at long-range with the MP5 and bullet time. Ascend the scaffolding until you reach its peak.
There are three enemies around the right corner. Stay at your location and lure them from out of their cover. Use shoot-dodging to defeat them. Step into the room slightly and turn around as three more enemies are approaching your rear flank. Enable bullet time and eliminate them as they enter the area. Grab all of their weaponry. An additional three enemies enter on the far side of the area. Peer around a corner and eliminate them. Grab the painkillers from the medical box.
Traverse this area and get word from Max. Walk to the door at the far end. Open the door cautiously and watch the guy strutting his stuff. Enter bullet time and lay waste (use the MP5 or even a desert eagle). Work quickly and head to the far end of the room and take out three more enemies to the right.
After clearing the room, move to the center of the area and find the hole. Leap down onto the girder then drop into the room to complete the chapter.
Chapter Five: Out of the Window
Kill the nearby enemy and snag all of the ammunition. Go down the hall to the right. When you see some planks to the right, run and leap to the pathway to enter a small room with some painkillers. When you jump back over, jump again as soon as you land as the planks will give way. Go to the far door on the right and get word from Max again. There are more painkillers to the right of the door.
An enemy will open the door so be ready for him. The next room contains a couple enemies on the ground and several more up above. Stay in bullet time and be underneath them. When you spot any body part, move from cover and blast them. Go up the ramp to collect their ammo and painkillers. Return down the ramp and cross to the far door.
Exit and spot Max get blown out of the window. Now you must protect him. An enemy enters from the adjacent door alcove; blast him then gather all the ammo from the corner. Enemies will pour toward Max below. Start shooting them. After saving Max from the first barrage he moves on foot. You must continue to protect him as he moves. Use the sniper rifle to eliminate the enemies near the building.
When Max starts moving, go forward through the opening so you'll peer over the wall and toward the building. A zoomed-in MP5 works well; the sniper rifle fires a bit too slowly. Get the enemies on the building, then the one that appears from behind the building. Next watch the far left and then the upper right. Clear these enemies and Max reaches a locked door.
Kill more enemies on top of the building. Max gets pinned down. Clear any enemy you can, then retrace your steps to the level's start. Watch for some enemies on the right when you reach the initial room. Find the scaffolding on the left and kill them.
Max gets pinned again. You must exit the hall to the left and blast through many sets of enemies. Nail the first few with your sniper from long-range. Grab some painkillers on the floor to the right.
Keep going down the hall and battle remaining enemies. Find the scaffolding on the left. Watch out for an enemy toward the top of the scaffolding. Blast the enemy that pins Max down. He can't find a way in. Move from your location to the right into new territory. Find the hole in the room and drop down inside to complete the chapter.
Chapter Six: The Genius of the Hole
Kill the sniper ahead. Peer out over the scaffolding. Enter bullet time and equip the sniper rifle. Shoot the guards with head shots then blast the gas canisters. Clear the guards and Max tries more doors to no avail. He gets pinned down again and you must get to the other side of the yard to provide cover.
Turn around and start to the right. There are three enemies at the end of the hall. Blast them while in bullet time (sniper rifle works well). Approach and enter the door marked "Hard Hat Area". Follow the path to the scaffolding on the right. Blast the lone enemy on the structure then Mona tells Max to go. Get out as far as you can on the scaffolding and face the structure. Enemies collect around the bottom of the structure.
It's locked again and Max tries to reach a door under your position. It's time to move again so you can get a better view. Watch above you. Guards get into the scaffolding. Shoot them and a ramp lowers. Go up and enter the room. A guard enters from the far door so be ready to dodge and eliminate him.
Open the door and enable bullet time. Turn left and find the guard trying to climb up. Eliminate him and his partner just below. Drop down. Proceed to the wooden bridge. A guard assaults from across; use a long-range weapon like the sniper rifle or desert eagle to finish him off. A group emerges to the left so be ready with bullet time and your carbine. The guards to the left go up into an alcove; leave them for last and tackle a group on the right first with shoot-dodges.
Proceed to the right after you're finished clearing the room. Lure the enemies on the scaffolding down and into the room. Annihilate them. Go down the scaffolding to the lower floor. Round the corner and peg a few more guards using bullet time and a shoot-dodge.
Find the ramp down. There are four guards below; two on the right and two on a ramp to the left. Enable bullet time and shoot the guards on the right then the gas canister near the guards on the ramp. Eliminate them all and grab the painkillers on the right side. Proceed down the stairs and enable bullet time as you round corners so you can get a jump on any enemies below.
At the bottom, grab the sniper rifles. Two commandos are just outside the door so use bullet time to get a jump on them. Use the sniper rifle to eliminate the guards on the scaffolding to the right. After talking to Max, start ascending the scaffolding if you want to search it for ammo. Cross the yard to the left and approach the trailer. A couple commandos stand on the other side. Grab some painkillers in a crate next to the trailer. Go over to the lift and use the controls to ascend.
Part III: Waking Up From the American Dream
Prologue
Exit your hospital room and follow Mona to the right. You'll eventually enter the Pink Bird Mental Institute. Run past the cells and listen to Max's ranting. Enter the door at the end. Find Mona to the left. As soon as you find her you appear elsewhere.
Exit the fiery cell and go left. Reach the television and listen to the familiar broadcast if you wish. Go up the staircases. When you reach the intersection, activate the tape player and use it to listen. Go to the top of the stairs and enter the police station. Find Mona and Winterson in a standoff. They decide to fire at you instead.
Chapter One: Too Stubborn to Die
Grab the painkillers from the cabinet. Search the room but there are no guns. The commando stands on the other side of the door. Push it open to knock him down. Go up two flights of stairs then burst through the red double doors. Go left and through the hall taking the first door on the left. Go through these two rooms and across the hall through recovery. Go left and into a dark office. Find some painkillers on a desk and wait for your two pursuers to start searching the room. A security officer arrives and is shot, dropping a gun in the doorway.
Leap over the cubicles and get the gun. Go right into the next hall and use bullet time to annihilate your pursuers. Search the room for any remaining painkillers in the cabinets and grab the discarded weapons.
Exit and enter the first room on your left. Grab the shotgun and the pain killers. Enemies are battling some security in the door to the right. Lure the enemies into the doorway and blast them at close-range with several shotgun blasts. Search the lockers for ammo. Exit through the next door into another hallway.
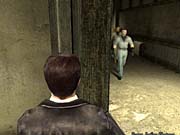
Walk to the far end on the left. Two enemies emerge from a room on the right. Search the room for painkillers. When you exit the room, there are more guards to the right so be ready with bullet time. Ideally you should be using the MP5 or the Kalashnikov. Kill those guards and more that enter from the door.
Before opening the next door, enter bullet time. Stay to the door's left. Open the door and shoot the gas canister across the room. Wait for the explosions. Search the room for ammo and painkillers. In the next room, approach the exit door. Enter bullet time then open the door; guards stand on the other side.
The stairwell is tough. Lure them toward the door or use a grenade if possible. Go down the stairs and to the next exit door. It's the parking garage. The enemies are grouped to the right. Allow them to come to the door. Stand up the stairs and to the left and pummel them at the doorway. Gather the ammunition then go to the back of the black van to complete the chapter.
Chapter Two: On a Crash Course
Shoot the guards at the top of the stairs. Watch for another to enter from the far right. Grab the painkillers. Go to the far right and enable bullet time. Enter the door and shoot the guards on the far side of the kitchen. Find some painkillers inside to the right. Wait for your bullet time to replenish, then enable it and enter the door on the left. Three guards wait downstairs with another group upstairs. Go to the left so you avoid fire from the upstairs enemies.
Start up stairs or use the scaffolding. As you go up, kill the guards above you. When you reach the top, wait by the far door on the right for guards to enter. Enter the door and search the far left corner for a carbine and a striker. Go up the stairs (shoot the gas can above if you can get sight on it) and kill the enemy. Enter the door and listen for the guards in the room to the left. Wait for them to emerge, enter bullet time, and terminate them. Search the room for painkillers then go right.
Spot the huge explosives. Before shooting them, cross the room and kill the guards curled in the corner. The explosion will occur, blasting a hole in the wall. Guards wait on the other side, so peer around the corner with bullet time enabled.
Cross the catwalk to the other side. Be cautious as there may be some guards remaining below. Descend to the ground level and move through the exit. Guards hide behind the far shelf. Enable bullet time and kill them. More guards enter from the door behind you, so be ready. They carry carbines and can inflict damage very quickly. Blast them while in bullet time and work your way down the staircase.
Enable bullet time and open the door at the bottom. Shoot the enemies near the van. Search the room for painkillers and plentiful ammunition. Enter the double doors. Start up the stairs and invoke bullet time to clear the next floor of its enemies. Continue your ascent.
On the next floor, some enemies cower behind cover. Toss a grenade to smoke them out, then enter bullet time and fire away. Go around the corner to the right. Enter the first door on the right and eliminate the guards standing next to the speaker. Terminate them to complete the chapter.
Chapter Three: A Mob-War
Start forward (snag the cocktails from the shelf). Go around to the right and hide behind the wall. Blast the commandos that enter from the opposite door. Another comes down from the stairs. Go all the way up the stairs and bust through the fragile wall. Find the hobo at the top watching television and snag the nearby painkillers. Follow the doors to the balcony and shoot the commandos across the way.
Walk by the used car lot sign and Max comments he needs to find a way down there. Go to the top of the stairs on the right if you wish to find some more enemies and ammunition. You can go all the way downstairs (kill the enemies on the way) and exit the building but you can't go anywhere. Go back up one flight and enter the green door. Use bullet time first so you get a jump on the enemy inside. Cross the wooden beams to the opening in the adjacent building.
Go to the top of the stairs and kill the enemies watching television. Snag painkillers from the bathroom. You can also go to the bottom but there are only enemies, and no way out of the building. Retrace up to the third floor and enter the room overlooking the street. Go to the right and spot the open window to the left. Kill the guards here. Cross the beams and enter the open bathroom to the left. Snag painkillers if necessary. Follow the doors until you meet the crew.
Follow the crew to the city street. Enemies appear from in front of you. Watch the top of the walls. Turn the corner to the left and kill more entering from the right. A guy in a white shirt will emerge from down the street. He's going to reveal you're Max Payne so turn and shoot your crew quickly and the guy running down the street. Open the green door on the right and go to the next street. A van pulls up. Enter bullet time and kill the guards to the left and right. Clear the area to advance to the next chapter.
Chapter Four: Dearest of All My Friends
You must protect Vinnie. He'll hide from guards but you must keep him alive to complete the task. He's a pretty big target in that ridiculous suit! While he hides in the office, kill the commandos that enter. He'll walk out and hide again as more enemies pour over the wall. You can intercept them outside by exiting to the right. After you hear a car pull up, hop through the window using the ramp. Attack the incoming enemies from this position. Watch out for the window to the right as an enemy could sneak in. When you're done, Vinnie will move on.
He'll stop in the next room as guards enter from the window to the upper left. Blast them as the round the crates to the left of the window. As Vinnie moves to the next door, search the locker for painkillers. He can't fit through the door so he'll start back to an elevator. Watch to the left then behind him for a few more attackers.
Snag some painkillers to the left. Vinnie will move into the elevator but you shouldn't follow. Instead, go up a flight of stairs to the left and wait for the guards to enter from the door on the opposite site. Start blasting as they enter. Watch the door to the right also. Go to the top of the stairs to rendezvous with Vinnie and enter his apartment.
Search the cabinet quickly if you need painkillers. Face the front door and blast anyone who enters. Vinnie hides again (he's a collector!). Go to the balcony and wait for the enemies to enter. Peer over the side and eliminate the enemies below. Allow Vinnie to drop while you remain high; a van pulls in, releasing some commandos. You can hit them easier from the high vantage point. Drop down once they've perished and follow Vinnie.
Proceed around the corner and move to the left. Another van pulls up as Vinnie attempts to open a door. Kill the enemies (the first is higher on a ledge to the left). After eliminating that group, a secondary squad climbs over the wall behind the van. Vinnie enters the bay door. Collect ammo then enter through the adjacent door. Go up the stairs and use the control pad to lift Vinnie.
While he lifts, a van busts into the garage. Hop down the stairs and annihilate the commandos as they try to pile out of the back of the van. There are some painkillers on a top shelf (you can shoot the boxes they're on to knock them down). Follow Vinnie back up the stairs.
As Vinnie is approaching his getaway van, turn around and face the route you came from to kill a few more pursuing commandos. Walk back to the van to complete the chapter.
Chapter Five: A Losing Game

You once again assume the role of Mona. Go left and down the stairs. Jump through the hole to the left and turn right. Go into the next room. Stand away from the barrels and gas cans; they're about to explode. The wall opens to the left so run through at the earliest opportunity. Around the corner, wait for the explosions and run up the beam and drop off to the right. Hop off the structure beyond the flames on the right. Run through the insane asylum lobby to the opening to the right.
Go right and avoid the rolling object. Grab the painkillers from the cabinet and use the fire alarm to douse the area with water. Go left and enter the door to the left. Keep going until you reach the open fuse box. Hit the button. Return to the power section (the electricity was blocking the stairs) and ascend. Move forward until a cut scene interrupts the action. Ascend the staircase in the far left corner. At the top, you'll find Max.
Chapter Six: There Are No Happy Endings
Talk to the cop. Enter the door on the left to find the body. Now you're in the police station. Go into the lineup room. Exit to the left then to the right and follow the hall. Talk to the cleaner if you want and continue to follow yourself down the hallway. Follow the only available route into a door on the right at the far end of the hall. Reach the three doors. Go forward and find the mirror (freeze!). Go left and then to the right and find Mona.
Chapter Seven: Love Hurts
You automatically equip the carbine. Shoot the two guards on the balcony. The next three enemies enter from behind the van. Target the red barrel or green gas can to eliminate them quickly and easily. The next guards emerge from the balcony to the right of the first and from the front door. Another guard waits inside the front door. Search the van for painkillers and ammo and gather all discarded weapons from the area. Head toward the front door and enter.
The enemies set off a bomb which collapses the ceiling. Avoid the falling debris. Stand in the upper right corner of the room (facing the locked door). When the debris above starts to fall, walk in front of the door. Now you can move through the door. Beware of the enemies waiting on the other side. Kill both (shoot the gas cans near the piano for added damage) and head to through the door to the upper right. More guards in this courtyard. Head right and use bullet time. Take out the enemy to the right and scurrying in the courtyard. Mona is above and will assist. After a brief conversation, be prepared to face more enemies on the other side of the windows.
Kill a couple guards, then enter the second door to the right and grab the painkillers from the cabinet. Move through the room and enter the door on the left. There's a commando behind a bookcase to the left and two more guards in the room's center. There's a gas can on a bookcase for added damage. Mona will enter the second floor and dish out some damage of her own. Hide in the formation of bookcases and face the upper floor door behind you. Nail everything that emerges. After about four or five enemies, enter bullet time and turn right to face a second upper floor door. A couple commandos emerge with better weapons and aim. Annihilate them, then chat with Mona again.
Enemies enter from the lower floor door on the right. Use the bookcases as cover. Work down the hall and eliminate the enemies down the hall. Check nearby cabinets for painkillers. Open the far door and alert the enemies. Shoot the visible gas can and back out of the room. After the explosion, enter bullet time and mop up the survivors.
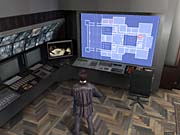
Watch the upper balcony on the right and back and to the left for enemies. Greet Mona and watch the lower floor exit (opposite the entrance) for more hostiles. Head that way. Ascend the staircase and watch for enemies along the top floor. Enter the unlocked door on the right. It's a security room. Check the lockers for supplies then use the console to watch the monitor.
Exit the next door and go through the room. Enter the next door and back up to your left but face the doors to the right. Enemies pour through. Enable bullet time and engage. Exit near the stairwell and fire at the enemies in the courtyard at the bottom. Descend the staircase cautiously; there's a commando underneath the stairs. Toss a grenade down there to finish him off. Stay up the stairs and face the door you didn't enter from. More enemies arrive. Kill them then search the courtyard for painkillers and ammo. Enter the room at the top of the stairs.
Here's the room with the collapsed floor. Turn left and start down the hall (yelling to Mona automatically). Go through a couple more doors and enter bullet time when you spot the enemies. Shoot the ammo if possible for added explosions or just terminate the enemies. Nail a few more in the courtyard and descend the staircase. Approach the door to conclude the chapter.
Chapter Eight: That Old Familiar Feeling
Walk forward, enable bullet time, and kill the enemy around the corner to the left. Grab his MP5. Walk though the hall and encounter a second enemy entering from a door on the left. Wait until Vlad sets off the charges and run back to the start position where the panic room has fallen through the ceiling. Enter and use the controls to close the door. Pick up the painkillers.
Open the door. Walk out to the left and spot the open area to the right. Shoot the guard below. Drop down. Don't stand around too long; a bomb is being pushed over you. Run into the door on the right. Enable bullet time and annihilate the enemies. Go through the area to the left. Vlad fires at you from the top. Run up the stairs and wait for the debris to collapse the walkway. Leap over and go to the door.
Enable bullet time as you move down this hall; enemies will move around the corner ahead of you. Move toward the staircase. Kill the enemy hiding under the stairs. Open the door at the top, then back off quickly. Grenades were just tossed down. Start up the stairs in bullet time and eliminate the guards. At the top, spot Vlad through the window.
Descend the stairs and wait for enemies to emerge from the top of the stairs. Kill them and return to the window. It's open now. Enter the room and grab the plentiful ammo. Listen to the answering machine. You can also turn on the television and listen to the news. Enter and use the lift.
Kill the guards in Woden's room. Beware of more on the upper catwalk. Grab some painkillers if needed. Enter the next door and back up while the staircase explodes. Vlad stands at the top. You must use the wheelchair lift to get to the top while avoiding Vlad's shots. He'll hit the switch to stop the machine so you must hit your switch twice. Duck for cover against Vlad and utilize your bullet time. You will likely need to use some painkillers to survive. Hit the button on the lift to start going up. Once you reach a certain height, Vlad flees and some of his thugs enter. Kill them and follow.
Here's the final encounter. Vlad is on the top platform. Aim for the orange pins that are holding the platform up. You need to position yourself so your shot will propel the pin out of the mechanism. Meanwhile, keep dodging Vlad's explosives by just moving to the right or left after he tosses one from the platform. Knock out three and Vlad falls to the roof.
Now you must aim for the next set of four orange pins holding the top mechanism up. Hit all four as you did the first batch. Once it falls, the final battle remains. Vlad stands up and tosses cocktails down. Dodge them, enable bullet time, and aim for Vlad's upper body. Shoot him several times with the carbine to finish him off once and for all. You can also just keep dodging and Vlad will likely damage himself with the flaming cocktails. A few shots should finish him off.
Unlockable Modes
Completing Max Payne 2's single-player storyline unlocks several new gameplay modes. This section reveals all unlockable modes and provides a few strategies for each where applicable.
Hard Boiled and Dead on Arrival
When you play Max Payne 2's single-player storyline for the first time, you complete on the "Detective" difficulty level. Completing the game on Detective unlocks Hard Boiled, a higher difficulty level. Completing the game on Hard Boiled unlocks Dead on Arrival, the highest single-player storyline difficulty. In Dead on Arrival, you possess a limited number of saves per level.
Completing the game on Dead on Arrival features its own bonus. Finish the game on this highest difficulty level to watch an exclusive ending sequence that's altered from the two lower difficulty levels.
New York Minute
New York Minute is unlocked once you complete the game on Detective difficulty level. In New York Minute, you can select any part and chapter in the game. When the chapter begins, a timer starts ticking in the upper right corner of the screen. Your goal is to complete the level in the fastest time possible. Eliminating enemies reduces your time by two seconds. Cutscenes (such as Max's spinning reload) and graphic novel interludes aren't included in the time. Also, bullet time delays the timer to correspond to the slowdown.Your goal is to balance speed through the level and killing enemies. You shouldn't ignore every enemy because you do receive the time benefit from killing each foe. Keep moving toward the level's end as you defeat the enemies so you aren't taken off route. Level memorization plays an important role in the game mode; the better you know the level, the more you will eliminate "wrong way" mistakes to create the fastest times. Seek out shortcuts and, as with other game modes, aim for the head for quicker kills, which will generally have the effect of reducing damage to Max or Mona. Since you won't want to waste time seeking out painkillers, you need to remain as unscathed as possible.
Dead Man Walking
In Dead Man Walking, your goal is to stay alive as long as possible in a confined space. Enemies spawn slowly at first but as time progresses, more and more enemies enter the area. You can gain time by killing enemies; so the more enemies you kill, the greater your time (essentially your score).
You must carefully balance your goal of killing enemies with your goal of staying alive. Bullet time drains just as it does in the single-player storyline. You'll need to utilize bullet time carefully. Don't stay in bullet time unless you're either actively killing enemies or reloading your weapon. You should use bullet time to reload because you're extremely vulnerable while reloading (since you can't shoot back). Avoid remaining in bullet time if you're just ducking behind cover. You want your meter as high as possible when you're attempting to clear a large group of guards.
Obviously you should aim for headshots with each and every kill. The faster you kill enemies the better. This permits extended bullet time as well as increasing your time on the map. Avoid shoot-dodging. You're extremely vulnerable when getting back up after a shoot-dodge. The maneuver isn't worth the danger. You should utilize bullet time exclusively. Save your painkillers and use each bottle to its fullest extent.
Cheats and Secrets
Sometimes Max can't survive on gun skills alone. When that time comes, your last resort might be to utilize Max Payne 2's cheat codes. This section reveals Max Payne 2 cheat codes and a few other secrets in the game.
Cheat Codes
To utilize cheat codes, you must first run Max Payne 2 in developer mode. Create a shortcut to the Max Payne 2 executable in your Max Payne 2 directory. Right-click on the executable and select "Create Shortcut". Right-click on the shortcut and select properties. In the "Target" box, add "-developer" without the quotes after the end quote in the line. So your target box reads: "…\MaxPayne2.exe" -developer
Use this shortcut to run Max Payne 2. During the game, press the ~ key to open the console. With the console open, enter any of the following codes to utilize the specific cheat. These codes can also be used in sections of the game in which you control Mona.
god - God mode. Gives Max invincibility.
mortal - Disables God mode.
getallweapons - Gives Max all weapons.
showfps - Reveals the frame rate.
getberetta - Give Max a Beretta with 1,000 ammo.
getcoltcommando - Give Max a Colt Commando with 1,000 ammo.
getdeserteagle - Give Max a Desert Eagle with 1,000 ammo.
getdragunov - Give Max a Dragunov with 1,000 ammo.
getingram - Give Max an Ingram with 1,000 ammo.
getkalashnikov - Give Max a Kalashnikov with 1,000 ammo.
getmp5 - Give Max an MP5 with 1,000 ammo.
getpumpshotgun - Give Max a pump shotgun with 1,000 ammo.
getsawedshotgun - Give Max a sawed-off shotgun with 1,000 ammo.
getsniper - Give Max a sniper rifle with 1,000 ammo.
getstriker - Give Max a striker with 1,000 ammo.
getmolotov - Give Max a Molotov cocktail with 1,000 ammo.
getbullettime - Puts Max into bullet time.
gethealth - Give Max 1,000 health.
Hidden Ending
When you beat the game on the Detective difficulty level, a new difficulty level, called Hard Boiled is unlocked. If you beat the game on Hard Boiled, another difficulty level, called Dead on Arrival, is unlocked.
To get the hidden ending, you must beat the game on Dead on Arrival difficulty mode.
Character Models
You can change Max or Mona's character model to other models in the game, though you won't be able to play the game in the same fashion (for instance, cutscenes don't work properly and many can't even use weaponry). To view these alternate character models, you must first run Max Payne 2 in developerkeys mode.
Create a shortcut to the Max Payne 2 executable in your Max Payne 2 directory. Right-click on the executable and select "Create Shortcut". Right-click on the shortcut and select properties. In the "Target" box, add "-developerkeys" without the quotes after the end quote in the line. So your target will read: "…\MaxPayne2.exe" -developerkeys
Now during the game press the "Page Up" and "Page Down" buttons to cycle through alternate character models. All models featured in the game can be selected, including an R-rated Mona.
Secret Memorial
On Part I, Chapter 7, there's a hidden room after Max defeats some cleaners near a window washer. Max loses contact with Mona soon after. Drop down the scaffolding. Guys are tossing down grenades all over the place. Go right and spot the open window. Blast the guard inside. Instead of going through the window, keep going around to the left and find the open window. Check out the small memorial inside.
Got a news tip or want to contact us directly? Email news@gamespot.com
Join the conversation