Lost Planet: Extreme Condition Walkthrough
It's time to head to the surface of EDN III to take on the Akrid in Lost Planet. GameSpot's Walkthrough will get you through the adventure!
Design: Randall Montanari
It's been a good year for Capcom and the Xbox 360. Last summer, they released Dead Rising, a critically acclaimed (and fan favorite) zombie adventure game. In fall, they released Street Fighter II for Xbox Live Arcade, which quickly became the quickest-selling XBLA game after its launch. Now, in winter, Capcom's shipped its long-awaited game Lost Planet.
Lost Planet tells the story of Wayne, a colonist on the planet of E.D.N. III, which was intended to be a new outpost for the human race. After the colonizing project took off, though, the planet's intimidating climate and fiercesome fauna became problematic for the settlers, which quickly factioned and split. The largest faction is NEVEC, a scientific group that's attempting to terraform the planet, while the ice pirates, of which Wayne is one, wishes simply to be left alone to live their lives. Or...something like that.
Honestly, the story in Lost Planet is about as confusing a hodgepodge of random cutscenes as you're likely to find anytime soon. Characters come in and out of the story, plotlines pop up and disappear just as quickly, and there's never really any coherent theme to the game. The action, though, should sustain most gamers for a few hours of fun. Lost Planet lets you take on the role of Wayne as he battles across the ice-covered surface of the world, into NEVEC's underground facilities, and through the heart of a volcano.
GameSpot's Game Guide to Lost Planet is intended to be a walkthrough for the single-player portion of the game, first and foremost. You can expect videos for all of the bosses, as well as some tips on getting through the levels and which weapons to select as you play. Enjoy!
Weapons And Items
You're going to have plenty of weapons to choose from in Lost Planet, and you're going to have to use most of them to get through the game. While your choice of VS will usually be a matter of finding whatever's available, you'll generally have a bit more flexibility when choose weapons.
Weapons are divided up into three categories: personal guns and rifles, grenades, and VS weapons and rifles.
Personal Weapons and Rifles
Machine Gun

The old faithful standby; whenever you start a new level or sublevel, you'll be carrying a machine gun into battle with you. It's fairly easy to find more ammo for the machinegun, and it'll be a decent weapon against snow pirates and most low-level Akrid, especially the flying Trilids. Against humans, go for headshots! When you get a headshot, the screen will flash yellow, and your target will instantly die.
Even against larger Akrid, the machinegun can still be a helpful tool, thanks to its ability to lay down sustained fire against weak spots, such as those on the Chryatis. It won't do much more than bounce off a VS, however.
Shotgun
The shotgun is going to be the second weapon you find in the game, but it won't be something you'll want to use for very long. As is the case in almost every game that actually includes a shotgun, this one will fire a powerful spread of shells that quickly dissipate after traveling a few meters. Thus, it'll be useful for enemies that get up close and personal, but won't be of much use against distant foes. In general, you can trade it in for other weapons without fretting too much, as most of the enemies in the game will keep their distance from you, or will pelt you with projectiles while you try to get within range to use the shotgun. Great for dongos and Akrid generators that you can get close to, but not recommended for general usage.
Rifle
The rifle, like the shotgun, is a fairly specialized weapon. Capable of holding only six shells in its chamber, it'll be great for nabbing headshots against distant foes, thanks to its ability to zoom in with the d-pad. That mostly only works on human enemies, though, since they're really the only ones with heads, although you can probably do a good amount of damage to an Akrid weak spot if you take particular aim.
Apart from humans, you can sometimes snipe the pilots out of a stationary VS with an accurate shot from a rifle. It's difficult to do, but perfectly possible, and will let you hop into the VS and use it for yourself. Apart from that, you shouldn't expect to deal major damage to large Akrids or a VS with the rifle. Use it on humans and upgrade it to something better when you have the opportunity.
Rocket Launcher
This is the first time a "rocket launcher" has ever been featured in a game. Well, that's a blatant lie. But seriously, if you've ever played a video game before, then you should know what you're in for here: the launcher in Lost Planet is a single-fire device capable of putting down enemies in just one or two shots. Unfortunately, you can only fire one round at a time, and the reload time is fairly substantial.
In most instances, the only time you'll want to use the rocket launcher is against enemy VS's (which will usually take three or four hits to go down) or against bosses. It'll be overkill against human enemies, and will sometimes frustratingly bounce off Akrids unless you manage to hit them directly in their weak spots.
Energy Gun
Although it appears weak at first glance, the Energy Gun is actually going to be one of the most powerful weapons you'll come across in Lost Planet, and will be a fine replacement for your machine gun if you manage to find one. This is due to some of the special properties it possesses.
First off, the energy gun's fire will automatically home in on anything that you fire at, allowing you to take down enemies without needing to aim at them individually, even if they move around while the round is in mid-air. This is especially helpful for nabbing flying enemies like Trilids, although sometimes the homing factor can be annoying, such as when you're attempting to hit an Akrid generator and your bolts keep veering away from your target to hit a lesser enemy.
Secondly, the energy gun doesn't use ammo and doesn't need to be reloaded; shots will drain your T-Eng meter, but only very slightly. You can rapidly knock off shots and you likely won't have too many problems with drainage.
Thirdly, you can charge up your shot by holding down the firing button until the weapon flares up, then release the shot for added damage. This is of marginal effect against most humans and Akrids, since they'll die in a couple of normal shots anyway, but when you land a charged shot on an enemy VS or turret, the pilot will fly out of his or her seat and eject the vehicle rather violently, thus leaving you with a much weaker opponent to fight, as well as a relatively unharmed VS to claim for yourself. This won't work against boss-level VS's, obviously, but will still be handy in VS-intensive missions.
Plasma Gun
The plasma gun is something of an amalgam between the rifle and energy gun; it's a sniper rifle that requires no ammunition, instead drawing on your T-Eng to power itself. It's also arguably the most useful of the normal weapons in the game, since it's much more powerful against humans and VS's than most other weapons.
When fired against a human, a headshot or two shots to the body will drop your foe. Unlike a rifle, though, the plasma gun can take down a full VS from long range in just a few shots. Smaller VS's, such as the bike model, will take only four rounds before blowing up, while larger mechs will need upwards of ten. That's still a pretty small number of rounds of ammunition for a weapon that can fire on enemy suits from as far away as you can see, though!
While the firing rate isn't ideal, the plasma gun is still probably your best bet for taking down humans and vital suits. Keep a machinegun or shotgun handy for dealing with larger Akrid, though!
Grenades
Hand Grenade
Hand grenades are of obvious use. While most human enemies will attempt to run away from them when they land, they'll be really handy against enemy VS's and larger Akrid. Most VS enemies won't be able to withstand more than four or five grenades when they detonate underneath them, making them a handy method of disposing of VS's when you don't have any heavy firepower in your arsenal. Grenades are also fairly easy to find, as they're liberally scattered throughout most levels.
Gum Grenade
The gum grenade is rarer than the hand grenade and less universally useful. When thrown, it will stick to anything it hits and wait a few moments before detonating. This is theoretically great for dealing with VS enemies, but unfortunately, the throwing range of the gum grenade is perhaps half that of a normal hand grenade, so even if you manage to get close enough to stick a gum grenade on an enemy VS, you'll be paying for the privelege with a bit of life. It's best to just stick with hand grenades, in most instances.
Plasma Grenade
The NEVEC soldiers you encounter throughout the game will often drop plasma grenades. When these detonate near an enemy VS or human, they'll be frozen in place for a couple of seconds. The duration of this freezing effect is usually too short for you to accurately place a shot with your primary weapon, so it's of dubious use in most instances. The grenades also do a bit of damage, though, so if you're out of hand grenades, you could do worse than to substitute in some plasma grenades.
Disc Grenades
Arguably the rarest kind of grenades, disc grenades pack a wallop and travel almost in a straight line when thrown, making them more of a rocket launcher than a standard grenade. You won't find them very often, though, and even when you do, they'll be in small five-grenade stacks.
VS Weapons

Each VS that you encounter can carry up to two weapons at a time. You can transfer weapons from one VS to another, but in order to do so, you have to exit the VS, detach the weapons from the sides of the VS while on foot, then place them on the ground and pick them up with the other VS. If a VS is destroyed, its weapons will likewise blow up along with it, so if you're using a VS and want to preserve its weapons, be sure to eject from it before it's destroyed, then detach the weapon from its chassis and move it to another VS.
Note that VS weapons can be used while you're on foot, although you can't stow them. You have to keep them in your hand for as long as you want to use them; if you switch to your normal weapons, you'll drop the VS weapons. Most of them will also require you to be standing still before you fire or reload them.
Gatling Gun
The baseline weapon for a VS is the gatling gun, which can rapidly cycle through shells, not unlike a machine gun when you're on foot. It's a universally useful weapon, whether dealing with Akrid weak spots (gatling guns will usually be all but required in boss fights) or against VS's. They may not do as much damage as quickly as some of the other weapons available, but their ability to lay down sustained fired will help you when you have to quickly deal with an Akrid weak spot. They won't be quite as useful against human enemies, who are small enough to avoid the spread of the rounds, but even they will go down eventually.
Shotgun
The VS shotgun possesses perhaps the most distinctive firing sound of any weapon in the game. Like the human shotgun, this is going to launch a number of shells in front of your VS in a wide spread, making it capable of hitting multiple targets at once, if necessary. When used on a single target, such as an enemy VS, the shotgun deals significant damage, allowing you to quickly take down your target if you're willing to get into a slugging match. Against most bosses, you'll want to be keeping your distance, so the shotgun isn't generally going to be your first choice for end-of-mission enemies.
Rocket Launcher
Same deal as the human-sized rocket launcher, really: high damage, scarce ammo, single fire. Against most Akrid bosses, you'll have to hit their weak spots dead-on to deal damage, so it can be painful to miss with rocket launcher shots against those enemies, since the splash damage usually won't affect their weak spot. The rocket launcher will still be quite useful against VS enemies, though.
Grenade Launcher
When you fire the grenade launcher, it's initial shell will rapidly travel forward, then disintegrate into a number of smaller grenades that will disperse and detonate. The grenades don't travel too far from the initial point of impact, but that's fine, as the grenade launcher will thus act as the single largest source of damage available to you. When firing at an enemy VS or the weak spot of an Akrid, the grenade launcher effectively acts as a collection of four or five individual rocket shells. Some of them will stray far enough not to damage your target, but if you manage to land the initial shell precisely, you'll find that the grenade launcher will deal more damage than any other weapon you're capable of using, at least on certain bosses.
Laser Rifle
The Laser Rifle is somewhat similar to the energy gun that you can carry around on foot. Instead of balls of energy, though, it'll fire beams of light that damage anything it hits. You can fire off small beams by pressing the trigger, or charge up more powerful beams by holding down the button and waiting for it to fully charge. The laser rifle uses no ammunition, but will instead knock off your T-Eng when fired or when it charges.
EM Laser
A slower, but more powerful version of the laser rifle. Use this with charged shots against VS enemies to quickly knock them on their rears.
Homing Laser
One of the rarest weapons you'll come across, the homing laser is a lot more impressive to watch than it is when actually used. When you hold down the fire button, it will lock on to up to four different targets (or the same target four times), then, when you release the button, homing lasers will track down those targets and impact them. Truth be told, this is only really useful against enemy VS's, which won't be able to dodge the bolts, even if the lasers don't really do that much more damage than other VS weapons. Against Akrid, especially those with weak spots, the homing lasers will usually wind up being worthless, as they'll lock onto the biggest part of the body and will usually wind up missing the weak spots entirely.
Walkthrough
This walkthrough is intended to get you through the game on Normal difficulty. We'll describe most of the fights and have videos for each of the bosses, but we're not going to point out all of the target mark locations to you. The target marks are really only needed if you want to get achievement points; you can safely skip them without impacting the game at all. If you want a complete list of their locations, check the walkthroughs at gamefaqs.com.
Prologue
Before the game proper begins, you're going to find yourself running through a short tutorial mission / prologue. It's not too difficult, and indeed will mostly consist of simply learning the controls of the game. Begin by following your father Gale up the ramp near where you start; the X button will launch your anchor and pull you up and over the railing there. When he destroys a floor and drops through, follow him by simply dropping through the hole yourself; your anchor will automatically arrest your fall, and you'll be able to use the left analog stick to continue your descent.
When you drop all the way down to the floor, a Dongo will roll in and attack. Your teammates will automatically kill it, but you can shatter the icy body and grab the thermal energy from its body. Move into the next room after that and start firing on the Trilid pods on the walls; if you don't destroy them, they'll continually pop out more Trilids, and that's no good. Again, you can collect the thermal energy from the Trilid's bodies and use it to power your thermal suit, which will keep you alive.
You can get a large boost of thermal energy from the Data Post nearby, which also lights a beacon to show you the direction in which you should be moving. There are plenty of Data Posts in the game, and they'll always be worth activating for the large thermal energy boost. The destination direction beacon can also be handy, but the game is fairly linear for the most part, so you'll rarely have too many problems finding out where to go.
The Green Eye
A large Green Eye appears now, forcing your team to retreat from the NEVEC labs. You can't kill it (yet), so don't bother even trying - just run! Head around the corner and up the stairs before it can catch up to you. Other soldiers in the area will be heading the same way, so follow them along until you reach the walkways above the hangar. When you reach your VS, activate the Data Post to get a boost to your T-Eng, then hop into the VS and take it out for a spin. Don't worry overmuch about attacking the Green Eye here, as you can't kill it. Fire your weapons at it for a while, then watch the cutscene that ensues.
Mission 01: A World Of Ice
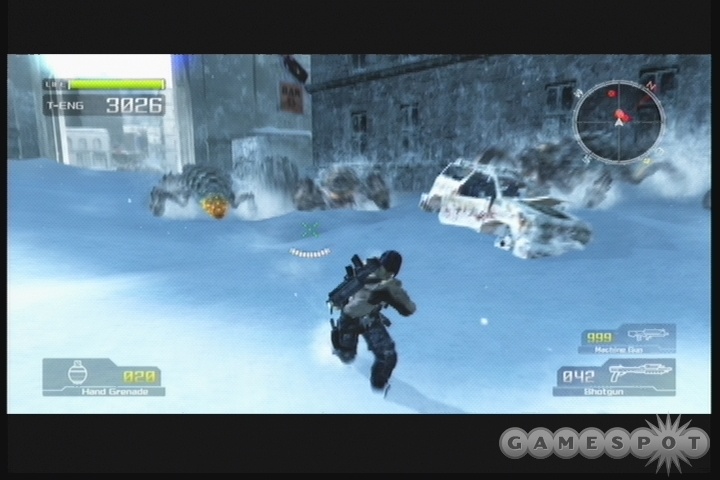
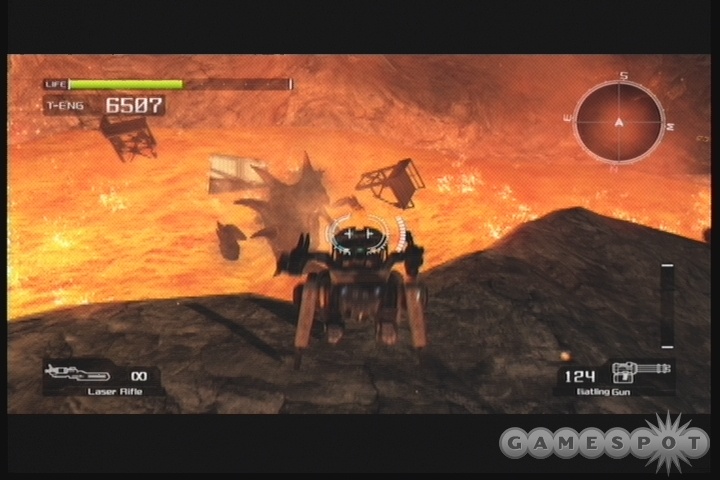
It's time to take on your first mission for the ragtag group of ice pirates that you've been found by. There's a rudimentary VS in front of you that you can hop into and use on the Akrid in the area. If you need more thermal energy, destroy the oil tanks and cars near your starting point and absorb the goop that they absorb.
When you pass under the overhang, you'll be attacked by a chryatis that pops up from underground. You can defeat it, if you wish; it's easiest to do so by attacking its arms (the bright orange spots are where you need to aim), then unloading rounds into its bright, glowing abdomen as it writhes on the ground. You can't bring your VS into the building nearby, so ditch it (B button), grab the shotgun by the corpse, and wander into the Akrid lair.
When you reach the far side of the parking lot, head up the snowy hills and dig in the pile of snow nearby to find a rocket launcher. You don't need it, really; the machine gun and shotgun will be a fine duo for the fight ahead. As you enter the Material Storage warehouse, another chryatis will appear. You'll likely be on foot this time around, but the same basic advice holds: shoot the arms off first, then go to work on the abdomen. Watch out when it rears one of its legs up in the air; it'll likely sweep it across the floor after a second and knock you down. That's reason number one to destroy the arms!
Head Em Up, Move Em Out
When you're done in the warehouse, head outside, where a group of dongos will attack you. Dongos are definitely killable, but getting around to their rear, where their weak spot is located, can be difficult, especially when there are two or three of them attacking you simultaneously. It's best to simply run across the clearing and grapple your way up the cliff to the Data Post above you. The dongos won't be able to follow you up.
Proceed up the hill here and avoid shooting the boulders if at all possible. If you hit them, they'll tumble down the hill towards you and probably knock off a good amount of your health. Avoid or kill the other dongos on the hill as you proceed upward. Find the cave and head inside.
Akrid Hive
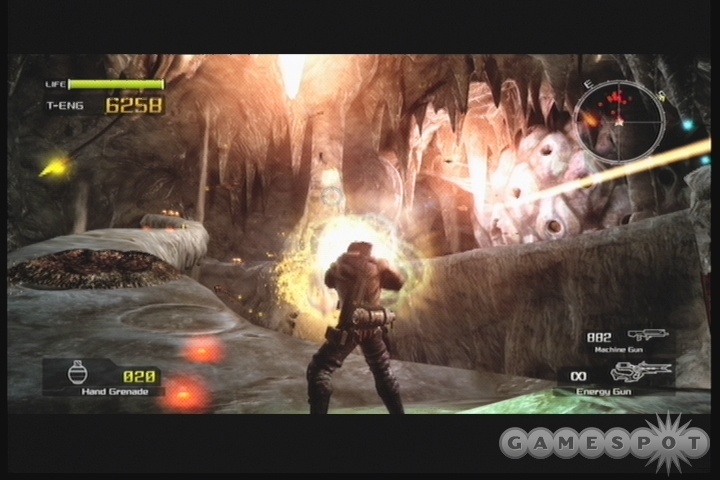
You'll likely be VS-less when you enter the cave here, so you'll have a bit of a walk in front of you. Head around the path to your right and find the Data Post. There's an energy gun nearby; you may want to trade in your shotgun or rocket launcher for it, as it has infinite ammo, and will kill most of the smaller Akrid here in one hit. Walk from there across the walkway in the middle of the room. The numerous small trillids will be coming your way, but individually they don't possess much stopping force, and won't do a huge amount of damage. If a number of them hit you at once, they may knock you off the ledge, but that's unlikely to happen. When you reach the far end, drop down to the small group of Akrid eggs, then move around to the next Data Post, on the far side of all the ground-based Akrids and their spawning machines. When you reach the Post, head across the gossamer threads connecting the cliff to the Akrid Hive, and head inside.
Boss Fight: Large Dongo
The super-sized dongo that awaits you in the center of the hive is, well, big. The confined space will make this fight somewhat taxing, but if you hop into one of the two VS's in the area, you can nab another gatling gun by walking over to it on the floor and equipping it to your unused weapon slot. With two gatling guns, you'll be able to unload on the dongo when it's possible to do so. There's also a rocket launcher in this area, but it'll be difficult to use it properly.
Why's that, you ask? Well, the dongo can only take damage if you fire at its abdomen, which just so happens to be at its rear, making it somewhat taxing to hit. You basically always want to be rotating around the creature as it attempts to attack you in an attempt to lay eyes on its glowing weak spot. You can dash with your Y button, and it may help to attempt to do so when you're almost in view of the beast's rear. It may sound difficult, but it's not incredibly so. The dongo takes a while to react when you start firing on its abdomen, so if you get a good view to a kill, you should be able to unload most of a magazine before it whirls around.
The creature has a number of attacks, most of which involve its stubby appendages. It can smash its arms into the ground in front of it or extend them out towards your VS and attempt to harm you that way. The most deadly, though, is its rolling attack. When it rolls, it will either attempt to charge you directly (quickly strafe or dash out of the way when you see this coming) or try to cling to the wall and start making revolutions around the room. This is a confusing situation for you, as rocks will start to fall and deal heavy damage to you when they hit. It's somewhat difficult to see where the rocks are going to fall, so you may want to stay as mobile as possible; try jumping and hovering in midair and moving around to see if that helps. The dongo will start whipping out this attack more and more often as you whittle down its health, but when it finally comes back down to the ground and hits a wall, it will smash into it and be dazed momentarily, allowing you to unload on its tail. If you have the rocket launcher attachment, now would be the time to use it.
Mission 02: Stronghold Assault
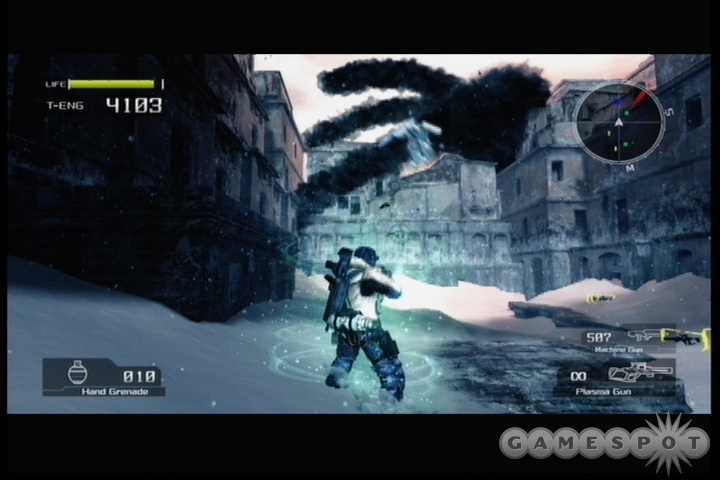
City Streets
Crimson Unity, a group of snow pirates, is who you're going after now. Time for some fun. The first section of this level will see you fighting off against large numbers of dongos. Head down to the open area in front of you and shoot the cars to reveal more weapons; you'll find plenty of machinegun and shotgun ammo to work with. The shotguns work well on the dongos if you get caught in the open; fire a round into their faces to stun them, then work your way around them and unload into their abdomens. If they roll at you, sidestep their attack and wait for them to hit an obstacle, then perform the same motion. If you have to take on multiple dongos, though, it's somewhat safer to get up onto an elevated area and pelt them with grenades.
As you head further down the street, more dongos will appear, followed by a pair of Chryatis's that pop up one at a time. Use your machinegun on their arms, then shotgun their abdomens into oblivion, before heading through the Akrid tunnel nearby.
After passing through the tunnel, use your machinegun to wear down the number of trilids somewhat before moving off to the left and shooting the hangar door. A VS suit is waiting for you there, pre-loaded with dual gatling guns. Use it to bust through more of the trilids and make your way down the street. Around the corner, you'll finally come across the snow pirates you've been looking for; they're trying to pound the hell out of a Chryatis. Finish it off yourself after defeating the snow pirates, then start making your through the streets to a dilapidated building nearby. The pirates here will be pelting you with rockets, so you may want to step out of your VS and engage them on foot. It's up to you!
The Railway
Make your way up through the building with your anchor system. Be sure to clean out any soldiers above you before grappling, though; if you're hit while you pull yourself up, you'll fall to the ground. Eventually, you'll come out to a longish railroad line that leads to the Pirate base. You'll have a long trip to reach it, though.
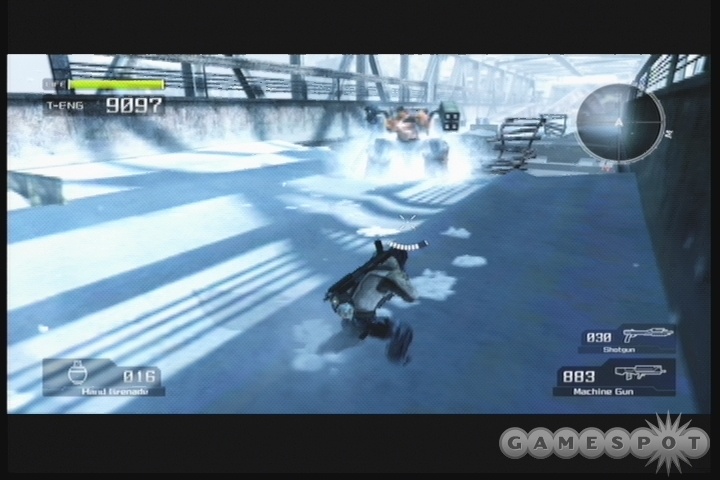
To aid your travel, you'll be able to find a GTF-13M VS near where you first hit the railroad. This is a VS that can transform into a bike. It moves exceedingly slowly as a VS, but the bike form can speed along with the A button, and if you hit the left bumper button when you're on a ramp, you'll fly into the air and will be able to cross the gaps in this area. You can use the bike for quick transportation, and switch to the VS form when you need to shoot some fools, if you wish.
Further down the tracks, you'll come across your first Rifle. You can use the rifle in conjunction with your zoom function (up and down on the directional pad) to get headshots on foes from long distance. When you cross the gap near the rifle, though, you'll be accosted by a large VS, equipped with a rocket launcher. You can also grab the gum grenades atop the train car here to use those; they stick to whatever they hit, making them useful against VS's. Regular grenades work fine, if you can angle them under where the VS is currently standing. If you don't want to fight the VS, though, you can probably just bypass it and head into the tunnels nearby to reach the next section of the level. Note that it'll be best to bring in a rifle instead of a rocket launcher to the next area.
Rail Tunnel
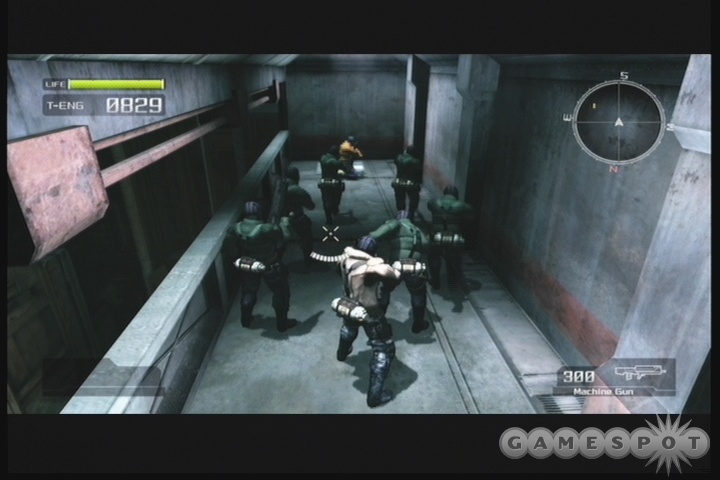
The lengthy tunnel in front of you houses a fair number of soldiers, all bedecked with machine guns, with a couple wielding rocket launchers. These guys are easiest to deal with with a rifle; you can find one on the upper walkway above the rails if you grapple up. Proceed slowly, nabbing headshots when you can, and be careful of the rocket laucher soldiers near the far end of the tunnel. There's a Data Post halfway through the tunnel if you need some extra T-Eng.
When you reach the exit from the tunnel, you'll be at a familiar site: this is the snow pirate camp that you probably assaulted a few dozen times in the Lost Planet E3 demo. The basic route here is much the same. If you bring a rifle with you from the tunnel, you can attempt to snipe the pilot of the mech out of his cockpit, leaving you with a full-powered mech to use on the rest of the pirates. Otherwise, though, your best bet is to head towards the large building up the ramp to your left as you exit the tunnel.
You'll find a Data Post atop one of the buildings, and a few of the soldiers here will drop energy guns. Energy guns aren't great in firefights, due to their slow-firing mechanisms, but if you use them on the rocket turrets across the way (hold down the fire button to charge them up), they'll boot the turret gunners out of their seats, thus freeing you to walk across the fields beneath them and find the steps leading up. You can hop into either the VS here (assuming it's still intact) or the rocket turrets and use them to finish off the remaining Snow Pirates. Before you head up to the large door nearby, be sure to pick up any rocket ammo in the area.
VS Arena
When you head through the doorway nearby to the next area, you'll immediately be accosted by a pair of Crimson Unity VS suits, both of which will wield gatling guns in an attempt to take you out. Fortunately for you, you should have rocket ammo and hand grenades to use against them, as well as no fewer than three VS suits scattered around the area. The initial two VS's aren't overly difficult to defeat. If you have enough rockets, then you may want to get behind one of the small buildings in the area to block their fire, then duck out and use the rocket launcher on them to weaken them up while preserving the health of the VS suits in the area.
After one of the initial VS suits goes down, another VS jumps into the area. This model packs a rocket launcher, as well as a jumping attack that can stagger you when it lands nearby you. Hop into a VS of your own at this point; the one closest to the door through which you entered has a gatling gun and a shotgun. If you use the shotgun at close range on the enemy, you'll deal a good amount of damage to it. There's also other goodies around the area, including a rocket launcher atop one of the buildings. With three VS suits to go through, and plenty of thermal energy from the VS's that you destroy, you shouldn't have too many problems here.
Mission 03: Crossing The Plains
Your goal now is to find the source of a large thermal energy reading in the snowy plains near the group's trailer; you'll need fuel if you're going to...go somewhere, presumably. You'll start in a small collection of buildings with a number of trilid generators. Destroy them, if you wish (there's a VS rocket launcher near your starting position which will do the trick nicely), then collect the energy and ammo scattered around before heading off to the north.
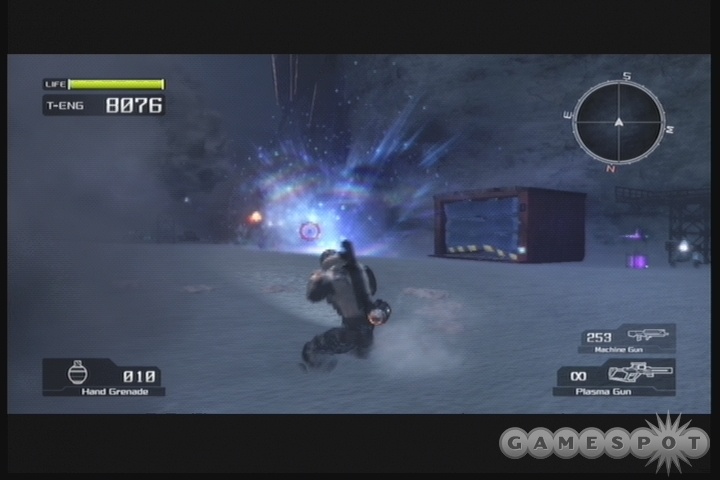
Reaching the power plant will take a goodly amount of time, thanks to the fact that you can't use a VS to cross the huge plain. There are VS's in the starting area, sure, but as soon as you take one onto the plain, you wind up getting knocked off by a giant worm Akrid. There are two ways to proceed here: fight the worm for an achievement (but no real in-game benefit), or simply avoid it entirely and move on to the power source in the far north.
Avoidance Tactics
If you decide to simply avoid the worm completely, the best way to do so is to stick to the rock wall on the eastern side of the plain and walk along it. If you stay as close to it as possible, the worm will generally not appear at all, preferring to stick underground. It'll still occasionally cause you to stumble, but it won't be able to attack you for the most part.
Attacking The Beast
On the other hand, if you decide you want to attack the worm and earn your 50 achievement points, you're in for a heck of a ride. The worm has a few major attacks, all of which occur after it sticks itself up out of the ground. The hardest to avoid is a wave of ice which it cause to erupt from the ground with a well-timed breath of hot air. This wave attack won't instantly kill you, but it's almost impossible to dodge, so you'll definitely take damage when it hits.
Secondly, if the worm sticks its tail up into the air, it will launch, um, big blocks of material at you. We don't want to know what the heck this stuff is made of. The blocks will come your way and deal heavy damage if they hit. They won't instantly kill you (not on Normal difficulty, anyway), but if you get hit by a block, fall down, then get back up and get hit again (which is all too likely given the rapidity with which they come), you'll be killed and will be forced to start over. When you see these things start coming your way, it's best to actually start running towards the worm, as they'll fly over your head and wind up landing behind you.
Most problematic is the swallow attack, wherein the worm will rear back, pause, then slide across the ice towards you on its belly. If this attack hits you, you automatically die. It can be tough to dodge, as your only real defense is to move laterally away from the path that the worm follows as it comes towards you. If you're not far enough away from the worm, then you won't have enough time to avoid this attack and will be dying rather often. It's tremendously frustrating to get hit with this attack when you've damaged the beast significantly, as dying here resets the entire encounter and forces you to start over.
That's tough, because killing the worm requires dealing a lot of damage to it. Its only weak spots are the yellow spots on the sides, which are rarely going to be facing you; hitting them reliably is difficult to do. It's best to aim at them either when the worm's tail is in the air and it's shooting missiles at you, or just after you dodge its swallow attack, when the worm is temporarily motionless. You can finish off most of the spots with nothing more than your machinegun, and it's probably recommended that you do so, as it'll be the most flexible weapon available to you.
When you "kill" the giant slug, it'll pop out of the ground and flop over onto its side, and the tension music will stop. You won't receive the achievement for the kill at this point; you need to wait until the end of the mission before you can obtain that.
The Fight
When you cross the plain and reach the building on the northern end, find an entrance to it near the windows and head inside. You'll want to have as much T-Eng as possible before you do so. You'll immediately be accosted by a mysterious VS which claims that the area you're entering is under NEVEC supervision. You'll have to fight her to complete the mission!
The enemy VS attacks with missiles, gatling guns, and an odd laser beam which sweeps back and forth across the battlefield. You'll have a tough time dodging her attacks, especially since she often uses a smokescreen ability that will make it difficult even to see her. If you're in a VS yourself, the lasers are almost impossible to dodge, although you can attempt to jump over them if you see them coming ahead of time - which you probably won't. Since you probably won't be able to keep your VS alive throughout the entire fight, try to unload on the enemy with your gatling gun while constantly firing and reloading your rocket launcher. There are other rocket launchers on the ground, in both VS and normal form factors, so if you run out of ammo you can pick up something else.
If you are forced to fight on foot, you can climb the snow pile in one corner of the building to get above the laser beams and avoid them. The woman will still hit you with her rockets, of course, but avoiding the lasers will allow you to avoid a bunch of damage. Shell her with your rocket launcher or grenades until you wear down her health all the way.
Mission 04: Mountain Route 01
Make your way up the little canyon in front of you, killing or avoiding the Akrid in your way. A giant moth will periodically fly by overhead, dropping bombs at you. They're difficult to avoid, so try to bulk up on T-Eng as best you can.
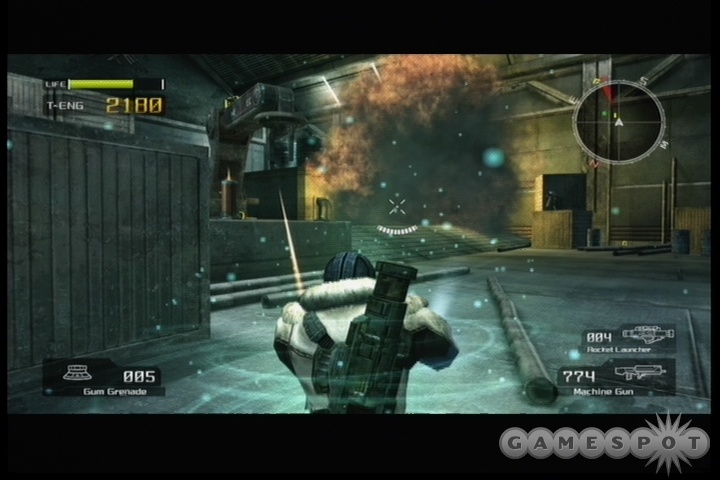
When you find a hole in the ground beyond the first Data Post, throw a few grenades down before descending yourself. (You should nab the rocket launcher buried in the snow across the way before heading down.) The large room below is overrun with Akrid generators and the Akrid themselves. You don't particularly need to engage them, so if you don't want to do so, simply run into the hallway nearby and move along.
The fight against the Snow Pirates that follows is a difficult one: they'll have two VS's in the room, along with numerous rifle-wielding soldiers that will chip off a good amount of your health each time they hit you. If you picked up the rocket launcher earlier, you can use it on the first VS while remaining safely in the corridor leading up to the room while picking off any nearby soldiers with your machinegun. If you don't have a rocket launcher, you can attempt to grapple up atop the crane in the center of the room to nab one, or just use your grenades on them. When the room has been somewhat cleared out, activate the Data Post and nab any T-Eng on the floor before moving on.
The Cliffs
When you see the giant moth again, you'll be out on the cliffs. Drop down to the platform below you and shoot at the snow pirates on the ridge off to the right. When most of them are dead, drop down to the moving platform below you and start riding it up the ramp. The path will be destroyed as it moves, so you'll need to grapple up to the snowy ridge where the snow pirates were and proceed from there.
The next interior area will feature a GTB-22 VS for your using pleasure. It can either double-jump with the A button, or perform a super-high jump with the Y button. The double-jump will be all you need to get to the top of the shaft that you're in, and will give you more control to boot. Jump your way up and out of the shaft to find yourself back in the snow, near a Data Post. Jump out and activate the Post if you need more T-Eng, then dig out the other VS buried in the snow here. It's the same as the one you've been using, but it has a missile launcher and a fresh supply of gatling ammo. Don't bother bringing a laser gun to the boss fight here; go with a gatling gun and either a rocket or missile launcher.
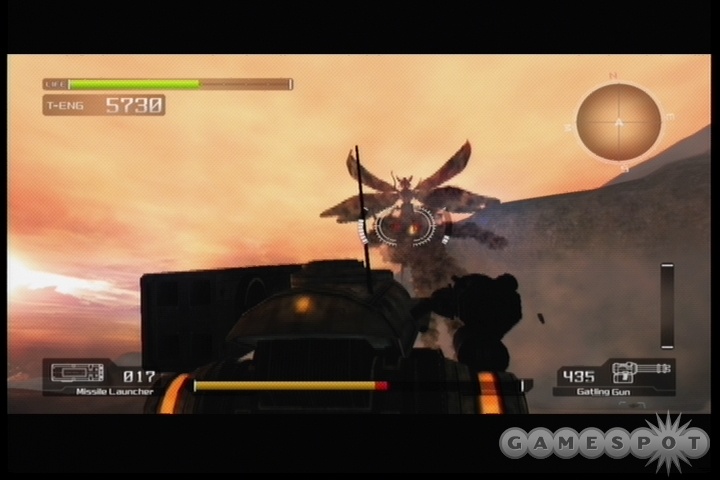
Bee Akrid
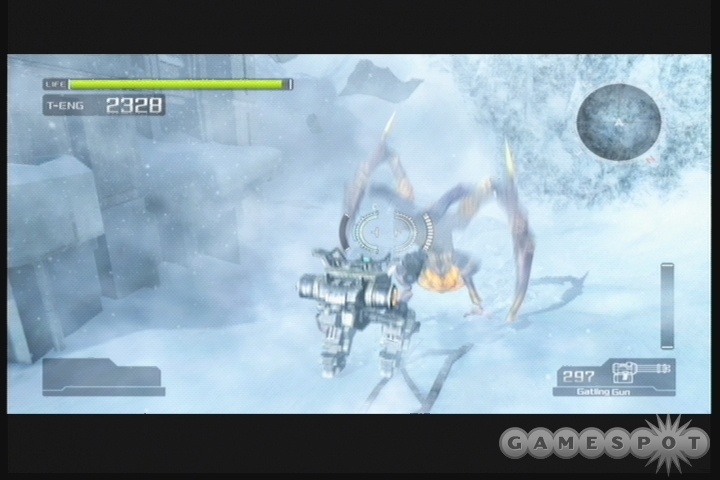
The giant bee that attacks you atop the mountain is going to be the toughest challenge you've faced yet - it's fast, has powerful attacks, and is difficult to wound. Taking it down is going to be difficult.
Attacks
This Akrid has a number of attacks that it'll use to pummel you - almost too many. Most of them will come while the bee is up in the air and a good distance away. This includes an attack involving explosive spores that are launched at you, as well as a ramming attack that will come after the bee flies off far into the distance. Both of these can be avoided if you put yourself on the far side of the central pillar here and let the attack hit that instead of you. The ramming attack is especially devastating, being capable of taking off as much as a third or a half of a VS suit's health in one blow. Be sure not to let it hit you!
Other annoying attacks include lines of explosive rocks that the bee flings at you from its mouth - these are difficult to avoid in a VS, but slightly less so while you're on foot. Another powerful attack sees the bee sending up a flare that rains down explosives over a large area. It's difficult to avoid them, but if you're in a VS, you can attempt to jump just before they hit the ground to avoid the explosive ramifications.
Killing The Bee
As is obvious, the only weak spot on the bee is the large orange spot on its abdomen. You'll want to unload on it with your gatlings while you attempt to avoid its attacks to whittle down its health. The gatling will be the most reliable, if the slowest, method of taking down the bee, as it's almost impossible for the bee to avoid the damage. All the other VS weapons available for you here, including a laser gun, missile launcher, and rocket launcher, will deal more damage, but will be less likely to hit due to the movements of the bee.
If you're in a VS, then, just unload your gatling at the orange weak spot, and use your alternate weapon when the bee stops moving, such as after it launches a volley of rocks or bounces off the central pillar in a charge attack. It's still going to be difficult to hit, even when it's standing still, but a few rounds will put you on the path to victory.
Unfortunately, the VS suits here have a hard time avoiding the bee's attacks - it's a bit easier to avoid them on foot, since you'll be able to move around the central pillar a bit more quickly. If you wind up going through the health of all the VS's in the area (there should be three, including the one you start the encounter in), you can attempt to finish the bee off on foot. Your machinegun won't deal much damage to it, but if you grapple your way up to the top of the central pillar, you can grab one of the VS rocket launchers, then fall back down to the ground and use it from the cover of the pillar when your shot is available. You can go a couple of minutes at a time without having a clean shot, mostly because you're going to be spending a lot of time getting knocked down, but if you perservere, you can finish the animal off and move on. It's difficult, though!
Mission 05: Mountain Route 02
The Giant Moth
The Mountain Route 02 is your next destination. It's a little odd how Wayne manages to clear a level, warp back to the trailer for some cutscenes, then warp back to where he was before and continue on. Not that we're complaining.
Anyway, your ascent here is complicated by the presence of a giant moth, which swoops across the area you start in, causing blasts of wind to drop down. The wind doesn't damage you (although it will knock you off your feet), but the rockslides which follow the wind blasts will definitely be more than a nuisance. There are numerous small rooms inset into the cliffs here, so crawl inside one when you spot a rockslide coming to get out of the way. Destroy all of the Akrid generators and explosive barrels that you see to generate some much-needed heat.
The giant moth here isn't a required kill, but like the giant worm, doing so will net you an achievement. Luckily, it's much easier to kill the moth than the worm. Grab the VS Laser Rifle weapon that's lying on one of the cliffs, about halfway to the top, and lug it all the way to the highest platform of this area, near the cave. You'll be above the rockslides at this point, and will be able to use your laser rifle to fire away at the weak spots on the underbelly of the moth as it flies over you. There are three rows of spots, each with three spots apiece. A single blast from a charged-up laser rifle will destroy an entire row in most cases, however. Timing the shot can be tricky, as you'll need to lead the animal as it flies over, but if you don't get knocked down, you should have enough time for two shots per pass.
Into The Cave
The cave beyond the climb is - guess what? - full of Akrid. Mostly Trilids, but there are also some new miniature versions of the bee boss, as well as Akrid tentacles which pop up from the ground and fling explosives at you. If you hop into the VS near the starting point (there's another one at the bottom of the shaft here), you should be able to gatling gun your way through most of the enemies. Beware the boulders that will periodically roll your way; you can hit them with your gatling gun to break them up into smaller rocks and prevent any damage to your VS when they strike you.
At the top of the circular ramp, head into the small cave, then move up and around to the little platform there. Hop out of your VS to activate the Data Post nearby; you'll need the energy for the upcoming boss fight. From there, drop down to the platform to your right and keep dropping until you reach an ice shard. There's a jumping VS in one of the side rooms, so grab it and equip it with dual gatling guns.
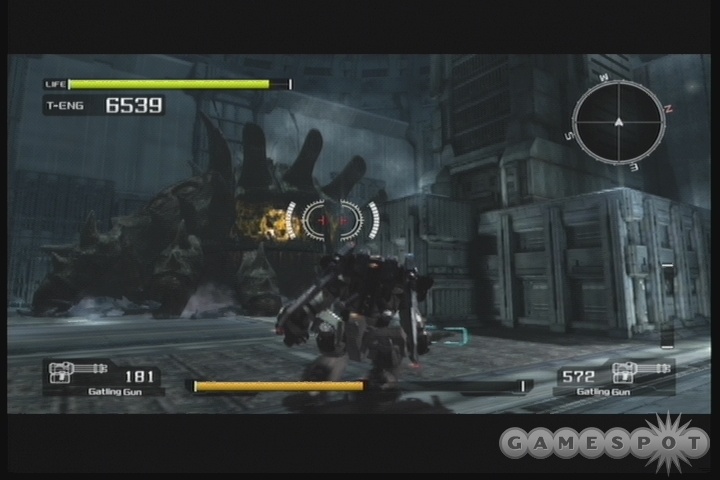
Boss Fight: Mega Chryatis
You haven't seen a chryatis in a little while, so it may come as a surprise to find that the boss for this level is, in fact, a giant version of that specific brand of Akrid. It's big, it's bad, and it's got a nasty temperament to boot. Luckily, it's immobile, but that won't stop it from laying the hurt down on you.
Attacks
Most of the chryatis's attacks revolve around the use of its arms, although it does have some breath attacks which cause ice to spurt from its mouth. This can either take the form of an ice-laser that heads from the ground to the ceiling, or a lateral spurt of ice that causes crystals to form all around you. Either way, try to jump up and to the side to avoid these attacks.
Apart from that, the usual suite of arm attacks are on call here. The Akrid can repeatedly hit the ceiling with one arm, which indicates that a shower of rocks is about to fall; avoiding these are difficult, so if you're attempting to keep your VS healthy, you may want to simply hop out of it when they start falling, then hop back in when they're done. In addition, the arms can attack you directly, either by pounding at you, or by sweeping across a large surface area. You can jump over the latter attack if you see the Akrid rearing up for a sweep, but it can be difficult to see the attack coming.
Killing The Akrid
As with normal chryatis's, the mega version here has weak spots on both of its arms, near where they pop out of the body. If you hit these spots enough, they'll gradually redden, then explode, flinging the arm away from the chryatis. These arms can be regrown, however, and that will usually happen fairly rapidly, so if you want to take advantage of the color-coded weakness meter, by weakening one arm almost to the point where it'll be shorn off, then switch to the other arm and work on that one as well.
When both arms are blasted off the chryatis, it will flop down on the ground and lay its head near your feet. Take the opportunity to blast away at the weak spot on the top of its head with whatever weapons you happen to have equipped, with more powerful weapons being preferable, as you'll only have a few seconds of unfettered access to this weak spot. Shotguns or rocket launchers will work well here, but if all you have are dual gatling guns, then those will at least deal a good amount of damage; just be sure to reload them just after you shoot off the second leg, as that will let you reload while the beast falls down and will ensure that you don't have to reload in the middle of firing.
Dual gatling guns are probably going to wind up being the preferable weapon selection for your VS here, in point of fact, mostly because they're going to let you shoot off the arms of the creature much more easily than would any other weapon selection. The arm stalks move quickly, and thus your shots from the rocket launcher or anything else will most likely miss. A grenade launcher can sometimes get lucky shells in, as can a laser rifle (which has unlimited ammo, to boot), but dual gatlings will likely be the best choice, especially if your aiming assistance is turned off.
Mission 06: Green Eye Returns
Street Fighting
The initial battle against the NEVEC forces in the streets here is going to be fairly tough. Many of the NEVEC soldiers are packing plasma rifles, which are effectively sniper rifles with infinite ammo; they'll do a good amount of damage to you when they hit, so try to pick up one of your own as soon as you can and go to town on the remaining soldiers. Apart from the soldiers, which are easily killed by the plasma rifles, the other threats in the area are turrets and VS's, so try to find a rocket launcher or other powerful weapon and use that on the armored enemies. (You can probably snipe out the turret gunners if you zoom in far enough.)
After the first corner, the best way to proceed here is to hug the left wall and get underneath the platform that the VS is on while shooting the soldiers along the rightmost wall. When you reach the platform, you can angle grenades up onto it and blow it away; it'll drop a huge amount of T-Eng, and you'll also be able to access the Data Post nearby. You should be able to nab a plasma rifle somewhere around here, and use that to destroy the rocket turret across the way. From there, cross the street at the corner and climb up to where the rocket launcher was located; you can destroy the fuel tanks here for extra fuel, and use the elevation to fire down on the enemies in the street below. When everything's dead, cross back to the Data Post across the way, and nab one of the rocket launchers hidden beneath the explosive barrels. When you reach the end of the street, another VS will appear and pelt you with rockets. Use your own rocket launcher to finish it off, then move through the narrow corridor near the end of the street to reach the transition point for this level.
Boss Fight: Green Eye
You'll fight Green Eye in your father's VS, a tough little machine that will be your only defense against the Akrid threat. You can't switch VS's here, as there are no other machines in the area that you can jump to, and you can't leave the VS, as it's apparently too cold for you to survive outside the machine (although you were in this same area earlier in the game without a VS suit and seemed to do fine).
This fight is difficult, to say the least. You have to keep your VS's health up as high as possible during the opening rounds, as the Green Eye begins to move much more erratically towards the end of the fight and will be dealing much more damage to you then, assuming you learn the patterns of the boss and how to dodge its attacks earlier on.
Green Eye Attacks
The Green Eye has a number of ways of dealing damage to you, but the most predominant method of destruction will be its ability to launch ice shards out of the top of its husk, which will rapidly come your way and attempt to knock the stuffing out of your VS. If you get caught up against a wall when one of these hit you, say goodbye to around a third of your life total, as they'll keep pummeling you without giving you a chance to escape. If you're in a relatively open area, your best bet is to dash by tapping the Y button on your controller. Pick a direction and head that way; if possible, try to scootch around the boxes in the center of the map to avoid the shards altogether.
Apart from that, the bulk of the Green Eye's attacks are physical ones, where it will attempt to run you down or run you over. It's capable of some startlingly quick movements, especially at the end of this fight, and it can dash forward and even backward to quickly bash you against a wall. There isn't much to say here, except that you'll need to play through this fight a few times to learn all the nuances of the Green Eye's movements. You aren't completely safe anywhere on the battlefield; even if you jump onto one of the platforms available to you, it can still crawl up the sides of the walls and pound you that way.
Taking Down The Green Eye
As with other Akrid bosses, you're going to have to find some weak spots on the Green Eye in order to kill it off completely. You have to begin with the two rows of four weak spots on the beast's sides, then punch out the four weak spots on its forehead, then demolish the single large weak spot underneath the carapace that cracks on its forehead.
Begin the fight with a pair of gatling guns; they'll be your best bet for taking down the individual weak spots. You may want to keep that rocket launcher you started with, but as is so often the case with other Akrid bosses, you need a bit too much precision with your shots; if you happen not to hit the weak spots dead on, you won't wind up doing any damage to the beast at all. It's best to spray and pray with the gats. Again, placement is a bit of a sticky issue here; it's best to stay near the stacks of boxes in the center of the area, but not so close that you stand a risk of getting trapped if the beast charges, and definitely not on top of the boxes themselves. Try to aim at the weak spots on the side of the beast as it approaches the corner, then backtrack a bit around the corner as it approaches you. It's harder than it sounds, obviously.
Be sure to pick up the T-Eng that drops from the destroyed weak spots whenever possible, as you'll be burning a lot of fuel when you jump, hover, and dash around. There are some fuel tanks atop some of the platforms that will net you a bit of T-Eng if you destroy them, but if you manage to loot the heat from the boss monster, you should stay ahead of the curve.
When the beast rotates in one corner of the room, you should be able to start tagging the spots on its other side. With dual gatling guns, you shouldn't have too hardcore of a time with popping these little suckers out, assuming you can stay alive. Watch our video in the HTML version of this guide if you're having problems.
Finishing It Off
When all eight of the initial weak spots are destroyed, the forehead of the beast will light up with four additional yellow spots. Each of them will fracture fairly quickly if you lay on them with dual gatling guns.
When you finish off the four spots on the head of the beast, it will go into overtime mode and start moving really rapidly and firing off more and more ice spikes, often while moving. It's at this point that the battle is won or lost, as you won't be able to live too much longer unless you're quite adept at dodging the beast's erratic movements. The new weak spot is a large target on the beasts forehead, but will be somewhat resistant to your gatling gun fire. It's best to switch your guns out for a rocket launcher and a grenade launcher (you can find the latter near the center of the room, on one of the walkways). A single shot from the grenade launcher, if aimed properly, will wipe out most of the beast's remaining health at this point.
This fight is probably one of the most challenging in the game, so don't feel too bad if it takes a few go-rounds before you manage to polish the animal off. Watch our video, learn the patterns, and you'll eventually put it down.
Mission 07: Caravan Ambush
The open plains near the Crimson Pirate Fortress are the staging area for the NEVEC forces. Despite what Luka says, don't worry about moving quickly here; you'll complete the level no matter what. Specifically, don't fire at the VS's that are marching away from you at the beginning of the level. Getting them angry will only make it more difficult for you to survive.
The first thing you'll want to do here will be to head west, past the large raised platform near where you start. Don't shoot anything until it opens fire on you. You can dodge the fire of any VS's in the area relatively easily, since they'll be so far away, allowing you to focus on the soldiers in the area. One of them will eventually drop a plasma gun for you, and if they don't, then you can find one in one of the sheds in the northwestern corner of the area. With a plasma gun in hand, start going to town on the smaller VS's and the soldiers in the area; they'll all die after only two or four shots. The smaller VS's will be useful sources of T-Eng for you. If you're uncomfortable fighting on foot, then hop into one of the VS's in one of the sheds here and use that to go to town.
When most of the opening area is cleared out, use your plasma gun to snipe away at the VS's at the far southern end of the area, and proceed slowly that way in a VS. You'll be waylaid by a few small VS's when you do so; either fight them off or run past them to the tunnel beyond them to end this section of the level.
Familiar Pastures
The next area is the same large, open field in which you fought the giant worm in Mission 03. Apparently, there's been some action here, as there are plenty of fallen VS's and the like in the area. There aren't any boss monsters, although there are a huge number of Chryatis', with some of them being even larger than normal.
Anyway, the same basic path here from before is advisable. Strap yourself into a VS, stick close to the wall, and head down from there. You don't need to cross the entire plain, just the small bit of it that leads to a walled-off stairway. Nevec VS's will be guarding it, so kill or avoid them, jump the fence, then run up the stairs where there's a Data Post and head to the door there. If you get lost, then just activate a Data Post and follow its directions.
Well-Guarded Courtyard
There are plenty of enemies in this courtyard, but only a few of them are actual humans. Kill the enemies near where you start and try to find a plasma gun. With that in hand, you'll be able to kill the floating drones in two shots, assuming you can fire past their armor. The drones will only attack you if they spot you with their lasers, or if you attack them first; they're dangerous enough in a large group that your best bet is to grapple across to the balconies on the southern side of this area and walk along them to avoid having to move past the bulk of the lasers that are painting the lowest level of the southern walkway. You don't have a huge amount of ground to cover, but if you get swamped by the drones, then they'll make life pretty difficult for you.
That said, if you can stay above the fray and avoid most of the lasers, you should be able to cross over to the far side of the area without too many problems. Use your plasma gun to snipe out the rocket turrets there, then shoot the doorway that's up off of the ground and anchor yourself up to the opening there. There's a Data Post there, along with a few fuel tanks; grab all the energy you can, as there's a boss fight coming up after you hop into the VS at the end of the line here.
Boss Fight: Crab VS
This VS is something of a foreshadow to a much tougher fight to come. It can be challenging on its own, or it can be a pushover; it seems somewhat variable in that regard. With a little luck, though, you should be able to finish it off without many problems.
The VS you're equipped with will come with rocket launcher and gatling guns, and that's a good combo for this fight. There's another gatling gun in the corner of the arena across from where you pop up, so grab that to ensure that you don't run out of ammo. There's also a reload for your rocket launcher, as well as a couple of shotguns in the area.
Your best bet here is to keep the central boxes between you and the crab whenever feasible. It has an odd electrical attack that deals good damage to you, and can sometimes also morph into a drilling mode and attempt to ram you for big damage. Just keep your gatling gun depressed at all times; if you can't shoot the VS, shoot the drones that move around atop it. The VS will often jump up on top one of the boxes, which is your cue to aim for the lower part of its central stalk and unload a rocket on it. Reload, then fire another rocket at it when it jumps down; it'll be temporarily immobile after it makes a jump, usually.
If you run out of rockets, feel free to nab a shotgun in its place and go to town. In general, though, you'll want to keep your distance from the VS and fire on it from afar. If worst comes to worst, you can leave your VS and attempt to finish it off on foot, but this is difficult due to the drones.
Mission 08: Volcano Dome Facility
The Mountain Path
You're going to encounter a new enemy near the beginning of this level: a large quadraped scorpion-like Akrid that has a somewhat difficult-to-hit weak spot on its rear stinger. They're not overly difficult to kill, though; just lay down a hand grenade underneath them, then unload on them with your machinegun when they flip over.
Make your way down the path past a few scorpions to meet a new small Akrid, which can launch fireballs at you from their mouths. Destroy any generators for these guys when you spot them. Eventually the path will branch, with a couple of exits leading out above a large open area in which a VS awaits. If you want to make things a bit easier on you, drop down to the VS, kill the scorpions around there, and hop into the drilling machine. Like the bike VS from earlier in the game, you can morph this VS between a tank and a less mobile, but more powerful, crawling VS. Get used to the controls, as you'll be using it a fair amount through the rest of the level.
Lava Flow
Move through the entryway here and cross the bridge over the lava to reach an exterior area. There are a couple of VS's near the entrance here that you can use if you need to switch out for something fresh. Nothing too complicated here, although there are a lot of enemies, with some massive dongos and more scorpions for you to deal with. If you're having troubles taking them out (assuming you want to), jump and hover back and forth across the lava flow to get the dongos to fall into the lava and die. With a little luck, the scorpions will succumb to the flow, as well.
There are two exits from this area, with one to the south and one to the east. The one to the east is the easier exit, but they both lead to the same area.
Rivers Of Goo
Two entrances, but one exit for this zone, due east of where you enter. If you entered via the eastern doorway from the last map, you'll be in a large tunnel with a few drones. You can find an energy gun here, which will be helpful, as there are a lot of VS's in this area. If you find yourself running around on foot, use it to fire fully-charged shots at any enemy VS's that come your way to knock the pilots right out of the seat and neutralize them.
When you're ready to make a break for it, hop into a VS and drop down to the lower levels of this area. There are plenty of enemy VS's guarding the tunnel leading east, so you can either engage them or attempt to avoid their fire, depending on the speed of your VS. Inside the tunnel is a driller VS, so bypass it, drop down into the hole in the rear of that tunnel, then grapple or jump your way out to the other side.
There'll be an EM laser on your way up. If you don't have the energy gun, grab that and use it to zap the VS's there, but if you do have the energy gun, you can knock their pilots out from long range. Regardless, grab a VS around here and start making your way through to the next large room. You should smash as many of the fuel tanks as you can to retrieve energy, and try to outfit yourself with two EM lasers on your mech before heading up to the uppermost level and proceeding out to the boss fight.
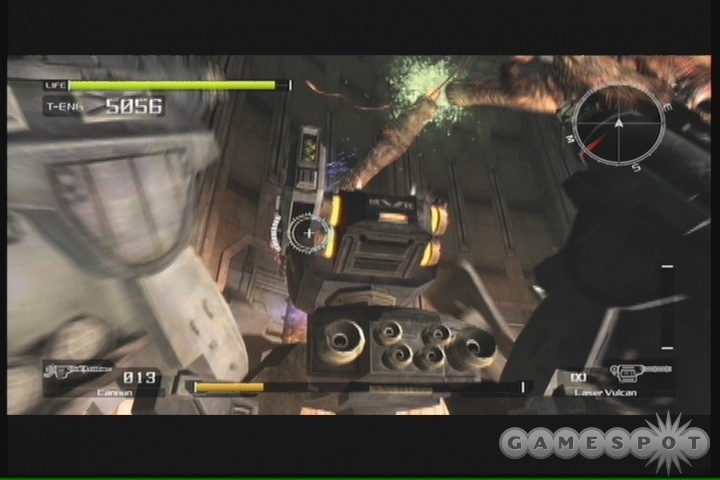
Boss Fight: Giant Driller VS
This is a super-sized version of the drilling VS that you've ridden in a few times previously. Before you take it on, though, try to snipe out the three smaller VS's in this arena from a position of height. If you can zap them before dropping down, you won't have to deal with them and fight the driller at the same time.
When you get the driller on its own, it's time to whittle down its health. Assuming you entered the arena in a VS, you're going to have three of them available to you, including the two on an elevated platform at one side of the arena. That should be more than enough to get you through the fight, although you may have a tough time with it initially.
Attacks
The driller has few attacks, really. When it's in drilling formation, it will attempt to face you, then whip out its drill and ram you. If this hits, then you'll take a lot of damage, but all of the VS's you have at your disposal should be able to jump and hover long enough to avoid this attack. More dangerously, the four-legged mech version of the driller will be able to fire missiles and plasma vulcan rounds your way. The missiles are generally going to be unaimed, but the vulcan rounds can be damaging; try to avoid them by placing one of the small pillars on the side of the arena between you and the enemy.
Attacking the Driller
The driller can only be harmed in one specific spot: the bottom of the central stalk. And it can only be hurt when it's in mech form; it'll be invulnerable when attempting to drill you.
So, yeah...shoot it a lot in the dingus when it's crawling around on its legs. And avoid its attacks; that'll help, too. Sorry if it sounds reductive, but at this point in the game, there's not much else to say; you should have the basics of dodging and firing down by now, and although the driller can appear intimidating, a bit of practice should get you into the position to be able to predict its motions a bit. Two EM lasers are quite capable of taking the beast down, but if you're struggling to finish it off, there's a grenade launcher on one of the small raised circles in the center of the arena.
Mission 09: Thermal Energy Deposit
Move forward here and hope that one of the two soldiers you initially encounter drops an energy gun. There are plenty more soldiers in your path here, so it'll be helpful to have a fire and forget weapon as you move forward and kill the rest of them off. If one of them drops a plasma gun, then it'll go along well with your energy gun.

Your path is denoted by the data post here as leading you to the north, but there are plenty of enemies below you. Before you drop down, use the energy gun to knock out some of the rocket turrets on the eastern wall, as well as the VS enemies atop the wooden structures below you. The best place for dropping down is back where you entered the level, at the eastern edge of the road there; you'll avoid the bulk of the soldiers below you and will be right near three large fuel containers, which will let you load up on T-Eng. From there, you can fight your way through the soldiers below you to one of the VS suits you knocked out (or to the one in the hangar bay) and use it to cross the valley and jump over the lava river.
After moving into the structure atop the bridge, avoid the explosive Akrid, then find the room with a few soldiers on foot and drop down to the groove in the middle of the floor. There's a small tunnel there that's only passable on foot.
The Tunnels
Drop down to the bottom of the chasm that you come to and find the driller VS there. The path that you have to take is periodically blocked by rocks, but if you attack them with the drill on the VS (right analog stick while in treaded movement mode), you can bust through them. There are a couple of different paths through the tunnels, but both will lead you to the same industrial-looking interior after a bit of exploration. A large dongo will bust out of a containment shed here, but there's another driller VS next to it that will suit you well. Be sure to hit the Data Post nearby before heading through the Akrid-infested tunnel, as the boss fight is right around the corner.
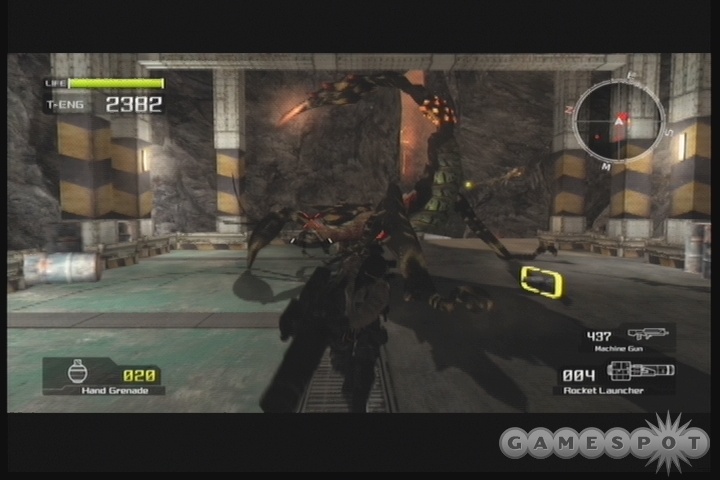
Boss Fight: Spider Akrid
It's curious how your teammates express so much shock about how this Akrid could be the source of the heat signatures you've been reading. Isn't that what's been happening all game long? They detect a heat signature, you explore, and it turns out to be an Akrid?
Anyway, the Spider here is large and intimidating, but follows a fairly simple pattern. His attacks can be mighty annoying, though, especially when you're on foot, so try to stay in a VS as often as you can. Note that using a driller VS here is perfectly possible, but if you continually hold down the fire button on your vulcan cannon, you'll probably burn through a good three or four thousand T-Eng just from firing it alone, not counting damage or normal rundown. Be sure to have yourself topped off before coming in, then, or switch to another VS when you have the opportunity to do so.
The Spider has weak spots on each of its legs, with another one on top of its body. As you'll probably deduce from simple trial and error, destroying a weak spot on one of its legs will cause the leg to fall off, not unlike the large Chryatis boss from Mission 05. Although there are four legs on the Spider, you only need to shoot two of them. Shooting any two legs will cause the body of the Spider to collapse to the floor, slightly revealing the weak spot on top of it, which you should fire away at. It can be tough to get an angle on the weak spot, but if you happen to be in a VS capable of jumping and hovering, you can do so to let yourself fire downwards onto the weak spot.
If you're in the driller VS, then your cannon will be capable of destroying the leg weakspots in one or two hits, with the main weak spot requiring a bit more work. If you hop to another VS, use a gatling gun to destroy the leg joints and save your rocket or grenade launcher (if there happens to be one) for the main weak spot. Although the Spider will summon in numerous smaller Akrid to the fight, they can be dispatched relatively easily with your gatling gun, and may actually add to your T-Eng total.
Mission 10: Showdown Below
Time to fight through the remaining NEVEC forces in an attempt to get to the orbital elevator. You start off in a large cave with plenty of scorpion Akrids and large dongos to deal with, so quickly hop into the VS suit near your starting point and go to town as best you can. There are also some of the automated turrets in this area; you can either destroy them directly or search around for the purple stalks nearby, which control their fire. Destroying the purple stalks will shut down all of the turrets.
There's another VS at the end of the tunnel beneath the suite of three turrets; busting through the walls will reveal one of the faster VS models there, equipped with a rocket launcher and grenade launcher. Feel free to shuffle around its weapons before scaling the wall nearby and reaching the tunnel that leads on.
The Underground City
Follow the tunnel until it dumps you out near a collection of buildings and smashed roads. There's a large Chryatis stomping around here, with no apparent weak spots. It can also spit explosive rocks at you! Its weak spots will eventually be revealed as it thrashes around, but there's no real reason to fight it. Instead, find the two holes in the ground, semi-obscured by fallen buildings, and drop down to reach another Data Post. There's a fresh VS in this area, so grab it before activating the post and jumping into the Akrid hive.
Boss Fight: Akrid Slug
This Akrid boss looks very intimidating, but is, in actuality, something of a pushover. He has two feelers that stick up from the ground, as well as a large central shaft that is where you're going to want to finish him off. Its attacks aren't particularly devestating; the usual assortment of physical attacks, as well as some ranged attacks that will start coming from its mouth towards the end of the fight. At the outset, you'll mostly be dealing with its feelers, which will attempt to bash you into the ground. It's fairly easy to sidestep these attacks. It may also sweep its feelers side to side, which can be jumped over.
At The Outset
In the beginning of the fight, concentrate your fire on the "hands" at the end of the feelers. There are two weak spots there, so fire away at them and try to knock them off. When you manage to destroy a feeler stalk, it will retract into the Akrid's body through the passage it punched into the ground. Quickly leave your VS and walk into the tunnel it leaves behind. There'll be a large weak spot underground there, near the lava. If you have a rocket launcher, peg a round into this weak spot; otherwise, unload on it as best you can.
If you don't destroy the weak spot underground quickly enough, the stalk will regenerate and kick you back out of the tunnel, forcing you to re-enter the VS and fire away at the feeler again to repeat the process.
Destroying The Body
When both of the feelers have been dispatched, start working on the main body. Begin by shooting out the two weak spots on the lower left and lower right corners of the main body area; you should see these spots periodically spit out Trilids or other missiles coming your way. A bit of gatling fire will knock them out permanently, allowing you to focus on finishing off the beast.
The central mouth of the Akrid will periodically open, revealing a fleshy missile-spitting orifice underneath. This is the target that you need to take out permanently. If you have a rocket launcher on your VS, you can wait until it's exposed, then nail it for some big-time damage. Its attacks at this point are relatively avoidable; when it rapid-fires projectiles at you, move forward towards the beast to avoid them. With a few rounds of explosives down the gullet, the beast will solidify and reveal a passage leading onwards. Surprise! The level continues!
NEVEC Base
Not much to say here - more Akrid and NEVEC enemies to kill. There are plenty of VS suits to go around, though, including the handy speedy ones, so feel free to shuffle around as much as you like.
Eventually you'll drop down to a huge room with rows upon rows of VS's parked inside. Avoid dallying too long here, but be sure that your VS is at or close to full health when you move through to the end of the room and drop down.
Boss Fight: Brother
You know, we've been paying so little attention to the storyline that we don't even know what this character's name is, or what role he's supposed to play, save for the fact that he was apparently designed with the same kind of thermal energy absorption device that you were. But he's a bad guy. Of that much we're sure.
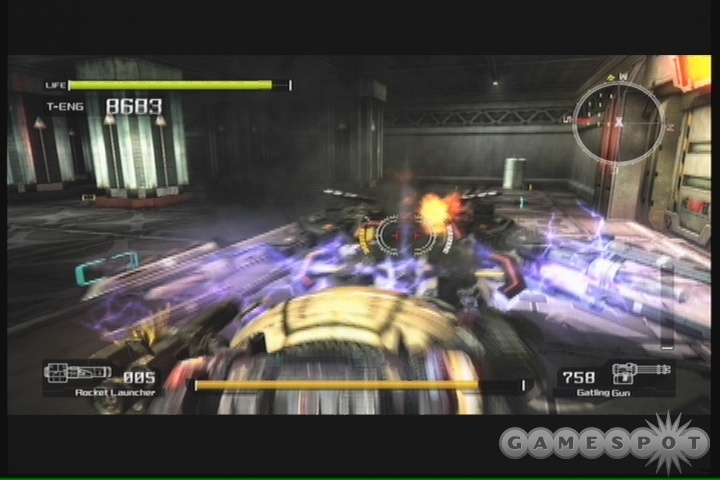
He's going to be coming at you with a suped-up VS of your father's design, and it's something of a beast. Among the attacks are a simple gatling gun spray, a pair of fire-and-forget rockets, and most damaging of all, a close-up attack which causes an electric field to sprout in front of him. This last attack can easily take off half the life off of a VS, thanks to the fact that it will mostly immobilize you and prevent you from moving while it hits you.
Luckily, there's nothing especially mysterious about defeating the VS. Equip your own VS with a rocket launcher of some sort, along with either a gatling gun or an EM laser or something similar. Use the posts in the area as cover, and listen to your opponent to know what attacks are coming your way when you can't see him. The rockets are usually going to be the most annoying, but you can slide away from them if you can see them coming. The gatling guns can be listened for and avoided by only slipping out of cover when they're almost over.
Apart from that, well...hit him with rockets and stuff. The opposing VS can move quite quickly, but you can definitely overpower it, especially since you'll have two fresh VS's waiting for you in the arena if the one you enter with is destroyed.
Mission 11: Final Battle
Ah, time for the final ascent. The VS you're riding in has been super-modded by the disc you attached to your arm, and now you suddenly find yourself in the middle of Zone of the Enders or something - by which we mean that you can fly. If you want to fly upwards, press Y; to fly downwards, press B. To cancel your upward or downward movement, press the same button you just pressed to arrest your movement and keep you flying on an even keel.
Avoid any tiresome fights on your ascent up the tube that you start the level in. Just ascend as quickly as you can, and try not to get blown away. When you reach the exit leading to the open-air area, the final boss fight will begin.
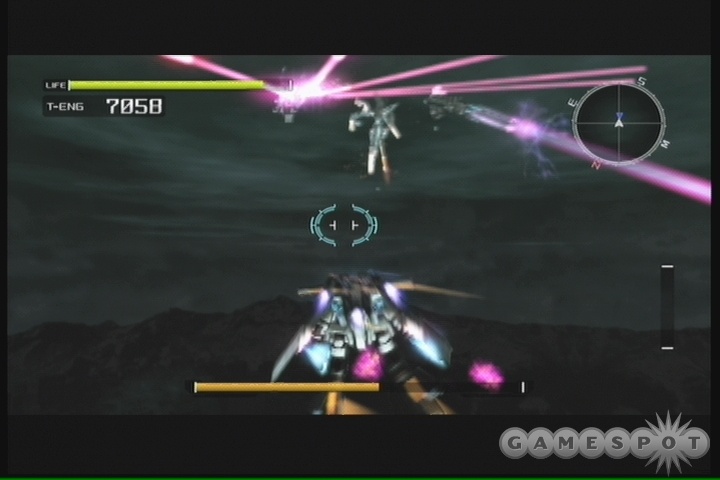
Boss Fight: Commander Isenberg
Isenberg's a tough nut to crack. Like most of the other bosses in the game, which have patterns that can be learned and adapted to, Isenberg becomes fairly predictable in terms of his attacks as the fight progresses. Unfortunately, your own movements will have become more difficult to control in the VS that you're in, especially when you attack with your laser swords.
Speaking of attacks, you have three possible attacks here. Hitting the X button will fire a very weak projectile weapon in front of you. This is basically only good for shooting target marks that you spot in the level; it will deal basically no damage at all to Isenberg. Your primary sources of damage will be the left and right triggers. The left trigger will cause an energy sword in your suit to slash forward laterally, while the right trigger will cause the sword to slash vertically. Use the left trigger if you're roughly on the same plane as Isenberg, but the right trigger will often be the easier choice, since your suit will automatically center Isenberg when you "fire" the sword. Just remember that you have to hold down the trigger for a second, then release it to actually swing the sword. As you hold down the trigger, though, your use of T-Eng will drastically increase, so be careful about keeping the triggers depressed.
Isenberg's Attacks
Isenberg, as mentioned, is going to be tough to take down. He's got plenty of health and will have a number of attacks capable of quickly draining your health. The two attacks that pop out most often are a chaingun attack that will usually appear when Isenberg attempts to move from one point to another, and a pair of missiles that will attempt to track you down. The chaingun attack can be avoided by moving to one side along with Isenberg, while the missiles will quickly self-detonate five or six seconds after launch. The missiles will be most problematic when you're holding down the sword trigger, since they'll force you to keep moving until they detonate; attempting to swing at Isenberg while the missiles are in mid-air will cause you to stop, allowing them to hit you. When attempting to avoid them, be sure not to run into the invisible barrier that rings the battlefield; if you do, it'll look like you're moving, even though you're really not, and the missiles will easily hit you.
Later in the match, Isenberg will debut new attacks, including a pair of homing lasers that will fire from his shoulders. Keep your distance and let these fizzle out, just like the missiles. He'll also call up two of the laser defense cannons from the orbital elevator and use those for personal defenses. One will fire a laser up and down, while the other will fire a spread of five lasers on a horizontal plane. Both of these will deal heavy, heavy damage to you when they hit, and will temporarily freeze you. Isenberg will usually take advantage of this freezing by launching a pair of missiles and shooting you with his chaingun, so take care to avoid them! The best bet for avoidance here is to wait for Isenberg to prepare to fire (usually he'll pull his arm back and throw it forward in a "charge!" motion), then quickly hit either the ascend or descend buttons on your VS to avoid the horizontal spray of lasers. The vertical-sweeping laser can be avoided by consistently strafing away from it.
Attacking Isenberg
As mentioned, the only real way to take down Isenberg is by using the laser sword that you come packaged with at the beginning of the level. The trick here is that using the sword will immobilize you for two or three seconds. If you miss, then Isenberg will usually begin moving away and pounding you with his chaingun attacks, or fire rockets at you to take advantage of your distress.
The key thing to keep in mind is that it's best to swipe your sword at Isenberg just after he gets done moving. He'll usually move horizontally, firing his chaingun while doing so, then pause for four or five seconds. Move along with him, holding down the right analog stick, and when he stops, unleash it to hit him over the head with the sword. Just be sure to keep your ears open for the sound of the missiles being launched; if they come out, then quickly backtrack to avoid having them hit you. You'll lose T-Eng from having to hold down the sword trigger, but that's better than losing health from getting hit by the missiles. When the missiles explode, try to cover the ground again and unleash the sword at the end of the move.
When Isenberg brings up the lasers to help him out, you'll have to spend a lot more time attempting to dodge his attacks than you did beforehand, but you can still dart inward to use the swords when you find an opening. We're probably making it sound easier than it is - you can expect to replay this fight a goodly number of times before you finally manage to swing in for the kill. If you're reading the PDF version of this guide, then you may want to check out our HTML version to watch the video there, as it shows precisely how to move and attack if you want to take down Isenberg.
The End?
After Isenberg dies, the mission - and the game - comes to an end. Feel free to watch the lengthy cutscenes detailing the ultimate fate of Wayne, then play through the game again to find all of the target marks!
Achievements
| Name of Achievement | Task | Point Reward |
|---|---|---|
| Mission 01 Cleared | Complete Mission 01. | 10 |
| Mission 02 Cleared | Complete Mission 02. | 10 |
| Mission 03 Cleared | Complete Mission 03. | 10 |
| Mission 04 Cleared | Complete Mission 04. | 10 |
| Mission 05 Cleared | Complete Mission 05. | 15 |
| Mission 06 Cleared | Complete Mission 06. | 15 |
| Mission 07 Cleared | Complete Mission 07. | 15 |
| Mission 08 Cleared | Complete Mission 08. | 20 |
| Mission 09 Cleared | Complete Mission 09. | 20 |
| Mission 10 Cleared | Complete Mission 10. | 20 |
| Mission 11 Cleared | Complete Mission 11. | 30 |
| "EARTH" Explorer | Find all target marks in Mission 01. | 10 |
| "STORM" Explorer | Find all target marks in Mission 02. | 10 |
| "MIRAGE" Explorer | Find all target marks in Mission 03. | 10 |
| "METEOR" Explorer | Find all target marks in Mission 04. | 10 |
| "AURORA" Explorer | Find all target marks in Mission 05. | 15 |
| "THUNDER" Explorer | Find all target marks in Mission 06. | 15 |
| "TORNADO" Explorer | Find all target marks in Mission 07. | 15 |
| "VOLCANO" Explorer | Find all target marks in Mission 08. | 20 |
| "RAINBOW" Explorer | Find all target marks in Mission 09. | 20 |
| "BLIZZARD" Explorer | Find all target marks in Mission 10. | 20 |
| "STARDUST" Explorer | Find all target marks in Mission 11. | 30 |
| Extreme Soldier | Complete the game on Extreme difficulty. | 150 |
| TM Master | Find all Target marks on all difficulties. | 50 |
| Worm Hunter | Defeat the giant worm enemy in Mission 03. | 50 |
| Moth Hunter | Defeat the giant moth enemy in Mission 04. | 50 |
| Ace Medal | Get 10 Ace Medals in the Elimination matches online. | 30 |
| Conquerer Medal | Get 10 Conquerer Medals in the Post Grab matches online. | 30 |
| Elimination Medal | Get 10 Elimination Medals in the Elimination matches online. | 30 |
| Hunting Medal | Get 10 Hunting Medals in the Fugitive matches online. | 30 |
| Grand Slam | Collect all four types of medals in online play | 30 |
| Online Master | Get to level 50 in online battles. | 50 |
| Chain Killer | Kill 10 opponents in a row online without dying. | 50 |
| Head Hunter | Get 50 head shot kills in online play. | 50 |
Got a news tip or want to contact us directly? Email news@gamespot.com
Join the conversation