Final Fantasy XIII-2 Walkthrough
Cocoon has fallen! Kweh! Our game guide for Final Fantasy XIII-2 features an in-depth walkthrough covering equipment, monsters, abilities, and more!

Final Fantasy XIII-2's main story is brief compared to most games in the series. That does not mean it's short on content though. There are alternate paths, multiple endings, a monster-catching system, and numerous avenues for unique customizations. Check here for info on side quests, character building, maps, equipment, chocobo racing, and much more in the days to come.
Updates:
- February 17, 2012: All episodes (1-6) are complete.
- February 10, 2012: Episode 4 is finally up, and we've enriched the content for all previous pages in the walkthrough with treasure locations and screenshots. Stuck looking for the graviton cores? We've got you covered.
- February 7, 2012: I've updated the first three episodes with richer formatting. There is also a new section for DLC. Stay tuned for more updates this evening.
- February 5, 2012: Updated Primers on fragments and more, plus the conclusion of Episode 3.
- February 2, 2012: In-depth breakdown of the battle system.
- February 1, 2012: Walkthrough for episodes 1-2 and part of episode 3.
- January 31, 2012: The walkthrough begins!
Primers
Battle System
If you've played Final Fantasy XIII since its release in 2010, you'll feel at home in XIII-2. For the uninitiated or anyone who needs a reminder, here's how the battle system works in Final Fantasy XIII-2:
*Related pages: Status Effects, Roles & Paradigms, Monsters

The action takes place within the Active Time Battle system. Contrary to turn-based systems, your timing is relevant to the outcome of the battle; take too long to issue commands, and your enemy will whittle away your character's HP. If a character has 0 HP, they are inactive until they are revived. At the conclusion of a battle, all of your characters return to full health. A battle is lost when the two main characters (Noel and Serah) are dead.
A turn is made up of single or multiple actions. The number of actions you may command is determined by the number of segments in a character's ATB gauge. Each character starts with three segments and can attain a maximum of six. Actions require one to six segments and can be executed at your discretion so long as the gauge is adequately charged. You may issue individual commands or stack up multiple actions to execute in series. The use of items is immediate and does not affect the ATB gauge.
Chain Gauge & Staggering
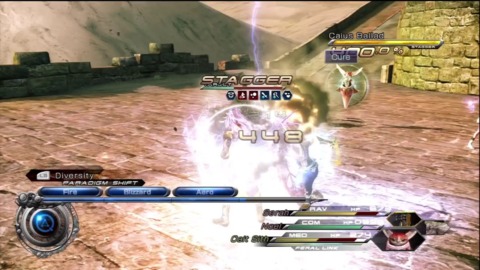

The gauge in the top right corner of the screen is known as the chain gauge. As you attack an enemy, the gauge will fill. After your attack, the gauge will deplete continuously unless there is a successive attack, which will continue the charge from the maximum level, regardless of depletion. The gauge resets when the charge reaches 0. The percentage displayed below the gauge represents the percentage of damage the enemy will incur. The minimum is 100 percent and the maximum is 999 percent.
When the gauge is filled completely, an enemy becomes staggered. In the staggered state, the enemy becomes more vulnerable to damage and certain abilities. The state lasts until the gauge is completely depleted. Every enemy has a different threshold for reaching the staggered state.
Blood Damage & Wounds

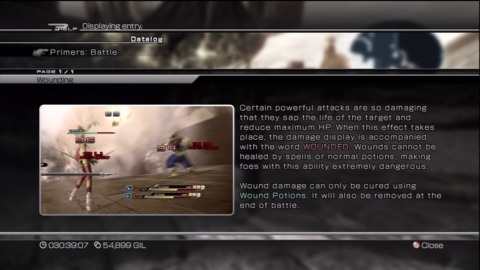
It's possible to incur Blood Damage, putting a character into a wounded state. Wounds reduce a character's maximum HP for the duration of the battle. It's possible to recover from this reduction in HP potential with wound-related healing items, such as the straightforward Wound Potion. Wounds (like all status effects) will also be reset when a character is killed. Blood Damage is considered to be a nontraditional status effect in regard to the game/series.
Primers
Status Effects
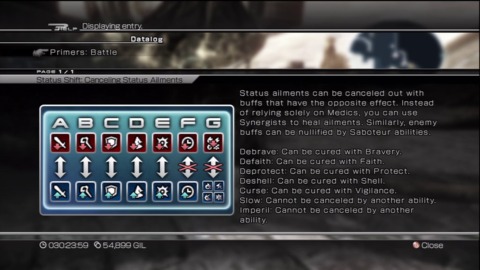
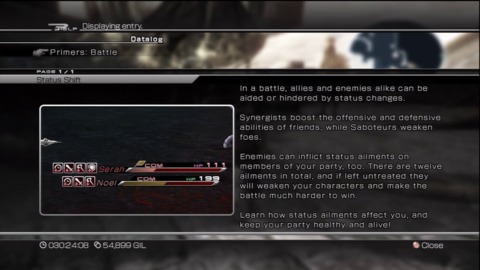
Characters can receive buffs and debuffs, which are status effects that boost or diminish attributes (maximum of eight per character). These tables describe the gamut of status effects in FFXIII-2:
Enhancements
| Counter | ||
|---|---|---|
Ailments
| Counter | ||
|---|---|---|
Primers
Monster System
Introduction to Final Fantasy XIII-2 MonstersFinal Fantasy XIII-2 forgoes a third party member in order to introduce a new monster catching system.
Noel and Serah are the only human characters you'll have in your party apart from guests and certain DLC characters. XIII-2 introduces a new monster catching system to the series (not counting the Tactics games).
How to Catch Monsters in Final Fantasy XIII-2You capture monsters during battle. Sadly, you have little control over the process. Later in the game, you can acquire Fragment Skills; Special abilities that enhance various aspects of the game and your character. These are the fragment skills related to monster catching in Final Fantasy XIII-2:
- Battlemania: Attract strong and rare monsters.
- Encounter Master, increase or decrease the encounter rate
- Monster Collector, 20% increase in monster crystallization rate
For more information on fragment skills, look here: (coming soon)
The best chances you have for influencing the outcome in the beginning of the game lies in your battle rating and the execution of Feral Links as the final blow during combat.
Final Fantasy XIII-2 Feral Link SystemEach monster also has a unique Feral Link ability. They are similar to limit breaks in Final Fantasy VII. A gauge fills up during the course of battle. When it's full, you can unleash the ability as an instant by pressing X (or Square for PlayStation 3). This will lead to a CAS that is unique to each monster. Executing the inputs quickly enough can result in a major boost in damage. Also, executing a Feral Link as a final blow can slightly increase your chances of catching the enemy in question.
The Monster CrystariumUnlike Noel and Serah, monsters do not accumulate CP during the game. They still level up within the crystarium, just in a different manner. Instead of CP, you use monster materials. They come in many different forms and are often specialized for a particular type of monster. An organic monster cannot use monster materials made for mechanical monsters, for example.
In most cases, Materials are geared for specific stat boosts, though there are materials that boost all stats. In either case, you spend X number of materials to level up a step in the crystarium. The number depends on how far along you are along in the current crystarium level.
Like materials, Monsters come with a Grade on a five point scale. Monsters can only be upgraded using materials at a specific grade. As you level up the monster, their grade will gradually increase. The materials made for the higher grade monster are harder to discover in the field and are more expensive if sourced from Chocolina.
You have to use a large variety of monster materials to competently raise a strong team of monsters.
Infusing Monsters in Final Fantasy XIII-2You can combine monsters in a process known as infusion. Doing so allows you to pass abilities from one to the other. There are two categories of abilities that can be transferred: Role and Passive abilities. Passive abilities can be transferred between any two monsters, so long as the ability is not locked (represented by a lock icon). Role abilities can only be infused from monsters of the same class.
A monster can only posses a maximum of ten passive abilities. When infusing additional passive abilities, the most recent one is replaced, unless it is maked with a yellow lock icon, indicating preferential status.
Role abilities are not always passed on and the availability of them are based on each monsters individual crystarium level.
Additional InfoFor more info on monsters, check out the upcoming beastiary and monster taming sections of this guide.
Primers
Complete Fragment List
Fragments are collectibles that provide info on the characters, locations, and, the history of the worlds Cocoon and Gran Pulse. They also serve as a means to acquire Fragment Skills; abilities and options that enhance Final Fantasy XIII-2's gameplay.
Here's a list of all the available fragments in the game, broken down by location.
For more information on Fragment Skills, check out the dedicated Fragment Skills page located in the Primers section.New Bodhum, 003 AF
| | |
|---|---|
| | |
| | |
| | |
| | |
New Bodhum, 700 AF
| | |
|---|---|
| | |
| | |
| | |
| | |
| | |
New Bodhum, Year Unknown
| | Type |
|---|---|
| | |
| | |
| | |
New Bodhum, ??? AF
| | |
|---|---|
| | |
Bresha Ruins, 300 AF
| | |
|---|---|
| | |
| | |
| | |
| | |
Yaschas Massif, 010 AF AF
| | |
|---|---|
| | |
| | |
| | |
| | |
| | |
Yaschas Massif, 01X AF
| | |
|---|---|
| | |
| | |
| | |
| | |
Yaschas Massif, 100 AF
| | |
|---|---|
| | |
| | |
| | |
| | |
| | |
| | |
| | |
Yaschas Massif, 110 AF
| | |
|---|---|
| | |
| | |
| | |
| | |
| | |
| | |
Oerba, 200 AF
| | |
|---|---|
| | |
| | |
| | |
| | |
| | |
Oerba, 300 AF
| | |
|---|---|
| | |
| | |
| | |
| | |
| | |
| | |
| | |
| | |
| | |
Oerba, 400 AF
| | |
|---|---|
| | |
| | |
| | |
| | |
| | |
| | |
| | |
| | |
| | |
Oerba, ??? AF
| | |
|---|---|
| | |
Sunleth Waterscape, 300 AF
| | |
|---|---|
| | |
| | |
Sunleth Waterscape, 400 AF
| | |
|---|---|
| | |
| | |
| | |
| | |
| | |
| | |
| | |
Sunleth Waterscape, ??? AF
| | |
|---|---|
| | |
Coliseum, Year Unknown
| | |
|---|---|
| | |
The Archylte Steppe, Year Unknown
| | |
|---|---|
| | |
| | |
| | |
| | |
| | |
| | |
| | |
| | |
| | |
| | |
| | |
| | |
The Archylte Steppe, ??? AF
| | |
|---|---|
| | |
Serendipity, Year Unknown
| | |
|---|---|
| | |
| | |
| | |
| | |
| | |
Academia, 400 AF
| | |
|---|---|
| | |
| | |
| | |
| | |
| | |
| | |
| | |
| | |
| | |
| | |
| | |
| | |
| | |
Academia, 4XX AF
| | |
|---|---|
| | |
| | |
| | |
| | |
| | |
| | |
| | |
| | |
| | |
| | |
| | |
Academia, 500 AF
| | |
|---|---|
| | |
| | |
Augusta Tower, 200 AF
| | |
|---|---|
| | |
| | |
| | |
| | |
Augusta Tower, 300 AF
| | |
|---|---|
| | |
Augusta Tower, ??? AF
| | |
|---|---|
| | |
Vile Peaks, 010 AF
| | |
|---|---|
| | |
| | |
| | |
| | |
Vile Peaks, 200 AF
| | |
|---|---|
| | |
| | |
| | |
| | |
| | |
| | |
| | |
| | |
A Dying World, 700 AF
| | |
|---|---|
| | |
| | |
| | |
| | |
A Dying World, ??? AF
| | |
|---|---|
| | |
The Void Beyond, Year Unknown
| | |
|---|---|
| | |
| | |
| | |
| | |
| | |
Primers
Fragment Skills
Fragment Skills are granted to you by the mystic in Serendipity, located in the building on the left, right after you enter. When you've collected certain fragments (usually every fragment for a given location(s)), the mystic will awaken the powers within you.
| Skill | Description | Requirements |
|---|---|---|
| Anti-Gravity Jump | Increased jumping distance and hangtime. | Acquired after Episode 5. |
| Bargain Hunter | A 25% shop discount. | Acquired after Episode 5. |
| Battlemania | Increased chance of fighting strong/rare monsters. | Complete Paradox Professor side quest in Academy 400 AF. |
| Chocobo Music | Choose the music that plays while riding a Chocobo. | Gather all "Bounty Hunter" and "Monster Bits" fragments. |
| Clock Master | Speed up gameplay and cutscenes. | Gather all 160 Fragments. |
| Encounter Master | Increase or decrease encounter rate. | Gather all Yaschas Massif Fragments. |
| Eye of the Goddess | Control of camera during in-game cutscenes. | Gather every fragment in New Bodhum 003 AF, Bresha Ruins 005 AF, Yaschas Massif 010 AF, Yaschas Massif 01X AF, Oerba 200 AF, and Sunleth Waterscape 300 AF. (Episode 1-3 locations) |
| Field Killer | Battles with weak enemies are won instantly. | Gather all Academic Reward and Great Mog Wisdom Fragments. |
| Haggler | Increased selling prices. | Rewarded the first time you speak to the Mystic at Serendipity. |
| Mobile Mog | Mog returns sooner when tossed. | Gather all Oerba Fragments. |
| Mog's Manifestation | Improved Moogle Throw with bonus rewards. | Rewarded the first time you speak to the Mystic at Serendipity. |
| Monster Collector | 20% boost in monster crystallization rate. | Gather all Vile Peaks fragments. |
| Paradox Scope | Invoke a paradox to explore alternate histories. | Complete the main storyline. |
| Rolling in CP | Earn more CP from battles. | Gather all Bresha Ruins and Yaschas Massif fragments. |
DLC: Serah's Weapon, Azrael 300 AF
For 240 MS Points, Xbox 360 owners can purchase access to a new series of weapons for Serah. Azrael was co-developed by Microsoft and Square Enix as an exclusive add-on. The only way to acquire the weapon is from Chocolina and each successive variant requires the sacrifice of the previous model. It comes in four flavors:Azrael
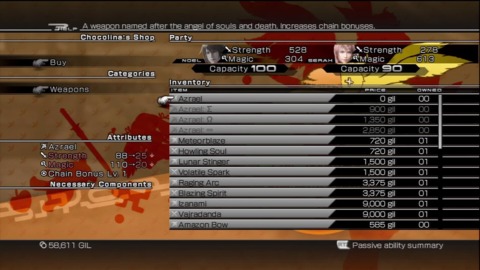
Azrael Sigma
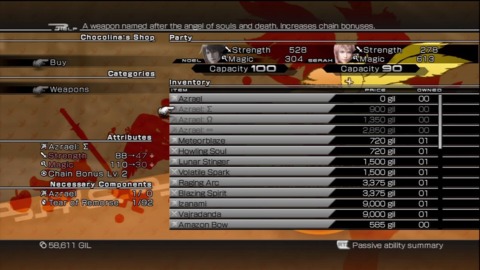
Azrael Omega

Azrael Infinity

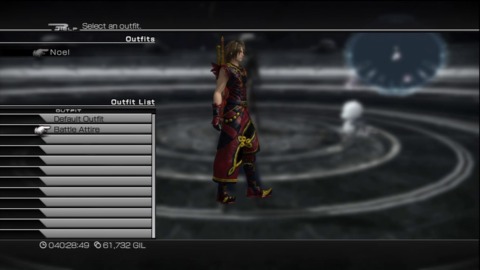
DLC: Noel's Outfit: Battle Attire
A purely cosmetic augmentation to Noel, the Battle Attire outfit can be had for 240 MS Points on the Xbox Live Marketplace. The PSN (or SEN) cost will be available tomorrow, Feb. 8.

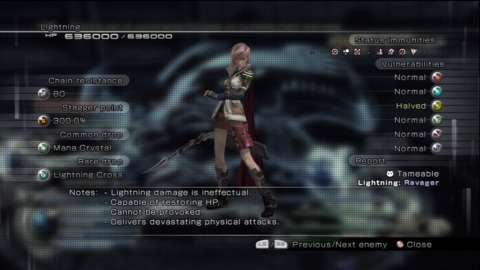
DLC: Opponent: Lightning & Amodar
First of all, defeating Lightning and Amodar does NOT gaurantee that you'll acquire them as party members (or monsters). You only stand a chance of capturing them in crystal, just like any other tameable enemy in the game.
| |
|---|
| |
| |

| |
|---|
| |
| |
Main Story Walkthrough: Valhalla, ??? AF
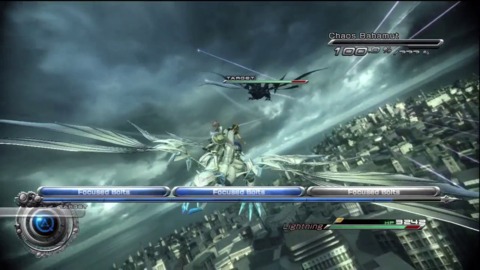
Valhalla ??? AF, Enemies: Chaos Bahamut, Caius
You start the game in control of Lightning, the heroine from the first game in the XIII series and sister of Serah, the female lead in XIII-2. Lightning has thrived in the afterlife as protector of Valhalla.


Lightning sits astride Odin's back and battles Chaos Bahamut. You can familiarize yourself with the ATB system with a tutorial if you haven't played the first game. Auto-battle will suffice for now. If you find yourself uncomfortably low on health, use Ullr's Shield to refill your HP and gain Shell, plus Protect.
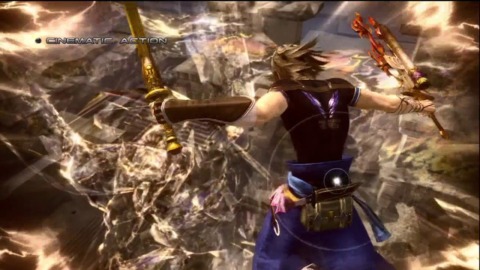
When you drain Bahamut's health, you'll sit through a short cutscene and encounter your first Cinematic Action Sequence. It's FFXIII-2's version of a quick-time event. As you probably guessed, follow the onscreen prompts. This time around it's:
| |
|---|
| Xbox 360: UP, A |
| PlayStation 3: UP, X |
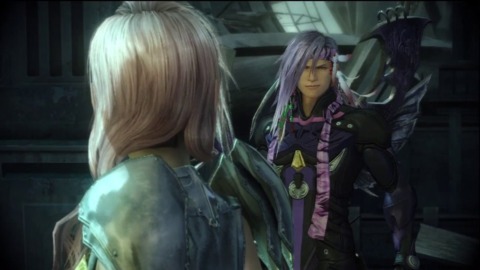
We are then introduced to Caius, Lightning's nemesis. Stay sharp, because the C.A.S. isn't over yet:
| |
|---|
| Xbox 360: Tap X, X or B, X or B, UP, X or B, A, RIGHT, B, A |
| PlayStation 3: Tap SQUARE, SQUARE or CIRCLE, SQUARE or CIRCLE, UP, SQUARE or CIRCLE, X, RIGHT, CIRCLE, X |

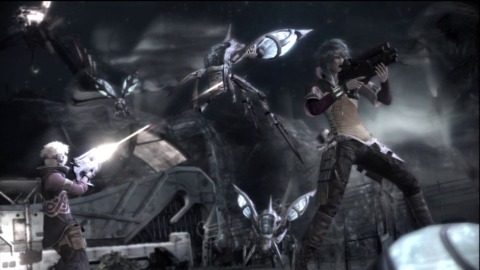
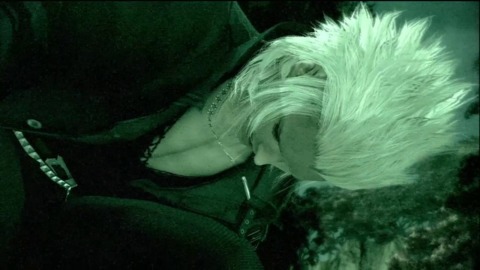
There is a brief cutscene where Lightning spots Noel, the lead male protagonist, falling from Etro's gate. She catches him, and the two continue to battle Chaos Bahamut. This battle is as easy as the first. Use Auto Battle, and refill your health, and gain Haste with War's Benediction when necessary.
Main Story Walkthrough: New Bodhum, 003 AF
New Bodhum 003 AF, Enemies: Pulsework Soldier, Nektons, Meonektons, Gorgonopsid, Sarracenia
| |
|---|
| |
| | | | |

Now that you are in control of Serah, exit her home following the simple movement tutorials. Once you're outside, you'll have to wade through a disorienting world.
| |
|---|
| |
| | | | |
Walk forward, and eventually Serah will come to. New Bodhum is under attack by a swarm of Nektons and Meonektons.
At this point, Noel shows up. He hands off the mogsword to Serah and your part in this battle begins. Move around the beach and take on the various swarms of enemies.
When the beach is clear, follow Noel over the barricade and continue heading north. The toughest enemies you'll encounter at the moment are Pulsework Soldiers. You'll have to stagger them before you can inflict any real damage. Once you have the ability to capture monsters, however, Pulsework Soldiers should be at the top of your hit list. The soldiers, and their variants (knights), make excellent sentinels.
Before the fighting continues, you'll be introduced to the Mog Clock, a mechanic used for initiating random encounters in FFXIII-2.
| |
|---|
| When the Mog Clock activates, that indicates an enemy is within range, represented as a ring around your character. You have the ability to run away or to attack the enemy to initiate battle (with the X or A button) and earn preemptive strike bonuses. If you choose to run, you must get far enough away before the Mog Clock runs out, or you will be forced into battle. The bonus for striking first is a free attack from each character and 2,000 points toward your battle rating. The higher the battle rating, the better chance you stand to get rare items from common enemies. |
Continue heading north. Look for the Treasure Sphere on your right after the ramp. Open it to claim three potions. There are a few citizens of Bodhum fighting enemies and another treasure sphere on your right that is just out of reach. Ignore it for now, continue north, and open the Treasure Sphere in the middle of your path to acquire the Map of New Bodhum.

Follow Noel northwest to initiate a cutscene. Double back southwest, grabbing the treasure sphere along the way for a Librascope. It's an item you use during battle to analyze enemies, revealing their strengths, weaknesses, and a plethora of other info.
Take the left-most path north. Follow Noel over the fallen logs. You'll enter a temporary state of confusion, but no matter, keep following Noel. Open the treasure sphere to score a phoenix down. Continue following Noel. There will be a quick cutscene, and then a relatively easy boss.
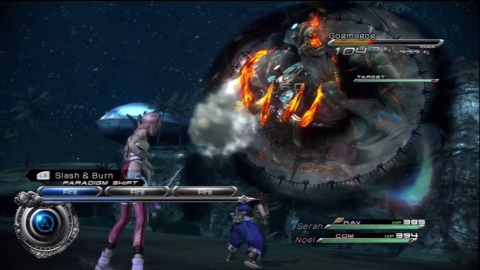
| |
|---|
| |
| The game will inform you that the Twin Shields paradigm is the key to winning this battle. As sentinels, you'll incur less damage, but as a strictly defensive paradigm, you'll also be unable to attack your enemy. When you see Gogmagog ready his swipe ability, quickly switch paradigms to Twin Shields to protect Serah and Noel. Switch back to Slash & burn paradigm to continue chaining Gogmagog. Once you get a hang of switching back and forth, this fight will be a breeze. Stagger him with physical and magic attacks and then finish the job. |
| |
| |
| |
|---|
| Fragments play a special role in FFXIII-2. They are solidified memories, containing valuable knowledge of the history behind characters and locales in the game. |
Keep up with Noel and grab the treasure sphere containing 300 gil. When you hop down into the crater, grab one more treasure sphere for 2 Gysahl Greens. It's slightly hard to see, located just over the edge of the cliff near the crater. You'll use these to ride chocobos found throughout the game.
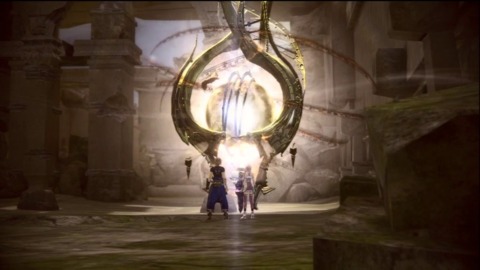
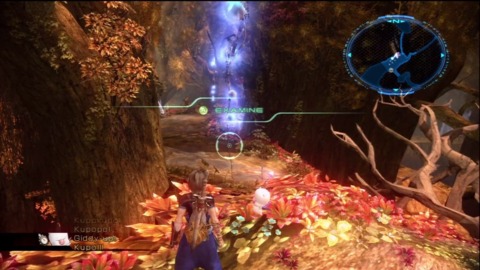
Examine the crystal structure in the middle of the crater. Noel uncovers a time gate within the crystal and reveals that this is the way back to Lightning in Valhalla.
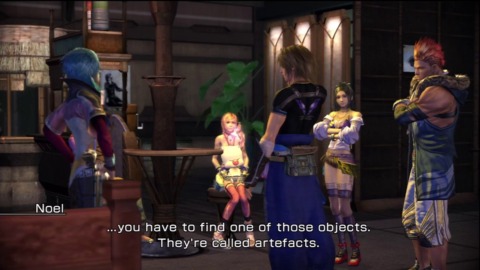
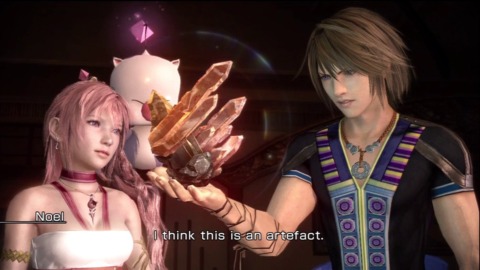
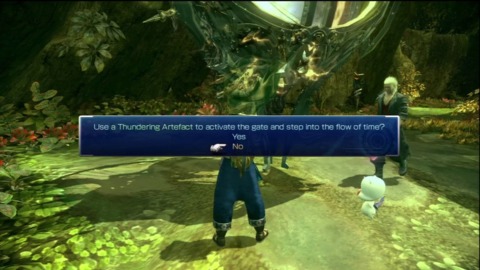
In the cutscene that follows, he mentions that artefacts are needed to travel through gates. Artefacts are objects stuck between two points in time, creating an informal link between the two eras. They act as keys to gates. You'll have to find an artefact to continue your search for Lightning. But first, let's get some rest!
When you awake, the game informs you that you now have access to the crystarium and paradigms section in the menu. The crystarium is how you upgrade your character. You spend CP toward a series of nodes. You can focus your CP toward a primary role or mix and match between multiple.
Open up the crystarium into the crystarium. Upgrade Serah and Noel's primary roles, ravager and commando respectively. I took each of them to LV. 10.
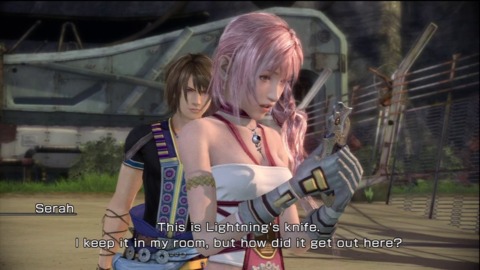
Your current goal is the artefact needed to open the gate within the crater. First, examine the tree on the beach near NORA's headquarters. You'll find Lightning's knife, and engage a new live trigger event.
| |
|---|
| |
| | | | |
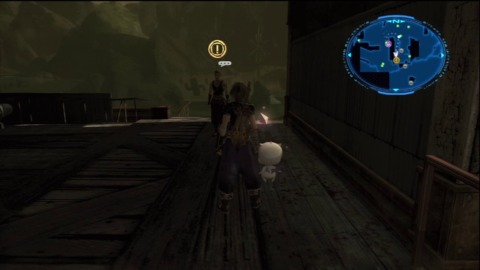
As Noel suggests, head to NORA headquarters to see if there are any more mysterious objects. If you look at the map, you can see an orange exclamation mark, indicating a point of interest. In this case, it's a mysterious mirror in one of the bedrooms. Examine it, and Serah will pull the artefact from the mirror.

With the artefact in hand, you can now head to the gate. First, though, open the treasure cube for a reward. If you chose A like me, you'll get a potion.
Start exploring the rest of the map; there are new sections to explore in the east along the water. There is a treasure sphere there containing a Phoenix Down and another with an Iron Bangle accessory
Occasionally you'll find non-player characters (NPCs) that offer side quests. They are entirely optional, and the rewards vary from fragments, artefacts, and common items. They often take the form of fetch quests and are never too challenging.
| |
|---|
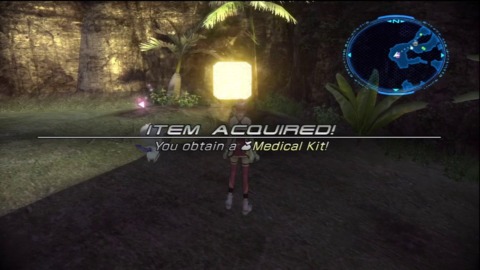
| Look for the girl reclining on the beach. She'll offer your first side quest. Help her find a missing medical kit located somewhere in New Bodhum. West from the treasure sphere containing the Phoenix Down lies the medical kit that the girl on the beach is looking for. It's within a treasure cube, rather than a treasure sphere. Head back to the beach and hand off the med. kit to receive the Heart Piece Fragment and 50 CP. |
With that taken care of, head for the gate. When you get close, Gogmagog makes another appearance.
| |
|---|
| |
| Stagger him with a barrage of magic and physical attacks. This is a relatively easy fight. Just don't forget to switch to Twin Shields when he prepares his swipe attack. With a five-star rating, I received an Iron Bangle and a Phoenix Down. |
| |
| |
Post battle, you'll get your first taste of chocobos in FFXIII-2.
| |
|---|
| You'll collect Gyshal Greens throughout the game, and they are strictly used to mount chocobos. A standard yellow chocobo will consume 1 gyshal green and allow you to ride it for as long as you wish. Sadly, each time you dismount, say, to grab a treasure sphere, you will have to sacrifice another gyshal green to remount the chocobo. |
At the gate, you'll be presented with another Live Trigger event.
| Live Trigger |
|---|
| "If you go through the gate with Noel, you might not be able to ever return. Are you ready to begin your journey?" |
| | |

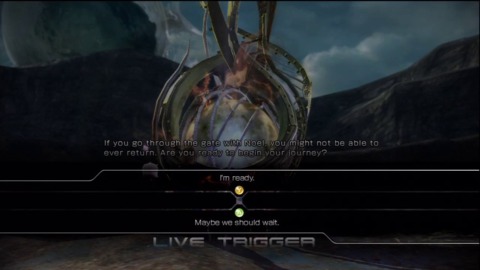
If you're ready to go, chose Y.
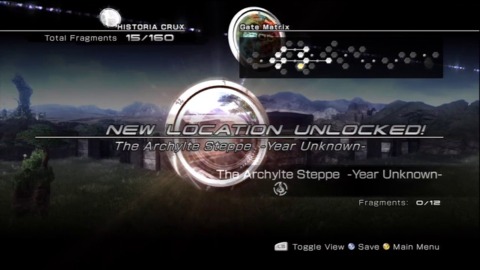
After Serah says her good-byes, you'll enter the gate. You'll end up in the game's overworld, the Historia Crux.
Main Story Walkthrough: Bresha Ruins, 005 AF
Bresha Ruins 005 AF, Enemies: Gremlin, Garchimarcera, Zwerg Scandroid, Cait Sith, Nekton, Albino Lobo, Dendrobium
| |
|---|
| Welcome to the Historia Crux, Final Fantasy XIII-2's "compass for navigating the rivers of time." Here, you can chose different times and locations to explore. The gate you just entered reveals a path to Bresha Ruins: 500 AF. That's where you're headed next, but if you would like a little more info on traversing time, check out the Historia Crux section of this guide. For now, let's venture onward. |
No time to get acquainted with time travel and such, it's time to fight! Right when you land in Bresha Ruins, you'll enter a miniboss fight against a gigantic arm connected to an invisible foe.
This battle is not particularly difficult, but it introduces a new mechanic to Final Fantasy,
| |
|---|
| Wounds reduce your total HP potential. Normal potions will only heal up to your newly reduced health limit. That being said, you can recover from wounds with specific wound-related potions. |
These aren't much of a threat at the moment; you'll only be wounded a few times, for minimal loss. Continue to whittle Paradox Alpha down, and eventually it'll lead to a brief Cinematic Action Sequence.
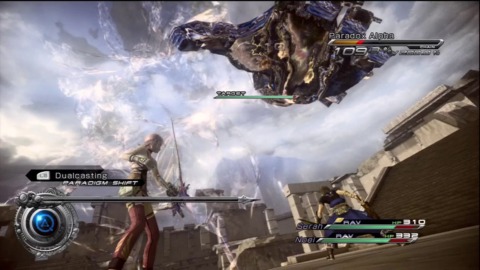
| |
|---|
| RIGHT |
If successful, Serah and Noel move out of harm's way and gain Faith and Bravery respectively. If you miss the command, his hand will come smashing down on you, resulting in modest damage.
After more damage, another sequence begins.
| |
|---|
| Xbox 360: RIGHT, UP, A |
| PlayStation 3: RIGHT, UP, X |
Succeeding will stagger Alpha. Throw everything you've got at him. When you've depleted his HP, a cutscene will ensue.

| |
|---|
| Xbox 360: Tap Y |
| PlayStation 3: Tap Triangle |
If you perfect the CAS inputs, you get a Cinematic Bonus during the battle results. This time around, you get a Silver Gear, an adornment for the monsters in your party (more about that shortly).
Even though you've taken down the threat to the ruins, the army decides to arrest you anyway. Apparently, your mysterious appearance has raised a few eyebrows. Once in custody, your presented with a Live Trigger.

| |
|---|
| |
| | | | |
Talk to the guard for another LT.
| |
|---|
| |
| | | | |
Talk to the guard again, for another LT.
| |
|---|
| |
| | | | |

At this point, a girl runs into the scene and knocks into the guard. She convinces the guard that you are VIPs, and therefore should be released immediately. Talk to the guard one more time and he will release you after apologizing.
As you walk through the ruins with Alyssa, there's another LT.
| |
|---|
| |
| | | | |
You are now free to roam the ruins for a bit. First, let's hit up the crystarium.
You should have enough CP at this point to boost your roles a bit more. Again, I focused solely on each character's primary roles. Both Serah and Noel were able to reach level 20. At 19, they were granted a bonus for expanding the crystarium. You have a choice between boosting role bonuses, unlocking roles, increasing the ATB gauge, and increasing your accessory capacity. Considering the importance of chaining multiple attacks together, I opted to increase each character's ATB gauge.
Now, follow Alyssa. Talk to her and she'll give you an Academy Communicator, and a Map of the Bresha Ruins. In order to take out Atlas, head for the orange exclamation point in the north end of your map.


On your way, you'll get into a battle with two enemies: a Cait Sith and a Zwerg Scandroid. This is an easy fight, but it serves as your introduction to the monster-catching feature of this game.
| |
|---|
| Aside from a guest character, monsters will act as your third party member throughout the entirety of the game. Nearly every non-boss in the game can be caught and raised with a crystarium of their own. Unlike Noel and Serah, each monster has a predefined role and must be leveled up using items, not CP. Each monster also has its own Feral Link ability. Similar to the limit breaks in Final Fantasy VII, a gauge will fill up during the course of a battle (it will also carry its charge between battles). When it's full, you can unleash the ability at any time by pressing X (or SQUARE). This will lead to a CAS that is unique to each monster. Executing the inputs quickly enough can result in a major boost in damage. Also, executing a Feral Link as a final blow can increase your chances of catching the enemy in question. It is not a guarantee, however. There are also rarer varieties of common enemies that can be caught, but they usually pose a significant challenge, so just encountering them is half the battle. |
| |
|---|
| When roaming the ruins, you'll come across a PSI-COM soldier in red gear. Talk to him to pick up a side quest. He's looking for two capsules containing an experimental drug. Capsule #1: Located in a hidden treasure sphere in the middle of the Bresha Ruins Map. Check the path heading west from the gate near the pillars where you first see Chocolina. Capsule #2: You can find the second capsule in the underground section of the ruins. The treasure sphere lies in the western tunnels connecting the middle and upper sections of the map. |


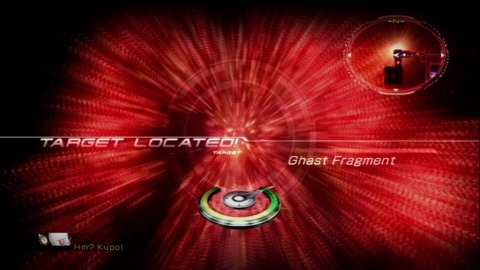
| |
|---|
| Keep an eye out for a yellow PSI-COM soldier (Chester) with a chat bubble over his head. There are a few, no doubt, but eventually, one of them along the way will mention the Cie'th and offer you a side quest. You must locate the Cie'th and defeat it to earn the Ghast Fragment. Cie'th Location: Far northwest corner of the map. |
You'll see a gate on your way to the next goal on the map. Examine it and an LT event will pop up.
| |
|---|
| |
| | | | |
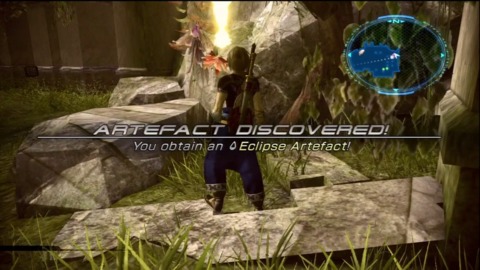
Near the gate, Mog will indicate something of importance near a PSI-COM footman. Talk to the soldier and he'll recall some equipment that seems to have disappeared. If you notice, there is a semitransparent object nearby. Mog steps in to reveal the hidden item.
| |
|---|
| Whenever you encounter these mysterious see-through objects (paradoxes, essentially), you can use mog to dispel the paradox and reveal the tangible object. To do so, press RB or R1, and Mog will undo paradoxes within a certain proximity. |

Use Mog to uncover the nearby object. Congratulations! You've just obtained your first wild artefact!
| |
|---|
| Wild artefacts can be used to open crystal gates only. There are 10 in the world, and an equal number of wild artefacts. Crystal gates appear blue, while standard gates are white. Wild artefacts can be used universally, while normal gates require a specific artefact for activation. |
Onward toward the goal. Before you get there, you'll see a cutscene regarding a mysterious energy surge in the ruins. It is somehow connected to Atlas, and at the moment, it's your only hope for defeating the humongous foe.
| |
|---|
| |
| | | | |
Head up the stairs and charge ahead until you reach a fork; a trail to your left and Atlas on the right. As you've probably guessed from the previous cutscene, you should head to the other underground section in the northwest to reach the device prior to fighting Atlas.
*Side note: At this point you can chose to fight Atlas head-on, or disable the device to weaken him. While you can only progress in the game by following the latter path for now, later on you can reverse time for each stop along the Historia Crux. Doing so, and defeating Atlas without use of the machine, will change the outcome of the battle. For more information, check out the Paradox Endings section of this guide.


Grab the treasure sphere nearby for a free Phoenix Down. Head underground. Your goal is marked on your map, in the eastern section of the ruins in the north. On your way there, keep an eye out for the treasure sphere floating on the docks. Grab it to claim an Orange Newsboy Cap adornment. Also, you can head to the northwest room to find the C'ieth needed to complete the Ghast Fragment side quest. There is also a treasure sphere containing a Star Pendant.

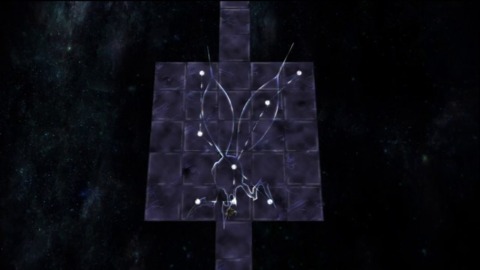
Make your way to the room in the east and examin the device. Before you can turn it off, you have to solve a few puzzles.
| |
|---|
| You've been sucked into the Void Beyond. In order to escape, you must solve the "tile trial" puzzles. In this set, you must proceed to collect crystals and make it to the exit gate. The trick is that each tile you step on will disappear. |
| Stage 1 | Up x 4, Left, Up, Right x2, Up, Left, Up x 4 |
| Stage 2 | Up x4, Right, Up x 2, Left, Down, Left, Up x3, Right, Up x4 |
| Stage 3 | Up x 4, Left x2, Up, Right x2, Up, Right, Up, Left x 2, Up x4 |
Once it's complete, head back to the weakened Atlas. To prepare for battle, check your paradigms. Here are a few suggestions:
| Paradigm | Noel | Serah | Monster |
|---|---|---|---|
| Tri-Disaster | Ravager | Ravager | Ravager |
| Relentless Assault | Commando | Ravager | Ravager |
| Diversity | Commando | Ravager | Medic |
| Mystic Tower | Sentinel | Ravager | Ravager |
| Tortoise | Sentinel | Sentinel | Sentinel |
| Consolidation | Sentinel | Sentinel | Medic |

| |
|---|
| |
| Raise Atlas' stagger gauge with setup #1, then quickly switch to #2 to slow the gauge down with physical attacks. When he inflicts status effects on your party, switch to 3 or 6 (depending on your HP at the time) so Cait Sith can cure your party with Esuna. When he's staggered, switch to relentless assault (#2) and let loose. |
| |
| |
| |
|---|
| Xbox 360: Right, B, Right, A, Right A, Right A |
| PlayStation 3: Right, Circle, Right, X, Right X, Right X |
After the fight, a live trigger sequence:
| |
|---|
| |
| | | | |

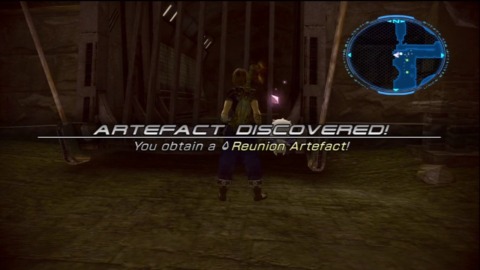
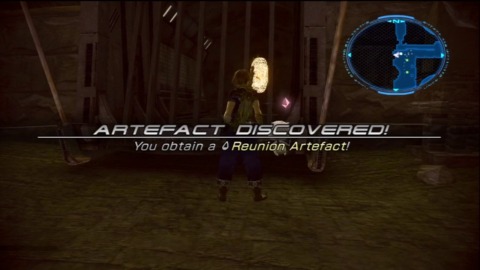
Check out the area that was previously inaccessible due to Atlas. Examine the monument along the south wall. After the cutscene, you'll find an artefact in the northeast corner. Use Mog to reveal the hidden object. There will potentially be a live trigger reward cube as well. For choosing "Who would do something like that?", I received a Locky Clover Adornment. Head back to the gate in the middle of the map. Along the way, examine the goal maked on your map. Behind the bars is the Reunion Artefact. Use Mog to reveal the hidden artefact and claim it for yourself.

If you feel like spending a little more time in the Ruins, there are a plethora of treasures to recover. Head back towards the starting area, with the giant hand in the circular pit. along the way, use a chocobo to jump off the ramp and into the grassy area near the stairs. There is a treasure sphere containing eight Power Droplets. There's also a hidden Fragment, Graviton Core Beta. Use Mog to find it now, because you'll need it to progress through the story before you know it.
Now, continue to the large hand back at the starting area. You'll notice a treasure sphere floating on one of the finger tips. You won't be able to get it yet, but make a mental note of it. From there, head east towards Chocolina. South of her are two treasure spheres, one with a Black Belt accessory, and another with 300 Gil.
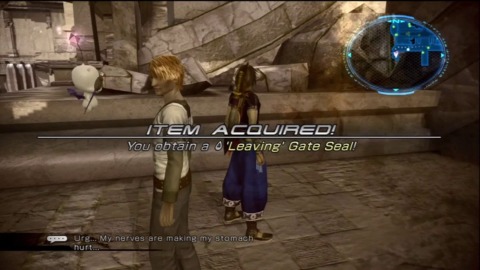
Next, return to the southern part of the starting area. There is a long, lateral platform, just north of the black gate where you entered the ruins. In the east, you'll find a treasure sphere with 400 Gil. To the west, use Mog to uncover the Leaving Gate Seal.
Now, head for the gate in the center of the map, adjacent to the pillars. Unlock it with the artefact you recovered near the purge monument and you'll open up Yaschas Massif 010 AF. Let's head there and level up a bit in the crystarium.

Main Story Walkthrough: Yaschas Massif, 010 AF
Yaschas Massif 010 AF, Enemies: Mandrake, Feral Behemoth, Narasimha, Gandayaks, Gahongas, Uridimmu
When you arrive at Yaschas Massif, take stock of your characters and level them up a bit.
I leveled up Serah to a level 39 Ravager, at which point the crystarium expanded for the second time so far. I chose to unlock the Medic Role as my level bonus. I had enough CP left to level her up to a level 4 Medic.
Now for Noel. Like Serah, you'll want to level up his primary role, Commando, to level 39. Rather than unlocking an role bonuses or additional roles when the crystarium expands, I increased his ATB gauge again. At this point, he has five bars in his ATB gauge. This is the maximum you can achieve through the crystarium. The only way to reach the true limit of six is through equipment, which won't come until much later in the game. I then upgraded him to a level five Sentinel with my remaining CP.
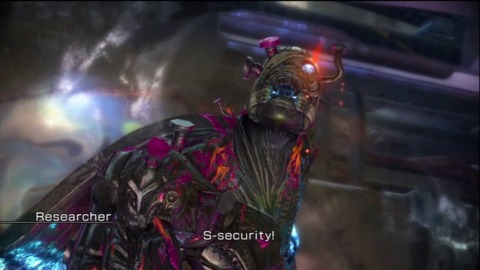
With that out of the way, talk to the male researcher at the start of the area and he'll supply you with a map of Yaschas Massif. After that, grab the treasure sphere nearby to collect 500 gil. Now, head east. After dropping down the cliff, make your way northwest.


You'll come upon a female researcher standing under a lamp post. Take heed of her warning. Remain within the light to avoid encounters, or run for the light to escape an oncoming threat. Behemoths (and the rare Narasimha variant) are too great of a callenge for your team at the moment. When you can topple a Behemoth, you'll collect a Behemoth Fang, a key item used in a Side Quest later in the game. It would be a good idea to return when you are strong enough to take on the challenge, as both monsters make excellent additions to your paradigm-pack repertoire, as well.
While navigating the area, keep an eye out for treasures along the walls. In the west, you'll find 960 gil in a treasure sphere. Just north of that is another sphere with 8 Mana Slivers. On the eastern side, you'll find a treasure cube containing the key item, Tablet of Padra. And just north of that, is a sphere containing Mana Bolts.
Eventually, you'll run into Chocolina. She has new weapons for Serah and Noel; The Volatile Spark and the Lunar Stinger. I recommend picking them up for substantial boosts to Physical and Magic stats for each character.
After you stock up on new equipment and items, continue along the path, heading east. Just after Chocolina is a treasure containing Scars Gate Seal. There are two more treasures that will be on your right; a sphere containing Gysahl Greens and another with 540 Gil.

Take a left at the fork (the path to the right is inaccessible at the moment). As you head north, you'll reach the goal marked on your map. You'll be able to purchase items from Chocolina again, but she has nothing new since running into her a minute ago. Unless you need to restock, chat with the girl to the left, but be warned; Initiating a conversation with her leads to a boss battle. Make sure your paradigms are up to snuff. Here's my setup:
| Paradigm | Noel | Serah | Monster |
|---|---|---|---|
| Tri-Disaster | Ravager | Ravager | Ravager |
| Relentless Assault | Commando | Ravager | Ravager |
| Diversity | Commando | Ravager | Medic |
| Mystic Tower | Sentinel | Ravager | Ravager |
| Tortoise | Sentinel | Sentinel | Sentinel |
| Consolidation | Sentinel | Sentinel | Medic |

| |
|---|
| |
| When he casts Deshell and Deprotect, allow Cait Sith to remove the debuffs before switching paradigms. Once you are set in that regard, switch to relentless assault to stagger him. When he's staggered, hit him hard. Once he recovers, he'll cast defensive buffs on himself that won't disappear until he's staggered again. Watch out for the Swipe prompt. Unless you switch to SEN SEN SEN, you will incur incredible damage. Mastering the art of reading enemies and managing paradigms is important for moments just like these. Try your best to beat him during the second stagger, or you will have to endure repeating the two-fold stagger sequence again. Once he's downed, Hope steps in to deal the final blow. |
| |
| |
After the cutscene, follow Hope. When you come to a halt, talk to the soldier nearby to clear the path ahead.


Once you gain security access, feel free to explore the area a bit. There are a handful of treasures to discover. Two of which you won't be able to obtain, but it's good to remember their whereabouts.
There are three treasures near the Fal'Cie dock. On the metal scaffolding, you'll find a sphere with three remedies, a sphere with a Carbuncle Figurine adornment, and a hidden treasure cube with the Pathos Jewel Fragment near the Fal'Cie's head that's just out of reach at the moment. You can retrieve it after visiting the Sunleth Waterscape for first time.
In the nook just northeast from the Fal'Cie dock, there's a hidden treasure sphere with the Serenity Sachet accessory. Southeast from Hope is another sphere containing a Warding Talisman. In the northeast corner of the same platform, you'll find a sphere containing Gysahl Greens.

Talk to hope again, for a live trigger event.
| |
|---|
| |
| | | | |
After the LTE, follow hope up the stairs an initiate another conversation with him. He shows off the Oracle Drive, a device that records memories. He then provides you with the Arteface you need to travel time in an effort to solve the paradox and clarify the message contained in the Oracle Drive.


Head south, and take the path heading east. Use the artefact from hope to open the gate. Before you take off, there's one last LTE for now.
| |
|---|
| |
| | | | |

Finally, you'll head through the gate. Your new artefact unlocks the path to Oerba, in the year 200 AF.
Main Story Walkthrough: Oerba 200 AF
Oerba 200 AF, Enemies: Ghast, Chon Chon, Clione, Zwerg Scandroid, Seeker

Upon arrival, itseems that the map is slightly obscured. Head north and examine the timespace distortion. You'll need to solve a few puzzles to unlock the rest of the map.
| |
|---|
| The puzzles are a little different this time around. You'll need to complete constellations by connecting crystals. Each crystal switches between two colors. You can only connect two crystals of the same color. There are no duplicates colors. Tiles no longer disappear after you walk on them. Your biggest enemy is time, but even so, it's not like you need to rush. Keep an eye out for matching colors and if you can't see a crystal with the same color as the one you're standing on, wait for the crystals to shift colors after a few seconds. |


After the anomolies are resolved the map will open a bit and you'll get the Time's Stardust Fragment. Head north to get 2 Gysahl Greens from a treasure sphere.
You can jump down to the right, but before you do, take a left down the alley to open a treasure sphere containing a power wristband. If you hop off the north wall of this section, you'll land safely below. Look who it is; Chocolina! Explore towards the southeast and you'll find a treasure cube at the top of the staircase within within a building, at the top if the starcase. Open it for the Visions Gate Seal. Beneath the staircase is a treasure sphere containing a map of Oerba.

Head north east until you reach another space time barrier. Use the moogle hunt to reveal the timespace distortion.
Solve another set of puzzles in the same manner as the last.

More of the map is revealed. Take a quick left, down the alley near Chocolina. It forms the shape of a rotated "L" on your map. At the end is a treasure sphere containing a Magicians Mark accessory. It boosts your magic ability by 10%.
Exit the alley and explore to the northwest. You'll find a treasure sphere near the base of a tree containing 550 gil.
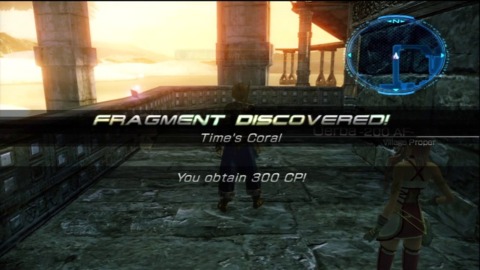
In the far northwest, theres a staircase leading into the abyss. Moogle hunt there to reveal another time space distortion. As before, connect the dots to escape the void and open up the rest of the map. You'll also be rewarded with the Time's Coral fragment.
Head down to the east, open the treasure sphere on your right for three Cie'th Tears. Make note of the gate ahead. Take a left down the stairs leading to the shore.
Northwest from the gate is a treasure sphere containing a Librascope. South of that is a a treasure sphere at the base of a tree containing a Hypnocrown. Run to the far end of the beach and take the stairs in the bottom of the building on the right. There is a treasure sphere with 550 gil along the way.

Before you examine the object with the orange [!], let's upgrade our crew in the Crystarium.
Noel's build is fairly standard as a physical powerhouse goes. I upgraded Noel to a level 52 Commando and level 24 as a Sentinel.
Serah on the other hand, can benefit in this battle from the Poison skill, obtained when you reach Saboteur level 9. Her medic role is important in emergency cases, but don't sacrifice Saboteur levels for Medic levels at the moment. Poison will make your life a lot easier and the standard cure will suffice for now. In my case, I made her a level 50 Ravager. I also taught her the Saboteur role and brought it up to level 9. Show her Medic role some love while you're at it. For me, she grew to level 17.
Also, raise Cait Sith to level 21 in order to increase its viability as a healer.
I have an Albino Lobo in my party; A rare animal from the Brescha ruins. I've put him in as my Ravager and leveled him up to level 5 so he can access a few new moves.
I leveled up my Hoplite (Commando) to level 20, which is his max.
Next, setup your paradigms.
| Paradigm | Noel | Serah | Monster |
|---|---|---|---|
| Attrition | Sentinel | Saboteur | Medic |
| Diversity | Commando | Ravager | Medic |
| Delta Attack | Sentinel | Ravager | Commando |
| Combat Clinic | Sentinel | Medic | Medic |
| Entourage | Sentinel | Ravager | Medic |
| Relentless Assault | Commando | Ravager | Ravager |
Examine the device known as an Oracle Drive and prepare yourself for a battle with Caius.
| |
|---|
| |
| Remain in the default role (#1) until Caius has a magic debuff and Poison. Switch to #2 to begin building the stagger gauge, and heal your party on the quick. When your health is full, switch to #6. Caius' blast wave will inflict a lot of damage, especially when he buffs himself with body and soul. Switch to #4 or #5 to heal your party, using a phoenix down if necessary. He'll debuff one member with Eye of Bahamut at some point, but you should be close enough to killing him at the point to push through. If not, switch out to a #4 for some relief from Esuna and Cure. While staggered, blast him with paradigm #6. |
| |
| |

| |
|---|
| |
| | | | |
Hop down into the school from the roof to get the treasure sphere below, containing 10 power bolts (monster materials.
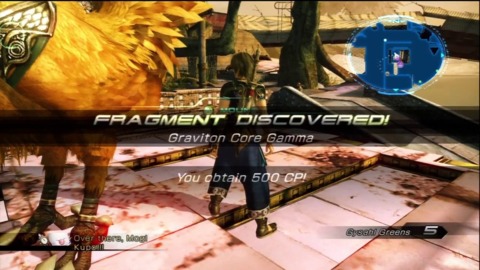
Ride the chocobo back on the beach and use it to hop on the roof of a building, represented by a dark blue rectangle in the middle of the map. Moogle hunt to reveal a fragment: Graviton Core Gamma. Be glad you found it now, because it's part of a five part fetch quest down the road.
For now, head to the white gate. Use the artefact you scored after the battle, and open up Yaschas Massif 01X AF.
| |
|---|
| |
| | | | |
Main Story Walkthrough: Yaschas Massif 01X AF
Yaschas Massif 01X AF, Enemies: Mandrake, Feral Behemoth, Narasimha, Gandayaks, Gahongas, Spiranthes, Uridimmu
| |
|---|
| |
| | | | |
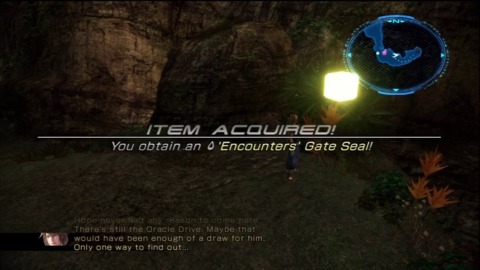
Around the corner from your starting point, look for the treasure cube on your right containing the Encounters Gate Seal. Head north. At the fork, use the moogle hunt to reveal a treasure sphere containing a pearl necklace. Continue north towards the "Meet with Hope" marker on your map. Halfway there you'll get a cutscene with a Yeul you havn't met yet.
| |
|---|
| |
| | | | |

Talk to hope. Try to leave, then talk to him one more time.


Head up the ramp next to his tent. At the top, use moogle hunt for a sphere containing 600 gil. To the right, is a hidden artefact. Again, use the moogle hunt to reveal it. Now, go to the gate in the far south.
Before you go, take heed of the two treasures on the map that are just out of reach. One is located behind boxes on the large platform in the northeast section of the map. The other is east of the gate you are headed too. Come back and collect these items after completing the Sunleth Waterscape area when you can toss Mog to retrieve out of reach items.


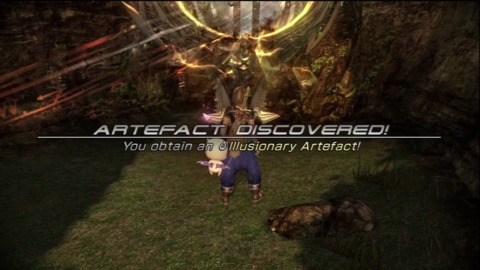
Examine it, and it will turn the recently acquired Mysterious artefact into the Illusionary Artefact, which thankfully you get to keep.
This gate will take you back to the historia crux…in a way. You are transported to a lost section of the crux with two locations: Locked Location, Year Unknown, and The Void Beyond, Year Unknown. Start off by heading to the Locked Location
Main Story Walkthrough: Locked Location & The Void Beyond
Locked Location & The Void Beyond Enemies: None
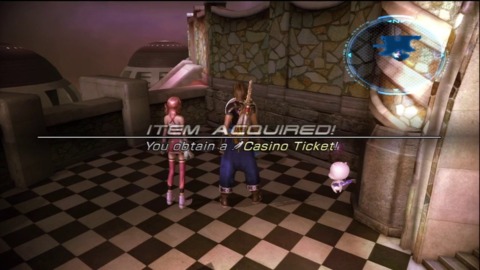
There are two locations to go from here. The one on the left takes you to a "Locked Location" (Serendipity). Head there for the moment. After you realize there's nowhere to go, grab the Casino Ticket from the treasure sphere nearby. That's all you can do here for now.
Exit and go to the other node, The Void Beyond.

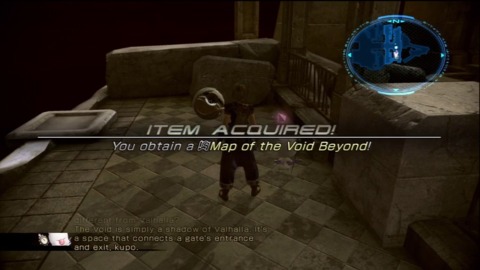
You'll end up in Valhalla, rather, a shadow there of. Open the treasure in the south for a map of the area. Again, sadly, that's all you can do for now. Head back to the Historia Crux.

Main Story Walkthrough: Sunleth Waterscape, 300 AF
Sunleth Waterscape Enemies: coming soon
Lost?

To get to the next location, The Sunleth Waterscape 300 AF, you'll need an artefact from the Bresha Ruins. Perhaps you've grabbed it already, but in case you haven't, there should be an orange [!] on your map showing you the location. Use Mog to reveal the hidden artefact behind bars, and take it to the ruins in the south end of the map to open the gate underground.

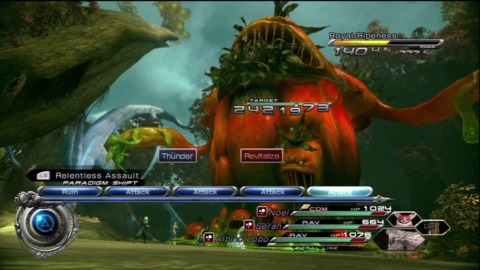
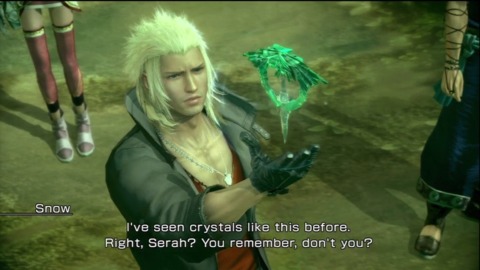
Now, head to Sunleth Waterscape 300 AF. When you get there, Serah has a vision of Snow and runs off. Chase after her. You'll run into Snow, Serah, and a huge Flan, the Royal Ripeness. Better join the fight!
| |
|---|
| |
| With Snow in your party, you shouldn't have a difficult time staggering his Ripeness. Snow will assume the role of Commando, so stagger the Flan with Ravagers and he'll keep the chain gauge from losing its charge. Once he's staggered, switch to a Commando centric paradigm to chip away at his health. The smaller flan at his base will heal him occasionally, though it won't make a notable difference once he's staggered. When the battle is concluded, you'll have to settle for a stalemate, because he is just too powerful to take down for good. |
| |
| |
| |
|---|
| Xbox 360: Up, X, Tap X, Tap B, Right |
| PlayStation 3: Up, Square, Tap Square, Tap Circle, Right |
Perfecting the CAS earns you a Crystal Heart adornment.
From here on out, you can chose to fight the Royal Ripeness again, or search the Sunleth Waterscape for an alternate means of stopping the Flan. Talk to Snow for a map of Sunleth Waterscape. Open the treasure near Serah for 625 Gil. Head south, purchasing goods from Chocolina if you need to restock. When you reach a fork, take the western route.

When you hit the a dead end, a large creature will appear. Everyone hops on its back during a cutscene. Once you regain control, you've got the chance to try out a new moogle ability: the moogle throw. Follow the instructions and toss Mog to collect the three treasure spheres in the area. They are highlighted on your map. You gain a Libarscope, a Silver Bangle, and eight Mana Chips
| Moogle Throw |
|---|
| The Moogle Throw allows you to use Mog to acquire distant objects or treasure spheres. Hold down LB (or L1) and aim using the right stick. When the target it near the object you're after, tap RB (or R1) to toss Mog. With proper aiming, he should return bearing the treasure in question. |

When you've collected the three treasures, keep an eye out for the Wild Artefact on the left hand side as the beast starts walking.
If you look west, you'll spot Chocolina. Take this as your cue to hope off your ride. There is a treasure sphere nearby with seven Vitality Chips. South of Chocolina is a branch that extends over the Flan Parade. Keep your eye out for the vine hanging nearby. Use it to swing (as a short cut) southwest to solid ground.
Head southwest from there, open the treasure sphere for a Zephyr Ring accessory. Use the Mog Hunt ability to uncover a vine. It will carry you north. Reveal the hidden treasure sphere for a Unicorn Horn. Just north of that is a Frost Ring in another treasure sphere. Return to the platform you swung from a moment ago.
There is a gate nearby, but you obviously dont have the right artefact to activate it. Follow Snow up the branch heading southeast. Keep going in that direction until you reach a fork. Head to the right and work your way to the end of the map. You'll see a group of miniflan surrounding an artefact. Engage them in battle, where you'll fight a total of five Miniflan.
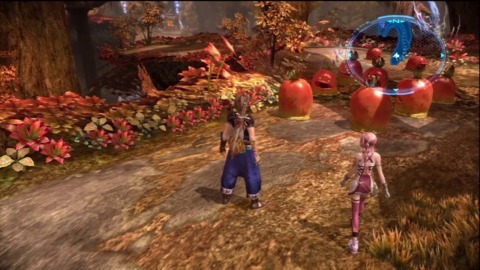
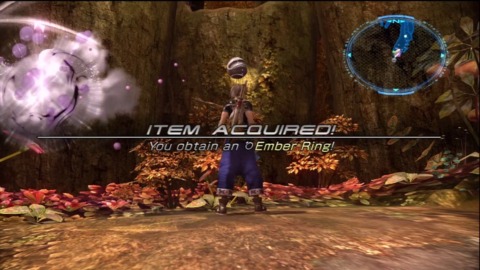
After you collect the artefact, toss Mog to collect an ember ring from the treasure sphere floating over head.
You should venture into the eastern section of the map that we've yet to explore. If you head down the small section branching to the south, you can find a treasure sphere with 960 Gil. In the distance, to the left of the Gil sphere is a fragment. Toss Mog to collect the Extraordinary Egg fragment.

Head back north and continue exploring. There's a sphere containing nine Vitality Droplets. Continue onward. Swing on the vine, then run towards the dead end. When you get there, you'll find another group of Flan protecting an artefact. engage them in battle and collect the artefact.

Snow reminisces about Fang, Vanille, and their sacrifice. This leads to a LTE:
| |
|---|
| |
| | | | |
I chose Y (Triangle on the PlayStation) and received a LTR cube containing a Blue Flower adornment nearby. Head north but ignore the vine and jump down the series of branches to continue exploring the rest of the map. There aren't any treasures to find, but it's best to uncover the map while you're in the area. At this point, the only portion that is left to explore is the area blocked off by the Royal Ripeness.
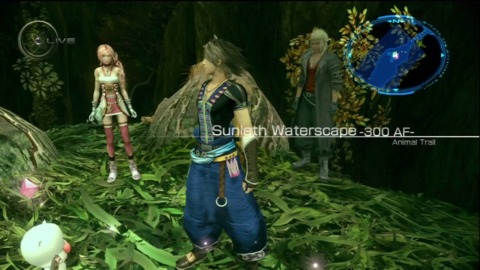
With that out of the way, you can head to the gate. It's marked on your map, west from the artefact's location. Noel and Serah head back into the Historia Crux while Snow stays behind to monitor the flan and the crystal pillar. Activating this gate unlocks the Coliseum, Year Unknown.

Coliseum, Year Unknown
When you arrive to the Coliseum you'll be confronted by the Arbiter of Time. Noel persuades him to hand over a fragment, the White Hole Gem. Before you leave, explore the perimeter of the coliseum. There are treasure spheres floating in the distance. Toss Mog to acquire six Power Chips, 10 Potent Chips, seven Power Slivers, nine Power Droplets, and eight Power Bolts. Head for the exit, and use Mog's abilities one more time to reveal a treasure sphere containing the Map of the Coliseum. Head through the gate and return to Sunleth Waterscape.
Sunleth Waterscape 300 AF
Now that you're back in Sunleth, take the second artefact you found to the gate located at the northern tip of the map. This will unlock our next stop in the Historia Crux, the Archylte Steppe, Year Unknown.
Main Story Walkthrough: Archylte Steppe ??? AF
Archylte Steppe Enemies: Clione, Chelicerata, Goblin, Testudo, Scutari, Samovira, Pulsework Gladiator, Cloudburst, Red Chocobo, Blue Chocobo, Gancanagh, Microchu
Archylte Steppe Map

| |
|---|
| 1. TS, 2 Remedies 2. TS, 3 Potions 3. TS, 8 Mana Droplets 4. 600 gil 5. Grimoire Hat Accessory 6. 2 Fractured Horns 7. 6 vitality Droplets 8. Single Horn Adornment 9. 8 Mana Chips 10. 9 Vitality Spheres 11. Phoenix down | 12. 8 Mana Bolts 13. Gaurdian's Edge Weapon (Noel) 14. 700 Gil 15. Unicorn Horn 16. 3 Gysahl Greens 17. 8 Power Slivers 18. Cactuar, Crimson Crystal Fragment, teleport to camp 19. Cactuar, Azure Crystal Fragment, teleport to camp 20. Cactuar, Forest Crystal Fragment, Teleport to lake (West) 21. Cactuar, Amber Crystal Fragment, Teleport to Camp 22. Cactuar, Summon Gigantuar (Battle) |
Head for the goal on your map. Grab the treasure spheres along the way for 2 Remedies and 3 Potions. There is another sphere containing eight Mana Droplets outside the western entrance to the camp.
When you get inside the camp, open the two spheres in the area for 600 gil and a Grimoire Hat accessory.

Go to the second floor of the fort and talk to the Hunter with the [!] over his head. He'll give you a map of Archytle Steppe.

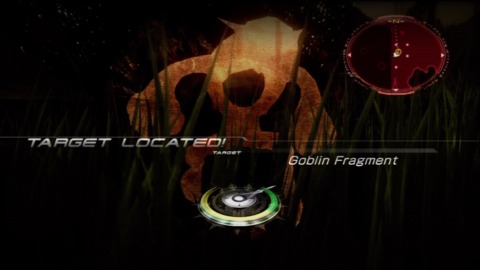
Talk to him a second time for the quest, Goblin Fragment. It seems like a side quest, but it's the only way to earn the hunters trust. Run to the goal-marker in the field and you'll encounter the goblin mob in no time. I faced off against 3 Goblins, a Miniflan, and a Chocobo. It's a large group, no doubt. Pay close attention during battle, you may need to swap a Medic in once or twice. Overall, it's not a challenging fight. Once you've taken care of the Goblins, you discover the Goblin Fragment and earn 300 CP.

Return to the Hunter you spoke with earlier. He'll direct you to a female hunter at the bottom of the stairs. She needs help gathering wool from three types of Sheep in the steppe.

Head back into the grass and look for herds of sheep. Examine the largest ones in three separate groups to collect rough, thick, and fluffy wool. There are a few cactuars throughout the steppe. The yellow one transports you to the west side of the map, beyond the immediately accessible area.
When you return the Wool, you'll receive the Wooly Stone fragment. It's about time you figure what's goin on with the weather. Talk to the female hunter again and she'll direct you to the weather controlling machine.

Having completed these tasks, the hunters trust you enough to reveal the secret to controlling the weather in the Steppe. There is a machine with two levers, and four possible weather conditions. Each setting results in different weather and enemies. Here are the four possibilities:
| |
|---|
| | |
| | |
There is a boss you have to face in order to reach the gate in the south. You'll need proper weather conditions for him to appear; Apply the Stormy setting on the machine. (Down, Up)


Before you head southeast, consider this: There is a treasure sphere in the northwest containing a new weapon for Noel. Head as far northwest as you can, near the ravine that divides the map in the west. In that corner is a treasure sphere in the distance. Toss Mog to collect a new weapon for Noel, the Gaurdian's Edge.

Now, head towards the fearsome Faeryl, located in the southeast. Before you engage in battle, level up your characters/monsters in the crystarium.
When leveling up Noel, I continued to focus on his Commando and Sentinel roles. Since I'm trying to maximize his physical attack, I leveled up his COM role on the larger nodes in the crystarium to utilize the Commando Bonus. I leveled up to a level 69 commando and a level 38 sentinel. When the crystarium expanded, I chose the "COM Bonus Boost II", and, "Increase Accessory Capacity by 20".
Focus Serah's points om her ravager and medic roles. I raised her to a level 64 ravager and a level 34 medic. For her crystarium expansions bonuses, I went with "Increase ATB Gauge", followed by "Rav Bonus Boost".
Setup these paradigms:
| Paradigm | Noel | Serah | Monster |
|---|---|---|---|
| Relentless Assault | Commando | Ravager | Ravager |
| Consolidation | Sentinel | Sentinel | Medic |
| Combat Clinic | Sentinel | Medic | Medic |
| Diversity | Commando | Ravager | Medic |
| Diversity | Commando | Medic | Ravager |
| Cerberus | Commando | Commando | Commando |

| |
|---|
| |
| Use Faeryl's elemental weakness to your advantage by building up the chain gauge with Relentless Assualt (#1). Whenever you see him ready the Megaton Charge switch to Consolidation (#2) as quickly as you can to increase your defenses. Then, switch to Combat Clinic(#3) to heal your team, and back to Relentless Assault to continue charging the chain gauge. Once he's staggered, switch to Cerberus (#5) to finish him off. |
| |
| |
Now that Faeryl is dead, collect the Black Hole Gem Fragment and return to Sunleth Waterscape. The Royal Ripeness is no longer at his former glory, but Snow needs your help finishing him off.
Sunleth Waterscape, 300 AF

| |
|---|
| |
| Use Tri-Disaster or Relentless Assault when starting off agaist Mutantomato. His chain gauge will fill up much quicker this time around. If he is able to poison your team prior to becoming staggered, switch to a paradigm with a Medic for some relief via Esuna. Once he is staggered, use triple COMs (Cerberus) to finish him off |
| |
| |
With your help, Snow's accomplished his goal of preventing the destruction of the crystal pillar at the mouths of the Flan horde. Then, he fades into time, leaving Serah once again.
Run towards the artefact in the distance and toss Mog to retrieve it. Head for the gate marked on your map. When you get there, the Mysterious Artefact will activate the gate and you'll receive the Restoration Artefact.


That wraps up Episode 3. Return to the Historia Crux. We're headed for Academia 400 AF.
Main Story Walkthrough: Academia 400 AF
Academia 400 AF, Enemies: Ghoul, Taxim, Nelapsi, Koboldroid Yin, Ghast
Academia 400 AF is an exercise in frustration. When you first arrive, you'll have to fight a group of Cie'th. Chances are they'll go down without too much of a fight. The problem is, you'll experience about a million of these battles. At this point in Academia, they are near impossible to run from, and you earn nothing from these fights: No CP, no gil. With that in mind, don't deviate from the goals identified on your map. You can explore the map in a safer point in Academia's timeline. Treasure spheres appear in the same place with the same contents throughout time. The only exception is with treasure cubes, which appear only during a particular year.
Start off heading east. Change the direction of the ramp at the nearby terminal. Head up to the next level and pay attention to the security barriers in the area. Next, grab the Map of Academia at the orange terminal after the alert cut scene. Speak to Miss Horizon, located in the same alley as Chocolina. For every map that you explore 100%, she'll reward you with a new fragment. Grab the Farewells Gate Seal in the treasure cube nearby.
Check out Chocolina's new weapons for Noel and Serah. Restock any other items you may require while you're at it. Head through the security gate to the right of Chocolina, then the next, guarded by three Koboldroid Yin. Once they're defeated, continue towards the goal marked on your map. You'll run into a Fencer guarding the next barrier.
As you get close, you'll auto battle a group of Cie'th along with one Taxim, a Cie'th that likes to wound your party. The battle isn't too challenging, just make sure to focus your efforts on the Taxim early on.
Once Caius appears, you need to follow him across the map, all the way on the other side of Academia. Navigate your team over there as best you can; Academia is a confusing mess of alleys and corridors, some obscured by the map due to multiple levels.
When you get close to the southwest corner, just before the blue escalator, level up in the crystarium and setup paradigms before you continue. Focus on Noel's ability as a Commando but make sure Serah is growing as a Ravager and a Medic. There's a boss waiting for you just after you walk off the escalator. If for some reason you reach the boss encounter before you get a chance to level up, you'll be given another chance to do so, should you lose the fight the first time around.
Paradigms:
| | | | |
|---|---|---|---|
| Tri-Disaster | Ravager | Ravager | Ravager |
| Relentless Assault | Commando | Ravager | Ravager |
| Cerberus | Commando | Commando | Commando |
| Tortoise | Sentinel | Sentinel | Sentinel |
| Solidarity | Commando | Sentinel | Medic |
| Consolidation | Sentinel | Medic | Medic |
| |
|---|
| |
| Focus your initial efforts on the tentacles. Zenobia Summons three tentacles initially, Vaballathus A-C. They like to cast Fog, Deprotect, Cura, Ruinga, Onslaught, and Shuffle, the last being a series of attacks that inflicts Wounds on your team. Luckily, they stagger quite easily with magic and once they're all dispatched, you can finally start your assault on Zenobia. Continue to use Tri-Disaster to quickly fill up her chain guage. As usual, switch to the Cerberus paradigm to inflict as much damage as you can when she's staggered. If you fail to defeat her during the initial Stagger, she'll resurrect more tentacles than before when she casts Defensive Stance; Six, to be exact. This is when Shuffle becomes a little more intimidating. |
| |
| |
When you've K.O.'d Zenobia, , get ready for a cinematic action sequence.
| |
|---|
| Xbox 360: Up, Left, Right, B, Right, Tap A |
| PlayStation 3: Up, Left, Right, Circle, Right, Tap X |
Perfecting the CAS nets you a Crystal Petal adornment.
After the cut scene, take your new Tower Artefact to the gate marked on your map, northeast from your location. Grab the treasure sphere along the way to collect 1050 gil. When you head through the gate, you'll unlock Augusta Tower 200 AF.
Main Story Walkthrough: Augusta Tower 200 AF
Augusta Tower 200 AF, Enemies: None
At the start of your time in the tower, examine the terminal in the southwest corner of the room. After a brief cutscene, you'll be able to explore beyond this small office. Take a left, and enter the first room that appears, again, on your left. Access the second terminal on your right when you enter the room. You'll be asked to choose one of four, four digit number sequences. Pick, "9261".
After a cutscene, you'll be granted access to the rest of the floor. You'll also receive the Map of Augusta Tower. Exit the room, take a left, and open the treasure sphere at the dead end for 1500 Gil.
Run clockwise along the outer ring and you'll spot Caius in the distance. Continue going 'til you reach another dead end and a treasure sphere with 2 Remedies. Toss Mog across the gap for another sphere containing a Librascope. Enter the office behind you to reach the inner ring. If you head to the dead end on the left, you'll find a Wild Artefact, ripe for the pickin'. Again, throw Mog over the gap to collect some treasure. This time, it's a Train Conductor's Belt adornment.
Run towards the goal marker. You'll see Caius in a different part of this floor. You need to use the terminal nearby to complete the path in front of you. Sadly, the access card needed to activate it is in a different time.
You need to travel back to Yaschas Massif 01X. Use a Wild Artefact to open the gate in the west of Y.M.. This will open up Augusta Tower 300 AF.
Main Story Walkthrough: Augusta Tower 300 AF
Augusta Tower 300 AF, Enemies: Flanborg, Flanitor, Thexteron
When you first arrive, access the orange terminal in front of you to rotate the room. Take a left, and examine the terminal outside of room #2. After the room rotates, go to the outer ring and access the terminal outside of room #3 to the right. Access it a second time to complete the required rotation. Go to room #3 and the elevator will be introduced. Before you ride the elevator, explore the middle ring. Go clockwise to score 800 Gil from a treasure sphere.
Activate the elevator to reach the 14th floor. First, run to the northeast section of the inner ring and toss Mog to collect two Potions from the sphere in the distance. From there, take the western path. If you need to stock up, Chocolina is on the right. On the left is a terminal that will rotate the room in from of you. Activate the rotation mechanism twice. Enter the room and collect eight Vitality Bolts from the treasure sphere. Take the southern route to the next room. When you're in there, rotate the room twice. Head towards the center of the tower to collect six Vitality Slivers. Turn back and continue towards the goal marker, leading to a elevator like platform. Activate it to reach the 15th floor.
Go through the first room and onto the middle ring. Take a right, and toss Mog to the outer ring to collect a Phoenix Down in a sphere. In the northern end of the middle ring, toss him again to collect a Librascope.
Return to the terminal outside the first room you entered on this floor. Rotate it three times. Now, go outside room number two and rotate it once. Access the computer terminal on the inside. Choose the password, 1237172. You'll receive the Entropy Board Fragment and 500 CP.
Suddenly, you're identified as a target for meddling with the timeline. Then, you're granted Access Key 50, the item needed to continue exploring Augusta Tower in the year 200 AF. Let's head back there now.
Main Story Walkthrough: Augusta Tower 200 AF
Augusta Tower 200 AF, Enemies: Vespid Soldier, Zwerg Metrodroid, Flanitor, Orion, Dragoon
Return to the terminal that you couldn't access before. This time, with the Access Card in hand, a platform will raise from below and allow you to venture forth. Head east to talk to Alyssa. Turns out she's actually a duplicate. Head southeast through the room with Chocolina. Open the treasure sphere for a Twist Headband accessory. Run counter-clockwise from there and activate the terminal outside room #3. Access the computer inside this room for a side-quest, Find Paradox Agent Type A. Now, head to the middle ring and use the terminal across from Alyssa to create a path to the inner circle.
Talking to her will lead to a LTE:
| |
|---|
| |
| | | | |
I chose A.
Next, talk to Alyssa when she's on the elevator. She'll take you to the top floor of the tower. During your trip, you're forced into battle against a Vespid Soldier, Orion, and Zwerg Metrodroid. After that, there's another battle with three Vespid Soldiers and an Orion. These are all considered common enemies and are not necessarilly difficult. There's even a third fight; this time it's four Metrodroids and an Orion.
Then the Alyssa dissapears and you're left at the top of the tower. There are four terminals within the inner ring. Each one controls a different room on the map. You'll use every terminal to complete the paths on this floor of the map. Activate them as follows:
Toss mog of the NE corner to collect a Casino Ticket. Take the southeastern route and open the treasure sphere nearby for a Bloodguard accessory.Head to the other end to collect a Silence Gate Seal from the treasure cube towards the east. From here, begin to follow the path towards the goal using the previously rotated rooms. When you first get there, rotate the room with the small terminal inside so you can access the middle ring. After exploring that portion of the map, return to the room. When you get to the [!] marker, access the terminal at the desk. You'll acquire Access Key 52, and an activation panel will appear within the elevator.
Navigate back to the elevator and head for the 52nd floor. Once you get there, there's a LTE:
| |
|---|
| |
| | | | |
Head northwest towards room #3. Enter and go through the door on the right to get a treasure sphere containing 1450 Gil. Return to the inner circle and go southwest. Toss Mog to collect the treasure sphere with Eight Mana Engines in the center ring while facing north. If you do a 180 degree turn from there, you can explore the rest of the mid-ring to collect eight Vitality Orbs from a treasure sphere in the east. Continue through the southwest room. Toss Mog south to open the treasure sphere containing a Platinum Casino Ticket. Return to the room and use the terminal inside to rotate the room into the proper position. Use the southeast exit to grab a Magistrel Crest from the treasure sphere, then go through the other exit.
Go into the western room and rotate it twice. Use the eastern exit and then access the terminal on your left to rotate the next room into position. You are now in the outer ring, toss Mog southwest to collect 200 Gil from a treasure sphere. Next, run clockwise 'til you reach a deadend and a TS containing a Phoenix Blood item. After that, head into the room with the goal marker and access the computer for the Top Floor Access Key. With that in your posession, return to the elevator.
As you ride to the top floor, you'll encounter a Greater Behemoth. He looks formidable, but he's relatively easy. When he stands up, he begins to dish out physical attacks on your party, so perhaps bring a medic to the battlefield if you need to replenish your health. He's tameable, so if your lucky, you might catch him for personal use.
Once on the top floor, you'll find Chocolina to the N. In front of her is a treasure sphere with three Potions. Head up the stairs right next to her to continue your pursuit of Caius. At the top, you'll see a gate, and Yeul in the middle of the room.
Before you head over there, consider levelling up your party. I did not at the point, but it might be a good idea if you've accumulated a lot of CP.
Now, head towards Yeul and she'll hand you an Artefact. You'll enter the gate and reappear in the middle of a large circular room. All of a sudden, you're attacked by the Proto Fal'Cie, Adam.
Start by taking out the left and right manipulators with magic. After that, focus on staggering Adam. For a boss, he'll go down rather easily. Of course, this was only the first round.
In round 2, he'll buff himself and the manipulators. When he casts Gate of Babylon, switch to a Sentinel centric paradigm as quickly as you can. If you fail to beat him during the first stagger of this fight, he'll regenerate the manipulators. In my case, his health was low eough where I could ignore the sidekicks and finish him off. If his health is still high, take out the manipulators so you aren't overwhelmed.
| |
|---|
| Xbox 360: Right, Up, Right, B, Tap A, Right, Tap A |
| PlayStation 3: Right, Up, Right, Circle, Tap X, Right, Tap X |
Perfecting the CAS nets you a Crystal Apple adornment.
| |
|---|
| |
| | | | |
Choose option 3.
Once that's done, take the Artefact of Rebirth Yeul gave to you, and enter the gate to unlock Academia 4XX AF.
Main Story Walkthrough: Academia 4XX AF
Academia 4XX AF, Enemies: None
After meeting Hope and Alyssa, you can explore the city and collect treasure or follow them to the academy building in the far north.
Make your way to the Academy when you're ready. Once inside, continue north through the giant doors past the information desk. When you're inside the research facility, talk to Hope and Alyssa. They'll tell you that they need five seperate graviton cores. It's up to you to find them.
Main Story Walkthrough: Graviton Core Hunt
Graviton Core Locations
If you've followed this guide up to this point, you'll already possess two of the five cores: Alpha and Gamma. For reference, here are the locations of all five cores:
Graviton Core Alpha: New Bodhum 003 AF Located on a stout, raised platform in the middle of the map. Use Mog to reveal the hidden treasure containing the core.
Graviton Core Beta: Bresha Ruins 005 AF Located in the grassy section, next to the broken arm rail on the staircase. Use the chocobo to jump over the rail and into the grass below. The Core is hidden in the grass, so use Mog's jewel to locate it.
Graviton Core Gamma: Oerba 200 AF Near Chocolina's shop is a building where you'll find the graviton core. Jump onto the rood with a chocobo and use the Moogle Hunt to reveal the Core.
Graviton Core Delta: Academia 400 AF Sadly, we have to return to the land of high encounter rates. Look for Chocolina's shop in the NW corner of the map. From her, head north and head down the red escalator. Hop down the escalator and reveal the last next core at the end of the path. To find the last core, return to Chocolina's shop and head down the blue escalator. At the bottom, turn around and take the next escalator down. Turn around again when you are at the bottom and follow the path to the south in order to find a new gate. Use a Wild Artefact to open the gate and open Yaschas Massif 100 AF
Graviton Core Epsilon: Yaschas Massif 100 AF While there's a lot to do here, we'll cover that in the post storyline portions of the guide. For now, head to the section of the map with the Behemoths and searchlights. Head for the largest crack in the ground and Mog will begin to signal that something interesting is nearby. Use Moogle Hunt to reveal the last graviton core.
Hand over Graviton Cores: Academia 4XX AF
With all the cores in hand, return to Alyssa and Hope. Give each core to Alyssa and you'll receive the Vagabond Artefact. Chat with Noel for a second, then take it to the gate in the east.
Main Story Walkthrough: The Void Beyond ??? AF
The Void Beyond: Clione, Chelicerata, Nekton, Meonekton
Serah arrives in the Void Beyond by herself. Explore before talking to Yeul. Locate the treasure sphere nearby containing a Librascope.
When you've explored the area, go chat with Yeul.
Turns out you're stuck in a shadow of Valhalla. You must escape the shadow or live in a dream forever. Great.
You'll receive the Etro's Sorrow fragment and 600 CP.
Follow Yeul , pick up another librascope from a treasure sphere. Talk to the next Yeul along the path. She reveals that Serah is the next chosen servant of the goddess.
| |
|---|
| |
| | | | |
I chose, B, and received a Live Trigger Reward: Caius Sword Adornment.
When Serah finishes her conversation with Yeul, she receives the Pulse's Recognition Fragment and 600 CP.
Follow Yeul again and you'll receive Lindzei's Desire Fragment and another 600 CP.
The next Yeul has some information about the original game and the characters' true purpose. After, you'll get Mwynnes Tenderness Fragment and another 600 CP.
Head up the stairs, talk to her again for Behunivels' Sleep and 600 CP.
With the new section of the map open, this will be the final time you speak to Yeul. Before you do, check the crystarium and level up if you can. Setup the following paradigms:
| Paradigm | Serah | Monster |
|---|---|---|
| Saboteur | Sentinel | |
| Medic | Sentinel | |
| Sentinel | Sentinel | |
| Ravager | Ravager | |
| Ravager | Commando | |
| Sentinel | Medic |
| |
|---|
| |
| The most difficult part of this battle is the Chain Break skill employed by Caius. Just when you thought you had the battle under control, he resets the chain guage. Poison is a useful tactic against him, and will prevent his Regen buff from hindering your progress. Serah's abilities as a Saboteur should, in theory, keep his HP and buffs in check. Switch to Medic in order to Cure and Dispel debuffs from your crew. With a Sentinel in your Paradigm Pack, you should be able to draw enough damage away from Serah so she can maintane the balance on the battle field. When there are moments of relative clarity, switch to RAV/RAV or perhaps RAV/COM to build his gauge. Don't forget to draw his attacks and distract him with the SAB/SEN setup. This way, he won't heal himself as often and you'll stand a chance of taking him out. |
| |
| |
Main Story Walkthrough: New Bodhum 00X AF
New Bodhum 00X, Enemies: Ghast, Seeker
Serah awakes in New Bodhum, but suspects it might only be a dream. Talk to labreau, the girl with dark hair.
| |
|---|
| |
| | | | |
Next, talk to Yuj.
| |
|---|
| |
| | | | |
Talk to Maqui, our spikey-headed, blonde, friend.
| |
|---|
| |
| | | | |
Finally, talk to Gadot.
| |
|---|
| |
| | | | |
I wonder who might be waiting for you in the NORA house. It's time to find out.
So in this time, you and him got married. Lightning is alive an present as well. This isn't easy for Serah to process and timespace begins to distort. When you regain control, go talk to lightning at the end of the dock.
"In this place you can see all your hearts desires come true."
- Lightning
It sounds like a warning that this is a false reality and perhaps Serah needs to find a way out.
| |
|---|
| |
| | |
I chose "No", of course.
Head for the crater up north. Look out for Ghasts and Seekers along the way. Another mysterious figure? Go see who it is; turns out she isn't alone. It seems that Lightning was indeed a delusion driven by Serah's strongest desires. What she really wants, is the real thing. Enter the spacetime distortion to continue the journey.
Main Story Walkthrough: A Dying World 700 AF
A Dying World 700 AF, Enemies: Apotamkin Pleuston, Pantopoda, Garganzola, Strigoi, Seeker, Metalicactuar
Suddenly, the Void Beyond transforms into a new location, A Dying World, in 700 AF.
Run through darkness to find noel, standing next to a downed behemoth. As it turns out, you're in Noel's dream world. Caius and him are hunting together as mentor and student respectively. Noel is training to replace Caius as the one True Guardian. When you regain the use of Mog, use him to reveal a hidden treasure sphere containing a map of the Dying World. Head southeast where you'll find a bunch of red figures. Using the Mog Hunt to reveal them results in their demise, which bares no consequence now, but may come into play later on.
Explore the map a bit. Around the corner where the world forks, there is a live trigger reward behind a small wall on the east side, just before the rectangular notch. It's the Promises Gate Seal. If you explore farther, you'll find an Oracle Drive. Nothing else to see here for the moment though. If you're interested in seeing what Chocolina has to offer, she can be revealed courtesy of Mog, just north of the sphere containing the area map. Next, follow Noel until he finds Caius. You'll gain control of Noel and battle Caius. Don't worry about the solo affair, it's a cinch to win; Caius only has 5,000 HP.
After the battle, you receive the Martyr's Emblem accessory. When you're back in control of Serah, follow Noel towards Yeul. As you follow him north, detour into the little arm breaking off the main map in the northwest. There is a treasure sphere containing an Obsidian Choker. Near a tree in the east is another, this time with ten Vitality Essences.
As you continue to follow Noel, he will begin to drift towards Valhalla. Serah pulls him back and reveals that she's there to save him from his dream state. After that scene, the both of you teleport to the middle of the map. Continue approaching Noel and the both of you will teleport two more times. When you end up near Chocolina, this is an indication that a boss fight will ensue the next time you interact with Noel. Restock, upgrade, and generally prepare for battle!
| |
|---|
| |
| Oddly enough, Gogmagog casts debuffs onto himself early in the fight. Eventually, he'll pass the savings onto you! He's capable of inflicting deshell, deprotect, defaith, debrave, fog, and pain. You'll likely want a medic trained in the ways of Esuna, if you didn't already have one in your paradigms for healing. It might not be a bad idea to keep two on hand to speed up the process. On that note, Gogmagog can heal himself, so continue assaulting him while keeping your own health in check; you don't want him to undo too much of your progress. |
| |
| |
There's a LTE following the battle:
| |
|---|
| |
| | | | |
I chose: "You need to take responsibility." and was rewarded with the Crystal Rose adornment from the resulting LT reward cube.
With all that taken care of, continue following Noel towards the oracle drive. Activate the device and you'll be reunited with Mog, who was sent back from the Void by Lightning. Enter the spacetime distortion for the conclusion of Episode 5.
Main Story Walkthrough: New Bodhum 700 AF
New Bodhum 700 AF, Enemies: Pantopoda , Pleustons, Patomkin, Seeker, Chonchon, Strigoi, Metalicactuar
When you regain control of Mog, use the Moogle Hunt ability at the place where you first started. Open the cube behind you for the Cartesian Board fragment and 600 CP. Examine the spacetime distortion at the dock and Lightning will make an appearance. After the cut-scene, Mog's hunting abilities will receive a much desired upgrade. The concealed items with historia-crux like rings are now accessible.
Head north from the dock and use your new ability to reveal the Artefact of the Ark. Even though you've got the artefact, best not to leave just yet. Explore the map to find these treasures scattered about: Supply Sphere Access Code (used to open a sphere with monster materials in the DLC coliseum), Hope's Message Fragment, and the map of New Bodhum 700 AF.
Finally, head for the gate. You'll unlock Academia 500 AF, but don't head there just yet! We have a couple small diversions to make first.
Dying World 700 AF
When you're back in the wastleand of the Dying World, head back to the location of the Oracle Drive. Use Mog to reveal the OD then examine it for a LTE:
| |
|---|
| |
| | | | |
Choose "I can do this." and you'll receive a Wild Artefact that appears on your right. You want to take this WA to the gate located in the western section of this map, to the south. To reach that part of the map, you'll have to use Mog to uncover the bridge(s) connecting the two halves of the map. If you collected the map of the area during your first visit, consult to identify the bridge's locations. Before you activate the gate, look for the pillar laying on the ground, broken in sections just north of the gate. There's a treasure sphere nearby containing the Sacred Cross weapon for Noel. After that, open the crystal gate with the wild artefact. You'll open up the Bresha Ruins 100 AF.
Bresha Ruins 100 AF
When you arrive in the ruins, consult your map. You'll see a section of the map that has, up until this point in time, been inaccessible. Hop on a chocobo or run over there to collect two good items: an Elixer contained with a concealed treasure sphere, and the Chrysalis Arc, a weapon for Serah with the Quick Stagger passive ability. Last but not least, return to the area on your map with a group of pillars (in the middle section of the Ruins) to open a treasure cube containing the Eternity Gate seal.
One more stop to go before we continue to Academia 500 AF.
Serendipity
The sole reason we've come here is to get the Anti-Gravity Jump fragment skill from the Mystic, located in the first building on your left. This will allow you to increase your hang-time when jumping. This will come in handy during the final episode as there is a lot of jumping involved and the consequences for missing your landing are frustrating, to say the least.
With that added to your repertoir, let's get ready for the final episode in Academia 500 AF.
Main Story Walkthrough: Academia 500 AF
Academia 500 AF, Enemies: Proto Behemoth, Shrodinger, Pantopoda, Managamr, Yeoman
Academia 500 is a series of golden platforms, some of them static and others dynamic. Some of the moving platforms are controlled by terminals that change their direction. In short, it's a confusing mess and it's going to take a bit of meandering to collect every treasure in the area before reaching the goal. Luckily you grabbed the anti-Grav Jump fragment skill from the mystic in Serendipity. You did grab it didn't you? If not, you'll wish you had!
To start, head south and grab the Determination Gate Seal from the treasure cube nearby. After that, head north, then east, and jump on the long platform. Grab the Phoenix Down from the sphere on this platform, and examine the cactuar. Everytime you fall into the abyss, you'll respawn at the last cactuar you checked in with.
From the cactuar, head north and then east. Cross the long platform while continuing to head east and grap the Phoenix Blood from the sphere. With that in hand, return to the last checkpoint by dropping off a ledge.
Go north again, then head west. After the long platform, head north. The next platform ahead of you will change positions. Wait for it to point west, then cross it. From there head north down a flight of stairs and grab the Shaman's Mark from the treasure sphere. Return up the stairs, wait for the path heading east to become available, and you'll be able to access the platform with the goal marker. Before you go there, understand that there is a boss fight against two, large, elemental-giraffes (seriously). Setup your paradigms accordingly:
| Paradigm | Noel | Serah | Monster |
|---|---|---|---|
| Ruthless | Commando | Saboteur | Ravager |
| Relentless Assault | Commando | Ravager | Ravager |
| Cerberus | Commando | commando | Commando |
| Diversity | Sentinel | Medic | Medic |
| Consolidation | Sentinel | Sentinel | Medic |
| Combat Clinic | Sentinel | Medic | Medic |

| |
|---|
| |
| |
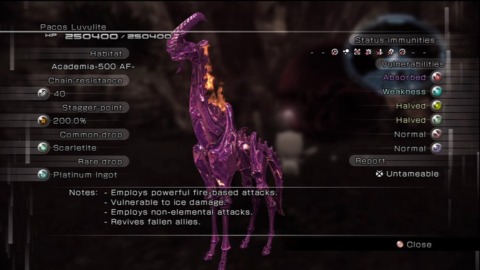
| |
|---|
| |
| |
There's nothing like twins that can't let go. When you kill one of the giraffes, the other will resurrect the fallen one. It doesn't happen right away, but it will continue to happen until both of them are defeated at the same time. The good news is that they only return with as much HP as the remaining giraffe, so you do stand a chance.
Stick both of them with deprotect and deshell. Do the same when they're revived as well. These are the only debuffs you're likely to apply on them.
The only advantage these bosses have is their resurrection abilities, so employ the usual tactics of charging they chain guage with ravagers, followed by pummeling them with commandos once their staggered.
After the battle, you'll receive the Amethyst and Luvulite Fragment, plus 8000 CP. You'll also get the ability to manipulate the various platforms in the area using the cube that appears. There are a bunch of them scattered throughout the map and the cubes they alter aren't always obvious. In other words, to avoid lots of trial and error, follow our notes! FYI, the cactuar on the platform will be activated automatically.
When you regain control of noel, head south into the long platform. Wait for the L shaped platform to rotate so that its pointing south, then cross. Head east from here, activate the cactuar, and continue north. Wait for the L shaped platform to reach the east, and continue as such. Activate the new cactuar, then head north and activate the cube.
Head south, back down the stairs, wait for the L shaped platform to rotate, giving you access to the next platform north, to your right. Head up there and touch the cactuar in the middle of the long platform.
Touch the cube in the middle of this platform to cause the T shaped platform to rotate. Use it to access the platform northwest from your current location. Activate the cube. Return to the T-platform, and take it to the opposite platform in the east from you current location. Run up the stairs. On the next platform, atop the stairs, activate the cactuar and the cube. Wait for the L shaped platform in the north to rotate so yo ucan head east. Run to the end of L-platform, and jump down to open a treasure sphere with the Sisters Gate Seal. Drop off the edge to return to the last cactuar you activated moments ago.
Deactivate the cube, hop on the L-platform and run to the T-Platform west of it. Let it spin 180 degrees and hop to the west, to the platform in the middle of the map. West from there is another T-platform that will rotate and take you take you to an L-platform. When you get there (L platform) head south, and activate the cube and cactuar once you get there. This cube will cause the L shaped platform northwest from her to twist, giving you access to the end of this platforming madness. Double back to the last T-platform, and use it to access the platform north of it. From there, wait for the recently activated L-platform to create a path heading north, and head for the final platform. When you get there, stock up with whatever you may need (Phoenix Downs!) from Chocolina, then continue towards the goal marker to begin the series of boss fights that will mark the end of the main storyline.
Main Story Walkthrough: Final Bosses
Chaos Bahamut
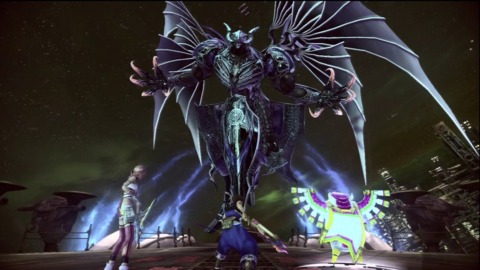
When battling Chaos Bahamut, the biggest threat to your party is going to be Mega-Flare, a move he pulls out after his "Metamorphosis". When you see him telegraph the move, switch to Sentinel-Sentinel-Sentinel (Tortoise) to mitigate some damage. Mega-Flare will inflict wounds on youu characters, but this fight is pretty straightforward. You can't just mash auto-battle, but at this point in the game, Chaos Bahamut is easily managable.
Caius, Part 1
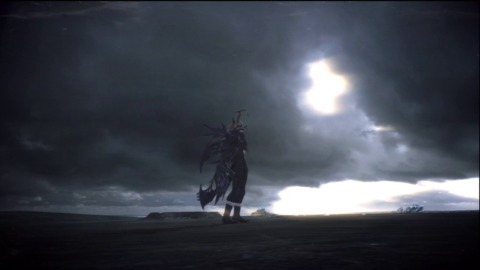
Immediately after defeating Bahamut, you'll face off againt Caius. He's up to the same tricks as always; he likes to inflict debuffs (Poison, Deshell, Deprotect) on a team member with Eye of Bahamut. On the contrary, he'll buff himself with Heart of Chaos. Caius will also break the chain gauge using Chain Break. Oh yea, and he carries the Reraise buff as well. He'll cast a devestating move, "Inferno" that will likely KO the debuffed member. It's a good idea to have two medics in a paradigm for this specific reason, incase a medic gets KO'ed.
You can dispatch him without staggering, so don't focus on magic too much when physical attacks will inflict slightly more pain.
Caius Part 2
He'll start off the battle by casting Heart of chaos, thoroughly buffing his stats. The same goes for Eye of Bahamut; he'll stick it on one of your characters soon after casting Heart of Chaos. Thankfully, he no longer employs Chain Break and you'll be able to stagger him easier than before.
This time, reraise takes effect during battle, so don't think the battle's won as his HP reaches zero. The biggest challenge in this fight is managing the HP of whoever carries the debuffs. While his attacks will destroy that individual, other members should be able to survive his various techniques. If they can't, it's likely that you won't be able to survive the next (and final) boss. Perhaps you should consider grinding and leveling up a bit if that's your current situation.
Garnet, Amber, and Jet Bahamut
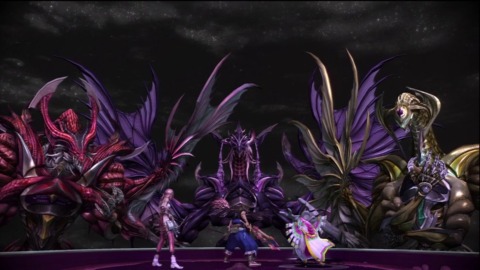
This is the final battle in the main story. If you the other bosses seemed like pushovers, this fight will still be a challenge. Be sure to have a paradigm stuffed with sentinels.
At the start of the fight, Jet Bahamut will take back stage to the other two. Your goal is to KO amber and Garnet so you can defeat Jet.
The other reason you want to defeat them as quickly as you can is because Bahamut(s) will cast Giga Flare, and depending on how many Bahamuts are on screen, will determine how much damage you take. The attack from one is manageable, all three will likely KO your entire team.
The usual tactics apply; use your ravagers to chain each of the bahamuts to a stagger. Make sure to adjust your paradigms to the "X" variety, so all team members focus on a single target. This is something I did the entire game, but unless you play like me, it's worth mentioning. Without it, the characters you don't control will likely attack either bahamut without prejudice.
Once you destroy Garnet and Amber, you'll incur Poison, Slow, and Deshell from Jet Bahamut's Break Curse move. Whip out a medic to Esuna these debuffs away.
He'll also cast Seeds of Destruction. This plops…seeds of destruction on the battlfield. They are quick to kill, but should you neglect them, they'll expldoe and cause damage to your team. Like Giga Flare, the more of them that remain, the more damage you'll take. Take them out quickly and refocus your energy on Jet. Stagger him with magic, as usual, then continue to pummel him with physical attacks. You can also use a paradigm like relentless assault (Commando, Ravager, Ravager) to inflict damage whilst raiding the chain guage percentage. Granted, you do more damage with physical attacks, but the higher chain percentage will more than make up the difference as all damage climbs with the guage.
One attack of his that is worth mentioning is Judgement Blade, which sends Caius' sword into the ground, inflicting considerable damage to your entire team. You have time to switch to a sentinel-centric paradigm, which is recommended. If you neglect to, heal as quickly as you can. Losing a team member for too long will cause you to spend the rest of the fight managing the time and momentum lost in the process.
You likely won't be able to beat Jet before he resummons Amber or Garnet with Attitude Shift. Eventually, the other will resurface as well, without any effort on Jet's part. Repeat everything you've done up until this point, but…WATCH OUT FOR THE COUNTDOWN ABOVE JET'S HEAD! The moment it reaches "1" switch to Tortoise or consolidation paradigm, or suffer the consequences. This is the countdown to Giga Flare. Don't try to take out Amber or Garnet during the countdown unless you are sure there's enough time. Even though you want to get rid of as many of them as you can before Giga Flare, you'll regret missing your chance to defend yourself if you run out of time.
This should be all the advice you need. The biggest key to winning this fight is being able to switch paradigms on the fly, without delay. Master this, and you should be just fine so long as you aren't too under leveled.

Got a news tip or want to contact us directly? Email news@gamespot.com
Join the conversation