Dark Souls Walkthrough
Praise the sun. Our Dark Souls Walkthrough provides tips for surviving the adventure, a guide to the entire world, and hints for slaying bosses.

- Getting Started: Learn how the game works and joining with other players
- Walkthrough: A guide to Dark Soul's giant world and intense boss fights
- Xbox 360 Achievements: Boost your Gamerscore with a huge list of Achievements
- PlayStation 3 Trophies: Gain new Trophies for your collection
What's New:
- October 18, 2011: Version 1.3. The walkthrough now covers all of the areas for the standard (good guy) storyline.
- October 10, 2011: Version 1.2. Our walkthrough takes you all the way into Anor Londo.
- October 5, 2011: Version 1.1. Updated the Equipping section with info about armor defenses and how to cure status effects.
- October 4, 2011: Version 1.0 of the Dark Souls Walkthrough is here. We are starting with a Primer to get you started, but will be updating to a full walkthrough. Check back later for more info.
Character Stats
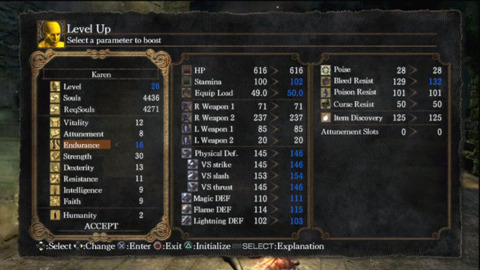
In Dark Souls, each of your character's eight statistics determines your overall level. Instead of being limited to the RPG norm of level 99, you can gain upwards of 700 levels. You can level up at Bonfires and spend accumulated Souls that improve your abilities. Each overall character level costs more Souls than the last, so you should be mindful of which stats you build up.
Because you can lose your cache of Souls easily, it is handy to hold onto consumable items such as Soul of a Nameless Soldier or Soul of a Proud Knight. Using these items will instantly fill your Soul counter with several hundred or thousand Souls, topping you off for a new level or two.
Each level raises your defense against Physical, Magical, Flame, and Lightning attacks. Because of this, leveling in general makes things defensively easier.
Vitality
Vitality improves your HPs, allowing you to survive longer in battle. The best strategy is to avoid taking damage all together, but even with the best evasion and shields you'll still probably wind up getting hit at some point. Because of this Vitality is recommended for all builds, but should be left alone until after both your primary offensive stat and Endurance are high enough.
Attunement
A higher Attunement score will allow your character to equip more types of magic. Unlike in Demon's Souls, where this was only needed for Sorceries, Miracle users will also need to boost Attunement to have more magic slots (Instead of just relying on Faith alone). Obviously, you should raise this stat to allow you to equip new spells; however, if you don't have an additional studied magic, leave Attunement alone. It's a useless stat for characters that plan on never casting at all.
Endurance
Determines your Stamina and Equip Load. This is probably the most universal stat, as any build can make use of more Stamina. Your Stamina meter allows you to withstand block hits, swing weapons, dash, and roll out of the way. Your big weapon or shield won't do you much good if you lack the Stamina to use them. Likewise, being able to escape an enemy's attacks will save the need to stop and heal; dodging should always be the prime strategy for those lacking heavy armor.
Equip Load is also great as it can allow you to move quicker with heavier items, but you need to put in a lot of points into Endurance: you might need upwards of 20 or 50 levels worth of Endurance to make a piece of armor lighter.
As an added bonus Endurance will also raise your resistance to Bleeding. Overall, raise Stamina after your main attack stat is a decent level (around 30 is a good start).
Strength
Strength is required to wield "powerful" type weapons such as swords and axes. Each point of Strength will also increase the damage of most melee weapons, even some which depend on Dexterity to equip. With enough Strength you can also hold two-handed weapons in one hand with a small damage penalty.
Strength is one of the key offensive stats. Because of this, you should either build up Strength quickly or forget it entirely. If you prefer to use brutish large weapon, consider a Strength build.
The Veil - Exclusive Clip inZOI - Official Roadmap Overview Gameplay Trailer Jackbox Naughty Pack Teaser Trailer Keylocker Official Announcement Trailer SULFUR Coming to Xbox Trailer Stampede: Racing Royale | Coming to Game Preview Trailer Promise Mascot Agency - Official Announcement Trailer Lost Records: Bloom & Rage | Lo-fi Summer Trailer Genshin Impact - Official Cutscene Animation: "Execution" Guilty Gear Strive - Official Slayer DLC Character Gameplay Reveal Trailer FATAL FURY: City of the Wolves|Official Marco Rodrigues Character Reveal Trailer Street Fighter 6 - Official Akuma Gameplay Reveal Trailer
Please enter your date of birth to view this video
By clicking 'enter', you agree to GameSpot's
Terms of Use and
Privacy Policy
Dexterity
Dexterity is needed to effectively wield more "advanced weapons" such as bows, spears, and daggers. These weapon types have the advantage of being much quicker or having range. Because of this, they are best paired when carry a lighter Equip Load, allowing you to move quickly and roll. This stat is also well suited for riposte counters and getting in back stabs.
Dexterity is one of the four main offensive stats, so much like the other three, you should either max out this stat or leave it alone. If you want a speedy, agile character go with a Dexterity focus.
Resistance
Resistance boosts your protection against poison. It also gives a few extra points of Physical Defense (But does not provide extra protection from Magic, Flame, or Lightning). Overall the worst stat, not because it's bad, but because every other stat has so many more uses. Still, you should raise this in places where you know there will be an absurd amount of unavoidable poison and you lack another means of healing.
Intelligence
Intelligence determines the power of your Sorceries and Pyromancies. This stat can also improve the damage of magic based weapons. Obviously this is the stat to improve if you plan on using either type of offensive spell or are looking to fight with magic weapons.
You will also need a Sorcerer's staff or Pyromancer's flame to cast your respective school of magic. Because of this you need to switch out your melee weapon often to cast destructive spells. In general, Sorcery catalysts gain large bonuses from Intelligence (A rank for even the most basic staff), while Pyromancy catalysts gain far less (E or no rank for early flames, C and B rank for very strong ones).
Like with Strength and Dexterity, either max this stat quickly or ignore it if you don't want to cast magic.
Faith
Faith controls of the power of your Miracles and divine weapons. The main stat for a defensive caster or healer. To use Miracles you'll need a Cleric Talisman in your right hand. Also, some Miracles will require you to kneel and pray, making them risky to use while already in combat.
You should either make your character based on Faith or leave the stat at the default level. Because Miracles are mostly defensive in nature, Faith builds can be challenging. However, you'll be a giant help when teaming up with other players.
Starting Classes

The starting classes come with various equipment, possibly magic, and stats. They also have different levels, making leveling up further easier or harder.
Because of this, each class makes it slightly easier to specialize in something, or have some backup skills. For example, the hearty Warrior can be built to use both melee and range weapons, while a Thief might be able to dabble with magic after some training. Still, with enough grinding you can level every stat and gain all spells. It's just a question of how much of a starting boost you desire.
| Class | Level | Vital | Attune | Endure | Strength | Dex | Resist | Intel | Faith | Notable Equipment |
|---|---|---|---|---|---|---|---|---|---|---|
| Warrior | 4 | 11 | 8 | 12 | 13 | 13 | 11 | 9 | 9 | Longsword, Leather Armor |
| Knight | 5 | 14 | 10 | 10 | 11 | 11 | 10 | 9 | 11 | Heavy Armor, Heavy Shield |
| Wanderer | 3 | 10 | 11 | 10 | 10 | 14 | 12 | 11 | 8 | Scimitar |
| Thief | 5 | 9 | 11 | 9 | 9 | 15 | 10 | 12 | 11 | Dagger, Master Key |
| Bandit | 4 | 12 | 8 | 14 | 14 | 9 | 11 | 8 | 10 | Battle Axe |
| Hunter | 4 | 11 | 9 | 11 | 12 | 14 | 11 | 9 | 9 | Bow and Arrow |
| Sorcerer | 3 | 8 | 15 | 8 | 9 | 11 | 8 | 15 | 8 | Soul Arrow Sorcery |
| Pyromancer | 1 | 10 | 12 | 11 | 12 | 9 | 12 | 10 | 8 | Fireball Pyromancy |
| Cleric | 2 | 11 | 11 | 9 | 12 | 8 | 11 | 8 | 14 | Mace, Heal Miracle |
| Deprived | 6 | 11 | 11 | 11 | 11 | 11 | 11 | 11 | 11 | Unclothed! |
Bonfires
Dark Souls no longer contains the Nexus of Demon's Souls. Instead, your safe havens are Bonfires placed around the world. These have several functions to help you on your journey, or may actually hinder your efforts.
Bonfires have three main functions just by resting at them: they will restore lost health, stamina and spells; upon death you will respawn at the last Bonfire you rested at; and most unfortunately, it will revive every non-boss enemy. Yes, the Bonfires are a double edged sword: you'll be restored to full, but in turn will have to battle through deadly opposition over again.
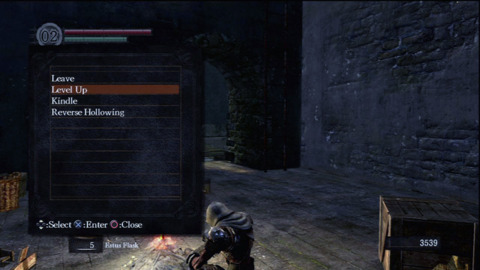
Additionally, resting at a Bonfire opens up a menu for various functions.
Leveling Up and Attuning Spells
The Bonfire's main function is to customize your character. Any stored Souls you have can be spent on various stats to level up your skills. You should save consumable Soul items--such as the Soul of an Undead--until you're ready to spend them on a level up. After all, you don't want to lose those unlocked Souls to a careless death.
You can also use the Bonfire to equip spells to any free Attunement Slots. In a change from Demon's Souls system, both Magic and Miracles in Dark Souls use the same slots. Another major change from Demon's is the removal of MP. Instead, each spell that is Attuned has a limited amount of casts. For example you can only use Heal five times before you will need to return to the Bonfire and replenish your supply.
However, you can Attune multiple scrolls to different slots for more casting. If you purchase two Heal spells, you may equip both for ten casts.
Humanity and Kindling
At the start of the adventure you will be a Hollow: an Undead that is slipping away into a mindless zombie state. You can very well play through the game in this state, although you have various restrictions regarding both single player and joining online. Hollow players have only the base drop rates and are easily hit by curses. Also you can only join other player's Worlds, but cannot act as a human host.
The Veil - Exclusive Clip inZOI - Official Roadmap Overview Gameplay Trailer Jackbox Naughty Pack Teaser Trailer Keylocker Official Announcement Trailer SULFUR Coming to Xbox Trailer Stampede: Racing Royale | Coming to Game Preview Trailer Promise Mascot Agency - Official Announcement Trailer Lost Records: Bloom & Rage | Lo-fi Summer Trailer Genshin Impact - Official Cutscene Animation: "Execution" Guilty Gear Strive - Official Slayer DLC Character Gameplay Reveal Trailer FATAL FURY: City of the Wolves|Official Marco Rodrigues Character Reveal Trailer Street Fighter 6 - Official Akuma Gameplay Reveal Trailer
Please enter your date of birth to view this video
By clicking 'enter', you agree to GameSpot's
Terms of Use and
Privacy Policy
As you explore through the world and fight, you can gain Humanity points. When at a Bonefire you can spend one Humanity to restore yourself to Human form. As a Human you will gain increased drops, and this bonus is increased as you gather even more stored Humanity. Also, you can invite Hollow players into your game or invade other worlds.
Additionally, as a Human you can spend extra Humanity to Kindle a Bonefire. At a normal fire you can store up five Estus Flasks to recover lost health. However, Kindled Bonfires yield ten of these healing items. It is very wise to Kindle a nearby Bonefire before lurking into a strong monster's domain.
Revival and Reclaiming Souls
Dying is a part of Dark Souls. Upon death you will return to your last Bonefire in Hollow form with no Souls or Humanity. However, back where you died will be a blood stain holding your lost goods. If you can make it back to this spot you may recover your lost Souls and Humanity.
However, if you fail to touch this blood stain, those Souls and Humanity will be lost forever. Because of this, try to lure your enemies as close to a Bonfire as you can. This way, you'll have an easier time recovering your Souls, while crossing paths with the least amount of danger.
Shopping and Forging
Souls are not only your means of improving stats, but also the currency in Dark Souls. Merchants and smiths will offer their services for your hard earned Souls, but most aren't interested in buying old equipment. Keep this in mind, as spending a few thousand souls on a neat piece of gear might be a waste if you can't resell it.
You'll eventually be able to sell items for Souls to one important NPC, though they only appear in Firelink Shrine after completing the game's first main objective: ringing the two bells and opening Sen's Fortress.
Some NPCs (typically ones that have already set up shop) will remain stationary, requiring you to travel in order to purchase their goods. Vendors that start captured and are rescued on your adventure will often journey back to the safety of Firelink Shrine.
The different retailers carry various amounts of items, including consumable items, gear, keys, and spells. Some of them are distrustful of Hollows, and may require you to be in Human form to sell items. Others are wary of outsiders and will only deal with members of their Covenant. Listen to the dialogue of an NPC to get an understanding to why they are avoiding business.
Other NPCs might be outright hostile to Hollows and rival Covenants. By changing into a Human form or joining another organization might turn an old foe friendly. Likewise, avoid outright attacking NPCs, as many will fight back, rending their services unavailable.
Forging
Blacksmiths around the world can help repair, reinforce, and modify equipment. Each piece of your equipment has durability, and as they are used or hit, will require Souls to repair. With some materials of your own and a grinding stone, you can also do some repairs at a Bonfire.
Most basic pieces of weapons and armor use Titanite to increase damage and defenses. More complex items might require other stones, or even exotic Embers to customize your weapon. A good smith will also trade you such materials for Souls. Of course a blacksmith's services are not free and may demand several hundred Souls for the labor. Still, it is generally better to upgrade old gear instead of buying basic wares from other merchants.
Each of the smiths specializes in a different ascension and only accepts embers they are comfortable with. If the blacksmith down in the Undead Parish doesn't want to work on Crystal or Flame weapons, consider donating the embers to the smith within Anor Londo.
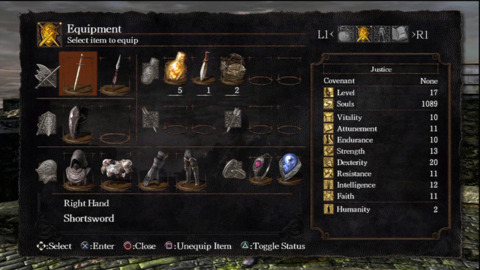
Equipping
Before entering battle, you'll need to be armed for the fight. It is possible to fumble around the menus while already in combat, but will probably prove too distracting to be practical. The main thing to factor in is the size of your Equip Load, which will greatly affect your fighting style.
Equip Load
Your Endurance score will grant additional numbers to your max Equip Load. Each piece of armor your wear and weapon in your hands adds weight that will slow down your movement. When your Equip Load is less than 25%, you may run at high speed and will roll quiet far. At 26-49% your movement is slowed slightly, but still enough to dodge around enemies. When you have over 50% of your load, running is slowed down considerably, and your roll is more of a quick thud onto the ground. Finally, with over 100% of your Load, you will be unable to run and your rolling is replaced with a short forward stomp.
To help balance out your load, you need to be mindful of your equipment. Stronger weapons and better armor typically will weigh you down, but some of these items might be very powerful or prevent staggering. The Poise stat on heavy armor can help withstand the most potent attacks, allowing you to strike and heal even when being hit.
The Veil - Exclusive Clip inZOI - Official Roadmap Overview Gameplay Trailer Jackbox Naughty Pack Teaser Trailer Keylocker Official Announcement Trailer SULFUR Coming to Xbox Trailer Stampede: Racing Royale | Coming to Game Preview Trailer Promise Mascot Agency - Official Announcement Trailer Lost Records: Bloom & Rage | Lo-fi Summer Trailer Genshin Impact - Official Cutscene Animation: "Execution" Guilty Gear Strive - Official Slayer DLC Character Gameplay Reveal Trailer FATAL FURY: City of the Wolves|Official Marco Rodrigues Character Reveal Trailer Street Fighter 6 - Official Akuma Gameplay Reveal Trailer
Please enter your date of birth to view this video
By clicking 'enter', you agree to GameSpot's
Terms of Use and
Privacy Policy
Your movement and defense style really varies from enemy to enemy. In some cases you need that extra mobility to safely dodge those attacks. On other foes, straight defense will keep you from being pushed or knocked down. You should be prepared to change your armor and weapon sets depending on what you're up against.
Defense and Resistance
Each piece of armor has six different types of defense and four resistances. An armor will favor one or more of these properties, but will have a weakness in some area. Because of this, you should be mindful of what armor you wear for different foes.
An armor's physical defense is further broken down into three types: Strike that protects against blunt force attacks, Slash for swords and clawed swipes, and Thrust which guards against spears and arrows. When you check a piece of armor, it will only display its base physical defense, but you can hit the "Toggle Display" button to gain additional information. Armor will also reduce damage from Magic, Fire, and Lightning. In general, Lightning defense is the hardest to come by, so any piece that protects against shocks is valuable.

Armor also has four types of resistances for abnormal status. The first value is Poise, which isn't a true status effect, but will help prevent being stunned and knocked down. Lighter clothes typically have no Poise, but heavy plates and stone mail offer high staggering protection.
Your equipment and natural ability scores will also protect against two types of damage over time: Bleed and Poison. Bleeding typically happens from getting hit by piercing daggers and other weapons. Poison is most likely part of an enemy's main attack, but can also be caused by stepping on poison ground or water. You aren't hit with either of these two status abnormalities immediately. Instead, a "build-up" meter will appear and when the gauge fills, you will be afflicted. Bought or farmed healing items--such as Moss Clumps from Darkroot Wood--can be used to cure Bleeding and Poison.
There is also the ever deadly Curse. You have no natural protection from this ailment, but can boost resistance from armor and by being in Human form. If your Curse build-up meter does fill up you will instantly die. Upon revival you will be at half health, and curses can stack until you're at an eigth of your life. If you do come under Curse, you will need to use Purging Stones sold by NPCs at the top of Undead Parish and Undead Burg sewers. You can also take a journey into New Londo Ruins for a cure that costs Humanity, but it can be very difficult at even high levels.
In Your Hands
You can equip up to four different items in your hand slots. All heroes in Dark Souls are right handed, so main attack weapons should be placed in the right, while off hand weapons and shields go in the left.
Main hand equipment usually have a normal attack and a slower, yet deadlier power attack. In some cases, as with the Halberd, this power attack delivers a sweep. Your shield and off-hand weapon can be used to block in coming blows, parry for a counter, or even quickly attack. While guarding with heavier shields will nullify all damage, blocking with a sword or dagger will still result in receiving some damage. Rapiers and other swift weapons typically parry instead of outright block, allowing you to deliver a powerful riposte.
You also need to place spell casting items: staves, flames, and talisman in one of your free hands. This means that you have to forgo equipping an extra weapon to make up for these slots. If you're mixing magic school together, you might find that you have no room for even a melee weapon.
Additionally, you will need the required Strength, Dexterity, Intelligence, or Faith to effectively wield a weapon. If you lack one of the key stats, your swings will be wobbly, weak, or you may simply scratch your head while attempting to cast. In some cases, weapons that are too wily for use in one hand can be used in two hands. You can quickly change to holding your right hand weapon in both hands, resulting in more control and power.
Not only does your hand equipment have requirements to use correctly, it also receives a different score from each of the four attack stats. You might pick up a rare holy sword that uses both C ranks of Strength and Faith to determine its power. Other items might have an A rank (or even S rank) in a single stat, making it only viable for builds that pumped up that stat.
Be Ready for Any Situation
As with armor, you will need to change equipment to fight various type of enemies. You might find that some beasts are immune to Flame or Physical damage, while other creatures fly and require some kind of ranged attack. Other times you might need the biggest weapon to crack a foe's heavy defense.
For example, an agile spellsword might want to consider having a spear and casting staff in their right hand, while a shield and rapier are in their left palms.
Combat Basics
Now that you're armed and ready, it's time to go over the fundamentals of battle. As mentioned previously, each enemy fights differently, meaning that you will have to switch tactics for every new foe in your path.
Be Mindful of Stamina
Stamina governs many important offensive and defensive properties. You need Stamina to run, dodge, block, and even swing weapons. If you run out of Stamina, you might find yourself unable to avoid a painful assault. You recover Stamina faster while standing or moving normally, so put down your shield for when you need a Stamina recharge. This means that you typically can't just roll around or slash endlessly, and will need to pause to restore your lost energy.
Time Your Actions
The Veil - Exclusive Clip inZOI - Official Roadmap Overview Gameplay Trailer Jackbox Naughty Pack Teaser Trailer Keylocker Official Announcement Trailer SULFUR Coming to Xbox Trailer Stampede: Racing Royale | Coming to Game Preview Trailer Promise Mascot Agency - Official Announcement Trailer Lost Records: Bloom & Rage | Lo-fi Summer Trailer Genshin Impact - Official Cutscene Animation: "Execution" Guilty Gear Strive - Official Slayer DLC Character Gameplay Reveal Trailer FATAL FURY: City of the Wolves|Official Marco Rodrigues Character Reveal Trailer Street Fighter 6 - Official Akuma Gameplay Reveal Trailer
Please enter your date of birth to view this video
By clicking 'enter', you agree to GameSpot's
Terms of Use and
Privacy Policy
You can't just swing wildly in Dark Souls. You need to wait and attack when your enemy's defenses are down: mainly while they recover from an attack or block. Some fast weapons, such as daggers, can straight interrupt enemy attacks, while heavy axes might be able to even bash through shields.
Be aware of what stance an enemy is using. Some will attempt to goad you into attacking, only to quickly counter with an absolutely devastating strike. Others will start with a ranged swipe, but might switch to powerful grapples if you get in too close.
This holds true for your own attacks. You can often times use your shield or off-hand weapon to stagger enemies and get in a powerful counterattack. If you're fast enough you can also try rolling behind an enemy and backstab them for extra punishment.
You also need some timing when casting magic and firing arrows. If you are too close, a Soul Arrow might fly over an enemy or you might not have time to cast at all. In general, Miracles force you to sit down and pray (Though some like Force don't require this), so you should cast them while out of combat. If you really need to heal, stick to your Estus Flasks.
Priority Targeting
When fighting a single enemy you'll want to lock on to make combat easier. However, with multiple targets it's some times better to not use lock-on as this can make it hard to notice your other opponents. You can also lock on and off so that you can shoot guided magic one second, but move around freely the next.
Try to target the most fragile enemy, regardless of how deadly they are. For example, in the Undead Parish you might find yourself fighting several knights at once. Some will be wielding heavy shields and long sword, while others have rapiers and shields. It's actually the heavily armed knights that have less health and should be destroyed first.
Retreat to Favorable Ground
You will often find yourself fighting in environments that put you at a disadvantage. These might include being on a narrow bridge, slowed by water, or surrounded by fire. In these cases, it is in your best interest to lure the enemy into a place where you have the upper hand, or at least an open playing field. It's also good to fight closer to a Bonfire, or simply in a place where you can't be ambushed.
Your weapon of choice might also effect how well you fight in environments. Large sweeping weapons will bounce against walls, leaving you exposed for a few seconds. In these cases you'll want to switch to a spear to thrust forward.
Danger is Everywhere
Dark Souls takes place in a massive open world with very little direction of where to go next. This leads to a lot of exploration and discovery. Be warned, you're lack of familiarity with a new location can be incredibly dangerous. Traps are in places you might least expect, ranging from rolling boulders to fiery blazes. Thankfully, most of these will not reset after resting at a Bonfire. However, enemies will always be lurking around.
Worse yet are assassins and guards that hide behind doors and corners, ready to ambush as you walk passed; often sneaking up out of view of your camera. Move with caution, but be ready to quickly roll or block at anytime. The potential to suddenly be in deadly combat is extremely high.
Death is Inevitable
Face facts: even if you're a high level with great gear and a plethora of knowledge, you will die at some point in Dark Souls. Enemies attack you in droves, often using tricky attacks that can completely breach your defenses. Likewise, other players will often enter your world and attack when you least expect.
This is all part of the experience. Embrace your deaths and use them to ready yourself for the next encounter. Try to recover your Souls and Humanity when you can, but don't get discouraged if hours of hard work suddenly get flushed down the drain. Dark Souls is an abusive relationship. You'll need thick skin and a masochistic heart to love your tormentor.
Online Multiplayer
You might be alone in Lordran, but parallel worlds are all around you. As long as you sign into PSN or Xbox Live you will be automatically taken into Online mode. If you wish to play on your own, disable your internet connection.
There are several activates you may engage in with other souls: giving helpful hints, joining forces, or attacking other players.
Other Souls
As you roam around the world you may spot other players in Soul form as they attempt to complete their own quest. In some cases they may leave behind their own blood stains. If you click on a fallen player's blood stain, you can witness the last few moments leading to their demise.
Messages
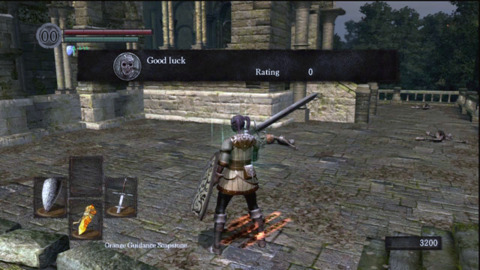
In the Undead Burg you can purchase various items from a merchant. Among them is an Orange Soapstone that will allow you to leave messages for other players. Even though you can buy multiple Soapstones, the item is not consumed when used.
You cannot fully customize your messages. Instead, you enter a number of statements from a list of dialogue choices. For example, you might leave a message of "Be wary of Right" to let people know that there is an enemy hiding behind the corner.
You can also use messages to outright lie, giving other adventures a false sense of security when trouble is abound. However, messages can be rated by other players. Messages that have high scores may reward the writer with bonuses or an instant heal. It's your choice if you want to aid or hinder other users.
Cooperation
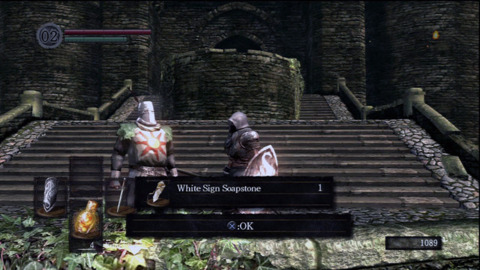
After defeating the Taurus Demon in Undead Burg you can encounter a white knight of the sun. He will offer you a White Soapstone that can be used to join with other players. To join other people's worlds place your White Soapstone down on the ground. You may do this in both Human and Hollow forms. As long as you stay within a minimum range and not near a Bonfire, you can be summoned by other players.
To invite other players you must be a Human. Locate the other player's Soapstones and summon them into your world. As the host you can invite two others to join your team. While working together you can defeat bosses and other enemies as a team. This can aid the Human to complete areas that were far too challenging. Guests are rewarded with bonus Souls and Humanity for aiding the host player.
A warning though: if the Human host should die they will become Hollow and all guests will be banished from his world.
Invasion
Eventually you can find Cracked Red Eye Orbs. These can be used to invade other worlds and engage in player vs player combat. Killing other adventures will allow you to steal Souls and Humanity, and also cripple their progress. Red Eye Orbs are consumed even when you cannot find a victim for invasion.
Your main goal as an invader is to kill the host, though disposing of any allied guests will make this process much easier. In general you should remain hidden and ambush when the host least expects you. In other cases you should attack while the host is already engaged with a strong enemy. This will leave them distracted and unable to defend themselves.
The host and his guests are most likely headed for a boss room, so you may want to head there if you spawn in a strange location. However, the host can chicken out of a fight by reaching the white light of a boss door and entering inside.
Be warned though, killing other players can lead to the wraith of the Darkmoon. Your victims can purchase Books of the Guilty from the Undead Parish and take revenge on you by adding you a hit list. By being on this list you may be constantly attacked by powerful black knight minibosses.
No Direct Communication
Dark Souls is a lonely experience. Even with other players on your side or after your head, you cannot use built in voice chat. This means there is no forming a plan with your team or taunting your victims.
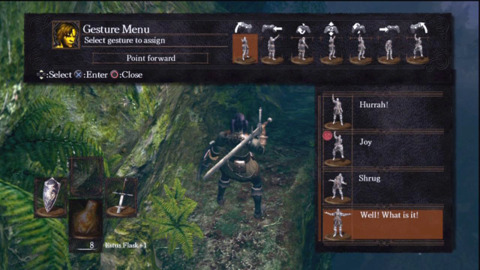
Instead, you will have access to gestures that will help get your point across. These start out as pointing in a direction or sulking in defeat. As you talk to various NPCs they may teach you more gestures to help interact with other players.
If you have a motion device--such as the PlayStation 3 Sixaxis--you can perform gestures without entering the menu. Simply hold your confirm button and flick your controller to make a gesture.
Covenants
Covenants are organizations throughout the world. Being a member of a Covenant has benefits both within singleplayer and multiplayer. There are nine Covenants total, each which have their own strengths. You should pick one wisely, as breaking their rules can cost you dearly.
One example of changes to multiplayer is from the Way of White. All members of this Covenant will be able to join each other easier and will be given benefits from Miracles cast around them. They are also better protected from enemy Covenants.
Some Covenants are designed to harm other players. Members of the Forest Hunter gain bonus Souls and are summoned to kill other players within the dark forests. Gravelord Servants can force extra enemies into other player's world and steal Souls, but can be easily invaded themselves.
Other Covenants don't have direct effects on multiplayer, instead granting access to new spells, extra healing items, or making allies out of enemies. Pick the one that best suits your play style and be careful to not betray their trust.
If you do break a covenant (or simply want to quit one), head to the top of the Undead Parish bell tower and speak to the black garbed NPC there. With his aid you can abandon a covenant for free, but it will cost many thousands of Souls to remove any sins commited.
Northern Undead Asylum
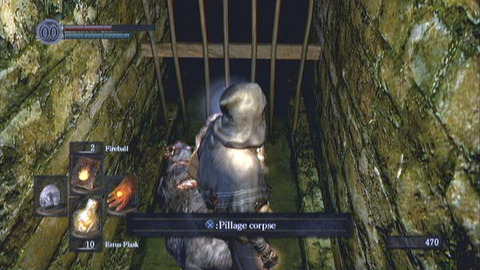
You begin in a prison cell. After a body drops down from a hole in the ceiling, you are granted control of your character. Head forward and pillage the corpse to obtain the Dungeon Cell Key. Use it on the nearby door. Now start down the adjoining corridor. As you advance, there are points along the floor that look like scratches with red light oozing from them. You can investigate those points for a rundown of the controls.
At the end of the corridor, stairs lead down into a lower room where you can target a figure who is standing against the far wall. To the right from there, a short passage leads to the base of a ladder. Climb the ladder and exit the small chamber to arrive in a small courtyard. Start forward and there's a sword protruding from the ground. This is your first opportunity to light a bonfire. You'll learn to cherish such opportunities later in the quest. For now, light the bonfire and then start forward again. Climb some stairs and start forward through a chamber. You'll come under attack by a monster known as the Asylum Demon.
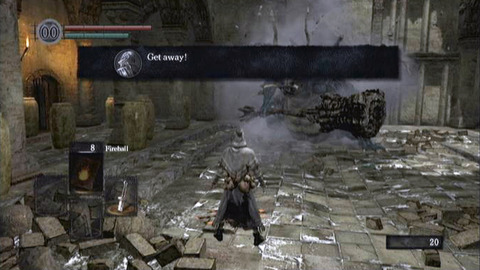
Your only goal here is to get away from the beast. It moves slow and slams the ground with a powerful weapon. You can head to one side of the room and dash along it (through some pots) and find an opening on the back left side. When you pass through the opening, bars slam down behind you and provide a barrier between you and the creature (who probably couldn't have fit through the door, anyway).
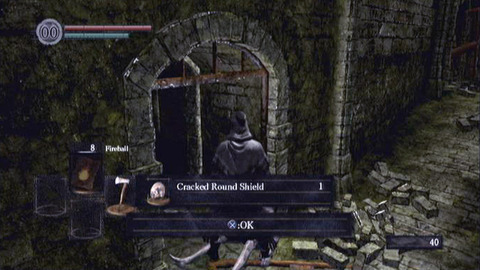
Descend the stairs and continue forward to find another place where you can light a bonfire. Do so, then descend some short steps. There's a note on the floor instructing you to get a shield. As you start along the next hallway, note the archer at the far end. He'll fire arrows at you, which you can easily avoid with a step to either side. As you start along the hallway, though, watch to your left. There's a slumped over corpse to the side. You can pillage that corpse to obtain the Cracked Round Shield, which you should immediately equip. In the same general vicinity, you can also find another weapon on a corpse.
After you've looted everything, continue along the corridor and rush up to the archer. He may retreat and you can follow and hack him apart with your weapon. Then ascend the stairs that he was guarding and you'll arrive at a wall of mist. Investigate it and step through into the next chamber.
Follow the passage left to a ledge overlooking a large room. The left branch that you can take here is a dead end. There's a hint on the ground with instructions on how you can step back, which you are welcome to keep in mind as you start along the passage toward the right. There, you'll find a split in the path where you can head up some steps or down some other steps.
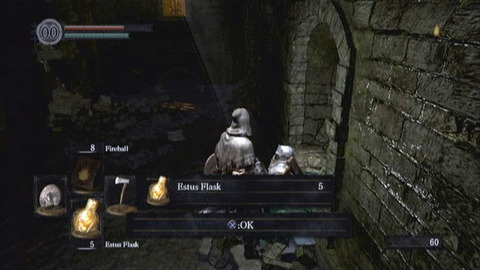
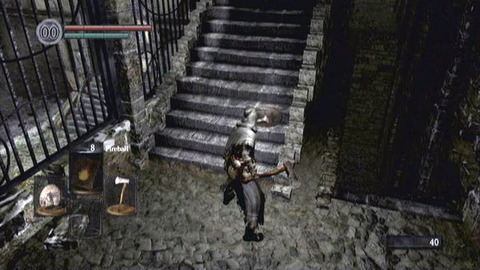
Cautiously, start up the stairs and you should hear some movement. As you do, dodge quickly to the side. A boulder will roll down the path and damage you if you're standing in the way. After you dodge it, run up the steps and kill the fellow at the top of the stairs who rolled it toward you. Then descend the stairs and look at the wall. The ball will have crashed through it and you can enter the opening to find a hidden chamber. There, talk to the soldier on the floor and listen to his story. You'll be rewarded with five of the Estus Flask. It's an Undead favorite. You'll also receive the Undead Asylum F2 East Key, which is sure to come in handy.
Head back through the opening now and descend the stairs in the previous room. At the base of the stairs, look left to find a door through which you can pass. The opening leads out into the familiar courtyard where you can rest at a bonfire again. Then climb back up the stairs you just descended. Return to the area where the enemy rolled a boulder down the steps to try and crush you. The enemy will have returned if you rested at the bonfire, so kill him as necessary. Then use the key that you obtained from the soldier to open the door.

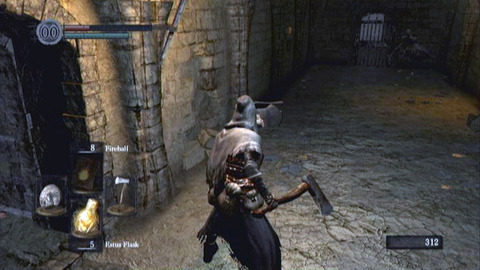
Continue along the corridor and there are more hints on the ground about kick attacks and two-handed weapon wielding. Beyond those, the passage opens into a wider area where you can investigate a corpse to obtain the Pyromancy Flame. Nearby, there are two skeletal enemies that will try to hack you apart while beyond them, an archer waits. If you try to take out those soldiers without paying attention to the archer, he'll pelt you with shots from a distance. Lure the skeletons toward you so that they round the corner and you have less issues to deal with at once. Eliminate the skeletons, then head beyond them and tend to the archer.
Ahead of and to the left of the archer's standard position, there's a wall of gray mist. You can pass through it, or you can head through an opening beyond the archer's corpse to find a room with an armored knight. You can prevent him from being an issue if you target him and then take him out with projectile magic before he gets near. Otherwise, parrying and riposte moves will prove necessary.
Behind the armored soldier is a locked door. You can't open it yet, so you'll need to backtrack to the wall of mist that you saw previously. When you pass through it, note that you'll immediately find yourself in the chamber patrolled by the Asylum Demon (the monster that you ran from earlier in the stage). Defeating him is your only way forward.
Asylum Demon
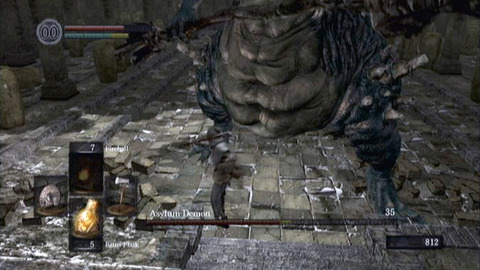
The Asylum Demon is a huge monster who you very possibly can't see as you first enter the chamber. That's because he's stomping around far below you. However, that doesn't mean that you're safe. If you stand where you are on the ledge that grants entry to the room, he'll leap up and destroy the ledge, inflicting serious damage on you in the process. You'll die. It's not pleasant.
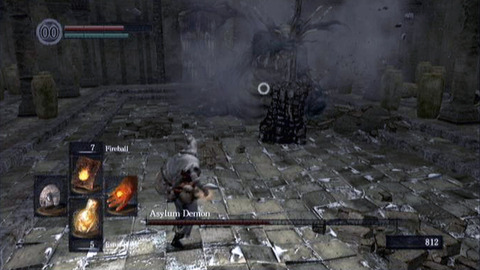
To win the fight, you need to take the offensive. Jump from the ledge and brandish your sword or other such weapon as you plummet toward the ground below. With any luck, you'll land a fearsome blow that cuts away half of his health. Then you'll find himself standing nearby. The first thing you need to do, of course, is roll away so that he can't just immediately hit you with his massive spiked club. Then from a distance, target him with projectile weapons or move in close and hit him with melee attacks from the flank if you must. The demon may be halfway gone, but he'll still put up a fight.
As you battle, make sure that you roll away from his attacks. You can withstand a knock or two from the club, but once you take a hit it's easy to let yourself get cornered by the pillars or pots and then it's difficult to avoid taking additional damage. Try to keep moving and stay out of the range of his club as you plan and execute each attack. Once you hit him a few times, the fight concludes.
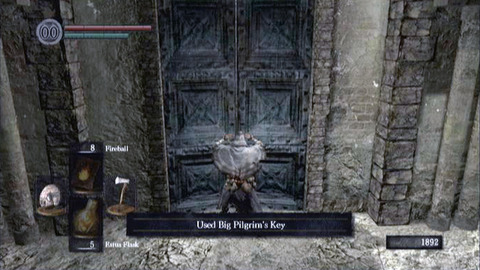
Once you defeat the Asylum Demon, you'll receive the Big Pilgrim's Key as your reward (along with a bunch of souls). The double doors that lead to the courtyard with the bonfire will open, so you may want to use that resource before you proceed. Then you should head along the chamber where you fought the demon.
On its far side of the chamber, there's a set of iron doors. You can open them with your new key and you'll arrive on a grassy trail. A hint on the ground congratulates you and instructs you to continue straight ahead. You're safe to do so. Just walk along the grassy path to the end of the cliff and you'll trigger a cutscene as you finally are allowed to leave the shrine and begin your proper adventure in Lordran.
Firelink Shrine
You'll finally have an opportunity to level up your character now that you've cleared the Northern Undead Asylum. Head to the bonfire and when you access it, you'll see some new options that you'll want to make use of for the game's remainder. Make sure that you level up your character using the souls that you've gleaned thus far.
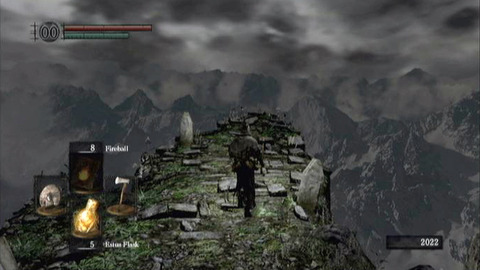
When you're ready to proceed, talk to the man who is sitting on the nearby steps, among the grass. He'll give you a tip about ringing a bell high in a tower and another one that is far below the surface. Then you should investigate the surrounding area. There are a number of items to find on corpses in the ruins at the top of the steps leading uphill from the bonfire. You can find the Firebomb and the Soul of a Lost Undead. There's also the Humanity that can be obtained from the corpse draped over the edge of the well, nearer to the bonfire. It's also possible to descend a trail left of where the man is sitting on the steps. That path leads to a lift that you can ride to a lower area where a blacksmith is located, but there's really no reason to go there just yet since you don't need his services.
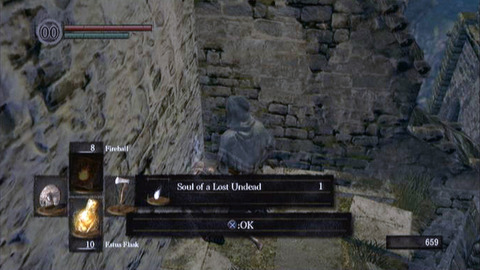
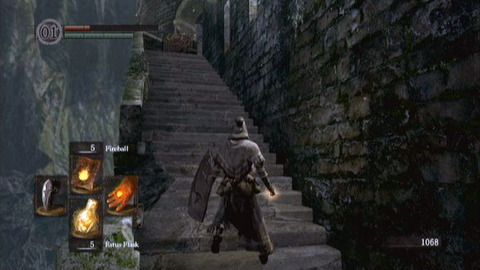
The well at the center of Firelink Shrine is a good marker when you're ready to proceed. Beyond it, against the base of the high rock wall overlooking the area, there's a steep flight of stairs. Head up those stairs and near the top you'll find two swordsmen. Defeat them near the top of the stairs, without heading forward any more than you have to. Then when they're done, you can look forward. There are more stairs leading upward, with an enemy at their top who throws powerful firebombs down at you. On the lower level, there's also an armored soldier near a corpse where you can find another Soul of a Lost Undead. If you try to take him out without tending to the fellow overhead, you may wind up taking a lot of damage. Proceed cautiously.
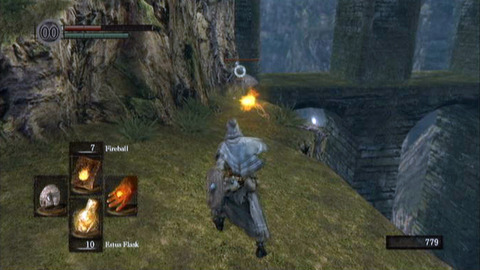
Once you're ready, climb the stairs and take out the guy who throws the firebombs. There are more enemies on that high ground, so continue along that route and mind your footing. It's possible to step over the side of the ascending trail and fall to your death if you're not careful.
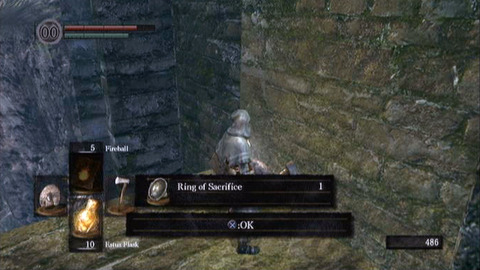
As you reach a high point on that trail, more steps lead to the upper right and a stone walkway. You can climb those and take out the waiting soldier. Just past him is an opening. Ignore it and head along the walkway to its end to find a Soul of a Lost Undead on a corpse. You also have a decision to make at this point. If you like, you can head back down the steps and walk around to the back side of the stone wall. There, a grassy bank allows you to drop to a lower level of the wall. From there, you can head along the edge (there's just barely room to pass around a few stone columns, if you're careful) and find the Ring of Sacrifice on a waiting corpse. Then you can backtrack the way you came and step onto the lower bank near where you found the armored soldier a moment ago.
Whether or not you take that detour, you'll eventually need to return to the high ground and head through the opening in the wall. There, you'll find yourself with a choice: do you go left or right? If you head left, you'll find a giant rat sniffing at a corpse. Kill the rat and investigate the corpse to find another Soul of a Lost Undead. Then return to the right and proceed in that direction. You'll find a scratch on the floor wishing you good luck, then a split in the path. The right fork reaches an immediate dead end at a gate you can't open from your current position. The left path leads up some stairs and into the next area, the Undead Burg.
Undead Burg
As you arrive in the Undead Burg area, you'll see two armed enemies ahead of you. They shouldn't pose much of a threat, so save your magic if you have any left and rely on melee attacks instead. If you take the initiative, you should eliminate the foes without taking any damage.
Beyond where you take down those soldiers, there's a pile of barrels and a path leading left. If you head left, you'll find a store room with nothing in it and two enemies, as well as a door of mist leading to the right (which you should ignore at present).
If you instead approach the barrels, you can smash them and then drop down through an opening behind them to land on a ledge where you can loot a corpse to obtain a Large Soul of a Lost Undead. Then you can drop down from there. Watch out, though; in addition to the two enemies that appear ahead of you, there's one that will come from a dead-end alley behind you. Take care of the enemies in one direction and quickly turn to avoid being slashed in the back by the other enemy or group.
When you have cleared that lower area of enemies, you should head in the direction from which the two enemies came. As you head along that route, you'll cross through an empty room and then come out on another stone balcony area. There's a corpse with a glowing point on it, just ahead of you and to the left. That item is Rubbish. Don't let it distract you. As you near it, several enemies will jump down from a ledge overhead and to the right. Take care of them quickly so they don't slash you to ribbons. Then you can grab the rubbish before heading up the nearby ramp.
At the top of the ramp, you'll find a ladder. Climb the ladder, then head toward the right along the high stone ledge. You'll find Humanity on a corpse against the far wall. Grab that precious item, then backtrack and note the hole in the low wall to the left. You can drop through that opening and then head back to the right along the path you followed a short time previously. This time, you should go ahead and pass through the white door of mist.
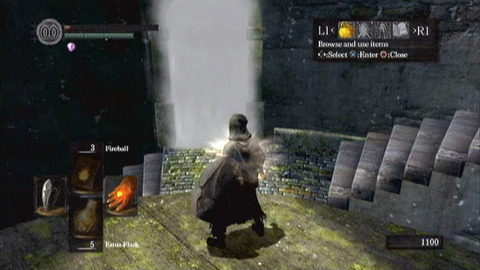
Through that wall of mist, you'll find an empty lower room. Look along the left side and there's a corpse that you can investigate to obtain a Soul of a Lost Undead. Along the wall that's ahead of you as you first enter the room, there are stairs leading to the building's higher level. Head up the stairs with your shield ready and start forward along the next balcony that you find. As you do, a dragon will swoop down to startle you. Its claw should just grace the stone ahead of you and then it is gone.
Continue along the walkway but be careful of the area ahead of you. There are enemies that lie in wait. You'll see a few of them, and one will crash out from behind some barrels. Take them out swiftly as you see fit, but note that there's an archer on a tower in the distance. He'll try to pelt you with arrows (and will succeed, if you let yourself be distracted). After you eliminate the enemies, you can head over to the tower, open the door and check inside to find a corpse on which rests a Wooden Shield.
Leave the small room and look along its side wall. There's a staircase that you can climb to reach the roof, where the archer is waiting. Hack him apart, then look off toward the left. In that direction, you can head through an opening and find a bonfire. Use it as you see fit so that you don't have to come all this way again, then consider backtracking to explore an are that you've not yet visited.
Remember the wide, open area that you crossed while avoiding shots from the archer? A ledge in that direction leads to a couple of armored soldiers with shields. You'll have to fight them carefully, as they're every bit as capable of blocking your attacks as you are theirs. Eliminate the two armored soldiers (from a distance with fire magic, if possible) and then look around the area that they were guarding. You can break apart some crates and find a stair that descends to a lower level.
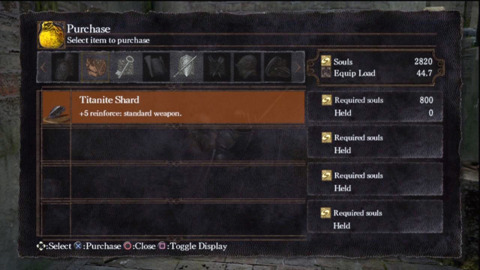
As you arrive on that lower level, keep up your guard. An enemy will burst out from behind some crates, but you can dispatch of him quickly. Head through an opening to the left and you'll find a stone balcony where a merchant has set up shop. He has a lot of merchandise, including the Residence Key (priced at 1000 souls) that you can use to open residences in Undead Burg and a Repairbox (priced at a hefty 3000 souls) that you can use to repair weapons and armor at bonfires. The Short Bow is also available for 1000 souls, a good projectile weapon that could come in handy in certain circumstances to come. Plus there's some other general-purpose gear that can boost your defenses.
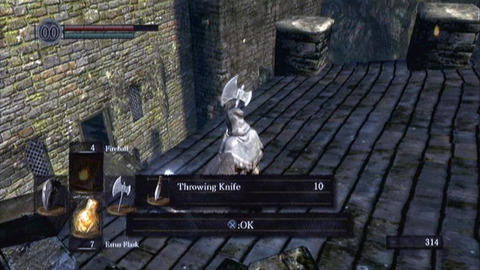
Purchase whatever you like from the merchant (you may have to come back a few times as you earn souls) and then return to the adjoining building. Head through the other opening to arrive at the top of some stairs. Descend the stairs to gain entry to a wide alleyway. Ahead, there will be two separate groups of swordsmen waiting. They like to charge as you get within range, so be sure to engage only two at a time or you may become overwhelmed. Past the soldiers, there's a ladder you can climb to reach a rooftop where you can salvage a Throwing Knife from a corpse.
Now you should backtrack. Make your way to the bonfire and now you're ready to proceed past it to see what else lurks in the burg.

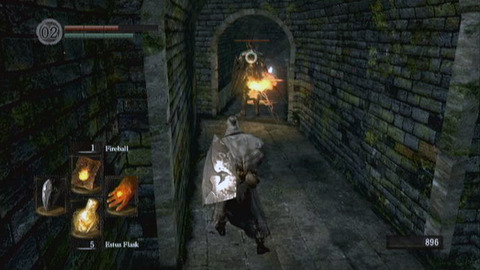
Head back out from the bonfire and toward the area where the archer was positioned on top of the tower. Beyond that point and to the left, there's a narrow walkway that leads to an enclosed room. As you head along it, you want to move quick because soldiers will toss firebombs at you if you delay. When you reach the far side, you'll need to clear a room of soldiers. Make sure not to let any circle around behind you and strike from behind.

After you clear the room, head through the opening and along another open balcony area. Here, there's an opening to your right and just past it a stairway leading up to the higher level. Enter the opening first and take care of the waiting soldier. There are two more openings here, one straight ahead and one up some steps to the left. If you go straight ahead first, quickly turn left once you do and block an attack from a waiting soldier and follow that up with a killing blow. When he's gone, return and head through the other opening that was to the left.
In that direction, you'll find the Black Firebomb item in a chest. Then you can head outside of the building and climb the stairs that you previously ignored. As you reach the top of the stairs, you'll find an open area where three guards are waiting. One of them likes to stand back and toss firebombs, so be careful as you tend to him and his two cohorts. Then you have some options about how you proceed.
There's a wall to the right with a ladder. Ahead, there's a locked door that you can open with the Residence Key if you purchased it from the merchant. To the left from there, you'll find a stone walkway leading down to an area with some waiting guards.

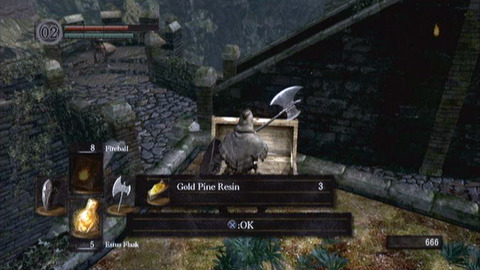
Start by opening the locked door, if that's an option. Head carefully through the room along the right side to reach an outside balcony. There's a chest that you can open there to obtain the Gold Pine Resin. Then you can return to the previous area.
Next you should climb the ladder. At the top, walk around on the roof and investigate a corpse to find a Soul of a Lost Undead. Then return down the ladder. You're now ready to head forward to the left of the building (the one that had the locked door) and around the other side.
As you start in that direction, look to your left. There's an opening to a cylindrical tower. Enter and climb the stairs with your shield held at the ready. As you reach the top of the tower, you'll find an archer. Take him out, then descend the tower and resume your trek along the path. There are several armored soldiers waiting. You need to lure one of them toward you at a time, so that they don't overwhelm you. Eliminate each of them until all three are gone, then continue along the path that they were guarding.
That path soon splits. There are stairs leading up and straight ahead, or you can descend some stairs toward the lower right. Start with the lower path. It leads down toward a long hallway. Near the end of that hallway, standing in a doorway, you'll see a knight with his back to you. This fellow is able to hit hard if you attract his attention, so make sure that you do so only when you are dealing a first blow. Sorcery works well to make sure that each hit does some good, especially if you can get him when he doesn't have his shield up. After that initial blow, you'll need to backtrack while making sure to block any blows he sends your way. When he misses on a lunge, that's your chance to hit him with an attack of your own.

Once you defeat the knight, grab the Titanite Chunk he drops and then check the room that he was guarding. You'll find that it's a dead end, but you can obtain the Blue Tearstone Ring from the corpse. Then you should backtrack to the split in the path. This time, you're ready to consider the stairs.
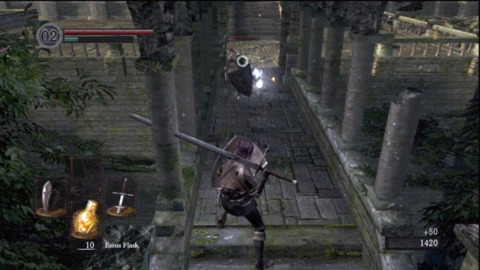
As you look to the stairs, know that they lead to a trap. There's a boulder at the top of the stairs and a soldier will push it down the stairs as you approach. Quickly backstep and dodge to the side to avoid it. Then head up the stairs and kick the soldier's butt. Beyond him, you'll find yourself in the base of a tower. Ahead, there's a locked door. To the side, a spiral staircase ascends a couple of floors to a mist-shrouded door. To open the locked door, you'll need the Watchtower Basement Key, obtained in the Undead Parish area.
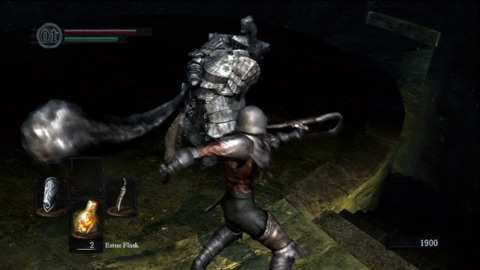
If you come back later and open the door, you can head inside and find a ridiculously powerful enemy. Just descend some stairs that circle in a spiral as they descend. At the base of those stairs, you'll see a stone enemy. He'll spot you and give chase. You can get ahead of him and drop down from above to hit him with an attack, but even that doesn't do much damage. The enemy, meanwhile, is capable of hitting through your shield and doing tremendous damage with his stone club. You need to battle him in an open area where you can dodge the club and then counter with a few slashes before retreating and repeating the process. You need to try to hit it in the back if you want to do any real damage, but even that can be tricky.
On your first visit, of course, you won't have that key. Climb the stairs that lead to the upper floors instead. Pass through the mist on the tower's third floor and you'll emerge on a lengthy walkway. The walkway is guarded by some archers who are positioned on the tower that you've mostly just climbed. They'll try to hit you from behind with arrows as you head along the walkway, but you can climb up a ladder on the side of the tower to reach their level. Once you've arrived, block any opening attacks (they'll see you coming up over the ladder) and then take out the two archers.
Now is your chance to catch a breather. Refill your life and steady your nerves, then descend the ladder and start down the walkway. As you near the far end, you'll attract the attention of a powerful new boss monster: the Taurus Demon.
Taurus Demon
The Taurus Demon will charge you on sight. There are a number of strategies that can work against him, but first we'll offer some notes on how things will go if you try to battle the Taurus Demon the “fair” way.
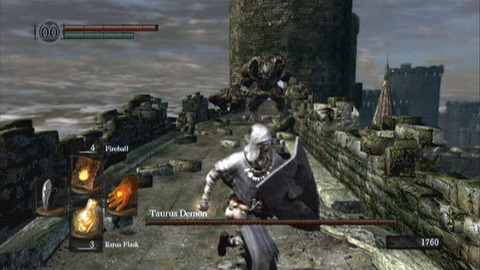
If you fight the Taurus Demon using standard melee attacks (which is not the best way to defeat him), keep in mind that his spiked club isn't the only hazard. He can also knock you around with his feet and legs, which are girded with spiked gauntlets. You need to try to avoid both attacks, of course, but there's limited space. Lock your target onto your foe, roll around (or between) his legs and slash at his feet or tail when you can get in a hit without leaving yourself open to take a possibly-fatal hit from your massive foe. You need to be ready to dodge out of the way if he tries to pounce you, too.
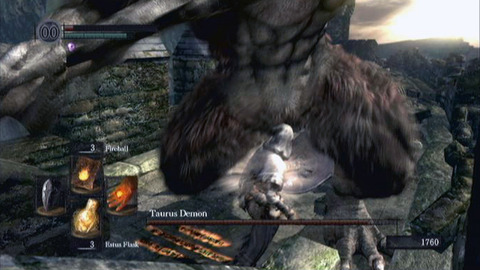
None of your weapons do enough damage to really matter as you battle the demon, and your magic also isn't especially useful, either. Therefore, some cheating is in order. You have two options. The first is to trick him into charging through the hole in the wall partway along the tower. If you can get him to rush through it (without falling yourself), that's an easy kill.
A more consistent method is to hit the demon from the roof where you killed the archers. When the fight begins, as soon as the demon lands, rush back toward the tower and climb up the ladder. If you didn't move quickly enough, he will damage you but you should still be able to get to the top of the tower. Now turn and face the edge of the tower. You'll see the demon standing below you. Quickly step off the edge of the tower and press the required button to use your weapon as you descend. It will strike a fearsome blow to your foe. As you land, gulp down a potion if needed and then roll between his legs. Run away from him and when he follows, you need to lead him toward the other side of the wall. Then roll through his legs and run like crazy back for the tower so that you can repeat the process.
It's important to note that if you take too long climbing the tower and jumping down (if you stop to enjoy a potion, for instance), there's a chance that the demon will leap up to the tower and join you. Of course you don't want that. So move fast, get in your hits and finish the fight in style.
Once you defeat the demon, head along the walkway he was guarding. You'll soon reach a set of stairs that descend toward a lower floor. At the top of the stairs, there are some crates you can break open to reveal a corpse. Investigate to obtain a Large Soul of a Lost Undead, then descend the stairs.
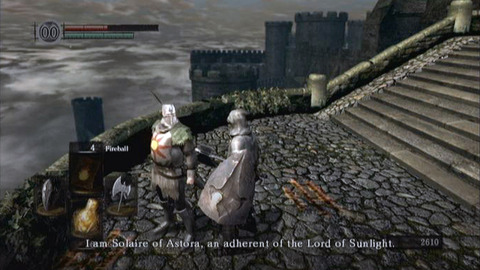
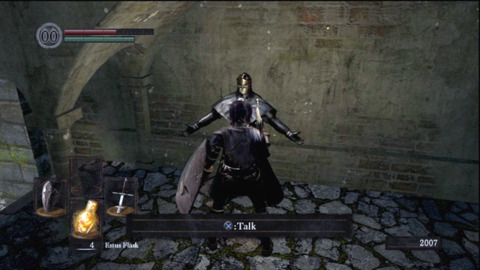
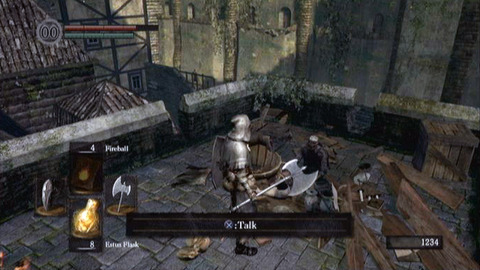
At the base of the stairs, you can head left (down another wide rampart) or right. Start by heading right. Descend some steps and meet with a knight named Solaire. Talk to him twice and (as prompted) agree to his suggestion that the two of you should work together. You'll receive the White Sign Soapstone for doing so. You can use the item to summon Solaire to assist you.
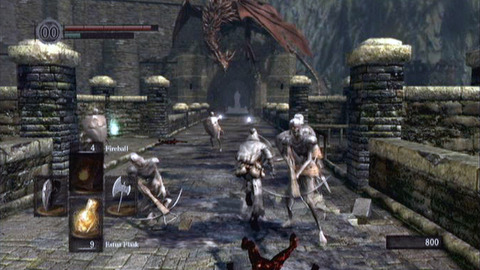
Head back up the steps to the area at the base of the stairs. Since you can't open the nearby door (it's locked by the Basement Key that you'll find in the Undead Parish area), you'll need to start along the guarded walkway ahead of you. However, there are unexpected complications. Rather than just walking forward, which will attract the attention of archers, you should run forward with your shield held high. Halfway down the corridor, you'll see two stone railings that extend to either side of the main walkway. You want to veer right (ignoring the archers) and head down some stairs that wait there. If you move fast enough, you'll beat the dragon flames that come scorching through the area just behind you.
Descend the stairs now and you'll arrive in a square room with two doors branching off from it in different directions. One door leads to the top of a flight of stairs. The other will take you outside, where you'll see that you're on a high ledge with drop-offs to either side. Start by following the first route, down the stairs. You'll come to the top of a ladder in a room with a bonfire below you. Stand near the ladder and press the button prompted on-screen to kick the ladder. You'll cause it to extend so that you can descend to the bonfire, which is the one that you used prior to your battle with the Taurus Demon. You've just created a helpful shortcut. Now climb back up to the room beneath the dragon and this time head out the door that takes you onto the outside ledge.
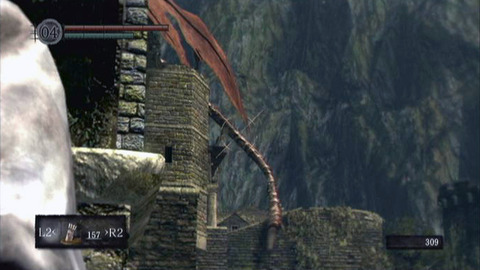
Now it's time for a special activity that's completely optional and completely recommended. If you have a bow equipped and you're carrying plenty of Large Arrows (it's not a bad idea to have at least 50, though around 30 or 35 will kill the dragon; remember that you can purchase the large arrows from the merchant not far from the bonfire for 50 souls apiece), you can obtain the Drake Sword.
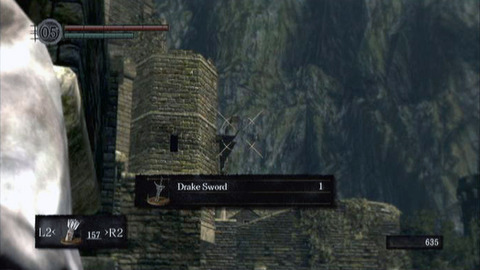
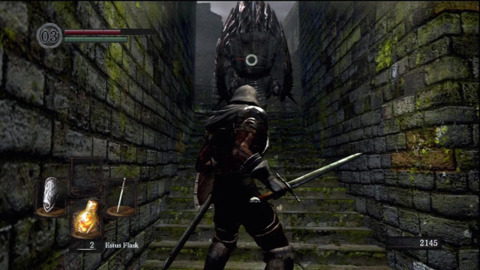
To claim the sword, head along the right edge of the outside area, just near the door that you use to arrive. Look ahead and you'll see the dragon perched on the tower with his tail handing and swinging back and forth like a cat's tail. You can hit it with an arrow from this distance (a few shots are almost sure to miss, but you should be able to hit it on most attempts). If you hit it enough times, you'll receive the item as a reward. At this stage in the game, there's simply not a better melee weapon, though you'll need a STR attribute of 16 or higher in order to wield it.
When you're ready to actually proceed, you can head along the left or right side of the ledge. There are huge stone columns along the way, so watch them as you proceed. Ahead and along the left side of the outside wall, you'll see an armored soldier waiting. As you approach, keep an eye to your right. Another soldier is waiting there behind the stone column. Round that corner with your shield ready and take care of him, then turn toward the other soldier who likely saw you coming and will by now be approaching to try and kill you.
When the soldiers are slain, continue along the route they were guarding, beneath the dragon's overhead perch. Ahead, you'll spy an opening in the wall. There are several ways to proceed here. You can enter the opening slowly, which will lead to a group of rats rushing you and possibly pushing you back out the opening and to your death (by way of a long fall). You can instead rush the opening yourself, roll into the room and try to slay the rats as a group. Their attacks have a chance of poisoning you, and you're all but guaranteed to get poisoned if they mob you. That's just not good. Therefore, you may prefer a third approach to the chamber.
From where you killed the armored soldiers, you can stand on the edge of the ledge and notch an arrow. Then you can aim in the cave and you should see one of the rats. Release the arrow and if it hits the rat, the critter will rush out and charge you by itself. This allows you to kill it and you can repeat the process for a second rat, as well. Then it's safer to enter the area where the rats were gathered and to kill a third rat that will be waiting for you.

After you kill the rats, you can climb up a ladder and then you have two choices as to how you will proceed. One option is a narrow staircase leading upward, while another option is a wide passageway with a waiting soldier. If you head for that soldier, you'll arrive in the Undead Parish area.
You can proceed however you like, of course. If you decide to climb the stairs, you'll find that they ascend for quite some time before finally arriving at the top of the tower. There, you'll find a heavily armored knight like the one that you may have defeated earlier in the stage in order to reach the Blue Tearstone Ring. You can try your hand at him and perhaps win a Titanite Chunk as a reward for defeating him, or you can go ahead and enter the Undead Parish.
Undead Parish
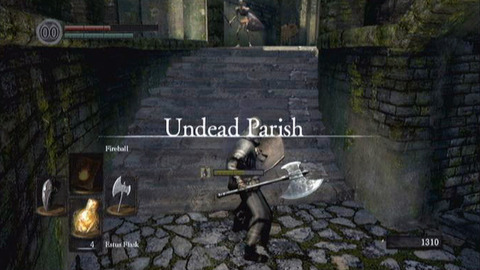
When you arrive in the Undead Parish, it likely will come as a bit of a relief. However, you're not safe yet. You still haven't found a bonfire, and you won't yet for awhile.
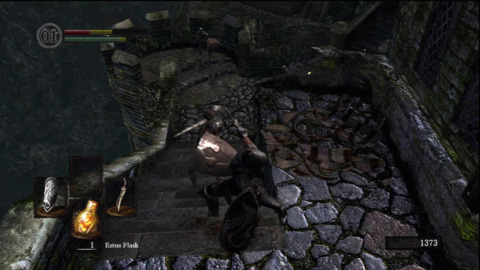
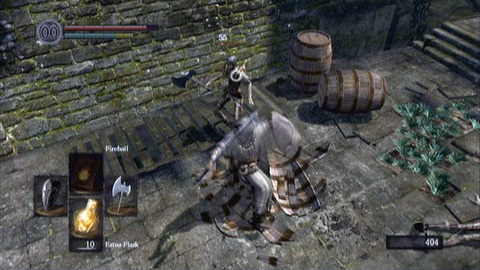
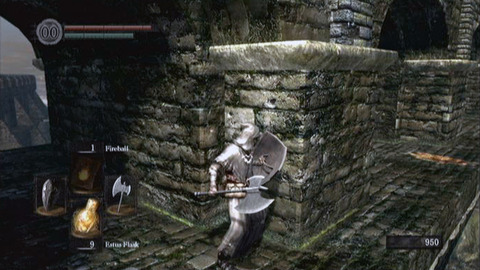
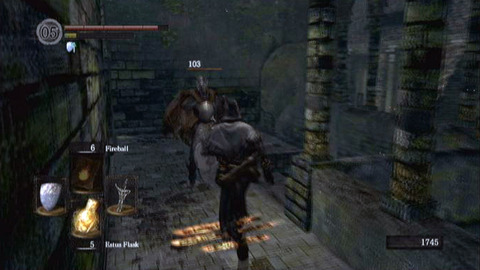
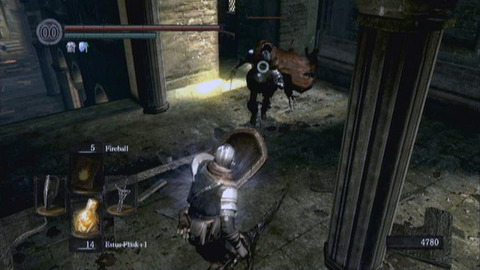
From the entrance to the parish, start forward. There will be an armored soldier or two waiting in plain sight. Take out any of those characters and start into the wider arena ahead. You'll see a giant boar situated on the distant steps. It is surrounded by enemies that you don't want to have to face. You can lure them toward you one at a time by pelting them with arrows and then letting them charge you.

Once you have dealt with those soldiers, start forward through the high archway. Look quickly to your right, as another armored soldier likes to hide in the corner. Deal with him carefully; he has stone columns that make it difficult to approach him, but he's good at spearing you from his point of relative safety. Once you take care of him, head left along the wall where he was positioned and you'll find some steps leading up to a higher floor.
As you arrive on that higher floor, there's a soldier with a shield and lance ahead of you. Beyond him, there also are two archers. You should rush around the armored soldier and take out the archers first, so that they don't pick you apart. Then head back around the armored soldier and look nearby to find another standard soldier who is hiding in the area. Deal with him and then finally the first armored soldier that you found. Then you're free to loot bodies. At the end of the archway where the archers were positioned, you'll find the Alluring Skull lying on a corpse.
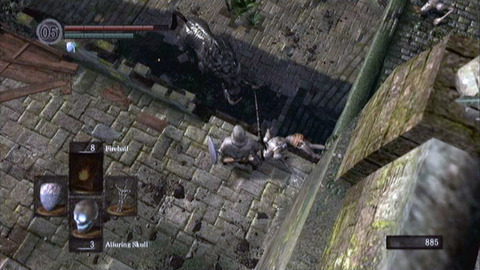
Now you're ready to deal with the boar. He's still positioned below. If you made a lot of noise and caught his attention, he may be pacing around the area. Stand near the drop-off area and toss an alluring skull on the ground. The boar should come to investigate and will be standing roughly below you. Quickly drop down from the ledge and use your weapon as you do so to land a fierce blow. With any luck, that will instantly kill the boar. If it doesn't, you'll have to dance around him as he charges and then hit him with your melee weapon to slowly drain his life meter. He's not especially difficult, actually.
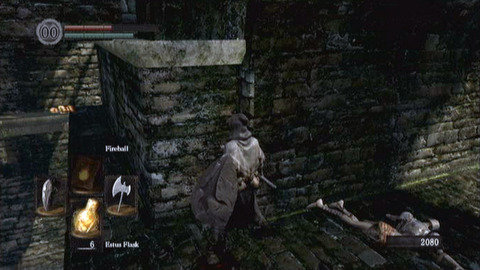
When the boar is toast, you can freely investigate the surrounding area. Near the burning corpse, there's a set of steps that descends toward a new chamber. Start down those steps and as you round the corner you'll see an enemy waiting in the hallway. He's likely to run upon spotting you, but don't follow. He is trying to lead you into a trap. Instead, slowly approach with your shield raised. You should see a ledge ahead of you in the room. There's another enemy waiting there. You can hit him with an arrow to draw him toward you. Then, quickly prepare your shield and tend to him as he gets near. The ruckus may draw two more enemies toward you who are waiting in the next room. Deal with them in the usual manner, then head into the room and climb to the level where the one enemy was standing near the tables.
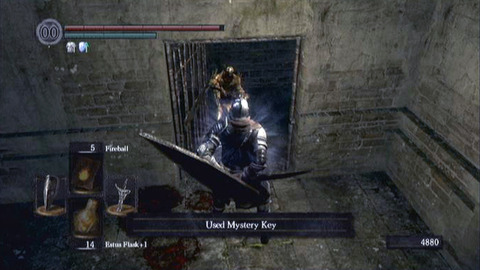
As you climb to that level, note that there's probably a guy still waiting to the right in some barrels, and another may rush you from the left. Work quickly to take care of both of them, then head past the tables and descend to a dead-end corridor where another goon is waiting. Take him out, then investigate the body just beyond him to obtain the Mystery Key. Now return to the upper level with the tables and look along the back wall. You should see a red ladder. You can climb it to an overhead chamber.
At the top of those stairs, two weak enemies are waiting. Take them out, then look to the left. Ceiling beams lead in that direction and you'll spy a corpse with a glowing item. If you head out onto the beam, you can retrieve a Large Soul of a Lost Undead from the remains. Then you should return to the ledge at the top of the ladder and climb a second ladder. It leads to a higher area with more tables. There are no waiting enemies here, just a mist-shrouded doorway. Step through the doorway.
On the other side, you'll come almost immediately to a 'T' in the path. Start by heading left and up some stairs, but move cautiously. As you reach the top of the stairs, look toward the right. There you'll see an area to the left where an armored soldier is waiting. Throw a firebomb at him or hit him with magic to make any conflict easier, since he otherwise can be difficult to fight in the cramped quarters.
Then you're ready to continue down a short hallway to the side. Note that it will come to another 'T' in the path and you don't want to linger long because soldiers will rush you from both sides of that 'T.' If you like, you can attract the attention of the guy to the right and lure him toward you, then kill him before you worry about the guy who waits to the left. The guy on the left is a knight with a cape. He's a new enemy and he packs quite a punch. He also has good armor, the Balder Armor, which you can sometimes obtain for yourself if you defeat him. Your best shot in combat is to wait for him to overexpose himself, then hit him with a flurry of slashes and hope your stamina lasts. Blocking more than one of his blows isn't really an option because he drains your stamina too quickly.

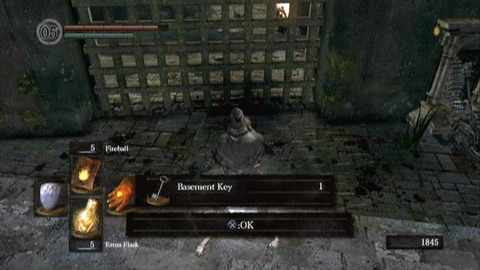
When you defeat the knight, head in the direction where he was positioned and look for a passage leading left. Head along that passage and you'll descend some stairs. At the base of the stairs and to the left, you'll find a more open area. Proceed cautiously and don't head too far forward. Veer left down the steps to find the Basement Key on a corpse in front of a portcullis (you can use it later to unlock the door at the base of the high bridge where you battled the Taurus Demon). Then look to the right and you can activate a lever to raise the portcullis, which creates a shortcut to your location (it's the area that was guarded by the boar).
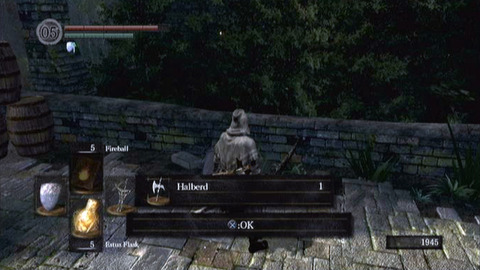
When you're ready, head up the steps and as you do you'll probably alert another of the caped knights. Defeat him, then check the corpse to the left for the Halberd weapon.
Now it's time to ponder an approach on the area the knight was guarding. While you can head through the opening and almost immediately attract the attention of another caped knight, it's not recommended. Instead, head along the alleyway to the right (which you used a moment ago) and then take a left and continue along it. You'll head along the side of the cathedral area and as you come around the far side, the path widens. There, you can take on a group of weaker soldiers. Hit them from a distance with firebombs or magic if you like, while watching for a distant archer. Melee attacks also work, naturally, but they require you to go up against multiple foes at once and that's always risky. When those enemies are tended to, you can approach the cathedral through an opening along its back side.
Before you do that, though, head to the right. There's a long trail that descends in that direction. You can follow it to finally find a new bonfire in a room. Use it if you like, then note that you can proceed along a path to a locked door or you can descend. If you descend, you'll find a blacksmith who can repair or upgrade your gear. He'll also sell you reasonably-priced items that allow you to do some of your own smithing at bonfires and a less reasonably priced Crest of Artorias that can be used to break a seal in Dark Root Garden (it costs 20,000 souls). The variety of options makes this a wonderful area to farm souls (you can do so by battling the enemies above, just outside and possibly inside the cathedral) so that you can invest in upgrades. As for the path leading out of the room with the bonfire, it only takes you to a portcullis that presently bars entry to Sen's Fortress. Keep the location in mind for later, after you clear Quelaag's Domain, and return to the back entrance to the cathedral. Enter it.
Here, you will find a heavily-armored foe waiting just to the right. Approach so that he notices you, then quickly retreat to the area where you just took out the armored soldiers and archer. The knight should follow you and that's good because you need a lot of space in which to fight him and you don't want your battle to alert other enemies to your presence.
To battle this armored guy, draw out his attacks by moving around in front of him until you see him readying himself to swing. He has long range, so quickly roll back and out of the way. He may use a vertical strike that hits directly ahead of him, or he may swing wide. You can block both attacks with your shield, but doing so depletes your stamina and you'll need to quickly back away before any follow-up blows can crush through your defenses. Assuming that you dodge and the knight misses, you can roll forward and hit him a time or two before you retreat and repeat the process. When you have his health low, your foe will try to drink a potion to restore himself. Quickly move in to use another strike or two and finish the job. He'll drop a Titanite Shard.
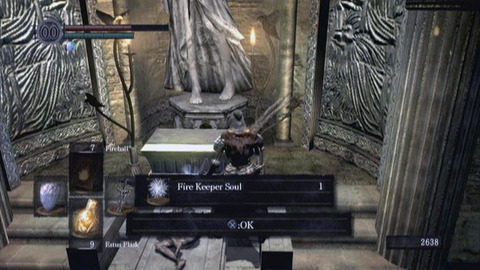
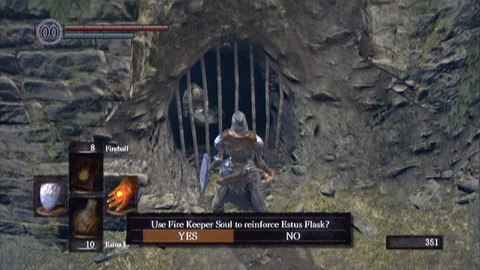
Now you can enter the cathedral properly, though you should still move cautiously. There are some enemies to worry about and you still don't want to draw them to you until you're ready. Proceed into the building past where the heavily-armored knight was stationed to the right. You'll find a waiting altar with a corpse. Investigate the corpse to obtain the Fire Keeper Soul, an item that will improve the ability of your estus flask. On the wall nearby, you'll also notice a couple of elevators. One is open, so step into it and you can ride it down to Firelink Shrine for a brief but important detour.
Back in Firelink Shrine, head along the route that leads to the lower left. Make sure to use the bonfire so that your recent route doesn't need to be retraced if you fall in battle. You can also visit the man who is waiting in the side corridor. Talk to him and if he hasn't already, he'll give you a Copper Coin (talk to him two or three times if necessary). You can talk to him again after that and he'll offer to enter a Covenant with you, if your Faith is sufficient. This allows you to learn miracles. The man only has a few available, but they're darned useful. There's the Heal ability available for 4000 souls, for instance (it does what you'd expect and has five uses) and the Homeward ability for 8000 souls. The latter will return you to the last bonfire that you used.
Once you have invested in any miracles that interest you, should head down the steps that descend along the side of the area (just to the left of the place where the man is sitting on the short wall, not far from the bonfire). Down those steps, you'll find a lower area where there is a woman resting behind some iron bars in a cave. She's mute, but if you interact with her you'll be provided the opportunity to upgrade your estus flask. To do so, you'll have to use the Fire Keeper Soul that you obtained on the altar in the Undead Parish area, a short time ago. Updating your flask was your primary reason for descending to Firelink Shrine (besides the bonfire), so now you're ready to ride the lift back up to Undead Parish.
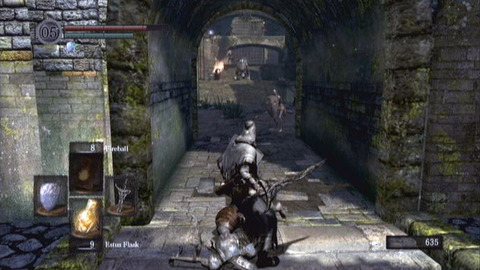
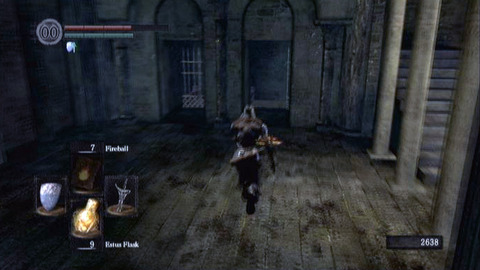
As you arrive back in the Undead Parish area, you're now ready to resume your exploration. Step off the elevator and head up the nearby stairs. Deal with the caped knight in the usual manner, then start into the room that he was guarding. Head forward and toward the right, where you'll note that the hallway enters a larger room. You should see windows and there are enemies moving in them.
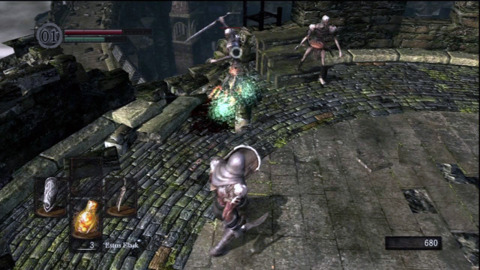
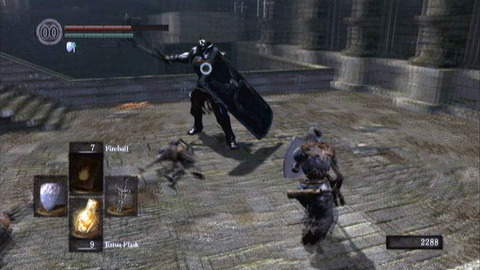
You definitely don't want to fight all of those enemies at once. There is a whole mob of them. You can lure the first few toward you and fight them more easily, then let more keep coming and take care of them a few at a time. One of the enemies is a tall, cloaked magic user. He'll go down quickly once you're able to get to him and hit him with a few attacks, but rushing into the room doesn't make sense if you can help it. Tend to the enemies carefully and you'll have a better day. Note that fire attacks work well against them if they're stuck in the cramped hallway.
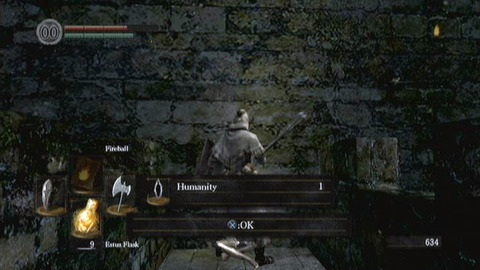
Once the room is cleared, you can explore again. To the left, there's a hallway that leads back in the general direction from which you just came. As you start down it, another caped knight will rush you. You can back out into the large room and deal with him where you have more space. Then head back down the hallway and climb some stairs. There, you'll find an area with a boarded over door to your right. Head beyond it for a moment and break the barrels to find a Humanity item. Then return to the boarded over doorway and break it down with your weapon.
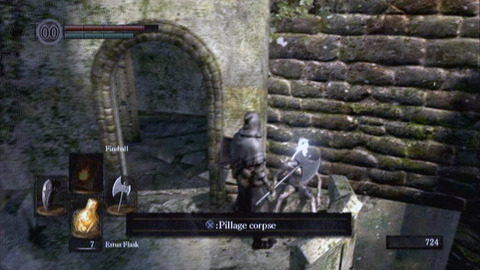
In the hidden chamber, you'll find some stairs. Climb the stairs and at the top, you'll find a cell. There's a prisoner waiting inside. If you have the Mystery Key on you, it's possible to open his cell. Before you do that, though, make sure that you've cleared the area (including the lower cathedral and possibly even the outside areas) of any enemies. Then open the door and attack the prisoner. He'll get up and slowly start toward you, but soon he'll move more quickly You should retreat to an area where you have a lot of room to battle, such as the lowest floor of the cathedral or the area just outside of it.
The prisoner has a few attacks. If you try to attack him when he is guarding, he'll thrust aside your attack and skewer you with a sickle move that does a lot of damage. The best thing you can do is let him swing twice at you and miss. Then you can retaliate with a quick stroke or two of your own before backing swiftly away and repeating the process. Your foe is able to roll around and move quickly to strike you, which is why it's nice to have a lot of room in which to battle him. If you manage to win, you'll be able to pick up some Humanity and also the Ring of Favor and Protection, a powerful item that boosts your stamina and HP while allowing you to carry more items. If you decide to equip it, be sure that you won't want to remove it later; the ring breaks if removed.
Also, the time is right for a word of caution: if you free the prisoner but kill him, you'll miss out on the fantastic item that he carries. He'll eventually extinguish the bonfire in Firelink Shrine, but it is worth getting the reward later in the game. It's best to free him and let him live. If you leave him rotting in his locked cell he'll escape on his own.
When you're ready to proceed after the optional battle with the prisoner (you may wish to visit the local bonfire first), return to the room where you battled the magic user and his minions. Head across that chamber. There are two adjoining rooms on the back side. The one on the left contains a corpse that you can investigate to obtain a Large Soul of a Nameless Soldier. The area on the right side is more interesting. A red ladder ascends to another small chamber with a second red ladder. Climb that ladder to reach a mist-shrouded door. When you pass through the door, you'll be in the boss area.
Bell Gargoyle
When you first enter the battle with the gargoyles, there will be only one of them. You want to take advantage of that fact. Quickly get close to the gargoyle's body, near the base of its tail (not the dangerous tip) and start hacking away at the body or at the tail. You should be able to quickly inflict enough damage that the gargoyle collapses, and you shouldn't have to put yourself at terrible risk to do so.
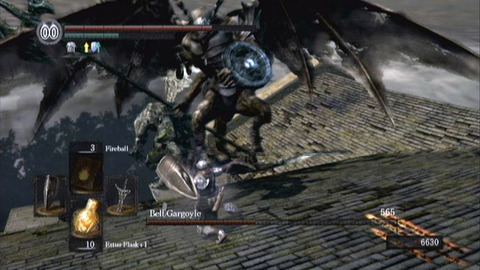
When you kill the first gargoyle, or before you finish doing so if you're not quick about it, a second gargoyle will arrive on the scene. It approaches from the far side of the roof and it will breathe fire in your direction. Face it and use your shield to block it if you must, or roll out of the way as an alternative method if that's doable. Then you can move in close to attack before the gargoyle can try and toast you again.
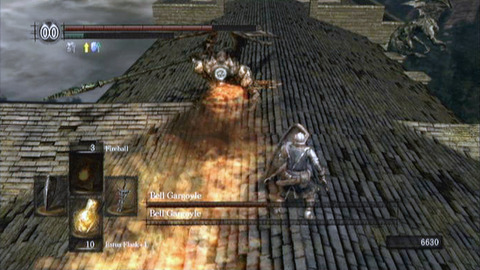
Note that if you break the second gargoyle's face (risky, since it breathes fire), you can obtain the Gargoyle Helm. Another thing to note is that while both gargoyles are capable of inflicting heavy damage, neither of them have especially good defenses (this despite being made out of stone). If you have a good weapon equipped and your Strength rating is at a decent level, this should prove a decidedly easy battle.

Once the gargoyles are toast, head forward to the bell tower. There, you can climb a high ladder and work your way up the building to a lever at the top, just beneath the huge bell. Pull the lever to ring the bell, then carefully descend the way you came (you don't want to get in a hurry and accidentally jump to your death, after all). At the base of the bell tower, you'll meet with a character who identifies himself as Oswald of Carim. From him, you can purchase an item known as the Purging Stone. It costs 3000 souls and will cure you of the effects of Curse, a debilitating attack that enemies employ later in the game. If you have the funds to spare, you may wish to purchase several of the item and you may want to earn more souls and come back and purchase still more of the stones. You can also pick up Velka's Talisman for 5000 souls, if you're in need of a talisman.
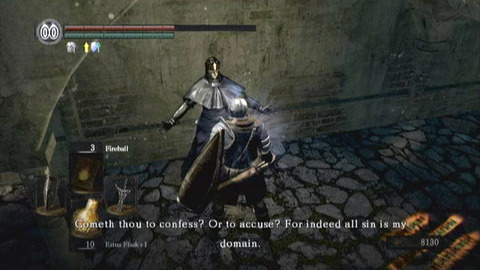
With that done, you have a choice about how to proceed on your quest. You can head down to Darkroot Garden (an excellent option because it includes a sealed area where you easily can grind levels to your heart's content) or you can head back to Undead Burg. There, you'll find that you now have a key to unlock the door at the base of the stairs you descended after battling the Taurus Demon (at the end of the long stone bridge opposite where the red dragon is perched). If you use the Basement Key on the locked door to view a new portion of the burg.
Darkroot Garden
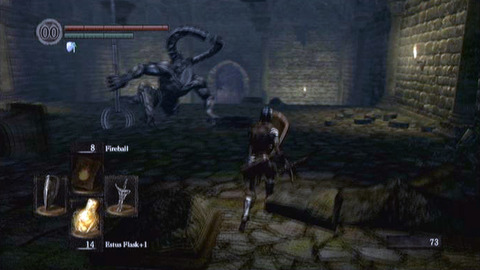
From the blacksmith shop in the Undead Parish, you can head down some stairs and pass through a large chamber with a monster. Note that this can be done just about any time you like, as long as you're feeling hearty enough. You don't have to first clear the Undead Parish.
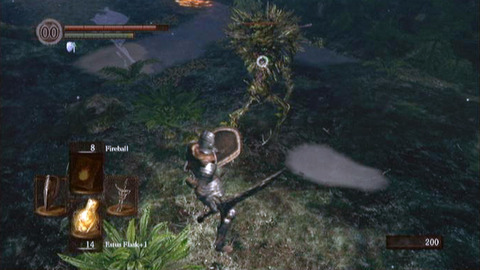
Keep your distance from the monster as you cross the wide chamber. It throws bolts of lightning at you when you are out of its normal range, but you can easily roll out of their way. If you get closer, it can lash out with a far-reaching melee attack or it may try to pounce you. Roll out of the way of either attack and keep going to the opposite end of the chamber.
Once you move past the beast, who you can kill for 1000 souls and the Demon Titanite if you're feeling gutsy, you'll be able to pass through an archway and into the Darkroot Garden area. It's a grassy area deep within the forest. The main enemy you'll encounter here is a walking monstrosity formed from various roots and leaves. It's actually not all that powerful. Fire attacks work well against it, or even moving in close and blocking its swinging roots before using a quick melee attack. The root creature is surprisingly agile and capable of bending to avoid your attacks, so work swiftly.
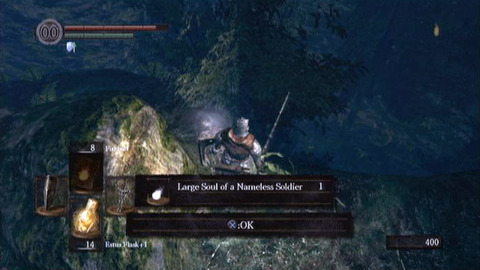
Head left through the swamp area and you'll encounter several of the beasts. There are glowing points all throughout, but mostly those are just flowers except one point just behind a large boulder (overlooking a ravine to the left where you can see a higher ledge with a corpse and item waiting). You can check the corpse behind the boulder to find a Large Soul of a Nameless Soldier. That's worth snagging.

Near that boulder, there's also a ledge that leads to the right. You'll see an outcropping overlooking a lot of forest. There's a glowing flower near the edge of the ledge. Though it's not easily visible, you can head right from the flower, then circle back left and descend along a path. However, that path leads to a different area known as Darkroot Basin. Keep it in mind but you're not ready to go there just yet.
For now, continue along the main trail past the point where you find the soul of the nameless soldier and you should soon find a glowing point on the wall. It's a moss-covered doorway that you can't pass through unless you have the Crest of Artorias (purchased from the blacksmith in the Undead Parish area for 20,000 souls). Beyond the seal is an extremely lethal area, so you should ignore it for now even if you have the crest. To the left of that sealed doorway, note the brick wall. You can slash at the wall a time or two and destroy it to reveal a hidden ledge with a bonfire waiting. Use that bonfire as you see fit, then turn back the way you came. Near the glowing door, there's a side path.
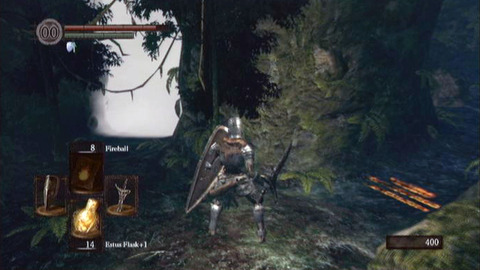
Follow the side path and you'll find a narrow trail that leads through a defile. Start along it and you'll come to a branch in the path. Along the left route, there's a fog-shrouded door. To the right, you'll see that the trail widens into a clearing. You should approach that clearing cautiously. There's a body with a glowing object waiting for you at the center of the clearing, but it's a trap.
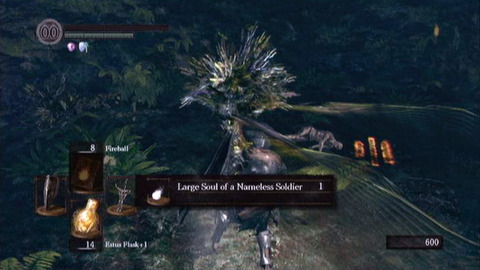
Start into the clearing and when you're ready, loot the corpse to find a Large Soul of a Nameless Soldier. As you grab the item, the ground around you comes to life and three of the root creatures attack you at once. Target one and circle around it so that you can see all of your threats. You need to focus on trying to take them out one at a time, perhaps with fire magic or a firebomb to make things go more smoothly.
When you have eliminated all of the root monsters, head back to the bonfire and use it if you like. Note that this is a great place to farm for souls. Every time you use the bonfire, the monsters in the dead-end clearing regenerate and you can take them down again from just outside the clearing with a flurry of fire spells. Just stay away from them when they lunge or one may grab you and suck life out of you. Each of the moss creatures generate 100 souls, so you can see how easy it would be to build up a lot of souls.

Then when you're done with that exercise, you can go ahead and pass through the mist-shrouded opening. As you start through the clearing, you'll wake a slumbering enemy stone knight. You can't attack him until he stands up. Once he does, you'll find that he's a tough fellow who moves very slowly. He carries a huge sword and a powerful stone greatshield that he may drop if you're fortunate, so steer clear of the weapon and try to strike from the flank or behind. Usually, he'll swing two or three times and then you can move in and get two or three hits in before rolling away to avoid his follow-up. Watch out when he casts a spell, though; you won't be able to roll or move quickly after that until its effects wear off. Fortunately, the spell takes time to cast. You can move in and get in a few hits while he's casting it, potentially allowing you to finish him off before you have to worry about its effects.
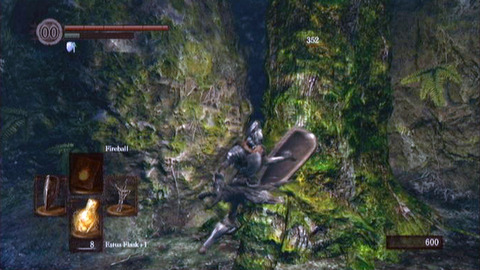
Take care of that enemy and continue to explore. Along the edge of the area, you'll find a moss-covered tree that you can attack repeatedly. As you do, notice that it has a life meter. Keep attacking until the tree disappears in blinding light, revealing a hidden path behind it. There are other paths nearby, as well. One leads to a Partisan that you can find on a corpse ahead of a tree, but be careful. The tree has limbs that come to life and can inflict poison, plus one of the vine creatures may follow you and try to attack from the rear.
Grab the weapon and head back out into the main clearing. Note that in this general vicinity, there's a second one of the lumbering giants. Deal with it as you did the first one and head around the area. You'll likely come to a point where there are two of the stone knights sleeping. As they awaken, just run past them and look for a corpse. If you can loot the corpse, you'll find the Elite Knight Helm, the Elite Knight Armor, the Elite Knight Gauntlets and the Elite Knight Leggings. They have terrific defensive properties.
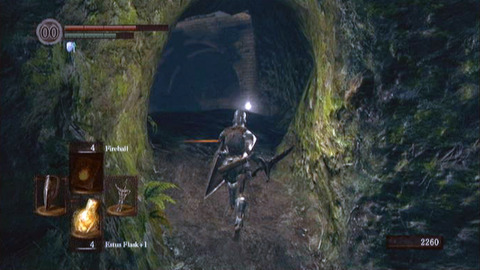
When you're done looting, you can continue exploring and you'll likely find a stone archway where it's possible to enter and fight a boss. You're not done exploring and grabbing items yet, though. For now, return to the place where you hacked apart the tree to reveal a secret path. Head along it and you'll find an enemy that skitters along the ground and looks a bit like a red and black manta ray. It's easily hacked apart, but make sure that you're not being chased by root enemies that will try to hit you from behind if you're not paying attention.
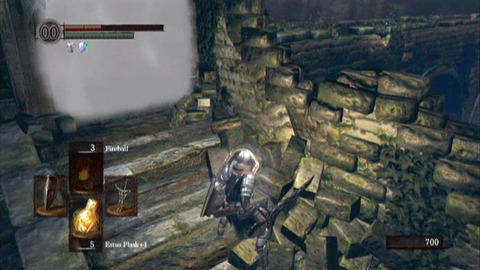
Past that monster, you can find another narrow ravine. Proceed along it and you'll find a spinning tree. You can head around it without contact and then continue through the forest to reach a series of stone steps leading up through a cave. This is a dangerous trail, but one that you need to take. Ascend and watch for another of the stone knights at the top. It will fight you on a narrow ledge. Nearby, there's a corpse you can investigate to obtain the Wolf Ring. You're now on a ledge overlooking the starting point of the stage. There's a bottomless gap ahead of you, though you may be able to leap over it and land on the lower ledge ahead of you, then travel left to return to rest at the bonfire.
Now you're ready to look into fighting the area boss. As a reminder, the route to find him from the bonfire is to head through the area where you passed through the mist, past the sleeping stone knights and toward the back side of the open area they guard. A final stone knight is asleep in front of the doorway you need to enter. Roll past him and then you can climb up some steps in a tower and at the top, you'll be able to pass through the mist and into the area where the boss awaits you.
Moonlight Butterfly
This battle is a slow-paced one and you should have only moderate difficulty winning it if you follow a few simple strategies.
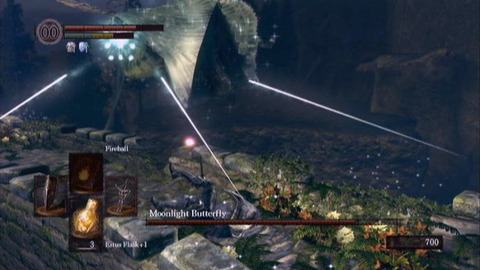
When the Moonlight Butterfly first appears, it is floating slowly to the side of the long bridge where the battle takes place. As it floats in the air, you can't reach it except with projectiles or magic. However, it can hit you. Periodically, it charges up a ball of green light and then it fires a homing shot at your current location. You can roll out of the way to easily avoid it if you have enough stamina. This shot can one-hit kill you, so it's the most important attack to avoid. Sometimes, the butterfly also fires a spread shot or it will fire a laser that sweeps back and forth and tries to find you. Make sure that you roll away from that laser as possible, since it inflicts fairly severe damage. The spread shot will only inflict moderate damage if it hits, so you can withstand that. What's most important is that you dodge the spread shot.
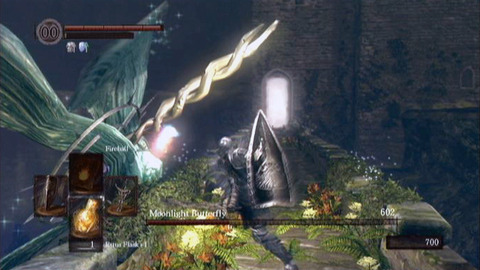
After you dodge its attacks for awhile, the Moonlight Butterfly will be tuckered out. It will stupidly descend to the ledge where you are positioned and will rest there. Rush over to it and hit it with your weapon of choice until it starts to glow. That's a sign that it is about to send a shockwave outward from its location. Quickly back away so that you're not hit by the explosive wave.
The butterfly will now take to the air and the whole process will repeat. If you equip your weapon with two hands to increase the damage it inflicts, you can likely take down the butterfly in only a round or two. It's an easy battle if you know what you're doing.
When you win, you'll receive the Soul of the Moonlight Butterfly. Head along the walkway that it was guarding, then ascend the tower. At the top, you'll find a corpse. Loot it to obtain the Watchtower Basement Key and a Divine Ember.
If you're interested in a final detour, now is a time to consider entering the sealed door near the bonfire. If you do enter it, you'll find that the area is populated by fearsome enemies. Many of them are human, but they're wearing cloaking gear that makes them difficult to see (and makes it impossible to lock onto them as a target). Not only that, but they have spectacular defenses and you'll have to hit them quite a few times to drain their life meters.
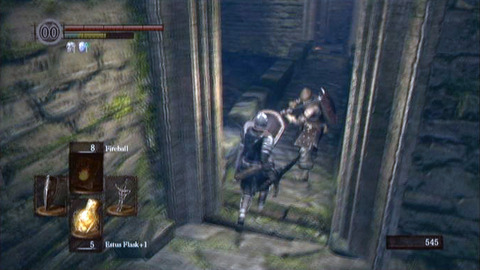
If you like, you can run from those enemies (along with other more familiar enemies in the area) and make your way toward the eastern slopes, which overlook a distant castle. There, you will find a corpse on the ground that you can loot for the Eastern Helm, Eastern Armor, Eastern Gauntlets and the Eastern Leggings. It's powerful armor.
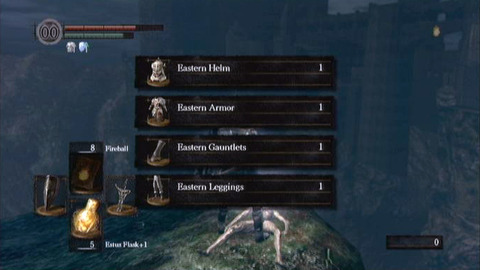
The area is also a good place to farm for souls, if you're ready to get cheap. When you first enter, you're standing at the top of some stone steps. You can descend the steps and start forward into the trees to lure enemies toward you. Once an enemy or two is rushing you, head back toward the exit. As you're facing the steps that lead up to the exit archway, head around their right side on the lowest level. There's an extremely narrow ledge there, but you can follow it to its end and hug the wall. Any enemies that are chasing you will climb the steps and try to drop down on you from above, killing themselves in the process. You can get around 7000 souls per run in this manner, making it easy to build levels. It's cheap, but it works most of the time. Sometimes enemies will land on the ledge next to you and you'll have to knock them off, or the magic user will follow you around and pelt you with magic from a distance, but that's the exception rather than the rule.
Once your equipment is much better and your levels higher, it's worth coming back to the area to find a special boss, the Great Grey Wolf Sif. To find the wolf's lair, head forward from the entrance to the area. Proceed straight forward through some trees and past where you battled the four tough enemies. You'll come to a walled area. As you first enter, look to the left and there's a cat sitting in a window high on the wall. You can talk to her to join her covenant and receive the Cat Covenant Ring that lets you attack unwelcome players who enter the vicinity. Note that if you join the covenant, you're not to harm any creatures in the area, only unwelcome players who you can battle when you have the ring equipped. The exception is the wolf who lurks at the end of the forest.
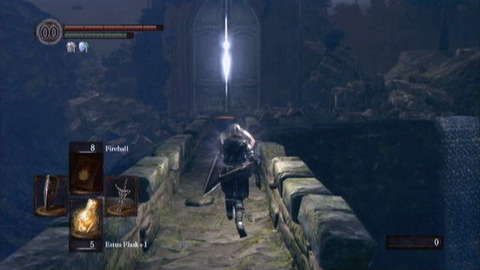
There are some ruined stairs ascending ahead of you as you work through the area, but you can veer left and descend some stairs through the area to arrive at another chunk of forest. From there, you can either continue forward to find a rock ledge, or you can head to the right through the forest and find mushroom characters and a dangerous cat-like animal that will attack you even if you're in Alvina's covenant. You should avoid it if you want to remain on good terms with Alvina. If you decide to fight it instead, know that it is capable of taking a tremendous amount of damage, plus you aren't allowed to brush against it (even when it's not charging) because it has quills that will inflict damage on you. Try to take it out from a distance with fire magic, and make sure that you target it so you know where it is positioned and can dodge out of the way of its rolls.
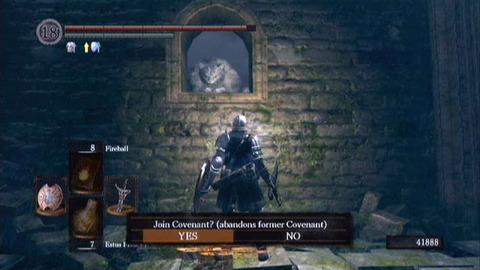
If you go for the rock ledge, you can jump down from the rock ledge and head forward again to reach a mysterious gate. It's easily opened without any special equipment. Through the gate, you'll find a hauntingly quiet area. Ahead of you, near the edge of some water, there's a huge sword. When you approach the sword, a scene is triggered and then the boss wolf attacks.
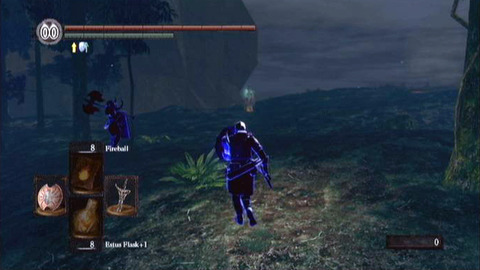
Before you try to kill Sif, it's not a bad idea to join Alvina's covenant and to kill a few players who venture into the forest. Three or four ought to do the trick, but do yourself a favor and only attempt things when more players are likely to be online than just high-level players (the early AM hours can be brutal, with players that are leveled up to the point where they're essentially impossible to beat). Then you can talk to Alvina again and she'll ask you to hunt down the wolf on her behalf. It's an extra step, but one worth taking if you want a nice reward.
Grey Wolf Sif
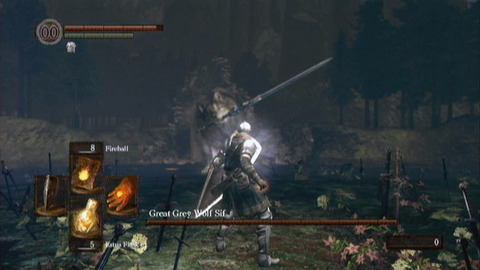
Battling Sif can be tricky, as the creature has amazing range with the huge sword that it carries around in its mouth. Mostly, it will prance around the clearing and swing the sword back and forth, but occasionally it will pause and shake it briefly before resuming the swinging efforts.

You need to avoid being struck by the swinging sword at all costs. It can take away a lot of your life and even blocking a hit mostly drains your stamina. Your best bet is to roll out of the way at the right moment and get close to the wolf, at which point you can strike at its flanks.
Darkroot Basin
You'll find the trail that descends into Darkroot Basin along the edge of Darkroot Garden near the blacksmith in Undead Parish. If you start from the smith and head along the trail, there's a sharp right you can take after the first root monster attacks you. There, you'll find a glowing flower. You can head around behind it and descend along a precarious ledge that leads into the basin.
You can descend along the trail for some distance and then ahead of you, you'll see a glowing enemy. It's a rare lizard that drops a valuable item if defeated, so try to take it out swiftly before it has time to run away from you. Then continue your descent. The trail will double back on itself and you'll see two paths descending ahead of you. One descends less steeply than the other. Head along it to a wide ledge, then drop to a lower ledge and check the corpse to obtain the Leather Armor, Leather Gloves, Leather Boots, Longbow and sixteen of the Feather Arrow. Then drop down again and now you're on the trail you saw descending more steeply.
As you continue along the trail from there, you'll reach another split in the path. Here, you can head either left or right along a precipice. Wide trails lead in both directions.
Start with the area to the right. Proceed cautiously, though, because you'll face one of the black knights. Hit him from fire with a distance, if possible. Then when he's defeated, grab the Blue Titanite Chunk that he drops and descend the trail to find a corpse resting at the end. Loot it for the Grass Crest Shield, then start back uphill. As you do, you'll notice an opening where you can head into the cliff. If you head up through that opening, you'll find a bonfire. Beyond that bonfire, there's a lever that you can pull to activate an elevator.
The elevator leads to an area known as the Valley of the Drakes. You can head there, of course, but you still have business in Darkroot Basin that you may wish to tend to first.
Return to the overhead ledge where you had gone right at the fork in the trail. This time, you'll want to proceed along the left route, which is straight ahead of you as you approach it now after ascending from the bonfire. Along that route, you'll reach a much wider area. As you look ahead, you'll see white giants made out of crystal. There are around four of them, positioned along the sloping hills ahead of a large body of water.
Manage your approach by heading forward along the left side of the area, along the higher ledge. Move forward and you can likely throw firebombs or use fire magic from that vantage point to take down the nearest of the crystal giants. Then you can lure another one toward you. Target them and back up the slope, hitting them with your attacks to easily eliminate each one. Then you should continue forward and lure any others down toward you, one at a time.
After those crystal giants are out of the way, you can head right to find the Large Soul of an Undead Soldier on a corpse, and past that an area where there's a locked door. Use the Watchtower Basement Key on it and you can unlock it, providing a shortcut to Undead Berg (though it's guarded by a fierce warrior).
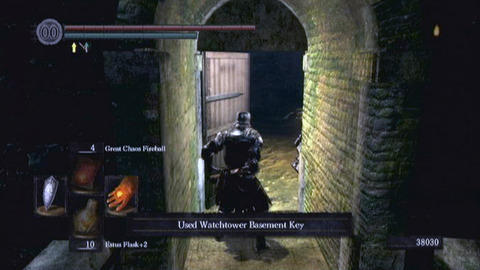
Spare yourself a moment for that detour and possibly kill the fellow on the stairs (use attacks from behind, and you probably shouldn't risk magic unless it's really powerful). You'll receive Havel's Ring as a reward. When worn, the ring increases the amount of heavy equipment you can easily carry around with you.

Return to where you fought the crystal enemies and proceed toward a shallow lake shore. Near the right side of that lake, you can check a corpse to find the Knight Helm, the Knight Armor, the Knight Gauntlets and the Knight Leggings. The loot is guarded by a hydra, which packs quite a punch unless you have really good defenses. It will try pelting you with projectile attacks and it will sometimes send its heads to the shoreline, which is the place from which you should mount your attack. Let any heads crash down on the shore beside you and hack them off, one at a time. Otherwise, face out to the water and either dodge magical projectiles that the beast fires or block them if you have a capable shield.
When you defeat the monster, you will receive the Dragon Scale and the Dusk Crown Ring. Then you can head left along the shallow lakeshore edge (if you venture too far into the center, the water gets deeper and you'll plunge to your death) and find a ladder. Climb the ladder if you want to reach Darkroot Garden, in the area beyond the sealed gate.
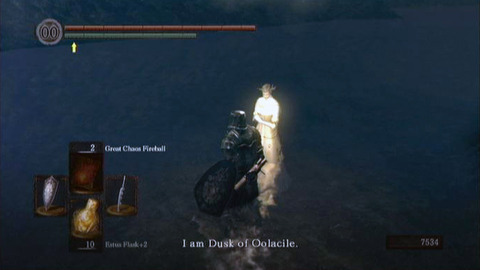
Alternatively, you can exit the area and then return. Proceed to the area where you fought the hydra and advance beyond it to find another of the crystal giants. It is a tougher one than the others, but still shouldn't pose any real problem. Defeat it to free Dusk of Oolacile. Answer “Yes” to her question and you'll be able to summon her when needed. Now you're definitely done in this area and should head elsewhere, perhaps to the Valley of the Drakes.
Undead Burg Slums
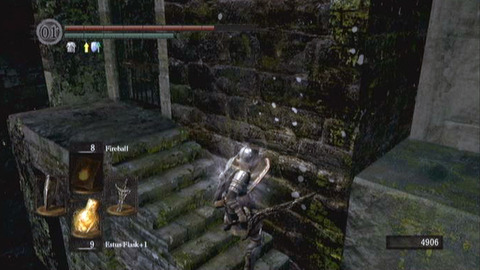
When you clear the Undead Parish, you'll need to return to the Undead Burg. Make your way to the area where you battled the Taurus Demon, then descend some steps in the tower that he was guarding. You'll come to the area ahead of the long stone bridge, where the dragon breathes fire from its perch on the distant roof. Ahead of you as you stand at the base of the stairs that you just descended, there's a door. You can use the Basement Key (obtained partway through the Undead Parish) to open it.
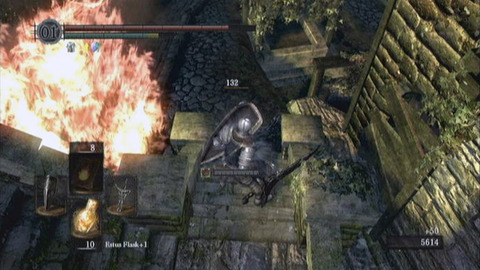
Past the door, stairs descend to the top of a ladder. You can descend that ladder and then a series of steps to arrive in an open area. There are some stairs that climb to the upper right. Ascend those stairs and then follow them back to the left to reach a locked door. There are enemies waiting behind the door. Open the door and then roll into the room. Take out the enemies quickly and head toward the far door. You'll see a familiar walkway that leads to a similarly familiar bonfire that you've likely used many times before. Take advantage of it, then return to the door that you just opened.
Descend the stairs that you climbed a short time ago and at the branch in the path, look down along some steps that descend past a massive blaze. You can start down those steps, but only advance to the first landing and then wait. You'll likely attract the attention of one of the hounds that roam this area. They move quickly and are capable of poisoning you, so you don't want to have to deal with more than one at once if you can help it. Stand on the landing and let them approach you. Block their leap with your shield, then counter with a sword swipe.
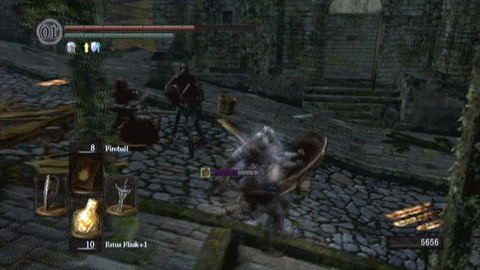
There are three hounds, so take them out as you see fit and then advance toward where a cart is waiting in the street. You can break it apart or leave it where it is, though presently you may wish to use it for cover. Just past the cart and to the left, there's a doorway. It's locked, and so is one to the right. If you advance along the alley, though, the doors will fling open and three assassins will rush you. They carry poison-tipped daggers. In a group, they're fearsome opponents. Don't let them get behind you or they'll try to slit your throat (perhaps successfully). Be careful to keep your shield up to deflect any daggers they might try to throw, as well. If you didn't break the cart, you can use it for shelter to make it easier to battle only one or two assassins at once.
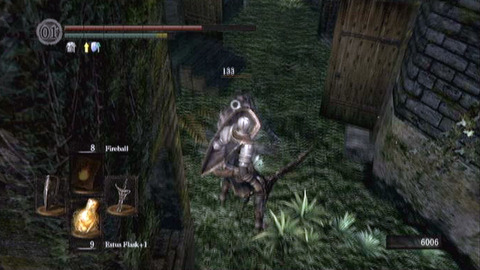
When you have killed the assassins, you can check the buildings from which they emerged. In the first recently opened building to the right, you can find the Mail Breaker weapon on a corpse. You can also head back toward the blaze but watch to the left. A path in that direction leads past some buildings. You can open the door on one of those buildings to find Griggs of Vinheim, a sorcerer. Talk to him and he'll announce his plans to head back to Firelink Shrine, which is convenient. You can roll through the barrels to the right, as well, to obtain a bunch of loot from a corpse that falls out of one: the Sorcerer Hat, the Sorcerer Cloak, the Sorcerer Gauntlets, the Sorcerer Boots and the Sorcerer's Catalyst. If you head further down that side alley, you can beat a bunch of torch-wielding enemies and investigate a corpse they were guarding to obtain a Twin Humanities item, as well. Then it's time to return to the main path.
Continue along that main path through the burg and you'll find yourself approaching a grassy basin. That grassy area should not be approached too quickly because as you start down the steps, a hound will rush you. Block its attack, then hit back. Slowly start forward again. Check to the left to find a small recess in the wall where a corpse stands upright in a barrel. Break the barrel apart to obtain a Large Soul of a Lost Undead and then return your attention to the area not far ahead.
You'll notice there are huts on either side of the grassy walkway. As you get near enough, enemies will emerge from the huts. Again, let them come to you and hit them with whatever attacks you like. Then investigate the corpse in the second building on the right to find the Thief Mask, the Black Leather Armor, the Black Leather Gloves, the Black Leather Boots and the Target Shield. Note that heading forward may call another of the poisonous hounds to attack, so be ready for that.
Proceeding forward, you'll notice a mist-shrouded archway ahead of you. Through that archway there is a boss encounter, but you're not ready for that just yet. First, you should continue exploring.
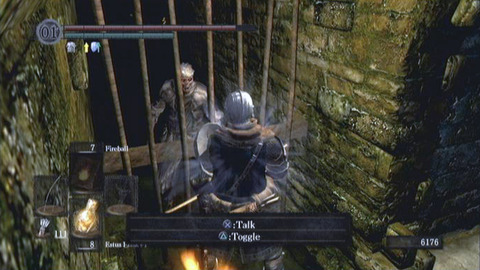
To the right of the mist-shrouded door, you'll see stairs that descend in that direction. Head down those and to the first landing, then look ahead of you at the steps that continue their descent. Ahead of you, in plain sight, there waits an enemy. From the landing where you're currently positioned, you can fire an arrow to snipe him. Draw him to you in that manner and take him out, then start forward again but keep an eye on the left wall. As you are most of the way down the stairs, an assassin will attack from a recess there. Be ready for him and hit him with whatever attack you like. Then continue forward toward where you shot the poor fellow near the base of the stairs.
After his corpse, there's a wide alleyway ahead of you. Stairs lead up to a door to the left. You can climb those stairs and then enter a tower with a spiral staircase. Put up your shield and head up the stairs. An archer on an upper platform will try to kill you, but he's easily defeated. Keep climbing from there to the next floor and you'll see an opening ahead of you. Stairs continue to ascend to your left, but permit yourself a detour to the opening and talk to the person behind the bars to the right after passing through that opening. He is a merchant. You can purchase a variety of items from him, including the Purging Stone (his price is steep, though) and precious Humanity. The moss items that he sells can easily be obtained for free by defeating enemies in the Darkroot Garden area, so there's no point in buying them here.

If you head left from where you meet the merchant, down the long tunnel, you can find and open a door. It doesn't require any special key. Opening the door activates a shortcut to Firelink Shrine for possible future use (it's handy if you want an easy route to the nearby boss from a convenient bonfire without having to travel through most of the burg, for instance). Then you should return to exploring Undead Burg.

Continue along the alley and at the end, you'll find a corpse that you can pillage to obtain a Large Soul of a Lost Undead. Just ahead of that, there's a doorway that leads into a room to the right. When you first find that door, it's likely locked, meaning that you've presently explored as much of the area as possible until you defeat the boss. Head back up the stairs to face him now.
Capra Demon
You'll find a relatively easy boss waiting in this chamber, along with two of the poisonous hounds. While it's true that the demon is capable of dealing the most damage with his massive swords, you actually have more to fear from the hounds (particularly if two of them corner you at once while you're trying to take down their master). Do yourself a favor and tend to the four-legged critters first before you focus on the main target.

Once it's down to just you and the demon, you'll find that he's not a huge threat. You can block his swings and the worst you'll suffer is some stamina loss. You can get in close and hit him a few times after he misses with a series of swipes. Then you can back away and give yourself some distance if you need to gulp down an estus potion.
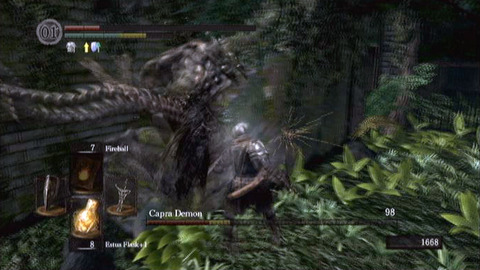
There are some high stairs along one side of the room, which is another thing to keep in mind. You can jump from the top of the stairs and slash down on your foe if you get the positioning right, though you may have a simpler time just going up against him the old-fashioned way. Still, the stairs are obviously there for your benefit. Use them as needed and soon you should turn your worthy foe into a less worthy corpse.
When you defeat the Capra Demon, you'll receive the Key to Depths. There's nothing more to do in the chamber where you fought the Capra Demon, so exit and take a sharp left turn to follow some stairs down into the alley that you explored a short time previously. Remember the locked door? You can open it now to reach the next area: Depths.
Depths
When you arrive in Depths, you'll descend some stairs and then arrive at a large balcony area. There are some obvious enemies ahead of you, as well as one that may try to ambush you from behind. Block their attacks and then easily counter with some blows of your own. Once the ledge is cleared, check back behind the stairs you just descended to find a Large Soul of a Nameless Soldier.

Once you've gathered that loot, it's time to head to the far end of the ledge. There, some stairs descend back toward the right and toward some waiting enemies brandishing torches. Take them out as you see fit. You can retreat up the stairs to force them to come at you single-file, if you like. Be careful, though, because they'll come at you from basically all sides of the staircase and it's easy to forget to look behind you.
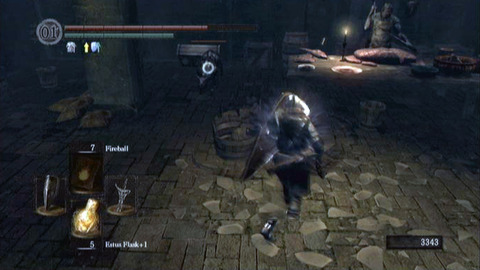
After you clear the area of those enemies, you can descend toward the left where it looks like a blacksmith is pounding on a forge. That's actually an enemy pounding a slab of meat with a cleaver, not a friendly blacksmith. As you approach, some of the poisonous hounds will rush to meet you. Block their attacks and pet them with your favorite melee weapon. Then you have to deal with the ogre. He swings a huge cleaver. It does a lot of damage if it connects, but the ogre is slow and you should be able to easily dance out of the way before moving in and hitting him with your sword a few times. Then you should back away again and repeat as needed.
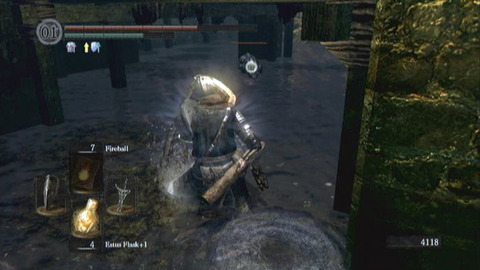
When you defeat the ogre, check the treasure chest against the wall, next to the barrels. You'll find a Large Ember to reward you for your troubles. Breaking the barrels also reveals a hidden opening. You can drop through that opening in a moment, but for now you have other things to do. Since you have the ember, you should head back the way you came, keeping to the lower level.
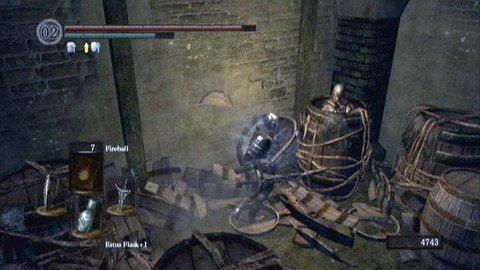
As you proceed through the fetid water, watch for more of the hounds and more of the torch-carrying goons. It can be difficult to see, since the wooden planking overhead gets in the way of the camera, so make sure to lock onto a target and circle around with your shield raised so that you don't lose track of a threat.
When you near the edge of the area, another of the goblins with a set of cleavers will surprise you. This one drops from the rafters to attack. If you haven't cleared out the other enemies, this can make for a hectic fight. Even still, the goblin has a way of bringing a nasty surprise to the occasion. Move carefully around him and make sure that you avoid his cleaver. Dance out of his way until he slams the ground in front of him with the cleaver, which leaves him briefly stunned and lets you attack safely. Don't lose your cool and you should come through the scrape in relatively good shape.
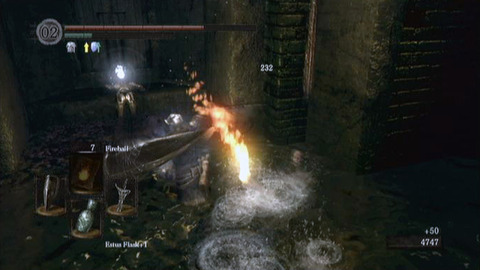
After clearing out the enemies, head toward the back wall and up some steps. You'll come to a split in the path. If you head left, you'll find a store room full of barrels. A man in the back corner is asking for your help. You can roll through the barrels (there's no need to use a weapon) and free him. Talk to him and he'll reveal that his name is Laurentius, of the Great Swamp. He now is in your debt.
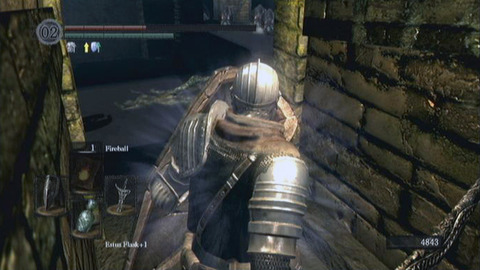
Return to the branch in the path and this time follow the other route. You have a few points of danger along this route, but it's an important one to follow if you want to reach the bonfire. As you head along it, you won't have anything to worry about first. Proceed along a stone corridor until you descend some stairs to a small, square room. To the left, there's a corpse resting on a ledge. Resting on the corpse is a Soul of a Nameless Soldier, but it's a trap. If you approach, slime will drop from the ceiling and try to absorb you. An enemy will also attack, so it's easy to take a lot of damage here if you fall for the trap.
Head along the passage until it takes a right turn that fines you looking down another long passageway with a skeleton near the end. This is a treacherous area because there are more of the slime blobs on the ceiling. They'll drop to hit you if you move slowly, so you need to either rush past them in a dash or you need to lure them down. A dash is risky but can definitely work if you head along the middle of the path to avoid the first two slimes and then dodge left or right to avoid the third one. Then you can roll forward take out the enemy at the far end of the passage before turning around and pelting the enemies with firebombs or magic. Fire works really well on the moving slime and it will occasionally drop the Large Titanite Shard that you need for upgrades.
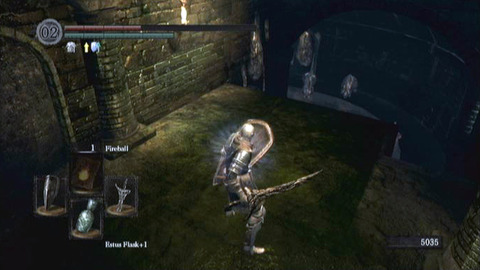
The door at the end of the passage is locked (and leads eventually to a bonfire), but you can turn left from there and descend more steps to reach a grated area. Here, there are some crates you can destroy to reveal a ladder, but if you descend the ladder you'll only find a door that must be opened from the other side later in the stage. For now, ignore this lower route and remain along the higher rout to reach a tunnel that leads to a dangerous 'T' in the path. Here, you can either head right toward a swarm of waiting rats or left and take your chances with more of the poisonous gelatin. Neither route is likely to end well for you unless you prepare yourself and fill your health. You can help yourself with the rats by luring them toward you with arrows, though. It's best not to rush them all at once if you have a choice.
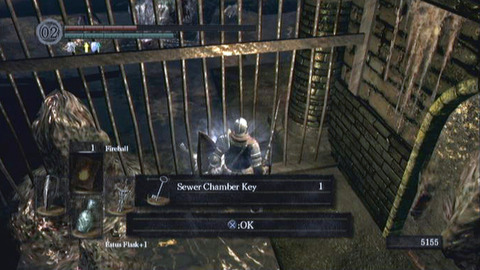
Once the rats are cleared out, check the nearby corpse for a Greataxe. Then turn and head back toward the left. You can actually run past the oozing slime, since it's on the floor and only moves slowly. Past the slime, though, you'll find crates. A rat bursts out of one of them, so hack it apart quickly and round the bend. There, another rat appears and runs from you. Watch where it goes, down some steps to a fetid pool of water. You can fire arrows at the rats from your vantage point to force them back up the steps, enabling you to destroy them one at a time while they pose a smaller threat.
After clearing the lower area of rats, descend the steps and look to the left. There's some grating positioned there, with a corpse lying on the other side. Make sure you kill any rats that might have survived your arrow attacks, then check the corpse to obtain the Sewer Gate Key.

Backtrack the short distance to the locked door. The key that you just found will work on that door. Use it to open the door, then head down the waiting corridor. At the end of said corridor, you'll find a bonfire waiting for you to use it. This is terrific because you're in an area where it's easy to farm the Large Titanite Shards (by killing the slime that appears on the ceiling in the corridor near where you find the bonfire) that you can use to continue upgrading armor. Depths is good for something after all!
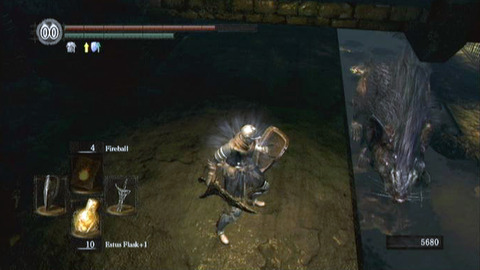
Now that you've lit the bonfire, it's time to resume your exploration. While it's easy to feel good about your progress, though, you're coming up on an area of the game that can really try your patience. It's important to be extremely careful as you continue exploring.
Start by backtracking to the area where you fought the first goblin with the meat cleaver. If you've killed him once, he's no longer there. You'll still have to deal with the dogs and other enemies, however. When you reach the area, break the barrels to the right of the treasure chest that you emptied, revealing the secret passage again. Now drop through the passage to land on a high ledge along one edge of the room.
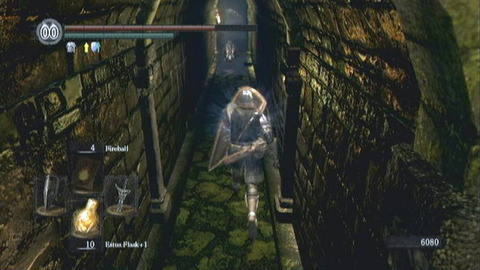
Ahead of you, the ledge drops to lower ground. Don't drop down just yet, though. Instead, look around. Ahead of you, there will be a giant rat roaming around on the lower level. You can fire arrows at him from your vantage point on the high ledge and inflict damage. It's possible to kill the rat without ever needing to drop down to his level. Then you should head around, still on the upper level, and check a glowing point on a corpse to obtain the Spider Shield. After you have that item, go ahead and drop down to where you killed the giant rat.
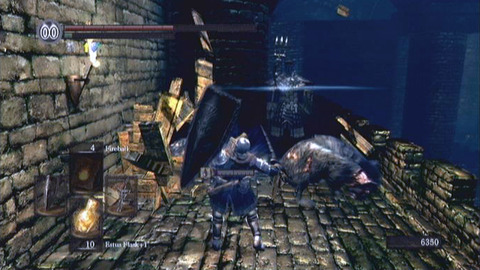
On that lower level, collect the Humanity that the giant rat will have dropped. You can also find a Soul of a Nameless Soldier near one corner of the chamber, not far from the top of a waterfall. Keep that waterfall in mind as you will be returning later, but for now you should look along the opposite side of the room and there's a narrow passageway. Start down it and grab the Soul of a Nameless Soldier from a corpse. From there, you have a choice. You can either head left, where a rat wants you to follow it to your possible doom, or you can continue straight ahead and fall down a shaft.
You do not want to fall down the shaft, especially not just yet, so begin by heading along the left route. The rat will lead you to a 'T' in the path where a second rat waits. At that intersection, you can choose to head either left or right. Start by going to the right to find another intersection. To the left, there are some rats waiting along with a magic user. If you're ready for a group of rats, you can head in that direction. Or you can lure the rats toward you and eliminate them, then start forward again.

There are a lot of rats along that route, around four or so in the nearest area. There's also a spellcaster who hangs back and will try to pelt you with magic. As you follow him, note that more rats will break out of the crates to attack. Be ready for that and deal with them while you avoid the much more lethal magic from the magic user. Then tend to him (he won't come back after you take him out now, thankfully) and investigate the area beyond him for the Large Titanite Shard on a corpse in the corner of the high ledge where you're now positioned.
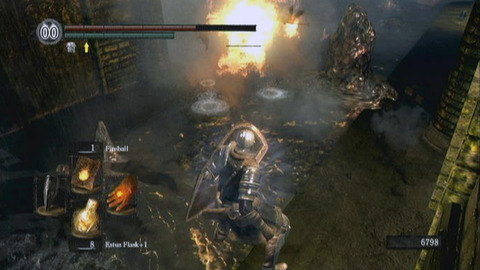
Note that along the left side of this ledge, you can also find a glowing, mist-shrouded doorway. It doesn't lead anywhere that you haven't already been at this point, but go ahead and pass through it so that it's not a distraction later. Then head back the way you just came and return to the area where you fought the giant rat. Along the edge of that chamber, there's a steep slope where water rushes down into a gap in the floor. To the left of that is a stone surface that also descends in that direction. You can slide down that stone slope and if you perform it properly and veer left, you should drop safely to a lower area.
This area is the same general area where you would have appeared if you dropped through an opening that we suggested you avoid earlier, but you've entered it by a safer route. Now you can find out what to expect from the area.
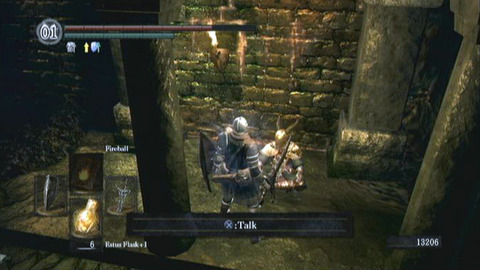
Begin by heading around carefully and watching for what looks like a large frog. The frogs seem like no big deal, but be careful because they can inflict you with Curse. If you are cursed, bad things happen. Your health is halved and that remains the case even if you die and return to a bonfire. You'll have to use an expensive Purging Stone to cure yourself, if you even brought one (you should have a few in your possession if you've been following this walkthrough from the start, but it's still no fun to have to use them). To fight the frog, either hit it with fire magic from a distance or let it get close. Then dodge back out of the way, wait for it to breathe noxious fumes, then hit it as it starts forward again. Avoid standing in the vapors or you will likely be cursed. Your likelihood of being cursed increases if you are not in human form, as well.
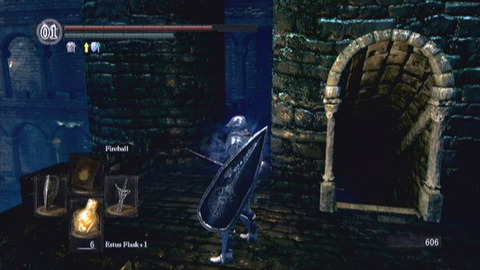
Head forward along the main corridor after you take care of the frog (don't head along the left corridor or you'll find a bunch more cursed frogs). Watch out for a number of rats that are in the area along the main route, as well as slimy blogs that drop from the ceiling to try and surprise you. Remember that you can take them out with fire attacks. They'll go down quickly to that particular element.
Continue around the passage and you'll find grating through which you can pass. There's a hole in it. On the other side of that grating, you'll find a merchant who you can talk with to purchase items such as the Bottomless Box (for inventory management at bonfires) and the Crystal Straight Sword and Crystal Shield. He also offers the Crystal Greatsword and the Armor of the Glorious. The armor is the most expensive item, with a cost of 15,000 souls. It's clear that this merchant is after some real riches.
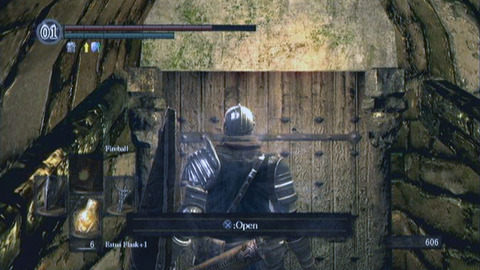
Purchase what you like, then turn around and pass back through the grating. To the left just after the grating, there are some stairs you can climb to an area outside the castle that you're exploring at present. If you head up those stairs (which you shouldn't do just yet), you'll find the route that leads to the area boss. Before you do that, though, it's time for a little bit more backtracking.
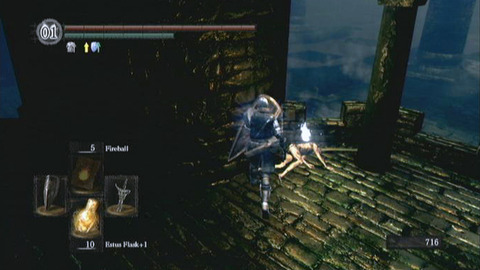
Head back to the lower chamber where you fought the frog. Continue left and you'll find another set of stairs that leads upstairs. Follow those steps to find a doorway. You can open the door to create an important shortcut. Head through the door, climb a ladder and you'll appear in an area that should be familiar to you. It's the grating area that overlooked the large rat that you killed previously.
Now you can simply turn around, head back down the hall, kill the waiting skeleton, take a sharp right and head down to the room with the grating, descend the ladder and then head down the steps through the door that you recently opened. If you killed the frog already, it'll be gone. Remember to watch for the rats and slime, though. Take the next opening to the right and climb the stairs to reach the outside area again.
You're now ready to proceed to the right, through that area. Fortunately, there are no waiting enemies. Just head around the castle tower until you find some stairs that descend one level. Head down those stairs and then to the right. There are more stairs there. At the top of the staircase, you'll see a patch on the ground where you can summon Soltaire if you like. You can head left around the corner from there to find a Heavy Crossbow and a Heavy Bolt waiting on a corpse, if needed. Then you can return and descend the stairs to reach a mist-shrouded doorway. If you pass through that doorway, you'll find a boss battle.
Gaping Dragon
This battle should go fairly easily for you. The monster that you'll fight, though huge, moves slowly and doesn't have any projectile attacks. You can avoid taking damage almost entirely just by staying at a distance, but the best way to kill the dragon (naturally) is to get in close and hack at it a few times, then retreat to avoid taking damage.
When the dragon first appears, it doesn't look like much of a threat at all. Then you see its full size emerge from the water and it becomes much more imposing. Your first order of business should be to hack of its tail, which should only take a few hits if you have a good weapon equipped. The first time you do that, the dragon will drop the Dragon King Greataxe. Be sure to pick it up and then return your attention to the battle at hand.
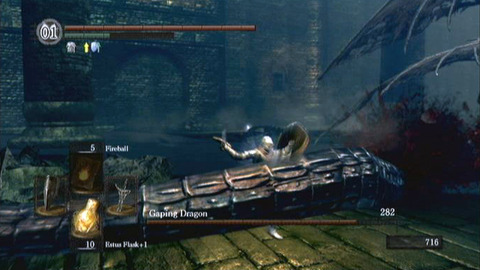
The dragon likes to lift its torso back, then slam down on the ground and spread out a yellow mist that you definitely want to avoid. When it finishes doing that, you have a brief moment and then the dragon will charge you. Definitely get out of the way. Try to stay on dry ground rather than wading through water, since you'll be able to move better. Note that sometimes the dragon will lift up from the ground and fly a short distance. When you see that starting to happen, roll like crazy to get out of the way. If the dragon lands on you, the damage it will inflict is significant. If it manages to grab you with a swipe of its paw (which shouldn't happen unless you get especially careless), it can swallow you and inflict severe damage, but that attack is easy to avoid as long as you don't get greedy about hitting the dragon too many times in a row.
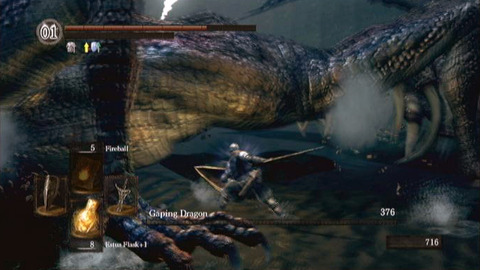
For the most part, it's a pretty easy fight that ranks among the easiest in the game. Just move in and hit the dragon in the flank two or three times with a quick weapon such as the Drake Sword, then back quickly away as the dragon retaliates (it can bend over backward to hit you if you just remain in one place and keep hacking). It's an easy process to perform and to repeat throughout the fight until you win.
Once you defeat the dragon, you'll receive the Blighttown Key. It's also safe to check the corpse that you've likely noticed in the area, from which you can pillage the useless Standard Helm, Hard Leather Armor, Hard Leather Gauntlets and Hard Leather Boots gear (no wonder the poor sap died!). Then you can head back through the dungeon to the area where you found the merchant. Nearby, there's a locked gate that the key will open. It leads to a new area: Blighttown.
Blighttown
When you arrive in Blighttown after using the key that you obtained by defeating the Gaping Dragon, the first thing you should do is equip the Spider Shield that you obtained in the Depths area. It provides powerful protection from poison attacks, which are common in the coming dungeon.

From the entrance, head left along the stone rim and you'll reach the top of a red ladder. Descend it. From the base of the ladder, start forward and look for the top of a wooden ladder to your left. Descend along that to a lower platform and then start forward to where an enemy will be waiting. It is a powerful enemy, but slow.
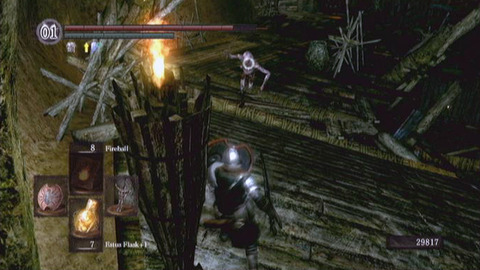
For this particular enemy, your best strategy is to let it attack. It will typically use a heavy vertical strike and follow it up with a swing or two. Block or dodge the initial strikes, then get around behind your adversary and stab him in the back a time or two, or just hit him quickly with your weapon a few times. Then repeat the dance. It's possible also to easily lure him to the side of the wooden planking and then let himself rush to his doom by way of a fatal fall. Just make sure that you don't make the fall yourself. Note that sometimes the monster will stop to bellow and you can get in a few easy hits, but you should be ready to back away when he finishes his bellow or he'll possibly hit you with a melee attack. He can also break your stamina down pretty easily if you take too many hits, so try not to let the monster hit you too many times in close succession. He often drops the Dung Pie when defeated, and less often the Large Club. Sadly, he will reappear in the area if you use a bonfire.
Continuing down the planking, you'll soon encounter a second of those same monsters. Don't push too far forward as you fight him, though; enemies below may notice your fight. You might not see them, but they can run around, find a ladder and climb up to give you trouble. You really only want to fight one enemy at a time, where possible. There's a third of the huge monsters after you defeat the second, as well.
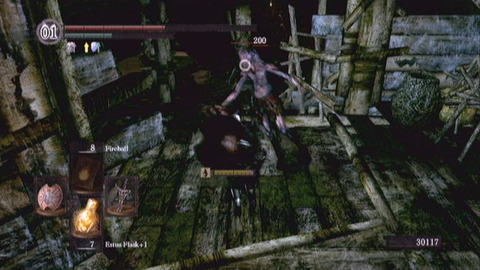
After you've taken out the third of the goblins, you'll meet a new type of enemy. This one is faster and lizard-like. You have to treat it with more caution, but it's not a real threat if you're careful to block and counter. Keep your distance and let it swing its weapon at you, then move in for a killing series of blows to make the job easy.
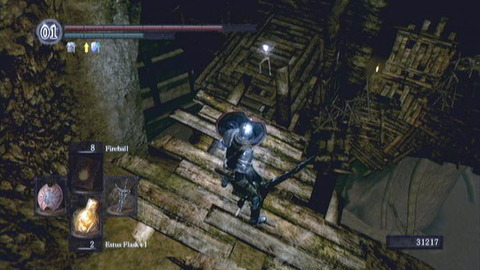
Past the first of those more agile enemies, you'll soon find a more dangerous threat. There are some enemies nearby that are obvious, and there's one that will throw poison-tipped daggers. If these hit you, Toxic effect will take place. Your life meter quickly drains unless you use the Blooming Purple Moss Clump, found in Darkroot Garden when you defeat the walking tree roots. You can also buy it from the merchant near Firelink Shrine (up the tunnel that you explore on your way to Undead Burg). Make taking out any dagger-tossing enemies your priority so that you have to worry less about the toxicity.
When that's tended to, resume your trek forward. You can head right here, or left. If you head left, some enemies will rush you. Defeat them, then look down over the edge of the ledge that you have reached. You'll see a lower platform with a skeleton lying on it. The only way to reach that platform is to make a running jump from the corner of the higher ledge to the beam that extends from the lower ledge. Then you can walk along it and investigate the corpse to obtain the Iaito blade. Note that it's a tricky leap to make and you'll likely die if you fail, so keep that in mind and decide just how badly you want the sword.
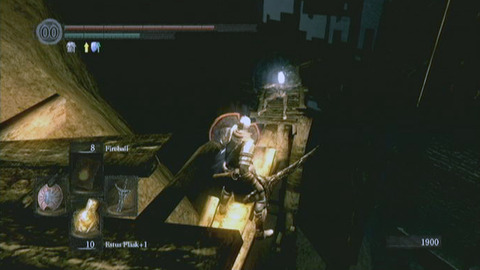
Drop down from the right side of the platform next and you can head a few steps in that direction to find something wonderful: a bonfire. Naturally, this is a terrific base of operations as you consider your journey through the remainder of the area.
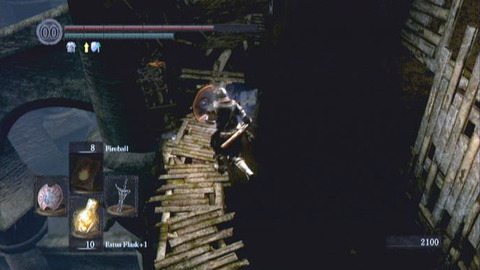
There are two direction you can follow from the fire. One is to head away from the fire, with the ledge where you found the Iaito blade to your back. That route actually leads to some ladders (positioned just to the right along some wooden planking) that you can climb to reach the overhead series of planks where you first started the level. It's the route you would have taken down to the bonfire if not leaping to the platform for the weapon. Along that route, keeping to the high road, you can find the Large Soul of an Unknown Soldier. The way to proceed through Blighttown can also be found if you head in this direction from the bonfire and just keep to the low road along the stone bridge (where some dogs are standing guard), but before you continue your descent you might want to explore in the area to the other side of the bonfire.
Your other option from the bonfire is to head back in the general direction of the high ledge where you found the Iaito blade. Head around the base of that ledge and you'll find the top of a ladder. You can peer over the edge to possibly attract the attention of some enemies lingering below. Let them climb up to you and then hack them apart, or drop down with your weapon ready to manage a damaging surprise attack (though you'll take some damage yourself because of the height involved). Descend the ladder and walk along the ledge they were guarding. On a beam that extends from it, you can investigate a corprse to obtain three of the Blooming Purple Moss Clump. Then you can return to the base of the ladder.
Now from the base of that same ladder, head up a small ramp and to the right to find yourself at the start of some rickety footing. Before you start across that, you should know that it will sway gradually when you put weight on it, swinging left or right like a wooden arm. Don't let that freak you out as you head slowly across the shaky footing, and don't let an agile red hound startle you as you reach the halfway point.
A word about the hounds here: they're smaller and faster than the ones you may have already encountered elsewhere in the game. Red in color, they can sprint fairly quickly and as they get near they may also try to roast you with fire. You're better off not facing them directly but (when the level architecture permits it) approaching them from the side instead. You may also try picking them off with projectile weapons.
When you reach the far side of that rickety ledge, you can drop off the left side and double back a short distance to grab Humanity from the corpse that you might have noticed lying off to the side. Then you're done in this direction and you should return to the bonfire.
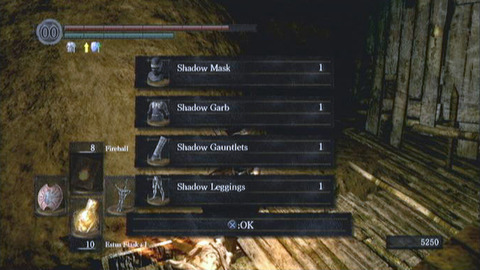
Back at the bonfire, head in the direction where the ladders lead up to the area entrance from the Depths. If you haven't found it in this direction, note that you can climb a ladder and work your way past where an enemy is trapped in a stone vase. Kill the enemies there, then look to the right. You can drop from your current position to a lower ledge in that direction, then climb up another nearby ladder (after defeating more enemies) to find some excellent gear with terrific resistance to poison-based attacks: the Shadow Mask, the Shadow Garb, the Shadow Gauntlets and the Shadow Leggings. Drop down from that ledge, kill an enemy and check around the wooden walls to find two Soul of a Proud Knight items resting on corpses spread around the same general vicinity.

Once you have that gear and those items, you're going to want to stick to the lower route that leads across more of the stone bridge (no ladder climbing necessary). In that direction, you'll find more of the fiery hounds like those you fought a moment ago. Tend to them and to a guy who tries to attack from the left from the sharply angled corner, but a bigger threat comes in the form of an enemy ahead of you and to the right who will try to fire poisoned darts at you to inflict Toxic. Block those attacks at all costs as you deal with goons, and get behind some wood when you can to eliminate yourself as a target.
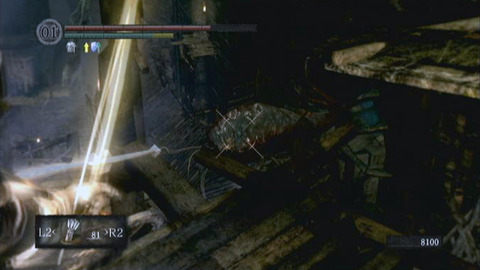
Continue onward from there but watch the area ahead of you and below you. It's possible to drop down along the planking toward a monster that looks like a slug with tentacles. You can shoot at it from a distance with arrows if you have them. The beast won't chase you, so it's easy to destroy him from afar. Then you can head forward to find a ladder to a lower ledge. Drop down along those ledges to the area that the slug was guarding to find the Pyromancy: Power Within on the corprse.
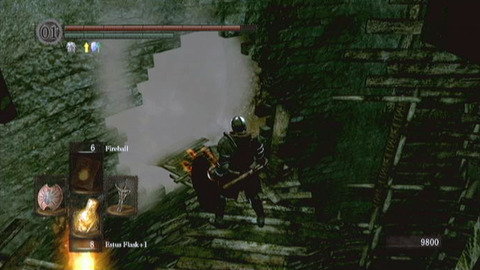
In the same general area, you'll also find a number of enemies that will climb around the platforms trying to hurt you. It's worth waiting around for a bit just to let them come to you. You can check corpses for soul-generating items. Near where you killed the slug, the path descends to an area where another of the large goblins with a long club is waiting (like the ones you fought at the entrance to the area from the Depths). You can hit him in the face as he tries to ascend toward you, so it's an easy fight with the advantage definitely in your favor.
Descend along the planking that he was guarding, which itself is positioned against a stone wall, and you'll find the entrance to a cave. It is guarded by another of the faster enemies, but you can easily block its rush and then eliminate it with a few melee attacks. Head into the cave that it was guarding to find another circular chamber like the one that served as the entrance to the area. To the left, you can descend a platform that leads to a lower ledge ahead of a mist-shrouded opening.
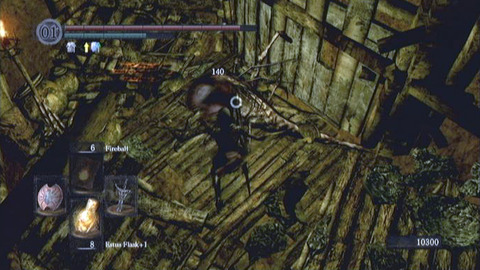
Before you pass through the mist-shrouded opening, it's a good idea to equip the Shadow equipment that you found higher in the stage. Its protection against poison will come in handy now, as you're about to venture to an area where you must battle enemies that can inflict poison while you also spend time rolling around in fetid standing water. You should already have the Spider Shield equipped, as well. The combination of all of that will make things go much easier for you.
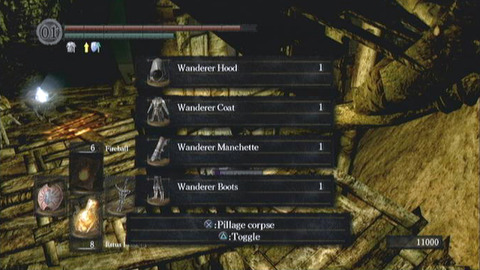
When you step through the opening, you'll find yourself on some wooden platforms. On a ledge ahead of you, one of the enemies that throws the poisonous daggers is waiting. Hold up your shield and start toward that enemy, though it is in the distance. Don't walk over a platform yourself, but if you move closer the enemy may rush you and fall to his death. Then you can look left, where a torch is burning. You'll find that such torches often serve the purpose of guiding you through a level. Where there is light, you'll usually find other things of interest (as is the case here).
Descend the ladder and a second one just after it, then start forward. A sluggish monster will rush you. Quickly head forward and get to its side, as this monster is capable of breathing fire. A few hacks from the side will disable it. Then you can continue descending and take out another of the monsters before you find yourself looking down a series of wooden platforms. Ahead of you and below, there's another of the dagger-tossing enemies. Be careful to block its attacks. You can possibly take it out with well-aimed arrow shots, or just quickly drop down along the platforms and then head forward to eliminate it.

Once that dagger-tosser is toast, grab the loot from the nearby corpse (you'll find the Wanderer Hood, the Wanderer Coat, the Wanderer Manchette, the Wanderer Boots and the Falchion) and then head back the way you came along the wooden platform. You should find yourself starting to be pestered by insects in this area. Don't try to slash them if you'll have to risk stepping toward the edge of a platform. You may fall off and plunge to your death. A better strategy is to use magic or arrows from a distance.
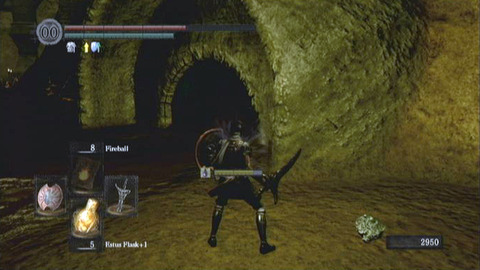
As you descend through the area from there, the main thing to keep in mind is that there are a lot of the sluggish creatures to deal with. Don't try to rush on your way down. Instead, take your time and look ahead at each ladder. Kill any circling insects, then descend a ladder and take out a slug. Repeat as necessary until you arrive along the bottom of the area.
Now you've found the swamp water. Wading through it saps your defenses and can eventually lead to your character being poisoned. You should leap into the water when you first enter it, then roll and keep moving quickly to minimize the amount of time you have to spend in it. Try to fight any enemies (including more of the slug creatures) on land when possible. You should also be looking toward the right for an archway in the stone. Through that archway, you'll find the region's second bonfire at the base of a stone walkway that ascends toward a tunnel.
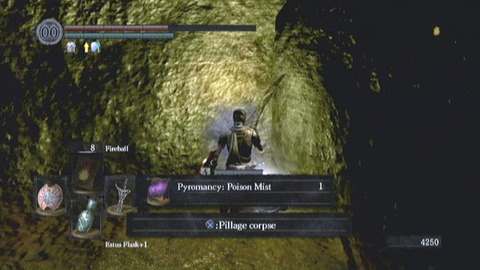
Climb that walkway and at the end you'll find a basin. Descend into the basin and open the chest to obtain a precious Dragon Scale. Then backtrack to the area with the standing water and look around for a bit. You can find corpses with items, including the Large Soul of a Proud Knight. There are all kinds of items along this murky bottom.
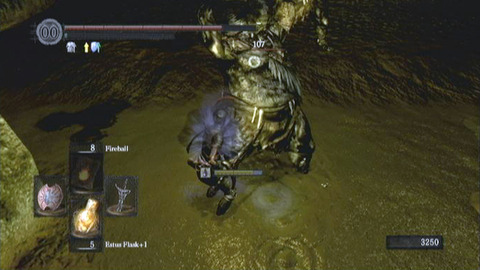
Straight ahead of the exit to the cave where you found the bonfire, you can roll straight through murky water and work your way around a stone structure to find a waiting corprse. Check there to obtain the Pyromancy: Poison Mist ability. Elsewhere in the vicinity, as you check corpses along the edges of the region and throughout the soupy center, you'll find a couple of the Large Titanite Shard, a Large Soul of a Proud Knight and a bunch of treasure on a corpse guarded by enemies that appear to be giant leeches. In that area, you can find the Tattered Cloth Hood, the Tattered Cloth Robe, the Tattered Cloth Manchette and the Heavy Boots.
Another area of interest, along one edge of the region, is guarded by two of the huge goblins. These fellows carry boulders instead of clubs. They're able to slam down the boulders to inflict severe damage, or to roll them toward you to the same effect. You'll be fighting two at once and there's a lot of swamp water nearby, so you might want to weaken them with some magic or projectiles before you move in to finish off the two goblins. Moving quickly and getting behind them for back stab moves will make the fight go much better. When you defeat them, you will obtain the Great Club, a powerful weapon if you have the strength to carry it.
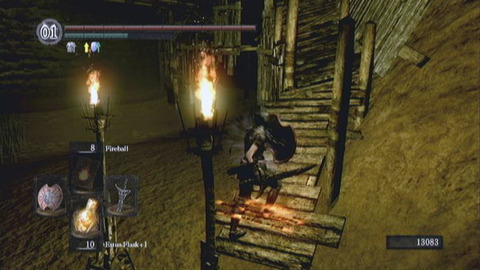
When you have looted the vicinity, which may require several runs, you can return to the bonfire and to recover and to prepare yourself. Then you should head back into the swamp area and head toward the right.
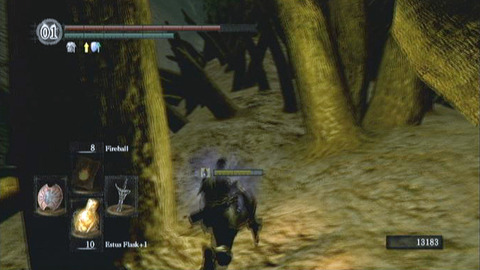
You'll have to defeat more of the slug enemies if you rested at the bonfire, or if you haven't yet tended to them for some reason. Proceed in that direction, keeping near the wall, and you'll soon reach a waterwheel. You can continue a short distance beyond it to find an area where there is webbing on the side of a hill, with rocks protruding from it like spikes. If you climb up this hill, you'll find the entrance to a new area: Quelaag's Domain.
Quelaag's Domain
When you enter Quelaag's Domain, you'll find that it's a long tunnel descending into the heart of the webbed hill that you just climbed along the edge of the lower Blighttown swamp. There are webbed cocoons overhead.
As you descend along the shaft, you will eventually come to some strange objects in the corridor. These are actually enemies. You can pick at them from a distance with arrows or fire attacks and you'll break apart what looks like an egg. That turns out to be an assortment of bloody worms. They move quickly and several of them will come toward you now that you've broken them apart. They're actually able of causing some serious harm, so you may find it better to simply run past them. If you do deal with them, fire attacks continue to work well.
Past that threat, the trail continues its descent and stops finally ahead of a mist-shrouded opening. When you step through that opening, you'll reach the area boss.
Chaos Witch Quelaag
Quelaag is a fearsome foe, the most difficult boss that you've yet encountered. She is half giant armored spider, quarter woman. However, her fighting tactics resemble those that you might expect to encounter from a dragon.

When the battle starts, let Quelaag skitter toward you. She will rely heavily on fire attacks, so make sure that you've equipped fire-resistant gear if you have any. If you are standing in front of the spider, it will likely try to hit you with flame attacks. It's better if you can move in close before that happens and stand to either side of its mouth, between the first and second legs on either side of the mouth. From there, you can hack away at the spider and do some pretty good damage, maybe even use two-handed attacks.
Once you have done enough damage from there, the spider will shift away. Keep in mind that if you remain at too great a distance, Quelaag will try to use a luminescent blade to swipe at you. Though you can block part of the damage with your shield, you're still likely to take damage and suffer from stamina loss. You're better off if you for the most part stay close to your foe throughout the fight. Then you only have to worry about the occasional noxious fumes that the spider will send out (watch for her lovely upper body to drape forward if you want to know when the noxious explosion is about to happen), or a lava flow that it sends out to either side of its body. Except when you're rolling to escape a lava flow or the fumes, you're always safer right up against the critter than you are trying to stay at a distance.
Besides having a few powerful attacks, Quelaag also has a larger life meter than other bosses up to this point. You'll have to hack away at her for quite some time to do any real damage. It's a battle of endurance, but staying close should be enough to give you the upper hand and it should allow you to eke out a victory.
When you defeat the boss, you will receive the Soul of Queelag item. You can head up the stairs beyond where the battle took place and when you do, you'll reach a room with a lever that you can pull. Do so and you'll ring the second bell, which triggers a scene showing a giant beast raising the portcullis that you may remember finding at the the end of a forest path near the blacksmith at the Undead Parish. That opening now leads to a new area known as Sen's Fortress, though you probably shouldn't head there just yet.

Once that scene showing the rising portcullis ends, head around behind where you pulled the lever and you can descend a staircase if you like. That will take you toward a new area known as the Demon Ruins, but you're not necessarily ready to venture there just yet. However, along the way you'll find a room with a large circular plate on the floor.
Near the plate, look at the path descending ahead of you. Then roll against the wall to the right. Part of it will dissolve to reveal a wide, hidden path. You can head along that path to meet with a character. Talk to him and answer “Yes” to his question to be allowed through into the next chamber. There, you can rest at a bonfire and talk to a woman who extends partially from the wall to the right. You can join her covenant (Chaos) if you like.
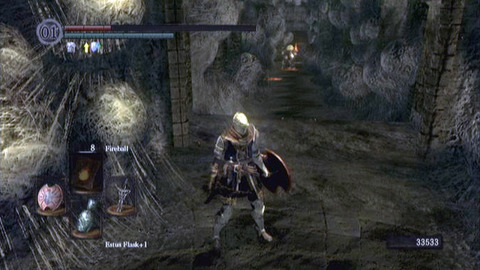
If you join the Chaos covenant, you'll receive the Pyromancy: Great Chaos Fireball item but abandon your former covenant. By joining the new covenant, you'll be able to then talk to the nearby character and improve your Pyromancy Flame (at the cost of souls for each improvement) so that your magic of that sort does more damage. It's in your best interests to join this particular covenant if you are a character of that class, though you won't have that option otherwise.
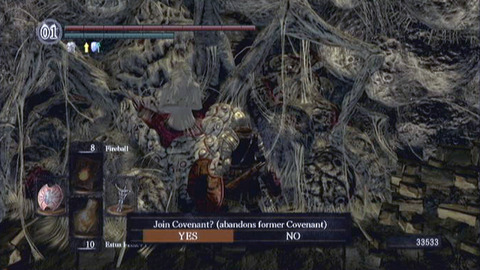
When you're done there, you can leave and resume your adventure. You have a number of good options for how you wish to proceed, but perhaps your best bet is to head to the Catacombs area next. You may also have luck in Darkroot Garden, if you haven't already cleared that area and want to try switching up the order of things, or in The Great Hollow.
The Great Hollow
At the bottom of Blighttown, there's a bonfire in a stone passage built into the side of a mountain. Head out of that area and toward the edge of the swamp water, then hang a left. Proceed past the are that leads up to Blighttown's higher level and keep going, then cross through some swamp water to a low point where a huge tree limb allows you to ascend toward a tree.

Climb the bark trail and you'll reach a small cave that contains the Plank Shield. You'll find it on a corpse. Look left to the wall and you can hit it with your sword to make it dissolve. Head along the trail that you reveal to find a treasure chest that you can open for the Twin Humanities item. Grab it, then hit the wall behind the chest with your weapon to make it dissolve.
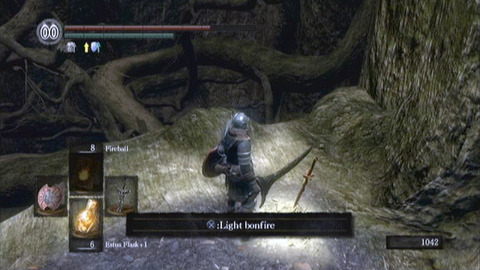
Head along that trail and you'll see the name of The Great Hollow flash on the screen as you descend a barren trail that leads to the top of a ladder.
Climb down the ladder and continue along the path. As the path widens and you see huge tree roots ahead of you, there's a bonfire that you can light. Then it's time to see about descending through the area along the huge roots.
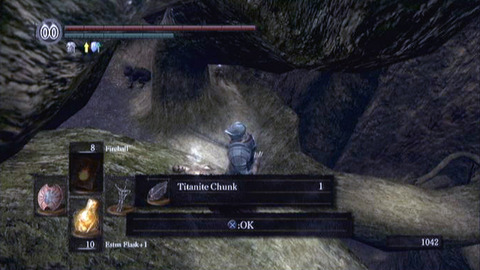
Head slightly left and start down the trail. You can descend for a long way without encountering anything, save an empty room along the right side of the path. Continue past that chamber and you can drop down to a lower branch and head forward. There, you'll find a corpse. Investigate to obtain a Titanite Chunk. If you look down from there, you'll see another corpse and (to its left) an room with a gray floor. Sitting in that room is one of the chameleon creatures with buggy eyes that inhabits this area (they look like the cursed frogs in the Depths).
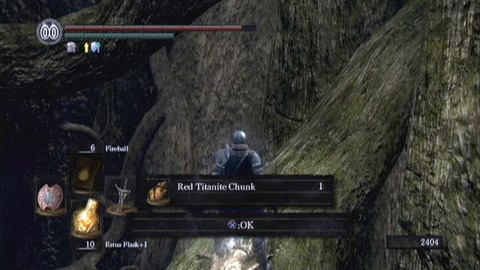
If you wait for a bit, the creature may spy you. It will head up along the branches, which is what you want. Watch carefully, as it is capable of climbing to a higher ledge and then dropping down behind you. Hit it with a fire attack if you have one to keep a safe distance. When you're ready, you can drop down to the lower ledge but know that there are two more of the same creature waiting behind the wooden wall where they're harder to see. They will rush you if they spot you and you need to tend to them quickly without getting caught up in their cursing mist attack. If you're playing through this portion of the stage online, note that you'll sometimes see strange images appear for a moment, like petrified statues. Those images let you know that other players are trying to proceed through the same area and are dying after being cursed. This is a very dangerous portion of the stage.
After defeating the creatures, investigate the corpse lying along the outer side of that lower room to find a Large Soul of a Nameless Soldier. Then head out along the nearby limb and look down to where more limbs crisscross on the way down. You can worry about grabbing items along those limbs if you like. You'll find the Red Titanite Chunk along one branch and the White Titanite Chunk along another. Lower down, there's also a Blue Titanite Chunk.
Keep descending by carefully dropping down along branches. As you head down through the tree, look around for another gray ledge extending from the side of the tree. It has a ladder descending from its side. You can drop down to that ledge from a higher branch nearby, then descend the ladder to reach another ledge with the gray, thatched surface. Look from there and you'll see another ladder descending to a wide area. If you start down the ladder, though, you'll attract the attention of a chameleon. You may prefer to drop down from a higher ledge with your weapon drawn and kill the chameleon upon arriving on the lower level. There are others in the same vicinity, though, so be ready to hit them from a distance to avoid being cursed.
Circle around the area and look for a hole in the floor, near the trunk. There's a ladder along the side of one such hole, but that's not the one for which you are searching. The one you want to find provides a view of a corpse resting on a limb. You can drop down on that corprse from above and investigate to find the Blue Titanite Chunk. However, there are more of the cursed critters nearby and they'll probably notice you and attack. Make sure that you avoid them.
Continuing down the tree, you'll soon find an area of red fungus platforms that extend from the tree. These are past the last of the cursed frogs, and they are inhabited by shroom enemies. The shroom enemies have good defense but you can easily block their attacks and let the fight drag on as long as it needs to. Just be careful that you don't let them mob you. Often, you can run past the shrooms as you drop along the final few ledges and reach the bottom of the tree. There, you'll find an opening that branches off to the side and reaches a mist-shrouded door. When you pass through that door, you'll start along a ledge that serves as the entrance to a new area: Ash Lake.
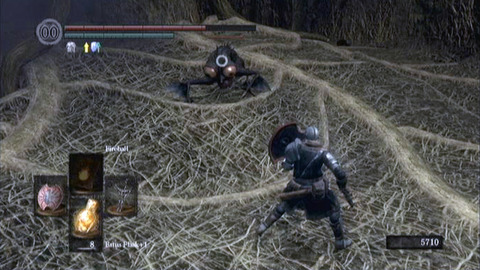
Keep in mind that Ash Lake is a dead-end region. When you're done there, you'll have to ascend back through The Great Hollow. All of the enemies regenerate and there are less options for movement going up than there were going down. It can be difficult to find your path, so we'll provide a few notes below.
First, head up through the chamber while climbing on mushroom ledges and avoiding the mushroom critters that run around throughout the area. As you ascend higher, you'll leave behind the reddish ledges and start making your way along tree bark. You'll probably encounter a cursed frog there before reaching high ground, which has a thatched appearance. Here, there are a bunch of frogs. Take care of them and keep circling around to find a ladder. Climb the ladder.
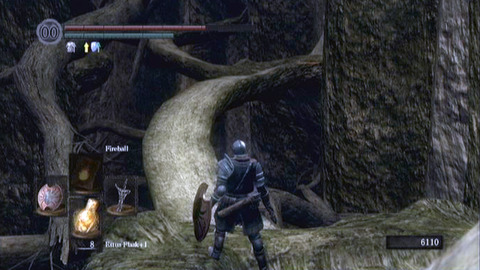
From the top of that ladder, quickly circle around. There are at least two more of the frogs and you want to fight them one at a time if possible. Then along the edge of the area, against a wooden wall, you'll find another ladder. Climb it to a higher ledge and walk forward another few steps from there to find and climb another ladder. At the top of that ladder, look around and you'll see a wooden limb nearby. Start ascending along that limb and you'll find a low ledge that doesn't even come up to your knees. It prevents you from traveling further, but you can turn your back to it and then backstep to hop up onto the higher ledge.
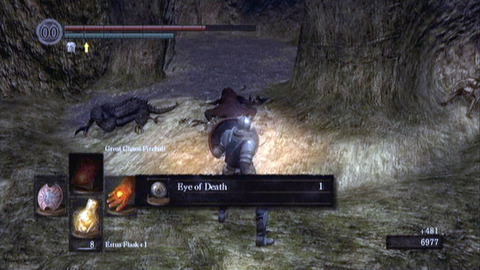
Continue ascending along the wooden ledges and you'll soon reach a cave area with more of the frogs. They are dangerous now, as always, but you should be able to fight them one at a time by luring them toward you. After defeating them, climb the ledge that they were guarding to reach a higher tree limb, then walk along that limb to find still more limbs that you can climb along. There are no more enemies here, just branches that crackle and break out of your way as you ascend.
When you reach the top of those branches, you'll find the bonfire that you found when first entering the area from the Blighttown. Rest there and then be on your way.
Ash Lake
You'll arrive in Ash Lake only after descending through The Great Hollow, itself accessible from the edge of Blighttown's lowest level (in the direction opposite where you find Quelaag's cavern).
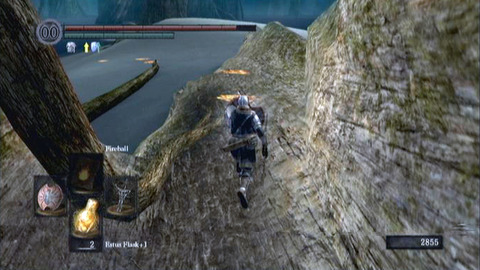
From the entrance, start forward along the gray path and you'll arrive on a tree limb overlooking a blue expanse. That is the lake, naturally.
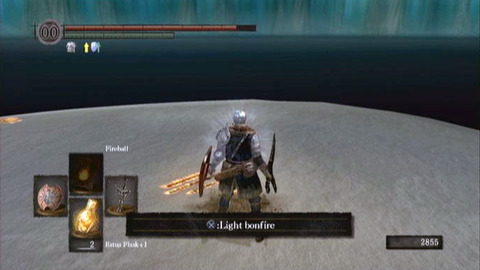
Continue left along the tree limb to find a place where you'll walk along a half-pipe of sorts, fashioned from tree bark. As you descend, you'll come to a sandy base and ahead you'll see a hydra in the water. Instead of immediately approaching, turn sharply right and head along the sand in the opposite direction of the hydra. There, you'll find a bonfire that you can light and kindle. Then when you're ready, turn and head back to the hydra.
There are two options in dealing with the hydra. You can either fight it or you can run past it. Fighting is a risky option, but it also requires a lot of stamina to just run past it. Sometimes if you try to fight the hydra, it will pull a stupid and kill itself. Since you're near a bonfire and don't have to backtrack far if you fail, it might be worth just trying to kill the beast.
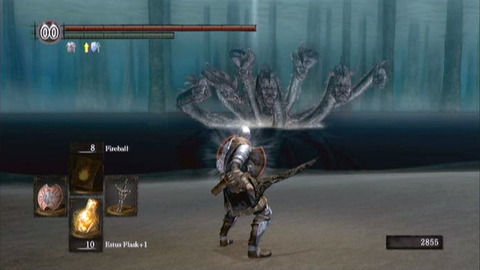
Whether you decide to try to fight the hydra or just to avoid it, note that you can't safely head far from the shore. If you step into the deep water, you'll plunge into its depths, sliding along the bank to your watery death. Therefore, you want to lure the hydra to a safe point along the sandy ground and fight it where you have the most safe footing. You can head around the huge tree near the bonfire and along the far side, you'll find a Dragon Scale resting on a corpse near the water. You can also head toward the right along the beach and find another Dragon Scale in the shelter of a hollowed out log. That log is one good point of shelter if you decide to battle the hydra, though it can't block every attack if you're standing near its edge. Just beyond the hollowed out log, the beach widens.
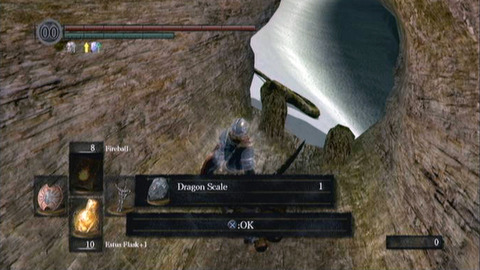
You can keep running along that beach, past a huge tree where a cursed frog and a large walking mushroom will attack you if you try to enter. You can battle the frog and the mushroom and defeat them with fire attacks (particularly the agile frog) and melee attacks as needed. Around the back side of the tree, outside where you're looking at water, there's a point where you can drop to a lower ledge of bark. There, you will find a trail that leads back into the tree so that you can grab the Great Magic Barrier miracle from a corpse.
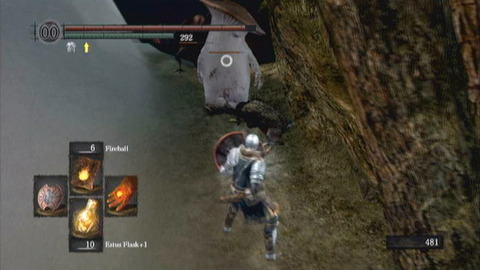
Not far beyond that point, there's a bar of sand that follows a wavy pattern. If you manage to run all the way along it, you can finally enter a forested area that the hydra can't enter. There, you'll find another bonfire. Just past the bonfire, you can approach a huge dragon and kneel before him for the opportunity to enter his covenant. If you agree to do so, you'll receive the Dragon Eye and the Dragon Head Stone. You are also permitted to offer dragon scales to deepen your covenant. Your level within the covenant won't go up unless you offer at least 10 scales, though, so don't start offering them unless you have that many to spare.
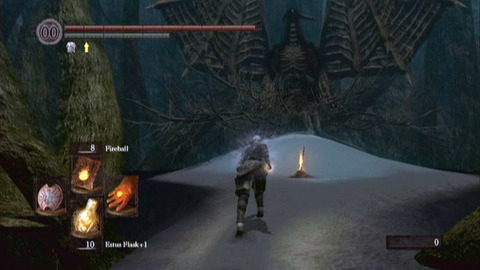
When you're done with any covenant business, go ahead and return the way you came. It's time to ascend through the Great Hollow area again and resume your regularly-scheduled adventure. If you're having trouble making the climb, we offer some tips at the end of that section in this walkthrough.
Return to Northern Undead Asylum
After you clear the Undead Parish and activate the shortcut to Firelink Shrine, you're able to revisit the Northern Undead Asylum (the general vicinity where the game began). There are a few reasons to do so.
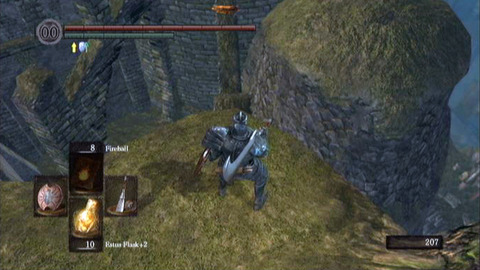
To find the entrance, head up from the bonfire in Firelink Shrine and make your way to the elevator that you activated. Step inside and start to ride up, but face out in the direction of the shrine. Watch for an opening to appear ahead of you and quickly step or roll out onto a ledge. Then walk along the ledge a short distance and you'll see a grassy hill to your right.
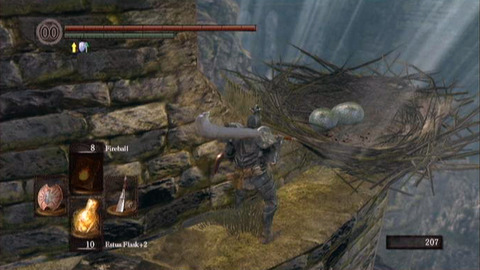
Step onto the grassy hill and walk along it until you can see a steeply rising narrow ledge that leads up to an opening in the side of a circular tower. You can step onto that ledge, then run up along it and through the opening. There, you can climb toward higher ground. Note that it's possible here to drop down onto a roof to the right and find an item (the Undead Asylum F2 West Key, which can be used in the area where you're headed) on a corpse, but you'll have to head back to the elevator to try again if you stop to snag the item.
Keep climbing the circular tower and you'll arrive at the top, where there's a nest with two eggs in it. You can step next to the eggs and a prompt will appear to allow you to curl up into the shape of an egg, which you should do. Then you need to wait a number of seconds, around 10 or 15. A huge bird will come flying down, snatch you up and then fly you to the asylum.
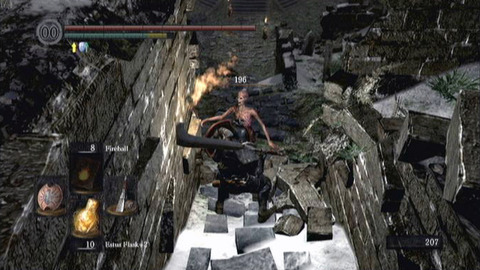
When you appear in the asylum, you're near the top of a hill. You can start down it and there will be debris to the left and right. Ahead of you, several skeletons will be walking slowly toward you. Take care of them and then you can explore the areas to the sides.
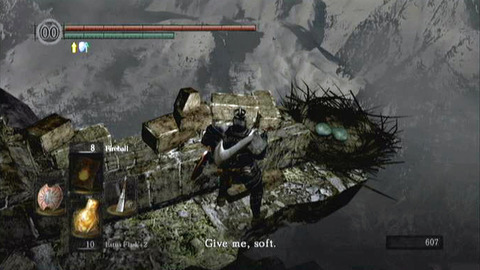
Along the right side of the trail, you can descend to find a corpse propped near the edge of a ledge, against a wall. Check that corpse to find a Soul of a Lost Undead. Along the left side of the trail, you'll instead find another nest. If you get near, the nest's owner will ask for materials for the nest. It wants warm and soft items. You can give a number of items here in trade. You have to drop the item within the nest so that it sits next to the eggs. Then when you quit your game and return later, you'll find something else left in exchange.
Here is a partial list of items that you can trade with the crow.
- Bloodred Moss Clump (Twinkling Titanite)
- Blooming Purple Moss Clumb (Twinkling Titanite x2)
- Cracked Red Eye Orb (Purging Stone x2)
- Dung Pie (Demon Titanite)
- Purple Moss Clump (Twinkling Titanite)
- Twin Humanities (Rare Ring of Sacrifice)
The above is not a complete list. Remember that he's looking for items that are soft or warm. You can only trade any one specific item once before the bird will start rejecting items of that type, and dropping several of an item won't allow you to receive more than one in trade so there's no getting around that limitation.
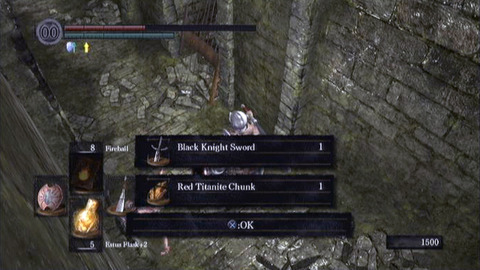
Now continue down the main trail through the area and you'll arrive in a huge rectangular chamber. Keep along the edges for now and battle any skeletons that attack. Head to the back side of the chamber and through the open doors to find a familiar room with a bonfire. Use the bonfire, then consider your options.
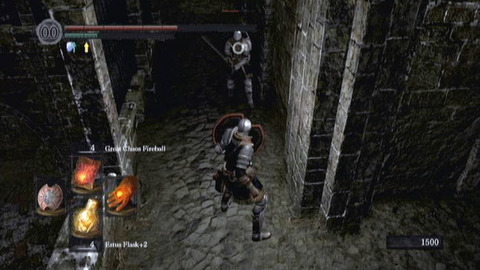
One option is to explore the rest of the asylum. Along the familiar corridors, you'll now find a black knight who you can defeat to obtain the Black Knight Sword and the Red Titanite Chunk. The former is a powerful, worthy weapon even in its default form (though you'll need 20 Strength and 18 Dexterity to wield it properly). Elsewhere in the asylum corridors, you'll find another soldier who you can defeat for the Crest Shield. It's also terrific gear.
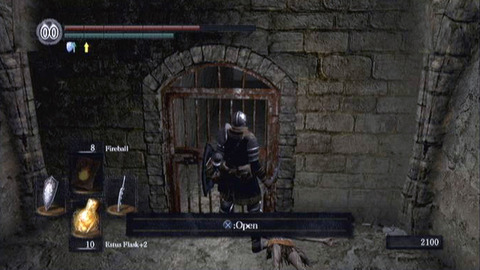
Finally, you can find a locked door near the very top of the asylum, not far past where a skeleton tries to crush you by rolling a boulder down the stairs. Beyond that skeleton, you'll kill several soldiers and an archer, then head forward and left along the passage to find the door guarded by two more soldiers with shields. Kill them and open the door, then head through it. Inside, you'll find a stairway that you can descend to grab the Rusted Iron Ring from a corpse. It's an item that improves your balance on poor footing.
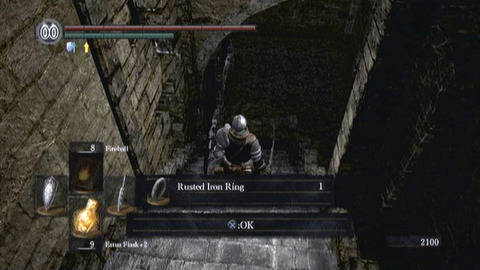
When all of that is properly tended to, or if you decide to forgo the extra exploration, you should head back the way you came through the large rectangular room. This time, go ahead and make your way toward the center of the room. As you do, the floor will give out from under you and you'll fall into the room below to do battle with a hidden boss.
Stray Demon
The Stray Demon is an extremely powerful boss, capable of hitting you for extreme damage regardless of your likely level and armor situation when you encounter him. For this reason, your best bet is to settle on a strategy that dependably allows you to avoid his attacks. They're not something you can simply shrug off as you can with most bosses.
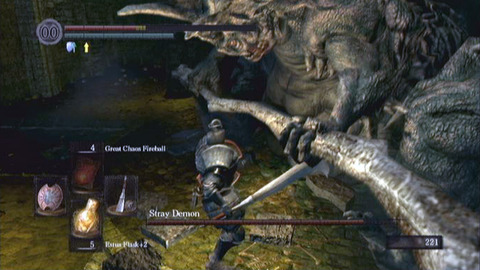
When you first land in the arena, you're likely going to lose some of your health straight off the bat because of the fall. Recover quickly before the monster starts forward, then immediately it's time to plan your approach. The demon attacks primarily with powerful swings of a tower-sized ax. It has a vertical strike that you definitely want to avoid, as well as a wide horizontal swing that may well go over your head if you roll out of its way.
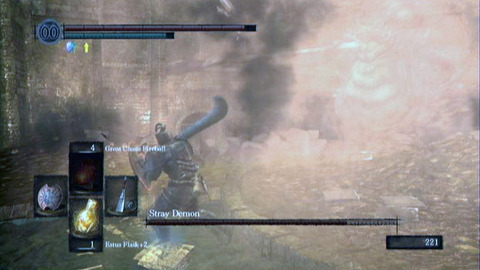
Besides the ax attacks, the demon will sometimes launch itself off the ground and then fly around at low altitude. When you see it doing that, make sure that you're rolling out of the way. You don't want it to land on you, no matter how good your armor rating might be. Another attack the beast has is a noxious cloud of red gas. If you're hit with that, you'll take a lot of damage.
Because of the combination of attacks that you face, you might find it helpful to strip away any armor that slows your movement (since armor isn't much use, anyway) and hit the demon with a two-handed weapon of your choice. You can avoid his attacks, move in close and hit him once or maybe twice if you're lucky, then retreat to avoid his gas and flying attacks. Repeat the process as needed and be careful to guzzle estus drinks only when it's entirely safe to do so (there's no point in trying to down one and taking more damage as a result than the flask will even refill). This is a challenging fight, but also an optional one.
If you defeat the Stray Demon, he'll give up 20,000 souls. You're free to leave by the red ladder in the corner of the room. From the upper area where you fell through the floor, head back up the hill to the nest and curl up like a ball again to catch a ride back to Firelink Shrine.
Sen's Fortress
When you defeat Quelaag and ring the second bell, you'll be treated to a scene of a giant raising a portcullis. You can find the freshly-raised portcullis at the end of the forest path that leads out of the room with the bonfire, upstairs from the blacksmith in Undead Parish.
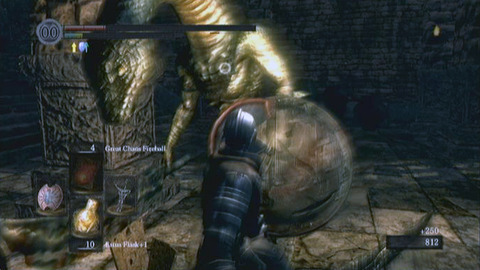
As you enter the area, keep your shield raised and start forward through the room. Ahead of you, there's an arrow trap, so keep your shield up to deflect its three shots. There are pillars lining either side of the wide center path, and a staircase ahead of you. Positioned at the top of the staircase, behind pillars, are two of the area's guards. They are difficult to see, but you're bound to notice them when they rush you with their hooked swords. They resemble men with snake heads, so we'll call them snake knights. If you're lucky, you can use pyromancy to hurl a Great Chaos Fireball at them and perhaps take them both out at once. If you don't have that ability or are weaker, you'll have a longer fight of it but can still rely on fire. When the monsters are about to attack, they lean back before delivering a stamina-crushing blow, so you'll have time to roll around and possibly backstab them. Note that very rarely, these fellows will drop the Man-serpent Greatsword.
Investigate the area at the top of the stairs to find a corpse along the right side. You can check it out to obtain the Soul of a Brave Warrior. Then you should keep climbing the stairs through another archway.
In the next chamber, you'll notice some swinging pendulums ahead of you. They're sharp and dangerous. Predictably, they swing back and forth across a stone trail that you'll have to follow across a chasm. On the far side of that stone bridge, there's another of the snake creatures. On a ledge above, there's yet another one. The one on the high road will hurl lightning at you as you proceed, so you need to keep your shield raised and you need to move quickly forward while avoiding the swinging blades. Get within range of the snake knight on the path and take him out with fire, then rush forward and hide behind the stone wall for protection.
Here, you can head left to find some stairs. When you climb those, keep an eye to the left where the snake knight is positioned on higher ground. It will likely continue to throw lightning shots your way. Climb to the top of the stairs and look around the wall. There's a path that leads forward to where the monster is waiting, but you'll have to pass through some more of the huge swinging blades. Keep your shield up and run past the enemy, through the opening beyond and then quickly veer left. If you did it right, a trap in that room will fire several arrows at your foe as he turns around to chase after you. He'll be killed.
In the room you just reached, there's a treasure chest. When the path is clear (after the trap has sprung), open it to find two of the Large Titanite Shard.
Head right from the chest and up a short set of stairs to find yourself on another walkway. This one proceeds forward toward an opening, and ahead of that opening there are some stairs that descend to the lower left before wrapping around to the right where a snake knight is waiting. From your vantage point, you can toss firebombs or other fire-element attacks at the knight and kill it before it can even get close to you. Then proceed toward the opening you saw. You'll likely attract the attention of another snake knight who is patrolling just beyond that opening. Kill him and start for the opening, but be careful not to pass entirely through it.
Just beyond the opening, there's a hard-packed dirt path. That path is a trough. If you look to the right, there's a drop-off. To the left, the trough continues for some length to the base of a flight of stairs. A huge boulder regularly drops, rolls down the stairs and then along the length of the trough. Wait for one to pass you, then immediately run forward and up the stairs to the first landing. Then head quickly left to find a doorway shrouded in mist. From there, you can wait for another boulder to drop, then run partway up the stairs and drop off onto the right side to find a weapon known as the Shotel. You can also proceed uphill to find an enemy that you can defeat to get your chance at a treasure chest that holds the Ring of Steel Protection (quite useful). Or you can just proceed through the mist-shrouded door directly.
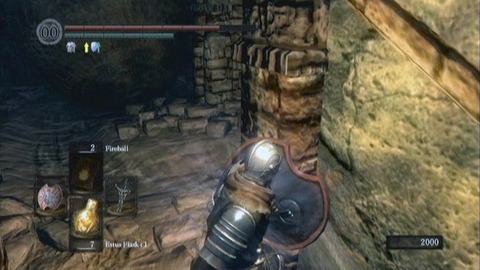
Once you pass through that opening, you'll find a small chamber with statues along the sides. Ahead, there's an opening. If you try to start through it, you'll find another of the snake knights. Lure him to you, then take him out comfortably. Now pass along that corridor and keep to the side to avoid stepping on a floor plate that will spring a trap behind you and cause you to get hit by several darts.
Head through the next room and start up some stairs, but stop short of passing through the opening. Watch the area ahead of you for a moment and you'll see a huge boulder go rolling past. This is part of the same trough that you negotiated earlier. You'll need to wait for a boulder to roll past you (don't step out too far or you'll be clipped by the boulder; it comes closer to the wall than you might think), then you'll need to immediately run uphill to the right and keep going until you reach a wide room where you can roll to the side just before a boulder crushes you.
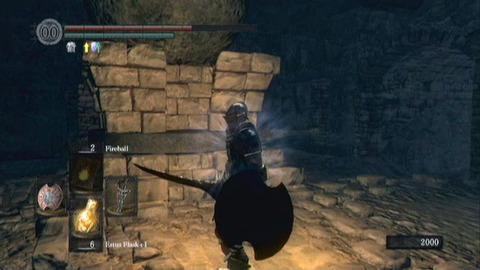
The way this room works is that there's a pedestal at the center. A boulder drops onto the pedestal, some gears turn and then a log extends from the far wall and knocks the ball like a pinball so that it rolls down through the trough. There are openings on each side of the chamber. You can head around the platform to the opening on the opposite end of the room (the one below the wooden pole that sends the ball rolling) to find a wooden pole protruding from the platform. Interacting with this will push it in the direction that you are facing, turning the platform a quarter of a turn and impacting the direction in which the boulder will roll. Push it around three times and let a boulder fall and roll each time (to produce a new opening near the beginning of the stage), so that if you look at the pedestal from the direction where you first entered the room, the wooden pole that you pushed extends from the pedestal's right side. This positioning causes the boulder to roll through an opening and fall into an abyss overlooking a bridge, preventing it from being a serious threat to you as you explore the dungeon in the short term (though eventually the positioning will reset).
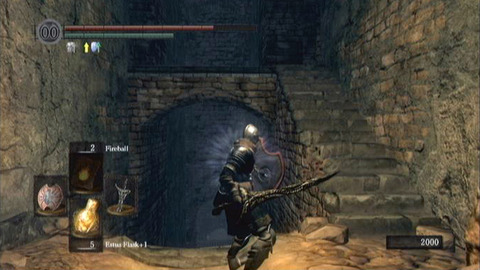
Now that the boulder won't be bothering you, it's time to explore. There are two main directions worth following. One is positioned just to the side from the opening that you used to enter the room. The other is in the direction that the wooden pole extending from the platform should now be facing if you've followed the above directions.
Start with the latter option. As you start downhill, you should notice some steps leading up to the right. Climb those steps to arrive at an archway. There's a door to the right, but you can't open it from this side. Head left over the archway to another similar room, but in this case some stairs descend toward the left. Start down those to reach a small, square room. There's a door here along one edge with a lift that goes up and down. You need to be careful here. If you step onto the platform as it pauses in front of you, it'll carry you up to a spiked ceiling. So watch for it to come down and drop onto it as it descends. Then when it reaches the base of the shaft, quickly roll off to the side.
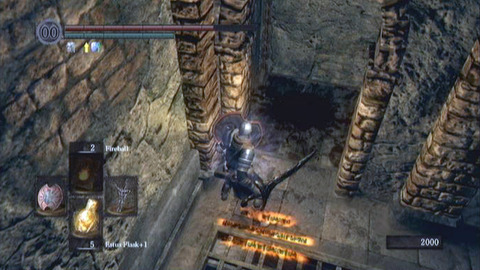
In the room that you find at the bottom of that shaft, there's a treasure chest. Do not open the chest, which is a trap, unless you want to defeat the mimic and receive the Lightning Spear that it will drop. Instead, head around it and through an opening. You'll come to a 'T' in the path where you can head left to the top of a ladder or into a hole in the wall that has been produced because of the turning you did on the pedestal in the room at the top of the hill. For starters, ignore the ladder and walk into the opening.
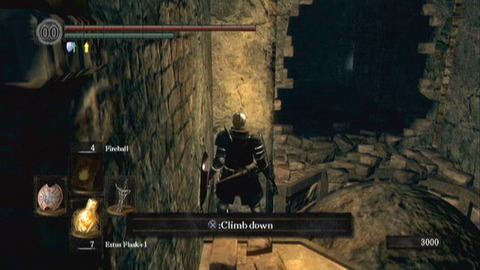
Quickly veer left if another boulder is following you (quite possible, regardless of where you left the pedestal's positioning in the upper room) and let any boulder roll past you. Then check the corpse hanging from a window along the right wall. You can check it to obtain the Covetous Gold Serpent Ring.
Along this path, you can also drop off to the side where you see a ledge with some scaffolding and an enemy to find the Large Soul of a Proud Soldier. Then you can explore the adjoining rooms to find another corpse where you can obtain the Black Sorcerer Hat, the Black Sorcerer Cloak, the Black Sorcerer Gauntlets, the Black Sorcerer Boots and Hush sorcery. You can also find a door that you can open from this side to create a shortcut from the other side.
In the other opposite direction from where you dropped down, there's a detour for the especially brave player. You can head through an opening in the wall, drop down to a ledge and explore it to find the Slumbering Dragoncrest Ring on a corpse. Then you can drop down along the bars that run along the side of the chamber to gradually descend to the lowest point of the area. Defeat the monster that waits there and you can receive the Demon Titanite. Check the room it was guarding for a Soul of a Brave Warrior and for the Scythe weapon. You can roam around this low area and kill another of the large monsters, as well. They're dangerous, but you can attack from a distance with fire and probably do fairly well for yourself as long as you avoid any of the other snake knights. Along the side of the area, you'll also find a high ladder that you can climb to a ledge where you can pillage a corpse for the Large Soul of a Proud Knight. Keep climbing from there while battling any more snake knights that may be chasing you and you'll emerge on the rooftop. From where you appear, you can head forward to attack another giant, or hit him from a distance with arrows to gradually kill him. He drops the Titanite Chunk when defeated.
Next, it's time to return to the room with the pedestal. Get there by whatever route works best for you (trying to run uphill probably isn't it). This time when you arrive in the room where the boulders drop onto the pedestal, you'll want to head through the room to the side of the chute for the boulders. Proceed in that direction and you'll find traps along the left wall. Walk along that wall with your shield facing it. You'll trip a trap, but your shield can block any darts that issue forth from the holes. From there, continue forward and then left through another room.
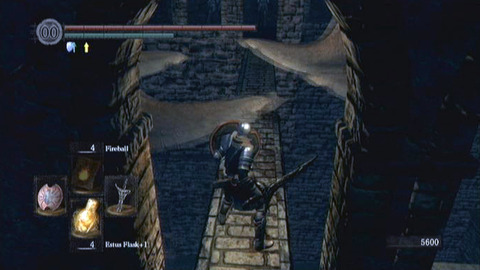
You'll soon come to a narrow ledge that leads across a wide gap. This ledge is extremely dangerous. Pendulum scythes swing back and forth across it and they're capable of easily knocking you off the ledge and to your death. Their placement can be difficult to track and they're placed closely together. The best way through is to perform two consecutive rolls as the first one finishes gliding in front of you. You should just barely beat the series of pendulums as you reach the far side of the ledge.
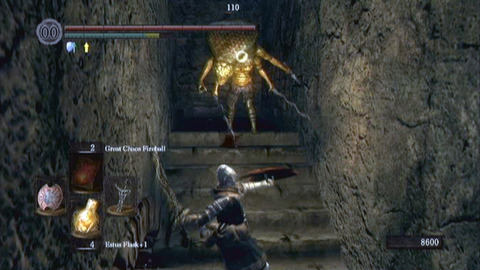
When you venture into the next room, you'll find that it has reached a 'T' of sorts. There is a recess to the right where one of the snake knights is positioned (he'll likely come out to attack you as you arrive) and to the left there is a lower path and a staircase. There's a magic-wielding knight at the top of the stairs. Once you start left, begin with the lower route and you'll find two of the Large Titanite Shard on a corpse in that direction. The corpse is guarded by another snake knight, of course. Then you can return and start up the stairs. Take out the magic user with magic or projectiles of your own, or by quickly rushing him.
From the top of the staircase, head left and up more stairs. At the top, look out to see another of the narrow ledges with pendulums. Don't start along it just yet, though. Instead, look left. There is a ledge there with windows along it, and a magic user standing in one of the windows. It will try to pelt you with magic if you let it, which would make crossing the platform difficult, so take care of it with projectile weapons or magic. Then you can more safely creep carefully across the ledge.

When the time comes to pass through the next set of four pendulums, your best bet is to take them two at a time. Walk through the first group and then stop short of the second group as they cross your path. Walk through that second group also, and to the far side of the room where stairs ascend to your right to reach a mist-shrouded gate.
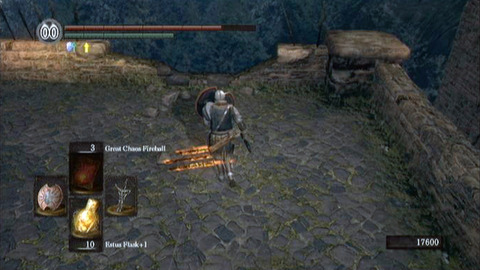
Step through the gate and you'll find yourself on the area rooftop. Ahead of you, there's a giant standing next to a pile of explosive balls. He'll pick them up and chuck them at you as long as you're not behind shelter (and even once you take shelter, if he's spotted you). Head forward and climb some stairs that lead to your left. Continue climbing until you're higher on the rooftop, where the explosive boulders tend to land. Look toward the right and you'll notice a low point along the wall. Head there (not at a run) and carefully look down over the edge of the wall. There's a ledge below you that you can jump down to in order to find the area's bonfire point. Unless you don't want to save your progress up to this point, there's no reason not to use it.
From the bonfire, head through the nearby opening. You'll find yourself on a ledge where you can drop down and onto a staircase. It's the one you climbed a short time previously in order to first reach the rooftop. Climb it again and this time when you reach the rooftop, you should head to the right.
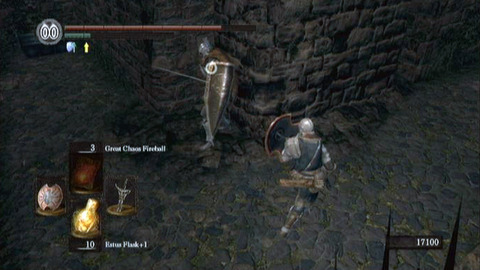
As you proceed to the right, you'll eventually start down some steps toward a lower portion of the outside area. Here you need to be on your guard, as one of the caped knights most common in the Undead Parish area will try to kill you on the stairs. Defeat him in the usual manner, descend the stairs and continue forward through the stone area. Beyond a gap in some high columns, the path turns right and you'll have to battle another caped knight before you can claim the Flame Stoneplate Ring from a treasure chest.

Now return to the rooftop, near where you dropped down to light the bonfire. Proceed beyond that to find the Large Soul of a Brave Warrior on a corpse ahead of some stairs. Climb the stairs to find two Large Titanite Shard on another corpse.
At this point, you can either climb higher onto the roof, or you can follow it toward the right on the current level. It's worth heading to the roof first. There, you should look ahead and notice a gap between your current location and a grated area. Then look left. You'll be able to continue along the high stone ledge and then to the left, there's a wide gap you can leap across. If you fall, you'll land in a courtyard area below where you can grab the Sniper Crossbow and Sniper Bolt from a corpse, so even then your exploration isn't a total loss.
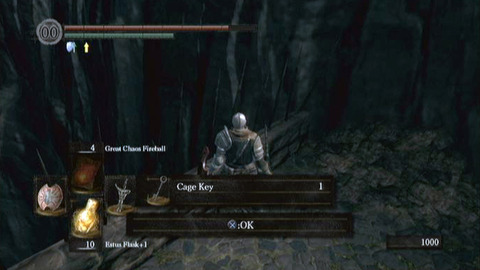
If you make the jump in one piece, however, you'll find a man in soldier gear. He's not an enemy, so talk to him and he'll offer to sell you gear. He carries pieces of the Catarina armor, which are expensive but great defensively. He also has some powerful rings, if you have the souls necessary. Note that besides talking to the merchant, you can also descend some stairs and at the base of the tower (it's a long descent), you can find a magic-wielding snake knight. Defeat him, then check the corpse behind him to obtain the Cage Key, which you can put to use elsewhere in this dungeon. Then you should backtrack to the top of the tower, where you were avoiding explosive boulders a moment ago.
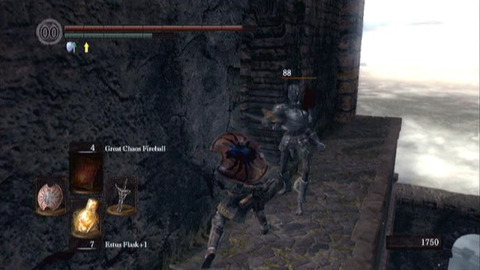
Still on the highest point of the rooftops, jump back over to the main portion of the high stone ledge and run along it toward the far side. You'll find a split in the path where you can head either left or right. Go right first to find a room with some hanging cages. Open one of them with the key that you just obtained and step inside. You'll create a shortcut that leads back to one of the earliest points of the dungeon, the first major ledge with the swinging pendulums. That's convenient, but for now you should go ahead and return to the room where you activated the shortcut. You can continue past it to reach the back side of an outdoor area.
As you ascend through this area, you have to dodge daggers that are being tossed toward you by enemies on the higher wall. The easiest way to get through is to just walk along the ledge with your shield up. Reach the stairs, climb them and then take out any enemies. Past them, you can enter a chamber where you will see a mist-shrouded doorway. That door leads to the boss area, but you shouldn't go there just yet.
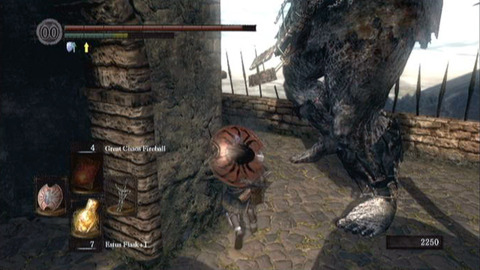
Near the mist-shrouded door that leads to the boss, you'll see the base of a spiral staircase. You can ascend it to reach the area where the giant who throws rocks is positioned. You definitely want him out of business. When you get near his feet, he's likely to notice you and will try to stomp you. Dance back and after he sends out a shockwave with his tantrum, he'll collapse for a moment. That frees you up to hack away at his head for a bit. Then you should let the process repeat. You can retreat a few steps down the stairs to stay safe (for the most part), so the giant is actually easy to defeat and when you win you'll obtain a Titanite Chunk as a reward.
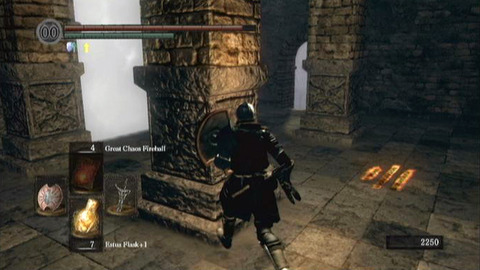
Now you're ready to descend and enter the doorway to face the boss.
Iron Golem
The Iron Golem is a heavily-armored foe, every bit as durable as his name suggests. However, you can chip away at him just like any foe as long as you can keep out of the way of his fearsome attacks.
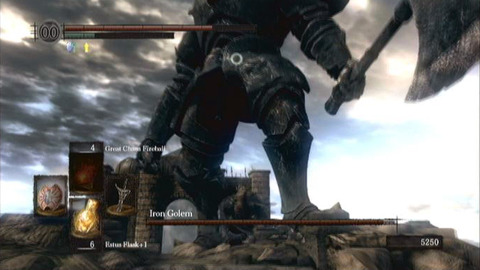
If you try to fight at a distance, you'll find that the Iron Golem has ridiculous range. He attacks with an ax that might as well be a projectile weapon. You can dodge out of the way, and you'd better hope you do or you'll take a lot of damage. Mostly, you'll have better luck if you move in close to the golem, but even then there's the problem of dealing with his fists. If you are in front of him at the wrong moment, he'll grab you in his massive hand and crush most of the life out of you before tossing you to a short distance.
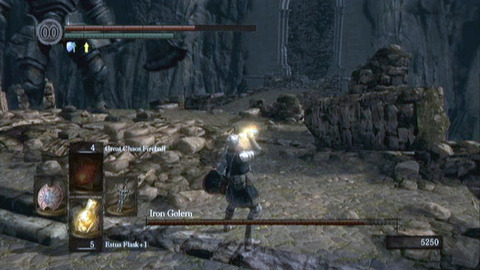
To win the fight, you should make sure that you always know where your foe is (through targeting) so that you can see his attacks coming and avoiding them. Always knowing where to expect danger from means the battle is half won. If you want, you can circle and pelt him with fire attacks to drain some of his life, then move in close and finish things off by dancing around his feet. Roll through them and try to keep up an attack from behind so that you're less likely to be grabbed. Make sure that you don't roll off the roof and fall to your death, though. It's surprisingly easy to do so in this battle.
One final note: if you have powerful fire magic and enough of it, you can win this fight entirely by circling your foe and pelting him with fire magic. He's ridiculously weak against that element. Keep it in mind if you're having trouble winning through other means.
Once you defeat the boss, you'll receive the Core of an Iron Golem and a ring of light appears on the ground. You can investigate it to travel to a new area, Anor Londo, by way of gargoyle. It's possible to travel between the two areas at will now. Before you head in that direction, though, you may want to instead start back the way you came. There's still some exploring to do in the local area.
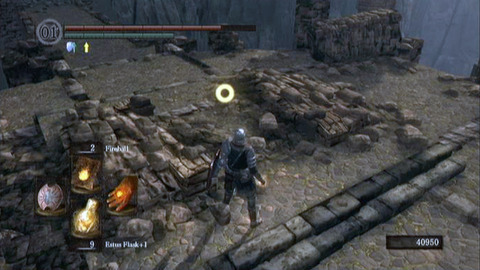
Retrace your steps to reach the place where you found the two titanite shards on the corpse, up a few sets of stairs from where you can drop down to reach the bonfire. If you keep to the lower route instead of heading up more stairs when you came this way previously, you'll be able to follow a lengthy walkway until finally you're able to head down some steps and along a pathway where a heavily-armored enemy (one with a body-high metal shield like the one you fought in the Undead Chapel) waits. If you have powerful fire magic, you can back away and pelt him with it from a distance to eliminate the enemy. Otherwise, you'll want to try to get around behind his shield and hit his exposed flanks.
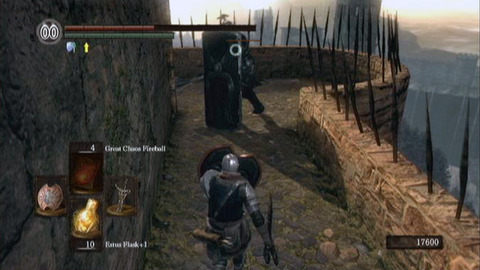
Past that enemy, you'll find the top of a ladder. You can descend it to find a pathway that leads to the side of a tower. As you start up the tower, you'll be attacked by an armored enemy. He can be tough, but he'll go down quickly if you keep your distance and pelt him with fire attacks. He will drop Ricard's Rapier when defeated and then you can climb the tower that he was guarding. At the top, you'll find two treasure chests. You can open them to find the Divine Blessing and the Rare Ring of Sacrifice.
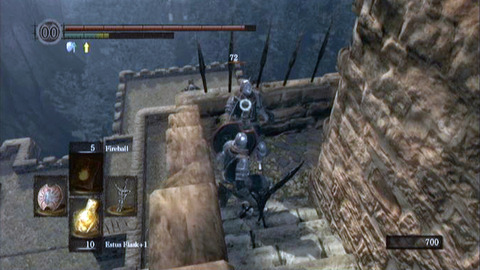
Now you're almost done in the area. Head back down to the lowest area, where the boulders fall onto the pedestal (you likely remember it well). Make sure that you let boulders descend in all directions so that they break through a wall or two. Then descend along one of the paths and you'll find yourself in one of the first rooms in the dungeon. There's a hole in the wall, though. Pass through it and you'll find hanging cages like the ones that you activated elsewhere to trigger a shortcut.
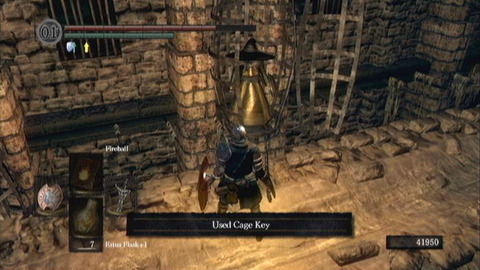
In one of the cages, you'll find a man named Logan. Use the Cage Key to free him and he'll promise to reward you when you meet him back in Firelink Shrine. In another cage, you'll find a corpse that you can investigate to obtain the Soul of a Hero. Now you're done exploring and should resume your adventure.
Anor Londo
You can only enter Anor Londo once you clear Sen's Fortress. When you best the Iron Golem boss, a circular ring of light will appear. You can investigate it to catch a ride from some gargoyles. They'll take you directly to the entrance of Anor Londo. You can talk to the gargoyle nearby if you need to leave, as well.
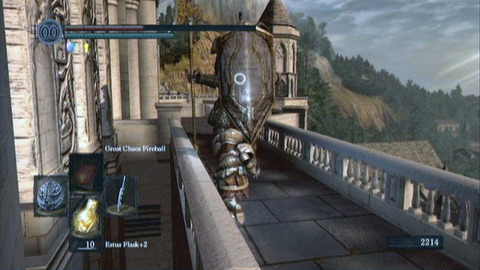
Anor Londo is full of powerful enemies, so prepare for a bit of a struggle as you acclimate yourself. Start down the stairs and you'll be able to descend a fair amount of time before you meet your first enemy, a towering guard with a huge shield and spear. He's not as bad as he looks, if you can draw him out and pelt him with Fireball magic or some firebombs, but he can inflict some serious pain on you if you don't block his attacks (or even if you do block but then lose too much stamina). Though he is a fearsome foe and you have tight quarters in which to defeat him, you've won battles like this in the past and should do fine here.
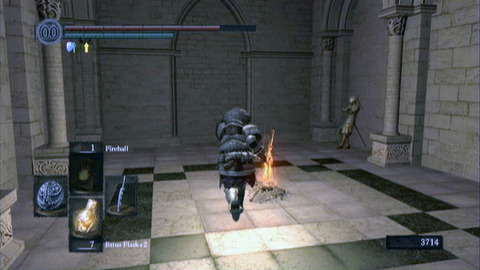
Past that knight, the stairs continue to descend and then you can head left into another room. Here, look left and you'll see a pair of the knights like the one that you just defeated. With projectiles or magic, you can draw the closest fellow to you first. Defeat him, then lure his fellow toward you and repeat the process. Just make sure that you're not stuck fighting them both at once.
After those encounters, you're likely running low on resources. However, you can proceed right and through the doorway to arrive in a large courtyard area. Resume your trek forward and ahead you'll see a building with some enemies standing guard. To your left and right, there are two other buildings. Start by heading left and down some stairs, where you'll find an area bonfire. There's also an NPC in the area. Talk to her and she'll say that you can head upstairs and proceed directly ahead to perhaps meet with Gwyn.
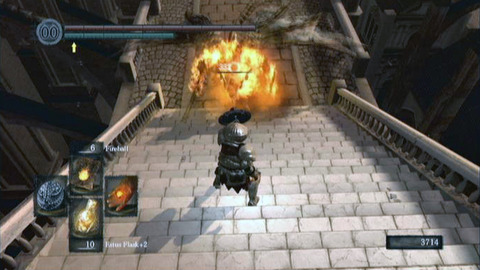
Head up the stairs as directed, but you still have some exploring to do. Head left and you will find another chamber like the one you just cleared a moment ago, with a couple of the fearsome knights. Defeat them, then check the chests that they were guarding. The left one contains Twinkling Titanite and the right one is a Mimic enemy. Defeat it to obtain the Crystal Halberd. If you want, you can head outside and past the knight to find a grassy trail that leads up to an opening, but the opening is presently sealed and can't be passed until later.
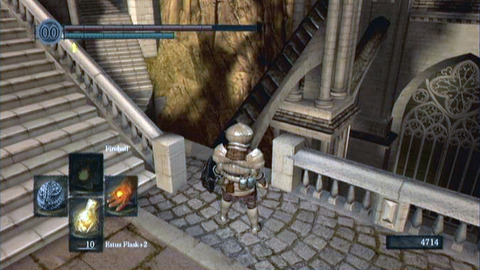
For now, return and rest at the bonfire before you climb the steps again and this time proceed directly across the courtyard. You'll find an elevator, which you should ride down to the lower level. Descend some steps and start out of the building to see a winged gargoyle. As you start down the wide steps that lead to the pathway it occupies, the beast will rush you. Let it come to you, then greet it with the attack you favor. Fireball magic works great, or firebombs. The beast is able to move pretty quickly, despite its girth, but you can use ranged attacks as you back up the stairs and you'll be at only minimal risk.
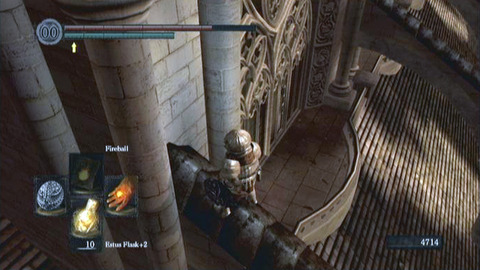
When the gargoyle is toast, head down the steps and then look to the left from the base of the steps. There's an opening to the side where you can drop carefully down to a lower level. Head along that level and pass through an archway to the left side. In that direction, you can find Demon Titanite in a chest. Snag it, then head back through the archway and look ahead to the nearby building. You'll notice some steep platforms rising toward it. You can climb along this nearest platform, dubious though it may seem, and arrive above a balcony that extends from that upper building. Drop down to the balcony and step through a hole in the glass windows.
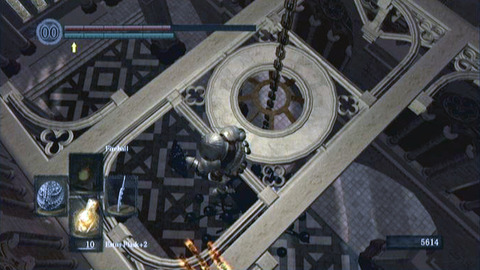
As you start inside, you'll be attacked by two assassins with throwing knives who drop down from an upper balcony along the room's closest edge. They're weak foes if you get in close and slash them apart.
Past those enemies, you'll find a ladder that you can easily ascend. Do so and then look out over the area ahead of you. There are narrow ceiling beams spanning the area. You can climb out along those beams and work slowly across, though along the way you'll be greeted by the assassins. You might try picking them off from a distance with projectiles to get them to rush you, since their ability to move quickly without jumping to their doom is as limited as yours.
Continue carefully along the ceiling beams and you'll reach a chandelier at the center. You can try dropping onto the chandelier, which has a corpse and item on it, but your weight will break the chandelier and it will plummet to the floor. The fall is too much and you'll die in the process, but at least the item will be left on the floor of the building where you can snag it later. You could always try hacking the chain with a weapon instead to see if that achieves the same net end.
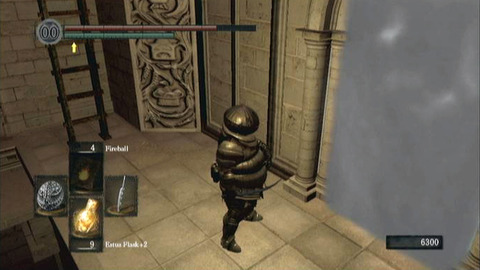
Continue along the room. As you near the far side, it's important that you be careful because there are two more knife-throwing assassins who may try to rush you. If possible, you want to take them out with projectiles or magic before they get near you. While it's true that sometimes they will just fall without your intervention, those few instances where they don't can really suck because it's difficult to fight when a few steps to either side will find you falling to your death.
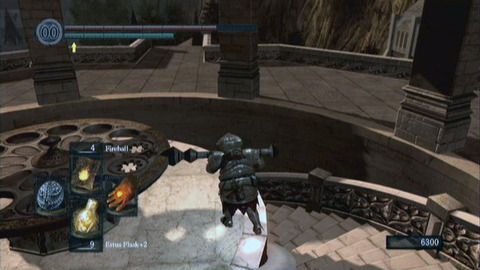
When you reach the far side of the chamber, you can descend a ladder to find a mist-shrouded door on the right side of the chamber. You're still high above the lowest floor of the cathedral building, but the door is progress. Note that you can go past it to find stairs that lead to an area with some pillars and there's an assassin to kill, but otherwise that detour is unremarkable. Pass through the mist-covered door.
On the other side of that doorway, you'll find a lever to the left. That seems promising, but at least for now it won't move. Start forward along the nearby walkway and you'll come to a center area with a huge lever at the center. It looks like a gear with a stick protruding from its side. You can interact with the protrusion to turn the gear. Doing so will cause the platform to twist and turn as it descends toward an area below. You're now in the vicinity of the area where you fought the first gargoyle, which is interesting because now you'll be attacked by a second one. Defeat it in the same manner that you did the first (though now there are stone columns that can get in the way or give you shelter from its attacks, depending on how you fight). Then look ahead of you. There are high stone steps leading to an area densely populated by enemies.
Before you proceed, go ahead and backtrack to the bonfire (which is now only a short distance away, with the platform properly moved). Then return to the platform.
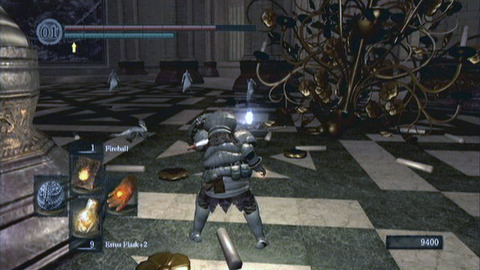
Before you continue forward and up the steps, you may wish to make a dangerous but potentially lucrative detour. Because the location of the platform has moved, it's now possible to descend its steps and reach the lower entrance of the cathedral area you explored before. This should be done with caution, however. The cathedral's lower level is populated by a bunch of assassins and they can be difficult to pick off if they're swarming you. If you decide to enter the cathedral, take a methodical approach that allows you to lure one toward you at a time so that you're not swarmed.
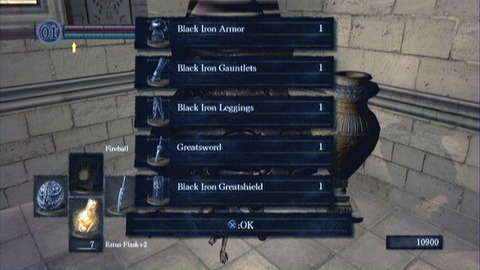
The item that fell with the chandelier when you were moving through the rafters, you'll find, was the Great Magic Weapon sorcery. If you head along the room to the back corner (near the conspicuously large and hideous painting along the back wall), you'll find a corpse that you can loot to receive the Black Iron Helm, the Black Iron Armor, the Black Iron Gauntlets, the Black Iron Leggings and the Black Iron Greatshield. Then you're done here, at least for now.
Return to the pedestal with the lever and give it another twist in the same direction to drop it down one more level. Then descend along the stairs and you'll find a small chapel area. As you approach, make sure that you have the Darkmoon Seance Ring equipped (you will have found it in the Catacombs area if you've been following this walkthrough). As you head into the building, you'll find a bonfire ahead of you. Put it to use and step forward to investigate a nearby corpse. As you approach, a wall will vanish in front of you because you're wearing the ring. Check the corpse for the Ring of the Sun's Firstborn, then head down the stairs where the wall had been. At the base of those stairs, you'll be spoken to by a voice and then you can step forward and press the on-screen prompt to kneel. Agree to enter the covenant and you'll receive the Blue Eye Orb and the Darkmoon Blade Covenant Ring.
Now backtrack the way you came. Turn the lever again and ride the elevator up. When you're ready, start forward toward the enemy-infested steps that you noticed previously.

As you begin advancing up the steps, you're in for an unpleasant surprise. Two of the huge knights with shields will rush you at the same time. Back away and rely on fire attacks to weaken or kill them, preferably one of them almost immediately so you only have to focus on dodging the attacks of one knight. You should be capable of dancing around these fellows by this stage in the game.
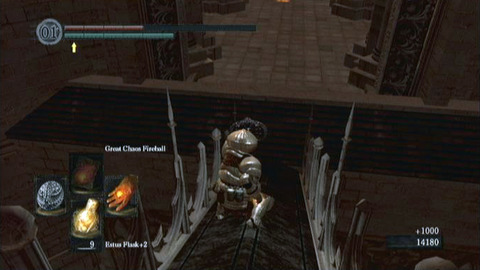
When they go down, keep climbing to the top of the area and you'll find mostly locked doors. The exception is the area to the right, where you can come out on the top of some stairs that descend to a cluster of sickly looking white gargoyles. They are able to attack with pretty good range and their spears are of the lightning element. If you have any fire magic left, you can use that. You can also push the gargoyles back toward the edge of the ledge to trick them into falling off, which kills them (even though you'd think they could fly). Try to lure one toward you at a time so that you don't have to deal with too much at once.
After killing the gargoyles, descend along the steep slope ahead of you (which looks a lot like the one you climbed to enter the cathedral's upper level). Near the base, pause to prepare. As you start forward through the pillars, two gargoyles will try to rush you. If you target one, you can easily back up along the ledge you just descended and force them to follow you so that you can worry about one at a time. You may even be able to use a spell like Great Chaos Fireball to hit them and take out both gargoyles when they're clustered close together.
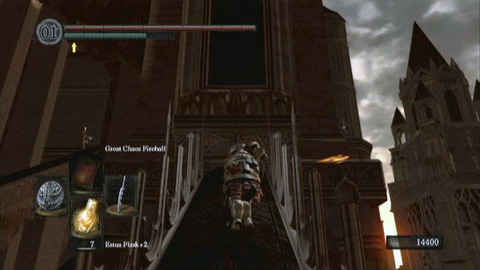
Now you need to keep up the streak and look to the area left of where the gargoyles tried to trap you in the pincer attack from behind the pillars. Up on a ledge above, there are two snipers positioned. They'll fire arrows as you try to approach, and the only way to climb is up the steep ledge. Move quickly with your shield raised and ascend to the first ledge, which provides a wall you can use for shelter.
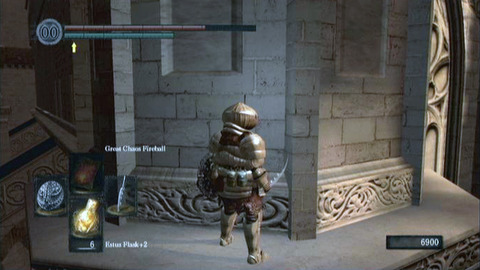
You've now reached the tricky part. You need to head around the ledge and climb a second of the ledges like the one you just climbed, and you need to do so quickly enough that no arrows hit you and knock you from your perch. It's actually quite difficult to do. Try the right side. Wait at the wall for an arrow to hit it, then head quickly forward at your normal walk speed. In a steady manner, head forward and then around the corner to the left and then start up the steep ledge. Now as you near the top, you need to head right and rush the knight. Roll under any arrow he fires while hugging the wall, then get close and hit him with your attacks before he can fire another shot. Hit him before he can shoot you, then hopefully you'll knock him off the ledge and to his death.
Once the knight is toast, you can follow the ledge around to the back side and drop down to the balcony where a mist-shrouded door waits. Pass through it to find yourself in a long hallway. Take the first door on your left, which opens without a key, and you'll find a room with a bonfire and Solaire.
Now that you've saved, explore the rest of your immediate surroundings. The doorway on the opposite side of the hallway leads to a room with a silver knight. You can hit him from a distance with fire magic if you want to cheese the fight, or you can apply more standard practices to play fair. However, know that the knight is capable of leeching through your stamina and even if you survive a flurry of blows with his long weapon, you'll be too weak to retaliate. That can get old fast, so it's better if you can dodge and step around from behind to deal a quick blow to the back. After killing the knight, he may drop the Silver Knight Spear. Open the treasure chest he was guarding to find a Sunlight Medal.
Return to the main hallway and you'll find some stairs to climb. Ignore them and head around the back side to find another silver knight. Defeat him, then try the doors. One is locked from the other side, but you can enter the other one to find an empty room. Check the fireplace and roll through the brickwork along its back side. You'll find a hidden room with a descending staircase. Head down the stairs and at their base, you will find a huge, dim room with a lot of pillars. Near the back corner, you can check a series of treasure chests. They contain, from left (starting with the lone chest) to right: a Mimic monster that drops the Occult Club, a Dragon Tooth, Havel's Greatshield, Havel's Helm and Havel's Armor (in a single chest) and finally Havel's Gauntlets and Havel's Leggings in the last chest.
Return upstairs and now you're ready to ascend the large spiral staircase. It will take you to a landing where you should walk out carefully (rather than continuing to climb) and watch your back. There's another silver knight here and he'll surprise attack. Defeat him, then check one corner of the room to find a Mimic that hopes you'll think it's a treasure chest. Defeat it for the Gold Coin that it is carrying.

While you're on this floor, look around some more. You'll find another of the knights at the end of a hallway. He's the other of the two snipers who made life so difficult as you were ascending to this tower. Have your revenge on him now. Then you can explore the side rooms. As you head back from taking out the knight, the door on the left is locked but the door to the right leads to a dress room. There's another door there, near the painting, which you can open to find another of the silver knights just right of the doorway. Take him out as usual, then check the edge of the room for a spiral staircase. Climb it and you'll find yourself on an open rooftop.
Ahead of you on the rooftop, there's a silver knight standing in a door. Another one (this one armed with a bow) is in a doorway to the right. Start with the nearer knight and eliminate him quickly, then take out the other knight just to be safe. Now you can check the rooms that they were guarding, which lead to stairs in both cases. The room that was just ahead of you will let you descend to find Sir Onion (the character you last met outside of Sen's Fortress) in front of a door. Open the door, but be careful about passing through; there's a knight waiting to the right. Kill him, then look along the room. There are two more knights waiting to challenge you. Kill them by luring them toward you one at a time and fighting on the opposite side of the corridor. Then open the treasure chest that they were guarding, which is near the side of a bed. You'll find two Demon Titanite.
Open the door just to the left and now you are back in the familiar hallway. Head forward and there's another Mimic pretending to be a chest. Defeat it for five of the Silver Coin item. Then open another nearby doorway, near the Mimic you just defeated, and ahead of you there is a knight. He won't move to attack unless you get near or start to the right, where you can find the Soul of a Hero on a corpse.
In this same room, look over the railing and you'll see a room below you. There, a monster is wandering around. It's one of the powerful beasts like the one near the blacksmith in the Undead Parish. You've now explored most of this upper tower, but you still haven't come face-to-face with that beast. It's time to change that, so go ahead and return to the tower roof.
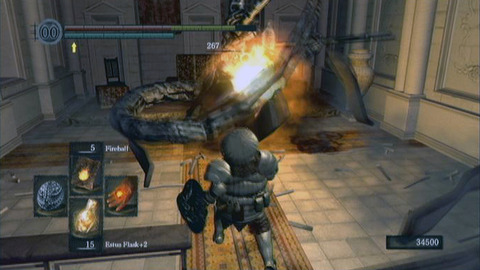
Previously when you came to the roof (assuming you've been following our instructions), you had two options about where to head. You had initially gone straight, and descended stairs after defeating a knight there. This time, you'll want to head across the rooftop to the lone staircase on the side of the building opposite where the two smaller towers are close together. Defeat the knight that stands guard with his sword and bow, then descend the stairs. You'll arrive finally at a new intersection. There are doors to the left and right, or you can proceed directly up a high staircase.
Start with the door to the right. There are two knights in this room, one partway down the staircase and another hiding near a door at the bottom of the room. Defeat them carefully as you battle along the stairs, then open the chests he was guarding. You'll find the Silver Knight Helm and Silver Knight Armor in one of them and the Silver Knight Gauntlets and Silver Knight Leggings in the other. Then you should open the nearby door, which creates a shortcut into the hallway from which the room with the bonfire branches.
Head back upstairs to the intersection and this time, go in the door that was to the left side of the path instead of to the right. You'll find the huge monster that you previous observed from an upper balcony. It can be tough to battle him in such confined space, especially because he now has a much, much larger life meter and is capable of inflicting more severe damage. If you fight him and win (make sure you get behind him to increase your chances or he'll just pound you repeatedly and kill you almost before the battle even begins), though, you'll always have the memories.
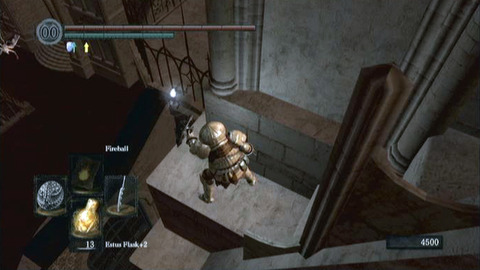
Now you should head back to the intersection and ascend the long staircase that you saw ahead of you. It leads to a higher landing where you can start to the left and find two choices about how to proceed. You can either ascend a set of steps along the wall, or you can descend into a wider room below.
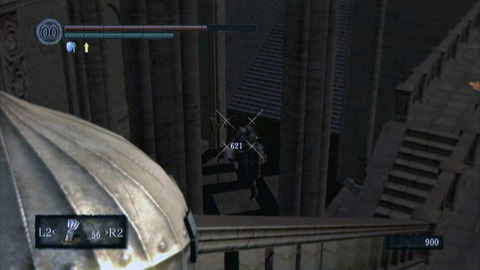
Note that there are two giants in this room, powerful enemies that can severely ruin your chance at glory if you rush down and try to fight them fairly. However, from the vantage point above, you can perhaps snipe them with shots from your arrow (if you brought plenty of arrows) and take them out without engaging them directly. If you land a few poison status effects, things will go almost smoothly. Then you can descend to the lower floor and head toward the locked double doors (though you should watch out for an archer on the stairs on the opposite side of the room). To their left as you approach, there's a lever that you can pull. Doing so will create a shortcut leading back to the early portions of the stage. Then you can cross to the far side of the chamber, climb some steps and enter the mist-shrouded door to fight the area boss. Alternatively, you can finish exploring the area first.
If you head up the stairs at the intersection rather than descending to take care of the giants and activate the shortcut, you'll find a high series of glass windows. One is busted. You can drop out of it onto a ledge, then descend along a building to find yourself back outside, overlooking the early portions of the stage. You can head around the wall and drop down to collect items that are guarded by gargoyles. You'll find the Dragonslayer Greatbow and Dragonslayer Arrow on a single corpse. There's also a Titanite Chunk nearby, if you drop down through a hole in the fence and head left to battle some more gargoyles. Finally, you can also find a blacksmith in this area if you head in the nearby door. Then you can ascend some stairs to arrive back in the main chamber ahead of the boss, but on the other side.
When everything is settled, go ahead and make your way to the boss chamber. It's time to prove definitively that you're better than anything Anor Londo has to throw at you.
Dragon Slayer Ornstein and Executioner Smough
This battle is actually against two bosses at once: Dragon Slayer Ornstein and Executioner Smough. You'll need to focus on taking one of them out at a time so that you don't have to spend the whole fight dodging attacks from the both of them. Which one you take care of first is entirely up to you and should be determined by who you most would like to vanquish ahead of the fight's more difficult second half.
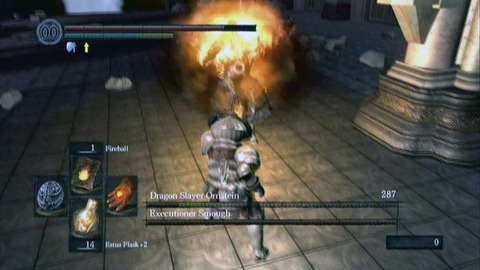
Dragon Slayer Ornstein is the faster of the two, but in general less lethal. He attacks with a Lightning Spear, so you would do well to bring gear with strong defense against that. Smough hops around, settles, charges and then resumes leaping around the area. You should hit him after he lands and strikes. He's weak against good pyromancy magic, but you'll have to spend a lot of hits to take him out for good. He drops the Leo Ring when defeated.
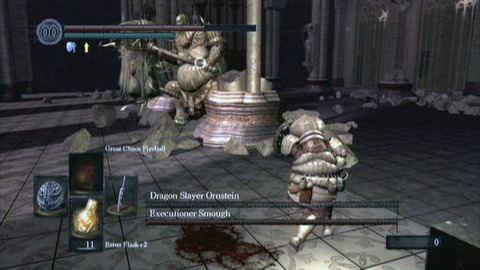
Executioner Smough brings a heavy hammer that he can use to break apart the architecture as you battle. His moves are much easier to avoid and you can even block the horizontal swings if you have a good shield. Be careful, though, because the weapon has longer range than you might suppose. hat's especially true since Smough is capable of leaping a short distance and hammering down to send small shockwaves a short distance from wherever the hammer strikes. Not only that, but he'll happily use his girth against you. Make sure to avoid his charges.
When you defeat one of the two, the other will get all grumpy about it and will attack more ferociously (and with powers gained from his fallen comrade). Regardless of how much damage you have done to both characters throughout the fight up to that point, the remaining warrior will also have full HP. To win, just keep following your same general strategies that have taken you to the fight's halfway point and dodge out of the way for some estus healing when necessary. There probably won't be a lot of that happening, though, because your foe is suddenly capable of one-hit kills (especially if the one remaining is Smough; he practically turns into a lightning freight train and about the only way to avoid him is to circle around the remnants of the pillars that he probably smashed earlier in the fight). If you fall in battle before taking out Smough and Ornstein, both bosses will be alive again the next time you encounter them, even if you slew one of them.
Once you win the battle against Ornstein and Smough, you'll receive the Soul of Smough. Your reward for victory over the pair is 30,000 souls.
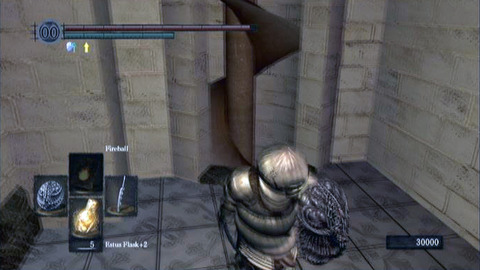
Head to the back left side of the room and there's a lift that you can ride to an upper balcony, where there's a bonfire that you can light. Nearby, some stairs lead up to a side room. Open the doors and head inside, where you'll meet Gwynevere. Kneel before her and she will hand over the Lordvessel, which allows you to warp between bonfires. After that, you can kneel again and you will have the opportunity to join the Princess's Guard covenant. If you agree to do so, you'll receive the Ring of the Sun Princess.
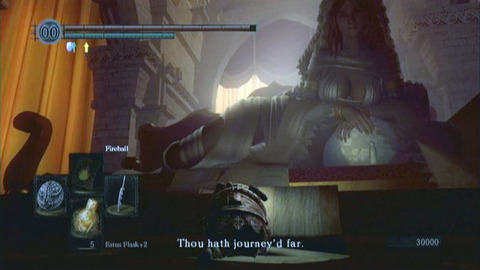
Now you're done in the area. You can go ahead and exit now. The most convenient way to do so is to head to the bonfire and use the new 'Warp' option. You can teleport instantly to bonfires at a number of locations you may have visited on your journey so far. It's a real time saver.
Painted World of Ariamis
To enter this world, you should head to the huge painting in Anor Lando with the Peculiar Doll item in hand. You can find the Peculiar Doll by revisiting the cell where you started the game, during a second visit to the Northern Undead Asylum during which you face the Stray Demon. Once you have the doll and head for Anor Lando, you can backtrack to the lowest floor of the huge cathedral building.

The easiest way to get there is to warp to the bonfire in Anor Lando where the flame keeper is positioned. Head straight along the path, ride the lift down to the lower level, head forward again and then descend the stairs. Head left from there to enter the building, then work along the left wall as you battle a few assassins who can't be avoided. Then, when you're definitely ready to clear this optional area, you can investigate the painting on the wall.
When you check the painting with the Peculiar Doll in hand, it will suck you into the secret world behind it. This is an icy world, packed with snow and enemies. You appear on a suspension bridge spanning a chasm. There are wide holes that you cannot cross, in the direction from whence you came, so you're committed to clearing the area once you rest up at the first bonfire (which you should also kindle to its highest available level, just to make clearing the remaining stage easier).
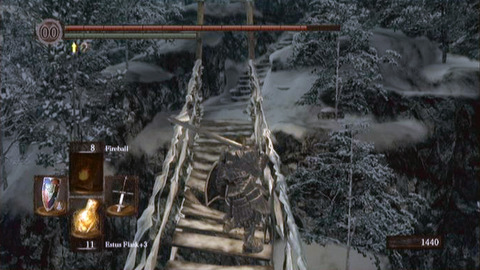
Start up the stairs beyond the bonfire and ahead of you, there's a closed gate. Ahead of the gate, a weak enemy with a torch will rush you. Take him out, then look to the right where a couple more of the same enemy are probably on their way to ruin your party. Eliminate them and head in the direction from whence they came. You'll find the base of some stairs that you can climb up to the ledge over the locked door. There is another set of stairs just a few steps beyond that, which you can climb toward the upper right.
As you arrive at the top of those stairs, you'll be attacked by several more of the weak enemies. However, don't think you'll have it easy; there archers who will also fire on you from distant ledges. It's easy to take more damage here than you would probably like.
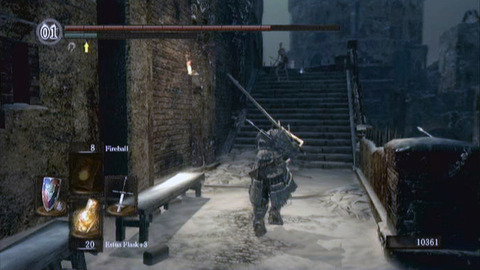
Once you've cleared the enemies in the immediate vicinity, you have a choice about how to proceed. There are wide stairs to your upper right, with an archer along them. Also, there's a narrower opening that you can squeeze through to the left. It's easy to miss but a more lucrative route. If you want, head up the stairs to the right and take out the archer, as well as the enemies that will rush you from further up the steps. Those two enemies are dangerous and capable of inflicting you with the Toxic status ailment, so make sure that you have blooming purple moss on hand just in case. You can check along the stairs for the Soul of a Proud Knight, but then it's a good idea to head back down the steps and left through the aforementioned tight space.
In that direction, you'll find a few more weak enemies as you climb the steps and toward the rooftop. Be careful as you arrive there, though, because some bird enemies will swoop down to attack. They're powerful, so make sure that you block and retaliate carefully, as you would with any dangerous foe. The corpse that served as the trap those birds sprung will give up the Soul of a Proud Knight.
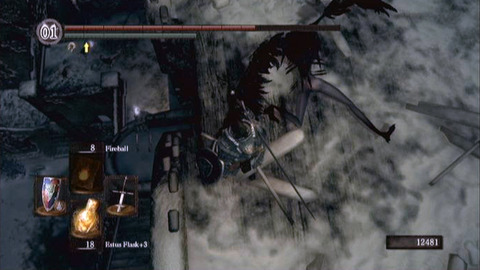
With the rooftop clear, you should now head toward one edge of the building where the low wall falls away. Look down over that edge and you'll see a lower balcony with a corpse resting on it. Drop down and check the corpse to find the Dried Finger. Then head in the nearby opening to enter the building you've been climbing around for the last little bit.
Inside, you'll drop down to some planking where another weak enemy awaits, and possibly a bird if one of the two that attacked you on the roof fell off the side. Defeat any enemies you must, then look around the room. There are two sets of stairs here. One leads up and the other descends. Start with the stairs that descend to find the Soul of a Brave Warrior on a corpse. Be careful of the rats in the cellar, as they will try to poison you if given the chance to attack. You can grab the Painting Guardian Hood, Painting Guardian Robe, Painting Guardian Gloves and Painting Guardian Waistcloth from a chest they are guarding, in the corner of the room. When you have the loot, you can return to the stairs and climb them to arrive along the ledge that you would have reached if you ignored the detour through the narrow opening.
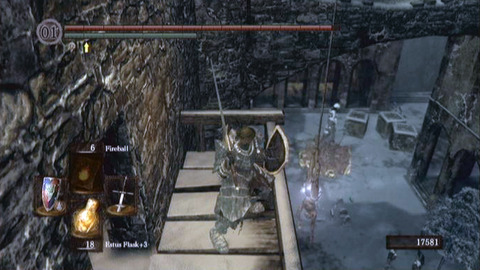
Ahead of the you, at the top of those stairs, there's a bridge that leads across a gap. On the far side of the bridge, an archer is on a ledge to the right of a doorway. You can cross the bridge and head through the doorway and into the nearby building, but be warned: it's full of enemies. There are quite a few of the guys who can inflict toxin on you (when they're not throwing firebombs) and there are some regular soldiers too. The archer may even enter the fray as you battle his fellows. Proceed carefully and watch for enemies to drop down from planking overhead.
When you clear the room, head back out through the opening on its lower side to find yourself on a wooden balcony. Ahead of you, there's a rope with a corpse hanging from it. Slash the rope with your melee weapon to drop the corpse and item to the ground below, where you can retrieve them later. Then reenter the building and head across it. Up a short flight of stairs, you'll find another opening that leads outside.
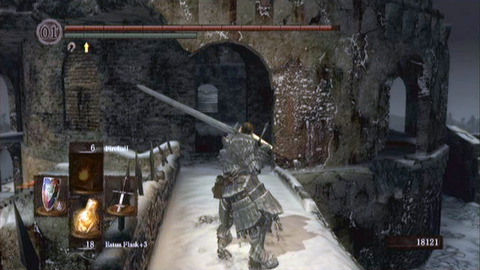
Now you're on a snowy ledge. Head left to claim the Large Soul of a Proud Knight from a corpse. Note that an enemy climbs up over the wall to attack here, but he's a weak one. After you have the loot, head back the way you came and this time follow the path that led right from the opening. You'll be able to cross a walkway that leads to one entrance to a circular tower.
Here, you have a lot of options about how to proceed. You can head down the stairs that lead left ahead of the tower entrance, or you can enter the tower itself and head climb it to find treasure and enemies.
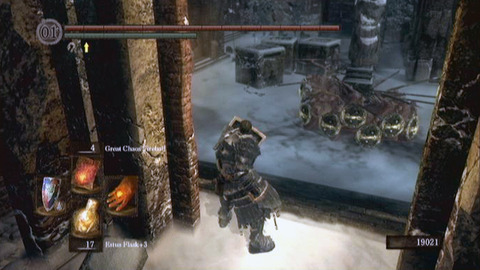
If you start by going left, that will allow you to make strides toward creating a shortcut that leads back to the beginning of the stage, something you're likely keen to do. Start there, then. Descend the steps that lead left, then head right and through a building and descend along some steps to its lowest floor. Ahead, you'll see a mist-shrouded doorway.
Step through the mist and then start down the steps. Ahead, you'll see a group of armored phalanx soldiers with spears and large shields. They are in a circle formation, but you can start toward them and chuck a fire attack to get them to slowly advance. Keep your shield ready, as members of the group can throw spears to harm you if you're not blocking such attacks. Fire attacks can take out a soldier or two each time, if you're well-equipped, and you can retreat back into the building to give yourself time to safely gulp down liquid from your estus flask, if needed.
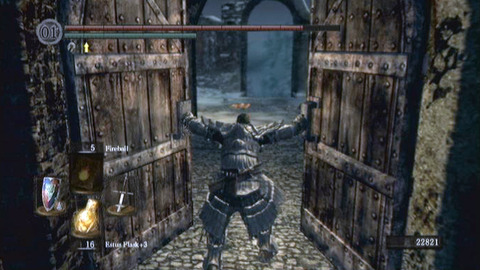
When you defeat the soldiers, check the edge of the courtyard to your right to find Humanity on a corpse that you dropped onto the area previously by cutting the rope. You can also check the far side of the courtyard, opposite the side from which you entered, to open the gate and create a valuable shortcut back to the bonfire. That saves a lot of backtracking.
Now you're ready to return to the area where you first approached the tower before descending through it to battle the phalanx soldiers. This time, you should start through the opening that had been directly ahead of you. Inside, a bird will attack, so be ready to block its attacks and counter in the confined space. Then you should climb the stairs that lead upward along the interior edges of the tower.
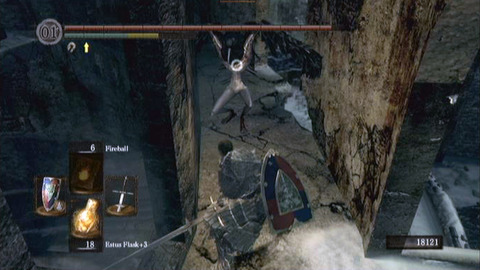
As you ascend, you'll find the area densely populated by the harpy birds such as the one you just defeated. There's not a lot of room on the stairs to fight, but typically if you have to fall you should try to fall left. There sometimes will be a nearby ledge to reduce the impact that a fall has. You can find the Soul of a Brave Warrior on one such ledge, even.
If you do manage to reach the top of the stairs, which requires defeating around three of the harpies or tricking them into falling so that you can proceed past them, you'll find a flock of birds gathered around an item. Snag that item to obtain the Red Sign Soapstone item. Then return to the courtyard area.
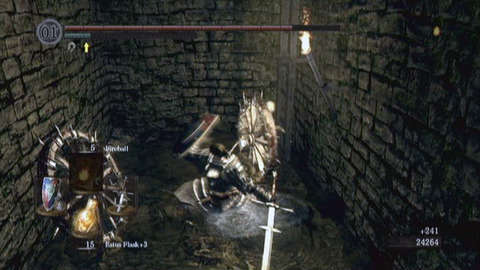
Along the side of the courtyard, to the right as you're looking out the doorway that you opened to create a shortcut back to the bonfire, there are some stairs that you can climb to a higher interior room. Do so, then exit left onto a ledge and start along it toward the right. You'll find a corpse. Around four weak enemies will attack you then, but they're weak and you can eliminate them just about any way you like. Then check the corpse to find the Soul of a Proud Knight. Nearby, another corpse is hanging from a rope and you can cut the rope to drop it to the snowy ground.
Return to the building and head around to find a ladder that leads to its lower floor. Descend the ladder, then head out an opening to the left. There, you'll find the Soul of a Brave Warrior and the Soul of a Proud Knight on corpses. There also is a lever on one pillar, which you can turn to provide a path to the bridge elsewhere in the stage.
Of course, such loot and a switch aren't going to be unguarded. Throughout the room, you'll face a number of the wheeling skeletons. They will see you, grab their shield and use it as a wheel to roll around the chamber, like skeletons you will have by now likely faced in the Catacombs. The easiest way to fight them is to block their charge as you stand near a wall. Then when the skeletons hit a wall, they will be stunned for a moment and you can take care of them.
Note that near the edge of this passage, left from where you turn the crank to open the way to the bridge, there's an illusory wall. Roll through it to reveal a series of passages beyond. These passages are populated by more of the wheeling skeletons and there are more fake walls.
From where you first pass through the first of those fake walls, proceed straight ahead until you come to an area where it seems you can only go left. To the right, though, there's a dirt wall you can roll through. Do so, then follow that passage forward and left to find a skeleton guarding a corpse. Defeat the skeleton, then check the corpse for the Annex Key.
Now backtrack to where you rolled through the dirt wall. Head along the path that led left from there and take the first right. You'll find another skeleton at the base of some stairs. Defeat him and climb the stairs. At the top of those stairs, you'll find a lone enemy. Defeat him (while watching out for his Toxic death breath) and then you can grab the Fire Surge pyromancy ability from his corpse.
Now you should put the annex key to use. Return to the open courtyard area overhead and work your way to the edge of the area where you'll see a number of wide openings with two or three steps leading down to a room that's not quite on the same level as the courtyard (but close). There, along one wall, you'll find a door that you can unlock with the key.
Unlock the door, then head up the stairs to reach a room overhead that looks out onto a snow-covered walkway. You can head out the door and reach an intersection. Go straight through the intersection and at the end of the pathway (which is guarded by more of the toxic enemies that toss firebombs), you'll find the Dark Ember resting on a tombstone.
Return to the intersection and this time break through the wood panel to the right to head along a hidden path where you can find Velka's Rapier on a corpse. Then return to the intersection yet again and follow what would have been a sharp left as you first approached it to find some stairs that lead up toward a higher level. There are some of the flame-tossing enemies along these stairs, so be sure to be careful as you ascend. At the top of the area, you'll also find several of the screeching harpies gathered around a hole in the ceiling. Be sure to not the harpies pounce you, particularly the ones on a higher ledge, as the pounce attack deals severe damage.
If you climb to the higher ledge where one bird will remain, it screeches and two more come to join it. Defeat them in a hurry and be sure to watch your life meter. Fire magic or aggressive melee warfare is critical here. When you win, you can check the corpse that the birds were guarding to obtain the Vow of Silence miracle.
Now head back down and continue to skirt the large hole in the ceiling. Descend along the steps that you find and head left to obtain the Mask of Velka, Black Cleric Robe, Black Manchette and Black Tights. Then return the way you came to the lower courtyard.
Along the back side of the tower, you may remember that there were stairs descending toward a long walkway with a dragon positioned along it. The dragon is awake, so you'll attract his unwelcome attention if you try to grab the items. He's guarding the Large Soul of a Proud Knight and a Bloodshield. The dragon itself tends to also drop the Dragon Scale.
To defeat the dragon, you'll have to proceed carefully. You can run up against him if you like and repeatedly hit him with a weapon, but he'll swipe at you from the side with his paw and even when that move is blocked, it does a lot of damage. The dragon also breathes toxic fumes, but those won't reach you when you're right up against his torso. You can either stay at a distance and pelt him with attacks at that range, or move in close and slash away at his gut as you gulp down estus flasks. Either strategy will eventually lead to victory, if properly executed. Further along the balcony, there's another of the dragons but you can't fight him.
There's another area that you might want to explore before you proceed along the path that will allow you to leave this region. Return to the courtyard and look for the stairs that descend along its right side as you enter the courtyard from the direction of the bonfire. If you descend those stairs, you'll find a number of corpses and enemies along the snowy ledges. You can search to the right to find the Acid Surge pyromancy (walk around behind a brick wall near the edge of the area to find it), while further down the ledges you'll find the Large Soul of a Proud Knight and two of the Soul of a Proud Knight item.
Defeat the enemies that you encounter in that area, then return to the upper courtyard and start through the lowest floor of the tower. On the far side, you'll notice the passageway that leads to a mist-shrouded doorway. That's the trail that you want to follow once you're ready to leave this area.
As you head along the walkway, you'll be attacked by a large number of skeletons. Some of them are in plain sight and will fire arrows at you or rush you as you approach, but note that there will be a few waiting behind pillars. They'll let you pass, then try to surprise you from behind.
Beyond the skeletons, there's also an enemy garbed in heavy black armor. He carries a Tower Shield that you'll receive from him if you defeat him, and he knows how to use it to protect himself. Hopefully by the time you face him, you've defeated any straggler skeletons and can fight him alone. Dodge his swing attack, then get around to his flank side and hit him with your melee weapon. He can take a lot of abuse, but you should have little difficulty as long as you block his attacks. When you defeat him, continue onward to the mist-shrouded door and step through it to reach the boss chamber.
Crossbreed Priscilla
When you enter this chamber, you'll see a translucent figure standing ahead of you, scythe in hand. This is Crossbreed Priscilla, but she won't attack you until you make the first move. Make sure that you have prepared yourself, then attack.
The first thing you should do when attacking is take off her tail, which allows for a weapon drop. You want that weapon. The second thing you should do is keep in mind that Priscilla is capable of turning invisible. She will do so once you have damaged her enough.
Even while invisible, Priscilla can be tracked by watching for her footprints in the snow, and for her spell effects. However, she primarily attacks with a lethal scythe that deals terrific damage. You need strong resistance against bleeding to survive this fight, since if your Bleeding meter fills that's an instant death. Havel's equipment provides the best protection, plus you can equip the Bloodbite Ring if you have it.
As you battle Priscilla, try to hit her once and if that happens keep wailing on her (as possible) to drain more of her life while you are certain of her position. If you don't know where she's at, you need to dodge around the area and keep watching for her spell effects so that you can find her and hurt her again. Running up the steps on the back side of the arena, then turning to face Priscilla so that she has to come to you (and so that you can pelt her with magic) is a great way to tip the scales in your favor.
Once you defeat Crossbreed Priscilla, you'll receive the Soul of Priscilla and an animation will follow that depicts you leaping from the high ledge that she was guarding. You'll appear back in Anor Lando and can resume your adventure.
Firelink Alter
Once you have obtained the Lordvessel after defeating the boss duo in Anor Londo, return to Firelink Shrine. There, you can talk to the huge snake guy that resides in the pit, just uphill from the bonfire.
You'll find the serpent sleeping, but you can hit him once with your weapon to wake him. He'll be grumpy, understandably. Talk to him again and a scene follows. He's elated that you have obtained the Lordvessel and will grab you in his mouth, then take you down to the Firelink Altar area.
When you arrive in the area, you can head up some steps ahead of you and press the button indicated to place the vessel. It's possible to rest at the altar now, or to warp to another location. If you do happen to warp in that manner, you can return to the serpent in Firelink Shrine and select 'Warp' to return to the altar area as needed.
Before you do any of that, note the stone doors behind the altar. They won't open if you try them, so head back down the steps to where the snake is waiting. When you talk to him, he'll give instructions on what you need to do in order to open those doors. You need to hunt down four spectacular souls belonging to the most powerful beings in the realm. When the information is given, the serpent will take you back up to Firelink Shrine. You can return to the altar once you have slain Gravelord Nito, the Witch of Izalith, the four kings of Londo and Seath the Scaleless.
The Catacombs
The Catacombs are accessible through the graveyard area of Firelink Shrine, which itself can be easy to miss even if you're looking for it. From the bonfire, look for the gloomy fellow sitting along the wall. To the right of him a bit, some steps lead to an opening in the wall. You can head through that opening, then diagonally left and through another opening. Walk straight through another door frame and you'll be in an area with a huge pit. A strange creature likely occupies the pit by the time you're ready for an actual run at the Catacombs.
Head forward along the left side of the pit and climb some stairs that lead left from there. Now start to the right. You can climb up some steps to find yourself on a high ledge overlooking the area with the pit. You can walk around up there and find a Soul of a Lost Undead on a corpse, or you can find a massive bird.
Otherwise, ignore the steps and head forward past their base to arrive on a ledge overlooking the graveyard. It's full of graves, just like you'd expect, and therefore difficult to miss.
As you start through the graveyard, you'll find your adventures interrupted by skeletons. They assemble from the bones lying on the ground and will rush to attack you a few at a time. You can easily take them out with melee attacks and keep moving to find a Large Soul of a Lost Undead. Continue along the main trail through the graveyard and as you approach a larger tomb, a huge skeleton will emerge from the ground. Back away and toss fire his way to scorch him. Then check the tombstone that he was guarding to find the Zweihander, a powerful sword. You can head out on a nearby ledge to also find the Binoculars.
Up the hill and to the right from where you found the sword, there's another pile of huge bones waiting among some graves, near a corpse. Defeat that skeleton, then check the corpse to find the Winged Spear.
Also not far from where you found the Zweihander weapon (and not far from where you can check a corpse for the Caduceus Round Shield), you can head downhill and search along the edge of the cliff. Some steps descend from there, pressed tightly against the cliff wall. If you follow them, they'll lead down for quite some time before entering a cave. As you continue into the cave (which is dark enough that you'll want to bring a light source), text will flash on-screen to let you know that you've just entered the Catacombs.
As you start forward through the catacombs, the first thing you'll face is a skeleton. You should be able to defeat him easily enough, but if you're not using a divine weapon he'll just come back to life because a nearby necromancer keeps reviving surrounding enemies once they are killed with anything else. You need to take out that fellow as soon as possible, but he'll be out of range for quite awhile.
To find him, you should mostly ignore the skeletons to the extent that is possible as you descend through the cave. You can't see much as you first visit, so you'll want to feel your way forward. Head down the long staircase that descends into the area, keeping to the right against the wall until you reach the base of those stairs. You'll have to battle or avoid two or three of the skeletons on the way. When you reach the base of the stairs, you'll find yourself in a larger and more open area. Now start to the left through a doorway.
You'll definitely pick up more skeletons as you're starting toward the left, if you don't stop to kill them. Keep moving if you're just trying to elude them, though, and try to stay ahead of them. You'll pass through another room that is an apparent dead end, which contains more skeletons. You can head along the side of that room and find an opening. Drop through it and continue down a corridor to descend to a chamber where there's a waiting bonfire. There's also a necromancer, though, and you'll need to defeat him (and any skeletons who may be closely tailing you) before you can put the bonfire to use. When you defeat the necromancer, he may drop the Red and White Round Shield. Some good news is that he also won't be returning, even when you rest at the bonfire. Some bad news is that there are more necromancers throughout the area.
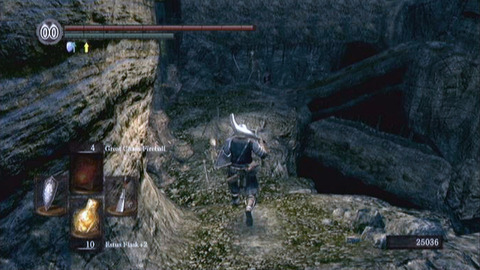
Clearly, it's in your best interests to continue finding and defeating the necromancers so that your efforts against any skeletons in the area are a bit more helpful. It's time to start searching for the next necromancer.
Near the bonfire, there's a strange device on the wall. You can push a lever on it. Doing so will cause something to happen in the preceding room. Head back up the stairs you descended to reach the bonfire and look to the left. You should now see an opening with bluish light issuing forth. Head through that opening and be prepared for a skeleton to attack you near the top of the stairs. He's not worth bothering with because a necromancer is on a ledge across a gap and it will repeatedly revive the skeleton even if you defeat it.
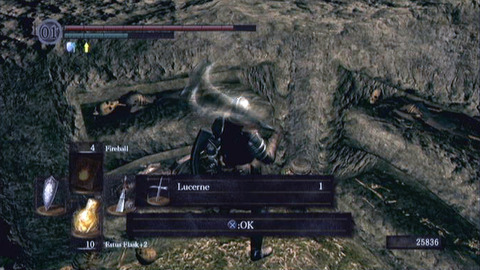
Head down along a trail that descends toward the left and as you go you'll have to battle or avoid a few more skeletons at the base of a trail. A stone bridge allows you to ascend back to the right from there, in the direction of the industrious necromancer. Head up across it and through a door to the right, where you'll notice an opening on the wall to your upper left. Skeletons are up here, including an archer that will try to pick you off as you explore the adjoining area. He's difficult to reach from low ground, so just keep him in mind as you press forward.
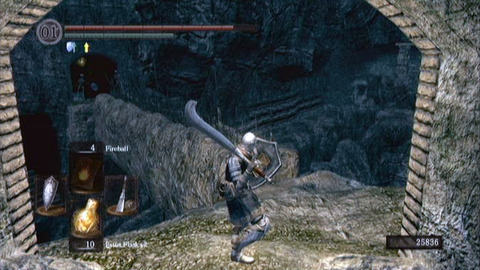
Continuing forward, you'll reach the necromancer who was pelting you with fire a moment ago. He's scared of you when he gets close and will try to run through an area thickly populated by skeletons. You need to chase him down and kill him before he gets far, then tend to any skeletons around him that the chase has roused.
Proceeding in the direction the necromancer ran, you'll find an opening to the right. You can obtain the Lucerne sword from a corpse lying on a shelf there, but there are two skeletons to defeat also. Further along the same main corridor, you can head left to reach the room where the skeletons tried to snipe you from above. Defeat them, then check around for the Large Soul of a Nameless Soldier on a corpse.
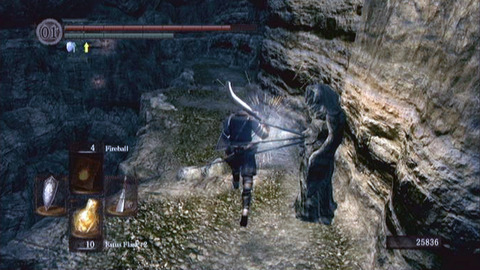
There are two options that seem to allow you precede now, both ahead of you. Any paths to the left merely let you drop down to the area you've already explored, though. Start through the opening to the right and watch ahead of you. There's a stone bridge leading to a waiting necromancer, but you can't cross it because spikes protrude from its surface.
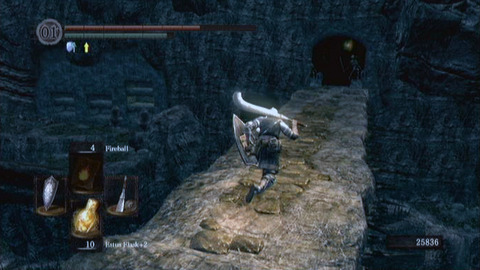
The trick is to run along the trail that leads to the right. This trail is densely populated by regenerating skeletons, and there's another hazard you might not anticipate: statues along the right side of the trap may attack. They don't do anything especially aggressive, just stand there, but dangerous spikes protrude swiftly like the quills of a porcupine and you can take some damage if you're too near. Rush past them and the skeletons to find a Soul of a Proud Knight at the end of the trail. You may also notice a bonfire through the wall to the right, but you can't reach it at this time. Your main reason for coming along the trail is a second lever that you can push. Do so and the spikes on the stone archway will lower.
Now return to the stone archway and head swiftly across it, hopefully without too many skeletons chasing you. There's a necromancer on the far side who will try to pelt you with magic, plus there are a number of skeletons that will rush anxiously forward to meet you. Clear them out while avoiding the magic shots from the necromancer, then take out the necromancer himself.

Past where you found the necromancer, the path splits. There's an opening to your right and there's a room up some steps to the left. Only go through the opening if you want to backtrack for no apparent benefit. Along that route, you can head toward the center of the room and step into the left of the two open caskets. You'll fall through the floor into a lower passage, which is lined by the spike-producing traps. Head along that passage with your shield raised to find a ladder at the end. From the top of that ladder, head left to find and fall through another open casket. You'll land in the area near where you pushed the second lever (to lower the spikes on the archway). No apparent benefit.
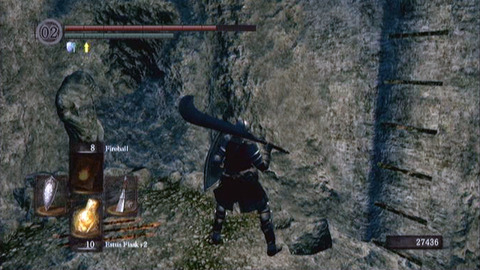
Going left at the split in the path leads somewhere more interesting. You'll find yourself at the top of a tall vertical shaft. As you descend along stairs on the edge of that circular shaft, you'll face numerous skeletons. Defeating them will only give you a brief respite, as they regenerate fairly quickly. You should focus on descending. You can find two Soul of a Proud Warrior items in the rooms to the right, and partway down you'll also find a statue with a switch that you can and should push.
After pushing the switch, you can take an optional detour. Continue down along the steps and when you reach the very edge, roll forward or take a fast-moving step off the ledge (if you're going too slowly, you'll fall to your death) and drop straight down to a lower ledge. You will likely take some damage from the fall, even when it is done properly. Continue making small drops to subsequent ledges and finally you'll arrive at the bottom, where there is a hole in the floor. Drop through it and ahead of you, a huge fellow with a scythe will appear. He knocks a hole in the wall to the right and invites you to head through it so that you don't spoil his focus. You can talk to him when he returns to the back wall and you'll find out that he's a blacksmith who can create fire-based gear for you. When you're ready to leave, head through the opening the blacksmith created and climb some stairs. At the top, you'll find yourself in an area with rolling pinwheel skeletons. You've found the shortest route to that area, but there are good reasons to get there by a longer route. Keep the detour in mind for when you're ready to head quickly to the boss from the nearest bonfire, but for now return to your exploration.
Once you're done with the shortcut detour, head back up the stairs from where you tripped the most recent switch. When you reach the larger area partway up the shaft, look left and there's a new route you can follow. However, it's worth making a detour first. To the right of that new path, there's a weak wall. Break through it and investigate the area beyond. As you battle skeletons, you'll work to the end of a path where an especially large fellow will form from the bones lying on the cavern floor. Take him out with fire attacks or careful swordplay, then investigate the tomb that he was guarding to pick up the Darkmoon Seance Ring. It's an important item. Once you have it, knock out a side wall in that passage and head up a series of stairs to find one of the stage's necromancers and some skeletons. Take them out and then climb the ladder to reach a high secret room. You'll obtain the Tranquil Walk of Peace miracle from a corpse you find at the end of that passage, just past a trap statue. Then you should check the floor for a week point where you can drop through to an earlier portion of the stage.
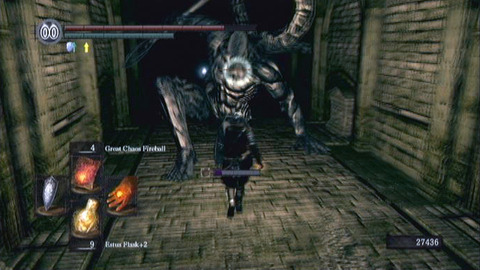
Return to the portion of the stage where you descended along the spiral staircase in the vertical shaft and make your way through the new opening that appeared after you pressed the switch. When you proceed in that direction, you'll almost immediately come to a split in the path. The path straight ahead is presently useless because of some upturned spikes, so take a detour left through a dark passage to find a trail that leads left along the side of a cliff. Follow it to the apparent end and you'll find a statue that bristles with spikes, as well as a ladder to your right. Roll past the statue and against the wall to reveal a hidden opening. Beyond the opening are some stairs that you can climb to a secret bonfire. It's the one that you may have noticed through the wall earlier in the dungeon.
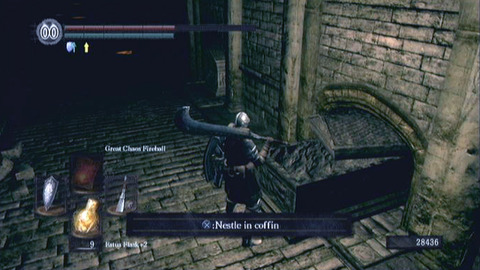
Descend the stairs from a bonfire and now you should climb the ladder that you saw. At the top, there's another large pedestal with a switch. Push the switch to rotate a nearby bridge so that the spikes are no longer protruding upward. Now head back the way you came. You can cross the bridge to enter a mist-shrouded doorway. Note that as you head along the bridge, you can jump over to an outcropping ledge to find the Great Scythe resting on a corpse in a chamber. Make sure not to miss that weapon if it interests you. Then work your way back around and pass through the mist-covered doorway referenced above.
From that doorway, start down along some stairs to the left. Continue descending through the area, battling skeletons, as the path wraps its way around and back toward the right. You can enter the doorway that you find there, or you can take another detour and drop along some ledges to find the Large Soul of a Nameless Soldier on one ledge and the Priest's Hat, the Holy Robe, the Traveling Gloves, the Holy Trousers and the Mace on a lower ledge. This is a one-way excursion and takes you down to the area just ahead of the boss, so you'll probably die and have to return to where you decided to drop instead of entering the doorway. On your second visit, enter the doorway.
Here, you'll find yourself wandering along a narrow, lengthy passage with plenty of skeletons for company. Stone coffins rest on shelves to either side. Continue forward, battling skeletons but not wasting too much time on them because an unseen necromancer will periodically revive them. The path will eventually widen, and as you keep moving forward you'll find a tough enemy (like the one that you may recognize from the room below the blacksmith in the Undead Parish). As always, you should keep a distance while fighting this guy (when possible) and hit him with fire magic. When you defeat him, he drops the usual Demon Titanite and then you can check a corpse behind him to find an Eye of Death.
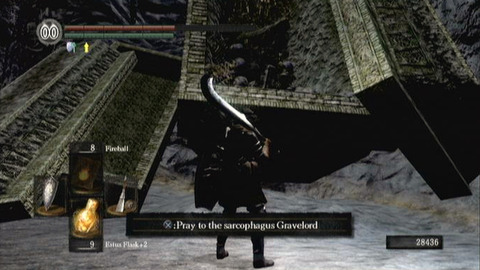
Turn around and head back the way you came, watch along the wall to the right and you'll notice a coffin extending from it, with the lid ajar. You can get near to the coffin and investigate for a prompt that lets you “nestle” in the coffin. Climb inside and wait for around 20 or 30 seconds. You'll be taken to a secret portion of an area known as the Tomb of the Giants.
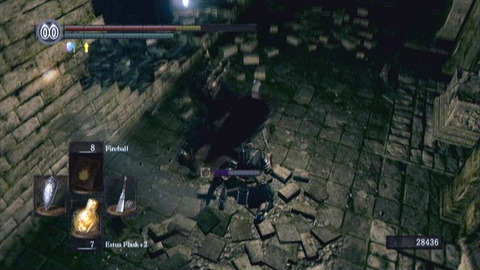
Once you arrive in the Tomb of the Giants by way of the coffin nap, head forward and against the back wall, you'll see a huge coffin. You can get near it and pray to the lord of the sarcophagus to enter the covenant. If you do, you'll receive the Gravelord Sword and the Gravelord Sword Dance miracle. You can offer Eye of Death items to increase your stature within the covenant. When you're ready to leave this chamber, just return to the coffin and nestle in it again. You'll appear back within the Catacombs.
As you head back the way you came through the area with the coffins, watch to the left to spot a hole in the wall. You can pass through that hole to find a tall vertical chamber with a ladder. Defeat any skeletons, check the corpse at the top of the ladder for a Large Soul of a Nameless Soldier, then descend the ladder. In the room below, there's a weak floor on either side of the coffin. Defeat any skeletons, then drop through the hole to reach a chamber below where a black knight is waiting.
Take out the black knight with the attacks you favor, then check the nearby corpse that is resting on the nearby ledge for a Soul of a Proud Knight. You can drop from that ledge to reach a lower area.
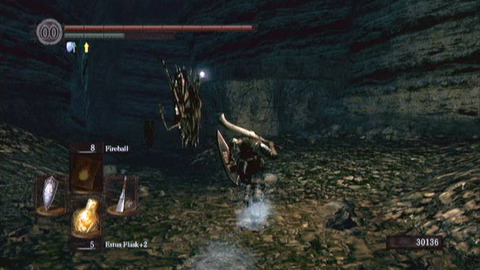
In that lower area, you'll face a number of pinwheel skeletons that cartwheel crazily around the area. They roll around in a hurry and crash into you, causing moderate damage. The problem is that there are a bunch of the skeletons and they move quickly, plus they are frequently revived by a necromancer you can't see.
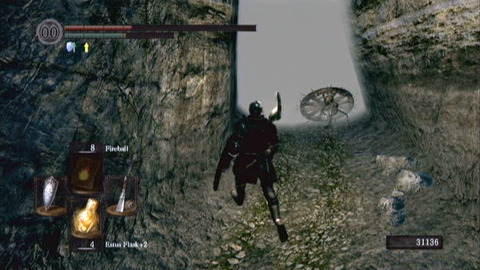
From where you drop after battling the knight, head sharply right and look against that door. You should find a path you can follow. Do so and it comes to a 'T' in a brick room. There will be some more skeletons here, as well as the necromancer. Take out the necromancer and the skeletons, then check around and you'll find a ladder that you can climb. You can either head back in the direction of the pinwheel skeletons and defeat them to continue along the cavern area and find the mist-shrouded doorway that leads to the area boss, or you can climb the ladder.
If you climb the ladder, you'll arrive back in the upper area that you've already explored. That may be worth doing if you're running low on healing items. Otherwise, it's time to go face the boss.
Pinwheel
When you enter Pinwheel's area, you're on a trail leading down to a large coffin. Drop through the opening and you'll land in a shallow pool of water as a scene commences. When the scene concludes, Pinwheel attacks.
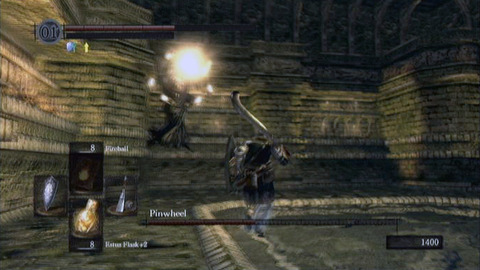
The first thing Pinwheel is likely to do is send a huge ball of magic your way. Roll out of its path, then head forward toward Pinwheel as he splits into multiple figures. None of these figures are particularly powerful and they'll fall easily to powerful weapon strikes, but they'll also keep splitting throughout the fight as you whittle away Pinwheel's life meter.
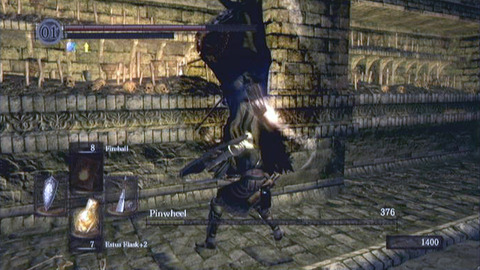
Try to keep moving if you want to survive, and have your shield up to block magic attacks. If you have gear such as the Crest Shield equipped, that's going to work to your benefit. Pinwheel's multiple forms like to try to hit you in the back with magic, but if you should still focus on taking them down one at a time. If you're having trouble harming one of the two (they do dance out of the way and one always seems to be more vulnerable than the other), just switch targets and keep up the attack. As long as you brought a few estus flasks, you'll have little reason to fear.
Defeating Pinwheel earns you 6000 souls. He will also drop the Mask of the Child and the Rite of Kindling. The latter makes it possible to kindle bonfires more than you previously could, which is sure to come in handy throughout the remainder of your adventure.
When you're done in the lower coffin area where you fought Pinwheel, head to the back corner and you'll find a ladder that you can climb to reach the top of the coffin. There, you can climb yet another ladder and you'll arrive on the edge of a dark path with light points floating along it ahead of you. Follow the points of light forward on the trail and you'll arrive in the Tomb of the Giants area, if you're ready (though it's unlikely that you are).
If you'd rather head back through the Catacombs and seek out other adventures (which is the case if you haven't cleared the Abyss area yet), head around to the left and you'll find a trail that you can follow to reach a high ledge overlooking an early portion of the Catacombs. You can obtain the Large Soul of a Proud Warrior from the edge of a ledge, then drop down and backtrack along the trail to a convenient bonfire.
Tomb of Giants
You can enter the Tomb of Giants by way of the Catacombs area. After you defeat Pinwheel, you'll climb out of his tomb and appear on a trail with lights positioned along it. As you walk along the trail delineated by the lights, you'll see the text appear on-screen to indicate that you've entered the new area. Note that you should not bother attempting to clear this area until after you have claimed the Lordvessel from Anor Lando, or you'll just be blocked from proceeding once you reach the bottom of a decidedly inconvenient dungeon. It's also not a bad idea to bring along a divine melee weapon, to make the area boss fight go more smoothly.
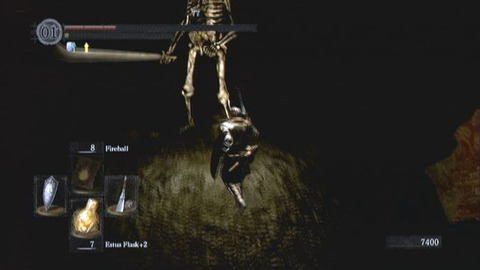
When you're ready to head into the tomb, move slowly as you follow the trail marked by the lights. They don't give off enough light to make it clear where the trail begins and ends and there are a lot of dangerous falls that you can take as you descend through this area. If you have the Sunlight Maggot helmet that gives off light (found near the end of the Lost Izaleth region beneath the Demon Ruins), you'll have much easier time in this stage because you'll see better and because you won't have to give up your shield to use the lantern that can be found partway through the stage. We'll give instructions here that assume you haven't found that helmet, so that you're covered either way.

Follow a straight line from the first light to the second one, then start for the light to the right (but move slowly to make sure that you step onto the walkway that bridges the gap in that direction), then head carefully forward with the wall to your right. You'll come up against one of the giant skeletons, so defeat it with fire attacks if possible so that you don't have to dance around too much on the uncertain footing.
When the skeleton is dead, continue down the trail with the wall still to your right as a guideline. You'll see a corpse to the lower left with a tempting glowing item, but you're not safe going directly for it because there's a pit. Instead, continue descending along the wall and toward the next light.
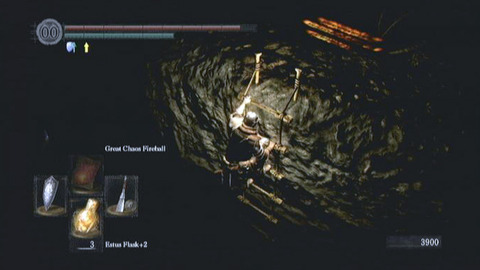
Here, the lights point to the top of large fallen pieces of stone. You can climb on those to slide down to a lower ledge, then do the same with another of the stone slides. At the base, an archer from the side will try pelting you with magic arrows, while to the right you can start forward to find yourself battling two giant skeletons. They're a real threat if they get you together, but you can hit them with fire magic (while hopefully avoiding any arrow projectiles) to make things go easier. Then continue descending carefully, a few steps at a time as you proceed past the area where the skeletons were positioned. Slide along another of the huge stone slides (this one isn't marked by lights, alas).
You should soon reach the edge of a ledge overlooking some lava. There's the top of a ladder here. Descend the ladder, then head left along the ledge to find a bonfire. Go ahead and light it if you're sure you want to proceed through this area.
From the bonfire, you're now safer to explore the upper areas without much fear of losing progress, if you're interested in what items you may have missed during your cautious descent. If you head back up the ladder and veer left, you'll find a stranger. Talk to him and he'll ask if you are a cleric. Answer “no” to his question (you'll miss out on stuff if you go with a different answer). Then head toward the nearby light and a scene will follow.
You'll be pushed over the ledge that you were exploring and will fall to the ground. Your friend on the high ledge will gloat about the treasure he'll be able to collect from your corpse. There are other corpses already nearby and you can investigate them to find the Skull Lantern, which you can equip and use like a shield to see your surrounding area. You'll also find two of the Large Soul of a Proud Knight, but that's less exciting.
With your lantern equipped and in use, head around the area where you've fallen. Near a stone column, you should find an NPC. You can talk to her to learn that the members of her escort have been turned Hollow. If you proceed past where you meet her, you'll be attacked by the two warriors in question, Vince and Nico. You'll do best if you can draw back from a distance and use fire magic or firebombs to eliminate them, since they have strong armor and fierce attacks that make it difficult to fight the two of them. When you defeat them, you can talk to the girl again and you will receive Replenishment, a helpful miracle that regenerates HP over time.
Once that task is tended to, you can keep looking around the area to find a White Titanite Chunk on a corpse at the top of a path that leads up along one wall. Note that in this area, you'll encounter a new type of enemy: skeletons that form walking totem poles. They're strong against physical attacks, but go down almost instantly to fire attacks.

When you're done exploring the area in the hole, you can head out along the route that Vince and Nico guarded. That trail leads to more of the towering totem skull enemies. Defeat them in the same manner as you did their predecessors, then find a ladder at the end of the corridor. Climb it to its top and it will seem that you've found a dead end. However, you can roll through the wall to arrive on a high ledge.
Be careful on that ledge. There's an archer firing powerful arrows at you from somewhere to the left. For now, you should head to the right to return to the bonfire. If you head left instead, you'll find an oversized stone tomb. You can drop down through a hole to land in a lower area, but it's full of huge skeletons. Defeat them and you can obtain the Soul of a Brave Warrior and the Large Divine Ember by checking corpses in the area.
If you're interested in returning to the start of the area, this is the route to take. Further up the trail that leads left from the coffin, you can find some more large skeletons out in the open. Defeat a guy with a sword and an archer, then climb a ladder to a higher ledge. From the upper ledge, you can drop down to the left to pick up the Large Soul of a Proud Knight. There are some enemies waiting on the high ledge, as well. They're more of the large skeletons, so act lively as you arrive or they'll take you out before you even figure out that they're hiding in the darkness ahead of you. You can find another Large Soul of a Proud Knight on a corpse that they were guarding. In the back corner, hard to see against the wall, there are metal rungs on a ladder. You can climb up along that route to reach the start of the area, when it's time to leave (you can also drop down on a ledge and find three of the Eye of Death from the top of the ladders and the Large Soul of a Proud Knight on an even higher ledge, which is always nice).
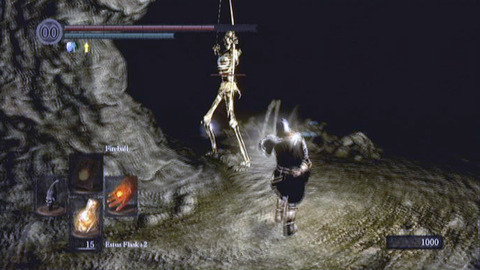
Assuming that you return to the bonfire rather than leaving the stage, you should next head back up to where the man pushed you down the hole. If you head right and forward from there, now using the lantern that you obtained, you'll find a large skeleton lizard crawling about. Hit it with fire attacks from a distance, or careful sword strikes at closer range, then advance past it to find a mist-shrouded opening. Pass through it.
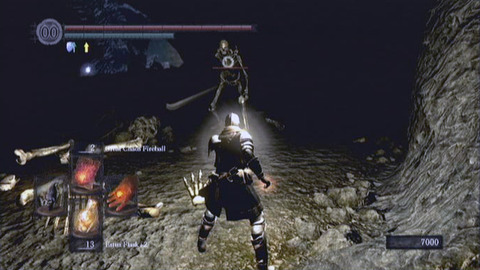
On the other side of that opening, you'll find some real trouble. There are a variety of threats.
First, if you head toward the left you'll find another of the bone lizards. It's joined by an archer not far beyond that, so you need to be careful to conserve your magic and use it to the most positive effect. After you clear out that upper area and grab the Soul of a Brave Warrior that rests on the corpse the archer was guarding, you have a possible detour worth taking. You can drop off the end of the ledge and if you land properly, you'll find yourself on a ledge with a corpse ahead of you. Check the corpse to find the Covetous Silver Serpent Ring, which will cause the skull totems to appear around you. Hack them apart and then return through the cave to the approximate area where you dropped down to find the ring. Head around and you'll find a path that descends toward a lower tier. Here, you'll need to battle yet another of the bone lizards and also another of the giant skeletons.

If you manage to defeat that threat, you can continue roaming around and you'll find another ledge that descends even further before coming to a second bonfire. You're almost to the lowest point of the stage now.
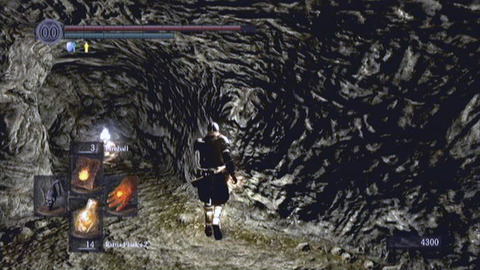
Head back up from the bonfire and explore the upper ledges again. You'll need to defeat any enemies that were revived when you rested, as usual, so that means at least a bone dragon and a large skeleton. Climb up a slope from there and veer left so that you're following a narrow ledge with a wall to your left. You'll soon meet with a golden knight. If you're carrying around a lantern to see, remember that you don't have a shield. He'll just repeatedly lance you and the only way to survive is to back away and toss powerful fire magic at him while you avoid falling from the narrow ledge where the fight begins. If you get past him, you can check a corpse on a ledge to find the Effigy Shield.
Backtrack to the area's second bonfire. You're ready to descend through the last leg of the stage now, having collected any worthwhile treasure. Start back up the hill from where you found the bonfire and pay attention to the path. It branches left and descends along that route, below where you can fight the bone lizard and archer. Descend along that path and you'll soon find a recess on the right with a corpse in it. You can check the corpse for a White Titanite Chunk.
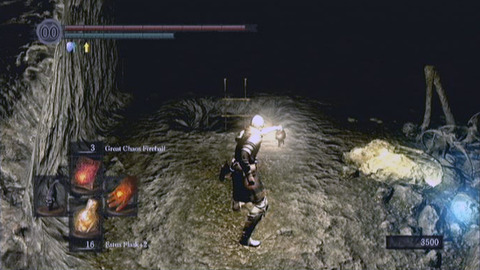
Continue descending along the trail from there and you'll soon find three more of the bone lizards. They're off to the left side and the path you need descends to the right, so you may prefer just to run past them and keep going. As you descend, watch for the path to double back on itself; you can descend through an opening there to find the Lost Soul of a Brave Warrior. Then continue your descent.
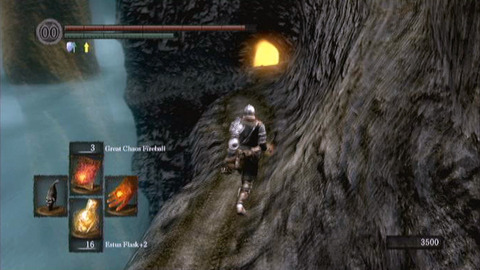
Soon you'll reach the top of a ladder. Climb down it, then descend along a cliff-side trail. It leads eventually to an opening bathed in orange light. The opening is sealed unless you have already defeated the boss enemies in the Abyss. You won't be able to proceed any further here unless that is the case.
Assuming that all is well, take a moment to change up your equipment to best handle the coming area (you no longer need to use a lantern, thankfully) and proceed through the opening.
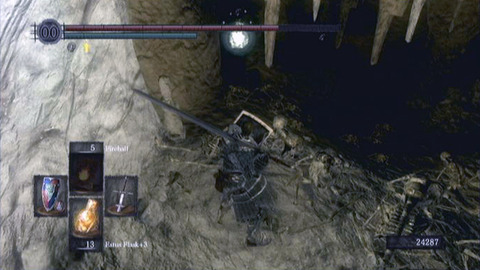
As you start through the opening, you'll find yourself on a long path that descends through rock. There are places where the ledge falls away into an abyss, so you need to progress carefully. Along the trail, a couple of totem towers and some more skeletons will greet you, but ahead of that there's one of the rare crystal lizards that you can kill if you're fast enough.
Once you beat those enemies and continue along the ledge, you'll come to the entrance to a larger cave area. There will be a bunch of skeletons lined up on the edge of the ledge ahead of you. Below, miniature versions of the Pinwheel foe you fought in the Catacombs are positioned. There are around five of them throughout the area. The closest will be able to target you as you stand along the ledge. Their magic can break through most shields, so be careful.
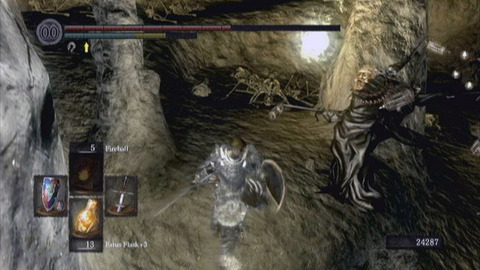
Drop down from that first ledge and work around toward the left to easily take out the closest pinwheel magic user. You want to stay on the upper ledges of this room as long as possible while you destroy the various casters. Their magic shouldn't pose much of a threat, since you can duck behind stone walls or columns and then rush them as the sorcerers prepare additional magic blasts.
As you work to eliminate the sorcerers, look around the cave to find a mist-shrouded doorway. It's largely obscured by bones but isn't far from where you first enter the area, on an upper ledge. You can simply rush for that door if you'd like, but then you'd miss some items. On the plus side, you'd also miss spending much time fighting the miniature skeletons that spawn endlessly in the lower portion of this room. They're weak monsters but they rush you and jump on you, quickly bumping up your Toxic meter. If you get hit by a swarm of them, you'll fall to that status ailment, which is why it's a good idea to take out the sorcerers first.

Once you're able to explore, you'll still have to run from the skeletons or hit them with magic or a quick weapon, but you'll more easily find the area loot: two of the Soul of a Hero, the White Titanite Chunk and the White Titanite Slab. The items are often hidden around the back side of stone columns, so you'll have to look carefully while keeping an eye on the miniature skeletons so they don't build up enough numbers to overwhelm you. The slab is easiest to find if when you first enter the room with the sorcerers, you keep dropping down along the left side of ledges and continue in that direction until you find the prize at the end of a narrow corridor.
When you have finished exploring and looting, head to the mist-shrouded door and pass through it to find the area boss.
Gravelord Nito
As you appear in the cave where you'll battle Nito, you're on an upper level and will have to drop forward off the ledge. That can cause you to take some severe damage, so be ready to gulp down some estus flasks after Nito's introductory animation concludes.
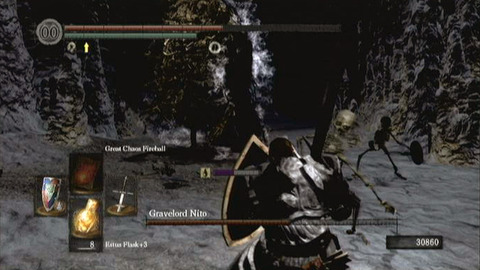
Nito looks imposing but isn't actually a huge threat. He's a floating mask of blackness and skeletons, armed with a massive sword. The bigger problem as you battle is that he is joined by a bunch of standard and slightly larger skeletons. If you try to battle Nito without dealing with them first, you'll have to work extra hard to avoid having most of your attacks interrupted by slashes from the side that can quickly drain your life meter.
The best trick is to let the skeletons come to you. Kill them with a divine weapon so that they don't respawn, and keep an eye on Nito to avoid his huge sword thrust. If you let him close in on you, then you can move in close and hack at him with your weapon or toss powerful fire magic at him (it works wonders, as you might expect of an undead foe) without worrying about causing more skeletons to leap to their master's aid.
As long as you're good at avoiding the infrequent attacks Nito levels at you with his sword, and as long as you're not letting his skeleton crew pick you apart, this fight is one of the easiest of the late-game battles to win.
When you defeat the boss, you will receive the Lord Soul. Then you can light a nearby bonfire to find the means to warp out of the cave.
Valley of Drakes
As you descend through Darkroot Basin, keep mostly to the right when presented with any choices as to which way to head. As you head toward the area's lowest right portion, you'll find a black knight. Defeat him and just beyond, there's a cave leading into the cliff that you can enter to find a bonfire. Beyond that a short distance along the same corridor, you'll find an elevator that you can ride down to the Valley of the Drakes.
From the base of the elevator, head around the wall and out through the doorway. When you start into the valley, you'll see a dragon ahead of you almost immediately. If you start forward far at all, it will head toward you. Though you might not expect it, powerful fire magic will work just fine against the dragons in this area. So will melee weapons, but those make it more difficult to avoid lightning attacks that the dragons use. You'll want to bring gear that defends well against that element, and you'll want to be careful to roll back when you see the dragon launch into the air. It'll follow the temporary flight with a dive that can eat up stamina or your life meter if it connects.
Beyond the first dragon, you have a choice: you can head left to fight a boss dragon, or you can proceed forward. You should start with the latter option. Head forward and start across a bridge to engage another of the dragons. Because the bridge has little in the way of railings, you'll do best if you lure the dragon back to the wider space where you fought his fellow. Then repeat your hat trick.
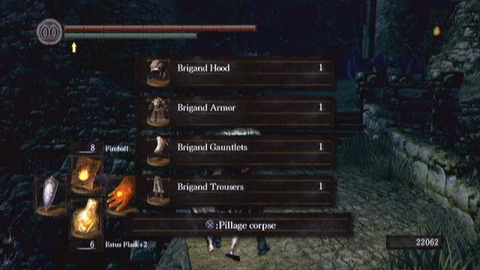
Beyond that dragon, you can find the Brigand Hood, the Brigand Armor, the Brigand Gauntlets, the Brigand Trousers and a Spider Shield on the corpse. Take those, but note that your looting has likely attracted the attention of at least one dragon nearby. There are a total of three of them ahead of you. Hopefully, you have alerted only one and you can have it follow you across the bridge. Lure one dragon across the bridge at a time for easier slaying.
When all of those dragons are dead, head back to the wall and climb up the ladder that you find to snag the Red Tearstone Ring from a corpse. Then it's time to descend the ladder, cross back over the bridge and head to the right (formerly the left, when you were entering from the direction of the Darkroot Basin bonfire) to face the larger dragon that waits for you.
As you proceed in that direction, past another of the weaker blue dragons, you'll soon encounter the dragon that is in charge. It is asleep along the edge of the ledge and you can creep past it if you like. If that doesn't suit you, another option is to approach the snoring creature and start looting items from around it (you can find the Soul of a Proud Knight, Astora's Straight Sword and the Dragon Crest Shield on the various corpses), but that activity is likely to wake the beast and it will attack.
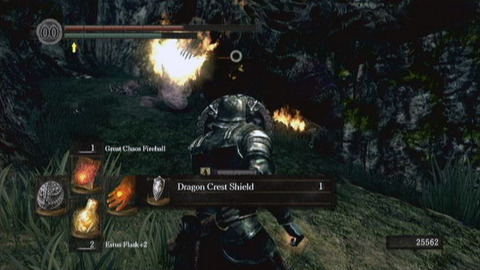
Your process for defeating the dragon will depend on what gear and skills you have, naturally, but the easiest strategy is to back away a short distance and let the dragon do its thing. It remains hanging from the ledge and it will move its head back and forth, spewing flames and noxious fumes that you want to avoid. Roll back to stay out of the way of the cursed fumes, then move in and attack with melee weapons or fire attacks. You should be able to chip away at the beast while placing yourself at only minimal risk.
Once you defeat the dragon, you can continue up the trail that he was guarding. It's treacherous, but at least there are no more enemies. Most of the way to the end of the trail, you can cross to the right over a board and find the Large Soul of a Nameless Soldier. There's also a locked door leading down to the New Londo Ruins, but you likely don't have the key.
Back across the bridge and further up the trail, you'll find an opening to a cave that leads to Blighttown. You can battle some familiar enemies (with long clubs) from that area and proceed past them to find a treasure chest that contains the Key to New Londo Ruins. Now you can backtrack and use that key on the locked door that you spotted a moment ago to create a shortcut from the Valley of Drakes to New Londo Ruins (near where you can enter it from Firelink Shrine). The New Londo Ruins serve as an excellent next area for you to explore, if you haven't already.
New Londo Ruins
You can access this area from the beginning of the game, but it appears that you're not really expected to fully explore it and clear it until after you have cleared Anor Londo (accessible after you beat the Iron Golem in Sen's Fortress). You may want to venture into the area anyway just because there are some great items that make the Curse status effect less of an issue elsewhere in the game.
In Firelink Shrine, there's a man who sits on the stone wall near the bonfire. Just past him, a trail descends to a graveyard area. You can find where there's a cave with bars across it (the place where you can upgrade your estus flask once you have the proper item) and then you can head down some stairs from there to reach a room with a lift. There's a lever if you just see a gaping hole. Otherwise, step on the center of the lift to ride it down to a lower level.
Once you arrive at that lower level, head out and to the left, then descend along some stairs. There are weak enemies here in the graveyard that you can attack as you search for soul items. Keep descending and you'll soon see notification flash on-screen to let you know that you have entered the ruins.
From the entrance to the ruins, note that you can head to the right and then down some steps that descend along the side of the cliff to find a blacksmith in a cave. He'll help you through the bars.
Otherwise, head toward the left from the area entrance and look for three skeletons supplicating themselves against a large stone wall. There's another single skeleton to their left, and to the left of that an opening in the stone wall. You can pass through that opening and look sharply right to find the Estoc weapon resting on a corpse. From there, you can descend toward the left to reach the shore of a large body of water. You can head across the narrow wooden platform and along stone islands to reach an area that is haunted by ghosts.
Note that ghosts are not weak to your standard physical weapons. You can only harm them if you are cursed (the Transient Curse item is useful in this regard, since it temporarily curses your character without the need to find an expensive weapon and remove the curse) or if you have a special weapon that only the ghosts drop. It's not a bad idea to bring a bunch of Transient Curse items, then, and farm ghosts near the ruin entrance until you obtain that weapon, the powerful Jagged Ghost Blade. Then you'll fare better against any future ghosts, even if you aren't under the effects of a curse (though you should upgrade it with a blacksmith before you head deeper into the ruins).

When you're ready to head into the ruins properly, start forward across the shallow pool of water that you gain access to after wandering along the docks. Some ghosts will hunt you down here, but you should be able to take care of them easily since they're out in the open. Then you should look around at the stone walls, near the edge where the water grows deeper. You will find a corpse in a barrel behind a low stone wall. Roll through the barrel to break it open and knock down the corpse. You will receive two Transient Curse items as a reward.
If you look around in that general area, you should see a distant glowing point that represents an item on a corpse. It appears to be floating on the deep water, but you can still reach it. There's a barely-submerged stone ledge that leads out there. As you near the item, two ghosts will rise from the water. Don't let them knock you from the ledge as you hack at them and kill them. You might just want to roll through them so you can fight them on more solid ground. Be careful about fighting in the doorway, too, as the camera likes to shift so that you press one direction and your character walks another (usually to his or her death). When you defeat the ghosts (or before), check the nearby corpse to receive the Fire Keeper Soul that you can trade in for another estus flask upgrade.
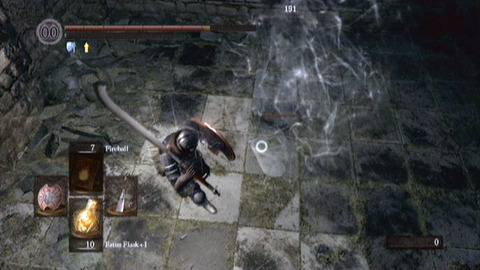
Now head back to the shallow pool of water and start uphill. In this area, almost any corpse you check is going to obtain more Transient Curse items (a good thing, since you need it to be able to be offensive here). You should be able to stockpile enough to survive for awhile, since the effects of the item last a fair while. Keep an eye on yourself, though; you don't want to have the effects wear off just before you need to kill some ghosts.
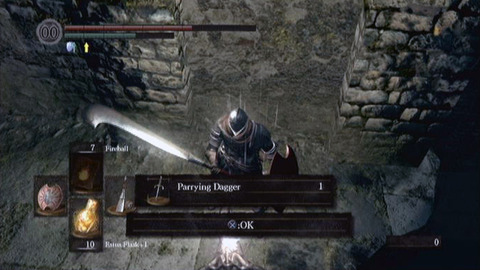
As you head up the hill from the shallow, low-lying water areas, you'll come to a series of stone rooms. Here, the ghosts will come at you a great deal more thickly. Head up the steps and across the bridge ledge, but be careful. Ahead of you, as you start forward because a ghost is waiting in plain sight, another ghost will try to ambush you from a passage to the left. Wait for that attack and block it, then kill the ghost before you head forward to the next one.
In this area, you'll again be ambushed, this time by a bunch of ghosts that come at you from all sides. Be ready to roll around to avoid them and try not to let yourself get mobbed or struck from behind. Continue forward from there and follow the passage left to the top of a spiral staircase. Descend it.
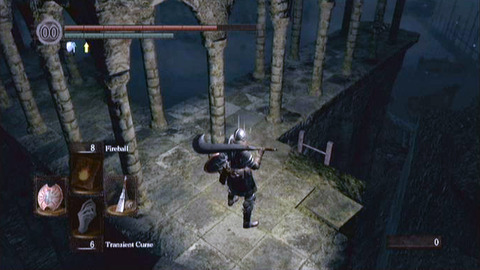
From the base of that staircase, start forward and you'll see a corpse lying on the edge of a ledge. Approach carefully. There's a ghost hiding in the wall to its left. Get near and the ghost will sweep out its scythes. Attack from the side and kill the ghost, then check the corpse to obtain the Parrying Dagger.
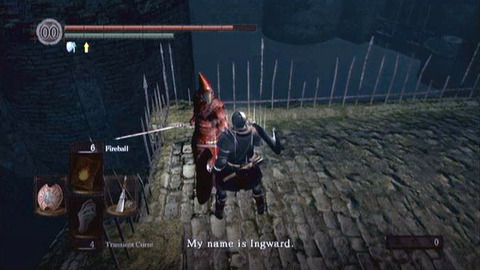
Head back the way you came now, but take a left along a passage that you come to ahead of the base of the spiral staircase. Along that route, you'll find a mist-shrouded door. Before you enter it, you can head past it to find a ghost on a ledge near a corpse. It will scream as you approach. Kill it and then check the corpse for two more Transient Curse items. Then return to the mist-shrouded door and pass through it.
At the top of the stairs look forward and you'll see the top of a ladder. Make sure that you kick it, which creates a shortcut. Now if you have to come back here, you can leap over a gap from the shallow pool of water near the start of the area, then run along the ledge to reach the ladder.
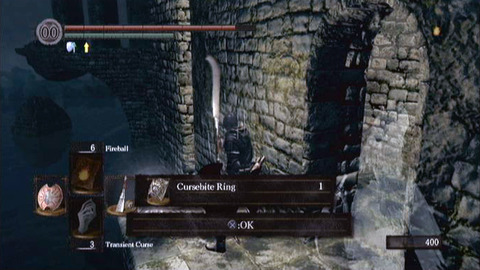
From the top of that shortcut ladder, you can also head forward to fight a ghost and check a corpse (you'll receive the Large Soul of a Nameless Soldier), or you can head left. As you proceed left, and continue left at the 'T' in the path (right is just an obvious dead end overlooking the water), you'll come to a point where you're walking along the side of a building. Ahead, you'll see an opening that leads to the right. When you near that opening, ghosts will attack. Unless you're using magic, they can be difficult to fight without falling in the water unless you lure them into the building and dispatch of them there.
Once the ghosts are dead, you can head inside the house building and battle more of them. This isn't strictly necessary (you can run and jump along the outside portion of the building if you prefer), but it's a worthwhile detour because after you defeat the ghosts, you can climb a ladder hidden in a chimney. Make sure that no straggler ghost catches you by surprise (one will come out of the wall to attack as you start up the chimney).
If you make it to the top of the chimney, you'll meet a character named Ingward on the edge of the building's fenced roof. You can buy the Resist Curse spell from him for 5000 souls, if desired. That could come in handy elsewhere in the game. Depending on what else you have accomplished in the game (you need to have cleared Anor Londo and obtain the Lordvessel), he may also give you the Key to the Seal you need in order to proceed through the area. You can also kill him and loot the item from his corpse, if you prefer.
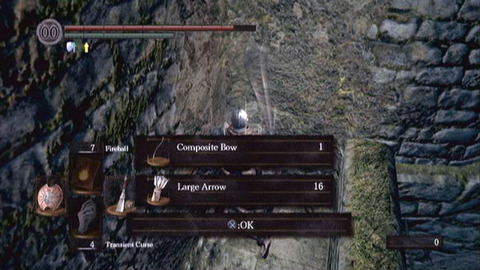
After meeting with Ingward, you can return to the lower path that led along the side of the building. Near the base of those stairs, make sure that you venture inside the building and head along the corridor to find the Cursebite Ring (which adds a welcome boost to your resistance to the Curse status effect) resting on another outside ledge along the building's side (there's a ghost guarding the corpse where you'll find it). In another hallway, you'll find the Soul of a Proud Soldier. Head back through the building and exit along the main ledge. Follow the ledge to find a low-lying area that looks like a stone gazebo along the left branch of a 'T' in the path. You can find a Green Titanite Shard on a corpse that you find there. Then head back to the 'T' and this time follow the steps that led upward.
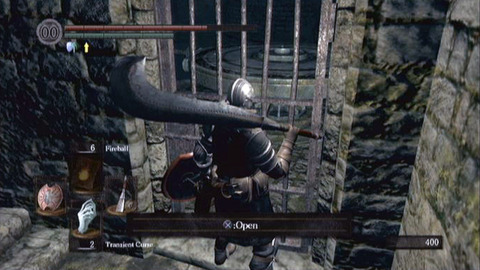
At the top of the stairs, you'll find the Large Soul of a Nameless Soldier resting on a corpse. Follow the ledge left from there and you'll find some stairs ascending along a high stone wall to your side, as well as the entrance to another building ahead of you. Ignore the building for a moment and climb the stairs.
The stairs will lead you to Humanity on a corpse resting along the far end of the platform. You can also drop down from that ledge to land on the roof of the building where you met with Ingward. If you head along the eave, you'll find another corpse that you can check to obtain the Rare Ring of Sacrifice. Then you can drop into the building through one of the windows.
Now head back around the house and enter the final building that you previously ignored. You may not be able to do much just yet, depending on whether or not you have the appropriate key, but you can climb some steps to find a ledge overlooking a moss-covered walkway where you can pillage the Composite Bow and 16 of the Large Arrow. To do anything more in the area, you'll need to head downstairs and you'll need to have Ingward's key (the Key to the Seal) in your possession.
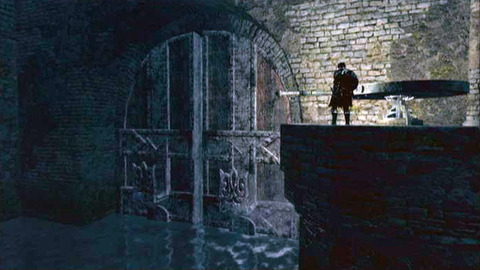
When you have the key, you can open the iron gate near the bottom of the area and then you can head along the passage and through another opening to find a gear like the ones you would have encountered in Anor Londo. You can grab onto the bar that extends from one side and give it a push. As the gear spins around, the nearby gates will open and high water will flood out of the area, draining it so that you can explore.
Head back the way you came and when you find the lever that you may have noticed before, give it a tug. You'll cause an elevator to rise up to your level, creating a handy shortcut to the Valley of Drakes. Now you can enter that region from the entrance to the New Lando Ruins and take an easy shortcut through that domain to reach the New Lando Ruins in the area near the lever that you pushed to drain the water. It can save a lot of inconvenient backtracking, as long as you're good at battling dragons.
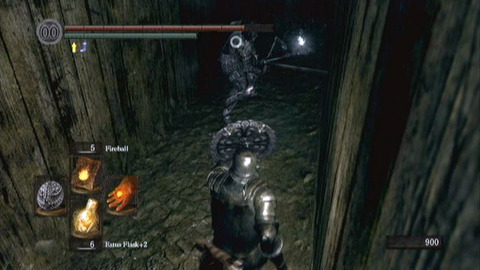
Start through the area ahead of the elevator that you just descended and you'll encounter a new type of enemy. This fellow is ghostly but wears a suit of armor and wields powerful magic. You should attack him from a distance as possible using fire attacks. Try not to get too near to him, or to attract another of the enemies (there's another nearby). Defeat any of the nearby fellows, then head up some steps and to the right to find a small building. Inside, on a corpse at the end of a corridor, you'll find the Large Soul of a Proud Knight.
If you continue around this same general area, you'll find something a lot more troubling than just the one or two ghostly knights. As you head to the right, you'll find a handful of them. Try to lure them toward you one at a time and take care of them with your preferred method, all without luring more to the fight. You'll find two more Large Soul of a Proud Knight items as you work through the area. Eventually, you'll also reach a huge, black blob.
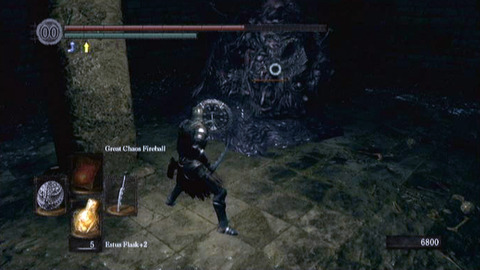
The blob is capable of absorbing a great deal of damage, and what's worse is that you'll likely be battling ghosts besides. Since the ghosts can be dispatched almost immediately, you should do so and then focus your attacks on the blob. It doesn't actually move fast at all, so you should be able to get in close and assault its flanks quite easily until it finally gives way. Then you can check the chest that it was guarding to find a Titanite Chunk.
In the same general vicinity, you'll also find six of the Cracked Red Eye Orb. Most important, though, are the items that you'll find along a high ledge above the area. To reach the ledge, climb some spiral stairs in the area that was most heavily guarded by the ghostly knights and the blob. Then cross along the chamber by following the narrow ledges that lead along the upper level (grab the Soul of a Brave Warrior along the way) and descend to find the Very Large Ember on a high ledge. Drop down and then head around again to reach the area near where you fought the huge blob. This time cross over a narrow ledge nearby to find a mist-shrouded doorway, which you should now enter.
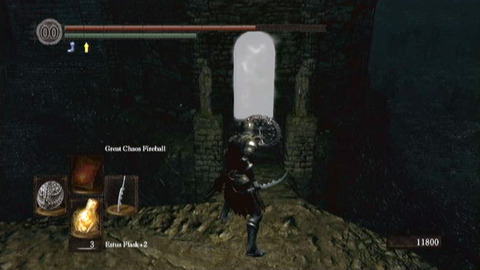
The mist-shrouded doorway leads to the top of a very high staircase that descends in a spiral fashion through the cylindrical tower. Equip the Covenant of Artorias (a ring) and then head down to the base of the stairs. After preparing yourself, drop down into the blackness and you'll fall a long, long way into a new area known as the Abyss (which you can't leave until you either die or defeat the waiting boss).
The Abyss
When you initially head to the New Londo Ruins, you'll find that its lower levels are submerged in water. You can use the Key to the Seal (which you obtain from an old man named Ingward once you have cleared the Anor Lando area and obtained the Lordvessel. With the key that you get from the old man in your possession (find Ingward on the rooftop of a building in that area, after climbing a ladder in a chimney), you can head outside of the building and follow some stairs to reach a locked iron door. Use the key to open it, then head around and activate a lever to drain water from the area.

Next, you'll need to battle your way through the lower portion of the New Lando Ruins until you reach a mist-shrouded door. When you pass through that door, you will be unable to return until you either die and appear back at a bonfire, or once you defeat the boss enemy waiting to challenge you in this region.
Equip the Covenant of Artorias, a ring that you receive for defeating the giant wolf Sif in the area of Darkroot Garden that waits beyond the sealed door. When you have the ring equipped, you can descend the spiral staircase and from the bottom you can jump into the black pit beneath you. After falling for awhile, you'll land in an area surrounded by blackness. As you head forward, “The Abyss” will flash on the screen. Not long after that, you'll find yourself in the area boss fight.
Four Kings
You need to move quickly to win this battle. As it begins, you're surrounded by blackness and it can be difficult to even see your opponent. Look around swiftly and find him, then race toward him and try to hit him hard and fast. You want to inflict as much damage as possible before more enemies appear, which they will do periodically.
One problem is that each king you have to defeat is capable of dealing devastating damage. That's why it's so important that you not fight more than one at a time if possible. Hit with a fast enough weapon to quickly eliminate each foe and make sure that you block the vicious sword swings and roll back out of the way of the magic. You'll do better in this fight if you're able to withstand magic damage easily, as the kings are capable of producing aura bursts around them.
Another move the kings have is to occasionally grab you as you stand in front of them. This move is powerful, but it's a problem even if it doesn't kill you just because it takes so long to play out and thus gives more kings time to arrive on the scene. You'll do best in this fight if you can get around to the enemy's flank or attack from behind and minimize the number of moves that he can use against you. Each king that you take out eliminates around a quarter of the overall boss life meter, so you should soon win if you're able to keep the fight moving along at your speed and don't allow yourself to be swarmed by too many kings at once. Starting out with strong pyromancy magic (if you have it) is a good way to get rid of the first king or two and start the fight along the path you need it to follow.
When you defeat the boss, a bonfire will appear. You can use it to warp back to a more friendly bonfire and then resume your adventure.
The Duke's Archives
After you clear Anor Lando, you'll receive the Lordvessel from a character in a side room above where you defeat the boss combo in that area. You can head out of the main castle and along the side path to find a forest trail that leads to an opening. Without the Lordvessel, that doorway will be impenetrable, covered in an eerie orange light. With the vessel, you'll be able to enter the hallway beyond the doorway.
Past those boars, you'll find a larger chamber with a bonfire in plain view. Use it, then start forward again as you make your actual journey into the archives. At the top of the stairs, you'll step onto a platform and there's a lever you can pull. When you do so, a gate closes behind you as the platform rises. It's an elevator. Once it ascends one level, it'll stop and you can start forward again.
Your arrival on the upper level will not have gone unnoticed, naturally, so your first order of business is the group of guards that rush you. At first, you'll only see one or two, but don't let down your defenses. There are more lurking behind the pillars that line the edge of the room, plus an archer at the top of the stairs who will take potshots at you as you battle any of the lower troops. The battle that you wage through this area will go better for you, as usual, if you can lure a few enemies toward you (back to the elevator, for instance) and deal with them while their numbers are small and they'll have a harder time slicing or shooting you in the back.
Even when you reach the top of the short staircase, there are more guards to either side of the doorway and yet another archer ahead of you. Again, draw the weaker enemies down into the lower room and don't give them the chance to hit any harder than absolutely necessary. Progress here comes to the smart and cowardly soldier, not the brave one.
Through the archway beyond the large cluster of guards, there's a magic user. He will pelt you with magic from a distance if you let the guards distract you. It's doubly important here that you lure the guards into a safe area and dispatch of them so that you're not too distracted. The guards and sorcerer are both capable of hitting you hard, no matter how lengthy your life meter and no matter how high your defenses, but they're pretty weak if you're meeting their attacks with a capable shield instead of your exposed back.
Pushing past that first sorcerer, you'll soon find a second one who is positioned partway up a high staircase on the far side of the room. You have to put yourself out in the open to approach him unless you head along the left or right side of the room using bookcases and the underside of the stairwell for cover. You should do that anyway, to find the Large Soul of a Brave Warrior that is resting on a corpse beneath the stairs. Don't get careless, though; there's a chance when you rely on the architecture to shield you from the sorcerer that he'll get impatient and come to find you. If he does, it's easy to sneak up from behind and take care of him. You just don't want to give him the chance to do something similar to you.
When the area is clear, go ahead and start up the staircase. You'll note that it splits left and right near the top. You will find less resistance to the left, but to the right there's more of interest. Work your way through several more soldiers, using the architecture to your advantage as possible. You'll find an opening the the left where you can obtain the Twinkling Titanite from a corpse. When the main balcony ledge reaches a dead end at the chest, be careful because the chest is actually a Mimic monster. Defeat it to obtain the Crystal Knight Shield.
Now return to the top of the stairs you climbed a moment ago and this time head along the left route. You'll find an archer there, and past him along the balcony another piece of Twinkling Titanite, waiting in a chest. Grab the goods, then return to the top of the stairs yet again and head around toward the back side of that balcony.
You'll now find yourself on another of the lift elevators. Prepare yourself, then pull the lever. The elevator will ride up to an upper chamber and you can head along a branch to the right. This is a narrow corridor and mostly it just ascends along stairs. You should keep your shield ready, though, because partway up the stairs you'll have to battle a lizard enemy. It should be easy to defeat if you block its attacks and respond with melee attacks of your own. Then you can keep climbing.
As you continue your climb, you'll see one of the rare enemies that melts into the floor as you get near. Past it, the hallway begins to grow thick with crystals. These don't harm you, so just keep ascending and at the top of the stairs you'll find a mist-shrouded doorway.
When you pass through the doorway, you'll find yourself engaged in a boss battle with a fearsome beast known as Seath the Scaleless. Though he has a life meter, this is a battle that you cannot win. He's perched on a high ledge and will pelt you with dragon breath and crystals and all sorts of nastiness. You're expected to lose, and when you do you'll wake up in a crystal prison cell with your stats restored as if you just rested at a bonfire.
Look to the right and you'll see why that is: there's a bonfire. Use it if you like, then look around. Though he's hard to see through the crystal because he blends in with the architecture so well, there's a lizard guard posted just to the left of the cell door that was directly ahead of you as you appeared in the cell. You can attack him through the bars and then when he dies, you can pillage the Archive Tower Cell Key from his corpse. Use the key on the door.
When you step outside, a scene is triggered. Some lizards will run past you and to the left, where they'll ascend a ladder and climb to a high ledge in front of a locked door that you can't open yet. You should head to the right, in the direction from whence the lizards came.
As you descend the stairs in that direction, you'll find enemies climbing the stairs. They are easily taken care of with fire attacks, which leaves you free to explore the cells to the side of the trail (which the squid-like enemies will not enter). You won't find anything of interest until the third cell, which contains an enemy prisoner. If you drop through an opening, you'll find a corpse at a dead end. Check the corpse to find the Archive Prison Extra Key.
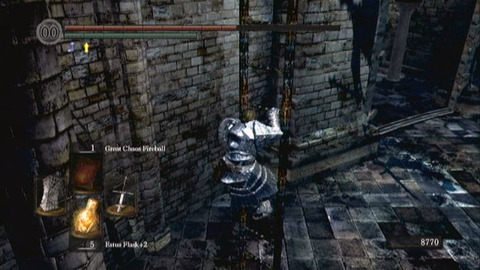
Head out through the nearby door, then continue your descent along the stairs toward the right. There will be plenty of the squid-like enemies along this route, but they're no real threat if you don't run out of fire attacks. Clear them out and as you reach the base of the area, you'll find yourself in a large, circular area. You can head to the right from there, through an opening, to find two more of the squid-like security detail. Defeat them and check the items that they drop for the Soothing Sunlight and Beautiful Sunlight miracles. There's a locked prison cell and prisoner nearby, as well, but you don't yet have the key.
Head back out into the circular area and look along the edge to find a ladder. You will need to climb that ladder and take care of some enemies that wait up top, so recover any health that you may have lost and then do so. Note that the guards attack with lightning-infused weapons, so you should make sure that you have a shield that's strong against that element. When you defeat the guards, you can deactivate the alarm that has been wailing ever since you first left your cell. Also check the nearby chest for the Archive Tower Giant Door Key.
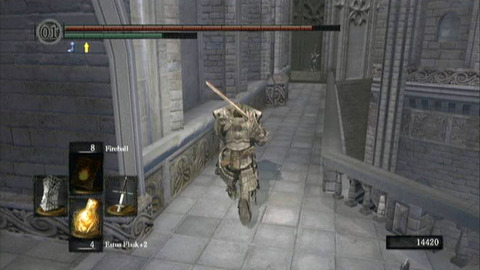
With that key in hand, you've done everything you can in this area for now. Descend the ladder to the circular room at the base of this tower, then climb back up the stairs that you descended a moment ago. Return to the area where your sell was located, near the top of the tower, and keep climbing from there in the direction that you saw the lizards flee when you first broke out of your cell. You'll find the base of another ladder. Climb it, take out any lizards waiting at the top, then open the huge doors with your newest key.
If you want, you can take a detour here. Head left along the planking that leads left from the high platform at the top of the ladder. At the end of the planking, you can drop down (still hugging the wall) to a lower bit of planking. Continue along that area to find a cell you can enter to snag the Maiden Hood, the Maiden Robe, the Maiden Gloves, the Maiden Skirt and the White Seance Ring from a corpse. Now return to the high platform and pass through the doors.
Through those doors, you'll find yourself back in the more visitor-friendly portion of the archives. However, there are still plenty of enemies. As you start forward, you'll come to a 'T' in the path. There's an enemy waiting out of sight to the right (you may see his shadow), while to the left an archer waits along the path. Quickly tend to the enemy to your right, then head left toward the archer but be careful; there's an enemy hiding behind the door frame and he will try to attack you from behind as you deal with the archer. It's not a bad idea to dash so that you can rush the archer and roll around behind him, then take him out and the other sneaky enemy without having your back to either of them.
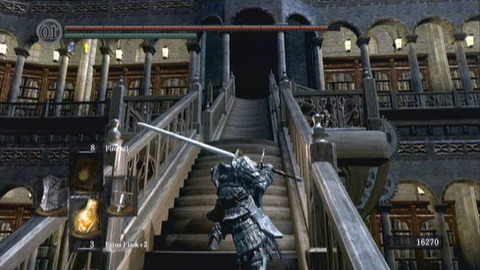
Continue forward, climb some stairs and then you're back in the area that looks like a massive library. As you start left along the walkway, you'll run into another of the sorcerers. Make sure that you block any spells on the approach, then take him out swiftly to minimize the damage he can inflict. You'll also have to worry about another sorcerer who tries to take you out from the other side of the room.
As you start past the nearest sorcerer, you'll see that you can continue straight ahead. Do so and continue along the balcony. Defeat any enemies you find (there won't be any serious threats) and watch for a staircase that ascends to the right. When you find it, start up the stairs to the first landing. Defeat the enemy, then turn the lever and you'll cause the staircase to spin a quarter-circle. When it finishes spinning, you can head up the stairs to defeat some enemies on an upper balcony.
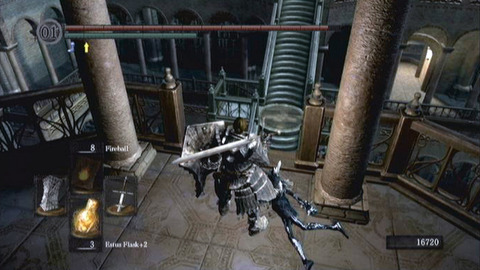
Proceed left along that balcony and keep your shield ready. Further ahead, there's an enemy with a bow and arrows. Get close and kill him, then look around in the immediate vicinity. There's an opening in the railing to the left and if you look down, you'll see another of the staircase sets that can be spun. You'll have to drop through the opening now and aim so that you land on the stairs. Then climb to the first landing and turn the switch to turn the stairs. Once they finish their rotation, descend the stairs to reach a lower ledge.
Next go right a short distance and you'll find an opening leading to the left. Raise your shield and step through the opening. Ahead, there's an archer on the far side of a ledge. Take care of him with a projectile weapon or magic, then look around. There's a ladder here that you can descend to the lower floor, where you'll see a lever directly ahead of the base of the ladder. Go ahead and pull it to open some shelving so that you can easily backtrack to the beginning of this dungeon area.
You can enter the room just beyond the lever to find books strewn across a wooden floor. There's a single treasure chest that you can open to obtain the Blue Titanite Chunk. The other nearby room also has a chest out in the open, but it's actually a Mimic. If you attack and defeat him, he'll drop the Enchanted Falchion weapon. Check other chests in the same vicinity for the Archive Tower Giant Cell Key (which opens the locked door behind which you saw the prisoner as you were making your prison break) and the Six-Eyed Helm of the Channelers, the Robe of the Channelers, the Gauntlets of the Channelers and the Waistcloth of the Channelers in another chest. In an adjoining side room that's easy to miss, near that chest, you'll find another chest that you can loot for the precious Crystal Ember. Make sure that you don't miss it.
When you've finished looting, there's also a lever to pull in the same room that has the two treasure chests and Mimic. When you pull that lever, a staircase will sink into the floor and you can descend the stairs to reach an outside area (though first you should backtrack and free the prisoner so that you can learn crystal-based sorcery skills from him, if that's of interest to you). If you do backtrack to free him, which is easy to do by spinning just one staircase to easily give yourself a shortcut back to the prison area, make sure to grab the Fire Keeper Soul from the back of his cell, as well. You can never have enough of those. The prisoner will appear back in the area with all of the treasure chests, so he's not difficult to reach.
When you descend the stairs that you lowered in that area by pulling the lever, watch out for an enemy that will try to surprise you from behind them. You can also check a treasure chest to find twenty of the Prism Stone item. If you're ready, you can also pass through the mist-shrouded doorway on one side of the room to reach the aforementioned outside area, though you may want to backtrack through the area with all of the wooden floors and head back a short distance to find a bonfire on a ledge, now that you've created shortcuts throughout the area.
Once you do step through the mist-shrouded door, you'll appear in a grassy garden area. This place is densely populated by the crystal giant enemies like those you likely have encountered in the Valley of Drake. You can stop to fight them if you need good experience points, but they will sap your resources and you'll need those for the next area that you'll be exploring.
From where you arrive in the outdoor area, head left along some planking and descend a ladder to the grass. Then you can head forward from that planking, with the stone wall to your back and find a corpse over a small rise. If you investigate the corpse, you'll obtain the Crystalline Helm, Crystalline Armor, Crystalline Gauntlets and Crystalline Leggings. If you head to the far stone wall and then right from there, you can also find a Blue Titanite Chunk on another heavily-guarded corpse. Then you're done in this area and should descend downhill, taking out giants with fire attacks or careful melee warfare.
At the bottom of the grassy slope, a crystalline trail leads into the Crystal Cave area.
Crystal Cave
After you work your way through to the end of The Duke's Archives, you'll find yourself in a grassy area with trees and lots of the crystal giant enemies. If you head downhill along the slope, you'll find the entrance to the Crystal Cave area. It's not far at all from a bonfire that you should have by now activated in the archives, which is good because you won't be finding a bonfire in the short but dangerous cave area until you defeat its boss.
When you start forward, it's important to keep in mind that the platforms you're working along are slick and treacherous. If you simply proceed straight forward, you'll likely start sliding and you won't be able to stop yourself as you slide right into an abyss. Instead of letting that happen, watch for a platform that branches right from the main trail. Along that route, you'll see one of the crystal giants plodding toward you.
Defeat the giant and proceed along the trail he was guarding. Ahead of you, there is an opening with ice powder falling in small chunks from a ceiling and breaking apart on an invisible pathway. You can watch where the ice is falling and breaking apart to determine the location of the invisible path. You can head straight forward through that opening to reach a far ledge, which you can climb to reach a corpse. Check the corpse to obtain some Humanity.
Now it's time to backtrack along the invisible path, and this time to follow the trail that visibly leads down past a floating butterfly. You don't have to engage the butterfly. Just keep a moderate distance from it and it won't wake up to attack you. At the end of the highest ledge along that route, you can drop down to some darker rock and then head back to the right, with the butterfly to your left and behind you as you proceed in the new direction. You'll soon reach another wide gap with more of the falling ice.
Assuming that you're facing properly, you can walk straight across that gap to reach the ledge on the far side. It's nerve-wracking, but you'll be safe. When you reach the far side, however, you need to be prepared to fight one of the crystal golems that will come at you from the left. This fellow is a tougher one, with stronger armor, and he hits harder. However, the strategy for battling him hasn't changed. Just make sure that you're not so ambitious that you fall into the abyss.
After defeating that golem, continue along the trail he was guarding. You'll have to head along some more of the gravel-like rock and ahead, you should see more ice chunks falling and breaking apart along the path. Edge forward and make sure that you have a good feel for the path's location. Then you can drop down onto it and quickly turn around to face the area behind you. There, you'll see some of the glowing rare enemies that like to retreat upon sight. Quickly take out as many of them as you can and collect the loot they leave behind.
Now you can either continue in that direction to cross the gap ahead of you and find a Blue Titanite Chunk on a corpse, or you can turn around and start back in the direction you were facing when landing on the nearby invisible ledge ahead of the lizards. If you do decide to go after the item on the ledge, be careful because the invisible ledge is not a straight shot; it has a curve around three fourths of the way across and you'll need to follow its path carefully to avoid stepping off the ledge you can't even see. Given the relatively unimpressive nature of the item that you'll receive if you make the perilous trek, you may well decide it's not a trek worth taking.
The path leading away from where you found the lizards is a much safer one. It follows what essentially is a straight line. You should still proceed cautiously and let the falling ice dust show you where you're safe to step, but there's less to worry about. When you finally reach the far ledge, there's more good news: you've crossed the last of the cave's invisible paths.
When you reach the far side of that path, the area widens and you'll see a bunch of the clam enemies ahead of you. There's one sharply to the left, as well, so make sure that you don't let it sneak up behind you. These clams are easy enough to toast with fire or to hit with melee attacks from the sides and behind if you take them on individually. Just make sure that you don't get too close too fast or you'll have a few clams rush you and that's more difficult.
Once the clams are defeated, equip a two-handed weapon and remove your shield. Make sure that you have good defense against magic and physical attacks both, then head forward. As you descend, your arrival will trigger a second fight with Seath the Scaleless, the dragon who you fought before being jailed in the Duke's Archives.
Seath the Scaleless
Though your previous encounter with Seath may not have ended well, this encounter in the Crystal Cave doesn't have to unfold the same way. As the fight begins, you'll see a crystal object ahead of you. Before you can start toward it, Seath slides down the slope behind you to attack. He clearly doesn't want you hacking apart that crystal device.
Quickly turn around once you are given control and run away from Seath, toward the crystal device. You should be able to hack it apart and when you've done that, it will be possible to finally harm Seath. Keep in mind that each time you battle Seath, you must start the fight by destroying that crystal device (which is behind him when you make subsequent attempts) or he will just heal any damage you inflict.
Seath has a number of attacks once the proper fight begins. While none of them are especially powerful, they do have an unpleasant side effect: they can curse you. The main thing that you absolutely must do is avoid letting yourself be cursed, or you'll die an instant death and then have to use a Purging Stone. While you can get more of those by battling the clams in the area ahead of the encounter with Seath, it's still an unpleasant situation. Reduce the likelihood of falling victim to that status ailment by equipping the Cursebite Ring, if you got it in the New Lando Ruins, and most or all of the Havel armor set.
To avoid being cursed, you'll also want want to keep a careful eye on Seath as you battle him. You want to hit hard (hence the directions to unequip your shield, so you can use two-handed attacks) and be ready to retreat. Most of his attacks won't hit you if you are close to him (or better yet, his tail), but occasionally he'll charge up a move and then send out a field of ice crystals in a radius around him. Those ice crystals will curse you if you don't get out of their way, which means running away from Seath's body and toward the edge of a cave (where you will probably also want to heal). You need to be ready to make that run at any time, and obviously your equipped gear will make it easier to do so. It's not worth staying in close and getting in an extra hit or two if that winds up leaving you unable to get away in time.
As long as you get good at avoiding the crystal attack, you should have a fairly easy time with Seath. When he's not charging up to hit you with crystals, his attacks are largely ineffectual and you should be able to get in a few hits before you're forced to back away to avoid being cursed. Then you can return to his side and resume your attack. If you have an especially powerful weapon, you will wear him down relatively quickly and win the day.
Once you defeat Seath, he'll drop the Bequeathed Lord Soul Shard and a bonfire appears. You can use it to warp out of the area. You may also wish to backtrack to where you originally fought Seath in the Duke's Archives to obtain the Large Magic Ember from a chest (and the Soul of a Great Hero from a corpse positioned along the upper balcony in that chamber). You can also revisit Big Hat Logan, in the side passage near the area's second bonfire. He taught you sorcery skills, but once you defeat Seath he will become an enemy. Talk to him, then kill him to learn the White Dragon Breath sorcery and to pick up a Big Hat and Tin Crystallization Catalyst.
With those activities completed, you're truly ready to continue your quest. Though first, you may also want to farm the nearby clams for precious Twinkling Titanite, now that you have a bonfire right next to them. Most of the best weapons at this late stage in the game require that material, and this is your best opportunity to acquire it.
Demon Ruins
The Demon Ruins are another area that you shouldn't visit until you have obtained the Lordvessel from Anor Lando. If you head into the ruins ahead of that time, know that you won't be able to complete them because of a sealed opening.
When you first enter the ruins by way of the hill that descends to the lowest point of Quelaag's Domain, you'll see a wide ledge ahead of you. Along the ledge, which descends toward lava, there are numerous slow-moving enemies with the eggs on their heads. They're easy to avoid as you start forward and almost immediately come to a bonfire.
Use the bonfire, then start forward through the area. You'll find that the slope that you're descending along descends toward a lake of lava. That lake hides much of the level that you'll need to eventually explore, but you can't pass through it yet because the lava is harmful. As you proceed along the slope toward the lava, watch from some rubble to your right. Just after the rubble, there's a portion of the path that doubles back on itself and you can follow a ledge in that direction to reach a mist-shrouded door.
Step through the mist-shrouded door and you'll find yourself walking along a new ledge that is lined by stone columns. Start forward along that ledge and climb a short ascending staircase. Watch toward the right just beyond the top of that staircase and you'll see a ravine opening leading in that direction. You can head through it to reach the chamber where you'll face the first of several boss encounters in this area.
Ceaseless Discharge
When you first pass through the ravine that leads into the chamber where Ceaseless Discharge is waiting, there won't be a life meter and you'll only see your foe as a hulking beast in the distance, just ahead of the ledge you are positioned along.

Start right as you reach the edge of that ledge and you'll come to an altar with a corpse draped across it. Check the corpse to obtain the Gold-Hemmed Black Hood, Gold-Hemmed Black Cloak, Gold-Hemmed Black Gloves and Gold-Hemmed Black Skirt. As you loot that corpse, your activity will draw the attention of Ceaseless Discharge.
Once you have the demon's attention, you need to backtrack. Sprint back the way you came, first along the ledge and then (now, as you come from the direction of the altar) left through the ravine. You will appear on the side of the rock formation that is nearest the mist-shrouded doorway that you most recently negotiated. Look to the right as you let your stamina refill and you should see your foe heading around the bend. You want to make sure that he's following, but you don't want to let him get too close.
When you can, run left toward the mist-shrouded door, which now has the mist covering it again because you're locked in combat. When you get there, turn around and watch Ceaseless Discharge, with your shield held ready. He may have decided to turn around if you got too far ahead of him. If that's the case, start forward and he'll turn around again and resume pursuit. Otherwise, wait with your shield ready.
The attacks Ceaseless Discharge will use most resemble those of the hydra monster that you likely battled in Darkroot Basin. He uses some powerful fire attacks, but you should be out of the range of those and should only have to worry about his tentacles. He'll slam those down on the ledge and they'll remain there for a time. You can hack at one (be careful not to get too ambitious and fall from the ledge) and deal damage without much risk from subsequent attacks from the monster.
As you continue to deal damage, you'll either drain his life entirely or Ceaseless Discharge will fall into the lava because he has followed you too far. The latter is the most likely scenario. Either way, the fight should soon be won.
Once Ceaseless Discharge is defeated, the lava lake cools and you can head back through the doorway to the ledge that you had been descending toward the boiling lava. Now you'll find paths that you can follow. Return to the bonfire overhead and rest up if you need to, then start your descent into the cooled lava field.
Descend along the path and ahead of you, there's still a lot of lava left. You should start toward that lava, but for now you shouldn't try to cross it. You can return later for treasure when you have defeated the area boss and claimed an item that will allow you to cross lava. For now, ahead of the first large pool you should turn to the right and make your way toward the wall. There, you'll find the Soul of a Proud Knight on a corpse. Grab it, then look around nearby to find a path that descends toward the right.
As you head along that path, you'll face enemies that look like miniature versions of the Capra Demon you battled in the lower portion of Undead Burg. At first, it's easy to battle only one at a time. They walk back and forth and you can usually lure one toward you, then back away so that you find a more favorable place to fight without luring a second one toward you. That gets more difficult as you continue to progress, though, and these demons hit hard. You want to make sure that you're blocking and countering with the utmost of proficiency, or that you're rolling back and saving stamina (even better) so that you can then counter.
The miniature Capra demons aren't your only enemy in the area, either. After you have taken out a handful of them, you'll find what looks a lot like a floating egg at the top of a staircase. It is capable of using more explosive attacks, but you can still take it out with attacks from the flank. Then descend the stairs it was guarding and head sharply back to the right. As you go, collect two Soul of a Proud Knight along the way and watch for another miniature Capra demon or two.
Ahead of you, there's a campfire positioned near a wall, but a giant centipede head protrudes from that wall. If you try to head directly for the fire, it'll probably cause you a lot of harm. However, you can roam around to the far side (safe from its attacks) and then chuck fire attacks at it. You might suppose that in this hot area, fire attacks would do no real good. That's not the case, though. Your fire attacks will take down the beast easily and then you can use the bonfire that it was guarding to recover energy lost in your recent descent.
Once you're appropriate recovered, you can start back the way you came but you won't want to climb stairs back up to the upper level. Instead, continue forward near the base of the stairs, further along this lower area. Battle any of the floating gas balls you encounter and you'll soon reach an intersection in the path where you can either head left or proceed straight forward. There is a large fellow here with a huge ax who will attack, so try to back away and hit him with magic-based attacks if possible to quickly eliminate him without getting in close. Otherwise, melee attacks will work fine.
On your initial visit to that intersection, it's worth heading left first. Along that route, however, be prepared for a lot of resistance. You'll face another of the huge guys with an ax, and past him the stone pedestal that leads to the left is protected by numerous groups of the caterpillars that will drop from the ceiling to attack. You may find it easiest just to roll past them, though be careful of their toxic spewing that can easily break your weapon. Past a group of four of those caterpillars, you'll find a chest that you can open to obtain the precious Large Flame Ember.

Backtrack to the intersection, where you can look ahead to see a mist-covered door. A final detour that you might consider is the short jaunt uphill (guarded by another of the caterpillars that uses its height advantage to routinely break your equipped weapon if you get even remotely close) to check a corpse near the top. You'll find the Soul of a Brave Warrior on that corpse, if you make the trip. Otherwise, it's time to head forward along the main path.
Ahead of the mist-shrouded door, look to the right. There's a hole in the wall with roots leading down to a lower chamber. You have an important decision to make here. You can descend along those roots on the left side of the room (there's also a Soul of a Brave Warrior on the upper right side) to find a sealed door that only opens if you your Chaos covenant affinity up to a high enough level, or you can keep to the upper path that you were following and pass through the mist-shrouded doorway to face the second boss battle in the Demon Ruins. If you go through the trouble of following the lower route, you will need to battle nine bug enemies as you start through the sealed door. Make sure to kill them all without advancing too far, and then when they are dead it is safe to enter Lost Izaleth. Skip to that section for further assistance with the area. Otherwise, we'll assume that you're planning to work through the Demon Ruins by way of the conventional route that leads through the mist-shrouded door.
Demon Firesage
Through the mist-shrouded door, you'll find a boss. He may have a new name and new ambitions, but the Demon Firesage is essentially the Asylum Demon all over again. He still relies heavily on his hefty ax, which you'll want to roll out of the way to avoid. He also leaps into the air and floats around, then tries to drop on you and deal crushing damage.
Make the fight easier on yourself by equipping gear that has the highest defense against physical attacks, which is basically all you have to worry about. You can do more damage if you attack with two-handed weapons and eschew the shield once you get in close (it's not really needed here anyway, since your opponent moves slowly enough and gives you time to see most of his moves coming).
Attack from the flanks or belly and hit until you see your foe floating, then roll out of the way as he crashes down on the ground. Move in from there and repeat the process. It's a relatively easy fight, overall.
After you defeat that enemy, you will receive the Demon's Catalyst as your reward. Then you can proceed to the back side of the chamber that it was guarding and continue your journey through the ruins.
You'll come almost immediately to an area with a black opening ahead of and below you, while to the left there are stairs that lead up along the edge of the room. If you head up the stairs, they'll keep climbing and you'll have to battle the gas balls as you make your ascent. They're easy to defeat if you step around to their sides and let them spew their flames in a direction you're not located as you hack at their sides and backs. Note that three of them are guarding a Soul of a Brave Warrior in a recess as you ascend, but those three can be avoided easily if you don't care about their loot. You can keep climbing to reach the top of the area, where stepping onto a lift will take you to Quelaag's Domain near the chamber where you can join the Chaos Covenant.
After activating that extremely handy shortcut, return to the area with the gas balls and descend to the opening you passed previously. Go ahead and descend through that area now and you'll quickly reach a bonfire, which you'll want to activate and probably kindle a time or three. Then head forward again.
As you start through the room, you'll be descending on a massive root. The first thing it will do is curve toward the right side of the passage. From that first bend, you can drop down to a ledge and head along it a short distance to find a corpse. Pillage the corpse to obtain the Soul of a Brave Warrior. Then head down the root to the base of the room. On the far side of the chamber, there's a mist-shrouded door through which you can pass to reach the area's actual boss.
Centipede Demon
This battle takes place in an arena with a lava bed as a floor. There are cool patches of ground along the sides and those are where you'll want to stay to battle the demon. Otherwise, your footing will work against you as much as your actual foe.
When the fight begins, the demon will be positioned at the center of the area. It may take him a moment to actually start toward you. Be sure to block any attacks that he throws your way from a distance. As he gets closer, he'll hit with some ferocious attacks that can eat up most of your stamina or cause a lot of damage to your life meter if they connect.
Once the Centipede Demon is closer at hand, though, the battle is mostly won. His attacks have decent range, true, but they tend to go over your head if you're nestled in close to his flanks and hacking away at him with your weapon of choice. Let that be your strategy and make sure that you keep an eye on your life meter. You'll probably need to guzzle a few potions throughout the fight. Keep it up and you'll win.
When you defeat the beast, you should receive and equip the Orange Charred Ring. It significantly reduces the damage that you take when crossing the large lava flows in this area and the coming area. You can backtrack to the start of this area now and find the Chaos Flame Ember by descending the first hill and then heading across the lava that first (mostly) drained when you defeated Ceaseless Discharge. At the edge of that area, guarded by several demons, you can find the item. Then return to the room where you battled the Centipede Demon and exit through a narrow shaft along its left side to reach your next destination: Lost Izalith.
Lost Izalith
There are two routes that you might follow to enter Lost Izalith, and the process you follow determines whether or not you can save the NPC named Solaire, or whether you must battle him.
To save him, you'll need to enter Lost Izaleth by a secret route. You must deepen your affinity with the Chaos covenant by handing over enough humanity to reach level 2. This will require handing over 30 humanity without abandoning the covenant, which is most easily done if you farm humanity in the Depths area of the game by defeating rats. Then as you are working through the Demon Ruins, battle until you reach the area ahead of the chamber where you fight the Demon Firesage boss.
To the right ahead of that chamber, there's a hole in the wall with roots growing down along it. You can carefully descend along those roots to reach a sealed doorway. Pass through it and open the door that lies beyond (it won't open if your Chaos covenant level isn't high enough) and start through the corridor. There are nine bug enemies here and you must destroy them all without stepping forward too far and accidentally entering Lost Izaleth. If you fail to kill them all, you'll eventually have to battle Solaire.
If you don't care whether or not you save Solaire, you can take a more conventional route to the Lost Izaleth area. When you reach the bottom of the Demon Ruins, you'll battle the Demon Centipede and obtain the Orange Charred Ring. It allows you to head across lava while receiving reduced damage compared to what you would otherwise receive. You can cross to the left side of the chamber where you battled the demon and proceed onward through a narrow passage to descend into Lost Izalith. Right at the entrance to the area, you'll find a bonfire. If you see Solaire seated nearby, then you've taken the route that means you'll have to eventually kill him (near the end of this area). He'll has gone hollow.
If you followed the path to save Solaire, you'll arrive in Lost Izaleth at a later point. If you don't watch out for Solaire's welfare, your arrival in the earlier portion of the area will find you at the edge of a lake of molten lava. Make sure that you keep the Orange Charred Ring equipped and start along that lake. You can follow tree roots as you go to mostly stay out of the lava. They'll lead you forward and into a wide area, then along the left side as your movement possibly attracts the attention of the massive enemies in this area.
Move around on the limbs and then reach safe ground near a corpse that you can eventually check for the Soul of a Brave Warrior. Before you check, though, let any enemies that have followed you take care of one another with their jump attacks. They are such big foes that they'll often damage or even kill one another, making things easier for you. The best part is that the enemies won't return once dead, even if you return to a bonfire.
Clearing the huge enemies out of the area may take quite some time and a few trips back to the nearest bonfire, but eventually the immediate area should be clear to proceed. Then you can head around (still mostly sticking to the roots) and reach the entrance to a building. Since the monsters around you can't enter this building, you can use it for shelter. Stand inside the door and let foes get near, then sneak out and hit them with your weapons or magic before retreating back into the building and repeating this process. Using that tactic, you should be able to eliminate a few more of the monsters. Make sure that you obtain the Soul of a Great Hero from the treasure chest inside the building, too.
Then it's time to make your way toward the next building. Ahead of it, a huge root dips down into the lava. You can step onto the root and follow it up toward the next building's higher level. Watch out for any enemies that may try to rush you along the way. Rush quickly up the root to the higher ledge that protrudes from the building's left side. Step onto that ledge to find a safe vantage point. If you press near the building there, the monsters can't harm you. Then you can head around and snipe them with long-range projectile weapons. Grab the Twin Humanities item from the corpse on one side of that ledge, as well.
When you're done, you can and should drop down to the lowest level. Check the building walls on the side that overhead has the extended ledge. You can roll through the wall to reveal a hidden room with a bonfire, the last one in this area. Activate it and then you're ready to push through the last bit of the level.
After using the bonfire, head back out and proceed straight ahead through the lava in that direction to reach a stone structure that looks like a partially submerged tin can floating in the lava. As you pass through it, you'll find some roots that you can then climb. They lead up along the wall to the left. Climb to the top of the roots and you'll find yourself overlooking a lower courtyard area. There are many of the statues here that come to life and chase you around breathing fire, so prepare yourself for that and then descend to face them. Keep an ear out for the sound of them breaking free from their casings, and watch around the corner to the left for one that tries to hide and approach when you're distracted.
On the far side of that courtyard, you can pass through one of two halls with a low ceiling. Be careful of the statues that come to life as you pass through, though. On the far side of those tunnels, you'll find more statues in a more open courtyard area. Defeat them and head forward to find some stairs that ascend to the upper right. Walk around the back side of those stairs to find the Large Soul of a Brave Warrior on a corpse. Then climb the stairs.
As you start up the stairs, you'll attract a large enemy near the top. He'll start rolling down to face you. Get close enough to target him, then back away and throw magic or fire at him to eliminate him from a distance. Once he's gone, climb to the top of the stairs and head right through that small square chamber to find more stairs.
The stairs lead in the direction you ultimately need to go, so remember this location. You'll be coming back to it, but first you can choose take a detour to the lower right to experience some important events and to grab some items that will be astonishingly useful in the near future (even though they're not required). You'll find most of the loot and the important event by following a root trail that leads down and to the left into a wide courtyard, while the rest of the items are located at the base of another root further to the right that leads to a ledge that you can circle to find the Soul of a Hero and (once you drop down again to the area you visited a short time ago) a Rare Ring of Sacrifice.
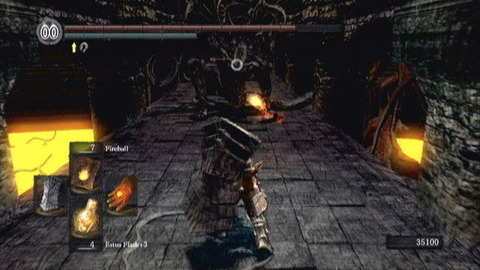
The main vine that leads down into the plaza area should be descended only when you're ready for more of the statues to come to life and attack. There are a lot of them, so try to work your way across the area smartly and not let any sneak behind you. To the left of the area, you'll notice a dark passage with a corpse resting inside. There's a glowing point on the corpse, but that item is a trap to lure you into a dangerous area. Ignore it for now and look to the right instead, where some stairs ascend.
Climb the stairs and you'll find a long walkway. This is the walkway where you will have arrived in the area if you entered by way of the special entrance from the Demon Ruins area. Along the walkway, you'll find one of the headless demons that attacks with a trident and scorpion tail. He's dangerous, as you'd expect, so keep your distance and pelt him with fire attacks as possible to wear him down. Then move in closer and disable him permanently.
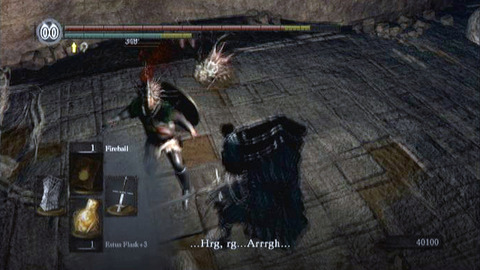
Proceed along the passageway and you'll find a crystal lizard that tries to escape you. Defeat it for a nice reward, or it'll just get away and you'll get nothing. Beyond that is an area where small bugs are jumping around. They can't harm you, but you can kill them. Among them, if you didn't save him from his fate, is the familiar form of Solaire. He'll attack you if he's there and you will have to defend yourself from his attacks and then slay him. When you do, check his corpse for the Humanity and the Sunlight Talisman, Iron Helm, Armor of the Sun, Iron Bracelet and Iron Leggings.
While you're in this area, make sure that you kill each of the hopping insects until you beat the one that will drop an important item, the Sunlight Maggot. You can use that item in the Tomb of Giants area to see without the use of a lantern. Such an item is invaluable in that region.
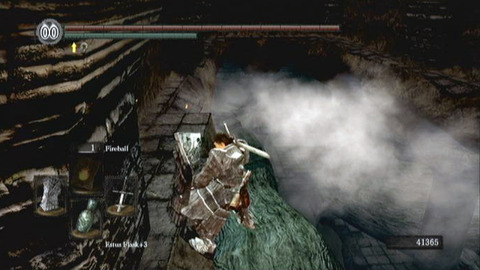
Now head back to the area mentioned previously, where the corpse with an item on it lies on the underside of a tunnel. You're ready to spring that trap now. Inch forward and keep to the left wall as you do so. The brick floor will collapse to your right, but you'll be safe as you stand on a root trail. Descend it toward the lower area and you'll come to a lower ledge where you can step off the trail and head right to the top of some stairs.
You don't want to go down the stairs. Instead, go left and drop down to a lower point, then head through the roots. Keep away from the hole near the center of the floor, but look through it and you'll see several large enemies waiting. They were the trap that was meant to catch you when the floor caved. Now you can take care of them using magic from the upper ledge, or some shots with a bow and arrows. Once the enemies are defeated, you can drop down and check out the area. First, though, equip something to add protection to poison. The water here will leech your defenses and then poison you if you're not careful.
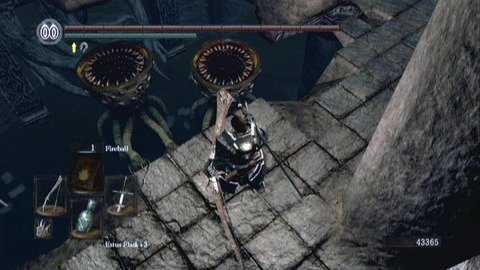
The items you can find in this low area are mostly just titanite chunks of various colors. However, once you have dropped down in the murky soup, you should head around (being careful to walk around the edges of the gaping holes in the floor, which isn't terribly difficult) to find the Red Titanite Slab in a far passage. Then you can head back up the stairs and up the root trails to at last return to the point at the base of the highest staircase where you first took the detour to the right for all of the loot hunting (in other words, the point we said you would be returning to eventually). Now you're ready to finally start up those stairs.
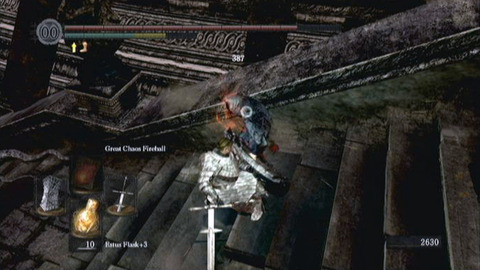
As you ascend the stairs, do so with caution. There may be an enemy waiting to rush you on the steps. If you see him coming, note that he uses powerful pyromancy and is all but impervious to any that you may throw at him. You'll do much better if you dodge his fire bursts, then move in from the side and hit him hard with a melee weapon as he is preparing to cast.
Head up the stairs past where you defeat him and you'll see stairs descending left toward a mist-shrouded doorway. That's the door through which you'll find the area boss, but first you should continue along the upper path and head around to the right. Another enemy waits there, so defeat it with fire attacks or careful melee maneuvering (you don't want to let it suck you up or it'll potentially kill you instantly, depending on your stats). Then head past it to find a treasure chest that you can open to obtain the Chaos Fire Whip. Now backtrack to the mist-shrouded door that you saw and pass through it when you're ready for a boss battle.
Bed of Chaos
This is a challenging and unique battle that you can't win based on your stats (though having a powerful character doesn't hurt). You'll have to rely on ingenuity.
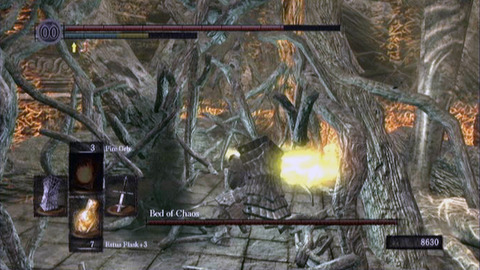
As the fight begins, you'll see what looks like a large tree ahead of you with a bunch of gnarled branches. This is your foe, but you won't try to beat him in a head-on fight. Instead, you'll need to disable two barriers on the far sides of the arena.
Start with the one to your left. You can and should sprint toward it to reduce the amount of time that you're an exposed target for your foe, who will sweep at you with his large limbs. These can be blocked, mostly, but they'll still inflict damage and you need to be in the habit of avoiding them whenever possible.
Once you reach the glowing barrier, you can step through it and then hack at the object behind it, a glowing limb. When you do enough damage, a scene is triggered.
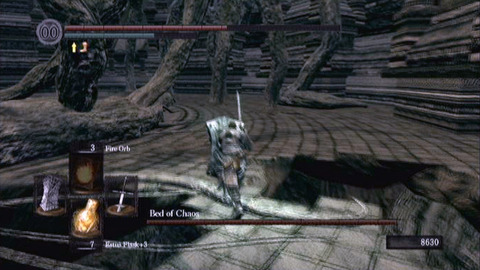
Now you need to head back around the way that you came, toward where you first entered the arena, but running is actually a bad idea now. The floor ahead of you will periodically give way and you'll have to pick your way along the path. Keep your shield up and move slowly, primarily sticking to the points where tree trunks are rising out of the floor (the brickwork near their base won't crumble away like the other will).
Note that while it's possible to head left of the brickwork so that you're on the main pedestal ahead of the tree, that's not recommended because the tree is more easily able to use sweep attacks with an arm that he grew when you destroyed the first barrier. These attacks will knock you back and cause damage, but a bigger concern is that they're also likely to knock you into a bottomless pit. You'll die instantly if that happens, regardless of your life meter.
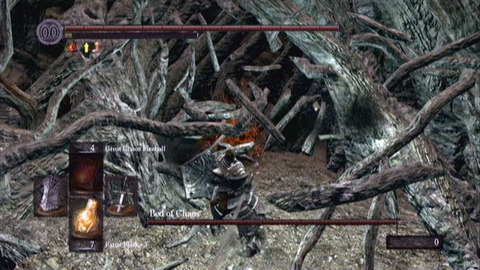
Make your way around to the starting point, and from there continue right to reach the second of the glowing barriers. Step through it, as well, and destroy the glowing limb. Now the Bed of Chaos will grow a second arm and you'll have to return to the starting point yet again as it gains a new attack that allows it to create eruptions of fire. If you see red glowing on brickwork nearby, steer clear of it to avoid a fiery death.
Head back around to the left and continue to keep to the brickwork rather than getting close where the boss will hit you with his lethal sweep attacks. Look ahead of the starting point and you'll notice that the pedestal has now fallen partially away. Bait and avoid a sweep attack, then rush toward the center of the area and leap to a lower root ledge. Run along that platform now and when you reach the end, you'll see some more branches. Hack them and then continue along the path, hacking more of them. Pause and hold up your shield if fire erupts around you, but otherwise you can't be harmed. Proceed forward to find a corpse lying on the ground.
Attack and destroy the corpse to win the battle. Note that if you do fall in battle, any progress you've made is saved, so you won't have to re-hit the branches behind the barriers and you won't have to make the pit appear at the center of the pedestal. In that respect, the fight isn't so difficult after all.
Once you defeat the Bed of Chaos, you'll receive the Lord Soul. You can light a bonfire that appears where the corpse was lying, then use it to warp out of the area if you like.
Kiln of the First Flame
This is the final area in the game and can only be accessed once you have obtained the Lordvessel and have defeated the bosses that lurk at the end of the Tomb of Giants, The Abyss, Lost Izaleth and the Crystal Cave. When that is the case, you can head down to Firelink Altar and place the souls in the vessel (which you will have previously placed on the altar in order to gain access to the required four boss areas) to open a doorway.
As you start through the area, you'll descend some wide stairs where spirits pass over ahead of you. The spirits don't harm you, even if you walk directly through them, so just keep descending.
You'll come out in an area filled with what look like dunes of ash. Though you can walk up and along hills to the left and right, for the most part all that you need to do is descend. There are no items to worry about collecting just yet. As you descend, you'll run into the occasional enemy. There's really only one type of enemy in this area, besides the boss. It's a knight with terrific defense and the ability to hit you harder than really seems fair. Not only that, but once you're hit a time or two, you'll probably keep being hit because your stamina will be gone and you can't even get up without meeting a sword thrust to the gut from your foe.
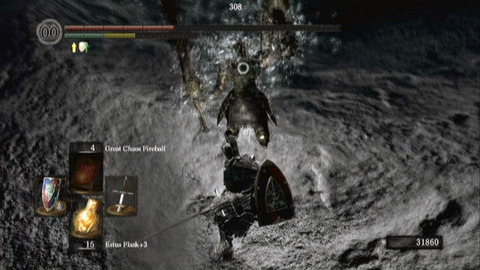
There are two knights to worry about as you descend through the ash dunes. Fortunately, there's plenty of time to heal after both encounters if necessary.
When you have descended to the base of that area, you'll see narrow ledges ahead of you. These cross a wide gap, and there are more of the knights along the ledge. Your best bet here, if you have the ability, is to hit the knights with magic from a distance as they approach. That way, you won't have to worry about them knocking you into the pit.
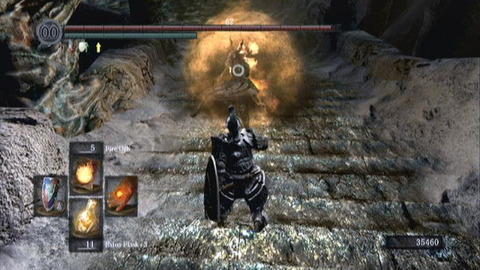
Near where you meet the first knight in this treacherous area, you can head right along the ledge to find a corpse dangling from the edge. Whoever managed to get this far before you apparently fell short just a bit ahead of the goal. You can loot the Black Knight Helm, Black Knight Armor, Black Knight Gauntlets and Black Knight Leggings from that unfortunate someone, then head back to the intersection and continue in the direction you found the knight.
Along that route, you'll soon ascend and find a moss-lined stone path that leads in a gradual arc toward the right as it descends toward a mist-shrouded door. Along this route, you'll find two more of the knights that you've already faced, spaced far enough apart that you only have to fight one of them at a time. Continue relying on magic to eliminate them safely from a distance if you like, then continue onward to the mist-shrouded door.
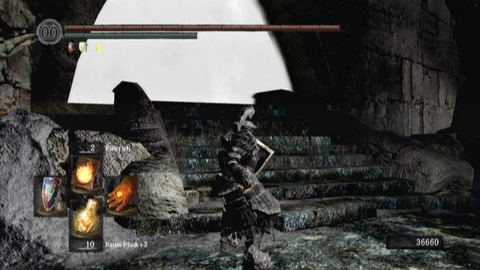
When you're ready, step through it to face the game's final boss.
Gwyn, Lord of Cinder
The Veil - Exclusive Clip inZOI - Official Roadmap Overview Gameplay Trailer Jackbox Naughty Pack Teaser Trailer Keylocker Official Announcement Trailer SULFUR Coming to Xbox Trailer Stampede: Racing Royale | Coming to Game Preview Trailer Promise Mascot Agency - Official Announcement Trailer Lost Records: Bloom & Rage | Lo-fi Summer Trailer Genshin Impact - Official Cutscene Animation: "Execution" Guilty Gear Strive - Official Slayer DLC Character Gameplay Reveal Trailer FATAL FURY: City of the Wolves|Official Marco Rodrigues Character Reveal Trailer Street Fighter 6 - Official Akuma Gameplay Reveal Trailer
Please enter your date of birth to view this video
By clicking 'enter', you agree to GameSpot's
Terms of Use and
Privacy Policy
As boss battles go, this one can prove rather anti-climactic if by now you're good at parrying and counter-attacking. Those are the two skills that will serve you well as you battle Gwyn.
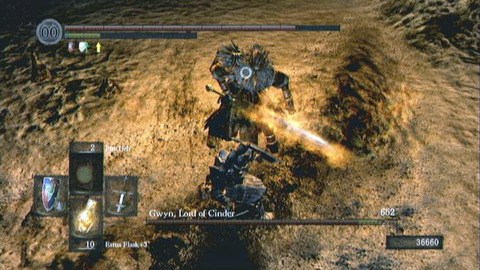
When you first appear in the area, Gwyn will be standing at a distance. When he spots you, he'll start running toward you. You should rush to meet him, shield ready, but it's worth noting that throughout this fight, Gwyn is capable of hitting you so hard that even if your stamina is maxed, you'll lose a lot of it and possibly take some damage by follow-up strikes. Gwyn can often hit two or three times in a row before he is temporarily exhausted and easy to hit.
Dodge the attacks that you can, then, and move in to get in a blow or two of your own. You want to be careful about staying too close, though, because Gwyn can skewer you, lift you into the air and then fling you back. That move drains a lot of stamina, of course, and it also gives Gwyn time to recover so that before you can stand up, he'll rush you and leap into the air then try to bring his sword down in a powerful arc that has a good chance of proving fatal. Make sure that you roll out of the way and then counter-attack in such instances.
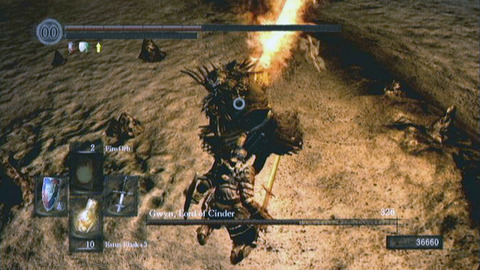
Don't just use all of your openings to attack, either. If Gwyn has your health in a bad place, it's perfectly acceptable to gulp down potions before your foe recovers. Remember that once you start the animation once, you can also guzzle subsequent potions without waiting as long for them to take effect. You want to keep your life meter in good shape so that a surprise move by your opponent doesn't spell your end.
If you have a good weapon, a good rating for your strength and decent stamina, this fight will go very well for you. Just keep everything in mind that you've learned up to this point, apply it and victory will soon be yours!
After you defeat the boss, you'll receive 50,000 souls and the Soul of Gwyn, Lord of Cinder. Then you'll be able to choose the ending you want based on your next actions. Head to the bonfire that appears at the center of a nearby ring of stones if you want the noble ending, or try to leave the cavern without using a bonfire if your wish is to be a scoundrel. After the closing credits conclude, you'll immediately begin the game's New Game+ mode. Enjoy!
Xbox 360 Achievements
| Achievement Name | How To Earn | Reward |
|---|---|---|
| Art of Abysswalking | Acquire the Art of Abysswalking. | 15 |
| Bond of a Pyromancer | Acquire all pyromancies. | 25 |
| Chaos Weapon | Acquire best weapon through chaos reinforcement. | 15 |
| Covenant: Chaos Servant | Discover Chaos Servant covenant. | 25 |
| Covenant: Gravelord Servant | Discover Gravelord Servant covenant. | 25 |
| Covenant: Way of White | Discover Way of White covenant. | 15 |
| Crystal Weapon | Acquire best weapon through crystal reinforcement. | 15 |
| Divine Weapon | Acquire best weapon through divine reinforcement. | 15 |
| Enchanted Weapon | Acquire best weapon through enchanted reinforcement. | 15 |
| Enkindle | Light bonfire flame. | 15 |
| Estus Flask | Acquire Estus Flask. | 15 |
| Fire Weapon | Acquire best weapon through fire reinforcement. | 15 |
| Knight's Honor | Acquire all rare weapons. | 25 |
| Lightning Weapon | Acquire best weapon through lightning reinforcement. | 15 |
| Lordvessel | Acquire the Lordvessel. | 25 |
| Magic Weapon | Acquire best weapon through magic reinforcement. | 15 |
| Prayer of a Maiden | Acquire all miracles. | 25 |
| Raw Weapon | Acquire best weapon through raw reinforcement. | 15 |
| Reach Anor Londo | Arrive in Anor Londo. | 25 |
| Reach Lordran | Arrive in Lordran. | 15 |
| Ring the Bell (Quelaag's Domain) | Ring Bell of Awakening in Quelaag's domain. | 15 |
| Ring the Bell (Undead Church) | Ring Bell of Awakening at Undead Church. | 15 |
| Rite of Kindling | Acquire the Rite of Kindling. | 15 |
| Strongest Weapon | Acquire best weapon through standard reinforcement. | 15 |
| The Dark Soul | All achievements completed. Congratulations! | 50 |
| Wisdom of a Sage | Acquire all sorceries. | 25 |
| Covenant: Blade of the Darkmoon | Discover Blade of the Darkmoon covenant. | 25 |
| Covenant: Darkwraith | Discover Darkwraith covenant. | 25 |
| Covenant: forest Hunter | Discover Forest Hunter covenant. | 25 |
| Covenant: Path of the Dragon | Discover Path of the Dragon covenant. | 25 |
| Covenant: Princess's Guard | Discover Princess's Guard covenant. | 25 |
| Covenant: Warrior of Sunlight | Discover Warrior of Sunlight covenant. | 25 |
| Dark Lord | Reach "The Dark Lord" ending. | 90 |
| Defeat Bed of Chaos | Defeat the Soul Lord Bed of Chaos. | 25 |
| Defeat Crossbreed Priscilla | Defeat Crossbreed Priscilla, the Lifehunter. | 25 |
| Defeat Gravelord Nito | Defeat the Soul Lord Gravelord Nito. | 25 |
| Defeat Seath the Scaleless | Defeat Seath the Scaleless, inheritors of souls. | 25 |
| Defeat the Dark Sun Gwyndolin | Defeat Dark Sun Gwyndolin, the Darkmoon God. | 25 |
| Defeat the Four Kings | Defeat the Four Kings, inheritors of souls. | 25 |
| Occult Weapon | Acquire best weapon through occult reinforcement. | 15 |
| To Link the Fire | Reach "To Link the Fire" ending. | 90 |
PlayStation 3 Trophies
| Trophy Name | How To Earn | Reward |
|---|---|---|
| Art of Abysswalking | Acquire the Art of Abysswalking. | Bronze |
| Bond of a Pyromancer | Acquire all pyromancies. | Bronze |
| Chaos Weapon | Acquire best weapon through chaos reinforcement. | Bronze |
| Covenant: Chaos Servant | Discover Chaos Servant covenant. | Bronze |
| Covenant: Gravelord Servant | Discover Gravelord Servant covenant. | Bronze |
| Covenant: Way of White | Discover Way of White covenant. | Bronze |
| Crystal Weapon | Acquire best weapon through crystal reinforcement. | Bronze |
| Divine Weapon | Acquire best weapon through divine reinforcement. | Bronze |
| Enchanted Weapon | Acquire best weapon through enchanted reinforcement. | Bronze |
| Enkindle | Light bonfire flame. | Bronze |
| Estus Flask | Acquire Estus Flask. | Bronze |
| Fire Weapon | Acquire best weapon through fire reinforcement. | Bronze |
| Knight's Honor | Acquire all rare weapons. | Silver |
| Lightning Weapon | Acquire best weapon through lightning reinforcement. | Bronze |
| Lordvessel | Acquire the Lordvessel. | Silver |
| Magic Weapon | Acquire best weapon through magic reinforcement. | Bronze |
| Prayer of a Maiden | Acquire all miracles. | Silver |
| Raw Weapon | Acquire best weapon through raw reinforcement. | Bronze |
| Reach Anor Londo | Arrive in Anor Londo. | Silver |
| Reach Lordran | Arrive in Lordran. | Bronze |
| Ring the Bell (Quelaag's Domain) | Ring Bell of Awakening in Quelaag's domain. | Bronze |
| Ring the Bell (Undead Church) | Ring Bell of Awakening at Undead Church. | Bronze |
| Rite of Kindling | Acquire the Rite of Kindling. | Bronze |
| Strongest Weapon | Acquire best weapon through standard reinforcement. | Bronze |
| The Dark Soul | All trophies completed. Congratulations! | Platinum |
| Wisdom of a Sage | Acquire all sorceries. | Silver |
| Covenant: Blade of the Darkmoon | Discover Blade of the Darkmoon covenant. | Silver |
| Covenant: Darkwraith | Discover Darkwraith covenant. | Silver |
| Covenant: forest Hunter | Discover Forest Hunter covenant. | Silver |
| Covenant: Path of the Dragon | Discover Path of the Dragon covenant. | Silver |
| Covenant: Princess's Guard | Discover Princess's Guard covenant. | Silver |
| Covenant: Warrior of Sunlight | Discover Warrior of Sunlight covenant. | Silver |
| Dark Lord | Reach "The Dark Lord" ending. | Gold |
| Defeat Bed of Chaos | Defeat the Soul Lord Bed of Chaos. | Silver |
| Defeat Crossbreed Priscilla | Defeat Crossbreed Priscilla, the Lifehunter. | Silver |
| Defeat Gravelord Nito | Defeat the Soul Lord Gravelord Nito. | Silver |
| Defeat Seath the Scaleless | Defeat Seath the Scaleless, inheritors of souls. | Silver |
| Defeat the Dark Sun Gwyndolin | Defeat Dark Sun Gwyndolin, the Darkmoon God. | Silver |
| Defeat the Four Kings | Defeat the Four Kings, inheritors of souls. | Silver |
| Occult Weapon | Acquire best weapon through occult reinforcement. | Bronze |
| To Link the Fire | Reach "To Link the Fire" ending. | Gold |
Got a news tip or want to contact us directly? Email news@gamespot.com
Join the conversation