Crackdown Walkthrough
It's time to clean up the streets of Pacific City in Crackdown! GameSpot's Walkthrough will tell you what to expect.
Design: Randall Montanari
It's difficult to overstate the impact of the Grand Theft Auto series on the gaming landscape, but we don't need to tell you that; there's been a huge number of games attempting to capture a bit of the GTA III magic over the last half-decade. The Xbox 360 has seen a couple of entries into the sandbox game genre, with the story-driven Saints Row being arguably the best. Now comes along Crackdown, which is a decidedly more free-form action game.
Crackdown casts you as the last bastion of hope in a world overrun by crime. As a genetically enhanced law officer of the group known as The Agency, your goal is to head into Pacific City and take down the three gangs that have turned it into a festering pit of crime. Your enhancements will greatly help you out, since you'll become more proficient in a number of core skills as you play the game, which in turn will allow you to take on bigger challenges.
GameSpot's Game Guide to Crackdown will help you navigate through Pacific City and take out the baddest of the bad guys. In addition to tips on skills and achievements, we have a complete walkthrough for the game, with video showing off some of the more devious shortcuts you can take to the bosses. Enjoy!
Skills
Agility
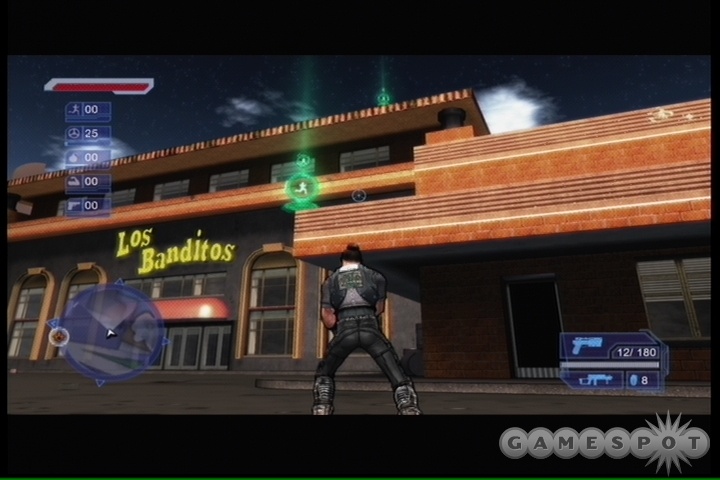
Agility is increased in a different manner than the other skills. Instead of being increased by use, its primary method of advancement is found by jumping around the city and finding the glowing green Agility Orbs that are scattered around, usually on rooftops. When you pop an Agility Orb by running through it, it'll release its chocolatey goodness. Collecting enough to reach 100 percent of the required amount for the next level will bump you up, allowing you to jump farther and higher as well as run faster. You start out the game being able to jump around 10 feet or so, but by the time you reach rank four in Agility, you'll be able to leap around 30 feet and will be as speedy as any track star.
Getting to the first level of Agility will require around five or 10 Orbs, and from there, you can expect skill-ups at around 50, 150, and 250-300 Orbs. You can't really predict when you're going to skill up, because of the fact that different Orbs are worth varying amounts of skill. Orbs that are low to the ground and easy to reach will typically have one smaller orb atop them and will only be worth a small amount of skill to you, while Orbs that are more difficult to reach will have two, three, or four small orbs atop them, and will appear taller when you view them. These harder-to-reach Orbs will net you more skill advancement when you reach them.
In addition to picking up Orbs, you can also increase your Agility by completing the green running races that are scattered around town. You also earn very small amounts of Agility when you shoot or otherwise kill enemies while standing on a surface much higher than they are. Try sniping enemies from a buildingtop to earn these rewards — they're quite tiny, though. Since there are 500 Orbs scattered around Pacific City, though, you won't have to perform either of these activities to earn level four Agility.
Driving
Driving is arguably the least important skill in Crackdown, since you can easily beat the entire game without setting foot in a vehicle. It controls how well your vehicles handle. Higher levels of this skill will allow you to turn more sharply and control the vehicle when you're in midair, and will also unlock new abilities for the Agency cars (which you can requisition from the garage in the Agency basement). When you max out your driving skill, you'll be able to perform jumps with the SUV, fire guns from the front of the Supercar, and perform a charge attack with the truck cab.
The primary method of increasing the driving skill is to hit enemies with your car while you're driving. This can be tricky, though, as your foes will continually dodge your movements in a car, making them difficult to hit. If you intend to increase your driving skill beyond a couple of levels, it's best to spawn at the Agency supply point, grab the Agency SUV, and use that to run around mowing people down. The SUV can take a lot more damage than most vehicles will be able to, and will usually right itself if it happens to roll. It also has a tighter turning radius, making it easier to run people down.
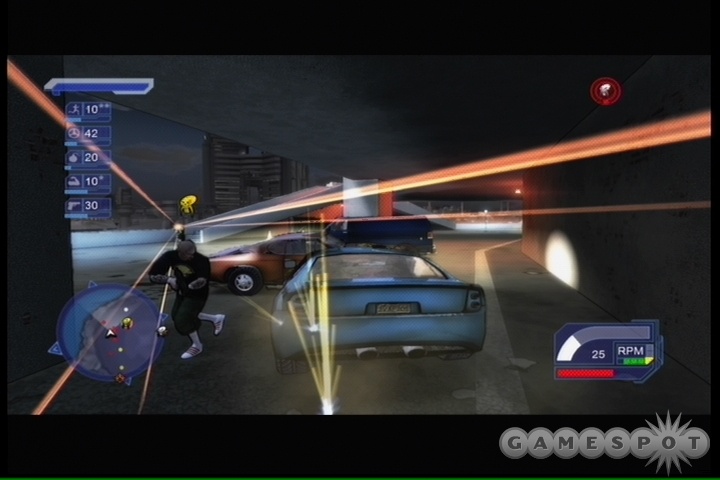
In addition to running people down, you can increase your driving skill by completing the races scattered around the island. These are shown on your HUD as large purple beams of light. There are usually fast cars scattered around near these start points, so grab one and head into the light! Completing the race will net you a goodly amount of driving skill points. Note that a lot of these races will have you crossing pedestrian zones; you can lose driving skill by running down civilians, so do your best to avoid them!
You can also raise your skill by hitting air with your car and hitting one of the purple rings that are suspended in precarious positions around the city. You can see an example of these rings by leaving the Agency garage and taking one of the tubes to any part of the city from there. There are 39 rings around the city, but they're only visible if you're in a vehicle.
Lastly, you will get a very small amount of driving skill points by getting into a car and getting a large amount of hangtime after hitting a jump and before hitting the ground.
Explosives
This one’s pretty simple. All you need to do to increase your explosives skill is to kill the bad guys with your explosive weapons, which includes grenades and various grenade and rocket launchers. Shoot them at bad people, kill them, and reap the whirlwind!
Early on, increasing your explosives skill will be difficult, as your grenades initially do a puny amount of damage in a very small radius, not to mention the fact that most enemies will run away from them when they land. It’s when you grab a grenade or rocket launcher that you begin to really start pumping out the kills and upping your explosives factor.
As your explosives skill rises, the damage that your explosive weapons do, and the radius of the explosions they cause, will both increase.
Strength
Strength determines the power of your physical attacks, as well as the amount of health that you possess. Initially, you start out with only very weak physical attacks, but over time, as you exercise your muscles, your kicks will eventually become forceful enough to knock your enemies off of buildings or flip cars over, not to mention that they’ll often become one-hit kills when you max out your strength.
Strength also determines your amount of health. You start out with a single health meter, but as you increase your strength, you’ll begin earning more double, triple, or eventually five times the amount of your starting health.
Your strength also determines your ability to pick up items and throw them at your enemies. Initially you won’t be able to pick up much more than a trash can, but eventually you’ll be able to lift cars and other large objects. Killing enemies with thrown objects increases your strength score, but it’s not very practical unless you’re playing on the easiest difficult setting; the time it takes to pick up something and throw it will usually leave you exposed to enemy fire and getting shot up, and many enemies are capable of dodging thrown items unless you’re up close and personal.
Firearms
Shoot people! As you use your weapons to shoot people up, you’ll gain firearms skill points. It skills up fairly slowly, but as you gain new levels, you'll be able to lock onto enemies more quickly and presumably deal more damage with firearms. Note that if you shoot explosive barrels or the like, and enemies die as a result of the explosion, you still earn firearms skill points.
Los Muertos
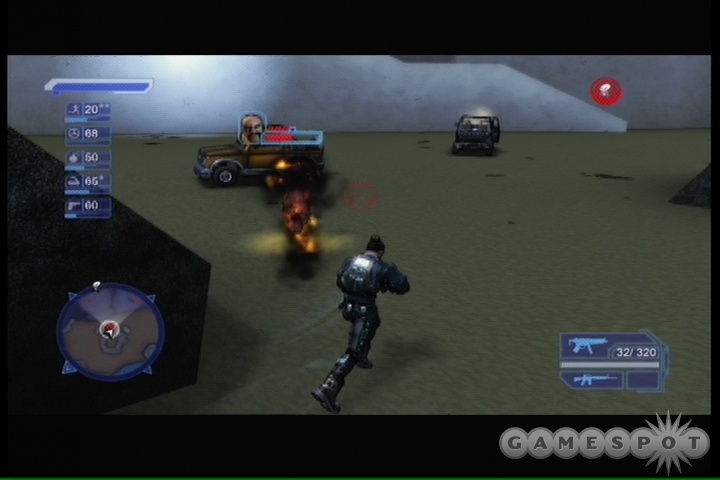
Los Muertos is the first gang that you'll come across in your travails. They're the easiest gang to take down, as their soldiers have the worst weaponry and the part of the city that they inhabit will possess the lowest rooftops, allowing you to jump around without too many problems. When you're ready to step up to the plate, follow the instructions in the Agency garage and grab a vehicle and head out through the shutters marked with the number one.
When you reach the end of the tunnel, you're going to find yourself in a little street fight with the city cops and a few Los Muertos. Feel free to get out, if you wish, and beat down some bad guys. Your first goal, though, as the Agency will tell you, is to head towards and retake an Agency supply point nearby.
Retaking Supply Points
Head towards the flashing symbol on your map to discover the supply point. You'll need to kill some Muertos to reach it, but when that's done, it's a simple matter of jumping to the supply point and pressing Y to convert it to your cause.
Supply points act as save points, health restoration devices, teleports (to other supply points around the city), storage devices for gang weaponry (the more supply points you have, the more weaponry you can store), and ammo and weapon resupply devices. Whenever you hit a supply point, you'll be able to resupply yourself with ammo for any weapon that you possess, and any gang weaponry you've picked up and returned to a supply point will become available for use. You're going to want to take over every supply point on the map.
With this supply point in hand, your next goal is going to be to find five or six Agility Orbs. That's all that you'll require to get up to level one in agility, which will in turn let you jump around a lot more effectively than you're capable of at the game's outset. If you're having trouble finding accessible Orbs, travel south to the beach and look for the carnival on the southeastern corner of the island. There are plenty of Orbs waiting for you there, all easily reached. Before you take on your first sub-boss, you'll probably also want to raise your Strength attribute to the first level, as well, since you'll gain another health bar by so doing.
Boss: Juan Martinez
Your first Muertos target will be Juan Martinez, the gang's treasurer. He's holed up on a rooftop to the west of the first supply point that you took on. When you have Agility and Strength raised to the first level, you should be more than capable of taking him down. You can feel free to travel around, gaining more Agility Orbs and other attributes before taking him on.

When you do move against Martinez, you'll want to be well-prepared. As you've probably discovered by now, submachineguns are currently your best weapon against the gangs here; the aiming reticule zeroes in a lot more quickly than do those of machineguns (if you've managed to find one), and they're powerful enough to drop most enemies with a few seconds of fire. Grenades also work well, as does your kicking when you get it skilled up. But pistols and machineguns are probably not going to help overmuch against your foes at this point. If you manage to find a sniper rifle (some of the gangsters that ride around in cars will have them), you can theoretically use that on some of Martinez's bodyguards, as well as Martinez himself if you manage to fire it from far enough away.
The catch is that Martinez is surrounded by bodyguards, most of whom will be a lot tougher than the normal run-of-the-mill thugs you've been facing off against thus far. Getting to him will be a somewhat longwinded affair of finding a way up to the rooftops, disabling groups of thugs with grenades or gunfire (switch to shrapnel grenades to pick up the grenades that the thugs drop), and fighting your way up to the upper levels of the area. Your shields will come under constant attack, so do your best to hide from fire when things get rough, but keep in mind that many of the soldiers will respawn if you leave the area; try to find alcoves and corridors to hide in rather than running too far away.
Martinez himself resides on a walkway connecting two of the buildings. He has plenty of health, but not enough to stop you. Get close to him, then nail him with gunfire or grenades to take him out. After Martinez is dead, you'll need to explore the city in order to find the other bosses that you need to kill.
Boss: Jose Guerra
Jose Guerra is holed up in a nightclub on the northeastern corner of the southern island of the Los Muertos district. You'll know it when you see it, since it's overrun with gang members. There's a supply point just to the west of the nightclub; grab it before heading in and resupply yourself with ammo and grenades.
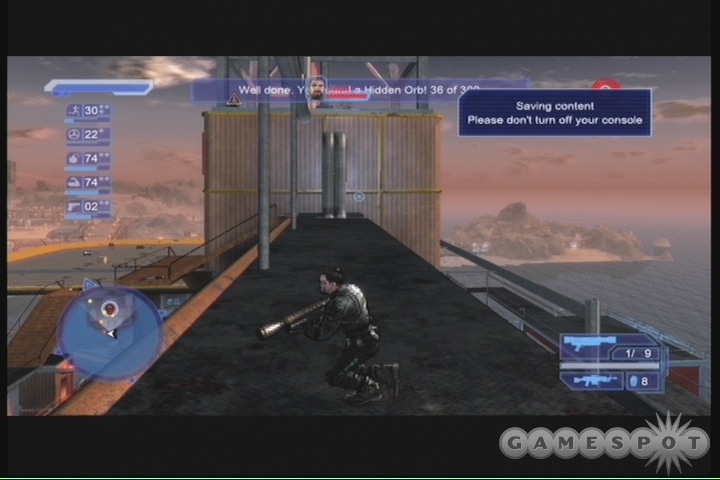
There are three entrances to the nightclub. If you approach from the west (from the direction of the supply point), you can find a couple of gates leading to the parking lot behind the nightclub, which will let you grab a car and run down a few enemies if you enjoy that kind of thing. There's a large purple race marker near this entrance. If you approach through the front entrance, you'll have a difficult fight against multiple soldiers (you can thin their numbers by sniping them with an SMG from one of the neighboring rooftops). Lastly, if you head to the southeastern corner of the nightclub and jump in the water down below the rocks, you can find a hidden path leading up behind the club and into the carpark. You'll also nab a couple of Hidden Orbs this way.
If you take the frontal entrance through the gates, then you'll probably have a bit of an easier time taking down Guerra, assuming you survive through the gauntlet in front of the compound. If you approach frontally, Guerra will be located in the parking lot at the rear of the building, surrounded by cars, in a little alcove where he can't escape and where the lines of sight are quite good. If you can get down here (and you'll have to kill a lot of dudes to do so), you can pelt him with grenades after running down his posse and finish him off.
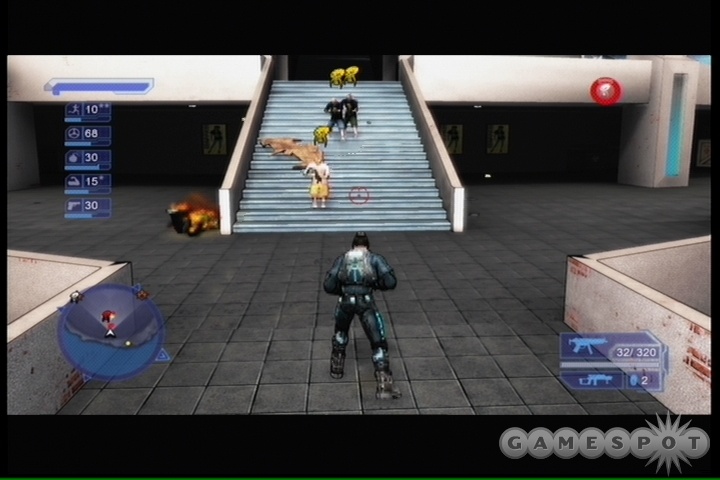
If you approach via either of the alternate entrances, though, Guerra will be located on a patio above the parking lots, forcing you to take the stairs up to reach him. A few waves of enemies will come at you, so make liberal use of your grenades to take them down, being sure to pick up whatever kinds of grenades that they're packing so that you don't run out. When you reach Guerra's patio, take out his bodyguards first, then try to knock him off balance with a grenade or a melee attack before finishing him off. Don't let him get the upper hand on you, though, as he can hit pretty hard himself with melee attacks, and will also throw grenades at you from very short range, which can quickly put a dent in your life meter, if not outright kill you.
General: Rodrigo Alvarez
Now that you've taken out the sub-bosses, it's time to move on to the Bosses themselves, second in rank only to the Kingpin in the gang heirarchy. There are four of these bosses scattered around the Los Muertos islands, but we'll deal with the two on the southern island first.
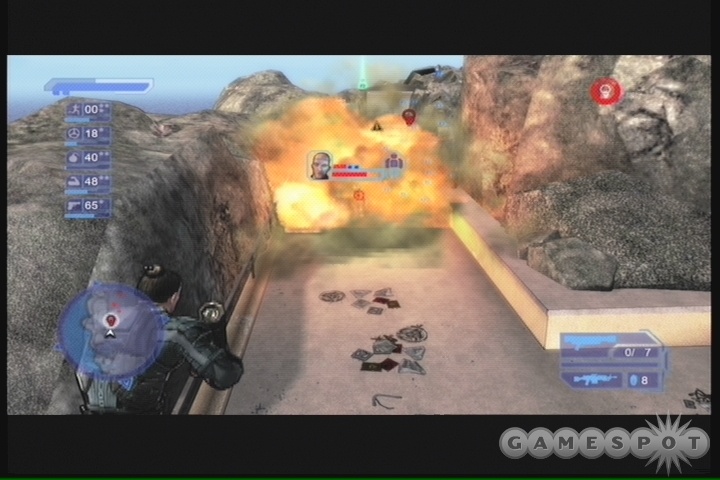
Alvarez is located at the Sportiz sports facility, located on the western side of the southern island. Again, either a frontal approach or a water approach works here, with the water approach probably being the best bet. If you wish, you can head around on the rocks that ring the northern side of the facility and use them as a perch from which to shoot at the enemies below.
Alvarez himself will likely be in a ring of stone on the beach behind the facility. You'll want to clear out his guards first before dealing with the man, but be careful, as he'll continually chuck grenades at you as you run around, and he can throw them far and accurately. Luckily, if you deal with the bodyguards, Alvarez should prove to be a fairly easy kill. Charge him, melee him, grenade him, shoot him; whatever. He'll try to throw grenades at you, but they're easy to run from while you're on the ground.
Note that Alvarez carries a grenade launcher. He will rarely fire it at you, but when you kill him, you'll be able to pick it up and take it back to a supply point to add it to your stash. It'll be a big big help in getting your explosives skill up and with killing the rest of the gang leaders in the area! With Alvarez dead, the strength of the Muertos street thugs will be diminished, especially at the gang leader's villa.
General: Violetta Sanchez
Violetta Sanchez is located in a favela on the southeastern corner of the southern map, near the highway that leads east to the Volk island. It's a tough haul to reach the interior of her little walled city, but if you approach from the south through the construction sites there, you'll find a hole in the wall that's blockaded by wooden panels. Kicking the panels will open a path. Otherwise, the northern approach is also doable, albeit a bit more tricky.
In any case, you'll find yourself inside a large apartment building at some point. You have to reach the top of it to deal with Violetta, who's hanging out on a balcony on one of the corners. You can make the jumps from the outside of the building if you're willing to deal with some technical jumping. Either way, her little balcony acts as something of a tight spot for her, allowing you to pump grenades down her throat or just melee her to death. She's not so tough, but more individual enemies will be approaching from the stairs nearby, so be wary of that.
Killing Violetta will result in fewer guards at the Kingpin's hideout, giving you an easier time when you go to kill him.
General: Rafael Diaz
Time to head to the northern island now. If you want to take on Diaz, head north via the roads and capture the northernmost supply point on the island, the Radio 410 Tower. With that in hand, you can head towards the large hangar to the south to kill Diaz and his thugs.
There are a few possible points of entry to the hangar, which is slowly being converted to a destruction derby/car show arena. The easiest one is on the northern side as you approach from the Radio 410 Tower; a large hole in the arena's upper side will let you get the upper hand on the forces inside. Otherwise, if you approach from the east, you can head in through the main opening in the wall of the arena, preferably in a car of some sort; there are a lot of enemies inside!
Sneaking In
The sneakiest entrance, however, lies to the east of the facility. If you take the northern route to the hole in the upper wall of the facility, you'll notice some dirt paths off to the east of the building. If you follow them, you'll be able to snipe out many of the defenders there. The lower of the two paths will veer near to the building. If you look on your map and find the room that Diaz is in, then you'll be able to spot a pipe leading from the back of that room to a rocky outcropping. It can be tricky to jump into the pipe, but if you do, you'll be able to deal with Diaz and his closest bodyguards without fighting all of the other soldiers in the area as well.
If you do this, then bring along the grenade launcher that Alvarez dropped and fire off a few rounds towards Diaz and his bodyguards after dropping into the room. That'll soften them up and let you hopefully isolate Diaz and melee him to death. With that done, you'll have to wait a few seconds for the garage to open, then run outside, grab a car before you're shot dead, and escape. Fighting through the soldiers in front of the door is also possible, albeit fairly difficult. Try to run as many of them down as you can, as you'll be relatively safe from gunfire when you're in a vehicle.
Diaz's death will remove a good number of the car gangs from the islands.
General: Ramon Gonzalez
Gonzalez is in the lighthouse on the northern end of the island. As per usual, there are a couple of ways to get to him. The first is a frontal assault via one of the roads leading up from the south. This is made difficult by the number of men on the roads, and the number of explosives on them, which the soldiers will occasionally shoot as you pass by. Don't come in a car; approach on foot!
Secondly, you can approach via the rocks on the northern side of the lighthouse, on the coast. You'll have to hop around for a long time, but when you get directly on the northern side of the lighthouse, you'll see a rocky set of steps leading up. These will take you to the upper level of the lighthouse, from which you can fire on the soldiers below. You'll be directly above Gonzalez, although you won't be able to fire at him through the floor, obviously. If you wish, though, you can jump over the railing and attempt to curve yourself back into the lighthouse, then drop down onto his little platform. It's quite satisfying to kill him by kicking him off the platform to the rocks below.
Gonzalez's death will theoretically make the soldiers around the villa less deadly with their gunfire.
Kingpin: Don Domingo Garcia
Time to finish off the head of Los Muertos. Don Domingo Garcia resides in a villa on the western coast of the northern Los Muertos island, to the northwest of the Garcia Point supply point. As per usual, there are a few entry points. The most obvious is a direct frontal assault from the east, and it's doable if you've skilled up a bit, but it's needlessly violent, as there are plenty of snipers, gunners and grenadiers waiting to give you a hard time. As you cross the bridge to the mansion, you'll also be facing off against vehicles that will attempt to run you down, as well.
It's better to dive into the water on either side of the mansion and climb up from the docking station underneath. Doing so will let you enter the stairwells leading up to the top of the mansion, allowing you to kill your way up. You'll still have to fight, but you should be able to take on the soldiers in groups of five or six instead of facing off against all of them at once, and you'll be able to retreat to the stairwells to take cover if needed. Don't proceed too quickly if you're on the walkway on the outside of the building, though, as one of the wooden sections of it will explode and fall away as you move along.
Anyway, clear out the soldiers as they appear, using grenades to thin their numbers a bit. When you find Garcia in his little house, chuck grenades or use your grenade launcher to deal with the bodyguards. When there's no one left but him (he's the only one that won't really leave the small building), head in, chuck a grenade or two at him, and kill him in the manner you see fit. It's best to try and keep him on fire, or he'll unload with his machinegun at you, which will deal quite a bit of damage. Garcia packs the Harlington HMG-90, which you've probably run into before. If you haven't, though, grab it and bring it back to a supply point.
Mopping Up
With Domingo dead, there's one last gasp of activity from Los Muertos. The remaining street thugs will gather at the carnival grounds on the southern island here and have one last party. Head down there and kill anything that moves (well, except for the civilians and the police) to finish off Los Muertos and move on to the next island.
The Volk
The Volk is an eastern European gang that has taken over the Den, the industrial part of town. If you thought Los Muertos were easy, then you'll be pleasantly surprised by the challenge here, as the street soldiers of the Volk are better armed and can take much more of a beating compared to the Muertos thugs.
Begin by grabbing a supply point somewhere in the Den. The Storage Facility point, on the southeastern corner of the island, is the easiest to take, and it'll put you near Igor Biragov, the first sub-boss on the island.
Before You Begin
If you intend to take on the Volk, be sure to have level three Agility (this will take you around 150 orb collections). You'll probably also want level three Strength, as well, to increase your life total. It'll also be very helpful to have the Harlington HMG-90 heavy machine gun in your inventory, as the Volk are tough nuggets to crack, and the extra damage from this beast will be useful in taking them out.
The Watson HE79 Grenadier has probably been a helpful ally to you for some time, but if you wish, you can upgrade it to a rocket launcher if you scout around for soldiers that carry it. They're rare, but there should be a group of them atop the rocks on the eastern side of the southern island here, firing rockets at the cars as they pass on the highway. Head directly east from Biragov's location on your minimap and you should eventually spot them if you try to get to the top of the rocks there. Nab a rocket launcher from them and return to a supply point. Although rocket launchers have less ammo than grenade launchers, the speed of the shell and the fact that it flies straight will allow you to use fewer of them between supply point visits.
If you can't find a launcher in the space we pointed out, you may be able to find one on the thugs that stand atop the billboards that line the road that rings around the lower level of the quarry in the northeastern corner of the Den. There may also be some on the thugs that spawn near the Storage Facility supply point. Regardless, grab one and fall in love with it!
Note that the hardest supply point to get here is the Retreat, which is the westernmost point on the map. If you want to take it, look in the buildings to the north of it for a stairwell, near the corner of the road, which leads to the top of the buildings, then jump south to take it over.
Sub-Boss: Igor Biragov
Igor is the boss of the transport section of the Volk, and is located in the trucking docks just to the northeast of the Storage Facility supply point. You'll know when you're getting close to it because of all the snipers in the towers and walkways surrounding the area. It can be tough to thin their numbers without dying, thanks to their pinpoint accuracy and high damage, but if you took our advice and found a rocket launcher, you can probably disable enough of them to get close to the facility.
Despite his status as a sub-boss, Biragov is going to be tougher to take out than many of the bosses back in Los Muertos. He's quite well protected by gangsters, including the snipers. What you want to do here is head around to the northeastern corner of the facility, which is near the large building where Biragov hangs his hat. Rocket or otherwise kill the snipers there, then jump over the wall and fall down near the building where Biragov's icon is showing. If you look around, you should find a small gap between that building and the eastern wall, making for a perfect location if you need to retreat and let your shields charge up.
Start running out from the gap and eliminating some of Biragov's bodyguards. When they've cleared out a bit, you can jump up to the second level, stun Biragov with a rocket or grenades, and go to town on him to finish him off. Be careful as you leave the facility, though, as there are plenty of guards still around, including snipers.
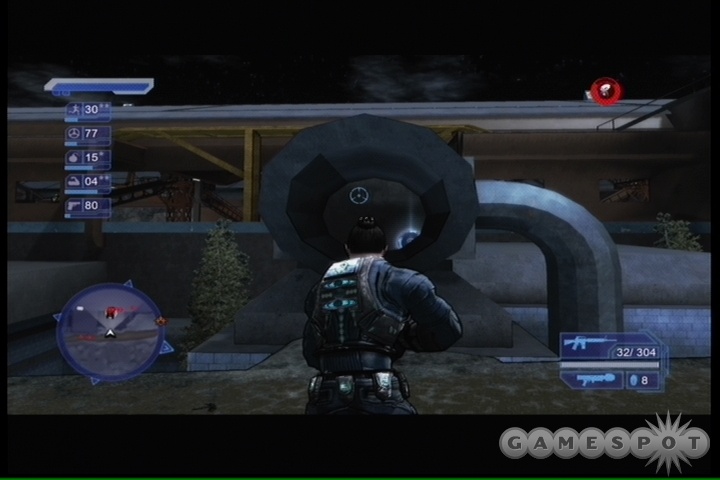
Sub-Boss: Sergei Sovetnik
The second sub-boss here is Sovetnik, one of the leaders of the Volk's black market goods trade. He's holed up in an oil refinery in the northwestern corner of the islands. You can't miss it. Beware of approaching from the south side, where most of the snipers are set up. If you wish, you can also look around for large grates set into the ground, mostly on the south side of the facility, which you can shoot to reveal a pipe passage that'll pop you up near Sovetnik's location. You'll need to have an Agility level of at least three to jump out of the tube, though.
When you reach the interior of the refinery, you'll note that the building that Sovetnik is in has been hardened to attack from the outside; you can't even get in! What you have to do here is find three switches and detonate them. They'll appear on your HUD as large red exclamation points. There are two in the structure to the north of Sovetnik's building, and one on the scaffolding to the south. You need to shoot the switches to destroy them. The one on the scaffolding will be in full view of the snipers, so it's best to leave them be and simply rocket the switch from a distance away.
When all three switches have been detonated, Sergei and his bodyguards will appear in the elevator at the top of the building. Get to them, wipe out the group with a rocket or grenade, then take down Sergei.
General: Natalyza Gryzunova
Gryzunova is among the easiest bosses you'll find in the city, simply because her lair is quite close to a supply point which overlooks it. If you head to the Maxims Arch supply point and use that as the spearhead of your assault, you won't have any problems with her, especially if you have a rocket launcher at your disposal. Note that Gryzunova can also appear in a training facility on the northern end of the island; we never attempted to take her down there.
Anyway, spawn at Maxims Arch and load up a rocket launcher. The southern lair of Gryzunova will be just to your west, allowing you to unload on the snipers and other defenders with rockets, then return to the supply point whenever you need to load up on ammo. A couple of rounds of this (be sure to jump when firing!) will eliminate the bulk of the soldiers in the courtyard and on the surrounding buildings. Use a Longeye or other scoped weapon to zoom in and check for any soldiers you can't see, then switch back to an HMG and rocket launcher combo to jump in for the kill.
Gryzunova lays down some heavy fire with her own machinegun, so killing her will require you to keep her off guard and not firing. If you haven't found a rocket launcher yet, she'll drop one when she dies, so return it to a supply point immediately. Natalyza's death will result in a sapping of strength to the guards of the Volk's kingpin.
General: Viktor Rabotnikov
Rabotnikov is located on the island off the southeastern coast of the main Volk islands; you'll know you're in the right spot when you see the broken-down bridges leading off the coast. You need to go in there and take him out.
Sporting the usual HMG/rocket launcher combo, dive into the water here and start poking around. You can cross the bridges for a frontal assault, if you like, or take to the southern side of the island to find an alternate entrance. You'll need to use explosives on the blast doors here if you do so.
The easiest method of clearing the base, though, is to approach from the west, and attempt to hop from the sunken rafters to the left of the main entrance to the rocks above it. You should be able to see a green trail extending from above the rocks. If you jump up to the greenery, you can find a Hidden Orb atop the rocks. This makes for a perfect sniping point if you aim at the explosives below; all of the white boxes in the area are actually exploding boxes! Most of them will have groups of soldiers standing around, so this is a perfect time to get a bunch of points in your shooting skill by firing on the boxes with your machinegun.
When you've shot all the explosives and finished off any remaining soldiers in your line of sight, head to the eastern side of the island to find Rabotnikov and his bodyguards. Finishing them off will reduce the effectiveness of the kingpin's soldiers when it comes to weaponry.
General: Boris Mikhailov
Mikhailov is ensconced in the Mary Jane, a large shipping vessel that's drydocked in the southwestern docks of the city. You can get in via the front door, a bit off to the west, but if you want an easier passage, swim around in the ocean to the east until you find a small stairway you can jump to.
Getting onto the ship can be difficult, since there's no gangway. To make one drop, you'll have to fight through some dozens of soldiers to the northwest of the ship. There's a small switch that you'll spot (red exclamation point) on your HUD, but you won't be able to reach the switch unless you enter the building at its rear. It'll be tough to fight off all the other people in the area, though.
If you have level three Agility, though, you can head to the two small huts on the southwestern side of the ship. If you run down the slope of the easternmost hut, you can jump from there to the deck of the ship without too many problems.
General: Olga Romanova
The Romanov's are back in town, and this time it's Olga that's representin'. She's holed up in the huge quarry on the northeastern corner of the island. It's big, it's bad, and it's surrounded by rock. Olga will be very tough to get to.
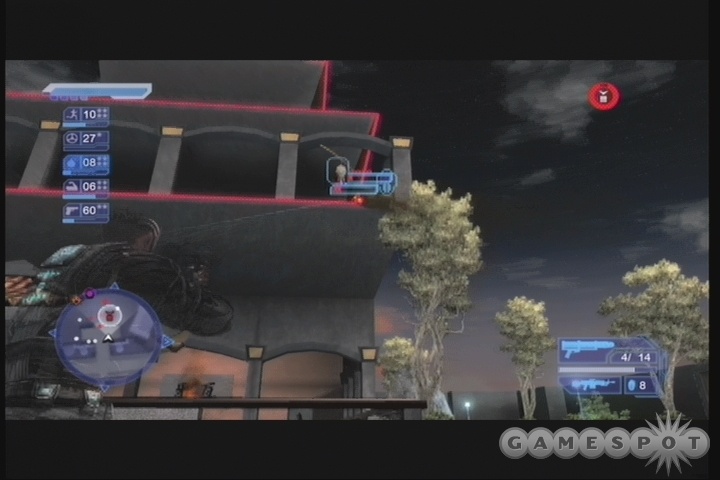
Now, this rock wall is apparently supposed to be impregnable and unjumpoverable, at least until you get level four agility, but careful scouting will reveal a single spot that can act as a springboard for avoiding most of the travails here at a level three Agility rating. If you head to the northwest of the quarry towards what was formerly Gryzunova's training facility. If you scale the rocks to the east of the facility, there is the barest slope on one of the walls that will let you land and jump again before you slide off; from there you can grab a handhold onto the rock above and jump over. It's difficult to describe, so take our screenshot as an example.
If you can't jump onto the rocks, then you'll probably have to opt for a frontal assault through the gates to the south of the quarry. You can do this anyway you like, but it's easiest to head through the first gates, then head south near the guard towers and jump onto the rocks there. That'll give you a bit of a perch from which to shoot out the guards in the nearby facilities before heading down to the quarry itself.
If you managed to jump onto the rocks, then it's a simple matter of following them around to the northeast and dropping down to the dirt path when you reach Olga's location; if you went in the hard way, you'll have to fight your way up the dirt path to it's end, which is going to require cleaning out a lot of enemies. In either case, Olga is in a small cave filled with explosives. When you find her, firing rockets into the cave will detonate the explosives and kill most of her bodyguards. Finish her off and escape through the rear of the cave.
Olga's death will remove some of the explosive weaponry from the hands of the kingpin's minions, making your journey to him a bit less complicated.
Kingpin: Vladmir Golyak
Vladmir is located in the southeastern corner of the southern island, on some kind of offshore oil derrick-ish structure. He's going to be hella hard to get to, in technical terminology. You can see the obvious route, which entails following the pipes that lead offshore to the derrick. Since you're going to be falling off it a few times anyway, though, you might as well get used to the alternate entrance and swim to the base of the tallest building in the area. There's a large opening that you'll be using to scale the derrick each time you fall off. You'll have to hop around quite a bit to get up to the fourth level or so of walkway and reach the opening leading to the walkways on the outside of the structure, which will lead you upwards.
There's a huge number of soldiers atop the derrick, so come prepared with as much ammo for your HMG as possible. Few of the soldiers will drop HMGs themselves, so you'll have to be ready if you run out of ammo and pick up a normal machinegun; they'll do a bunch less damage, so use your grenades or kicking skills as need be. If worst comes to worst, and you're on the brink of death, jump off the oil derrick to the water below to regenerate your health. You'll have to reclimb the structure, but you'll have to do so anyway if you die.
Golyak is situated at the very, very top of the derrick, on a small platform with some bodyguards. When you reach the point from which you can jump to reach the platform, walk down the walkway a bit to give yourself a bit of room to work with, then leap up and fire a rocket at the mass of humanity atop the platform. That'll clear out most of the bodyguards, and will set Golyak alight, allowing you to jump to the platform and take him out. It can be fun to kick him off the platform for the kill.
Shai Gen
The Shai Gen corporation runs the northeastern part of the city, and has built it up with some exceedingly tall buildings. Their goons are the toughest around, so you're going to need to be fairly powerful to crash the party.
Before You Begin
Getting yourself up to level four Agility is possible here, if you haven't done so already. Climb a tall building as best you can (they can be murder to get up), then start hopping around, looking for the tallest Agility Orbs you can spot. You'll need around 250 - 300 of them to reach level four Agility, depending on whether or not you've done the foot races.
Level four Strength would also be adviseable. Kick your way to glory.
If you're looking to nab an easy supply point, the Bubble point, the westernmost one on your map, will probably be the easiest one to reach for you.
Some of the Shai Gen soldiers will be carrying Cluster Grenades on their persons. These grenades have a much larger detonation area than other grenades, so they're worth seeking out.
Lastly, the Watson HE99-X Firefly, a heat-seeking, 20-shell rocket launcher, can now be claimed for your own use. The easiest place to nab it is at the lair of Baltazar Czernenko, who resides in the P.C.N. Institute of Research in the northwestern corner of the islands. The large building in the southeastern corner of the research campus will have a pair of soldiers on it that pack the weapon. Getting to them can be tough, but when you manage to return the Firefly to a supply point, you'll be happy you took them on. For the rest of the game, the HMG weapon and the Firefly will be all you need to use to beat the remaining bosses.
Boss: Melissa Fang-Yin
Fang-Yin is Shai Gen's intelligence director. She resides in a large building with a bubble atop it in the southeastern corner of the island, to the south of the easternmost supply point on the island. If you can reach the Intellicenter supply point (approach it via the building to the northeast), that'll make a nice vantage point to start your attack. You can use your Firefly to knock out most of the soldiers in the surrounding buildings, then return to the supply point to replenish your ammo.
Fang-Yin resides in the uppermost satellite room of the structure, in the large glass bubble that's the most prominent feature of the building. There are plenty of soldiers on the outside of the building, but you don't have to clear the entire map out; most of the hostile enemies on your map will be on the ground level or in the highway that runs under the building, so they won't all be able to shoot at you. Tackle immediate threats first.
Getting to and killing Fang-Yin will be difficult, as there are only two entrances to the room, and the walkways in the middle will prevent easy delivery of rockets and explosives. Clean out the bodyguards first, then jump up to the top of the room and rocket Fang-Yin to death.
Boss: Thadeous Oakley
Oakley is Shai Gen's PR manager, who runs the public relations campaigns that keep the company in high regard with the people. Nefarious evildoer! He deserves nothing less than death! Anyway, he resides in a PR center on the northeastern corner of the island. You can either approach through the tunnel in the front or by swimming around to the back of the island and blasting one of the sets of doors there. The rear entrance is slightly easier.
When you enter, clear out the car showroom (what is this place?) then find the stairs in the central pod-like structure and start working your way up. When you reach the room at the top, kill off all of the bodyguards, and try to get up to Oakley as quickly as possible. He's got a couple of panels that protect him from fire from below, so get behind those after rocketing him and use them to cover yourself from the bodyguard fire as you stomp him to death.
General: Dr. Baltazar Czernenko

Baltazar Czernenko is Shai Gen's research director, heading up their research into genetic experimentation. He's holed up in the P.C.N. Institute of Research, on the northwestern corner of the island, near the Comfortitude, LTD supply point. Assaulting the building from the rooftops is a definite possibility, although there are a lot of guards on the rooftops, including some with rocket launchers and heat-seeking Fireflies. If you want to have an easier time infiltrating the base, head just to the northeast of the facility. You should see a small bridge passing over a paved road leading underneath, near a race marker and a small lake. If you head underneath the bridge, you'll be able to infiltrate the tunnels underneath the main research facility. When you get underneath the main, circular building, start jumping up and throwing cluster grenades onto the upper walkways there, concentrating on the northwestern and northeastern walls. That's where most of the locked doors here are; busting them open will release the Freaks, genetic experiments that have no reason not to attack the guards there. Sowing some discord will make your job a lot easier.
Unfortunately, it's a bit difficult to actually infiltrate the base from these tunnels, so you may have to return outside and head back in through the normal entrance, which is a small underground passage on the northeastern side of the main base. Czernenko is on the uppermost walkway here, hidden behind a heavy iron door. Blow it with a grenade, then start taking down his guards before finishing off the man himself. Killing Czernenko will reduce the strength of the kingpin's guards.
General: Vitaliy Rzeznik
Rzeznik is Shai Gen's security manager. He's one of the easier kills in Shai Gen, and is located in the large circular structure on the eastern side of the island. On your map, you'll see that it’s connected to the mainland by three primary roads from the west.
If you want, you can start running up through the roads and assault the base from the bottom up. It's got a large interior, so it'll be difficult to hide as you ascend, but not impossible. It's far easier to go from the top down and scale the building to reach the parking lot on top first. There are a number of places to make this jump (so long as you have level four agility), but the easiest is probably to dive in the water and make your way to the southeastern corner of the facility. Jump up the rocks until you reach a glass-lined walkway, jump up from there to a group of airconditioning ducts, then jump from those to the structure's roof. On the western side of it, you'll find a glass corridor that will lead you down to Rzeznik's office. Kill him, then return to the roof and jump into the water to make your escape.
General: Mrs. Timbol
Mrs. Timbol is responsible for Shai Gen's recruitment efforts, and runs a large training facility in the middle of the southeastern island under Shai Gen's control, to the west of the Intellicenter supply point. Spawn there and head towards her lair.
There are a number of possible points of entry to Timbol's little fort, but the easiest way to get to her is to approach from the rooftops. Spawn at the Intellicenter supply point and start jumping to the west along the rooftops there. Eventually you'll come around to the northern side of the compound. Timbol is located in the central glass room in the middle of the compound. If you look below you, you should see a glass walkway leading north from her glass chamber. If you jump from the building to the stairs leading up to the glass walkway, you can bust the door in front of it, eliminate her guards, and kill her, without having to deal with most of the soldiers in the facility. There are some side passages to the east and west that are unpopulated, allowing you to recharge your health if need be.
Killing Mrs. Timbol will eliminate some of the guards at Wang's secret hideout.
General: Colonel Axton Cowell
Axton Cowell is responsible for providing personal security for Wang, as well as coordinating Shai Gen's defensives at their various buildings and bases. He resides in a skyscraper on the western side of the city, to the west of Wang's personal skyscraper in the middle of the city. It's right in between the Bubble and Stripey's Café supply points.
There doesn't appear to be any easy way to approach Cowell; the building is too tall to jump to, and the walls are sheer and unclimbable. You'll have to go in the hard way, by assaulting the guards in the main lobby. Bring grenades, as there'll be a lot of them! When you rush into the main lobby, get to the rear of it as quickly as possible and hit the button for the elevator, then go through the doors that open and hit the button there to start the lift's ascent.
The last five stories or so of your climb will be difficult. Plenty of soldiers, not many places to hide. Run up the ramps and hide behind the wall panels that separate them from the center of the room until your shields regenerate. If you wish, you can jump up from level to level in the middle of the room, but that will open you up to all kinds of gunfire. If you wind up dying, don't fret; if you make your way back here quickly, most of the soldiers you killed will still be dead.
When you reach an apparent dead-end, note the balcony; you can jump up the walls here to reach the roof of the building, where most of the bodyguards are located. Clear them out, jump up to the dome atop the building, and start chucking in cluster grenades. When the bodyguards have been thinned out a bit, kill off Cowell to almost completely neuter Wang's guards.
Kingpin: Wang
Wang is, obviously enough, going to be the toughest challenge you face in Crackdown. The kingpin of Shai Gen is holed up in a mansion in the center of the district, and is protected by hundreds of powerful guards. You'll want to be equipped with an HMG, a Firefly, and cluster grenades before heading inside. Possessing the fourth level in as many skills as you can get is a good idea, as well. Except for driving, obviously.
There's no super secret shortcut to Wang; you have to fight your way up most of the tower where he's staying. That said, you can cut some of your trip down by spawning in at the Stripey's Café spawn point. Jump to the east to the nearby building, then look at the next building over to the east. See all the pink stripes on it? You can jump to those and hold onto them as you scale the building. When you reach its top, jump to Wang's skyscraper and grab onto the small handholds on the south side, just underneath the point of the building where it slopes outward. If you grab onto the handhold just underneath this slope, you can jump up onto it and make your way around to the building's west side, where you can hop over some railings to reach the interior.
Inside the building, you'll be in a small security office. Killing everyone and heading upstairs will reveal a larger church-like area with plenty of golden bells. Jump to one of the upper walkways, then start taking the stairs up to the top of the room until you can jump to the bells. On one side of the room, a walkway descends from the ceiling, so jump there and continue your ascent.
When you pass through the Asian-styled rooms with thin walls, you can find a set of steps leading up to the building's roof, where Wang holds court. He's atop a small pagoda with plenty of bodyguards, but more often than not, if you hit him with a Firefly rocket, he'll fall to the ground and be killed by the fall.
The Final Fight
The remainders of the Shai Gen soldiers are holed up in the streets near the Comfortitude, LTD. supply point. Finish them off to clean up Pacific City once and for all! The ending cinematic will play after this is done, and you can rest easy in the knowledge that you've helped this metropolis become a bastion of safety. Or not; if you select the Crimes On option when you reload your game, you can respawn all of the roaming criminals in the city.
Achievements
At the moment, there are only 900 achievement points available in Crackdown, with the remaining 100 points to become available as a part of free downloadable content in the future.
| Name of Achievement | Task | Point Reward |
|---|---|---|
| Agency Explosives Expert | Reach level four Explosives. | 20 |
| Agency Athlete | Reach level four Agility. | 20 |
| Agency Wheelman | Reach level four Driving. | 20 |
| Agency Brawler | Reach level four Strength. | 20 |
| Agency Marksman | Reach level four Firearms. | 20 |
| Master Agent | Reach level four in all skills, then max out the skill meters. | 40 |
| Roadkill King | Run down 175 gang members. | 15 |
| Firing Squad | Kill 500 gang members with gunfire. | 15 |
| Bare-Knuckle Brawler | Kill 150 gang members with thrown objects or unarmed attacks. | 15 |
| Mad Bomber | Kill 500 gang members with explosives. | 15 |
| Untouchable Agent | Kill 200 gang members without dying yourself | 15 |
| Take Me To Your Supply Point | Unlock a supply point anywhere in the city. | 10 |
| It's Good To Be Connected | Unlock all supply points in the city. | 30 |
| First Blood | Eliminate the first of 21 gang bosses. | 10 |
| Los Muertos Intel Master | Locate all Los Muertos bosses. | 10 |
| Los Muertos Cleanser | Kill all Los Muertos bosses. | 20 |
| Volk Intel Master | Locate all Volk bosses. | 10 |
| Volk Cleanser | Kill all Volk bosses. | 40 |
| Shai Gen Intel Master | Locate all Shai Gen bosses. | 10 |
| Shai Gen Muertos Cleanser | Kill all Shai Gen bosses. | 50 |
| The Trifecta | Kill all bosses in the game. | 50 |
| Body Juggler | Keep a body in the air for 10 seconds with explosives. Even with the Firefly, this can be difficult to pull off. Your best bet might be to try this on one of the soldiers on tall buildings in the Shai Gen area. | 20 |
| Car Juggler | Keep a car up in the air for seven seconds with explosives. A chain explosion of cluster grenades can sometimes pull this off, if you give them plenty of room to move; try pulling it off on a freeway. | 20 |
| Hazardous Hangtime | Jump in a car and stay airborne for six seconds. Taking a ramp truck up into the hills and hitting it with a suped-up Agency SUV may be required for this. | 10 |
| Driving High | Achieve a height of 115 feet or more in a vehicle. As above, using an Agency SUV and a ramp truck may be required. | 10 |
| Front Flipper | Execute two forward flips in a single jump in a vehicle. | 20 |
| Timed Stunt Driver | Execute six car stunts in 60 seconds. | 20 |
| Road Warrior | Complete all 14 road races. | 30 |
| Ring Leader | Drive through all unique Stunt Markers. | 20 |
| Repo Man | Commandeer 100 gang-controlled vehicles. | 10 |
| Stunt Driver | This is a collection of five sub-achievements. You have to complete a front flip, a back flip, a left barrel roll, a right barrel roll, and a 200-foot jump in a vehicle. You don't have to do these all at once, but you need to do all of them to unlock the achievement. | 20 |
| Rampage | This is another multi-achievement achievement. There are six tasks to complete to unlock this achievement, as detailed below. | 20 |
| Vehicle Destruction | Blow up 25 gang-controlled vehicles in 60 seconds. | See above. |
| Bare-Handed Killing | Kill 15 gang members with your bare hands in 60 seconds. | See above. |
| Shooter | Shoot and kill 15 gang members in 60 seconds. | See above. |
| Explosivo | Use explosives to kill 25 gang members in 60 seconds. | See above. |
| Vehicular Homicide | Use a vehicle to kill 10 gang members in 60 seconds. | See above. |
| Poppin' Poppin' My Tires | Pop 20 tires on gang-controlled vehicles in 60 seconds. | See above. |
| Airtime Assassin | Kill five gang members in a single jump, while airborne. A simple matter when you start running across the rooftop Shai Gen soldiers and you have a rocket launcher. | 10 |
| Shot-putter | Throw any object other than a grenade 205 feet or more. | 10 |
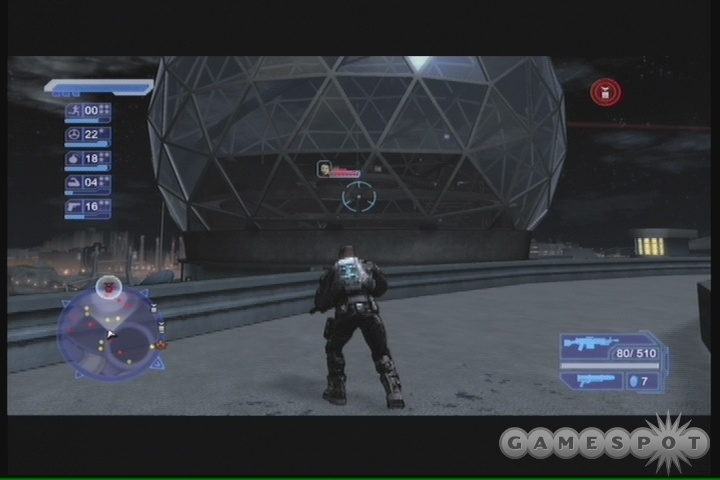
| Global Impact | Kill 15 gang members using the Observatory Globe. You just have to find it first! | 15 |
| Chain Banger | Blow up 100 explosive objects in 60 seconds. The densest collection of explosives seems to be around the docks in the Los Muertos district, but | 10 |
| Double Trouble | Complete one mission in co-op mode. | 10 |
| Tag Teamer | Complete all missions in co-op mode. | 40 |
| Over Our Heads | Complete all 12 Rooftop Races. | |
| High Flyer | Jump up to the top of the Agency Tower. | 10 |
| Base Jumper | Jump off of the Agency Tower into the water below. | 10 |
| Orb Hunter | Collect all 300 Hidden Orbs. | 50 |
| Free Runner | Collect all 500 Agility Orbs. | 50 |
Got a news tip or want to contact us directly? Email news@gamespot.com
Join the conversation