Brothers in Arms: Road to Hill 30 Walkthrough
Brothers In Arms puts you in the shoes of Matt Baker, a member of the 101st Airborne Infantry who's been dropped into France in advance of the D-Day Invasion. If you want to survive through the first week of the invasion, you'll need to learn how to command your squad, which weapons to use, and how to maneuver through the countryside. The GameSpot Walkthrough is just what you're looking for!
Design by Collin Oguro
t would take a lot by this point for a game to distinguish itself from the pack of World War II-themed shooters, but luckily, Brothers in Arms has a number of features that help it set itself apart, most notably its realistic portrayal of squad tactics. Instead of sending you rushing towards the German line with nothing but your wits and an M1 Garand, Brothers in Arms supplies you with something much more valuable: allies. As you play, you'll be able to take command of up to six individual soldiers who'll go where you tell them to go, shoot at what you want them to shoot at, and otherwise follow your orders to the letter.
You're going to need said teammates, though, as the enemies in Brothers in Arms are going to prove to be a handful. The German soldiers here will take cover, attempt to flank you, and be aware of your own attempts to flank them and react accordingly. In order to take them down and complete your objectives, you're going to need to know how to order for suppressing fire, how to move your teams around to an enemy's unprotected flank, and most importantly, how to keep your soldiers and yourself alive while under fire from large numbers of enemies. That's where GameSpot's guide to Brothers in Arms will help you out; in addition to our full walkthrough, we've got suggestions ordering your teams around, tips for utilizing your own character to maximum effect, weapon descriptions, and helpful videos for the game's hardest segments. Enjoy!
Combat Tactics
Weapons
Whether in multiplayer or singleplayer, you're only going to be able to pick up and use two weapons at a time. You won't be able to pick which weapons you start out with, but you will be able to exchange a weapon that you don't like for a new one after you kill an enemy or after one of your soldiers dies and drops his weapon.
In general, you're going to want to have one weapon that's accurate at long range and one weapon capable of automatic fire for short range encounters. (There are also special situation weapons, such as sniper rifles and rocket launchers, but these are encountered quite rarely and only when you actually need them.) We'll discuss some of your options here.
Accurate Weapons
When you have to hit a German in the head at 200 yards, you're going to need a weapon that you can hold steady and that will fire accurately at a distance. There aren't a large number of these, so your options are limited.
M1 Carbine: The M1 carbine is going to be one of the first Allied weapons you're issued at the beginning of the early missions, and a decent weapon it is. It has a large clip of 15 rounds and can be fired in semi-automatic mode, but it has less range for accurate fire than do most of the other weapons in this category. After you clear the first few missions, you'll start getting the M1 Garand at the beginning of levels, and won't see the Carbine any more.
M1 Garand: Like the Carbine, the M1 has semi-automatic fire, but for the purposes of firing at range, this isn't very useful, as there's a significant amount of kick from each fire, so if you want to actually hit something, you'll need to fire, then wait for your aim to center back on your target before firing again. You'll be able to zoom in a decent distance when aiming down the sights, though, which should let you scope out the heads of your foes from a good way off, even when they're hiding behind cover.
K98 Rifle: The favored weapon of many German infantry, the K98 is worse than the Garand in most ways: it's bolt-action, meaning it can't fire as quickly; there's only five rounds per clip; and you can only find it by picking it up off of dead Germans. Fortunately for it, though, you can zoom in a bit further than you can with the Garand, giving you the ability to hit enemies a bit further away. This alone generally makes it a better choice for one of your weapon slots, although the decision between this and the Garand will depend on personal preference a bit.
Automatic Weapons
Brothers in Arms isn't Call of Duty or Medal of Honor, though; if you attempt to rush forward and take out enemies by yourself, you're going to get killed quite quickly, even if you do have an automatic weapon at your side. That said, if you flank an enemy and can get close to them without having them notice you, then an automatic weapon will let you mow them down without having to worry about delays between individual rounds. Automatic weapons are notably less precise than rifles are, though, so you'll want to aim down the sights and get your targets in view before you squeeze off a clip.
M1A1 Submachine Gun: The M1A1 is going to be the first automatic weapon you receive in the game, and it'll generally be one of the two weapons you get at the beginning of the missions throughout. For an automatic, it's not bad, but it does suffer from poor ammo capacity (it can only hold 20 rounds) and poor accuracy at anything but very close range. When you can, you'll want to trade up for a German SMG.
BAR: The Browning Automatic Rifle is a powerhouse weapon, and probably the most preferable automatic weapon you can find. Although it has the same ammo capacity problems as the M1A1, it's much more accurate than any of these weapons when firing single bullets or short bursts. It also seems to have more stopping power than they do, so shots that land will do more damage. That said, the BAR is a pretty rare weapon to come across, unless one of your assault team soldiers bites the dust and drops it, so enjoy them when you do manage to find one.
MP40: The MP40 is going to be the most popular automatic weapon for the German soldiers in the game, and you'll be able to easily tell who has one thanks to the distinctive sound it makes. It has the same accuracy problems as the M1A1, but benefits from the presence of a much larger clip (32 rounds in all), allowing you fire for a longer space of time without having to reload, which is especially important when you're trying to suppress an enemy team, where sustained fire is more important than the power of the shots.
Stg44: If you can't find a BAR, then the Stg44 is likely going to be the best alternative. It's relatively powerful, more accurate than an MP40, and has a similarly large clip (30 rounds). You won't find these until the last few missions of the game, though.
Using Your Squad
Brothers in Arms isn't your typical shooting game; rather than place you in the role of a rush-forward-and-kill-everything superman, you're going to be in charge of two teams of soldiers, and your ability to complete the missions given to you will depend on your ability to competently order them around the battlefield.
Commands
You have four basic commands you can use on your teams: form up, move, suppressing fire, and assault.
Form Up: When you command a squad to form up, they'll automatically abandon their current post and attempt to reach your position. When they do so, they'll follow you around the map as best they can, generally staying a bit behind you. This is most useful when you don't have any hostile targets on your screen; when you're under fire, it's much better to manually order your teams to move where you want them to be.
Movement: A movement order will command the highlighted team to move to the target area. While in transit, a team will be quite vulnerable to enemy fire, although they themselves will attempt to fire on any enemies in their line of sight, which can help keep said enemies suppressed during the movement. When a team reaches the point at which you've ordered them, they'll automatically move to take cover from any incoming fire, but you'll still want to be as precise as possible when ordering them to move.
Suppressing Fire: If a team can see an enemy group, or knows their general location, they'll automatically take potshots at them without being told to, but you can intensify the fusillade by ordering them to open fire, but, you know, for real this time. When a team opens fire on a target, they'll really unload on them, and fire all their guns at once in an attempt to suppress the target. When a target group of enemies is suppressed, the icon above them will turn grey; when this occurs, the group will duck behind cover and will be much less likely to return fire, or really do much more than hide.
Your fire team is a better bet for suppressing enemy groups than your assault team is, due to their longer-range weapons. The assault team can suppress targets, but they'll need to be closer to their target to do so. Suppressing fire doesn't work equally well on all targets, though; its efficacy depends on the relative size of the groups (a one-man fire team will have a hard time suppressing a three-man German group, for instance), and relative cover (an MG that's completely surrounded by sandbags will be much more difficult to suppress than enemies ducking behind a tree.)
Note that the fire command can be combined with a move command, if you wish to have a team open fire on a target immediately after reaching their designated move spot. To do so, just issue the move command first, then issue the fire command while the team is still en route. When they reach their destination, they'll immediately begin blasting their target from whatever cover they've reached.
Assault: If you desperately need to clear out an enemy bunker, you can use your assault command. When a team is ordered to assault an enemy position, they'll ditch their cover and rush towards the targets, attempting to overrun them before they know what hit them. The main problem with this is the fact that you'll usually have to run across open space before you can get to the targets, who'll usually still be behind cover and therefore able to fire away at your assaulters without much fear of return fire.
If you want to successfully launch an assault, there are some things to keep in mind. First off is the value of having a suppressed target. If the target of your assault is ducking behind cover due to fire from your fire team, then they'll be much less likely to stand up and fire at your assault team as they approach. Secondly, you'll almost always want to at least attempt to flank your enemies a bit before attempting to assault them; charging head-on will usually result in plenty of dead Americans, especially when you're dealing with heavily fortified positions like MG nests. Finding a way to get on the side of such foes will help reduce the casualty count quite a bit.
For what it's worth, we never found Assault to be all that useful when we played through the game on Difficult mode. It can be useful, but will almost always result in damage to your assaulting soldiers, and most enemy positions can be flanked and eliminated with fire if you're willing to suppress them and find a way to their sides.
Using Cover
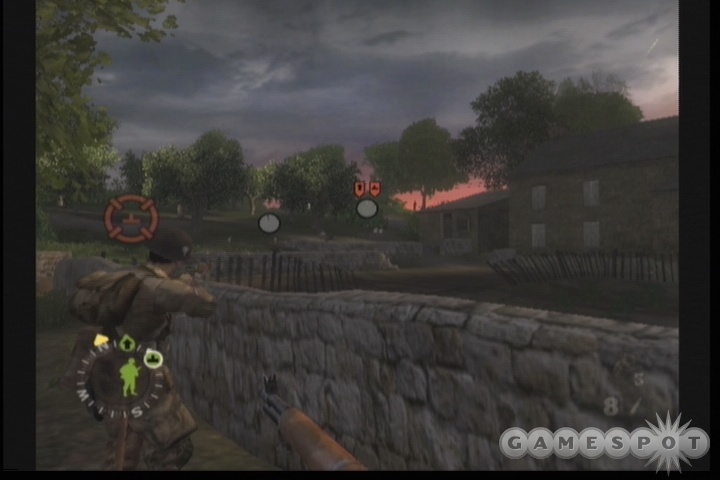
If you want to survive firefights and push through to the end of missions, you're going to have to have your teams take cover, rather than stand out in the open and get shot. Walls, fences, overturned carts, trucks...you're going to have plenty of options when it comes to cover in Brothers in Arms, but not all cover is made equal.
You have two main types of cover to choose from: high and low. High cover consists of things like trucks, 8-foot-high walls, or large berms of earth. While behind one of these pieces of cover, your soldiers will be invulnerable to fire coming from the other side, but won't be able to return fire.
Low cover, on the other hand, consists of things like rows of barrels, fallen trees, chest-high walls, and the like. When hiding behind low cover, your soldiers will be able to fire on enemies within their line of sight. They'll also take fire from said enemies, of course, but unless the enemies completely flank them or come from behind, they shouldn't ever actually take damage from gunshots. Of course, the same is mostly true of your enemies, making for many situations in which a team of your and a team of Germans get into a standoff, with each side emplaced behind cover and neither side taking damage. This is where you come in....
Control Yourself!
One of the good things about Brothers in Arms (as opposed to Full Spectrum Warrior, the game closest to it in spirit) is that you can take your character, Matt Baker, and act as an independent team, using your weapons to either suppress or kill enemies that your fire teams can't handle. Doing so will help you deal with recalcitrant enemies that would be too difficult for your other teams to handle.
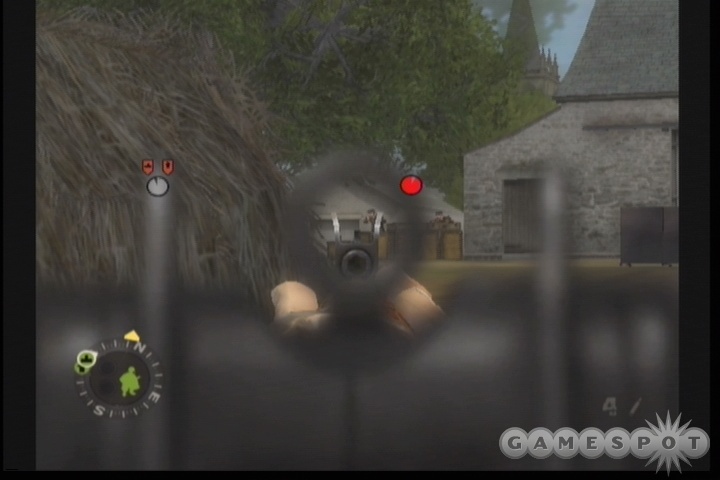
Sniping: In most cases, the best way to engage enemies with Baker is to whip out a distance weapon, like your Garand or a K98 rifle, and attempt to snipe them from a good distance away. This will reduce, but not eliminate, the amount of damage that Matt will take from return fire, and also let you engage without having to shuffle around to a position where your automatic weapons would actually be able to hit your targets. In order to shoot from a distance, though, you'll have to be able to actually see your targets, meaning that you may not actually want them to be suppressed by your other teams.
The basic process for shooting at a distance goes something like this: get one of your teams to suppress your targets so that they duck behind cover, then gradually ease yourself into a position where you could see the targets if they weren't ducking. When you're ready, shift your teams' fire to another target, or cancel the suppression order, then wait for the targets to pop back up before shooting them. You can also try to shoot them while they're suppressed, since they pop their heads up to take a look around every few seconds, but you won't have as much time or as big of a target when firing at a suppressed target vs. a non-suppressed one. Of course, you'll be much more likely to take damage when firing at a target that's not suppressed, but if you can stay out of their effective range (which isn't that long for most enemies) then most of their shots will miss.
The main problem here is that enemies will always shoot at Matt rather than your teams if they can see you, even if you're further away from them than your fire or assault teams, meaning that you really will have to be a good distance away before attempting to leave cover to take them on.
Suppression: Matt can also be used to suppress enemy groups to enable your own teams to move without the threat of harrassment. This is most easily done with an automatic weapon with a large clip like the MP40; just unload your weapon in the general direction of the enemy, and you should be able to get them suppressed with a single clip, depending on the size of the group and their cover. Although your fire team or assault team will be preferable for suppression work (thanks to the fact that they have infinite ammo), sometimes it'll be easier to just move yourself around to a position from which you can suppress an enemy, then get your team to follow you around to your cover to take over the suppression duties.
Flanking: Lastly, Matt can obviously flank foes with the best of them. If you can suppress a target group with your fire team, sometimes it's actually easier to attempt the flanking maneuver yourself rather than ordering your assault team to do so. This is mostly because of the fact that you're a human being (unless you're a robot from the future bent on bending us all to your will, of course), with human reflexes and the ability to adapt to changing circumstances. Not to say that the teammate AI in Brothers in Arms isn't good - it's usually quite good - but if you happen to be moving forward to flank an enemy and spot another enemy group moving to flank you, you'll usually have the presence of mind to retreat and rethink the situation, whereas your computerized teammates wouldn't have much choice but to sit there and be flanked. Note that most German teams will realize that they're being flanked and react accordingly, either by shifting position or ignoring your teammates and firing on you, making this a risky process.
Multiplayer Tips
The multiplayer variant of Brothers in Arms is an interesting, objective-based version play on the gameplay mechanics from the singleplayer campaign. Depending on the map and server settings, you'll be able to take a team of soldiers out into the wilds of France to either attempt to complete an objective, or prevent your opponents from completing theirs. This section of the guide is intended to give you a few basic tips to get you started in your online skirmishes.
Know Them Maps: Unfortunately, multiplayer Brothers in Arms has a somewhat steep learning curve. Unlike straight deathmatch, where you run around and kill things, BiA online rewards players for knowing where your objectives are and how to best achieve them, or how best to harry your opponents. What this boils down to is knowing the maps; the first time you play a certain map, you're likely to get creamed by one of the online pros who's played it a dozen times and knows all the best spots for defending and moving. In-game experience is rewarded, so if you get frustrated the first few times out (and you likely will), keep trying until you've got a better handle on the layout of each level.
Use Situational Awareness: The Situational Awareness view that's available in the single-player campaign can also be used in the multiplayer game, although it obviously doesn't pause the action. Your teammate and his squad should always be visible on it, regardless of distance, but the important thing to note is that your enemies will also be viewable on it if you've spotted them in-game. If you can quickly check it to keep aware of their movement without having to pop your head up from behind cover, you should be able to get an idea of where to move or position yourself to ambush or attack them. Of course, they'll probably be thinking the same thing...
Play The Objectives: Many missions will have both objectives that need to be moved, and an exit that the objectives need to be moved to. The key here for the defenders is not to just situate yourself at the exit and try to lock it down; you have to root out the objective items and hopefully cause your enemies to drop them (by killing them) before setting up a defensive position near them and daring your opponents to come get them. Defensive positions are usually easier to maintain than offensive movements, assuming you pick them correctly. Try to get to someplace where you have line of sight to the objective, but can't be easily flanked, such as a bit of cover near one of the exterior edges of the level.
Mind Your Teams: Your AI teammates will do their jobs fairly well, for what it's worth, but they have the same weaknesses as they do in the singleplayer campaign, namely a nearly complete inability to hit soldiers behind cover and poor accuracy overall. If you leave them unattended, and an opposing player happens to stumble across them, then they'll likely get picked off by distance fire without having the opportunity to kill the enemy, especially since you have to monitor their targets and order them to fire manually. (They'll still fire at things they see, but not nearly as fiercely as when you order them to do so.)
In order to use your teams to maximum effectiveness, then, you'll probably want to keep them pretty close to you. Don't discount their value as bait, though; if your enemy does happen to get a bead on them, they'll often betray their own position by firing on them.
Walkthrough
Mission 1: Rendezvous With Destiny
Objective: Get to the nearest crossroad.
The opening to the game is more of a tutorial level than a real challenge; if you have Hints and Training turned on in your Game Options menu, you'll be given tips on how to move around, how to fire your weapons, and so on and so forth. This is true of the first few missions, but especially so for Rendezvous With Destiny.
After landing in Normandy, you'll soon meet up with Platoon Sergeant Hassay, a higher-ranking officer than you. You'll be able to command soldiers soon enough, but for now, it'll be Hassay doing the commanding. He won't force you into specific areas of the map, so you'll be able to move as you like, but you'll still have to follow him around if you want to end the mission.
Although your weapons were knocked off of your suit during the jump, Hassay has a .45 pistol that he'll lend you. It's not a powerhouse weapon, but it'll do fine for killing the two Germans that you come across in the course of the level. They're not just ordinary Germans, though; they're magical Germans with weapons that disappear as soon as they die, forcing you to soldier on with just the .45 at your side. There aren't any more enemies in this mission, though, so follow Mac until you reach another pair of soldiers.
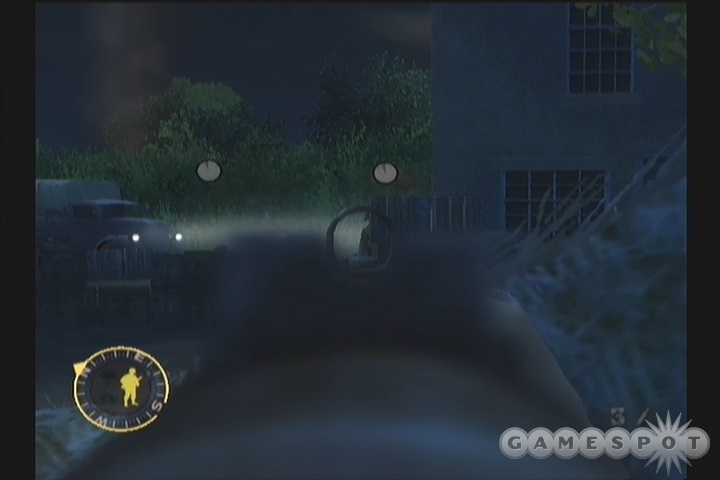
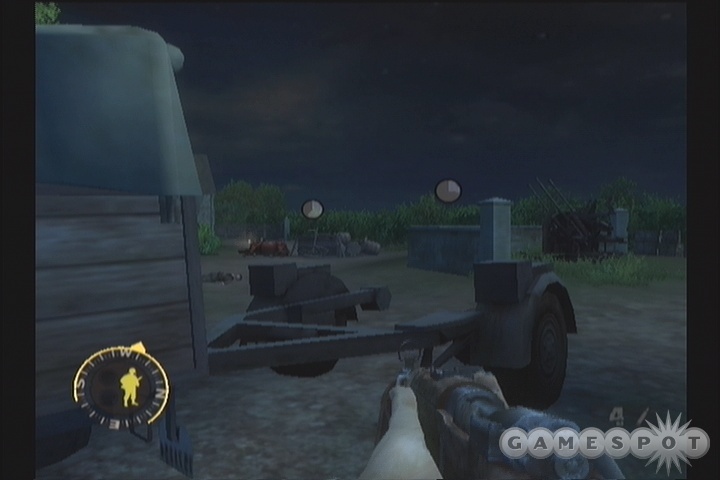
Mission 2: Silence The Guns
Objective: Follow Mac's Orders
Now that you're on the ground in Normandy, you'll have to get to the busy business of supporting the Allied invasion of France. You won't be able command any troops just yet, and your only weapon is the .45 Pistol that Mac gave you last mission, so you're not even going to be all that effective in firefights until you find something with a little better accuracy.
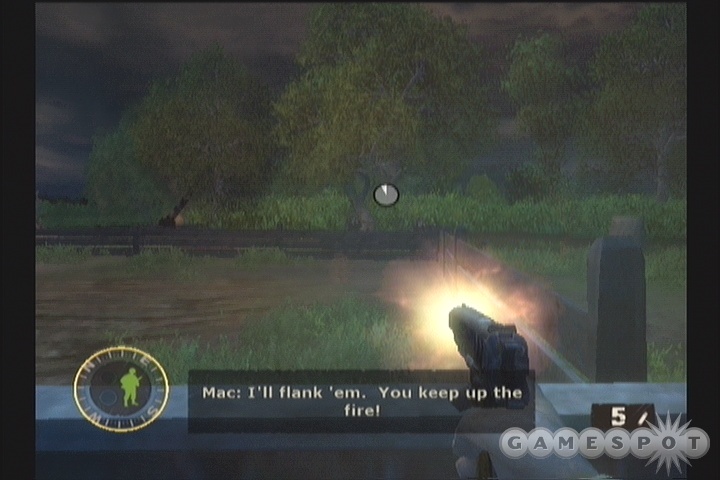
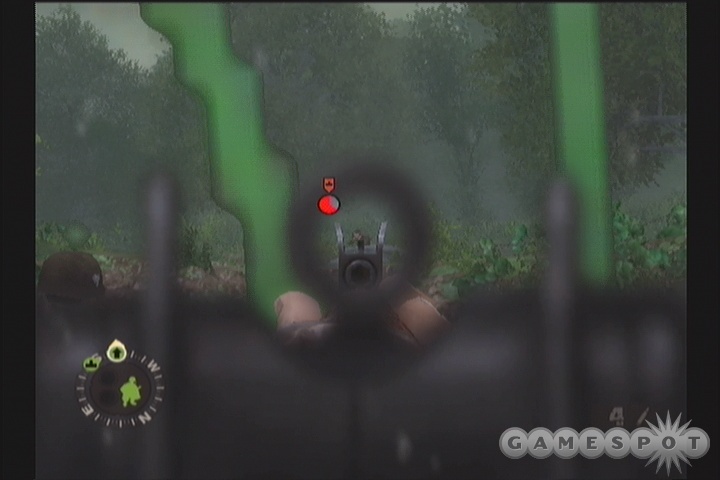
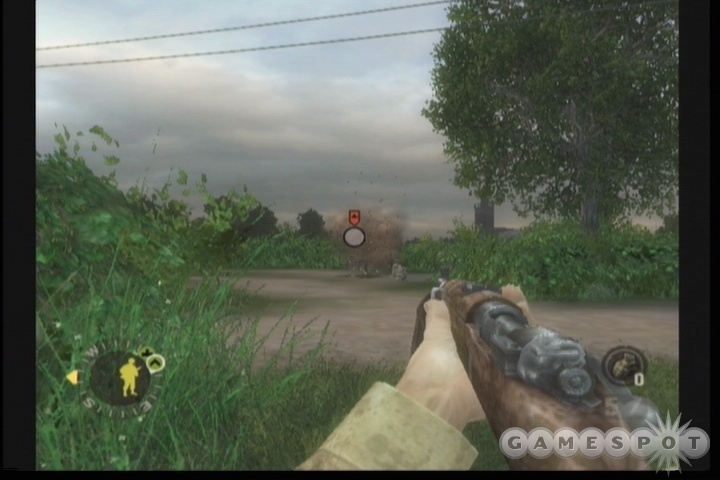
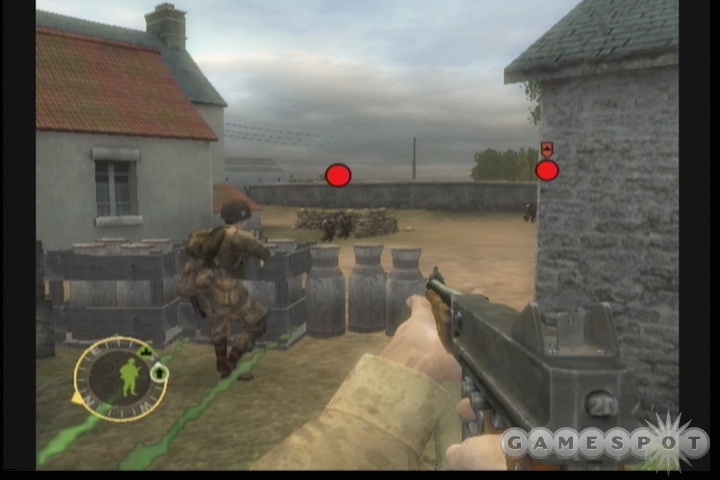
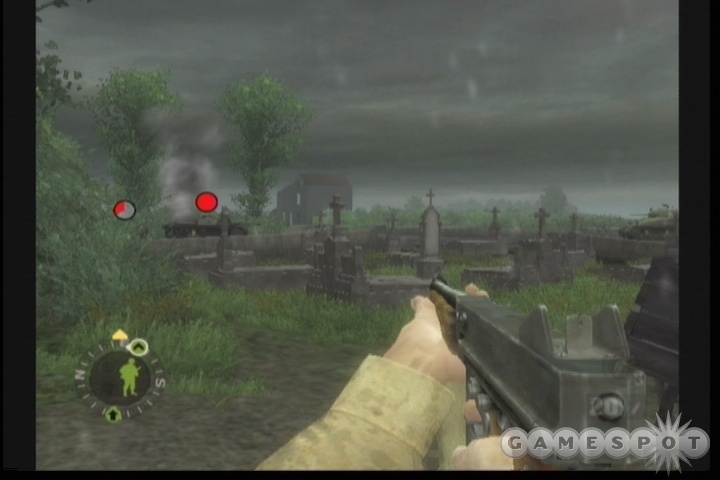
All you can do at the beginning of this mission is follow Mac and Leggett until they reach a farm zone. Your goal is to suppress the Germans across the way so that Mac can flank them and take them out, so get behind the low stone wall and start unloading your pistol rounds on them. You'll need to get used to taking cover while reloading, so try firing, kneeling, reloading, then popping back up and firing as rapidly as you can before repeating the process. It'll take a few clips of this before the Germans are suppressed, but when they are, Mac will handily pick them off, allowing you to move forward and grab one of their K98 rifles. This isn't going to fire nearly as rapidly as your pistol, but will let you make some precision shots when you're kneeling and aiming down the sights.
As soon as you get one, though, return to the stone wall; there are more Germans incoming. Leggett will start moving down to a building nearby, so follow him and start taking potshots at the Germans while Mac attempts to pin them down. You'll need to wait a few moments until Leggett and Mac both rush in towards the Germans; you'll be exposed if you attempt to move beyond Legget's position, so just wait for them to charge in and polish off the soldiers.
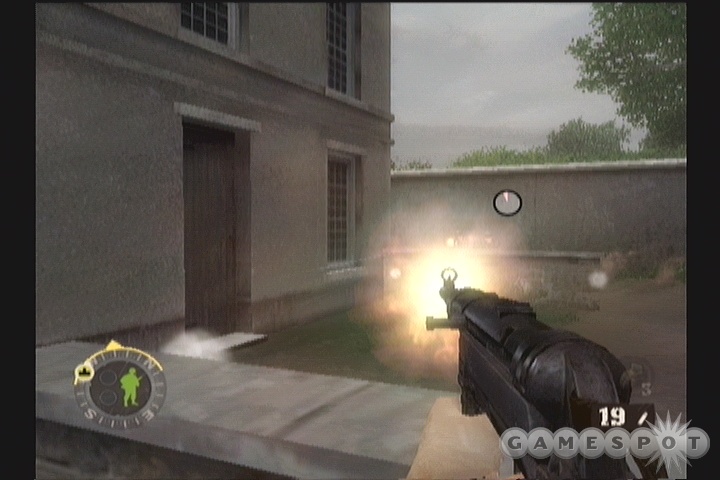
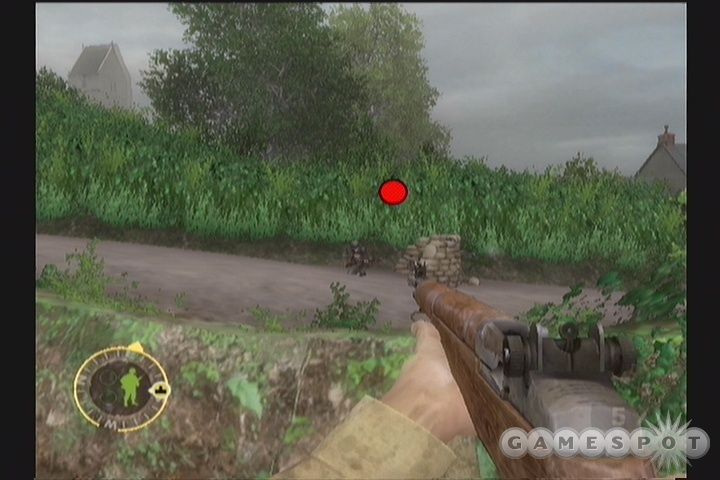
Next up are a pair of houses where two German groups will come rushing out of a truck. With the K98, you can likely pick off one or two of them from the same position as Leggett and Mac, so do so before attempting to flank. Leggett won't leave his position, so you'll be on your own; either left or right is a viable approach.
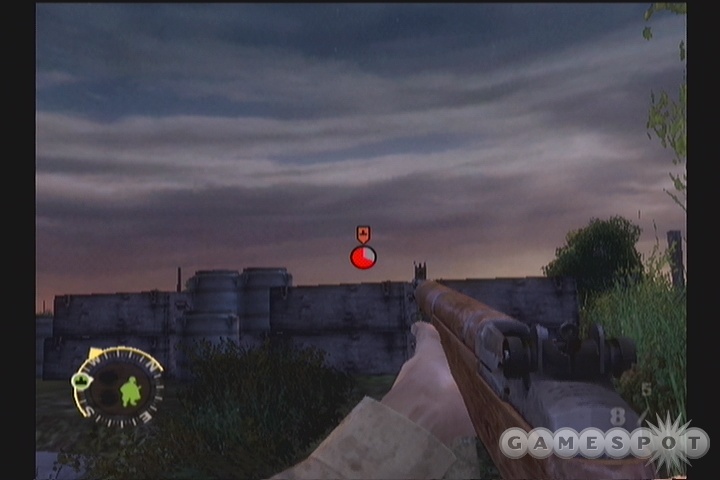
In the next farmyard, you'll come across an AA gun that you'll need to take out. Wait for Mac to fire here; he'll pick off one of the soldiers and suppress the rest, allowing you to flank to the left and remove the others from behind the lump of earth near the gun itself. After they're all dead, you'll need to blow the gun, using your handy explosive charges; follow the in-game tips for the precise button to use here.
Unfortunately, Mac will send you alone into the stable off to the right of the path after you've blown the gun. You'll need to kill two Germans inside by yourself, so proceed slowly but surely. If you can get behind cover inside the stable, then you'll probably be best off with the .45 as your weapon here, thanks to its ability to rapidly fire at the Germans.
When you're through the stable, you'll have to assault another anti-aircraft position, this time with three or four different German groups defending it. Mac and Leggett will rejoin you, of course, and quickly dispatch a group of soldiers that take up arms behind an overturned cart. When Mac orders you to flank, you'll have the option of proceeding up either the left or the right, but the right is far preferable; just jump the stone wall and get behind the car and use your K98 to start sniping away at any Germans that pop their heads up.
Mission 3: Ambush At Exit 4
Objective: Link Up with 4th Infantry Division at the Beachhead.
Your only ally for the beginning of this mission is Cpl. Hartsock, on a Fire Team, whom you will finally be able to command around. He'll be great for laying down suppressing fire on your targets while you attempt to flank them and take them out. Work your way through the tutorials here to figure out how best to use him.
When you're ready to move on, head towards the yellow arrow noted on your compass. You'll come to a farmhouse guarded by a pair of Germans. Hartsock can suppress them if you move him up behind cover and order him to do so; you can even help him keep them pinned down with your .45 or the M4A1 Carbine you seem to have found somewhere. When they've been suppressed, though, move around into the building to your right and use the window there to pop them off. If you wish, you can pick up one of their K98's by switching out your .45. It'll be less useful at close range, but will have better accuracy when zooming down the scopes. When you're ready to move on, get Red back on your tail and start moving on.

Your next little challenge will be to pass through a field ringed by stone walls. The horsecart near the entrance will be an ideal position for Red to lay down suppressing fire while you flank right and get into a position to shoot the Germans from their side. When they're down, move Red up to the wall they were hiding behind (but on the opposite side from their corpses), then move forward a bit to trigger another German or two. Around the corner is the first mortar team; if you send Hartsock up in front of you, he should be able to take them down easily.
Linking Up With Mac
The flooded field beyond the mortar team is going to be difficult to conquer with just two men. There are two separate teams of Germans here, each with two soldiers. What we found to work was to have Hartsock suppress the nearest group of Germans, then shift his fire to the other team until the nearest ones popped up. They'll be well within range of your K98, so try and snipe them out while Hartsock is keeping the other team pinned. After they're gone, you can move Hartsock up to a set of stones nearer to the second team, then order him to charge towards them while you keep them suppressed with your M4A1.
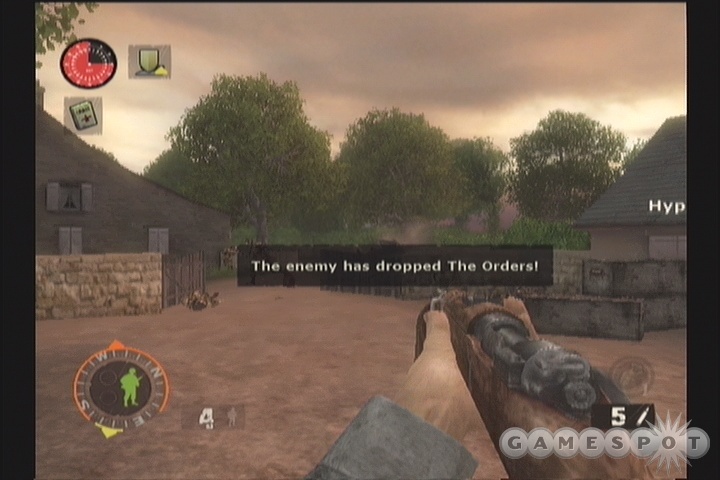
Around the corner, you'll meet up with Garnett and Allen, an independent assault team that won't follow your commands, but will still help you in your fight to secure the path to the beachhead. Numerous German conscripts are going to be running off the beach, so your job is to prevent their escape, preferably by killing them. Luckily, there's a Browning MG set up overlooking their escape route, so run up and grab it while keeping Hartsock on your six; he'll automatically take up a firing position and start plugging away at your foes. Your job as machinegunner is to start plugging away at the Germans that are coming at you. You've got infinite ammo and the gun can't overheat, so feel free to just depress the trigger and start wailing away at your targets. You can suppress enemies with just a second of fire, but they'll still be able to fire back at you, so you'll want to take out anyone with a clear view of your position. This means that you'll have to take out the rightmost soldiers first, such as the one behind the truck. There will also be three or four soldiers that continually attempt to come up the middle of your view, but they'll be momentarily vulnerable when they do so, so take the opportunity to pick them off.
After the situation settles a bit, you'll probably have one target to your right and two targets behind an overturned cart to your left. Your best bet to take these guys down is to send Hartsock in to assault them, starting with the one to your right. The two to your right are tough for him to handle, so you may be better off ordering him to move beyond their position. He'll fire on them as he moves by. Even if he dies, he'll come back next mission, so you can feel free to charge in with him, let him take the brunt of their fire, and come around on the side of the cart opposite to Hartsock.
After you kill the Germans in the floodplains, you'll be able to meet up with Mac and end the mission.
Mission 4: Objective XYZ
Objective: Defeat the soldiers at the German Barracks
Ah, Hartsock and you; what a pair. You guys are so good, Mac expects you to clear out an entire village of German soldiers all by your lonesome. Luckily for you, you have a couple of new weapons to use: a Browning automatic rifle, and the redoubtable Garand, star of stage and screen. The Garand is going to be decent for ranged work, with the semi-automatic capability that may save you in close quarters, while the Browning will be your weapon of choice for up-close-and-personal wetwork. You also have grenades.
Your first targets here are going to be a pair of soldiers camping out near a truck. Hartsock can suppress them easily enough, but they'll eventually retreat a bit, forcing you to shift positions. There'll also be a German attempting to flank you from behind the house to your east, so be ready for him with your Browning.
If the soldiers near the truck start to shift position, wrap around the eastern house with Hartsock and position him behind the barrels there. After he suppresses them, he can charge their position and finish them off.
When the initial soldiers have been polished off, more will appear on the main path of the village, including one who'll man a machinegun. We found it easiest to just run across the road with Hartsock trailing behind you rather than attempt to pin any of these guys down; you may get hit, but if you're fast you probably won't, and when you're in the first farmyard across the road, Hartsock will have an excellent firing position from which to take out the two Germans behind the overturned cart in the road.

You're next mini-objective will come in the form of a confusing trio of German teams. As you head through the yards of the farmhouses here, you'll eventually come to a stone wall with a gateless gap in it. Across the way are a set of stables; inside there's a single German whom you can probably spot if you zoom in with your Garand. You'll want to kill him with the Garand if possible, as it'll make the upcoming fight a lot easier to manage. Alternately, you can have Hartsock charge in and attempt to take him down, but he'll likely get wounded in the process.
When the German in the stables is out, move Hartsock up to the wooden fence outside the stable, so that he can cover the German fireteam and sniper in the window above. You can then walk through the stables and get an angle on the fireteam, at least; the sniper may require a bit more moving around before you have a line of fire on him. You can also enter the same building as the sniper and take him out at close range, if you prefer.
The last task here is to take out the machinegunner, but he won't be a huge threat to you, since you have such good sightlines on his position. If you wish, you can reach the same room as the sniper and use the alternate window in his room to shoot away at the machinegunner. Both he and one of the members of the fireteam will have dropped an MP40, a decent SMG weapon. It has a larger clip than your Browning, and will be easier to find ammo for, so if you wish to exchange weapons, we won't tell.
Assault the Farm
Across the way from the machinegun is a larger farm that's thoroughly overrun with Germans. We recommend that you set up Hartsock in position to the right of the truck, so that he has line of sight to each of the many German teams along the path to the southwest. Leaving him there will let him fire on those teams while you skirt around the houses to the north and flank them. There are three individual soldiers in your path, as well as a team of two that you'll have to take down to move on. A well-placed grenade will either kill them both or force them to duck, allowing you to peg them with your automatic weapon.
Reach the Garrison
You may be able to spot another German indicator to the southwest, but they'll be too far away to hit you at first. You'll need to charge up towards them, but be ready for a major engagement, as there are a lot of enemies in your path.
The first couple of groups will have taken up position around an overturned cart. Get Hartsock up to the nearby stone wall and use him as suppression while you do your best to pick off the troops with your Garand. One or two may attempt to flank you, so watch the southern wall and make sure that no one gets around to that side of yourself or Hartsock. If possible, try to kill all of the soldiers without bypassing the wall that you're hiding behind, as doing so will trigger more soldiers in the field beyond, and may encourage any remaining soldiers here to retreat to better cover, making for a more difficult tactical situation in the next engagement.
When you've cleaned out the soldiers behind the cart, move Hartsock up to the southern portion of the next field. There should be two more fireteams to take out here, with one being somewhat close and another beind a bit further down the path. You'll want to have Hartsock suppress the closer one while you move around and flank them from the northwest. After the first group goes down, move Hartsock closer up, then repeat the process on the second group of foes.
Wipe Them Out
Now that you've reached the German barracks, it's time to finish off the German company that you've come for. Begin by sweeping through the large house in front of you and blasting all of the guys there; they've sat down to lunch, so they won't be ready for your charge. You can send Hartsock in ahead of you if you want to save your ammo.
The fight in the farm courtyard won't be quite so easy, though, as you'll need to dispatch a large number of Germans in the stables here before you can end the mission. You're going to have a couple more soldiers at your side, albeit ones not under your command. We liked to keep Hartsock back a bit and have him take cover near the truck. He'll be able to take potshots at the soldiers that flood the courtyard, so long as you don't order him to fire on any single one of them. With him in place, we took up a position behind the wooden fence immediately adjacent to the stables. This let us fire on soldiers as they wandered into the courtyard, as well as those hiding on the other side of the fence itself.
You're going to need to take down 12 to 16 soldiers before you can group up with Mac and finish the mission. If you have any grenades left, don't hesitate to use them.
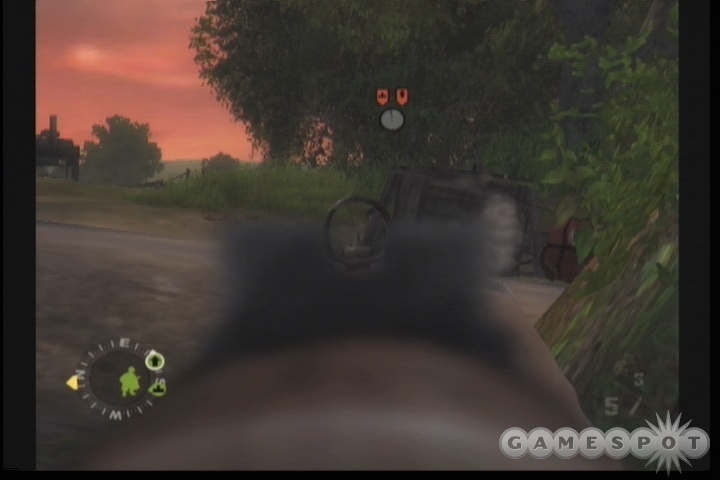
Mission 5: Foucarville Blockade
Objective: Secure the town of Foucarville
Turns out that Foucarville, which you thought was under Allied control, still seems to be in the hands of the Germans. It's up to you and a single three-man fire team to push them back out of town. It may sound like a task, but you'll find that a full three-man team will be more capable of suppressing enemies and of moving to different positions during a firefight, thanks to the greater concentration of fire they can bring to bear.
At the beginning of the mission, switch out your .45 pistol for the carbine near the dead soldier; it'll be a little more useful at range.
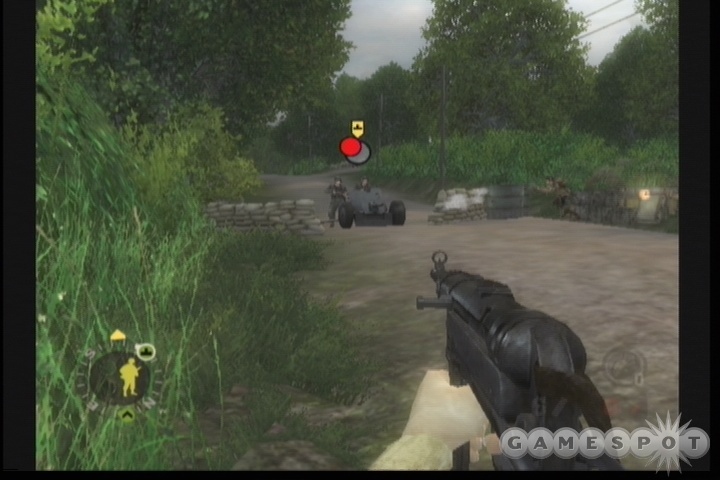
There are a few different ways in which you can assault the town, but the most sensible is probably to take your entire team and place them behind the truck in the road in the middle of town and use that as a base to clear out the main road. You'll come under fire from a couple of well-placed teams, as well as a pair of individual soldiers, but you can instruct your teams to suppress at least one target almost indefinitely, thanks to the fact that you'll outnumber your targets. If you order them to suppress the farthest fireteam, you should be able to sneak into the building to the left of the truck and snipe away at the nearer team with your Garand. If you come to a point where you can't hit any of the remaining soldiers, you can order your team to charge them and take them out.
Rather than head straight up the road, though, you'll want to return to the truck and head through the alley to the south of it. This will lead out into another flooded field, where a three-man German fireteam will attempt to fire on you. Your team can suppress them without too much trouble, allowing you to flank them to the left and hopefully get close enough to either use a grenade on them or just fire away until they all fall down. If you manage to get one or two of them down, you can also use a charge maneuver on them. When they're dead, you can grab an MP40 from one of their corpses, if you wish. It's probably going to be more useful to you than the carbine you got earlier.
Blowing the MG's
After heading across the road, avoid the northern branch from the crossroads, as it has at least one MG position set up overlooking it. Instead, head east a bit, and you'll find another path leading behind the houses that line the road. Two Germans will pop up, but you should be able to plow through them; just watch out for friendly fire from grenades in these close quarters.
When the Germans here are in the ground, continue moving through the yards until you come up against another pair of Germans; they'll guard a little path which you can use to flank one of the MG positions on the road. Take out both of the soldiers behind it. There's another MG position a bit further on, though; if you're good at chucking grenades, you can probably take both soldiers there out via explosives. Otherwise, you can probably just charge across the road towards the house to the west of the first MG. From there, you'll be able to flank a pair of soldiers in the garden as well as the Germans in the MG nest.
Hallowed Ground
Next up is the weed-strewn field near the church and the graveyard. There's a handy mound of earth near the entrance to the field, so station your troops there while you head east to the dirt road that runs between the field and the church. If you follow it to the north, you'll be able to easily flank the two German teams and take them out. If you softly chuck a grenade at them, they usually won't notice it's there until they're already dead.
The graveyard can be approached either from the steps to the west or from one of the gaps in the northwestern wall; the Germans seem to reposition themselves based on where you move. The gravestones offer plenty of cover, though, so it's not too difficult to suppress one of the teams while you sneak in and finish them off with an MP40.
Mortars!
Your next objective here is to man the MG42 that's been positioned in the dirt road and use it to fend off the numerous Germans that are coming towards your position. They'll come at you mostly from the field to the northeast, so concentrate your fire there and and take them out as they come over the fence. The second wave will attempt to come at you from the dirt road, in somewhat suicidal fashion, so blow them over with your machinegun and let your teammates finish off any flankers.
Next up is an assault on a pair of mortar teams. Unfortunately, there's not much you can really do against these guys save charge into the hole in the fence made by the first couple of shells and take them down head on. If you have all three of your fire team still with you, then try weakening the positions by chucking grenades at them before ordering them to assault. After taking both of them out you'll be able to meet up with Mac and finish off the mission.
Mission 6: Rommel's Asparagus
Objective: Destroy Eastern Field Poles
It would seem that a number of Army gliders are going to be landing in a field near where you begin the mission. Your task is to destroy a number of poles in the area to ensure their safe landing. Doing so is going to be a fairly complex task, though, thanks to the fact that the field is freakin' huge, and that the Germans have entrenched themselves with multiple MG42 positions.
To begin, form up your squad and move into the trench that runs along the back of the field. You'll eventually come to a small enclosure with a single gap in the wall; this will give your team a good field of vision over the field, including the first MG position, to the northeast. Taking the soldiers there out will be your job, so leave your fireteam be, sweep around to the east, and follow the small irrigation ditch around to the back of the MG bunker. If you can throw grenades accurately, try to get one into the bunker; they won't be able to run outside, so both soldiers in there will die, allowing you to move in and take over the MG42 they were using. There should be two groups of enemies across the way, including one solo soldier and a pair of troopers manning another MG position. If you're lucky, you can take them all out with your MG; if not, you may have to just settle for suppressing them while you send in your soldiers on an assault to wipe them clean.
When you've taken out the MG nest across the way, leave your soldiers where they are (so long as they're behind cover), then exchange your .45 for a K98 and start planting satchels on the poles in the middle of the field. There are three clusters of three that you'll need to take out, so deal with the ones closest to your position before moving towards your soldiers and assessing their situation.
Now, at this point, you should have six poles left to destroy, as well as two groups of Germans to the northwest; one manning an anti-air gun, and one that's firing on your fire team. The second group, the ones hiding behind a stack of lumber, will be your first targets. Be sure to suppress them with your fire team, then move them across the field for an assault. You may want to wrap around to the eastern pile of lumber to set up a crossfire before signalling for this charge, just to divert the German's attention momentarily while your boys are crossing the field.
After the first group of Germans have gone down, the soldiers manning the AA gun will likely leave their stations and start firing on you. An assault will again likely be your most efficient solution for these guys, but you may also want to try and chuck over a grenade into their little position to fluster them before finishing them off. When that's done, place a charge on the AA gun and any remaining poles to trigger the next objective. Some of the Germans may have respawned in the MG42 position across the field, but you should be able to safely ignore them and just work on getting the rest of the poles down.
Objective: Destroy Western Field Poles Now that the long slog of the eastern field is behind you, you can bask in the glory of a couple of semi-successful glider landings. No one pops out of them, so perhaps they were just launched for fun. Regardless, you need to make the western field safe for more of their ilk, so get moving.
You're going to face off against two groups of Germans at first; one in a bunker on the hill to the west, and one closer to you. The first thing you want to do is move your team up to the earthen barrier just to the left of where the glider crashed; if you do so, then tell them to suppress the closest German team, they may be able to take one of them out as they retreat. Your job during all of this should be attempting to take down the guys in the bunker with your K98. They're at the edge of your possible range, but they're both shootable. If your fire team is suppressing them to the point where you don't have a shot, move them around to the stone wall nearby so that they can get occupied with the other Germans there.
Unfortunately, the guys in the bunker will respawn over time, so you'll probably want to head south from your position and deal with the anti-aircraft gun and the other bunker there before dealing with the guys to the northwest. The second bunker here possesses another MP40/K98 pair, so try and take down the MP40 gunner with your own K98 before sending your troop in to assault the remaining soldier. From the earth wall near the bunker, your guys should be able to clear out the AA gun's defenders enough to make another assault action a done deal, but you'll have to head in through the gate a bit to the west. You may want to switch out your Garand for an MP40 if you can find one.
With the AA gun and bunker taken out, feel free to get your guys into a position where they can cover you and proceed to destroy the three or six closest poles, assuming there's no one that's actively firing at you. You'll probably have at least one more group of Germans to kill, so get into the trench that lines the western wall and creep to the north until you reach the two solders milling about by the truck there. An earthen barrier will let your fire team get pretty close; they should be able to kill the soldiers with grenades. After that, all you need to do is watch out for bunker respawns while you make your way through the field, destroying any nearby poles.
All this is just a recommended course of action, mind you; the bunker respawns here can change the situation in these fields pretty quickly. This can be a difficult fight, especially if you or your soldiers were wounded in the eastern field, but when you get the poles in the western field down, you'll be able to meet up with one of the woozy pilots of a glider to end the mission.
Mission 7: Action At Vierville
Objective: Clear the Town of Vierville
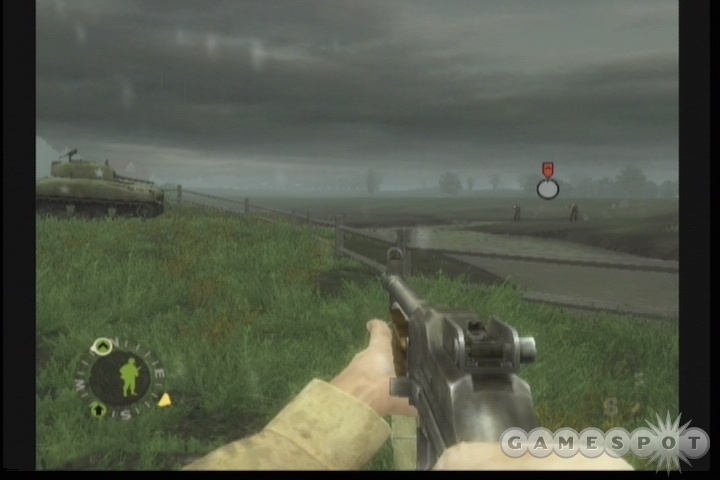
Ooo, a tank, you say? This is going to be your first mission where you have two teams under your command, and one of them is going to be an M5A1 Stuart Tank. This little puppy is going to be a big help in suppressing and clearing out enemy positions, since it can't be damaged by small arms fire. For the purposes of this mission, it can only be hurt by enemy tanks; none of the Germans here possess Panzerschreks or anything similar. So if you see a group of enemy soldiers, feel free to send your tank ahead to flank them and take them out. It possesses a pair of machineguns, as well as a nasty little cannon that can launch explosive shells at your foes, often killing two or three of them at one go. It can be commanded just like your infantry teammates, save for the fact that it's slightly less maneuverable in terms of where it can reach, so try and pick broad lanes for it to move up while your soldiers stick to the yards and alleys of the town.
As the mission starts, you'll have a three-man fire team at your disposal, with an objective waypoint on your compass. Instead of charging up the main road here, though, move northwest around the large house and get your soldiers behind some cover to suppress the Germans there. If you attempt to flank these Germans, the Stuart will pop out from over a ledge and do the job for you, so link up with it to add it as your second team.
After you've got Risner and his tank on your side, you'll have to head east to find your first objective, a small German fireteam in the field behind a farmhouse. Feel free to move up the main road here, then wrap around to the back of the house with your tank leading the way. Just keep the tank moving ahead of you, and get your fire team into a position where they can suppress the Germans while the tank moves ahead and flanks them.
Artillery Bad!
When the first little squad of Germans goes down, you'll have to start moving forward towards the church to the southwest and work on eliminating the artillery there. Obviously enough, this artillery is going to be bad news for your tank, so you'll want to try and keep it out of the line of fire while your fire team works on suppressing the soldiers manning the artillery. To do so, get your tank and soldiers onto the gray road that runs towards the church and start moving the tank slowly up the road. It'll eventually spot a couple of squads off to your right, so use it to take them out.
When the coast is relatively clear, move your fire squad up to a position from which they can suppress the two teams near the church; both of these man artillery guns, but only the leftmost will be able to fire on your tank thanks to their positioning, so suppress that team and start moving your tank up the road until it can fire on all of the Germans there. If they hide behind the walls, move it into the church courtyard and start the rout.
The First Tank
Now that you've cleaned out the courtyard, head back north to the town's main road and use your tank to destroy the bunker in the field beyond it. Your objective marker on the compass will then point you towards an ominous-looking collection of farmhouses; the first German tank you'll encounter is in here. It's not much of a threat, really, as it seems to consistenly undershoot your own tank, so park it near the two open hay-covering structures and let it loose on the Panzer. It'll take a few good shots, but the German tank will go down eventually. There's another German team hiding behind it, but you can easily destroy them with your tank.
Grenades Are Handy
You're almost done cleaning out Vierville, but you'll need to move your squad with precision if you want to successfully defeat the last tank here. Move back to the northeast from the last German tank you destroyed and set up your Stuart in between the two tall walls of grass. The next Panzer will be appearing at the end of the northern road here, so you don't want to have your tank visible to it at first; it'll be more valuable in squashing the many German infantrymen that are going to be coming your way. Have your fireteam take up a position behind the earthen wall on the southwestern side of one of the grass walls so that they can add their fire to the mix.
When everything's set up, move south onto the road until you hear the churchbells ringing, then return to your fireteam and take cover with them. As mentioned, another tank will appear, as well as a bevy of infantry near the tank and to the east, near the church. Your tank can easily handle the infantry that appear, and if you can manage to goad the German tank into approaching your position by standing in the roadway, you'll be able to get behind it and use explosives to destroy it while it's distractedly firing at your own tank. When it's dead, mop up any remaining infantry, then meet up with your tank to end the mission. Feel free to take a few risks here, as the last checkpoint is relatively recent.
Mission 8: Dead Man's Corner
Objective: Escort the tank to the crossroads.
Now that you have a tank on your side, you're going to have to help it reach the crossroads at the end of this mission. Doing so isn't going to be an easy task, though, as you'll have to bypass artillery and infantry with Panzerschreks while keeping your armored ally alive. You'll need to proceed slowly and coordinate your infantry and tank movement to ensure that both forces make it to the crossroads alive.
As you start the mission, you're going to be on the main road that you need to follow, but you're not going to want to stay on it for very long, as at least two of the German squads hiding in the brush ahead will be wielding a Panzerschrek. Instead of heading south along the road, then, you'll want to get your fireteam behind some cover and take your tank to the southeast until you hit a gap in the grass fence. From there, you can start moving it ahead incrementally to take out every single German fireteam in the area, and so long as you stay along the eastern wall of the area, it shouldn't take any damage. The main sticking point here will be a two-man team on the western side of the road. They have a Panzerschrek, so you don't want to get your tank too close, and they're behind enough cover to resist most of your fire. If you can get your fireteam into a position to suppress them constantly, then you can just leave them be while your tank moves around the large cluster of infantry to the southeast and takes them out, then you yourself can get near the western team and flank them. You'll probably want to trade your Garand for a K98 somewhere around here.
Eventually the eastern fence will run up another grass wall, and the tank will be forced to get back on the main road. There's an artillery piece in the next set of fields, though, which is going to be tough to reach, so you'll probably want to leave your tank behind and take your infantrymen around the corner, again moving along the eastern wall when possible, to avoid the machinegun and artillery to the west. (The tank is apparently too big to fit into the gap near the main road; ordering it to follow you will send it charging up the road instead, which will likely result in it getting hit by the artillery.)
There are three or four German teams on the eastern side of the road here, so you'll need to move under fire until you get into a position to flank them. The worst of these will be an MG42 bunker near the roadblock, but you can get up to the southwestern wall and bypass their guns without too much of a problem. When all of the teams here are dead, you'll be left with a machinegun nest and the artillery piece in the western field. This is honestly going to be a pretty difficult encounter, especially due to the fact that it's been so long since a checkpoint. We managed to take them out by executing a bit of a combined assault, by moving our fireteam up to where the eastern machinegun was (they'll be under fire during this move, but should be far enough from the western MG's to survive unscathed), then had them suppress the artillery men; they actually wound up killing them. After that's done, the tank can move up into the western field and kill the rest of the soldiers there.
Through The Roadblock
To bypass the roadblock, tell your tank to move past the fallen tree; it'll bust through it, allowing all of you to pass. Before you go too far, though, you'll come under assault from yet more Germans. Another artillery gun will be the main threat to your tank here; luckily, there's a truck in the road that will keep it from getting a clear line of fire if you happen to keep your tank to the left side. Do so, then slowly creep it up the road until it's almost near the truck to keep it out of harm's way.
While you're doing this, you're going to want to move your infantry into the northwestern field. There's an MG42 position set up overlooking it, but if you hide them behind the dirt wall near the truck in the field, they should be safe from its fire, and will be able to suppress the German fireteam next to the MG42 itself. While they're doing this, you can follow up to the tank on the road, creep into the southeastern field, and flank both the fire team and the MG42 gunners. If you're good at chucking grenades, then you should be able to kill the MG42 gunners with one; if not, hide near the southern wall and dispatch the lot of them with your K98. You should be far enough to do this without risking too much damage to yourself.
After the soldiers here are dead, you'll be able to cross the road in front of the artillery (they'll have a hard time hitting you) and take out the soldiers manning it from behind the earth wall to the northwest. More soldiers will start popping up to the southwest, though, so as soon as the artillerymen are cleared, send the tank up the northwestern side of the path (the main road is blocked) to clear out both the fireteam and the MG42 nest in your path before the next roadblock.
Objective:Defeat the German attack at the crossroads.
So, you've got a few fireteams to defeat here, and your tank has been conveniently disabled.... Since this is the last fight of the level, feel free to be reckless and use your soldiers in as many assaults as you like. You can, of course, utilize strict suppress-and-flank tactics, if you like, but since dead soldiers magically respawn in the next level, you may as well have a bit of fun with them. You should feel free to use your K98 to pick off the soldiers in the main square who happen to be hiding behind barrels; you're at close enough range to hit their helmets, even when they're mostly obscured. While you're doing that, get your fire team to sweep through to the southwest, clearing out the Germans there, before coming back around to the northwest and mopping up any remaining Germans in the road.
Mission 9: The Crack of Dawn
Objective: Clear the road to St. Come-du-Mont.
You'll now have two real teams under your control, so you'll have to get used to using them in tandem. The fire team is going to be best for suppression duties; there are three soldiers in it, allowing them to concentrate more fire on enemy groups. The assault team are going to be your flankers and killers; there are only two of them, but they wield heavier weapons.
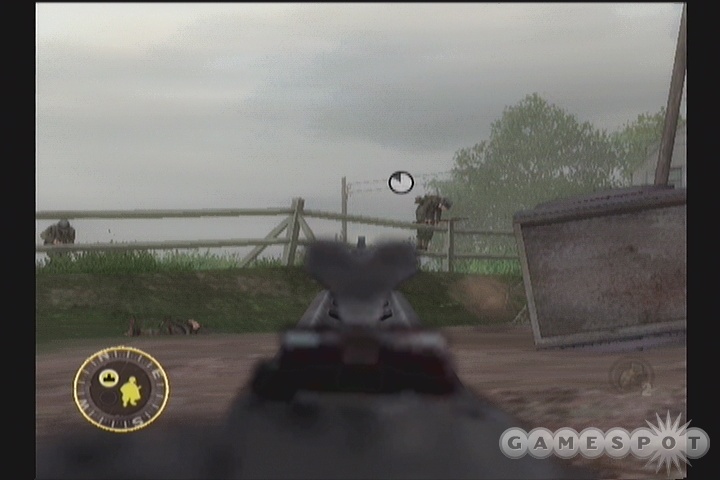
Your first objective is to get out of the small hamlet you're in and reach the main road. You'll note a large house on the left side of the road near your starting position. To begin with, move both of your teams behind the house, ignoring the soldiers that start to appear on the road itself. There's another German team hunkering behind a wall in the yard of the house, so get your fire team behind a wall and suppress them, then move the assault team around to the far side of the wall. Pause for a moment, though, as there'll be more troops shifting over to the yard from the road; if you're quick, you can instruct your teams to fire on them and take them down as they're moving into position.
If you do manage to take down the second team, you can order both of your teams to suppress the other German soldiers while you move around to flank them with your Garand. There may also be another solo soldier in the small gap between the two buildings near the road, so be sure to take him down if you spot him.
After all this excitement, there should only be one more pair of soldiers remaining to kill, hiding behind a cart at the northern end of the road. If you move your fire team back to the road and get them cover somewhere, they should be able to suppress the soldiers while your assault team charges in and finishes them off. You can also try to pick up a K98 and pick them off yourself.
Flanking the MG
The main road leading to the north is going to be watched over by an MG position, so you won't be able to move that way; instead, you'll be forced to head east into the fields and attempt to flank it. This is going to be difficult to do without getting at least a few of your guys injured, but luckily there's a checkpoint here that you can use if things really get screwy.
To begin with, you can dispatch one of the German squads here with a grenade, if you're willing to wait for a second. Place your teams in position behind the high grass wall, so that they don't accidentally get killed, then round the corner and hide behind the grass. If you use your targeting button to get an idea of where the enemies are, you should note one group entrenched behind a wall and another that will be flanking to the east. If you wait a moment, the eastern group will leave their position and move in towards where you are; they'll be close enough to hit you, but if you're lucky, you can maneuver so that you can chuck a grenade at them and kill them all. If this doesn't work, you may want to either try bringing your squads around the corner with you to try and hit them while they move, or just assault them when they move close to the corner.
With the eastern group out of the way, you can move your fire team around to a position in which they can fire on the other soldiers and suppress them. When that's done, hug the eastern wall with your fire team and reach a position from which you can take them out.
After those enemies are dispatched, you'll still have to deal with the soldiers at the MG on the road and a group of soldiers manning an AA gun behind another wall of grass. We liked to just send our assault team in to take on the AA gunners before pulling them back and creeping forward in the grass to take on the MG soldiers; they won't have any cover from your shots, most likely, so your strength of arms should be enough to kill them.
Clearing The Path
You'll probably have noticed the MG position in the destroyed farmhouse down the road a bit. Unfortunately, you can't snipe the guy out with a K98, despite the fact that he's completely exposed to fire.
To get past him, you'll need to set up your fire team in the northern corner of the field, near the AA gun; there should be an earthen wall they can hide behind and attempt to suppress the gunner from. He won't suppress easy, but even that distraction should be enough for you to get your assault team and sprint across the road to the orchard. When you reach it, another pair of Germans will probably try to approach you through the field, so retask your fire team to take them out before taking the assault team all the way to the grassed-in road to the west. This will lead you behind the farmhouse, where you'll have a clear shot at both of the Germans within, including the machinegunner. When he's down, hurry up to the upper floor there and set both of your teams behind cover on the street below you. Three or four more German teams will attempt to overrun you, so use the MG to kill the ones you can, then assault the remainder to finish off the mission.
Mission 10: The Fall of St. Come
Ah, the age old Superman vs. Batman debate. Obviously, Batman would win, given enough prep time, due to his complete knowledge of Superman's weak points, but there's something to be said for Superman's sheer strength.
Anyway, some immediate problems will project themselves at the beginning of this level; for once, you're going to start out under fire from German troops. To add to the difficulties, mortar shells will be dropping all around, preventing your free movement. Ruh-roh. The game can be really cheap here and knock some life off of one of your soldiers before you even have a chance to issue orders, so if that occurs, restart from the last checkpoint on general principles.
Both of your teams will be under decent cover, so suppress the two enemy groups with both of them. The assault team should suppress the closest enemies while the fire team suppresses the trio further back. When this is done, you'll be able to snipe out a couple of the soldiers with your Garand, or perhaps even the entire group of three soldiers if you instruct both of your teams to suppress the closer two and let the back three pop up. Regardless of how you tackle it, you'll want to sneak up the eastern side of the courtyard and finish off any of the nearer enemies before ordering an assault on the rear group, if you weren't able to snipe them all. Since you're so close to the beginning of the level, you may just want to reload if any of your troopers get injured.
After you've cleaned out the two groups and escaped the farmyard, start moving out towards the road leading north. Don't actually go along the road, though; it's well-covered by an MG and a mortar team. You'll want to sweep around the small barn here to the left, and set up your fire team behind the trough nearby so that they can attempt to suppress the mortar team, whose indicator should be the one just to the right of the MG. They'll do a poor job of it, but should provide enough of a distraction to let you and your assault team start working your way northwest through the fields.
As you proceed through the field, stop behind one of the haystacks and use your assault team to fully suppress the MG and the mortar soldiers, then move to the north, through the gap in the wooden fence, and around the small building on the road; this will wrap around to a set of crates you can use the finish off all of the soldiers in the area. Be sure to pick up a K98 if you haven't already.
House Of Germans
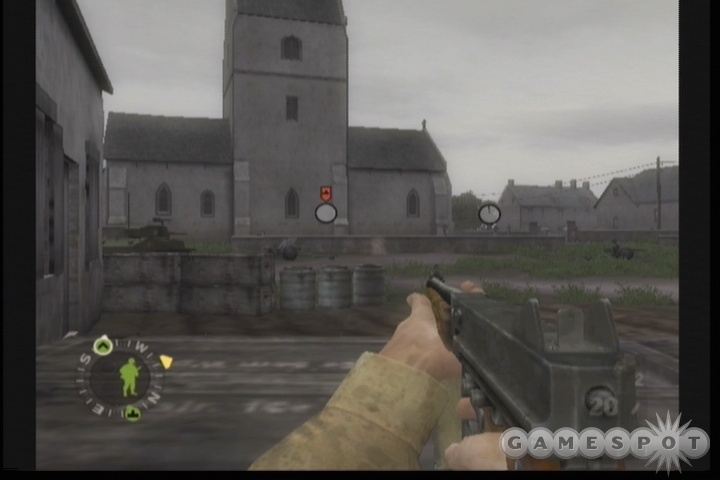
There'll be a large building overrun with Germans just beyond the checkpoint. If you set up your teams behind cover on either side of the truck, though, they should be able to suppress just about everyone. Be sure to change their targets once or twice to ensure that both teams get a good shot at each German squad while you stay back and pick off anyone who pops their head out with your K98. When you start running out of target, sweep around to the northeast and polish off the rest, or just send in your teams on an assault.
Immediately after you meet up with Mac, who asks you to take out a tank elsewhere in the village, you'll have to take part in a little standoff with three German squads who've taken up positions inside the farmhouse across the way. As per the last encounter, we liked to suppress the teams, then flank them with Baker from the right approach. You can also take Baker to the left, into the field there, but there's a good probability that one of the teams will move around to cut you off.
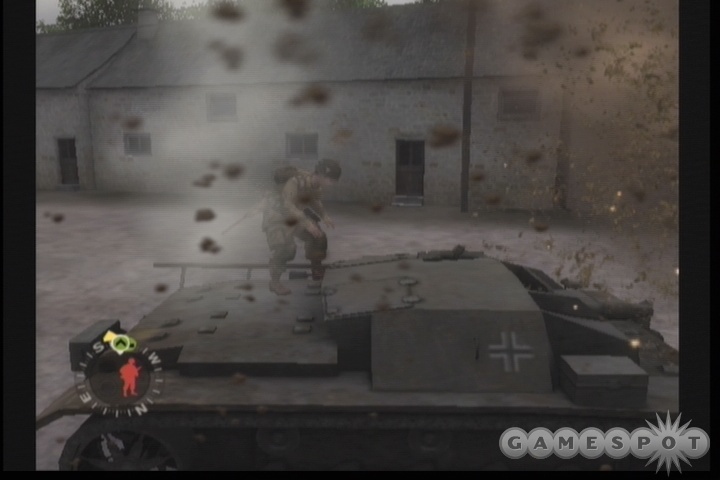
An Annoying Tank
Moving into the courtyard through the next passage will begin the little tank fight; we'll say straight up that this is going to be the toughest part of the game thus far, and will require you to be a bit lucky if you're going to succeed. You're going to be facing off against the aforementioned tank and a gaggle of enemy troops.
In order to successfully assault the tank, though, you're going to need to take down the troops. Begin by escorting all of your soldiers into the stables to the right of the chokepoint you enter the area from, and try to make sure none of them leave. The enemy soldiers will start coming in soon afterwards, both from the area of the tank and from the left side; so long as you keep your soldiers in the stables, though, they should be able to consistently take them out as they shift positions, and your troops will be protected from the tank's shells by the walls. (Although they'll likely take light damage now and again.) Feel free to creep over to the right side of the stables and pick off some of the soldiers with your K98, but you'll have a hard time doing so; they stay behind cover for the most part.
After all of the enemy troops have been eliminated (there'll be a couple waves from each side), you'll note the tank moving out of its little nook and start to wend its way towards the stables. So long as your troops are all inside, they should be able to avoid its fire, but for your part, you'll need to leave the stables, work your way around the left side of the truck, then find yourself a panzerfaust in one of the crates nearby and start working on the tank. It'll take four or five shots before it blows up, so you'll need to get behind cover and start a routine of popping up, firing, then ducking back down and restocking your ammo.
The tank has two main ways to kill you: its shells, and its machinegun. Both fire with relative predictability, so you'll need to wait for them both to fall silent before you pop up and hit it with a ‘faust. Even behind cover, though, the shells can damage you, so you may want to have your teams take turns assaulting the tank. They'll die quickly, of course, but they'll provide a useful distraction for you while you get a couple of Panzerschreks off.
We don't mean to make this sound trivial; you're going to die here a lot, especially on Difficult mode. On Authentic mode, you're going to break a few controllers before you finally manage to get past it. Hopefully our video will give you some idea of our technique in action, though.
Mission 11: Buying The Farm
Objective: Capture the Farmhouse
Ok, time to take over a farm. You're going to lose your fire team at this point, but you'll pick up another Stuart tank in exchange, so it's all good. Unfortunately, the Germans are well entrenched and have the high ground, so it'll be an uphill slog through numerous enemies in this mission. As a note, you only have one grenade in this mission. Do not use it until we say so. It'll be quite important towards the end of the mission, so if you use it before then you might have to wind up playing the whole thing over again.
As with most missions where you have a tank, you're going to need to be mindful of enemies with Panzerschreks. You can never tell just where they'll be (unless you play through often enough to figure out exactly where they are, of course), but we'll try to give you some idea. In general, if you just keep your tank well away from infantry, they either won't fire their rocket launchers, or if they do, the shells will fall well short of your tank.
Begin here by moving your tank down the road a bit to rile up the Germans in the overgrown orchard nearby. One group will attempt to come up the left side of the road and take up position behind an earth wall there. You can easily take them out with the tank, so do so, then move your assault team up behind the wall so that they can look out over the orchard. When they're in place, you can have them suppress the Germans in the orchard while you slowly take your tank around the road to flank and kill the rest of the many squads that inhabit it, but be careful, as the team at the northeastern corner of the orchard will have a Panzerschrek and will fire it if your tank gets too close. Sometimes they'll actually hit the barrier they're hiding behind and blow themselves up, though, so you may not have to worry about them. Your best bet is to park your tank well away from it and wait for it to kill the soldiers there with its cannon; it'll take a while, but your assault team should be well protected where they are. Just be sure to stay behind the tank, as there'll be a hell of a lot of fire coming your way. Luckily you won't be too far from the beginning of the level if you get hit.
After you get through the orchard, you'll have to take the road up to the farmhouse proper. Another team on the northwestern corner of the orchard will be in place with a Panzerschrek, but when you take them out, the only other threats will be some MP40-wielding infantry and a pair of MGs, so let your tank do the heavy lifting as you link back up with the road crossing in front of the farm. There doesn't seem to be any Panzerschreks on the path, although there are a couple of MGs, so keep your tank to the fore and start eliminating them and the rest of the soldiers in the area. If possible, just keep your assault team behind cover while the tank does its work.
Clearing the Farm
As you reach the path leading up to the farmhouse, position your tank directly in front of it and have it take out the Germans that attempt to hide behind the overturned cart. Actually penetrating to the courtyard will be a more difficult matter, as the Germans have an artillery gun set up overlooking the path. Luckily for you, there's a gap in the fence to the left of the path, which will let you take your assault team up and around one of the smaller buildings here to ambush the Germans; as soon as they're in position behind the truck, order your tank to move up and assault one of the other German teams in the area, if only to get it where it can fire. There's another Panzerfaust in the large farmhouse across the way, but it seems unlikely to fire while the dude is pinned down. Maneuver your assault team so that they can shoot at any remaining Germans.
Objective:Kill the German mortar team.
Here's where things get fun. As soon as you manage to take out the last German in the farmhouse, start running to the fields in the east; mortars are going to start dropping all over the place pretty soon, and you'll want to hit the checkpoint before they can do too much damage to your tank, or you'll have to reload from the last checkpoint and try again. Truth be told, you can probably assault and take out the mortar positions on your own, if you're lucky, but having a tank along makes the task much easier.
When you reach the checkpoint, order your tank to assault the two red dots far on the horizon; these are the mortar teams. Whether or not it actually gets to them without getting hit by a shell is a matter of luck, it seems, but the odds are on your side. There is going to be a group of German soldiers off to the north, so keep an eye out for their dot and let your assault team go after them when you can spot them. Besides the infantry, though, there's also a German tank watching over the mortars, and that's what you've been saving your grenade for. Just run up to it, get behind it, and chuck a grenade into its backside to take it out. When that's done, wait for your tank to kill off the mortar teams, then find Leggett to end the mission.
Mission 12: Alternate Route
Objective: Destroy the bridge to Carentan.
So, now you're going to play at some engineering and attempt to blow up a bridge leading into Carentan. Your commanders suspect that the Germans could use it to bring tanks across the river, and you're about to find out how right they are...
Take your tank up the path and clear out the first bunch of Germans that you find. They won't give you much trouble so long as you let your tank lead the way. Unfortunately, around the corner to the left you're going to come across a German tank. There's very little chance that your own tank will survive this encounter unscathed, so don't get too worried if it gets hit; if it goes down below half life, though, you may want to just start over from the last chapter. There'll also be a squad of three or four Germans that will attempt to maneuver through the graveyard here, so try to have your assault team in a position to hit them as they move. Keep them behind the stone wall near the cart, though; be sure they're not in a position where the German tank can hit them.
The basic strategy, besides staying out of sight, is to move your tank around to the railroad tracks and hope its movement prevents the Panzer from getting too many hits on it. When it's on the tracks, it'll be able to fire away without having to worry about the graveyard wall that protects the tank when you're firing on it from the west. Just let the tanks duke it out and see what happens: if your tank wins with a good amount of life left (which it should), move on; if not, then restart the checkpoint and try again.
When you're ready to move on, have your tank kill the Germans near the Panzer's wreckage, then move your assault team to the earth barrier near the overturned railcars. They'll be right near an artillery gun and able to kill the team manning it without a problem. Another set of Germans will appear across the busted bridge here, but your Stuart can deal with them easily.
Triggering The Counterattack
As you proceed along the riverbank, you can expect to come under fire from Germans on either side of the river. They'll have you in a nice little crossfire if you run ahead, so stay back and send your tank forward, but before you do so, backtrack with your assault team to the graveyard and place them behind the wall looking north, along the train tracks. They'll be better able to fire on the German troops incoming from there than they would anywhere near where you are.
When you're ready to trigger the assault, move out along the wooden fence that runs along the river until the Germans start pouring in. There'll be a few groups of infantry and a tank, but the tank will hang back behind the railcars and won't immediately be visible except on the Situational Awareness screen. Have your tank take out the soldiers on the eastern side of the river (you may need to move north a bit to trigger their appearance) while your assault team works on the Germans near the railcars. When the eastern Germans are down, let your tank start working on the rest of them. Try to have all of the Germans taken out before you attempt to assault the tank.
When you are ready to go after the tank, you should instruct your Stuart to assault it, wait for it to start heading towards one end of the railcar, then head around the other and attempt to rush the tank yourself and chuck a grenade into it. This is by far the easiest way to kill it, and will save your own tank from a beating if you can pull it off quickly enough.
The objective bridge is in site; luckily, the only thing that can really damage your tank at this point, the artillery gun across the bridge, will be out of firing range for a good long while, meaning that you can take your time and let your tank start mauling the soldiers on the southern side of the span while you and your assault team hide somewhere. There will be a few Germans on the dam to the east, which your tank is going to have a hard time hitting, so you may have to sneak around that way and pop them.
Blow The Bridge
When you start to cross the bridge, you should hit a checkpoint, even though your goal here isn't actually to cross it; the MG position is currently immune to damage, even from your tank, and will rip you up if you attempt to charge across. What you'll need to do here is put your tank on the bridge, behind the red railcar, so that it can suppress the MG and avoid the shells from the artillery. When that's done, take your assault team across the dam to the spit of land to the east and work on flanking the MG position.
After the MG gunners are down for the count, you'll want to move your team off to the north a bit so that they can open fire on the artillerymen. As you do so, order your tank to assault the artillery, then start running towards it yourself. Your movement is going to spawn in a desperate rush of German troops, including a tank, who'll try to prevent you from reaching the charge trigger near the artillery piece, but if you're quick, and a little lucky, you should be able to reach the trigger and blow the bridge without dying. You don't need to survive afterwards (the mission immediately ends), so feel free to send your assault team charging at the tank to distract it while you get to the trigger.
Mission 13: Purple Heart Lane
Objective: Advance to Bridge 4 on the Causeway
Well, you've got a sniper rifle, which is good, but you've got a bazillion Germans attempting to take you out, and you'll have to proceed past them on an open spit of land while you're getting sniped at all the while. Sounds like fun.
You've got three German teams in the flooded field behind the farmhouse at which you start, but you'll luckily have the powerful sniper rifle to use on them. Get your fire team set up behind one of the stone walls here, then wrap around the western side of the wall and head south while your assault and fire teams suppress the closest Germans. You should be able to pick off one or two of them with your sniper rifle; just kneel, wait for your aim to steady, then wait for one of them to pop his head up before taking him out. If you wrap around to the western side of their position, you'll be able to get eyes on the team to the southeast, so kill all of them before moving your assault team around to kill the remaining German from the nearest squad. After all that's done, you'll only have one team left to kill. They're going to be tough to suppress, so your best bet is to try and lure them out to the southeastern wall that they like to hide behind, then move one of your teams around to their rear and tell them to assault. If you set up well to the south, then you can also try to snipe them from a distance, but you may take damage if you stay in the open too long.
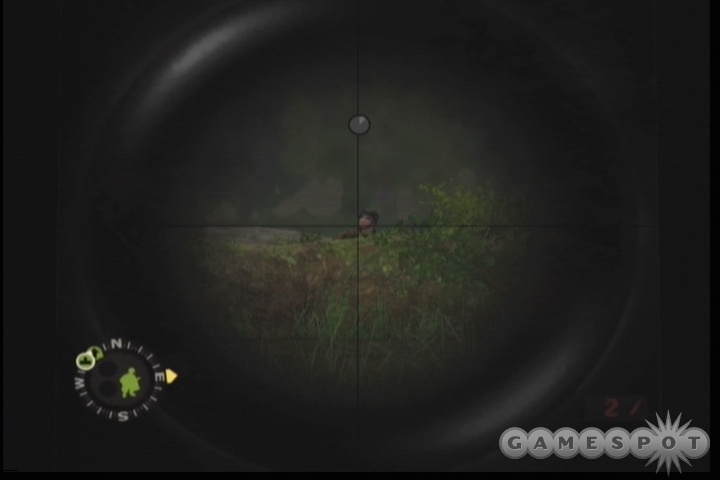
After you hit your checkpoint, you'll see two German squads coming up the causeway from the south. They're completely exposed to your fire, so get your teams behind the earthen walls or the fences here and unload on them until they go down before heading underneath the bridge to meet up with Cole.
The Mad Dash
Here's where the fun begins. Cole's going to instruct you to cross the causeway, which is unfortunately under fire from four to six infinitely respawning German troops across the way. You can suppress them, sure, but actually taking them out is another matter. Unfortunately you're going to have to advance while being shot at. Actually succeeding in getting across the entire causeway can be more luck than skill, especially on difficult or Authentic modes.
You have two basic options here: you can either attempt to do it the "real" way, and move your teams up the causeway by jumping from cover to cover in a leapfrogging pattern; or you can attempt to cover your own ass by having your teams lay down covering fire for you while you run to the end of the causeway. Both solutions are fairly dangerous, so be prepared to reload your game more than once.
To do it the authentic way, you'll need to get your teams up to the two firing positions near the checkpoint and have them start suppressing the enemy teams across the way, leaving the two German teams farther down the path unsuppressed. What you're going to want to do is attempt to suppress two of the teams, shift your fire team to another team further to the south, then move your assault team up to the next farther cover and use them to provide cover for the fire team while they move up, and so on. Before you attempt to move, though, be sure that you've sniped one member of each pair of Germans, so that each team's firepower is cut in half before you move. Just before you move a team, snipe out the other members of the two nearest German squads; they'll take a moment to respawn, giving you a bit of peace in which to move.
By this method, you can get to the end of the causeway, but your teams will probably take a good amount of damage no matter how careful you are. If you're willing to risk your own hide, though, you can make it to the end of the causeway pretty quickly. The basic technique is much the same; suppress the nearest two German teams, then snipe out one member of each of the two to the south. Instead of moving your teams, though, you're just going to run up the hill to the road and work your own way down the path, preferably after shifting your fire team's suppression to one of the southern German squads and killing the remaining soldier in the other. If this is all done quickly enough, you should be able to make it most of the way down the road without getting hit, although you will have to hope that a mortar shell doesn't land on you. They fall infrequently, though, so the chances of this are slim.
Well-Defended MG
When you reach the end of the causeway, you'll almost be at the bridge, but another task will await you; a German MG has been set up to the west, and you'll have to overrun it before you can get over the river. If your teammates make it all the way down here alive, they'll immediately take up the worst possible cover, so you'll probably want to bring them back up to the road and park them while you kill the German snipers that appear to the north. When they're down, you'll have to wrap around to the back of the MG nest and kill both the gunner there and another pair of soldiers. Since we were so close to a checkpoint at this point, we didn't bother with subtlety; we just ordered our remaining soldiers to assault the Germans while we flanked them from the north and took them out.
With that done, you can return to the bridge to finish the mission off.
Mission 14: Cole's Charge
Objective: Capture the farmhouse.
Cole's new objective for you is to capture the farmhouse off to the west of your starting position. The field between the road and the house is going to be covered with smoke, providing you with a bit of cover on your trip, but it's also going to make it fairly difficult for you to see where the heck you're going.
Unfortunately, there's an MG position that'll be firing blindly at your team during your traverse of the field, so you're probably going to want to avoid it. It's been set up to the northwest of the start position here, so take your teams and head directly south of where you enter the field until you reach the southern wall, then start skirting that up to the west. Thanks to the parallax effect of the enemy dots, you should be able to tell which ones are closest to you as you move, so park your teams in position, suppress the closest dot to you, then move up the southern wall until you can take out the soldiers there. The other soldiers in the field will start to pull back to the farmhouse, so work your way to the west with your assault team, kill the gunner in the first MG, then bring the assault team up to the earth wall across the way from the farmhouse and use them to suppress the soldiers in there.
This is something of a standoff situation, so your options aren't great. You can attempt to bring your fire team around from the north to flank the soldiers in the farm house, but this is probably going to open you up to fire from the northern MG. We preferred to just rush in with Baker and use a grenade and our SMG to clean out the farmhouse altogether. If you're less of a risktaker, you can just assault the gang in there, but this will likely result in damage to a few of your soldiers, if not a death. When the soldiers in the barn are dead, you can easily wrap around behind the western MG and take out the gunner.
Objective:Secure the area behind the farmhouse.
Ah, the grand game of chess. The fields behind the farm are a mess of stone walls, allowing you to maneuver your teams around, suppressing with the fire team, flanking with the assault team. There'll be a good half-dozen groups of Germans to work through, some at a good distance, so be sure to trade your Garand for a K98 if you haven't already and use it to pick off targets at long range. You can afford to be fairly bold here, due to the proximity of the checkpoint, so just suppress and flank until you clean the entire field out.
Clearing Out The Rest Of Them
Here's where it gets fun. As you cross the road, get your fire team behind the earth wall and get them suppressing the German team across the way - not the MG. The MG here will prevent you from crossing into the field, so you'll have to head to the north along the road to flank it. Oh, but there's another MG that's watching over the road, so...that's fun. All you can really do is attempt to run as quickly as possible down the road until you reach the truck in the middle of it. If you use that for cover, you should be able to take out the MG position in the field with a grenade or by rushing it with an automatic weapon. From there, you can shoot the Germans to the south, then order your teams to assault the remaining Germans while you suppress them with your MP40 or Browning.
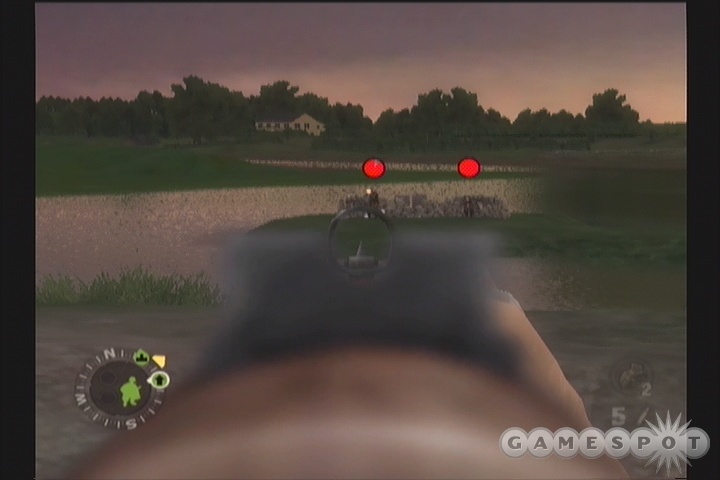
Around the corner near your next objective marker will be two MGs. Luckily, they're pointed away from you, giving you a free shot at the gunners there. You should be able to take them out with a K98 without getting in range of their weapons, so do so, but keep your soldiers back a bit, or they'll often charge ahead and get shot at by the enemies to the right. In point of fact, if you keep your guys near the earth wall to the right of the corner, before you head around, they'll sometimes be able to fire on the next enemy group through the grass wall, allowing you to suppress them before you take Baker around the corner and snipe them out. Otherwise, you can just assault them, since you're close to the end of the level.
The last task here will be flanking and assaulting the MG on the road. Since these are the last enemies, just take any remaining soldiers you have and charge at them to finish them off, then meet up with Cole to finish the mission.
Mission 15: Ripe Pickings
Objective: Find and rescue Combs
It appears that an Allied fireteam is pinned down by Germans near the farmhouse, but Cole can't afford to send everyone out to rescue them - most of your soldiers are needed to fortify the farmhouse itself. Thus, you'll be taking off with a single fire team to rescue them.
Your first task will be to maneuver through one of the fields you passed through in the last mission, only this time there won't be any Germans; all you'll have to do is dodge mortar fire. Unfortunately, it'll home in on your guys no matter which path you take through the field, so all you can really do is head for the main road and reload if any of your guys bites it.
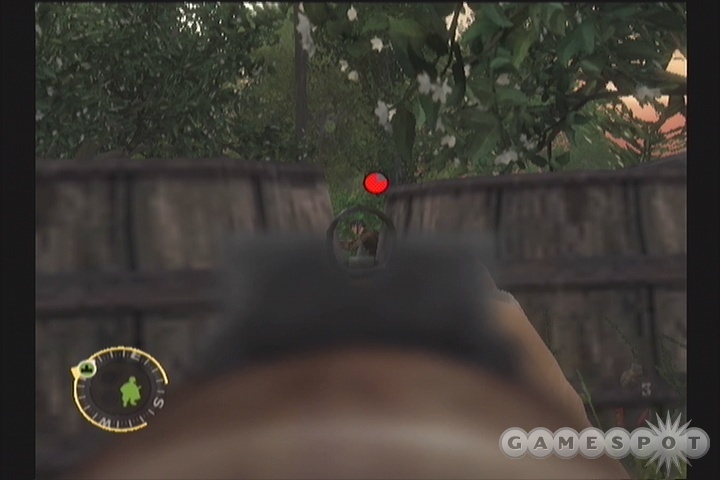
Next up is another farmhouse, heavily protected by German teams. You'll want to get your fireteam into the orchard and have them hide behind one of the log piles or row of barrels while you creep around to the right and start picking off soldiers with your Garand. The MG in the house is going to be difficult to hit until you get close, but luckily there's a gap in between two of the buildings there that will let you flank most of the Germans and pop their domes before getting into position to take out the gunner. When he's out, immediately head towards the next waypoint, as mortar shells are incoming, and it'll behoove you to make it to a save point before your guys take any damage. Be sure to change out for a K98 before you move on.
Combs!
Combs is squirrelled away behind some cover in the next field, but he's got three German fireteams who'd like nothing better than to take him out. Immediately move your fire team to his little wall and get them suppressing the nearest Germans while you scoot around to the south and hide behind the barrels there. From that position, you should be able to snipe out both of the southern teams with your K98, although it'll take a little bit of patience to wait for them to pop their heads up.
With those two teams out of the way, you'll have one more team on the road to the northeast to deal with. They're well entrenched, and one of them has an MP40, so it'll be difficult to take them down from a distance, but there is a earth wall near where you came into the garden. If you can return there without getting shot, you may be able to suppress them with your own automatic weapon before ordering your fire team to assault them from the southern part of the road.
With the roadway clear, your last objective will be to take out the mortar team to the northeast. With a little suppression fire from your automatic weapon, though, your fire team shouldn't have too many problems assaulting them.
Bigtime Suppression
After the next checkpoint, you'll have to work your way back through the orchard you just came through. Luckily, though, the MG position the Germans were using on you before is now facing them, so use it to suppress and kill off anyone you can while you order your fire team to sweep in and assault the baddies. If they take a lot of damage you can reload, but your MG should be able to force the Germans to keep their heads down quite well.
Objective:Defend the farmhouse.
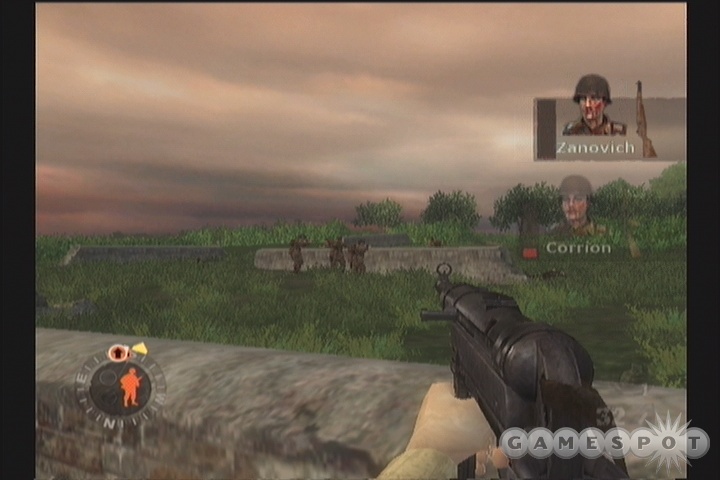
As you head back up the road with Combs in tow, you'll have to pass back through the farmhouse field to reach Cole. He'll immediately task you with defending the farmhouse from a German counterattack. This needn't be too difficult, if you position your troops effectively. You'll get a fresh assault team here; we liked to place both them and the fire team in the southern portion of the field, which will let your teams take down the German troops before they have a chance to get behind cover. You can also take on these guys from the northern end of the field, near where Cole gave you your orders, but you'll have to engage in some flanking maneuvers to knock them out of their cover when they dig in. That's no fun. This is the last part of the level, so feel free to just charge in with your troops and polish off everyone. When you start seeing three squads of Germans coming at you at a time, the fight is nearly over.
Mission 16: Push Into Carentan
Objective: Secure the industrial region of Carentan.
Ah yes, the ever-popular tactic of taking half a town with seven dudes. That's called tenacity. You only have two grenades here, and there's going to be two tanks in the mission, so...yeah, don't use ‘em on infantry. Also, it's worth noting that the last portion of this mission is the hardest, so if your teams take too many casualties, or even if you have a couple of guys who've been seriously hurt before then, you may just want to start over and try again. This mission is going to take a long time to beat on Difficult mode.
You won't be able to move too far from your start point, as there's an MG that's hovering over the road here that'll keelhaul your troops if you attempt to move too far. To bypass it, move your fire team up the alley to the west of your starting position, then have them take up a firing position near the small wall at the end of the alley so that they have cover from the Germans there. If you then order them to fire on the MG position (should be the red dot furthest to the left), they'll force the Germans on it to retreat back around cover to the south, allowing you to take your assault team around to the end of the road there and flank both them and the other set of infantry. Assault anyone remaining in the area, and switch out your M1A1 for the BAR near the corpse behind the machinegun before moving on.
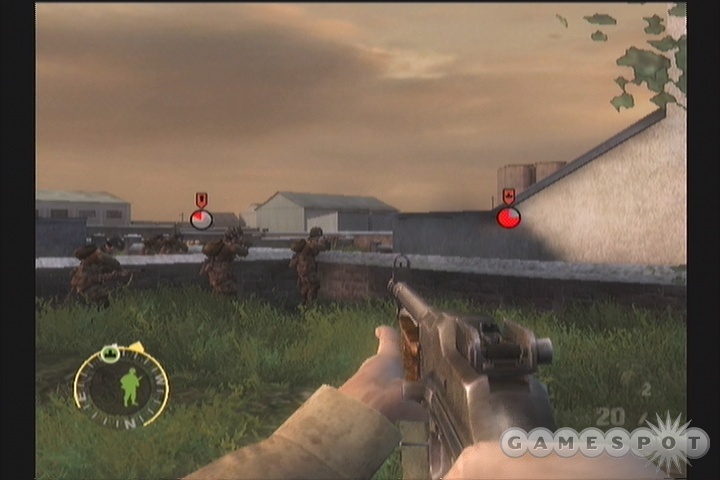
The next little courtyard is where things get tough. There'll be two teams on your position, one to the southwest and one to the west. If you get your teams into position behind the stone wall here, you should be able to completely supress the western team while you take your Garand and use it to pick off the two soldiers to the southwest. With the western team suppressed, you'll be able to move around to the south and get into a position to destroy them with your BAR.
Unfortunately, you won't have any time to rest on your laurels, as two more teams will pop their heads up to the southwest. They'll be well behind the walls, so you'll have a hard time hitting them from your current position. You'll want to move your fire team up behind the wall which the westernmost German group was crouching behind earlier; this will net you a bit better vantage point on the new positions. If you hide behind your team here, you should be able to use your Garand or your K98, if you have one, to pick off a few of the Germans in the industrial ruins, but don't risk your health too much, as you still have a long way to go until the end of the level.
If you're able to pick off one or both teams of the Germans, then you'll have to leave the yard you're in to the north, but tread cautiously, as there are a pair of Germans in one of the yards there that'll fire on you as you proceed. If you use your heavy weapon to suppress them, then you should be able to move your assault team around to the right side to get a vantage point on them.
Now the fun's really begun, though, as a tank will show up near the factories to the southwest. Now, assuming your teams and yourself are in relatively good health, what you're going to want to do is wrap all the way around to the west, then cut back and work your way south to the large metallic silos there, leaving your teams back and well out of harm's way. If you can stay out of sight of the tank, you'll eventually reach a checkpoint.
Two Tanks!
Now, here's a bit of game system manipulation for you: when you reach the checkpoint, immediately reload it. This will move the tank back to where it initially entered the area, and will also bring all of your guys up forward to where you are. With this accomplished, you can move off to the right a bit, crouch behind a stone wall, and wait for the tank to roll by before you finish it off with a grenade from the rear.
After it's down, another tank will spawn well to the east of the first one. There will likely still be a couple of groups of Germans to deal with in the factory yard. You can either take these guys down at long range with your K98, or attempt to get up close and personal with the BAR by sweeping around from the southwest. We preferred the latter method, as it should give you enough time to get down to the eastern road before the tank rolls into the factory area, allowing you to repeat the "wait until it rolls by to grenade it" maneuver. Failing that, there are a couple of boxes of Panzerschreks in the yard which you can use to take it out from long range.
When the second tank is out of the way, you'll have to move into the eastern road and take out the Germans in one of the yards here. They're behind some good cover, so you'll need to leapfrog up the street until you get your teams into a position to completely suppress them while you attempt to snipe them with the K98.
Assaulting the Factory
As soon as you take out the Germans in the yard here, you should hit a checkpoint, which is good, as another German team will appear behind you and probably deal heavy damage to your teams. If you reload the checkpoint, your teams should be in a position from which they can shoot at the Germans without taking much damage in return.
After they're down, you should get ready for one of the toughest segments of the game thus far. Cole will show up and instruct you to move in to the nearby factory. Thing is, the factory has something like eight to ten German groups in it, as well as a pair of MGs with gunners that are invulnerable to sniping fire. Yeah, this is going to be rough.
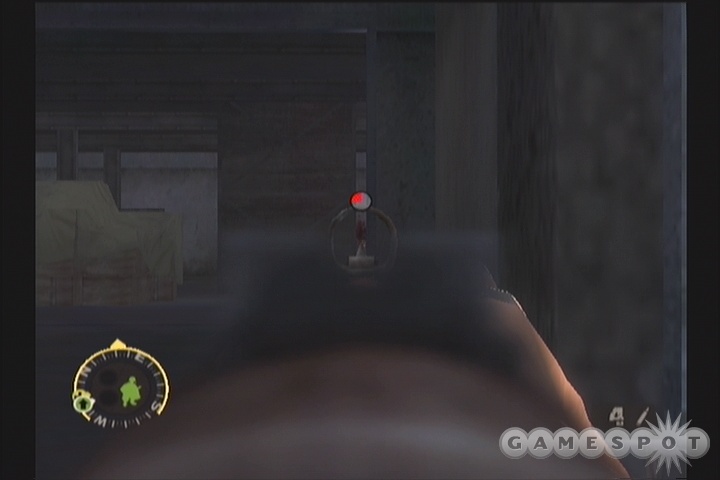
It helps - a bit - to proceed slowly and deliberately. After Cole moves into the factory, you yourself can follow him in to spawn a group of four Germans in the room to your east. They'll take up position behind some lumber there, but if you position yourself back near the sandbags, you should be able to aim down the sights of your K98 and move around so that only one of them will appear at a time, in a small gap formed by the pillar near them and the corner of the wall near Cole. With this gap, you'll be able to prevent more than one of the Germans from firing on you at a time, so hang back and start offing them with your K98; there are four in all.
With those guys out of the way, move your fire team through the doorway to the right so that they're holed up in the little fenced-in garage area near Cole. They'll be able to fire on any troops in the courtyard without coming under fire from the MG's in this position. There's going to be one or two German teams attempting to come up near their position, so suppress them and skirt out to a position where you can use your K98 to snipe them out.
When things have settled down a bit, it's time to take out the MG gunners. Unfortunately, they're magically resistant to bullets, so you'll need something a bit more powerful than your K98. If you recall the previous tank battle area, head back to it and find a box of Panzerfausts and pick one up. These boxes replenish infinitely, so you've got as many shots at the gunners as you need to take them out. Panzerfausts have a marked dip in their trajectories, so you'll need to aim them well above the heads of the gunners. If you miss, though, you can just return to the box and get another, so don't feel pressed for time.
With the gunners gone, it's time to sweep through the factory and dispatch all of the Germans that you find there. You may want to start with the group at the far end of the factory courtyard from your fire team, then wrap into the right side of the factory interior (it's separated by a wall inside, so you'll need to clean out both sides individually). There are some tight quarters inside, so proceed slowly, move your teams behind cover as quickly as you can, and use your K98 to snipe away at anyone who pops his head out. With enough patience, you can clean the factory out by yourself, but you can also use your teams to go ahead and assault some of the enemy positions, if you wish. This is obviously the last fight of the level, so any losses here will be made good at the beginning of the next level.
Mission 17: Tom and Jerry
Objective: Defend Carentan from counter-attack.
Ah, it's the always-unique sniper mission. Every FPS game has to have one - it's the law. You should remember how to use the sniper rifle from the causeway mission. Stay crouched, wait for your reticule to stop shifting around, and pop off your shots when you have an enemy locked in. Be sure to keep your health up, though, by not staying exposed; you're going to need to be pretty healthy to complete the third leg of this mission.
The hardest part about the first part of this mission is keeping your soldiers alive. Left in their default positions, they'll get picked apart by the enemies as they rush in from the south, east, and west, so you'll have to move them into cover. We found the best positions to be for the assault team to move behind some of the crates on the left side of the main road to the south, and for the fire team (when they become available) to move behind the sandbags overlooking the house to the east. When they're placed correctly, they'll be able to cover both of those entrances, as well as the small alley to the southwest that enemies will sometimes pop out of, leaving the road to the west to you and your trusty sniper rifle. The western approach is the safest one for you to mind, as the enemies there will be visible from a good distance away, allowing you to fire on them without too much fear; it's the enemies in the east that will be doing most of the damage to you, so let your fire team deal with them and stay out of the way.
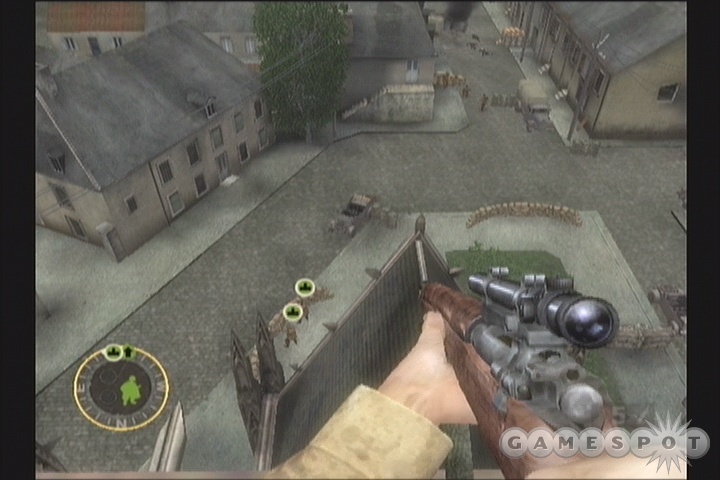
After a dozen or so German teams come in and fall down, you'll overhear a radio conversation Leggett's having, intimating the presence of a pair of German tanks. Ruh-roh.
More Sniping
The second part of the sniping game is a bit more difficult than the first, at least in terms of keeping your soldiers alive. Luckily, you can go in fully aware that this is the last portion of the level in which you'll need to use your soldiers, so don't feel too horrified if some of them happen to bite the dust - they won't be along for the third portion of the mission.
Having your soldiers alive and kicking will make it much easier to take on the soldiers that will be assaulting the church, though, so you'll probably want to move them from their initial (and incredibly exposed) positions so that they can actually hide from the German's fire. The best place for this is to move them back to the rear of the graveyard, behind the walls that are just underneath the balcony where you are. From there, they'll pretty much always have a stone wall between themselves and the enemy at all times, allowing them to fire on the Germans as they attempt to advance. While keeping yourself behind cover, you'll be able to crouch down and strafe around the parts of the balcony where the edge is crumbled to pick off Germans as they hide. There's a box of sniper ammo near Leggett, so hit that and restock if you need any.
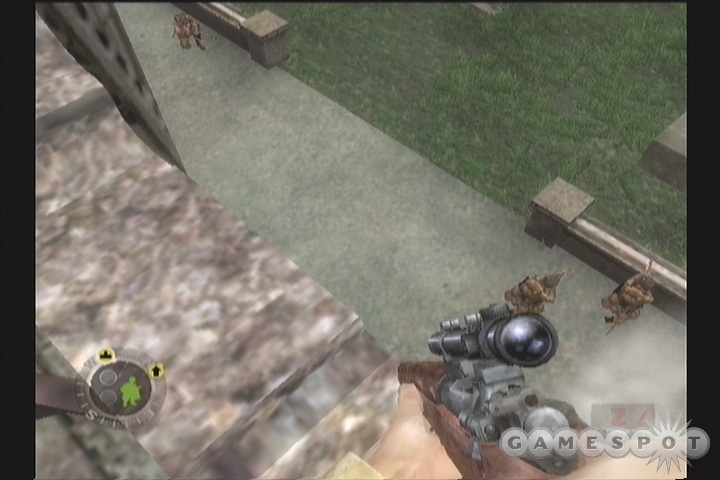
After all of the Germans in the second stage are dead, you'll hear the ominous rumblings of a tank. There's a Bazooka elsewhere on the balcony of the church, but in order to reach it, you'll need to pass through a few Germans near a doorway. These guys will have a good chance of damaging you if you attempt to rush them, especially on difficult mode, but if you just wait a bit, the German tank may destroy them in its zeal to fire on you, allowing you to rush past their corpses towards the bazooka further down.
More Tanks!
To a large extent, your ability to take down the tanks here will depend on the amount of health you've lost during the previous portions of the game. You'll need a lot of it if you're going to withstand the shells of the two or three tanks here.
There's no particular secret to killing the tanks; you just have to hit each of them with three or four rounds from your bazooka. Unlike a Panzerfaust, though, you'll be able to carry extra ammo for the bazooka, up to five rounds in all, letting you concentrate your fire on a tank without having to constantly hit the ammo boxes. The tricky part, again, is surviving the tank shells while you attempt to blow them to hell; they have a good amount of splash damage, so even if they hit the walls behind you, you're still likely to take a good amount of damage. You might want to try shifting around after firing, by ducking behind the balcony ledge, waiting for the tank to fire, popping up and launching a rocket, then ducking and immediately moving elsewhere in the hope that the tank won't be able to track you. They seem to have preternaturally good aiming abilities, though, and will likely aim directly at you whether they can see you or not, so you may want to find a good solid pillar to hide behind while you reload your bazooka.
After all three tanks are destroyed (you may have to destroy fewer, based on your difficulty level), the mission ends.
Mission 18: No Better Spot To Die
Objective: Defend Hill 30.
Well, the game's climactic mission sure isn't going to be easy. You're going to have to take your teams and sweep through a German-infested field just to meet up with Mac, and that's when the hard part starts.
To begin with, though: the field. Your fire team is a man short, meaning that you're going to have a harder time issuing suppressing fire with them. The thing to remember about this whole first part, though, is that neither of your teams will be around for the second part, so you don't have to worry overmuch about keeping them alive; just use them to destroy the enemy teams, but keep your own health as high as possible. That's the goal, anyway.
Begin by moving your assault team up to the fallen tree near your start point, and the fire team up to the earth barrier to the right of the standing tree a bit further up the hill. As you move them, you'll notice a German hostile marker moving into the field from the west. If you command both of your squads to fire on it, they'll probably take the Germans out before they can reach cover, leaving you another team in the northwest to deal with. You can either attempt to flank around and pop them yourself, or shift your fire team to the right until they're in a position to blast them from the side.
At this point, you should have two German teams in your field of vision; one near the corner leading to the far western field, and one in the middle of your field. The middle team will be the one you need to take down first, so suppress them with both of your teams, then move the assault up to the southwest, where there are two earth walls positioned side by side. If you place your assault team behind the southwesternmost wall, they should be able to get a good shot on the middle team here and eventually take them out. You may need to shift them further to the west before they can polish them off, though.
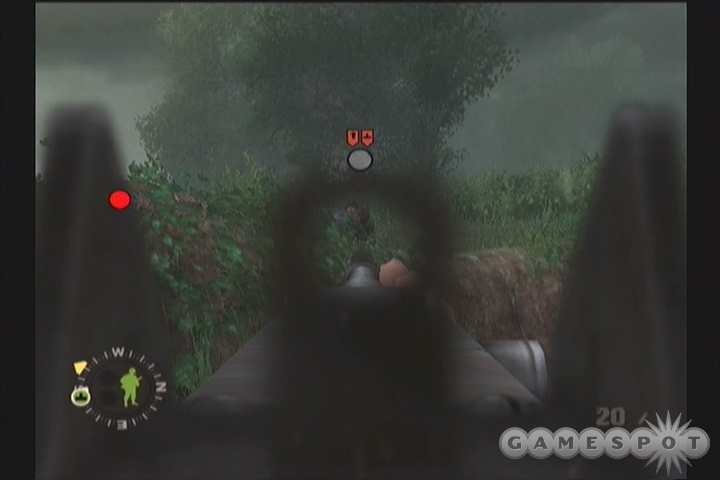
With that done, concentrate your fire on the western German team until they're suppressed, then start moving your fire team along the northern wall. There's a fallen tree that will make a good stop for them, as it'll let them add their fire to the suppression and hopefully give you the opportunity to pop the Germans there with a long-range weapon. You can also attempt to move them up to the stone-and-earth barrier near the Germans for a true flanking maneuver.
Next up is the western field, where there's another team of Germans and a manned MG. After moving your teams up to a position where you can fire on both of the German squads, suppress both of them (chipping in with your automatic weapon, if you have to), then try and get either your assault or your fire team up to the northwestern wall. Since you're not going to need your team for the next section of the map, and since these guys are the last soldiers you'll have to face off against before you reach the junction point of the level, you'll want to use them to wrap around from the north until you get behind the German teams, and just assault them to finish them off. There's an earth wall near the MG position which you can use to take them out the old-fashioned way, if you insist.
Interlude
You'll probably remember the interval here from the beginning of the game. As it was then, you can't do anything against the Germans that are incoming, so just hide behind the earth and wait for the storm to blow over. Any damage you take here is unnecessary, and will make the next part of the battle that much more difficult.
Find The Tanks And Return
Alright, it's Baker against the world for the last stretch of this mission. You're going to have to find the 2nd Armored Infantry on your lonesome, and that means wading through fields full of Germans and Panzers in order to reach them. Fun.
Begin by walking up and around the fallen tree a bit to trigger a German soldier, then retreat back around the tree and snipe him out. Around the corner, you'll have to take out two more Germans hiding behind a tree of their own, so use your Garand to do so.
After they've been taken out, you'll have to start heading to the east, but you'll want to avoid the main roads, as there'll be Panzers on patrol, and you don't have any grenades with which to take them out. You should be able to head up a ramp to the interior of one of the grassy areas, but be careful, as there'll be a pair of Germans within, including one that'll man an MG. If you can kill them both, though, you'll be able to take the MG and use it to mow down another group of three Germans as they attempt to escape.
With that out of the way, all you need to do is proceed to the east until you spot the American tank on the bridge. There'll be Germans coming from behind you, though, so just duck into the water and hide behind the tree there until you get the all-clear from the tank commanders.
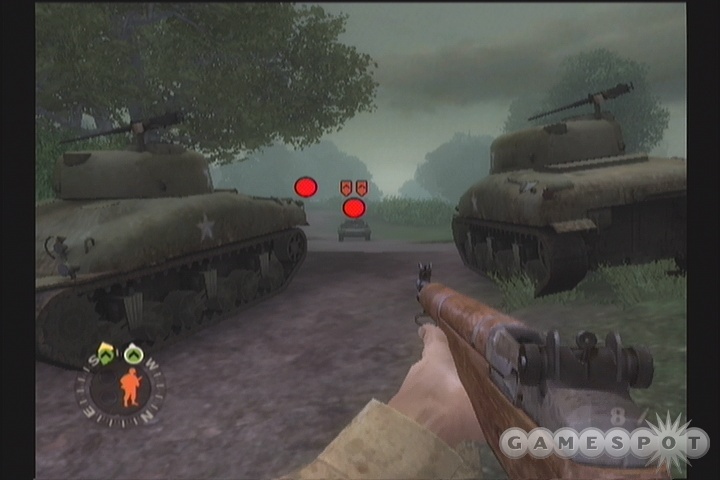
Now all you have to do is get these tanks back to Mac in one piece. There are three enemy tanks standing between you and your squad, but they're spread out so that you can take them on individually, and one is far enough to the north that you can probably avoid it altogether just by keeping to the southernmost road. Gang up on the other two tanks, and try to approach them with your own tanks from two different vectors to spread your fire out. Above everything, though, be sure to keep yourself behind cover, as it's been a long time since the last checkpoint, and you'll have to do everything over again if you get scratched.
After killing the tank nearest Mac and the field, all you have to do is send your tanks into the field where the Germans are positioned and wait for them to clean out the mess. Again, stay out of harm's way until the tanks get their job done, as you can be cut into cheese right quick if you're not careful. When they've cleaned the field, return to Mac to finish the game off!
Got a news tip or want to contact us directly? Email news@gamespot.com
Join the conversation