INTRO:
One of the silliest designs of base-building real-time strategy (RTS) games is the implementation of static defensive assets for the player to use. Considering that the primary goal of such games is the annihilation of the enemy, utilizing static defensive assets would diverge from the pursuit of that goal – and that is assuming that the opponent would not just circumvent them.
In fact, the act of building a base itself might seem silly. In a game about battles where things get destroyed rather readily, having to develop a static base that is close to the enemy and vulnerable to attacks can seem foolish in real-life.
Of course, in video games, any notion of applicability to or from real-life would be tossed out the window. Yet, a completely fictitious set-up can still be illogical if primarily defensive strategies go against the overarching goal of gameplay, which is taking the fight to the enemy in the case of RTS games of yore.
They Are Billions is not an RTS game of yore. In fact, it is one that emphasizes the preparation of static assets. Practically mindless but relentless enemies make such defensive strategies essential.
SOME PREAMBLE:
There is supposed to be an exclamation symbol after “They Are Billions”, but it will be omitted from this article because it is very disagreeable with the spell- and grammar-checking settings that I use.
In this article, the “Zombies”, “Infected” and “Zeds” are words that would be used interchangeably. In zombie fiction, they might as well mean the same thing.
PREMISE:
The game is set in a sci-fi future, where powered armor and advanced materials are around. However, 19th-century clothing and prevalence of steam technology might suggest otherwise. To be exact, the game has a rehabilitated post-apocalyptic setting, which might explain the incongruence.
Anyway, there had been a zombie apocalypse. Humanity has mostly succumbed to whatever caused the zombie outbreak. (The Story mode does imply the cause and the events that led to the apocalypse.) The pockets of resistance that are left have to rely on geography and topography to defend themselves from the ravening hordes of former humans.
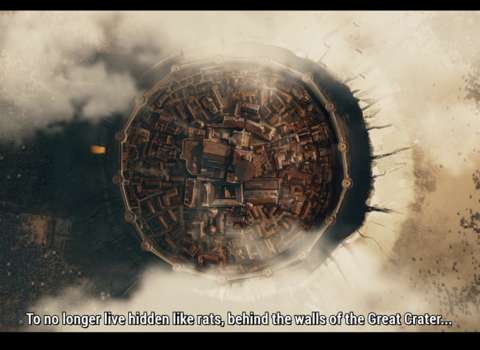
One of these pockets resides in the “Great Crater”, a conveniently and highly defensible place. Through means that are not clear, this bastion of humanity has since prospered and multiplied in number, eventually developing an Imperial system where one person calls the shots. That current person is Quintus Crane, who had ambitions about creating the “New Empire”.
The intro begins with him declaring the campaign to recover territory that has been lost to the outbreak; at this time, he was full of pomp and arrogant confidence. The intro then fast-forwards 13 years later, and it is obvious in his cynical demeanour that the campaign has gone nowhere. The failures have been pinned on his generals, of whom there were many prior to the player character’s appointment as the latest one.
The player character’s role is to reclaim or build new colonies away from the seat of the New Empire. This is easier said than done, of course.
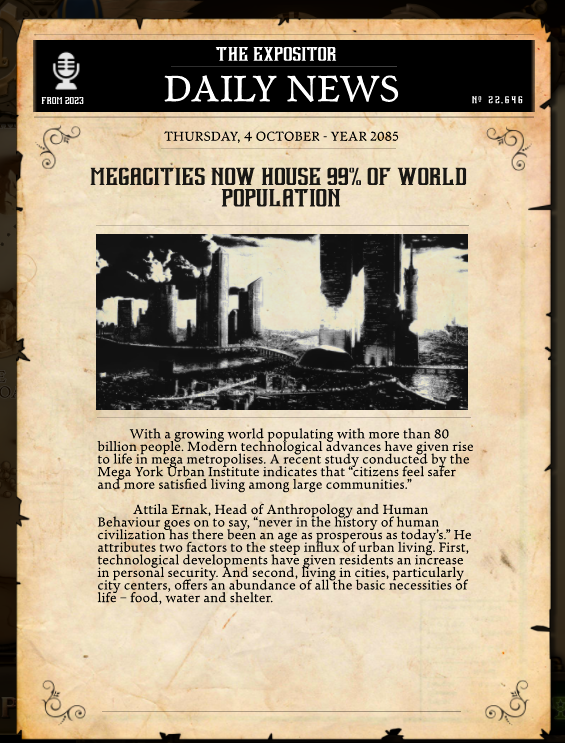
The actual backstory is not entirely told to the player, however. There are bits of lore that mention things about the world prior to the outbreak, and the events that led up to the outbreak. Suffice to say that the backstory is about a much exaggerated but perhaps familiar tale of overpopulation.
SURVIVAL MODE:
The Survival mode is the main gameplay mode of They are Billions. In this mode, the player has to raise a colony in a region that conveniently has a lot of natural resources. Then, the player has defend it from the incoming hordes of Zeds that have been somehow alerted and attracted to the presence of the colony.
In Survival mode, the maps are procedurally generated, thus more or less ensuring that the experience of every session would be different from the previous ones. Indeed, players who have had a lot of experience with the game would have a very good idea of whether they are able to win a session from the circumstances of their starting locations alone.
This was the gameplay mode that was available throughout the Early Access phase of the game. To most followers of the game, this is the main game mode and is the primary expression of the game’s goal of implementing sensible turtling-oriented RTS gameplay.
There will be more statements on the Survival mode later, after important gameplay elements have been described.
STORY MODE:
The story mode was introduced after the game has exited its Early Access phase. This was a surprise to some, especially considering that its Early Access phase was mainly about its Survival mode. In this mode, there are scenarios with specific coding that makes their gameplay different from that of Survival mode.
Firstly, there are the survival-oriented colony-building missions. These play out a lot like the Survival mode, with the exception that the maps are static and that there are specific goals that the player has to achieve. One of the goals is always the achievement of a specific number of colonists. There may be other objectives, usually involving the eradication of Zeds or withstanding the onslaught of Zed hordes.
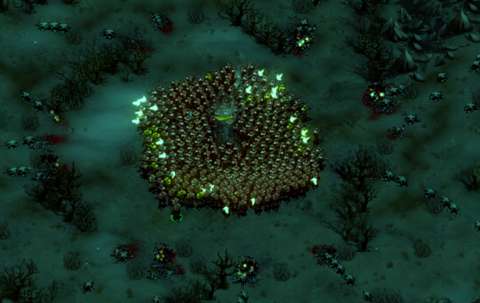
Secondly, there are the “Swarm” missions. These missions do not have base-building at all. Rather, the player introduces non-replaceable assets onto the field to fend incoming hordes. The player has to make use of these assets to annihilate the hordes, while protecting the Outpost in the middle of the map. Having the Outpost broken into or losing all said assets leads to a game-over.
Thirdly, there are the “Exploration” missions. These are the furthest-removed from the official gameplay formula, because the player controls only one “hero” character. The hero would be traipsing about facilities that have been overrun by the infected, recovering any items of value and escaping with these somewhere on his/her person.
There will be more elaboration on the mission types later. For now though, it should be apparent to anyone that remember the base-building RTS hey-days of the late 1990s and early 2000s that these are tributes to the various gameplay formulae that had been around in those days.
The missions with goals for the development of the colony are a call-back to the days where there were RTS games with droll missions where a target number has to be reached. The Swarm missions are reminiscent of the kind of gameplay that the Myth series has established. As for the “Exploration” missions, they are likely a tribute to the kind of gameplay that Warcraft III: Frozen Throne has introduced through its “hero” system.
PASSING OF TIME:
In ether game modes, with the exception of the “Exploration” missions, the passing of time is something that the player will want to keep in mind. The Infected will be coming and the player would be wise to take what time that he/she has to prepare defences.
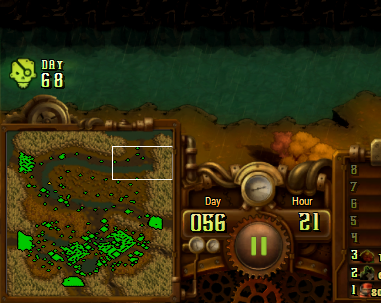
In missions or sessions in which the player can build bases, each real half-minute equates to an in-game hour. The player is also shown the day on which the arrival of Zed hordes is expected; there will be more elaboration on this later.
PAUSING:
Making the right decisions is an important part of gameplay; this is a game where hasty decisions are punished, and only much later. It can be very distressing to realize that some less-than-wise decisions earlier has doomed the colony to an incoming swarm. Examples include significant mistakes like over-extension, but even subtle ones like building a wall at a sub-optimal angle can lead to defeat.
Thus, there is the pausing feature, which lets the player take as much time as needed to make a decision. More importantly, certain take-back features are only available with pausing, namely the “undo” feature to reverse the placement of buildings.
Of course, there is the matter of the fan culture of this game. There have been competent players who video-stream their time with this game and win without using the pause feature. Ever since then, using pause in a video of the game can lead to heckling from others. (Of course, this is not actually a problem with the game, but the fan culture of the game can be a significant portion of the experience with the game if the player intends to stream its gameplay.)
MAPS:
The maps are the foremost element of the gameplay in They Are Billions.
The maps in Survival Mode are procedurally generated such that they have been designed for “balanced” gameplay. Weak Infected are around the player’s starting point, and forests and stone deposits are not far away. There are still instances where luck is a factor, such as wild variation in the size and distribution of the resource patches.
The maps for the colony-building missions in Story mode are static, though they are still generated according to code that the developers have set. Therefore, the player should still expect slight variations, such as a resource patch not having the exact same coverage as it had in the previous attempt at the mission.
As for the maps in the Swarm missions, the maps completely lack any resource patches, but have obstacles that the player should use to stall the Zeds with. However, some of these maps do not even have any obstacles at all.
The maps in the Exploration missions are thoroughly static. The only variations are the compositions of enemies that the player character would encounter. Even so, the variations are small.
For the purpose of populating the maps with objects, the maps in this game are made with grids of isometric squares. This is not important for the movement of units, but this is important for base-building. This will be described later.
FOG-OF-WAR:
They Are Billions is one of those RTS games that use both opaque and translucent fog-of-war. The opaque fog is used to hide unexplored areas from sight; this is especially important in Survival mode, where the maps are procedurally generated. In Story mode, the maps are static, so the player could recall the locations of resource patches on the next try.
Translucent fog-of-war is of course used to hide the presence of Infected, including after they have been found. The Zeds are not subjected to this rule of course; they always know where the player’s units and buildings are, if they have activated their awareness scripts (more on these later too).
In some scenarios in the Story mode, the rules on translucent fog-of-war are lifted, or are not applied to certain regions of the map. For example, there is a mission about Infected hordes coming from a wide bridge to the north of the Command Centre (more on this later); the bridge is always visible in its entirety to the player.
EDGE OF MAP FADE-INS:
Infected often come into the map from its edges; all of the incoming swarms will do so. They appear by fading into the map. When they appear, they are not immediately targetable for attacks. Likewise, they cannot immediately attack anything that they come across. This is important to keep in mind, if the player intends to set up defences at the edges of the map.
VISION RANGE:
All of the player’s assets project vision from where they are in a radius. Usually, buildings have longer vision ranges than units. Understandably, this vision is used to dispel the opaque fog-of-war and lift any translucent fog that is within range.
Obviously, any enemy has to be revealed before it can be attacked. A unit or defence structure does not necessarily have to be able to see an enemy in order to target it; another unit or building can spot the enemy for it instead. That said, there are some units and buildings that have attack ranges that are longer than their vision ranges; these depend on others to spot things for them.
In the Story mode, there are a few permanent upgrades that the player can purchase to permanently improve the vision range of certain units and buildings. These can be very handy in the long-term.
COLONIES:
As mentioned earlier, the player’s role is to raise a colony. The player will do this in the “Colony” missions of the Story mode, and definitely in Survival mode.
The colony starts small. The player only has a few starting units, and have to use these to clear the way to patches of resources that the player needs. A wrong move or a mistake in this phase dooms the player.
Surviving the early days means that the player is now entering the phase of gaining the assets to expand and in turn, the assets from the expansions. The player uses the latter assets to set up defences against the incoming Zeds.
For most of these missions, the colonies are only considered safe and stable after the final incoming swarm has been annihilated.
The most significant complication to be had from growing the colony is its size. Generally, a bigger colony has more exposed flanks. Some maps do have terrain that limit the approaches to the colony, but also hamper its growth and utilization of space.
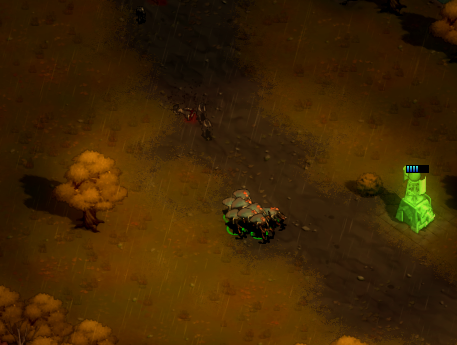
COLONISTS:
One of the gameplay factors is the number of colonists in the colony. Many colony missions in the Story mode require the player’s colony to accrue a number of colonists. The number of colonists in the colony is not as important in Survival mode, but as mentioned already, it is still a gameplay factor, as will be described later.
The player will want to know how many colonists that a building would contribute to the colony. This is actually the number of Zeds that would be spawned if the building is broken into. The player will want to avoid exposing these buildings to encroaching Zeds, lest the number of Zeds multiply and cascade into a mission-dooming outcome.
WORKERS:
Not all colonists directly contribute to the expansion and defence of the colony. Those that do are called “Workers”. Workers may be working at facilities as operators, or working as support for the soldiery. If the player does not have enough workers, the player cannot build most facilities or train new units.
Workers have to be gained by building housing for them. If the player loses the housing, the player also loses workers. This can put the player in the red, which prevents the player from building any further facilities or training new units until the player makes up the difference.
Building new housing does not immediately bring in new workers. Rather, the player has to wait for them to come over on the train, presumably from the capital city. The train will be described shortly.
THE TRAIN:
The gameplay element of the train and its tracks were added much later during development of the game, apparently as a way to balance any strategies that involve rapid expansions.
The colonies are not where humans thrive and are born. As mentioned earlier, in-game time is measured in days - too short for human life cycles. Thus, the colonists are bussed in through the train, and they are eager to start their new life in the colony (likely due to their gullibility, despite 13 years of failure).
That said, the train only arrives every 14 hours or so. Therefore, the player should not expect new workers to be available until the train arrives. Furthermore, only housing that has yet to achieve their full number of occupants would attract new workers. Housing that is being constructed or upgraded will not attract them, i.e. they will not be on the train.
However, any other building that increases the number of colonists without having to need workers, e.g. most food-producing buildings, will be operational from the get-go. This loophole in the narrative about colonists being bussed in was apparently put in place for gameplay convenience.
In the Story mode, the train can be “upgraded” to bring in more than just new workers. It can bring in additional resources, such as gold or wood. However, the influx happens only every time when the train arrives, so the resource injection is only useful in the early-game phase.
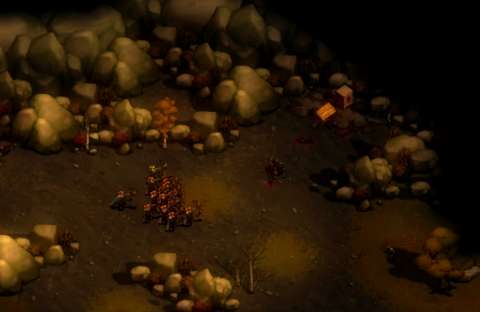
“INFECTION”:
That said, the narrative of the game is the kind of zombie apocalypse story that is caused by a absurdly contagious and rampantly mutagenic disease. Of course, consequently, the zombies are referred to as the “Infected”. How exactly the infection spreads is unclear, however. The gameplay designs for it toss out most of the usual fictional theories about infection-caused zombie outbreaks anyway.
For one, the soldiery that the player would use cannot be infected in any way. There is a lot that suggests that genetic engineering is involved, together with other implied reasons that not every surviving human could be subjected to this. If the zombies manage to gain ingress into a building, they quickly infect everyone in it and spawn more Zeds.
There is no inoculation for the infection. The player’s only reliable means of preventing any more Zeds from appearing is to prevent them from getting to the buildings in the first place. This is easier said than done, due to how numerous they are.
Anyway, the number of Zeds that are spawned are equal to the number of colonists that were in the building. Therefore, the player will want to avoid having buildings like the Farm be on the outer edges of the colony.
BARRIERS:
Any building that has people working in it is vulnerable to infection when the Zeds do get to it. To stall this occurrence, the building has “barriers”. The barriers are implemented in-game as a portion of the hit-points of the building. If this portion is gone, the building is breached; the Zeds will get in and infect everyone in it, thus spawning more Zeds.
However, the Zeds also stop damaging the building. if the player could contain the outbreak, the player can repair the building to restore its function. The lost colonists and workers are also conveniently returned.
MOVEMENT COLLISION:
One of the most important, most convenient and yet most frustrating thing about They Are Billions is movement collision.
Everything that the player can see happens to have collision hitboxes. Not a single thing can move through any other thing. For example, any Zed cannot move through another Zed. Furthermore, when anything makes attacks, he/she/it must stay at where it is. There is nothing that can fire on the move, not even the mechanical units that the player gets.
For the matter of tactical considerations, These limitations mean that Zeds cannot bring their numbers to bear so easily. Since most Zeds are melee-only, only the ones at the leading edges of the horde can attack.
This limitation also applies to the player’s units. Large bunches of the same units are not very effective at bringing their firepower to bear since the ones that are attacking would start attacking at their maximum range, so the ones behind them cannot attack at that moment. (The Zeds would eventually come closer though, so the ones behind the ones in front can begin shooting.)
UNITS WILL NOT MOVE AROUND OTHER UNITS FOR SHORT DISTANCE TRAVEL:
Usually, units in RTS games would try to move around their compatriots if the latter are blocking them from moving ahead. This is not always the case in They Are Billions. If the units and Zeds in this game intend to move across short distances, they will not attempt to move around any obstacle in the way.
This seems like a counter-intuitive limitation in their pathfinding, and can even seem frustrating. However, longer-term observation would reveal that this helps the player a lot. This prevents the player’s units from over-extending themselves when going on the attack, e.g. stretching out into a thin line just so that they can shoot at the Zeds.
The Zeds are also prevented from going around each other, thus slowing down their spreading if they come across obstacles like walls. This may or may not turn out well for the player; it prevents them from finding holes in any incomplete defences too early, but they will also concentrate their attacks on a specific spot in a line of walls.
Unfortunately, there is still a significant setback from this deliberate design: the player should not expect units to move across the map post-haste if there are Zeds about. They will just keep running into the Zeds. This means that the player should not expect to be able to send map-clearing task-forces back to the colony for defence without them being delayed by Zeds along the way.
INDIVIDUALS PUSHING INTO EACH OTHER:
Individuals may not be able to move through each other, but they can still push whoever is ahead of them out of the way. This only happens after a few seconds of the former continuously running into the latter, however.
In fact, the other units that are being pushed might end up being moved, and moving together with the cluster of units afterwards. This can be a problem if the player is trying to get a cluster of units past other units that the player has posted as sentries.
UNITS MOVE AT THEIR OWN SPEEDS:
This game does not lend well to combined-arms strategies when going on the attack (i.e. map-clearing in this game). This is because units move at their own speeds, and never in tandem unless they are units of the same type. Thus, this means that the player should use only one type of unit for map-clearing purposes, lest faster units over-extend themselves and get into trouble. Micromanaging them helps mitigate these occurrences, but this can take a lot of attention away from managing the expansion of the colony.
COMMAND CENTER:
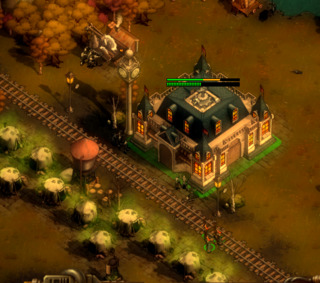
Somehow, every colony-building mission has the player beginning with the large Command Centre. There is the backstory about failed colonies and expeditions prior to the player’s arrival, and the fact that the Command Centres are next to functional train tracks. Therefore, presumably, the humans managed to sneak small groups into the pre-existing Command Centres and reactivate them without alerting the Zeds to their presence.
Anyway, keeping the Command Centre functional is the player’s goal. This is easier said than done, despite the massive number of barrier points that it has. Besides, if the Infected managed to get close enough to attack the Command Centre, the player likely already failed.
The Command Centre provides the resources that the player needs to start a colony. It comes with a small amount of resources, a number of workers and some food. In the Story mode, the player can upgrade it to provide more; indeed, this can give the player a considerable advantage.
The Command Centre is often already close to some resource patches. However, it is also a very large structure, which takes up space that could have been used for other buildings. In particular, the player will not want to have it within the area of influence of buildings like the Market, because that would be wasteful.
RESOURCES – OVERVIEW:
The Command Centres are somehow located in regions where there is considerable natural resources. In particular, there are mineral deposits that are somehow within mere kilometres of each other, even if this is not geologically possible.
Anyway, the resources that the colony needs can be categorized into two overarching categories: those that can be accumulated without any limit, and those that can only be hoarded so much before limits are reached. There is no clear narrative explanation for these differences.
The resources that can be accumulated without any limit are Workers, Food, and Energy. The resources with finite storage limits are Gold, Wood, Stone, Iron and Oil. The player will be juggling all of these resources in order to develop the colony and raise an army and other means to defend the colony.
Workers have already been described earlier. Incidentally, Workers are generally needed for many resource-gathering facilities, with the exception of the Hunter’s Cottage and Fisherman’s Hut, which are the basic Food-producing buildings.
CAPACITY LIMITS FOR FINITE STORAGE RESOURCES:
The early- to mid-game assets that the player can obtain do not cost a lot of the finite-storage resources. To elaborate, their prices are not higher than the starting limits of the storage capacities for these resources. Therefore, the player does not need to worry about the storage capacities, at least not early on.
However, the player will eventually need the end-game assets, especially the Engineering Foundry and anything that comes from it. To get these, the player will need to raise the storage capacities so that the player can hoard more in order to pay the prices for these assets.
WAREHOUSES:
The warehouses are the only means of raising the storage capacities. Fortunately, they are not just burdensome building; they also increase the productivity of nearby resource-extracting building. In particular, the player would want to increase the output of oil derricks – more on these later.
If Warehouses are disabled or destroyed while the player’s consumable resources are already stored close to capacity, any resources beyond the changed limits are simply lost.
COUNTER-BASED DESIGNS FOR NO-LIMIT RESOURCES:
Where the finite-storage resources are implemented as consumables that have to be stored, the no-limit resources are implemented as “meters”. Anything that use these resources fill up the meters. If any of these is removed, e.g. buildings that consume Energy are demolished, the pressure on the meters is relieved, i.e. more of these resources appear to be “returned” to the player. Gaining sources of these resources extends the meters.
FOOD:
As mentioned already, the Hunter’s Cottage and Fisherman’s Hut are the player’s starting means of getting Food. There tend to be some forests and a body of water that are close to the Command Centre, so the player can get some Food early.
Food is needed to build housing, which in turn brings in Workers. Many units also happen to need food too, in addition to the workers that are needed to support their fielding. These two demands on Food very much necessitate the exploitation of any Food source wherever they appear.
ENERGY:
The humans may have lost a lot of their tech due to the dark age brought about by the zombie apocalypse, but they have not lost the tech for the machines that they use. Incidentally, these machines require Energy in order to run.
The Command Centre provides some Energy from the beginning; the Story mode lets the player upgrade it so that it can provide more. Eventually though, the player will have to build structures that give more Energy.
The player’s choices are limited though. The player begins with the Mill (which is a wind-mill, of course), but little else. Furthermore, the Mills have to be built away from each other, and their fan blades prevent most things from being built close to them. Eventually, the player gains the Thermal Power Plant, which is a denser source of Energy but consumes Wood regularly.
Energy becomes a significant complication after the colony has grown to considerable size. The Mills prevent almost every other building from being built next to them, and the Thermal Power Plants are relatively large buildings.
If the player is lucky, the player may come across what appear to be compact power generators as loot from exploration or destroying Villages of Doom (more on these later). These outright increase the player’s Energy meter.
ENERGY COVERAGE:
In the sci-fi setting of this game, there is steam-powered technology, and – somehow – wireless transmission of steam power. If it is not apparent already, the player will have to toss his/her sense of disbelief out the window when playing this game.
Anyway, having a lot of Energy does not mean much if it cannot reach the buildings that need it. For this purpose, there is the Tesla Tower, which projects a field of energy coverage. Any building that is within any tower’s coverage radius is considered to be powered (including Tesla Towers themselves). Of course, Energy-producing buildings are already inherently powered, but must be within energy coverage in order to transmit their Energy.
When a building is powered, it is obviously functional. It is also available for repairs, which is important to keep in mind. Static defences like walls may not need energy, but will need to be under energy coverage in order to be (somehow) repaired.
The Command Centre also projects energy coverage, which is something that is essential to the early parts of a mission. In the story mode, the coverage of the Command Centre can be significantly improved, thus giving the player an early advantage, i.e. not having to build Tesla Towers so early.
GOLD:
Gold is the main consumable resource. It is spent on just about everything, so the player will want to have as much of it as possible. Incidentally, the storage capacity for Gold is also the highest of the four consumable resources.
The main source of gold is presumably taxation of the (really gullible) colonists. Thus, as the colony grows, the player’s gold income would increase too. The time period to the next round of taxation is shown as a meter below the Command Centre’s hit-point bar.
There are few other worthwhile alternatives to taxation. One of these is the mining of gold from gold deposits, but these are understandably rare. Gold deposits are also rarely near the Command Centre.
After the player has built the Market, practically every other resource can be converted into Gold and vice versa. However, the exchange rates are considerably biased towards being disadvantageous to the player. The player should not expect to get much Gold from selling the other consumable resources.
Since the main income of Gold is taxation and it is dependent on the number of colonists, the player might want to keep in mind how many colonists would be added by a building. Static defences and energy coverage buildings do not give any additional colonists, for example.
WOOD:
Wood is the construction material that the player uses at the early days of the colony. Eventually, the player would be using stone, but the player would be consuming a lot of wood before this happens. Wood is also used to train Rangers, and to feed Thermal Power Plants with.
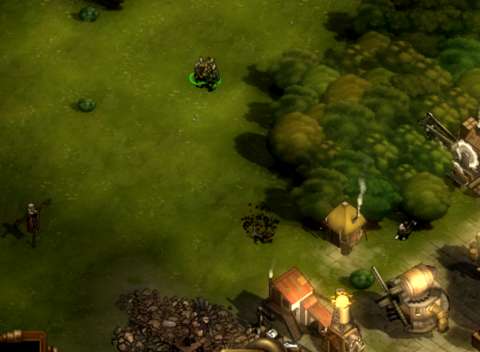
Wood is primarily obtained through the sawmills that are placed next to forests. (There have to be a substantial number of trees for a location to be considered a forest.) Other than loose piles of wood, there are no other sources of wood. Therefore, the player might want to note down the locations of any forests, for the later placement of any Sawmills or Hunter’s Cottages.
STONE:
Stone deposits are the most common mineral deposits, though they are rarer than copses of trees. Therefore, the player would be getting less stone than wood from most maps. Nonetheless, stone is needed to build the more advanced structures.
More importantly, it is needed to build the stiffest static defences, namely the Stone Walls and Gates. A player who favours having these mundane but otherwise easily manageable defences would need a lot of stone. Chances are that such a player would likely have to purchase Stone from the Market, just so the walls can be raised before the Zeds attack.
IRON:
Iron is mainly used for making high-end structures and units. Iron deposits are rarer that stone deposits. In some maps, iron deposits can be found next to stone ones, thus allowing the player to simultaneously extract both with the same Quarry.
In the Story mode, the player would have little use for Iron until much later in the playthrough, after the player has unlocked techs that use Iron in large quantities. The only early-game tech that would use Iron is the training of Soldiers, each of whom only requires a bit of Iron, which can be easily supplied by any number of Iron-mining Quarries.
OIL:
Oil is a late-game resource. By default, oil can only be obtained from Oil Platforms that are placed on top of oil pools (which look like steaming caldera). Oil has a low production rate, and there are not many oil pools in most maps. This is just as well, because not many things require oil, and these happen to be very expensive purchases that should be considered carefully anyway.
Oil happens to be most expensive of the consumable resources; the difference in its price compared to the others is considerable. Therefore, even if the player does not intend to use anything that requires oil (which is possible in the earlier colony-building missions of the Story mode), the player might want to produce them for sale anyway, if only to sell them for Gold.
In missions that involve very dense waves of Infected, the player will want to have an oil income that is as high as possible, if only for the production and maintenance of units that require oil. There will be more on these later.
BUILDING STRUCTURES:
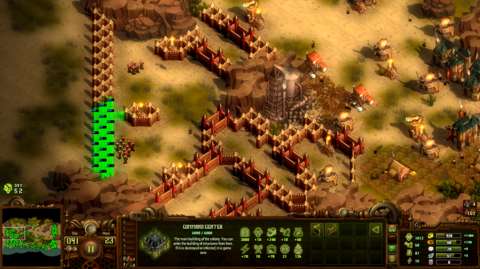
As mentioned earlier, the maps are designed with isometric grids of squares. Buildings are made according to these squares.
Most buildings cannot be built close to each other. The only significant exception to this limitation is the Tesla Generator, which can be built next to just about anything else except each other. Another minor exception is the three types of Houses, which can be built in rows with depth of two houses.
In almost every map, space quickly becomes a premium. Therefore, the player should maximize the use of space, while adhering to any limitations on the proximity of buildings to each other. This is– something that can be difficult to do without using the Pause feature. (Besides, such a feature is seen more frequently in city-builders.)
EXPANDING TO MAP LIMITS:
The player can only expand the colony so far before hitting the map’s boundaries. The boundaries are a dozen squares away from the edges of the map. These limitations were put in place so that the Infected have some distance to appear as a horde when they make incursions into the map (more on incursions later). This also allows the player to use explosive or other area-effect weapons against them.
DEMOLISHING STUCTURES:
Occasionally, the player might have to remove some existing buildings in order to make way for others. The main means to do so is to demolish them. Yet, demolishing structures is not something to be done lightly.
This is because the cost of the demolished buildings is not completely refunded. The story mode does provide some upgrades that let the player recoup more costs, but the refund will never be 100%. Therefore, the player will want to make building placements carefully and commit to them. (This is something that the player would likely use the Pause feature for.)
REPAIRING BUILDINGS:
Only buildings that are within the colony’s energy coverage can be repaired. This also applies to buildings that do not need energy, like walls and towers. Conveniently, there is a button in the user interface that lets the player repair all damaged buildings that are not under threat.
That said, there is emphasis on the phrase “under threat”. For whatever reason, Zeds that are close to damaged buildings prevent them from being repaired. This is particularly important in the case of damaged walls that are still being hammered by waves of Infected.
CANCELLING ORDERS:
The player places orders whenever the player wants units produced or techs unlocked for use. Typically, these orders cost resources up-front.
In other games, cancelling the orders would completely refund the resources to the player. This is not the case in this game. If the fulfilment of the order has already made any amount of progress, cancelling the order only refunds part of the costs. This is much like the case of demolishing structures.
WORKSHOPS AND FOUNDRIES:
One of the trope designs of base-building RTS games is that certain buildings are dedicated towards tech progression. Not having these buildings typically means that the player’s tech progression would be stunted. These buildings also make the player vulnerable to crippling strikes, especially in multiplayer-centric games.
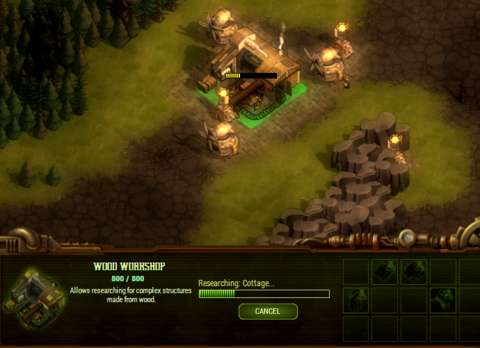
In They Are Billions, this trope is particularly amplified, for better or worse. These buildings come in the form of the Wood and Stone Workshops, and the Engineering Foundry. These buildings must be built if the player wants to improve the capabilities of his/her colony.
The player must be especially careful about where to place these, because these buildings do not give the player the option to demolish them. The player could have units attacking and destroying them; that removes them, of course, and the player does not get to recoup any cost. However, losing the building also reverses any tech unlocks that had been made through the building. After the player rebuilds them (and they are not cheap), the player has to purchase the tech unlocks all over again.
TRAIN TRACKS:
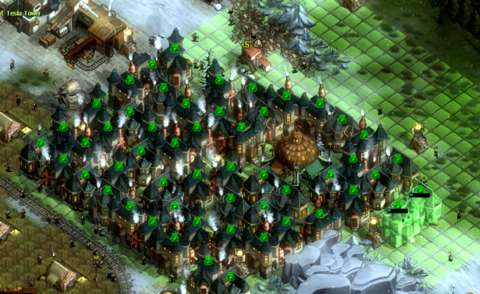
The train has to come by through the tracks that run through the map. The tracks happen to impede construction.
The tracks will always be adjacent to the Command Centre at one point along its length at the very least. Therefore, the beginning of the colony’s expansion will always be hampered by the tracks.
Furthermore, the tracks do not allow the construction of walls across them. Rather, the player has to build gates across them, and only at places where the track is straight; the bends in the tracks do not lend well to the presence of gates.
The only positive benefit of the train and its tracks also happens to be rather minor. The train cannot be stopped by anything in its path; not even Giant Infected can stop it. It kills just about any Infected that it runs into, with the exception of very tough Zeds like the Chubbies and, of course, the Giants. However, luring Zeds onto the tracks is not easy, much less timing the luring with the coming of the train.
Unbelievably but fortunately, the train will not kill any of the player’s units that happen to be on the tracks. However, the train will push them out of the way, and in some cases, carry them along the tracks before they are pushed out of the way.
THREAT OF INFECTED – OVERVIEW:
Although there are several types of Infected, they can be categorized according to two overarching types: the ones that are already in the map, and the ones that are coming into the map later.
The ones that are already in the map are not aware of the player’s colony, at least not outright. They are distressingly numerous, such that every decision to expand the colony must consider their proximity. Furthermore, as the days pass, their awareness of the colony increases, meaning that these Zeds will decide to stop moping around and encroach on the colony. Moreover, if the player is not careful in their elimination, he/she might attract one too many of them – more on this later.
The ones that are coming into the map will always come from one of the contiguous edges of the map, i.e. where the map seems to lead to other off-screen places. These Zeds are already aware of the colony and will be on the offensive.
In turn, these incoming Zeds can be further categorized to two types. The first type of Zeds can come in occasional trickles or sometimes small waves, generally with no warning unless the player has units or defences watching these edges of the map. The second type are swarms, which will be described in their own section.
The first type of Zeds and the gameplay elements that involve them would be described first.
SIGHTING:
Generally, any of the player’s units can see further than the Zeds, so the player has advance warning of any Zed that might be irked. However, any Zed will become aware of any human that comes near enough and will attack.
NOISE:
In the case of pre-existing Infected that have not visually spotted the player’s units, “noise” is the main factor in raising the awareness of the Zeds that are already around the map. Noise is implemented through two variables: the type of player’s unit that is attacking the Zeds and the distance between the Zed being attacked and any other Zeds. The actual location of the player’s unit that is doing the attacking actually does not matter.
Generally, Zeds that are closer to the Zeds that are being attacked will become aware. Different Zeds have different “hearing” ranges, however. For example, Harpies have the longest hearing range, and will come charging after the player’s units from rather far away.
Next, there is the type of player’s unit that is doing the attacking. Generally, if that unit has a loud and showy weapon, it is going to attract a lot of Infected.
Being armed with a non-firearm weapon, the Ranger has the least noise. Incidentally, players start with a few Rangers, so that they can begin killing any Zeds in the vicinity of the Command Centre, if there are any. Indeed, a swath of Rangers can entirely clear a map of weak Zeds, if there are no Villages of Doom or powerful Infected (more on these later).
The Soldiers have noisier weapons, but weak Infected would still ignore them even if they should be within earshot (at least until they themselves are shot). However, any more powerful Infected are likely to be drawn over to them, so the player would either have to resort to masses of Soldiers or have more powerful units accompanying them (the latter is more difficult to do, unfortunately, due to the aforementioned lack of any feature to make units move at the same speed).
Snipers have relatively discreet weapons, but their slow movement speed and slow attack rate make them unsuitable for map-clearing work.
Any other unit with ranged attacks makes a lot of noise, possibly drawing in more Zeds than they could handle. Many of them are slower on the move than the Soldier too.
OUTRUNNING ANGERED ZEDS:
Occasionally, the player might find that his/her map-clearing taskforce has attracted more pre-existing Infected than they could handle; this can happen if the player does not have advance warning about the density of Zeds ahead in unexplored areas. In such a case, running away might be wise.
Unfortunately, there are only a few of the player’s units that can actually outrun most Zeds. Slow-moving units like the Sniper and Lucifer cannot hope to outrun anything but the slowest and weakest of the Infected. Thus, only a few types of units are suitable for map-clearing.
That said, if the player’s units can run away from alerted pre-existing Infected without getting attacked for several seconds, the Infected give up. This means that the player can divide pursuing Zeds and destroy them piecemeal. This does require some micromanagement, however.
VILLAGES OF DOOM:
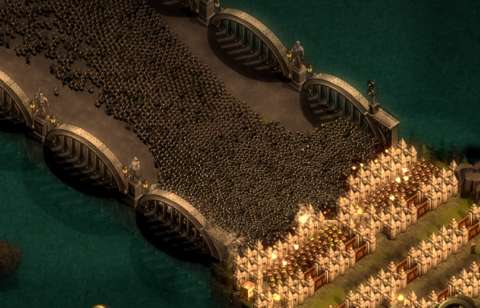
In addition to the Zeds that are already moping about, there are Zeds that are lurking in “Villages of Doom”. These “villages” are remnants of infected colonies, or vestiges of civilizations of the past. (The architecture of the buildings suggests that they are recent, however.)
These contain hundreds of Infected, which come surging out when the buildings are damaged. Noisier weapons cause more to pop out. Depending on the audacity of the weapons that are used, the Zeds that pop out may or may not be alerted.
The buildings do have limits to the Infected that they can spawn; it is possible for a sustained “siege” of sorts to eventually exhaust them of their reserves of Zeds. However, it is also possible to destroy the buildings before they can disgorge all of their reserves, in which case any Zeds that have yet to come out would die outright.
Each building in the Villages of Doom also has the same hearing scripts as the pre-existing Zeds. Therefore, if the scripts trigger, the building spawns Zeds that are already aware of the presence of the player’s units.
WANDERING ZEDS:
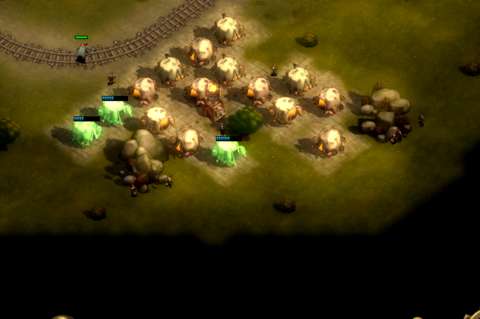
Pre-existing Zeds mostly just mope about, but they do occasionally stumble or crawl here and there in random directions. These could eventually wander too close to the player’s buildings, and then become aware of the latter’s presence. If the player has not been paying attention to red blips that are approaching the green blots that represent the player’s buildings on the mini-map, all it takes to start a cascade of infection is just one Zed wandering too close to a building.
The second category of Zeds and their associated gameplay elements would be described next.
OCCASIONAL INCURSIONS:
The Story mode has more than a few statements that Infected from other regions would be attracted to the player’s colony. This is the narrative excuse that is used to justify the occasional spawning of Infected that would enter the map through its non-isolated edges.
Depending on the difficulty designs of the map, these waves can compose of just several weak and slow Infected, or they may be a stream of the fresh and fast ones. If the map happens to have very high difficulty settings, these may include the special strains too, which can be distressing.
As mentioned earlier, the player is not given any warning about these waves. They can catch inexperienced players unaware, if they thought that monitoring the mini-map and moving forces to intercept incoming Zeds is all that is needed to deal with non-swarm Zeds.
INCOMING SWARM:
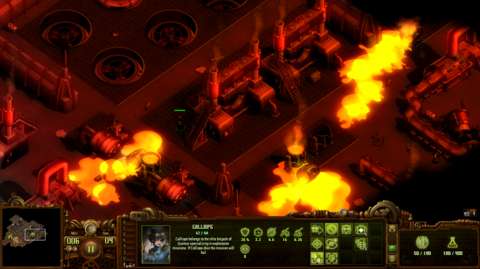
Swarms are significant waves of Infected that come into the map through its edges. Swarms always attempt to converge on the Command Centre, but they will also attack anything in their way. The player is warned about swarms, which is just as well because the waves are much more worrisome than the other kinds of incursions.
The first swarm is usually more manageable than the ones that come after, even though it does consist of dozens of Infected that can wreck a player who is not prepared. The second swarm is substantially more numerous, and the ones that come after are even worse.
The difficulty setting for the map determines how early that the swarms come; having less time in between swarms of course means less time to prepare. The number of swarms also increases, if the map has been designed to be only completed by a fixed number of days.
The player is shown the timer in which the swarm would arrive. “Arrive” is an ambiguous word in this matter, however.
The timer shows the number of days that would pass before the swarm’s attack is imminent. When the swarm “arrives”, the player is given another timer that ticks down the number of in-game hours before the swarm surges into the map. The second timer generally gives the player 24 hours to do any last minute work.
The complication here is when exactly the second timer appears. The second timer may appear in the day prior to the arrival of the swarm, meaning that the swarm actually arrives on the day that it is predicted to come. Alternatively, the second timer may appear during the day of arrival itself, meaning that the swarm arrives the day after.
Of course, this just means that the player should have completed preparations prior to the day of arrival, or at least have the resources and space to throw up some defences when the second timer appears.
WHERE SWARMS COME FROM:
Speaking of which, the defences should be in between the swarms and the colony’s heart. The placement of these should be easy, because the second timer also comes with a notification that mentions the edge of the map from where they appear.
Unfortunately, the information is incomplete, and this can be a problem in maps with many contiguous edges. The notification mentions which of the four edges that the swarm would come from, but does not exactly indicate where. For example, a map may have an edge where there are only two locations that connect to elsewhere outside the map. A swarm that comes from this edge may come through both of these locations, or one of these, which is not indicated to the player.
COMPOSITION OF SWARMS:
The game may inform the player of when the swarms arrive and where they would come from, but it will not inform the player of their composition.
In Survival mode, the composition of the swarms is more or less “balanced”. There are a lot of cannon fodder Infected, and among them there are the more troublesome strains. Still, the main challenge is their numbers.
In the case of some maps in the Story mode, the Swarms can be composed of very specific strains of undead. The last colony-building mission, in particular, has very troublesome waves that can severely test the player’s knowledge of the advantages and disadvantages of specific strains.
STRAINS OF INFECTED:
Speaking of which, the specific strains of Infected would be described next.
The first few strains came from the feeble and destitute. Understandably, poor specimens make for pathetic Zeds. These are slow and weak, and not even threatening in huge hordes.
The next few strains came from those that have been freshly infected, or from specimens that are already hale, like government executives. These are tougher and faster than the previous strains of Infected. They also happen to form the bulk of the swarms.
Then, there are the Chubbies. As their name suggests, these are huge and obese Infected, having gorged on a lot of meat. (The Infected are not undead, by the way.) Chubbies are much tougher than most Infected and despite their girth, they are just as fast as most other Zeds.
Next, there are the Venom Infected. These can spew a spray of toxic fluids across a considerable distance, equal to the default range of the Soldier’s gun. These punish the player for massing units, and they can also melt through walls rather readily. These Infected are also the only ones with ranged attacks.
After that, there are the Harpies. Amusingly, these came from pretty ladies who succumbed to the infection, which somehow avoided messing up most of their otherwise comely appearance. There are major changes anyway though: they are incredibly fast and they sport nasty talons. Also, as mentioned earlier, Harpies have the longest hearing range. Wherever they occur, the player should expect them to come running over to the player’s units across long distances.
Then, there are the Infected Behemoths. The Behemoths are remnants of bad ideas during the onset of the zombie apocalypse. These are the fastest Infected around, and they can hit multiple targets with a single swipe. They also occasionally roar, which brings lesser Infected over. Like the Harpies, they have incredibly long hearing ranges. Due to their huge size, they have attacks that can hit multiple targets at once, so strategies that involve bunching units may require some refinement.
Finally, there are the Infected Giants. These are practically Chubbies that have grown to immense sizes. They are even faster (likely because of their proportionally huge strides) and are much tougher (never mind Galileo’s law). They have the Behemoth’s roar ability too, except these draw in more Infected. Due to their humongous size, they can hit even more things with a single swipe than Behemoths. More often than not, Giants are found in the later swarms, and at higher difficulty settings.
Fortunately, Infected like the Chubbies and worse do not occur so close to the Command Centre when the map is generated. However, at higher difficulty settings, a few of these do, so the player should be careful about making sure that the map-clearing team is numerous or otherwise powerful enough to deal with what they come across.
DEFENCES:
The player needs both units and static defences to defend the colony, but perhaps the latter is more important. This is mainly because restricting the movement of the Zeds makes it more efficient to shoot them up.
Since most of the Infected are melee-only combatants, static walls made of solid material happen to be of great utility against them. These stall the Zeds, and cause them to bunch up and push into each other, as described earlier. The other Zeds behind the stuck ones will flow around them, however, which is the reason for having considerable stretches of walls wherever the player builds them.
All units and static weaponry can shoot past and through the walls, conveniently. Thus, they can shoot at Zeds that are being distracted and held up by walls.
The walls will eventually go down, however, due to the aforementioned limitations on repairing buildings that are being encroached upon by Zeds. It might be in the player’s interest to have a second layer of defences, as well as space for surviving units to retreat.
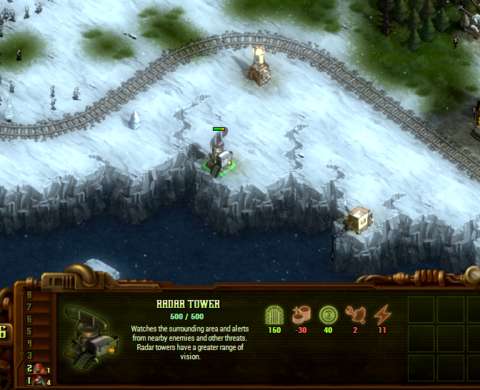
Static weaponry, like turrets, may be manned or automated. The Infected will go after manned ones, like the Great Ballista, but the automated ones are only attacked if they happen to be in the way. Their value is questionable, mainly because they also cost Energy in addition to having resource drains. Still, some players might like to have them if only because they can take a lot of damage and thus stall the Infected after the defence lines begin to crumble.
TYPES OF UNITS:
One of the complaints that are levelled at They Are Billions is that there are not many types of units that the player can have. Having played the game, I would say that most units have uses that are so situational, there is little reason to use them outside of their niches. If the player is expecting the kind of extensive unit variety such as that in the first Total Annihilation game, he/she would be disappointed.
All types of units have both immediate and long-term costs. The immediate costs are the straight costs in ordering their production. The long-term costs are indefinite drains on the player’s resource incomes. Whatever the costs are though, they always include an immediate fee in Gold, a drain on Gold income and the service of at least one Worker.
The types of units that the player can have can be categorized according to two types: those that are produced from the Barracks, and those that are produced from the Engineering Centre.
UNITS FROM BARRACKS:
Those that are produced from the Barracks have less costs, and never cost Oil. These have less firepower than those from the Engineering Centre, but they compensate by having access to the veterancy system, which will be described shortly. These units are also more mobile than those from the Engineering Centre. They are also the only units that can enter and occupy towers.
Anyway, the player begins with the most basic of units: the Ranger. In the Story mode, the player only has this unit at first; even the next unit to be had, the Soldier, requires a tech unlock. In Survival mode, both Rangers and Soldiers are available from the get-go, which is just as well because they are needed for the early-game segments. Rangers are also the fastest units, so they are well poised for exploration and quick-response, at least in the early days of the colony.
Rangers are needed for the discreet removal of pre-existing Zeds. For the removal of Villages of Doom, however, the player would need a massed platoon of soldiers.
Speaking of which, Soldiers can be reliably massed into tight clusters, which can be effective on both offense and defence. Indeed, if the player does not have a specific plan of defence involving more expensive units, then massed Soldiers can work too.
The Sniper has the least mobility of the three units from the Barracks. They have the highest hitpoints, but they have lack of armor compared to the Soldier, so they will not last long when under attack. Their main value is their high damage per shot, which is useful against tough Infected. On the other hand, they have very slow rates of fire, as mentioned earlier.
VETERANCY:
All of the units from the Barracks start green. They gain experience from killing Infected, i.e. they land the killing blows on the Infected. Their progress is showed in a percentage-based meter under their statistic for Veteran status. After the meter has reached 100%, the units become veterans, which raises their damage output.
This upgrade is one-time only; any further kills do not impart any more experience gains. Furthermore, veterans are not any tougher than the rookies; they merely inflict more damage. They are also not any faster, which is perhaps for the better as it allows veterans to travel together with rookie units of the same type.
If the player is willing to put it in the effort to micromanage them, the player can separate veterans from the main bulk of any force, posting them elsewhere where there is less action. This can help the rookies gain experience more quickly.
UNITS FROM ENGINEERING CENTRE:
The units from the Engineering Centre have higher costs than those from the Barracks and always cost Oil, both immediate and in the long-term. Due to their equipment, they cannot enter towers either. They have far greater firepower than units from the Barracks though, and their costs in Workers are comparable. This means that the player could have as many of them as the player can have units from the Barracks if the player can afford their resource costs.
Indeed, months into the colony’s existence, the player will want to have as many of these as possible. However, considering that all maps have limited sources of Oil, there can only be so many of these units before the player run out of Oil income.
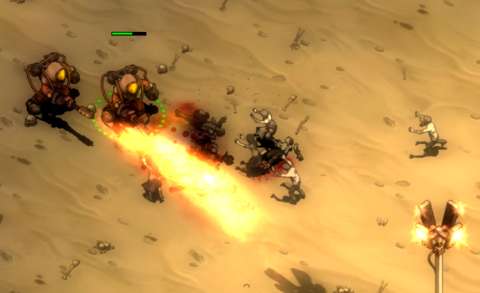
The player begins with the Lucifer. The Lucifer is practically a living flamethrower, and despite his apparent lack of any protective clothing, is completely immune to his own flames as well as those of his colleagues. This is important to keep in mind, because other units do not have immunity to the flames. This makes the Lucifer very incompatible with most other units, especially if he is used for map-clearing. In fact, the Lucifer is poor for map-clearing work, mainly because of his slowness on the move.
The Thanatos is a muscled dude with an exoskeleton (and who may be permanently bonded with the exoskeleton too). He also has a grenade launcher, which fires slowly but otherwise has tremendous area of effect. It is possible for a few Thanatos to keep an incoming horde of many dozens at bay if the player could getting their timing right (which is easier said than done).
The Titan is the premier map-clearer. A few of them is often enough to clear most maps, and they are fast enough to reliably respond to incursions. However, they take up a lot of space, making them unsuitable for defensive purposes.
Finally, there is the Mutant, which is a very expensive unit. The Mutant is melee-only too, thus making it not suitable for defensive strategies involving walls. However, the Mutant’s main value is its speed, which allows it to respond quickly to anything. Still, that value might not be enough for players who prefer that there would be no need to come to grips with the Infected in the first place.
GOING INTO THE RED:
All units impose a drain on Gold incomes. In the case of units from the Engineering Centre, they impose a drain on Oil too. If the player’s resource rates go into the red, i.e. the player is losing resources per time step, the player risks losing units. After the storage meters for consumable resources empty out and their income rates go into the red, units disappear at random.
The drain on Oil income is particularly worrisome. The inexperienced player may have the idea of building up a surplus of gold to keep purchasing oil to maintain the service of these units. However, this is more busywork than rewarding micromanagement, and Oil is a very expensive resource to purchase with Gold.
DECOMMISSIONING UNITS:
If the player has some units that the player no longer wants, they can be decommissioned. To do so, the units have to be close to any of the buildings that produced them. They cannot be decommissioned whole-sale, however, because the player has to select each individual for this to happen. This can be tedious.
Decommissioning units does not return all of the resources that have been spent on the units, so the player will want to consider this carefully.
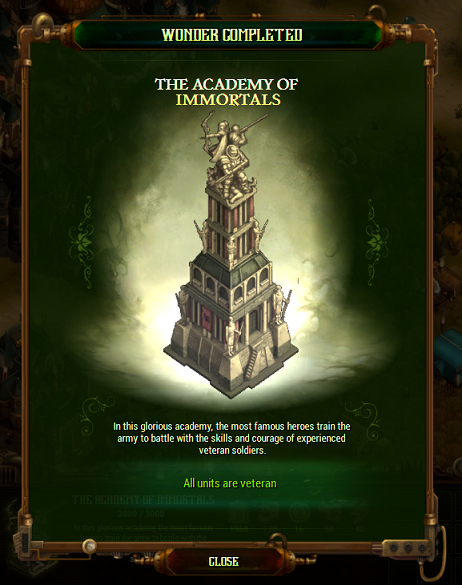
WONDERS:
Ever since the Age of Empires series established the gameplay element of Wonders, there had been games with these resource-intensive buildings that impart considerable benefits.
In They Are Billions, these are the results of salvaging and further developing the technology of the past civilization. These are not steampunk, and may even seem esoteric. For example, the Lightning Spire deliberately captures lightning from the sky to generate Energy and energy coverage.
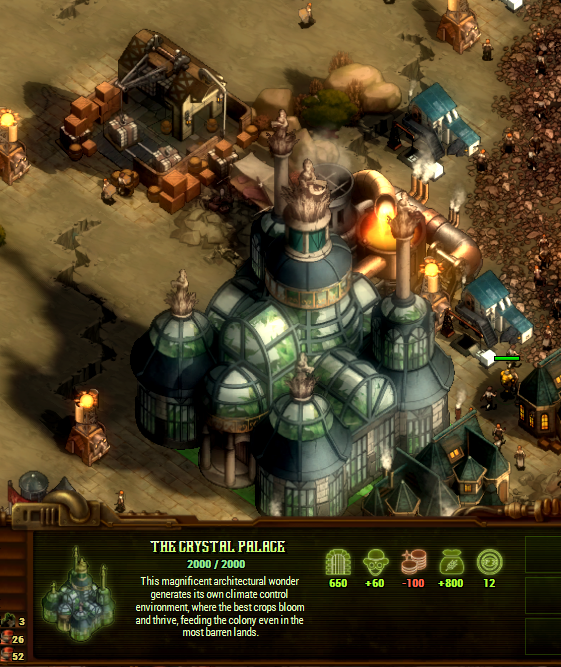
Building Wonders in the colony will not win a mission outright, but they do help a lot. The Wonders that most players would likely go for are the economic ones, such as the Crystal Palace, which produces a lot of food relative to the amount of space that it takes. Some of the economic ones also happen to be affected by the bonus effect of Warehouses.
Eventually, with enough resources, the player will likely want to build all of the Wonders. Having Wonders also increase the number of points that can be scored after winning a mission in Survival mode.
The Wonders are very costly, as to be expected. More importantly, the player must build Warehouses in order to accumulate the amounts of resources necessary to build them.
SWARM MISSIONS - FOREWORD:
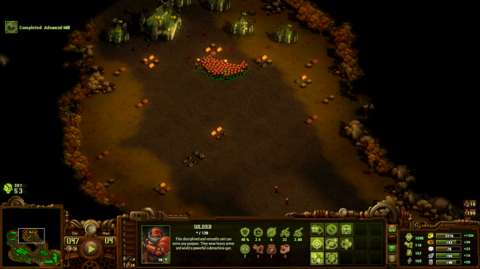
Swarm missions in the Story mode do not allow the player to build a colony. Rather, all the player gets is an “Outpost”, which the Empire has somehow managed to place in the middle of an incoming horde of Infected.
Prior to starting any Swarm mission, the player can examine the composition of incoming Infected. This will inform the player of what kinds of units to use – or to be more precise, anything to use other than the reliable tightly-packed mass of Soldiers. However, the player does not get to examine the map until after starting the mission.
Speaking of which, a Swarm mission begins paused. During this pause, the player can examine the map as much as he/she wants, because the fog-of-war system is not applicable here.
In addition, the player must spend as much of his/her “Empire points” as possible to place units that will withstand the incoming Infected. Placement of units is only possible during this initial pause too. Generally, having more units is better, because the player cannot get any more units at any other moment of this mission.
“EMPIRE POINTS”:
Empire points represent the wealth and influence that the player character has for requisitioning a task-force and other assets from the Empire’s military for Swarm-eliminating missions. Having more is better, of course.
To have these points, the player completes colony-building and swarm-eradicating missions. This means that the player would usually have enough points to deal with the latter of these missions.
Otherwise, there is no other use for Empire points.
EXPLORATION MISSIONS – FOREWORD:
The Exploration missions involve the character that the player has selected at the start of a playthrough in Story mode. There are two options: a hulking dude with an oversized gun, and a lithe top-hatted lady with two handguns. The guy is slower than the lady and has slower rates of fire, but compensates with considerable damage output. The lady moves a lot faster and has higher rates of fire, but is less durable.
Whichever character that the player chooses, the player is likely to use the same overarching strategy anyway: keeping away from the Infected and shooting them before they get close. Besides, the player character is almost always alone; somehow, he/she is not allowed to bring in any support, despite presumably being the general that is reviving the fallen colonies.
Anyway, the player always starts with just this character, right in front of the extraction points that he/she would need to get to later. There may be other extraction points, but there is usually only one, for better or worse.
The gameplay designs on noise are applicable in these missions, so the player will want to consider the density of Zeds that the player character would be approaching.
LOCALES:
Exploration missions have the player character reconnoitring abandoned or derelict facilities that the Empire’s scouts have discovered but otherwise not investigate further. Somehow the player character is considered enough.
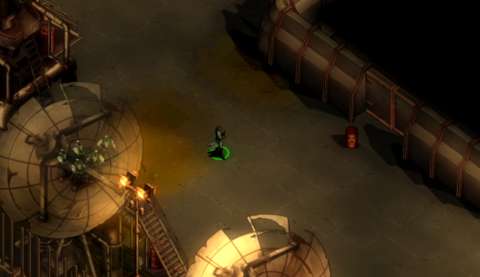
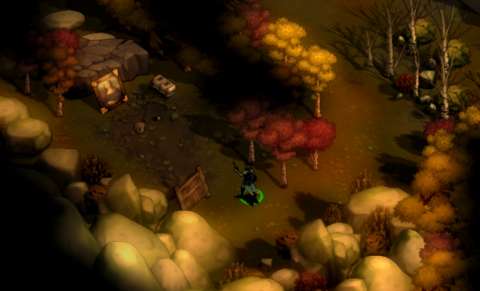
Anyway, these places tend to be industrial complexes, medical (or holding) facilities, or shelters that were overrun. Most of them look run-down, and in some cases, fires are still burning after what should have been centuries since they were abandoned. (The level designers and writers had not thought about this canonical issue.) Regardless, they have one thing in common: they are infested with zombies.
Most of the zombies are of the weak sort, though most of these also happen to be of the fast kind. The player character should be poised to keep his/her distance, though that also means that the player needs to prepare some clear space for him/her to kite enemies around.
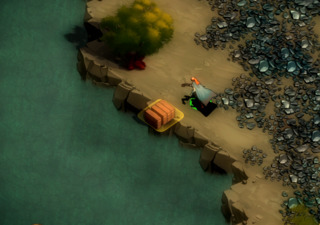
The value of these locales is in the various collectibles that the player character can find. However, the main objective is the “Mission Artifact”, a cubic box with black and yellow stripes. What it is and what it does is never explained; it is little more than something that was implemented as an objective that the player needs to achieve.
DIFFERENCES IN FOG-OF-WAR:
The maps for Exploration missions have the opaque fog of war covering any unexplored spots. However, the translucent fog of war is suspended, meaning that the player can see any spot that has been explored earlier. This is important, because some scenarios have scripts that trigger the appearance of more Zeds in the places that the player character has passed through; incidentally, these scenarios tend to have only one extraction point.
ALLIES:
The player character is not the only unit that the player gets, though of course this is the unit that the player must keep alive.
Anyway, the player may be informed before the start of the mission that other Imperial operatives have been sent there to investigate the location, but have since lost contact. The player will find them huddled somewhere isolated from the Zeds; there are also textboxes that pop up, telling the player that they are trapped in some rooms. To indicate that they are rescuable people, they have yellow life-bars and highlights instead of green ones. Moving the player character (or any other recruited unit) next to them would recruit them to the player’s cause.
These units do not need to live in order for the mission to be successful and the player does not gain any bonus from keeping them alive. Still, it pays to be careful with them, especially considering that the composition and density of the Zeds in the mission’s map has been designed with their assistance in mind.
For example, in the mission with two recruitable Lucifers, there are dense packs of Infected that can be too dangerous for the player character alone. The Lucifers make encounters with these dense packs a lot easier.
HEALTH & VETERANCY RESTRICTIONS:
In any other kind of mission, all of the player’s units regain lost health over time. This is not the case in the exploration missions. Any health that is lost, is lost indefinitely. It can only be regained by having the player character use medical kits that are sometimes found as loot. This somehow resets the health of all units in the player’s employ, regardless of their distance to the player character. (The player character can carry any number of medical kits too, by the way.)
The veterancy system is also suspended in this type of mission. Thus, there is no reason to kill every Zed around, especially considering that exploration missions rarely if not never require the player to do so.
GRENADES:
Grenades are another type of loot that can be obtained; they are only usable by the player character. These practically give the player character an attack like the Thanatos’s grenade launcher. Unlike the Thanatos though, the player character can toss another grenade as soon as the first one has landed, and the grenade travels quickly. This is useful during emergencies, e.g. the player character has to open a door into a room full of Infected that are immediately aware of his/her presence.
DEBRIS:
Incidentally, many of the locales in the Exploration missions are run-down, meaning that there is debris strewn about. There may be also remnants of last-ditch defences that had been raised to contain the infestation. These things act as obstacles for the Infected and any of the player’s units other than the player character; they slow their movement. Making use of these will be important in some missions, especially those in which the player character is always outnumbered by fast Zeds.
DOORS & SWITCHES:
When the locales were overrun by the Infected, the last defenders resorted to closing the doors where there are any in order to restrain the Infected’s movements. For whatever reason, the Infected would not tear these doors down, even though they could tear down stone walls eventually.
Oddity aside, these doors are used to literally gate the player’s progress through a map. Opening a door is not without risks; this makes a lot of noise, for whatever reason. The player should expect Infected to come running over whenever the player opens a door.
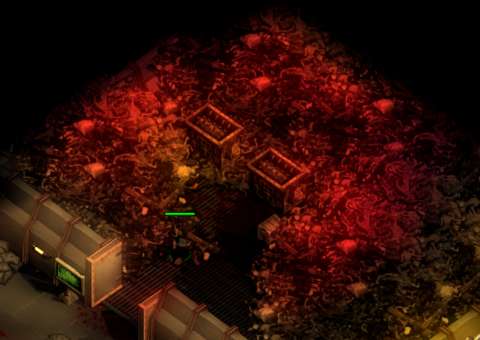
In some cases, opening a door immediately reveals the entire room – usually to show some grisly sight, such as corpse disposal rooms. Oddly though, the gore in some of these rooms is still rather fresh, even though the locales have been abandoned for years.
LOOT & PIXEL-HUNTING:
The secondary objectives of exploration missions are the looting of things of value. Lootable objects can vary a lot. They can be cabinets, shelves, crates or loose items like books that are lying about. Incidentally, the game randomizes which of these objects are lootable or which are just there as props. Therefore, each playthrough with any of these missions would be slightly different from another one.
Unfortunately, looking for lootable objects can be tedious. This is mainly because there are no means of giving them contrasting highlights. Of course, they flash bright every now and then, so if the player can be patient, the player can find them. However, if they blend into everything else around them whether they are flashing or not – such as jewellery next to sources of fire – they will still be difficult to find.
CHARACTER POINTS:
Every successful Exploration mission grants a point that can be spent on the player character’s own progression system, which is represented as a grid of squares. Spending a point on a square unlocks adjacent squares (both cardinal and diagonal). The player will never have enough points to unlock all squares, so the player will want to make his/her choice carefully. (When in doubt though, having greater damage output is usually a good default choice.)
RESEARCH POINTS & TECH TREE IN STORY MODE:
The story mode has a tech tree that represents the advancement of tech in the New Empire thanks to the player’s efforts, or the requisition of tech by the player character from his/her patron. It is not clear which is the case.
Anyway, the player’s progress in getting new tech is represented through the acquisition, accumulation and expenditure of “research points”. Every successful colony-building mission grants research points, but the most significant source of research points are exploration missions, or to be more precise, the loot that yields them.
Prior to starting a mission, the player can spend as many points as he/she wants and then revert them as much as he/she deems necessary. However, after successfully completing any mission, the player’s choices are locked in; no refunds are possible.
The tech tree has nodes that represent the tech options that the player can get. These can unlock units and buildings for use in the colony-building missions. Some of them are “improvements”, which are permanent upgrades that the player gets automatically without having to spend any resources during the colony-building missions. A few of these affect the Outpost in the Swarm missions. There is generally no option that uniquely contributes to the Exploration missions.
The player will never have enough research points to unlock all of the nodes, however. Therefore, the player will have to pick nodes that would contribute to his/her favoured – and hopefully reliable – strategies.
MORE ON SURVIVAL MODE:
As mentioned earlier, Survival mode is the main gameplay mode of They Are Billions. This mode is the basis for the colony-building missions in the Story mode, and both play a lot like each other.
The main difference is that the player does not get access to the tech tree and its conveniences, like permanent upgrades to economic buildings and units. Where these upgrades occur in a session in Survival mode, they have to be purchased with consumable resources. This means that these upgrades come with opportunity costs. Deciding whether to spend time and resources on upgrades or more immediate assets can be challenging.
That said, the player’s decisions, based on what he/she has, can determine whether the player is better prepared for the next swarm or not. Indeed, it is the mark of an experienced player that he/she knows what to go for next depending on how much the map has been explored and cleared.
MUSIC:
The music is the first thing that the new player hears from the game. Most of the tracks are orchestral and intended to project a theme of either urgency or ominousness. In particular, the player will hear the ominous tracks when starting a colony-building mission or a session in Survival mode. This is just as well, especially in the latter case, because the player has no idea what is ahead of the vulnerable Command Centre.
The more urgent tracks play whenever the swarms come, whether in Swarm missions or the scheduled swarms when building a colony. They will not change in tempo, however, regardless of how well or poorly the player is doing.
The different mission types in the Story mode also have different tracks. The ones for the Exploration missions are particularly foreboding, which is perhaps just as well because the player character is traipsing through places that are haunted by mistakes of the past. The player character’s voice-overs, however, do not lend to the atmosphere – there will be more on this complaint shortly.
CORNY VOICE-OVERS:
Only the player’s units have any legible voice-overs. The Infected do not have any, expectedly.
That said, They Are Billions pays tribute to the voice-overs of RTS games of yore – which means that all of the voice-overs are corny and cringe-inducing. The worst of these are those for the player characters of the Exploration missions, whose voice-overs lack convincing inflections.
At least the player’s other units have voice-overs that are not as cringe-inducing, though they are still corny. Most of them have been written with the intention of expressing their personalities, and not for gameplay purposes. For example, the Sniper is often ranting about killing things by shooting them in the head.
ZEDS MOAN AND GROAN:
Moaning and groaning is only heard if there are Zeds within the vision range of any of the player’s units or buildings, and only if the camera happens to be near where the Zeds are. This is actually important to be aware about. Years of zombie-themed video games may have dulled jaded players to these sounds, but ignoring them in this game is usually a mistake, especially if the colony has some exposed flanks.
It is especially important to keep an ear out for these noises in the early in-game days of a colony mission. The colony is very vulnerable to any encroaching Infected in this phase. Often, the groan and moans are the only warning that the player would hear moments before they attack the player’s buildings.
NO AUDIBLY LEGIBLE WARNING ABOUT ENCROACHING INFECTED:
That said, there are no speech clips about encroaching infected. There are warnings for when the Infected are attacking defences or buildings, but these warnings (especially the latter) often come a little too late. Therefore, the player has to glance at the minimap frequently, looking for red blips that are a tad too close to the green blots that represent the player’s buildings.
SOUND EFFECTS:
When the player clicks on buildings, the player can hear the chugging and churning of what the developer thinks is what steam-punk tech should sound like. There is a lot of hissing, grinding, and the occasional frizzle of electrical sparks when sci-fi versions of Nikola Tesla’s induction tech are involved. The player can also hear voice-overs, such as the loud chatter when the player clicks on the Market. These help the player know that he/she has selected the correct building.
When the player centres the screen over substantial pieces of terrain, the player can hear the ambient noises that are associated with it. For example, centring over the dense forests elicits a slightly ominous moan, faint rustle of leaves and owls hooting.
Then, there are, of course, the sounds of weapons-use. There is the near-silent whipping of bowstrings when Rangers fire arrows, and the loud reports of Soldiers dumping shots into Infected.
The other units have their own sound effects too, though some would sound less impressive than the others. For example, the Mutant, for all his imposing size, does not have a satisfying swish to his swings.
The sounds that the player would hear the most are either of the following two. One would be thuds of meat being hit when the Infected are being mowed down if the player has been successful. The other are the terrified screams of people and crashing of doors when the player made one too many mistakes that let the Infected through. Indeed, these sounds contribute the most to the gameplay.
VISUAL DESIGNS:
They Are Billions is a game that uses 2D layers, which are designed with the intention of giving the game an isometric look. The units and the Infected are represented with sprites that are made from 3D models that have been animated elsewhere and frame-captured.
This is nothing new in video games of course. In other games, this has been implemented when the developers want efficient technical performance from their games, while retaining the detail and convenience of animation of 3D models. In the case of this game, it is used to great effect, because the game can present hundreds, sometimes thousands, of these sprites rather efficiently. Watching an Infected swarm of such sizes can be both entertaining and daunting.
The steampunk influences are also obvious, as are the fictitious takes on Nikola Tesla’s esoteric technologies. There are few buildings that do not have animated parts.
The colonists are also visually represented in-game, but they appear to be there as just window-dressing; their sprites have no effect on the gameplay whatsoever. Watching them run away from the Infected in fear can be amusing though.
The particle effects include green vapours rising out of Villages of Doom, clearly marking them out as dangerous places. Other notable particle effects include the weapons-fire of massed Soldiers, which can be very satisfying especially if they are holding back hordes of Infected at bay. There is also the detonation of explosives, and the pushback that they inflict on Zeds.
Most of the maps look static though. Other than particle effects like snow and sometimes rain, there is little that the player would see moving in the maps.
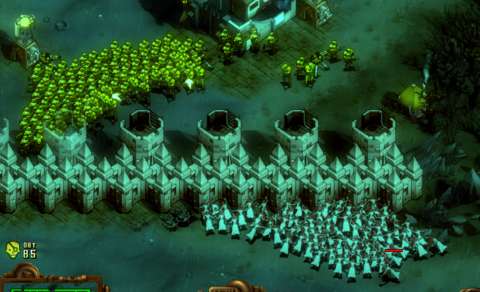
OVERLAPPING SPRITES:
With what are practically 2D graphics and an isometric perspective, there is inevitably the matter of sprites overlapping each other and thus obscuring the player’s vision. This happens frequently in They Are Billions, and not for the better.
This becomes a problem when the player is trying to adhere to a meticulous planning of the colony’s expansion. For example, placing new buildings, especially Houses, can be difficult when the sprites for existing buildings obscure where the player is trying to look at. For another example, posting units in between watchtowers can be difficult, especially along the vertical directions (relative to the player’s screen).
The game does try to compensate for this by making overlapping sprites translucent, but this only helps at very close zooms, where the player can actually see details among the things that have been made translucent.
Incidentally, the developers had implemented a feature that removes the sprites of terrain obstacles from the player’s view, but there is no other dedicated visual options that remove sprites for buildings or sprites of units.
SUMMARY:
At first glance, and perhaps even throughout the experience of the game, there may seem to be a lot of shortfalls in They Are Billions.
There are not a lot of units and buildings that the player can use. There are also not many variety to the Infected. There is certainly nothing like multiple factions either. If the player is expecting the kind of content variety that could be had from RTS games of yore, the player would be disappointed.
On the other hand, it should be obvious that They Are Billions is not that kind of base-building RTS game where players build bases to raise armies that in turn level the armies and bases of other players. Rather, it is the kind where the player builds bases and raise armies as defensive strategies against an enemy that is going to launch an overwhelming attack, i.e. the player would be turtling. There is not any follow-up after successfully doing that either, because this is exactly the point of the gameplay in this game.
That said, turtling to fend off seemingly overwhelming and distressingly dense waves of single-minded enemies is very satisfying. Watching plans to stall and divert the Infected unfold almost flawlessly is entertaining. There is even some amusement to be had from realizing mishaps, like letting just one Infected through and causing a cascade of outbreaks.
They Are Billions is not a typical base-building RTS game. It is something less yet more than the old titles of yore, and it is one where base-building is actually genuinely fun.

