God of War Walkthrough
This walkthrough includes a full walkthrough, videos, and general tips on helping Kratos exact his revenge.
Design by Collin Oguro
ony's God of War is a near perfect blend of combo-based twitch action and adventure puzzle solving. The fluid combat system uses a mix of weapon and magic attacks that can elevate your combo meter into triple digits. Varied puzzles and gameplay styles keep the adventure fresh from start to finish. Combine these elements with a Greek mythology revenge tale. Prepare to battle minotaur, encounter the hydra, enter the Underworld, and rip the head off Medusa. God of War doesn't disappoint.
Guide Kratos through sea, city, desert, and fire to his showdown against Ares, the God of War. The gods of Olympus have enlisted Kratos' aid in stopping Ares from destroying Athens. To do so, Kratos must accomplish what many have failed: find and recover Pandora's box. The journey will remind Kratos of past victories, past failures, and a regrettable relationship with Ares.
GameSpot's Game Guide to God of War includes combat strategies for surviving the beasts of the ancient world, tips for using Kratos' weapons and magic abilities, tactics to conquer boss encounters, details on extra costumes and secret messages, and a complete walk-through of the game.
Chapter 1 - Combat Strategies
This section provides some general combat strategies for God of War. Find weapon and magic specific combat strategies in the Weapons and Magic section of this guide.
Combo Starters
Some of Kratos' strongest attacks are those that knock down enemies. This is because Kratos can then follow up with additional damaging combos. Use the Blade of Chaos and try out the Plume of Prometheus (Square, Square, Triangle), Ascension (Hold Triangle) and Apollo's Ascension (L1 + X) and Square, Triangle, Triangle, Triangle. Check the weapons section for when these combinations become available.
Knock down undead or minotaur and continue to strike the fallen foe with more powerful strikes to juggle enemies, inflict damage with multiple hit combinations, or even unleash Poseidon's Rage. Score bigger combinations by trapping enemies against walls or cliffs or other obstructions. Juggle the enemies in the air and invoke Poseidon's Rage. After killing an enemy, keep the combo going by immediately seeking out a new target and scoring a blow. The higher the combos the greater the red orb experience reward.
Evasive Maneuvers
You could rather easily argue that Kratos' roll maneuver is as important as any of his combo attacks. When an enemy is about to attack or if you're suddenly surrounded by foes, just flip the right-analog stick in a direction to roll and evade the enemy's attack.
Although it'll be primarily used to evade attack, it's important to use the roll to put some distance between you and any enemies nearby. The advantage of Kratos' Blade of Chaos is its long-range usefulness. As you near closer range, roll away using the right-analog stick and restart your combination attacks. If you're close, an enemy can strike and interrupt combo strings. A solid pattern would be to perform a combo that knocks down enemies, perform a multi-hit strike to damage the prone foe, and then roll away and repeat the sequence.
Stat Management
As you'll learn during the game, killing a minotaur using a mini-game sequence provides health orbs and killing a gorgon using a mini-game sequence produces magic orbs. If you aren't in dire need of either then simply eliminate the minotaur or gorgon using combination attacks. You'll receive red experience orbs instead. The more experience orbs received, the faster you can upgrade your Blades of Chaos or magic abilities.
If you're approaching a circular "arena" like area you can probably count on being trapped inside and forced to battle a collection of beasts before you can escape. Obviously it's wise to use any health and magic chests before entering so you enter the battle at full strength.
Chapter 2 - Weapons and Magic
This section covers God of War's weapons and magic abilities. You'll find a breakdown of each, including their power-ups, new moves, and orb requirements.
Blades of Chaos
The Blades of Chaos are Kratos' initial weapon and the one you'll use most throughout the game. The weapon has five levels; powering up the Blade of Chaos increases damage and provides new maneuvers and even some new abilities, such as Rage of the Gods (invulnerability for a short period of time).
It's good strategy to upgrade the Blade of Chaos before all other magic abilities. If you're thorough in red orb collection (seeking out hidden chests, etc) then you can have the Blades of Chaos fully upgraded certainly by mid-game. This provides full damage potential, access to powerful new combos, and access to Athena's Blessing, which bestows infinite magic during the Rage of the Gods invulnerability move.
Take advantage of the Blade of Chaos' long-range attack. Make every effort to avoid getting too close to your opponent. If you begin to move close, use the right-analog stick to roll away. If you're close, an enemy's strike may interrupt your combo and leave you vulnerable for further attack. Roll away then start the combo string from long-range so you can complete the attack.
Some of the Blade of Chaos' strongest moves are those that knock enemies off their feet. The Plume of Prometheus is such a move that's granted from the very beginning of the game. Use the Square, Square, Triangle combo to knock lesser enemies off their feet and vulnerable to additional combo attack to inflict further damage and to also increase the amount of experience orbs you receive.
| LEVEL | ORBS | NEW MOVE | CONTROLLER | DESCRIPTION |
| 1 | N/A | Icarus Lift | X, X | Double Jump |
| Ascension | Hold Triangle | Launch enemies and Kratos into the air | ||
| Orion's Harpoon | Tap Circle | Launch enemy and tap Circle to slam them back to the ground. | ||
| Hades Reverse | Tap L1 | Use just before enemy's attack connects. | ||
| Plume of Prometheus | Square, Square, Triangle | Quick and powerful combo. One of the best ways to knock foes off their feet. Also breaks the shields on certain undead. | ||
| 2 | 1,500 | Rage of the Gods | L3 + R3 | God mode when meter is full. |
| Apollo's Ascension | L1 + X | Simultaneously launches enemies and Kratos into the air. Can follow with Hermes Stomp. | ||
| Apollo's Offensive (Air) | L1 + X | Slam enemies back to the ground with this powerful attack. | ||
| Hermes Rush | R1 | Ground dash attack. | ||
| Hermes Stomp (Air) | R1 | Air attack that drives Kratos quickly to the ground. | ||
| Tempest of the Fates | Square, Square, Square Hold | Space clearing attack used only during Rage of the Gods | ||
| 3 | 2,250 | Cyclone of Chaos | L1 + Square | 360 spin attack. Good for multi-strikes against downed foes. Follow with another combo starter. |
| Cyclone of Chaos (Air) | L1 + Square | 360 spin attack in the air. | ||
| Spirit of Hercules | Triangle, Triangle, Triangle | Powerful but slow combo. Like the Plume of Prometheus but slower. | ||
| Valor of Hercules | Triangle, Triangle, Square | Powerful but slow combo. Can chain into Plume of Prometheus, though slowly. | ||
| Hades Revenge | Square or Triangle or R1 while in Hades Reverse parry pose | Use this attack after parrying your foe. | ||
| 4 | 3,750 | Rising Helios | L1 + Triangle | Multi-hit attack that targets a single enemy. Ends with a powerful ground slam. |
| Falling Helios (Air) | L1 + Triangle | Multi-hit air attack that targets a single enemy. | ||
| Hermes Fury | R1 + R1 + R1 | Multi-hit dash attack. | ||
| Achilles Flip | Right-Analog Stick + X | While evading press X to attack. | ||
| 5 | 9,000 | Lance of the Furies | L1 + Circle | Continue to hold Circle for an even greater attack. Holding Circle basically charges the attack. Use when surrounded. |
| Lance of the Furies (Air) | L1 + Circle | In air, continue to hold Circle for an even greater attack. | ||
| Might of Hercules | Square, Hold Square | Hold Square during combo to unleash powerful attack. | ||
| Athena's Blessing | N/A | Infinite magic while Rage of the Gods is active. |
Blade of Artemis
The Blade of Artemis provides short-range power over a long-range advantage. It's stronger than the Blade of Chaos in terms of damage per strike but it's also slower and, since you must be at close-range, could potentially leave you more vulnerable to enemy attack. You're also a bit more vulnerable after completing combos and certainly more vulnerable after missing your attacks.
Use the Blade of Artemis against lesser undead; it slices through them like butter. It's also a solid weapon against the Cerberus pups. Since the small dogs can quickly reach close-range, the Blade of Artemis is ideal in chopping them into pieces before the pups can grow into their larger counterpart.
It is possible to start combos from long-range with the Blades of Chaos then summon the Blade of Artemis (Hold L1 + R1) for some finishing attacks. Note that there's a slight delay during sword summon. Each new power-up level increases the blade's damage but offers no new maneuvers.
| LEVEL | ORBS | NEW MOVE | CONTROLLER | DESCRIPTION |
| 1 | N/A | Sword Summon | Hold L1 + R1 | Summons the Blade of Artemis to Kratos' hands. |
| Sword Summon (Air) | Hold L1 + R1 | Summons the Blade of Artemis to Kratos' hands while in the air. | ||
| Sword Sheath | Hold L1 + R1 | Sheaths the Blade of Artemis if it's active. | ||
| Wrath of Artemis | Hold L1 + X | Multi-hit sword spin. | ||
| Revenge of Artemis | Hold L1 + Square | Slow but powerful multi-hitting attack. | ||
| Ascension of Artemis | Hold L1 + Hold Triangle | Launch enemies and Kratos into the air. | ||
| Retribution of Artemis | Hold L1 + Circle | Most powerful of all sword attacks. Single strike. | ||
| 2 | 3,750 | N/A | N/A | N/A |
| 3 | 10,000 | N/A | N/A | N/A |
Poseidon's Rage
Use Poseidon's Rage to create a blast of energy around Kratos. The energy damages anything within its blast radius. Therefore, it's best to use Poseidon's Rage when enemies surround you to get the maximum possible damage as well as the maximum possible combo. Every hit against a creature within the blast radius registers on the combo meter. You can chain Poseidon's Rage with normal attacks or even use Poseidon's Rage several times in a row to score big combo numbers resulting in additional red orb experience.
Power up Poseidon's Rage to increase damage, the blast radius, and to receive the Wrath of Poseidon spin attack. It's wise to keep Poseidon's Rage selected unless you are going to use another specific magic power for a specific purpose. That way you can simply hit "L2" at any instant. You may become surrounded quickly and need a counter. Instead of having to select Poseidon's Rage then hit L2, keep the power selected. You can use Poseidon's Rage to break a gorgon's gaze or even when you're about to be hit by a high damage foe--Kratos is invulnerable during Poseidon's Rage.
| LEVEL | ORBS | NEW MOVE | CONTROLLER | DESCRIPTION |
| 1 | N/A | Poseidon's Rage | L2 | Blast of energy surrounds Kratos. Use against multiple enemies for maximum effect. |
| Poseidon's Rage (Air) | L2 | You can activate the move while in the air. | ||
| 2 | 1,650 | Wrath of Poseidon | L2 + rapidly press Circle | Press Circle rapidly after enabling Poseidon's Rage to spin and create a larger blast radius. |
| 3 | 4,500 | N/A | N/A | N/A |
Medusa's Gaze
It's like Perseus stoning the Kraken! Use the severed head of Medusa to stone enemies with her petrifying gaze. Point the freeze beam at a specific enemy to stone that foe. Stronger foes require more time so it's best to use the gaze at long-range. The magic is also easily interrupted; if you're struck, the monster has time to recover.
Once stoned, the monster can eventually break out. Attack the stoned creature quickly to shatter the foe. Note that other enemies can actually strike the stoned creature (presumably inadvertently) and shatter his comrade. Medusa's Gaze is a good way of whittling down enemy numbers and should be used on adversaries such as minotaur or Cyclops.
Powering up Medusa's Gaze increases the power of the freeze beam and provides a few new moves, Gorgon Flash (essentially freezes faster) and Gorgon Rage for freezing surrounding enemies. Your experience orbs are best spent on the Blade of Chaos, Army of Hades, or Poseidon's Gift. When you have the extra orbs, then upgrade Medusa's Gaze.
| LEVEL | ORBS | NEW MOVE | CONTROLLER | DESCRIPTION |
| 1 | N/A | Gorgon Torment | Hold L2 + Hold Square | Use the gaze of Medusa to stone an enemy. The tougher the enemy, the longer the required gaze. |
| 2 | 3,000 | Gorgon Flash | L2 + Triangle | Instant freeze a single enemy. |
| Gorgon Flash (Air) | L2 | Using Gorgon Flash in the air. | ||
| 3 | 7,500 | Gorgon Rage | L2 + Hold Circle | Freezes all surrounding enemies. |
Zeus' Fury
Zeus grants Kratos the power to launch long-range attacks. A lightning bolt appears in Kratos' hand. Use the projectile primarily to assault undead archers from long-range. It's possible to use the attack against standard foes but it consumes a good deal of magic that would be better used for Poseidon's Rage or Army of Hades. Use against the sirens, which tend to try and remain at longer range.
Increase Zeus' Fury to bolster damage and lightning bolt rate of fire. Reaching level two also adds a charge attack for increased damage. It's a cheap upgrade even to its highest level, though you may still prefer your experience orbs spent on the better abilities.
| LEVEL | ORBS | NEW MOVE | CONTROLLER | DESCRIPTION |
| 1 | N/A | Zeus' Fury | Hold L2 + Square | Long-range lightning bolt attack. |
| Zeus' Fury (Air) | L2 | Long-range lightning bolt attack while Kratos is airborne. | ||
| 2 | 750 | Might of Zeus | Hold L2 + Hold Triangle | Charge attack. Hold the Triangle button to charge the lightning bolt's power. |
| 3 | 3,500 | N/A | N/A | N/A |
Army of Hades
Summon a swarm of tormented souls to fight at your side. The souls automatically seek out their targets and pummel anything in their path. Invoke the Army of Hades against groups of tough enemies. The magic ability consumes a huge chunk of magic so don't waste the ability on easy targets.
Powering up the Army of Hades increases the potency of the summoned souls. If you're having trouble with a particular sequence and possess Rage of the Gods, Athena's Blessing, and Army of Hades you can use all three in combination to lay waste to those previously frustrating foes.
| LEVEL | ORBS | NEW MOVE | CONTROLLER | DESCRIPTION |
| 1 | N/A | Army of Hades | L2 | N/A |
| 2 | 4,500 | N/A | N/A | N/A |
| 3 | 10,000 | N/A | N/A | N/A |
Chapter 3 - Bosses
This chapter compiles strategies for God of War's most menacing adversaries. Look here for specific tips on defeating the Aegean Sea's Hydra, the Challenge of Hades' Minotaur, and the God of War himself, Ares.
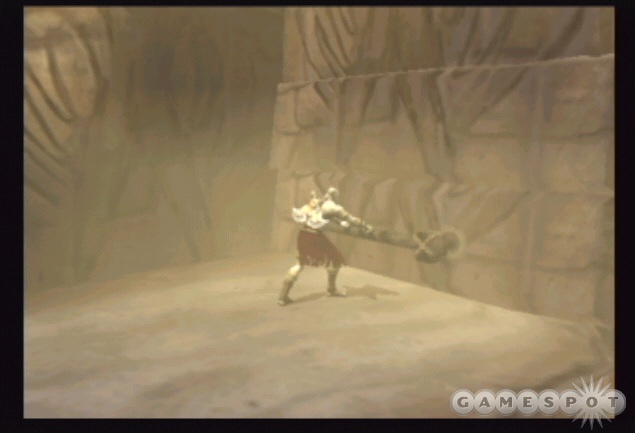
Hydra
You face the hydra during the game's opening level on the Aegean Sea. There are a couple encounters with the hydra early on. In the first, just block the hydra's attack then strike a five or six hit combo before blocking again. Then follow the mini-game to get past the hydra. The second encounter occurs on the ship's deck. Roll to evade the hydra's attacks (or use block) and attack wildly to bypass that encounter.
The final battle is against three hydra heads. There are two "smaller hydras" on the left and right sides of the deck. A larger hydra waits to battle in the center. Battle the hydra on the left and right side; block their attacks as you did previously. The hydras will suck you to their location so you can't concentrate on one hydra; you must split your time between each. Continue to hack and slash away when next to a hydra and block an incoming attack. Get close, use Triangle combos, block the counter, and then repeat.
When a hydra's head hits the deck, jump up onto the nearby crates (left of the left hydra and right of the right hydra). At the top, hop onto the platform and drive it into the hydra's neck. Finish off the other hydra in a similar fashion.
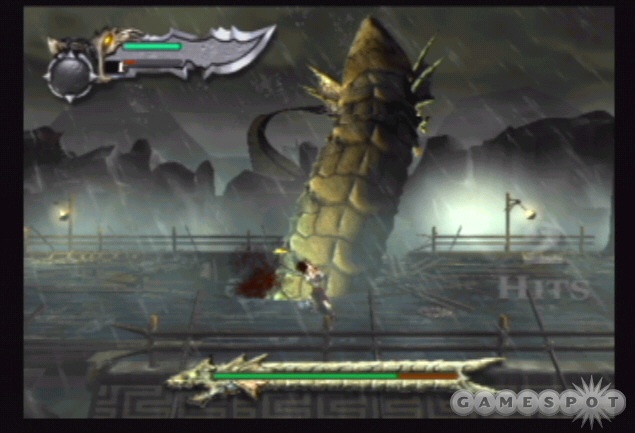
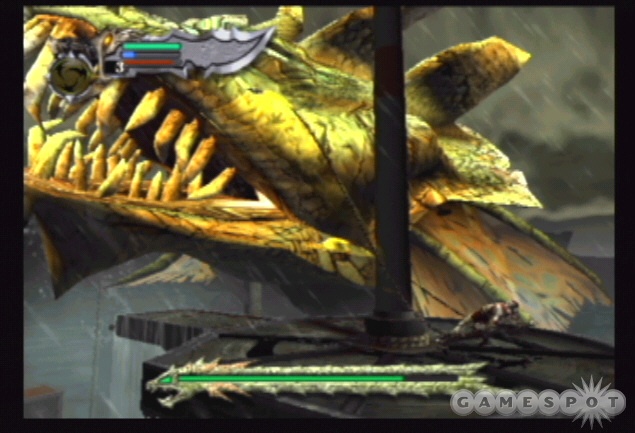
Climb the netting in the middle to battle the center, and much more menacing, hydra. This hydra can blow you off the platform; just climb back up if you're knocked off. Evade the hydra's bite. You can also use Poseidon's Rage as soon as the hydra bites; you won't take damage. When the hydra bites down on the platform, move left or right quickly to avoid then unleash repeated attacks on the head.
When prompted by the button icon, use it to inflict additional damage in the mini-game. Press the Circle button repeatedly when prompted to slam the hydra's head onto the mast. As long as the pole in the middle of the mast platform is breaking down, you're making progress--don't worry about the hydra's health bar. Just keep inflicting damage and successfully performing the button presses. Kratos smashes the hydra's head onto the broken pole.
Challenge of Hades' Minotaur
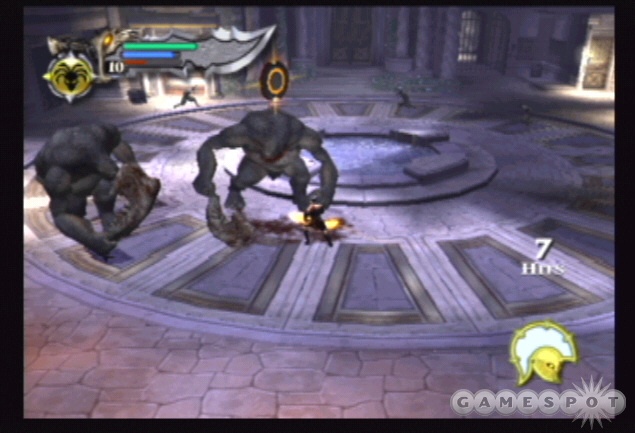
You face many minotaur throughout the course of the game but it's not until the Challenge of Hades within Pandora's Temple do you face the minotaur. Approach the large door and the huge minotaur boss emerges. Back up and go up the steps to the upper platform in the back of the room. It's better to battle the minotaur from that position rather than down on the lower floor. Strike the minotaur with your Blades of Chaos combinations. When the minotaur raises a hand, roll in the opposite direction. If the minotaur raises both hands, roll backward. Strike the minotaur repeatedly until it retreats. Perform the process over and over again until the button prompt appears over its head.
Drop down off of the ledge and quickly run to the minotaur. Use the Circle button to grab the beast. Follow the onscreen analog rotations. Complete the sequence to daze the minotaur. Run back to the upper platform and use the lever on the left side to launch an explosive projectile at the minotaur.
The beast shakes off the blow and charges the platform again. Repeat the process from the start. If you choose to use Rage of the Gods, use it early in the fight; that way it will have likely recharged near the end of the fight where you can use it again. This is a very long battle; the minotaur survives several projectile blasts. You're close to victory when the minotaur loses its armor and battles in its skin. Daze the menace a last time then use the lever to fire the projectile to complete the battle.
The God of War, Ares
In the first battle against Ares you possess all of your weapons and current magic powers. Use Rage of the Gods early and launch Army of Hades (hopefully upgraded) to start damaging Ares as soon as the battle begins. Get close and, if you have Athena's Blessing, use Poseidon's Rage to inflict further damage against Ares. Athena's Blessing keeps your magic bar full during Rage of the Gods.
A combination of the moves above should take a hefty chunk out of the God of War. You can block nearly every one of Ares maneuvers. Also, use the right-analog stick to roll out of the way to dodge Ares strikes and attacks. Ares will launch in the air and hurl flaming rocks at your position. Use the right-analog stick to evade the attack. Continue to evade until the bombardment stops. Ares will use his hammer like a flamethrower. Roll as far away as possible to avoid. Use the block button to resist other attacks, such as his overhead hammer blast and various strikes.
With Athena's Blessing, you should still have maximum magic after the Rage of the Gods move so continue to use Army of Hades to keep Ares occupied while you attack with various combinations (Square, Square, Triangle or use Blade of Artemis and its L1 + button combos). After inflicting chunks of damage on Ares, orbs of health and magic emerge from his body. The orbs should keep you relatively healthy and boost your magic so you can cast another Army of Hades or, if Ares' life bar is nearly drained, Poseidon's Rage when you're close enough.
As Ares nears death, the Circle icon appears above his head. Get close and use the Circle button to grab Ares. Once Kratos' has Ares grabbed, mash the Circle button repeatedly. Be careful, however, as soon as you complete the sequence another button icon appears. If you're mashing Circle without paying attention to the screen, you'll have to complete the entire sequence again. Complete the onscreen button sequences to finish off Ares.
In the second battle against Ares, you have been stripped of your weapons and magic. Instead of your familiar inventory, you possess a gigantic sword (the one used as a bridge earlier in the game). It's called the Blade of the Gods. You have a few new moves at your disposal: Zeus' Gift (hold L1 + X), Poseidon's Gift (hold L1 + Square), Athena's Gift (hold L1 + Triangle), and Hades' Gift (hold L1 + Circle).
One of the most important elements in the fight is momentum. The more damage you inflict against Ares, the higher your health bar rises. The more damage Ares inflicts on you, the higher Ares' health bar rises. The battle could end quickly in victory, in defeat, or could go on for several minutes as Kratos and Ares wage war back and forth.
Keep your finger ready on the L1 button, which serves as both the block button and your means of attack with the Blade of the Gods. If you spot Ares disappearing into the ground, roll away. When you spot the four spires appear from the ground, roll away to avoid being crushed. Block Ares attacks and counter quickly with the Blade of the Gods combinations.
After completing a combo Ares, a mini-game starts. Press the Circle button very rapidly to win the face-off. These are extremely vital to a successful victory against Ares. You'll inflict some big damage against him by completing the mini-game (which means your health bar rises as well). Exhaust Ares' health to defeat the God of War.
Chapter 4 - Walk-through
This section provides a complete walk-through for God of War. You'll find specific solutions to puzzles, tactics for combat situations, and the location of hidden health, magic, and red orb experience chests as well as Gorgon Eyes, Phoenix Feathers, and Muse Keys.
Note that once you maximize your health and magic bar, you will no longer find Gorgon Eyes and Phoenix Feathers. So late in the game these chests become red orb experience chests. Therefore, this walk-through may differ slightly in its latter portions. The walk-through reveals the location of these chests but the contents may be different depending on what you've already found during the game.
The Aegean Sea
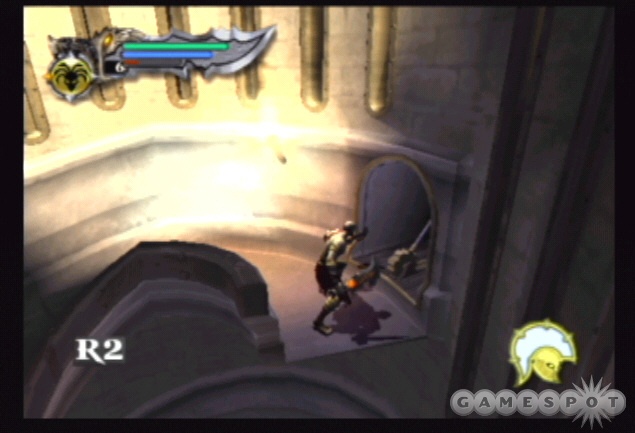
Crack the skulls of the four undead troops at the ship's bow. Practice using the Plume of Prometheus combo (Square, Square, Triangle) as it's one of your best allies through the game, especially against weaker undead foes. After defeating the first batch, a second set breaks through the chain-locked trapdoor and even more crawl from the ship's sides. Clear the bow then approach the trap door. Use R2 to open the trapdoor.
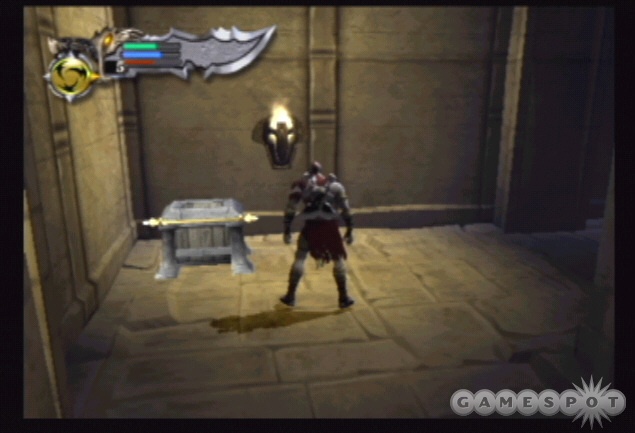
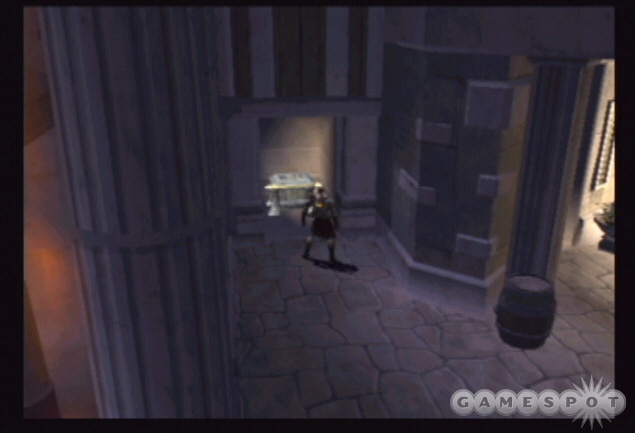
Drop inside the ship. Recover health from the chest if necessary or leave it for later. Use your Blades of Chaos to pound the nearby undead. Break open the barrels for more red orbs. Use your weapons to break apart the wooden planks blocking the path to the right of the health chest. In the barracks, break apart the beds for more red orbs.
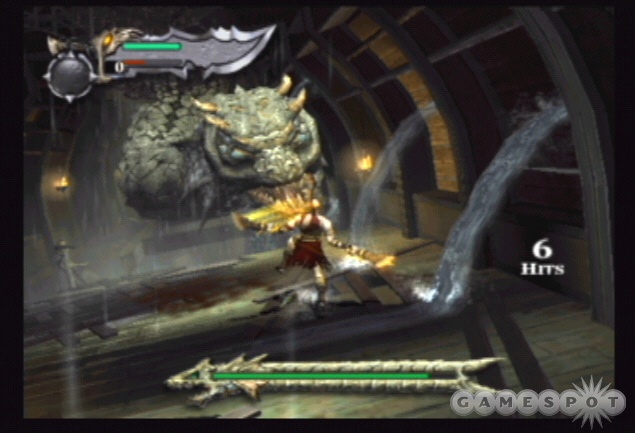
Follow the hallway into the larger chamber and face off in your first battle against the hydra. The monster serpent appears in front of you and attacks with its fierce jaws. Use L1 to block the attack then counter with successive attacks. After scoring five or six hits, block again to avoid the hydra's bite. Resume the attack then block again and repeat. When the hydra gets knocked out, follow the button sequence to inflict more damage and drive the hydra away. Break all barrels for orbs then cross the beams ahead of you.
Smash more barrels on the left then exit through the opening also to the left. Once outside, go left and speak with the prisoner. Find the opening on the right and ascend the staircase. Open the chest full of red orbs. At the top of the stairs, break through the wooden blockade with your attacks. Use R2 to open the door.
Emerge onto the ship's deck and attack the harpies. Kratos isn't much concerned with the ship's innocent inhabitants; if you need health to mend your wounds, attack one of the frightened humans scampering around the ship's deck. Use light attacks to strike the harpies. Eventually the hydra bursts through the deck's center.
The hydra uses a spin attack (spins its head around the deck), a bite attack, and also slams its head onto the deck. Block these attacks with the L1 button and repeatedly cut the hydra's flesh with your blades. Use the right-analog stick to dodge if necessary. When you're inside its mouth, follow the button presses to escape and resume the attack.
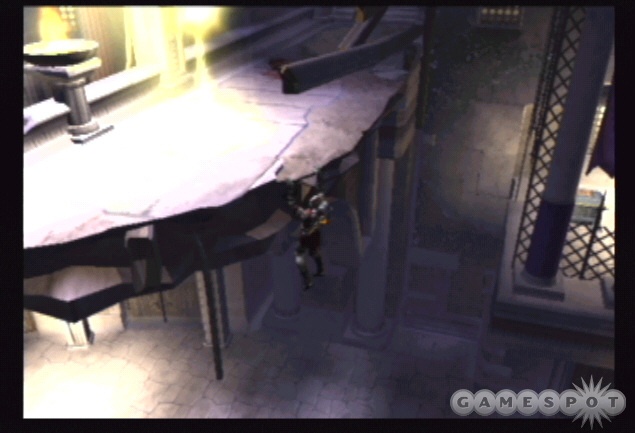
Cross the deck to the right side and use the R2 button to open the two doors. Open the chests inside for red orbs. Drop into the hole in the deck and swim to the upper left. Grab the netting and climb up. Return to the ship's deck and battle more undead forces. Spot the beam on the right. Carefully cross the beam and reach an intersection of beams. At the intersection, go right to find a chest full of red orbs. Return to the intersection and follow the beam on the right and jump onto the deck of an adjacent ship.
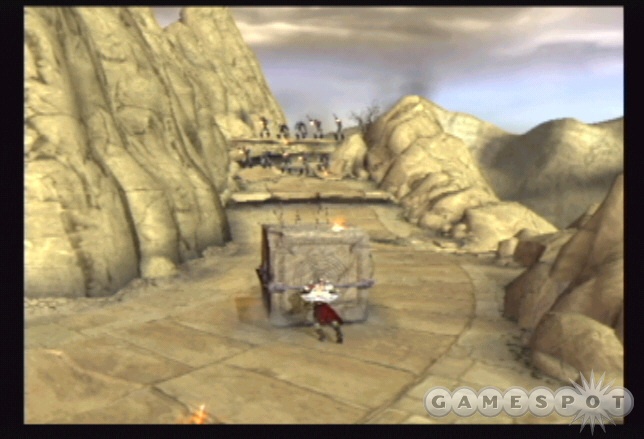
Save your game in the glowing light on the left and use the health chest if you're in dire need. Otherwise save it. A gang of undead archers overlook the stretch of ship before you. While their arrows don't inflict serious damage, the problem is you can't reach their platform without the aid of a crate. And unfortunately the arrows do inflict serious damage on the crate. The crate begins on the lower right portion of the area.
You need to push and kick the crate to the other side while using the larger obstructions to take cover from the arrows. Grab the crate and move it left or right. Charge up Kratos' kick fully and launch it down the stretch. Run to catch up to the crate and take cover quickly. Try to time your movements away from the obstructions to avoid getting pummeled immediately by arrows. The box can't sustain much damage so you must work quickly and carefully. Kick the box all the way to the area just below the archers so you can use it as a platform to reach the higher ledge. When you reach them, beat the archers down. Use the nearby health chest.
Find the path on the right side. Walk forward to the door with the wheel. Press R2; the door leads to the captain's quarters and it's locked. Turn around and climb the ladder and then the netting. Prepare to face undead forces on the net. Use the analog stick plus attack buttons (Square and Triangle) and the grab (Circle) to eliminate the opposition. Work your way to the top. Continue up the next set of netting. Reach the top of the mast and pummel the present undead.
There are two beams from this mast platform. Take the one on the left to find a chest full of red orbs. Return to the platform and spot the rope overhead. Jump up to the rope and ride it to the next ship. Break the wooden planks on the left and right side to reveal hidden chests. The one on the right contains your first Gorgon Eye; collect a total of six to increase your maximum health.
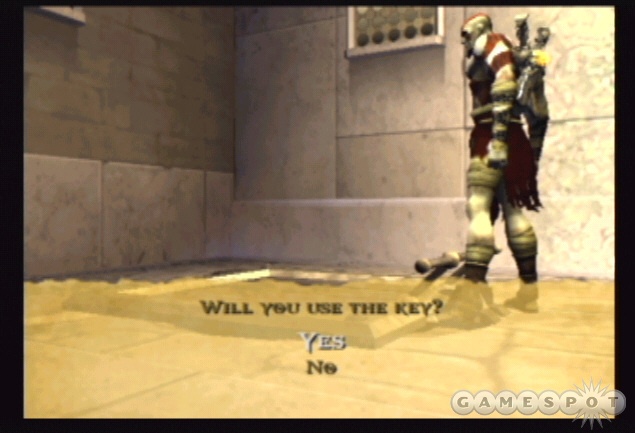
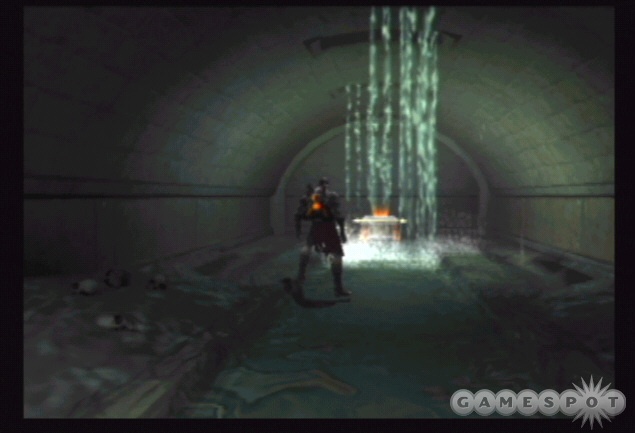
Break open the middle planks to reveal a passage. Follow it to the blue aura and enter. Receive Poseidon's Rage. Combat the undead that appear inside the room using your weapons and your new magic ability. Walk through the passage and to the ship exterior. Save your game on the left side. Search the right side for health and magic chests. Climb the netting on the right to reach the ship's deck and spot the hydra menace. Watch the cut scene to see the fate of the captain--and his key.
There are two "smaller hydras" (if such a thing exists) on the left and right sides of the deck. A larger hydra waits to battle in the center. Battle the hydra on the left and right side; block their attacks as you did previously. The hydras will suck you to their location so you can't concentrate on one hydra; you must split your time between each. Continue to hack and slash away when next to a hydra and block an incoming attack.
When a hydra's head hits the deck, jump up onto the nearby crates (left of the left hydra and right of the right hydra). At the top, hop onto the platform and drive it into the hydra's neck. Finish off the other hydra in a similar fashion.
Climb the netting in the middle to battle the center, and much more menacing, hydra. This hydra can blow you off the platform; just climb back up if you're knocked off. Evade the hydra's bite. You can also use Poseidon's Rage as soon as the hydra bites; you won't take damage. When the hydra bites down on the platform, move left or right quickly to avoid then unleash repeated attacks on the head.
When prompted by the button icon, use it to inflict additional damage in the mini-game. Press the Circle button repeatedly when prompted to slam the hydra's head onto the mast. As long as the pole in the middle of the mast platform is breaking down, you're making progress--don't worry about the hydra's health bar. Just keep inflicting damage and successfully performing the button presses. Kratos smashes the hydra's head onto the broken pole.
Enter the hydra's throat and find the captain--still alive. Press R2 to recover the key...and send the captain down the rest of the way. Climb the crates on the right side of the deck. Hop to the platform at the top and open the chests; the one on the left contains a Gorgon Eye. Jump to the rope and ride it to a previous ship. Save your game if desired and get health if you didn't before.
Drop down into the area where you pushed the crate before. Undead archers appear on the obstructions in the center. Defeat them and jump up onto the crate at the back end and onto the upper platform. Go right and to the captain's quarters. Press R2 to open the door. Descend inside and watch the cut scene.
When you regain control of Kratos, partake in some fun by pressing R2 next to the bed and following the button presses and analog stick rotations to...alleviate some stress and gain some red orbs. Approach the exit and read the journal on the right side. Exit and save your game in the light. Go around the left side and open the health and magic chests before climbing the ladder.
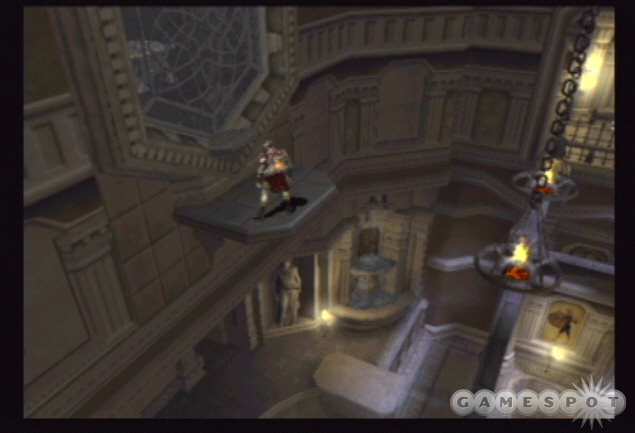
The Gates of Athens
Walk forward and speak with Athena for a recap of your primary objective. Exit the ship to the right and defeat the undead greeting party. Bust some containers then continue forward and take the left turn over the bridge. More undead appear here to greet your arrival. Defeat them and continue forward. Near the walkway's end, turn right and spot the decrepit wooden walkway. Cross it into the hole in the wall on the right.
Jump down into the water and swim left. Hop up onto the next ledge and move through the passage. Eliminate the undead guarding the hall. Open the chest to recover a Phoenix Feather, which will be used to increase your maximum magic. Around the corner, find the health chest. Jump up onto the crates and drop over the other side. You're back to the bridge. Cross the bridge and return to your previous location.
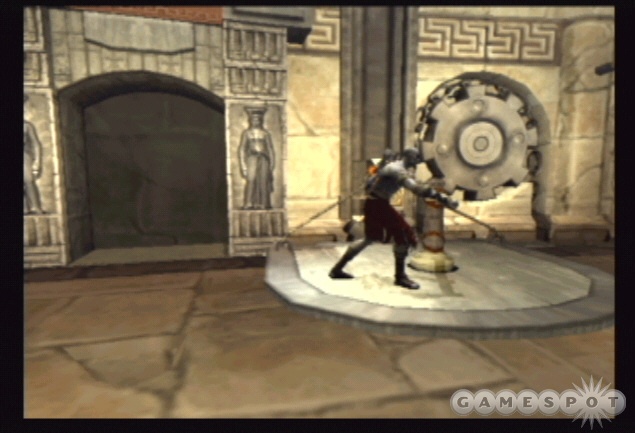
This time cross the decrepit wooden walkway and jump to the lift station in the alcove. Use the lever to activate the lift. Walk out onto the next catwalk. Bypass the health chest unless you're near zero. Defeat the minotaur on the catwalk. Keep your distance with long-range strikes from the Blades of Chaos. Finish off the minotaur using the mini-game to recover health from the minotaur's death. Don't hesitate to utilize Poseidon's Rage because there's a magic chest after the battle.
Continue down the catwalk and use the aforementioned magic chest if needed. Move toward the camera and around right to another lift station. Use the lever to ascend. Approach the Athens gate to see a snippet of the current situation. A Cyclops appears in the courtyard moments later. Use the right-analog stick and the evade maneuvers to avoid its spiked ball attack. Keep your distance with long-range weapon strikes. When the button prompt appears, follow the mini-game to deliver the death blow. A couple more Cyclops appear after the first perishes. After the battle, go to the far right side of the courtyard to find a ladder down to a health chest.

Return to the courtyard and cross it toward the open passage. There's a chest there that switches between health and magic; replenish whichever is needed then proceed into the passage. Enter the room with large crates. It's a top-down view. Look carefully and spot the crates with the wooden crates underneath. Break the wooden crates with your weapon to lower those upper crates; this provides a step system to ascend the room.
Jump onto the crate in the lower left corner. Jump to the crate to its upper right. Go right to find a crate containing red orbs. Jump back to the previous crate then jump again to Kratos' right to a higher crate. From the top of this crate, leap in the same direction to an alcove. The area contains a magic chest and another chest containing a Gorgon Eye.
Return to the crate top that contained the red orbs and use the ladder. Traverse the narrow ledge to the left then hop onto the next crate top. Jump to the netting. At the top of the crate with netting, you can spot the exit tunnel. Before jumping there though, jump to the crate to its lower left. The camera switches and a new chest is revealed. Leap to this chest and collect the red orbs inside. Jump right into the exit passage.
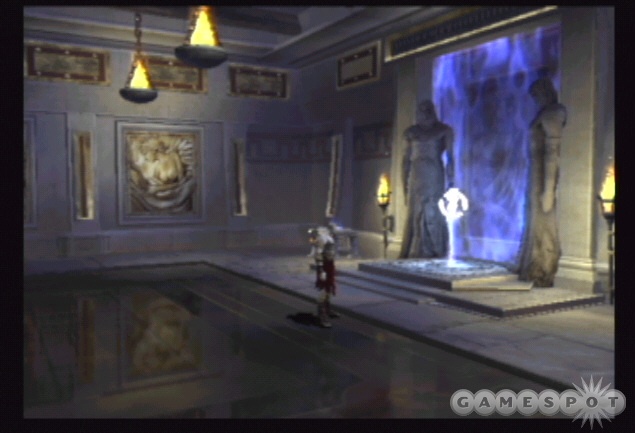
Drop down into the next room. Break open the containers around the room's edge for red orbs. Save the health or magic chest in the left corner. Walk into the yellow aura to speak with Aphrodite. Medusa appears and it's time to battle.
She's extremely quick. Use your weapons from long-range; use the Square, Square, Triangle combo, which also jolts Medusa out of her gaze. You can also avoid her gaze by using the right-analog stick to evade away from her position. If you are stoned, shake the left-analog stick quickly to break out. Don't jump away to avoid Medusa's gaze; if you're stoned in the air, you drop down and crack apart leading to death. When the button prompt appears, grab Medusa and follow the analog stick rotations to finish her off. Eliminating gorgons with button grabs nets magic orbs.
Three minotaur emerge after Medusa's death. Utilize your new magic ability, Medusa's Gaze to defeat them. As soon as one is stoned, attack it with your weaponry to break it apart before the creature recovers. Continue down the hall and defeat some undead down near a ladder. After clearing the hall, ascend the ladder. From the top of the ladder, double jump toward the camera to reach a ledge containing a chest full of red orbs. There's a second chest in an alcove to the left. Return to the ladder and climb.
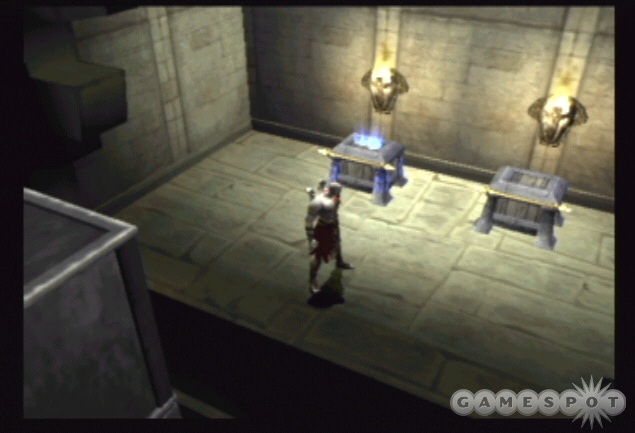
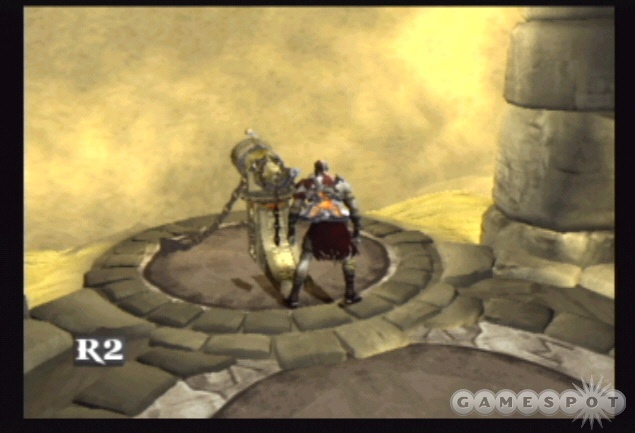
Walk toward the ballista and save your game on the left. Use the chest nearby to replenish health. Approach the back of the ballista and use the R2 button to grab then pull back to launch a projectile. It opens a secret room on the other side of the area.

Return down the previous hall to the lever. Pull the lever once to rotate the ballista toward the wooden door. Return to the ballista and pull it back to launch a projectile at the door. There's another secret room. Rotate the ballista again so it points toward the save game point. Pull the ballista back and launch a projectile at the wall. Open the chest inside to collect the Phoenix Feather. Return the ballista to its position pointed down the hall toward the former wooden door.
Proceed down that hallway. Climb the ladder on the left down the short hallway. Defeat the undead at the bottom. Walk toward the camera to find a chest near a gate. Open the chest to find a Gorgon Eye. Open the gate using the R2 button but don't go outside; return down the hallway and go back up the ladder.
Climb the ladder on the right side. Walk out onto the balcony. Crush the undead that arrive. Face the entrance to the balcony and climb the wall on the left side. Eliminate the undead that appear on the wall using attacks or grabs.
Before continuing to the right, find a narrow ledge on the left. Leap from the ledge to a rooftop. Double jump from the rooftop to the two red orb crates in the area you opened with the ballista previously. Return to the balcony.
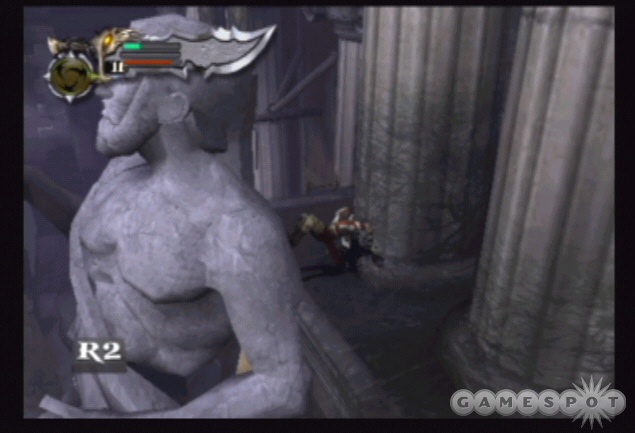
Climb the wall and jump over the gap to the right. Continue across several gaps until you're forced to climb down. Reach the ledge. Defeat the undead along the ledge and move behind the statue. Use the R2 button to push the statue over.
The ladder down is just around the corner. Use the nearby health chest to mend wounds if necessary. Descend the ladder and drop to the courtyard below. Cross to the left side and find the statue you toppled over. Jump from the top of its head to the ladder.
Defeat the gorgons. There's a health chest around the corner to the left if needed. Climb the next ladder and face off against minotaur and gorgon. If you left the health chest on the previous ledge, you can return and recover it at any time during the fight. After the battle, approach the pillars on the left side. Attack the pillars with your weaponry to lower their position; this enables you to jump up to the top and reach the next area.
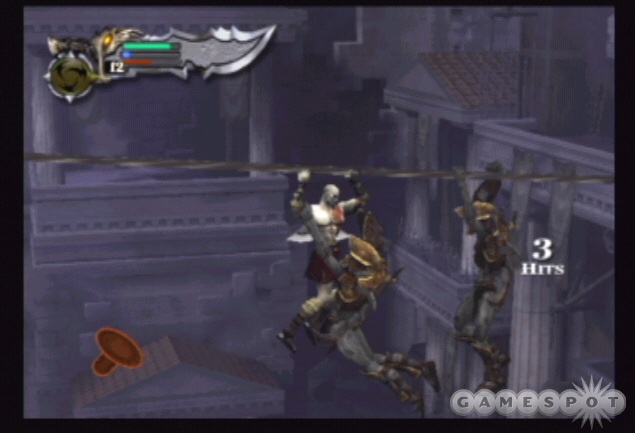
Crush the undead on this rooftop and find another ballista. Pull back and fire to launch a rope to the other side. Go under the rope and start crossing to the right and the other side. Undead troops pursue; use attacks and grabs to get them off the rope. A good tactic is to use a light attack followed by the grab.
Traverse the rope to the far ledge then climb down the ladder. Use the health chest at the bottom if needed. Go to the left side to the large door. Open it using the R2 button. The location should look familiar; it's the hall where you first used a ballista weapon.
Now that the door is open you can shoot another ballista projectile to break apart the next wooden door. Make sure the ballista is pointed down the hall then fire the projectile to break the next door. A gang of minotaur enter. Use the ballista repeatedly to eliminate the approaching foes. If you don't get them all, eliminate remaining minotaur with your weapons and magic. Go down this hall to the ladder (use the health chest on the left if it's still there and needed). Jump onto the ladder at the end of the hall and ascend to find a couple chests. While standing inside this alcove, leap toward the camera to reach a ledge containing a red orb chest.
Descend the ladder completely and exit to the exterior. Approach the center of the bridge to speak with the oracle. Continue across the bridge.
The Road to Athens
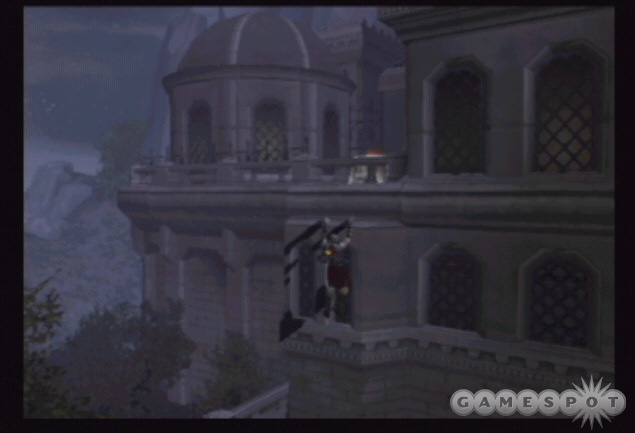
As you cross the bridge, break all of the pots to unleash some red orbs. Cross the bridge and exit to the balcony and get your first good look at the God of War. Walk out to the balcony's edge. When you regain control, go left and down to the streets. The path ahead is blocked so veer to the left. A projectile closes the gate behind you.
Although it doesn't look like it, this area is actually a puzzle. You must use Medusa's Gaze to stone a minotaur on top of the floor switch; this opens the opposite gate and enables you to escape. There are two minotaur initially. It's easier to eliminate them and wait until the next, single minotaur appears. Lure it toward the switch by standing behind the switch. As it nears the switch, enable Medusa's Gaze. There's a chest full of magic orbs on the right side if needed. As soon as the minotaur is stoned, run toward the open gate. Roll under as you approach. Use the health chest if necessary.
Exit to the streets on the right. Start the trek down the street and break open all containers and crates for more red orbs. You can also break wooden doors leading into the various structures; many are empty but a few contain red orb chests and even two Gorgon Eyes (on the rooftop to the right and near the end on the left) and Phoenix Feathers (on the left side of the street near the beginning and near the end on the left).
Ignore the fleeing humans, though they can be slaughtered for health. The road contains undead archers, gorgon, and minotaur. When you round the corner and spot Ares in the background, leap up onto the rooftop on the right to find a crate with the Gorgon Eye. Jump to the adjacent roof, kill the archer, and enter to find a red orb crate. Continue down the street and search other structures for another red orb crate.
As you near the end, search a storage area on the left for two chests: one contains a Gorgon Eye and the other a Phoenix Feather. If you've followed the walk-through, this Gorgon Eye will increase your maximum health bar. Defeat another gorgon and find a red orb crate on the right near the barricade at the end of the street. Break the barricade and enter the recess to bust open some containers for red orbs.
Return up to where the barricade stood and spot the overhead rope. Use the rope to swing to the next rope. Before swinging to the other street, turn left and swing to an alcove containing a chest of red orbs. Return to the rope and finally down to the next street.
Go around the corner toward the staircase. Break open some containers on the left for red orbs. Ascend the staircase.
Athens Town Square
After the first flight, go left and break open the door to find a chest of red orbs. Search another alcove on the left to find a second chest of red orbs. Continue up the stairs and into the town square.
Once the force field appears behind you, turn left and break down the door ahead to find a red orb chest. A mammoth Cyclops appears in the town square. Frightened humans run everywhere; they can be killed for health!
If you are wounded during the fight just kill some of the humans to regain some health. Additional Cyclops appear. Defeat these foes. Break all crates and containers scattered around the area for some red orbs.
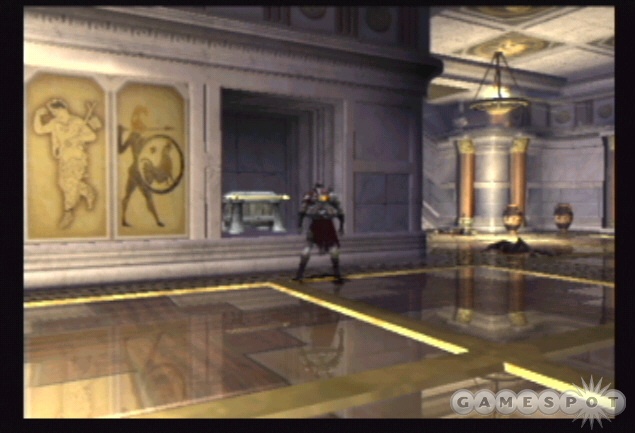
After exploring the area, cross the courtyard and enter the open passage. Enter the ornate room. Note that some of the wall murals are cracked. Break them open to find red orb chests, a health or magic chest, and a Gorgon Eye. Smash open the vases and other objects for more red orbs. Follow the woman up the stairs.
Exit onto the balcony. Use the health if you're in dire need then proceed to the right. Spot the woman on the other side of the broken balcony to the left. You can drop down into the courtyard if you want; there are some containers with red orbs as well as a health or magic chest. Use the ladder to return to the previous location.
There's also a tough secret here. Jump across the gap and aim to the left side. But just barely miss so Kratos grabs hold of the ledge. Shimmy left and around the corner until you can't go any further. Next, double jump backward to the ledge behind you. Break open the door to find a crate with a Gorgon Eye. Return to the previous location using the ladder.
Cross the jump and go right. Ascend the stairs and follow the woman to the balcony. Unfortunately she topples off the high ledge and plummets to her death below. Save your game to the left. Leap to the adjacent balcony to the left and open the chest to recover a Phoenix Feather. Drop off the balcony and approach the woman's body. Use the R2 button to recover a key.
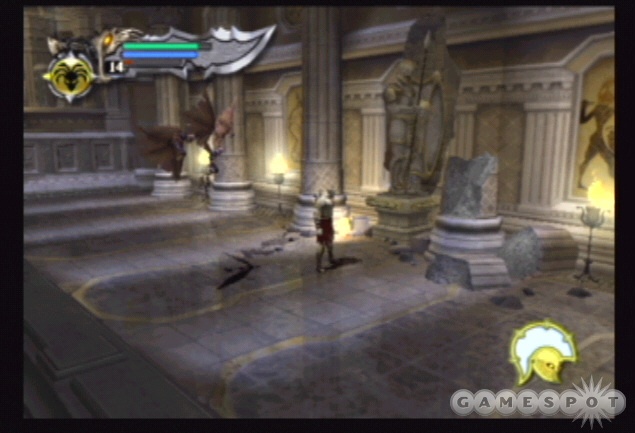
You're back in the square. Return to the passage and into the ornate room you were in previously. There are new undead foes inside now. Break their shields using the Square, Square, Triangle combo. Ascend the stairs and battle two gorgon. Crush the archers on the upper balcony. Break open the door on the right side and enter another ornate chamber.
Defeat the undead inside. Break the cracked mural for a red orb chest. Exit onto the balcony on the right to find a health or magic chest. Break anything in the room for red orbs before returning to the broken balcony.
Jump over and ascend the stairs you climbed earlier. Defeat the archers and exit onto the balcony. Save your game to the left again if desired. Go right and jump over to the ledge. There's a hatch in the back corner. Open it with using the key and the R2 button.
Drop down and open the gate. It leads back to the town square. Head in the opposite direction and save your game. Traverse the tunnel and stick to the left. Open the gate at the end using the R2 button. Continue until you're outdoors.
Rooftops of Athens
There are plenty of things to break open here for red orbs. Climb up the ivy on the right side. Follow it to the top. When you can't move any further up, jump backward to the other ivy-covered wall. Ascend again until you stop then jump backward to more ivy. Finally, do it one more time until you're near a ledge with a couple chests. Jump to the ledge and use the health and magic chests if needed.
Enter the next room and crack open all containers for red orbs. Walk forward to trigger an encounter with the wraiths. These undead beasts burrow in the ground and attack from under your position. When you see a wraith burrow, press the block button to avoid the strike. Counter quickly with a combo or magical attack. Search the far right corner of this room for a breakable door. Bust it down and open the chest inside for a Gorgon Eye.
After killing the wraiths, ascend the wooden staircase (use the health chest near if needed). Kill the archers on the steps and break nearby containers for orbs. At the top of the stairs, battle more wraiths and Cyclops. Use the chest to replenish health. Walk to the far end of the roof and go right to find a couple secret chests. It's a red orb chest and a Phoenix Feather--which should raise your maximum magic bar.
Return downstairs and into the previous chamber. Go through the passage. Move toward the camera to find a chest full of red orbs. The other side contains a health chest. Walk to the end of the broken bridge. Perform a double jump move to reach the platform below then again to the pillar with the ivy. Rotate around the right side and avoid the archers' projectiles. Go down and back to the left. You will be close to a platform. Jump to it to find a red orb chest and a breakable door. Knock it down.
Defeat the wraiths in the hallway and crush the archers on the balcony. Walk to the left side of the balcony and use the R2 button to lower the wooden ramp. Return to the ivy-covered pillar. Rotate right and then jump to the next pillar and finally to the far ledge.
Open the chest of red orbs. Find a health or magic chest near the entrance. Turn left and leap over the broken bridge. Go left and spot a ballista. Continue into the next chamber and open all of the doors. Clean out any undead inside. Break all pots and containers nearby for red orbs.
Push the ballista into the room. Once in the room, push it onto the circle on the left side. The nearby switch (inside the alcove; you must open the door if you hadn't already) rotates the ballista. Use the lever once. Climb the ladder behind the lever and open the red orb chest at the top. Push the ballista off of the circle. Use the lever again. Return the ballista to the circle and use the lever a third time. The ballista should now be pointed toward the wooden door. Fire a projectile at the door.
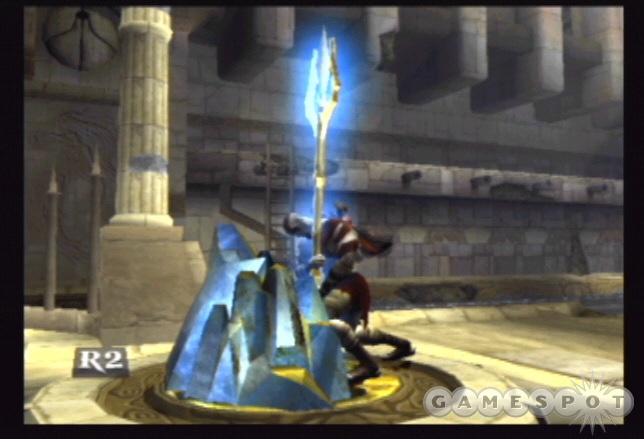
Follow the hall into the room with the blue aura. Step into the aura and speak with Zeus and recover Zeus' Fury. Use the magic chest nearby if needed. Exit forward.
You'll start to cross the broken bridge. Use your new magic ability, Zeus' Fury, to kill the archers on top of the temple. This opens a passage to the right across the bridge. Proceed into this passage. Break all of the containers inside to recover red orbs. Smash through the breakable wall to the right to find a magic chest, a Phoenix Feather, and a Gorgon Eye.
Return across the bridge and go left. Break the statues and vases for red orbs. Save your game. Climb the ladder to the next rooftop. Defeat the minotaur and harpies. Go to the right side of this rooftop to find a ladder. Ascend the ladder to find a chest containing a Gorgon Eye and a health or magic chest. Return down the ladder.
Leap to the adjacent roof to the left. Go to the left side to find the ledge and rope. You can use Zeus' Fury to kill the archers in the distance. Swing across the ropes to find a set of chests, including red orbs, and a health or magic chest. Return across the ropes.
Leap onto the next rooftop and defeat the minotaur. Go to the upper left side of this rooftop. Stand about half a body length from the top edge then drop off the left side. You'll land on a small balcony that contains a Gorgon Eye chest. Return to the rooftop.
Break the barrier on the right side. Jump to the next rooftop. Use the chest if needed. Run up the ramp to the right and shoot the man at the lever across the path with Zeus' Fury. This opens a new passage and raises the bridge. Cross the bridge and break tons of pots and barrels for red orbs. Open the chests for a Phoenix Feather and Gorgon Eye.
Defeat the wraiths in the next hall. The room at the end contains some red orb chests and plenty of statues and containers to break open. Stand on the circular switch to lower on the lift. Follow the tunnel to the next bridge. Spot the oracle in trouble in the distance.
Athens Town Square, Part 2
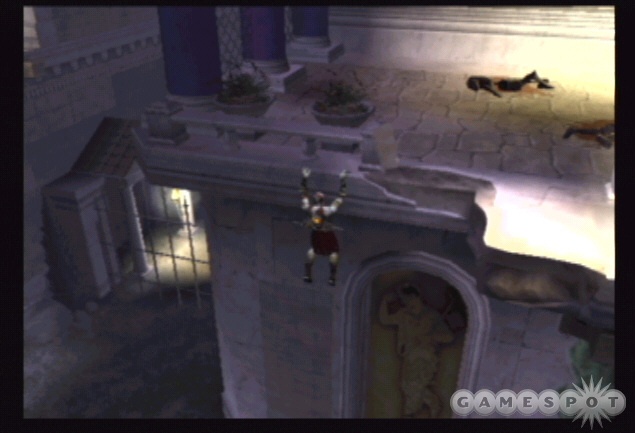
Carefully traverse the narrow beam that used to be part of the bridge. If you fall, there's a ladder on the right side. There's a challenging secret here. While on the narrow beam, jump to the right side where the bridge segment returns. If done correctly, Kratos will grab hold of the crumbling edge. Shimmy around to the right until you can't go any further. Jump backward to a small alcove with a red orb chest, a Gorgon Eye, and a Phoenix Feather. Return to the bridge using the ladder on the right.
Save your game in the light then proceed up the stairs. Defeat the undead troops. There's a breakable wall in the cliff; it's on the right side of the path. Find a red orb chest inside. Continue up the stairs toward the temple.
Temple of the Oracle
Use the magic and health chest if needed. Advance over the bridge and spot the oracle kidnapped by harpies. Force fields appear around the exits. You must defeat a small army of harpies as well as some gorgon. Block the harpies' bomb attack; press block when the fiery icon appears under Kratos.
Ascend the steps toward the temple entrance. Save your game in the light on the left. Go to the far left and spot a red orb chest on the ledge. Double jump to grab hold of the ledge then pull up to reach the chest. There's a second red orb chest on the far right side. Recover the Phoenix Feather and Gorgon Eye from the chests nearest the entrance then move inside.
In the top room, harpies are entering from the large holes in the walls. You can continue to combat the harpies but there's no end in sight. You must use something to block the large holes. Cross the room to the far back end. There are two large statues there. Pull and move the right statue and place it in front of the right hole (so the shield covers the hole) and pull and move the left statue and place it in front of the left hole.
There are a couple chests behind the statues and another on the left side of the room. These chests can replenish your health or magic. Also run toward the back side of the room near the entrance. You can't see them but there are two more chests on upper ledges. Leap to the ledges and find a Gorgon Eye and a red orb chest.

Open the gate on the left side using the R2 button. Climb the stairs. You're above the previous room and must cross the girders to reach the other side. Move slowly and wait for any girders around you to crumble to the ground so you know which way to move. Go along the far left edge and you can leap to a ledge just under a window. Break the window and find a Gorgon Eye inside. Reach the far side of the room and save your game.
Proceed through the long hallway and crush the undead troops inside. Exit outdoors and spot the oracle hanging precariously from a rope above the area.
There's no time limit to the first part of this challenge so don't feel pressured to rush...at least yet. From your start position, move to Kratos' left and pull out the large statue. Drag the statue to the lift just to the statue's right (it has the circular symbol on it). This lowers the lift. Jump back up to the upper platform.
Now drag the other statue and push it onto the lowered lift so it lands on the top of the other statue. Stand on the lift so it lowers then drag the double-decker statue into the lower courtyard. Search the courtyard for chests. You can break open a wall on the right side after you lower on the lift to find some red orbs and another to its left for a Gorgon Eye. Go to the back end of the area and leap to an upper ledge for more red orbs.
There are more red orbs chests to recover but it's very difficult to get them. You must drag the double-decker statue to the right of the structure at the back end of the area (near where the red orb chest was on the ledge). You can jump from the ledge to the top of the structure then to the top of the double-decker statue. From there you can see the alcove with the red orb chests on the right side. Jump into the alcove to recover them.
Your primary goal is to move the double-decker statue to the left side of the structure so you can use it to reach the ivy growing on the left wall of the area. Traverse the ivy to the left until a cut scene interrupts the action...this starts a timer and the pressure.
You have 67 seconds to reach the oracle before she falls, which leads to game over. Your first obstacle is to jump past the moving gears. Wait for the gear to stop then jump across to the next patch of ivy. When you reach the far side, don't just crawl along the ivy; use the jump button and press left to traverse the ivy faster.
Reach the ledge and next set of ivy. Jump up onto the ivy path and keep ascending. Use the jump button to climb instead of just crawling. At the top, spot the rope. Leap to the rope and hold circle to swing and immediately press X to jump to the far ledge. Turn left and spot the beams.
Carefully, but quickly, cross the narrow beams. Note that you can jump to save yourself some time. At the end, turn left to the rope and swing down to the statue and large dish. Turn left and run out to the oracle to save her.
After the oracle has been saved, you can return to the path which led to her swinging rope, if you wish, to obtain another feather. When you reach the curved wooden paths that you have to tiptoe along, you can turn right (facing the wall) and double-jump to reach another chest.
Exit through the open passage and descend the stairs. Save your game in the light. Ascend the long set of stairs on the left side of the area (near the save game point) to find a small temple. Go around to its far side and location a chest with a Phoenix Feather. Return to the save game point area.
Cross the long sword bridge. Descend the spiral staircase inside. At the bottom, find the chest under the stairs to recover a Phoenix Feather. Jump over the ledge and into the sewers.
The Sewers of Athens
There are two chests here if you need to replenish health or magic. Proceed down the tunnel. You'll encounter some undead troops with archers in the distance. Lure the troops away from their archer cover. After clearing out the ground troops, charge the archers. As you approach, jump onto their ledge on the left side (double jump to grab hold). Crush the archers on the ledge and open the chest on the left for red orbs. Continue into the sewers.
Battle the minotaur in the next tunnel. Use the chest on the right if needed. Round the corner and battle the archers. Drop off the next ledge and instead of going forward, turn around and walk under the ledge to find a secret red orb chest. Continue through the sewers and use the health or magic chests as needed. There are a couple red orb chests at the base of the next ledge. Open the chests then jump up to proceed through the sewer.
Face off against the Cyclops. The small obstruction in the middle of the tunnel provides a nice chokepoint. Utilize Medusa's Gaze to stone the Cyclops. As soon as one is stoned, attack with your Blades of Chaos to shatter the creature. Remember back as you battle more minotaur so you don't move into the range of the undead archers. If you need health or magic you can return to chests in the previous tunnel.
Climb the ladder and slaughter the archers on either side of the path. Open chests for red orbs, health, or magic. Continue to the back end of the sewers and climb the ladder to escape. Use the chest at the top of the ladder if needed. Ascend the spiral staircase and use the lever. Return to the bridge.
The Road to Athens, Part 2
Proceed forward up the stairs. Save your game in the light. Turn right and run along the mountain path. When you reach the ominous statues, find a red orb chest on the right side. Go through the open doorway into the next area.
Desert of Lost Souls
Move forward into the desert. To successfully traverse the desert, you must find the three sirens and kill each of them. This is the only way to unlock the next passage. The best way to find the sirens is by listening for their song. The louder you hear the song, the closer you are to the sirens.
The area isn't that large and basically resembles a rectangle. Each siren moves around in a small area of the desert. Look for a siren northeast (if north is away from the entrance), northwest, and far north from the entrance. The far north siren is close to the exit door. There are also red orb chests scattered through the desert.
Once you locate a siren, attack the creature quickly and aggressively. It will attempt to move away from you and use its longer ranged attack. Continue to strike with the Square button until you see the button prompt above the siren. Grab the siren to administer the finishing blow. Find and kill all three to open the exit. Expect to also face some minotaur in the desert.
With the exit passage open, proceed inside and save your game. Open the magic and health chests to replenish your supply. Proceed down the stairs and to the ledge above the conveyer system.
Drop onto the conveyer. It's possible to stop the conveyer by attacking the gear on the right side. It takes many hits; plus, touching the gear causes major injury. Strike twice from long range then jump back away from the gear to avoid being struck.
Underneath the ledge find the door. Lift it with the R2 button and pull the stone out. Defeat the undead that appear. Use the chest behind the stone if needed. Push the box to the left side, which will be more challenging if the conveyer remains intact. Leap on top of the stone and to the upper ledge. Break the containers for red orbs. Open the door and follow the hall toward the horn. You can look at the murals on either side of the room before approaching the horn.
Walk up to the horn and press the R2 button to blow the horn and create a path through the sand. Traverse the path and approach a second horn. This one disappears and three siren appear in its place. It's much tougher facing all three siren at once.
The three siren remain at a perimeter around you and pummel you with their projectile attack. Use your Blade of Chaos and combinations (Square, Square, Triangle). If the siren move close to each other, use Poseidon's Rage to inflict damage to all three. The siren can also survive several grabs; however, when the button prompt appears, grab the siren to inflict more damage and recover some health and magic from the orbs that appear. Unfortunately the siren reappear several times.
Once you've defeated the siren, blow the horn using the R2 button. When you regain control, save your game in the light. Start across the rope bridge.
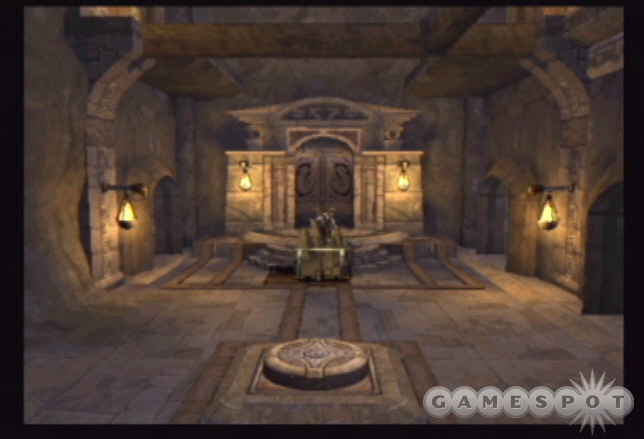
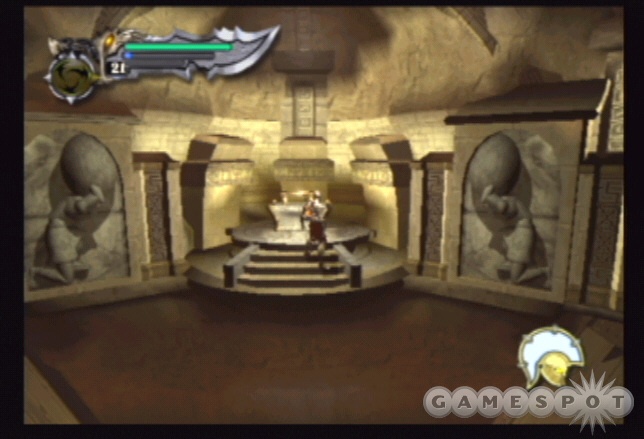
Pandora's Temple
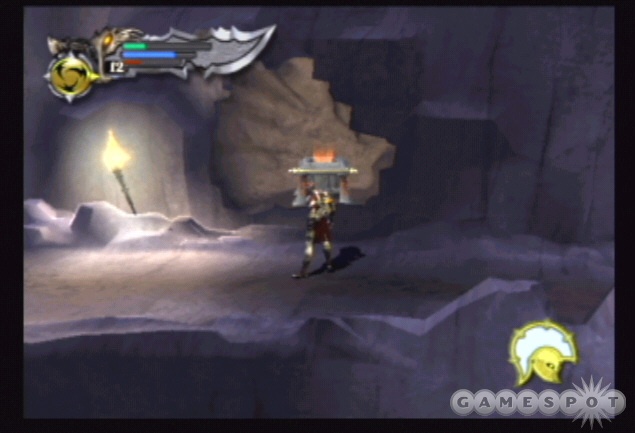
As you approach the steps, look on the left and right sides to find health and magic chests. Save the health for later because there's another soon. Find the path to the far left and follow it around to the right side. You'll reach a handle. Pull the handle to expose the large stone block. Leap up the blocks and speak with the man near the pyre. Use the health chest here if needed before dropping down and returning to the temple entrance.
Battle the Cyclops. The force field lowers upon defeating the beasts. Ascend the stairs. Open the chests at top for red orbs and a Phoenix Feather. Rotate the lever to open the door. Enter the temple. Fight the wraiths and archers inside. Use the chests to replenish health.
Approach the book on the pedestal and press R2 to read the text. There's an alcove on the right you can examine as well. Press R2 against the half-circle doorway ahead of you to open the passage.
The Rings of Pandora
Move forward and find the passage on the right side. The hall contains some spike traps. Navigate carefully past them then save your game inside the next chamber. Defeat the archers in the back corner and collect the orbs from the chest. Enter the alcove and pull the lever; this lowers another crank back in the previous hall.
Use the crank to rotate the rings and open up new passages in the previous hallway. Explore the first passage to find the door locked with muse keys (you'll find these later). Rotate the crank again to find another hallway. Follow the next hall and approach the aura to receive a new weapon, the Blade of Artemis. Walk through the opening into the next section.
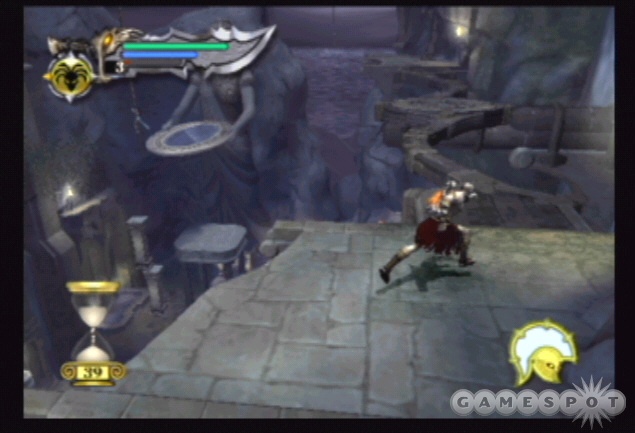
The Challenge of Atlas
Save your game at the light. Enter the next chamber (the gate closes behind you) and battle the undead. Test out the new Blade of Artemis to make short work of these foes. A pack of gorgon also attacks you. When they're close together, use Poseidon's Rage to cancel their gaze and to inflict damage. Recover magic by killing a gorgon with a grab when prompted. Break all containers in the room for red orbs and find the health chest in the corner.
Jump to the broken staircase in the upper right corner of the room. There's a magic chest up here. Defeat the undead along the catwalk. When you spot the archers, switch to Zeus' Fury to eliminate them. Follow the catwalk to a narrow beam and cross it to the back ledge. Open the red orb chest on the right side and pull the lever on the left to lower the weight.
Leap to the rope and climb down. There's a second rope at the bottom. Jump and grab hold and traverse across. Undead troops attempt to impede your progress. Use quick attacks and grabs to pull them off the rope. Use the chests to regain full health and magic and continue right to the blue shield--the Shield of Hades.
As soon as you pick up the shield, a force field blocks the path. A spiked wall starts moving from the other direction. You must defeat an army of undead to deactivate the force field before the wall crushes you. Enable Poseidon's Rage when surrounded by undead. The best place is to stand close to the barrier and allow the undead to collect at that spot. Don't waste the magic unless you can strike many undead at once. Pummel them with your attacks and combos in between blasts of magic. Once out of magic and surrounded, retreat a bit then use the Square, Square, Triangle combo in the group's direction to launch a whole undead squad off their feet.
When the barrier falls, the wall retracts and you can return to the health and magic chest if you didn't use them previously. Continue through the downed barrier and find another health and magic chest. Jump to the far rope and return upward.
Exit into the tunnel on the right and battle the gorgon. Pull the cart from down the hall and send it down the hall on the left. Defeat any gorgon in your way. Once inside the room, eliminate the archers. Push the cart onto the floor switch and watch the doorway in the distance spin around. You must put the cart on the switch and get to the doorway before it spins.
Place the cart on the far side of the switch, so Kratos' back is to the spinning doorway. Instead of pushing the cart onto the switch, kick the cart onto the switch so you can activate the switch from long range. As soon as the cart is on the switch, roll backward to reach the doorway in time.
Battle the undead inside the next hall. Search the left side for breakable containers and a red orb chest. Replenish your health and magic if needed then find the ladder on the right side. Climb the ladder and exit onto the ledge overlooking the room.
From the first ledge, jump to the left to find an alcove containing red orbs. Cross the girder to the yellow shield--the Shield of Zeus. Cross the girders to the far right side to find a red orb chest. Drop back down into the room with the cart. Find the door on the left side; the Shield of Hades and Shield of Zeus fit into the door. Use R2 to place the shields and open the door.
Descend the stairs on the right and reach the save point. Continue down the hall and locate the room with spinning blades. Cross the room and find the exit hall on the right side. Bust some pots for red orbs then go left to find a breakable wall. Defeat the undead foes inside the hallway.
Walk to another conveyer belt. You must traverse the conveyor belt while avoiding the spiked traps. Wait for the traps to pull away then roll or scamper through. Go left and up the steps to the bridge. Defeat the harpies. Part of the bridge railing is broken. Jump from there to the ledge in the distance. You'll find a red orb chest and a Phoenix Feather.
Cross the bridge and finish off any remaining harpies. Replenish your health or magic as needed. Find the climbable wall in the back left side. Ascend the wall and jump the gaps. Explore some of the ledges to find a couple red orb chests before ascending the cliff and proceeding to the far left side. Jump to the chain and go up to find more red orbs. Use the health and magic chests to replenish Kratos--there's a tough battle around the corner.
Go forward down the hall and you discover yourself trapped in the chamber with undead and sirens. Break the shields of the undead using the Square, Square, Triangle combo. This is a tough battle because there's also a time limit involved. The floor opens up beneath you after a short period of time; if you haven't defeated the minions inside the room, you plummet to your death. You must reach the blocked portion of the room before the floor opens.
Crushing the shields on the undead is your first priority. Once down, activate the Poseidon Rage when surrounded to big damage. Maintain an aggressive attack and use the Square, Square, Triangle move to disable enemies for further combinations and magic assaults. As soon as the barrier falls, leap to the area on the far side of the room to avoid any impending floor opening. Grab the Handle of Atlas from the pedestal.
Return outside and descend the chain to the bottom. Save your game in the light. Retrace your steps across the bridge and back to the conveyer belt. The spiked traps are still operational so time your advance over the belt while the spike traps are open. The patterns are different; the traps close quicker and more frequently. Roll through the opening to bypass the traps as fast as possible.
Follow the hall until you return to the room with the spinning blades. These move faster as well. Avoid the blades and reach the upper left corner of the room. Pull the lever to open the exit passage to the right. Enter and hop onto the ledge on the right side and traverse it to the far end. Open the door and defeat the archers to the left.
Use the crank handle to raise the large stone ball. Go behind the statue to find a chest containing the first Muse Key. Go to the right side of the room and find the staircase up. Defeat the undead and reach the upper ledges of the room. Search to Kratos' immediate left for a chest containing a Phoenix Feather. Cross the girder to find a red orb chest. There are two more red orb chests; just right from the entrance on both sides of the room to find them. You may want to wait until you pull the lever so they're easier to reach.
Stand on the middle of the upper girder and use the lever. The stone ball crashes down and breaks open the exit. Emerge outside and look left for some red orbs. Approach the coffin and pull it open. Hop onto the body inside and use the R2 button to pull off the Architect Son's Head. Descend the ladder and use the chest at the bottom.
Follow the long hallway past the corpses on the ground. Use another chest if needed then open the door. You return to a previously visited location just outside Pandora's rings.
The Rings of Pandora, Part 2
Save your game if desired then return through the hall to the rings. Defeat some undead along the way. When you reach the rings, the door closes behind you. Use the door with the skull on it in front of you to place the Architect Son's Head. Enter the inner ring.

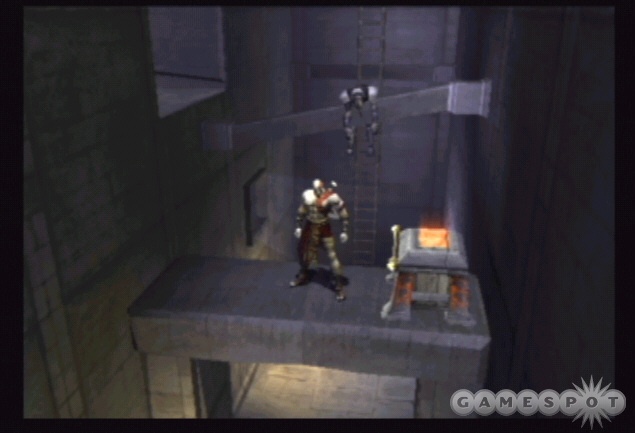
There's a huge steamroller behind you when you enter the inner ring. Run toward the camera until you reach the steps on the left. Your goal here is to jump on top of the steamroller and ride it until you're next to the ladder on the right. You need the height of the steamroller to reach the ladder. To ride the roller, just keep moving in the opposite direction of its roll. Adjust your pressure on the analog stick carefully so you don't move too fast or too slow. Reaching the ladder lowers it and also removes the steamroller.
Climb the ladder to the top to find an alcove with a health and magic chest and some red orbs. Save your game here as well. Follow the hall until you're back outdoors.
The Challenge of Poseidon
Cross the bridge and approach the circular area to face off against the Cerberus dogs. There's one full size Cerberus and several smaller dogs. If left alone, the smaller dogs eventually grow into their larger counterpart--this is not advisable. Ignore the full size Cerberus at the start and concentrate your battle on the smaller dogs to prevent them from growing. Use the Blade of Artemis to hack up the smaller dogs quicker.
It's also possible to use Medusa's Gaze to stone the large Cerberus dog as soon as the battle opens then shatter the stone with your weaponry. If you fail, though, making other attempts becomes a big risk with the smaller dogs having time to grown to full strength. With the large dog out of the way you can concentrate fully on the smaller variety. The small dogs keep respawning for awhile; just keep hacking away with the Blade of Artemis to complete the task. After the battle, use the chest to replenish health or magic.
Exit along the new path. There's a second health or magic chest if needed. Before worrying about the stone block, defeat the Cyclops that arrive. Push the block to the corner. You need the block as cover against the gang of undead archers at the end of the path. Crush the archers when you get close. More small Cerberus dogs appear on the path ahead; switch to the Blade of Artemis and eliminate the pups.
There are more archers around the corner. Retreat and defeat the dogs away from the archers' line of fire. Clear out all creatures to lower the barrier. Enter the chamber.
The lever in the middle rotates the room. As it moves around, you can collect red orbs from the chests in the side rooms. However, you must work quickly. Enter, open the chest, and then roll back into the room. If you're too slow, the gate closes and spikes appear from the ground, which kill you instantly. Collect all of the red orb chests in a similar fashion before waiting for the exit.

Combat the undead outside. Jump up to grab hold of the upper ledges. At the top, go to the right to find a hidden chest. It's the second Muse Key. Go around to the left and battle the minotaur. Break the statues in the next hall for red orbs and continue toward the save game spot. Use the chests to replenish health or magic as needed.
Approach the large chandelier made of cages. Break the pots and statues in the area for red orbs. Proceed up the ramp to the small room at the far end. Break more containers for orbs. Read the note on the left side then grab the handle on the left. Return to the cages and spot the crank. Use the handle on the crank to lower the cage.
The object is to push the cage up the ramp and get it inside the small room at the end. The problem is since it's a ramp, if you let go of the cage it will slide back down to the front of the area. While that sounds like a simple task, you must also find undead creatures during the trip up the ramp. That's why the ramp has some elevated rocks. You can position the cage on the rock to prevent it from sliding down to the bottom.
Stick the cage on the rock and combat the undead then continue moving the cage up after the battle. There are health and magic chests at the top if you need them. Simply get the cage inside the room. Even if there are undead still alive, you don't need to worry about them once the cage is in the room.
Push the cage onto the floor switch beyond the lever. Use the lever. Return to the ramp and replenish health or magic if needed before continuing down the new tunnel.
When you enter the next room, go left immediately and jump into the water. Climb the ladder to find a chest with a Phoenix Feather (the right side contains a health or magic chest). Cross the bridge and acquire Poseidon's Trident, which allows you to swim underwater indefinitely. Save your game in the back corner then jump into the water to the right side of the bridge.
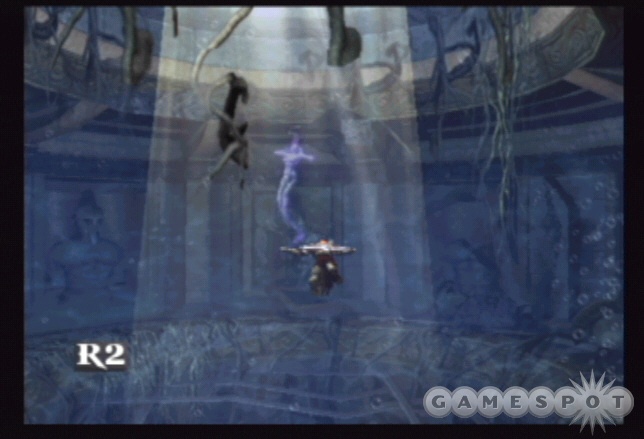
Swim down and find the underwater tunnel. Use the R1 button to dash underwater and break the barriers. Swim up and out into the chamber filled with small Cerberus dogs. Hack them to pieces with the Blade of Artemis and use Poseidon's Rage to assist. Open the red orb chest on the left before opening the door. Use the lever inside to move stones in the previous chamber. Swim back and find a Cerberus and some harpies waiting to greet you.
Climb the recently-created stone steps to the upper tunnel. Follow the hall to another pool; stop and use the chest on the way if needed. Swim down and go forward. Swim toward the Nyad; after examining the Nyad, press the Circle button to embrace her.
Swim down. Go forward to examine the mural of Poseidon. Swim through the tunnel on the right. At the intersection, use the dash move to break through the mural ahead of you. Embrace the Nyad inside the alcove. You receive a Phoenix Feather. Return to the intersection and swim left. You emerge out of the water.
Defeat the undead and enter the circular chamber. Replenish your magic or health if necessary. Break the wall on the far side of the room. Crack apart all of the pots in the alcove for tons of red orbs. There's also a chest at the back end with even more. Swim back in the water and at the intersection go right.
When you read the passage with the large face-like entrance, use the dash move to swim quickly through the next tunnel to avoid being trapped inside. Swim until you emerge out of the water. Battle the undead and harpies to lower the barrier. There are a lot of enemies here; use the health and magic chests to replenish your supply during the fight. Lure enemies to one side of the area then roll to the chest so you provide some time for you to open the chest before the creatures can pursue and strike.
Once the barrier lowers, use the lever. It opens the Poseidon mural wall. Before leaving, jump onto the ledges on the opposite side of the water. The ledges are on the left and right side of the area. Break down the walls and find red orb chests in the alcoves.
Retrace your steps and swim through the open mural wall. Save your game in the light. Use the dash move to break the wall on the left side of the room. Embrace the Nyad inside the chamber. Swim up from the Nyad to find a room full of red orb chests. Return to the save game point.
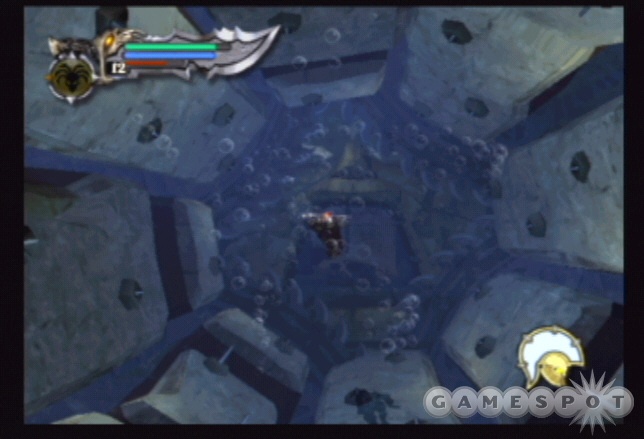
Swim to the right side of the room toward the Poseidon statue. Swim down and spot the moving mechanism at the bottom. Wait for the mechanism to pass then swim down and to the left. Swim quickly and duck when you spot the space along the floor. The mechanism continues to pass through this hall. You must avoid it or you become crushed. Use the dash move to swim faster. Remain in the hole until the mechanism passes and start swimming again. Use the dash move to go quickly to the next hole in the floor. Duck down and wait for the mechanism to pass. Once it does, swim to the circular hole in the floor and swim down.
Swim forward and up into the next room. Emerge out to the left and save your game. Defeat the minotaur nearby. Use the chests to replenish health or magic. Use the lever on the middle of the platform. This raises a series of step-like platforms. It's timed so you must move quickly otherwise you must return to the lever and try again. Run and jump across the platforms to the statue. Read the book on the pedestal. Defeat some undead and open the chests.

Return to the lever and pull it again. Instead of leaping onto the platforms, jump into the left side of the water. Swim toward the back platform and find the secret alcove inside the pillar. Hide inside until the platform lowers. Swim through the passage and out of the water. You're back in a familiar room.
The Rings of Pandora, Part 3
Return through the spike trapped chamber (they aren't working) and defeat the undead inside. Return to the ring. Remember you picked up both Muse Keys now (if you followed this walk-through). Go to the right and follow the ring until you find the crank. Turn the crank until you reach the room with the Muse Lock. Use your keys to open the hidden chamber.

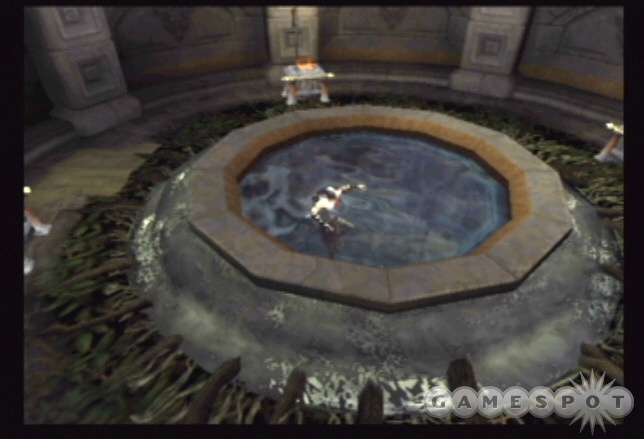
Inside you'll find a ton of red orbs and two fountains that raise your maximum health and life bar. If you followed this walk-through, you're now at the highest possible health; but your maximum magic requires one more feather. Use the center fountain for tons of red orb experience. Save your game then return to the ring. Use the crank and return the visible hall to the spiked traps.
Proceed to the inner ring and go left until you reach the stairs used earlier to avoid the steamroller. Ascend the stairs. Now you can jump and swim in the middle pool. Swim down and find the tunnel. Follow it to a new hallway. Ignore the door and lever in the room for now. Break the wall on the right side and continue through the tunnel. Save your game. Replenish health and magic at the chest then climb the ladder and enter the next chamber.
The Challenge of Hades
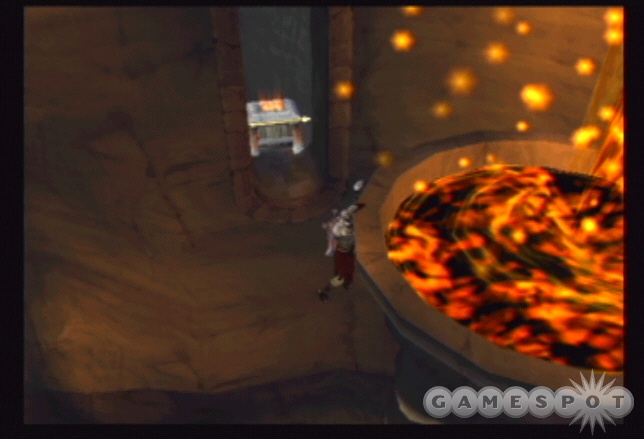
Break containers for red orbs. Search the left side for a ledge. You can jump to the higher ledge, break the wall, and find a chest inside. There are health chests on either side of the large staircase. Ascend the stairs and leap off the left side to grab hold of the lava bowl. Shimmy to the left and find a chest inside a narrow alcove. Do the same on the right side of the staircase to find chest with a Phoenix Feather (if you followed the walk-through, you're now at maximum) on the right side.
You can't move inside the path at the top of the stairs--it's too dark to see. Instead, go up the ledges on the left side and approach the door. Apparently Hades requires blood sacrifices before you can proceed. Accept the challenge.
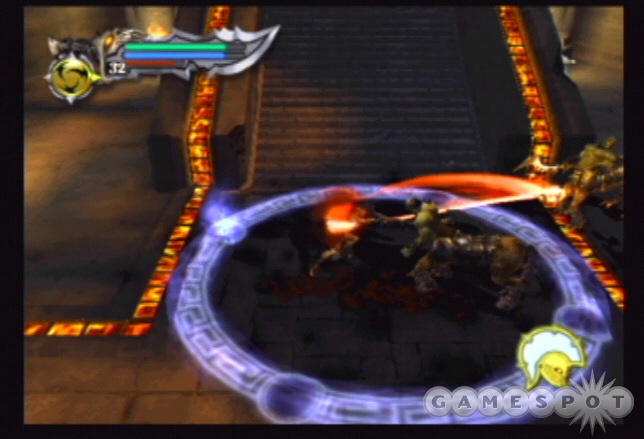
Centaur emerge from the darkness. You must kill the centaur on the glowing blue circles; there are two circles. One near the stairs and one near the chamber's entrance. Start with the circle close to the stairs. You know you have slaughtered enough centaur when the exit door opens slightly. The centaur must be defeated inside the circle. Scamper to the other circle and continue the attack after completing the first circle. If you need health, use the chests on either side of the stairs.
Enter the new hallway and replenish health and magic if needed. Break apart containers for orbs. Leap up to the platform along the back way to find a couple chests. Open the door on the far left.
The hall contains floor traps. Time your jump across the traps to avoid falling into the lava, which instantly kills you. Around the next corner, use the roll maneuver to bypass the arrow trap. Leave the health chest for later. Crush the gorgon around the corner.
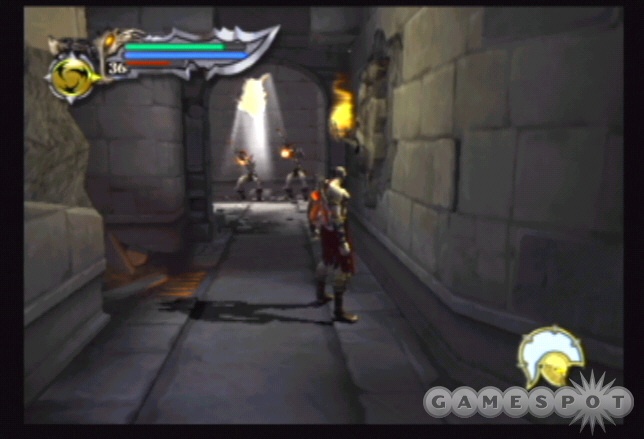
You've entered a maze and you must defeat all creatures within. At the next intersection, go right and defeat the archers. Go left now. You reach another intersection. There are archers ahead and more beasts left. Defeat the centaur and gorgon to the left. Break apart all the pots for red orbs. Exit the chamber and open the chest. Go right and defeat some undead foes and finally some archers at a dead-end. You will eventually circle around into the same chamber. Exit and proceed toward the archers to the left.
At the archer intersection, go right to find some undead and gorgon in a dead-end. There's a health chest here if needed. Go left to the lift. Turn the crank to ascend.
Defeat the undead at the intersection. Before advancing further, push the block on the left wall. This opens a passage with some chests at the back end. At the intersection, follow the far right tunnel. Push the block until a new room opens. Eliminate the undead inside the room. Explore the left side to find some archers. Kill them with Zeus' Fury or just jump up to their ledge and hack away. Open the door on the left side to return to the intersection.
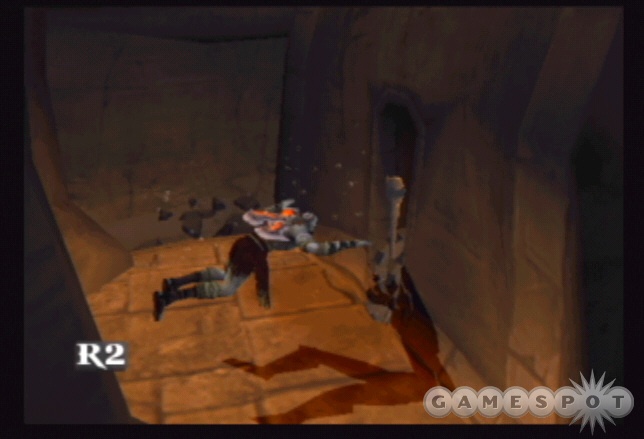
Proceed left and find some archers at the entrance to a tunnel. Kill the archers. The tunnel features a large crushing block. When the block moves to the far right, exit into the tunnel and leap onto the block. Kill the archers on top. Read the mural at the back end. After clearing the area, look on the right side of the tunnel while standing on the block. You can see another entrance. Wait until the block moves far enough back for you to drop into the new entrance. Kill the enemies here to lower the mural and the exit.
Stand on the floor switch to raise the center statue. Jump into the water below the statue. Swim down and use the lever to activate the light. Climb to the top of the statue and reach the upper level of the statue near the head. Turn the lever so the statue's head and light points toward the dark corridor you couldn't enter.
The new hallway contains huge, molten balls rolling toward you. Scamper to the left and right to narrowly avoid the balls and reach the very end of the tunnel. Enter the small room to find several chests, some undead enemies, and book that reveals that puzzle: you must find the appropriate exit in the tunnel and only one of the eight doors leads to the hall. Open the doors until you find the exit hallway. Wait until there's a large gap in balls before attempting to open the door.

Follow the hall into the chamber with two huge minotaur. There's a health chest on the left side if needed. Ascend the stairs on the right side of the chamber and defeat the undead archers at the top; this detour will help shortly. Open the chests here and return to the previous chamber. Take the left route now.
Reach the overhead rope. Traverse across and knock off the undead along the way. Combat the creatures on the circular platform. Use the magic chest in the right corner when needed.
Once the barrier lowers, climb the ladder. Jump onto the ledge and follow the hall. Check the alcoves on the right side for breakable containers and a chest. After the chest, reach the intersection and go right to the save point.
Proceed down the hall to the top of the challenge's primary room. There are narrow girders here as well as spinning blades. The trick is to traverse the girders while avoiding the blades. Look carefully at the girders and notice the markings; this reveals where the blade spins over.
Step onto the girder and instead of going left, jump to the platform to the right. You'll find a couple chests on along the right wall; the first is close to your current position and the other is farther to the left. When the blade moves toward your feet, perform a double jump just before you're hit. You'll remain in the same position, so you land on the girder, but avoid the blade.
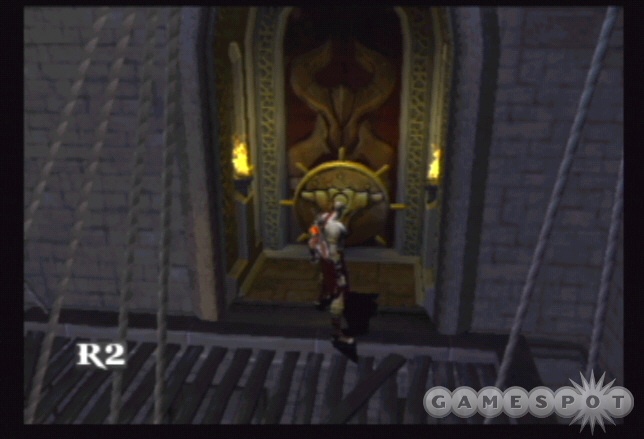
After the second chest, continue to the right all the way to the wider ledge for another chest. Return to the girder and walk onto the broken girder to Kratos' right. When the spinning girder ahead of you lines up in front, leap to it. Climb the ladders.
Cross another girder system--this time without spinning blades. Go around to the right to find a ledge with a chest. Return to the rope and use it to descend toward the new path. Follow the hall to the door with the minotaur logo. Use the wheel crank on the door. Descend the staircases. Use the health and magic chests here if available and needed. Climb the ladder and save your game. Return to the initial chamber with the large door and the lever. Time for battle!
This is a colossal fight. Approach the large door and the huge minotaur boss emerges. Retrace your steps to the upper platform in the back of the room. It's better to battle the minotaur from that position rather than down on the lower floor. Strike the minotaur with your Blades of Chaos combinations. When the minotaur raises a hand, roll in the opposite direction. If the minotaur raises both hands, roll backward. Strike the minotaur until it retreats. Repeat the process over and over again until the button prompt appears over its head.
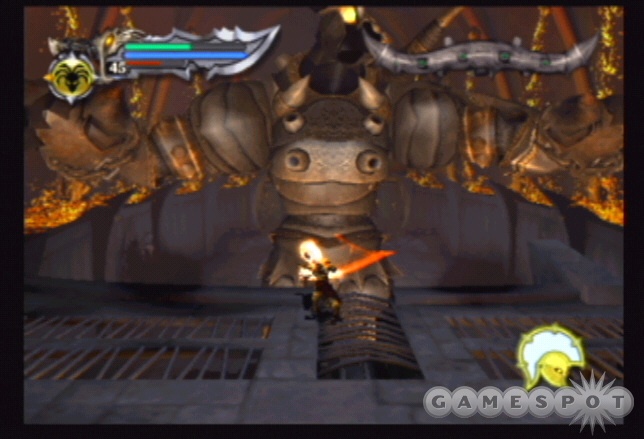
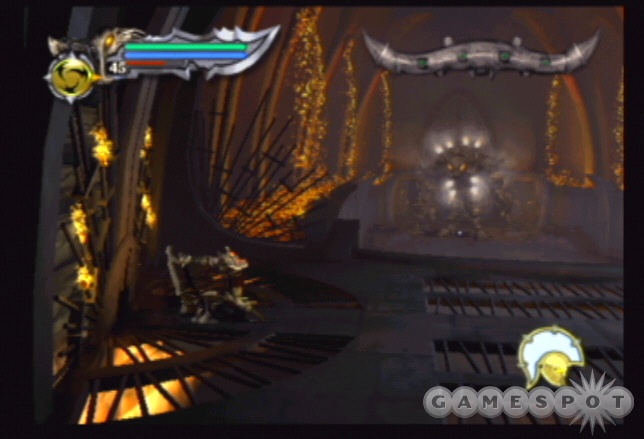
Drop down and quickly run to the minotaur and grab it. Follow the onscreen analog rotations. Complete the sequence to daze the minotaur. Run back to the upper platform and use the lever to launch an explosive projectile at the minotaur.
It shakes off the blow and charges the platform again. Repeat the process from the start. If you choose to use Rage of the Gods, use it early in the fight; that way it will have likely recharged near the end of the fight where you can use it again. This is a very long battle; the minotaur survives several projectile blasts. You're close to victory when the minotaur is down to its skin. You will have cracked off all of its armor and exposed its hide. Daze it a last time then fire the projectile to complete the battle.
Walk through the opening in the door and ascend the staircase to the left. Cross over the chain and to the save game point. Open the chests at the top of the stairs. Read the book at the pedestal. Open the casket then remove the Architect Son's Head. Return down the steps and proceed back into the minotaur room. Spot the red aura. Walk into it to receive the Army of Hades power.
You get a chance to use the power quickly--undead flood the room. Activate the power as you batter and bruise the undead foes. Proceed through the open passage. Stop and use the health chest if needed. Swim through the tunnels to return to the rings.
The Rings of Pandora, Part 4
You emerge in the middle pool. Locate the door with the skull and use it to place the Architect Son's Head inside. Enter the room with the crystal and the crank. Your goal is to rotate the rings of Pandora so there's a straight shot from this room through the rings, through the hall with the spiked trap, and into the room with the crystal eye. A beam of light will run from the crystal eye into the new room. If anything blocks the beam, you must rotate the rings again to create a clear shot.
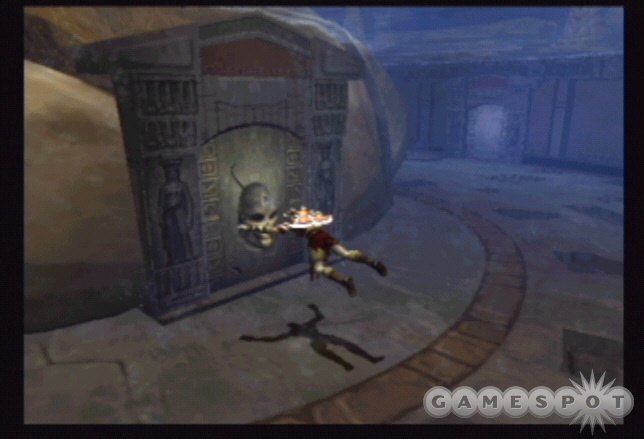
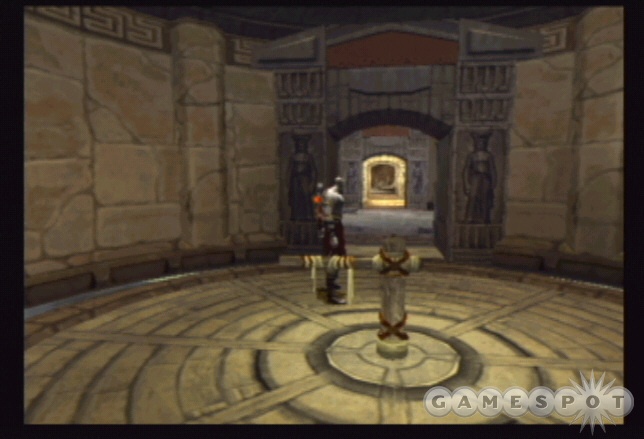
Enter each area of the rings to find the crank and adjust the hall so there's a clear shot. Don't forget you'll need to adjust the room just opened (via the skull lock). It begins unaligned. Rotate that room and get a clear shot down the hall then go to the crystal eye (through the spike trap room, again with some undead) and pull the handle to close the eye and create the light beam.
Return to the inner room and use the lever to ride the lift. Exit onto the statue's hands then into the circular arena to battle the satyr. Replenish health and magic upon leaving.
Cross the bridge. Read the book on the pedestal. Break a wall on the right side to find a couple chests inside. Save your game. Continue forward into the next area.
The Cliffs of Madness
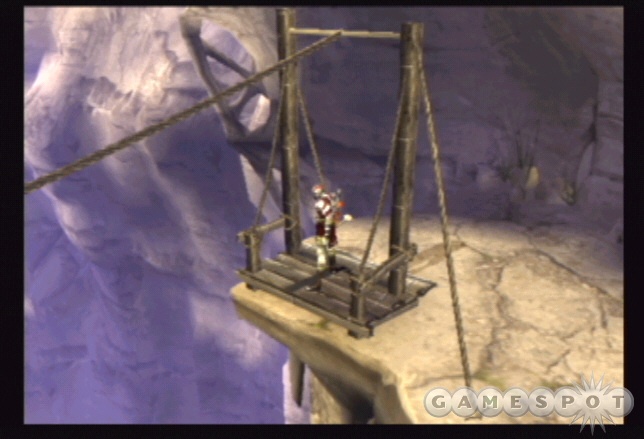
Walk forward and crush the undead. Check the left side for breakable containers and a magic chest. Use Zeus' Fury to eliminate the archers on the right side. Leap over the gaps and face more archers. Defeat them with your weapons or with Zeus' Fury from longer range. Defeat the harpies and archers near the rope. Traverse the rope to the far ledge.
Go around to the left side and crush additional undead troops. Use the crank to raise the lift. Use the save game point. Instead of using the ladder, go right and leap onto the new path. Defeat the archers in the way. Use the health chest here if you need any; there's a tough battle ahead. Enter the cavern. A barrier erects at the entrance. Defeat the satyr and undead inside the cavern. There's a health chest on the top catwalk but more undead guard it.
Proceed through the cave exit and find another lift. Turn the crank to ascend. Save your game. Enter the next cavern. The holes in the floor are actually spikes. This room is trapped. You need to pull the lever to raise the nearby gate. With the gate raised you can pull out the stone block. You must move the stone block from this cave to an adjacent cave on the upper portion of the screen (the path is back and to the left of Kratos' current position).
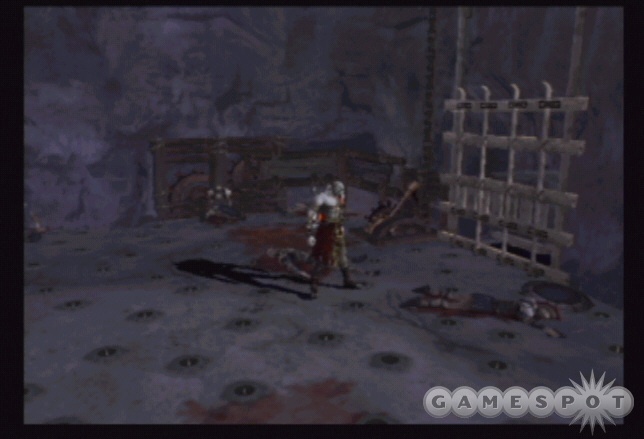
You must work quickly because the floor spikes eventually reappear. The best way to complete the task is to pull out the stone far enough so you can jump behind it. Charge a kick and kick it toward the other cave entrance. Charge completely and the block should line up almost perfectly with the next cave entrance. If not push it slightly into place before getting behind the block again. Charge a full kick again and kick it into the next cave.
Approach the block and push it slightly into place so you can kick it to the left. Get behind it and kick it left toward the ledge. Jump onto the block and finally onto the ledge before the spikes rise.
Open the red orb chest on the ledge then continue up the ivy to retrieve the Necklace of Aphrodite. Exit the cavern and stand on the stone block to the right to lower. Open the chest and defeat the archers that appear. Proceed around to the right side to the next entrance. Go down the first ladder to find a health chest.
Enter the cavern and battle a satyr, a minotaur, and finally undead archers (use Zeus' Fury). Stand on the unconnected bridge so the segment moves beyond the other segment. When you let go of the crank, the bridge rotates in the opposite direction. Your goal is to jump to the other side while it rotates. You want to rotate it a bit farther so you have time to make the jump.
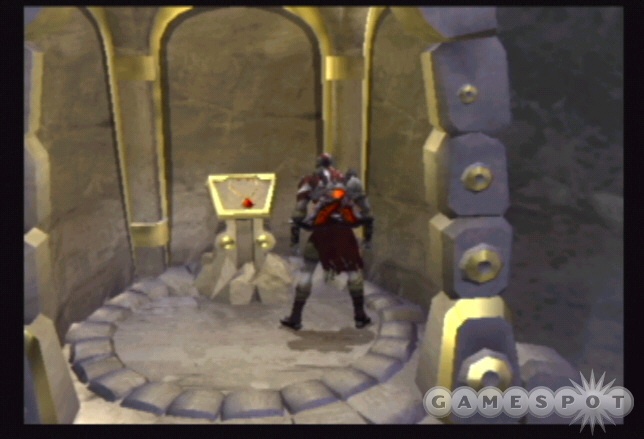
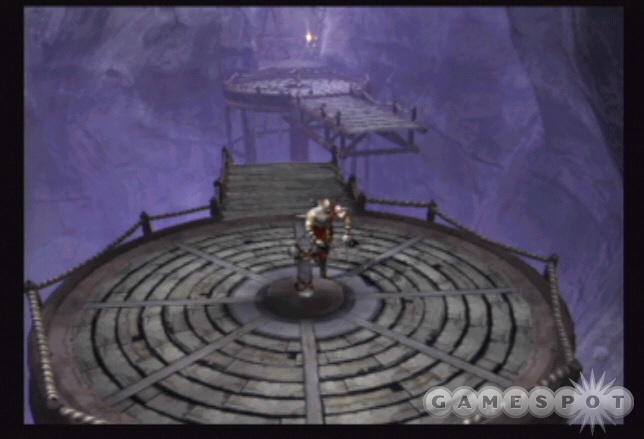
Defeat the creatures inside the tunnel and exit. Find the health or magic chest to the left. Proceed right and combat the minotaur. Descend the ladder to the ledge below. Defeat the undead and approach the rope (opening the nearby chest in the process). Traverse the rope to a new cave.
Battle the undead and minotaur inside the cavern. Use the health or magic chest when needed. Approach the next necklace. As you approach the necklace, a gate rises that blocks the prize. To solve the puzzle, you must move the Tetris-like puzzle pieces against the gate so you complete the wall. You must use the crank to rotate the pieces so they'll fit in properly. Read the book on the left side of the cave if you wish.
First, move away the small block from the gate area. You don't need the small block. Instead, position it on the left side of the cave and use it as a stepping stone to reach the upper ledge with several chests.
Next, place the upside-down "L" shaped piece onto the circular platform and use the crank to rotate it 180 degrees and place it on the far left side of the gate.
Next, move the long, straight block on the left side of the cave to the far right part of the gate.
Next, move the double block on the right side of the cave next to the "L" shaped piece.
Next, move the question mark piece onto the circular platform and use the crank to rotate it so it looks like a standard question mark. Position it on the far right side of the gate next to the straight piece.
Next, move the piece shaped like a "T" to the platform and use the crank to rotate it so it looks like a "T" and move it next to the question mark and in the puzzle's center.
Make sure all pieces are firmly against the gate to complete the puzzle. Pick up the Necklace of Hera.
Exit the cavern and use the ladder on the left. Climb onto the wall and use grabs to pull off the undead foes. Search everywhere you can climb. Find a couple crates near the top as well as the upper right side of the climbable wall. There are several ledges that include chests. Traverse down the wall and return to a previously visited area.
Follow the path left to the ladder. Climb and start to explore to the right side. Go all the way around to the right to find a chest. There's another tunnel to the chest's left. Follow it underwater to a secret area with a bunch of orbs. Break the walls in the area to find the chests.
Approach the large gate and notice the two holes--one for each necklace. Place the necklaces. This causes the bridge-like platforms to move. You must jump across each moving platform and reach the upper right side. Search the upper left for chests.
At the top, proceed to the right and battle the undead and minotaur after the cut scene. Follow the path to the rope. Swing from the first rope to the second. Make sure you are swinging strong and don't jump until you reach the apex. Climb the wall on the other side. Use the lever to activate the lift. Enter the passage and bust apart all of the containers for red orbs.
The Architect's Tomb
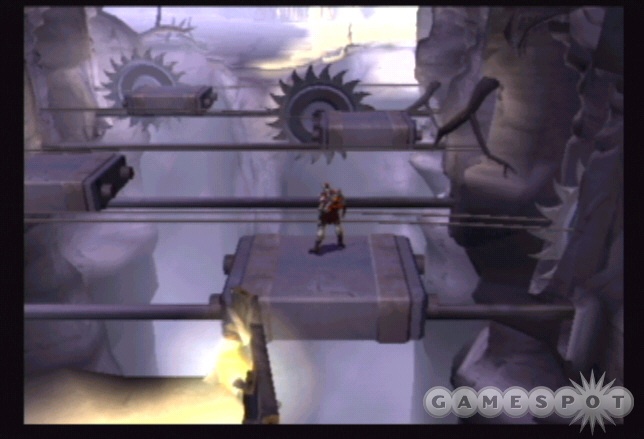
Save your game in the light on the left. There's a floor switch that opens part of a gate in the distance. You can't do anything with it yet. Instead, traverse the moving platforms while avoiding the spinning blades.
Break all of the containers in the area for red orbs. Open the gate on the right side and clear out the hall of enemies. Approach the upper arena and battle the Cyclops and small Cerberus dogs. Although you could stone the Cyclops with Medusa's Gaze to get it out of the way, another Cyclops appears right after. Instead, lure the small dogs into the hallway. More appear and should follow you to the hallway. Defeat them with the Blade of Artemis. You must work quickly to avoid their larger counterparts. If you're low on health, return down the hall to open a replenishing chest.
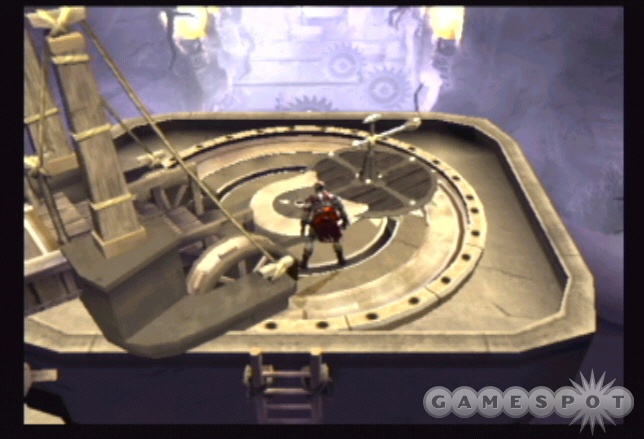
There's also a ladder on the upper side of the area. Climb it and break the wall at the top to find a room with chests, including a health or magic chest.
Climb the ladder on the far left side to reach the crane mechanism. Before rotating the crane, walk out to its end and jump to the ledge. Break the wall to reveal a couple chests. Return to the crank.
Rotate the crane so the stone block is over the breakable flooring below your position. Release the crane using the lever at its far end. This breaks the flooring. Rotate the crane again so the stone block is over the switch on the far right side of the area below. Release the block so it lands on the switch.
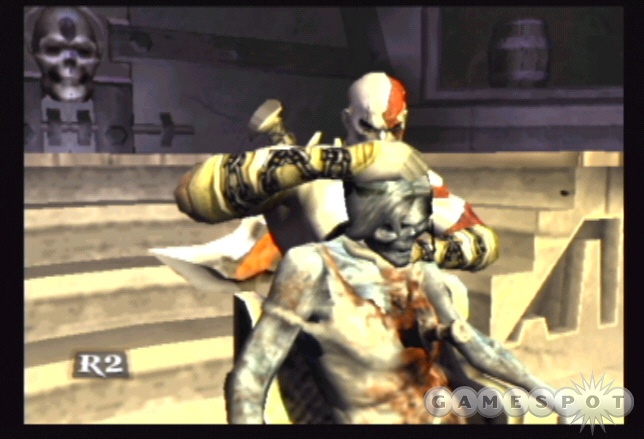
Drop down to the area where the floor switch is and defeat the Cyclops. Pull the statue in the back corner to the open floor on the far right side. Drop the statue inside then go down so you can pull it onto another switch.
There's one more switch to press: that switch at the beginning of the area. Return over the moving platforms and step on the switch. Now you must traverse the platforms quickly to reach the gate before it closes.
Roll into the room to avoid the closing gate. Read the note on the table and use R2 to examine all of the blueprints around the room's edges. Stand behind the corpse sitting at the table and use the R2 button to pull off the Architect's Head. Place it in the lock behind you.
Exit toward the bridge. Break anything you find for red orbs. Search the right side for a couple chests. Save your game then enter the structure ahead.
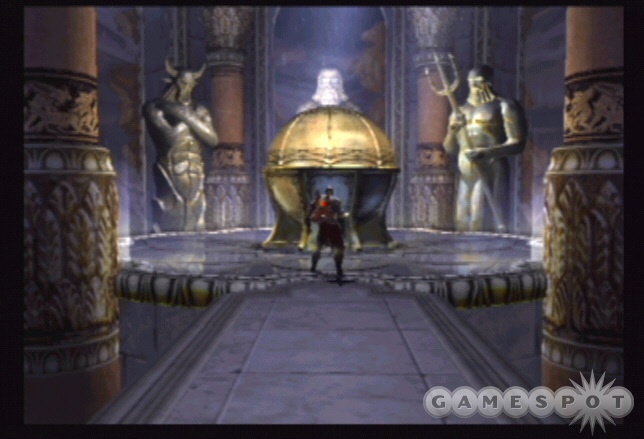
Descend the spiral staircase into the room with the conveyer flooring. Tons of harpies and archers protect the room. Use the Army of Hades (hopefully upgraded) to assist in the battle. Clear out the archers quickly then concentrate on the harpies. Avoid standing too close to the room's edge so you don't suffer damage near the gears.
When the barrier lowers, enter the next room. Examine the mural on the floor. Enter the next room and pull the lever to reveal Pandora's Box. Examine it. When you regain control, pull the box out of the temple's entrance. Unfortunately, Ares has other plans.
The Path of Hades

Walk up the spine flooring and use the health chest on the right. Save your game. Leap across the platforms. Go forward to find a red orb chest. Follow the platforms right to find another. Proceed left from the second chest to find the next ledge.
Combat the Hades undead troops. Advance up to the next ledge and defeat more of the Hades undead. Approach the spinning pole with the blades. The goal is to traverse the spinning pole while avoiding the blades. If you just nick a blade, you plummet to your death. The poles adjust speed and even change direction.
Start across the pole and search a ledge on the right for a chest. Return onto the pole and go forward to a second chest and a Hades archer. If you want another chest, proceed along the pole to the right. Stop on the ledge to defeat an archer then continue along the next pole to reach a chest at the end.
Return to the previous chest and jump to the pole to its left. Before reaching the end, leap to a ledge on the right for another chest and an archer. If you want another chest, you can continue onto the pole connected to this ledge and follow another pole to the left to find a chest at the end.
Return to the main pole and reach the next ledge. Defeat the archer. Proceed onto the pole to the left. Go to its end, jump to the pole on the right, and go to the end of that pole to find two chests. Defeat the harpies that attack. Return to the pole and jump to the ledge on the right. Continue across the next pole.
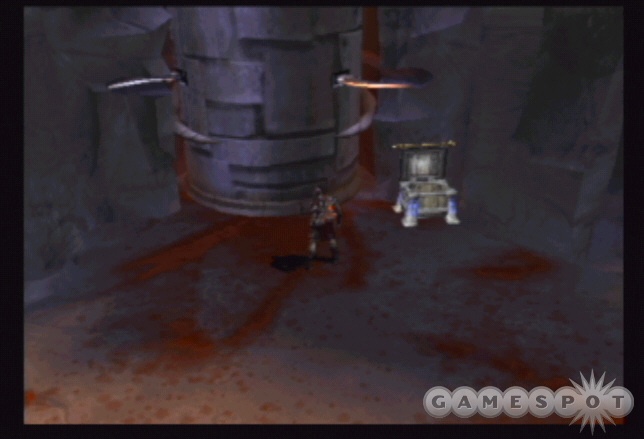
Follow this pole to its end. Battle the harpies on the ledge before advancing to the next area. Use the chest on the right side and the save game point on the left.
Next you must jump across the moving platforms while avoiding the archer fire at the far end. Use Zeus' Fury for assistance or just try and avoid the projectiles until you can get close enough to the archers to attack. Defeat the remaining archers and Hades minotaur on the ledges. Clear out all of the enemy presence on these ledges as you continue to ascend. A barrier blocks a spiked pole. You must defeat all enemies before the barrier falls.
Traversing the vertical spiked pole is extremely challenging--which is a nice way of saying it's extremely frustrating. If one of the blades simply touches Kratos, you fall down to the very bottom. It might not sound that bad but get nicked near the top and you must start over completely.
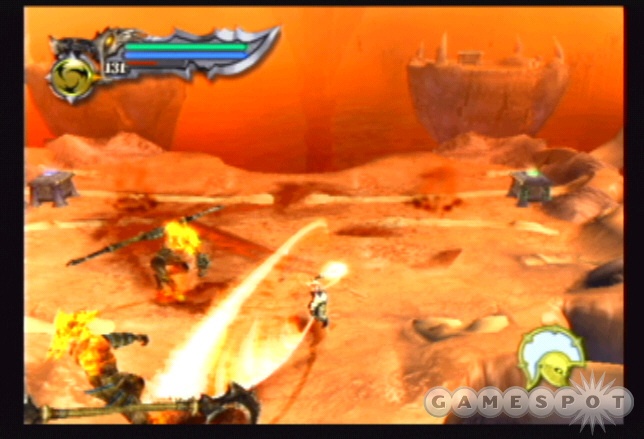
The key is patience. Don't try to go too quickly. If you're patient, you'll notice larger gaps in the spikes that you can work your way through. Since the pole is rotating, you'll be shoved against one side unless you work against the rotation. Keep this in mind if you're trying to climb diagonally between a couple spikes. When you near the top and the area is clear, press the jump button to ascend quickly. You can use the jump button at any time to try and bypass a segment quickly but it's much more dangerous because you could accidentally nudge a spike and go crashing down. There are two poles to traverse. Defeat the enemies between the first and second pole.
Save your game at the top and use the health and magic chests. Cross the platforms. Stick to the right to find a chest. The next ledge contains Hades satyr. You must defeat enough satyr to create the next platform walkway. There are a couple chests to replenish your health and magic as needed. As you cross the platforms, leap to the left and right to find chests. Leap across the final set of platforms to reach the rope. Climb the rope out of Hades.
Temple of the Oracle, Part 2
Save your game in this familiar location. Use chest as needed to replenish health and magic. The temple has seen better days. Ascend the staircase into the ruins. In the top courtyard, defeat the Cyclops and minotaur to lower the barrier. Exit to the left side.
Eliminate the gorgon and archers on the way up the staircase. At the large chamber, use Zeus' Fury against the archers. Cross the debris bridge to the chest on the other side. Go left and up more stairs. Combat the minotaur and archers in the hallway.
Reach the area where you saved the oracle--it's now in ruins. Drop down to the area below. Save your game. Go through the far passage and find the oracle on the ground. Speak with her. Open all of the chests on your way down the staircase.
Boss: Ares
You possess all of your weapons and current magic powers in this first battle against Ares. Use that to your advantage. You won't have magic powers during the game's final battle so use them to their maximum potential in this fight. Use Rage of the Gods early and launch Army of Hades (hopefully upgraded) to start damaging Ares as soon as the battle begins. Get close and, if you have Athena's Blessing, use Poseidon's Rage to inflict further damage against Ares.
A combination of the moves above should take a hefty chunk out of the God of War. You can block nearly every one of Ares maneuvers. Also, use the right-analog stick to roll out of the way to dodge Ares strikes and attacks. Ares will launch in the air and hurl flaming rocks at your position. Use the right-analog stick to evade the attack. Continue to evade until the bombardment stops. Ares will use his hammer like a flamethrower. Roll as far away as possible to avoid. Use the block button to resist other attacks, such as his overhead hammer blast and various strikes.
With Athena's Blessing, you should still have maximum magic after the Rage of the Gods move so continue to use Army of Hades to keep Ares occupied while you attack with various combinations (Square, Square, Triangle or use Blade of Artemis and its L1 + button combos). After inflicting chunks of damage on Ares, orbs of health and magic emerge from his body. The orbs should keep you relatively healthy and boost your magic so you can cast another Army of Hades or, if Ares' life bar is nearly drained, Poseidon's Rage when you're close enough.
As Ares nears death, the Circle icon appears above his head. Get close and use the Circle button to grab Ares. Once Kratos' has Ares grabbed, mash the Circle button repeatedly. Be careful, however, as soon as you complete the sequence another button icon appears. If you're mashing Circle without paying attention to the screen, you'll have to complete the entire sequence again. Complete the onscreen button sequences to finish off Ares.
Boss: Kratos' Family Sequence
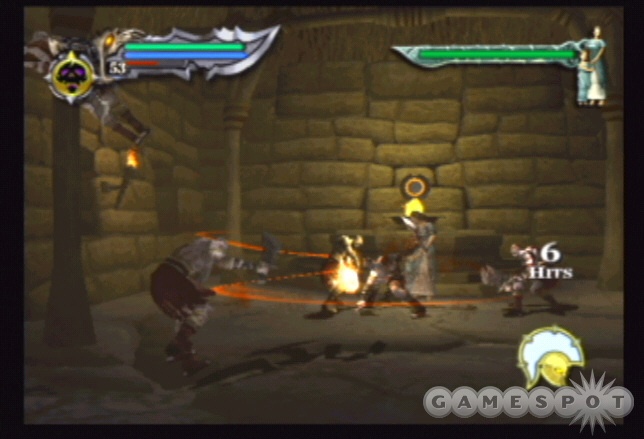
In the second battle sequence, Kratos must protect his wife and child...from himself. Dozens and dozens of Kratos clones emerge and attack. You still possess your weapons and magic attacks. If you used Rage of the Gods in the first battle, you may have to wait for it to regenerate. If you used it early enough, it might be ready. Rage of the Gods combined with Athena's Blessing can inflict a lot of pain on the Kratos clones. During Rage of the Gods, Athena's Blessing bestows infinite magic, which means you can cast Army of the Gods and repeated blasts of Poseidon's Rage against a packed group of clones for big damage and combos.
The most important aspect of the battle to keep in mind is that you can transfer Kratos' health to his family. Approach Kratos' family and press the Circle button to embrace them. During the embrace, Kratos' health decreases and Kratos' family's health increases. Monitor the family's health carefully and use the embrace when needed.
The structure begins to crumble around you. Watch your step carefully during the battle. It's possible to fall out of the structure, thus ending the battle rather anti-climatically. Remain close to Kratos' family so you can engage any clone attacking your loved ones. If you exhaust magic, use the Square, Square, Triangle combo and other attacks to bounce the clones away from your family.
Boss: Ares, Part 2
You must fight the God of War one final time to complete the game. This time you have been stripped of your weapons and magic. Instead, you possess a gigantic sword (the one used as a bridge earlier in the game). It's called the Blade of the Gods. You have a few new moves at your disposal: Zeus' Gift (hold L1 + X), Poseidon's Gift (hold L1 + Square), Athena's Gift (hold L1 + Triangle), and Hades' Gift (hold L1 + Circle).
This battle is different than your prior fights. One of the most important elements in the fight is momentum. The more damage you inflict against Ares, the higher your health bar rises. The more damage Ares inflicts on you, the higher Ares' health bar rises. The battle could end quickly in victory, in defeat, or could go on for several minutes as Kratos and Ares wage war back and forth.
Keep your finger ready on the L1 button, which serves as both the block button and your means of attack with the Blade of the Gods. If you spot Ares disappearing into the ground, roll away. When you spot the four spires appear from the ground, roll away to avoid being crushed. Block Ares attacks and counter quickly with the Blade of the Gods combinations.
After completing a combo Ares, a mini-game starts. Press the Circle button very rapidly to win the face-off. These are extremely vital to a successful victory against Ares. You'll inflict some big damage against him by completing the mini-game (which means your health bar rises as well). Exhaust Ares' health to defeat the God of War and complete the game.
You receive Athena's Blades (replacement for the Blades of Chaos) for defeating the God of War. Use the R2 button on the left side to spot the bloodied sword. Enter the circular portal.
Mount Olympus
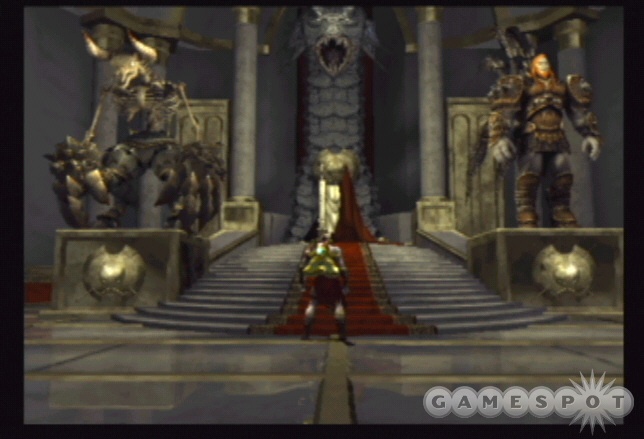
Ascend the staircase into the structure. Examine the statues of the minotaur and of Ares. You can unlock a secret (one of the Secret Messages in the treasures section) by destroying both statues. Each statue requires a bunch of hits. Just use your Athena's Blades or the Blade of Artemis to damage the statue. Jump and pummel the statue's midsection. Maintain the onslaught until each statue crumbles to receive the message. See the "Treasures" section of this game guide for more details.
Approach and sit on the throne to conquer God of War.
Chapter 5: Treasures
This section reveals some of God of War's hidden treasures. You'll find instructions on finding the two Muse Keys during the game and where to use them to receive your reward. Plus, there are Kratos' new costumes and those mysterious secret messages.
The Muse Keys
Although it's not involved with any of the unlockable treasures, the two Muse Keys found in the game offer the opportunity to locate a valuable reward during the game. There are just two Muse Keys and they're used to unlock a door found within the Rings of Pandora.
The first Muse Key is located behind the statue of Atlas. During the Challenge of Atlas level, you'll discover a giant statue of Atlas. Use the nearby crank handle to raise the large stone ball over Atlas' head. Walk behind the statue to find a chest containing the first Muse Key.
The second Muse Key is near the beginning of the Challenge of Poseidon level. When Kratos traverses the exterior of Pandora's Temple and must shimmy along a narrow ledge, go to the right side to find an alcove with a hidden chest. The chest contains the second Muse Key.
After completing the Challenge of Poseidon, return both Muse Keys to the Rings of Pandora. Use the outer ring crank to rotate the ring until you can explore the hall that contains the locked muse door. Use both Muse Keys to open the door; this reveals a secret treasure room. Inside you'll find upgrades to your maximum health and magic as well as a ton of red experience orbs.
Costumes
Complete the ten Challenge of the Gods rooms to unlock alternate costumes for Kratos. The costumes aren't just a fashion statement. Each outfit offers a slightly different gameplay experience...or even a drastically different gameplay experience in regards to the cow costume!
Select a new game at the main menu. After choosing the difficulty level, you have the option to switch costumes. Note that you can't use the costumes on "God" difficulty.
Chef of War
The bloodied Chef of War's preferred skill is magic. The Chef of War costume replenishes more magic per magic orb.
Bubbles
Bubbles, the swimmer's costume, prefers the skill of health. Bubbles recovers additional health per health orb.
Tycoonius
Kratos dresses like a Wall Street mogul in the Tycoonius costume. His preferred skill is experience, which means he receives more experience per red orb absorbed.
Dairy Bastard
Kratos' most ridiculous costume is the new cow attire, complete with udder. It's the Dairy Bastard! The preferred skill is listed as magic, and for good reason, because the Dairy Bastard possesses an infinite magic bar! See how high you can raise the combo meter during Poseidon's Rage!
Ares Armor
Wear the God of War's outfit with the Ares Armor costume.
Secret Messages
There are two items in the God of War treasures labeled "secret messages". Unlock secret message #1 by completing the game on the "God" difficulty level. After completing the game, the message appears on screen. It's a phone number: 1-800-613-8840.
Call the number and Kratos' congratulates you for completing the God difficulty mode and offers you a "private" tour of one of Mount Olympus' darker corners.
Secret message #2 can be unlocked on any difficulty level but it must happen during the game. After defeating Ares for the second time, Kratos can go to Mount Olympus. There are two statues inside: one of the minotaur and another of Ares. Break apart both statues! Both statues are quite durable. It may seem like you're hitting those statues for an eternity but they will eventually break! A scrambled message appears on screen. It turns out it's also a phone number: 1-888-447-5594.
Call the number in secret message #2 to hear a congratulatory message from Kratos and David Jaffe, God of War's lead designer. They seem quite impressed that you discovered the hidden Easter egg...but aren't as impressed if you discovered the Easter egg from this game guide.
Got a news tip or want to contact us directly? Email news@gamespot.com
Join the conversation