Assassin's Creed 3 Walkthrough
Our guide for Assassin's Creed III will prepare you for dismantling the Red Coats' forces, detailing each sequence and optional objective along the way.

Introduction
Now that the stories of Altair Ibn-La’Ahad and Ezio Auditore seem to have come to an end, Assassin’s Creed III sees you picking up the mantle of Connor Kenway, a young Native American Assassin who sees himself swept up in the events of the American Revolutionary War. His journey will see him travel up and down the East Coast, fighting the British, rubbing up against various Founding Fathers, and killing a whole lot of people as he attempts to fend off the plots of the Templars and save his people from their predations. It’s an epic trip to an era that’s not often visited in big-budget gaming, and seems sure stand alongside Assassin’s Creed Brotherhood as a fan-favorite entry into the franchise.
GameSpot’s Game Guide to Assassin’s Creed III is intended to help you complete Connor’s journey. There are a lot of side tasks and collectibles to find, but our goal here is to guide you through the game’s main missions while preferably completing all of their optional objectives, as well. We’ll offer up tips and tricks as to how to get through the toughest missions in the game, and there’ll be plenty of video for you to watch when you need help the most. So, without further ado, let’s start the process of kicking the Redcoats straight off the continent, shall we?
General Tips
Here are some basic tips to help you navigate some of ACIII’s new features.
New Features In Assassin’s Creed III
Assassin’s Creed III sets itself apart in a number of ways from the previous games. Here’s an overview:
- Combat no longer requires you to manually lock onto opponents. In previous games, you’d have to target an opponent and click your left trigger to lock onto them; here you simply get close and wait for them to become highlighted, then start swinging away. This will take a bit of time to get used to, but should become second nature as you play.
- No more grappling. In previous games, it was a simple matter to grab hold of your enemy and throw them off rooftops, but ACIII largely does away with the physical wrestling aspects of the combat system. It won’t matter too much, as you’ll spend very little of your time fighting on rooftops this time around, but it’s still sad to see it go.
- You’re now able to perform stealth assassinations without slowing down to play through the whole animation. Likewise, you can now pick weapons up off the ground in the middle of running. Handy if you find yourself without time to reload your pistol; just run over a musket, grab it, and keep moving.
- Guns, guns, guns! The 18th century features far more firepower than did Ezio’s Italy, and as such you’re going to have to deal with quite a few more enemies who’ll be lining up shots on Connor, but Connor can use a variety of firearms himself. Guns and rifles here take a substantial amount of time to reload, but they’re often going to be the deadliest weapons available to you.
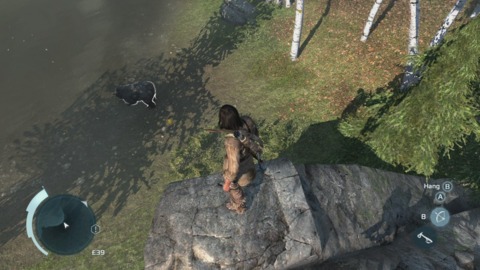
Hunting
It’ll take you a few hours to unlock hunting, but you can expect to spend a fair amount of time running around killing animals with Connor. You can earn a great deal of cash by selling the skins and other items you gain from doing so, and those materials are also going to be used by your homesteaders to craft new items for you. Here are a few tips to keep in mind.
- You can hunt from horseback, if you like. If you spot an animal while riding through the forest, tap your attack button if you get close enough to target it. Connor will leap off the horse and kill it with his hidden blade, allowing you to skin it. Many animals will run away faster than your horse can chase, however.
- Shooting animals with a pistol or musket is the easiest way to kill them from a distance, but it’ll also damage the pelt, leaving you with an item that sells very cheaply and can’t be used in crafting.
- You can skip the skinning animation by rapidly pressing the same button you use to start it.
- If you’re trying to discover all of the animals that live in an area of the frontier, check all of the clues that you see. Clues will result in animal discoveries just like killing them will, and require no sneaking up on, to boot.
- Using Eagle Vision will allow you to more easily spot animal clues from further away.
Homesteading
A major but optional part of the game is homesteading. ACIII abandons the property-buying feature of the Ezio games in favor of a more personal set of side missions at your homestead. You’ll recruit new artisans and level them up to craft new items and sell them via trading.
- Homestead missions are relatively easy to complete and never feature optional objectives. Completing them will increase the abilities of your artisans and let them craft more advanced recipes, but they’re not all unlocked immediately; you’ll have to progress through the game’s main storyline to find all of the homestead missions.
- Recipes are found in many places, such as in treasure chests and by completing almanac chapters for Ben Franklin. Although you can purchase weapon upgrades at shops still, many of the best weapons will only be available through crafting, so you’ll want to be on the lookout for those recipes! Crafting also appears to be the only method with which to equip Connor with bigger pouches for ammunition.
- You can access the homestead interface from any general store in the cities, so there’s no need to travel all the way back to the homestead to send out your convoys.
- Convoys can generate a lot of money for you if you’re willing to invest the time to craft high-cost items and sell them in distant ports. Keep in mind that you can sometimes reduce the tax rate that you’ll be charged by conquering Templar forts in the world.
SEQUENCE TWO
The first sequence of the game is effectively an extended tutorial, as you guide Haytham through an assassination at an opera house and then on a trip to the New World. Learn the basics of gameplay, survive the trip over the Atlantic, kill the man you need to kill, and arrive safely in Boston. As such, we’re going to be jumping right into Sequence Two!
2.1: Welcome to Boston
A simple introduction to the city where you’ll be spending a large amount of the game. There isn’t much to this mission; just follow Charles Lee to the inn where you’ll be staying, but make a pit stop at the general store to grab a sword and pistol. You can pick up the first Courier mission along the way, as well as offer to nab a few pages of an almanac for Benjamin Franklin. The almanac pages act much like the flags did in previous games, but with a twist: they float around in the air, forcing you to chase them down.
Explore Boston if you like, but eventually you’ll want to head on to more difficult tasks. Also, don’t forget that you can exit the Animus via the pause menu to check your email in the real world or talk to Desmond’s compatriots.
2.2: Johnson’s Errand
Optional Objectives:
- Kill 10 mercenaries using firearms.
- Do not let Hickey or Lee lose more than half their health.
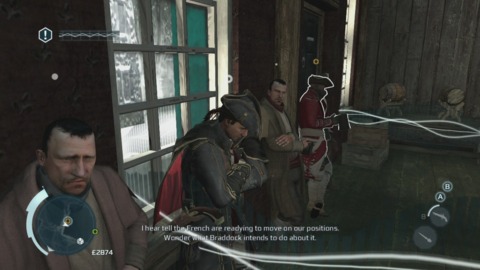
A man at the inn, William Johnson, will ask you to retrieve some documents that were stolen from him, no doubt by the Templars. Accept the task, and leave the inn to be warped to a nearby fort where the thieves took the documents. You’ll quickly make the acquaintance of one Thomas Hickey, Johnson’s acerbic young helper.
The mission, being one of the first you come across, isn’t very difficult, but getting the optional requirements can be tricky. You’ll be tasked with killing 10 mercenaries with firearms. There are two targets that you’ll take down in the first part of the mission, and four more on rooftops near the end, leaving four that you’ll have to take down in general combat. When you reach the escort part of the mission, keep an eye on your minimap for red dots approaching the two men, use your left trigger to aim, and fire at targets as they come at you. You’ll have a hard time reloading a musket while the enemies are swarming you, so you may want to drop your rifle, switch to your pistol for another kill, then pick up another musket as you walk.
It’ll be difficult to let Hickey and Lee drop below half health even if you flounder a bit during the fights, so you shouldn’t feel too pressured there. Just dispatch your enemies as quickly as you can, and don’t forget that you can block and counter attacks even while holding a musket!
2.3: The Surgeon
Optional Objectives:
- Remain undetected.
- Eavesdrop on a moving group of guards.
- Do not fail a single eavesdrop.
You need to find one Ben Church, but alas, he’s gone missing. The early parts of this mission will reintroduce you to that old staple of Assassin’s Creed, the eavesdropping minigame. Not much to speak of here; stay within the boundaries indicated on your screen, and meld with civilians when you’re about to be detected.
After hitting your first synchronization point, you’ll find that you have a few different eavesdropping targets on your minimap. One of these will be moving around a bit; these are the moving group of guards that you need to overhear for your optional objective. They move in a square pattern around a set of shop stalls; just follow behind them for 30 seconds or so, and you should be able to check that objective off your list.
Keep moving through the various zones that are marked out for you, and be on the lookout for pairs of men standing near the eavesdrop targets; it’s easiest to stay undetected if you can meld with civilians while people are talking. You can also walk to the corner of a building and push your analog stick at said corner; Hayworth will move up to it and peek around, remaining out of site to those in his line of sight.
When you reach the restricted area with Charles, simply climb up the tall building on the west side of the area and allow him to follow you. The guards aren’t very mobile, so none of them should spot you. It’ll be a little tricky climbing down, since your normal drop button has been overridden, but you’ll reach the door without too much trouble.
Eventually you’ll be tasked with finding a key. There are three guards that are marked out as targets for pickpocketing, but other guards may also have the key, and you don’t have to pickpocket them, exactly; looting their corpses will work fine, too. It’s easiest to go around the corner from the door. There’s a guard whose job is apparently to stare wistfully out to the water, and another guard closer to you who patrols around a bit. Wait for this guard to move back on his patrol, then sneak around into the brush nearby and assassinate him when he approaches you. If you simply wait in the brush, your hidden blade icon will turn a brighter shade of blue when he’s close enough to stab, and you’ll pull him into the brush so that his body won’t alert anyone. Search him for the key; if he doesn’t have it, pickpocket the guard by the water to find it.
Inside the building, kill one of the targets and Lee will take care of the other. Take out the third to end the mission.
2.4: The Soldier
Optional Objectives:
- Limit detecting time to 0:15.
- Perform three sequential combo kills.
- Prevent snitches from calling reinforcements.
A classic following mission. As per Assassin’s Creed tradition, you’ll have to follow close to your patrol, but not so close as to be detected by the guardsman. He’ll occasionally turn around as he leads the patrol, so follow Charles’ lead and stick to the corners behind the group as you can.
When the combat starts, look for the snitches who aim to run away to summon reinforcements, and try to kill them first. This can be difficult, as you only have a few seconds to catch them before they run! Use a smoke bomb as soon as the combat starts, and look for the two soldiers with a differently-covered red icon over their heads. They also wear big funny hats. Kill them first, but be aware that they’re capable of dodging most of your attacks; use your Break Defense maneuver to turn their backs before eliminating them.
The other optional objective, to complete three sequential combo kills, isn’t as hard. Simply counter an enemy’s attack (with the B button on the Xbox controller), follow up with a flourish kill, then press the stick towards another nearby enemy and press the attack button again. This should be an automatic kill; do this a couple of times in a row and you’ll complete the objective. The only problem is that your friends will be killing enemies as well, so you may run out of targets if you’re not quick about it.
2.5: Infiltrating Southgate
Optional Objectives:
- Find and kill the general.
- Perform three stealth assassinations from a corner spot.
- Avoid firing line damage.
One of the first really challenging missions if you intend to complete all of the objectives. The initial phases aren’t that tough, though: use the rifle nearby to kill a soldier below, then drop down to finish the massacre. When you’re in the wagon, ride along to the fort and be ready to press your left bumper button whenever prompted. Poor puppy!
Minecraft – Kung Fu Panda DLC Trailer Sclash - Console Release Date Trailer Kingdom Come: Deliverance 2 - Official Cinematic Announcement Trailer Stellar Blade - BIBI ‘Eve’ Official Music Video Trailer | PS5 Apex Legends: Urban Assault Collection Event Trailer Total War: WARHAMMER III - Elspeth von Draken Gameplay Showcase Potionomics: Masterwork Edition - Official Announcement Trailer Genshin Impact - "Arlecchino: Sleep in Peace" | Official Character Teaser Snowbreak: Containment Zone - "Gradient of Souls" Version Trailer Harold Halibut GameSpot Video Review Nancy Drew: Mystery of the Seven Keys | World Premiere Official Trailer Modern Warfare III & Warzone - Official Cheech & Chong Bundle Gameplay Trailer
Please enter your date of birth to view this video
By clicking 'enter', you agree to GameSpot's
Terms of Use and Privacy Policy
Inside the fort, things get rougher. Walk forward until the officer is dragged into the haystack and killed, then head to the right. There are four officers in the camp here, and while the rank-and-file soldiers won’t see through your disguise, the officers will, and will come investigate you and eventually unmask you if they get close enough, ending your mission. Your optional objectives are to kill the general while nabbing three corner kills. The kills don’t all have to come from officers, but they’ll be the easiest ones to take down since most of the soldiers travel in packs.
Begin with the general, who’s on the right side of the area from the viewpoint of Hayworth as he entered. Stick to the rightmost wall here as you approach him. He has a roundabout patrol, and there’s a soldier working on the stockade that will notice if you ace him. Wait for the general to poke the haycart, then walk up behind the soldier and quietly kill him. Head into the nearby brush to wait for all the soldiers to reset, then take up a position behind the boxes near the stockade and wait for the general to pass by. You don’t want to whistle him over, since that might attract the nearby soldiers, and if you wait too long to stab him, he’ll spot you, so just mash on your attack button as he comes nearby, and you should take him down.
From there, run to the other side of the fort. Two more officers in this area, each of whom patrol small patches of ground. Stick close to the wall to take down the first one with a corner kill from behind the tent near him (it’s safe to whistle him over), then free the prisoners nearby. The officer closest to the water has a trickier path here, since he’ll pass by more soldiers at closer range. It’s safest to simply hide in the shrub near the prisoners and quickly backstab him when he pauses, then free the prisoners and head towards the ship.
There’s another officer on the docks with a more far-ranging patrol, but there are plenty of boxes to hide behind. It’s easiest to nab him with a corner kill while he’s closest to the ship. With that done, check the patrol of the officer on board, corner kill him if you still need one for the optional objective, then kill the last soldier and free the prisoners there to move on to the next part of the mission.
Minecraft – Kung Fu Panda DLC Trailer Sclash - Console Release Date Trailer Kingdom Come: Deliverance 2 - Official Cinematic Announcement Trailer Stellar Blade - BIBI ‘Eve’ Official Music Video Trailer | PS5 Apex Legends: Urban Assault Collection Event Trailer Total War: WARHAMMER III - Elspeth von Draken Gameplay Showcase Potionomics: Masterwork Edition - Official Announcement Trailer Genshin Impact - "Arlecchino: Sleep in Peace" | Official Character Teaser Snowbreak: Containment Zone - "Gradient of Souls" Version Trailer Harold Halibut GameSpot Video Review Nancy Drew: Mystery of the Seven Keys | World Premiere Official Trailer Modern Warfare III & Warzone - Official Cheech & Chong Bundle Gameplay Trailer
Please enter your date of birth to view this video
By clicking 'enter', you agree to GameSpot's
Terms of Use and Privacy Policy
Assassinating Silas isn’t too difficult in this madness, but avoiding firing line damage can be. You’ll get an introduction on how to do it right off the bat; simply grab someone with your A button when you see the yellow firing indicators above the heads of riflemen. There are more firing lines on the path to the fort, but it’s easiest to just avoid them altogether by running to the beach here. Scramble up the sandy outcropping to reach the entrance to the fort, but stick behind the horsecart and the wall to avoid getting too close to the gunmen within the doorway. You can attempt to simply run through them after they fire a fusillade, but you’re more likely to avoid getting shot if you drop a smoke bomb right in front of them or in the middle of them before passing through.
Take a hard left when you get through the door, attempting to avoid any soldiers that threaten you, and you’ll reach Silas shortly. Pop him with a pistol shot or another kill method to end the mission.
SEQUENCE 3
3.1: Unconvinced Optional Objectives:
- Use breakable objects during a fight.
- Limit health loss to 50%
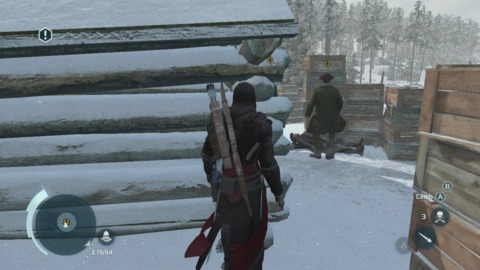
Follow the waypoint to the Frontier section of the map and find Charles off in the snow. He’s got bad news - he’s been recalled to Braddock’s service. Which…is weird, considering you and he murdered a bunch of Braddock’s soldiers right in front of him. That seems to merit something more serious than having Charles’ leave revoked, but maybe these Redcoats are a bit more laid back then they’ve been letting on.
When you catch up with the mysterious woman, you’ll have to chase her through the snow - try to find an exposed log or something that’ll get you out of the drifts, or you may lose her. Wolves will attack you on the way, but the quicktime events to push them off aren’t too difficult, as they always seem to start with your counter button.

When you catch up with Ziio, talk with her a bit, then escort her to an inn in nearby Concord. There are a couple of eavesdropping opportunities here; move slowly through the inn, find the gaps between the civilians, and slide in to overhear the talk. Before you can leave, though, the Redcoats will brawl with you, leading to another set of constraints: you can’t lose more than 50% of your health, and you have to use two breakable objects here. Concentrate on countering enemy attacks and counterattacking. If you move around enough, you should find yourself throwing enemies into tables and barrels automatically, easily allowing you to complete the objective.
3.2: Execution Is Everything
Optional Objectives:
- Sabotage two cannons.
- Do not kill any guards.
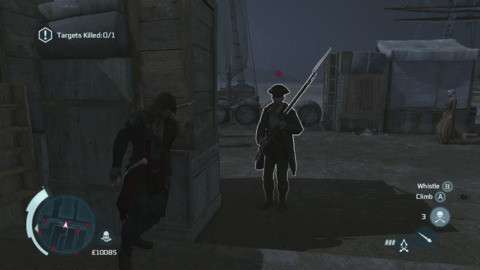
It’s a bit of a trek to the next mission waypoint, so steal a horse from the inn before setting out. When you do arrive, Ziio will task you with infiltrating the nearby fort, St-Mathieu. Check the road approaching it for a cart, and hop into the back of it to ease your access.
When you arrive, more optional objectives will pop up, encouraging you to sabotage a pair of cannons while avoiding any soldier death. If you happen to get spotted by a soldier as you leave the cart, try to hide in the nearby brush or the well nearby; if you’re forced to kill one, simply let the rest of them kill you, and you’ll reset to a point where the game doesn’t consider any enemies to be dead.
Completing all of the optional objectives here is difficult, and you should budget in some time to try the mission a couple of times to get the timing down. (Feel free to watch the video here to get a good overview of how to proceed.) Begin by hopping out of the cart and into the brush nearby. There are a couple of guards in the area that you’re going to have to eavesdrop on; head towards them, but note the Redcoat that’s patrolling in the area. When you enter the eavesdrop zone, the two guards will begin moving. You’ll want to time your own movement so that you scramble up the nearby building while both the patrol and the eavesdrop targets are facing away from you. It’s difficult, but you have some leeway here, as being seen isn’t an automatic fail. If a guard’s interest is piqued and he remains watching you for five or ten seconds, though, you’ll have to start over.
Minecraft – Kung Fu Panda DLC Trailer Sclash - Console Release Date Trailer Kingdom Come: Deliverance 2 - Official Cinematic Announcement Trailer Stellar Blade - BIBI ‘Eve’ Official Music Video Trailer | PS5 Apex Legends: Urban Assault Collection Event Trailer Total War: WARHAMMER III - Elspeth von Draken Gameplay Showcase Potionomics: Masterwork Edition - Official Announcement Trailer Genshin Impact - "Arlecchino: Sleep in Peace" | Official Character Teaser Snowbreak: Containment Zone - "Gradient of Souls" Version Trailer Harold Halibut GameSpot Video Review Nancy Drew: Mystery of the Seven Keys | World Premiere Official Trailer Modern Warfare III & Warzone - Official Cheech & Chong Bundle Gameplay Trailer
Please enter your date of birth to view this video
By clicking 'enter', you agree to GameSpot's
Terms of Use and Privacy Policy
When you’re on the rooftop, maneuver so that you’re out of everyone’s sight, then head to the southeastern corner of the roof to hear the end of the conversation. With that done, your target shifts to a nearby tent with a map in it. Wait for the guard in front of it to turn his back, then jump into the brush near the wall of the fort. The guard’s route is too short for you to enter the tent and steal the map without being detected, so you’ll need to distract him. Sidle up next to the nearby piece of leather hanging from a post and maneuver so that you’re at its corner; when you’re in position, the Whistle command should become available. Use it, then sneak around the other side of the post while the guard starts his search. He’ll be gone a while, so get into the tent, steal the map, and head to the brush on the other side of it.
Now for the two cannons. The first is nearby, and is guarded by a Redcoat in the tower above. His patrol is simple: he stands above the cannon for a few seconds, then heads back into the tower. Wait for him to head into the tower, run to the cannon and disable it, then return to the brush nearby before he returns. With that done, steal down the brush by the stairway nearby, and creep along the southern wall here, being careful of the patrol from the beginning of the mission. Head through the brush along the other stairwell here, being mindful of yet another patrol. Watch this patrol’s route until you figure out when he’s away from the cannon, then head over and disable it as well. With that done, jump from the cannon to the sea below and skirt the cliffs to your right to head back to Ziio. This is a tough mission, so don’t be surprised if you have to try it a couple times!
3.3: The Braddock Expedition
Optional Objectives:
- Kill two militia without triggering open conflict.
- Destroy three powder carts.
Fast forward to five months later. Head to the mission start to learn your objective: killing Braddock before he can stake a claim further to the west.
When you gain control of Haytham, you’ll be asked to take out two of the nearby guards without being detected. This can be difficult, since the Redcoats will be on guard, but it’s not impossible. We found it easiest to skirt around to the right side of the camp, wander into view of a couple of the guards, then run backwards to the nearby canyon and hang off of the edge. When they investigate, then turn back, leap up and off anyone who came by. Repeat if necessary for the dual kill requirement. You can also attempt to time the patrols and sneak into one of the wilderness equivalent of haystacks on this side of the camp. A soldier paces nearby. If you can kill him with a silent takedown without being seen, you can pop out into the nearby brush and grab another soldier as he walks by. The second kill can alert the rest of the camp; you should still get the bonus objective regardless.

After riding to Braddock, there’ll be a short horse chase segment, with the optional objective of destroying three explosives carts. Simply mash on your fire button (Y on the Xbox controller) while they’re highlighted in white to destroy them. There’s one near the beginning, middle, and end of your chase, so you should have ample time to reload in between shots.
With that done, chase down Braddock, using the trees and pathways to gain ground on him in the swamp, and off him to end the sequence after a cutscene with Ziio. You sly dog, Haytham, you.
SEQUENCE 4
While Desmond’s out of the Animus, check your email and talk to the crew if you haven’t done so recently. You can also walk up the brightly-lit stairwell Desmond’s father patrols and into the room nearby to talk with one of the Predecessors to get their explanation as to how they were intending to get around that whole sunflare/violent death of everyone on Earth thing.
When you pop back into the Animus, well…things are different. You’re no longer stepping into the shoes of Haytham; instead you find yourself occupying the childhood of the offspring of him and Ziio.
4.1: Hide And Seek
Optional Objectives:
- Find all the children without making a mistake.
- Find all the children within four minutes.
A relatively simple game to start with here, as you’re tasked with finding four children hiding in the forest within four minutes. The first child can be found easily by tracking him up via the clues scattered near the start of the game; he’s barely concealed in a rocky outcropping near where you start the contest. The second child can be narrowed down by finding clues; he’s in a leaf pile at the center of his particular circle. (You can use Eagle Vision to find clues from farther away, if you like.) The third and fourth kids are together in another woodpile, but you’ll have multiple piles to choose from. If you look at the circle of probabilities on the map, the northernmost pile should be the one you want. There doesn’t appear to be enough clues to narrow it down precisely, so nab the north pile and get the bonus objectives!

Afterward, hide as best you can, then complete the following objectives to become something of a man. When you have to travel to your mother, move to the right of the door to find your way into the house.
4.2: Feathers And Trees Optional Objectives:
- Find three more feathers.
- Do not touch the ground or water.
Hope you like moving fast, because that’s what you can do now as Haytham’s son. The trip to the eagle’s nest is largely a matter of holding down the right trigger and pressing forward, so don’t stress too much; if you hit the ground, simply reset the checkpoint if you wish to try again for the optional objective.
The other optional objective, to collect three more feathers, is likewise fairly simple. The first should be near where you regain control of your character, while the second is easily found if you freerun through the treetops from that point to the objective marker. The third can be found by running along the ground and reaching the last waypoint, then climbing into a tree.
4.3: Hunting Lessons Optional Objectives:
- Hunt three different kinds of animals.
- Use bait and a snare to catch an animal.
- Air assassinate two animals.
This is, by and large, a straightforward tutorial on how to catch prey and skin them. When you’re tasked with capturing a doe, toss the bait into the brush that you’re standing in and wait for it to get to close to you before taking it down with your fists.

When you get the rest of the objectives handed to you, do the bait and snare mission first. Find a clue in the brush, investigate it, set a snare on top of it, then lay down some bait. With any luck, you’ll nab an animal right quick (it’s easiest with hares). Next up should be the two air assassinations; find branches you can crouch on and scatter bait beneath you while you’re still clinging up top, then pounce when a target comes beneath you. When you have those done, you’re likely to have a hare and deer already killed. Find something else to shoot with your bow, and you’ll easily complete the bonus objectives. Now all you have to do to get home is fight off a bear attack!
4.4: Something To Remember
Optional Objectives:
- Avoid mid-air collisions.
This is an extended flying mission, as you’ll soon find out. Your only optional objective is to avoid crashing into any trees or other obstacles in your path. You can maneuver, but not very quickly, so keep an eye on the path in front of you and try to plot a way through the underbrush. Frustratingly, the most difficult-to-avoid obstacles are at the very end of the course, so you may have to replay it a couple of times to get the path down.
SEQUENCE FIVE
Now that you have control of Ratonhnhaké:ton, Assassin’s Creed III begins in earnest. Make your way towards the next mission marker to proceed, or flex your muscles a bit by hunting animals or killing some of the seemingly randomly-placed soldiers in the wilderness.
5.1: A Boorish Man
Optional Objectives:
- Limit health loss.
After meeting - briefly - with Achilles, camp in his barn to avoid the rain. After a bit of hesitance on his part, you’ll have to fight off a group of bandits on his lawn, after which he’ll deign to speak to you. Nothing too complicated about the combat here; Connor controls in the exact same manner as Haytham did, albeit with different weaponry. Counter attacks until everyone’s dead, then head to Achilles’ house for a conversation.
5.2: A Trip To Boston
Optional Objectives:
- Escape within 1:20.
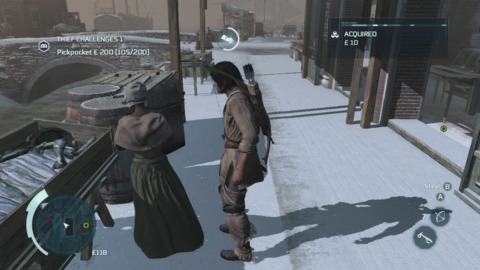
Head off to Boston and start pickpocketing your way through the rubes and townspeople. You can find a few side missions here if you wish, but you’d be just as well served by proceeding through a few of the main missions until you’re better able to freely explore the city. Follow the man that Achilles points you to, kill him when prompted, then run along the rooftops until you see a hay pile below you to hide in. Look for birds congregating along the railings; they denote locations you can jump from into the hay.
5.3: Boston’s Most Wanted Optional Objectives:
- Do not raise your notoriety to level 3.
Stick to the alleyways as best you can while you head to the mission marker here. You can track the guards on your minimap, and as long as you stay on the ground, you won’t have to worry about the faded dots that indicate rooftop snipers.
Samuel Adams will hand you a beer and ask you to tear down some wanted posters; if you’ve played previous AC titles, this should be old hat by now. He’ll eventually lead you to a tunnel entrance. If you can’t get past the guards nearby, simply climb a wall leading to the sewer; when you hit the ground, Adams will make his way towards you past the Redcoats.
5.4: Lying Low
A simple trip through the sewers makes up the bulk of this mission. Light candles as you go and watch the rats as they move under the walls to find your way, then lockpick the door to move on.
After bribing the printer to alter his propaganda, take a boat back to the Davenport Homestead to find the next mission.
5.5: River Rescue
Optional Objectives:
- Do not touch the water while rescuing Terry.
The goal here is to rescue Terry before he reaches the waterfall, preferably without touching the water. There are animals on the paths beside the river that will slow you down, so you’ll need to follow the path of logs that are jutting out of the river itself. There’s a fairly straight path that you should follow, but there is a small element of the luck of the draw when you swing from a tree branch onto the ground beside the river. You’ll want to hold down your B or Y buttons on the Xbox controller to slide under and hop over the fallen logs here. Occasionally there’ll be a cougar waiting for you before you hit the last log that leads back onto the path of the river; if there is, you should go ahead and restart the mission if you care about full synchronization. A few practice runs and you should be able to reach Terry while his log is still underneath the branches at the end of the path, allowing you to jump for him without getting wet.
Now that you have laborers, it’s time to start building up your homestead. There’s a mission nearby that Achilles will point out to you. Head to it, kill the highwaymen, and rescue Lance to add another piece of the puzzle to your homestead.
5.6: The Hard Way
Optional Objectives:
- Do not take any damage.
- Successfully brace when attacked, three times.
- Use the swivel guns to destroy two ships.
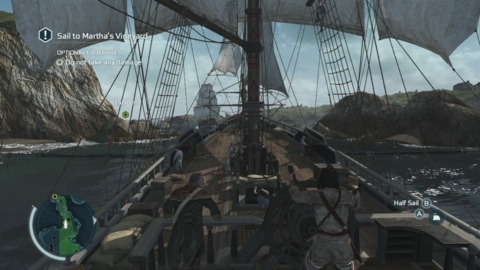
Because Connor is the luckiest damn Assassin to ever assassinate, you now find yourself in possession of a ship. Even if it’s seen better days, the Aquila is still a mighty vessel…except for the fact that she has no guns.
Head off to Martha’s Vineyard to see about equipping the ship. You’ll get your first taste of ship steering on the way. Nothing too complicated here: use half sail for maneuverability and full sail for pure speed. Avoid the rocks and other ships, and you should make it to the dock without a scratch.
After the guns are installed, it’s time for a bit of target practice, wherein you’ll get to use both of your ship’s weapons. Cannon fire is controlled with the right trigger. It’s powerful, but requires finesse to use, as you’ll need to line your ship up alongside your target and release the trigger so that the shot hits precisely. Against moving targets, you’ll usually want to release your shot a moment before you line up; it takes a second for your men to fire, and the travel time of the shot will further introduce some lag into the equation.
The smaller guns, controlled with the left trigger, are more precise than cannon fire, but have a much more limited range. You’ll want to use these against skiffs and smaller vessels that threaten you. If the targeting reticule doesn’t turn red when you’re aiming at a ship, you’re out of range and won’t hit anything.
After the target practice, you’re going to face off against a few British ships, with some optional objectives thrown in for good measure. You’ll want to use the first three ships to fulfill the swivel guns requirement; get in close, use the small guns, and they should go down relatively quickly, although one of them is a bit larger than the other two. When the larger ship appears, you can fulfill the “brace” optional objective. Wait until you hear the other ship’s cannons fire, then immediately press the brace button (X on the Xbox) to order your men to duck their heads. It doesn’t always register as a brace, so you may have to let the ship fire on you before it registers success.
Actually defeating the ship is a bit more complicated. It will be using its cannons against you, and is pretty good at maneuvering itself into position. You can take more damage than it can, though, and you can ready up your cannons and maneuver your own ship at the same time. Use your full sails to gain on it when it draws away, and switch to half sails to come around for a fusillade. Just remember to depress the trigger to prepare to fire, then let go of the trigger to actually fire the cannons, but issue the order just before your targeting field starts to intersect the enemy. That will allow for travel time and the delay in firing, ensuring that the bulk of your shot will hit the target instead of the water.
DESMOND INTERLUDE ONE
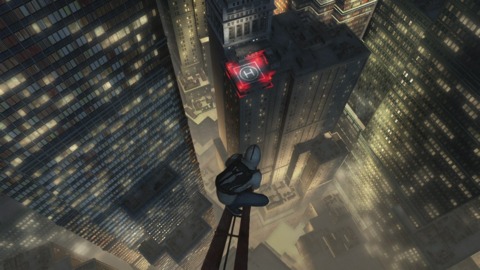
Ah, a modern-day interlude! This Desmond sequence isn’t very difficult, as the path through the tower is fairly linear. Follow the lit-up sections of the path, find the crane at the top of the building, and jump! You have to trigger your parachute when your handler radios you, which will occur around a second after your leap.
With the artifact in hand, head back to base and check your email and talk to your compatriots. Before you head back to Connor, head into the reactor room at the top of the lit stairs that your father paces. If you go up to the second floor here, you can find a path leading up to a metal beam. Follow it, moving around the cylinder in the path, and up to the third floor. Here you can place the artifact and put more power into the facility, which opens a new chamber near the Animus chair. There are two more cutscenes to be found within, explaining more of the First Civilization’s plans to save the world, and further exploration will lead you to the slot where the next battery goes. You don’t have it at the moment, so head back to the Animus chair and return to Connor.
SEQUENCE SIX
Connor, now a man and wearing the Assassin’s white robes, is finally ready to start defending his people’s land and working against the Templars. There are many new tasks and side missions available to you. Here are a few of them:
- There’s a Homestead Mission to the southeast of the manor. This will introduce you to Myriam and let you practice a bit with the new rope dart weapon. Completing Homestead Missions will unlock new crafters for your homestead, as well as level them up and allow them to create better items, including new weapons and pouches. They’re entirely optional, but generally they’re easy enough to complete.
- Achilles will ask you to help compile the Encyclopedia of the Common Man by examining people (aiming at them with the left trigger) around the homestead.
- Naval missions are available at your ship, as well as a ship upgrade interface in the book next to the captain. It’s unlikely you’ll be able to afford any of the upgrades yet, though.
- Peg Leg has rumors of a great treasure left by Captain Kidd, but he wants you to find trinkets for him before he gives them up. These are marked on the map with goblet icons. You can turn one in to unlock a naval mission, but you’ll need to find many more to unlock the rest of the missions. You can buy a map to reveal their locations at a general store.
- You can use the Ledger in the manorhouse to access your crafting capabilities, but you won’t be able to craft many items…yet.
- The Frontiersman challenges are available at a Frontiersman camp in the Frontier section of the map. They’ll also give you some quick quests to perform.
In other words, it’s a good time to explore the world a bit and perhaps flesh out your homestead by recruiting new inhabitants from Boston and the Frontier. You still won’t be able to craft much, but you’ll be able to use your woodworker to make new Land Convoys and send them off with Connor’s hunting materials to Boston for some hefty profits. Or, you can just resume the main quest. Up to you!
6.1: On Johnson’s Trail
Optional Objectives:
- Stay below notoriety level 2.
- Limit firearm use to five shots or lower.
- Use three powder kegs to destroy smuggled cargo.
The first little skirmish here will unlock Liberation Missions for Connor, the first form of which are scattered tax collectors that you can dispatch. Ignore them for the moment.
You’re tasked here with destroying three stacks of illicit tea in the harbor. Your optional objectives are to use powder kegs to do so and limiting the amount of times you fire a weapon. Neither objective is particularly difficult. One of the tea stacks is practically unguarded, so you can simply drop a nearby keg at its feet and shoot it to destroy it. The other two might be a bit more difficult to get near with the guards afoot; you can either kill them, or run past them, drop the keg, then move far enough away to lose their interest before returning to shoot the powder and destroy the stacks.
With that done, you’ll need to kill a few tax collector groups or kill smugglers in order to free the district from Templar control. Try to kill collectors while guard patrols are out of the area; a large fight will be more likely to raise your notoriety. Rip down posters between fights to return yourself to incognito, and you shouldn’t have a problem finishing the mission off.
6.2: The Angry Chef Optional Objectives:
- Limit time spent in open conflict - 0:15.
- Limit Chapheau’s health loss to 50%.
- Perform five low profile assassinations.
Stephane’s on the warpath here, and he’s not going to listen to Connor’s reasoning. It’ll be up to you to keep him from getting killed by Redcoats as he slowly rampages through Boston. That’s not difficult, but fulfilling the optional objectives can be. Namely, you need to complete five silent assassinations and not remain in open combat for more than fifteen seconds. If you can do both of those, there’s practically no way that Stephane’s health will drop below fifty percent.
Minecraft – Kung Fu Panda DLC Trailer Sclash - Console Release Date Trailer Kingdom Come: Deliverance 2 - Official Cinematic Announcement Trailer Stellar Blade - BIBI ‘Eve’ Official Music Video Trailer | PS5 Apex Legends: Urban Assault Collection Event Trailer Total War: WARHAMMER III - Elspeth von Draken Gameplay Showcase Potionomics: Masterwork Edition - Official Announcement Trailer Genshin Impact - "Arlecchino: Sleep in Peace" | Official Character Teaser Snowbreak: Containment Zone - "Gradient of Souls" Version Trailer Harold Halibut GameSpot Video Review Nancy Drew: Mystery of the Seven Keys | World Premiere Official Trailer Modern Warfare III & Warzone - Official Cheech & Chong Bundle Gameplay Trailer
Please enter your date of birth to view this video
By clicking 'enter', you agree to GameSpot's
Terms of Use and Privacy Policy
The difficulty lies, of course, in actually getting those accomplishments done. The primary thing to be aware of here is that the 15 second timer appears to reset itself after you leave combat, so you have a little leeway in each individual fight. Of course, if you do things right, you shouldn’t have to worry about it. Here’s a breakdown of the encounters to expect, and how to handle them. You’ll want to have the hidden blade, poison darts, and your pistol equipped. If you wind up coming close to the time limit in a fight, a poison dart will stop it from counting down so long as there aren’t any other soldiers still standing.
- Two soldiers on the street. Position yourself behind the soldier farthest from Stephane and stab him when Stephane begins yelling. Stephane should shoot the other one; if not, quickly dispatch him with your own pistol.
- Three Redcoats are tussling with citizens on the street. Get close to one of them, and when Stephane starts yelling and sends the mob into the group, stab your target. The other Redcoats will run; you can chase one of them down, but it won’t count as a low-profile assassination.
- Two soldiers stand up next to a wall. Again, get behind the farthest one, and stab him when the other heads over to Stephane. If you’re quick, you can assassinate the other one while he’s walking, as well.
- Four soldiers in a small square. This one can be tough; if you don’t get some clean kills, the two more experienced soldiers will probably take long enough to put down that you’ll go over your time limit in combat. Use a poison dart on the second soldier from the left; the other soldiers will become aware of you, but they’ll lose interest in a few seconds when they see their compatriot acting funny. Ignore the poisoned soldier and try to get three quick, clean low profile kills on the other soldiers. Remember not to run while assassinating someone, as that’ll alert the remaining guards and force you into a fight. If you miss one, use your pistol.
- Two soldiers walking in the street. Get behind one of them and assassinate them before Stephane starts talking. Shoot the remaining one.
When you complete the mission, Stephane will join you as an Assassin in training; you’re now able to use him to start riots and, more importantly, as a junior assassin. Start wandering the streets looking for isolated two-man guards; use Stephane to kill one of them, then help him with the remaining soldier. He’ll earn some XP for your guild. You can also do assassination missions via the Assassin’s menu, but you’re unlikely to be able to attempt many of them until you gain some more troops.
To do so, start wandering into the north and south sections of the city and start running down the tax collectors and other Loyalist miscreants via the large number of quests there. When you clear out the Templar influence on a district, you can head to your contact in the district to pick up a mission to kill off the Templar in charge, thus gaining yourself another Assassin to command. You can take your time with this if you like, but it’s probably best to just go ahead and get all three of the possible Bostonian Assassins available to you before you move on.
6.3: The Tea Party
Optional Objectives:
- Dump 10 crates of tea in the water.
- Throw three redcoats in the water.
- Perform a musket air assassination.
Assuming you have recruited all three soldiers, the first part of this mission shouldn’t be difficult. You can call in an assassin or two for the first group of six guards, then call down the whole bunch for the second group of nine guards.
The following fight will be a bit more difficult if you intend to complete the optional objectives, which are: throw ten crates of tea into the water yourself, throw three Redcoats into the water, and perform one musket air assassination. Get the ten crates done first, by simply picking them up and chucking them over the sides of the two boats here; check your button prompts to see which buttons you need to press to do so.

The musket assassination will be accomplished by picking up a musket from a downed Redcoat and jumping onto another one with it; you can do this as the Redcoats run up the ramps, if you’re quick, by jumping off of the little railing next to the ramps and mashing your assassinate button. Otherwise you’ll need to let some of the Brits onto one of the ships and find higher group from which to jump onto them, preferably while they’re fighting one of your companions. (Keep in mind that the two NPCs you need to keep alive are generally competent fighters, but can have some problems if they get surrounded or are attacked by enemy officers. Don’t forget to summon your Assassins to help out if necessary!)
Lastly, the three water kills. These are best accomplished on the ramps themselves or on the actual ground outside the boats. Goad the Redcoats into attacking you while you’re on the ramp, and continually counter their attacks; eventually Connor should kick them or nudge them off into the water. If you counter with a sword or other large weapon, Connor will usually grab his opponent and fling them backwards, so fight with your back to the water as best you can. Accidentally nudging your foes into the water doesn’t seem to count, so focus on your counterattacks.
Getting all of the optional objectives in one go can be tough, but it’s entirely doable. Good luck!
6.4: Hostile Negotiations
Optional Objectives:
- Do not let a Native American die.
- Reach Johnson undetected.
- Perform a swan dive to escape.
Another big timeshift here, as it’s time for Connor to perform his first major assassination mission by tracking down and murdering William Johnson. You’ll be faced with quite a climb to reach him, as the bulk of the Frontier is blocked off from you for the purpose of this memory. There’s no way to skirt around the bay, in other words; you’re going to have to go for a swim and scale the cliffs.
The path you have to take here is a bit complicated to explain in text, so it’d suit you best to simply watch the video here and follow our lead. If you don’t want to watch, though, here’s a basic overview. Run forward into the water and swim towards your right, avoiding the guards on the shore. Find the two little dirtslides that Connor can scramble up; they’ll lead to a path up the cliff.
Minecraft – Kung Fu Panda DLC Trailer Sclash - Console Release Date Trailer Kingdom Come: Deliverance 2 - Official Cinematic Announcement Trailer Stellar Blade - BIBI ‘Eve’ Official Music Video Trailer | PS5 Apex Legends: Urban Assault Collection Event Trailer Total War: WARHAMMER III - Elspeth von Draken Gameplay Showcase Potionomics: Masterwork Edition - Official Announcement Trailer Genshin Impact - "Arlecchino: Sleep in Peace" | Official Character Teaser Snowbreak: Containment Zone - "Gradient of Souls" Version Trailer Harold Halibut GameSpot Video Review Nancy Drew: Mystery of the Seven Keys | World Premiere Official Trailer Modern Warfare III & Warzone - Official Cheech & Chong Bundle Gameplay Trailer
Please enter your date of birth to view this video
By clicking 'enter', you agree to GameSpot's
Terms of Use and Privacy Policy
You’ll eventually pop up beneath the spot where a guard patrols. Either ledge kill him, or sneak up into the bushes nearby and take him down from there. The other guard sits on the edge of the cliff, so take him out as well. Head up towards the house where Johnson is holding court, but stick close to the cliffside rather than heading inland. There are plenty of patrolling guard groups, so avoid their site as best you can. Eventually you’ll come to a treetop path below which two guards patrol. You can air assassinate both of them if you like, or poison one and take out the other one from above.
Either way, you should have a relatively clear path to the house if, again, you stick to the cliff and approach from the far side. Eventually the game will, confusingly, cut away to a cutscene and probably place Connor somewhere he wasn’t before. We’ve been relocated to both sides of the house, but it’s much more common to wind up on a hill to its right side. You need to move quickly now if you want to reach Johnson before he kills one of your people, but resist the urge to run immediately. Instead, wait for the nearby guards to turn their backs, then find the branch path near the house, jump onto its roof, highlight Johnson as a target, then commit to the air assassination.
Lastly, you need to escape via a leap of faith as the last objective. If you orient Connor so that he’s looking away from the front door of the house, towards the water, start sprinting on a generally leftward tangent. You don’t need to worry about the guards. If you run down the hill near the rocky outcropping, you should eventually bypass the two guards you murdered before, who’ve respawned. Run past them and head towards the cliff. Find the birds that indicate a safe spot to jump and dive off.
SEQUENCE SEVEN
7.1: Paul Revere’s Ride
Optional Objectives:
- Do not trigger open conflict.
- Reach Prescott’s location within two minutes.
So here’s a bit of revisionist history for you! Rather than Revere riding on his lonesome, he’ll be relying on Connor to help him navigate through the back woods of Massachusetts. This is a fairly simple mission, so long as you stay away from patrolling bands of Redcoats. Look for them on your minimap and head off-road and into the woods if they get close.
You need to find three houses here. Revere will guide you to a few small villages, and you’ll have to walk up to the lit doorways in order to find the one that you need to knock on. In the first town, the house you want is the one that the Redcoats are standing in front of; wait for them to walk off before approaching it. Note that Revere is not particularly stealthy, so stay far away from the Brits here, lest they spot him. In the second, look for the house near where Troy’s mission is given, or simply head to the one furthest from where you entered the village.
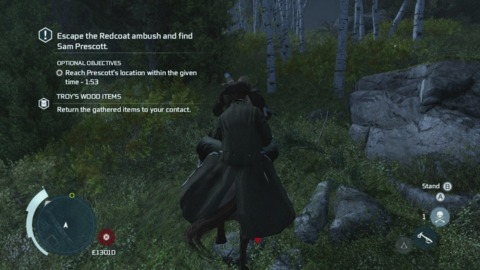
The third house contains a trap for you, so be ready to run. Even getting away from the Redcoats is difficult, as they’ll shoot your horse out from under you and proceed to kill Revere fairly quickly. Attempting to run away in the direction you’re initially pointed in will quickly end your ride. Instead, turn about 45 degrees to the right when you regain control of Connor and head up the hill through a copse of thin white trees. If you’re quick about it, you should be able to get up the hill before open combat starts, from which point it’s a relatively simple matter to stay in the woods until you reach your destination.
7.2 Lexington And Concord
Optional Objectives:
- Kill seven groups of regulars with a single order.
- Rescue one civilian hostage.
Mount the horse near where you begin the mission and get a-ridin’. It’s a three minute ride to Concord, and you should have plenty of time to get there, although there is an optional detour in the form of a prisoner rescue in one of the villages along the way. Look for the red dot on your HUD and ride over to find a few British soldiers escorting their prisoners. Use poison or your gun on their captain, then quickly dispatch the remainder before resuming your journey.

With that done, you’ll take up the command of the line of troops defending Lexington. Your optional goal here is to dispatch groups of British troops with a single volley from the soldiers under your command, but it seems as though almost every shot you issue will have that result, so you shouldn’t have to worry too much about it. The Brits will be coming en masse, though, so you’ll have to order your men to fire as quickly as you can. They won’t shoot until you give the order, so the bulk of the mission will see you simply riding on horseback along the line from one end to the other. You don’t have to stop to give the firing order; simply ride through the command circle and mash the button as quickly as you can while riding along. If you’re quick about it, the Brits will be eliminated before you run out of reinforcements. If the Brits break through, you’ll have to get your hands dirty.
7.3 Conflict Looms
Optional Objectives:
- Cross Charlestown without taking damage.
- Air assassinate a grenadier.
- Remain undetected while on ships.
Ah, now we’re getting into the business. The Revolutionary War has started in earnest, and you’re going to play a critical part in it on behalf of the rebels. You can start with disabling two warships that threaten to destroy the encampment on Bunker Hill. Oh, and you’ll have to do it on foot, and alone. No bigs. IMPORTANT NOTE: if you intend to complete the optional objectives for this mission, bring along as much poison as you can carry. The mission’s completely doable without the poison, but the optional objectives are much tougher without it.
Minecraft – Kung Fu Panda DLC Trailer Sclash - Console Release Date Trailer Kingdom Come: Deliverance 2 - Official Cinematic Announcement Trailer Stellar Blade - BIBI ‘Eve’ Official Music Video Trailer | PS5 Apex Legends: Urban Assault Collection Event Trailer Total War: WARHAMMER III - Elspeth von Draken Gameplay Showcase Potionomics: Masterwork Edition - Official Announcement Trailer Genshin Impact - "Arlecchino: Sleep in Peace" | Official Character Teaser Snowbreak: Containment Zone - "Gradient of Souls" Version Trailer Harold Halibut GameSpot Video Review Nancy Drew: Mystery of the Seven Keys | World Premiere Official Trailer Modern Warfare III & Warzone - Official Cheech & Chong Bundle Gameplay Trailer
Please enter your date of birth to view this video
By clicking 'enter', you agree to GameSpot's
Terms of Use and Privacy Policy
For the first optional objective you need to cross Charlestown without taking damage. This is easy; simply stay to the right when you enter the town, heading into the backyard of the buildings and sticking close to the memory border. When you see the building on fire in front of you, take another right and head to the harbor. The harbor’s mostly safe from shelling, so move down a bit until you find a path to the water, then swim out towards the ships.
Your new objectives are to light the ships by setting the black powder on them ablaze while remaining undetected and killing a grenadier via an air assassination. Tricky! The grenadier is on the ship to the left, so start there. He patrols most of the ship, and attempting an air assassination while anyone else is alive will usually cause you to be detected, so you’ll need to take the rest of the soldiers out before killing him.
Swim around to the eastern side of the boat and begin from there. There’s a stationary soldier on the southeastern corner whose back is up against a railing, so crawl up beneath him and perform a ledge kill. (If the prompt doesn’t appear, make sure that both of Connor’s hands are on the same level of the railing; if they’re uneven you can’t make the kill.) If anyone sees you perform the kill, quickly drop into the water to get out of their eyesight.
Leave the pair of soldiers nearby alone for now and take out the other patrolling guards. One of them pauses by the eastern edge of the ship, making for an easy railing kill. The other patrol is at the northern tip, and his route sometimes overlaps with that of the grenadier. Crawl up the northeastern side of the ship, and when both soldiers aren’t looking, climb over and hide behind the boxes there. Move up the corner and you’ll be able to perform a silent kill when the soldier walks by; just be sure the grenadier doesn’t see you.
Jump off the ship and head back to the southern end of it. When the grenadier’s up north, quickly hop the ledge behind the two soldiers, poison one of them, and use the hidden blade on the other for a low-profile assassination. The poisoned gent might draw the grenadier’s attention, so quickly hop back over the edge of the ship and wait for him to resume his patrol. When he does, crawl up the ropes to one of the platforms high above the ship’s deck, wait for him to come to a stop below you, and take him out. Loot the bodies to check for poison before lighting the powder and heading south.
The other ship is relatively simple by comparison. There are two officers on patrol and a number of two-soldier groups scattered about. Swim to the northern side of the ship, where the cannons are firing, and head down to its front side near the bowsprit. One of the officers come to a stop near the railing here, so watch his patrol, set up shop near where he pauses, and railing kill him. The two soldiers nearby will probably spot you, but you can drop back into the water before they become alert.
Move around to the southern side of the ship and watch the other officer’s patrol. Railing kill him, but be sure the nearby soldiers have their backs turned. With that done, you still have three groups of two soldiers to deal with. Poison one soldier in each group near the powder, hopping back overboard in between each poisoning to let the groups reset. If you have extra poison, feel free to try and nab the last group on the eastern edge of the ship, as well. With the soldiers split up, you’ll have a much easier time sneaking onto the ship and killing them. Use the boxes and perform corner kills if possible, whistling to draw your foes towards you. Keep in mind that these soldiers may not return to their normal positions if they become alert to your presence now that their partners are dead.
Light the second ship, then climb the mast to replace the flag and be on your way.
7.4: Battle Of Bunker Hill
Optional Objectives:
- Air assassinate Pitcairn without being detected.
- Cross the battlefield without taking damage.
- Limit regular kills to three or fewer.
Time to take out Pitcairn, but to get to him you’ll have to cross a battlefield, preferably without dying yourself. There’s a pretty clear path of cover here, so move slowly but surely down the hill. You need to time your movements so that Connor avoids enemy fire, obviously. You can either look at the British army and move immediately after their muzzle flashes indicate that they’ve shot and are reloading, or you can check the top of the cover you’re behind; bullets will ricochet off of it every few seconds to show when it’s safe to move.
Minecraft – Kung Fu Panda DLC Trailer Sclash - Console Release Date Trailer Kingdom Come: Deliverance 2 - Official Cinematic Announcement Trailer Stellar Blade - BIBI ‘Eve’ Official Music Video Trailer | PS5 Apex Legends: Urban Assault Collection Event Trailer Total War: WARHAMMER III - Elspeth von Draken Gameplay Showcase Potionomics: Masterwork Edition - Official Announcement Trailer Genshin Impact - "Arlecchino: Sleep in Peace" | Official Character Teaser Snowbreak: Containment Zone - "Gradient of Souls" Version Trailer Harold Halibut GameSpot Video Review Nancy Drew: Mystery of the Seven Keys | World Premiere Official Trailer Modern Warfare III & Warzone - Official Cheech & Chong Bundle Gameplay Trailer
Please enter your date of birth to view this video
By clicking 'enter', you agree to GameSpot's
Terms of Use and Privacy Policy
When you’re past the battlefield, head to the tree branches to avoid the Redcoats and head to the top of the nearby cliff. The path should be fairly simple to follow. When you reach it, it’ll be time to sneak up on Pitcairn and do him in, while remaining undetected and killing fewer than four guards. You can probably do it without killing any of them, but you have some leeway if you feel like covering your back.
Minecraft – Kung Fu Panda DLC Trailer Sclash - Console Release Date Trailer Kingdom Come: Deliverance 2 - Official Cinematic Announcement Trailer Stellar Blade - BIBI ‘Eve’ Official Music Video Trailer | PS5 Apex Legends: Urban Assault Collection Event Trailer Total War: WARHAMMER III - Elspeth von Draken Gameplay Showcase Potionomics: Masterwork Edition - Official Announcement Trailer Genshin Impact - "Arlecchino: Sleep in Peace" | Official Character Teaser Snowbreak: Containment Zone - "Gradient of Souls" Version Trailer Harold Halibut GameSpot Video Review Nancy Drew: Mystery of the Seven Keys | World Premiere Official Trailer Modern Warfare III & Warzone - Official Cheech & Chong Bundle Gameplay Trailer
Please enter your date of birth to view this video
By clicking 'enter', you agree to GameSpot's
Terms of Use and Privacy Policy
Although it looks like you can head either left or right here, only the left path will let you air assassinate Pitcairn. The path is, again, not very complicated: stick to the shrubbery, watch the guards patrolling, and avoid them or kill them, as you see fit. The last guard you pass, an officer, can easily be killed with a corner assassination, and it’s best to do so, as he’s got a pretty good view of the tree you need to climb to kill Pitcairn. When he’s down, move to the tree, and gingerly do some parkour to get to the flagpole above Pitcairn. Get atop it and hit Pitcairn with the air assassination to end the mission.
SEQUENCE EIGHT
8.1: Something On The Side
Optional Objectives:
- Do not tackle or shove anyone.
- Perform a successful static eavesdrop.
- Perform a successful mobile eavesdrop.
Tail the counterfeiter, but be aware that he’ll turn around after he gets in a fight with a would-be pickpocket. He’ll eventually meet up with a compatriot, popping up your first bonus objective, to perform a “static eavesdrop.” That just means you can’t move while you’re doing it. If you hop into the branches above the conversationalists, you’ll be above the sightlines of the nearby guards and nab the objective. If you get discovered, restart from the last checkpoint, and you’ll be right below the branches.
The mobile eavesdrop that follows is quite a bit more difficult. You need to stay within range of the two men without raising their suspicions. The long, narrow alleyways won’t help matters much. Use whatever crowds you can to stay inconspicuous and hide behind corners. You may be able to ride the ledges when you see a path upward, but it’s easy to fall behind if you run out of things to walk along.

Lastly, you’ll need to tail Hickey as he attempts to run from you. Not shoving anyone here is pretty tough, since all it takes is a bit of contact to do so, and Hickey will be scattering money in his wake to make crowds form. This chase won’t actually end until you catch up with Hickey, as he’ll just run in a loop until you do so. The best place to catch him is early in the route, after he attempts to lose you by cutting you off with a horse-drawn carriage. Stay on his tail, and he’ll eventually run into a market on the ground floor of a building, and then past a firing line that forms on the street. The firing line will knock you down and usually force you to reset, but if you play from the last checkpoint, you can take a left at the market instead of following Hickey directly, then cut him off as he comes out of the alleyway nearby. Try it a couple of times and you’ll get it quickly enough.
8.2: Bridewell Prison
Optional Objectives:
- Limit prison guard deaths to one or fewer.
- Reach Hickey in less than two minutes.
Well, things certainly have taken a turn for the worse for ol’ Connor. Talk to Weems in the common area to get things started; you don’t need to win the game that you play, or even bother trying, as you won’t get a chance to finish it.
The man you need to pickpocket winds up standing in the doorway of an open cell on the wall to the right of Connor when you reach the top of the stairs and turn. Run into that cell and wait for him to approach, then very discreetly pickpocket him. If any of the guards see you, you’ll have to try again.
Get into the fight that Weems suggests, then pickpocket the warden when he stands in front of your cell. Use the key to exit the cell, then make your way to the VIP area. It’s an easy path; just head down the hallway and up the stairs nearby, being sure not to be detected by any of the guards, or killing any of them.
When you reach the VIP area, you’ll have to reach Hickey’s cell within two minutes. Follow the guard up the stairs, then take a right down the pathway here while his back is turned. One of the guards on the upper level might spot you, but that’s not such a bad thing, as he’ll be drawn down the stairs to look for you. Run down the path and take the stairs on the far side of the room. Watch the guard here and head to Hickey’s room when the path is clear. If you have trouble here, don’t forget that you can kill one of the guards; any more than that and you’ll fail the optional objective.
8.3: Public Execution
Optional Objectives:
- Washington’s bodyguards must survive.
- Kill two enemy militia.
Well, those tricksy Templars are going to put Connor to death for the crime he was trying to prevent! When they can’t even get that right (thanks to Connor being able to call on the Assassins for help), Hickey attempts to take advantage of the chaos by rushing George Washington and attempting to kill him. You have to take him down before he can do so.
Minecraft – Kung Fu Panda DLC Trailer Sclash - Console Release Date Trailer Kingdom Come: Deliverance 2 - Official Cinematic Announcement Trailer Stellar Blade - BIBI ‘Eve’ Official Music Video Trailer | PS5 Apex Legends: Urban Assault Collection Event Trailer Total War: WARHAMMER III - Elspeth von Draken Gameplay Showcase Potionomics: Masterwork Edition - Official Announcement Trailer Genshin Impact - "Arlecchino: Sleep in Peace" | Official Character Teaser Snowbreak: Containment Zone - "Gradient of Souls" Version Trailer Harold Halibut GameSpot Video Review Nancy Drew: Mystery of the Seven Keys | World Premiere Official Trailer Modern Warfare III & Warzone - Official Cheech & Chong Bundle Gameplay Trailer
Please enter your date of birth to view this video
By clicking 'enter', you agree to GameSpot's
Terms of Use and Privacy Policy
Fulfilling all of the optional objectives here is pretty difficult on first try. You’re asked to both ensure that at least one of Washington’s bodyguards stays alive and also take down two members of the enemy militia. Killing the militiamen will generally allow Hickey to reach Washington and kill the bodyguards, if not Washington, as well. You will occasionally get lucky and have him stumble, allowing you to get your kills in, but that’s pretty rare.
As such, it’s best to surge through the crowd and follow Hickey straight to Washington without worrying about the militiamen. When you catch up to Hickey, don’t attack him! Just run right into him and bump him. That should get his attention and force him to turn and attack you. Start attempting to lure him backwards away from Washington, then turn to kill any nearby militiamen. When you do that, turn your focus back to Hickey and wear him down. It’ll take a couple of attempts to get everything right, but when you do, do the world a favor and put Hickey down like the dog he is.
DESMOND INTERLUDE TWO
Another short trip to the present day as Desmond attempts to track down another power source. This one’s a bit trickier than the last one, though, since you’ll have plenty of security to deal with in the MMA arena that the power source is located in.
Get off the metro and head to the ticket station. You’ll have to sneak by the security here, which will be tricky since there are wanted posters for you up pretty much everywhere you look. The civilians are mostly too busy having a good time to care, but the security guards will spot you from a mile away. They’re not instantly hostile to you, and they’ll take a while to become fully aware of you, so if you spot yellow markers, be quick to duck around a corner or other obstacle. You can also seem to hide inside the middle of groups of sports fans (they apparently think it’s perfectly normal for someone to just wander into their personal space), but this doesn’t always protect you from the guard’s sites.
There aren’t any optional objectives here, and for the most part the way forward is fairly clear. When you see a security checkpoint, look around for another doorway to get around the guards; it’s almost always on the right side of the hallway. A bit of parkour and a trip across the arena’s girders later, you’ll come across the same individual who almost foiled your first attempt at finding a Precursor battery. Chase him as best you can, and you’ll eventually wind up fighting him a few guards in the courtyard you passed through earlier. You don’t have a health bar, but that doesn’t mean you’re immortal, and you can most definitely get killed here. You also won’t have the normal icons to see when an enemy is preparing to take a swing at you, so be on the lookout for their windups. Try to take out the guards first before dealing with the Templar, as he’ll require a bit more of an effort to put down. He’ll rebuff your attacks, so drop his guard and pummel him to retrieve the power source.
You can plug it in now, if you wish! Head into the doorway that was opened the last time you put a battery in, climb the stairs, and then drop to the lowest level of the large room beyond and look for a door in the middle of that room. A bit of climbing and you’ll find the battery slot. With that done, return down the stairwell you climbed up from to see another cutscene. The battery will have opened up a new chamber on the right side of the main hall. Feel free to explore to get some more backstory.
SEQUENCE NINE
Ah, winter in New England. If you find yourself exploring and fighting your way through snow drifts, don’t forget that you have a horse whistle in your inventory. Horses are largely immune to snow-related travel impediments, so use your pony to get around quickly in the snow should you need to. You don’t even need to bind it to a button; simply select it with the right-bumper menu and use it, then flip back to whatever else you had there.
Of course, with New York available to you, you might wish to simply head there and start mapping out the new city. You can find three more Assassin recruits here, and it’s a good idea for you to pick them up now, rather than later. Finding all of the Liberation quests can be tough, but if you manage to hit all of the Synchronization points, you’ll find most of them. The northernmost district will be the toughest to clear at this point, since there are so few vantage points in it, but it is possible to recruit the Assassin there if you ride around and look for all of the Liberation missions.
9.1: Missing Supplies
Optional Objectives:
- Catch the cart driver within 30 seconds.
- Do not hide in the hay cart while following the convoy.
- Kill three camp guards without being detected.
Well, this is unexpected: Connor and his father teaming up to achieve a common goal. Use your Eagle Vision to look for clues from a distance; you’ll be able to see them from much further away than if you simply wander around looking for them. There’s no time limit here, so avoid the Redcoats and track the clues available to you until you find the wagon master.
The cart driver should be easily caught within the time limit if you give a spirited chase. From there, your goal is to track the soldiers that move in front of you, without hiding in the haywagon. As always when you’re in the wilderness, stick to the trees and use your freerunning ability to stick close above the caravan without tripping any guard’s senses. It’s a fairly short trip to the camp, at any rate. Keep to the left as you creep up on the caravan and you’ll find yourself near a rocky outcropping. That’ll lead you to a path through the tree branches that will keep undetected by the guards, so long as you move quickly.
When you reach said camp, your goal will be to kill three camp guards without being detected. Even if you managed to avoid hiding in the hay cart on your way into the camp, you’ll be placed here regardless. You’ll need to hang around for a second before everyone starts moving here; when the first camp guard comes alongside the cart, perform a hidden kill to nab the first of three guard kills you need to complete the optional objective. There’s a laborer in the vicinity, but don’t worry about him. He’ll neither alert the guards nor be overly concerned about the soldier you just killed.
With the first guard taken care of, hop out of the cart and into the brush nearby. There’s a building near the path that the guards you’re tailing are taking. Follow them and quietly assassinate the guard near the boxes. The two Redcoats you’re following will probably come to investigate, so hang back a bit until they resume their course. There’s another guard near more boxes nearby, so run up to him and kill him as well to complete the optional objective. With that done, stick to the brush along the road and follow the guards. They’ll lead you to Haytham.
Haytham’s getting the crap kicked out of him, so get up close to the guards and start taking them out. They’ll bring in reinforcements, so you’ll have to take out quite a few of them before the mission ends. Use your normal weapons on the guards that are beating on Haytham; the tougher enemies can be defeated with poison. Regardless, kill all of the enemies to complete the mission.
9.2: Father And Son
Optional Objectives:
- Do not get detected while stealing the mercenary outfit.
Follow Haytham along the rooftops to the church. You’ll need to steal a guard’s uniform in order to enter. Find the guard while maintaining a low profile so as to not attract unwanted attention. To steal the clothes without being detected, look for a set of tall boxes in the street near where the guard patrols. They form a little alcove that will largely protect you from view; hide back here, whistle the guard over, and kill him with a corner kill. Just be sure that there aren’t any other Redcoats in the area, and you should be able to nab the clothes without being spotted.
9.3: The Foam And The Flames
Optional Objectives:
- Do not take any fire damage.
- Limit Haytham’s health loss to 50%.
The opening fight here can be difficult, since your objective is to keep Haytham above half health. Stay close to him and use your smoke bombs to stun all nearby enemies, then get your blades into them while they reel. Focus on the grenadiers while they’re stunned; if they manage to throw a grenade you’ll have to worry about keeping Haytham alive, let alone above 50% health.
It shouldn’t be too difficult to escape from the building without taking fire damage so long as you move carefully and with consideration to your surroundings. There’s no time limit, so move slow and avoid anything that’s aflame. There’s a rafter above you in the first room that looks like it’ll burn you, but it won’t. After that, follow the dots and escape.
9.4: A Bitter End
Optional Objectives:
- Limit environmental damage to 20%
- Stay within 500 meters of the schooner.
- Achieve a minimum kill streak of three kills or higher.
Ah, another chance to show off your ship on the high seas. If you have some extra cash, you may want to upgrade it a bit if you haven’t done so yet. The improved rudder will help you maneuver, and you’re going to be in some tight spots coming up.
And those tight spots come pretty much immediately, as you find yourself maneuvering the Aquila through some tight island canals. You’ll find Church’s ship right quick, but will have to follow a smaller vessel through the channels here. At full sail you’ll gain on it, while at half sail it’ll have the speed edge on you. Attempting to both limit environmental damage and stay within 500 meters of the ship will take some doing, then. Use full sail whenever you have a bit of clear space in front of the boat, but switch to half when you need to maneuver. This is especially important when rogue winds pop up, as they’ll dangerously veer your ship off its course if you’re at full sails. The chase isn’t so much a matter of knowing a trick; it just requires some finesse and execution.
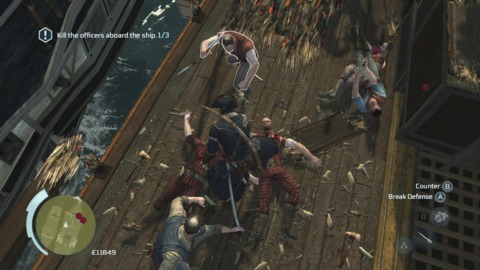
When you catch up to the ship - surprise! There’s a fully-loaded man-o-war and five escorts waiting for you. The escorts can be eliminated with your swivel guns, so start taking them out first. The man-o-war requires you to use chain shot to destroy its masts; switch your cannons out for the new ammo before firing on it. With the masts down, it’s time to live out your pirate fantasies and board the ship.
Getting the three-kill streak here can be tricky, given the chaos aboard the ship, but the sailors are easy targets and there are an infinite number of them to work with, so it’s just a matter of tapping your attack button and changing targets as often as possible. You’ll occasionally be interrupted by your own men running around, but, again, you have no shortage of targets to take out here, so simply keep trying until you get the objective notification.
SEQUENCE 10
10.1: Alternative Methods
Optional Objectives:
- Tackle the target from above.
- Use two guards as human shields.
The large fight early in this mission can be a bit annoying, but it shouldn’t be too bad if you take advantage of your toolbag. Your optional objective is to use two soldiers as human shields, so be on the lookout for the yellow triangles above the officers nearby and quickly grab a soldier when they appear. Don’t use smoke bombs here if you intend to complete the optional objective, as the officers won’t be able to fire and will instead slowly walk towards you, walking back to their position when the smoke clears, and if they’re not shooting you won’t be able to grab human shields. Don’t kill any of the gunmen, or you’ll have to restart.
The second bonus objective, to tackle the escaped officer from above, is a bit trickier. As per usual in these kinds of missions, he’ll attempt to impede your progress by calling other soldiers in to help him, so be on the lookout for lines that start to form and avoid them. Be on the lookout for stairs leading to second-story doors; these are your best bet for hitting the soldier from above. You can actually get ahead of him if you’re lucky, either by simply running into him, which will knock him off his stride momentarily, or by restarting the checkpoint a few times until you learn his route and can cut him off by predicting his movements.
10.2: Broken Trust
Optional Objectives:
- Stop the Kanien’keha:ka with non-lethal methods.
- Do not touch the ground.
- Stop Patriot messengers within three minutes.
Time to kill some soldiers. Your goal is to eliminate the messengers that are heading towards your village with orders for the army to destroy it. Optionally, you need to do so within three minutes and without touching the ground. Tricky.
This will be a lot easier if you have Ellen back at your homestead make you a double holster so that you can fire two pistols before having to reload, or you can purchase a double-barrel pistol from a shop. (Or both!) It’s still doable otherwise, just difficult. Anyway, follow the path out of Valley Forge, using your bow or gun on the first messenger by the side of the road. The group of three messengers ahead of him will be a bit more difficult to deal with, but the easiest way to proceed is to shoot the rearmost soldier, use your other pistol on the soldier in the middle, and then wait for the lead soldier to get off his horse before poisoning him. (Poison doesn’t seem to work if you aim it at someone on horseback.) That will give you time to reload your pistols or get a shot off with your bow. If any of the soldiers shoots your horse, you’ll be dismounted.
Reload again and head down the road to catch the last messenger. He’s pretty speedy, so you’ll have to spur your horse a couple of times to catch up with him. Shoot him and head for your village. Your next goal will be to stop the attack on the soldiers nearby by your misguided compatriots. If you run up behind them and tap your attack button at a full sprint, you’ll be able to perform a nifty disabling maneuver on the go. You may wind up having to fight one or two, but you shouldn’t have too many problems with that this deep in the game.
10.3: Battle of Monmouth
Optional Objectives:
- Neutralize eight platoons with a single cannonball.
- Kill two platoons with a single cannonball.
- Prevent three patriot executions.
Up for a bit of cannoneering? Connor has to hold back the British while the rebels retreat, and he’s given a cannon and a few men to do the job. The British, in the face of certain death, will slowly walk up in platoons and stand right in front of you, waiting their turn for a cannonball. God only knows how these guys didn’t constantly run around in panic at being told to fight wars like this.
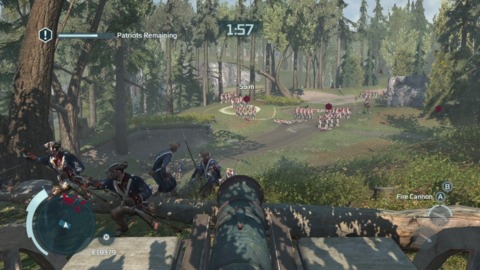
Your optional objectives here are to kill eight platoons with a single cannonball on top of killing two platoons with one cannonball. The former objective is easy; laying down a cannonball in the middle of a platoon will knock it out without any trouble. The latter objective is tougher, as the cannonballs have only a limited area of effect and it’ll be difficult to make them cover two platoons at the same time. You’ll want to try and hit platoons that are in front of and behind each other rather than attempting to aim between two platoons that are side by side. We had luck with the leftmost line of soldiers to Connor. Let them stack up there, aim the cannon between them as best you can, and with a little luck you’ll complete the objective, with an achievement popping up to boot. If you’re not having luck with the left side, try taking out two of the platoons in the middle of the road, and note that you don’t seem to need to take out a whole platoon to get the objective. Nailing a couple of half-strength ones seems to do the trick.
Hold out for a few more minutes, concentrating on the soldiers in the road, and you should escape before you lose all of your reinforcements, although it’ll be close. To complete the mission, you’ll have to run back to the Colonial lines, foiling three public executions along the way. Follow the road here (you don’t appear to be able to get on the horse at the beginning of this sequence, alas). The first execution is in the town square. It’s easy enough to stop them: just run right up through the British soldiers and get between them and their target. They’ll break off from their shooting and focus on you instead, but there’s no need to fight; just keep running towards the next green marker. They’ll chase you, but you’re faster than them. Another execution can be foiled in the yard of a house nearby, and the last one is on the right side of the row as you get closer to the battlefield ahead. Be sure to find it before you head towards the Colonial army; if you miss it, you’ll probably fail the objective when you hit the next checkpoint, forcing you to restart the whole mission to obtain it.
DESMOND INTERLUDE THREE
Time to head into the belly of the whale, as Desmond attempts to infiltrate the Abstergo building to find his father. You don’t have to worry about being spotted here, though, as Desmond decides to simply walk into the building through the front door. Killing a building full of Abstergo shouldn’t be too difficult for an Assassin, right?
It’s difficult to get lost here, as your path is largely linear. Climb out of the elevator shaft and start working your way through the guards. Again, no HUD here, so you’ll have to be on the lookout for enemies that are about to take a swing or shoot at you and counter their attacks as best you can. The Break Defense option is a great choice in most of these fights, as it almost always connects and will net you some cheap kills by throwing enemies into walls or off railings.

You’ll eventually come to your old prison cell, where Cross is waiting for you. Follow him back out the door and down to the room with the dozens of Animuses. (Animii?) He’ll hop around on the girders for a while, attempting to avoid you, but if you stay on the girders and follow him around, you should eventually manage to get above him and get an air assassination. Finally. If the guards below trouble you, simply drop to the floor and take them out before climbing back up and killing Cross. He doesn’t leave the room, so you have as much time as you need.
Head up to the fifth floor and start killing more guards. While you don’t get the prompt for it, you can still take human shields to deflect enemy gunfire, which will also thin their ranks substantially. You’ll eventually come to Vidic’s office, where the man himself has apparently forgotten precisely what the Egg can do. Leave the building after dealing with him and get back to the cave. Feel free to insert the power source before returning to Connor.
SEQUENCE ELEVEN
11.1: Battle of the Chesapeake
Optional Objectives:
- Destroy three ships using only one broadside.
- Destroy two frigates by firing on their powder stores.
- Counter kill five enemies.
You’ll be returning to your ship for this mission, so upgrade it if you need to or haven’t in a while. The first fleet action here will see you fending off Loyalist ships, with an optional objective to destroy three of them in a single broadside. If you’ve added a cannon to your deck and focus on the smaller ships, this shouldn’t be difficult, but you’ll need to act quickly before your ally ships put your targets down. Mop up the rest of the enemies and head to the next encounter.
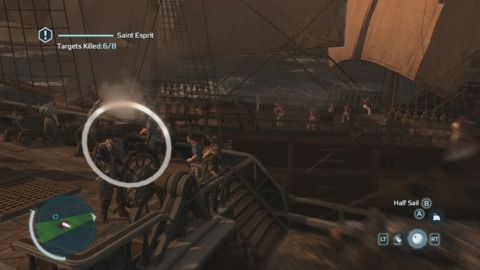
Your objective here will be to destroy two of the frigates by firing on their powder stores. Only problem is that there aren’t any frigates around! Kill four or five of the smaller ships, and they’ll arrive, probably in your headwind. The stores can be seen as small white targeting circles, but are only on one side of the frigates, meaning that you’ll have to maneuver a bit in order to spot them. Wait for your swivel guns’ targeting reticule to pass over the circle, then hit the weak spot for massive damage.
Lastly, ram and board the man-o-war. Five counter kills should be easy to come by if you focus on the weakest enemies here. Hit your counter button when they attack you, and quickly follow up by mashing your own attack button. The tougher foes will be more difficult to counter attack, so focus on the swabbies and get your kills.
With that done, rush after the captain of the shift, ignoring anyone else in your way if you can. When you catch up with him, hit everyone with a smoke bomb and kill the captain, then return to the Aquila to finish the mission off.
11.2: Lee’s Last Stand
Optional Objectives:
- Reach the signal tower within three minutes.
- Remain undetected.
- Limit health loss to 50%
Find Lafayette in the sewers to begin this mission; he’s not from the entrance, and the path is fairly clearly marked. After getting into the military district, you have to reach the signal tower within three minutes without being spotted and while remaining above half-health. Bring a full load of poison along for this one. If you haven’t yet, having Ellen craft you a poison pouch, assuming you have the recipe and have levelled her up a bit via quests, will be a good idea. Sometimes the game will restore you with an incorrect amount of poison, which can be frustrating, but not entirely crippling.
You’re not prevented from actually killing anyone, mind, as the guard at the well will find out when you ledge assassinate him. From there, take to the rooftops and head towards the green marker on your HUD. There are two rooftop guards nearby, facing away from each other. You can sneak up behind one for a silent kill, if you like, or you can use poison on one and simply run past. Keep in mind that poison will still attract the attention of other guards in the vicinity, so if you use it on a guard, you’ll have to be very mindful of all the other enemies in the area. Enemies will stay in the red zone of their awareness for a good while before they become fully alert and desynchronize you, so take advantage of that by running up to anyone who sees you and low-profile assassinating them.
Minecraft – Kung Fu Panda DLC Trailer Sclash - Console Release Date Trailer Kingdom Come: Deliverance 2 - Official Cinematic Announcement Trailer Stellar Blade - BIBI ‘Eve’ Official Music Video Trailer | PS5 Apex Legends: Urban Assault Collection Event Trailer Total War: WARHAMMER III - Elspeth von Draken Gameplay Showcase Potionomics: Masterwork Edition - Official Announcement Trailer Genshin Impact - "Arlecchino: Sleep in Peace" | Official Character Teaser Snowbreak: Containment Zone - "Gradient of Souls" Version Trailer Harold Halibut GameSpot Video Review Nancy Drew: Mystery of the Seven Keys | World Premiere Official Trailer Modern Warfare III & Warzone - Official Cheech & Chong Bundle Gameplay Trailer
Please enter your date of birth to view this video
By clicking 'enter', you agree to GameSpot's
Terms of Use and Privacy Policy
Follow the rooftops towards the tower, where one last rooftop sniper awaits you. Kill him, then look below for a haycart in the open area near the tower. There are a couple, but aim for the one on Connor’s right. There are a couple of guards patrolling the area that you can eliminate with whistles and hiding spot assassinations. Do so, then check the other two guards that are patrolling near the tower. Sneak up behind them, kill them both, and climb the tower before time runs out.
What follows is a quick fight between a concussed Connor and his father. You can’t defeat Haytham with normal attacks, so you’ll need to, as the game indicates, counter his attacks while standing near objects in order to use them against him. Keep Connor’s back to the barrels and tables in the area, as this makes it easier for him to get Jackie Chan on Haytham. You’ll need to counter him three times with objects in order to defeat him, but Haytham will periodically seem to land blows no matter what you do, so you’re on a bit of a timer here. You don’t need to be perfectly precise with your countering; you seem to be able to just mash the button as often as you like and still get your counters in when the game permits you. Regardless, get the counters set up to finish off Haytham.
SEQUENCE 12
12.1: Laid To Rest Optional Objectives:
- Limit regular kills to 14 or fewer.
- Escape the HMS Jersey without entering into open conflict.
- Kill the HMS Jersey’s captain.
Charles Lee isn’t the brightest fellow in the book, openly espousing treasonous Templar ideas in front of a broad crowd of civilians. But then, Connor’s not exactly outsmarting him by showing up and willingly getting captured. (Fun fact: the phrase “founding fathers” wasn’t actually coined until the 20th century by President Warren G. Harding.)
Minecraft – Kung Fu Panda DLC Trailer Sclash - Console Release Date Trailer Kingdom Come: Deliverance 2 - Official Cinematic Announcement Trailer Stellar Blade - BIBI ‘Eve’ Official Music Video Trailer | PS5 Apex Legends: Urban Assault Collection Event Trailer Total War: WARHAMMER III - Elspeth von Draken Gameplay Showcase Potionomics: Masterwork Edition - Official Announcement Trailer Genshin Impact - "Arlecchino: Sleep in Peace" | Official Character Teaser Snowbreak: Containment Zone - "Gradient of Souls" Version Trailer Harold Halibut GameSpot Video Review Nancy Drew: Mystery of the Seven Keys | World Premiere Official Trailer Modern Warfare III & Warzone - Official Cheech & Chong Bundle Gameplay Trailer
Please enter your date of birth to view this video
By clicking 'enter', you agree to GameSpot's
Terms of Use and Privacy Policy
When you fight your way out of the guard’s grasp, you’ll be offered your optional objective, to limit your kills of the guards in the area. But your first objective is to kill the guards around you. Luckily, you don’t have to get your hands dirty: simply call in your assassins and let them get the job done. The guards will die (and you can loot them for supplies), and your kill counter won’t go up at all. Repeat the process on the rest of the mercenaries (if your assassins get in trouble, help them out by laying down a smoke bomb), then head to the harbor. Your inventory might have been depleted by one of the missions recently (or the game may have simply deleted some of your items), so use your troops to kill more guard groups on the way to replenish your stores. Fill up your poison, at least, while trying to keep your kill count as low as possible.
With that done, head out to the water, avoiding the high-security zone at the harbor. You’ll need to maneuver your way aboard the HMS Jersey to eavesdrop on the captain, without being detected. Stay to the right, front side of the ship as you approach, well out of view of the guards near the water. There’s a metal pipe-looking thing sticking down into the water here; find it and climb up, heading up to the rear section of the ship. There’s a guard here, but you should have plenty of kills left on your meter, so take him out with a ledge kill or poison, depending on where he is in relation to you.
Cross the deck to the far side of the ship and crawl over the side of the railing to hide from the guards on patrol. If you see one that pauses near a railing, feel free to take him out with a ledge kill, but be wary of poison on the main deck, as it will attract attention and will make the guards’ patrol paths a bit difficult to predict. Stay out of sight and head to the eavesdrop target.
With the first conversation out of the way, you’ll need to head to the rear of the ship to overhear another one. There are two guards nearby, though; you’ll probably want to kill both of them just to prevent any prying eyes later on. They both come to the edge of the ledge, so they’re easy to ledge kill, but you’ll want to take out the farther one first, as the nearer one patrols. Kill the farther one while the nearer one has his back turned on the other side of the boat, then lie in wait for the patroller to come back and off him as well.
Two more guards remain, near the captain’s cabin. Their patrols don’t overlap, luckily, so you should be able to sneak up with relative ease on the first one, especially if you cleared out the guards below. Kill them, eavesdrop on the captain (hide behind the corner while doing so, since he’ll walk out onto the deck afterward), then kill the captain himself. If you left a guard’s body around, he’ll head over to check it out, allowing you to walk up for the low-profile kill; otherwise he’ll patrol a bit. Take him down without being detected and jump off the deck to complete the mission.
12.2: Chasing Lee
Optional Objectives:
- Stay within range of Lee.
- Do not shove anyone during the chase.
- Do not take any fire damage.
Finish him! It’s time to take out Charles Lee at last. His end will be slightly less dignified than anyone could possibly have imagined, but before you can enjoy it, you have to effect it yourself. Find him at the harbor and prepare for a bit of a chase. You may want to bring smoke bombs with you if you don’t have any in your inventory right now.
Minecraft – Kung Fu Panda DLC Trailer Sclash - Console Release Date Trailer Kingdom Come: Deliverance 2 - Official Cinematic Announcement Trailer Stellar Blade - BIBI ‘Eve’ Official Music Video Trailer | PS5 Apex Legends: Urban Assault Collection Event Trailer Total War: WARHAMMER III - Elspeth von Draken Gameplay Showcase Potionomics: Masterwork Edition - Official Announcement Trailer Genshin Impact - "Arlecchino: Sleep in Peace" | Official Character Teaser Snowbreak: Containment Zone - "Gradient of Souls" Version Trailer Harold Halibut GameSpot Video Review Nancy Drew: Mystery of the Seven Keys | World Premiere Official Trailer Modern Warfare III & Warzone - Official Cheech & Chong Bundle Gameplay Trailer
Please enter your date of birth to view this video
By clicking 'enter', you agree to GameSpot's
Terms of Use and Privacy Policy
Chasing Lee is a tough proposition, but the hardest part is right at the beginning, at least, so you won’t have to redo too much if you fail an objective. The optional objectives here are to stay within 50 meters of Lee and to avoid shoving anyone while you chase him down. The shoving thing will complicate your path a bit, especially at the outset, when two gunmen shoot powder kegs that’ll knock you around. They’re avoidable by veering to the left, but there’s a civilian placed there who’ll be difficult to avoid. If you do get knocked backwards, it’s not a death knell, but you’ll need to be quick to regain your bearings and keep charging forward.
There are three or four sets of riflemen here that will impede your bath, and they’re tough to get around cleanly. If you attempt to run through them, they’ll usually knock you down, causing you to fail the 50 meter objective. So, avoid them! The first pair of gunmen should be smokebombed as you get close to them, and after that, you can bypass the rifles altogether by taking a left up the gangplank to board the docked ship. Lee will be taking a left up ahead of you, so you won’t be losing too much ground to him. Stay sprinting as long as you can, then climb up the ship’s prow and leap off to the left, attempting to hit the ground as far away from the riflemen as possible. They’ll probably tag you with a few shots, but don’t worry about: just keep on Lee.
Lee will eventually reach a ship that’s been set ablaze by some amazingly convenient accident, forcing you to follow him through the burning wreck without taking any fire damage if you wish to complete the optional objective. When the first large mast comes down, head up the right wall towards the rafters and follow Lee as best you can from there. It’s not an overly difficult path, and Lee will helpfully wait for you to catch up if you fall behind, so keep moving on until you finally reach him.
From there, the game’s denouement begins. Little that follows is difficult to grasp from a gameplay perspective, so we’ll let you experience everything for yourself! Just keep in mind that you can continue to play after the credits roll. There are a few epilogue missions to complete, as well as an odd Animus Synching sidegame that’s tied into online play (you may have to play for a while until this appears for you).
Got a news tip or want to contact us directly? Email news@gamespot.com
Join the conversation