Super Mario Galaxy Walkthrough
That rapscallion Bowser has kidnapped Princess Peach again. Luckily, you've got GameSpot's Walkthrough to help you get her back.
To say that Super Mario Galaxy has been a highly-anticipated game is a bit of an understatement. Although the Wii has shot Nintendo back to the forefront of console gaming in terms of hardware sales, the software for the title has been lacking in terms of high-profile, exclusive titles. With the delay of Super Smash Bros. Brawl until next year, Super Mario Galaxy is a bright spot in an otherwise port-filled release schedule for the Wii.
That said, Nintendo couldn't have found a better game to ship in the weeks before the important Thanksgiving holiday. Super Mario Galaxy has been lauded far and wide for its accessible but challenging gameplay and its unique use of the Wii controls. As you may expect for a Mario game, the plot revolves around Bowser kidnapping Princess Peach and forcing Mario to chase him down to rescue her. The caveat here is that the game takes place in deep space, so that Mario has to travel from galaxy to galaxy, picking up Power Stars until he's re-powered the Comet Observatory that he's on. When he finally collects enough Power Stars, he'll finally be able to take down Bowser once and for all…until the next Super Mario game, that is.
Anyway, here's what to expect from GameSpot's Game Guide to Super Mario Galaxy.
Walkthrough
A walkthrough of the game's main galaxies.Obscure Stars
Details on the comet missions, Luigi's missions, Hungry Luma galaxies, and the green Trial Galaxies.Star Checklist
Want to know where all 120 stars in the game are located? This is a good place to start looking!
Walkthrough
A note here: we start this walkthrough off with a fair amount of detail. As the game progresses, though, you can expect the walkthrough to become a bit less detailed; by the time you reach the later levels of the game, you should be familiar with the mechanics and used to the proposition of making your way through the fairly linear challenges that are arrayed in front of you. If you need to be told the precise position of every enemy in the game and exactly when to jump to get past a fire trap, then this probably isn't the walkthrough for you.
With that said, we're pretty sure that we have the location of all of the stars in the game listed. Not all of them are in the main walkthrough, mind you; if you're trying to track down a particular star, but can't find it in a galaxy's walkthrough, check the Obscure Stars chapter or the Star Checklist at the end of the document.
Mushroom Kingdom
When you arrive in the Mushroom Kingdom at the beginning of the game, you'll be able to collect Star Bits, either by running into them or simply by pointing at them with your Wii remote. When Bowser arrives, try to make it to Peach; you won't be able to rescue her, though. (Go figure!) Things certainly do seem dire…
Galaxy Gateway
Grand Star Rescue
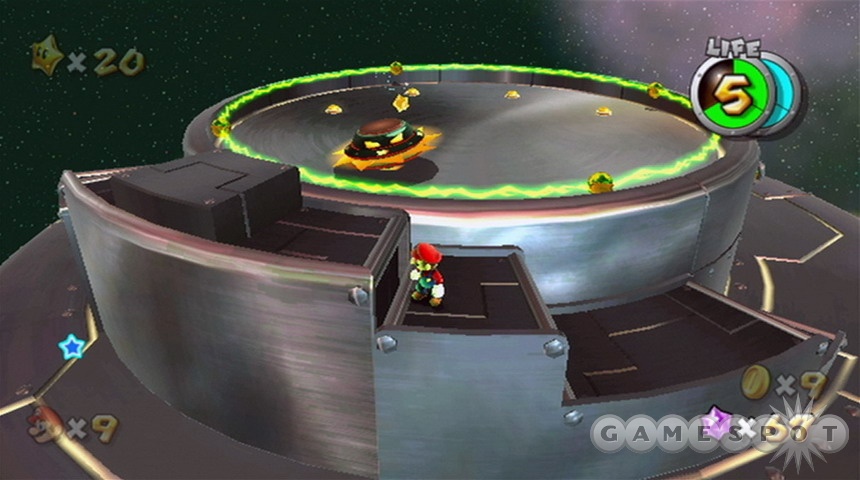
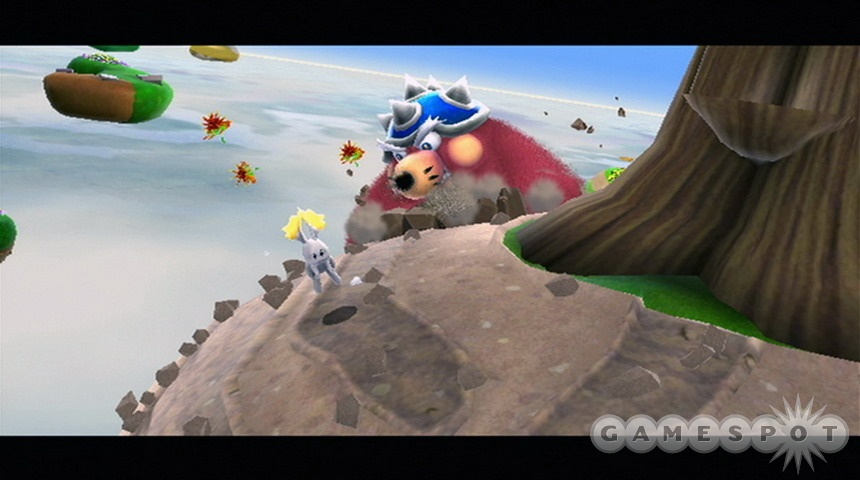
After waking up on the strange planetoid, a small creature will appear to you, and introduce you to its friends. There are three of the little bunnies, and they'll all hide from you; you'll need to track them down before you can move on. One hides in the pipe, one in a tuft of grass, and one in the large hole through the planetoid. You'll need to chase them down when you find them; they'll run, but will eventually tire out.
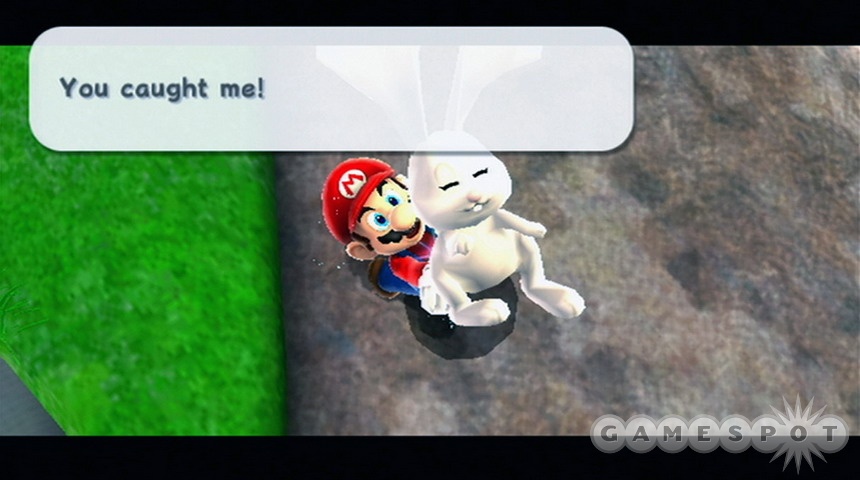
After you find all three of the bunnies, a castle will be revealed. Speak to Rosalina here, and she'll give you a Luma; that will let you perform the Spin move. Rosalina wants you to find the Grand Stars that have apparently been scattered around the galaxy; to get started on your path, use the Spin move to destroy the crystals that appear beneath her. That will unlock a Launch Star, which you can use to move on to the next planetoid.
Planetoid Hopping
The next planet you wind up on has another Launch Star, but it's been broken into five pieces. Move around on the surface of the planet, using Spin to bash enemies and crystals, until you find all five of them. Keep in mind that you'll also want to be collecting the coins, as well; there's also a 1-Up on this planet, to boot.
The third planetoid has a Luma in a cage. Hit the Goombas on the planet to reveal a key, then unlock him. He'll chuck you off to another planetoid, where you'll repeat the process. The large Goomba here is the one with the key, but don't be afraid; he'll fall just as easily as the small ones do to your spin attack. After freeing the second Luma, head into the pipe to find the Grand Star.
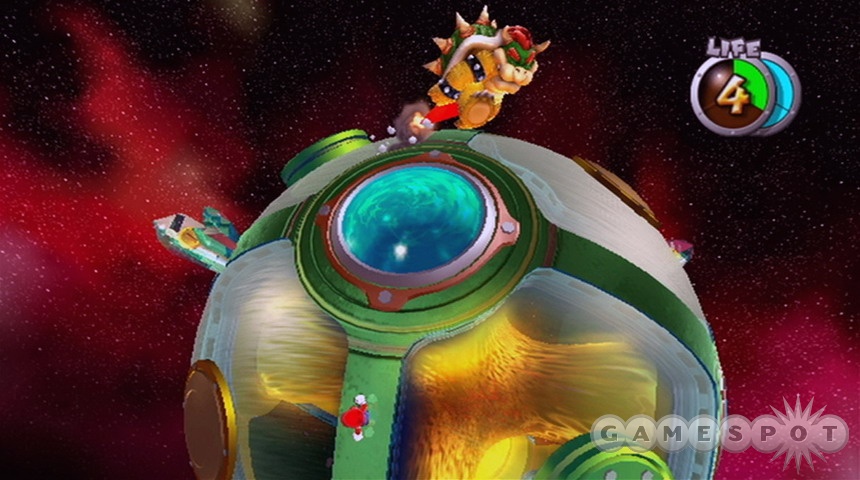
The Grand Star is hidden away in another cage. In order to free it, you need to find all of the switches on the floor and change them from gold to blue. There are a number of them around the cage itself, and also four more on the sides of the “wall”, where the electrified barriers rotate around. Find them all and change them to blue to free the Grand Star, then hit it to move on.
Comet Observatory
After speaking to Rosalina, you'll learn about your ultimate goal: find the Power Stars that have been stolen from the Lumas by Bowser. Begin by heading into the Terrace observatory and using the Pull Star there to travel to a new galaxy.
Terrace Observatory
Good Egg Galaxy
Dino Piranha
First Planet: Go ahead and fly to the Good Egg Galaxy to get your adventure underway. The first planetoid here will have a hidden area: if you head to the dark underside of the planet, you can find a golden pipe that will lead into the house on the upper side. Follow the trail of musical notes that appear after hitting the question mark to reveal a 1-Up.
Second Planet: On the second planetoid, find the five shards of the star, put them together, then launch yourself off to the third planet.
Third Planet: Kill the enemies here by chucking Star Bits at them with the B button, then hitting them. When the Sproutle Vine sprouts, hit the large coin to cause a number of other Star Bits to appear, then climb the vine by spinning around its base.
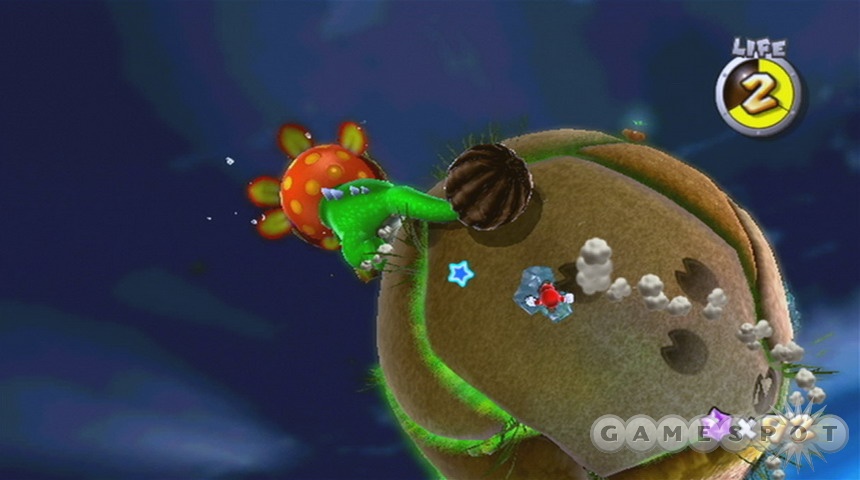
Fourth Planet: Make your way past the rolling blocks until you reach the huge man-eating plant. In order to kill it, you need to move behind the green plants nearby, position them so that they're between you and the plant, then spin into them so that they hit the plant. It'll poof away, revealing another Sproutle Vine.
Fifth Planet: There's a 1-Up hidden behind the stone blocks, so grab it before heading up top and revealing the Launch Star.
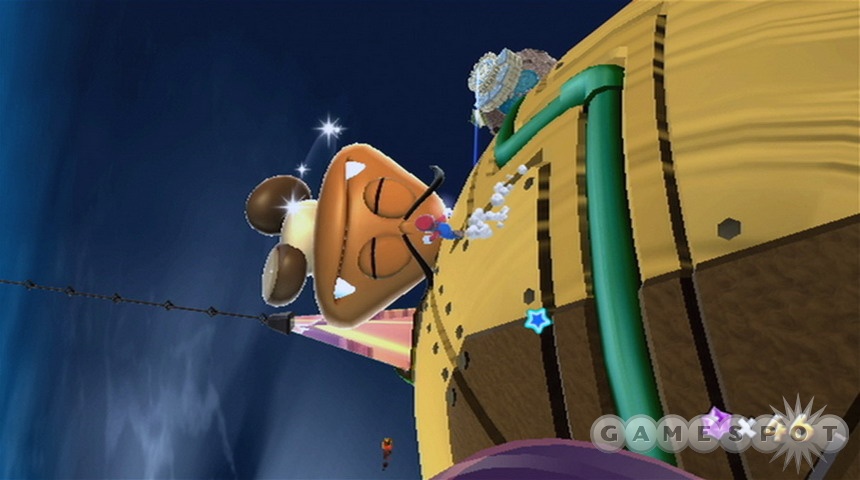
Sixth Planet: Your first boss fight occurs here, against the massive Dino Piranha. In order to hurt him, you need to spin near the bulb that comes out of his large tail: doing so will cause it to smash into his head. It can be tricky to time it right, though, since he'll try to chase you down. If he charges at you, don't run away: he'll catch you. Instead, move off to his side and run right to his behind, then spin near his tail again. When he loses sight of you due to your movements, he'll slow down a bit, making this a bit easier than it seems.
Keep in mind that you can shoot star bits at the small flowers on the ground here to generate coins to heal yourself.
A Snack of Cosmic Proportions
When the Dino Piranha has been defeated, you'll return to the Terrace Observatory automatically. After the lesson from the Luma, head down to the next portion of the Good Egg Galaxy.
First Planet: This is the same first planet as the one you saw before. Be sure to collect all the star bits here that you can before heading to the platform on the dark side where a Luma will shoot you off to a new planet.
Second Planet: Again, find the enemies, kill them, grab their star bits. The Launch Star will be inside a crystal.
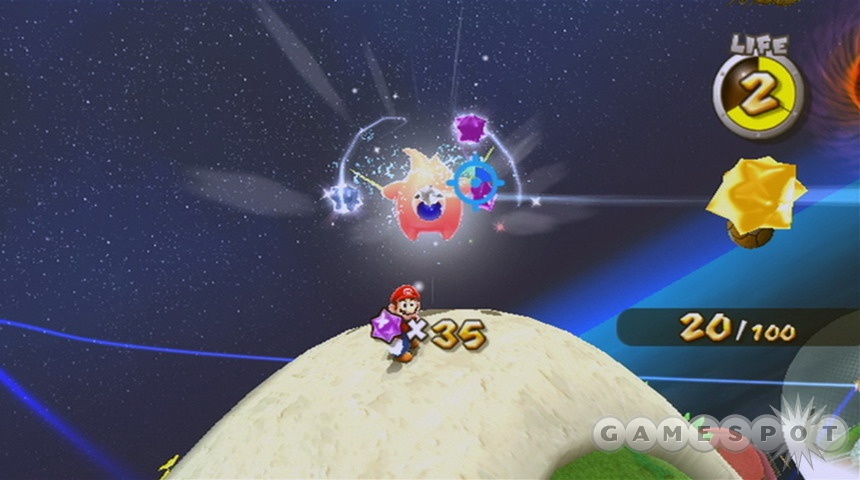
Note that there will be more Launch Stars in the path of your flight here; if you want to use them, simply attempt to spin in mid-flight, and you'll be shunted off to another planet. There are three main planets here, including the Second one. If you travel from the second, to the third, to the fourth, you'll find a fat little Luma that asks you to feed it 100 star bits. Stand underneath it so that the counter appears, then throw as many star bits as it takes into its mouth. That will cause a new planet to appear, as well as a new launch star.
Fifth Planet: After feeding the 100 star bits to the Luma and moving on, you'll land here. Keep in mind that you can kill spiky plants by spinning near one of the green balls; that will unlock a 1-Up for you here. Slowly but surely make your way to the top of this planet to reach another launch star.
Sixth Planet: This central planet is covered in a crystal window. Eventually you'll find a crystal that you can crack to head inside, where a number of gravity switches will keep you guessing. Typically there will only be one path to take, but watch out for platforms that raise and lower; if you stand on them when they completely raise, you'll often be pushed into another gravity field and fall off.
Eventually you'll reach the top of this planet and find another launch star. Ride it out of the window.
Seventh Planet: Find all of the star pieces here to load up a number of smaller blue stars. Press A while you're locked onto them to float up towards them. In order to reach the Power Star, you'll need to lock onto a blue star, then lock onto one on the far side of the Power Star, and continue to do this until you eventually intersect with the Power Star, which will bring you back home.
King Kaliente's Battle Fleet
First Planet: In order to move on from this planet, head to the underside, enter the red pipe, go through the house, and you'll find a launch star on the roof.
Second Planet: Use the coconuts here to destroy the spiked plants; one of them will have the launch star inside of it.
Third Planet: The giant Pokey here has the launch star inside of it. Roll a coconut over to his base, spin it into him, then spin his head when it plops into the sand to reveal it.
Fourth Planet: This planet is somewhat optional, since you land directly on the launch star leading to the fifth planet. If you get down and head down the pipe, though, you can hit the coin to become invincible Rainbow Mario. That'll let you kill the goombas and steal their star bits before moving on.
Fifth Planet: You come out onto the underside of this planet. There's a number of coins here to collect, but what you want to do is get onto the upper side, avoid the Bullet Bills that come your way, and smash the crystal that hides the launch star.
Sixth Planet: At the outset here, use your spin attack to throw the coconuts back at the launcher enemies across the way. When they're both dead, the bridge will lower. If you want to get the coins on the upper levels of the first ship here, use a launch jump: hold down the Z button to crouch, then hit A to jump extra high.
Make your way to the deck of the second ship to find the launch star.
Seventh Planet: The boss fight against King Kaliente occurs here. He's not so bad, though; all you really need to do is wait for him to fire coconuts at you, then spin them back at his face. The first one will hit him straight on, but the second and third will require you to hit them back multiple times. When you hit him in the head three times, he'll pop out the Power Star. Collect all of the star bits and coins on this planet before nabbing it and returning to the Observatory.
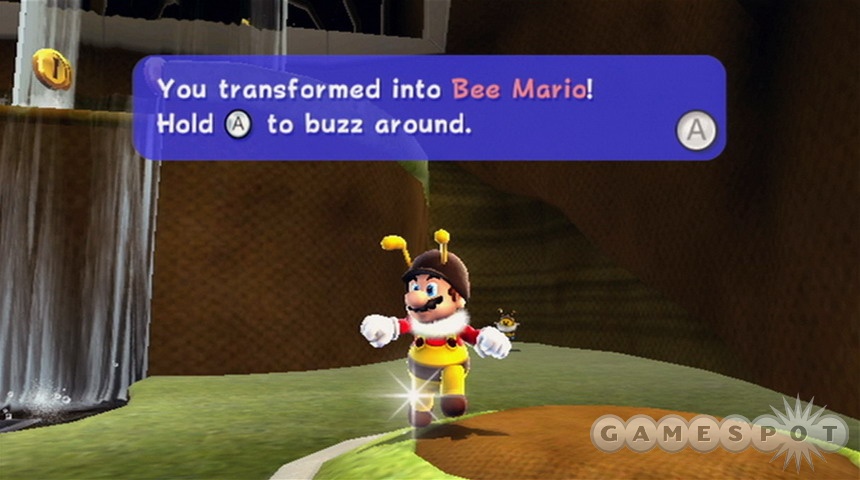
Honeyhive Galaxy
Bee Mario Takes Flight
Planet One: Head for the sign near where you land and use the D-pad to look around; you'll spot a 1-Up on the ledge there.
From there, head up the slope nearby and into the fountain area. Hit the large glowing coin to reveal a Bee Suit powerup nearby. Grab it, then fly up behind the waterfall (bee-ing sure not to hit the water, which removes your suit). A hole beyond it will lead you to the Bee Queen, eventually. You'll need to get another Bee Suit at the bottom of the slope, then hop your way to the launch star at the end of the path.
Planet Two: Grab another bee suit here, if need be, then head to the bottom of one of the flower stems and use the spin move to shoot upwards. You'll need to buzz from the apex of your jump to the central flower petal, with all the star bits on it; from there, you can jump to the higher flower, where another launch star is located.
Planet Three: Use your bee suit to latch onto the honey and start climbing upwards! If you lose your bee suit, you can find another one on the lower ledge of the planet by spinning into a plant. There's a giant coin in the middle of the honey, if you look for it; hitting it will cause a trail of real coins to appear.
When you reach the queen, use your bee suit to fly up and latch onto her fur. Crawl around and find the five star shards to free her from her itchiness.
Planet One: The launch star that appears will return you to the top of Planet One, where you'll meet with a number of toadstools. They'll give you a Power Star, allowing you to return to the observatory. You'll likely uncover a new galaxy from this star.
Trouble On The Tower
Planet One: It would appear that strange blocks have started to fall from the sky. You can bust them with the Ground Pound maneuver, which you can perform by jumping and then tapping the Z button. Destroy as many of them as you can find; most of them will have star bits inside, but one of them will reveal a Sproutle Vine.
Hop onto the vine and ride it off to the other platform here; just go as fast as you can on it, then shoot off, and you'll land on another vine, where you can spin again to reach dry ground. Use the ground pound on the trampoline here to smash the block above you.
Explore this area if you like; there's another trampoline here that you can use to reach a launch star. It's not a real launch star, though; it'll only shoot you up to the next platform. You'll come to an area where a caterpiller roams around a switch. Ground pound into the switch to extend a bridge, ground pound the wooden switch to lower a platform that will let you wall jump upwards to the real launch star.
Planet Two: You find yourself on a pair of bent cylinders here. Kill the Piranha plants, then jump down to the colorful world below you, where more caterpillars await. (You can kill them by spinning into them, then jumping on their undersides.) You may want to just avoid your enemies here instead of risking attacking them.

Planet Three: Hit the golden star here to pop an invincibility effect onto Mario, then run around hitting the piranhas and the caterpillar. When you've killed everything, jump into the hole above you to float back down to Planet One.
Planet One: You'll come out near the upper area of Planet One, where Mandibugs have taken over the bees' observation deck. You can kill the mandibugs by ground pounding onto them when they attempt to hit you with their pincers. Wall jump upwards here and pound the red switch to activate the windmill here, then ride it to the observation tower. A strong mandibug will be here; you'll need to ground pound it twice to finish it off and reveal the Power Star.
Big Bad Bugaboom
Planet One: The mandibugs have extended their reign over the bee kingdom, so it looks like you'll have to find a way to finish them off. Climb the ramp here until you find a water bulb shooter that will shoot you off to the far platform here, then drop down near the flagpole until you find another Bee Suit. When you have it on, drop into the pipe nearby and make your way up and past the waterfall. When you reach the Queen Bee, she'll open a launch star to the next planet.Planet Two: The Bugaboom here is just like any other mandibug…except for the fact that it's absolutely huge, and it flies. Still, with basic principles, you should be able to defeat it.
Like other mandibugs, you need to ground pound the Budaboom in the back in order to defeat it. At first, this is easiest to do by getting in front of it, waiting for it to charge at you, then flying straight up and waiting for it to get underneath you before pounding it from above.
In the second phase, the Bugaboom will begin flying. It's tricky, but you can spin around the root of a flower to fling yourself into the air to get above the Budaboom. If you hover around up there, you'll eventually get into a spot where you can pound into the Buda's back while it flies. You will need to hit the button a bit before the Bugaboom is directly underneath you, though.

In the third phase, the Bugaboom will spit bombs onto the ground, making it dangerous to walk around. It'll also fly much more quickly than it did before. What you want to do here is fly up to one of the clusters of honey in the middle of the tree. If you hang onto the honey at the highest spot, you can wait for the Budaboom to fly around before jumping off and pounding it. You'll need to get above it well before it actually comes around underneath you, though; if you jump off from the tree and begin hovering in the middle of the path when the Bugaboom is still about 90 degrees around the circle from you, you should be able to start the ground pound while it's still in the distance and hit it as it comes underneath you. It'll take some practice, but eventually you will get your foe.
When the Bugaboom drops the Power Star, return it to the observatory to finish off this galaxy. A Hungry Luma will appear outside the observatory; feed it 400 Star Bits to reveal the Sweet Sweet Galaxy.
Luigi In The Honeyhive Kingdom
Later in the game, when Luigi starts sending you letters when he gets stuck, you can return to the Bee Mario Takes Flight level to find him. This should be the third mission he sends you on. To find Luigi, grab the Bee Mario suit, then return up to where the boulders roll. See the small branch that has the trapeze hanging from it? Jump onto the branch itself to regain your flight, then head up to the piranha plants. Jump from there to the ice crystals across the way, then jump from that ledge to the walkway behind the waterfall. When the slope becomes too high to climb, fall down to the ledge below you, where Luigi is stuck to a tree above a fly. Jump up to him to nab your star.
Loopdeeloop Galaxy
Surfing 101
There's only one planet here, where you'll learn to ray surf. Ray surfing has pretty simply controls: simply press A to go forward and twist the Wiimote left or right to turn. Actually surfing can be difficult, however, since the edges of the track have no walls; flying off of it will cause you to lose a life and start completely over. Try to nab the 1-Up near the start of the track; that'll eliminate you from having to really lose a life if you go over the edge.

The reward for completing the course is a Power Star, provided you finish in a decent time. We managed to finish in 1:04 and received the Power Star. If you get really frustrated with completing the course, feel free to come back and try it again later.
Flipswitch Galaxy
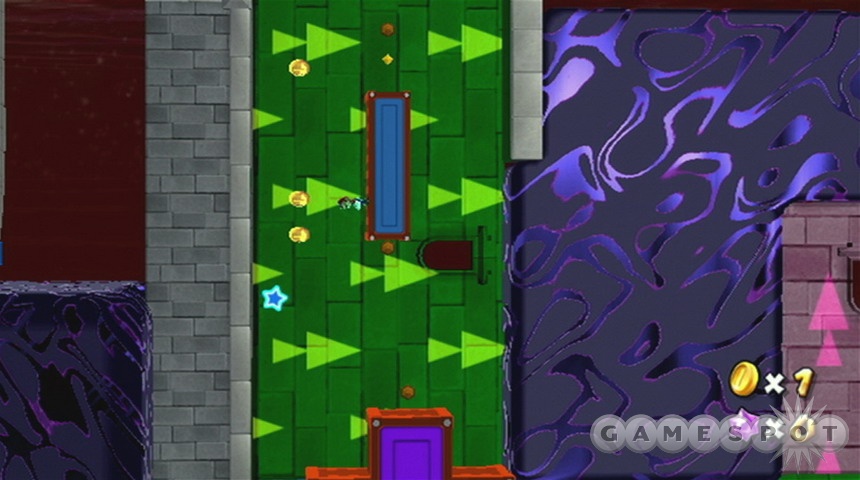
Painting The Planet Yellow
This is another one-planet galaxy. Your goal here is to turn all of the flipswitches from blue to yellow. You begin on the corner of one of the planes here, where a machine off in the distance sends out electrical pulses.
Begin by flipping over the side here to the plane nearby where a pink square is making its revolutions across the flipswitches. Move directly down the side of the plane across the blue squares, then jump onto the pink square to return to the plane you originally started on. Make your way through the first plane, and keep in mind that the machine here will send out three electrical pulses before pausing for a bit. Clear out the plane, then head to the final one and finish it as well to get the star.
Bowser Jr.'s Robot Reactor
Megaleg's Moon
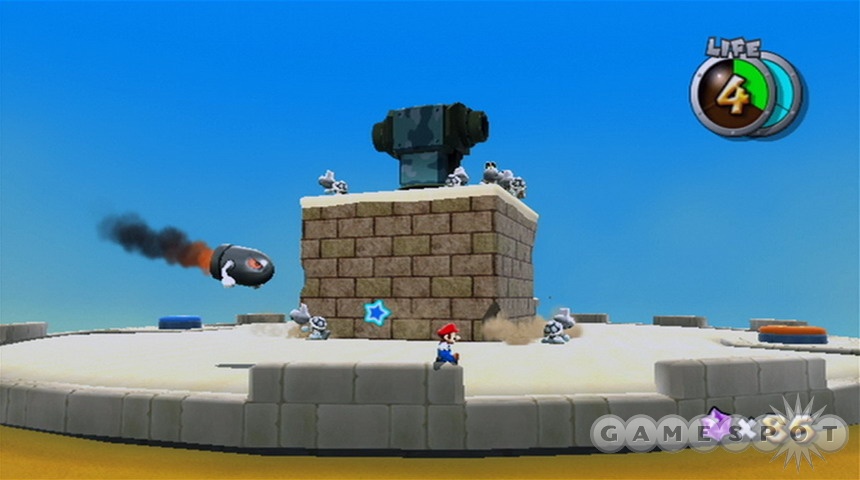
First Planet: The small enemies here can be killed by spinning into them, then jumping onto their feet. In order to blow the small prisons here, though, you need to head towards the Bullet Bill shooters, let one of them lock onto you, then lead it back to the prison and let the Bill hit the cage. That will unlock a 1-Up, as well as a launch star.

Megaleg will attack you when you land on the second planet. He's not difficult to figure out, though: in order to take him down, you first need to climb up one of his legs. When you get past the first line of Bullet Bills and the rotating gears, you'll come up to Megaleg's head. Get a Bullet Bill to follow you to the grand star's prison and destroy it.
Oh ho, but not so fast! The destruction of the prison will cause a huge number of Bullet Bill launchers to appear. What you need to do now is lure one of them up and into the gate surrounding the grand star, then somehow lure another Bill past the lowered gate before it closes. The gate rotates, so when you get one of the gate segments to fall, you'll need to run in the direction that it rotates so that it's easier to get a Bill past it before the gate pops back up. This is all pretty complicated to do, so you may be trying it for a bit, but eventually you should manage to get a Bill in through the gate and into the Grand Star prison to claim it.
Fountain Observatory
Space Junk Galaxy
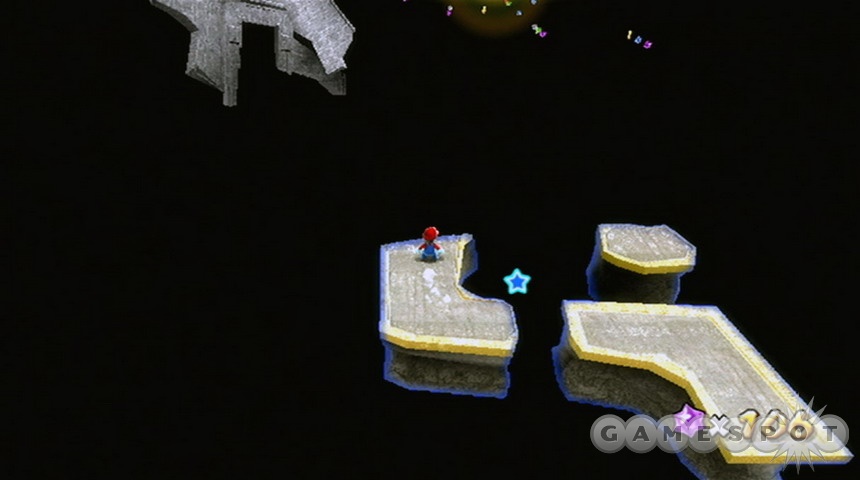
Pull Star Path
There isn't so much a series of planets here as there are a series of very small spheres to walk on. The pull stars are going to be what you need to work with to get from sphere to sphere; grab onto them and pull yourself from star to star. Keep in mind that when you get out of a star sphere, you'll fall towards the nearest gravitational body.

Make your way to the three spheres and recraft the launch star from the pieces there. After making your way to the rocket, ride the pull stars off to the next large area and smash the crystals atop it to reveal the Toadstools. When their ship arrives, jump up to it, then use the sling star to reach the final area of the level.
The path in the final area recreates itself as you walk, so it can be a bit confusing to follow. Move slowly and find the five silver stars here to recreate the Power Star.
Kamella's Airship Attack
Jump from the Toadstool spaceship to the enemy fleet and start making your way through space. You can drop the first bridge by spinning into the lever near it. Use the jump-and-spin technique to reach the coins and the 1-Up, then smash the crate to move on.
On the second ship, you can reach the ? block by somersaulting (Z+A) then spinning at the top of the jump. Pick up the shells here by spinning near them, and shake your remote to throw them into the treasure chests. Doing so for all of the chests here will let you move on, but you'll have to kill the Magikoopa first.

On the next set of ships, drop down and spin near the Koopas to grab their shells. Throw them at the octopi to unlock the bridge leading to the final ship.
Kamella, when she appears, is a large Magikoopa that uses her staff to throw shells and fireballs at you. What you need to do isn't very mysterious: grab a shell that pops out of the staff, get close to her, and chuck it right into her body. You'll need to be close to ensure that you don't miss, but she has a pretty predictable pattern. After two hits, she'll summon a couple of lesser Magikoopas; deal with them before finishing her off.
Tarantox's Tangled Web
Use the pull stars at the outset to pull yourself along to a large enclosed planet.
When you have the hidden star tucked away, return to this planet and find the hole leading inside. The launch star within will launch you to a spider-infested part of the galaxy. Use the sling pods here to start warping from planet to planet, using the lines of coins to tell where you need to go.
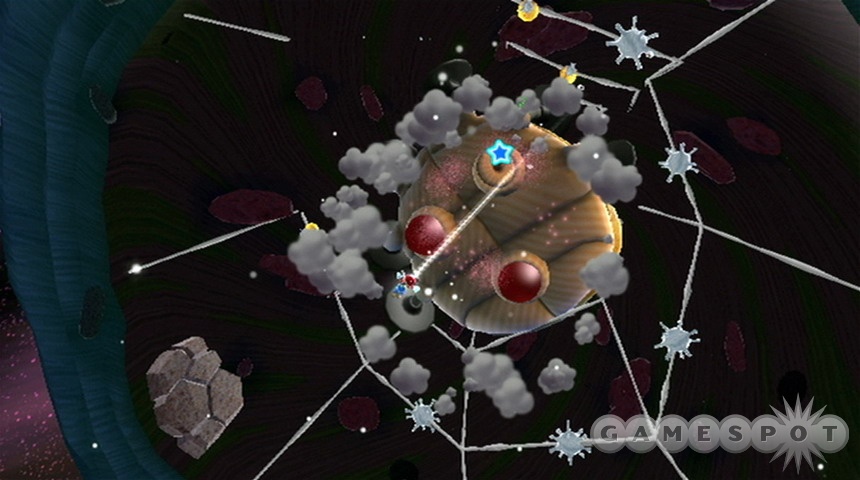
Eventually you'll wind up on Tarantox's planet. Jump into the small bits of goo here and pull yourself downwards to shoot yourself into Tarantox's web, knocking him free. Tarantox looks intimidating, but he's not too bad if you know what you're doing. The primary method of attacking him will be to jump into the small pods of good and pulling yourself like a slingshot. He has weak spots on his sides which will force him to pause if you hit them, but his primary weak spot is on his rear end. Run around him until you get into a position where you can shoot yourself into it.
When you hit Tarantox's butt, he'll flip over on his webbing, revealing three red orbs on his thorax. Hit all three of them, then repeat the process a couple of times to reveal the Power Star. Collect all of the coins in the area before grabbing it.
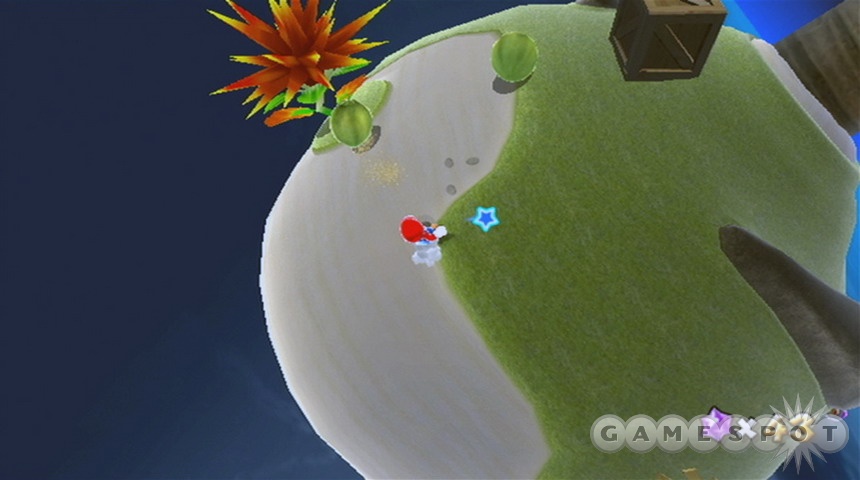
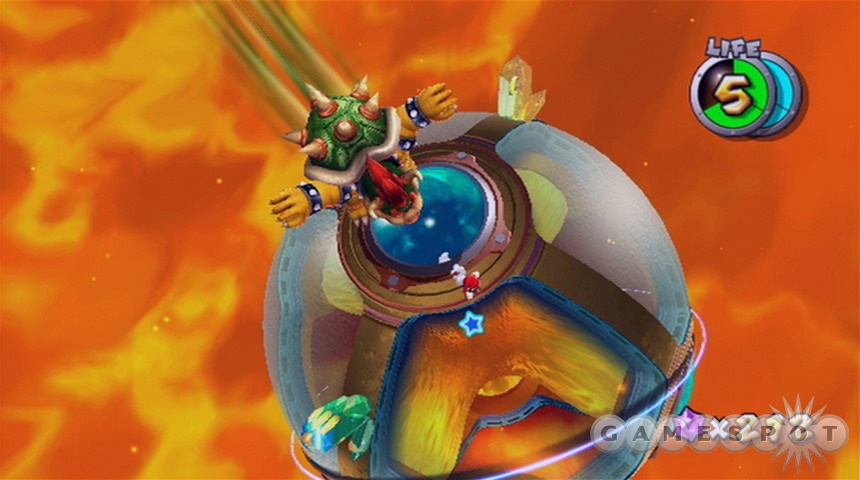
Rolling Green Galaxy
Rolling In The Clouds

This Monkey Ball-esque adventure will have Mario rolling around on top of a ball. Getting used to the controls here can be difficult since they're so different than what you normally use, but you can reap the benefits by grabbing a lot of star bits if you hit the ? coins. Make it to the end of the course to nab the Power Star.
Battlerock Galaxy
Battlerock Barrage
Remake the pull star at the beginning here to get yourself to a launch star, then collect as many star bits as you can from the distance before launching yourself off to the large planet here.
When you reach the blue screw atop the platform, get ready for the toughest challenge so far: you need to move up and down on the platform as it moves, in order to avoid the laser beams, cannon shots, and rotating electrical devices. The safest place to be here is on the edge of the disc, but the rotating electrical balls will ensure that it's also not perfectly safe.

It'll take you a couple of tries, but you'll eventually get to the end of the platform's movement. Jump to the far platform here, get the attention of the Bullet Bills, and start smashing the gates. Don't forget the 1-Up that's locked away on the underside of the platform!
Breaking Into The Battlerock
You'll need to chuck the bombs here onto the other platforms to break the cages. Unlock the launch star to move on.
There's another Hungry Luma here. If you don't have 30 star bits, unlock the cage with the rainbow star in it, get invincible, and smash the chain chomps to get plenty of bits from them. When you unlock the new planet, warp over to it and start the hidden minigame.

When you finally destroy all of the trash, you'll receive a Power Star.
Anyway, when you return to the globule that you were on before, head back to the bomb factory and unlock the Luma. He'll make a shortcut to a field of pullstars. Make your way through it to the next launch star and ride it out to a large structure. When you land, you'll see two pulsars rotating around a switch atop a dome. It is possible to get to the switch; you can somersault while facing away, then spin your way up to the switch. It's difficult, but not impossible. Groundpounding the switch will reveal around 25 star bits.
When you're ready to move on, drop through the pipe. The bombs here actually move, but you can still pick them up by spinning into them. Grab one, then wait until it's almost about to explode, then throw it at the cage to reveal a hole in the ground. Drop through to reveal a cannon, then shoot yourself through the Luma star in the middle of the level. Repeat the process to hit the launch star and ride on.
When you land on the small rocket, grab a bomb at one end and hop over the electrical lines to reveal the 1-Up and cannon on the other end. Hop into the cannon, then wait for the timing on the shields to be right and nab the Power Star.
Topmaniac and the Topman Tribe
Avoid the wrench-throwers here at the beginning and get to the pullstars. Make your way upward from there, past the bomb platforms, until you land on a platform where a Luma is being kept in a cage. Spin the Topman here into the electrical fields to free the Luma and open the next shortcut.
After landing, spin through the boxes to find a pipe and head into the Battlerock itself. You need to start making your way through the level here, going all the way to the right to flip the gravity and hit the ceiling. (There is a shortcut that you can take, by somersaulting off of the first ? block that you see above the rotating fire.)
Keep making your way through the Battlerock. When you find the two Topmen near the electrical fence, spin them into it to drop the electricity and move on. Eventually you'll head out to a flying saucer where you'll find another Luma; you can buy either a 1-Up or a shield from it. The shield may be handy.
Topmaniac will appear when you reach the top edge of the saucer. He's one of the easiest bosses you'll face; just jump on him to retract his spikes, then spin him into the electrical fields. Repeat the process three times while avoiding the enemies he summons to help him, and you'll receive your Power Star.
Hurry-Scurry Galaxy
Shrinking Satellite
The paths here will fall away as you step on them. It may take some trickery, but if you manage to collect all of the notes on the small planet without dying, then you'll nab another Power Star.
Bowser's Star Reactor
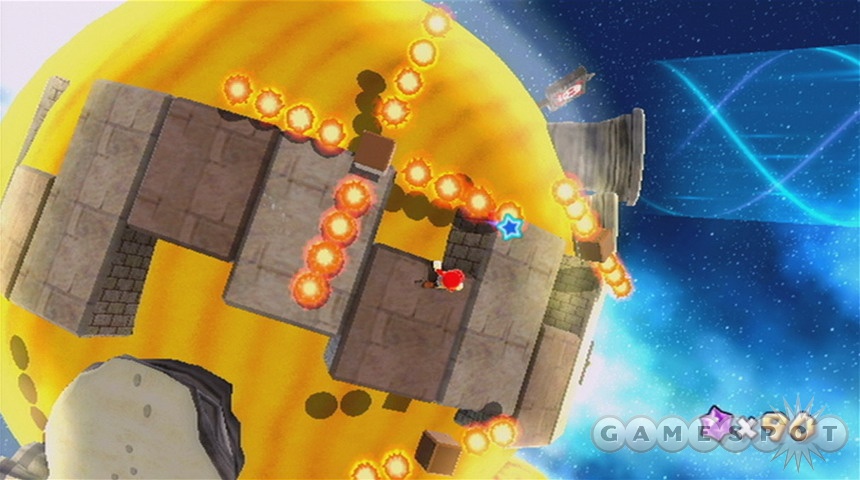
The Fiery Stronghold
There is a fair amount of trickery in Bowser's castle here, but the path is at least fairly consistently clear. When you reach Bowser, he'll attempt to shoot the platforms out from under you; hurry towards him to start the boss confrontation.
When you land on Bowser's battle planet, stand on one of the glowing blue panels and wait for him to jump towards you, then scurry out of the way. When he lands, he'll be burnt by lava and start to run around. Wait for him to come to you; when he spots you, he'll turn around, allowing you to spin into his tail to flip him over, then spin into him again to hurt him and end phase one.
The other two phases play out more or less identically, but Bowser will fire more breath flames, cause more electrical shockwaves to occur (jump over them), and eventually need to be spun into multiple times in order to go down. When he does, though, you'll nab the Grand Star for this observatory.
Kitchen Observatory
Beach Bowl Galaxy
Sunken Treasure
You're dropped off on a beach here. Sink or swim! Swimming can be done by holding down the Z button while you're in the water. A will let you move forward slowly, while spinning will cause you to zip through the water. Find the five star pieces in the water (one is inside the clam, one is inside a box, and another is off to the side a bit). That'll shoot you up to the top of the island, where you can use the groundpound switches to make your way up to the Power Star.
(Don't worry about the treasure chest here, we'll get it in the next level.)
Passing The Swim Test
Welcome to annoyedville, population you. After speaking to the Coach penguin, dive into the water and start spinning around while trying to track down the line of small penguins that are roaming around. You need to spin through the first one to nab the golden shell, then let go of the Z button to automatically float back to the surface. Bring the shell back to Coach for your Power Star.

When you land on the other island, lure one of the beaked creatures over underneath the ? coin that's flying in the sky; it'll hit you into the air and unlock an Ice Mario suit. While you're wearing the suit, you can walljump up the waterfalls here. If you walljump all the way to the top of the island (you'll need to walljump + airspin to reach the last launch star), you'll find a little winter wonderland. Check around for the Power Star in the air, then turn to Ice Mario, lure the beak bird over underneath the Power Star (making a path for it by walking on the water), then have it pop you into the air to reach the Star.
The Secret Undersea Cavern
Get underwater here and grab a shell. Shells will propel you underwater if you just let go of all the buttons; when you're ready to hit something with it, tap Z to slow down and aim before spinning to fire it. Break the wall underwater to reveal a new cavern that you can proceed into, then ground pound the switch to move on.
When you reach the floating platforms, you'll be faced with some tricky maneuvers. Get underneath the block that moves around; one of its sides is missing a face, so you'll be able to tell where you can hide without taking damage. Use that to jump onto the cylinder in the middle of the area. The farther part of the level can be difficult; you need to dodge the mobile blocks, or they'll kill you in one shot. Keep in mind that the moving blocks will jump in place without moving when they're about to turn around; if you're following one and see it hop up and down, it's about to come right back onto you!
Make your way to the end of the path and you'll net another Power Star.
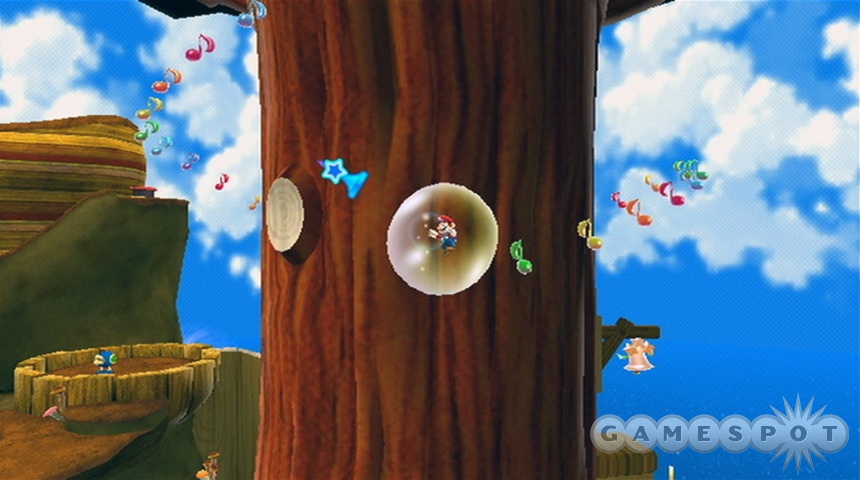
Bubble Breeze Galaxy
Through The Poison Swamp
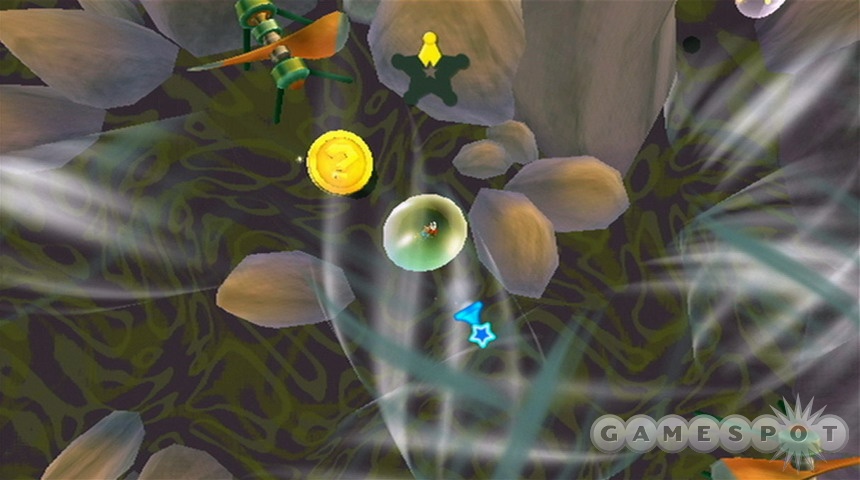
Bubbles! You need to find a bubble here and hop into it. When you do, you can move the pointer around the screen, then press A to blow on yourself. That'll push you around the level. It can take a while to get used to the motions, and also to the notion that you have to point the pointer at what you want to avoid (meaning bombs). Make your way through the level and you'll find the Power Star eventually.
Ghostly Galaxy
Luigi And The Haunted Mansion
Looks like it's time to get Booed up. Make your way into the mansion here, then flip the switch by the door to turn on the lights. Lure the Boos in the room into the light by entering it and keeping your back to them; one of them will drop the key that'll let you move on. Move into the next room and collect the launch star pieces to move on.

When you reach Luigi, lock yourself into one of the pullstars, then drop down to grab the key, but be sure to lock onto a pullstar just as you fall so that you don't die. You'll find a Boo Suit inside; it will let you levitate by tapping the A button (use this ability to get the 1-Up here) and float through bars if you shake your remote.
Head into the next room and float through the bars near Luigi, then use the light to turn off your Boo suit and hop over to him. He'll give you a Power Star. When you return to the Observatory, Luigi will be at the Garage, helpfully telling you which galaxies have stars that you've missed.
A Very Spooky Sprint
Make your way through the pullstars until you reach the helmeted ghost, who will challenge you to a pullstar race. Make your way through the track as quickly as you can! Note that there is a shortcut; there's a launch star that you should see in one of the turns. Get to it and spin to launch yourself forward, but be sure to lock onto the pullstar that you land near, or you'll fall a long way back down to the ground. When you reach the far planet, the ghost will hand over a Power Star.
Beware of Bouldergeist
Make your way past the spiders here and into the mansion. When you get close to the bomb boo portrait, it'll pop out and come your way. Lure it to the fireplace and spin it to the explode and move on.
After killing the spiders, start somersaulting yourself into the sling pods and moving up. Eventually you'll use a launch star to get to another vertical area. Recreate the pullstars, then zoom over and start launching yourself along. When you see a Luma Shop, buy the red shield.
Bouldergeist: Bouldergeist's first form is pretty easy; repeatedly hit him with the boo bombs to knock off his shell and then his little dangling uvula when he floats around.

The second phase is much more difficult, as Bouldergeist will add a pair of hands to the equation. You need to avoid the punches and the various other attacks that come your way here (which can be difficult, no lie). Every so often Boulder will raise spikes from the ground; you can coax him into destroying them by standing in the middle of them and waiting for his hands to smash them. Still, the same concept applies here: you need to grab the Boos that come from the stones and chuck them into Bouldergeist's body. You'll probably have to destroy one of the hands first, though.
Look for the yellow stones here; they'll drop coins that you can use to heal yourself. When Bouldergeist dies, another galaxy gets cleared off the map.
Bouy Base Galaxy
The Floating Fortress
Dive into the water here and head all the way to the ground. There's a couple of bullet bill shooters down here. Destroy both the cages here; one leads to a pipe and the other will raise the fortress up so you can reach the top.
After raising the fortress' platforms, start walljumping upwards. After spinning down the green gear, a spinning enemy will appear. Jump atop him to reach the blue screw above you and spin it down. You need to collect the five blue pullstar pieces from the rotating gears (the final one is on top of the fortress itself) to reveal the pullstar leading to the upper planet here. Make your way to the top of that planet and unscrew the golden screw to reveal the Power Star.
Bowser Jr.'s Airship Armada
Sinking The Airships
There are two routes to take here from the first cannon. If you look off to the left, you'll see a flagpole with a Hungry Luma near it; if you launch yourself that way, you can buy a shield and ride a celestial skateboard through a fairly difficult cannonball gauntlet to reach Bowser Jr. It's a shortcut. Better to aim off to the right, towards the small planet with the Goombas on it. Killing them all will net you a 1-Up and you can launch from there to quickly get back to the Hungry Luma's ship. 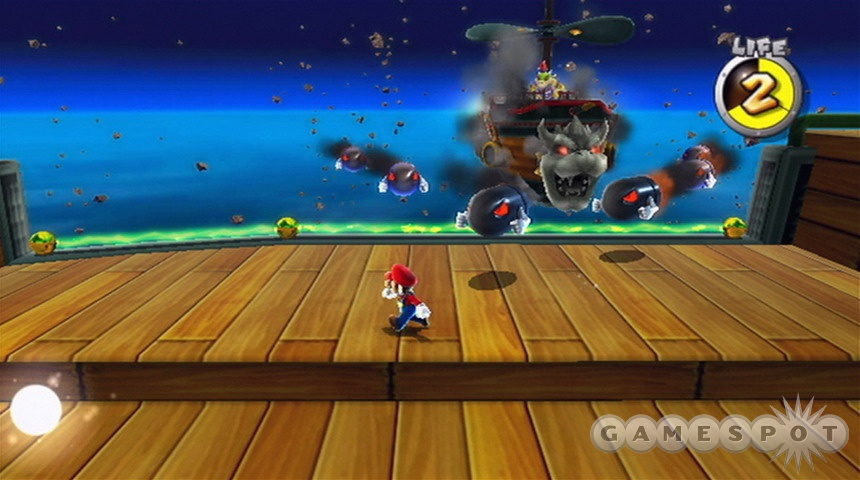
When you do reach Bowser Jr., the match becomes a boss fight. In order to defeat him, you need to bop the Koopas, grab their shells, and throw them at the ship that Bowser is piloting. It's easy enough to do early on, but later in the match the ship turns sideways, forcing you to make a slightly tougher shot, not to mention dodge the six Bullet Bills that will be coming your way. The best thing to do here seems to be to somersault over the Bills or otherwise cause them to be led astray; there's a gap between firing, so you should have enough time to grab a shell and launch it before the next group comes. Otherwise, you can just stand at the edge of the ship and let the Bills hit you; there's a fair amount of coins around, and the immunity will last long enough for you to send a shell back at Bowser.
Bedroom Observatory
Gusty Garden Galaxy
Bunnies In The Wind
The floaty fluff flowers will let you move from platform to platform here. To use them, spin in the middle of a tuft of flowers, jump up to grab onto the bottom, then spin your way to the next platform. You can only spin three times, though, so be careful not to use them up before you reach safety.
The second platform has a pipe in the underside of it where you can find plenty of star bits. The third platform has a couple of hidden sproutle vines (kill the piranha plants to reveal one of them); if you ride them both, you'll nab a 1-Up.
Continue to explore (if you ever get lost, check the other side of your platform or kill the piranha plants to reveal Sproutle Vines). When you reach the large garden cube, you'll find a bunny that challenges you to chase him. Do so, catch up to him in the tube, and he'll give you the Power Star.
The Dirty Tricks of Major Burrows
Check the undersides of the first couple of platforms here to find some semi-hidden areas. Don't worry if you miss some of the ? coins in the air here; they'll eventually reveal a cache of star bits if you hit enough of them in a row, but it's not mandatory.
When you start running into the hedgehogs, do as the bunnies say: groundpound near them to pop them up, then spin into them. You'll need to finish off all the hedgehogs on a couple of planets to reveal new launch stars. When you reach the apples, smash the stumps to reveal the path leading onward.
When you come across Major Burrows, he'll be chasing a rabbit. Wait until he pops up out of the ground, then groundpound and spin to knock him flying. In the second phase, he'll burrow at you under the ground; run away from him until you see his helmet, then wait for him to pop out his upper body and ground pound again. You'll have to chase him a bit to spin into him this time.
In the third phase, Burrows will move more quickly when he's underground, but you still need to run away and wait for him to pop up a bit before you can groundpound him. When you do, though, he'll immediately start burrowing towards you again; move away a bit and groundpound him again to fully pop him onto the surface and spin into him to defeat him.
Gusty Garden's Gravity Scramble
After you get the hidden star, make your way back to the mission and get past the Chain Chomp. You'll come to a series of platforms with flagpoles in them. You'll need to investigate the upper and lower halves of the platforms to find a number of star fragments.

When you reach the blocks where gravity shifts, just keep in mind that the only block faces you can walk on are the yellow ones with red exclamation points. Make your way to each switch and flip it by spinning into it. When you get past the cannonball barrage, you'll find the Power Star.
Freezeflame Galaxy
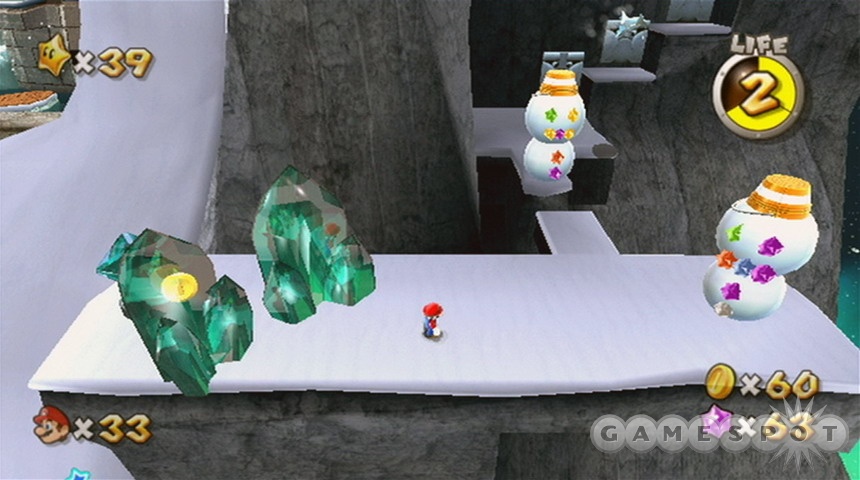
The Frozen Peak of Baron Brrr
The penguin at the beginning of this level will teach you how to skate. You can skate on any ice surface; begin by spinning, then just move your directional stick as you would normally. Catch the penguin while skating to reveal a launch star moving on.
Make your way through the ice barriers around here to reach the golden coin that's above a landmass; that'll let you change into Ice Mario. There are a number of paths reaching up from here, but the most intriguing lies along the back wall.
When you have the hidden star, restart the mission and start heading up the mountain the normal way. Eventually you'll reach another Ice Mario suit; grab it, then quickly make your way over the moving blocks to meet up with Baron Brrr.
Baron Brrr isn't too difficult to take down, but you need to move rather quickly. Head around to the left to find a cubbyhole under his platform where you can find an Ice Mario suit. Put it on, then run around and walljump up to Brrr's platform. Brrr will slam into the ground, causing an ice wave to push you off of the platform; if you can time your jump, though, you can leap over the wave, then spin near Brrr to suck up his icy shroud. Keep spinning him until you hit him.
After you hit Brrr a couple of times, he'll summon a smaller pair of monsters to help him. No matter; you still need to kill him in the same manner as before. If you do so, you'll earn your Power Star.
Freezeflame's Blistering Core
Reconstruct the launch star here on the first planet, then launch yourself off into the distance. When you land, start avoiding the rolling mines, then climb up the flagpole and jump around to where you can reach the golden coin. Tag it, then change to Fire Mario to start raining hot death on the mines.
You need to light the torches here to move on; eventually you'll be able to flip up to the ceiling by jumping upwards. Move on until you come to the box that dispenses mines; if you want a bunch of free star bits, repeatedly roast them with fire as they pop out.
(There's a hidden 1-Up behind the little temple here; head behind one of the torches and drop down. Tap the golden coin, then wall jump and hit all of the music notes before you reach the top.)
Your goal here is to become Fire Mario and light the two torches outside the temple. One is easy to hit, but the other can be difficult. Stand on top of the granite slab that's raised a bit off of the ground near it, then aim your fireball off to the side so that it hits the lava and bounces into the torch. Lighting both torches will reveal the path leading upwards.
When you reach the next lava maze, make your way to the Fire Mario suit and then run around to where the platforms are floating by and try to light the second torch. When you do so, the Power Star will appear.
Hot And Cold Collide
Maneuver through the first planet here as best you can, then use the launch star to move on. In the little watery area, grab the 1-Up and shield, if you wish, then spin on top of the green gear to reveal a path leading on. The flipside of this level features lava that pulsutes upwards and downwards. Make your way along the path, find the green gear, spin it when it's safe to do so, then grab the Fire Mario suit and return to the ice water and light the two torches there to move on.
When you reach the suspended fields of fire and ice, grab an Ice Mario suit and start skating across the lava; just spin to boost your speed and get from ice suit to ice suit as quickly as possible. Keep in mind that you can jump a full square gap if you're skating; it'll come in handy when you're near the Power Star.
Dusty Dune Galaxy
Soaring On The Desert Winds
Hitting the quicksand here is an instant death, so avoid it. Hop over to the tornados and spin while you're inside of them to get an aerial boost. Ride the winds off to the pipe nearby to head down.
There are some goodies here if you know where to look. After smashing through the line of blocks below you, head off to the right. The first smashing block that drops from above can be jumped on if you jump+spin from the wooden block to its left; it'll lead you to a shield, a hard-to-reach 1-Up, and a walljumpable golden coin that will reveal numerous star bits. Eventually you'll find a golden star that reveals a Fire Mario suit; use it to bust through the piranha plants, then hit the red spot on the huge boulder to destroy it. Eventually you'll reach a launch star; use it to head up.

When you reach the next set of tornados, start heading upwards along the tower. Keep in mind that you'll want to let the tornado suck you up to the top of them before spinning; you'll get extra height that way. Make your way up the tower, through the wall-jump maze. When you reach the top of the tower, you'll spot the Power Star; you can jump quickly through the sand and spin its cage to release it.
Blasting Through The Sand
Hop to the sandy platform here to find a coin—and a bunch of enemies. Start spinning your way through them. When the Pokey dies (you can spin it, too), a launch star will appear to let you move on.
Put all of the stars together without getting crushed and you'll obtain another Green Star.

If you restart the mission, you'll eventually come to a ring where a number of boulders are rolling around. It's easy to jump to the launch star, but what isn't clear is that the platforms are two-sided. Walk underneath the launch star to find an invisible Rainbow Mario suit and smash the boulders for lots of star bits. The other small platform here has a shield on its underside.
Keep on moving until you start finding blue shards. One of them is in the chest here; bring the green turtle shell to it to bash it open. Eventually you'll reach a planet with two paths. If you take the harder path (with the narrower blocks to follow and the electrical beams above it), you can find a hidden pipe that will let you claim three 1-Ups if you find all of the magical blocks within.
When you reach the last planet, it'll have two sides; one with blue bricks and one with yellow. You need to move around in the blue brick area until you find a hole that will let you reach the center of the yellow brick side, where a large groundpound switch is residing. Flip the switch, then quickly run to the blue side of the platform to grab the Power Star.
Sunbaked Sand Castle
Flip the groundpound switch here to start the sand raising, and look for the goodies on the way up, including a 1-Up and a shield. When you reach the launch star, head up and away. When you land, grab the star shard and hit the switch to raise a large structure in the middle of the sand. You'll need to find the rest of the shards on the tower here. One of them can only be found by grabbing a shell, then lowering the tower and hitting the treasure chest as it comes down. The others can be found in various static positions around the tower. Keep in mind that you can walljump up the tower if you get stuck at the bottom.
When you're ready to move on, return to the mission and use the spiky plant's launch star. You'll land near a Pokey and a 1-Up. Take the launch star here to the planet nearby and kick the coconuts there from the lower planet to the upper one. When you have a couple up there, return to the Pokey and kick a coconut into it, then stomp on its head to reveal another launch star.
When you reach the Power Star, drop to the “ceiling” and smash the box outside the glass enclosure to reveal a pipe. When you reach the interior of the enclosure, move quickly. Don't wait for ledges to come down to you; use somersaults to reach them as quickly as possible. When you hit the bottom/top; you'll get your Power Star.
Honeyclimb Galaxy
Scaling The Sticky Wall
This is, as the name implies, a galaxy where you have to climb patches of honey stuck to walls. Just remember that if you tap A, you'll leap up and fall back down towards the wall; holding it down will make you float above the wall, letting you avoid the various enemies here. Getting to the top of the bug-filled wall will net you the Power Star.
Bowser's Dark Matter Plant
Darkness On The Horizon
Make your way up to the gravity-shifting area and proceed through there to the flagpole near the Goombas. Climb up that to move on to more dark matter areas; avoid anything that doesn't look solid. Jump over the blue holes to reach another gravity area. As you move along the platforms, try to always have solid matter between you and the ground as well as between you and the dark matter that's coming at you; look at the arrows on the walls to know which direction to avoid.
When you reach the Lumas trapped in crystals, break them free and head up to meet Bowser. Bowser fights almost identically to the encounter you had with him before; he still sends shockwaves out, shoots firebreath, and attempts to jump on you. New twists here include the fact that the firebreath will loop around the planet, making it difficult to dodge, and that he has a new spin attack that copies your own. Still, the basic premise is the same: wait until he jumps, force him to land on one of the blue panels, spin his tail, then spin again into him as he spins around on his back to finish him off.
Engine Room
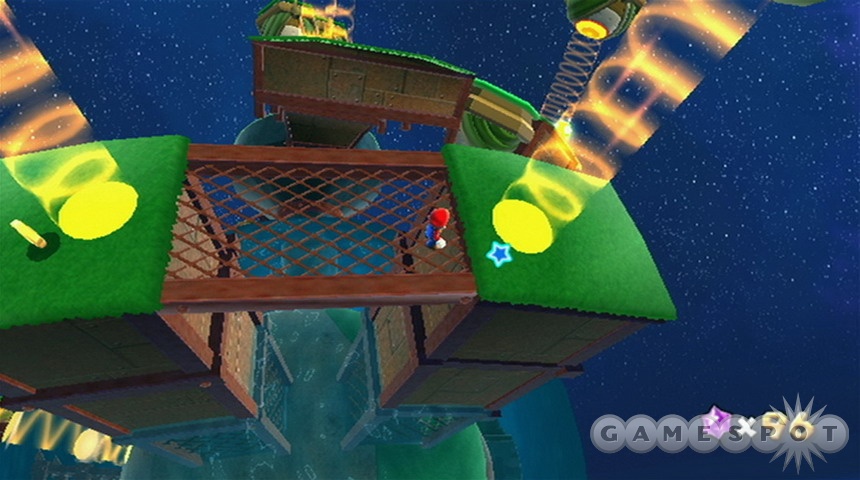
Gold Leaf Galaxy
Star Bunnies On The Hunt
You need to find five blue star pieces here, but they're fairly spread out. The bunnies will give you clues as to their locations; if you spot a bunny, you know a piece is nearby. One can only be found by using the bee suit and flying above the flower; one is behind the waterfall in a crate; one can be found by walljumping up behind a bunny near the edge of the world; one can be found by stomping three tree stumps into the ground; and the last is located at the top of a swing. Grab onto the swing and swing into the launch star to find it.
When you land on the next planet, the bunny will dare you to catch it. Let it run away and look for the groundpound switch. The switch will raise barriers all over the planet, confusing the bunny and letting you catch up to it. It'll give you a Power Star when you nab it.
Cataquack To The Skies
Make your way up to the Cataquack and let it hit you up to the launch star above you.
When you return to the mission, get the bee suit and let the Cataquacks and your flying take you upwards. Eventually you'll hit a launch star. That'll lead you to a few small planets where your goal will be to lead the Cataquacks to one side where they'll launch you to another planet. The last planet consists of a number of small sticks; you need to stand directly under the launch star, on the small landing there, to be hit up into it.
In the next planet, destroy the hedgehogs by ground pounding them, then grab the bee suit and lead a Cataquack underneath the Jenga tower here. A combination of a launch and flying will let you reach the top. When you reach the flower petals, buzz your way across them to reach the Power Star.
When It Rains, It Pours
Kill the piranha plants near the storm clouds here to find the Bee Suit atop a storm cloud. You may be able to see a large gold coin underneath the planet here; if you buzz down to it, you'll be able to gain a lot of coins and find a hidden room with a number of boulders and a Rainbow Mario suit.
When you get the Bee Suit, though, you can ride the flower petals and rainclouds up to the observation deck. Make your way across the wood until you reach the tower; use a combination of jumping and flying to get to the top without getting drenched by the storms. The storms here move from point A to point B, then disappear and reappear where they started.
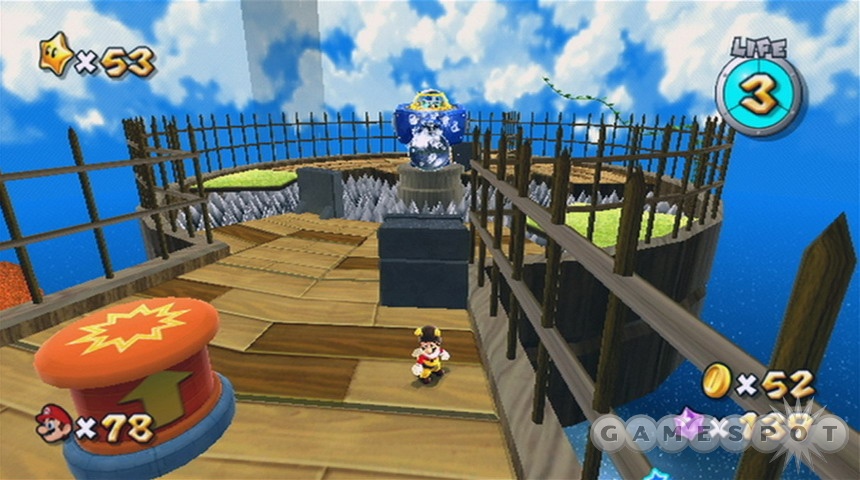
Eventually you'll reach the top and face off against the mean mole. Your goal here is to get behind the mole, groundpound the switch there, and then return to the front side of the observation deck, jump on top of the mole's position, and groundpound his head. It will get difficult if you lose the Bee Suit, as it actually makes it a lot easier to get past the spikes on the ground, but it's still doable (try using the long jump by tapping Z + A while moving). When you groundpound his head three times, you'll wind up receiving the Power Star for the planet.
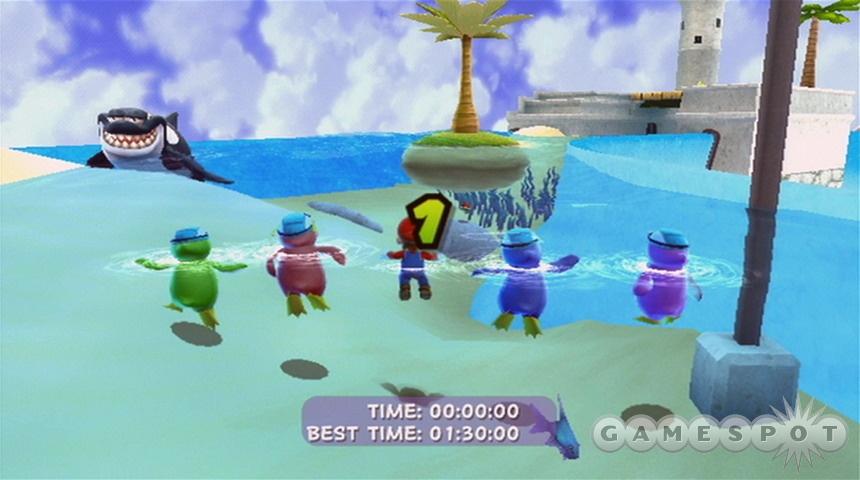
Sea Slide Galaxy
Going After Guppy
You'll land on a large ring of water here; you're told that the shark in the water is “causing trouble”. Sounds like a capital offense to us.
Go talk to Guppy to learn that he has a challenge for you: he wants you to follow him through the galaxy and through the eight rings that he lays in his wake. Use your spin move to keep up with him initially, then grab a red shell and use that to follow him the rest of the way. The rings will disappear eventually, so don't dawdle. When you get through eight of them, Guppy will give you a Power Star.
Faster Than A Speeding Penguin
Win the penguin race here to claim the Power Star. You'll start off slow, but grabbing the red shell near the starting line will let you catch up a bit. Keep in mind that if you see an enemy in front of you, you can shake your remote to throw the red shell at them, just like in Mario Kart. You'll only want to do so if you're close to a replacement shell, though. There are also a couple of speed boosts near the end of the course.
The Silver Stars of Sea-Side
The first silver star here can be found by jumping over to the Bee Suit near where you start, zipping up into the tree, then floating over to the cloud and then jumping to the rock arch nearby.
The second star can be reached with the cannon. Launch yourself towards the blue pullstars above the mushroom, then pull yourselft to find the shard. When you're ready to return, pull yourself above the launch star and tap Z to fall into it.
The third star can be found near the lighthouse. Grab the Bee Suit, hop onto the tree nearby, across the bridge, and fly upwards to nab it. With that one grabbed, pop down and head into the nearby launch star; that'll launch you over to the tree on the far side of the ring. Use your Bee Suit to climb the branches and clouds here until you reach the top, where the fourth star piece is located.
With that done, drop down to where Guppy is located and unscrew the screw there to make a water pipe heading to the central egg planetoid appear. You can find the final star piece here. Ride the launch stars to find the Power Star.
Toy Time Galaxy
Heavy Metal Mecha-Bowser
Ride the train around the circle here, then launch yourself across to the next planet. The gear creatures here are distressed about their friends who've been kidnapped—aww. You can kill the turtles by groundpounding them.
Make your way around this area, unspinning bolts and screws wherever you can. If you climb up on the wall near the laser creature (you can drop down to the coins on the walkway to find a shield), you'll be able to unscrew a golden screw that will drop a grate. There's a blue switch across the way from the bottom of it that will extend a walkway allowing you to reach the launch star.
You'll find a Spring Mario outfit on the next planet; you'll need it to move upwards here. Keep in mind that you can still groundpound in spring form. When you reach the upper level, you'll find another Spring Mario suit. Moving to your left will find you a pipe with a puzzling puzzle inside: if you can launch yourself to the top and hit the golden coin there, any bricks you didn't smash will turn into star bits. It can be tough reaching the coin, though.
If you make the coin or skip it, return to the moving walkways and bounce past the laser guard there. It can be tough to get past him, but if you're having trouble, try not jumping; just bounce. You can move a bit more quickly like that. If you can get past him and launch yourself up the nearby blocks, you'll find another launch star.

That star will lead you to the robot planet. Begin by unscrewing the two screws on its legs, then riding the launch star up to the waist area. Make your way through here, past the arm, and quickly take the launch star from the arm joint up to the head. Grab the Spring Mario suit here, jump over the Magikoopa and over the flames coming at you, then head up to the top of the head and smash the stack of bricks there to finish off Mecha-Bowser once and for all.
Mario Meets Mario
When you reach the first large planetoid here, hop around to find the five pieces of star shards. Four of them are pretty easy to find, but the fifth will require you to unscrew the blue screw here. That'll unveil a launch star.
Ride the launch star to the next portion of the area. This part can be kind of tricky: there are five star pieces around on this plane, but the only things you can step on are platforms that will either rotate or disappear. The thing to keep in mind is that you need to keep a path open so that you can actually return back to the platform where you start the plane on. When you find all five of the star pieces, return there and nab the Power Star.
Bouncing Down Cake Lane
Take the launch star, then spring up and walljump upwards when you land. Make your way over the chocolate walls, down onto the spinning orange circle, and around to the launch star. Keep moving until you come to the small slivers of ice that have enemies on them; the safe way to proceed here is to zap them with star bits before jumping.

After using the cannon to hit the next launch star, you'll land on a cake. You can find a 1-Up by heading into the pipe at the end of the red spoon here. Get to the top of the cake and blow out the candles by spinning into their flames to move on.
When you reach the Mole that spits electricity at you, grab a Spring Mario suit, get near the bottom of the bottle of gumballs, then launch yourself atop him and ground pound him. Do this three times to unlock the Power Star.
Bonefin Galaxy
Kingfin's Fearsome Waters
Note that the Bonefin Galaxy will take its sweet time on getting accessible; we had to wait until we had 80 power stars before it came online.
When you can reach it, you'll find yourself in for one heck of a boss fight. Kingfin is fast and fiercesome, and summons numerous Bullet Bill-esque fish to help guard himself. You'll need to grab the red shells underwater here and use them to hit Kingfin in his head. Repeat the process five times or so (don't forget to nab the Life Mushroom if you spot it) and you'll earn your Power Star.
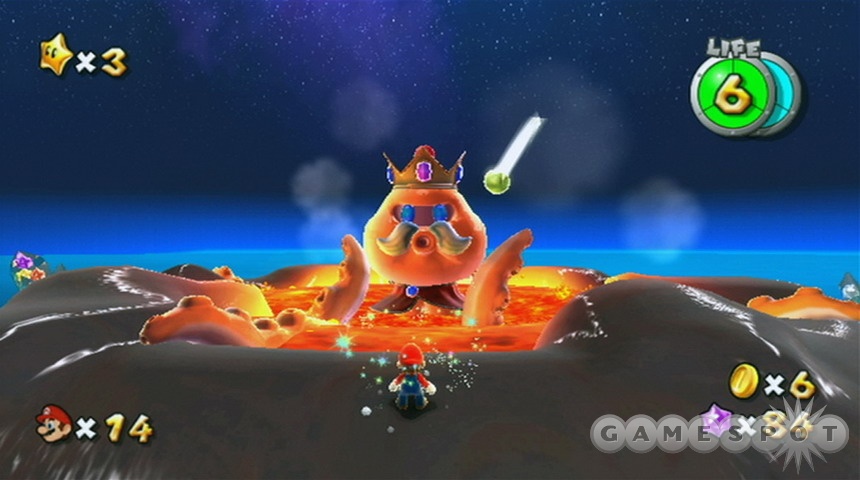
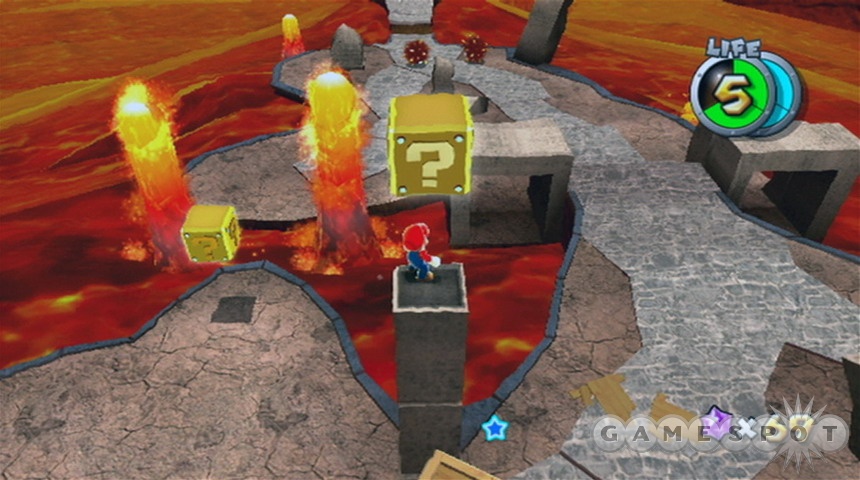
Bowser Jr.'s Lava Reactor
King Kaliente's Spicy Return
You need to reach the Bullet Bill launcher here and guide the Bill around the planetoid back to the cage where the launch star is located. You can try a long jump to make a shortcut, but usually that will cause the Bill to impact on the ground.
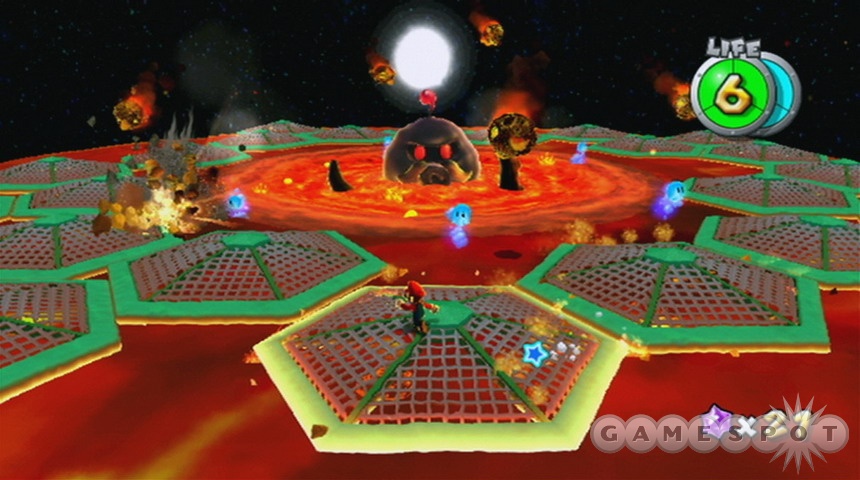
In the next area, get to the safe ground and jump forward to cause the two sentries to appear. Spin their coconuts back at them to kill them and reveal the launch star.
Kaliente offers you the same basic fight as he did before; all you need to do is reflect his coconuts back at him to defeat him. You'll have a lot more to contend with than you did before, such as the melting platforms. Keep in mind that you can somersault and spin up into the air if you're on a platform that's sinking; that'll give it enough time to come back up almost all the way.
Kill Kaliente for the Grand Star and move on.
Gate Observatory
Gateway Galaxy
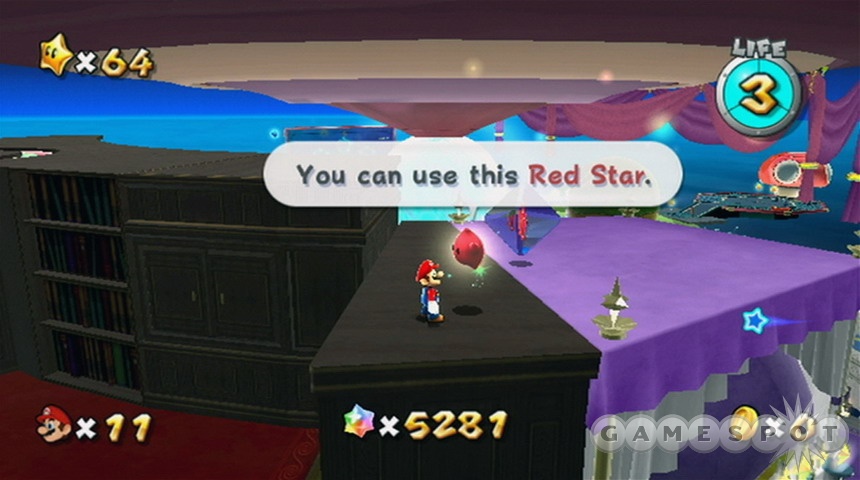
Getting through the Engine Room will let you open up two new observatories. The Gate observatory is the same world you woke up on after the events with Princess Peach at the beginning of the game. Head inside and speak to Rosalina atop the castle tower. If you do so, you'll earn a new ability: the Flight Mario suit. Use it to collect all 100 purple coins on the planet, and then nab the Power Star here. After you're done with that, you'll be able to speak to the Red Luma atop the library in the main Comet Observatory to let you fly around.
Garden Observatory
Deep Dark Galaxy
The Underground Ghost Ship
There are actually three 1-Ups on the beach here: one is atop the Shroom ship, one is in the green crab, and one is in the chest in the water; use the shell to pop it open. When you've got them, use the cannon here. You can hit either of the main planets in the sky to gain a Fire Suit and lower the gate here; the wooden planet offers you the chance to load up on star bits if you get the Rainbow Suit, while the green planet will let you net a load of gold coins.

Use the fire suit to set the torches by the gate on fire and raise it. Dive into the water and head down. Follow the arrow of star bits to reach a switch; flip it, then head to the top of the water tube and flip the second switch between the octopi to move on.
When you reach the Ghost Ship, lure the Boos into the light shaft, then somersault up the cliffside near it to find a Life Mushroom shield.
When you reach the deck of the ship, a large Magikoopa will appear. You'll need to repeat your actions from before, when last you saw her: wait for the green shells to shoot at you, pick them up, then throw them at her when she's standing still. If you can't hit her from the ground, jump a bit and try to throw while jumping. She'll make you jump through some hoops, but you'll get her down eventually.
Bubble Blastoff
The cannon here at the beginning of the level has been hijacked by a mole. Get close to him, somersault on top, and ground pound three times to defeat him. With that done, return to one of the planets in the sky and grab another Fire Suit. Return to the gate and light all three torches here to reveal an Ice Suit. Use that to cross the lake nearby and jump upwards on top of the sprinklers to reach the upper level here.
When you grab the large coin here, you'll be shot up to a green ledge. Somersault up to the nearest water spout and walk past the stone spikes and through the Magikoopas to find a pipe with some goodies. With that explored, use the bubble blasters to shoot you over the moving blocks and upwards. Eventually you'll find a bubble blaster near a ring of fire that will shoot you off to a planetoid.

When you pound the three stumps here into the ground, another blaster will appear. Ride its bubble to another planet with electrical rings around it. When the tennis balls that roll around inside the sphere are directly underneath you, ground pound them into the watermelon in the middle of the sphere to blow it up and reveal the Power Star.
Guppy And The Underground Lake
Head down to Guppy in the lake inside the cave here to meet up with him. Complete his track of eight rings again for the final Power Star here.
Dreadnought Galaxy
Infiltrating The Dreadnought
Avoid the electrical fields in the first planet here, then launch you way to a tube enclosing a pipe. Kill the enemies to raise the pipe and move on. When you reach the interior of the dreadnought, start making your way to the right. When you find the gravity switch, flip it and wall run up past the smashers before they get you.
Move past the gravity switches into the pipe, then start climbing the exterior portion of the Nought by jumping on the springed spinners. When you reach the top, walljump up to the next launch star and move on.
The last planet here has a water fountain in a cage; lure a Bullet Bill over to destroy it and flood the planet. With that done, you can start hopping around up top and avoid the electrical beams to reach the Power Star.
Dreadnought's Colossal Cannons
Drop down to grab the 1-Up here, then return to the bolts and stand on their right side to start them turning. You'll have to run towards the left while remaining on the right side to get to the end of the next platform, or you can just turn them a bit and then longjump to the far side. The pressure plates near the rolling Chomps all need to be switched to move on.
When you get past the next screws, you'll launch yourself to the exterior of the Dreadnaught. There isn't really much to say about this section, save that it's pretty difficult to get past. It's difficult in the sense that the timing of the jumps is annoying, sure, but it's also difficult because the game changes the ways in which you move when the gravity shifts. It's annoying, but if you get to the end you'll net another Power Star.
Revenge of the Topman Tribe
After moving upward, spin the two Topmen into the electrical lines at the top of the planetoid to drop the electricity. You can also somersault+spin to reach the 1-Up here. The next satellite has a groundpound switch; hit it to recreate a pull star and launch onward.

There's a hidden Life Mushroom under the rocket from which you need to hit all of the pull stars. Use it before making your way to the launch star. The next plane you land on will have a Koopa wandering around near where you begin; use him to unlock the chest before the launch star to get a 1-Up.
Topmaniac at the end of the level is pretty much identical to the one you fought before: knock him on the head, spin him into the electricity, and he'll go down pretty quickly.
Matter Splatter Galaxy
Watch Your Step
Heh. This isn't difficult to describe; it's difficult to do. The ground here is unstable; there are large pockets of dark matter that can cause you to fall to your death. And, indeed, the process of getting the star here will involve dying a few times as you trial-and-error your way through it. Maybe you'll get it in one life, but otherwise you'll have to die your way to each progressive checkpoint and learn the level to get your Power Star.
Melty Molten Galaxy
The Sinking Lava Spire
Make your way across the level here, being sure to nab all the star bits that you see. Eventually you'll get into some launch stars that will put you on top of the volcano; let yourself fall into the volcano, then hit the switch in there to reveal a number of additional star bits.
When you return to the mission, look for the pullstars on the orbs near the Hungry Luma and follow the path there onwards. Eventually you'll wind up on a half-sunken planetoid. Recreate the launch star here to move on to the Lava Spire.

The Lava Spire is, as described, sinking. Make your way around it as quickly as you can, and don't waste your time opening crystals. Get to the top and the Power Star is yours.
Through The Meteor Storm
Move around here until you get close to the two unlit torches here. There'll be a small flame sprite that pops up out of the lava here; lure it over to the unlit torches and set them on fire to reveal a launch star.
Keep moving on until you reach another set of launch star shards. This area can be extremely hazardous due to the meteor shower and the blue flames that dance around, but the shards are mostly easy to spot, save for one that's hidden away in a crate.

After escorting a Bullet Bill to one last launch star, ride it to another area where the Power Star is located inside a ball. You need to hop onto the ball and escort it to the far end of the lava tube to unlock the Star and finish the mission. Move slowly, watch the way the platforms move before getting onto them, and you should be ok.
Fiery Dino Piranha
Make your way across the jumps here and reach the wall jump area that'll let you reach the pipe. Take the launch star to the first of a pair of planetoids. You need to kill all of the flame creatures here before the next launch star opens up: spin around them and kick them to finish them off.
After the next planetoid, you'll be in a large circle with rotating platforms. Do your best to get to all of the launch star shards, then launch onward, grabbing the Life Star if you need it (and you likely will).

Eventually you will reach Dino Piranha, lavasized! It's nostalgia, all over again. This fight is more or less identical to ones you've passed by previously, with an old boss coming back in slightly harder form, but Dino Piranha here seems to be substantially more difficult than when you first fought him. The process is still the same: hit his bulb with a spin attack onto his head to knock him out. Unfortunately, the bulb here will often be set on fire, forcing you to wait for it to turn dark until you can hit it onto him. It will eventually also start leaving a trail of fire, making one more headache for you to keep an eye on. Still, if you have a Life Mushroom active, you'll hopefully be able to make your way past the boss to receive the Power Star.
Bowser's Galaxy Reactor
After you obtain all of the Grand Stars (the last one will be in the Engine Room) and have 60 Power Stars, you can head off to Bowser's Galaxy Reactor. Try to bring as many 1-Ups as you can. You don't have to go as soon as it becomes available; feel free to wait.
The Fate Of The Universe
Make your way up the walls, following the beams of light that will stick you to the sides of the walls with their gravity field. Eventually you'll reach a fire planetoid; hop to solid ground, then jump onto the rotating panel with fireballs shooting around above it. Avoid them and make your way to the next set of platforms to reach another gravity beam.
When you reach the ice cube walkway, keep in mind that the ice will fall moments after it locks into place. Only go for the 1-Ups if you really need them, and keep in mind that it's sometimes easier to jump from block to block than to follow narrow walkways. After the ice paths, you'll go through a desert area and a very rapidly-shifting gravity area. Do your best to get through them without dying too often.
After the gravity-shifting madness is complete, you'll reach the inner portion of a tube filled with lava and Bullet Bill launchers. Hide behind the Bowser statues if a Bill locks onto you; let it impact, then quickly run forward and under the Bill launcher to avoid further lockons.

Towards the end of this section, you'll be faced with a giant Bill launcher and around half a dozen of the normal sized ones. Let the large Bill pass you by, then quickly move onto a moving green platform and rotate around so that the Big Bill is not in any danger of hitting you. Do your best to avoid the smaller Bills here as you make your way forward to the stone platform and the Launch Pad.
Bowser's Going Down!
As you run up the stairs here, Bowser Jr. will launch cannon fire at you and destroy the steps. Try to nab the Life Mushroom, if possible, before reaching Bowser himself and starting the final boss battle.
Phase One
Bowser's energy waves are in full effect here, so jump over them at every opportunity. Bowser's primary attack, though, is to summon rocks to cover himself, then roll at Mario like a boulder. In order to hurt him, you need to spin just as his head is about to hit you; any other part of the body will wind up wounding Mario.

When the head is hit, Bowser will spin away on his back. Hit him while he's spinning to cause damage to him. He'll pop back up and begin his attacks again, but this time his boulder rotates much more quickly, making it more difficult to hit his head. Keep your health up while you attempt the head-knocking again, and eventually he'll get knocked away to another planet.
Phase Two
This phase is somewhat easier than phase one. Bowser will shoot fire at you here, so stay away from him as best you can. He'll eventually retract into his shell and start spinning at you fairly quickly. Be ready for this by waiting on the other side of one of the green plants here; when he starts coming for you, spin attack the plant to launch it towards Bowser to hurt him. That'll cause him to spin on his back again; hit him with a spin attack to really wound him. Repeat the process while avoiding the fireballs and you'll move on to the final challenge.
Phase Three
As all things begin, all things must end. Or something. If you recall any of the previous fights with Bowser, then you can probably finish him off here. Jump over the electrical beams that he sends out and avoid his fire breath (which will often curve back around the planet more than once, so watch out for it coming from below you).
When he starts to jump around, stand on a blue panel, then move away when his shadow locks onto you. His tail will catch on fire and he'll run; move into his path and force him to turn his back to you, then spin attack his tail. When he's in shell form, spin attack him again to hurt him. Repeat the process to finish the game.
Luigi After The Fact
After Mario goes down, a longish cutscene plays out. Wait for it and the credits to roll, then save your game. You can restart it immediately to find yourself back on the Comet Observatory, where the countdown under your feet now reads the total number of remaining stars you've yet to find. The Purple Comet will also have taken to the skies, revealing 15 new stars for you to check out.
If you collect all 120 stars in the game, you can speak to Rosalina again to fight Bowser for a second time. This time, however, defeating Bowser will allow you to play the game once more, but this time with Luigi as your playable character. He moves differently than Mario does, although he has the same combat abilities. Try him and see!
Obscure Stars
Some stars are found out-of-order. We'll detail those stars here.
Comet Missions
Many of the larger galaxies in the game have comet missions attached to them. As you play through the game, you will eventually notice a purple Luma appear near Rosalina. This Luma can help you control the comets as they wander around the multiple galaxies; pay it 20 star bits to move the comets to a different galaxy if you don't want to play the missions that they offer.
There are four types of comet missions that you will encounter. Each galaxy only has one comet mission of a specific type. In other words, you'll always encounter a Speedy Comet above the Good Egg Galaxy; it'll never be a Daredevil or Fast Foe comet, or anything else.
Speedy Comet: You have to complete the entire mission while operating under a time limit. The mission itself is otherwise unchanged, so if you've already played it you will at least have the advantage of knowing what to do. Ignore out-of-the-way coins and powerups, and focus on getting your job done here.

Cosmic Comet: Cosmic Comets will reveal a cosmic Mario twin that you have to race in order to get to the Power Star first. The easiest way to complete these is to simply hang back, watch your twin maneuver the course, die and restart, and then do everything your twin did, but do it more rapidly.
Daredevil Comet: Annoyingly, these comets force you to replay part of a mission (usually a boss fight) with only one sliver of life remaining. There are no coins to heal with, so if you take any damage, you die.
Fast Foe Comet: Your enemies will move twice as fast in fast foe missions, but apart from that these missions are much the same as they were previously.
Hungry Luma Stars
Hungry Luma stars are obtained from the galaxies that are created by the Hungry Lumas. As you play the game, you'll notice that Hungry Lumas will appear outside the observatories that you've unlocked, and demand that you feed them star bits. If you do so, they'll transform into new galaxies that you can explore. These galaxies are often fairly challenging, but will each contain a Power Star for you to obtain at the end.
Sweet Sweet Galaxy
The Sweet Sweet Galaxy is obtained by feeding the Hungry Luma that appears outside the Terrace Observatory. If you travel to it, you'll have to make your way across some exceedingly tricky jumping puzzles to reach the Power Star that's hidden away there. There's not much to explain; just get jumping!
Sling Pod Galaxy
Head to the Fountain and pay the Hungry Luma outside of it her star bits to unlock the Sling Pod Galaxy. As the name implies, this area is filled with sling pods, so you'll have to pull them to and fro to move Mario along. Towards the end of the galaxy, the throws get wickedly difficult, so come in with plenty of 1-Ups.
Drip Drop Galaxy
This is the galaxy that's unlocked by the Hungry Luma near the Kitchen. If you head here and dive into the water, you'll be able to tag three of the giant eels underneath the waves with red shells. Killing them all will net you the Power Star.
Bigmouth Galaxy
Outside the bedroom is this Hungry Luma. Head to his galaxy and grab the green shell on the beach. Take that into the water and barrel through the brick wall ahead of you. On the ground in this large, water-filled room are five golden star shards; collect them all, and a launch star will appear in the middle of the octopi. Ride it to the shining shell, then ride that back to the beach (the light from the shell will kill the Boos in the water). Use the shell to break open the chest to gain the Power Star.
Sand Spiral Galaxy
The Hungry Luma behind the Engine Room starts this one. Start off with the Boo Suit here; it's a bit easier to get to the end of the hallway with it, as opposed to the Bee Suit, or so we've found. When you reach the rotating disc area, grab the Rainbow Suit and run to the left, heading for the narrower portions of the track. Eventually you'll be able to jump to the moon in the middle of the Track and claim the Power Star.

Boo's Boneyard Galaxy
Find the Hungry Luma outside the Gate platform for this galaxy. This is another race, but this time you'll be in Boo form the entire time. Just head straight down whenever possible, using the invisibility power to get through the crystals, and you should win the Power Star.
Snow Cap Galaxy
Lastly, the Hungry Luma outside the Garden observatory will have this galaxy on tap, if you have the 1,600 star bits it wants.
When you land on the first little orb here, you need to head to the bottom side and make a blind jump to reach a green shell, which you can use to open the nearby chest. That'll launch you over to a pill-shaped galaxy where three bunnies challenge you to catch them before the timer runs down. This is difficult to do, and will take a couple of tries.
To start with, you need to find the five blue plates and step on all of them. There's one near where you begin, one buried underneath the small patch of snow (use your cursor to brush it away), two buried in the larger patch of snow near all the snowmen, and one on the lower end of the planetoid. Hit them all, and the bottom of the planet opens up, revealing a Fire Suit.
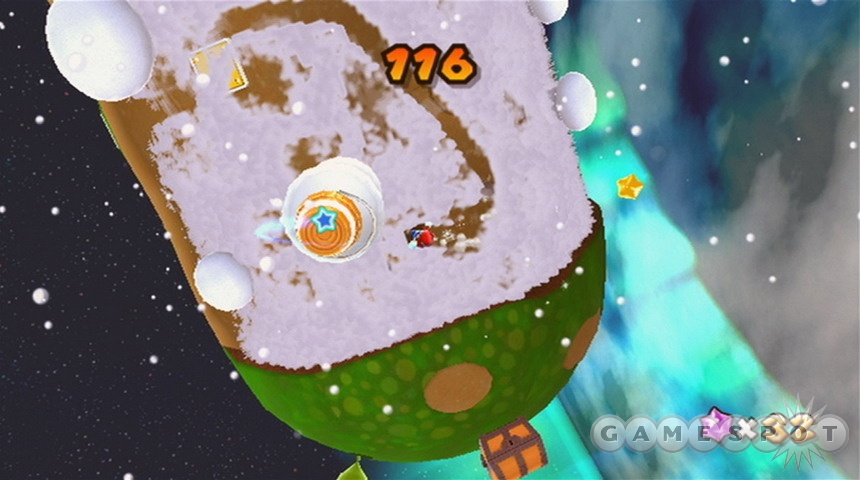
Use the Fire Suit to reveal a bunny in one of the snowmen, but let it roam free for now. Keep using the Fire Suit on the snowmen until you have the free bunny and a green shell. Use the shell on the treasure chest to reveal the second bunny. Now head around the cylinder with your cursor and sweep the snow off of the holes in the ground. The third bunny will pop up from one of them.
With the bunnies on the surface, you need to herd them back into the hole at the top of the cylinder so that they're all in one place. If you can do that, you can grab them without having to chase them far. If you're lucky, one or two of the free bunnies will head into one of the holes while you're sweeping for the third. Catch all the bunnies, and you get your Power Star.
Green Trial Galaxies
The green trial galaxies can only be obtained if you manage to find all three of the special green stars. These can be found at the Bouy Base galaxy, the Dusty Dune galaxy, and the Battlerock Galaxy (as a Luigi mission). Check those galaxies in their respective observatory walkthroughs, or in the Luigi section of this chapter, for details on obtaining them. When you have them all, a special warp will be revealed to these ultra-hard missions.
Rolling Gizmo Galaxy
Hop onto the star here and roll your way to success! The path is obvious, for the most part, but do you have the patience and the skill to succeed? Travel slowly—there's no time limit, and the slow movements will help keep you from having to overreact.
Bubble Blast Galaxy
If you're not intimidated by this galaxy's appearance when you load it, then you're probably insane. When you land, you have to find five star chips that are located at the end of the each pipe here. Start with the northwestern pipe, as it has an easily accessible 1-Up near where you begin.
When you recreate the star, you'll move on to the tougher second half of the stage, where Bullet Bills will actually chase you down. There are some fairly accessible 1-Ups here, though, so you should be coming out even or ahead if you die. When you spot the mines, try to straighten up and head straight down the middle, and speed up as more Bullet Bills start launching at you. After the narrowest part of the track, though, you'll hit a ball just before the Power Star; be ready to quickly get around it and nab the Star before you get pounded.
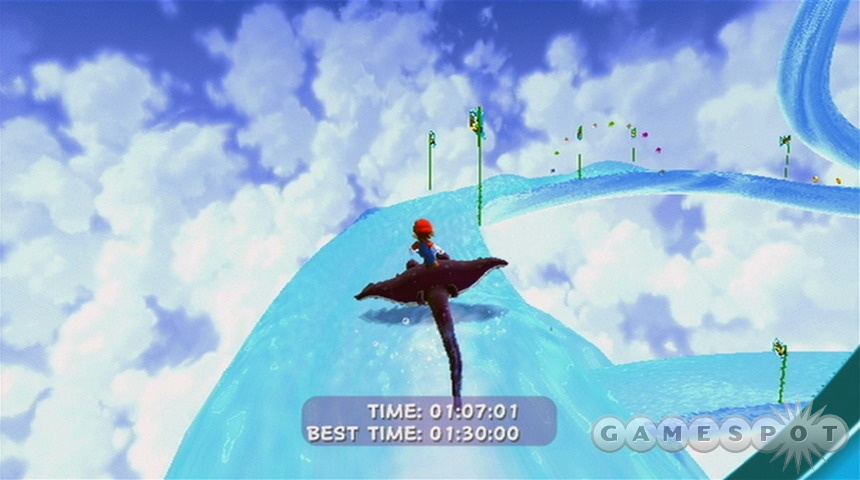
Loopdeeswoop Galaxy
Well, damn. This is another ray surfing level, but much, much harder than the previous one. You'll need to go fairly slow if you want to stay on the track here; we found that tapping the A button gave us a good mixture of speed and stability. If you can make it to the end (and even if you can't, there are multiple 1-Ups to make it worth your while), you'll get the Power Star. It's not clear if you need to be under a certain time, or just finish within three minutes. We finished in 1:45 and still got the Star.
Luigi Stars
Luigi appears in the middle of the game after Mario rescues him from a haunted mansion. He'll take up residence in the garage of the Comet Observatory here and periodically move out on his own to find new Power Stars. You'll know that he's out and about when he sends you a letter in the mail. He'll give you a picture detailing his location, but you won't know precisely where he is until you find him!
Luigi finds three stars on his own. Here's the location of each of them. You can only help Luigi after he sends a letter to you; if he sits around in the garage, go on a few missions to spur him along towards his next one.
Terrace Observatory: Good Egg Galaxy
Go into the Dino Piranha mission here and Luigi will be on the roof of the cottage in front of you. Find the orange pipe below the platform here to enter the house and rescue Luigi.
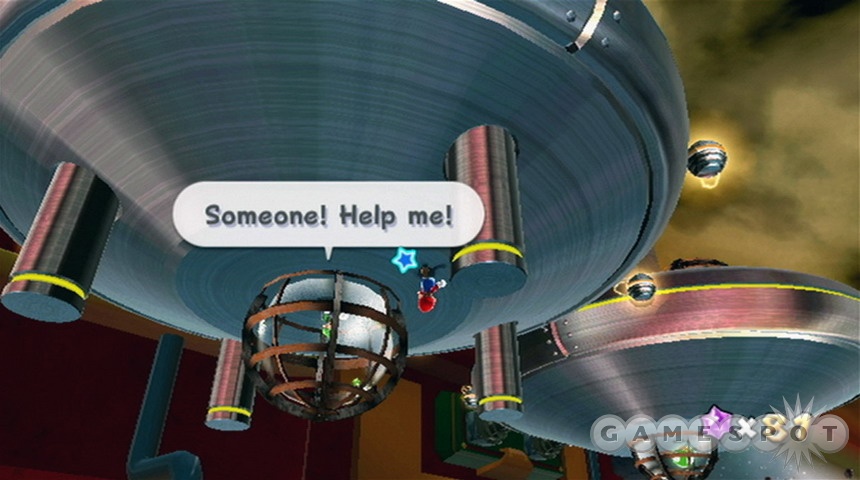
Fountain Observatory: Battlerock Galaxy
Select the Battlerock Barrage mission here. Luigi is at the very end of the path here, directly below the silver Power Star that you've already collected. Lure a Bullet Bill from the far side of the platform and bring it back to smash his cage and collect the green power star.
Terrace Observatory: Honeyhive Galaxy
Head into Bee Mario Takes Flight here. To find Luigi, grab the Bee Mario suit, then return up to where the boulders roll. See the small branch that has the trapeze hanging from it? Jump onto the branch itself to regain your flight, then head up to the piranha plants. Jump from there to the ice crystals across the way, then jump from that ledge to the walkway behind the waterfall. When the slope becomes too high to climb, fall down to the ledge below you, where Luigi is stuck to a tree above a fly. Jump up to him to nab your star.
Purple Comet Stars
After defeating Bowser, a purple comet will begin making its way throughout the galaxy, offering you the opportunity to obtain 15 more power stars. In order to do so, you'll need to track down the purple comet and enter the galaxy where it's hanging around. Doing so will launch a new minigame where you have to obtain purple coins. Lots of purple coins.
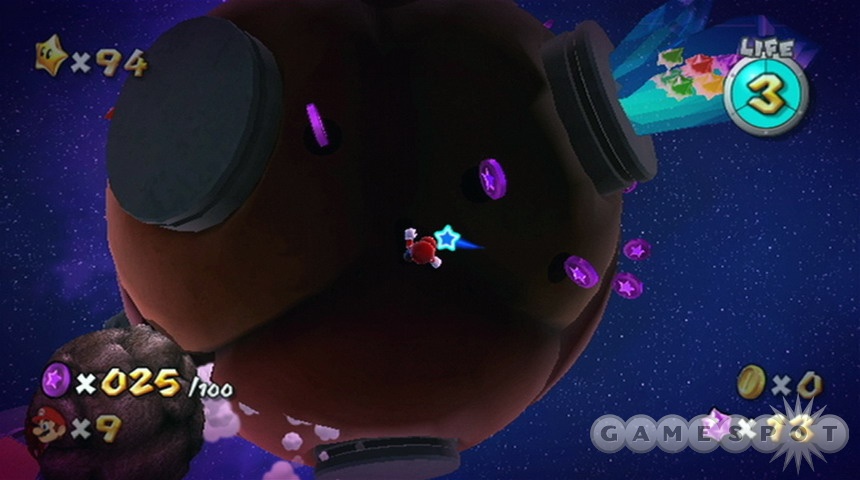
Unfortunately specific walkthroughs for these missions are a bit outside the scope of this guide, especially since these missions aren't even available until you beat the game; they vary in difficulty from the relatively easy to the maddeningly difficult. They're mostly intended to get you up to 120 stars in order to unlock Luigi's playthrough, so if you intend to pursue that goal, then feel free to give them a whirl. If you're looking for detailed guides to these missions, check gamefaqs.com; we're sure that there'll be guides for these missions relatively soon.
Star Checklist
With 120 stars to collect, you're going to have your hands full here. Here we offer a (hopefully) complete list of the stars that you're capable of collecting in the game, complete with a box for checking off the stars that you've obtained (assuming you print this out of course; don't mess up your computer monitors on our account). This is mostly in order, although the Luigi missions will likely not be encountered until well after you pass by their listing on this chart. We've also separated out the Hungry Luma galaxy missions, the green star Trial Galaxies, and the Purple Comet missions that are unlocked after you defeat Bowser.
Note that the very first star that you find at the beginning of the game is part of the Gate observatory area. It can be found at position 78 on this list.
| Terrace Observatory | Mission Name | Check It Off! |
|---|---|---|
| Good Egg Galaxy | Dino Piranha | 1 |
| A Snack of Cosmic Proportions | 2 | |
| King Kaliente's Battle Fleet | 3 | |
| Dino Piranha Speed Run (Comet Mission) | 4 | |
| Luigi On The Roof (Luigi Mission) | 5 | |
| Honeyhive Galaxy | Bee Mario Takes Flight | 6 |
| Trouble On The Tower | 7 | |
| Big Bad Bugaboom | 8 | |
| Honeyhive Cosmic Mario Race (Comet Mission) | 9 | |
| Luigi In The Honeyhive Kingdom (Luigi Mission) | 10 | |
| Loopdeloop Galaxy | Surfing 101 | 11 |
| Flipswitch Galaxy | Painting The Planet Yellow | 12 |
| Bowser Jr.'s Robot Reactor | Megaleg's Moon | 13 |
| Fountain Observatory | Mission Name | Check It Off! |
| Space Junk Galaxy | Pull Star Path | 14 |
| Kamella's Airship Attack | 15 | |
| Tarantox's Tangled Web | 16 | |
| Pull Star Path Speed Run (Comet Mission) | 17 | |
| Yoshi's Unexpected Appearance (Hidden Star) | 18 | |
| Battlerock Galaxy | Battlerock Barrage | 19 |
| Breaking Into Battlerock | 20 | |
| Topmaniac and the Topman Tribe | 21 | |
| Topmaniac's Daredevil Run (Comet Mission) | 22 | |
| Battlerock's Garbage Dump (Hidden Star) | 23 | |
| Luigi And The Disc (Luigi Green Star Mission) | 24 | |
| Rolling Green Galaxy | Roll Through The Clouds | 25 |
| Hurry-Scurry Galaxy | Shrinking Satellite | 26 |
| Bowser's Star Reactor | The Fiery Stronghold | 27 |
| Kitchen Observatory | Mission Name | Check It Off! |
| Beach Bowl Galaxy | Sunken Treasure | 28 |
| Passing The Swim Test | 29 | |
| The Secret Undersea Cavern | 30 | |
| Fast Foes on the Cyclone Stone (Comet Mission) | 31 | |
| Wall Jumping Up Waterfalls (Hidden Star) | 32 | |
| Ghostly Galaxy | Luigi and the Haunted Mansion | 33 |
| A Very Spooky Sprint | 34 | |
| Beware of Bouldergeist | 35 | |
| Bouldergeist's Daredevil Run (Comet Mission) | 36 | |
| Matter Splatter Mansion (Hidden Star) | 37 | |
| Bubble Blast Galaxy | Through the Poison Swamp | 38 |
| Bouy Base Galaxy | The Floating Fortress | 39 |
| The Secret of Bouy Base (Hidden Green Star) | 40 | |
| Bowser Jr.'s Airship Armada | Sinking The Airships | 41 |
| Bedroom Observatory | Mission Name | Check It Off! |
| Gusty Garden Galaxy | Bunnies In The Wind | 42 |
| Dirty Tricks of Major Burrows | 43 | |
| Gusty Garden Gravity Scramble | 44 | |
| Major Burrows Daredevil Run (Comet Mission) | 45 | |
| The Golden Chomp (Hidden Star) | 46 | |
| Freezeflame Galaxy | The Frozen Peak of Baron Brr | 47 |
| Freezeflame's Blistering Core | 48 | |
| Hot And Cold Collide | 49 | |
| Frosty Cosmic Mario Race (Comet Mission) | 50 | |
| Conquering The Summit (Hidden Star) | 51 | |
| Dusty Dune Galaxy | Soaring On The Desert Winds | 52 |
| Blasting Through The Sand | 53 | |
| Sandbaked Sand Castle | 54 | |
| Sand Blast Speed Run (Comet Mission) | 55 | |
| Bullet Bill On Your Back (Hidden Star) | 56 | |
| Treasure Of The Pyramid (Hidden Green Star) | 57 | |
| Honeyclimb Galaxy | Scaling the Sticky Wall | 58 |
| Bowser's Dark Matter Reactor | Darkness On The Horizon | 59 |
| Engine Room Observatory | Mission Name | Check It Off! |
| Gold Leaf Galaxy | Star Bunnies On The Hunt | 60 |
| Cataquack To The Skies | 61 | |
| When It Rains, It Pours | 62 | |
| Cosmic Mario Forest Race (Comet Mission) | 63 | |
| The Bell On The Big Tree (Hidden Star) | 64 | |
| Sea Slide Galaxy | Going After Guppy | 65 |
| Faster Than A Speeding Penguin | 66 | |
| The Silver Stars of Sea Slide | 67 | |
| Underwater Cosmic Mario Race (Comet Mission) | 68 | |
| Hurry, He's Hungry (Hidden Star) | 69 | |
| Toy Time Galaxy | Heavy Metal Mecha-Bowser | 70 |
| Mario Meets Mario | 71 | |
| Bouncing Down Cake Lane | 72 | |
| Fast Foes Of Toy Time (Comet Mission) | 73 | |
| The Flipswitch Chain (Hidden Star) | 74 | |
| Bonefin Galaxy | Kingfin's Fearsome Waters | 75 |
| Bowser Jr.'s Lava Reactor | King Kaliente's Spicy Return | 76 |
| Gate Observatory | Mission Name | Check It Off! |
| Gateway Galaxy | Mission before reaching Comet Observatory | 77 |
| Mission after unlocking Gate and heading through to speak with Rosalina (Red Star) | 78 | |
| Garden Observatory | Mission Name | Check It Off! |
| Deep Dark Galaxy | The Underground Ghost Ship | 79 |
| Bubble Blastoff | 80 | |
| Guppy and the Underground Lake | 81 | |
| Daredevil Run To The Ghost Ship (Comet Mission) | 82 | |
| Boo In A Box (Hidden Star) | 83 | |
| Dreadnought Galaxy | Infiltrating The Dreadnought | 84 |
| Dreadnought's Colossal Cannons | 85 | |
| Revenge of the Topman Tribe | 86 | |
| Topman Tribe Speed Run (Comet Mission) | 87 | |
| Dreadnought's Ammo Depot (Hidden Star) | 88 | |
| Melty Molten Galaxy | Sinking Lava Spire | 89 |
| Through The Meteor Storm | 90 | |
| Fiery Dino Piranha | 91 | |
| Lava Spire Daredevil Run (Comet Mission) | 92 | |
| Burning Tide (Hidden Star) | 93 | |
| Matter Splatter Galaxy | Watch Your Step | 94 |
| Bowser's Galaxy Reactor | Galaxy Name | Check It Off! |
| Bowser's Galaxy Reactor | The End Of The Game! | 95 |
| Hungry Luma Galaxies | Galaxy Name | Check It Off! |
| Terrace Observatory | Sweet Sweet Galaxy | 96 |
| Fountain Observatory | Sling Pod Galaxy | 97 |
| Kitchen Observatory | Drip Drop Galaxy | 98 |
| Bedroom Observatory | Bigmouth Galaxy | 99 |
| Engine Room | Sand Spiral Galaxy | 100 |
| Gate | Boo's Boneyard Galaxy | 101 |
| Garden Observatory | Snow Cap Galaxy | 102 |
| Trial Galaxies | Galaxy Name | Check It Off! |
| Bubble Blast Galaxy | 103 | |
| Loopdeeswoop Galaxy | 104 | |
| Rolling Gizmo Galaxy | 105 | |
| Purple Coin Challenges | Galaxy Name | Check It Off! |
| Good Egg Galaxy | 106 | |
| Honeyhive Galaxy | 107 | |
| Space Junk Galaxy | 108 | |
| Battlerock Galaxy | 109 | |
| Beach Bowl Galaxy | 110 | |
| Ghostly Galaxy | 111 | |
| Gusty Garden Galaxy | 112 | |
| Freezeflame Galaxy | 113 | |
| Dusty Dune Galaxy | 114 | |
| Gold Leaf Galaxy | 115 | |
| Sea Slide Galaxy | 116 | |
| Toy Time Galaxy | 117 | |
| Deep Dark Galaxy | 118 | |
| Dreadnought Galaxy | 119 | |
| Melty Molten Galaxy | 120 |
Got a news tip or want to contact us directly? Email news@gamespot.com
Join the conversation